
DPR-1020 - Printer D-LINK - Free user manual and instructions
Find the device manual for free DPR-1020 D-LINK in PDF.


| Product Type | Network Printer |
| Brand | D-Link |
| Model | DPR-1020 |
| Dimensions (W x D x H) | 250 x 200 x 100 mm |
| Weight | 2.0 kg |
| Power Supply | 100-240 V AC, 50/60 Hz |
| Power Consumption | 15 W (standby), 50 W (printing) |
| Print Technology | Laser |
| Print Speed (Black) | 20 ppm |
| Print Resolution | 600 x 600 dpi |
| Connectivity | Ethernet 10/100 Mbps, USB 2.0, Parallel port |
| Supported Paper Sizes | A4, Letter, Legal |
| Paper Tray Capacity | 150 sheets |
| Duplex Printing | Manual |
| Operating Systems Supported | Windows, macOS, Linux |
| Printer Languages | PCL, PostScript emulation |
| Maintenance | Clean paper path and toner area regularly |
| Security | No built-in security features |
| Spare Parts & Repairability | Replacement toner cartridge and fuser unit available |
Frequently Asked Questions - DPR-1020 D-LINK
User questions about DPR-1020 D-LINK
0 question about this device. Answer the ones you know or ask your own.
Ask a new question about this device
Download the instructions for your Printer in PDF format for free! Find your manual DPR-1020 - D-LINK and take your electronic device back in hand. On this page are published all the documents necessary for the use of your device. DPR-1020 by D-LINK.
USER MANUAL DPR-1020 D-LINK
USB MULTI-FUNCTION PRINT SERVER
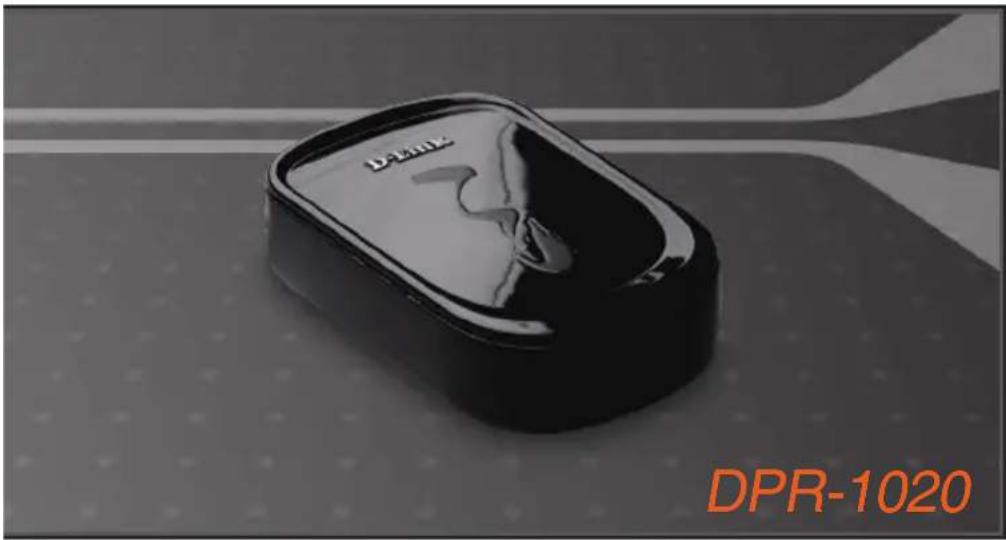
Quick Install Guide+
natural_image
Black rectangular object with a triangular lid, enclosed in a blue circular frame (no text or symbols visible)DPR-1020
USB Multi-Function Print Server
Before You Begin
This Quick Installation Guide provides you with step-by-step instructions to set up your MFP Server and start your printing tasks. The model you have purchased may be slightly different from those seen in the illustrations. For more detailed information regarding the Print Server, please refer to the User's Manual that is included in your installation CD.
NOTE: The images and setting values in this manual are FOR YOUR REFERENCE ONLY. The actual settings and values depend on your Print Server, system and network.
Check Your Package Contents

natural_image
Black rectangular electronic device with a triangular top and internal slot, isolated on yellow background (no text or symbols visible)DPR-1020 USB Multi-Function Print Server

CD-ROM (Software, Manual and Warranty)
natural_image
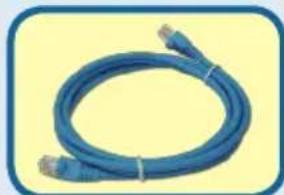
Blue cable with connectors on a yellow background (no text or symbols visible)Ethernet (CAT5 UTP) Cable
natural_image
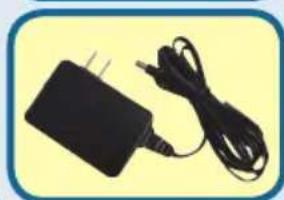
Black rectangular electronic device with a power plug and coiled cable, isolated on yellow background (no text or symbols visible)5V DC, 2.5A Power Adapter

Using a power supply with a different voltage rating will damage this product and void its warranty.
If any of the above items are missing, please contact your reseller.

EXTERNAL FEATURES
Physical Interfaces

USB Port
The DPR-1020's USB port is located on the rear panel. The port can be configured using the web configurator which allows users to configure settings through their web browser.
The default IP address of the DPR-1020 is automatically acquired from a DHCP server on the network. If a DHCP server cannot be found the default IP address for the DPR-1020 will be 192.168.0.10.
NOTE : The PC's IP address must be in the same subnet as the Print Server's IP address for the two devices to communicate. (For example, if the Print server's IP address is 192.168.0.10, with a subnet mask of 255.255.255.0, then your computer's IP address should be 192.168.0.x, where x is a value between 1-254, excluding 10.)
Ethernet Port (LAN)
The Print Server's rear panel features an RJ-45 port for the connection of a 10/100Mbps CAT 5 Ethernet cable. The port supports the NWay protocol, allowing the Print Server to automatically detect or negotiate the transmission speed of the network.
DC Power Connector
The DC power input connector is located on the Print Server's rear panel and is labeled DC 5V.
Reset Button (Bottom Panel)
Press and release this button to reset the MFP Server. To restore the device to factory default settings, press and hold the button for three seconds until the USB LED on the front panel lights up and then release the button.

LED INDICATORS
The top panel of the Print Server features three LED indicators:

Power
A steady blue light confirms that the Print Server is turned ON.
USB
A steady blue light indicates the printer is online and successfully connected to the print server. This light will also blink to indicate that data is being transferred between the print server and printer.
Link/Act
A steady blue light confirms that the Print Server has a connection to an Ethernet network. This light will also blink when receiving or transmitting data on the network.
These three LED indicators are also used during the device's power-on self test to indicate any hardware failures. Please refer to the User Manual for more information about this test.

HARDWARE INSTALLATION
WARNING: There may be configuration problems if the Print Server is turned on without first establishing a network connection.
Follow the steps below to avoid any complications during the hardware installation:
- Confirm that the printer you will use to connect to the DPR-1020 is operating correctly.
- When you have confirmed that the printer is operating correctly, switch its power OFF.
- Confirm that your network is operating normally.
- Using a CAT 5 Ethernet cable, connect the DPR-1020 Ethernet Port (labelled LAN) to the network.
- While the printer is turned OFF, connect the USB printer cable to the printer and then to the USB port on the Print Server.
- Switch on the printer.
- Insert the power adapter's output plug into the DC 5V power socket on the rear panel of the Print Server.
- Connect the other end of the power adapter into a power outlet. This will supply power to the Print Server. The blue LED on the Print

PS SOFTWARE INSTALLATION
PS Software (Windows Vista/XP/2003/2000) includes both PS-Link and PS-Wizard. PSLink can help you set up your printer for multi-function printing using your manufacturer's drivers. PS-Wizard is a utility that enables you to easily add a printer to your computer.
These utilities can also configure additional Print Server settings. Please refer to the user's manual for more information.
To install PS Software, insert the included installation CD into your computer's CD-ROM drive to initiate the auto-run program.
NOTE: If auto-run does not start you can access the CD-ROM contents in Windows by clicking My Computer > [CD-ROM Drive Letter].
Installation
The content of the Installation CD-ROM includes:
- Install Acrobat Reader – click this to install Acrobat Reader onto your computer. This enables you to view the manual and Quick Installation Guide in PDF format.
- Install PS Software – click this to install the PS Software, which contains PS-Link and PS-Wizard.
- View Quick Installation Guide - click this to see the Quick Installation Guide in PDF format for step-by-step instructions of the print server Installation.
- View Manual – click this to see the User Manual in PDF format for more detailed information regarding the print server.
- Exit – click to close the Auto-Run program.
After clicking Install PS Software the following screen will appear.
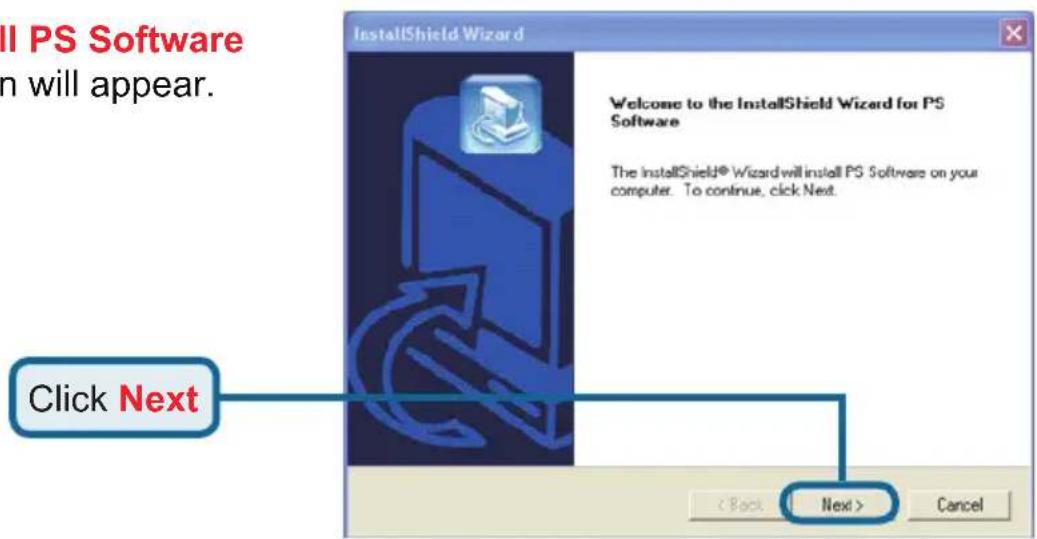
To change the default installation location, click Browse.
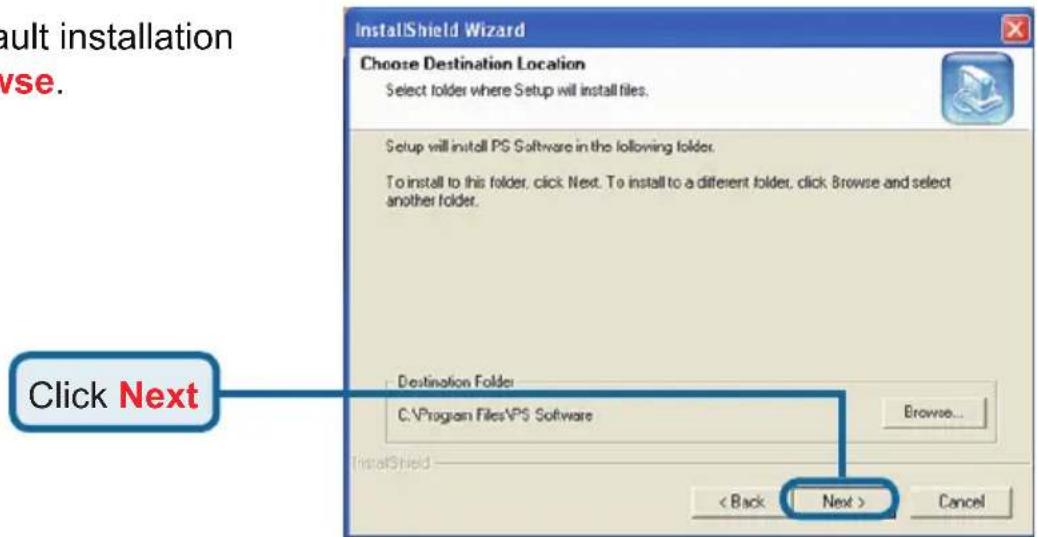
In this screen you can change the name of the installation folder. The default name is PS Software.


PS SOFTWARE INSTALLATION
To finish the installation of the PS Software, click Finish.
Click Finish
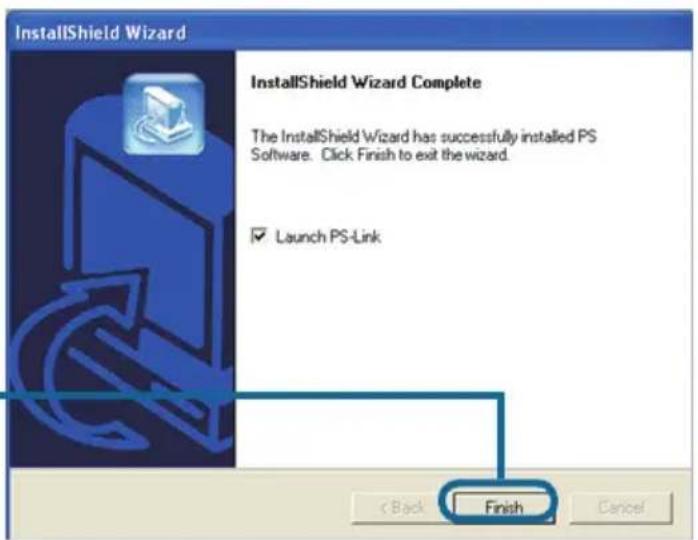
To access the utilities, click Start > Programs > PS Software and select the utility you wish to use.

Technical Support
You can find software updates and user documentation on the D-Link website.
Tech Support for customers in
Australia:
Tel: 1300-766-868
24/7(24Hrs, 7days a week) technical support
http://www.dlink.com.au
e-mail: support@dlink.com.au
India:
Tel: 1800-222-002
9.00 AM to 9.00 PM. All days
http://www.dlink.co.in/support/productsupport.aspx
Indonesia, Malaysia, Singapore and Thailand:
Tel: +62-21-5731610 (Indonesia)
Tel: 1800-882-880 (Malaysia)
Tel: +65 6501 4200 (Singapore)
Tel: +66-2-719-8978/9 (Thailand)
24/7, for English Support Only
http://www.dlink.com.sg/support/
e-mail: support@dlink.com.sg
Korea:
Tel: +82-2-2028-1815
Monday to Friday 9:00am to 6:00pm
http://www.d-link.co.kr
e-mail: arthur@d-link.co.kr
New Zealand:
Tel: 0800-900-900
24/7(24Hrs, 7days a week) technical support
http://www.dlink.co.nz
e-mail: support@dlink.co.nz


- USB MULTI-FUNCTION PRINT SERVER
- Before You Begin
- Check Your Package Contents
- EXTERNAL FEATURES
- Physical Interfaces
- USB Port
- Ethernet Port (LAN)
- DC Power Connector
- Reset Button (Bottom Panel)
- LED INDICATORS
- Power
- USB
- Link/Act
- HARDWARE INSTALLATION
- PS SOFTWARE INSTALLATION
- Installation
- Technical Support
- Tech Support for customers in
- Indonesia, Malaysia, Singapore and Thailand:
Brand : D-LINK
Model : DPR-1020
Category : Printer