
BS 1281 - Vacuum Cleaner CLATRONIC - Free user manual and instructions
Find the device manual for free BS 1281 CLATRONIC in PDF.


| Product Type | Canister Vacuum Cleaner |
| Brand | Clatronic |
| Model | BS 1281 |
| Color | Black and Red |
| Dimensions (L x W x H) | 35 x 25 x 28 cm |
| Weight | 4.5 kg |
| Power Supply | Mains, 220-240 V ~ 50 Hz |
| Maximum Power | 1200 W |
| Tank Capacity | 1.5 L (dust bag) |
| Operating Radius | 6 m (power cord) |
| Noise Level | 78 dB(A) |
| Filtration System | Washable HEPA Filter |
| Bag Type | Disposable Dust Bag |
| Included Accessories | Floor nozzle, upholstery nozzle, dusting brush |
| Liquid Suction Function | No |
| Automatic Shut-off | Yes (overheat protection) |
| Maintenance | Clean HEPA filter every 3 months, change bag when full |
| Safety | Use only on grounded outlet, do not vacuum liquids |
| Spare Parts Available | Bags, filters, nozzles (references on Clatronic website) |
| Repairability | Repairability index: 7.5/10 (estimated) |
Frequently Asked Questions - BS 1281 CLATRONIC
User questions about BS 1281 CLATRONIC
0 question about this device. Answer the ones you know or ask your own.
Ask a new question about this device
Download the instructions for your Vacuum Cleaner in PDF format for free! Find your manual BS 1281 - CLATRONIC and take your electronic device back in hand. On this page are published all the documents necessary for the use of your device. BS 1281 by CLATRONIC.
USER MANUAL BS 1281 CLATRONIC
natural_image
Black and white photo of a vacuum cleaner with attached cable, no visible text or symbols on the device itself.DEUTSCH
Inhalt
Overview of the Components ...... Page 3
Instruction Manual....Page 32
Technical Data...... Page 34
JEZYK POLSKI
Spis treści
natural_image
Line drawing of a hand holding a syringe, no text or symbols presentDüsenaufsätze
natural_image
Close-up of a hand pouring liquid into a container (no visible text or symbols)Abb. 2

natural_image
Close-up of hands holding a mechanical component with a circular dial and handle (no visible text or symbols)Abb. 3

natural_image
Black plastic cylindrical device with a lid and base, no visible text or symbolsnatural_image
Simple line drawing of a faucet and a water tap with sun above (no text or symbols)Abb. 4

natural_image
3D rendered model of a human torso with a black circular object and directional arrow (no text or symbols)Abb. 5

natural_image
Front view of a vacuum cleaner device with ventilation grille and control panel (no visible text or symbols)D-47906 Kempen/Germany

natural_image
Line drawing of a hand holding a syringe, no text or symbols presentMondstukken
natural_image
Close-up of a hand pouring liquid into a container (no visible text or symbols)Afb. 2

natural_image
Close-up of hands holding a mechanical component with circular features (no visible text or symbols)Afb. 3

natural_image
Black cylindrical object with a curved top and base, resembling a mechanical or industrial component (no visible text or symbols)Stofopvangbak legen
natural_image
Simple line drawing of a faucet and a sink with a sun above (no text or symbols)natural_image
3D rendered mechanical component with a central circular feature and an arrow indicating direction (no text or symbols)2. Inlaatfilter
natural_image
Front view of a white vacuum cleaner with ventilation grille and control buttons (no visible text or symbols)3. Uitlaatfilter
natural_image
Line drawing of a hand holding a syringe, no text or symbols presentEmbouts
natural_image
Close-up of a hand holding a compact vacuum cleaner with a lid (no visible text or symbols)Illustr. 2

natural_image
Close-up of hands holding a mechanical component with no visible text or symbolsIllustr. 3

natural_image
Black plastic cylindrical device with a curved top and base, no visible text or symbolsnatural_image
Simple line drawing of a faucet and a water dispenser under a sun (no text or symbols)Illustr. 4

natural_image
3D rendered mechanical component with a central circular feature and an arrow indicating direction (no text or symbols)Illustr. 5

natural_image
Front view of a vacuum cleaner with visible ventilation grille and control panel (no text or symbols)natural_image
Line drawing of a hand holding a syringe, no text or symbols presentBoquillas
natural_image
Close-up of a hand pouring liquid into a black air purifier (no text or symbols visible)Imagen 2
natural_image
Close-up of hands holding a mechanical component with no visible text or symbolsImagen 3
natural_image
Black plastic cylindrical device with a curved top and base, no visible text or symbolsnatural_image
Simple line drawing of a faucet and a water tap with sun above (no text or symbols)Imagen 4

natural_image
3D rendered mechanical component with a central circular feature and directional arrow (no text or symbols)Imagen 5
natural_image
Front view of a vacuum cleaner with visible control panel and buttons (no text or symbols)natural_image
Line drawing of a hand holding a syringe, no text or symbols presentBocais
natural_image
Close-up of a hand cleaning a car airbag (no visible text or symbols)natural_image
Close-up of hands holding a mechanical component with no visible text or symbolsnatural_image
Black plastic cylindrical device with a curved top and base, no visible text or symbolsnatural_image
Simple line drawing of a faucet and a sink with sun above (no text or symbols)natural_image
3D rendered mechanical component with a central circular feature and an arrow indicating direction (no text or symbols)natural_image
Front view of a vacuum cleaner with visible ventilation grille and control buttons (no text or symbols)3. Filtro de saída
natural_image
Line drawing of a hand holding a syringe, no text or symbols presentBocchette
natural_image
Close-up of a hand pouring liquid into a container (no visible text or symbols)Fig. 2

natural_image
Close-up of hands holding a mechanical component with no visible text or symbolsnatural_image
Black plastic mechanical component with a cylindrical base and flange (no visible text or symbols)natural_image
Simple line drawing of a faucet and a water dispenser under a sun (no text or symbols)natural_image
3D rendered mechanical component with a black circular feature and an arrow indicating direction (no text or symbols)natural_image
Front view of a vacuum cleaner with visible ventilation grille and control buttons (no text or symbols)natural_image
Line drawing of a hand holding a syringe, no text or symbols presentMunnstykkeelement
natural_image
Close-up of a hand holding a black appliance with a handle, no visible text or symbolsIII.2

natural_image
Close-up of hands holding a mechanical component with circular features (no visible text or symbols)III. 3

natural_image
Black plastic cylindrical object with a curved top and base, resembling a mechanical or industrial component (no visible text or symbols)
natural_image
Simple line drawing of a faucet and a water tap under a sun (no text or symbols)natural_image
3D rendered mechanical component with a central circular feature and an arrow indicating direction (no text or symbols)III. 5

natural_image
Front view of a vacuum cleaner with ventilation grille and control panel (no visible text or symbols)2. Innsugingsfilter
General Safety Instructions
Read the operating instructions carefully before putting the appliance into operation and keep the instructions including the warranty, the receipt and, if possible, the box with the internal packing. If you give this device to other people, please also pass on the operating instructions.
- The appliance is designed exclusively for private use and for the envisaged purpose. This appliance is not fit for commercial use. Do not use it outdoors. Keep it away from sources of heat, direct sunlight, humidity (never dip it into any liquid) and sharp edges. Do not use the appliance with wet hands. If the appliance is humid or wet, unplug it immediately.
- When cleaning or putting it away, switch off the appliance and always pull out the plug from the socket (pull the plug itself, not the lead) if the appliance is not being used and remove the attached accessories.
- Do not operate the machine without supervision. If you leave the room you should always turn the device off. Remove the plug from the socket.
- The device and the mains lead have to be checked regularly for signs of damage. If damage is found the device must not be used.
- Do not try to repair the appliance on your own. Always contact an authorized technician. To avoid the exposure to danger, always have a faulty cable be replaced only by the manufacturer, by our customer service or by a qualified person and with a cable of the same type.
- Use only original spare parts.
- Pay careful attention to the following "Special Safety Instructions".
Children and Frail Individuals
- In order to ensure your children's safety, please keep all packaging (plastic bags, boxes, polystyrene etc.) out of their reach.
WARNING!
Caution! Do not allow small children to play with the foil as there is a danger of suffocation!
- This device is not intended to be used by individuals (including children) who have restricted physical, sensory or mental abilities and/or insufficient knowledge and/or experience, unless they are supervised by an individual who is responsible for their safety or have received instructions on how to use the device.
- Children should be supervised at all times in order to ensure that they do not play with the device.
Special Safety Instructions
- Do not suck up liquids!
- Do not suck up hot ashes or pointed or sharp objects!
- Do not use the appliance in humid rooms!
- Never use without the filter. Check that the filter is inserted correctly!
-
hair, clothing and body parts away from the vacuum nozzle during use!
-
Keep the vacuum cleaner away from sources of heat like radiators, ovens, etc.!
- When the door is closed the cable must not be trapped or pulled along sharp edges or corners.
- Do not roll over the cable with the vacuum cleaner.
- The device must not be used to vacuum up broken glass, small toys, needles, paper clips, hot ash, burning cigarette ends or matches etc.
Overview of the Components
1 Air slide
2 Hose connection
3 Vacuum power regulator
4 Carrying handle
5 Cable-winding key
6 On/off switch
7 Parking assistance
8 Cover of outlet filter
9 Button for releasing the new dust container
10 Dust container with motor protection filter
11 Hook on the suction tube
12 Floor nozzle
13 Telescopic suction tube
14 Accessory holder
Accessories:
15 Parquet brush
16 Brush nozzle
17 Crevice nozzle
18 Upholstery nozzle
Start-up
- Insert the connection head of the suction hose into the hose connector until it locks in place. To do so, please press the buttons simultaneously. In order to release the hose again, please press the buttons once more on the connection head.
- Keep the buttons pressed down and then pull out the hose.
- Insert the vacuum tube into the handle if required.
Using the Appliance
- Fit on the accessory.
- Unwind the necessary length of cable and insert the plug in a duly installed 230 V/50 Hz protective contact socket.
- Set the vacuum power with the vacuum power regulator (Min to Max).
- Vacuum at a steady speed. There is no need to exert pressure.
Attention: pay attention to the range that can be covered with the cable length.
Vacuum power regulator
Low vacuum power: For curtains and delicate fabrics Medium vacuum power: For long-pile velour carpets and textile flooring
High vacuum power: For sturdy rugs and floors
Cable winding device
Pull out the cable up to the maximum length indicated with the yellow mark. Never pull the cable out up to the red mark as the cable winding can be damaged. Said damages are not covered by the warranty.
Winding
Press the cable winding button and guide the cable. Hold the cable to avoid wrapping.
Telescope Vacuum Pipe
The height-adjustable vacuum pipe enables individual alignment to your height.
Unlock the coupling by pressing the key in the direction of the arrow.
Slide the vacuum pipe to the desired length. To lock the device, release the key until you hear it lock in place.

natural_image
Line drawing of a hand holding a syringe, no text or symbols presentNozzle accessories
Groove and brush nozzle:
For vacuuming upholstery, curtains and in corners and crevices etc.
Upholstery nozzle: For cleaning upholstery, curtains etc.
Floor nozzle: To clean carpets or smooth surfaces.
Smooth floors:
Press down the lever with the brush symbol ,mmigh-wn foot.
The brush is now visible..
Carpets:
Move the lever with your foot to the "symbol"
Parquet brush: The floor nozzle is fitted with rollers for improved manoeuvrability. For large areas such as parquet, laminate or tiles etc.

Move the switch on the brush to Symbol A in order to increase the quantity of suction air. In the case of symbol (B) this is correspondingly less. This increases the suction power.

Releasing the nozzles: Pull these off while turning slightly.
Air Slide
Open the air slide on the hose handle in order to regulate the airflow or to clear any particles sticking to the nozzle.
Filter
Your machine has three filter systems. The traditional dust bag system has been replaced by a transparent dust container. In this, coarse dirt particles and tiny particles floating in the air are swirled out of the suction air by the high speed of the air current.
It is therefore unnecessary to buy dust bags.
Once the dust level has reached the MAX mark on the dust container, or the suction power of the vacuum cleaner is reduced, please proceed as follows:
III. 1
natural_image
Close-up of a hand pouring liquid into a black container (no visible text or symbols)III. 2

natural_image
Close-up of hands holding a mechanical component with no visible text or symbolsIII. 3

natural_image
Black plastic cylindrical device with a curved top and base, no visible text or symbols
natural_image
Simple line drawing of a faucet and a lamp under a sun (no text or symbols)Emptying the Dust Container
- Press the button to release the dust container and remove it from the vacuum cleaner.
- Pull the filter insert out carefully by the two retainers. Move the dust container to a vertical position if necessary.
- Empty the contents of the dust container. Then put the filter insert back in position. Please ensure that the filter insert is reinstalled firmly in an upright position.
Attach the dust container again by locking it in position.
1. Motor Protective Filter (in the Dust Container)
Cleaning the Filter Element
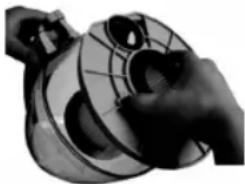
- Press the button to release the dust container and then remove it (see illustration 1).
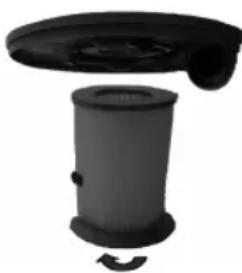
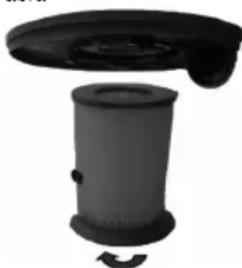
- Empty the contents of the dust container (see Illustration 2). Unlock the filter insert by turning it a short distance in a clockwise direction (see Illustration 3). In the second step the filter insert can be pulled out towards the bottom. Clean the motor protection filter by tapping and gently brushing out.
• Now replace the components. - Attach the dust container again by locking it in position.
Every third time the dust container is emptied, or in the case of severe soiling, clean the filter by allowing water to flow through the filter fabric against the direction in which the vacuum cleaner blows. The dust container should only be reinserted when it is completely dry!
Now place this back in position once it has completely dried!
Caution: Never wash the filter in the washing machine, and please do not use a hairdryer to dry it.
III. 4

natural_image
3D rendered mechanical component with a central circular feature and an arrow indicating direction (no text or symbols)III. 5

natural_image
Front view of a vacuum cleaner with ventilation grille and control panel (no visible text or symbols)2. Inlet filter
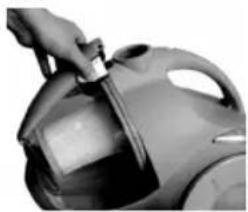
The inlet filter is to be found in the dust filter compartment - see the arrow. Press the button to release the dust container and then remove it. Pull the filter out towards the front. Clean the inlet filter approximately every tenth time the dust container is emptied, or more frequently if necessary. Please ensure that the filter is always clean, as otherwise air circulation cannot be guaranteed. If necessary, the filter can also be washed in warm water without any additives. Place it back into place only once it is completely dry!
3. Outlet filter
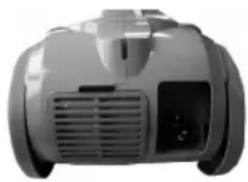
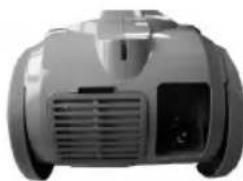
The appliance is also equipped with an outlet filter. In order to ensure that the filter works correctly, we recommend that you replace it every six months. It is located on the rear part of your appliance behind a ventilation grid. Open the ventilation grille by pressing the lever on its side. Then pull the grille out towards the front. Remove the filter and clean as described above. Fit the filter back into place and close the ventilation grid by following the steps above in the opposite order.

Important note!
Cleaning may become necessary after a shorter time, depending on the conditions of use, e.g. when vacuuming fine dust. If the suction power of your vacuum cleaner diminishes please clean the filters as described. If the suction power suddenly diminishes during operation this may be due to the filters being locked.
Cleaning and storage
Cleaning
- Pull the plug out of the socket before cleaning!
- Clean the casing with a dry cloth.
- Clean the motor protection filter approximately every 3. time the vacuum cleaner is emptied. Clean the filter in hot water without additives. Put it back into place only once it is completely dry.
Storage
- Let the iron cool down completely.
• Wind the cable completely. - Please position the device horizontally and insert the hook on the telescopic tube into the parking aid (7) on the back of the device.
Troubleshooting
• The Device Does Not Work.
Remedy: Check the connection to the mains. Check the position of the switch.
• The device does not suck up anything.
Possible Cause: The dust container or the filters are dirty.
Remedy: Empty or clean the components.
Possible Cause: There is a foreign body in the suction tube or the nozzle.
Remedy: Check the accessories for foreign bodies.
Noise development
The sound pressure level in the ear of an operator (LpA) was measured according to DIN EN ISO 3744. Sound pressure level detected: 78.0 dB(A) (no limit)
Technical Data
Model: BS 1281
Power supply: 220-240 V, 50/60 Hz
Power consumption:
$$ \begin{array}{l} P _ {\text { nom. }}: \dots 1 8 0 0 \mathrm{W} \ P _ {\text { max. }}: \dots 2 3 0 0 \mathrm{W} \ \end{array} $$
Protection class: ....
Net weight: 5.85 kg
This device has been tested according to all relevant current CE guidelines, such as electromagnetic compatibility and low voltage directives, and has been constructed in accordance with the latest safety regulations. Subject to technical changes without prior notice!

Meaning of the "Dustbin" Symbol
Protect our environment: do not dispose of electrical equipment in the domestic waste.
Please return any electrical equipment that you will no longer use to the collection points provided for their disposal.
This helps avoid the potential effects of incorrect disposal on the environment and human health.
This will contribute to the recycling and other forms of reutilisation of electrical and electronic equipment.
Information concerning where the equipment can be disposed of can be obtained from your local authority.
natural_image
Line drawing of a hand holding a syringe or needle, no text or symbols presentKońcówki odkurzacza
natural_image
Close-up of a hand using a vacuum cleaner to handle a container (no visible text or symbols)Rys. 2

natural_image
Close-up of hands holding a mechanical component with a circular housing (no visible text or symbols)natural_image
Black plastic cylindrical device with a lid and base, no visible text or symbolsnatural_image
Simple line drawing of a faucet and a water tap with sun above (no text or symbols)natural_image
Front view of a white industrial vacuum cleaner with ventilation grille and control panel (no visible text or symbols)3. Filtr wylotowy
natural_image
3D rendered mechanical component with a central circular feature and an arrow indicating direction (no text or symbols)Możliwa przyczyna:
natural_image
Line drawing of a hand holding a syringe, no text or symbols presentNástavce
natural_image
Close-up of a hand holding a container with a label, next to a black plastic bag (no visible text or symbols)Obr. 2

natural_image
Close-up of hands operating a mechanical component with a spool (no visible text or symbols)Obr. 3

natural_image
Black plastic cylindrical device with a curved top and base, no visible text or symbols
natural_image
Simple line drawing of a faucet and a smartphone under a sun (no text or symbols)natural_image
3D rendered mechanical component with a central circular feature and an arrow indicating direction (no text or symbols)Obr. 5
natural_image
Front view of a white industrial vacuum cleaner with ventilation slots and a control panel (no visible text or symbols)natural_image
Line drawing of a hand holding a syringe, no text or symbols presentSzívófejek
natural_image
Close-up of a hand holding a black vacuum cleaner's lid, no visible text or symbols2 ábra

natural_image
Close-up of hands holding a mechanical component with no visible text or symbolsábra
natural_image
Black plastic container with lid and side outlet, no visible text or symbolsA porgyújtő ürítése
natural_image
Simple line drawing of a faucet and a water tap with sun above (no text or symbols)natural_image
3D rendered mechanical component with a central circular feature and an arrow indicating direction (no text or symbols)2. Beszívófilter
natural_image
Front view of a vacuum cleaner with ventilation grille and control panel (no visible text or symbols)3. Kibocsátófilter
natural_image
Line drawing of a hand holding a syringe, no text or symbols presentСопла-насадки
natural_image
Close-up of a hand holding a vacuum cleaner's lid, no visible text or symbolsРис. 2

natural_image
Close-up of hands holding a mechanical component with circular features (no visible text or symbols)natural_image
Simple line drawing of a faucet and a water tap with sun above (no text or symbols)Рис. 4

natural_image
3D rendered model of a human torso with a black circular object and arrow indicating a specific area (no text or symbols)Рис. 5

natural_image
Front view of a white vacuum cleaner with ventilation grille and control buttons (no visible text or symbols)


- DEUTSCH
- Inhalt
- JEZYK POLSKI
- Spis treści
- Düsenaufsätze
- Mondstukken
- Stofopvangbak legen
- Inlaatfilter
- Uitlaatfilter
- Embouts
- Boquillas
- Bocais
- Filtro de saída
- Bocchette
- Munnstykkeelement
- Innsugingsfilter
- General Safety Instructions
- Children and Frail Individuals
- WARNING!
- Special Safety Instructions
- Overview of the Components
- Accessories:
- Start-up
- Using the Appliance
- Vacuum power regulator
- Cable winding device
- Winding
- Telescope Vacuum Pipe
- Nozzle accessories
- Air Slide
- Filter
- Emptying the Dust Container
- Motor Protective Filter (in the Dust Container)
- Cleaning the Filter Element
- Inlet filter
- Outlet filter
- Important note!
- Cleaning and storage
- Cleaning
- Storage
- Troubleshooting
- • The Device Does Not Work.
- • The device does not suck up anything.
- Noise development
- Technical Data
- Meaning of the "Dustbin" Symbol
- Końcówki odkurzacza
- Filtr wylotowy
- Nástavce
- Szívófejek
- A porgyújtő ürítése
- Beszívófilter
- Kibocsátófilter
- Сопла-насадки
Brand : CLATRONIC
Model : BS 1281
Category : Vacuum Cleaner