
DO429K - Coffee machine DOMO - Free user manual and instructions
Find the device manual for free DO429K DOMO in PDF.


| Product type | Drip coffee maker |
| Brand | DOMO |
| Model | DO429K |
| Dimensions (L x W x H) | 25 x 20 x 30 cm |
| Weight | 2.5 kg |
| Power supply | 220-240 V, 50 Hz, 1000 W |
| Carafe capacity | 1.25 L (10 cups) |
| Coffee type | Ground coffee |
| Filtration system | Permanent filter or paper filter No. 4 |
| Main functions | Drip coffee preparation, automatic shut-off, keep warm |
| Automatic shut-off | Yes, after 40 minutes |
| Keep warm | Yes, heating plate |
| Water level indicator | Yes, graduated |
| Maintenance and cleaning | Regular descaling with white vinegar or citric acid |
| Safety | Automatic shut-off in case of overheating |
| Spare parts available | Carafe, permanent filter, lid gasket |
| Repairability | Repairability index: 8/10 |
| Warranty | 2 years |
| Color | Black and stainless steel |
Frequently Asked Questions - DO429K DOMO
User questions about DO429K DOMO
0 question about this device. Answer the ones you know or ask your own.
Ask a new question about this device
Download the instructions for your Coffee machine in PDF format for free! Find your manual DO429K - DOMO and take your electronic device back in hand. On this page are published all the documents necessary for the use of your device. DO429K by DOMO.
USER MANUAL DO429K DOMO
natural_image
Modern black and silver milk dispenser with two glass cups on a tray, no visible text or symbols.DO-429K
DO-429KDO-429K
GARANTIEVOORWAARDEN
CONDITIONS DE GARANTIE
This appliance has a two year warranty period. During this period the manufacturer is responsible for any failures which are the direct result of construction failure. When these failures occur the appliance will be repaired or replaced if necessary. The warranty will not be valid when the damage to the appliance is caused by wrong use, not following the instructions or repairs executed by a third party. The warranty will only be valid if the warranty application has been completed by the dealer at the time of purchase.
Type nr. Apparaat
RECYCLING INFORMATIONEN
RECYCLING INFORMATION
This symbol on the product or on its packaging indicates that this product may not be treated as household waste. Instead it shall be brought to the applicable collection point for recycling of electrical and electronic equipment. By ensuring this product is disposed of correctly, you will help prevent potential negative consequences for the environment and human health, which could otherwise be caused by inappropriate waste handling of this product. For more detailed information about recycling of this product, please contact your local city office, your household waste disposal service or the shop where you purchased the product.
- Wanneer het elektrisch snoer beschadigd is, moet het vervangen worden door de fabrikant, zijn dienst naverkoop of een gelijkaardig gekwalificeerd persoon, om ongelukken te voorkomen.
- Si le cordon électrique est endommagé, il doit être remplacé par le fabricant, son service après-vente ou toute autre personne qualifiée, pour éviter tout accident.
- Wenn das Stromkabel beschädigt ist, muss es vom Hersteller, dessen Kundendienst oder einer gleichartig geschulten Person ersetzt werden, um Unglücke zu verhindern.
- If the supply cord is damaged, it must be replaced by manufacturer of its service agent or a similarly qualified person in order to avoid a hazard.
VEILIGHEIDSVOORSCHRIFTEN
natural_image
Line drawings of a kitchen appliance with a side view showing internal components (no text or symbols)natural_image
Simple line drawings of a mechanical device and a cabinet (no text or symbols)WATERFILTER VERVANGEN
natural_image
Simple line drawing of a cylindrical container with a downward arrow indicating a drop or movement (no text or symbols)
natural_image
Hand placing a hand on a box with an upward arrow (no text or symbols)ONTKALKEN
natural_image
Technical line drawing of a mechanical assembly and housing (no text or symbols)
DO-429KDO-429K
REPLACEMENT DE FILTRE D'EAU
natural_image
Two-step diagram showing a hand pressing down on a cylindrical object in a container, with arrows indicating direction (no text or symbols)natural_image
Line drawing of two laboratory apparatuses with no visible text or symbolsnatural_image
Simple line drawing of a room with furniture and a window (no text or symbols)

DO-429KDO-429K
Read this manual carefully before using the appliance and save it for later reference. This unit is suitable for use in the domestic environment and in similar environments such as:
- Kitchen area for staff of shops, offices and other similar professional environments
- Farms
- Hotel en motel rooms and other environments with a residential character.
- Guest room, or similar
PLEASE NOTE: The appliance should not be used with an external timer or a separate remote control.
Children or people with physical or mental limitations should not use this appliance. Also people with limited experience or knowledge may not use the appliance, unless they have received appropriate instruction or are supervised by people concerned for their safety. Make sure that children cannot play with the appliance. This appliance produces both steam and water with a high temperature. Always use it with due care. - Check to make sure the voltage of the appliance matches the voltage in your house.
- Unwind the mains cable completely before using the appliance.
- Place the appliance on a flat and firm surface.
- Unplug the electric lead in the following cases: Before you fill the water reservoir.
When cleaning or carrying out maintenance of the appliance.
If the appliance is not working correctly.
After you have used the appliance.
- Empty the water reservoir if the appliance will not be used for an extended period of time.
- Use cold water when making coffee. Hot water or other liquids may damage your appliance
- Use the coffee grinder to grind coffee only.
- Do not leave the appliance unattended when it is switched on and use it indoors only.
- Do not touch hot parts of the appliance and use it only for its intended purpose.
- Do not let the electric lead hang over the edge of a table or touch hot surfaces. Do not use the appliance if the drip tray or the drip tray grid is incorrectly placed.
- Do not immerse the appliance in water or in any other liquids to clean it.
- Do not use the appliance with damaged parts.
- Do not use the appliance if it is not working correctly.
- Do not pull on the electric lead to remove the plug from the socket.
- Do not attempt to repair the appliance yourself.
- Do not connect external accessories that are not standard parts of your appliance.
- Do not place the appliance near hot gasses, an electric burner or a hot oven.
DESCRIPTION OF PARTS


DO-429KDO-429K
| .2 | ||||||
| On/off | Small Espresso | Large Espresso | Cappuccino | Latte | Milk foam - Hot water | 2 cups |
| > | ||||||
| Quantity of coffee | Quantity beans | Ground coffee | Tempera-ture | Following | Menu | Back |
EXPLANATION OF ICONS
| Type of coffee: Cappuccino, Espresso, Latte | |
| 2 | Number of cups: Two |
| Amount of coffee: Small, medium or large | |
| Temperature: Low, medium or high | |
| Amount of coffee beans: Low or high | |
| Ground coffee |
ACCESSORIES
A number of useful accessories have been provided for your convenience:
• Measuring spoon for coffee
- Cleaning brush
• Cloth for cleaning LCD screen
• Descaling agent, filter and filter cap.
To prevent your coffee cooling off too quickly in the cup, you can preheat your cups by using the warming plate provided.
FLUSHING THE APPLIANCE BEFORE FIRST TIME USE
If using the appliance for the first time or if you have not used it for quite some time you must flush it.
- Fill the reservoir with a sufficient amount of water (see "Fill water reservoir").
- Place a container on the drip tray grid to catch any wastewater.
- The appliance's display will show and it will automatically be set to the default setting.
- Press on the On/Off button ⏻. The display will show and a small amount of water will be released from the nozzle in order to remove any remaining residue.
- If the automatic flushing is finished, the display will show the following message: The following buttons will also be illuminated.

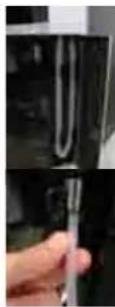
- Also keep a container with clean water ready. Connect the milk suction pipe found behind the door on the front right-hand side of the appliance (see example) to the foam control knob and dip the other end into the wastewater container.
- Press on the button, press on the FOLLOWING the display will show:
- Press on the button again and the flushing/rinsing process will start after warming up first for about 30 seconds.
• After the rinsing/flushing process is finished, you can return to the original menu using the 📋
FILLING THE COFFEE BEAN HOPPER WITH COFFEE BEANS
- Remove the lid from the coffee bean hopper.
• Fill the hopper with coffee beans. - Close the lid carefully.
Do not use ground coffee, double roasted coffee or freeze-dried coffee in the coffee bean hopper. This can damage the grinding mechanism. You can grind your coffee beans
to suit your personal taste by using the coffee grinding knob located in the coffee bean hopper/container. The finer the grade (-), the stronger the coffee and the slower the water will pass through the ground coffee.
CAUTION!! Only adjust this dial DURING the grinding process and do try not to adjust the grinding mechanism when the grinder is switched off.
FILLING THE APPLIANCE WITH GROUND COFFEE

natural_image
Line drawing of a laboratory apparatus with two views (top and side), no text or symbols present.
DO-429KDO-429K
• Take the lid off the ground coffee container
- Fill the container with one spoon of ground coffee using the measuring spoon supplied and carefully close the lid.
FILLING THE WATER RESERVOIR
- Open the lid of the water reservoir completely.
- Pull up the water reservoir by using the handle.
- Fill the reservoir with cold water. Do not fill it higher than the MAX level indicator located on the side of the reservoir.
- Put the water reservoir firmly into its correct position and carefully close the lid.
- You can of course fill the water reservoir without removing it.
- Fill the water reservoir with a sufficient amount of water. If the water level is too low, the water sensor will flash and you will hear an acoustic signal until you add a sufficient amount of water to the tank.
- Try to make sure that you do not switch the appliance on if the water reservoir is empty and never fill the reservoir with warm or boiling water. Do not leave water in the tank for several days. Use fresh water as much as possible.
- Never remove the water reservoir while you are already brewing coffee. If the water runs out during the process of making coffee the appliance will stop automatically. The display will flash and you will hear an acoustic signal to remind you to add water.
After you have refilled with water the appliance will finish off the coffee making process. You can stop the coffee making process at any time by pressing the BACK button.
ESTABLISHING PRE-SETTINGS
After the device has been turned on, you press the Menu-icon: . Press one of the icons to make your choice:
| SETTINGS DISPLAY OPTIONS | ||
| SMALL ESPRESSO | ||
| To select the desired amount of coffee, pressrepeatedly 40ml --> 50ml --> | 60ml | |
| For the desired amount of coffee beans, choose | Select orTwo coffee beans indicates stronger coffee. | |
60
| For ground coffee you press | Is selected on the display. | |
| To choose the right temperature, you press | You can choose between:andWarm, very warm and hot |
| To save the above settings, simply press the Menu button. The icons will keep flashing and with you return to the main menu. If you do not want to save, then press twice on |
| Number of cups (1 or 2). This can not be determined in advance, it must be pressed after you have made your choice in the main menu. The default is 1 cup. No X2 for ground coffee. | ||
| LARGE ESPRESSO | ||
| To select the desired amount of coffee, press repeatedly | 100ml --> 125ml --> 150ml | |
| For the desired amount of coffee beans, choose | Select or Two coffee beans indicates stronger coffee. | |
| For ground coffee you press | Is selected on the display. | |
61
DO-429KDO-429K
| To choose the right temperature, you press 🚗 | You can choose between: 🏠 and ⚠Warm, very warm and hot |
| To save the above settings, simply press the Menu button. The icons will keep flashing and with you return to the main menu. If you do not want to save, then press twice on. |
| Number of cups (1 or 2) | This can not be determined in advanceit must be pressed after you have made your choice in the main menu. The default is 1 cup. No X2 for ground coffee. |
| CAPPUCCINO | ||
| For the desired amount of coffee, press repeatedly | 150ml --> 250ml -->350ml | |
| For the desired amount of coffee beans, choose | Select or Two coffee beans indicates stronger coffee. | |
| For ground coffee you press | Is selected on the display. |
| To choose the right temperature, you press 📁 | You can choose between: 🎊 and 🎊Warm, very warm and hot |
| To save the above settings, simply press the Menu button. The icons will keep flashing and with you return to the main menu. If you do not want to save, then press twice on. |
| Number of cups (1 or 2). This can not be determined in advance it must be pressed after you have made your choice in the main menu. The default is 1 cup. No X2 for ground coffee. | ||
| LATTE | ||
| For the desired amount of coffee, press repeatedly 150ml --> 250ml-->350ml | ||
| For the desired amount of coffee beans, choose | Select or Two coffee beans indicates stronger coffee. | |
| For ground coffee you press | Is selected on the display | |
| To choose the right temperature, you press | You can choose between: and Warm, very warm and hot | |
DO-429KDO-429K
To save the above settings, simply press the Menu button. The icons will keep flashing and with you return to the main menu. If you do not want to save, then press twice on.
| Number of cups (1 or 2) | This can not be determined in advanceit must be pressed after you have made your choice in the main menu. The default is 1 cup. No X2 for ground coffee. |
ESPRESSO
You can make espresso from coffee beans or ground coffee.
Coffee Beans
Fill the water reservoir (see: Filling the Water Reservoir)
The display will show 🎨. Press on the ON/OFF button. The display will show 🎨 and a small amount of water will be released from the nozzle to remove any remaining residue. If automatic flushing is finished, the display will show the following message:
The following buttons will also be illuminated.

You can set the amount of Espresso, the temperature, the choice of coffee beans or ground coffee and the amount of beans/ground coffee by pressing on the menu button (see Establishing Pre-settings).
Place a coffee cup on the grid directly below the drip nozzle. You can slide the nozzle upwards and downwards as desired, depending on the height of your cup.
To make a small Espresso press or for a large amount of Espresso press. Choose the number of cups within 5 seconds, 1 of 2. Standard is 1 cup; you must press on for two cups. The appliance will make your espresso.
Ground Coffee
If you selected ground coffee in the pre-settings the display will show the following:

The icon will flash to remind you to add ground coffee. With ground coffee added press on the icon to make espresso. In the accompanying table below, you can read the volume of the selected amount of coffee per cup.
CAPPUCCINO
Coffee Beans
Fill the water reservoir (see: Filling the Water Reservoir) The display will show Press on the ON/OFF button. The display will show and a small amount of water will be released from the nozzle to remove any remaining residue.
If automatic flushing is finished, the display will show the following message: The following buttons will also be illuminated.

You can set the amount of Cappuccino, the temperature, the choice of coffee beans or ground coffee and the amount of beans/ground coffee by pressing on the menu button (see Establishing Pre-settings).
Place a coffee cup on the grid directly below the drip nozzle. You can slide the nozzle upwards and downwards as desired, depending on the height of your cup.
Keep a jug of fresh milk ready next to the appliance. Connect the milk suction pipe to the milk foam control knob and dip the other end into the milk. Turn the foam control knob to (f.l.t.r.) less foam, fine-pored foam, more foam. Always use full-fat milk and store it at a temperatur below 8°C.
For Cappuccino you select
Choose the number of cups within 5 seconds, 1 of 2. Standard is 1 cup; you must press on . For two cups. Your Cappuccino will be made.
Ground Coffee
If you selected ground coffee in the pre-settings the display will show the following:

The icon will flash to remind you to add ground coffee. With ground coffee added press on the icon to make Cappuccino.
LATTE
Coffee Beans
- Fill the water reservoir (see: Filling the Water Reservoir) The display will show
- Press on the ON/OFF button. The display will show and a small amount of water will be released from the nozzle to remove any remaining residue.
If automatic flushing is finished, the display will show the following message: The following buttons will also be illuminated.

You can set the amount of Latte, the temperature, the choice of coffee beans or ground coffee and the amount of beans/ground coffee by pressing on the menu button (see
DO-429KDO-429K
Establishing Pre-settings).
Place a coffee cup on the grid directly below the drip nozzle. You can slide the nozzle
upwards and downwards as desired, depending on the height of your cup.

Keep a jug of fresh milk ready next to the appliance. Connect the milk suction pipe to the milk foam control knob and dip the other end into the milk. Turn the foam control knob to (f.l.t.r.) less foam, fine-pored foam, more foam. Always use full-fat milk and store it at a temperature below 8°C. Press on the Latte button.
Choose the number of cups within 5 seconds, 1 of 2. Standard is 1 cup; you must press on for two cups. The appliance will make your espresso. Your Latte will be made.
Ground Coffee
If you selected ground coffee in the pre-settings the display will show the following:

The icon will flash to remind you to add ground coffee. With ground coffee added press on the icon to make Latte. In the accompanying table below, you can read the volume of the selected amount of coffee per cup.
| CAPPUCCINO | LATTE | ||
| 150ml | 150ml | ||
| 250ml | 250ml | ||
| 350ml | 350ml | ||
FLUSHING AFTER USING MILK
Every time you have made Cappuccino or Latte the appliance will remind you to clean the internal circuitry to remove milk residues. The - button shows continually. To clean the appliance, simply press on the -button.
Attention!!! Insert the end of the milk suction pipe in a jug of clean water and place a large container (250ml at least) under the nozzle button, to collect the flush water.
MILK FOAM AND HOT WATER
To make milk foam, always use full-fat milk and store it at a temperature below 8^ C. Keep a jug of fresh milk ready next to the appliance. Connect the milk suction tube to the milk foam control knob and dip the other end into the milk. Turn the foam control
knob to (f.l.t.r.) less foam, fine-pored foam, more foam.
If you want to make milk foam or hot water with your appliance, press the button. The display will show the icon and the button will flash.
For warm water put the foam control knob on 'less foam' (left), press on the button and the display will show
You can use the button to switch between milk foam or hot water.
Now you press on the button. After 30 seconds of warming up the appliance provides approximately 250ml of hot water. You can always stop prematurely by
pressing the 📋 button. If you have been made milk foam, then rinse the appliance afterwards as described above (FLUSH AFTER USING MILK).
ADDITIONAL SETTINGS
Using the Menu button allows you to store additional settings such as: automatic shutdown, water hardness, brightness of the display, sound on or off.
ADJUSTING THE SETTINGS
- Press on the Menu button to adjust the settings.
- Press on “” in order to choose one of the settings and then press on the Menubutton to select. Now you can use the button to select the desired setting and then establish it by pressing the Menubutton
- After you have established all of the settings you can use the button to return to the main menu. For descaling, please see the separate chapter "Descaling".
| SETTINGS DISPLAY | OPTIONS | |
| Automatic shutdown | Not activated | |
 | Shutdown after 15 minutes. | |
 | Shutdown after 30 minutes (default). | |
 | Shutdown after 60 minutes. | |
 | Shutdown after 120 minutes. | |
| Water hardness | Very soft water. | |
 | Soft water. | |
 | Average water (default setting). | |
 | Quite hard water. | |
 | Hard water. | |
 | Filter in use | |
| Filter Cartridge | Filter not in use | |
 | ||
 |
DO-429KDO-429K
| Display brightness Very dark. | ||
| 2 | Dark. | |
| 3 | Light. | |
| 4 | Very light (default setting.) | |
| Sound on and off | Sound on | |
| Sound off | ||
| Descaling See 'DESCALING' |
CLEANING AND MAINTENANCE
To continue to guarantee a good coffee taste and extend the life of your appliance, you must carry out regular maintenance.
Drip Tray
If the drip tray is full, the red drip tray indicator above the grid will stick out. Remove the grill, dry the drip tray completely and put all parts back.
The appliance's waste container for used coffee
After repeatedly making coffee, the coffee waste container will become full. The display will indicate this:
-
Open the Maintenance Door
-
Pull the drip tray with waste container towards you. Clean both parts, put them back into place and close the maintenance door. The display will show and the machine is ready to make coffee again. If this procedure fails to take place it means the parts have been put back into place incorrectly.
N.B. Your appliance has a sensor that monitors the process to make sure everything is carried out correctly and which switches the appliance back to its original settings.
Cleaning the appliance

natural_image
Simple line drawings of a building interior with an upward arrow and a door (no text or symbols)
Remove the plug from the socket
Make sure the appliance and all components are completely cooled off
Do not immerse in water or other liquid
Do not wash any of the parts in a dishwasher
Wipe the casing of the appliance with a damp cloth.
Clean the drip tray as described above
Clean the tank regularly.
Cleaning milk foam control knob and milk suction tube
Provide a container that can hold at least 250ml water.
Connect the milk suction pipe to the milk foam control knob and dip the other end into the container. Run through the procedure "Flushing after using milk" to make sure that the appliance is also cleaned thoroughly inside. Remove the milk foam control knob from the appliance (pull gently downwards) and flush/rinse it under running water. Do not forget to put the milk foam control knob back into place.
Cleaning the nozzle
Unplug the electric lead.
Wait until the appliance has completely cooled off.
Pull the nozzle gently downwards away from the cover.
Wash the nozzle under running water.
Gently put the nozzle back into place.
The coffee-making element and the outlet tube
The coffee-making element must be cleaned regularly to prevent coffee residue sticking, which could cause your appliance to fail to run smoothly.
Remove the plug from the electric socket.
Make sure that the appliance is completely cooled off.
Gently open the maintenance door.
Press with thumb and forefinger on the two red buttons on
the side of the coffee-making element and carefully pull it towards you.
Clean the element under running water.
Clean the interior of your appliance too. Use a
cleaning brush to remove excess coffee residue.
Remove the coffee outlet tube by pushing it gently
upwards. Rinse well under running water. Do not
use cleaning agents to clean separate parts and never
put them in the dishwasher. Never remove any parts
when the device is switched on!
REPLACE WATER FILTER

natural_image
Two technical line drawings of a device or machine, one with internal components and the other showing internal structure (no text or symbols visible)

DO-429KDO-429K
The water filter will purify the water and make it less hard. If you choose not to use the water filter, you must install the provided cap, which will only filter impurities in the water, instead. Using your appliance without the water filter (with cap) will decrease the life span of the coffee making element. After using 50 litre of water the display will remind you to replace the water filter [e]. If you want to continue to use the appliance without replacing the water filter press to return to the main menu. After a couple of cups the appliance will reremind you to replace the water filter. To replace the water filter, press Menu Remove the water tank and the filter, and place a new one. Replace the water tank. Push the appliance will return to the main menu. Immersing the water filter a couple of minutes in clear tap water before installing, will produce an even better filter result. Replacement of the water filter is recommended after using 50 litre of water or every two months. If you do not use the appliance for a couple of weeks we recommend to replace the water filter. Follow below procedure to restart the counting of water usage after replacing the filter cartridge.
-
Switch on the appliance
-
Press the Menu button .. than press seven times until the display shows
-
Press the Menu button again, the display will show to remind to replace the filter.
-
Replace the filter, press > and confirm by pressing the blinking icon
-
Press, to return to the main display.

natural_image
Simple line drawing of a cylindrical device inside a rectangular enclosure, with a downward arrow indicating a component (no text or symbols)
natural_image
Hand pressing a button on a wooden box with an upward arrow (no text or symbols)DESCALING
Please remove the water filter before descaling. In order to prolong the life of your appliance it is recommended that you descale it regularly. Your appliance indicates when it needs to be descaling, this icon will be shown on the display. Dissolve the descaling product provided (1 sachet) in 800ml of water. Make sure that the device has cooled completely. Fill the reservoir with the descaling solution. Put a container able to hold at least 1.5 litres under the nozzle. Press on the ON/OFF button. The display will show and a small amount of water will be released from the nozzle to remove any remaining residue.
If automatic flushing is finished, the display will show the following: 📋. The following buttons will also be illuminated.

Press on the Menu button and press five times on the button until the display shows €. Confirm with the Menubutton. Press on the button and button: the descaling process will start.
The descaling process will take in between 15 and 20 minutes. The display will show the following:


After descaling the appliance will remind you to remove the descaling product and to fill the water reservoir with clean water: Then press on 40 flush the appliance with water.


After this, the appliance will automatically return to the main menu. Use a safe descaling agent, otherwise the appliance may be damaged or residues could remain in the water reservoir. Do not switch the appliance off during the descaling process or you may cause remains from the descaling process to be left behind inside the appliance.
EXPLANATION OF ICONS
| Icon | Description Solution Alternative | |
| [YS4D] | No coffee beans Refill the hopper with coffee beans | Remove the plug |
| [G3ZA] | No coffee-making clement. | Place the coffee-making clement. Remove the plug |
 | Waste coffee container is full. Empty the container. Remove the plug | |
 | Lime-scale warning. | Descale the appliance. Remove the plug |
DO-429KDO-429K
| Drip tray not in place. Put the drip tray into place. Remove the plug | |||
| Waste coffee container not in place. | Put the container into place. | Remove the plug | |
| Maintenance door is open. | Close maintenance door. Remove the plug | ||
| Warning. Pay attention. Remove the plug | |||
| No water. Fill the water reservoir. Remove the plug | |||
ERROR MESSAGES
| Problem Cause Solution | ||
| Nothing happens, no display. | Appliance is not plugged in. | Plug the appliance in. |
| No reaction or delayed reaction after repeatedly pressing the on/off switches. | Appliance is under the influence of electromagnetic interference. Control panel is dirty or greasy. | Remove the plug out and restart after a few minutes.Clean the control panel with dry cloth. |
| The coffee is not hot enough. | The cups were not preheated.The coffee-making element is too cold. | Place the cups on the heating plate beforehand.Flush and clean the appliance. |
| The coffee is not running through one of the nozzles. | A nozzle is blocked. Clean the nozzles regularly. | |
| The first cup of coffee is poor quality. | The grinder is providing the coffee-making clement with an insufficient amount of coffee. | Throw the coffee away; the following cups should be good. Clean the coffee bean hopper. |
| The milk foams insufficiently. | Milk is not fresh, milk is too warm, milk is boiled. The nozzle is blocked. | Use fresh, cold milk. Clean the nozzle. |
| The coffee is not creamy. | Beans or ground coffee is not fresh or is poor quality. | Use a good quality brand of coffee beans or ground coffee. |
| Heating up takes too long. | Limescale deposit. Dscalc | the appliance. |


- DO-429KDO-429K
- GARANTIEVOORWAARDEN
- CONDITIONS DE GARANTIE
- RECYCLING INFORMATIONEN
- RECYCLING INFORMATION
- VEILIGHEIDSVOORSCHRIFTEN
- WATERFILTER VERVANGEN
- ONTKALKEN
- REPLACEMENT DE FILTRE D'EAU
- ACCESSORIES
- FLUSHING THE APPLIANCE BEFORE FIRST TIME USE
- FILLING THE COFFEE BEAN HOPPER WITH COFFEE BEANS
- FILLING THE APPLIANCE WITH GROUND COFFEE
- FILLING THE WATER RESERVOIR
- ESTABLISHING PRE-SETTINGS
- ESPRESSO
- Coffee Beans
- Ground Coffee
- CAPPUCCINO
- LATTE
- FLUSHING AFTER USING MILK
- MILK FOAM AND HOT WATER
- ADDITIONAL SETTINGS
- ADJUSTING THE SETTINGS
- CLEANING AND MAINTENANCE
- Drip Tray
- The appliance's waste container for used coffee
- Cleaning the appliance
- Cleaning milk foam control knob and milk suction tube
- Cleaning the nozzle
- The coffee-making element and the outlet tube
- REPLACE WATER FILTER
- DESCALING
Brand : DOMO
Model : DO429K
Category : Coffee machine