
Alpha a6000 - Camera SONY - Free user manual and instructions
Find the device manual for free Alpha a6000 SONY in PDF.


| Type of Product | Mirrorless digital camera |
| Dimensions (WxHxD) | Approx. 120.0 x 66.9 x 45.1 mm (4 7/8 x 2 3/4 x 1 13/16 in.) |
| Weight | Approx. 344 g (12.1 oz) with battery and memory card |
| Power Source | Rechargeable battery NP-FW50 (7.2V, 1020mAh), USB charging via micro-USB |
| Sensor | 24.3 MP APS-C Exmor CMOS sensor (23.5 x 15.6 mm) |
| Image Processor | BIONZ X |
| Lens Mount | Sony E-mount |
| Autofocus System | Fast Hybrid AF: 179 phase-detection points (focal plane) + 25 contrast-detection points |
| Continuous Shooting Speed | Up to 11 fps (with continuous AF) |
| Video Recording | Full HD 1080p at 60fps/50fps/30fps/25fps/24fps, MP4/AVCHD format |
| Viewfinder | 0.39" OLED electronic viewfinder (1,440,000 dots), approx. 100% coverage |
| LCD Screen | 3.0" tilting TFT LCD (921,600 dots), tilting up 90°, down 45° |
| Connectivity | Built-in Wi-Fi (IEEE 802.11b/g/n), NFC, micro-USB 2.0, HDMI micro (Type D) |
| Storage Media | Memory Stick PRO Duo / PRO-HG Duo / MicroSD / SDHC / SDXC / Memory Stick Micro |
| ISO Sensitivity | 100-25600 (expandable to 51200) |
| Shutter Speed | 30 - 1/4000 sec, Bulb, Flash sync up to 1/160 sec |
| Metering Modes | 1200-zone evaluative, center-weighted, spot |
| Flash | Built-in pop-up flash (GN 6 at ISO 100, meters), hot shoe for external flash |
| Battery Life (CIPA) | Approx. 360 shots (with LCD), 310 shots (with viewfinder) |
| Care and Cleaning | Use a blower to remove dust from lens/sensor; wipe body with soft dry cloth; clean sensor using camera's cleaning mode |
| Safety Precautions | Do not expose to moisture or extreme temperatures; use only Sony NP-FW50 batteries; do not disassemble; avoid magnetic fields |
| Spare Parts and Repairability | Spare batteries, chargers, grips, and USB cables available; service by authorized Sony centers recommended |
| General Information | Released in 2014; supports features like Picture Effects, Auto Object Framing, and PlayMemories Camera Apps |
Frequently Asked Questions - Alpha a6000 SONY
User questions about Alpha a6000 SONY
0 question about this device. Answer the ones you know or ask your own.
Ask a new question about this device
Download the instructions for your Camera in PDF format for free! Find your manual Alpha a6000 - SONY and take your electronic device back in hand. On this page are published all the documents necessary for the use of your device. Alpha a6000 by SONY.
USER MANUAL Alpha a6000 SONY
http://www.sony.net/SonyInfo/Support/
SONY
4-532-055-41(1)
α
6000
E-mount
α 6000
© 2014 Sony Corporation Printed in Thailand
4532055410
Interchangeable Lens Digital Camera/Instruction Manual GB
Learning more about the camera ("Help Guide")

“Help Guide” is an on-line manual. Refer to it for in-depth instructions on the many functions of the camera.
①Access the Sony support page.
http://www.sony.net/SonyInfo/Support/
②Select your country or region.
③Search for the model name of your camera on the support page.
- Check the model name on the bottom of your camera.
Viewing the Guide
This camera is equipped with a built-in instruction guide.
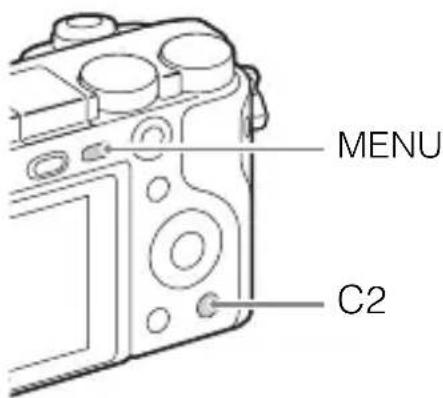
In-Camera Guide
The camera displays explanations for MENU items and the setting values.
①Press the MENU button or the Fn (Function) button.
②Select the desired item, then press the C2 button.
Shooting Tip
The camera displays shooting tips for the shooting mode selected.
①Press the C2 button in shooting mode.
② Select the desired shooting tip, then press ● on the control wheel. The shooting tip is displayed.
- You can scroll the screen using ▲/▼ and change shooting tips using ◀/▶.
Owner's Record
The model and serial numbers are located on the bottom. Record the serial number in the space provided below. Refer to these numbers whenever you call your Sony dealer regarding this product.
Model No. ILCE-6000
Serial No. ____
Model No. AC-UB10C/AC-UB10D
Serial No. ____
WARNING
To reduce fire or shock hazard, do not expose the unit to rain or moisture.
IMPORTANT SAFETY INSTRUCTIONS -SAVE THESE INSTRUCTIONS DANGER TO REDUCE THE RISK OF FIRE OR ELECTRIC SHOCK, CAREFULLY FOLLOW THESE INSTRUCTIONS
If the shape of the plug does not fit the power outlet, use an attachment plug adaptor of the proper configuration for the power outlet.
CAUTION
Battery pack
If the battery pack is mishandled, the battery pack can burst, cause a fire or even chemical burns. Observe the following cautions.
- Do not disassemble.
- Do not crush and do not expose the battery pack to any shock or force such as hammering, dropping or stepping on it.
- Do not short circuit and do not allow metal objects to come into contact with the battery terminals.
- Do not expose to high temperature above 60^ (140°F) such as in direct sunlight or in a car parked in the sun.
- Do not incinerate or dispose of in fire.
- Do not handle damaged or leaking lithium ion batteries.
-
Be sure to charge the battery pack using a genuine Sony battery charger or a device that can charge the battery pack.
-
Keep the battery pack out of the reach of small children.
- Keep the battery pack dry.
- Replace only with the same or equivalent type recommended by Sony.
- Dispose of used battery packs promptly as described in the instructions.
IAC Adaptor
Use the nearby wall outlet (wall socket) when using the AC Adaptor. Disconnect the AC Adaptor from the wall outlet (wall socket) immediately if any malfunction occurs while using the apparatus.
The power cord (mains lead), if supplied, is designed specifically for use with this camera only, and should not be used with other electrical equipment.
For Customers in the U.S.A. and Canada
IRECYCLING LITHIUM-ION BATTERIES
Lithium-Ion batteries are recyclable.
You can help preserve our environment by returning your used rechargeable batteries to the collection and recycling location nearest you.
For more information regarding recycling of rechargeable batteries, call toll free
1-800-822-8837, or visit http://www.call2recycle.org/

Caution: Do not handle damaged or leaking Lithium-Ion batteries.
Battery pack and lens (If lens supplied)
This device complies with Part 15 of the FCC Rules. Operation is subject to the following two conditions:
(1) This device may not cause harmful interference, and (2) this device must accept any interference received, including interference that may cause undesired operation.
This equipment complies with FCC/IC radiation exposure limits set forth for an uncontrolled environment and meets the FCC radio frequency (RF) Exposure Guidelines in Supplement C to OET65 and RSS-102 of the IC radio frequency (RF) Exposure rules. This equipment has very low levels of RF energy that are deemed to comply without testing of specific absorption ratio (SAR).
For Customers in the U.S.A.
If you have any questions about this product, you may call:
Sony Customer Information Center
1-800-222-SONY (7669)
The number below is for the FCC related matters only.
Regulatory Information
Declaration of Conformity
Trade Name: SONY
Model No.: ILCE-6000
Responsible Party: Sony Electronics Inc.
Address: 16530 Via Esprillo,
San Diego, CA 92127 U.S.A.
Telephone No.: 858-942-2230
This device complies with Part15 of the FCC Rules. Operation is subject to the following two conditions: (1) This device may not cause harmful interference, and (2) this device must accept any interference received, including interference that may cause undesired operation.
This equipment must not be co-located or operated in conjunction with any other antenna or transmitter.
ICAUTION
You are cautioned that any changes or modifications not expressly approved in this manual could void your authority to operate this equipment.
Note:
This equipment has been tested and found to comply with the limits for a Class B digital device, pursuant to Part 15 of the FCC Rules.
These limits are designed to provide reasonable protection against harmful interference in a residential installation. This equipment generates, uses, and can radiate radio frequency energy and, if not installed and used in accordance with the instructions, may cause harmful interference to radio communications. However, there is no guarantee that interference will not occur in a particular installation. If this equipment does cause harmful interference to radio or television reception, which can be determined by turning the equipment off and on, the user is encouraged to try to correct the interference by one or more of the following measures:
– Reorient or relocate the receiving antenna.
– Increase the separation between the equipment and receiver.
- Connect the equipment into an outlet on a circuit different from that to which the receiver is connected.
- Consult the dealer or an experienced radio/TV technician for help.
The supplied interface cable must be used with the equipment in order to comply with the limits for a digital device pursuant to Subpart B of Part 15 of FCC Rules.
For Customers in Canada
This device complies with Industry Canada licence-exempt RSS standard(s).
Operation is subject to the following two conditions: (1) this device may not cause interference, and (2) this device must accept any interference, including interference that may cause undesired operation of the device.
For Customers in Europe
Notice for the customers in the countries applying EU Directives
Manufacturer: Sony Corporation, 1-7-1 Konan Minato-ku Tokyo, 108-0075 Japan
For EU product compliance: Sony Deutschland GmbH, Hedelfinger Strasse 61, 70327
Stuttgart, Germany

Hereby, Sony Corporation, declares that this equipment is in compliance with the essential requirements and other relevant provisions of Directive 1999/5/EC. For details, please access the following URL:
http://www.compliance.sony.de/
Notice
If static electricity or electromagnetism causes data transfer to discontinue midway (fail), restart the application or disconnect and connect the communication cable (USB, etc.) again.
This product has been tested and found compliant with the limits set out in the EMC regulation for using connection cables shorter than 3 meters (9.8 feet).
The electromagnetic fields at the specific frequencies may influence the picture and sound of this unit.
Disposal of waste batteries and electrical and electronic equipment (applicable in the European Union and other European countries with separate collection systems)

natural_image
Symbol of a trash bin crossed with two crossed lines, representing no waste or discharge (no text or labels)This symbol on the product, the battery or on the packaging indicates that the product and the battery shall not be treated as household waste. On certain batteries this symbol might be used in combination with a chemical symbol. The chemical symbols for mercury (Hg) or lead (Pb) are added if the battery contains more than 0.0005% mercury or 0.004% lead. By ensuring these products and batteries are disposed of correctly, you will help prevent potentially negative consequences for the environment and human health which could otherwise be caused by inappropriate waste handling. The recycling of the materials will help to conserve natural resources.
In case of products that for safety, performance or data integrity reasons require a permanent connection with an incorporated battery, this battery should be replaced by qualified service staff only. To ensure that the battery and the electrical and electronic equipment will be treated properly, hand over these products at end-of-life to the applicable collection point for the recycling of electrical and electronic equipment. For all other batteries, please view the section on how to remove the battery from the product safely. Hand the battery over to the applicable collection point for the recycling of waste batteries. For more detailed information about recycling of this product or battery, please contact your local Civic Office, your household waste disposal service or the shop where you purchased the product or battery.
For Customers in Singapore
Complies with IDA Standards DB00353
For customers who purchased their camera from a store in Japan that caters to tourists
Note
Some certification marks for standards supported by the camera can be confirmed on the screen of the camera.
Select MENU → (Setup) 6 → [Certification Logo].
If display is not possible due to problems such as camera failure, contact your Sony dealer or local authorized Sony service facility.
Table of contents
Preparing the camera Step 1 P. 9
- Checking the supplied items
- Identifying parts
- Inserting the battery pack
- Charging the battery pack
- Inserting a memory card (sold separately)
- Attaching/removing the lens
- Setting the clock
Basic operation Step 2 P. 23
- Shooting still images/movies
Playback function Step 3 P. 24
- Viewing images
Recording function Step 4 P. 25
- Introduction of other functions
Importing images to the computer P. 26
- Features of PlayMemories Home™
Adding functions to the camera P. 28
- Adding functions to the camera
Others P. 29
– Number of still images and recordable time of movies
- Notes on using the camera
- Specifications
This manual covers several models supplied with different lenses.
The model name varies depending on the supplied lens. The available model varies depending on the countries/regions.
| Model name Lens | |
| ILCE-6000 Not supplied | |
| ILCE-6000L E16 – 50 mm | |
| ILCE-6000Y E55 – 210 mm and E16 – 50 mm | |
Checking the supplied items
First check the model name of your camera (page 8). The accessories supplied differ depending on the model.
The number in parentheses indicates the quantity.
Supplied with all models
- Camera (1)
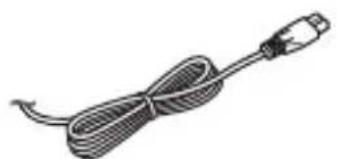
- Power cord (mains lead) (1)* (not supplied in the U.S.A. and Canada)
natural_image
Illustration of a cable with a connector, no text or symbols present* Multiple power cords may be supplied with your camera. Use the appropriate one that matches your country/region.
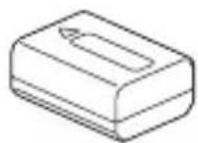
- Rechargeable battery pack NP-FW50 (1)
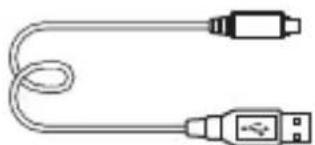
- Micro USB cable (1)

natural_image
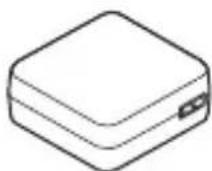
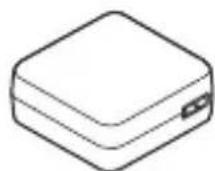
Line drawing of a U-shaped cable with two USB connectors (no text or symbols)- AC adaptor AC-UB10C/UB10D (1)

- Shoulder strap (1)

natural_image
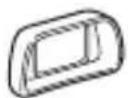
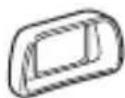
Line drawing of a pair of pliers (no text or symbols)- Eyepiece cup (1)
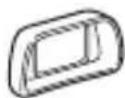
- Instruction Manual (this manual) (1)
- Wi-Fi Connection/One-touch (NFC) Guide (1) This guide explains the functions that require a Wi-Fi connection.
ILCE-6000
• Body cap (1) (attached to the camera)
ILCE-6000L
- E16 – 50 mm zoom lens (1) (attached to the camera)/Front lens cap (1) (attached to the lens)
ILCE-6000Y
- E16 – 50 mm zoom lens (1) (attached to the camera)/Front lens cap (1) (attached to the lens)
- E55 – 210 mm zoom lens (1)/Front lens cap (1)/Rear lens cap (1)/Lens hood (1)
Identifying parts
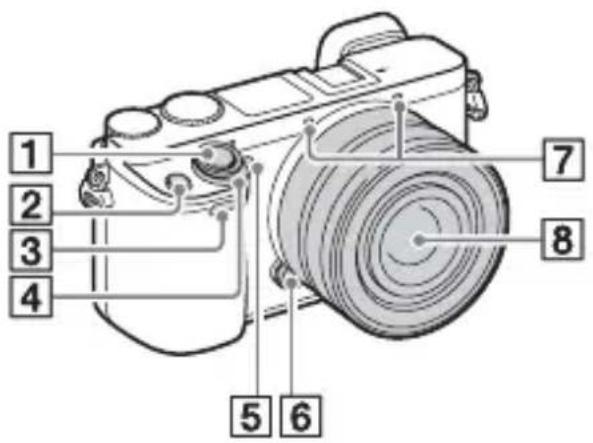
When the lens is removed

1 Shutter button
2C1 (Custom 1) button
3 Remote sensor
4 ON/OFF (Power) switch
5 Self-timer lamp/AF illuminator
6 Lens release button
7Microphone 1)
8 Lens
9Mount
10Image sensor 2)
11 Lens contacts 2)
1) Do not cover this part during movie recording.
2) Do not touch this part directly.

1 Multi interface shoe 1)
2 Image sensor position mark
3 Hook for shoulder strap
4 Wi-Fi sensor (built-in)
5 Flash
- Press the (Flash pop-up) button to use the flash. The flash does not pop up automatically.
- When not using the flash, press it back into the camera body.
6 Mode dial

(Intelligent Auto)/

(Superior Auto)/

(Program Auto)/

(Aperture Priority)/

(Shutter Priority)/

(Manual Exposure)/

(Memory recall)/

(Movie)/

(Sweep Panorama)/

(Scene Selection)
7 Control dial
8 Charge lamp
9 Multi/Micro USB Terminal 1)
• Supports Micro USB compatible device.
10 HDMI micro jack
1) For details on compatible accessories for the multi interface shoe and the Multi/Micro USB Terminal, visit the Sony web site, or consult your Sony dealer or local authorized Sony service facility. You can also use accessories that are compatible with the accessory shoe. Operations with other manufacturers' accessories are not guaranteed.

Multi
Interface Shoe
Accessory Shoe

11 Eye sensor
12 Viewfinder
13Eyepiece cup
- Not attached to the camera at the factory. It is recommended that you attach the eyepiece cup when you intend to use the viewfinder.
Attaching/removing the eyepiece cup

- Remove the eyepiece cup when you attach an accessory (sold separately) to the Multi Interface Shoe.
14LCD screen
- You can adjust the screen to an easily viewable angle and shoot from any position.

natural_image
Diagram of a digital camera with an arrow indicating rotation or change in the body (no text or symbols present)15 Diopter-adjustment dial
- Adjust the diopter-adjustment dial to your eyesight until the display appears clearly in the viewfinder. If it is difficult to turn the diopter-adjustment dial, remove the eyepiece cup and then adjust the dial.

natural_image
Diagram of a car interior showing a circular component with directional arrows indicating rotation or cycle (no text or symbols)16(Flash pop-up) button
17MENU button
18 For shooting: AEL button
For viewing: Playback zoom
19MOVIE (Movie) button
20 For shooting: Fn (Function) button For viewing:
(Send to Smartphone) button
- You can display the screen for [Send to Smartphone] by pressing the ⬤Send to Smartphone) button.
21Control wheel
22C2 (Custom 2) button/
(Delete) button
23(Playback) button

1 (N Mark)
- Touch the mark when you connect the camera to a smartphone equipped with the NFC function.
• NFC (Near Field Communication) is an international standard of the short-range wireless communication technology.
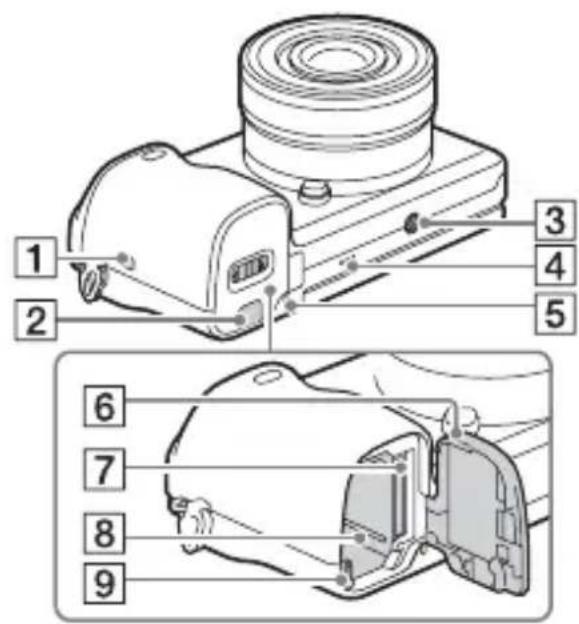
2Connection plate cover
- Use this when using an AC-PW20 AC Adaptor (sold separately). Insert the connection plate into the battery compartment, and then pass the cord through the connection plate cover as shown below.
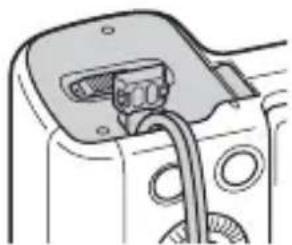
natural_image
Diagram of a plug inserted into a socket with a coiled cable (no text or symbols)• Make sure that the cord is not pinched when you close the cover.
③Tripod socket hole
- Use a tripod with a screw less than 5.5 mm (7/32 inches) long. Otherwise, you cannot firmly secure the camera, and damage to the camera may occur.
4 Speaker
5 Access lamp
6 Battery/memory card cover
7 Memory card slot
8 Battery insertion slot
⑨ Battery eject lever
[Non-Text]
Lens
See page 36 on the specifications of the lenses.
E PZ 16 – 50 mm F3.5 – 5.6 OSS (supplied with ILCE-6000L/ILCE-6000Y)

①Zooming/Focusing ring
2Zooming lever
3 Mounting index
4 Lens contacts 1)
1) Do not touch this part directly.
E55 – 210 mm F4.5 – 6.3 OSS (supplied with ILCE-6000Y)

1 Focusing ring
2Zooming ring
3 Focal-length scale
4 Focal-length index
5 Lens contacts 1)
6 Mounting index
1) Do not touch this part directly.
Inserting the battery pack


GB
1 Open the cover.
2 Insert the battery pack.
- While pressing the battery eject lever, insert the battery pack as illustrated. Make sure that the battery eject lever locks after insertion.
- Closing the cover with the battery inserted incorrectly may damage the camera.
Charging the battery pack

1 Connect the camera to the AC Adaptor (supplied), using the micro USB cable (supplied).
2 Connect the AC Adaptor to the wall outlet (wall socket).
The charge lamp lights orange, and charging starts.
- Turn off the camera while charging the battery.
- You can charge the battery pack even when it is partially charged.
- When the charge lamp flashes and charging is not finished, remove and re-insert the battery pack.
Notes
- If the charge lamp on the camera flashes when the AC Adaptor is connected to the wall outlet (wall socket), this indicates that charging is temporarily stopped because the temperature is outside the recommended range. When the temperature gets back within the appropriate range, the charging resumes. We recommend charging the battery pack in an ambient temperature of between 10^ to 30^ (50°F to 86°F).
- The battery pack may not be effectively charged if the terminal section of the battery is dirty. In this case, wipe any dust off lightly using a soft cloth or a cotton swab to clean the terminal section of the battery.
- Connect the AC Adaptor (supplied) to the nearest wall outlet (wall socket). If malfunctions occur while using the AC Adaptor, disconnect the plug from the wall outlet (wall socket) immediately to disconnect from the power source.
- When charging is finished, disconnect the AC Adaptor from the wall outlet (wall socket).
- Be sure to use only genuine Sony brand battery packs, micro USB cable (supplied) and AC Adaptor (supplied).
- Power is not supplied during shooting/playback if the camera is connected to a wall outlet (wall socket) with the supplied AC adaptor. To supply power to the camera during shooting/playback, use the AC-PW20 AC adaptor (sold separately).
Charging time (Full charge)
The charging time is approximately 310 minutes using the AC Adaptor (supplied).
Notes
- The above charging time applies when charging a fully depleted battery pack at a temperature of 25^ (77°F). Charging may take longer depending on conditions of use and circumstances.
Charging by connecting to a computer
The battery pack can be charged by connecting the camera to a computer using a micro USB cable.
Notes
- Note the following points when charging via a computer:
- If the camera is connected to a laptop computer that is not connected to a power source, the laptop battery level decreases. Do not charge for an extended period of time.
- Do not turn on/off or restart the computer, or wake the computer to resume from sleep mode when a USB connection has been established between the computer and the camera. That may cause the camera to malfunction. Before turning on/off, or restarting the computer or waking the computer from sleep mode, disconnect the camera and the computer.
- No guarantees are made for charging using a custom-built computer or a modified computer.

Battery life and number of images that can be recorded and played back
| Battery life Number of images | ||
| Shooting (still images) | Screen Approx. 180 min. Approx. 360 images | |
| Viewfinder Approx. 155 min. Approx. 310 images | ||
| Typical movie shooting | Screen Approx. 60 min. — | |
| Viewfinder Approx. 60 min. — | ||
| Continuous movie shooting | Screen Approx. 90 min. — | |
| Viewfinder Approx. 90 min. — | ||
| Viewing (still images) Approx. 275 min. Approx. 5500 images | ||
Notes
- The above number of images applies when the battery pack is fully charged. The number of images may decrease depending on the conditions of use.
-
The number of images that can be recorded is for shooting under the following conditions:
-
Using a Sony Memory Stick PRO Duo™ (Mark2) media (sold separately).
- When an E PZ 16 - 50 mm F3.5 - 5.6 OSS lens is attached.
- The battery pack is used at an ambient temperature of 25^ (77°F).
- [Viewfinder Bright.]: [Manual] [± 0]
- [Monitor Brightness]: [Manual] [± 0]
- The number for “Shooting (still images)” is based on the CIPA standard, and is for shooting under the following conditions:
(CIPA: Camera & Imaging Products Association)
- DISP is set to [Display All Info.].
- [Focus Mode]: [Automatic AF]
- Shooting once every 30 seconds.
– The flash is used once every two times. - The power is turned on and off once every ten times.
- The number of minutes for movie shooting is based on the CIPA standard, and is for shooting under the following conditions:
- [Record Setting]: 60i 17M(FH)/50i 17M(FH).
- Typical movie shooting: Battery life based on repeatedly starting/stopping shooting, zooming, turning on/off, etc.
- Continuous movie shooting: Battery life based on non-stop shooting until the limit (29 minutes) has been reached, and then continued by pressing the MOVIE button again. Other functions, such as zooming, are not operated.
Inserting a memory card (sold separately)

natural_image
Line drawing of a mechanical component or device with no visible text or symbols
natural_image
Diagram of a mechanical device with a close-up view showing internal components (no text or symbols)Ensure that the notched corner is faced correctly.
1 Open the cover (page 15).
2 Insert the memory card (sold separately).
- With the notched corner facing as illustrated, insert the memory card until it clicks into place.
3 Close the cover.
Memory cards that can be used
| Memory card For still images For movies | |||
| A | Memory Stick XC-HG DuoTM | √ | √ |
| Memory Stick PRO DuoTM (Mark2 only)√ | √ | √ | |
| Memory Stick PRO-HG DuoTM | √ | √ | |
| B | SD memory card (Class 4 or faster) | √ | √ |
| SDHC memory card (Class 4 or faster) | √ | √ | |
| SDXC memory card (Class 4 or faster) | √ | √ | |
- In this manual, the products in the table are collectively referred to as follows:
A: Memory Stick PRO Duo media
B: SD card
To remove the memory card/battery pack
Memory card: Push the memory card in once to eject the memory card.
Battery pack: Slide the battery eject lever. Be sure not to drop the battery pack.
Notes
- Never remove the memory card/battery pack when the access lamp (page 13) is lit. This may cause damage to data in the memory card.
Attaching/removing the lens
Set the power switch of the camera to OFF before you attach or remove the lens.
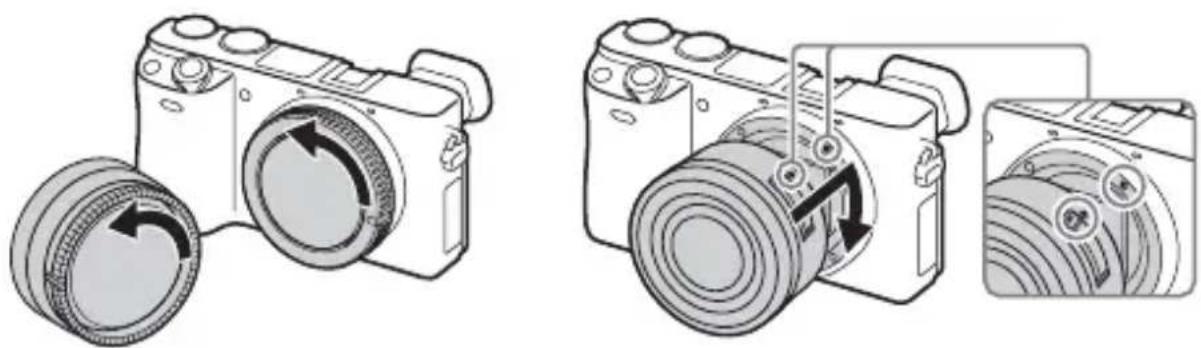
natural_image
Illustration of a camera with rotating lens and adjustment mechanism (no text or symbols)1 If the cap or the packaging lid is attached, remove it from the camera or the lens.
- Quickly change the lens somewhere away from dusty locations to keep dust or debris from getting inside the camera.
2 Mount the lens by aligning the white index marks on the lens and the camera.
- Hold the camera facing down to prevent dust from entering into the camera.
3 While pushing the lens lightly toward the camera, turn the lens clockwise until it clicks into the locked position.
- Be sure to put the lens on straight.
Notes
- When attaching a lens, do not press the lens release button.
- Do not use excessive force when attaching a lens.
- The Mount Adaptor (sold separately) is required to use an A-mount lens (sold separately). For details, refer to the operating manual supplied with the Mount Adaptor.
- When using a lens equipped with a tripod socket, attach the socket on the lens side to the tripod to maintain balance.
Removing the lens

natural_image
Line drawing of a camera with a circular lens and directional arrows indicating rotation (no text or symbols)Lens release button
1 Press the lens release button all the way in and turn the lens counterclockwise until it stops.
GB
Notes
- If dust or debris gets inside the camera while you are changing the lens and adheres to the surface of the image sensor (the part that converts the light source to a digital signal), it may appear as dark spots on the image, depending on the shooting environment. The camera vibrates slightly when it is turned off, due to the anti-dust function, to prevent dust from adhering to the image sensor. However, attach or remove the lens quickly somewhere away from dusty locations.
- If foreign material attaches to the image sensor, dust it off using a blower.
- Do not leave the camera with the lens removed.
- When you want to use body caps or rear lens caps, please purchase ALC-B1EM (Body cap) or ALC-R1EM (Rear lens cap) (sold separately).
- When you use a lens with a power zoom, set the power switch of the camera to OFF and confirm that the lens is completely retracted before switching lenses. If the lens has not retracted, do not press the lens in by force.
- When attaching the camera to a tripod, be sure not to touch the zooming/focusing ring by mistake.
Setting the clock

1 Set the ON/OFF (Power) switch to ON.
The Date & Time setting is displayed when you turn on the camera for the first time.
- It may take some time for the power to turn on and allow operation.
2 Check that [Enter] is selected on the screen, then press ● on the control wheel.
3 Select a desired geographic location by following the on-screen instructions, then press ●.
4 Set [Daylight Savings], [Date/Time] and [Date Format], then press ●.
- When setting [Date/Time], midnight is 12:00 AM, and noon is 12:00 PM.
5 Check that [Enter] is selected, then press ●.
Shooting still images/movies

Shooting still images
1 Press the shutter button halfway down to focus.
When the image is in focus, a beep sounds and the ● or (○) indicator lights.
2 Press the shutter button fully down to shoot an image.
Shooting movies
1 Press the MOVIE (Movie) button to start recording.
- When using a lens with a zoom lever: Move the zoom lever. When using a lens with a zoom ring: Turn the zoom ring.
2 Press the MOVIE button again to stop recording.
Notes
- Do not pull up the flash manually. This may cause a malfunction.
- When using the zoom function while shooting a movie, the sound of the camera operating will be recorded. The sound of the MOVIE button operating may also be recorded when movie recording is finished.
- For the continuous shooting time of a movie recording, refer to “Number of still images and recordable time of movies” (page 29). When movie recording is finished, you can restart recording by pressing the MOVIE button again. Recording may stop to protect the camera depending on the ambient temperature.
Viewing images

1 Press the ▶(Playback) button.
■ Selecting next/previous image
Select an image by pressing ▶ (next)/◀ (previous) on the control wheel or by turning the control wheel. Press ● in the center of the control wheel to view movies.
■ Deleting an image
①Press the (Delete) button.
② Select [Delete] with ▲ on the control wheel, then press ●.
■ Returning to shooting images
Press the shutter button halfway down.
Introduction of other functions

Control wheel
GB
DISP (Display Contents): Allows you to change the screen display.
ISO (ISO): Allows you to set the sensitivity based on the brightness.
(Image Index): Allows you to view multiple images in a single-image screen at the same time.
(Photo Creativity): Allows you to operate the camera intuitively and shoot creative images easily.
☑ (Exposure Comp.): Allows you to compensate the exposure and brightness for the entire image.
/ (Drive Mode): Allows you to switch between shooting methods, such as single shooting, continuous shooting or bracket shooting.
● (Standard): [Lock-on AF] is assigned to this button in the default setting.
■ Fn (Function) button
Allows you to register 12 functions and recall those functions when shooting.
①Press the Fn (Function) button.
② Select the desired function by pressing ▲/▼/◄/► on the control wheel.
③Select the setting value by turning the control wheel.
Control dial
You can instantly change the appropriate setting for each shooting mode just by turning the control dial.
Features of PlayMemories Home™
The software PlayMemories Home allows you to import still images and movies to your computer and use them. PlayMemories Home is required for importing AVCHD movies to your computer.

flowchart
graph LR
    A["Photo: Reading"] --> B["Camera"]
    C["Filmstrip: Video with a soccer ball"] --> D["Laptop"]
Importing images from your camera
Playing back imported images
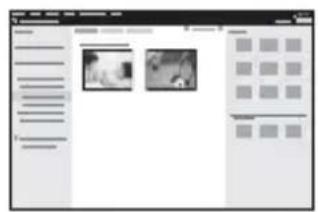
For Windows, the following functions are also available:

Viewing images
on a calendar

Creating
movie
discs


Uploading
images to
network services
Sharing images on PlayMemories Online™


- You can download Image Data Converter (RAW image editing software) or Remote Camera Control, etc. by performing the following procedure: Connect the camera to your computer → launch PlayMemories Home → click [Notifications].
Notes
- An Internet connection is required to install PlayMemories Home.
- An Internet connection is required to use PlayMemories Online or other network services. PlayMemories Online or other network services may not be available in some countries or regions.
- Use the following URL for Mac applications: http://www.sony.co.jp/imsoft/Mac/
- If the software PMB (Picture Motion Browser), supplied with models released before 2011, has already been installed on your computer, PlayMemories Home will overwrite it during the installation. Use PlayMemories Home, the successor software of PMB.
System requirements
You can find the system requirements for the software at the following URL: www.sony.net/pcenv/

Installing PlayMemories Home on a computer
1 Using the Internet browser on your computer, go to the following URL, and then install PlayMemories Home.
www.sony.net/pm/
- For details on PlayMemories Home, refer to the following PlayMemories Home support page (English only): http://www.sony.co.jp/pmh-se/
- When installation is complete, PlayMemories Home starts.
2 Connect the camera to your computer using the micro USB cable (supplied).
- New functions may be installed in PlayMemories Home. Connect the camera to your computer even if PlayMemories Home is already installed on your computer.
Notes
- Do not disconnect the micro USB cable (supplied) from the camera while the operating screen or the accessing screen is displayed. Doing so may damage the data.
- To disconnect the camera from the computer, click on the tasktray, then click (disconnect icon). For Windows Vista, click on the tasktray.
Adding functions to the camera
You can add the desired functions to your camera by connecting to the application download website (PlayMemories Camera Apps™) via the Internet.
http://www.sony.net/pmca
- After installing an application, you can call up the application by touching an NFC-enabled Android smartphone to the (N mark) on the camera, using the [One-touch(NFC)] function.
Notes
- The application downloading function may not be available in some countries and regions. For details, refer to the application downloading website above.
Number of still images and recordable time of movies
The number of still images and recordable time may vary depending on the shooting conditions and the memory card.
Still images
[image Size]: [L: 24M]
When [Aspect Ratio] is set to [3:2]*
| Quality\Capacity | 2 GB |
| Standard 330 images | |
| Fine 200 images | |
| RAW & JPEG 54 images | |
| RAW 74 images |
* When the [Aspect Ratio] is set to other than [3:2], you can record more pictures than shown above. (Except when [Quality] is set to [RAW].)
Movies
The table below shows the approximate maximum recording times. These are the total times for all movie files. Continuous shooting is possible for approximately 29 minutes (a product specification limit). The maximum continuous recording time of an MP4 (12M) format movie is about 20 minutes (limited by the 2 GB file size restriction).
(h (hour), m (minute))
| Record Setting\Capacity | 2 GB |
| 60i 24M(FX)/50i 24M(FX) 10 m | |
| 60i 17M(FH)/50i 17M(FH) 10 m | |
| 60p 28M(PS)/50p 28M(PS) 9 m | |
| 24p 24M(FX)/25p 24M(FX) 10 m | |
| 24p 17M(FH)/25p 17M(FH) 10 m | |
| 1440×1080 12M 20 m | |
| VGA 3M 1 h 10 m |
- The recordable time of movies varies because the camera is equipped with VBR (Variable Bit-Rate), which automatically adjusts the image quality depending on the shooting scene. When you record a fast-moving subject, the image is clearer but the recordable time is shorter because more memory is required for recording. The recordable time also varies depending on the shooting conditions, the subject or the image quality/size settings.
Notes on using the camera
Functions built into this camera
- This manual describes 1080 60i-compatible devices and 1080 50i-compatible devices.
To check whether your camera is a 1080 60i-compatible device or 1080 50i-compatible device, check for the following marks on the bottom of the camera. 1080 60i-compatible device: 60i 1080 50i-compatible device: 50i
- This camera is compatible with 1080 60p or 50p-format movies. Unlike standard recording modes up to now, which record in an interlacing method, this camera records using a progressive method. This increases the resolution, and provides a smoother, more realistic image.
On use and care
Avoid rough handling, disassembling, modifying, physical shock, or impact such as hammering, dropping, or stepping on the product. Be particularly careful of the lens.
Notes on recording/playback
- Before you start recording, make a trial recording to make sure that the camera is working correctly.
- This camera is neither dust-proof, nor splash-proof, nor water-proof.
- Do not look at the sun or a strong light through a removed lens. This may cause irrecoverable damage to your eyes. Or it may cause a malfunction of the lens.
- If moisture condensation occurs, remove it before using the camera.
- Do not shake or strike the camera. It may cause a malfunction and you may not be able to record images. Furthermore, the recording media may become unusable or image data may be damaged.
Do not use/store the camera in the following places
- In an extremely hot, cold or humid place
In places such as in a car parked in the sun, the camera body may become deformed and this may cause a malfunction.
• Under direct sunlight or near a heater
The camera body may become discolored or deformed, and this may cause a malfunction. -
In a location subject to shaking or vibration
-
Near a location that generates strong radio waves, emits radiation or is strongly magnetic
In such locations, the camera may not properly record or play back images.
• In sandy or dusty places
Be careful not to let sand or dust get into the camera. This may cause the camera to malfunction, and in some cases this malfunction cannot be repaired.
On storing
Be sure to attach the front lens cap when not using the camera.
Notes on the screen, electronic viewfinder and lens
- The screen and electronic viewfinder are manufactured using extremely high-precision technology, and over 99.99% of the pixels are operational for effective use. However, some tiny black and/or bright dots (white, red, blue or green) may appear on the screen and electronic viewfinder. These dots are a normal result of the manufacturing process, and do not affect the recording.
- When the lens is operating, be careful not to let your finger be caught by the lens.
About the magnet
There is a magnet attached in the area around the flash. Do not put objects that are affected by magnetic fields, such as a floppy disk or a credit card to the screen or the camera body.
On using the lenses and accessories
It is recommended that you use Sony lenses/accessories designed to suit the characteristics of this camera.
Using the products of other manufacturers may cause the camera not to operate to its capability, or result in accidents and malfunctions of the camera.
Notes on shooting with the viewfinder
When shooting with the viewfinder, you may experience symptoms such as eyestrain, fatigue, travel sickness, or nausea. We recommend that you take a break at regular intervals when you are shooting with the viewfinder.
The required length or frequency of the break may differ depending on the individuals, so you are advised to decide at your own discretion. In case you may feel uncomfortable, refrain from using the viewfinder until your condition recovers, and consult your doctor as necessary.
Notes on the flash
- Do not carry the camera by the flash unit, or use excessive force on it.
- If water, dust or sand get into the open flash unit, it may cause a malfunction.
- Be sure to keep your fingers out of the way when you press the flash down.
On camera's temperature
Your camera and battery may get hot due to continuous use, but it is not a malfunction.
On the overheat protection
Depending on the camera and battery temperature, you may be unable to record movies or the power may turn off automatically to protect the camera.
A message will be displayed on the screen before the power turns off or you can no longer record movies. In this case, leave the power off and wait until the camera and battery temperature goes down. If you turn on the power without letting the camera and battery cool down enough, the power may turn off again or you may be unable to record movies.
On charging the battery
If you charge a battery that has not been used for a long time, you may be unable to charge it to the proper capacity.
This is due to the battery characteristics. Charge the battery again.
Warning on copyright
Television programs, films, videotapes, and other materials may be copyrighted. Unauthorized recording of such materials may be contrary to the provisions of the copyright laws.
No guarantee in the case of damaged content or recording failures
Sony cannot provide a guarantee in the case of failure to record or loss or damage of recorded content due to a malfunction of the camera or recording media, etc.
Cleaning the camera surface
Clean the camera surface with a soft cloth slightly moistened with water, then wipe the surface with a dry cloth. To prevent damage to the finish or casing:
- Do not expose the camera to chemical products such as thinner, benzine, alcohol, disposable cloths, insect repellent, sunscreen or insecticide.
Maintaining the screen
- Hand cream or moisturizer left on the screen may dissolve its coating. If you get any on the screen, wipe it off immediately.
- Wiping forcefully with tissue paper or other materials can damage the coating.
- If fingerprints or debris are stuck to the screen, we recommend that you gently remove any debris and then wipe the screen clean with a soft cloth.
Notes on wireless LAN
We assume no responsibility whatsoever for any damage caused by unauthorized access to, or unauthorized use of, destinations loaded on the camera, resulting from loss or theft.
Specifications
Camera
[System]
Camera type: Interchangeable lens digital camera
Lens: E-mount lens
[Image sensor]
Image sensor: APS-C format (23.5 mm × 15.6 mm) CMOS image sensor
Total pixel number of image sensor: Approx. 24 700 000 pixels
Effective pixel number of camera: Approx. 24 300 000 pixels
[Anti-dust]
System: Charge protection coating on Optical Filter and ultrasonic vibration mechanism
[Auto focus system]
System: Phase detection system/Contrast detection system
Sensitivity range: EV0 to EV20 (at ISO 100 equivalent, with F2.8 lens)
[Exposure control]
Metering method: 1 200-segment metering by the image sensor
Metering range: EV0 to EV20 (at ISO 100 equivalent, with F2.8 lens)
ISO sensitivity (Recommended exposure index): Still images: AUTO, ISO 100 – ISO 25 600 Movies: AUTO, ISO 100 – ISO 12 800 equivalent
Exposure compensation: ±5.0 EV (switchable between 1/3 and 1/2 EV steps)
[Shutter]
Type: Electronically-controlled, vertical-traverse, focal-plane type
Speed range:
Still images: 1/4 000 second to 30 seconds, BULB Movies: 1/4 000 second to 1/4 second (1/3 EV step), 1080 60i-compatible device up to 1/60 second in AUTO mode (up to 1/30 second in [Auto Slow Shut.] mode) 1080 50i-compatible device up to 1/50 second in AUTO mode (up to 1/25 second in [Auto Slow Shut.] mode)
Flash sync speed: 1/160 second
[Recording media]
Memory Stick PRO Duo media, SD card
[LCD screen]
LCD panel: Wide, 7.5 cm (3.0 type) TFT drive
Total number of dots: 921 600 dots
[Viewfinder]
Type: Electronic viewfinder
Total number of dots: 1 440 000 dots
Frame coverage: 100%
Magnification:
Approx. 1.07 × Approx. 0.70 × (35 mm-format equivalent) with 50 mm lens at infinity, -1 m^-1 (diopter)
Eye point: Approx. 23 mm from the eyepiece, 21.4 mm from the eyepiece frame at -1 m^-1
Diopter adjustment: -4.0 m^-1 to +3.0 m^-1
[Input/output terminals]
Multi/Micro USB Terminal*: USB communication
HDMI: HDMI type D micro jack * Supports Micro USB compatible device.
[Power]
Battery type: Rechargeable battery pack NP-FW50
[Power consumption]
When using an E PZ 16 – 50 mm F3.5 – 5.6 OSS lens*
When using the viewfinder:
Approx. 2.8 W
When using an LCD screen:
Approx. 2.4 W
* supplied with ILCE-6000L/ILCE-6000Y
[Others]
Exif Print: Compatible
PRINT Image Matching III: Compatible
DPOF: Compatible
Dimensions (CIPA compliant) (Approx.): 120.0 mm × 66.9 mm × 45.1 mm (4 3/4 inches × 2 7/8 inches × 1 13/16 inches) (W/H/D)
Mass (CIPA compliant) (Approx.): 344 g (12.1 oz) (including battery and Memory Stick PRO Duo media) 285 g (10.1 oz) (camera only)
Operating temperature: 0 °C to 40 °C (32 °F to 104 °F)
File format:
Still image: JPEG compliant (DCF
Ver. 2.0, Exif Ver. 2.3, MPF
Baseline), RAW (Sony ARW 2.3 Format)
Movie (AVCHD format): AVCHD format Ver. 2.0 compatible
Video: MPEG-4 AVC/H.264
Audio: Dolby Digital 2ch
Dolby Digital Stereo Creator
- Manufactured under license from Dolby Laboratories.
Movie (MP4 format):
Video: MPEG-4 AVC/H.264
Audio: MPEG-4 AAC-LC 2ch
USB communication: Hi-Speed USB (USB 2.0)
[Flash]
Flash guide number: 6 (in meters at ISO 100)
Recycling time: Approx. 4 seconds
Flash coverage: Covering 16 mm lens (focal length that the lens indicates)
Flash compensation: ±3.0 EV (switchable between 1/3 and 1/2 EV steps)
[Wireless LAN]
Supported format: IEEE 802.11 b/g/n
Frequency band: 2.4 GHz
Supported security protocols: WEP/WPA-PSK/WPA2-PSK
Configuration method: WPS (Wi-Fi Protected Setup)/Manual
Access method: Infrastructure mode
NFC: NFC Forum Type 3 Tag-compliant
AC Adaptor AC-UB10C/UB10D
Power requirements: AC 100 V to 240 V, 50 Hz/60 Hz, 70 mA
Output voltage: DC 5 V, 0.5 A
Operating temperature: 0 °C to 40 °C (32 °F to 104 °F)
Storage temperature: -20 ^ to +60 ^ (-4 ^ to +140 ^)
Dimensions (Approx.): 50 mm × 22 mm × 54 mm (2 inches × 7/8 inches × 2 1/4 inches) (W/H/D)
Rechargeable battery pack NP-FW50
Battery type: Lithium-ion battery
Maximum voltage: DC 8.4 V
Nominal voltage: DC 7.2 V
Maximum charge voltage: DC 8.4 V
Maximum charge current: 1.02 A
Capacity: Typical 7.7 Wh (1 080 mAh) Minimum 7.3 Wh (1 020 mAh)
Lens
| Lens | E16 – 50 mm zoom lens ^1) | E55 – 210 mm zoom lens |
| Camera | ILCE-6000L/ILCE-6000Y | ILCE-6000Y |
| Equivalent 35 mm-format focal length ^2) (mm) | 24 – 75 82.5 – | 315 |
| Lens groups/elements 8 – 9 9 – 13 | ||
| Angle of view ^2) | 83° – 32° 28.2° | – 7.8° |
| Minimum focus ^3) (m (ft.)) 0.25 – 0.3 | (0.82 – 1) | 1.0 (3.28) |
| Maximum magnification (×) 0.215 0 | 225 | |
| Minimum aperture f/22 – f/36 f/22 – | f/32 | |
| Filter diameter (mm) 40.5 49 | ||
| Dimensions (max. diameter × height) (Approx. mm (in.)) | 64.7 × 29.9(2 5/8 × 1 3/16) | 63.8 × 10⁸(2 5/8 × 4 3/8) |
| Mass (Approx. g (oz.)) 116 (4.1) 345 | (12.2) | |
| SteadyShot Available Available |
1) Power zoom.
2) The values for equivalent 35 mm-format focal length and angle of view are based on digital cameras equipped with an APS-C sized image sensor.
3) Minimum focus is the shortest distance from the image sensor to the subject.
Design and specifications are subject to change without notice.
On focal length
The picture angle of this camera is narrower than that of a 35 mm-format camera. You can find the approximate equivalent of the focal length of a 35 mm-format camera, and shoot with the same picture angle, by increasing the focal length of your lens by half.
For example, by using a 50 mm lens, you can get the approximate equivalent of a 75 mm lens of a 35 mm-format camera.
Trademarks
• Memory Stick and are trademarks or registered trademarks of Sony Corporation.
- “AVCHD Progressive” and the “AVCHD Progressive” logotype are trademarks of Panasonic Corporation and Sony Corporation.
- Dolby and the double-D symbol are trademarks of Dolby Laboratories.
- The terms HDMI and HDMI High-Definition Multimedia Interface, and the HDMI Logo are trademarks or registered trademarks of HDMI Licensing LLC in the United States and other countries.
- Windows is a registered trademark of Microsoft Corporation in the United States and/or other countries.
• Mac is a registered trademark of Apple Inc. in the United States and other countries.
- iOS is a registered trademark or trademark of Cisco Systems, Inc.
- iPhone and iPad are registered trademarks of Apple Inc. in the United States and other countries.
- SDXC logo is a trademark of SD-3C, LLC.
- Android, Google Play are trademarks of Google Inc.
- Wi-Fi, the Wi-Fi logo and Wi-Fi PROTECTED SET-UP are registered trademarks of the Wi-Fi Alliance.
- The N Mark is a trademark or registered trademark of NFC Forum, Inc. in the United States and in other countries.
- DLNA and DLNA CERTIFIED are trademarks of Digital Living Network Alliance.
- Facebook and the “f” logo are trademarks or registered trademarks of Facebook, Inc.
- YouTube and the YouTube logo are trademarks or registered trademarks of Google Inc.
- Eye-Fi is a trademark of Eye-Fi, Inc.
- In addition, system and product names used in this manual are, in general, trademarks or registered trademarks of their respective developers or manufacturers.
However, the ^TM or marks may not be used in all cases in this manual.

Additional information on this product and answers to frequently asked questions can be found at our Customer Support Website.
http://www.sony.net/
Français
Monture E
Responsible : Sony Electronics Inc.
Adresse : 16530 Via Esprillo, San Diego, CA 92127 É.-U.
natural_image
Simple line drawing of a trash bin with two crossed lines indicating no waste or prohibition (no text or symbols)Complies with IDA Standards DB00353
natural_image
Illustration of a cable with a connector, no text or symbols present- Batterie rechargeable NP-FW50 (1)

- Câble micro-USB (1)
natural_image
Illustration of a U-shaped cable with two USB connectors (no text or symbols)natural_image
Line drawing of a pair of pliers (no text or symbols)natural_image
Diagram of a camera with an arrow indicating rotation or movement (no text or symbols present)natural_image
Diagram of a mechanical component with a circular component and bidirectional arrow indicating rotation (no text or symbols)23 Bouton ▶(lecture)
1 (Marque N)
natural_image
Diagram of a plug inserted into a socket with a cable (no text or symbols visible)natural_image
Diagram showing a mechanical device with a rotating knob and directional arrows indicating motion (no text or symbols)(CIPA: Camera & Imaging Products Association)
natural_image
Line drawing of a mechanical component or device with no visible text or symbols
natural_image
Diagram of a mechanical device with a valve and adjustment knob (no text or symbols)natural_image
Illustration of a camera with rotating lens and adjustment mechanism (no text or symbols)natural_image
Line drawing of a camera with directional arrows indicating rotation or movement (no text or symbols)flowchart
graph LR
    A["Photo: Reading"] --> B["Camera"]
    C["Filmstrip: Video with a soccer ball"] --> D["Laptop"]
(PlayMemories Camera Apps™).
http://www.sony.net/pmca
(h (heure), m (minute))
Capacité
2 Go
Réglage d'enreg.
60i 24M(FX)/50i 24M(FX) 10 m
60i 17M(FH)/50i 17M(FH) 10 m
60p 28M(PS)/50p 28M(PS) 9 m
24p 24M(FX)/25p 24M(FX) 10 m
24p 17M(FH)/25p 17M(FH) 10 m
1440×1080 12M 20 m
VGA 3M 1 h 10 m
Batterie rechargeable NP-FW50
natural_image
Simple line drawing of a trash bin with two crossed lines indicating no waste or prohibition (no text or symbols)natural_image
Illustration of a USB cable with a connector (no text or symbols)natural_image
Simple line drawing of a USB cable with two connectors (no text or symbols)natural_image
Line drawing of a pair of pliers (no text or symbols)- Okularmuschel (1)

11 Augensensor
12 Sucher
13 Okularmuschel
natural_image
Diagram of a digital camera with an arrow indicating rotation or movement (no text or symbols present)natural_image
Diagram showing a circular component with directional arrows indicating rotation or movement (no text or symbols)1 (N-Zeichen)
natural_image
Diagram of a plug inserted into a socket with visible wiring (no text or symbols)
(CIPA: Camera & Imaging Products Association)
natural_image
Line drawing of a mechanical component or device with no visible text or symbols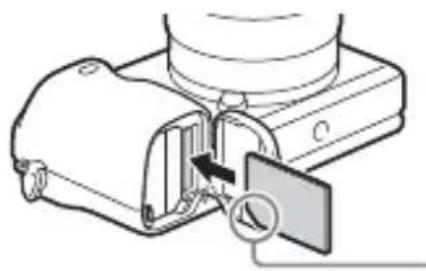
natural_image
Diagram of a device with a magnified inset showing internal components (no text or symbols)natural_image
Illustration of a digital camera with two circular lenses, one showing rotational arrows (no text or symbols)
natural_image
Diagram of a digital camera with an arrow indicating rotation or adjustment, shown in two views (no text or symbols present)DE
natural_image
Line drawing of a camera with directional arrows indicating rotation or movement (no text or symbols)flowchart
graph LR
    A["Photo: Reading"] --> B["Camera"]
    C["Filmstrip: Video with soccer ball"] --> D["Laptop"]
Konfigurationsmethode: WPS (Wi-Fi Protected Setup)/Manuell
natural_image
Simple line drawing of a trash bin with crossed x-bracing (no text or symbols)natural_image
Illustration of a cable with a connector, no text or symbols presentnatural_image
Illustration of a U-shaped cable with two USB connectors (no text or symbols)natural_image
Line drawing of a pair of pliers (no text or symbols)- Caperuza de ocular (1)

natural_image
Diagram of a camera body with an arrow indicating rotation or movement (no text or symbols present)natural_image
Diagram of a car interior showing a circular component with directional arrows indicating rotation or motion (no text or symbols)1 (marca N)
natural_image
Diagram of a plug inserted into a socket with visible wiring (no text or symbols)natural_image
Diagram showing a hand operating a device with a circular button and directional arrows indicating motion (no text or symbols)1 Abra la tapa.
(CIPA: Camera & Imaging Products Association)
natural_image
Line drawing of a mechanical component or device with no visible text or symbols
natural_image
Diagram of a mechanical device with a handle and clamped component, no visible text or symbolsnatural_image
Illustration of a camera with two circular lenses, one rotating and the other rotating (no text or symbols)
natural_image
Diagram of a digital camera with an arrow indicating rotation, shown in two views (no text or symbols present)natural_image
Line drawing of a camera with directional arrows indicating rotation or movement (no text or symbols)flowchart
graph LR
    A["Photo: Reading"] --> B["Camera"]
    C["Filmstrip: Video with a soccer ball"] --> D["Laptop"]
(DCF Ver. 2.0, Exif Ver. 2.3, MPF
Baseline), RAW (Sony ARW formato 2.3)
Dimensiones (Aprox.): 50 mm × 22 mm × 54 mm (An/Al/Pr)
natural_image
Simple line drawing of a trash bin with two crossed lines indicating no waste or prohibition (no text or symbols)natural_image
Illustration of a cable with a connector, no text or symbols presentnatural_image
Illustration of a U-shaped cable with two USB connectors (no text or symbols)- Alimentatore CA AC-UB10C/UB10D (1)

- Tracolla (1)

natural_image
Line drawing of a pair of pliers (no text or symbols)natural_image
Diagram of a camera with an arrow indicating rotational motion (no text or symbols present)natural_image
Diagram of a car interior showing a circular component with directional arrows indicating rotation or movement (no text or symbols)1 (Contrassegno N)
natural_image
Diagram of a plug inserted into a socket with visible wiring (no text or symbols)natural_image
Diagram of a mechanical device with a knob inserted into a housing, showing directional arrows (no text or symbols)(CIPA: Camera & Imaging Products Association)
natural_image
Line drawing of a mechanical component or device with no visible text or symbols
natural_image
Diagram of a mechanical device with a rotating component and a magnified view (no text or symbols)A: Memory Stick PRO Duo
B: Scheda SD
natural_image
Illustration of a digital camera with scroll wheel and camera body, showing three sequential states of rotation (no text or symbols)natural_image
Line drawing of a camera with a circular lens and directional arrows indicating rotation (no text or symbols)natural_image
Diagram of a circular mechanical or electrical component with directional arrows and a pointer, no text or symbols present.flowchart
graph LR
    A["Photo: Reading"] --> B["Camera"]
    C["Filmstrip: Video with a soccer ball"] --> D["Laptop"]
natural_image
Simple line drawing of a container with crossed diagonals and no text or symbolsnatural_image
Simple line drawing of a trash bin with two crossed lines indicating no waste or restriction (no text or symbols)natural_image
Illustration of a cable with a connector, no text or symbols presentnatural_image
Illustration of a U-shaped cable with two USB connectors (no text or symbols)- Transformador de CA AC-UB10C/UB10D (1)

natural_image
Line drawing of a pair of pliers (no text or symbols)natural_image
Diagram of a camera module with an arrow indicating rotation or movement (no text or symbols present)15 Seletor de ajuste de dioptria
natural_image
Diagram of a car interior showing a circular component with bidirectional arrows indicating rotation or movement (no text or symbols)1 (marca N)
natural_image
Diagram of a plug inserted into a socket with a cable (no text or symbols)natural_image
Diagram showing a mechanical device with a rotating knob and directional arrows indicating motion (no text or symbols)1 Abra a cobertura.
2 Insira a bateria.
(CIPA: Camera & Imaging Products Association)
natural_image
Line drawing of a mechanical component or device with no visible text or symbols
natural_image
Diagram of a mechanical device with a clamped component and a magnified inset showing internal structure (no text or symbols)A: Memory Stick PRO Duo
B: Cartão SD
natural_image
Illustration of a digital camera with scroll wheel and camera body, showing three sequential states of rotation (no text or symbols)natural_image
Line drawing of a camera with directional arrows indicating rotation or movement (no text or symbols)flowchart
graph LR
    A["Photo: Reading"] --> B["Camera"]
    C["Filmstrip: Video with a soccer ball"] --> D["Laptop"]
Instalar PlayMemories Home num computador
(DCF Ver. 2.0, Exif Ver. 2.3, MPF
Baseline), RAW (Formato Sony ARW 2.3)
Helpfunct. in camera
natural_image
Simple line drawing of a trash bin with two crossed lines indicating no waste or restriction (no text or symbols)natural_image
Illustration of a USB cable with a connector (no text or symbols)natural_image
Line drawing of a U-shaped cable with two USB connectors (no text or symbols)- Netspanningsadapter AC-UB10C/UB10D (1)
• Schouderriem (1)

natural_image
Line drawing of a pair of pliers (no text or symbols)natural_image
Diagram of a camera with an arrow indicating rotation or movement (no text or symbols present)15 Diopter-instelwiel
natural_image
Diagram of a car interior showing a circular component with bidirectional arrows indicating rotation (no text or symbols)1 (N-markering)
natural_image
Diagram of a plug inserted into a socket with visible wiring (no text or symbols)
(CIPA: Camera & Imaging Products Association)
natural_image
Line drawing of a mechanical component or device with no visible text or symbols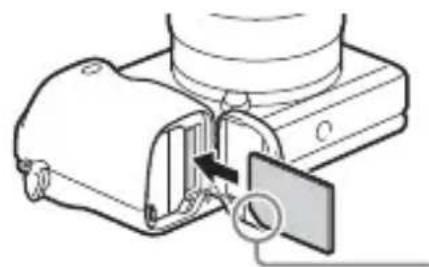
natural_image
Diagram of a mechanical device with a magnified inset showing internal components (no text or symbols)natural_image
Illustration of a camera with two circular lenses and an arrow indicating rotation (no text or symbols)
natural_image
Diagram of a digital camera with an arrow indicating rotation, shown in two views (no text or symbols present)NL
natural_image
Line drawing of a camera with directional arrows indicating motion (no text or symbols)Lensontgrendelingsknop
MPF Baseline), RAW (Sony ARW
2.3-formaat)
Bewegende beelden (AVCHD-
Configuratiemethode: WPS (Wi-Fi Protected Setup)/Handmatig
natural_image
Symbol of a trash bin crossed out by two diagonal lines (no text or numbers present)natural_image
Illustration of a USB cable with a connector (no text or symbols)natural_image
Line drawing of a U-shaped cable with two USB connectors (no text or symbols)natural_image
Line drawing of a pair of pliers (no text or symbols)natural_image
Diagram of a camera module with an arrow indicating rotation or movement (no text or symbols present)natural_image
Diagram of a device with a circular component and bidirectional arrow indicating rotation (no text or symbols)1 (znak N)
natural_image
Diagram of a plug inserted into a socket with visible wiring (no text or symbols)natural_image
Diagram of a mechanical device with a handle and lock mechanism, showing directional arrows (no text or symbols)1 Otwórz pokrywę.
2 Zamontuj akumulator.
(CIPA: Camera & Imaging Products Association)
natural_image
Line drawing of a mechanical component or device with no visible text or symbols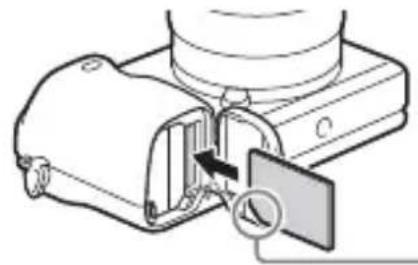
natural_image
Diagram of a device with a lock and magnifying glass, showing internal components (no text or symbols)natural_image
Illustration of a digital camera with two circular lenses and an arrow indicating rotation (no text or symbols)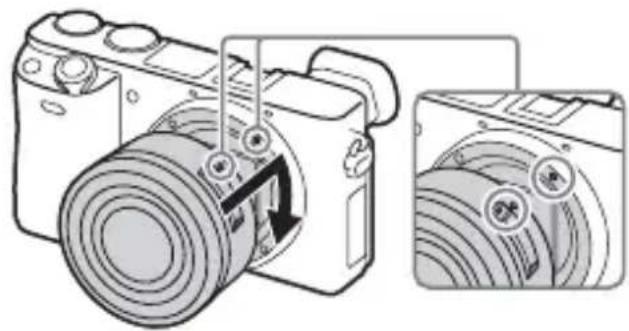
natural_image
Diagram of a digital camera with an arrow indicating the camera's rotation direction (no text or symbols present)natural_image
Line drawing of a camera with directional arrows indicating motion (no text or symbols)(wraz z akumulatorem
i Memory Stick PRO Duo)
285 g (sam aparat)
Temperatura robocza: 0 °C do 40 °C
Format pliku:
Film (Format AVCHD):
Zgodny z formatem AVCHD wer. 2.0
Obraz: MPEG-4 AVC/H.264
natural_image
Simple line drawing of a trash bin with two crossed lines indicating no waste or prohibition (no text or symbols)natural_image
Illustration of a cable with a connector, no text or symbols presentnatural_image
Line drawing of a U-shaped cable with two USB connectors (no text or symbols)- Адаптер переменного тока AC-UB10C/UB10D (1)

natural_image
Line drawing of a pair of pliers (no text or symbols)natural_image
Diagram of a camera with an arrow indicating rotation or movement, showing internal components without any text or symbols.natural_image
Diagram of a car interior showing a circular component with directional arrows indicating rotation or movement (no text or symbols)1 (Метка N)
natural_image
Diagram of a plug inserted into a socket with a cable (no text or symbols)
natural_image
Line drawing of a mechanical component or device with no visible text or symbols
natural_image
Diagram of a device with a lock and cable inserted, showing internal components (no text or symbols)natural_image
Illustration of a digital camera with two circular lenses and an arrow indicating rotation (no text or symbols)
natural_image
Diagram of a digital camera with an arrow indicating the camera's rotation direction (no text or symbols present)natural_image
Line drawing of a camera with directional arrows indicating rotation or movement (no text or symbols)natural_image
Simple line drawing of a trash bin with two crossed lines indicating no waste or prohibition (no text or symbols)Sony Corporation 1-7-1, Konan, Minato-ku, Tokyo, Japan, 108-0075.
natural_image
Illustration of a cable with a connector, no text or symbols presentnatural_image
Illustration of a U-shaped cable with two USB connectors (no text or symbols)natural_image
Line drawing of a pair of pliers (no text or symbols)natural_image
Diagram of a camera body with an arrow indicating rotation or movement (no text or symbols present)natural_image
Diagram of a car interior showing a circular component with directional arrows indicating rotation or movement (no text or symbols)1 (позначка N)
natural_image
Diagram of a plug inserted into a socket with a cable (no text or symbols)natural_image
Diagram showing a hand pressing down on a mechanical component with directional arrows indicating motion (no text or symbols)1 Відкрийте кришку.
2 Вставте батарею.
(CIPA: Camera & Imaging Products Association)
natural_image
Line drawing of a mechanical component or device with no visible text or symbols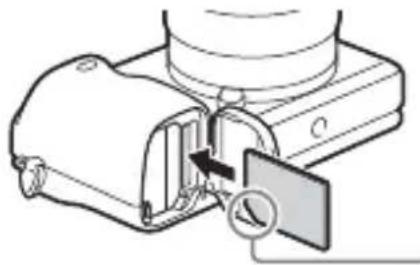
natural_image
Diagram of a mechanical device with a valve and handle, showing no text or symbolsnatural_image
Illustration of a camera with two circular lenses, one rotating and one fixed (no text or symbols)
natural_image
Diagram of a digital camera with an arrow indicating rotation, shown in two views (no text or symbols present)natural_image
Line drawing of a camera with directional arrows indicating rotation or movement (no text or symbols)natural_image
Simple line drawing of a trash bin with two crossed lines indicating no waste or prohibition (no text or symbols)natural_image
Illustration of a USB cable with a connector (no text or symbols)natural_image
Line drawing of a USB cable with two connectors (no text or symbols)- Nätadapter AC-UB10C/UB10D (1)

- Axelrem (1)

natural_image
Line drawing of a pair of pliers (no text or symbols)- Ögonmussla (1)

• Handledning (det här häftet) (1)
- Wi-Fi Connection/One-touch (NFC) Guide (1)
11Ögonsensor
12 Sökare
13Ögonmussla
natural_image
Diagram of a camera with an arrow indicating rotation or movement (no text or symbols present)15 Dioptrijusteringsratt
natural_image
Diagram of a car interior showing a circular component with directional arrows indicating rotation or movement (no text or symbols)1 (N-märke)
natural_image
Diagram of a plug inserted into a socket with a cable (no text or symbols)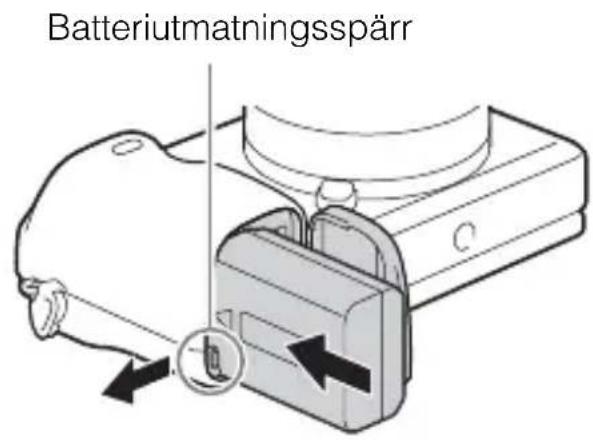
1 Öppna locket.
2 Sätt i batteripaketet.
(CIPA: Camera & Imaging Products Association)
natural_image
Line drawing of a mechanical component or device with no visible text or symbols
natural_image
Diagram of a medical device with a valve inserted into a housing (no text or symbols visible)natural_image
Illustration of a camera with rotating lens and adjustment mechanism (no text or symbols)natural_image
Line drawing of a camera with directional arrows indicating rotation or movement (no text or symbols)flowchart
graph LR
    A["Photo: Reading"] --> B["Camera"]
    C["Filmstrip: Video with a soccer ball"] --> D["Laptop"]
Protected Setup)/Manuell
natural_image
Simple line drawing of a trash bin with two crossed lines indicating no waste or restriction (no text or symbols)natural_image
Illustration of a cable with a connector, no text or symbols presentnatural_image
Line drawing of a U-shaped cable with two USB connectors (no text or symbols)• Verkkolaite AC-UB10C/UB10D (1)
- Olkahihna (1)

natural_image
Line drawing of a pair of pliers (no text or symbols)- Okulaarin kuppi (1)
11 Silmäanturi
12 Etsin
13 Okulaarin kuppi
natural_image
Diagram of a digital camera with an arrow indicating rotation or movement (no text or symbols present)natural_image
Diagram of a car interior showing a circular component with directional arrows indicating rotation or cycle (no text or symbols)1 (N-merkki)
natural_image
Diagram of a plug inserted into a socket with a cable (no text or symbols)
1 Avaa kansi.
2 Aseta akku.
(CIPA: Camera & Imaging Products Association)
natural_image
Line drawing of a mechanical component or device with no visible text or symbols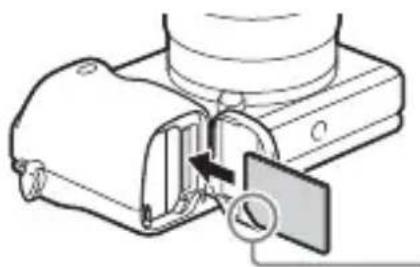
natural_image
Diagram of a mechanical device with a close-up view showing internal components (no text or symbols)natural_image
Illustration of a camera with rotating lens and external camera, showing mechanical adjustment (no text or symbols)natural_image
Line drawing of a camera with directional arrows indicating rotation or movement (no text or symbols)flowchart
graph LR
    A["Photo: Reading, Filmstrip: Video, Camera"] --> B["Laptop: Screen with blank space"]
(DCF Ver. 2.0, Exif Ver. 2.3, MPF
Baseline), RAW (Sony ARW 2.3 -muoto)
natural_image
Simple line drawing of a trash bin with two crossed lines indicating no waste or prohibition (no text or symbols)natural_image
Illustration of a USB cable with a connector (no text or symbols)natural_image
Pure diagram of a USB cable with two connectors (no text or symbols)• Vekselstrømadapter AC-UB10C/UB10D (1)

- Skulderrem (1)

natural_image
Line drawing of a pair of pliers (no text or symbols)- ∅yemusling (1)
1Multigrensesnitt-sko ^1)
2 Posisjonsmerke for billedsensor
3Krok for skulderrem
4 Wi-Fi-sensor (innebygd)
5Blits
11∅yesensor
12 Søker
13∅yemusling
- Ikke festet til kameraet i fabrikken. Det anbefales å feste øyemuslingen när du har tenkt å bruke sökeren.
natural_image
Diagram of a camera module with an arrow indicating rotation or movement (no text or symbols present)natural_image
Diagram of a device's rotation mechanism with circular component and directional arrows (no text or symbols)1 (N-merke)
natural_image
Diagram of a plug inserted into a socket with wires (no text or symbols visible)
1 Åpne dekselet.
2 Sett inn batteriet.
(CIPA: Camera & Imaging Products Association)
natural_image
Line drawing of a mechanical component or device with no visible text or symbols
natural_image
Diagram of a medical device with a magnified view showing internal components (no text or symbols)natural_image
Illustration of a camera with rotating lens and adjustment mechanism (no text or symbols)natural_image
Line drawing of a camera with directional arrows indicating rotation or movement (no text or symbols)Utløserknapp for objektivet
flowchart
graph LR
    A["Photo: Reading"] --> B["Camera"]
    C["Filmstrip: Video with a soccer ball"] --> D["Laptop"]
Installere PlayMemories Home på en datamaskin
1 Bruk nettleseren på datamaskinen, gå til følgende internettadresse og installer deretter PlayMemories Home.
www.sony.net/pm/
(h (time), m (minutt))
| KapasitetOpptaksinnst. | 2 GB |
| 60i 24M(FX)/50i 24M(FX) 10 m | |
| 60i 17M(FH)/50i 17M(FH) 10 m | |
| 60p 28M(PS)/50p 28M(PS) 9 m | |
| 24p 24M(FX)/25p 24M(FX) 10 m | |
| 24p 17M(FH)/25p 17M(FH) 10 m | |
| 1440×1080 12M 20 m | |
| VGA 3M 1 h 10 m |
LCD-skjerm: Vid, 7,5 cm (3,0 type) TFT drive
natural_image
Simple line drawing of a trash bin with two crossed lines indicating no waste or prohibition (no text or symbols)natural_image
Illustration of a USB cable with a connector (no text or symbols)natural_image
Line drawing of a U-shaped cable with two USB connectors (no text or symbols)• Lysnetadapter AC-UB10C/UB10D (1)

- Skulderrem (1)

natural_image
Line drawing of a pair of pliers (no text or symbols)- ∅jestykkedel (1)

11 ∅jesensor
12Søger
13∅jestykkedel
natural_image
Diagram of a digital camera with an arrow indicating rotation or movement (no text or symbols present)15 Dioptri-justeringsknap
natural_image
Diagram of a car interior with directional arrows indicating rotation or movement (no text or symbols)16 (Pop op-blitz)-knap
17MENU-knap
1 (N-mærke)
natural_image
Diagram of a plug inserted into a socket with a cable (no text or symbols)
(CIPA: Camera & Imaging Products Association)
natural_image
Line drawing of a mechanical component or device with no visible text or symbols
natural_image
Diagram of a mechanical device with a valve and clamped component (no text or symbols)natural_image
Illustration of a camera with rotating lens and adjustment mechanism (no text or symbols)natural_image
Line drawing of a camera with directional arrows indicating motion (no text or symbols)flowchart
graph LR
    A["Photo: Reading"] --> B["Camera"]
    C["Filmstrip: Video with a soccer ball"] --> D["Laptop"]
(h (time), m (minut))
| KapacitetOptageindstilling | 2 GB |
| 60i 24M(FX)/50i 24M(FX) 10 m | |
| 60i 17M(FH)/50i 17M(FH) 10 m | |
| 60p 28M(PS)/50p 28M(PS) 9 m | |
| 24p 24M(FX)/25p 24M(FX) 10 m | |
| 24p 17M(FH)/25p 17M(FH) 10 m | |
| 1440×1080 12M 20 m | |
| VGA 3M 1 h 10 m |
DK
Konfigurationsmetode: WPS (Wi-Fi Protected Setup)/Manuel
Adgangsmetode: Infrastrukturtilstand
NFC: NFC Forum Type 3 Tag-kompatibel
Lysnetadapter AC-UB10C/UB10D
- SONY
- α
- 6000
- E-mount
- Learning more about the camera ("Help Guide")
- Viewing the Guide
- In-Camera Guide
- Shooting Tip
- Owner's Record
- WARNING
- IMPORTANT SAFETY INSTRUCTIONS -SAVE THESE INSTRUCTIONS DANGER TO REDUCE THE RISK OF FIRE OR ELECTRIC SHOCK, CAREFULLY FOLLOW THESE INSTRUCTIONS
- CAUTION
- Battery pack
- IAC Adaptor
- For Customers in the U.S.A. and Canada
- IRECYCLING LITHIUM-ION BATTERIES
- Battery pack and lens (If lens supplied)
- For Customers in the U.S.A.
- Regulatory Information
- Declaration of Conformity
- ICAUTION
- Note:
- For Customers in Canada
- For Customers in Europe
- Notice for the customers in the countries applying EU Directives
- Notice
- Disposal of waste batteries and electrical and electronic equipment (applicable in the European Union and other European countries with separate collection systems)
- For Customers in Singapore
- For customers who purchased their camera from a store in Japan that caters to tourists
- Note
- Table of contents
- Preparing the camera Step 1 P. 9
- Basic operation Step 2 P. 23
- Playback function Step 3 P. 24
- Recording function Step 4 P. 25
- Importing images to the computer P. 26
- Adding functions to the camera P. 28
- Others P. 29
- Checking the supplied items
- Supplied with all models
- ILCE-6000
- ILCE-6000L
- ILCE-6000Y
- Identifying parts
- When the lens is removed
- (N Mark)
- 2Connection plate cover
- ③Tripod socket hole
- Speaker
- Lens
- Inserting the battery pack
- Charging the battery pack
- Notes
- Charging time (Full charge)
- Charging by connecting to a computer
- Battery life and number of images that can be recorded and played back
- Inserting a memory card (sold separately)
- Memory cards that can be used
- To remove the memory card/battery pack
- Attaching/removing the lens
- Removing the lens
- Press the lens release button all the way in and turn the lens counterclockwise until it stops.
- Setting the clock
- Shooting still images/movies
- Shooting still images
- Shooting movies
- Viewing images
- ■ Selecting next/previous image
- ■ Deleting an image
- ■ Returning to shooting images
- Introduction of other functions
- Control wheel
- ■ Fn (Function) button
- Control dial
- Features of PlayMemories Home™
- System requirements
- Installing PlayMemories Home on a computer
- Adding functions to the camera
- Number of still images and recordable time of movies
- Still images
- Movies
- Notes on using the camera
- Functions built into this camera
- On use and care
- Notes on recording/playback
- Do not use/store the camera in the following places
- On storing
- Notes on the screen, electronic viewfinder and lens
- About the magnet
- On using the lenses and accessories
- Notes on shooting with the viewfinder
- Notes on the flash
- On camera's temperature
- On the overheat protection
- On charging the battery
- Warning on copyright
- No guarantee in the case of damaged content or recording failures
- Cleaning the camera surface
- Maintaining the screen
- Notes on wireless LAN
- Specifications
- Camera
- [System]
- [Image sensor]
- [Anti-dust]
- [Auto focus system]
- [Exposure control]
- [Shutter]
- [Recording media]
- [LCD screen]
- [Viewfinder]
- [Input/output terminals]
- [Power]
- [Power consumption]
- [Others]
- [Flash]
- [Wireless LAN]
- AC Adaptor AC-UB10C/UB10D
- Rechargeable battery pack NP-FW50
- On focal length
- Trademarks
- Français
- Monture E
- Capacité
- Batterie rechargeable NP-FW50
- Abra la tapa.
- (Contrassegno N)
- (marca N)
- Abra a cobertura.
- Insira a bateria.
- Instalar PlayMemories Home num computador
- Helpfunct. in camera
- Otwórz pokrywę.
- Zamontuj akumulator.
- Відкрийте кришку.
- Вставте батарею.
- (N-märke)
- Öppna locket.
- Sätt i batteripaketet.
- (N-merkki)
- Avaa kansi.
- Aseta akku.
- Åpne dekselet.
- Sett inn batteriet.
- Installere PlayMemories Home på en datamaskin
- (N-mærke)
- Lysnetadapter AC-UB10C/UB10D
Brand : SONY
Model : Alpha a6000
Category : Camera