
Voice Tracer VTR7000 - Voice recorder PHILIPS - Free user manual and instructions
Find the device manual for free Voice Tracer VTR7000 PHILIPS in PDF.


| Product Type | Digital Voice Recorder |
| Brand | Philips |
| Model | Voice Tracer VTR7000 |
| Dimensions (H x W x D) | 120 x 55 x 20 mm |
| Weight | 100 g (including batteries) |
| Power Supply | 2 x AAA batteries (1.5V) |
| Recording Format | MP3 (stereo), PCM (WAV) |
| Internal Memory | 4 GB (up to 700 hours in MP3 32kbps) |
| Recording Modes | Dictation, Conference, Interview |
| Microphone | Built-in stereo microphone with 360° pickup |
| Speaker | Built-in loudspeaker |
| Display | Backlit LCD, 128 x 64 pixels |
| Connectivity | USB 2.0 (micro-USB), 3.5mm headphone jack |
| File Transfer | Drag-and-drop via USB mass storage |
| Battery Life | Up to 30 hours continuous recording |
| Maintenance | Clean with soft dry cloth; avoid liquids |
| Safety Precautions | Do not disassemble; keep away from moisture |
| Spare Parts & Repairability | Batteries, USB cable replaceable; no user-serviceable parts inside |
Frequently Asked Questions - Voice Tracer VTR7000 PHILIPS
User questions about Voice Tracer VTR7000 PHILIPS
0 question about this device. Answer the ones you know or ask your own.
Ask a new question about this device
Download the instructions for your Voice recorder in PDF format for free! Find your manual Voice Tracer VTR7000 - PHILIPS and take your electronic device back in hand. On this page are published all the documents necessary for the use of your device. Voice Tracer VTR7000 by PHILIPS.
USER MANUAL Voice Tracer VTR7000 PHILIPS
(VTR7000录音笔)
使用手册
目录

按键锁定((H00DD功能))
提示: :
| 1 Welcome | ||
| 2 Important | ||
| 3 Your Voice Tracer digital recorder | ||
| 4 Start to u se | ||
| 5 Recording | ||
| 6 Voice Mode | ||
| 7 Music Mode | ||
| 8 Radio Mode | ||
| 9 Wireless Mode | ||
| 10 The wireless microphone user manual | ||
| 11 Setting Mode | ||
| 12 Frequently Asked Questions | ||
| 13 Technical Parameters |
WelcometotheworldofPhilips!Wearehonoredbyyourchoice andpurchaseofPhilips'products.
You canhavePhilips'
comprehensivetechnicalsupportsfromourwebsite,e.g.user
's
manuals, software, warranty information etc.
www.philips.com
Product Features
- One-touch Recording: Just slide the recording switch upward to startrecording,turnofftosavefile.
- DigitalNoiseReduction: Effectivelyfiltertheambientnoiseinthe recordingenvironment,toenablecrystalclearrecording. (This featureshouldonlybeusedinnoisyenvironment.)
• RecordincommonMP3format.
• USB 2.0 high speed data access.
• Voice-activatedrecording. - USBmassstorage,ensuringmaximumcompatibility.
2 Important
Safety
- To avoid a short circuit, do not expose the product to rain or water.
- Do not expose the device equipment or direct sunlight.
- Protect the cables from beir
• Note that when the fold o the product from the top .

Attention! Before using the device please read this Users
Manual carefully. The company shall not be liable for
data
loss
due
to
erroneous
majeure.
Special
attention
operations
and
files back
any
up.
Hearing safety
safety
Observe
the
following
guidelines
- Adjust
to
suitable
volume;
time.
- Please
remember
that
do
tolerance.
Do
not
turn
up
the
volume's
around
you.
- When
in
dangerous
environme
earphones
or
stop
using.
- Do
not
use
the
earphones
skateboarding
to
avoid
traffic
regulations.
What's inithe box??
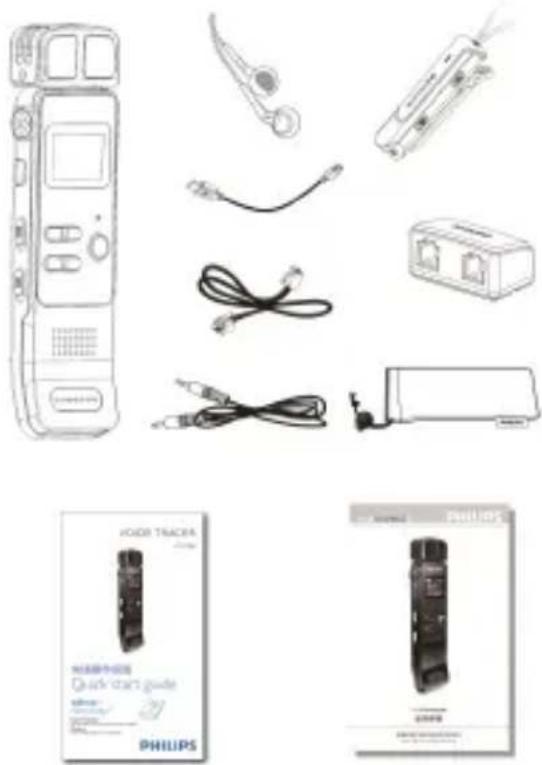
Overview :

I. USB Port
2. Power On/Off
3. HOLD
4. Built-in Microphone
5. Play/Pause
6. Previous Track, Fast Backward, Menu Selection Buttons
7. Speaker
8. Display
9. Record/Play Indicator
10. Stop Button, File Folder Switch Button
II. Menu Button
-
Next Track, Fast Forward, Menu Selection
-
Record Button
-
Volume Up
-
Volume Down
-
Delete
-
Line , in Microphone Jack
-
Earphone Jack
-
T he fold out stand
-
External Microphone
Power@m/Off
Note: please recharge the device for three hours before using it for
the first time!
(I) When the power switch
cut off from power.
(2) When the power switch
automatically and then display

Then the device displays the

Press MENU button for 2 c
interface. The main interface
pictures show the modes res
and Setting Mode.


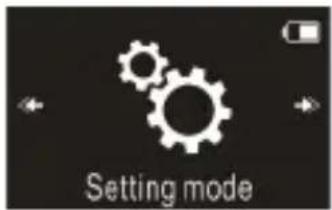
Note: When not taking voice recording, on any other interface,
users
can
press
MENU
button
interface.
From
now
's
Oom/Off, the
devicecontrolled
as follows:
Switch
off:
When
in
the
power
button
until
the
“ ByeBye
”
switched
off.
Switch
on:
When
in
the
power
button
until
the
startup
logo
Note:
• The device has a built-in little for a long time, please slide position.
- If the device cannot work not out of power .
- When the device is working,
otherwise damaged file or malfunction may occur.
•
W
hen
the
batt
battery
indicator
the
device
promptly.
Recharge
Notice:
please
slide
the
power
(1)
Connect
the
device
with
(2)
Use
the
specified
charger
When
using
the
above
methods
state
of
recharging.
The
batter
turning
from
empty
to
full
r
recharging.
Under
normal
recharged
in
around
3
hours.
battery
icon
is
full
and
the
oran

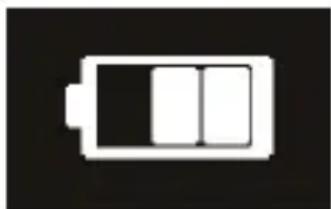
Note :
while:
the
device
is
connected
operated
manually.
Keypad Locka(HOLD Fu(HOIBD)
Function)
(1)
Slide
the
“ HOLD
" switch
buttons on the device, except the slide switch of recording.
Then “ Hold ” is displayed for a while and then disappear

(2) To unlock
buttons,
please
sl
OFF.
PC Connection
The device can be used as a
back up and move files. Link
cable . The voice recorder ca
storage device without the

Note:
When moving files into or
disconnect the device from
While the device is connected
manually.
Before using the device, please read carefully the following instructions .
(I) In the s top state of voice the folder you prefer.
(2) Slide the recording switch “ Record/Play ” indicator microphone towards the
(3) Press “ PLAY ” button to flickers, and the display ”shows “ Pause
(4) Press “PLAY” button again (5) Slide the recording switch device returns to the s top recorded file.
Recording Interface Reference:InterfacReference:

Illustration of Recording Interface:

Note: When the low battery icon occurs, it means the battery is
nearly
empty
and
the
system
device
is recording,
the system
file then
shut
down.
If the
dev
promptly.
When
the
device
following
icon
will
display.
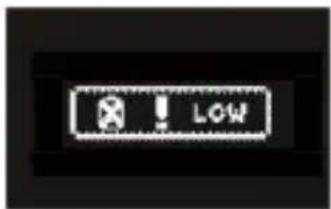
Note:
- Prior
to recording,
please
When
in the
Stop
state,
pr
folders
A,
B,
C,
D
and
MUSIC.
in any
of the
A,
B,
C,
D
folder;
audio files. If one folder is full with 99 files, the system automatically stores the subsequent files in the next folder. In the case that all four folders are full, please delete some unwanted file to enable recording.
- MakeatestrecordingtomakesurethattheVoiceTracer settingsarecorrect.
• Each folder can store 99 files at most, totally 396 files (99 files x 4folders) - If the recording time exceeds the usable storage of the device orthenumberoffilesreachesthelimitof396,therecording stops.Pleasedeletepartofrecordingorm oveittoacomputer.
- When recording, please do not cut off power, otherwise loss ordamageofrecordedfilemayberesulted.
- If need to record for a long time, please charge the device before recording.
• A fully charged battery will allow you to record for 25 hours. - Theuseoftheexternalmicrophonecomewiththedevice enablesbettersoundquality.
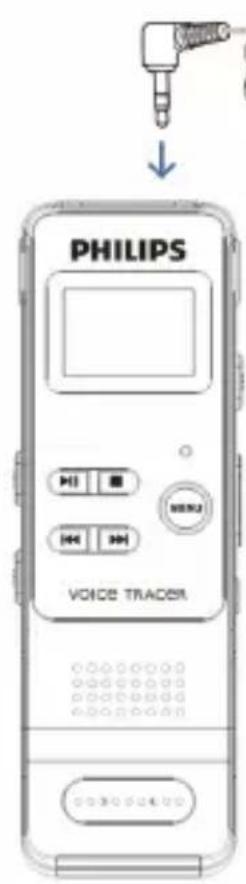
Use aam Extermall Monopphone too Record
When using an external microphone record, please first plug it
intothemicrophonejack, and then record according to the
procedures of built-in microphone. After you connect the external microphone, the built-in microphone is disabled. Please note that
plug
of
the
external
microphone
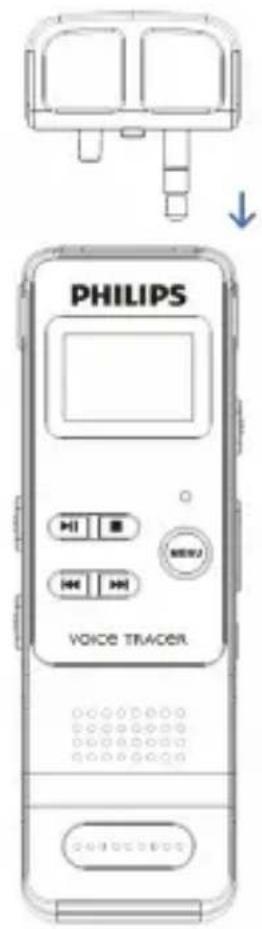
On the main interface you can select the voice mode with “” or
“▶” buttons,
and
then
shortly
Please refer
to
the
Voice
Stop

Voice Playback Interface Specification Specification :

Note: When
in
Stop
state,
folders A,
B,
C,
D
and
MUSIC.
Voice Playback
(I) In the Stop Mode of recorded the folder you prefer.
(2) Press “” or play. ” to select
(3) Press Play button to start
will turn green.
(4) Press “▲ and “▼ to adjust volume.
(5) Press STOP to stop playing. When the playing is stopped,
the MENU button for about interface.
(6) When playing, press PLAY continue playing.
(7) When playing, press “ forward or backward.
Note :
If the earphone is plugged in,
Playing Modes Modes
After the audio file is selected by.
When playing, press shortly
following playing layodsee the Rep
interface reference:

(I) Repeat Modes
Select Repeat shows in above picture, then press MENU button to enter repeat modes selection menu. You can choose
mode from the menu as shown
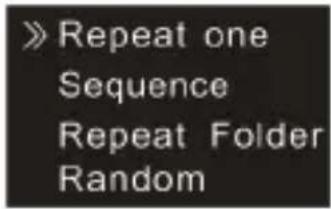
Repeat one: repeat continuously Sequence: Play tracks sequentially the tracks in the current folder, Rep eat F older: Repeat tracks Random: Play randomly tracks
(2) A-B Re play
Choose “A-B Rep lay” from the Play button to enter lay. For-B options refer to A-B Rep lay section
Delete Files Files
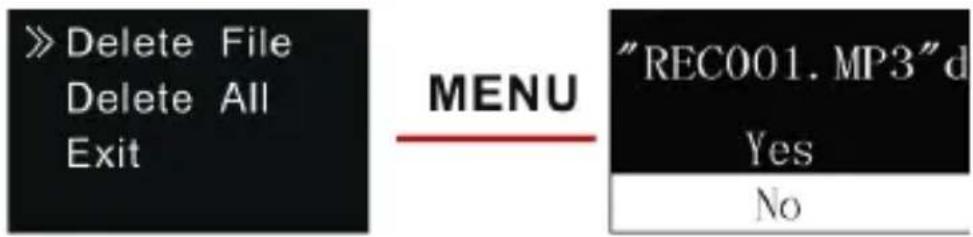
On the stopped playing interface 2 seconds, the interface of 1 are the pictures of the deletion
![graph LR A["Delete File"] --> B[">> Delete All Exit"] C["MENU"] --> D["Delete All Yes"] C --> E["No"]](/content/2026/06/1272831/images/294678d1fac4f114068053b660e9c6230f39a0c39ee7b4b8493143e5f0a4a584.jpg)
On the left side of the interface, press “” or “” button to select individual or all files; on the
and ▶▶| “ ” to choose “ YES ” to
press MENU button to execute.
Record Settings Settings
| You can change settings according | ||||
| On the stopped playing interface, pop up Functions Menu, the N oise Reduction , VA Contrøl, Auto divide feature recording |
pictures:

(I) Record type
From the Functions Menu select “ Record type ”, then press MENU
button to enter Record type
types to select: PCM REC,
and Line in REC . If select the
recording up to one hour,
automatically, then next record
pictures:


PCM WARE Format : , high sound
Stereo REC : MP3 format, high
Standard REC : MP3 format,
Long REC : MP3 format, ordinary
Line in REC : MP3 format, bit
the above record types.
| TelephoneRecord | Record | |||
| Connect | the | telephone | cable | |
| telephone | cable | to | the | telephone |
t he operation is the same as recording with microphone.

Line in Record :
| Line | in | r recording | is a way | of | |
| device | to an's audio | equipment | via | ||
| (audio | equipments | such | as | ||
| stereo | audio | cable | provided | ||
| equipment's | audio | output | with | “ Line | |
| recording | operation | is the | |||
| Before | recording | with | Line | ||
| sound | source | to a | suitable | le | |
| lack | fidelity. | ||||
| (2) | Digital | N | oise | Reduction | ||
| When | the | Digital | N | oise | Reduct | |
| can | effectively | filter | the | noise | ||
| of | recording, | and | then | you | ||
| following | picture: | |||||

Note:
This function should only be used in noisy environment. And the recording format is WAV with bit rate in 256kbps.
(3) Voice - activated
Recording
This is a practical
function
needed. When
the function
no voice is detected
, the device
after 3 seconds
; if voice
recording. See
the below
is
relate

(4) The Li sten In function
After activating
the Listen In
to listen's any if thousand
output. See
interface picture
as follows:

(5)SystemTimeSetting
SeethebelowpictureofSystemtimesetting:

On this interface, users can set the current time and the time display format.
When select "Time format", the device shows the picture as follow:

Fromthelist, userscanchooseoneoftwotimedisplayformat:
12-hourclockor24-hourclock. Thedefaultsettingis24-hourclock.
For example, when select" Set date", the device shows the picture as follow:
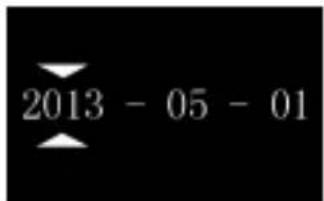
On this interface, press “◀” or “ ” to select year, month and day. Then ▲ press “ ” or “ ” to change When select “ Set Time ” ,

On this interface, press “ ” press ▲▼” or “ ” to change the
(6) Record time r setting
Record time r setting: first pr reaches the pre-set time, the
On the functions menu, choose MENU button to enter “Rec
reference picture:

The interface of Record Time

On this interface, users can select “ Set Date ” or “ Set Time ” set t time when the device starts
Note: If one FM channel is the user is listening to another pre-set time point to start record the FM channel which pre-set one. Please plug in th radio.
Record source: users can s microphone or radio The by defaulting takes the voice picks up by t the below auto off picture:

If the “ FM Source ” is selected, recording. Press Menu button The third function You can the set the recording duration to 30, 60, duration setting as follows:

Note:
W hen using record ing time setting, you must make sure the power
switch
is
in
the
ON
position
record
can
't be
started
at
the
(7)
Auto
divide
feature
recording
During
the
course
of
recording,
enables
recordings
to
be
saved
or
60
minutes.
The
auto
divide
follows:

OFF
30 minute
60 minute
7 Music mode
From the main interface, you can choose music mode with "or
"▶▶| " buttons,
and
then
shortly
in the voice
mode,
use
the
S
folder. Music
playback
interface
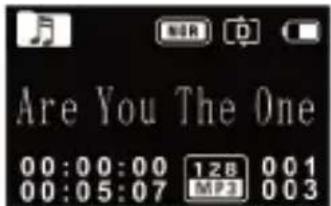
Note: music
files can
only
folder.
Music playback
Interface
illustrar

Playing Moodle
You can select
the
track
you
want
press PLAY play. When
playing,
shortly
the below
menu
pops
up
with
Replay, Replay times, and Replay gap. See the interface as follows:

(I) Repeat
As illustrated,
“ Repeat
” is s
enter the
Repeat You can
Selectione
repeat as follows:

Repeat
one:
repeat
continuously
Sequence:
Play
sequentially
the tracks
in the
current
folder,
Rep
eat
folder:
Repeat
tracks
Random:
Play
randomly
tracks
(2) Equalizer
F rom
the
Playing
Menu
select
enter.
The
Equalizer
include
and
DBB.
Refer
the
below
pic
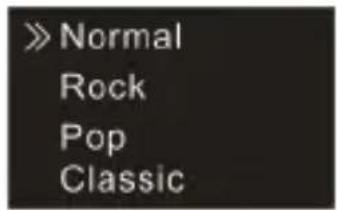
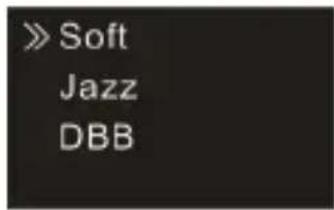
In the Equalizer Mode, you can choose mode with ▲” and “▼” buttons, press MENU button to confirm.
(3) A-B Replay
From the Playing "MeBu Rep select lye", pre to enter.
Set A-B Repeat
- Set the start mark : When
to enter Playing ▲Menu,▼ then
"A-B Re play " mode, then
Playing Menu. “A” in A B ” on LCD displ
need to confirm the ▶▶▶ start
confirmation
- Set the finish mark: "A-B "Aften
LCD display flickers, shortly
The “A-B” is displayed on the
fixed “A-B on ”, the section between
rep lay ed for specified times.
"A" itA-B " flickers to wait for
resumes normal playing. If A-B Rep lay is not needed, use any of the following method s to
- Cancellation : Shortly p marks and pause playing.
- Shortly press “ STOP ” butto playing.
- Shortly press “MENU” b continue playing.
(4)
Replay
times
From the Playing Menu select button to enter ▲Replay ▼ times times setting . See the below
(5)
Replay
gap
Replay gap means theYou cartime choosga the “ Replay gap ” from the Pla enter Replay ▲ gap ▼ setting. Use setting .
Delete Files
Regarding the operation approach, please refer to the Delete Files in voice playback section.
The lyrics displayed
This p roduct support s "*.lrc" broadcasting of song s and lyri
Note:
(I) Lyrics file's name and the consistent.
(2) If the current song file ma icon in the top of the screen lyrics match, then no sign

(3) If the lyrics match, long lyrics interface, Toyeict, display "menu" button to return 1
From the main menu select Radio Mode, press MENU button to enter. See the below picture of Radio Mode:
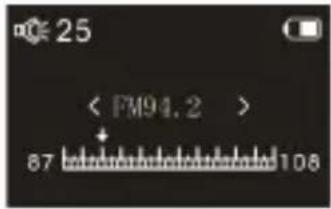
Note:ote:
Please
plug
in
the
earphones.
only
be
heard
in
the
earphones.
In
the
Radio


p press
“
frequency
;
press
MENU
including:
Auto
search,
Save


After
Auto
Search
is
selected,
radio
channels.
When
a radio
saved
automatically
into
radio
channel
search
is
completed,

You can choose Save Channel to save it. Choose Delete to delete a
current
saved
channel
or
Dele
store
40
radio
channels
at
mc
is stored,
short
press
“ PLAY
radio
channels
in
sequence.
starts
recording
the
radio
, SE

Select Wireless Mode on the main interface, press MENU to enter.
There are two built-in frequency
set the device working band and the
microphone to the same working band
band is set at BAND's working
has to be set at BAND I too
cannot record sound from t
Wireless reception interface
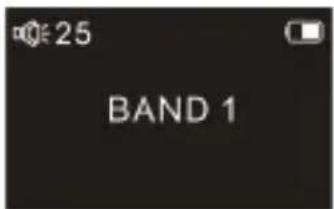
BAND

|
BAND
Note: please plug in the earpl
Sound can only be heard in th
On this interface, press “”
band is set, press “ PLAY ” butt
wireless reception. In order
microphone must be working
the below interface picture

The maximum working range of wireless recording is between 20 to
30
meters.
Thus,
the
wireless
and
please
try
to
avoid
any
wireless
recording
works
bey
recording
happens
in
special
interference,
large
sized
workin
recordings
with
low
sound
course
of wireless
recording,
the sound
being
recorded.
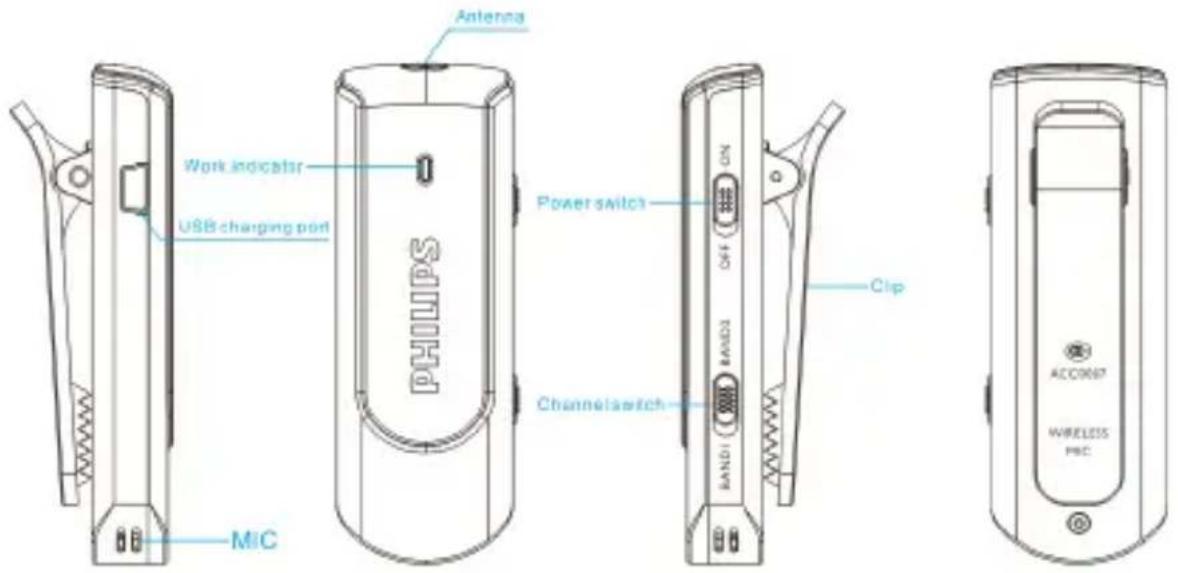
The wireless microphone instructions:
| Power | ON/OFF: | slide | the | sv | ||
| on | the | device. | When | the | device | |
| When | slide | the | switch | to | the | |
| off | and | the | device | powers | off. | |
| Charging: | please | use | the | charge | ||
| device | with | PC | via | USB | cable | |
| is | charging | power, | please | slide | ||
| The | general | charging | time | |||
| Indicator | light | turns | red | when | ||
| off | after | the | device | being | fully | |
| Working | distance: | under | the | |||
| working | distance | for | the device | |||
Working time: the device can work continuously for around 7 hours after being fully charged.
Notice for the wireless microphone: microphone:
- Please charge the device first time, in order to ensure
- Please slide the “ON/OFF when the device is not in use
- Please stretch the antenna transmission.
- If the indicator light or the used, please recharge the
- Do not use the device when
From the main menu select Setting mode, press MENU button to
enter.
The
Setting
mode
interfa
off,
memory
info,
Firmware
»Backlight
Language
Auto off
Memory info
» Firmware ver
Clear memory
Exit
Backlight
Time
The
backlight
time
function
Constant.
's no
lôpératière
on the
backlight
turns
off
automatically.
is
to
be
always
. See
the
below

Language
From
the
Language
menu
y
language.
See
the
following

Auto off
If there's no operation on the device for a set time, the system
automatically
shuts
down.
|
automatically
shut
down.
See

Memory
info
Use
this
function
to
check
t
following
picture:

Firmware
Version
You can check
'sthefirmwaredevice
version
See
the below
picture:
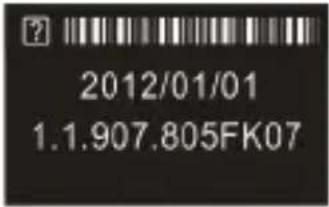
Clear memory
You can format the devices internal storage by using this function.
See the below picture:

12 Frequently Asked Questions
Answers to the frequently asked questions are listed here to solve
simple
problems
that
may
tc
solved,
please
contact
the
www.philips.com/support
Cannot switch on the device device :
The
battery
is
empty,
please
Cannot record with the device:
T he
maximum
file
n'sumbeemory
is
Please
delete
some
recordings
devices
The device cannot play recorded playio : audio
(1)
The
device
may
be
in
lock
switch
to
OFF
position.
(2)
The
battery
is
empty,
please
13 Technical Parameters
Storage
Internalstorage
Estimatedrecordingtime(4GB):approximately 1080hourswith
Long Recording mode, 280 hours with Standard Recording mode, 68
hourswithHighQualityRecordingmode.
Typeofinternalstorage:NANDFlash
Portablestorage(PC): Yes
Recordingtimewithfullychargedbattery:approx.25hours.
Dimensions and Weight
Wide×Long×High:32×101×13(mm)
Weight(withbattery):70g
Systemnequinement
OperatingSystem:Windows7/Vista/XP/2000,MacOSX,Linux
Port:USB
Recording
PCM REC ( PCM ): bit rate: 768kbps , format :WAV
StereoREC(HQ):bitrate:128kbps, format:MP3
StandardREC(SP):bitrate:32kbps, format:MP3
LongREC(SLP):bitrate:8kbps, format:MP3
Operating conditions
Temperature:5°–45°CHumidity:10%–90%,nocondensation
Warranty card
质保书
1
year warranty
一年质保
Type: VTR7000
Serial nr:
Date of purchase
购买日期
Dealer's name, address and signature
销售商名称、地址及签字
www.philips.com/welcome
This document is printed on chlorine free produced paper Data subject to change without notice
This product was brought to the market by Speech Processing Solutions GmbH or one of its affiliates, further referred to in this document as SPS, which is the manufacturer of the product. SPS is the warrantor in relation to the product with which this booklet was packaged.
For China only
只限中国地区
Printed in China


Specifications subject to change without notice.
Trade marks are the property of Royal Philips or their respective owners.
© 2014 Speech Processing Solutions GmbH. All rights reserved. Philips and the Philips' shield emblem are registered trademarks of Koninklijke Philips N.V. and are used by Speech Processing Solutions GmbH under license from Koninklijke Philips N.V. All trademarks are the property of their respective owners.
Document version 1.0,2014-01-01


- 目录
- 按键锁定((H00DD功能))
- PRODUCT FEATURES
- 2 IMPORTANT
- SAFETY
- HEARING SAFETY
- POWER@M/OFF
- NOTE
- RECHARGE
- KEYPAD LOCKA(HOLD FU(HOIBD)
- FUNCTION)
- PC CONNECTION
- ILLUSTRATION OF RECORDING INTERFACE
- USE AAM EXTERMALL MONOPPHONE TOO RECORD
- VOICE PLAYBACK
- PLAYING MODES MODES
- DELETE FILES FILES
- RECORD SETTINGS SETTINGS
- RECORD TYPE
- LINE IN RECORD
- 7 MUSIC MODE
- PLAYING MOODLE
- REPEAT
- EQUALIZER
- DELETE FILES
- THE LYRICS DISPLAYED
- NOTE:OTE
- NOTICE FOR THE WIRELESS MICROPHONE: MICROPHONE
- AUTO OFF
- MEMORY
- FIRMWARE
- 12 FREQUENTLY ASKED QUESTIONS
- CANNOT SWITCH ON THE DEVICE DEVICE
- CANNOT RECORD WITH THE DEVICE
- THE DEVICE CANNOT PLAY RECORDED PLAYIO : AUDIO
- 13 TECHNICAL PARAMETERS
- STORAGE
- DIMENSIONS AND WEIGHT
- SYSTEMNEQUINEMENT
- RECORDING
- OPERATING CONDITIONS
- WARRANTY CARD
- 质保书
- 1
Brand : PHILIPS
Model : Voice Tracer VTR7000
Category : Voice recorder