
MPD226 - DJ Equipment AKAI - Free user manual and instructions
Find the device manual for free MPD226 AKAI in PDF.


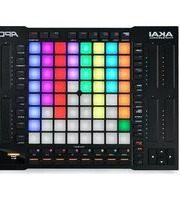
| Product type | USB MIDI controller for music production and DJ |
| Brand | AKAI |
| Model | MPD226 |
| Dimensions (L x W x H) | 320 x 220 x 60 mm |
| Weight | 1.2 kg |
| Power supply | USB bus-powered (cable included) |
| Connectors | 1 USB-B port, 1 sustain pedal input (TRS 6.35 mm) |
| Pads | 16 RGB backlit pads, velocity and aftertouch |
| Potentiometers | 6 rotary potentiometers (360°) |
| Faders | 6 faders – 40 mm travel |
| Transport buttons | 6 buttons (Stop, Play, Record, etc.) |
| Display | No |
| Main functions | Mappable MIDI control, pad banks, Note/CC/MIDI Machine Control modes |
| Software compatibility | PC (Windows 7+) and Mac (Mac OS X 10.9+), no additional driver required |
| Included software | MPC Beats (DAW) and AKAI Pro Editor |
| Maintenance and cleaning | Use a soft, dry cloth. Do not use solvents or abrasive products. |
| Safety | Do not expose to moisture, shocks, or extreme temperatures. |
| Spare parts and repairability | No spare parts provided. For any repairs, contact AKAI after-sales service. |
| General information | Indoor use, operating temperature: 5 to 40 °C |
Frequently Asked Questions - MPD226 AKAI
User questions about MPD226 AKAI
0 question about this device. Answer the ones you know or ask your own.
Ask a new question about this device
Download the instructions for your DJ Equipment in PDF format for free! Find your manual MPD226 - AKAI and take your electronic device back in hand. On this page are published all the documents necessary for the use of your device. MPD226 by AKAI.
USER MANUAL MPD226 AKAI
User Guide (English)
Introduction
Box Contents
MPD226
USB Cable
(2) 1/8"-to-MIDI Adapters
Software Download Cards
User Guide
Safety & Warranty Manual
Important: Visit akaipro.com and find the webpage for MPD226 to download the MPD226 Editor Software and Preset Documentation.
Support
For the latest information about this product (system requirements, compatibility information, etc.) and product registration, visit: akaipro.com.
For additional product support, visit: akaipro.com/support.
Quick Start
- Use the included USB cable to connect MPD226's USB port to an available USB port on your computer (powered on).
- On your computer, open your digital audio workstation (DAW).
- Select MPD226 as the controller in the Preferences, Device Setup, or Options of your DAW.
Tip: You can use MPD226 with a MIDI-controllable iOS app. To do this:
- Press and hold the Up Cursor.
- Connect your iOS device (powered on) to MPD226's USB port using an Apple iPad Camera Connection Kit (sold separately).
- After MPD226 powers on, release the Up Cursor.
Features

- USB Port: Use a standard USB cable to connect this USB port to your computer. The computer's USB port provides ample power to MPD226. If you connect it to a USB hub, make sure it is a powered hub. This connection is also used to send and receive MIDI data to and from your computer.
You can also power MPD226 by connecting this USB port to a power outlet using a standard USB charger (sold separately). If you do this, set any relevant controls to send their MIDI messages out of the MIDI Out. Any controls set to transmit only over the USB Port will not be sent to a device connected to the MIDI Out.
When using MPD226 with external MIDI equipment:
- If an external device is connected to the MIDI Out, your computer can send MIDI messages out along this path: Computer MPD226 External Device.
-
If an external device is connected to the MIDI In, the external device sends MIDI messages in along this path: External Device → MPD226 → Computer. MIDI messages can then be sent to an external device via the MIDI Out, but they must pass through the computer first.
-
Power Input: Connect this power input to a power outlet using an optional power adapter (6V DC, 1A, center-positive, sold separately). Alternatively, if you want to use MPD226 to control an external MIDI device and without a computer connection, you can connect MPD226's USB Port to a power outlet using a standard USB charger (sold separately).

- Power Button: Press this button to power MPD226 on or off.
- MIDI Out: Use the included 1/8"-to-MIDI adapter and a standard five-pin MIDI cable to connect this MIDI Out to the MIDI In of an external MIDI device (e.g., a synthesizer, sequencer, drum machine, etc.). Please see the above USB Port description for information about how MIDI messages are routed while using MPD226.
Important: Do not connect audio devices (e.g., headphones, monitors, etc.) to this jack. Use the included 1/8"-to-MIDI adapter to connect MIDI devices only.
- MIDI In: Use the included 1/8"-to-MIDI adapter and a standard five-pin MIDI cable to connect this MIDI In to the MIDI Out of an external MIDI device (e.g., another MIDI controller). The MIDI messages sent to this MIDI In will be sent to your computer via the USB port. Please see the above USB Port description for information about how MIDI messages are routed while using MPD226.
Important: Do not connect audio devices (e.g., headphones, monitors, etc.) to this jack. Use the included 1/8"-to-MIDI adapter to connect MIDI devices only.
- Kensington ^® Lock: You may use this Kensington lock slot to secure the MPD226 to a table or other surface.
- Display: Use this display to view MPD226's menus, options, parameters, and settings.
- Cursors: Use these buttons to navigate through the menus and options in the current page in the display.
- Data Dial: Use this dial to change parameter values, settings, etc. in the display. Pressing the dial also functions as an Enter button.
- Preset: Press this button to enter Preset Mode. See Operation > Preset Mode for more information.
- Edit: Press this button to enter Edit Mode. See Operation > Edit Mode for more information.
- Global: Press this button to enter Global Mode. See Operation > Global Mode for more information.
- Potentiometers: Use these 360° knobs to send continuous controller messages to your software or external MIDI device.
- Faders: Use these faders to send continuous controller messages to your software or external MIDI device.
- Switches: Use these switches to send MIDI CC messages to your software or external MIDI device. While Time Div is lit, press one of these switches to select the time division of the Note Repeat feature. Press a lit switch to select a triplet-based time division (the switch will flash). Press the flashing switch again to return to the normal time division.
- Control Bank (Ctrl Bank): Use this button to select one of three independent banks of potentiometers, faders, and switches. This lets you control up to 36 independent parameters.

- Pads: Use these pads to trigger drum hits or other samples in your software or external MIDI sound module. The pads are pressure- and velocity-sensitive, which makes them very responsive and intuitive to play.
- Pad Bank: Use this button to select one of four independent banks of pads. This lets you access up to 64 different pads (16 pads across 4 pad banks).
- Full Level: Press this button to activate Full Level Mode in which the pads always play at a maximum velocity (127), no matter how hard or soft you hit them.
- 16 Level: Press this button to activate/deactivate 16 Level. When activated, the last pad that was hit will be temporarily copied to all 16 pads. The pads will now output the same note number as the initial pad but at fixed velocity values that increase as the pad numbers increase (e.g., Pad 1 is the minimum, Pad 16 is the maximum), regardless of how hard you hit them.
- Note Repeat: Press and hold this button while striking a pad to cause the pad to retrigger at a rate based on the current tempo and Time Division settings.
Tip: You can sync Note Repeat to an internal or external MIDI clock source. - Tap Tempo: Press this button in time with the desired tempo to enter a new tempo (in BPM). This will affect the speed of the Note Repeat feature.
Note: This button is disabled if Note Repeat is synced to an external MIDI clock source. - Time Div: Press this button, and then press one of the four switches above it to select the time division of the Note Repeat feature: quarter notes (1/4), eighth notes (1/8), 16th notes (1/16), or 32nd notes (1/32). Press a lit switch to select a triplet-based time division (the switch will flash). Press the flashing switch again to return to the normal time division. While this button is lit, the switches will not send any of their normal MIDI messages.
- Transport Buttons: These three buttons are dedicated buttons for sending conventional transport control commands: Stop, Play, and Record. These can be set to send MIDI (Start/Stop), pre-assigned MIDI CC values, MMC (MIDI Machine Control), and MMC/MIDI SysEx. The PTEX setting is for use with Avid ^® Pro Tools ^® Express only.
Operation
MPD226 has three different modes of operation. Each mode can be accessed by pressing the corresponding button on MPD226.
In each page of each mode:
- Use the up/down Cursors to move between settings on the current page.
- Use the left/right Cursors to move between different pages.
- Turn the Data Dial to change the currently selected value/setting.
Following is a short description of each mode. Each mode is described in detail in its corresponding section later in this User Guide.
Preset Mode: This mode allows you to load your stored Programs. A Program is a collection of information about how the controls (pads, faders, etc.) will behave. Their behavior can be adjusted in Edit Mode then stored. Using Programs allows you to save different configurations, which can be quickly loaded when you need them, without having to reprogram MPD226 every time. See the Preset Mode section to learn more.
Edit Mode: This mode allows you to edit the configuration of MPD226. Edit Mode is a powerful tool for customizing your set-up. In this mode, you can make changes to how the pads, faders and other features behave. For example, you may want a fader to transmit only a limited range of MIDI data, or you may want the pads to transmit on a different MIDI channel from the faders. You can change these and other various parameters in Edit Mode. See the Edit Mode section to learn more.
Global Mode: This mode allows you to set global parameters and make general changes to how MPD226 functions. For example, you can set the brightness of the display, the MIDI common channel, MIDI clock settings, the pads' velocity curve and sensitivity, and more. See the Global Mode section to learn more.
Preset Mode
Preset Mode allows you to select and load a Program. MPD226 has several default Programs we created to work specifically with some popular DAWs or plug-ins, but you may also create/edit, store, and load your own Programs.
To select/load a Program:
- Press Preset. (Each time MPD226 is first powered on, it will automatically be in Program Mode.) The display will show the current Program name (flashing).
- Turn the Data Dial to browse through the list of available Programs.
- Press the Data Dial to load the desired Program.
To edit a program, please refer to the Edit Mode section.

To store your new settings in a Program:
Important: Without storing your edited settings, your changes will be lost if you load a new Program.
- Press Preset to enter Preset Mode.
- Press the Right Cursor to enter the Store Program page.
-
Use the up/down Cursors to select either the Save To or Name field:
-
Save To: Turn the Data Dial to select the Preset to which you want to store your new settings (this will overwrite that Preset).
-
Name: Turn the Data Dial to select the current character. Use the left/right Cursors to move to the previous/next character.
-
Press the Data Dial to store the Preset. Your settings will be saved to the new Preset and the display will automatically return to the normal Preset Mode.
Edit Mode
- To enter Edit Mode, press Edit.
- Select a control to edit by touching, pressing, or manipulating the desired control (fader, pad, etc.). In the display, the name of the selected control will appear in the upper left corner, and the editable parameters will be shown below it.
In each page of Edit Mode:
- Use the up/down Cursors to move through the parameters on the current page.
- If there are multiple pages (indicated by Pg1, Pg2, etc.), use the left/right Cursors to move between different pages.
-
Turn the Data Dial to change the currently selected value/setting. Any value/setting is automatically selected; you do not have to press the Data Dial to enter or select it.
-
To edit more controls, repeat Steps 2–3.
See the following sections for specific information about each control's editable parameters.
Pads (Pad 01–64)
Type: The type of event that will be sent. The available settings are Note, Program Change, and Program Bank.
MIDI Channel: This setting determines over which MIDI channel data is sent. The available settings are Common, USB A1–A16, and USB B1–B16.
Note: If Note is the selected Type, this assigns the note number.
Aft: If Note is the selected Type, this determines the Aftertouch settings. The available options are Off, Chn (Channel Aftertouch), and Poly (Poly Aftertouch).
Program Number / Pgm: If Program Change or Program Bank is the selected Type, this determines the Program number. The available range is 000–127.
Msb / Lsb: If Program Change or Program Bank is the selected Type, these determine the MSB (Most Significant Bit) and LSB (Least Significant Bit). The available range is 000–127.
MIDI to DIN: Determines whether or not MIDI data is sent to the MIDI Out (On) or not (Off). MIDI data will be sent to MPD226's USB connection regardless of this setting.

On Color / Off Color: These determine what colors the pad will be when it is pressed (On) and not pressed (Off). The available settings are Off, Red, Orange, Amber, Yellow, Green, Green Blue, Aqua, Light Blue, Blue, Purple, Pink, Hot Pink, Light Purple, Light Green, Light Pink, Grey.
Note Mode: If Note is the selected Type, this determines whether it is in Toggle or Momentary Mode.
Faders (Fader 01–12)
Type: The type of event that will be sent. The available settings are Aftertouch and MIDI CC.
MIDI Channel: This setting determines over which MIDI channel data is sent. The available settings are Common, USB A1–A16, and USB B1–B16.
CC Number: If MIDI CC is the selected Type, this determines the MIDI CC. The available range is 000–127.
MIDI to DIN: Determines whether or not MIDI data is sent to the MIDI Out (On) or not (Off). MIDI data will be sent to MPD226's USB connection regardless of this setting.
Min / Max: If Aftertouch is the selected Type, these determine the lowest (Min) and highest (Max) values. (If the Min is higher than the Max, the fader's polarity will be reversed.)
Switches (Switch 01–12)
Type: The type of event that will be sent. The available settings are Note, CC, PrgChange, PrgBank, and Keystroke.
MIDI Channel: This setting determines over which MIDI channel data is sent. The available settings are Common, USB A1-A16, and USB B1-B16.
Note: If Note is the selected Type, this assigns the note number.
Velo: If Note is the selected Type, this assigns the velocity. The available range is 000–127.
Mode: If Note or CC is the selected Type, this determines whether it is in Toggle or Momentary Mode.
CC Number: If CC is the selected Type, this determines the MIDI CC number. The available range is 000–127.
Invert: If CC is the selected Type, the switches send 000 as the “off” value and 127 as the “on” value. This determines whether the values sent are normal (Off), as described above, or switched/inverted (On).
Program Number / Pgm: If PrgChange or PrgBank is the selected Type, this determines the Program number. The available range is 000–127.
Msb / Lsb: If PrgChange or PrgBank is the selected Type, these determine the MSB (Most Significant Bit) and LSB (Least Significant Bit). The available range is 000–127.
MIDI to DIN: Determines whether or not MIDI data is sent to the MIDI Out (On) or not (Off). MIDI data will be sent to MPD226's USB connection regardless of this setting.
Key 1: If Keystroke is the selected Type, this determines what keystroke the switch sends. The available keystrokes are 0–9, A–Z, F1–F12, Backspace, Return, Up Arrow, Down Arrow, Left Arrow, Right Arrow, Tab, various symbols ( , . / [ ] \ ‘; ), Esc, Insert, Home, Page Up, Delete, End, Page Down, and Num 0–9.

Key 2: If Keystroke is the selected Type, this determines what modifier keystroke (e.g., Shift, Command, etc.), if any, the switch sends with the Key 1 keystroke. The available modifier keystrokes are None, Control, Shift, Alt, Option, Control-Shift, Control-Alt, Control-Option, Shift-Alt, Shift-Option, Alt-Option, Control-Option-Alt, Control-Shift-Alt, and Control-Shift-Option.
Tip: The HID (Human Interface Device) protocol lets devices send typical computer keyboard keystrokes. USB game controllers are an example of this, acting as an alternative to your computer's keyboard. MPD226 also uses the HID protocol, letting you configure certain buttons to send your most-often used keystrokes to your software, so you no longer need to switch focus constantly between the computer's keyboard and your MPD226.
Knobs (Potentiometer 01–12)
Type: The type of message that will be sent. The available settings are MIDI CC, Aftertouch, Increment/Decrement 1 (Inc/Dec1), and Increment/Decrement 2 (Inc/Dec2).
MIDI Channel: This setting determines over which MIDI channel the messages are sent. The available settings are Common, USB A1-A16, and USB B1-B16.
CC Number: If MIDI CC or Inc/Dec2 is the selected Type, this determines the MIDI CC number. The available range is 000–127.
MIDI to DIN: This determines whether or not MIDI data is sent to the MIDI Out (On) or not (Off). MIDI data will be sent to MPD226's USB connection regardless of this setting.
Min / Max: If MIDI CC or Aftertouch is the selected Type, these determine the lowest (Min) and highest (Max) values. (If Min is higher than Max, the knob's polarity will be reversed.) The available range is 000–127.
MSB / LSB: If Inc/Dec1 is the selected Type, these determine the MSB (Most Significant Bit) and LSB (Least Significant Bit). The available range is 000–127.
Value: If Inc/Dec1 is the selected Type, this determines the value sent by an Increment (CC #96) or Decrement (CC #97) message. The available range is 000–127.
Note Repeat
Time Division: The speed of the Note Repeat repetition as a division of the master tempo or external clock. The available options are 1/4, 1/4T, 1/8, 1/8T, 1/16, 1/16T, 1/32, and 1/32T. (T denotes a triplet-based time division.)
Mode: This determines whether it is in Toggle or Momentary Mode.
Gate: The length of the repeated notes of the Note Repeat feature. The available range is 1–99% of the current time division setting.
Swing: The amount of swing used in the repeated notes of the Note Repeat feature. The available range is 50–75%.

Tempo (Tap Tempo)
BPM: The tempo as indicated in beats per minute. The available range is 30–300 BPM.
Time Division: The speed of the Note Repeat repetition as a division of the master tempo or external clock. The available options are 1/4, 1/4T, 1/8, 1/8T, 1/16, 1/16T, 1/32, and 1/32T. (T denotes a triplet-based time division.)
Gate: The length of the repeated notes of the Note Repeat feature. The available range is 1-99% of the current time division setting.
Swing: The amount of swing used in the repeated notes of the Note Repeat feature. The available range is 50–75%.
Transport (Stop, Play, Rec)
Type: The type of event that will be sent. The available settings are MMC, MMC/MIDI, MIDI Real Time, MIDI CC, and PTEX. When set to PTEX, transport control messages will be sent only on USB Port B, Channel 16, regardless of the Common Channel (Common Chnl) setting. The PTEX setting is for use with Avid® Pro Tools® Express only.
MIDI to DIN: Determines whether or not MIDI data is sent to the MIDI Out (On) or not (Off). MIDI data will be sent to MPD226's USB connection regardless of this setting.
Global Mode
To enter Global Mode, press Global.
In each page of Global Mode:
- Use the up/down Cursors to move through the parameters on the current page.
- Use the left/right Cursors to move between different pages.
- Turn the Data Dial to change the currently selected value/setting. Any value/setting is automatically selected; you do not have to press the Data Dial to enter or select it.
Important: To store your global settings, see the Utilities section below.
See the following sections for specific information about each control's editable parameters.
MIDI Channel
Common Chnl (Channel): This setting determines which MIDI channel is the common channel (various controls can be assigned to the common channel in Edit Mode). The available settings are USB A1-A16, and USB B1-B16.
Note Display
Type: Determines whether the display will show notes as Values (e.g., C2, F#3, etc.) or a Number (e.g., 36, 54, etc.).

Pads
Pad Threshold: The velocity threshold to trigger the pads. The available range is 0–10. This can help prevent false triggering or make it easier to trigger the pads.
Velocity Curve: The pads' velocity curve. The available settings are Linear, Exp1, Exp2, Log1, and Log2.
Pad Gain: The pads' overall velocity sensitivity. The available range is 1–10. At 1, it would take a lot of force to generate a velocity value of 127. At 10, the opposite is true.
Tempo
Tempo: The global tempo as indicated in beats per minute. When MPD226 is using its internal MIDI clock, this global tempo setting determines the speed of the Note Repeat rate. The available range is 30–300 BPM.
Tap Average: The number of times you would need to press Tap Tempo to enter a new tempo. The available range is 2–4.
Tempo LED: When MPD226 is using its internal MIDI clock, the Tap Tempo LED will flash in time with the current tempo setting. You can set this feature to On or Off.
Clock
Source: Determines whether MPD226 uses its Internal MIDI clock or refers to an External clock (e.g., from a DAW).
SysEx
Send Program: The Program to be sent via SysEx. The available options are the individual Program numbers or all Programs. Press the Data Dial to send the Program.
Utilities
Contrast: The display contrast. The available options are 0 to 99.
Save Globals
On this page, press the Data Dial to store your global settings. After Saving Globals flashes on the display, the global settings are stored in MPD226's internal memory.
os
Version: MPD226's current operating system information.
Boot ROM: MPD226's current ROM read-only memory information.
Faders (Fader 01–12)
Switches (Interruptores 01–12)
Faders (Fader 01–12)
Switches (Interruttori 01–12)
OS (Sistema operative)
Switches (Tasten 01–12)
Technical Specifications
| Pads | 16 velocity- and pressure-sensitive pads, RGB-backlit4 banks accessible via Pad Bank button |
| Knobs | 4 360° assignable potentiometers3 banks accessible via Control Bank button1 360° encoder for display navigation and selection via push |
| Faders | 4 45mm assignable faders3 banks accessible via Control Bank button |
| Buttons | 4 assignable switches, amber-backlit10 dedicated function buttons, amber-backlit3 transport buttons4 directional cursor buttons for display navigation |
| Display | 20 x 4 characters, monochrome backlit with adjustable contrast |
| Connections | 1 USB port1 power input (power adapter sold separately)1 1/8" MIDI input (1/8"-MIDI adapter included)1 1/8" MIDI output (1/8"-MIDI adapter included)1 Kensington lock slot |
| Power | via computer USB bus or USB charger (sold separately)via power adapter (sold separately): 6V DC, 1A, center-positive |
| Dimensions(width x depth x height) | 13.1" x 10.0" x 1.9"33.3 cm x 25.4 cm x 4.8 cm |
| Weight | 2.9 lbs.1.3 kg |
Specifications are subject to change without notice.
Trademarks and Licenses
Akai Professional is a trademark of inMusic Brands, Inc., registered in the U.S. and other countries.
Apple and iPad are trademarks or service marks of Apple Inc., registered in the U.S. and other countries.
Avid and Pro Tools are trademarks or registered trademarks of Avid Technology, Inc. in the U.S. and other countries.
IOS is a registered trademark of Cisco in the U.S. and other countries and is used under license.
Kensington and the K & Lock logo are registered trademarks of ACCO Brands.
All other product or company names are trademarks or registered trademarks of their respective owners.
AKAI®
PROFESSIONAL


- User Guide (English)
- Introduction
- Box Contents
- Support
- Quick Start
- Features
- Operation
- Preset Mode
- To select/load a Program:
- To store your new settings in a Program:
- Edit Mode
- Pads (Pad 01–64)
- Faders (Fader 01–12)
- Switches (Switch 01–12)
- Knobs (Potentiometer 01–12)
- Note Repeat
- Tempo (Tap Tempo)
- Transport (Stop, Play, Rec)
- Global Mode
- MIDI Channel
- Note Display
- Pads
- Tempo
- Clock
- SysEx
- Utilities
- Save Globals
- os
- Switches (Interruptores 01–12)
- Switches (Interruttori 01–12)
- OS (Sistema operative)
- Trademarks and Licenses
Brand : AKAI
Model : MPD226
Category : DJ Equipment