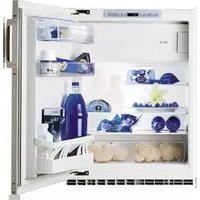
Komfort eco Swiss - Refrigerator SIBIR - Free user manual and instructions
Find the device manual for free Komfort eco Swiss SIBIR in PDF.


| Product type | Refrigerator |
| Brand | SIBIR |
| Model | Komfort eco Swiss |
| Dimensions (H x W x D) | 85 x 60 x 60 cm |
| Net weight | 30 kg |
| Energy class | A+ |
| Total net volume | 150 L |
| Refrigerator volume | 130 L |
| Freezer volume | 20 L |
| Defrost type | Automatic (No Frost) |
| Operating temperature | 0°C to 8°C (refrigerator) / -18°C (freezer) |
| Power supply | 220-240 V / 50 Hz |
| Annual energy consumption | 150 kWh/year |
| Noise level | 42 dB (A) |
| Main functions | Refrigeration, freezing, food preservation |
| Interior lighting | LED |
| Tempered glass shelves | Yes |
| Door shelf | 3 adjustable shelves |
| Refrigerant type | R600a (isobutane) |
| Maintenance and cleaning | Clean with a soft cloth and mild detergent |
| Safety | Automatic door closing, open door alarm |
| Spare parts and reparability | Thermostat, door gasket, shelves available from after-sales service |
| General information | User manual provided, 2-year warranty |
Frequently Asked Questions - Komfort eco Swiss SIBIR
User questions about Komfort eco Swiss SIBIR
0 question about this device. Answer the ones you know or ask your own.
Ask a new question about this device
Download the instructions for your Refrigerator in PDF format for free! Find your manual Komfort eco Swiss - SIBIR and take your electronic device back in hand. On this page are published all the documents necessary for the use of your device. Komfort eco Swiss by SIBIR.
USER MANUAL Komfort eco Swiss SIBIR
Built-In refrigerator
KOMFORT
Bedienungsanleitung
Mode d'emploi
Operating instructions
Inhaltsverzeichnis
Operating instructions
31 Introduction
31 Safety information and warnings
22 Operating and Control Panel
33 Freezing
33 Variable inner doors
33 Defrosting
34 Refrigerator
35 Cleaning
35 Informations for energy-saving use
35 Tips
36 Replacing LED
36 Malfunctions
37 Guarantee
38 Operating noises
39 Installation / dimensions
natural_image
Close-up of a hand adjusting a transparent plastic panel with a grid-like structure (no text or symbols visible)2
Abtauen
natural_image
Interior corner of a room with a white wall and a black circular object on the floor (no text or symbols visible)3
Kühlraum
natural_image
Hand holding a white cylindrical object with an arrow, mounted on a shelf (no text or symbols visible)4a

natural_image
Hand holding a white cylindrical object with an arrow indicating rotation (no text or symbols visible)4b
Reinigung
natural_image
Close-up of a hand holding an electrical socket (no visible text or symbols)5

natural_image
Close-up of hands installing or adjusting a white electrical socket with wires (no visible text or symbols)6
Störungen
natural_image
Simple line drawing of a door frame with no text or symbols


natural_image
Technical line drawing of a mechanical assembly with no visible text or symbolsDetail B
Chère Cliente, Cher Client,
①Touche principale En/Hors:
natural_image
Close-up of a hand adjusting a transparent plastic door frame (no text or symbols visible)2
Dégivrage
natural_image
Interior corner of a room with a white ceiling and a black wall-mounted scroll (no text or symbols visible)3
natural_image
Hand holding a white cylindrical object with an arrow, next to a shelf (no visible text or symbols)4a

natural_image
Hand holding a white cylindrical object with an arrow indicating rotation (no text or symbols visible)4b
Nettoyage
natural_image
Close-up of a hand holding a small electronic component (no visible text or symbols)5

natural_image
Close-up of hands installing or adjusting a white electrical socket with wires (no visible text or symbols)6
Pannes
natural_image
Simple line drawing of a double door with a vertical seam and two small switches at the bottom (no text or symbols)


Stimata cliente, stimato cliente
natural_image
Close-up of a hand adjusting a transparent plastic door panel (no text or symbols visible)2
Scongelamento
natural_image
Interior view of a minimalist room with white walls and a small dark object on the floor (no text or symbols visible)3
Vano frigorifero
natural_image
Hand holding a white cylindrical object with an arrow, mounted on a shelf (no text or symbols visible)4a

natural_image
Hand holding a white cylindrical object with an arrow indicating rotation (no text or symbols visible)4b
Pulizia
natural_image
Close-up of a hand inserting a small electrical socket into a wall (no text or symbols visible)5

natural_image
Close-up of hands installing or adjusting a white electrical socket with wires (no visible text or symbols)6
Guasti
nicchia SMS 6/6 (762 mm)
Incasso nella base
natural_image
Simple line drawing of a double door with a vertical seam and two small symbols on the sides (no text or labels)

particolare A


natural_image
Technical line drawing of a mechanical component with no visible text or symbolsparticolare B
Dear customer
You are the owner of a modern and thus energy-saving refrigerator. Congratulations on your new appliance!
This refrigerator has been designed and manufactured to the latest European directives and in accordance with the latest national and international standards. By affixing the CE mark subsequent to inspection of the product by authorised testing agencies, the manufacturer confirms compliance with the relevant directives and standards for household refrigerator appliances and household refrigerator/freezer appliances.
Disposal of the old appliance
Old appliance should be rendered unserviceable immediately (e.g. cut off the power cable). Please ensure that the piping of your appliance is not damaged before it is transported to the proper environmentally-friendly disposal facility. For disposal of your old appliance, please contact the appropriate facilities of your local authorities. (Unfasten the hinges and remove the doors so that children playing cannot lock themselves in and be in mortal danger).
Disposal of the packing material
All packing materials used are environmentally compatible and recyclable.
Safety information and warnings
Before putting the appliance into service, please read carefully the information given in the operating instructions and keep them carefully for use by a later owner.
■Electrical safety must be ensured (contact safety) by the installation.
■This appliance is only for household use as described in the operating instructions.
■This appliance is not to be used by persons with reduced physical, sensory or mental capacity, or limited experience and understanding, other than when
they are supervised or instructed in how to use this appliance by a person responsible for their safety. Children should be supervised to ensure that they do not play with the appliance.
■If you have been supplied with a damaged appliance please contact your supplier immediately.
■Do not use an extension cable.
■Repairs and other service work must only be carried out by a service technician.
■When cleaning switch off the power supply; pull out the power supply plug or deactivate the fuse. Never pull the plug out of the socket by pulling on the cable or with wet hands. Always grip the plug itself and pull it straight out of the power supply socket.
■High proof alcohol must only be stored well sealed and upright; further, do not store explosive materials in the appliance. Explosion danger!
■This appliance is CFC and FC-free and contains small quantities of isobutane (R600a), an environmentally-friendly coolant.
■When operating the appliance, care must be taken that the cooling circuit does not get damaged. Should the cooling circuit get damaged then keep it clear of open fires and any type of ignition source. The room in which the appliance is located should be ventilated for a few minutes.
■Appliance with a damaged cooling circuit must not be put into operation.
■When the appliance is in operation care must be taken that the ventilation vents are not covered over or closed.
■No mechanical devices or synthetic materials other than those recommended must be used to accelerate defrosting.
■No liability will be accepted for any possible damage if the appliance is used for
any other purpose, incorrectly operated, or not repaired by a professional technician. In such cases the guarantee and other liabilities are rendered null and void.
■If the connection cable of the appliance is damaged it must be replaced by the manufacturer or by his customer service or by a similarly qualified person to avoid any liability.
■Warning: do not operate any electrically-driven devices inside the foodstuff compartment.
Operating and Control Panel
①Main switch on / off:
Entire appliance: on / off.
Child safety: the switch must be pressed for at least 3 seconds.
②Temperature indicator:
A value of the average temperature over the last 2 hours is shown.
③Temperature setting:
Two buttons: + button warmer, - button colder. Press the switch for at least 3 seconds.
④Rapid cooling button:
Press the switch for 3 seconds. The appliance cools down first to 2 °C for 36 hours in the cold room, and then back to the set temperature. Normal position: 5 °C.
⑤Open door warning for cold room
After 2 minutes the LED flashes at 15 second intervals; reset by pressing any button.
After 3 minutes the LED flashes at 5 second intervals; reset by pressing any button.
After 4 minutes the LED flashes rhythmically at a one second frequency; reset by pressing any button.

After 10 minutes an alarm sounds; reset by pressing the alarm acknowledgement. Duration 3 minutes, repeats after 30 minutes.
Freezing
■Only fresh produce is suitable for freezing. ■Only small quantities should be frozen at one time and the rapid cooling button should be activated (see operating and control panel) so that the temperature in the freezer does not increase too much. The maximum quantity (2 kg) should be frozen on the bottom of the compartment. For freezing the maximum quantity please activate the rapid cooling button 12 hours before put in produce to be frozen. Leave the temperature in the normal operating position, about 5°C. it is the best to prepack small portions only.
■The electronics sense that products need to be frozen and the process control is carried out automatically. Leave the temperature control in the normal operating position, about 5 °C.
■Products for freezing should not be brought into contact with products which are already frozen. Products which have been thawed out must not be re-frozen because foodstuffs can spoil.
Variable inner doors
The cover inserts (Figure 2) in the inner doors can be adjusted somewhat and offer the option of a customized setting. To change the location of the inserts and bottle holder: first lift upwards and lift out, then set the required height and replace in the reverse sequence. Please note that the location of the cover of the uppermost cover cannot be adjusted.

natural_image
Close-up of a hand adjusting a transparent plastic door panel (no text or symbols visible)2
Defrosting
The cold room defrosts automatically. Ice which has formed on the back wall is melted (about once per day, see also the tips). The water flows out of the drainage channel (Figure ③) and evaporates from the collection dish outside the appliance.
Be sure to keep the collection channel and the drainage channel clean, so that the melted water can flow out easily. Clean out the drainage channel with the green cleaner provided using an up-and-down and turning motion.
Defrost the freezer compartment if the ice formation becomes excessive. A thick coating of ice reduces the effectiveness of the cold transfer to the frozen products.
Keep the frozen products as cold as possible and well insulated during the defrosting time, e.g. pack them in newspaper.
- Turn off the appliance by using the main switch (3 sec.)
- Leave the doors open.
Defrosting can be accelerated significantly if you place a bowl of hot water in the freezer compartment. Attention: do not use sharp implements to remove ice or anything hard frozen. Do not use an electrical heater or an open flame for defrosting.
- After defrosting clean the interior and dry it thoroughly.
- Turn on the appliance by using the main switch (3 sec.)

natural_image
Interior wall with a white shelf and a small black object near the edge (no text or symbols visible)3
Cold room
The height of the glass shelves can be adjusted individually. Pulling both holders sideways inwardly (Figure 4a) and for fixation turn them down and backwards (Figure 4b). Pull the glass shelf out of the guidance and replace it in reversed order at the desired position.

natural_image
Hand holding a cylindrical device with an arrow pointing to it, against a plain background (no text or symbols visible)4a

natural_image
Hand holding a white rectangular object with an arrow indicating rotation (no text or symbols visible)4b
Cleaning
The appliance is to be kept clean for the hygienic storage of foodstuffs. It should be washed out from time to time with a mild soapy solution and then dried. An occasional wiping with a vinegar solution suppresses odours and is recommended. Keeping the door seals clean stops them from sticking and thus avoids them being damaged.
No scouring cleaners or scratching cloths are to be used. Clean the door seals with a soft brush. If the appliance has not been used for some time, turn off by using the main switch (3 sec.). Empty the appliance, defrost it, clean, and then leave the cold room as well as the freezer compartment open.
- For cleaning the control element please use only a humid flannel.
- Be careful that as little cleaning water as possible goes though the drainage channel into the collection dish.
- Before being put back in use, the appliance and the seals of the cold room and the freezer must all be completely dry.
Informations for energy-saving use
■As far as possible, use the cooling unit in its as-delivered state. The arrangement of drawers, shelves and trays ensures the best possible temperature distribution.
■ Do not install the unit near radiators, radiator pipes or smoke extractors and protect it as far as possible from direct sunlight
■Make sure the unit doors are kept open for as short a time as possible. The quicker the doors are closed again, the less cold is lost.
■Make sure that the doors are closed fully and correctly. The door seal must be flush against the frame of the fridge.
■Leave warm or even hot items to cool down outside the unit.
■The storage of moisture-releasing food-stuffs leads to increased build-up of ice on the rear of the fridge and a reduction in cooling power.
Tips
The following points should be noted when using the new appliance:
■A appliance which has just been put into use needs approx. 15 hours (with products) until it has reached its normal operating temperatures.
■If the doors are open for longer than 2 minutes then the lamp starts to flash. Make sure after closing that the doors are fully sealed. The self-closing hinges assist this.
■The cooling time for beverages and other products can take up to 6 hours from room temperature down to the cold room temperature. The warmer they are when put in, the longer this time will be.
■Re-setting the temperature control has no effect on the cooling rate, only on the temperature reached.
■Condensation can form on the glass shelves if products are stored which emit water vapour.
■The electronic control defrosts the cold room only about once per day. A cat ice may be visible oftentimes at the back board of the cold room – this is though normal.
■Be careful that products do not come into contact with the rear wall of the cold room so that they do not freeze to it and that, during defrosting, water does not get diverted into the cold room.
■When filling be careful that:
- Oil and fats do not come into contact with the polymer parts and the door seals.
- The coldest locations in the cold room for any setting of the temperature controller are at the back wall and above the lowest shelf. Sensitive products should therefore be put on the lowest shelf.
■Example of how to use:
– Freeze and store foodstuffs and make ice in the freezer compartment.
- On the shelves from top to bottom: baked products, ready-made meals, dairy products, meat and sausages.
- In the suspended trays from top to bottom: butter and cheese, tubes, small cans and eggs, large bottles.
- In the vegetable compartment: vegetables, fruit and salad.
Changing the LED lighting
Switch off the power supply: pull out the power supply plug or deactivate the fuse.
Click off the LED lighting (Figure 5).
Disconnect the plug to the LED lighting (Figure 6). Please insert the new LED lighting in the reverse sequence.
N.B.: Please only use original LED lighting from the manufacturer.

natural_image
Close-up of a hand holding an electrical socket (no visible text or symbols)5

natural_image
Close-up of hands installing or adjusting a white electrical socket with wires, no visible text or symbols6
Malfunctions
The appliance is checked for trouble-free operation before being supplied. Should you have any problems please contact your nearest service facility, advising them of the model number and the details of the problem. A malfunction can occur if the electrical fuse is tripped. This problem can be solved easily if the fuse mechanism is re-activated.
Display following power failure
After interruption on the power supply the temperature display flashes and shows the temperature value that measured after restart. You can stop the temperature display flashing by pressing any button. The current average temperature value is then displayed.
Sensor error functions:
- Sensor error F1 on the left-hand side of temperature display = temperature sensor in the cold room is defective
- Sensor error F7 on the right-hand side of temperature display = surrounding room temperature sensor defective
Guarantee
We warrant the guarantee as of the delivery date of the appliance to the end user.
Any malfunctions which might occur during this time despite correct operation and which are caused by material or construction errors will be corrected under this guarantee by our customer service.
Not covered by the guarantee:
- LED defects
- Breakage of the glass shelves or polymer parts
- Defects resulting from not following the operating instructions or incorrect usage
– Damage claims beyond the guarantee - Appliance which have been repaired by third parties.
Operating Noises
Noises which are entirely normal
The chill cabinet is cooled by a compressor (refrigeration aggregate). The compressor pumps coolant through the cooling system, producing operating noises. Even when the compressor cuts out, noises caused by changes in temperature and pressure are unavoidable.
This appliance is fitted with a quiet compressor and a low-noise cooling circuit designed in line with the latest technical developments.
However, a certain level of noise, dependent on the size of the appliance, is inevitable. Operating noise will be most audible immediately after the compressor cuts in. It becomes quieter as the operating period continues.
Noises which are not normal
Unusual noise is normally the result of improper installation. The appliance must be installed or built-in so that it is level and stable. Under no circumstances must tubing come into contact with a wall, other furniture or with another tubing.
Where the appliances are installed in open-plan kitchens or in partition walls, the level of operating noise will be heard more acutely. However, this is due to the surrounding architecture and not to a fault with the appliance.
Description Cause Notes
| Droning Cooling aggregate | Normal operating noise of the cooling aggregate. The level is dependent on the size of appliance. | |
| Humming | Fan | Normal operating noise of the fan. |
| Gurgling BabblingMurmuring | Cooling circuit | Normal operating noise as coolant flows through the circuit. |
| Hissing | Cooling circuit | Normal operating noise as coolant is injected into the condenser. |
| Rattle | Shelves, contents | Arrange the shelves and contents so that they are fixed and not touching one another. |
| Cracking | Housing | Normal as materials expand and contract caused by temperature variations (e.g. plastics, insulation). |
Fitted refrigerator
Recess SMS 6/6 (762 mm)
Built-under
Electrical safety (personnel protection safety) is to be ensured during fitting.
If the mains power supply is not accessible after installation then a separation device is to be provided by the installer. This can be a switch with a contact opening of at least 3 mm, this includes line protection cut-outs as well as contactors.

natural_image
Simple line drawing of a double door with side-mounted outlets and a door handle (no text or symbols)


SIBIRGroup AG
Bernstrasse 60
8952 Schlieren
Tel. 044 755 73 00
Fax 044 755 73 01
www.sibirgroup.ch
info@sibirgroup.ch
Service Tel. 0844 848 848


- Built-In refrigerator
- KOMFORT
- Inhaltsverzeichnis
- Abtauen
- Kühlraum
- Reinigung
- Störungen
- Chère Cliente, Cher Client,
- Dégivrage
- Nettoyage
- Pannes
- Stimata cliente, stimato cliente
- Scongelamento
- Vano frigorifero
- Pulizia
- Guasti
- nicchia SMS 6/6 (762 mm)
- Incasso nella base
- Dear customer
- Disposal of the old appliance
- Disposal of the packing material
- Safety information and warnings
- Operating and Control Panel
- Freezing
- Variable inner doors
- Defrosting
- Cold room
- Cleaning
- Informations for energy-saving use
- Tips
- Changing the LED lighting
- Malfunctions
- Display following power failure
- Sensor error functions:
- Guarantee
- Operating Noises
- Fitted refrigerator
- Recess SMS 6/6 (762 mm)
- Built-under
- SIBIRGroup AG
Brand : SIBIR
Model : Komfort eco Swiss
Category : Refrigerator