
FL-F90 MTL - Oven Foster - Free user manual and instructions
Find the device manual for free FL-F90 MTL Foster in PDF.


| Product type | Built-in oven |
| Brand | Foster |
| Model | FL-F90 MTL |
| Category | Oven |
| Dimensions (H x W x D) | 59.5 x 59.5 x 55 cm |
| Net weight | 35 kg |
| Power supply | 220-240 V, 50-60 Hz, 16 A |
| Energy type | Electric |
| Oven capacity | 70 L |
| Cooking functions | Convection, traditional heat, grill, bottom heat, top heat, defrost |
| Cleaning | Pyrolysis (self-cleaning at high temperature) |
| Interior lighting | Halogen lamp |
| Door | Cold door with multiple glazing |
| Safety | Child lock, automatic shut-off, cooling ventilation |
| Included accessories | Grid, dripping pan, baking tray |
| Spare parts | Available on request |
| Repairability | Repairability index: 8.4/10 |
| Energy class | A+ |
Frequently Asked Questions - FL-F90 MTL Foster
User questions about FL-F90 MTL Foster
0 question about this device. Answer the ones you know or ask your own.
Ask a new question about this device
Download the instructions for your Oven in PDF format for free! Find your manual FL-F90 MTL - Foster and take your electronic device back in hand. On this page are published all the documents necessary for the use of your device. FL-F90 MTL by Foster.
USER MANUAL FL-F90 MTL Foster
natural_image
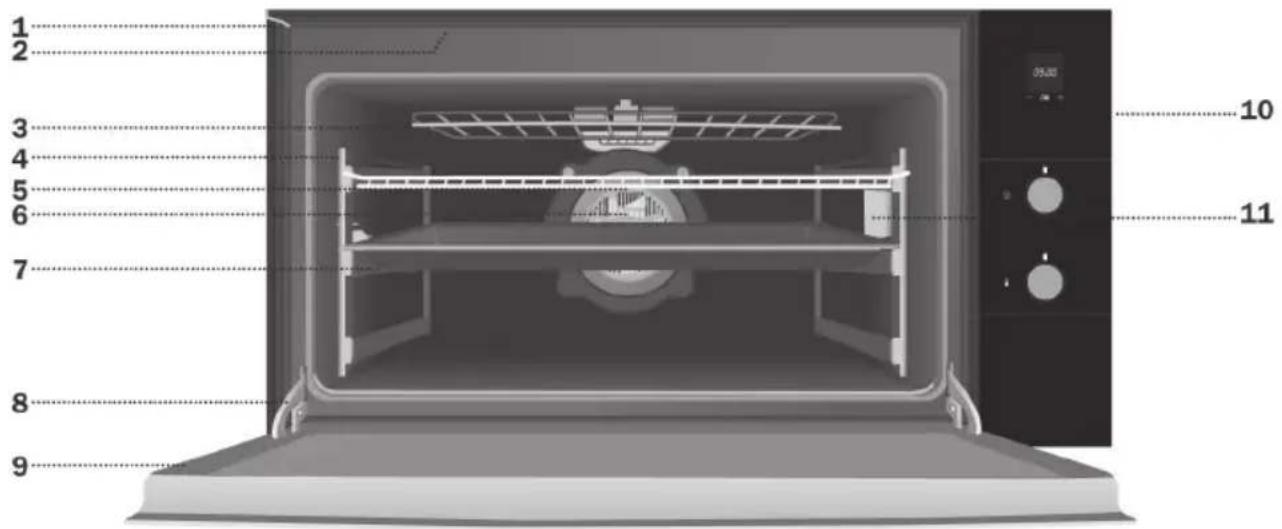
Front view of a black microwave oven with control knobs and a digital display (no visible text or symbols on the device itself)FL-F90 MTL
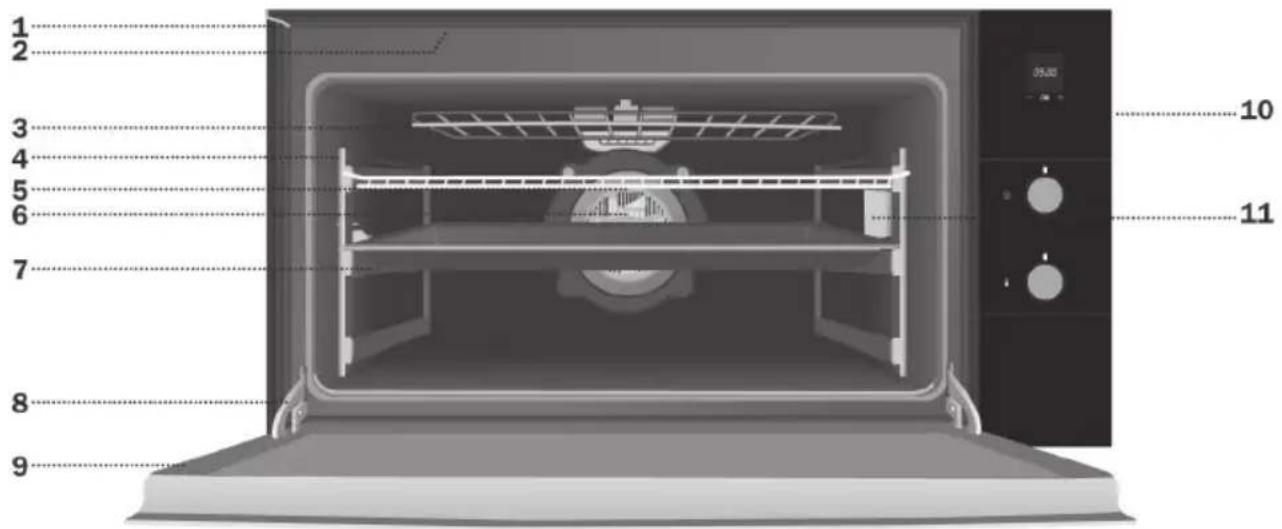

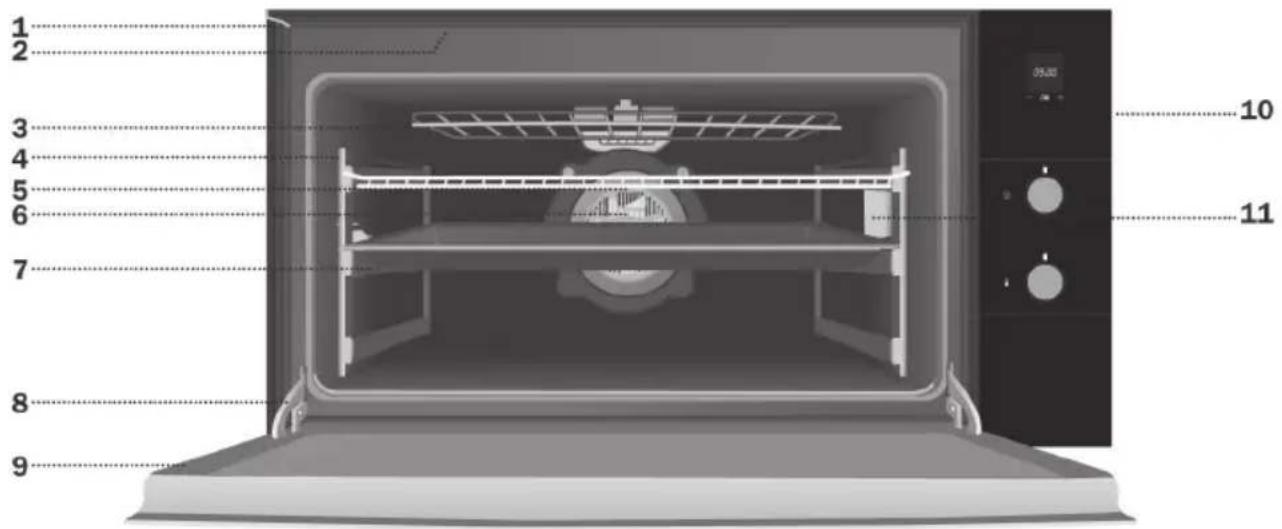
FL-F90 MTL

1 Fixing to Unit
2 Air Outlet
3 Fold-down Grill element
4 Chromed Support/Telescopic Guide
5 Grid
6 Fan
7 Roasting Tray
8 Hinge
9 Door
10 Control Panel
11 Light
For other markets, accessories may not correspond to those described in this manual.
Control Panel

1 Electronic clock.
2 Function selector.
3 Temperature selector.
□ Switch off oven
Conventional
It is used for sponges and cakes where the heat received must be uniform to achieve a spongy texture.
Conventional with fan
Appropriate for roasts and cakes. The fan spreads the heat uniformly inside the oven.
Grill and Lower element
Special for roasts. It can be used for any piece, whatever its size.
MaxiGrill
Allows greater surfaces to be prepared, than with the grill, together with higher power reducing the time required for browning of the food.
MaxiGrill with fan
Allows uniform roasting at the same time as surface browning. Ideal for grills. Special for large volume pieces, such as poultry, game etc. It is recommended to put the item on a rack with a tray beneath to collect the stock and juices.
This cooking function was used as a function of forced-air convection operation for energy efficiency testing according to EC regulation 65/2014.
Caution
While using the Grill, MaxiGrill or MaxiGrill with fan, the door must be kept closed.
Lower element
Heats only from beneath. Suitable for heating dishes and raising pastry and similar.
Lower element with Turbo
Ideal for cooking pizzas and baking pies, fruit tarts and sponge cakes.
Turbo
The fan distributes the heat coming from an element located at the back of the oven. As a result of the evenly distributed temperature, food can be cooked on two levels at the same time.
Defrosting
This function is suitable for slowly defrosting food, particularly food consumed unheated, such as soups, pastries, tarts, cakes, etc.
Lower element with fan
It distributes the heat from the lower part of the oven and is ideal for cakes with jam or fruit filling, which only require heating from beneath. Pre-heating is always necessary.
Note
The pilot light remains on in any cooking function.
Caution
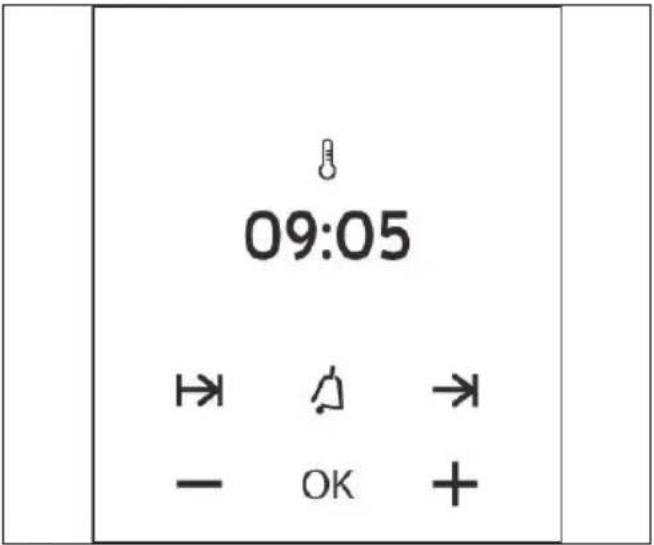
The electronic clock features Touch-Control technology. To operate, simply touch the glass control symbols with your fingertip.
The touch control sensitivity continuously adapts to ambient conditions. Make sure the glass surface of the control panel is clean and free of obstacles when plugging in the oven.
If the clock does not respond correctly when you touch the glass, unplug the oven for a few seconds and then plug it in again. Doing this causes the sensors to adjust automatically so that they will react once more to fingertip control.
Setting the time on the Electronic Clock
When the oven is connected to the power supply, the indication 00:00 flash on the display. Press – or + to set the time on the clock. The clock beeps twice to confirm the selected time.
If you wish to modify the time, press - or + until the current time flash on the screen. Press OK. Then press - or + to modify the time. The clock beeps twice to confirm the modification.
Manual Operation
The oven is ready to be used when the clock has been set. Select a cooking function and a temperature.
When you begin cooking, symbol lights up to indicate that the oven is heating the contents; the symbol goes out when the selected temperature is reached.
Set the controls to to turn the oven off.
Functions of the Electronic Clock
Alarm: Creates an alarm signal when the period of time finishes; the oven does not need to be in use in order to use this function.
Cooking Time: To cook for a selected length of time; the oven turns itself off automatically when the time finishes.
End Cooking Time: To cook until a set time; the oven turns itself off automatically when the time finishes.
Cooking time and End Cooking Time: To cook for a selected length of time and end at a set time. When this function is set, the oven comes on automatically at the time required in order to cook for the set length of time (Cooking time) and end automatically at the indicated time (End Cooking Time)
Programming the Alarm
1 Press + until symbol △ lights up. Press OK.
2 Set the period of time after which you wish the alarm to sound by pressing - or +.
3 The clock beeps twice, the current time is displayed and symbol ⚠ lights up permanently to indicate that the alarm has been set.
4 When the set period of time comes to an end, the alarm sounds and symbol ⚠starts to flash.
5 Press an y button to stop the alarm; symbol △ goes out.
You can consult the remaining time at any moment by pressing - or + until symbol ⚠ flashes and then pressing OK. You can also modify the set time at this point by pressing - or +. The clock beeps twice to confirm the change.
If you wish the remaining time to be displayed until the end of the set period of time, press - or + until symbol △ flashes and then press OK and keep it pressed in. Symbol △ flashes. Keep OK pressed in again to return to the real time.
Setting the Cooking Time
1 Press - or + until symbol lightb>up.
Press OK.
2 Select the period of time you wish to cook for by pressing - or +.
3 The clock beeps twice, the current time is displayed and symbol lights up permanently to indicate that the oven will turn itself off automatically.
4 Select a cooking function and temperature.
5 When the cooking time comes to an end, the oven turns itself off, the alarm sounds and symbol flashes.
6 Press any button to stop the alarm and turn the oven back on again.
7 Set the controls to turn the oven off.
You can consult the remaining cooking time at any moment by pressing - or + until symbol → flashes and then pressing OK. You can also modify the set time at this point by pressing - or +. The clock beeps twice to confirm the change.
If you wish the remaining time to be displayed until the end of the set period of time, press - or + until symbol flashes and then press
OK and keep it pressed in. Symbol ➤flashes. Keep OK pressed in again to return to the real time.
Setting the End Cooking Time
1 Press - or + until symbol lights-up.
Press OK.
2 Select the time you wish the cooking process to finish at by pressing - or +.
3 The clock beeps twice, the current time is displayed and symbol lights up permanently to indicate that the oven will turn itself off automatically.
4 Select a cooking function and temperature.
5 When the set time is reached, the oven turns itself off, the alarm sounds and symbol →flashes.
6 Press any button to stop the alarm and turn the oven back on again.
7 Set the controls to turn the oven off.
You can consult the end cooking time at any moment by pressing - or + until symbol → flashes and then pressing OK. You can also modify the end cooking time at this point by pressing - or +. The clock beeps twice to confirm the change.
This function can be used even when you are already using the oven. To do this, follow the instructions indicated above except point number 4.
Setting the Cooking Time and the End Cooking Time
1 Press - or + until symbol ➗ lights up.
Press OK.
2 Select the period of time you wish to cook for by pressing - or +.
3 The clock beeps twice, the current time is displayed and symbol → lights up permanently.
4 Press - or + until symbol → lights up.
Press OK.
5 Select the time you wish the cooking process to finish at by pressing - or +.
6 The clock beeps twice, the current time is displayed and symbol → lights up permanently.
7 Select a cooking function and temperature.
8 The oven remains off with symbols and lit up. Your oven is set.
9 When the time to start cooking is reached, the oven starts up and cooks for the set period of time.
10 When the set end cooking time is reached, the oven turns itself off, the alarm sounds and symbols and flash
11 Press any button to stop the alarm and turn the oven back on again.
12 Set the controls to to turn the oven off.
You can modify the end cooking time by pressing - or + until symbol lights up and then pressing OK. You can now modify the end cooking time by pressing - or +. The clock beeps twice to confirm the change.
Important
In the event of a power cut, all the electronic clock settings are deleted and the indication 00:00 flashes on the display. It is necessary to set the time and programme the clock again.

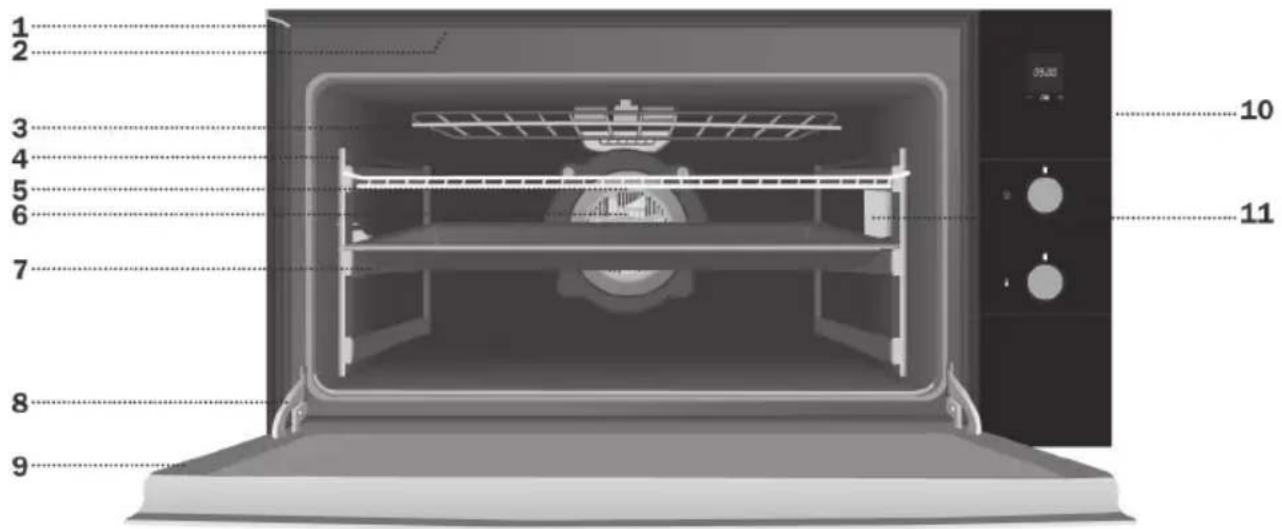

هام جدا



- FL-F90 MTL
- Control Panel
- □ Switch off oven
- Conventional
- Conventional with fan
- Grill and Lower element
- MaxiGrill
- MaxiGrill with fan
- Caution
- Lower element
- Lower element with Turbo
- Turbo
- Defrosting
- Lower element with fan
- Note
- Setting the time on the Electronic Clock
- Manual Operation
- Functions of the Electronic Clock
- Programming the Alarm
- Setting the Cooking Time
- Setting the End Cooking Time
- Setting the Cooking Time and the End Cooking Time
- Important
Brand : Foster
Model : FL-F90 MTL
Category : Oven