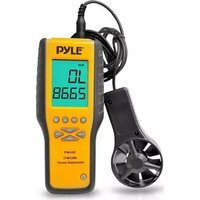
PMA90 - Anemometer Pyle - Free user manual and instructions
Find the device manual for free PMA90 Pyle in PDF.


| Product Type | Handheld Anemometer |
| Brand | Pyle |
| Model | PMA90 |
| Dimensions (H x W x D) | 5.1 x 2.0 x 1.2 inches |
| Weight | 0.2 lbs (with battery) |
| Power Source | 1 x 9V battery (not included) |
| Measurement Range (Wind Speed) | 0.3 to 30 m/s |
| Measurement Range (Temperature) | -10°C to 50°C (14°F to 122°F) |
| Units | m/s, km/h, ft/min, knots, mph, °C/°F |
| Functions | Wind speed, temperature, wind chill, Max/Min/Average, data hold |
| Display | Backlit LCD |
| Sensor | Low-friction vane with precision bearings |
| Accuracy (Wind Speed) | ±5% of reading |
| Auto Power Off | Yes, after approximately 15 minutes of inactivity |
| Maintenance | Wipe with dry cloth; avoid water ingress; replace battery when needed |
| Safety | Not waterproof; do not use in rain or submerge |
| Spare Parts / Repairability | Battery compartment accessible; no user-serviceable parts inside |
| General Information | Ideal for outdoor, HVAC, and environmental measurements |
Frequently Asked Questions - PMA90 Pyle
User questions about PMA90 Pyle
0 question about this device. Answer the ones you know or ask your own.
Ask a new question about this device
Download the instructions for your Anemometer in PDF format for free! Find your manual PMA90 - Pyle and take your electronic device back in hand. On this page are published all the documents necessary for the use of your device. PMA90 by Pyle.
USER MANUAL PMA90 Pyle
Congratulations on your purchase of the Thermo-Anemometer. This instrument measures Air Velocity, Air Flow (volume) and Temperature. The large, easy-to-read backlit LCD includes primary and secondary displays plus numerous status indicators. The meter is shipped fully tested and calibrated and with proper use will provide years of reliable service.
Meter Description
-
Meter
-
LCD Display
-
Power On/Off
-
AVG
-
UNIT
-
MAX/MIN
-
NEXT
-
HOLD
-
AREA

• AUTO POWER OFF ⏻ Press to turn the meter ON or OFF
- MAX/MIN Used to record and store the highest, lowest and average airflow or velocity readings.
(LEFT) also serves as change decimal point button in AREA mode
- UNITS Press to select the mode of operation. In FLOW mode, the meter displays air volume. In VELOCITY mode, the meter displays air speed.
▲(UP) also serves as increase number button in AREA mode.
• AVG Used to Average multiple readings in FLOW or VELOCITY mode. Up to 20 readings can be averaged.
- HOLD Press to freeze the displayed reading. Press again to unlock display. This button also functions as the RIGHT scroll button in AR EA mode and RE CALL mode.
- AREA Press and hold to manually enter the area of a duct in CFM or CMM mode
• NEXT In AREA mode, used to select memory locations 1-8.
- °C/°F The button is behind of battery cover, it needs to open the battery cover that can set.
• AUTO BACKLIGHT The model will be full auto backlight when operation, it is more convenient.
Battery compartment located on the back of the instrument.
The rubber protective jacket must be removed from the meter to access the compartment.
Display Layout
• MAX (top of LCD): Max Hold function engaged for the Air Temperature function
• HOLD (top of LCD): Data Hold function engaged for the Air Temperature function
• VEL: indicates that meter is in air velocity mode
• FLOW: indicates that meter is in air flow mode
• MAX (bottom of LCD): Max Hold for the IR Temperature and RH function
• HOLD (bottom of LCD): Data Hold for the IR Temperature function and RH function
• °C / °F: Temperature units of measure
• CFM/CMM: airflow units of measure
- Ft^2, m^2 : units for area dimensions
• m/s, ft/min, km/h, MPH, knots: air velocity units of measure
• X10, X100: multipliers for air flow readings
• AVG: air averaging mode
- RECORD: indicates that min/max function is running (top for temp, bottom for air)
• Large LCD digits at center of display for Relative Humidity and IR Temperature
• Smaller LCD digits at top, right of display for Probe Temperature
• : Low battery indicator

Operation
Connecting the Vane
-
The vane plug is inserted in the meter's sensor jack at the top of the meter. The plug and jack are keyed so that the jack one way.
-
Turn the plug carefully until it lines up with the jack and then firmly push the plug in place. Do not apply undue plug side-to-side.
-
If the vane is not connected to the meter or if the sensor is defective, the LCD display will indicate OL in place of a Temperature reading.
Air Velocity Measurements (Single Point) Side view of Vane
-
Turn on the meter using the ON/OFF button.
-
Press UNITS button to select the desired unit of measure. NOTE: At power up the meter will display the last unit of measure previously entered.
-
Place the sensor in the air stream. Ensure that the air enters the vane as indicated by the arrow sticker placed inside the vane.
-
View the readings on the LCD Display. The large main LCD display shows the Air Velocity reading. The upper right LCD sub-display shows the temperature reading.
Air Velocity Averaging Mode
-
To enter 20 P oint Averaging Mode, press and hold the AVG button until it beeps twice. The AVG icon will be displayed.
-
Take a measurement and press the AVG button. A single beep will sound and the HOLD icon will appear in the display.
-
The average reading will be displayed and number of readings measured will appear in the upper right hand corner of the display. After 5 seconds, the display will return to the current reading.
-
Repeat steps 2 - 3 until the desired number of points have been measured.
- To return to standard velocity measuring mode press and hold AVG button until meter beeps twice.
Note: In the standard velocity measuring mode, press the AVG button once to recall the previous average. The average will be cleared when you enter the Averaging Mode again.
Air Flow Measurements (CMM / CFM)
Side view
- Turn on the meter using the ⏻ ON/OFF button
- Press the UNITS button to select the desired air flow units: CMM (cubic meters per minute) or CFM (cubic feet per minute). NOTE: At power up the meter will display the last unit of measure previously entered.
- To begin entering the area in m^2 or ft^2 , press and hold the AREA button until it beeps twice. The leftmost digit of the bottom display will begin to flash.
- Use the ▲ (UP) button to change the flashing dig After all of the digits are entered, press and hold the AREA button (until meter beeps twice) to save the area into memory and return to CFM or CMM measuring mode.
- Place the sensor in the air stream. Ensure that the air enters the vane as indicated by the arrow sticker placed inside the vane. Refer to the diagram. The large main LCDdisplay shows the Air Velocity reading. The upper right LCD sub-display shows the temperature reading. The meter has 16 memory locations (8 for CFM and 8 for CMM) that can be used to store commonly used area sizes that you can recall at anytime.
-
Press the AREA button until meter beeps twice. A memory location number will appear in the top right of the display indicating the memory location.
-
Push the NEXT button to scroll thru and select the desired location. Once you have selected the desired memory location enter your dimension
Use the ▲ (UP) button to change the flashing digit
After all of the digits are entered, press and hold the AREA button (until it beeps twice) to save the area into memory and return to CFM or CMM measuring mode.
To select and use a previously stored dimension, press and hold the AREA button until it beeps twice.
Press NEXT to scroll thru the 8 memory locations. Press and hold the AREA button until it beeps twice to return to CFM or CMM measuring mode.
Air Flow Averaging Mode
- To enter 20 Point Averaging Mode, press and hold the AVG button until it beeps twice. The AVG icon will be displayed.
- Take a measurement and press the AVG button. A single beep will sound and the HOLD icon will appear in the display.
- The average reading will be displayed and number of readings measured will appear in the upper right hand corner of the display. After 5 seconds, the display will return to the current reading.
- Repeat steps 2 - 3 until the desired number of points have been measured.
- To return to standard airflow measuring mode press and hold AVG button until meter beeps twice.
Note: In the standard velocity measuring mode, press the AVG button once to recall the previous average. The average will be cleared when you enter the Averaging Mode again.
Data Hold (Air Velocity/Air Flow)
- While taking measurements, press the HOLD button to freeze the air velocity/air flow reading.
- The HOLD indicator will appear in the bottom of the LCD display.
- Press HOLD again to return to normal operation.
MAX/MIN/AVG Record (Air Velocity/Air Flow)
This allows the user to record and view the highest (MAX), lowest (MIN) and average (AVG) readings.
- Press the button MAX/MIN button. The MAX indicator and RECORD indicator along with the Max reading will appear on the LCD display and the meter will begin keeping track of the MAX, MIN and Average values.
- Press the MAX/MIN button again to view the minimum reading. The MIN indicator along with the minimum reading will appear on the LCD display.
- Press the MAX/MIN button again to view the average reading. The AVG indicator along with the average reading will appear on the LCD display.
- Press the MAX/MIN button again to display current readings. NOTE: the meter will keep recording MAX/MIN/AVG readings.
- To clear and stop MAX/MIN/AVG recording and return to normal operation, press and hold the MAX/MIN button until the meter beeps twice.
Automatic Power OFF
To conserve battery life, the meter automatically turns off after 20 minutes. To defeat this feature:
- Turn the meter OFF.
-
"dis APO" will appear in the display. The AUTO POWER OFF feature will now be disabled.
-
Note that AUTO POWER OFF is re-enabled each time the meter is turned on.
- Also note that AUTO POWER OFF is disabled in CFM/CMM or Average mode.
Battery Replacement
When 📄 appears on the LCD, the 9V battery must be replaced.
1. Disconnect the sensor.
2. Remove the meter's rubber protective jacket
3. Use a Phillips screwdriver to open the rear battery compartment
4. Replace the 9V battery
5. Close the battery compartment and replace the meter's protective jacket

You, as the end user, are legally bound (Battery ordinance) to return all used batteries and accumulators; disposal In the household garbage is prohibited!
You can hand over your used batteries / accumulators, gratuitously, at the collection points for our branches in your community or wherever batteries / accumulators are sold!
Disposal

Follow the valid legal stipulations in respect of the disposal of the device at the end of its lifecycle
WARNING: To avoid electric shock, do not operate the meter until the battery cover is in place and fastened securely.
[0]
NOTE:: If your meter does not work properly, check the fuses and batteries to make sure that they are still good and that they are properly inserted.
Specifications
| ycans | |||
| m/s (meters per sec) | 0.40 - 30.00 m/s | 0.01 m/s | ± (3% + 0.20 m/s) |
| km/h (kilometers/hour) | 1.4 - 108.0 km/h | 0.1 km/h | ± (3% + 0.8 km/hr) |
| ft/min (feet per minute) | 80 – 5900 ft/min | 1 ft/min | ± (3% + 40 ft/m) |
| mph (miles per hour) | 0.9 – 67.0 mph | 0.1 mph | ± (3% + 0.4 MPH) |
| knots (nautical MPH) | 0.8 to 56.0 knots | 0.1 knots | ± (3% + 0.4 knots) |
| Air Flow | Range | Resolution | Area |
| CMM (cubic meters/min) | 0-9999 m2/min | 1 | 0 to 9.999m2 |
| CFM (cubic ft/min) | 0-9999 ft3/min | 1 | 0 to 9.999ft2 |
| Air Temperature | Range | Resolution | Accuracy |
| 14 - 140°F (-10 - 60°C) | 0.1°F/C | 4.0°F (2.0°C) |
Circuit
Display
Sampling rate
Sensors
Automatic Power off
Operating Temperature
Storage Temperature
Operating Humidity
Storage Humidity
Operating Altitude
Battery
Battery life
Custom LSI microprocessor circuit
Dual function 0.5" (13 mm) 4-digit LCD
1 reading per second approx
Air velocity/flow sensor: Conventional angled vane arms with low-friction ball bearing Temperature sensor: NTC-type precision thermistor
Auto shut off after 20 minutes to preserve battery life
32^ to 122^ (0^ to 50^)
14 to 140°F (-10 to 60°C)
<80% RH
<80% RH
2000 meters (7000ft) maximum
One 9 volt (NEDA 1604) battery
80 hours approx. (if the Backlight is used continuously, battery life will be reduced significantly)
Battery Current 8.3 mA DC approx.
Weight Ryticole Vria
Dimensions
1.6 lbs. (725g) including battery & probe
Main instrument: 7.0 x 2.9 x1.2" (178 x 74 x 33mm)
Sensor Head: 2.75" (70mm) Diameter
Useful Equations and Conversions
Area equation for rectangular or square ducts

Width(W)
Height (H)
Area (A) = Width (W) x Height (H)
Area equation for circular ducts

Cubicequations
CFM (f+5/min) = Air Velocity (ft/min) × Area (ft²)
CMM (m^2 /min) = Air Velocity (m / sec)× Arec(m^)× 60
NOTE: Measurements made in inches
must be converted to feet or meters before using the above formulae.
Unit of Measure Conversion Table
| m/s | fl/min | knots | km/h | APH | |
| 1 m/s | 1 | 193.87 | 1.944 | 2.6 | 2.24 |
| 1 fl/min | 0.0568 | 1 | 0.00387 | 0.01529 | 0.01158 |
| 1 knot | 0.5144 | 121.27 | 1 | 1.5519 | 1.1523 |
| 1 km/h | 0.2778 | 54.63 | 0.54 | 1 | 0.6222 |
| 1 MPH | 0.4684 | 87.83 | 0.8698 | 1.6071 | 1 |

- Meter Description
- Display Layout
- Operation
- Connecting the Vane
- Air Velocity Measurements (Single Point) Side view of Vane
- Air Velocity Averaging Mode
- Air Flow Measurements (CMM / CFM)
- Use the ▲ (UP) button to change the flashing digit
- Air Flow Averaging Mode
- Data Hold (Air Velocity/Air Flow)
- MAX/MIN/AVG Record (Air Velocity/Air Flow)
- Automatic Power OFF
- Battery Replacement
- Disposal
- Useful Equations and Conversions
Brand : Pyle
Model : PMA90
Category : Anemometer