
Practika Plus 6 - Saucepan Magefesa - Free user manual and instructions
Find the device manual for free Practika Plus 6 Magefesa in PDF.


| Product Type | Saucepan |
| Brand | Magefesa |
| Model | Practika Plus 6 |
| Capacity | 6 liters |
| Material | Stainless steel |
| Base Construction | Tri-ply (aluminum core encapsulated between stainless steel layers) |
| Compatible Cooking Surfaces | All including induction, gas, electric, ceramic |
| Diameter | 24 cm (approximately) |
| Height | 15 cm (approximately) |
| Weight | 1.5 kg (approximately) |
| Handles | Riveted stainless steel, stay-cool |
| Lid | Tempered glass lid with steam vent |
| Oven Safe | Yes, up to 180°C (without lid) |
| Dishwasher Safe | Yes |
| Care Instructions | Hand wash recommended to preserve finish; avoid abrasive cleaners |
| Warranty | 2 years |
| Country of Origin | Spain |
Frequently Asked Questions - Practika Plus 6 Magefesa
User questions about Practika Plus 6 Magefesa
0 question about this device. Answer the ones you know or ask your own.
Ask a new question about this device
Download the instructions for your Saucepan in PDF format for free! Find your manual Practika Plus 6 - Magefesa and take your electronic device back in hand. On this page are published all the documents necessary for the use of your device. Practika Plus 6 by Magefesa.
USER MANUAL Practika Plus 6 Magefesa
Instructive & Warranty

natural_image
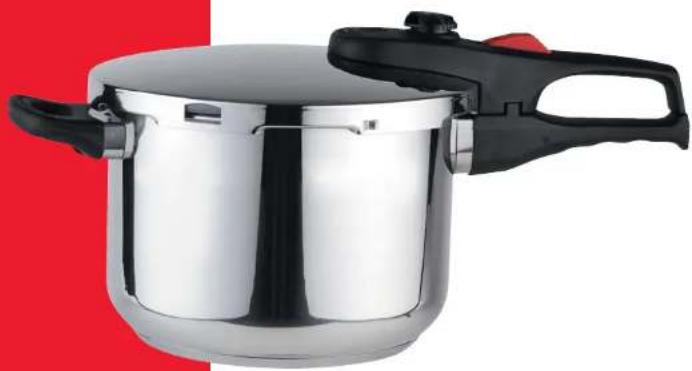
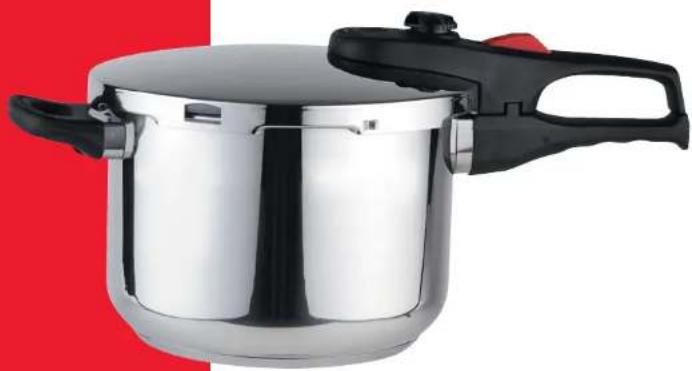
Exterior view of a stainless steel cooking pot with black handle against red background (no text or symbols)PRACTIKA PLUS
natural_image
Exterior view of a stainless steel cooking pot with black handle and red lid, set against a red-and-white background (no text or symbols visible)Super fast pressure cooker
PRACTIKA PLUS

TECHNICAL SUPPORT SERVICE

WARRANTY POLICY
ARGENTINA
BUENOS AIRES
ELECTROSERVICE
Esmeralda 870 -Capital Federal-
TE:4311-1355/6460/4312-3424
DÁURIA
Juramento 1627 -Capital Federal-
TE:4783-7488
ST CENTRAL
R.M. IMPORTS A
Catamarca 3733 - 1651 - San Andrés
Tel. 4768-6277 / 4768-4510 / 4768-5364
BOLIVIA
SERVICIO TÉCNICO CESER.
La Paz : (02)222-4924
Tarlia: (04) 665826
Oruro (02) 5111866
Sucre: (04)6434989
Cochabamba : (04) 4501894
Santa Cruz : (03) 3303292
EL SALVADOR
SAN SALVADOR
12800 NW 38th Avenue
Miami, 33054-4525
T: (786) 594-3781
F: (786) 594-3782
www.magefesausa.com
MÉXICO
DISTRITO FEDERAL
SERVICIO TÉCNICO CENTRAL
P. de la Reforma No. 219-102. Col. Cuauhtémoc
PRODUCTS COVERED BY WARRANTY
PRODUCT: PRESSURE COOKER MODELS:
□PRACTIKA PLUS 4 PRACTIKA PLUS 6 PRACTIKA PLUS 8
□PRACTIKA PLUS TRIO

DISTRIBUTOR'S DETAILS
NAME
ADDRESS TELEPHONE
DATE OF PURCHASE
LIMITED WARRANTY
This Pressure cooker is guaranteed to be free from defects in material and workmanship for a period of 10 YEARS from the date of purchase by the first user, provided that the unit is used in accordance with the use and care instructions supplied, and for household use only.
Moving and/or perishable parts such as gaskets, internal components, etc. which are subject to normal wear and tear are excluded from the warranty.
Also excluded are all defects resulting from accidents, damaged suffered in transit, misuse or negligence (including overheating and boiling dry), normal wear and tear such as scratches, dulling of the polish or staining, etc., and repairs or manipulations carried out by unauthorized or non-qualified personnel. If repairs become necessary during the warranty period, please return the unit, postage pre-paid to:
MAGEFESA
12800 N.W. 38 th Avenue
Miami, 33054-4525
In order for the warranty to be valid the distributor should complete details with a registered dated. After inspection to confirm that the claim satisfies the warranty conditions, the defective piece will, at the discretion of the manufacturer, be repaired or replaced free of charge.
This warranty is in lieu of all other warranties and representations expressed or implied and all other obligations or liabilities of our part.
Incidental or consequential damages are excluded. Some states do not allow exclusions or limitations on incidental or consequential damages or on implied warranties so the above exclusions or limitations may not apply to you.
This warranty gives you specific legal rights and you may have other rights which vary from state to state.
For spare parts or assistance not requiring the return of the product itself, please contact our Customer
Service Departament at (786) 594 - 3781 or email at info@magefesausa.com
CONTENTS
IM09_USAv1
PAGE
- GENERAL DESCRIPTION. 2
- SAFETY INFORMATION. 3
- CONGRATULATIONS. 4
- ADVANTAGES OF YOUR PRACTIKA PLUS PRESSURE COOKER. 4
- MAIN COMPONENTS AND FEATURES. 5
- DIRECTIONS FOR PROPER USE. 8
- USING THE PRESSURE COOKER FOR THE FIRST TIME. 8
- FILLING THE PRESSURE COOKER. 9
- CHECKING THE VALVE. 10
- CLOSING. 10
- COOKING UNDER PRESSURE. 11
- RELEASING STEAM PRESSURE AND OPENING. 12
- CLEANING AND CARE INSTRUCTIONS.
- TROUBLESHOOTING THE PRACTIKA PLUS.
- REPAIR AND SERVICE ADDRESSES. 18
- ENVIRONMENTAL PROTECTION/DISPOSAL.
- TABLE OF COOKING TIMES.
- RECIPES.
- SPARE PARTS.
1. GENERAL DESCRIPTION

PARTS OF THE PRESSURE COOKER
- Lid.
- Red Pressure sensor.
- Pressure Regulating valve.
- Open button.
- Lid handle.
- Safety window.
-
Safety valve.
-
Gasket.
- Helper handle.
- Lower handle.
- Pressure cooker pot.
12.Tri-ply thermo base.
13.Optional steamer insert & trivet.
2. SAFETY

ATTENTION: Read these instructions manual carefully before using the pressure cooker. Keep them safe with your purchase receipt and if possible the original packaging for any future references.
IMPORTANT SAFETY INSTRUCTIONS
Always read the following basic safety measures before using your pressure cooker:
- Read all the instructions carefully before use.
- Never touch hot surfaces. Only hold the pressure cooker by the lid handle and/or side grips.
-
Special attention and close supervision is necessary when the pressure cooker is used near children.
-
Never place the pressure cooker in a heated oven.
-
Read (Section 7) before using the pressure cooker on a burner.
-
Always use extreme caution when handling your pressure cooker, especially when it contains hot liquids.
-
Never use the pressure cooker for anything other than its intended used.
-
This appliance cooks under pressure. Improper use may result in serious and scalding injuries. Ensure the cooker is properly closed before operating. (See section 10).
-
Do not fill the unit over 2/3 of its full capacity. When cooking foods that expand during cooking such as rice or dried vegetables, do not fill the unit over 1/2 full. Over filling may cause a risk of clogging the vent pipe and developing excess pressure. (See section 8)
-
Be aware that certain foods, such as applesauce, cranberries, pearl barley, oatmeal or other cereals, split peas, noodles, macaroni, rhubarb, or spaghetti can foam, froth and sputte, and clog the pressure release device (steam vent). These foods should not be cooked in a pressure cooker.
-
Always check the pressure release devices for clogging and maintenance before use. (See section 9).
-
Do not open the pressure cooker until it has cooled down and the internal pressure has been released. If the handles are difficult to be pushed apart, this indicates that the cooker is still pressurized. Do not force it for opening. Any pressure in the cooker can be hazardous. (See section 12)
-
This pressure cooker must not be used for frying with oil under pressure.
-
Follow the instructions for cleaning and care after each use. (See section 13)
-
After normal cooking pressure has been reached, reduce the heat so that all the liquid inside the cooker does not escape as steam. (See section 11)
-
Only use authentic replacement parts manufactured and distributed by MAGEFESA. You can buy them at www.magefesausa.com.
-
SAVE THESE INSTRUCTIONS. If any reason you loose them you can download your free copy at www.magefesausa.com
3. CONGRATULATIONS
Thank you for choosing our Magefesa Practika Plus pressure cooker. We appreciate your confidence in our company. The Magefesa pressure cooker you just purchased is one of the finest pressure cookers In the market. Designed and engineered in Spain with the highest and better standards. This Magefesa pressure cooker will give you many years of tasty and healthy meals.
4. ADVANTAGES OF THE "PRACTIKA PLUS"
With your Practika Plus pressure cooker you will cook extraordinary and healthy meals for all your family in just a few minutes. You will enjoy the flavors and aromas of traditional cooking preserving all vitamins and natural food juices.
With your Practika Plus pressure cooker you will require less cooking liquids than with traditional cooking and even less than with first generation pressure cookers (with jiggle valves). During cooking time no steam release will be necessary to keep inner pressure stable. Furthermore all water-soluble vitamins and minerals will be retained in the pressure cooker and foods will preserve all their taste, colors and avors.
With your Practika Plus you will save money at home. You will be able to cook up to 3 times faster than with traditional cookware so your electricity or gas bill will be reduced considerably. The reason is quite simple. Faster you cook, less energy is needed. You will save time and money for yourself.
Your Magefesa Practika Plus pressure cooker is one of the safest in the world. With the automatic locking system, the safety locking handle will prevent the opening of the lid while pressurized. Both the regulating and safety valves and the window overpressure are release pressure systems. With its 5 security devices, we warranty you that this model of pressure cooker is one of the safest in the market.
With this Practika Plus pressure cooker you will forget the traditional jiggle noise of the old style pressure cookers and you will not smell the food.
With your Magefesa pressure cooker you will be happy in your kitchen thinking that you own the right piece of cookware to feed yourself and your family in less than 20 minutes (just the time you wait for a delivery meal) and with almost any effort, and taking control about the foods you eat. You will taste a healthy and wonderful meal.
Enjoy!
5. MAIN COMPONENTS AND FEATURES
INCORPORATED SAFETY DEVICES
This model of pressure cooker has been designed with 5 security systems. Prior to use it, please take time to get familiar with these important components and how they work. The 5 safety systems are as follows:
- Easy Lock: With this system the pressure cooker will be automatically locked only if lid and body are correctly aligned according with closing instructions referred in section # 10 of this Instructions manual. The main feature of this Easy lock system is to avoid accidents because of an incorrect or inadequate closing process. If the Red Open button (part#4) does not move back the pressure cooker will not be able to generate pressure. The pressure cooker is properly closed when both handles (lid and lower handle) are aligned and a clear “click” sound is heard. Easy and safe.
- Red pressure sensor: When the pressure cooker is correctly closed, the regulating valve is either in position I or II and the pressure cooker is heated in a hotplate or ring, steam will be generated inside the pot and the red pressure sensor will rise up and block the opening system avoiding voluntary opening of the pressure cooker. The pressure sensor rises up at around 0.58 psi of pressure (0.04 bar).
If this red pressure sensor is up that means there is still pressure inside the unit. While the red pressure sensor is up you must not open the pressure cooker.
- Pressure regulating Valve: This is one of the most important features of this pressure cooker. It will allow you to choose how fast you want to cook with your unit. You can select the right pressure level according to the type of food, your time and your experience. This Pressure regulating valve has 4 positions: according to each requirement select the necessary pressure level (High or low).
Please remember that in this type of pressure cooker you do not need to hear any jiggle noise and no steam release will be necessary. The pressure cooker operates quietly.
We highly recommend to select the desired pressure level before starts cooking. If you change the pressure level while the cooker is in operation you could lose efficiency and some benefits.
- Safety Valve: Inside the Red pressure sensor is located the safety valve. This safety valve will operate when a certain pressure level has been reached by the pressure cooker. This pressure level only may be reached if pressure regulating valve get clogged. This is not usual if you take the minimum checking procedures detailed in this Instructions manual before each use. If the safety valve operates and release steam remain calm but take out immediately the pressure cooker from the heating element.
Magefesa
- Lid edge Safety Window: As a final safety system, the pressure cooker is designed with a special window on the edge of the lid. If an overpressure happens and the other security systems get clogged at a range between (26.1 to 45.4 psi) - (1.8 to 3.0 bar) the gasket will be deformed to depressurize the pressure cooker getting out the over pressure through this window.
PRESSURE REGULATING VALVE POSITIONS.
∅ Off: In this position the Pressure cooker is Off. That means it will be impossible to reach any pressure level inside the pressure cooker. In this position all the steam generated inside the cooker will be automatically and constantly released. It will work like a regular pot with lid. Do not turn the regulating pressure valve to off position, while pressure cooker still contains pressure.
Pressure release position: When you place the regulating valve in this position, the pressure cooker will automatically release all the steam inside the pot. After you finish the releasing process, you will be able to open the lid. As an extra safety measure, if the inner pressure level remains higher than recommended, you will not be able to open it safely.
As an additional safety measure we highly recommend to operate the pressure regulating valve protecting your hands with a mitten. This part may be hot because of the steam releasing feature.
I Low pressure position: The lower cooking pressure level of your model is 8.7 psi (or 60 Kpa for Europe). This pressure is recommended for soft foods like rice, pasta, fish, some vegetables, etc... The pressure valve will keep stable this pressure inside the cooker.

II High pressure position: The highest cooking pressure level of your model is 15 psi (or 100 Kpa for Europe). This pressure is recommended for hard foods like meats, legumes, etc... The pressure valve will remain stable and maintain the highest pressure inside the cooker. No steam release is required. If this happens, reduce the heat of your stove to the minimum.
To move the regulating valve grab the valve cap with two fingers, push it down gently and turn right to the desired position (I - II or Ⓤ). NEVER turn right the valve to the position 0 while the pressure cooker is not totally depressurized, (to confirm check if red pressure sensor is down).
OTHER FEATURES.
- The triple impact diffused base or tri-ply base has been especially designed for extra resistance and evenly heat distribution.
- The thickness of the base is larger than common pressure cookers, giving extra heat absorption.
- The regulating pressure valve allows you to vary the pressure throughout the cooking process.
- No steady steam release is required so you can cook with less water and without noise and smell. Just use the right heat to keep pressure and let the cooker work.

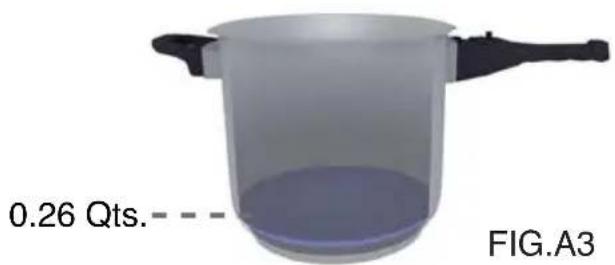
ATTENTION: DO NOT USE THIS PRESSURE COOKER FOR PRESSURE FRYING WITH OIL. ALWAYS USE AT LEAST 0.26 QTS OF LIQUID IN THE COOKING PROCESS.
ATTENTION: IF THE PRESSURE COOKER HAS BEEN HEATED WITHOUT ANY CONTENTS OR FOOD, PLEASE CONSULT THE NEAREST AUTHORISED TECHNICIAN BEFORE USING IT AGAIN.
ATTENTION: DO NOT PLACE THE PRESSURE COOKER IN A HEATED OVEN.
ATTENTION: NEVER OPEN THE PRESSURE COOKER TOWARDS YOUR FACE SINCE THERE MAY BE INTENSE COOKING STEAM STILL INSIDE THE UNIT.
THE "PRACTIKA PLUS" PRESSURE COOKER IS MADE FROM HIGH-QUALITY HEAVY-GAUGE 18/10 STAINLESS STEEL AND ITS THERMO HEAT CONDUCTIVE BASE MAKES IT SUITABLE FOR ALL COOKING SURFACES INCLUDING MODERN INDUCTION HOBS.
6. DIRECTIONS FOR PROPER USE
This product is intended for domestic cooking surfaces only, do not use pressure cooker for other than its intended use.
MAGEFESA pressure cookers are particularly suitable for foods that normally require a long cooking time, like:
- Soups, meats (joints, goulash, stews etc), vegetables, potatoes / some cereals and pulses, desserts.
Depending on the size of the pressure cooker you would be able to use this unit to pressure canning. For pressure canning, you will need special accessories. The pressure cooker cooks under pressure. Although the pressure cooker is characterized by a level of quality and safety, injury (by scalding) or material damage resulting from misuse or improper use cannot be ruled out. For this reason, take careful note of this instructions manual.
7. USING THE PRESSURE COOKER FOR THE FIRST TIME
Before using the pressure cooker the first time, wash the pot, lid and gasket with hot soapy water. Also it is recommended to fill with water 1/2 of its capacity and boil the pot without the lid for half hour to remove any dirt and dust. After washing out the pressure cooker thoroughly with warm water and washing-up liquid, place a few drops of cooking oil into the pressure cooker prior to its first use and then wipe them out with a paper kitchen towel. On electric cookers, the diameter of the pressure cooker base should match the one from the hotplate or ring. The compatible burner diameter is etched into the base of the pot. If you cook with gas, never allow the gas flame to lick the sides of the pot. If you do it, the exterior of the pot will become discolored and the grips (or handles) will be overheated and damaged. Always adjust the burner to verify that the flames remain under the base and do not extend up the sides.

8. FILLING
- Never fill the pot more than 2/3 of its capacity including the liquid you have added (FIG. A1).
- When cooking food that expand during cooking such as rice or dried vegetables do not fill the unit over 1/2 of its capacity (FIG. A2).
If overfilled, the safety elements may become impaired (risk of scalding).
- Never forget to add liquid, never use less than 0.26 Qts. (1/4 liter) of liquid as this could cause dry cooking, resulting in damages to the pressure cooker, as complete evaporation will spoil food and overheat the cooker (FIG. A3).
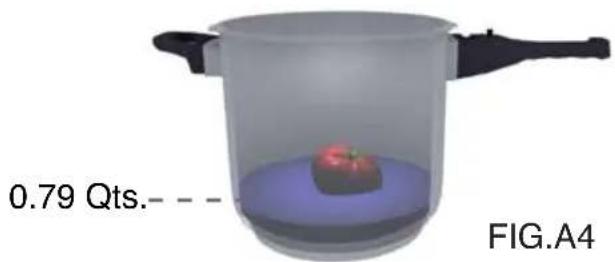
- For steaming, place insert in 0.79 Qts. (3/4 liter) of boiling water. Place ingredients in the optional steamer insert (FIG. A4).
- Be aware that certain foods such as pearl barley, fruits and pasta can produce foam blocking the pressure release systems (steam vent). These foods should not be cooked in a pressure cooker. Stir salt until is completely dissolved. To avoid damage to the stainless steel, do not store salt water or heavily salted foods in the pressure cooker. Even the smallest amount of dampness containing salt could cause corrosion.
maximum quantity


minimum quantity
9. CHECKING THE VALVE
The valves are safety devices. Always check them to be sure they are not clogged.
1 Red pressure sensor checking: Take the lid and turn it back. Just at the back side of the lid handle you will see a limit. Push it smoothly with a blunt element (ie pen or screwdriver). Immediately the closing system will move back to the position B (see image ...). In this position the lid simulates been closed. Then move up and down the red pressure sensor to be certain that it moves freely. It is very important because this safety element has to block the opening system only when there is a minimum pressure inside the cooker. After check turn the lid. By gravity the red pressure sensor will drop. Push the red open button to leave the lid in opening position.
2 The safety valve. Inside the red pressure sensor there is another security valve. This is a spring valve. So to check if this one is not blocked you have to push smoothly in the center of the base of the red pressure sensor. You have to feel some resistance because of the spring that contains the valve but you have to move it easily. If you feel the unit is blocked, don't use the pressure cooker and proceed to clean or replace the safety valve before using the pressure cooker.

10. CLOSING
-
Place the gasket carefully into the lid, ensuring that it lies on the roof and under the anges.
-
Place the contents inside the pressure cooker and the recommended liquid quantity.
-
Place the lid (1) on the pressure cooker pot (11) align the mark ● on the lid (1) with the mark ↑ on the base handle or lower handle (10) tting together the lid with the pot (FIG. 1).
-
Press down the lid lightly (1) and turn clockwise (FIG. 2) just until the two handles match up and lock together (FIG. 3).
-
When the two handles match correctly you will hear a "click" sound. The red opening button will move back automatically. Your pressure cooker is safely closed. If you do not close the lid properly, the red button will not be able to get back and the lid will not be closed. Even if you put the pressure cooker on the stove, the steam will be released through the red pressure sensor.

natural_image
Close-up of a mechanical component with a red circle highlighting a small feature (no text or symbols visible)
natural_image
Close-up of a metallic object with a red 'X' mark on its surface (no text or symbols visible)- To start generation pressure, turn the regulator valve from release steam position to I or II. If you keep the pressure regulator valve at release steam position the necessary inner pressure will not be generated.

11. COOKING UNDER PRESSURE
Place the cooker properly closed on a heat source according to the size of the pressure cooker base. See underneath of the cooker base for correct size. Then turn the heat source up to almost full power. Take note that if too much heat is applied, the pressure regulating valve will full release steam right away. This is a sign that the heat should be reduced.
Any air inside the pressure cooker is firstly released through the red pressure sensor just when foods and liquids start to boil and inner pressure begin to be generated. In this initial process we recommend to turn the heat source up almost to full power to the moment when the pressure regulating valve begins to release some steam. From this moment cooking time should start and heat source must be adjusted or reduced. Please Note:
- Cooking time begins when pressure level selected is reached.
- When the steam comes out from the pressure regulating valve for the first time we recommend to lower the heat.
- To avoid damage to the pressure cooker, never allow it to boil dry.
- Never leave an empty pressure cooker on a hot hob.
- In case of problems while cooking, remove the pressure cooker from the heat source and allow it to cool down completely. See section 14 to learn how to solve minor problems and practical tips and solutions.
Magefesa
- Never open the pressure cooker towards your face since there may be intense cooking steam still inside the unit.
- Always face safety vent on the side of the lid away from yourself while cooking.
- When changing pressure levels/moving the pressure regulating valve, we recommend to protect your hands with a heat resistant mitten.
- Always follow instructions about what kind of food is suitable to be cooked in a pressure cooker.
- Never use this pressure cooker for frying with oil under pressure.
12. RELEASING STEAM PRESSURE AND OPENING
The pressure cooker can only be opened when there is no pressure inside it. This is a safety feature. Reduce the pressure in one of the following ways:
- Natural pressure release: Remove the pressure cooker from the heat source and allow it to cool down naturally. Depending on the amount of food and liquid on the cooker this method may take around 10 to 15 minutes.
Passed these 15 minutes, turn the regulating valve to the "release position" and check when the red pressure sensor gets down to open the pressure cooker safety.
- Automatic Release: Remove the pressure cooker from the heat source, place the regulating valve in the release position and allow the steam to come out completely so you can open pressure cookersafety. We only recommend this automatic release method for foods cooked at the lowest pressure level (position I).
natural_image
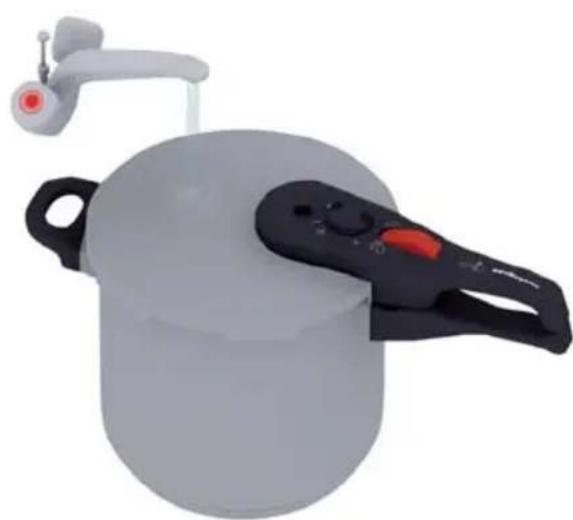
3D rendering of a white cooking pot with black handle and red handle, mounted on a surface with a faucet (no text or symbols visible)- Fast pressure reduction: Place pressure cooker under running water but prevent water from being sucked into the cooker.
This method is used to release pressure as quickly as possible. Primarily used for vegetables, seafood and other tender foods that can quickly overcook. To use this method, remove the pressure cooker from the burner, place it in the sink and run cold tap water gently over the lid until steam disappears completely and the pressure indicator is lowered. When putting the cooker in the sink, tilt it so the cold water runs downwards.
There is no remaining pressure in the cooker when the "Red pressure sensor / Safety valve" (7) remains in its lowest position. After all pressure has been released, for opening the cooker, slide the pressure cooker red button forward. Grasp the bottom of the base handle with your left hand and with your right hand on the lid handle slowly rotate the lid counter clockwise. The lid can now be easily removed.
Even though you have already released the pressure never open the pressure cooker towards your face since there may be intense cooking steam still inside the pot. (FIG 9)
When cooking sauces, make sure they are not too thick. Shake the cooker slightly before opening it, always making sure that all pressure has already been released. Never use force to open the lid. After cooking mash type foods (like grains or pulses) or foods with a high fat content, shake the cooker gently before opening the lid. This will prevent the contents spitting when the lid is opened.

natural_image
Two identical diagrams showing a tool interacting with a device, one with a red arrow indicating motion or change, the other with a black arrow indicating rotation (no text or symbols present)PRESSURE REDUCTION TIPS FOR SPECIFIC FOODS:
- Foods with a short cooking time: Use fast pressure release system with rice or some vegetables, otherwise foods can become overcooked.
- Vegetables with a long cooking time / soups / meats, completely covered by liquid / potatoes / cereals / dried pulses: Use slow pressure release system. Do not use water to cool down the pot! (Potatoes could otherwise fall apart)
- Meat / vegetables / frozen vegetables / fresh fruits / dried foods (excluding pulses): Use normal or fast pressure release system. For ready-prepared meals, allow the pressure cooker to stand beside the heat source for one minute before reducing pressure).
- Fish / risotto: Use fast pressure release system.
- Foods with a high fat content or mash-type foods (e.g. dried pulses): Use slow pressure release system and gently shake the cooker before opening the lid to prevent the contents from spitting when the lid is opened. After cooking meat with skin (e.g. ox tongue) which may swell under the effect of pressure, do not prick the meat while the skin is swollen as you might be scalded.
13. CLEANING AND CARE INSTRUCTIONS
To maintain your pressure cooker in its original state, this one should be washed with warm water, mild dish-washing soap and a non abrasive cleaning pad after each use. SEE THE FOLLOWING INSTRUCTIONS (FIG. 7a, 7b, 7c, 7d).
Never use dishwasher to clean you pressure cooker. Stainless steel may be discolored in a dishwasher because of long time action of hot water and salt.
LID
To remove any unwanted food deposits, clean the pressure sensor, pressure and safety valves by rinsing them with warm water.
Never clean lid (1) in the dishwasher as this may cause serious damages.
POT
-
From time to time, depending on the food and additives used, as well as the lime content in water, gold-coloured or bluish spots may appear on the bottom. To remove stubborn stains and any discoloration in the interior of the pressure cooker, try adding half lemon juice and 1 to 2 cups of water to the pressure cooker pot. Cook it at high pressure for 15 minutes, then remove from heat. Let pressure release naturally, then wash properly.
-
Never use corrosive or abrasive detergents like bleach (not even dilute in water), and foods with a high acidity content or salt water for long periods of time.
RUBBER GASKET
-
The gasket is made from hard wearing silicone. Wash the gasket with warm soapy water, after rinse it well and towel dry. Cover it with a thin coat of cooking oil. Follow this procedure every time you wash the pressure cooker in order to extend the life of the gasket.
-
When storing the pressure cooking, place the lid face down allowing ventilation and preventing any bad odors.

flowchart
graph TD
    A["Start: Lamp with red flame"] --> B["Step 1: Processed cooking"]
    B --> C["Step 2: Stabilized cooking pot with soap and bottle"]
    C --> D["Step 3: Stabilized cooking pot with soap and bottle"]
    D --> E["Step 4: Stabilized cooking pot with soap and bottle"]
    E --> F["End: Close-up of pan with hand near handle"]
REGULATING AND SAFETY VALVES:
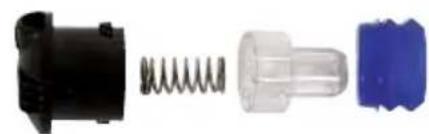
Place the pressure regulating valve (3) in position 0, remove all pieces and clean each piece (FIG. 7e) as instructed. This valve contains 4 pieces: the upper cap, the spring, the silicone cylinder cover and the inner plastic limit. For cleaning them you have to dismantle the 4 pieces, wash them with warm water and mild washing soap. Dry and assemble the pressure valve again. For assembling, take the upper cap, put the spring just in the inner inside, introduce the upper edge of the spring in the wide plastic base and finally fit the silicone cylinder cover. Push smoothly the central plastic limit to check that the system flex correctly.
Loose the Safety valve (7) with an appropriate tool (FIG. 7f) and clean as instructed, return all pieces to the pressure cooker, without forgetting any small parts.
natural_image
Four types of plastic connectors or seals: black, white, and blue, arranged vertically (no text or symbols visible)
natural_image
Top-down view of a spacecraft's helmet and antenna (no text or symbols visible)
natural_image
Close-up of a mechanical component with a red arrow indicating a specific feature (no text or symbols visible)FIG.7g

ATTENTION: THE RUBBER GASKET IS CONSIDERED WORN WHEN, DUE TO USE, THE PRESSURE COOKER STARTS LOSING STEAM AND DOES NOT REACH ENOUGH PRESSURE. FOR BETTER RESULTS, THE RUBBER GASKET SHOULD BE REPLACED APROXIMATELY EVERY TWO YEARS.
ATTENTION: DO NOT CLEAN ANY PART OF THE PRESSURE COOKER IN THE DISHWASHER.
Never remove stains or baked-in marks with abrasive tools such as knives, steel, wool or copper cloths. Instead, soak it with hot water with a little bit of detergent until stains can be easily removed with a soft brush, sponge or cloth.
Do not use any corrosive agents like bleach (not even dilute in water) for cleaning. Remove obstinate calcium stains (white spots) with a few drops of vinegar or lemon juice. If it is difficult to turn the lid for closing, then apply a light film of cooking oil to the rubber gasket. When storing, DO NOT LOCK THE LID IN PLACE. Simply place the lid upside-down on the pot, so that the rubber gasket inside the lid remains unstressed and free of deformation.
14. TROUBLESHOOTING THE PRESSURE COOKER
Before you begin cooking, it is important that you read this detailed instructions manual and make sure you understand how to operate the pressure cooker. If you are unsure about using your pressure cooker or the safety systems, do not use it and contact your retailer or MAGEFESA.
For your reference, here we mention some practical tips and some common problems you may experience using a pressure cooker:
CASE: PRESSURE DOES NOT BUILD UP
POSSIBLE REASONS:
1.- Pressure cooker lid it is not correctly closed.
2.- Silicone gasket is not in place, or is dirty or worn.
3.- There is not enough liquid inside the pressure cooker.
SUGGESTIONS:
1.- Open again, and carefully proceed to close the lid according with section 10.
2.- Check the silicone gasket is clean and correctly located.
3.- Check the gasket is not worn. We recommend to change the gasket yearly considering regular use.
CASE: STEADY STREAM OF STEAM IS RELEASED FORM THE REGULATING VALVE
POSSIBLE REASONS:
1.- The burner is too high.
2.- The regulating valve is dirty.
3.- The regulating valve need to be replaced.
4.- The regulating valve is not in the correct position (I or II).
SUGGESTIONS:
1.- Lower the burner or hot plate. If electrical residuary heat may be enough to cook the food.
2.- Check the regulating valve and clean it following the section 13 directions. 3.- Check the regulating valve is in the right position I or II.
3.- If after clean and verify the regulating valve is not obstructed, the malfunction persists, proceed to change the regulating valve going to www.magefesausa.com
| POSSIBLE REASONS:1.- Pressure cooker lid it is not correctly closed.2.- Silicone gasket is not in place, or is dirty or worn.3.- The pressure cooker is too much full. | SUGGESTIONS:1.- Open again, and carefully proceed to close the lid according with section 10.2.- Check the silicone gasket is clean and correctly located.3.- Check the gasket is not worn. We recommend to change the gasket yearly considering regular use.4.- To improve the gasket sealing performance lubricate it lightly with cooking/vegetable oil or moisten with a little water.5.- Never fill the pressure cooker more than 2/3 full. Some foods tend to foam. In these cases fill 1/2 full. See section 8 for reference. |
CASE: EFFORT IS REQUIRED TO OPEN /CLOSE THE LID
| POSSIBLE REASONS:1.- (If opening) There is still pressure inside the pressure cooker.2.- Silicone gasket is not in place, or is dirty or worn.3.- The handles of pressure cooker are not correctly aligned to proceed with opening/close. 4.- The red button of the lid is not in the appropriate position. | SUGGESTIONS:1.- Proceed with on of the releasing methods mentioned in this Instructions Manual section 12.2.- Check the red pressure sensor is dropped.3.- Check the gasket is in good conditions. If gasket is not worn, lubricate it lightly with cooking/vegetable oil or moisten with a little water.4.- To open and close properly the pressure cooker always move the handles clockwise or counterclockwise from and up to the marks on the lid and the lower handle. When open or close never force the lid.5.- Verify the red button is in the "Open" position (push forward to the regulating valve). 6.-When closing the lid, if handles are correctly aligned, it may be easy if you apply a little pressure with you hand at the end of the lid just opposite the handle. |
15. REPAIR AND SERVICE ADDRESS
Do not modify the pressure cooker, particularly the safety systems in any way.
Using replacement parts made by a different manufacturer can detrimentally affect the safety of your pressure cooker. MAGEFESA cannot check every accessory available on the market.
Only use authentic spare parts manufactured and distributed by MAGEFESA.
Before calling the service center or entry the web site please take few seconds to identify your model and the element you need to buy or replace. To do so please keep this instructions manual and check the required spare part in the exploding diagram included in section 1.
For repairs, original spare parts and information, contact your dealer or a MAGEFESA service center:
MAGEFESA
12800 NW 38th Avenue
Miami, 33054-4525
T: (786) 594-3781
F: (786) 594-3782
www.magefesausa.com
16. ENVIRONMENTAL PROTECTION / DISPOSAL
Cookware, accessories and packaging should be recycled in an environmentally-friendly manner. Please comply with your national and regional regulations.
17. COOKING TIME
FOOD COOKING TIME
(MIN)
COOKING LEVEL LIQUID ADDED
SOUPS
Broth 20 1 as required
Pea soup 12 1 as required
Vegetable soup 5-8 1 as required
Semolina soup 8 1 as required
Goulash soup 20 1 as required
Chicken broth/hen 40 1 as required
Chicken/pullet 15 1 as required
Potato soup
Flour soup
Minestrone
Oxtail soup
Beef soup (pot-au-feu)
Onion soup
6 1 as required
12 1 as required
8 1 as required
30 1 as required
45 1 as required
4 1 as required
FISH (With trivet)
Whole sh or large sh tail
Fish portions
Large sh llets
Fish soup
6 1 in pan up to trivet, *
3 1 in pan up to trivet, *
2 1 in pan up to trivet, *
5 1 in pan up to trivet, *
MEAT
Veal joint
Knuckle of veal (piece)
Knuckle of veal (sliced)
Veal stew
Veal tongue
Veal head
Beef joint/Sauerbraten
Beef paupiettes (roulades)
Sliced beef
Beef schnitzel in its own sauce
Beef stew/goulash
30 2 acc. to recipe, *
45 2 acc. to recipe, *
25 2 acc. to recipe, *
20 2 acc. to recipe, *
40 2 cover completely with water
20 2 cover completely with water
45 2 acc. to recipe, *
13 2 acc. to recipe, *
12 2 acc. to recipe, *
15 2 acc. to recipe, *
25 2 acc. to recipe, *
Broccoli 2 2 up to trivet, *
Fennel 6 2 up to trivet, *
White cabbage, halved 6 2 up to trivet, *
Chestnuts 12 2 up to trivet, *
Sugar peas 3 2 up to trivet, *
Kohlrabi (kale turnip) halved / sliced 6/2 2 up to trivet, *
Leek, sliced 3 2 up to trivet, *
Corn cobs 7 2 up to trivet, *
Sweet peppers, sliced / paprika 3 2 up to trivet, *
Swedes, quartered 12 2 up to trivet, *
Swedes, sliced 52 up to trivet, *
Beetroot 25 2 up to trivet, *
Brussels sprouts 4 2 up to trivet, *
Red cabbage 10 2 up to trivet, *
Carrots 62 up to trivet, *
Sauerkraut, raw 30 2 up to trivet, *
Black salsify 12 2 up to trivet, *
Celery halves, sliced 6/2 2 up to trivet, *
FROZEN VEGETABLES, NOT THAWED (With trivet)
| Spinach leaves (500g) | 10 2 only to trivet | |
| Cauli ower, in orets | 6 2 only to trivet | |
| Beans | 5 2 only to trivet | |
| Broccoli, in orets | 5 2 only to trivet | |
| Sugar peas 4 2 only to trivet | ||
| Brussels sprouts | 3 2 only to trivet | |
| Red cabbage, cooked (500g red cabbage) | 12 2 | only to trivet |
POTATOES (With trivet) (Cooking time for new potatoes is reduced by up to one third)
| Potatoes in jackets | 7-10 2 up to trivet, * |
| Boiled potatoes (quartered) | 4 2 ditto |
| Sliced potatoes | 2 2 ditto |
FRESH FRUIT (With trivet)
| Pears, apples, peaches, plums, apricots | 3 2 up to trivet,* |
| Quinces | 10 2 up to trivet,* |
| Chestnuts 12 2 up to trivet,* |
* At least 250 ml / 8 oz
Boiled beef 45 2 acc. to recipe, *
Knuckle of beef 35 2 acc. to recipe, *
Beef tongue 50 2 cover completely with water
Pork joint 40 2 acc. to recipe, *
Sliced pork 13 2 acc. to recipe, *
Knuckle of pork 40 2 acc. to recipe, *
Pork stew/goulash 25 2 acc. to recipe, *
Loin of pork 20 2 acc. to recipe, *
Pickled pork leg 35 2 cover completely with water
Smoked bacon 25 2 cover completely with water
Salted or unsalted bacon 202 cover completely with water
LAMB
| Roast joint | 30 2 acc. to recipe, * |
| Lamb stew | 20 2 acc. to recipe, * |
GAME
| Hare joint | 30 2 acc. to recipe,* |
| Deer joint | 30 2 acc. to recipe,* |
| Jugged game | 18 2 acc. to recipe,* |
| Sliced game | 20 2 acc. to recipe,* |
MISCELLANEOUS
| Minced meat (pork, lamb or beef) | 8 2 acc. to recipe, * | |
| Rabbit (joint, pieces) | 30 2 acc. to recipe, * | |
| Tripe | 15 2 acc. to recipe, * | |
| Meat broth 30 2 | acc. to recipe, * | |
| Meat terrines | 15 2 | acc. to recipe, * |
| Warming meat dishes | 3 2 | acc. to recipe, * |
| Aspic, jelly | 60 2 | acc. to recipe, * |
POULTRY
| Poultry in pieces | 8 2 | acc. to recipe, * |
| Whole chicken | 15 2 | acc. to recipe, * |
FRESH VEGETABLES (With trivet or steamer insert)
| Artichokes | 14 2 | up to trivet, * |
| Leafy vegetables (chard stalks, lettuce) | 3 2 | up to trivet, * |
| Cauli ower | 3 2 | up to trivet, * |
| Beans | 3 2 | up to trivet, * |
18. RECIPES
The cooking times listed in the following tables may vary slightly according to food type, storage and quality.

5 MIN
INGREDIENTS
1-1/2 pounds stew meat about 1/4 coup flour 2 tables spoons oil 1 large onion cut in 8 pcs. 6 cups hot beef broth 6-8 carrots cut into 1" pcs. 3-4 potatoes cut into 1" chunks 3 stalks celery, cut into 1" pcs. 1/2 teaspoon salt, or to taste Pepper to taste
BASIC BEEF STEW
Flour and season meat. Heat oil in cooker over medium heat. Add the meat and cook uncovered until well browned. (The longer you brown the meat, the darker your sauce will turn be).
Add hot broth and the onion. Bring to a boil, stirring occasionally. Close cover and bring to high pressure. Lower heat and cook 15 minutes. Remove from heat, let pressure reduce using the Natural Release method. Remove cover.
Add the remaining vegetables and salt and pepper. Close cover and return to high pressure.
Lower heat and cook 5 more minutes. Again, remove from heat and reduce pressure using the Natural Release method. Remove cover. Check seasonings and serve.

10 MIN
INGREDIENTS
1-1/2 pounds coarsely ground lean beef 2 medium onions, chopped 3 cloves garlic, minced 1-1/2 cups beef broth 14-oz. can tomato puree 1 teaspoon ground cumin 1/2 teaspoon dried oregano 3 tablespoons chili powder 1 to 2 teaspoons salt. 1/2 teaspoon pepper Cayenne pepper 15-oz. can pinto beans, drained 2 tablespoons corn meal 1/2 cup hot water
CHILI WITH BEANS
Brown meat with onions and garlic in uncovered cooker over medium heat. Drain if necessary. Add broth, tomato puree, and seasonings. Bring to a boil, stirring occasionally. Close cover and bring to high pressure. Lower heat and cook for 10 minutes. Remove from heat and let pressure reduce using the Natural Release method. Remove cover.
Add beans and bring to simmer in uncovered cooker. Combine corn meal and hot water and stir into chili. Cook and stir until thickened. Season to taste. Serve sprinkled with grated cheddar cheese and chopped raw onion.
20 ^MIN
SWISS STEAK
1-1/2 pounds round steak,
cut 1/2 inch thick
1/3 cup flour
1/2 teaspoon salt
Pepper to taste
3 tablespoons oil
3/4 cup water
1/4 cup dry red
or white wine
1 teaspoon dried
sweet basil
1/2 teaspoon dried thyme
1 large onion cut in 1/8"
slices
116 oz. can stewed tomatoes,
drained (reserve liquid)
Salt and pepper to taste
Cut steaks into serving size pieces. Flour and season meat. Heat oil in cooker over medium heat. In small batches, add the meat and cook until well browned. Remove meat, set aside. In cooker mix water, wine, reserved stewed tomato liquid, bouillon and spices. Place meat in cooker, top with onion and tomatoes. Bring to boil, close cover and bring to high pressure. Lower heat and cook for 20 minutes. Remove from heat, let pressure reduce using the Natural Release method. Remove cover, check seasoning and serve.
68 MIN INGF
POT ROAST WITH VEGETABLES
3 to 4 pound chuck or pot roast 2 tablespoons flour
Salt & Pepper, and seasonings of your choice
-garlic powder, herbs, or seasoned salt to taste
2 tablespoons oil
3 cups liquid of your choice (broth, wine and/or water)
2 onions, 2 potatoes, 4 carrots, 1/2 package cut into 1" pcs.
frozen Italian green beans thawed (optional)
Trim fat from roast. Flour and season meat. Heat oil in cooker over medium heat, adding additional oil if needed. Brown roast and onions together over medium heat in cooker with cover off. When roast is brown on both sides, add liquid. Bring to a boil. Close cover and bring to high pressure. Lower heat and cook 60 minutes. Remove from heat, let pressure reduce using the Natural Release method. Remove cover.
Add vegetables. Close cover and return to high pressure. Lower heat and cook 8 more minutes.
Again, remove from heat and reduce pressure using the Natural Release method. Remove cover and serve.

30
MIN
INGREDIENTS
2 pounds lean lamb stew meat, cut into 1-1/2 in cubes 2 or 3 tablespoon flour 2 tablespoons oil 2-1/2 cups water 1 more tablespoon oil 2 cloves garlic, minced 1/2 cup chopped onion 2 tablespoons chopped fresh parsley 1/4 teaspoon dried basil 1/4 teaspoon dried marjoram 1 bay leaf 1 teaspoon pepper 2 tablespoons tomato paste 4 carrots cut into 1" pieces 2 turnips, peeled & quartered 2 large potatoes, scrubbed or peeled and cut into 8 pieces 6 small boiling onions, peeled /2 package frozen peas (about 1 cup), thawed
LAMB STEW
Flour and season meat. Heat 2 tablespoons oil in cooker over medium heat. Add the meat and cook uncovered until well browned. Remove cooker from heat. Remove meat from cooker and set aside. Put 1/4 cup of the water in cooker and stir to loosen browned particles. Return cooker to stove and heat 1 tablespoon oil over medium heat. Add chopped onion and garlic and sauté a few minutes.
Add the meat, parsley herbs and seasonings, tomato paste, and remaining water. Bring to a boil, stirring occasionally. Close cover and bring to high pressure. Lower heat and cook for 15 minutes. Remove from heat and reduce pressure using the Natural Release method. Remove cover. Add all remaining vegetables except peas and stir. Close cover and return to high pressure. Lower heat and cook for 8 minutes. Remove from heat. Reduce pressure using the Natural Release method. Remove cover. Stir in peas and let stew sit for 5 minutes before serving.

20
MIN
INGREDIENTS
4 large lean pork chops, 1" thick 1/4 cup flour 2 tablespoons oil 2 tablespoons vinegar 3/4 cup water 1 clove garlic, minced 1 large onion, finely chopped teaspoon ground ginger 1 teaspoon dry mustard tablespoon brown sugar 1 teaspoon salt 1/4 teaspoon pepper 18-oz. can unsweetened pineapple, with liquid 1 tablespoon cornstarch 1/4 cup cold water
SOUTH SEAS PORK CHOPS
Trim fat from pork chops. Flour chops. Heat oil in cooker over medium heat. Add the chops and cook uncovered until browned. Add remaining ingredients except the cornstarch and 2 tablespoons water. Bring to a boil, stirring occasionally. Close cover and bring 10 high pressure. Lower heat and cook for 20 minutes. Remove from heat. Reduce pressure using the Natural Release method. Remove cover. Remove chops. Combine the cornstarch with water and stir until smooth.
Stir into sauce and bring to a boil just until sauce is thickened and translucent. Spoon sauce over chops to serve.

8 MIN
INGREDIENTS
Non-stick cooking spray 2 tablespoons oil 1 whole chicken 1/2 cup hot water Salt and pepper to taste Paprika and/or poultry seasoning to taste
WHOLE ROAST CHICKEN
Spray interior of cooker base with non-stick cooking spray. Heat oil in cooker over medium heat. Place chicken in cooker and brown gently, turning to brown all sides as evenly as possible, until golden. Remove cooker from heat and remove chicken from cooker. Put 1/2 cup hot water in cooker and stir to loosen brown particles. Return cooker to stove and place chicken in cooker, breast side up. (You can put chicken directly on bottom of cooker or place it on a trivet or rack to keep it up out of the drippings).
Sprinkle chicken with salt, pepper and seasonings to taste.
Close cover and bring to high pressure. Lower heat. Cook for 5 minutes per pound. (Cook 8 minutes per pound for stuffed chicken). Remove from heat; reduce pressure using the Natural Release method. Remove cover. Remove chicken, make gravy. If desired. Carve and serve.

13 MIN
INGREDIENTS
Non-stick cooking spray 2 tablespoons oil 1 whole chicken 1/2 cup hot water Salt and pepper to taste Paprika and/or poultry seasoning to taste
BARBECUED SPARERIBS
Spray interior of cooker base with non-stick cooking spray. Heat oil in cooker over medium heat. Place chicken in cooker and brown gently, turning to brown all sides as evenly as possible, until golden. Remove cooker from heat and remove chicken from cooker. Put 1/2 cup hot water in cooker and stir to loosen brown particles. Return cooker to stove and place chicken in cooker, breast side up. (You can put chicken directly on bottom of cooker or place it on a trivet or rack to keep it up out of the drippings).
Sprinkle chicken with salt, pepper and seasonings to taste.
Close cover and bring to high pressure. Lower heat. Cook for 5 minutes per pound. (Cook 8 minutes per pound for stuffed chicken). Remove from heat; reduce pressure using the Natural Release method. Remove cover. Remove chicken, make gravy. If desired. Carve and serve.


MIN
INGREDIENTS
4 small or 2 large pink salmon steaks, 1-inch thick 1 medium onion, sliced in rings 1/2 cup good dry white wine Salt and white pepper to taste 1 fresh lemon, sliced
SALMON STEAKS AND WINE
Place basket in cooker. Arrange onion slices in basket. Place fish steaks on top of onion. Pour wine over fish and sprinkle on salt and pepper to taste. (If you have a favorite seasoning for fish, sprinkle that on instead). Arrange lemon slices over the fish. Bring to a boil. Close cover and bring to high pressure. Lower heat and cook for 6 minutes. Remove from heat and reduce pressure using the Quick Release
Method. Remove cover. Discard onion and lemon slices and serve.

25 MIN
INGREDIENTS
4 orange roughy filets, 2lbs. total 1/4 cup bottled Teriyaki sauce 1/4 cup sherry 1/4 cup water Sprinkle to taste of the following: Chinese Five- Spice, paprika, grated orange peel, nutmeg, white pepper
"ORANGE" ORANGE ROUGHY
Combine the Teriyaki sauce, sherry, and water in a shallow baking dish. Place the fish in the marinade in a single layer and turn it over once. Sprinkle each of the spices over the fish pieces. Allow the fish to stand in the marinade for 10 minutes, then turn the filets and sprinkle the other sides with the spices.
Let stand another 10 minutes.
Lift the filets to a platter for a moment and pour the marinade into the pressure cooker. Heat marinade over a medium heat until it reaches a simmer. Lay the fish filets in the cooker; you may stack them on top of each other in two piles depending on how many pieces you have. Close cover and bring to high pressure. Lower heat and cook 5 minutes. Remove from heat and reduce pressure using the Quick Release method. Remove cover. Remove filets with a couple of slotted spatulas and serve.

5 MIN
INGREDIENTS
2 pounds (combined total) of two or three varieties of firm-fleshed fish such as cod, ling cod, halibut, snapper or monkfish, skinned, de-boned and cut into 2-inch chunks 1 teaspoon dried basil 1/2 teaspoon dried dill 1 teaspoon salt, or to taste 1/4 teaspoon pepper 1/4 cup finely chopped parsley 1/2 cup water 3 tomatoes, peeled and cut into 1/4 inch slices 1 medium onion, chopped 1/2 pound mushroom, slices. 1 large stalk celery, chopped 2 cloves garlic, minced
FISH STEW
Put all ingredients in cooker. Bring to a boil over medium heal, stirring occasionally, close cover and bring to pressure. Lower heal and cook for 5 minutes. Remove from heal. Reduce pressure using the Natural Release method. Remove fish and vegetables to a serving bowl with slotted spoon. Return cooker to the stove and boil remaining liquid with cover off until liquid is reduced by half, stirring occasionally. Ladle liquid over fish and serve.

5 MIN
INGREDIENTS
1 pound large shrimp or prawns, peeled and de-veined 1/2 pound Chinese pea pods (fresh or frozen) Small onion, chopped or cut into 1/2 inch strips 1/2 cup unsweetened pineapple juice 3/4 cup chicken broth 3 tablespoons soy sauce 2 tablespoons vinegar 3 tablespoons sugar 1 tablespoon cornstarch 1/4 cup cold water
SWEET AND SOUR SHRIMP
Combine all ingredients except comstarch and 1/4 cup cold water. Bring to a boil, stirring occasionally. Close cover and bring to high pressure. Lower heat and cook 2 minutes. Remove from heat and reduce pressure using the Quick Release method. Remove cover.
In a small bowl, combine cornstarch with water and stir until smooth. Pour into cooker and cook over medium heat, stirring until sauce thickens and becomes translucent (about 2 minutes).
Serve over hot rice.
SPARE PARTS
We have select the most important spare parts for you from a multiple of spare parts. I remember that you can consult our web: www.magefesausa.com for more information
| SPARE NAME | SPARE NUMBER | SPARE PART CODE | EAN 13 | UPC-A | |
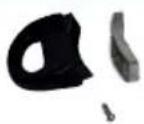 | - Helper handle 09 | PRÁCTIKA PLUS 409REMEASCP3 |  |  | |
| PRÁCTIKA PLUS 6 - 8 - TRIO09REMEASCPP |  |  | |||
 | - Safety valve 07 | PRÁCTIKA PLUS 4 - 6 - 8 - TRIOATHENAS 4 - 6 - 8 - TRIO09REMEVAPPL |  |  | |
 | - PressureRegulating valve 03 | PRÁCTIKA PLUS4 - 6 - 8 - TRIO09REMEVAPPP |  |  | |
 | - Lower handle 10 | PRÁCTIKA PLUS 409REMEMACP3 |  |  | |
| PRÁCTIKA PLUS 6 - 8 - TRIO09REMEMACP |  |  | |||
 | - Lid handle 05 | PRÁCTIKA PLUS 409REMEMAFP3 |  |  | |
| PRÁCTIKA PLUS 6 - 8 - TRIO09REMEMAFPP |  |  | |||
 | - Gasket 08 | PRÁCTIKA PLUS 409REMEJSPP3 |  |  | |
| PRÁCTIKA PLUS 6 - 8 - TRIO09REMEJSP68 |  |  | |||
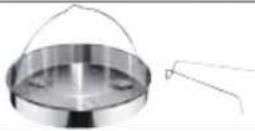 | - Steamer insert& trivet 13 | PRÁCTIKA PLUS 6 - 8 - TRIO09REMECOPP8 |  |  | |
 | - Lid 01 | PRÁCTIKA PLUS 409REMETAPP4 |  |  | |
| PRÁCTIKA PLUS 6 - 8 - TRIO09REMETAPP8 |  |  | |||
 | - Set silicon rings | PRÁCTIKA PLUS 4 - 6 - 8 - TRIOATHENAS 4 - 6 - 8 - TRIO09REMEPJAT |  |  | |
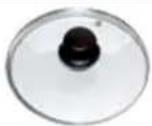 | - Crystal lid | PRÁCTIKA PLUS 6 - 8 - TRIO09REMETACP6 |  |  |
Magefesa®
Magefesa®
natural_image
Close-up of a stainless steel cooking pot with black handle against red background (no text or symbols visible)PRACTIKA PLUS
natural_image
Exterior view of a stainless steel cooking pot with black handle and red lid, set against a red-and-white background (no text or symbols visible)12800 NW 38th Avenue
Miami. 33054-4525
T: (786) 594-3781
F: (786) 594-3782
www.magefesausa.com
MÉXICO
DISTRITO FEDERAL
SERVICIO TÉCNICO CENTRAL
P. de la Reforma No. 219-102. Col. Cuauhtémoc
12800 N.W. 38 th Avenue
Miami, 33054-4525
8. LLENADO DE LA OLLA
natural_image
Close-up of a mechanical component with a red circle highlighting a small feature (no text or symbols visible)
natural_image
Close-up of a dark surface with a red 'X' mark, no visible text or symbolsnatural_image
3D rendering of a white cooking pot with black handle and red handle, mounted on a surface with a faucet (no text or symbols visible)flowchart
graph TD
    A["Start: Kitchen with red mark"] --> B["Step 1: Cooking bowl with lid"]
    B --> C["Step 2: Cooking pot with water bottle"]
    C --> D["Step 3: Cooking bowl with sponge and dipping oil"]
    D --> E["Step 4: Cooking pan with handle"]
    E --> F["End: Kitchen with hand near sink"]
natural_image
Four mechanical components: black plastic connector, spring, transparent plastic cap, and blue plastic housing (no text or symbols visible)FIG.7e

natural_image
Top-down view of a spacecraft's helmet and antenna (no text or symbols visible)FIG.7f

12800 NW 38th Avenue
Miami, 33054-4525
T: (786) 594-3781
F: (786) 594-3782
www.magefesausa.com
16. DISPOSICIONES MEDIOAMBIENTALES

- ARGENTINA
- BUENOS AIRES
- BOLIVIA
- EL SALVADOR
- MÉXICO
- DISTRITO FEDERAL
- PRODUCTS COVERED BY WARRANTY
- DISTRIBUTOR'S DETAILS
- LIMITED WARRANTY
- MAGEFESA
- N.W. 38 th Avenue
- Miami, 33054-4525
- CONTENTS
- PAGE
- GENERAL DESCRIPTION
- PARTS OF THE PRESSURE COOKER
- SAFETY
- IMPORTANT SAFETY INSTRUCTIONS
- CONGRATULATIONS
- ADVANTAGES OF THE "PRACTIKA PLUS"
- MAIN COMPONENTS AND FEATURES
- INCORPORATED SAFETY DEVICES
- PRESSURE REGULATING VALVE POSITIONS.
- OTHER FEATURES.
- DIRECTIONS FOR PROPER USE
- USING THE PRESSURE COOKER FOR THE FIRST TIME
- FILLING
- CHECKING THE VALVE
- CLOSING
- COOKING UNDER PRESSURE
- RELEASING STEAM PRESSURE AND OPENING
- PRESSURE REDUCTION TIPS FOR SPECIFIC FOODS:
- CLEANING AND CARE INSTRUCTIONS
- LID
- POT
- RUBBER GASKET
- REGULATING AND SAFETY VALVES:
- TROUBLESHOOTING THE PRESSURE COOKER
- CASE: PRESSURE DOES NOT BUILD UP
- POSSIBLE REASONS:
- SUGGESTIONS:
- CASE: STEADY STREAM OF STEAM IS RELEASED FORM THE REGULATING VALVE
- REPAIR AND SERVICE ADDRESS
- ENVIRONMENTAL PROTECTION / DISPOSAL
- COOKING TIME
- FOOD COOKING TIME
- COOKING LEVEL LIQUID ADDED
- SOUPS
- FISH (With trivet)
- MEAT
- RECIPES
- MIN
- INGREDIENTS
- BASIC BEEF STEW
- MIN
- CHILI WITH BEANS
- MIN
- SWISS STEAK
- MIN INGF
- POT ROAST WITH VEGETABLES
- 30
- LAMB STEW
- 20
- SOUTH SEAS PORK CHOPS
- MIN
- WHOLE ROAST CHICKEN
- MIN
- BARBECUED SPARERIBS
- SALMON STEAKS AND WINE
- MIN
- "ORANGE" ORANGE ROUGHY
- FISH STEW
- SWEET AND SOUR SHRIMP
- SPARE PARTS
- Magefesa®
- LLENADO DE LA OLLA
- DISPOSICIONES MEDIOAMBIENTALES
Brand : Magefesa
Model : Practika Plus 6
Category : Saucepan