
Spot 30.3030.01 - Weather Station TFA - Free user manual and instructions
Find the device manual for free Spot 30.3030.01 TFA in PDF.


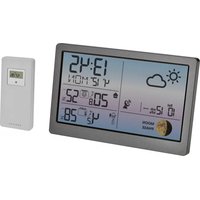
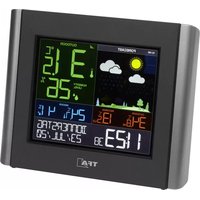
| Product type | Digital weather station |
| Brand | TFA |
| Model | Spot 30.3030.01 |
| Dimensions | 120 x 70 x 20 mm |
| Weight | 200 g (with batteries) |
| Power supply | 2 AA batteries (not included) |
| Outdoor sensor | Wireless sensor, powered by 2 AA batteries |
| Range | Up to 100 m in open field |
| Indoor temperature | From -10°C to +50°C |
| Outdoor temperature | From -20°C to +60°C |
| Indoor humidity | 20% - 95% |
| Outdoor humidity | 20% - 95% |
| Atmospheric pressure | Display in hPa |
| Clock | Radio-controlled DCF (German signal) |
| Additional functions | Alarm, weather trend, date display |
| Display | Backlit LCD screen |
| Maintenance and cleaning | Clean with a soft, dry cloth. Do not use chemicals. |
| Safety | Use only indoors. Protect from moisture and shocks. |
| Spare parts and repairability | Standard batteries. Outdoor sensor available separately. Repair by a professional. |
Frequently Asked Questions - Spot 30.3030.01 TFA
User questions about Spot 30.3030.01 TFA
0 question about this device. Answer the ones you know or ask your own.
Ask a new question about this device
Download the instructions for your Weather Station in PDF format for free! Find your manual Spot 30.3030.01 - TFA and take your electronic device back in hand. On this page are published all the documents necessary for the use of your device. Spot 30.3030.01 by TFA.
USER MANUAL Spot 30.3030.01 TFA
TFA®
Instruction manuals www.tfa-dostmann.de/en/service/downloads/instruction-manuals
Kat. Nr. 30.3030.01
CE UK CA

D
Thank you for choosing this instrument from TFA.
Before you use this product
• Please make sure you read the instruction manual carefully.
- The operating instructions are enclosed with the device or can be downloaded at www.tfa-dostmann.de/en/service/downloads/instruction-manuals
- This product should only be used as described within these instructions.
- Following and respecting the instructions in your manual will prevent damage to your instrument and loss of your statutory rights arising from defects due to incorrect use.
- Please take particular note of the safety advice!
- Please keep this instruction manual safe for future reference.

F Mode d'emploi
- Wireless thermometer (base station) - Outdoor transmitter Cat.-No. 30.3250.02
• Instruction manual
2. Range of application and all the benefits of your new instrument at a glance
- With wireless outdoor temperature transmitter, range max. 100 m, expandable up to 3 transmitters
• Indication of Indoor temperature
- Indication of maximum and minimum values with manual or auto-reset
• Radio-controlled clock with date and weekday (8 languages)
• Suitable for hanging or standing
3. For your safety
• This product is exclusively intended for the range of application described above.
• This product should only be used as described within these instructions.

WARNING
- Keep the devices and the batteries out of reach of children.
- Small parts can be swallowed by children (under three years old).
- Batteries contain harmful acids and may be hazardous if swallowed. If a battery is swallowed, this can lead to serious internal burns and death within two hours. If you suspect a battery could have been swallowed or otherwise caught in the body, seek medical help immediately.
- Batteries must not be thrown into a fire, short-circuited, taken apart or recharged. Risk of explosion!
- Low batteries should be changed as soon as possible to prevent damage caused by leaking. Make sure the polarities are correct. Never use a combination of old and new batteries together, nor batteries of different types. Remove the batteries if the device will not be used for an extended period of time. Wear chemical-resistant protective gloves and safety glasses when handling leaking batteries.

SPOT - Wireless Thermometer


CAUTION
- Unauthorized repairs, alterations or changes to the product are prohibited.
- Do not expose the device to extreme temperatures, vibrations or shocks.
- Clean the device with a soft damp cloth. Do not use solvents or scouring agents.
- The base station is only suitable for indoor use. Protect it from moisture!
• The transmitter is splashproof, but not watertight.
5. Elements
Base station (Receiver)
A: Display (Fig. 1):
A 1: Time A 2: Symbol for auto-reset
of the maximum-minimum values
A 3: Seconds A 4: Battery symbol for the transmitter
A 5: DCF reception symbol A 6: Date and weekday
A 7: Reception symbol for the transmitter
A 9: Channel number A 10: Outdoor temperature
A 11: Indoor temperature
A 13: Max.-Min. indicator
A B: Circle symbol for the alternating channel
A 12: Battery symbol for base station
B: Buttons (Fig. 2):
B 1: +/CHANNEL button
B 2: SET/MAX/MIN button
C: Housing (Fig. 2):
C 1: Wall mounting hole
C 2: Battery compartment
C 3: Stand (fold out)
D 1: Channel 1,2,3 D 2: Transmission signal
D 3: Battery symbol for the transmitter D 4: Outdoor temperature
E: Housing (Fig. 3):
E 1: Battery compartment E 2: Holder for table standing
E 3: Indentations for the holder for wall mounting
F: Buttons in the battery compartment (Fig. 3):
F 1: TX button
F 2: 1 2 3 switch for channel selection
6. Getting started
6.1 Insert the batteries
- Place the instruments on a table at a distance of about 1.5 meters from each other. Avoid being close to possible sources of interference such as electronic devices and radio equipment.
- Open the battery compartment of the transmitter and insert two new AA 1.5 V batteries, polarity as illustrated. All LCD segments will be displayed for a short moment. The display shows the temperature. The switch is set to channel 1.
- Close the battery compartment.
- Open the battery compartment of the base station.
- Insert two new AAA 1.5 V batteries, polarity as illustrated. All LCD segments will be displayed for a short
moment. The indoor temperature appears on the display. - Close the battery compartment.
6.2 Reception of outdoor transmitter
• The base station will scan the outdoor temperature for 60 seconds and the reception symbol flashes
-24--25-
SPOT - Wireless Thermometer

- If the reception is successful, the outdoor temperature and the reception symbol appear steadily on the base station display.
- If the reception of the outdoor temperature falls, '-' -" remains on the display. Check the batteries and try it again.
- You can also activate the reception manually. Press and hold the +/-CHANNEL button on the base station for three seconds. The reception symbol for the outdoor transmitter will be flashing.
- Press the TX button in the transmitter's battery compartment. The transmission of the outdoor data takes place immediately and if the reception is successful, the outdoor temperature appears on the base station display.
6.3 Reception of the DCF frequency signal
• After the reception of the outdoor values, the clock will now scan the DCF frequency signal and the DCF symbol flashes on the display.
- When the time code is successfully received after 3-10 minutes, the radio-controlled time and the DCF symbol will be shown steadily on the display.
- The DCF reception always takes place at 1:00, 2:00 and 3:00 o'clock in the morning. If the reception is not successfully received, further attempts will be taken at 4:00 and 5:00 o'clock.
- You can also activate the DCF reception manually. Press the +/-CHANNEL and the SET/MAX/MIN button at the same time for 3 seconds. The DCF reception symbol will be flashing.
- Interrupt the reception by pressing and holding again the + / CHANNEL and the SET/MAX/MIN button at the same time. The DCF reception symbol disappears.
- There are 3 different reception symbols:
((p)) flashing symbol – reception is active solid – reception is successful no symbol – no DCF reception
SPOT – Wireless Thermometer

- If the clock cannot detect the DCF-signal (e.g. due to interference, transmitting distance, etc.), the time can be set manually
- The clock will then work as a normal quartz clock (see: "Manual settings").
Note on radio-controlled time
- The time is transmitted from an atomic clock near Frankfurt am Main by a DCF-77 (77.5 kHz) frequency signal with a range of about 1,500 km. Your radio-controlled clock receives the signal, converts it and always shows the exact time. The adjustment of Daylight Saving Time and Standard Time is also automatic.
- During night-time, the atmospheric interference is usually less severe. A single daily reception is adequate to keep the accuracy deviation under 1 second. In extreme cases, please place the unit close to a window to improve reception.
7. Operation
7.1 Manual settings
- Press and hold the SET/MAX/MIN button for three seconds to enter the setting mode.
• The first adjustable value flashes on the display.
- Use the + / CHANNEL button to make the desired setting.
- Confirm with the SET/MAX/MIN button and go to the next setting.
• The sequence is shown as follows.
- DCF reception ON/OFF (default: DCF ON)
- Time zone -12/+12 (default: ZONE 00
- Day-of-week language (default: GER)
- Automatic reset of the maximum and minimum values ON/OFF (default: MIN MAX AUTO OFF)
- Hours, minutes
- Year, month, day
- After all adjustments are completed, press the SET/MAX/MIN button to exit the setting mode. - Press and hold the +/CHANNEL button in the respective setting mode for quick setting. The device will automatically quit the setting mode if no button is pressed for 20 seconds.
SPOT - Wireless Thermometer

7.1.1 DCF reception
- By default, the DCF reception is activated (DCF ON) and after successful reception of the DCF signal no manual adjustment is necessary.
- Once the DCF reception is deactivated (DCF OFF) the time and date must be manually set. No time zone will appear.
- If the DCF reception is activated, the manually set time will be overwritten by the DCF time when the signal is received successfully.
7.1.2 Time zone setting
• In the setting mode you can make the time zone correction
- The time zone correction is needed for countries where the DCF signal can be received but the time zone is different from the DCF time (e.g. +1=one hour plus).
7.1.3 Day-of-week language setting
• In the setting mode choose the day-of-the-week language:
German (GER), French (FRE), Italian (ITA), Dutch (DUT), Spanish (SPA), Swedish (SWE), Czech (CZE) and English (ENG).
7.1.4 Automatic reset of the maximum and minimum values
- In the setting mode you can activate or deactivate the automatic reset of the maximum and minimum values.
- By default, the automatic reset is disabled (MIN MAX AUTO OFF).
- If the automatic reset is activated (MIN MAX AUTO ON), AUTO appears on the display in normal mode.
- All maximum and minimum values will be reset automatically every midnight at 0:00.
7.2 Maximum/Minimum function
7.2.1 Indication of maximum and minimum values
- Press the SET/MAX/MIN button in normal mode to show the maximum (MAX) and minimum (MIN) values of indoor and outdoor temperature since the last reset with time and date of recording.
- The sequence is shown as follows: Indoor temperature (MAX), indoor temperature (MIN), outdoor temperature (MAX), outdoor temperature (MIN).
- If you have installed more than one outdoor transmitter, press the +/-CHANNEL button in MAX/MIN mode to change between the channels.
- Press the SET/MAX/MIN button again to return to normal mode.
7.2.2 Reset of maximum and minimum values
a) Manual reset
- Press and hold the SET/MAX/MIN button while the highest or lowest value is displayed. The value will be deleted (display -- -) and reset to the current state.
b) Automatic reset - Provided that in the setting mode the automatic reset is activated (MIN MAX AUTO ON). The AUTO symbol appears on the display.
- All maximum and minimum values will be reset automatically every midnight at 0:00.
• An interim manual reset is still possible.
8. Installation
- When placed outdoors, choose a shady and dry place for the transmitter. Direct sunlight may trigger incorrect measurement and continuous humidity damages the electronic components needlessly.
- Before the final installation, make sure that the measured values are transmitted from the transmitter at the desired installation site to the base station in the living area.
- Do not use the base station in the vicinity of radiators, other sources of heat or in direct sunlight.
- Make sure to avoid the vicinity of any source of interference such as computer screens, TV sets or solid metal objects. Within solid walls, especially ones with metal parts, the transmission range (max. 100 m) can be reduced considerably.
- If the transmission is successful, you can place or wall mount the base station with the suspension device.
-28--29-
SPOT - Wireless Thermometer

- To wall-mount the transmitter, screw the holder to the wall and click the outdoor transmitter into the holder. By attaching the holder to the bottom of the transmitter, it can also be placed on a flat surface.
9. Battery replacement
- As soon as the corresponding battery symbol appears in the display, please change the batteries of the base station or transmitter.
- Please note:
When the batteries are changed, the contact between the outdoor transmitter and the base station must be restored – so always restart both devices or start a manual transmitter search.
10. Additional outdoor transmitters (optional)
- When having more than one external transmitter (maximum of 3), select a different channel for each one with the 1/2/3 switch inside the transmitter's battery compartment. Insert two new AA 1.5 V batteries, polarity as illustrated. Start the base station operation or the manual search for the outdoor transmitter.
- For the manual transmitter search, choose the respective transmitter by pressing the + / CHANNEL button.
- Press and hold the + / CHANNEL button for three seconds. The last registered transmitter (channel) will be cancelled.
- Press the TX button in the corresponding transmitter's battery compartment. The transmission of the outdoor data will take place immediately.
- The outdoor temperature and the channel number will be shown on the base station display. If you have installed more than one outdoor transmitter, press the +/-CHANNEL button on the base station to change between the channels 1 to 3.
- You can also choose an alternating channel display. Press +/CHANNEL button. After the last registered channel (1 to 3) a circle symbol will appear. To deactivate the function, press the +/CHANNEL button again.
- After a successful installation close the outdoor transmitter's battery compartments carefully.
SPOT - Wireless Thermometer

11. Troubleshooting
Problem Solution
No indication on the → Ensure the batteries' polarities are correct base station or the transmitter → Change the batteries
No transmitter reception → No outdoor transmitter is installed
Display “--.” → Start the manual transmitter search:
Press the +/-CHANNEL button for 3 seconds.
→ Check the outdoor transmitter's batteries
(do not use rechargeable batteries below 1.5V!)
→ Restart the outdoor transmitter and the base station according to the manual
→ Choose another place for the transmitter and/or the base station
→ Reduce the distance between the transmitter and the base station
→ Check if there is any source of interference.
No DCF reception
Press the +/-CHANNEL and SET/MAX/MIN button at the same time for three seconds to start the initialisation manually
→ Wait for an attempt reception during the night
→ Choose another place for your device
→ Set the clock manually
→ Check if there is any source of interference
→ Restart the instrument according to the manual
Incorrect indication → Change the batteries
If your device fails to work despite these measures, contact the retailer where you purchased the product.
-30--31-
SPOT - Wireless Thermometer

12. Waste disposal
This product and its packaging have been manufactured using high-grade materials and components which can be recycled and reused. This reduces waste and protects the environment.
Dispose of the packaging in an environmentally friendly manner using the collection systems that have been set up.

Disposal of the electrical device
Remove non-permanently installed batteries and rechargeable batteries from the device and dispose of them separately.
This product is labelled in accordance with the EU Waste Electrical and Electronic Equipment Directive (WEEE).
Please do not dispose of this product in ordinary household waste. As a consumer, you are required to take end-of-life devices to a designated collection point for the disposal of electrical and electronic equipment, in order to ensure environmentally-compatible disposal. Observe the current regulations in place!

Disposal of the batteries
Never dispose of empty batteries and rechargeable batteries with ordinary household waste. They contain pollutants which, if improperly disposed of, can harm the environment and human health As a consumer, you are required by law to take them to your retail store or to an appropriate collection site depending on national or local regulations in order to protect the environment. The symbols for the contained heavy metals are: Cd=cadmium, Hg=mercury, Pb=lead.
13. Specifications
Base station
Power consumption Batteries 2 x AAA 1.5 V (not included)
Use alkaline batteries
| Measuring range - temperature 0°C ... 50°C |
| Housing dimension 109 x 20 (39) x 104 mm |
| Weight 99 g (device only) |
| Outdoor transmitter |
| Power consumption: 2 x AA 1.5 V batteries (not included)Use alkaline batteries |
| Measuring range - temperature -40°C ...60°C |
| Range max. 100 m (open field) |
| Transmission frequency 433 MHz |
| Maximumradio-frequency power < 10mW |
| Housing dimension 48 (54) x 26 (44) x 129 (135) mm |
| Weight 62 g (device only) |
SPOT - Wireless Thermometer
GB
No part of this manual may be reproduced without written consent of TFA Dostmann. The technical data are correct at the time of going to print and may change without prior notice. The latest technical data and information about this product can be found in our homepage by simply entering the product number in the search box.
EU Declaration of conformity
Hereby, TFA Dostmann declares that the radio equipment type 30.3030.01 is in compliance with Directive 2014/53/EU. The full text of the EU declaration of conformity is available at the following internet address: www.tfa-dostmann.de/service/downloads/ce
www.lla-dostmann.de


- BEFORE YOU USE THIS PRODUCT
- RANGE OF APPLICATION AND ALL THE BENEFITS OF YOUR NEW INSTRUMENT AT A GLANCE
- FOR YOUR SAFETY
- WARNING
- SPOT - WIRELESS THERMOMETER
- CAUTION
- ELEMENTS
- BASE STATION (RECEIVER)
- A: DISPLAY (FIG. 1)
- B: BUTTONS (FIG. 2)
- C: HOUSING (FIG. 2)
- GETTING STARTED
- 6.1 INSERT THE BATTERIES
- 6.2 RECEPTION OF OUTDOOR TRANSMITTER
- 6.3 RECEPTION OF THE DCF FREQUENCY SIGNAL
- SPOT – WIRELESS THERMOMETER
- NOTE ON RADIO-CONTROLLED TIME
- OPERATION
- 7.1 MANUAL SETTINGS
- 7.1.1 DCF RECEPTION
- 7.1.2 TIME ZONE SETTING
- 7.1.3 DAY-OF-WEEK LANGUAGE SETTING
- 7.1.4 AUTOMATIC RESET OF THE MAXIMUM AND MINIMUM VALUES
- 7.2 MAXIMUM/MINIMUM FUNCTION
- 7.2.1 INDICATION OF MAXIMUM AND MINIMUM VALUES
- 7.2.2 RESET OF MAXIMUM AND MINIMUM VALUES
- MANUAL RESET
- INSTALLATION
- BATTERY REPLACEMENT
- ADDITIONAL OUTDOOR TRANSMITTERS (OPTIONAL)
- TROUBLESHOOTING
- WASTE DISPOSAL
- DISPOSAL OF THE ELECTRICAL DEVICE
- DISPOSAL OF THE BATTERIES
- SPECIFICATIONS
- BASE STATION
- EU DECLARATION OF CONFORMITY
Brand : TFA
Model : Spot 30.3030.01
Category : Weather Station