
AC4053 - Air purifier PHILIPS - Free user manual and instructions
Find the device manual for free AC4053 PHILIPS in PDF.


| Product Type | Air Purifier |
| Brand | Philips |
| Model | AC4053 |
| Dimensions (H x W x D) | 50 x 30 x 30 cm |
| Weight | 5.0 kg |
| Power Supply | 220-240 V, 50/60 Hz |
| Power Consumption | 50 W |
| CADR (Smoke/Dust/Pollen) | 200 m³/h |
| Filtration Stages | Pre-filter, HEPA, Activated Carbon |
| HEPA Filter | Yes, HEPA 13 |
| Activated Carbon Filter | Yes, removes odors and gases |
| Pre-filter | Washable, captures large particles |
| Fan Speeds | 3 speeds (Low, Medium, High) |
| Auto Mode | Yes, with air quality sensor |
| Sleep Mode | Yes, ultra-quiet operation |
| Timer | 1, 2, 4, 8 hours |
| Filter Replacement Indicator | Yes, visual alert |
| Air Quality Indicator | Color ring (blue, amber, red) |
| Noise Level (min-max) | 22 - 45 dB(A) |
| Safety Features | Auto shut-off when cover opened, child lock |
| Replacement Filter | Model: FY1113 (HEPA) and FY1114 (Carbon) |
| Cleaning Instructions | Wipe exterior with damp cloth; wash pre-filter every 2 weeks |
| Recommended Room Size | Up to 25 m² |
Frequently Asked Questions - AC4053 PHILIPS
User questions about AC4053 PHILIPS
0 question about this device. Answer the ones you know or ask your own.
Ask a new question about this device
Download the instructions for your Air purifier in PDF format for free! Find your manual AC4053 - PHILIPS and take your electronic device back in hand. On this page are published all the documents necessary for the use of your device. AC4053 by PHILIPS.
USER MANUAL AC4053 PHILIPS
natural_image
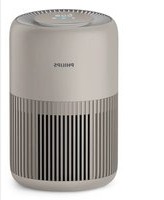
Two Philips brand speakers standing upright, one with mesh back cover and the other with mesh back cover (no visible text or symbols on device body)
ENGLISH 6
INDONESIA 14
한국어 22
BAHASA MELAYU 30
ภาษาไทย 38
繁體中文 45
Introduction
Congratulations on your purchase and welcome to Philips! To fully benefit from the support that Philips offers, register your product at www.philips.com/welcome.
With this new CleanAir System you breathe cleaner air. For the best results, place the CleanAir System in a room where you spend most of your time, e.g. the living room or bedroom.
Wherever there are people, plants or pets, there are airborne particles that can affect your well-being, especially if you suffer from allergies. Because of these particles, the air inside a room may be more polluted than the air in a large city.
Normally, particles are invisible and odourless. Nevertheless they can affect your health. The CleanAir System reduces the amount of viruses, bacteria, animal dander and industrial pollutants in the air, which improves the air quality.
Filtration in several stages
The air cleaner has a unique multi-stage filtration system that guarantees the best air quality:
- Stage 1: The pre-filter catches big particles.
- Stage 2: The corona particle charger charges finer particles.
- Stage 3: The ESP particle filter traps charged ultra-fine particles.
- Stage 4: Active oxygen sterilises trapped bacteria and viruses.
- Stage 5: The zeolite gas filter traps a wide range of harmful gases and odours.
- Stage 6: Active oxygen reacts with the zeolite gas filter to clean out the trapped gases and odours, so that the filter rejuvenates.
General description (Fig. 1)
A Air inlet
B Air outlet
C Control panel AC4065/AC4055
1 Standby light
2 SmartAir Control light
3 BoostPower light
4 Speed lights for low, medium and high speed
5 Air quality indicator
6 Function selection button
7 Timer lights (1, 4 or 8 hours)
8 Timer button
D Control panel AC4063/AC4053
1 On/off button
2 Speed lights for low, medium and high speed
3 Speed selection slide
E Front panel
ESP particle filter
G Pre-filter
H Zeolite gas filter
Brush
J Corona particle charger
K Recess
L Body of the appliance
M Handle
Important
Read this user manual carefully before you use the appliance and save it for future reference.
Danger
- Do not let water or any other liquid or flammable detergent enter the appliance to avoid electric shock and/or a fire hazard.
- Do not clean the appliance with water or any other liquid or a (flammable) detergent to avoid electric shock and/or a fire hazard.
Warning
- Check if the voltage indicated on the bottom of the appliance corresponds to the local mains voltage before you connect the appliance.
- If the mains cord is damaged, you must have it replaced by Philips, a service centre authorised by Philips or similarly qualified persons in order to avoid a hazard.
- Do not use the appliance if the plug, the mains cord or the appliance itself is damaged.
- This appliance is not intended for use by persons (including children) with reduced physical, sensory or mental capabilities, or lack of experience and knowledge, unless they have been given supervision or instruction concerning use of the appliance by a person responsible for their safety.
- Children should be supervised to ensure that they do not play with the appliance.
- Do not block the air inlet and outlet, e.g. by placing items on the air outlet or in front of the air inlet.
Caution
- This appliance is not a substitute for proper ventilation, regular vacuum cleaning or use of an extractor hood or fan while cooking.
- If the wall socket used to power the appliance has poor connections, the plug of the appliance becomes hot. Make sure you plug the appliance into a properly connected wall socket.
- Always place and use the appliance on a dry, stable, level and horizontal surface.
- Leave at least 10cm free space behind and on both sides of the appliance.
- Avoid knocking against the appliance (the air inlet and outlet in particular) with hard objects.
- Always lift or move the appliance by the handle at the back or the handgrips on both sides.
- Do not insert your fingers or objects into the air outlet or the air inlet.
- Do not use this appliance when you have used indoor smoke-type insect repellents or in places with oily residues, burning incense or chemical fumes.
- Do not use the appliance near gas appliances, heating devices or fireplaces.
- Always unplug the appliance after use and before you clean it.
- Do not use the appliance in a room with major temperature changes, as this may cause condensation inside the appliance.
- Do not use the appliance in a room that is larger or smaller than the recommended size. The recommended room size is 6m^2 up to 20m^2 for AC4055/AC4053 and 6m^2 up to 40m^2 for AC4065/AC4063.
- To prevent interference, place the appliance at least 2m away from electrical appliances that use airborne radio waves such as TVs, radios and radio-controlled clocks.
- The appliance is equipped with a safety device. If you have not placed the ESP particle filter, the zeolite gas filter and the front panel properly, you cannot switch on the appliance.
- If the indoor air quality is poor (e.g. due to smoking or cooking or after renovation), we strongly advise you to open windows when you use the appliance to improve the air circulation.
- The appliance is only intended for household use under normal operating conditions.
- Do not use the appliance in wet surroundings or in surroundings with high ambient temperatures, such as the bathroom, toilet or kitchen.
- The appliance does not remove carbon monoxide (CO).
Electromagnetic fields (EMF)
This Philips appliance complies with all standards regarding electromagnetic fields (EMF). If handled properly and according to the instructions in this user manual, the appliance is safe to use based on scientific evidence available today.
Before first use
Placing the zeolite gas filter
The appliance comes with all filters, except the zeolite gas filter, fitted inside.
Tip: Place the appliance against a wall for more stability when you remove or insert filters.
Note: Make sure you insert the filters in the correct position (with the arrow facing upwards).
Note: The appliance is equipped with a safety device. If you have not placed the ESP particle filter, the zeolite gas filter and the front panel properly, you cannot switch on the appliance.
1 Place your fingers in the recesses of the side panels. (Fig. 2)
2 Gently pull the top part of the front panel off the appliance (1) and then lift the panel upwards to remove it (2) (Fig. 3).
3 To remove the ESP particle filter, grab the filter handles on both sides and gently slide the filter out of the appliance. (Fig. 4)
4 Remove all packaging material from the zeolite gas filter and slide the filter into the appliance. (Fig. 5)
You can only insert the zeolite gas filter after you have removed the particle filter.
5 To insert the ESP particle filter, slide it into the appliance ('click') (Fig. 6).
6 To reattach the front panel, insert the bottom edge first (1) and then press the top part home (2) (Fig. 7).
Using the appliance
AC4065/AC4055
1 Put the plug in the wall socket
The standby light goes on (Fig. 8).
2 Press the function selection button one or more times to select the required function and setting (Fig. 9).
The corresponding light goes on and the standby light goes out.
SmartAir Control: the built-in air sensor determines the ambient air quality and automatically selects the most appropriate speed. In the first few minutes after you select the SmartAir Control function, the air quality indicator flashes red to indicate that the air quality sensor is measuring the ambient air quality. After approximately 5 minutes, the air quality indicator lights up green if the air quality is good or lights up red if the air quality is poor (Fig. 10).
BoostPower: the appliance operates at high speed for 30 minutes (BoostPower light is on) and then automatically switches to Smart Air Control (BoostPower light goes out and SmartAir Control light goes on) (Fig. 11).
Speed: the appliance operates at the speed you select.
- ⊙ = low speed
- ✅ = medium speed
- * = high speed
3 To stop the appliance from operating, press the function selection button until the standby light goes on (Fig. 12).
4 Unplug the appliance.
Timer function
1 Put the plug in the wall socket and select the required function and setting as described above.
2 Press the timer button to set the operating time (1, 4 or 8 hours) (Fig. 13).
The corresponding timer light goes on.
To deactivate the timer function, press the timer button and keep it pressed until the timer light goes out.
When the set time has elapsed, the appliance automatically switches to standby mode.
Note: If you want to stop the air cleaning process before the set time has elapsed, press the function selection button until the standby light goes on.
AC4063/AC4053
1 Put the plug in the wall socket
2 Press the on/off button to switch on the appliance. (Fig. 14)
3 Set the speed slide to the desired speed: low, medium or high (Fig. 15).
- ⓐ = low speed
- Ⓧ = medium speed
- ✿ = high speed
The corresponding speed light goes on.
4 Press the on/off button to switch off the appliance and unplug the appliance.
Cleaning and maintenance
Always unplug the appliance before you clean it.
Do not let water or any other liquid or flammable detergent enter the appliance to avoid electric shock and/or a fire hazard.
Do not clean the appliance with water or any other liquid or a (flammable) detergent to avoid electric shock and/or a fire hazard.
Body of the appliance
Regularly clean the inside and outside of the body to prevent dust from collecting on the inside and outside.
1 Wipe away dust with a dry, soft cloth from the body of the appliance.
2 Clean the air inlet and the air outlet with a dry soft cloth.
Corona particle charger
Never touch the corona particle charger with your fingers. Always clean the corona particle charger with the special soft cleaning brush, which is stored in the front panel.
Be extra careful when you clean the corona particle charger: the wires are very fragile.
1 Take the soft cleaning brush out of the front panel.
2 Pass the brush gently along the top and bottom of the corona particle charger.
ESP particle filter and zeolite gas filter
1 Remove the filters from the appliance (see chapter 'Filter replacement', section 'Removing the filters').
2 Remove visible dirt with a vacuum cleaner.
Pre-filter
1 Clean the pre-filter with a vacuum cleaner.
Filter replacement
The lifetime of the filters is substantially shortened by exposure to tobacco smoke:
number of cigarettes per day estimated lifetime of filters
0 - 1 up to 5 years
5 - 10 up to 6 to 12 months
20 up to 3 - 6 months
ESP particle filter
In case of normal household use in a non-smoking environment and in case of proper maintenance (see chapter ‘Cleaning and maintenance’), the particle filter lasts approx. 5 years.
To check if you have to replace the ESP particle filter you have to remove the front cover and pull out the ESP particle filter with two hands (Fig. 4).
▶ Turn the ESP particle filter upside down (Fig. 16).
Check the pollution between the layers and judge which pollution level applies. Only replace filter in case pollution bridges two layers. (Fig. 17)
A new ESP particle filter is available under the following type numbers:
- AC4107 for CleanAir System AC4055/AC4053
- AC4108 for CleanAir System AC4065/AC4063
Zeolite gas filter
In case of normal household use in a non-smoking environment and in case of proper maintenance (see chapter ‘Cleaning and maintenance’), the zeolite gas filter lasts up to 5 years.
Note: You may need to replace the zeolite gas filter sooner in case of more extreme usage conditions (smoking environment, just renovated room, non-domestic use etc.) and insufficient maintenance.
Replace the zeolite gas filter when you have to replace the ESP particle filter.
A new zeolite gas filter is available under the following type numbers:
- AC4117 for CleanAir System AC4055/AC4053
- AC4118 for CleanAir System AC4055/AC4053
Removing the filters
Tip: Place the appliance against a wall for more stability when you remove or insert filters.
1 Place your fingers in the recesses of the side panels. Gently pull the top part of the front panel off the appliance (1) and then lift the panel upwards to remove it (2) (Fig. 3).
2 To remove the ESP particle filter, grab the filter handles at both sides and gently slide the filter out of the appliance. (Fig. 4)
3 To remove the zeolite gas filter, slide it out of the appliance (Fig. 18).
Note: You can only remove the zeolite gas filter after you have removed the ESP particle filter.
4 To remove the pre-filter, slide it out of the appliance (Fig. 19).
Inserting the filters
Tip: Place the appliance against a wall for more stability when you remove or insert filters.
Note: Make sure you insert the filters in the correct position (with the arrow facing upwards).
Note: The appliance is equipped with a safety device. If you have not placed the ESP particle filter, the zeolite gas filter and the front panel properly, you cannot switch on the appliance.
1 Slide the zeolite gas filter into the appliance. (Fig. 5)
2 Slide the ESP particle filter into the appliance (Fig. 6).
3 Slide the pre-filter into the appliance. (Fig. 20)
4 To reattach the front panel, insert the bottom edge first (1) and then press the top part home (2) (Fig. 7).
Guarantee and service
If you need information or if you have a problem, please visit the Philips website at www.philips.com or contact the Philips Consumer Care Centre in your country (you find its phone number in the worldwide guarantee leaflet). If there is no Consumer Care Centre in your country, go to your local Philips dealer.
Environment
- Do not throw away the appliance with the normal household waste at the end of its life, but hand it in at an official collection point for recycling. By doing this, you help to preserve the environment (Fig. 21).
Troubleshooting
This chapter summarises the most common problems you could encounter with the appliance. If you are unable to solve the problem with the information below, contact the Consumer Care Centre in your country.
Problem Solution
| The selected function/ time mode doesn't work. | The appliance may be in standby mode or may be switched off. |
| The appliance doesn't work. | There may be a connection problem. Check if the plug is inserted in the wall socket properly. |
| The appliance may not be switched on. AC4065/AC4055: press the function selection button. AC4063/AC4053: press the on/off button. | |
| The ESP particle filter or the front panel may not be placed properly. Reinsert the filters and reattach the front panel. | |
| The zeolite gas filter is not placed yet. Insert the filter and reattach the front panel. | |
| If you have performed the above checks and the appliance still does not work, it may be malfunctioning. Unplug the appliance and take it to your Philips dealer or an authorised Philips service centre. | |
| The clean air doesn't come smoothly out of the air outlet | The pre-filter may be clogged. Clean the pre-filter (see chapter ‘Cleaning and maintenance’). |
| Perhaps you forgot to remove the plastic wrapper of a new filter. Remove the plastic wrapper before you switch on the appliance again. | |
| The air inlet or outlet may be blocked by external objects. Remove the object that blocks the air inlet or outlet. | |
| Problem Solution | |
| Clean the filters and the corona particle charger (see chapter ‘Cleaning and maintenance’). If this does not help, unplug the appliance and take it to your Philips dealer or an authorised Philips service centre. | |
| The odours are not removed properly. | The zeolite gas filter may be dirty or may have reached the end of its life. Clean the zeolite gas filter (see chapter ‘Cleaning and maintenance’) or replace it (see chapter ‘Filter replacement’). |
| Perhaps you use the appliance in a room in which the ambient air quality is very poor. In that case, open windows to improve the air circulation. | |
| Perhaps you use the appliance in a room that is much bigger than the room size the appliance is intended for. Put the appliance in a smaller room. The recommended room size is 6m^2 up to 20m^2 for AC4055/AC4053 and 6m^2 up to 40m^2 for AC4065/AC4063. | |
| The dust particles are not removed properly. | The ESP particle filter may have reached the end of its life. Check the colour of the ESP particle filter (see chapter ‘Filter Replacement’). If necessary, replace the filter. |
| Perhaps you use the appliance in a room that is much bigger than the room size the appliance is intended for. Put the appliance in a smaller room. The recommended room size is 6m^2 up to 20m^2 for AC4055/AC4053 and 6m^2 up to 40m^2 for AC4055/AC4063. | |
| The fans do not work, even though the appliance is plugged in and switched on. | The appliance may be malfunctioning. Switch off the appliance and unplug it. Take the appliance to your Philips dealer or an authorised Philips service centre. |
| The appliance produces an unusual noise (e.g. a hissing, sizzling or crackling noise) during operation. | The pre-filter may be clogged. Clean the pre-filter (see chapter ‘Cleaning and maintenance’). |
| Perhaps you forgot to remove the plastic wrapper of a new filter. Remove the plastic wrapper before you switch on the appliance again. | |
| The air inlet or outlet may be blocked by external objects. Remove the object that blocks the air inlet or outlet. | |
| The appliance may be malfunctioning. Switch off the appliance and unplug it. Take the appliance to your Philips dealer or an authorised Philips service centre. | |
| Perhaps the mesh of the corona particle charger is not clean. Clean the corona particle charger (see chapter ‘Cleaning and maintenance’). | |
| The appliance produces a burning smell during operation | The appliance may be malfunctioning. Switch off the appliance and unplug it. Take the appliance to your Philips dealer or an authorised Philips service centre. |
| The appliance gives off an unusual smell during operation. | In case of an unusual smell, contact an authorised Philips service centre. |
Problem Solution
The corona particle charger is still dirty after I have cleaned it with the soft cleaning brush.
This is not a problem. By brushing the top and bottom of the corona particle charger, you remove enough dirt to make it work properly again. Never touch the corona particle charger with your hands. Always clean the corona particle charger with the special soft cleaning brush, which is stored in the front panel. Be extra careful when you clean the corona particle charger: the wires are very fragile.
The appliance produces sparks during operation.
Sometimes small sparks may be produced in the corona particle charger. This is quite normal and the result of moisture in the air.
Pendahuluan
Corona particle charger
- Introduction
- Filtration in several stages
- General description (Fig. 1)
- Important
- Danger
- Warning
- Caution
- Electromagnetic fields (EMF)
- Before first use
- Placing the zeolite gas filter
- Using the appliance
- AC4065/AC4055
- Timer function
- AC4063/AC4053
- Cleaning and maintenance
- Body of the appliance
- Corona particle charger
- ESP particle filter and zeolite gas filter
- Pre-filter
- Filter replacement
- number of cigarettes per day estimated lifetime of filters
- ESP particle filter
- Zeolite gas filter
- Removing the filters
- Inserting the filters
- Guarantee and service
- Environment
- Troubleshooting
- Problem Solution
- Pendahuluan
Brand : PHILIPS
Model : AC4053
Category : Air purifier