
RMR391PA - Clock OREGON SCIENTIFIC - Free user manual and instructions
Find the device manual for free RMR391PA OREGON SCIENTIFIC in PDF.


| Product Type | Atomic Alarm Clock with Indoor/Outdoor Temperature |
| Brand | Oregon Scientific |
| Model | RMR391PA |
| Dimensions (approx.) | 162 x 102 x 45 mm (6.4 x 4.0 x 1.8 in) |
| Weight (approx.) | 250 g (8.8 oz) without battery |
| Power Supply | 2 x AA 1.5V batteries (not included) or AC adapter (optional) |
| Backup Power | No battery backup; main batteries required |
| Display Type | LCD with backlight |
| Time Synchronization | Radio-controlled (DCF-77 / MSF-60) atomic time |
| Indoor Temperature Range | -5°C to 50°C (23°F to 122°F) |
| Outdoor Temperature Range | -20°C to 60°C (-4°F to 140°F) via remote sensor (included) |
| Humidity Display | Indoor and outdoor relative humidity (20% - 95%) |
| Alarm Function | Dual alarm with snooze (8 minutes) |
| Additional Features | Ice alert, weather forecast icons, trend indicators, calendar display |
| Mounting Options | Table stand or wall mount (keyhole) |
| Remote Sensor Channels | Up to 3 sensors (1 included), channel selectable |
| Care & Cleaning | Wipe with a soft, dry cloth. Avoid harsh chemicals and water. |
| Safety | Do not expose to extreme temperatures or moisture. Dispose of batteries properly. |
| Spare Parts & Repairability | Remote sensor (model THN132N) and AC adapter available. No user-serviceable parts inside. |
| General Information | Designed for home use. Operating environment: 0°C to 50°C (32°F to 122°F). |
Frequently Asked Questions - RMR391PA OREGON SCIENTIFIC
User questions about RMR391PA OREGON SCIENTIFIC
0 question about this device. Answer the ones you know or ask your own.
Ask a new question about this device
Download the instructions for your Clock in PDF format for free! Find your manual RMR391PA - OREGON SCIENTIFIC and take your electronic device back in hand. On this page are published all the documents necessary for the use of your device. RMR391PA by OREGON SCIENTIFIC.
USER MANUAL RMR391PA OREGON SCIENTIFIC
Slim Projection Clock with Indoor/
Outdoor Temperature
Model: RMR391P / RMR391PA / RMR391PU
USER MANUAL
Slim Projection Clock with Indoor/Outdoor Temperature
Model: RMR391P / RMR391PA / RMR391PU
USER MANUAL
CONTENTS
Overview 2
Front view 2
Back view 2
Bottom view ....3
Remote sensor 3
Getting started....3
Power supply....3
Remote sensor....4
Sensor data transmission 4
Clock 5
Clock reception 5
Manually set clock 5
Alarm 5
Temperature....6
Projection 6
Backlight 6
Reset 7
Precautions ......7
Specifications 8
About Oregon Scientific 8
EU-Declaration of conformity 8
FCC Statement......9
OVERVIEW
FRONT VIEW
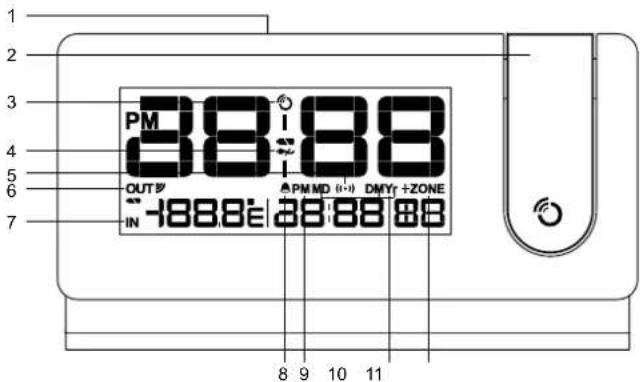
- SNOOZE / LIGHT: activate snooze alarm; turn on backlight / projector; flip projected image 180°
-
Projector
-
: clock signal reception indicator
- : adapter disconnected
- ((•)): alarm time is displayed
- OUT: remote sensor reception indicator
- IN: indoor temperature is displayed
- : daily alarm is ON
- AM/PM
- Calendar format
- +ZONE: time zone offset
BACK VIEW

- irc C / ircF : select temperature unit
- △ / △ increase / decrease value of the setting; activate / deactivate clock reception signal
- ON·PROJECTION·OFF: enable / disable continuous projection
- A: view alarm status; set alarm; activate / deactivate alarm function
- BACKLIGHT·HI·OFF·LO: enable / disable continuous backlight; select brightness
- MODE: set clock
- TEMP: toggle between indoor / outdoor temperature display; initiate auto-toggle
- RESET: reset unit to default settings
BOTTOM VIEW

- Adapter socket
- Battery compartment
REMOTE SENSOR

- LED status indicator
- Wall mount hole
- Battery compartment
- RESET hole: Reset unit to default settings
- CHANNEL switch: Select channel 1
GETTING STARTED
POWER SUPPLY
2 x CR2032 batteries
To insert batteries:
- Remove the battery compartment cover.
- Insert the batteries, matching the polarities.
- Press RESET after each battery change.
| LOCATION | MEANING |
| Clock area Main unit batteries low | |
| Outdoor / indoor temperature area | Sensor batteries low |
1 x adapter:
Alternatively, use the adapter supplied to power the unit. For continuous use of projector / backlight, adapter must be installed.
Make sure the adapter is not obstructed and is easily accessible to the unit.
NOTE The main unit and adapter should not be exposed to wet conditions. No objects filled with liquid such as vases, should be placed on the main unit and adapter.
To completely disconnect from power, the adapter should be disconnected from the main unit.
will appear when power supply is not connected.
REMOTE SENSOR
To set up the remote sensor:
- Slide open the battery compartment.
- Slide channel switch to select channel 1.
- Insert the battery, matching the polarities.
- Press RESET after each battery change.
- Close the battery compartment.
- Place the sensor within 30 m (98 ft) of the main unit using the table stand or wall mount.

natural_image
Illustration of a rectangular electronic device with a handle and base (no text or symbols)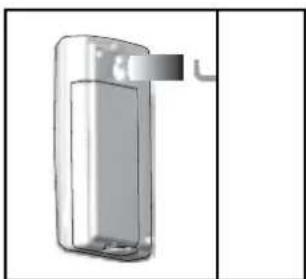
natural_image
3D rendering of a transparent cylindrical device with a handle and base, no visible text or symbolsThe transmission range may vary depending on many factors. You may need to experiment with various locations to get the best results.
NOTE We recommend that you use alkaline batteries with this product for longer usage and consumer grade lithium batteries in temperatures below freezing.
SENSOR DATA TRANSMISSION
Outdoor sensor:
The main unit will automatically search for the outdoor
sensor. The sensor reception icon in the remote sensor area shows the status:
| ICON DESCRIPTION | |
| OUT→OUT | Main unit is searching for sensor(s) |
| OUT→OUT'→OUT →OUT | A channel has been found |
| OUT | The sensor cannot be found. |
NOTE If the sensor is not found, check the batteries, obstructions, and remote unit location.
For best results:
- Place the sensor out of direct sunlight and moisture.
- Position the sensor so that it faces the main unit, minimizing obstructions such as doors, walls and furniture.
- Place the sensor in a location with a clear view to the sky, away from metallic / electronic objects.
- Position the sensor close to the main unit during cold winter months as below-freezing temperatures may affect battery performance and signal transmission.
TIP Ideal placements for the sensor would be in any location on the exterior of the home at a height of not more than 1.5 m (5 ft) and which can shield it from direct sunlight or wet conditions for an accurate reading.
CLOCK
CLOCK RECEPTION
This product is designed to synchronize its clock automatically with a clock signal.
RMR391P: EU: DCF-77 signal: within 1500 km (932 miles) of Frankfurt, Germany.
RMR391PU: UK: MSF-60 signal: within 1500 km (932 miles) of Anthorn, England.
RMR391PA: WWVB-60 signal: within 3200km (2000 miles) of Fort Collins Colorado.
To enable / disable signal reception:
Press and hold ⚙ to enable, or ⚙ to disable signal reception.
NOTE Reception takes 2-10 minutes. If the signal is weak, it can take up to 24 hours to get a valid signal. If signal reception is unsuccessful, place your unit next to a window, press and hold ⚙️ to force another signal search.
Clock signal reception indicator:
STRONG SIGNAL WEAK / NO SIGNAL


MANUALLY SET CLOCK
To set the clock manually, disable the clock signal reception first.
- Press and hold MODE.
-
Press 🔊 or 🔒 to change the settings.
-
Press MODE to confirm.
-
The setting order is: time zone offset, 12/24-hr format, hour, minute, year, day / month format, month, day and language.
RMR391P / RMR391PU: Time zone offset sets the clock +/- 23 hours from the received clock signal time. If you have deactivated the clock signal reception, do not set a value for time zone.
NOTE If you enter +1 in the time offset setting, this will give you your local time plus one hour. If you are in the US (RMR391PA) set the clock to:
PA for Pacific time MO for Mountain time
CE for Central time EA for Eastern time
NOTE The language options are (E) English, (S) Spanish, (I) Italian, (F) French and (D) German.
ALARM
To set the alarm:
- Press and hold ⚠ to enter alarm-setting mode.
- Press / to set hour / minute.
- Press ⚠ to confirm. 🐃 indicates alarm is ON.
To toggle alarms ON / OFF:
- Press ⚠ to display alarm time.
- Press ⚠ again to turn alarm ON / OFF.
To silence the alarm:
- Touch SNOOZE / LIGHT to silence it for 8 minutes OR
- Press any other key to turn the alarm off and activate it again after 24 hours.
TEMPERATURE
To toggle temperature unit:
- Press °C / °F.
To toggle between outdoor / indoor sensor readings:
- Press TEMP. IN / indicate indoor and outdoor temperature.
To auto toggle indoor / outdoor temperature displays: - Press and hold TEMP.
To deactivate auto toggle function, press TEMP.
PROJECTION
NOTE For continuous projection, install adapter.
To activate / deactivate continuous projection (when adapter is connected):
- Slide PROJECTION switch to ON / OFF.
Image can still be projected when no adapter is connected. However, when the battery power is low /
exhausted, the projection feature will be disabled.
To project image briefly:
- Touch SNOOZE / LIGHT.
To flip projected image by 180°:
- Touch SNOOZE / LIGHT.
To adjust location of projected image:
- Swivel the projection arm as required.
NOTE If projection is illuminated, do not look directly into the projector.

NOTE To save battery life, the projector and backlight will only operate continuously when adapter is installed.
BACKLIGHT
NOTE Install adapter to use backlight function. When the adapter is not connected, the backlight feature will be disabled.
To activate continuous backlight:
- Slide BACKLIGHT switch to HI / LO.
For a brighter display, select HI. For a dimmer display, select LO.
To deactivate continuous backlight:
- Slide BACKLIGHT switch to OFF. (Touch SNOOZE/LIGHT to turn backlight on for 5 seconds).
RESET
Press RESET to return to the default settings.
PRECAUTIONS
- Do not subject the unit to excessive force, shock, dust, temperature or humidity.
- Do not cover the ventilation holes with any items such as newspapers, curtains etc.
- Do not immerse the unit in water. If you spill liquid over it, dry it immediately with a soft, lint-free cloth.
- Do not clean the unit with abrasive or corrosive materials.
- Do not tamper with the unit's internal components This invalidates the warranty.
- Only use fresh batteries. Do not mix new and old batteries.
- Images shown in this manual may differ from the actual display.
- When disposing of this product, ensure it is collected separately for special treatment and not
as normal household waste.
- Placement of this product on certain types of wood may result in damage to its finish for which Oregon Scientific will not be responsible. Consult the furniture manufacturer's care instructions for information.
- The contents of this manual may not be reproduced without the permission of the manufacturer.
- Do not dispose old batteries as unsorted municipal waste. Collection of such waste separately for special treatment is necessary.
- Please note that some units are equipped with a battery safety strip. Remove the strip from the battery compartment before first use.
NOTE The technical specifications for this product and the contents of the user manual are subject to change without notice.
NOTE Features and accessories will not be available in all countries. For more information, please contact your local retailer.
SPECIFICATIONS
| TYPE DESCRIPTION | |
| MAIN UNIT | |
| L x W x H 175 x 80 x 18 mm(6.9 x 3.2 x 0.7 in) | |
| Weight 240 g (8.47 oz) | without battery |
| Temperature Unit °C / °F | |
| Temperature range -20°C to 60°C | |
| Signal frequency 433 MHz | |
| Power 2 x CR2032 batteries /3V adapter | |
| REMOTE UNIT (THN132N) | |
| L x W x H 92 x 60 x 20 mm(3.6 x 2.4 x 0.8 in) | |
| Weight 62 g (2.22 ounces) | |
| Transmission range 30 m (98 ft) unobstructed | |
| Temperature range -30°C to 60°C(-22°F to 140°F) | |
| Power 1 x UM-3 (AA) 1.5V battery | |
ABOUT OREGON SCIENTIFIC
Visit our website (www.oregonscientific.com) to learn more about Oregon Scientific products. If you're in the US and would like to contact our Customer Care department directly, please visit:
www2.oregonscientific.com/service/support.asp
For international inquiries, please visit:
www2.oregonscientific.com/about/international.asp
EU-DECLARATION OF CONFORMITY
Hereby, Oregon Scientific, declares that this Slim Projection Clock with Indoor/Outdoor Temperature (Model: RMR391P / RMR391PA / RMR391PU) is in compliance with the essential requirements and other relevant provisions of Directive 1999/5/EC. A copy of the signed and dated Declaration of Conformity is available on request via our Oregon Scientific Customer Service.


COUNTRIES RTTE APPROVAL COMPLIED
All EU countries, Switzerland CH
und Norwegen N
FCC STATEMENT
This device complies with Part 15 of the FCC Rules. Operation is subject to the following two conditions: (1) This device may not cause harmful interference, and (2) This device must accept any interference received, including interference that may cause undesired operation.
WARNING Changes or modifications not expressly approved by the party responsible for compliance could void the user's authority to operate the equipment.
NOTE This equipment has been tested and found to comply with the limits for a Class B digital device, pursuant to Part 15 of the FCC Rules. These limits are designed to provide reasonable protection against harmful interference in a residential installation.
This equipment generates, uses and can radiate radio frequency energy and, if not installed and used in accordance with the instructions, may cause harmful interference to radio communications. However, there is no guarantee that interference will not occur in a particular installation. If this equipment does cause harmful interference to radio or television reception, which can be determined by turning the equipment off and on, the user is encouraged to try to correct the interference by one or more of the following measures:
- Reorient or relocate the receiving antenna.
- Increase the separation between the equipment and receiver.
- Connect the equipment into an outlet on a circuit different from that to which the receiver is
connected.
- Consult the dealer or an experienced radio / TV technician for help.
DECLARATION OF CONFORMITY
The following information is not to be used as contact for support or sales. Please visit our website at www2.oregonscientific.com/service for all enquiries.
We
Name: Oregon Scientific, Inc.
Address: 19861 SW 95 Oregon 97062 USA th Ave., Tualatin,
Telephone No.: 1-800-853-8883
declare that the product
Product No.: RMR391P / RMR391PA / RMR391PU
Product Name: Slim Projection Clock with Indoor/Outdoor Temperature
Manufacturer: IDT Technology Limited
Address: Block C, 9/F, Kaiser Estate, Phase 1,41 Man Yue St., Hung Hom, Kowloon, Hong Kong
is in conformity with Part 15 of the FCC Rules. Operation is subject to the following two conditions: 1) This device may not cause harmful interference. 2) This device must accept any interference received, including interference that may cause undesired operation.
natural_image
3D rendering of a rectangular electronic device with a handle and mounting bracket (no text or symbols)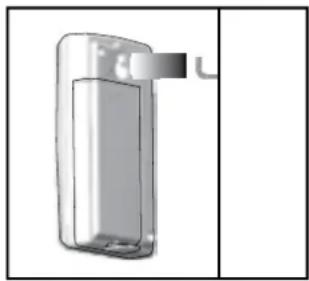
natural_image
3D rendering of a rectangular device with a handle and internal structure, no visible text or symbolsnatural_image
3D rendering of a rectangular electronic device with a handle and mounting bracket (no text or symbols)
natural_image
Illustration of a mobile phone with a screen and antenna (no text or symbols)natural_image
3D rendering of a rectangular electronic device with a handle and base (no text or symbols visible)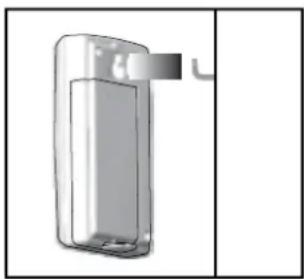
natural_image
3D rendering of a rectangular device with a handle and base, shown in perspective view (no text or symbols)natural_image
Illustration of a rectangular electronic device with a handle and mounting bracket (no text or symbols)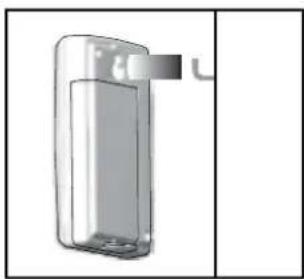
natural_image
Simple line drawing of a rectangular device with a handle and base, no text or symbols present.natural_image
White rectangular electronic device with a labeled component (1), no visible text or symbols on the body itself.
natural_image
Illustration of a rectangular electronic device with a handle and mounting bracket (no text or symbols)
natural_image
3D rendering of a rectangular device with a handle and base, shown in perspective view (no text or symbols)natural_image
3D rendering of a rectangular electronic device with a handle and mounting holes (no text or symbols)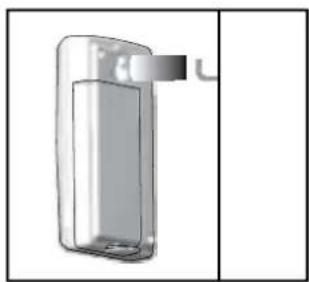
natural_image
Simple line drawing of a rectangular device with a handle and base, no text or symbols present.natural_image
3D rendering of a rectangular electronic device with a labeled component (no text or symbols on the body)natural_image
Illustration of a rectangular electronic device with a handle and base (no text or symbols)
natural_image
3D rendering of a rectangular device with a handle and internal structure, no visible text or symbols© 2010 Oregon Scientific. All rights reserved.
300102511-00001-10

- Slim Projection Clock with Indoor/Outdoor Temperature
- Model: RMR391P / RMR391PA / RMR391PU
- USER MANUAL
- CONTENTS
- OVERVIEW
- FRONT VIEW
- BACK VIEW
- BOTTOM VIEW
- REMOTE SENSOR
- GETTING STARTED
- POWER SUPPLY
- x CR2032 batteries
- To insert batteries:
- x adapter:
- To set up the remote sensor:
- SENSOR DATA TRANSMISSION
- Outdoor sensor:
- For best results:
- CLOCK
- CLOCK RECEPTION
- To enable / disable signal reception:
- MANUALLY SET CLOCK
- ALARM
- To set the alarm:
- To toggle alarms ON / OFF:
- To silence the alarm:
- TEMPERATURE
- To toggle temperature unit:
- PROJECTION
- To project image briefly:
- To flip projected image by 180°:
- To adjust location of projected image:
- BACKLIGHT
- To activate continuous backlight:
- To deactivate continuous backlight:
- RESET
- PRECAUTIONS
- ABOUT OREGON SCIENTIFIC
- EU-DECLARATION OF CONFORMITY
- COUNTRIES RTTE APPROVAL COMPLIED
- FCC STATEMENT
- DECLARATION OF CONFORMITY
- We
- declare that the product
Brand : OREGON SCIENTIFIC
Model : RMR391PA
Category : Clock