
MP250 - Loudspeaker EDIFIER - Free user manual and instructions
Find the device manual for free MP250 EDIFIER in PDF.


| Product Type | Portable Bluetooth Speaker |
| Brand | Edifier |
| Model | MP250 |
| Dimensions (W x H x D) | 150 x 70 x 50 mm |
| Weight | 300 g |
| Power Output | 5 W |
| Frequency Response | 100 Hz - 20 kHz |
| Bluetooth Version | 4.2 |
| Bluetooth Range | 10 m |
| Battery Type | Li-ion 1200 mAh |
| Battery Life | Up to 4 hours |
| Charging Time | 2.5 hours |
| Input Power | DC 5V via Micro USB |
| Audio Inputs | Bluetooth, AUX (3.5mm) |
| Controls | Power, Volume +/-, Play/Pause, Next/Previous |
| Built-in Microphone | Yes, for hands-free calling |
| Materials | Plastic with fabric grille |
| Color Options | Black, White |
| Accessories Included | USB Charging Cable, AUX Cable, User Manual |
| Cleaning Instructions | Wipe with a dry cloth. Do not use liquids or abrasives. |
| Safety Warnings | Do not expose to extreme temperatures or moisture. Avoid dropping. |
| Repairability | Non-user-serviceable. Contact authorized service center. |
Frequently Asked Questions - MP250 EDIFIER
User questions about MP250 EDIFIER
0 question about this device. Answer the ones you know or ask your own.
Ask a new question about this device
Download the instructions for your Loudspeaker in PDF format for free! Find your manual MP250 - EDIFIER and take your electronic device back in hand. On this page are published all the documents necessary for the use of your device. MP250 by EDIFIER.
USER MANUAL MP250 EDIFIER
How to Use This Manual
Printing This Manual
MP270 series
MP250 series
On-screen Manual
MC-3752-V1.00

Basic Guide
Describes the summary of this product.


Advanced Guide
Describes the detailed function of this product.

Troubleshooting

Contents
Overview of the Machine
Main Components
LED Display and Basic Operations
Copying
Copying Documents
Copying Photos
Fit-to-Page Copying
Scanning
Saving Scanned Data on the Computer
Printing from Your Computer
Printing Photos (Easy-PhotoPrint EX)
Printing Documents (Windows)
Printing Documents (Macintosh)
Other Usages
Printing Photos from a PictBridge Compliant
Device (MP270 series only)
Useful Software Applications
> Loading Paper / Originals
Loading Paper
Loading Originals
Routine Maintenance
When Printing Becomes Faint or Colors Are Incorrect
Replacing a FINE Cartridge
Cleaning the Machine
Appendix
Legal Limitations on Use of Your Product and Use of Images
Tips on How to Use Your Machine
Basic Guide
Advanced Guide Troubleshooting
Contents > Overview of the Machine
Overview of the Machine
This section shows the component names of the machine and describes the basic operations you need to know before using it.
Main Components
Front View
Rear View
Inside View
Operation Panel
LED Display and Basic Operations

↑ Page top
Basic Guide
Advanced Guide Troubleshooting
Contents > Overview of the Machine > Main Components
Main Components
→ Front View
→ Rear View
→ Inside View
→ Operation Panel
■ Front View

(1) Document Cover
Open to load an original on the Platen Glass.
(2) Paper Support
Raise and tip back to load paper in the Rear Tray.
(3) Rear Tray
Load various sizes or types of paper which you can use on the machine. Two or more sheets of the same size and type of paper can be loaded at the same time, and fed automatically one sheet at a time.
See Loading Paper.
(4) Paper Guides
Slide to align with both sides of the paper stack.
(5) Operation Panel
Use to change the settings of the machine or to operate it.
See Operation Panel.

Note
- The LED and lamps on the Operation Panel other than the Power lamp will go out if the machine is not operated for about 5 minutes. To restore them, press any button except the ON button or perform the print operation.
(6) Paper Output Tray
Opens automatically when printing or copying starts and printed paper is ejected.
(7) Output Tray Extension
Open to support the printouts. Open it when printing or copying.

(8) Platen Glass
Load an original to copy or scan.
(9) Direct Print Port (MP270 series only)
Connect a PictBridge compliant device such as a digital camera to print directly.
See Printing Photos from a PictBridge Compliant Device (MP270 series only).

Warning
- Do not connect any equipment other than PictBridge compliant devices to the Direct Print Port of the machine. This may cause fire, electric shock, or damage to the machine.

Important
- Do not touch the metal casing.
■ Rear View
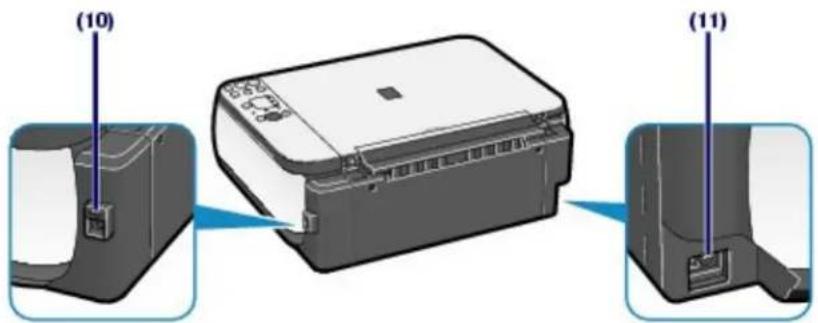
(10) USB Port
Plug in the USB cable to connect the machine with a computer.

Important
- Do not touch the metal casing.
- Do not plug in or unplug the USB cable while the machine is printing or scanning originals with the computer.
(11) Power Cord Connector
Plug in the supplied power cord.
■ Inside View

(12) Ink Cartridge Locking Covers
Lock the FINE Cartridges into place.
(13) Scanning Unit (Cover)
Scans originals. Open it to replace the FINE Cartridges or remove jammed paper inside the machine. When opening the Scanning Unit (Cover), lift it with the Document Cover closed.
(14) Scanning Unit Support
Holds the Scanning Unit (Cover) while it is open.
(15) FINE Cartridge Holder
Install the FINE Cartridges.
The Color FINE Cartridge should be installed into the left slot ( ) and the Black FINE Cartridge should be installed into the right slot ( B ).
(16) FINE Cartridges (Ink Cartridges)
A replaceable cartridge that is integrated with Print Head and ink tank.

Note
For details on installing the FINE Cartridges, refer to the printed manual: Getting Started.

Important
- The area (A) indicated in the figure below may be splattered with ink. It does not affect the performance of the machine.
- Do not touch the area (A). The machine may not print properly if you touch it.

■ Operation Panel

Turns the power on or off. Before turning on the power, make sure that the Document Cover is closed.

Important
Disconnecting the power plug
- When disconnecting the power plug after turning off the power, be sure to confirm that the Power lamp is not lit. If the power plug is disconnected from the wall outlet while the Power lamp is lit or flashing, the machine may become unable to print properly since the Print Head is not protected.

Note
Power and Alarm lamps
- You can check the status of the machine with the Power lamp and Alarm lamp.
- Power lamp is off: The power is off.
- Power lamp lights green: The machine is ready to print.
- Power lamp flashes green: The machine is initializing or shutting down.
- Alarm lamp lights or flashes orange: An error has occurred and the machine is not ready to print. For details, refer to "Troubleshooting" in the on-screen manual: Advanced Guide.
- Power lamp flashes green and Alarm lamp flashes orange alternately: An error that requires contacting the service center may have occurred. For details, refer to "Troubleshooting" in the on-screen manual: Advanced Guide.
(2) LED (Light Emitting Diode)
Displays the number of copies, Maintenance code, or operational status such as an error code.
(3) [+] button
Specifies the number of copies.
(4) Ink lamps
Light or flash orange when ink runs out, etc. The lamp on the left indicates the Color FINE Cartridge status and the lamp on the right indicates the Black FINE Cartridge status.
(5) Paper button
Selects the page size and media type.
(6) SCAN button
Starts scanning the original to save it on the computer.
(7) Stop/Reset button
Cancels operations. You can also press this button to cancel a print, copy, or scan job in progress.
(8) Color button*
Starts color copying. You can also press this button to finalize your selection for the setting item.
(9) Black button*
Starts black & white copying. You can also press this button to finalize your selection for the setting item.
(10) Fit to Page button / Fit to Page lamp
Enables the Fit-to-Page copy function. You can copy the original automatically enlarged or reduced to fit the selected page size. When the Fit-to-Page copy function is disabled, you can make copies in the same size as the original.
(11) 81 (Maintenance) button
Specifies the Maintenance code.
(12) Paper lamp
Lights to indicate the page size and media type selected with the Paper button.
(13) Alarm lamp
Lights or flashes orange when an error occurs, such as paper-out or ink-out.
* In the software applications or manuals, the Black and Color buttons are collectively called the "Start" or "OK" button.

↑ Page top
Basic Guide
Advanced Guide Troubleshooting
Contents > Overview of the Machine > LED Display and Basic Operations
LED Display and Basic Operations
You can use the machine to make copies or perform maintenance operations without a computer. This section describes the LED display and basic operations on the Operation Panel.
The number 1 appears on the LED normally when turning on the power.
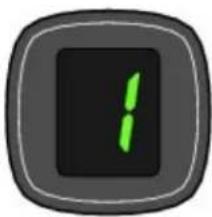
The LED display indicates the machine status as follows.
| Machine Status | LED Display |
| While copying | Number of copies (flashing) |
| While printing, scanning, or performing maintenance operations |  (flashing in order) (flashing in order) |
| When an error occurs | ● E and number appear alternately.For details on the error codes, refer to "Troubleshooting" in the on-screen manual: Advanced Guide.● P and number appear alternately.An error that requires contacting the service center may have occurred.For details, refer to "Troubleshooting" in the on-screen manual: Advanced Guide. |
| While the Scanning Unit (Cover) is open | [6032](flashing) |

Note
- When a PictBridge compliant device such as a digital camera is connected to the machine, C appears on the LED (MP270 series only).
• Number of Copies
When copying starts, the specified number of copies appears on the LED. While copying is in progress, the number on the LED flashes and decreases by one to indicate the remaining number of copies to be made.

Each time you press the [+] button, the number on the LED increases by one. When F appears, the
number of copies is set to "20". Press the [ +] button again to return to "1".
![graph LR A["1"] --> B["2"] B --> C["3"] C --> D["4"] D --> E["5"] E --> F["6"] F --> G["7"] G --> H["8"] H --> I["9"] I --> J["F"]](/content/2026/06/1260153/images/fb7dcb24cfad955c6237edd38cf4e8ace89d962d53acda852b2018876e60f918.jpg)
- Maintenance Codes
To perform maintenance of the machine, press the (Maintenance) button repeatedly until the desired code appears on the LED, and then press the Black or Color button.
| Maintenance Code | Operation | See |
 | Prints the nozzle check pattern. | Printing the Nozzle Check Pattern |
 | Cleans the Print Head.Cleaning the Print Head | |
 | Cleans the Print Head deeply. | Cleaning the Print Head Deeply |
 | Prints the print head alignment sheet. | Aligning the Print Head |
 | Scans the print head alignment sheet to align the Print Head automatically. | Aligning the Print Head |
 | Prints the current head position adjustment values. | Aligning the Print Head |
 | Cleans the Paper Feed Roller.Cleaning the Paper Feed Roller | |
 | Cleans the inside of the machine. | Cleaning the Inside of the Machine (Bottom Plate Cleaning) |
 | Switches the size of paper loaded in the Rear Tray between A4 and 8.5" x 11" (Letter).(This setting is used for making copies.) | Switching the Page Size between A4 and 8.5" x 11" (Letter) |
 | Sets the machine to prevent paper abrasion. | Refer to "Paper Is Smudged/Printed Surface Is Scratched" in "Troubleshooting" of the on-screen manual: Advanced Guide. |
- Error Codes
When an error occurs, E and number appear alternately on the LED to indicate the error code.
e.g. "E, 1, 6"

(flashing in order)

Note
- For details on the error codes, refer to "Troubleshooting" in the on-screen manual: Advanced Guide.
- If an error code with P appears, an error that requires contacting the service center may have occurred.
For details, refer to "Troubleshooting" in the on-screen manual: Advanced Guide.

↑ Page top
Basic Guide
Advanced Guide Troubleshooting
Contents > Copying
Copying
You can make enlarged or reduced copies of the original to fit the page size, and borderless copies of a printed photo, besides standard copies.
Copying Documents
Switching the Page Size between A4 and 8.5" x 11" (Letter)
Copying Photos
Fit-to-Page Copying

↑ Page top
Basic Guide
Advanced Guide Troubleshooting
Contents > Copying > Copying Documents
Copying Documents
This section describes the procedure to copy a document of A4 or Letter size on plain paper. For the operation, see the notes and operation procedure described in the reference page.


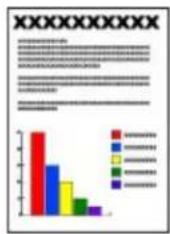
You need to prepare:
Originals to copy. See Originals You Can Load.
Paper for printing. See Media Types You Can Use.
1. Prepare for copying.
(1) Turn on the power. See Operation Panel.
(2) Load paper. See Loading Plain Paper / Photo Paper. Here we load A4 or Letter-sized plain p
(3) Open the Paper Output Tray gently, and open the Output Tray Extension.

(4) Load an original on the Platen Glass.
See Loading Originals.
Load the original WITH THE SIDE TO COPY FACING DOWN and align it with the alignment mark as shown below.
Then close the Document Cover gently.

Note
- For details on the types and conditions of the original which can be copied, see Originals You Can Load.

- Start copying.
(1) Press the [+] button repeatedly to specify the number of copies (max. 20 copies).

To make 1 to 9 copies or 20 copies
Display the desired number of copies on the LED.
Each time you press the [+] button, the number on the LED increases by one. When F appears, the number of copies is set to "20". Press the [+] button again to return to "1".
To make 10 to 19 copies
(1) Display F on the LED.
(2) Load only the desired number of sheets to copy.
(2) Press the Paper button repeatedly to select the page size and media type.
The Paper lamp indicates the selected page size and media type.
Here we select A4 or 8.5" x 11" Plain Paper.

Note
- You can select the following page sizes and media types.
- A4 or 8.5" x 11" Plain Paper
- A4 or 8.5" x 11" Photo Paper
- 10 x 15 cm or 4" x 6" Photo Paper
- You can switch the size of paper loaded in the Rear Tray between A4 and 8.5" x 11"
(Letter) regardless of the size indicated on the Operation Panel.
See Switching the Page Size between A4 and 8.5" x 11" (Letter). - When the Fit-to-Page copy function is enabled, you can copy the original in the size automatically enlarged or reduced to fit the selected page size. In this case, the original is copied with borders on the plain paper and without borders on the photo paper.
Cancel the Fit-to-Page copy function to copy the original in the same size.
See Fit-to-Page Copying
(3) Press the Color button for color copying, or the Black button for black & white copying.
The machine starts copying.
While copying is in progress, the number on the LED flashes and decreases by one to indicate the remaining number of copies to be made.
Remove the original on the Platen Glass after copying is completed.
To make 10 to 19 copies
The paper-out error will occur ("E, 0, 2" will appear on the LED) when all of the loaded paper runs out.
Press the Stop/Reset button to release the error.

Note
- You can set the print quality to "Fast" (speed priority) only when A4 or Letter-sized plain paper is selected for the page size and media type.
To set the print quality to "Fast" (speed priority)
-
Press and hold down the Color or Black button for 2 or more seconds in (3) of step 2.
The LED flashes once.
* When you press the Color or Black button for less than 2 seconds, the machine starts copying in the print quality "Standard". -
Release the button.
The machine starts copying.
- When the print quality is set to "Fast", print speed is given priority over quality. To give priority to quality, press the Color or Black button for less than 2 seconds to copy in the print quality "Standard".

Important
- Do not open the Document Cover or move the loaded original until copying is completed.

Note
- To cancel copying, press the Stop/Reset button.
■ Switching the Page Size between A4 and 8.5" x 11" (Letter)
You can switch the size of paper loaded in the Rear Tray between A4 and 8.5" x 11" (Letter).
This setting is useful if you usually load Letter-sized paper in the Rear Tray regardless of the page size indication "A4" on the Operation Panel, or vice versa.
- Press the 81 (Maintenance) button repeatedly until d appears.

- Press the Black button to select A4, or the Color button to select 8.5" x 11" (Letter).

Note
- When you switch the page size to A4 or 8.5" x 11" (Letter), load paper of the selected size regardless of the size indicated on the Operation Panel.
- When the page size is set to A4, load A4 plain paper or photo paper.
- When the page size is set to 8.5" x 11" (Letter), load Letter-sized plain paper or photo paper.

Basic Guide
Advanced Guide Troubleshooting
Contents > Copying > Copying Photos
Copying Photos
This section describes the procedure to copy a printed photo on 4" x 6" / 10 x 15 cm photo paper.


You need to prepare:
Printed photos.

Paper for photo printing. See Media Types You Can Use.

1. Prepare for copying a photo.
(1) Turn on the power. See Operation Panel.
(2) Load paper.
See Loading Plain Paper / Photo Paper.
Here we load 4" x 6" / 10 x 15 cm photo paper.
(3) Open the Paper Output Tray gently, and open the Output Tray Extension.
(4) Load a photo on the Platen Glass. See Loading Originals.
2. Start copying.
(1) Press the [+] button repeatedly to specify the number of copies. See step 2 in Copying Documents.
(2) Press the Paper button repeatedly to select the page size and media type. The Paper lamp indicates the selected page size and media type. Here we select 10 x 15 cm or 4" x 6" Photo Paper.

Note
- You can select the following page sizes and media types.
- A4 or 8.5" x 11" Plain Paper
- A4 or 8.5" x 11" Photo Paper
-
10 x 15 cm or 4" x 6" Photo Paper
-
You can switch the size of paper loaded in the Rear Tray between A4 and 8.5" x 11" (Letter) regardless of the size indicated on the Operation Panel. See Switching the Page Size between A4 and 8.5" x 11" (Letter).
- When the Fit-to-Page copy function is enabled, you can copy the original in the size automatically enlarged or reduced to fit the selected page size. In this case, the original is copied with borders on the plain paper and without borders on the photo paper. Cancel the Fit-to-Page copy function to copy the original in the same size. See Fit-to-Page Copying.
(3) Press the Color button for color copying, or the Black button for black & white copying.
The machine starts copying.
Remove the photo on the Platen Glass after copying is completed.

Important
- Do not open the Document Cover or move the loaded photo until copying is completed.

Note
- To cancel copying, press the Stop/Reset button.

↑ Page top
Basic Guide
Advanced Guide Troubleshooting
Contents > Copying > Fit-to-Page Copying
Fit-to-Page Copying
The Fit-to-Page copy function enables you to copy the original automatically enlarged or reduced to fit the selected page size.


- Prepare for copying.
See step 1 in Copying Documents.
-
Press the [+] button repeatedly to specify the number of copies.
-
Press the Paper button repeatedly to select the page size and media type.

Note
- When the plain paper is selected for the media type, the original is copied with borders. When the photo paper is selected for the media type, the original is copied without borders and fills the entire page.
-
In borderless copying, slight cropping may occur at the edges since the copied image is enlarged to fill the whole page.
-
Press the Fit to Page button.
The Fit to Page lamp lights up and the Fit-to-Page copy function is enabled. The original is copied in the size automatically enlarged or reduced to fit the selected page size.

Note
- Press the Fit to Page button again to cancel the Fit-to-Page copy function and copy the original in the same size.
- Press the Color button for color copying, or the Black button for black & white copying.
The machine starts Fit-to-Page copying.
Remove the original on the Platen Glass after copying is completed.

Important
- Do not open the Document Cover or move the loaded original until copying is completed.

Note
- You can set the print quality to "Fast" (speed priority) only when A4 or Letter-sized plain paper
is selected for the page size and media type. To set the print quality to "Fast", press and hold down the Color or Black button for 2 or more seconds in step 5.
See To set the print quality to "Fast" (speed priority).
- To cancel copying, press the Stop/Reset button.

↑ Page top
Basic Guide
Advanced Guide Troubleshooting
Contents > Scanning
Scanning
You can save scanned data on your computer, and edit or process them with the supplied software application.
Saving Scanned Data on the Computer
Preparing for Scanning with the Operation Panel Saving Scanned Data on the Computer

↑ Page top
Basic Guide
Advanced Guide Troubleshooting
Contents > Scanning > Saving Scanned Data on the Computer
Saving Scanned Data on the Computer
This section describes the procedure to scan originals using the Operation Panel on the machine and save them on the computer, according to the settings specified with MP Navigator EX. For the operation on scanning from the computer, refer to the on-screen manual: Advanced Guide.

Important
- Please note that Canon shall not be liable for any damage or loss of the data for any reason whatsoever, even within the warranty period of the machine.
■ Preparing for Scanning with the Operation Panel
Before scanning originals, check the following.
- Are the necessary software applications (MP Drivers and MP Navigator EX) installed? If the software applications are not installed, refer to the printed manual: Getting Started.
- Are the required settings specified with MP Navigator EX?
When you scan to save originals on the computer using the Operation Panel, you can specify the settings for saving scanned data in Preferences of MP Navigator EX. For details on the settings, refer to the on-screen manual: Advanced Guide.
- Does the original to be scanned meet the requirements for the original to be set on the Platen Glass?
For details, see Originals You Can Load.
- Is the machine connected to a computer correctly? Confirm that the connection between the machine and the computer is physically secure.

Important
- Do not plug in or unplug the USB cable while the machine is scanning originals.
- When You Are Using Mac OS X v.10.3.9
You need to set MP Navigator EX as the starting software application in Image Capture under Applications in Mac OS X.
(1) Select Applications on the Go menu, and double-click the Image Capture icon.
(2) Click Options at lower left of the scanner window, select MP Navigator EX 3 in Application to launch when scanner button is pressed, then click OK. To quit Image Capture, select Quit Image Capture on the Image Capture menu.

Note
- If Options does not appear, select Preferences on the Image Capture menu, click Scanner, and click Use TWAIN software whenever possible to clear the option. Then quit Image Capture and restart it.
■ Saving Scanned Data on the Computer
1. Prepare for scanning.
(1) Turn on the power. See Operation Panel.
(2) Load an original on the Platen Glass. See Loading Originals.
2. Press the SCAN button to start scanning.
The original will be scanned and saved on the computer, according to the settings specified with MP Navigator EX.
Remove the original on the Platen Glass after scanning is completed.

Important
- Do not turn off the power while the machine is operating.
- Do not open the Document Cover or move the loaded original until scanning is completed.

Note
● The position or size of the original may not be scanned correctly depending on the type of original.
In this case, refer to the on-screen manual: Advanced Guide to change the settings in Document Type and Document Size of MP Navigator EX to match the original and scan it.
When you are using Windows Vista
- The program selection screen may appear after performing step 2. In this case, select MP Navigator EX Ver3.0 and click OK.
When you are using Windows XP
- The program selection screen may appear after performing step 2 for the first time. In this case, specify MP Navigator EX Ver3.0 as the application software to be used, select Always use this program for this action, then click OK. From the next time, MP Navigator EX will be automatically started.

Basic Guide
Advanced Guide Troubleshooting
Contents > Printing from Your Computer
Printing from Your Computer
This section describes how to print photos or documents with a computer. You can easily print photos taken with your digital camera by using Easy-PhotoPrint EX supplied with the machine.
Printing Photos (Easy-PhotoPrint EX)
Using Various Functions of Easy-PhotoPrint EX
Printing Documents (Windows)
Printing Documents (Macintosh)
For Mac OS X v.10.5.x
For Mac OS X v.10.4.x or Mac OS X v.10.3.9

↑ Page top
Basic Guide
Advanced Guide Troubleshooting
Contents > Printing from Your Computer > Printing Photos (Easy-PhotoPrint EX)
Printing Photos (Easy-PhotoPrint EX)
Print image data saved on your computer by using Easy-PhotoPrint EX supplied with the machine. This section describes the procedure to print borderless photos on 4" x 6" / 10 x 15 cm photo paper. For details on Easy-PhotoPrint EX, refer to the on-screen manual: Advanced Guide.

Note
- The screens used in this section are for printing with Windows. The operations are also the same for printing with Macintosh.
- Install Easy-PhotoPrint EX from the Setup CD-ROM when it has not been installed or has been uninstalled. To install Easy-PhotoPrint EX, select Easy-PhotoPrint EX in Custom Install.
1. Prepare for printing.
(1) Make sure that the machine is turned on. See Operation Panel.
(2) Load paper. See Loading Plain Paper / Photo Paper.
Here we load 4" x 6" / 10 x 15 cm photo paper.
(3) Open the Paper Output Tray gently, and open the Output Tray Extension.

2. Start Easy-PhotoPrint EX, and select Photo Print.
(1) Start Easy-PhotoPrint EX.


Double-click (Easy-PhotoPrint EX) on the desktop.

Click Here: Easy-PhotoPrint EX

intosh
Select the Go menu, Applications, Canon Utilities, Easy-PhotoPrint EX, then double-click Easy-PhotoPrint EX.

Note

ndows
- To start Easy-PhotoPrint EX from Solution Menu, double-click (Solution Menu) on the desktop and click (Print photos or albums, etc.). See Solution Menu.
- To start Easy-PhotoPrint EX from the Start menu, select All Programs (or Programs), Canon Utilities, Easy-PhotoPrint EX, then Easy-PhotoPrint EX.
- To start Easy-PhotoPrint EX from Solution Menu, click (Solution Menu) in the Dock and click 📋 (Print photos or albums, etc.). See Solution Menu.

(2) Click Photo Print.

Note
- You can select Album, Calendar, Stickers, etc., besides Photo Print. See Using Various Functions of Easy-PhotoPrint EX.

3. Select a photo to print.
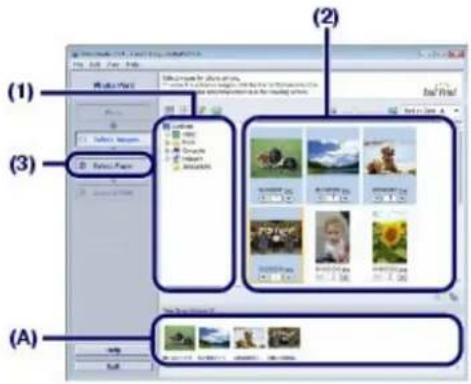
(1) Select the folder in which images are saved.
(2) Click the image to print.
The number of copies appears as "1", and the image you selected appears in the selected image area (A). You can select two or more images at the same time.

Note
- To print two or more copies, click (Up arrow) to change the number of copies.
- To cancel the selection, click the image to cancel in the selected image area and click (Delete Imported Image). You can also use ▼ (Down arrow) to change the number of copies to zero.
- You can also correct or enhance the selected image. See Using Various Functions of Easy-PhotoPrint EX.
(3) Click Select Paper.
- Select the loaded paper.
(1) Make sure that your machine's name is selected in Printer.
(2) Select the size and type of the loaded paper in Paper Size and Media Type. Here we select 4"x6" 10x15cm in Paper Size and the type of the loaded photo paper in Media Type.

Note
- If you select the wrong media type, the machine may not print with the proper print quality.
(3) Click Layout/Print.
![File Edit View Help (1) File Edit View Help (2) (3) [ ] [ ] [ ] [ ] [ ] [ ] [ ] [ ] [ ] [ ] [ ] [ ] [ ] [ ] [ ] [ ] [ ] [ ] [ ] [ ] [ ] [ ] [ ] [ ] [ ] [ ] [ ] [ ] [ ] [ ] [ ] [ ] [ ] [ ] [ ] [ ] [ ] [ ] [ ] [ ] [ ] [ ] [ ] [ ] [ ] [ ] [ ] [ ] [ ] [ ] [ ] [ ] [ ],](/content/2026/06/1260153/images/5840ce5f43ea09d339c965612a6a5e5c9dcb69fa7dcc369c3cdd5410c8c78395.jpg)
- Select a layout and start printing.
(1) Select the layout of the photo. Here we select Borderless (full).
The preview appears in the selected layout for confirmation of the required print result.

Note
- You can change the direction of photo or crop photos (trimming) to print. For details on the operation, refer to the on-screen manual: Advanced Guide.
(2) Click Print.


Note

ndews
- To cancel a print job in progress, press the Stop/Reset button on the machine or click Cancel Printing on the printer status monitor. To display the printer status monitor, click Canon XXX Printer (where "XXX" is your machine's name) on the taskbar.

Click the
- Click the printer icon in the Dock to display the list of print jobs in progress. - To cancel a print job in progress, select the desired job in the Name list and click Delete. To temporarily stop a job in progress, click Hold. To temporarily stop all the jobs in the list, click Pause Printer (or Stop Jobs).

Basic Guide
Advanced Guide Troubleshooting
Contents > Printing from Your Computer > Printing Photos (Easy-PhotoPrint EX) > Using Various Functions of Easy-PhotoPrint EX
■ Using Various Functions of Easy-PhotoPrint EX
This section introduces a few of the useful functions of Easy-PhotoPrint EX. For details, refer to the on-screen manual: Advanced Guide.
- Creating Your Own Prints
You can create an album or calendar using your photos.

Album

Calendar
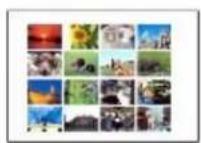
Stickers Layout Print

- Correcting Images
You can use Red-Eye Correction, Face Sharpener, Digital Face Smoothing, Brightness, Contrast, etc. to adjust, correct, or enhance images automatically or manually.
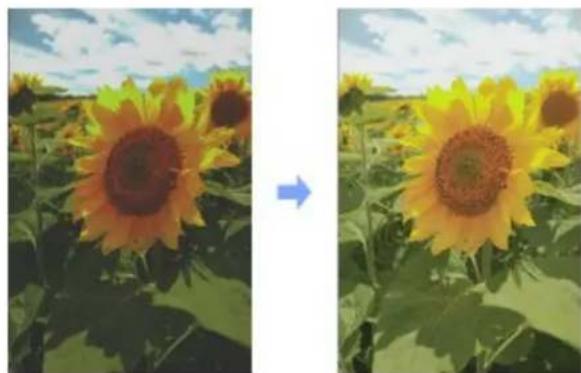
Brightness

Basic Guide
Advanced Guide Troubleshooting
Contents > Printing from Your Computer > Printing Documents (Windows)
Printing Documents (Windows)
This section describes the procedure to print a document of A4 size on plain paper. For details, refer to the on-screen manual: Advanced Guide.

Note
● Operations may vary depending on your software application. For details on the operation, refer to the instruction manual of your application.
- The screens used in this section are for printing with Windows Vista operating system Ultimate Edition (hereafter referred to as "Windows Vista").
- Make sure that the machine is turned on.
See Operation Panel.
- Load paper.
See Loading Plain Paper / Photo Paper. Here we load A4 plain paper. - Open the Paper Output Tray gently, and open the Output Tray Extension.
- Create (or open) a document to print using an appropriate software application.
- Open the printer driver setup window.
(1) Select Print on the File menu or the command bar in your software application. The Print dialog box will appear.
(2) Make sure that your machine's name is selected.

Note
- If another printer's name is selected, click and select your machine's name.
(3) Click Preferences (or Properties).

6. Specify the required print settings.
(1) Select Business Document in Commonly Used Settings.

Note
- When the print object such as Business Document or Photo Printing is selected in Commonly Used Settings, the items in Additional Features will be selected automatically. The settings suitable for the print object such as media type or print quality will also appear.
- When you specify two or more copies in Copies, the Collate check box will be selected.
(2) Make sure of the displayed settings.
Here we make sure that Plain Paper in Media Type, Standard in Print Quality, and A4 in Printer Paper Size are selected.

Note
The settings can be changed.
However, after changing Printer Paper Size, confirm that the setting for Page Size on the Page Setup sheet matches the setting set in the software application.
For details, refer to the on-screen manual: Advanced Guide.
- If you select the wrong media type, the machine may not print with the proper print quality.
(3) Click OK.


Note
- For details on the printer driver functions, click Help or Instructions to view the online help or the on-screen manual: Advanced Guide. The Instructions button appears on the Quick Setup, Main, and Maintenance sheets if the on-screen manual is installed on your computer.
- You can name the changed settings and add to Commonly Used Settings. For details, refer to the on-screen manual: Advanced Guide.
- To display the current settings next time when you open the printer driver setup window, select the Always Print with Current Settings check box. Some software applications may not have this function.
- To display the preview to confirm the print result, select the Preview before printing check box. Some software applications may not have a preview function.
- You can specify detailed print settings on the Main sheet or Page Setup sheet. For details, refer to the on-screen manual: Advanced Guide.
7. Start printing.
Click Print (or OK) to start printing.
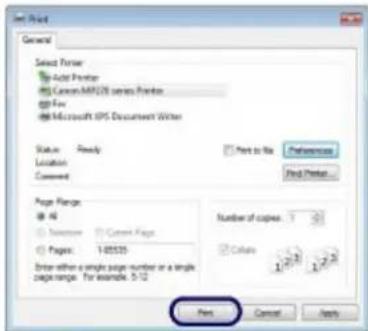

Note
- The message on how to load envelopes will appear when printing on them. This message will not appear next time if you select the Do not show this message again. check box. For details on the settings to print envelopes, see Loading Envelopes.
- To cancel a print job in progress, press the Stop/Reset button on the machine or click Cancel Printing on the printer status monitor. To display the printer status monitor, click Canon XXX Printer (where "XXX" is your machine's name) on the taskbar.
- If printed ruled lines are misaligned or print results are unsatisfactory, adjust the print head position. See Aligning the Print Head.

Basic Guide
Advanced Guide Troubleshooting
Contents > Printing from Your Computer > Printing Documents (Macintosh)
Printing Documents (Macintosh)
This section describes the procedure to print a document of A4 size on plain paper. For details, refer to the on-screen manual: Advanced Guide.

Note
● Operations may vary depending on your software application. For details on the operation, refer to the instruction manual of your application.
■ For Mac OS X v.10.5.x
- Make sure that the machine is turned on. See Operation Panel.
- Load paper. See Loading Plain Paper / Photo Paper. Here we load A4 plain paper.
- Open the Paper Output Tray gently, and open the Output Tray Extension.
- Create (or open) a document to print using an appropriate software application.
- Open the Print dialog box. Select Print on the File menu in your software application. The Print dialog box will appear.

Note
- If the dialog box below appears, click ▼ (Down arrow).

- Specify the required print settings.
(1) Make sure that your machine's name is selected in Printer.
(2) Select the page size of the loaded paper in Paper Size. Here we select A4.
(3) Select Quality & Media in the pop-up menu.

(4) Select the media type of the loaded paper in Media Type.
Here we select Plain Paper.

Note
- If you select the wrong media type, the machine may not print with the proper print quality.
(5) Select the print quality in Print Quality.
Here we select Standard.

Note
- For details on the print quality, refer to the on-screen manual: Advanced Guide.


Note
- For details on the printer driver functions, click Options, Borderless Printing, or Margin screen. (Question) on the Quality & Media, Color
- The preview appears on the left of the dialog box to confirm the print result. Some software applications may not have a preview function.
7. Start printing.
Click Print to start printing.

Note
- Click the printer icon in the Dock to display the list of print jobs in progress.
- To cancel a print job in progress, select the desired job in the Name list and click Delete. To temporarily stop a job in progress, click Hold. To temporarily stop all the jobs in the list, click Pause Printer.
- If printed ruled lines are misaligned or print results are unsatisfactory, adjust the print head position.
See Aligning the Print Head.
■ For Mac OS X v.10.4.x or Mac OS X v.10.3.9

Note
● The screens used in this section are for printing with Mac OS X v.10.4.x.
- Make sure that the machine is turned on.
See Operation Panel. - Load paper.
See Loading Plain Paper / Photo Paper.
Here we load A4 plain paper. - Open the Paper Output Tray gently, and open the Output Tray Extension.
- Create (or open) a document to print using an appropriate software application.
- Specify the page size.
(1) Select Page Setup on the File menu in your software application. The Page Setup dialog box will appear.
(2) Make sure that your machine's name is selected in Format for.
(3) Select the page size of the loaded paper in Paper Size. Here we select A4.
(4) Click OK.

- Specify the required print settings.
(1) Select Print on the File menu in your software application. The Print dialog box will appear.
(2) Make sure that your machine's name is selected in Printer.
(3) Select Quality & Media in the pop-up menu.
(4) Select the media type of the loaded paper in Media Type. Here we select Plain Paper.

Note
- If you select the wrong media type, the machine may not print with the proper print quality.
(5) Select the print quality in Print Quality.
Here we select Standard.

Note
For details on the print quality, refer to the on-screen manual: Advanced Guide.


Note
- For details on the printer driver functions, click (Question) on the Quality & Media, Color Options, Special Effects, Borderless Printing, or Margin screen.
- To display the preview to confirm the print result, click Preview. Some software applications may not have a preview function.
7. Start printing.
Click Print to start printing.

Note
- Click the printer icon in the Dock to display the list of print jobs in progress.
- To cancel a print job in progress, select the desired job in the Name list and click Delete. To temporarily stop a job in progress, click Hold. To temporarily stop all the jobs in the list, click Stop Jobs.
- If printed ruled lines are misaligned or print results are unsatisfactory, adjust the print head position.
See Aligning the Print Head.

Basic Guide
Advanced Guide Troubleshooting
Contents > Other Usages
Other Usages
This section introduces the function to print photos from your PictBridge compliant device such as a digital camera connected with a USB cable (MP270 series only).
This section also introduces useful software applications you can use with the machine.
Printing Photos from a PictBridge Compliant Device (MP270 series only)
Useful Software Applications
Solution Menu
My Printer
Easy-WebPrint EX

↑ Page top
Basic Guide
Advanced Guide Troubleshooting
Contents > Other Usages > Printing Photos from a PictBridge Compliant Device (MP270 series only)
Printing Photos from a PictBridge Compliant Device (MP270 series only)
You can connect the PictBridge compliant device to this machine with a USB cable that is recommended by the device's manufacturer, and print saved images directly.
For details on how to print saved images connecting the PictBridge compliant device, refer to the on-screen manual: Advanced Guide.
For details on the print settings on the PictBridge compliant device, refer to the instruction manual supplied with the device.

Connectable devices:
Any PictBridge compliant device can be connected to this machine regardless of the manufacturer or model as long as it is compliant with the PictBridge Standard.

Note
- PictBridge is the Standard to print your photos directly without using a computer, connecting a device such as a digital still camera, digital camcorder, or camera-equipped mobile phone.

(PictBridge) A device with this mark is PictBridge compliant.
Printable image data format:
This machine accepts images* taken with a camera compliant with the Design rule for Camera File system and PNG files.
* Exif 2.2/2.21 compliant

Basic Guide
Advanced Guide Troubleshooting
Contents > Other Usages > Useful Software Applications
Useful Software Applications
The machine can be used with useful software applications such as Solution Menu, My Printer, and Easy -WebPrint EX.
■ Solution Menu
With Solution Menu, you can start the software applications supplied with the machine or display the operating instructions.

Double-click (Solution Menu) on the desktop.
Click Here: Solution Menu

Click (Solution Menu) in the Dock.
* The screens below are for Windows Vista.

Click the button of a function to use.
After starting Solution Menu, click the button on the title bar to reduce the window size.

Note
- Install Solution Menu from the Setup CD-ROM when it has not been installed or has been uninstalled. To install Solution Menu, select Solution Menu in Custom Install.
● The buttons displayed on the screen may vary depending on the country or region of purchase.

- To start Solution Menu from the Start menu, select All Programs (or Programs), Canon Utilities, Solution Menu, then Solution Menu.

- To start Solution Menu from the menu bar, select the Go menu, Applications, Canon Utilities, Solution Menu, then double-click Solution Menu.
■ My Printer
With My Printer, you can display the printer driver setup window. It also provides you with the information on how to take an action when you have trouble with the operation.
My Printer is not available in Macintosh.

Double-click (My Printer) on the desktop.
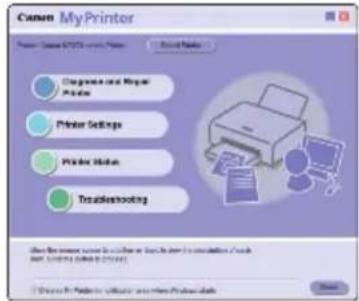

Note
- You can also start My Printer from Solution Menu or the taskbar.
- Install My Printer from the Setup CD-ROM when it has not been installed or has been uninstalled. To install My Printer, select My Printer in Custom Install.
● To start My Printer from the Start menu, select All Programs (or Programs), Canon Utilities, My Printer, then My Printer.
■ Easy-WebPrint EX
Easy-WebPrint EX provides quick and easy printing of web pages for Internet Explorer. You can print web pages automatically resized to fit the paper width without cutting off the sides of pages, or preview and select the desired web pages to print.
Easy-WebPrint EX is not available in Windows 2000 and Macintosh.

Important
- It is unlawful to reproduce or edit the copyrighted work of another person without permission from the copyright holder, except for personal use, use within the home, or other use within the limited scope as defined by the copyright. Additionally, reproducing or editing photographs of people may infringe on portrait rights.
When Easy-WebPrint EX is installed, it adds a toolbar to your Internet Explorer screen. The toolbar is available whenever Internet Explorer is running.

The clip function, for example, allows you to clip desired parts of web pages and edit them to print.
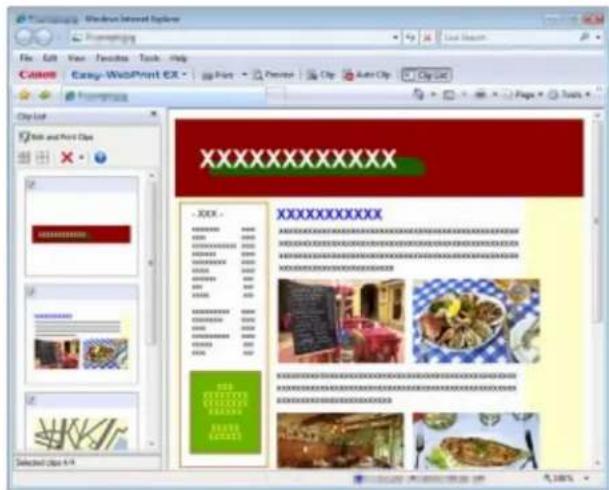

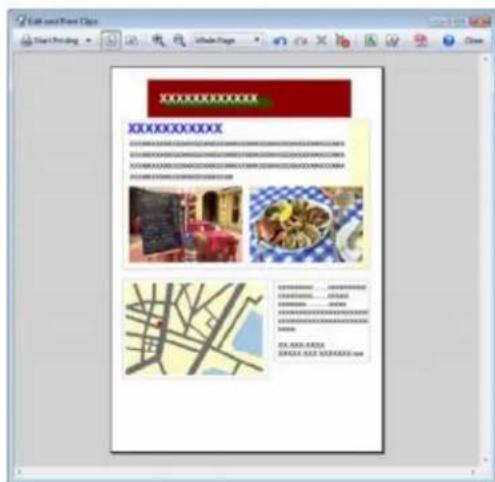
For details on printing web pages, click ? (Help) to view the online help.

Note
Notes for installation of Easy-WebPrint EX
- If Easy-WebPrint EX is not installed, the guidance for installation of Easy-WebPrint EX may appear from the taskbar on the desktop.
To install Easy-WebPrint EX, click the displayed guidance and follow the instructions on the screen. - You can also install Easy-WebPrint EX from the Setup CD-ROM.
To install Easy-WebPrint EX, select Easy-WebPrint EX in Custom Install. - To install Easy-WebPrint EX on your computer, Internet Explorer 7 or later is required and the computer must be connected to the Internet.

Basic Guide
Advanced Guide Troubleshooting
Contents > Loading Paper / Originals
Loading Paper / Originals
This section describes types of paper or originals you can load, how to load printing paper in the Rear Tray, and how to load originals to copy or scan.
Loading Paper
Loading Plain Paper / Photo Paper
Loading Envelopes
Media Types You Can Use
Media Types You Cannot Use
Loading Originals
Loading Originals
Originals You Can Load

↑ Page top
Basic Guide
Advanced Guide Troubleshooting
Contents > Loading Paper / Originals > Loading Paper
Loading Paper
Loading Plain Paper / Photo Paper
Loading Envelopes
→ Media Types You Can Use
→ Media Types You Cannot Use
■ Loading Plain Paper / Photo Paper

Important
- If you cut plain paper into small size such as 4" x 6" / 10 x 15 cm, 4" X 8" / 101.6 x 203.2 mm, 5" x 7" / 13 x 18 cm, or 2.16" x 3.58" / 55.0 x 91.0 mm (Card size) to perform trial print, it can cause paper jams.

Note
- We recommend Canon genuine photo paper for printing photos.
For details on the Canon genuine paper, see Media Types You Can Use. - You can use general copy paper.
For the page size and paper weight you can use for this machine, see Media Types You Can Use.
1. Prepare paper.
Align the edges of paper. If paper is curled, flatten it.
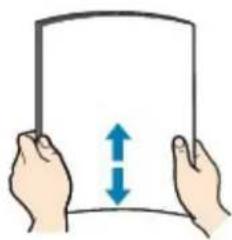

Note
- Align the edges of paper neatly before loading. Loading paper without aligning the edges may cause paper jams.
- If paper is curled, hold the curled corners and gently bend them in the opposite direction until the paper becomes completely flat.
For details on how to flatten curled paper, refer to "Troubleshooting" in the on-screen manual: Advanced Guide.
2. Load paper.
(1) Open the Paper Support, raise it, then tip it back.
(2) Open the Paper Output Tray gently, and open the Output Tray Extension.

(3) Slide the Paper Guides (A) to open them, and load the paper in the center of the Rear Tray WITH THE PRINT SIDE FACING YOU.

Important
● Always load paper in the portrait orientation (B). Loading paper in the landscape orientation (C) can cause paper jams.

(B)
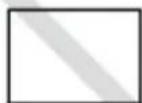
(C)
(4) Slide the Paper Guides (A) to align them with both sides of the paper stack. Do not slide the Paper Guides too hard. The paper may not be fed properly.


Note
- Do not load sheets of paper higher than the Load Limit Mark (D).


Note
● The machine may make operating noise when feeding paper.
- When copying, select the size and type of the loaded paper using the Operation Panel on the machine.
See Copying.
- When printing with a computer, select the size and type of the loaded paper in Printer Paper Size (or Paper Size) and Media Type in the printer driver.
See Printing Documents (Windows) or Printing Documents (Macintosh).
After loading paper

Basic Guide
Advanced Guide Troubleshooting
Contents > Loading Paper / Originals > Loading Paper > Loading Envelopes
■ Loading Envelopes
You can print on European DL and US Comm. Env. #10-sized envelopes.
The address is automatically rotated and printed according to the envelope's direction by specifying with the printer driver properly.
Important
- You can only print on envelopes with the computer.
-
You cannot use the following envelopes.
-
Envelopes with an embossed or treated surface
- Envelopes with a double flap (or sticker flaps)
- Envelopes whose gummed flaps are already moistened and adhesive
Note
- In Windows, the message on how to load envelopes will appear when printing on them. This message will not appear next time if you select the Do not show this message again. check box.
1. Prepare envelopes.
- Press down on all four corners and edges of the envelopes to flatten them.
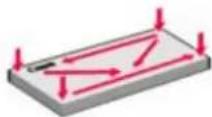
- If the envelopes are curled, hold the opposite corners and gently twist them in the opposite direction.

- If the corner of the envelope flap is folded, flatten it.
- Use a pen to press the leading edge in the inserting direction flat and sharpen the crease.

The figures above show a side view of the leading edge of the envelope.
Important
- The envelopes may jam in the machine if they are not flat or the edges are not aligned. Make sure that no curl or puff exceeds 0.1 inches / 3 mm.
2. Load envelopes.
(1) Open the Paper Support. Do not raise the Paper Support.

(2) Open the Paper Output Tray gently, and open the Output Tray Extension.
(3) Slide the Paper Guides (A) to open them, and load the envelopes in the center of the Rear Tray WITH THE ADDRESS SIDE FACING YOU.
The folded flap of the envelope will be faced down on the left side.
Up to 10 envelopes can be loaded at once.
(4) Slide the Paper Guides (A) to align them with both sides of the envelopes. Do not slide the Paper Guides too hard. The envelopes may not be fed properly.
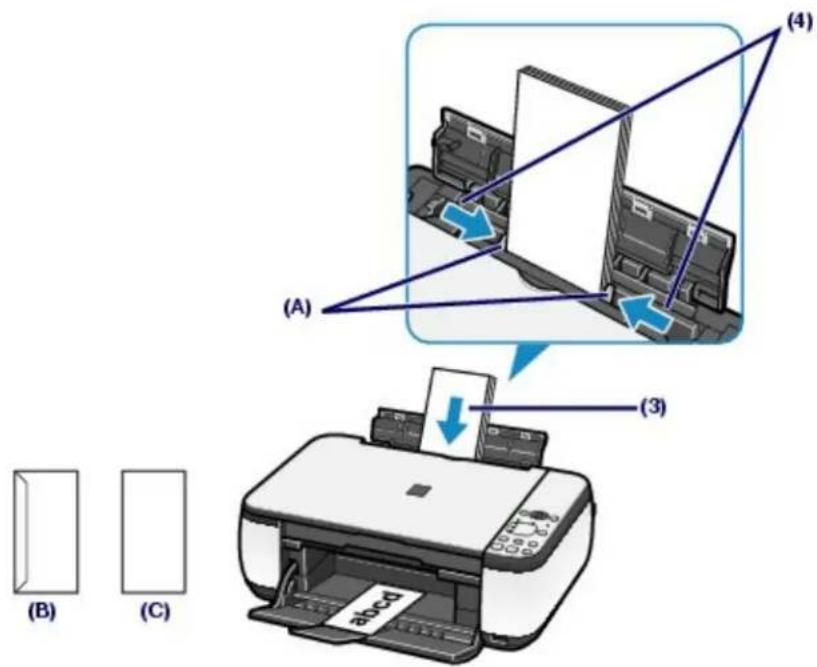
(B) Rear side
(C) Address side
- Specify the settings in the printer driver.

(1) Select Envelope in Commonly Used Settings on the Quick Setup sheet.
(2) Select DL Env. or Comm. Env. #10 in the Envelope Size Setting window.
(3) Select Landscape in Orientation.

(1) Select Envelope in Media Type.
(2) Select DL Envelope or #10 Envelope in Paper Size.
(3) Select the landscape orientation in Orientation.

Important
- If you do not specify the envelope size or orientation properly, the address will be printed upside down or will be turned to 90 degrees.

Note
● The machine may make operating noise when feeding envelopes.
- In Windows, if the print result is upside down, open the printer driver setup window, select Envelope in Commonly Used Settings, then select the Rotate 180 degrees check box in Additional Features.
- For details on the printer driver settings, see Printing Documents (Windows) or Printing Documents (Macintosh).


↑ Page top
Basic Guide
Advanced Guide Troubleshooting
Contents > Loading Paper / Originals > Loading Paper > Media Types You Can Use
■ Media Types You Can Use
Choose paper suitable for printing, for the best print results. Canon provides you various types of paper to enhance the fun of printing, such as stickers as well as papers for photo or document. We recommend the use of Canon genuine paper for printing your important photos.
- Media Types
Commercially available papers
| Name of Paper*1 | Rear Tray Paper Load Limit | Paper Output Tray Load Limit | Settings in Printer Driver: Media Type |
| Plain Paper (Recycled paper)*2 *3 | Approx. 100 sheets | Approx. 50 sheets | Plain Paper |
| Envelopes 10 envelopes | *4 | Envelope |
Canon genuine papers
| Name of Paper 1 | Rear Tray Paper Load Limit | Paper Output Tray Load Limit | Settings in Printer Driver: Media Type |
For printing photos: | |||
| Photo Paper Pro Platinum 5 | A4, Letter, 5" x 7" / 13 x 18 cm, and 8" x 10" / 20 x 25 cm: 10 sheets4" x 6" / 10 x 15 cm: 20 sheets | *4 | Photo Paper Pro Platinum |
| Photo Paper Pro II 5 | Photo Paper Pro II | ||
| Glossy Photo Paper "Everyday Use" 3 *5 | Glossy Photo Paper | ||
| Photo Paper Glossy 3 *5 | Glossy Photo Paper | ||
| Photo Paper Plus Glossy II 3 *5 | Photo Paper Plus Glossy II | ||
| Photo Paper Plus Semi-gloss 3 *5 | Photo Paper Plus Semi-gloss | ||
| Matte Photo Paper | Matte Photo Paper | ||
For printing business documents: | |||
| High Resolution PaperHR-101N> | 80 sheets 50 sheets | High Resolution Paper | |
For creating your own prints: | |||
| T-Shirt TransfersTR-301> | 1 sheet | *4 | T-Shirt Transfers |
| Photo Stickers*6 | Glossy Photo Paper | ||
*1 Paper with a Model Number is Canon genuine paper. Refer to the instruction manual supplied with the paper for detailed information on the printable side and notes on handling paper. For information on the page sizes available for each Canon genuine paper, visit our website. You may not be able to purchase some Canon genuine papers depending on the country or region of purchase. Paper is not sold in the US by Model Number. Purchase paper by name.
*2 Proper feeding of paper may not be possible at the maximum capacity depending on the type of paper or environmental conditions (either very high or low temperature or humidity). In such cases, reduce the number of paper you load at a time to less than half (100% recycled paper can be used).
*3 Paper that can be used for making copies when selecting the media type with the Paper button on the Operation Panel. You can only select A4 or Letter-sized plain paper, A4 or Letter-sized photo paper, and 4" x 6" / 10 x 15 cm photo paper.
*4 We recommend that you remove the previously printed sheet from the Paper Output Tray before continuously printing to avoid blurs and discoloration.
*5 When loading paper in stacks, the print side may become marked as it is fed or paper may not feed properly. In this case, load one sheet at a time.
*6 You can easily specify print settings for sticker paper with Easy-PhotoPrint EX provided on the Setup CD-ROM. Install it on your computer.

Note
- For details on the page size and media type settings when printing from a PictBridge compliant device, refer to the on-screen manual: Advanced Guide (MP270 series only).

Page Sizes
You can use the following page sizes.

Note
● In Macintosh, Choukei 3 and Choukei 4 are not available.
Standard sizes:
● Letter (8.50 x 11.00 inches / 215.9 x 279.4 mm)
● Legal (8.50 x 14.00 inches / 215.9 x 355.6 mm)
A5 (5.83 x 8.27 inches / 148.0 x 210.0 mm)
A4 (8.27 x 11.69 inches / 210.0 x 297.0 mm)
B5 (7.17 x 10.12 inches / 182.0 x 257.0 mm)
- 4" x 6" (4.00 x 6.00 inches / 10 x 15 cm)
- 4" x 8" (4.00 x 8.00 inches / 101.6 x 203.2 mm)
- 5" x 7" (5.00 x 7.00 inches / 13 x 18 cm)
- 8" x 10" (8.00 x 10.00 inches / 20 x 25 cm)
• L (3.50 x 5.00 inches / 89.0 x 127.0 mm)
2L (5.00 x 7.01 inches / 127.0 x 178.0 mm)
- Hagaki (3.94 x 5.83 inches / 100.0 x 148.0 mm)
- Hagaki 2 (7.87 x 5.83 inches / 200.0 x 148.0 mm)
- Comm. Env. #10 (4.12 x 9.50 inches / 104.6 x 241.3 mm)
DL Env. (4.33 x 8.66 inches / 110.0 x 220.0 mm)
● Choukei 3 (4.72 x 9.25 inches / 120.0 x 235.0 mm)
● Choukei 4 (3.54 x 8.07 inches / 90.0 x 205.0 mm)
- Youkei 4 (4.13 x 9.25 inches / 105.0 x 235.0 mm)
- Youkei 6 (3.86 x 7.48 inches / 98.0 x 190.0 mm)
- Card (2.16 x 3.58 inches / 55.0 x 91.0 mm)
- Wide (4.00 x 7.10 inches / 101.6 x 180.6 mm)
Non-standard sizes:
You can also specify a custom size within the following range.
● Minimum size: 2.17 x 3.58 inches / 55.0 x 91.0 mm
● Maximum size: 8.50 x 26.61 inches / 215.9 x 676.0 mm
- Paper Weight
17 to 28 lb / 64 to 105 g/m 2 (except for Canon genuine paper)
Do not use heavier or lighter paper (except for Canon genuine paper), as it could jam in the machine.
- Notes on Storing Paper
● Take out only the necessary number of paper from the package, just before printing.
- To avoid curling, when you do not print, put unused paper back into the package and keep it on a level surface. And also, store it avoiding heat, humidity, and direct sunlight.
● Notes on Paper for Full-page Borderless Printing
- You cannot use A5, B5, and Legal-sized paper, and envelopes for full-page borderless printing.
- You can use plain paper for full-page borderless printing only when printing from a computer. However, this may result in lower print quality. We recommend using plain paper for a trial print.

Basic Guide
Advanced Guide Troubleshooting
Contents > Loading Paper / Originals > Loading Paper > Media Types You Cannot Use
■ Media Types You Cannot Use
Do not use the following types of paper. Using such paper will cause not only unsatisfactory results, but also the machine to jam or malfunction.
- Folded, curled, or wrinkled paper
- Damp paper
● Paper that is too thin (weighing less than 17 lb / 64 g/m 2 )
● Paper that is too thick (weighing more than 28 lb / 105 g/m 2, except for Canon genuine paper)
● Paper thinner than a postcard, including plain paper or notepad paper cut to a small size (when printing on paper smaller than A5)
• Picture postcards
• Postcards affixed with photos or stickers
● Envelopes with a double flap (or sticker flaps) - Envelopes with an embossed or treated surface
- Envelopes whose gummed flaps are already moistened and adhesive
• Any type of paper with holes
• Paper that is not rectangular
● Paper bound with staples or glue
• Paper with adhesives
• Paper decorated with glitter, etc.

↑ Page top
Basic Guide
Advanced Guide Troubleshooting
Contents > Loading Paper / Originals > Loading Originals
Loading Originals
Loading Originals
→ Originals You Can Load
■ Loading Originals
Load originals to copy or scan on the Platen Glass.
Important
● After loading the original, be sure to close the Document Cover before starting to copy or scan.
- When scanning from a computer using a software application, you need to load the original in a different way.
For details, refer to the on-screen manual: Advanced Guide.
1. Load an original on the Platen Glass.
(1) Open the Document Cover.
Important
- Do not place any object on the Document Cover. It will fall into the Rear Tray when the Document Cover is opened and cause the machine to malfunction.
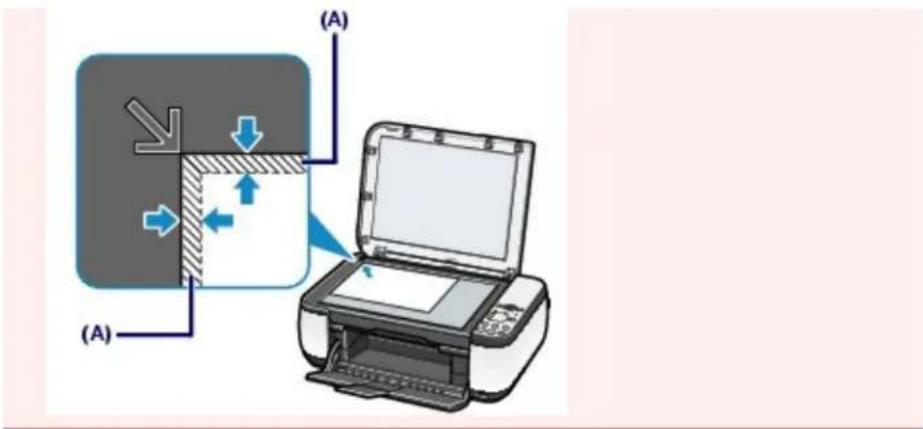
(2) Load an original WITH THE SIDE TO COPY OR SCAN FACING DOWN on the Platen Glass.
Align the corner of the original with the alignment mark ↗.

Important
- Do not place any objects weighing more than 4.4 lb / 2.0 kg on the Platen Glass.
- Do not press or put weight on the original with pressure exceeding 4.4 lb / 2.0 kg. Doing so may cause the scanner to malfunction or the Platen Glass to break.
- The machine cannot scan the shaded area (A) (0.04 inches / 1 mm from the edges of the Platen Glass).
- Close the Document Cover gently.


↑ Page top
Basic Guide
Advanced Guide Troubleshooting
Contents > Loading Paper / Originals > Loading Originals > Originals You Can Load
■ Originals You Can Load
You can copy or scan the following originals.
Types of originals:
Text document, magazine, or newspaper
Printed photo, picture card, business card, or DVD/CD
Size (W x L):
Max. 8.5 x 11.7 inches / 216 x 297 mm

Note
- When loading a thick original such as a book on the Platen Glass, you can load it by removing the Document Cover from the machine. For details on how to remove or attach the Document Cover, refer to the on-screen manual: Advanced Guide.

↑ Page top
Basic Guide
Advanced Guide Troubleshooting
Contents > Routine Maintenance
Routine Maintenance
This section describes how to clean the machine when the print result is faint, to replace FINE Cartridges when they run out of ink, or to take an action when paper does not feed properly.
When Printing Becomes Faint or Colors Are Incorrect
Printing the Nozzle Check Pattern Examining the Nozzle Check Pattern Cleaning the Print Head Cleaning the Print Head Deeply Aligning the Print Head
Replacing a FINE Cartridge
Replacing Procedure Checking the Ink Status
Cleaning the Machine
Cleaning the Paper Feed Roller Cleaning the Inside of the Machine (Bottom Plate Cleaning) Cleaning the Protrusions inside the Machine

↑ Page top
Basic Guide
Advanced Guide Troubleshooting
Contents > Routine Maintenance > When Printing Becomes Faint or Colors Are Incorrect
When Printing Becomes Faint or Colors Are Incorrect
If print results are blurred or colors are not printed correctly, the print head nozzles (FINE Cartridges) are probably clogged. Follow the procedure below to print the nozzle check pattern, check the print head nozzle condition, then clean the Print Head.
If printed ruled lines are misaligned or print results are otherwise unsatisfactory, aligning the Print Head may improve print quality.

Important
- Do not rinse or wipe the FINE Cartridges. This can cause trouble with the FINE Cartridges.

Note
Before performing maintenance
- Check if ink remains in the FINE Cartridge. See Checking the Ink Status.
- Check if the FINE Cartridges are installed correctly. See Replacing Procedure.
- Check if the orange protective tape on the bottom of the FINE Cartridge is removed. See Replacing Procedure.
- If the Alarm lamp lights or flashes orange, refer to "Troubleshooting" in the on-screen manual: Advanced Guide.
- Increasing the print quality in the printer driver settings may improve the print result. For details, refer to the on-screen manual: Advanced Guide.
- When the Print Results Are Blurred or Uneven:
Step 1
See Printing the Nozzle Check Pattern. See Examining the Nozzle Check Pattern
If there are missing lines or horizontal white streaks in the pattern:


After cleaning the Print Head, print and examine the nozzle check pattern.
Step 2
See Cleaning the Print Head.
If the problem is not resolved after cleaning the Print Head twice:

Step 3
See Cleaning the Print Head Deeply.
If the problem is not resolved, turn off the power and clean the Print Head deeply again after 24 hours.
If the problem is still not resolved:

Step 4
See Replacing a FINE Cartridge.

Note
- If the problem is still not resolved after replacing the FINE Cartridge, contact the service center.
- When the Print Results Are Not Even such as the Ruled Lines Are Misaligned:
See Aligning the Print Head.

Note
- You can also perform the maintenance operations from your computer. For details, refer to the on-screen manual: Advanced Guide.

↑ Page top
Basic Guide
Advanced Guide Troubleshooting
Contents > Routine Maintenance > When Printing Becomes Faint or Colors Are Incorrect > Printing the Nozzle Check Pattern
■ Printing the Nozzle Check Pattern
Print the nozzle check pattern to determine whether the ink ejects properly from the print head nozzles.

Note
- If the remaining ink level is low, the nozzle check pattern will not be printed correctly. Replace the FINE Cartridge whose ink is low. See Replacing a FINE Cartridge.
You need to prepare: a sheet of A4 or Letter-sized plain paper
- Make sure that the power is turned on.
- Load a sheet of A4 or Letter-sized plain paper in the Rear Tray.
- Open the Paper Output Tray gently, and open the Output Tray Extension.
- Print the nozzle check pattern.
(1) Press the 81 (Maintenance) button repeatedly until A appears.
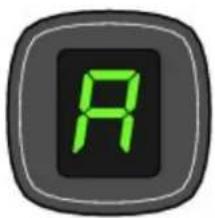
(2) Press the Black or Color button. The nozzle check pattern will be printed.
- Examine the nozzle check pattern. See Examining the Nozzle Check Pattern.

Basic Guide
Advanced Guide Troubleshooting
Contents > Routine Maintenance > When Printing Becomes Faint or Colors Are Incorrect > Examining the Nozzle Check Pattern
■ Examining the Nozzle Check Pattern
Examine the nozzle check pattern, and clean the Print Head if necessary.
- Check if there are missing lines in the pattern (1) or horizontal white streaks in the pattern (2).

(1) Check if lines are missing in this pattern.
If yes, the cleaning is required.
See Cleaning the Print Head.

(A)
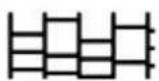
(B)
(A) Good
(B) Bad (lines are missing)
(2) Check if horizontal white streaks are present in this pattern.
If yes, the cleaning is required.
See Cleaning the Print Head.

(A)

(B)
(A) Good
(B) Bad (horizontal white streaks are present)

Basic Guide
Advanced Guide Troubleshooting
Contents > Routine Maintenance > When Printing Becomes Faint or Colors Are Incorrect > Cleaning the Print Head
■ Cleaning the Print Head
Clean the Print Head if lines are missing or if horizontal white streaks are present in the printed nozzle check pattern. Cleaning unclogs the nozzles and restores the print head condition. Cleaning the Print Head consumes ink, so clean the Print Head only when necessary.
-
Make sure that the power is turned on.
-
Clean the Print Head.
(1) Press the 81 (Maintenance) button repeatedly until H appears.

(2) Press the Black or Color button.
The machine starts cleaning the Print Head.
Do not perform any other operations until the machine completes the cleaning of the Print Head. This takes about 1 to 2 minutes.
- Check the print head condition.
When the cleaning is completed, the LED returns to the copy standby mode.
To check the print head condition, print the nozzle check pattern.
See Printing the Nozzle Check Pattern.

Note
- If the problem is not resolved after cleaning the Print Head twice, clean the Print Head deeply. See Cleaning the Print Head Deeply.

Basic Guide
Advanced Guide Troubleshooting
Contents > Routine Maintenance > When Printing Becomes Faint or Colors Are Incorrect > Cleaning the Print Head Deeply
■ Cleaning the Print Head Deeply
If print quality does not improve by the standard cleaning of the Print Head, clean the Print Head deeply. Cleaning the Print Head deeply consumes more ink than the standard cleaning of the Print Head, so clean the Print Head deeply only when necessary.
-
Make sure that the power is turned on.
-
Clean the Print Head deeply.
(1) Press the 81 (Maintenance) button repeatedly until y appears.

(2) Press the Black or Color button.
The machine starts cleaning the Print Head deeply.
Do not perform any other operations until the machine completes the deep cleaning of the Print Head. This takes about 2 minutes.
- Check the print head condition.
When the deep cleaning is completed, the LED returns to the copy standby mode.
To check the print head condition, print the nozzle check pattern.
See Printing the Nozzle Check Pattern.
If the problem is not resolved, turn off the power and clean the Print Head deeply again after 24 hours.
If the problem is still not resolved, replace the FINE Cartridge with a new one.
See Replacing a FINE Cartridge.
If the problem is still not resolved after replacing the FINE Cartridge, contact the service center.

Basic Guide
Advanced Guide Troubleshooting
Contents > Routine Maintenance > When Printing Becomes Faint or Colors Are Incorrect > Aligning the Print Head
■ Aligning the Print Head
If printed ruled lines are misaligned or print results are otherwise unsatisfactory, adjust the print head position.

Note
- If the remaining ink level is low, the print head alignment sheet will not be printed correctly. Replace the FINE Cartridge whose ink is low. See Replacing a FINE Cartridge.
You need to prepare: a sheet of A4 or Letter-sized plain paper*
* Be sure to use paper that is white and clean on both sides.
- Make sure that the power is turned on.
- Load a sheet of A4 or Letter-sized plain paper in the Rear Tray.
- Open the Paper Output Tray gently, and open the Output Tray Extension.
- Print the print head alignment sheet.
(1) Press the 81 (Maintenance) button repeatedly until u (lowercase "u") appears.

(2) Press the Black or Color button.
The print head alignment sheet will be printed.

Important
- Do not touch any printed part on the print head alignment sheet.
- Be careful not to get the print head alignment sheet dirty. If the sheet is stained or wrinkled, it may not be scanned properly.
![graph TD A["House Icon"] --> B["Home Icon"] B --> C["Control Icon"] C --> D["Output Icon"]](/content/2026/06/1260153/images/04d3f87c01e50057c5c5c296bc3a68be70ed7704eccf3eeb9652c4e899c791ce.jpg)
- Scan the print head alignment sheet to adjust the print head position.
(1) Load the print head alignment sheet on the Platen Glass.
Load the print head alignment sheet WITH THE PRINTED SIDE FACING DOWN and align the mark ▼ on the upper left corner of the sheet with the alignment mark ↗.

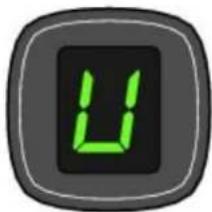
(2) Close the Document Cover gently, make sure that U (uppercase "U") appears on the LED, then press the Black or Color button.
The machine starts scanning the print head alignment sheet, and the print head position will be adjusted automatically.
When adjusting the print head position is completed, the LED returns to the copy standby mode. Remove the sheet on the Platen Glass.

Important
- Do not open the Document Cover or move the loaded print head alignment sheet until adjusting the print head position is completed.
- If adjusting the print head position has failed, the error code will appear on the LED.
Press the Stop/Reset button to release the error, then confirm the following. - The Platen Glass and the print head alignment sheet are not dirty.
- The print head alignment sheet is placed in the correct position with the printed side facing down.
For details, refer to "Troubleshooting" in the on-screen manual: Advanced Guide.

Note
- If the print results are still not satisfactory after adjusting the print head position as described above, adjust the print head position manually from the computer.
For details, refer to the on-screen manual: Advanced Guide. - To print and check the current head position adjustment values, display L on the LED, then press the Black or Color button.

Basic Guide
Advanced Guide Troubleshooting
Contents > Routine Maintenance > Replacing a FINE Cartridge
Replacing a FINE Cartridge
When ink runs out while printing is in progress, the error code "E, 1, 6" will appear on the LED. The
Alarm lamp will light up and the Ink lamp will start flashing.
Make sure which FINE Cartridge has run out of ink and replace it with a new one.

Note
- For information on the compatible FINE Cartridges, refer to the printed manual: Getting Started.
■ Replacing Procedure
When FINE Cartridges run out of ink, follow the procedure below to replace them.

Important
Handling FINE Cartridges
- Do not touch the electrical contacts (A) or print head nozzles (B) on the FINE Cartridge. The machine may not print properly if you touch it.

- To maintain optimal print quality, we recommend the use of specified Canon brand FINE Cartridges. Refilling the ink is not recommended.
- If you remove a FINE Cartridge, replace it immediately. Do not leave the machine with FINE Cartridges removed.
- Use new FINE Cartridges for replacement. Installing used FINE Cartridges may cause the nozzles to clog.
Furthermore, with such cartridges, the machine will not be able to inform you when to replace the cartridges properly.
- Once a FINE Cartridge has been installed, do not remove it from the machine and leave it out in the open. This will cause the FINE Cartridge to dry out, and the machine may not operate properly when it is reinstalled. To maintain optimal printing quality, use a FINE Cartridge within six months of first use.

Note
- If a FINE Cartridge runs out of ink, you can print with either Color or Black FINE Cartridge, in whichever ink remains, only for a while. However the print quality may be reduced compared to when printing with both cartridges. We recommend to use new FINE Cartridges in order to obtain optimum qualities.
Even when printing with one ink only, print with leaving the empty FINE Cartridge installed. If either of the Color FINE Cartridge or Black FINE Cartridge is not installed, an error occurs and the machine cannot print.
For information on how to configure this setting, refer to the on-screen manual: Advanced Guide.
- Color ink may be consumed even when printing a black-and-white document or when black-and-white printing is specified.
Both color ink and black ink are also consumed in the standard cleaning and deep cleaning of the Print Head, which may be necessary to maintain the machine's performance. When ink runs out, replace the FINE Cartridge immediately with a new one.
-
Make sure that the power is turned on, and open the Paper Output Tray.
-
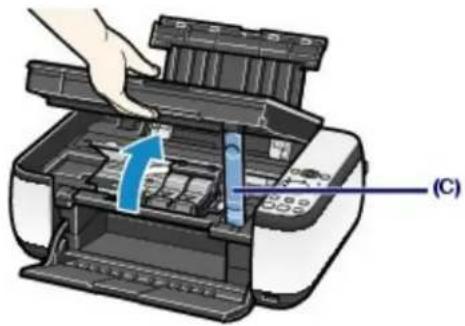
Lift the Scanning Unit (Cover), then hold it open with the Scanning Unit Support (C). The FINE Cartridge Holder moves to the replacement position.

Caution
- Do not hold the FINE Cartridge Holder to stop or move it forcibly. Do not touch the FINE Cartridge Holder until it stops completely.

Important
- The inside of the machine may be stained with ink. Be careful not to stain your hands or clothing when replacing FINE Cartridges. You can easily wipe off the ink from the inside of the machine with tissue paper or the like. For details on the cleaning, refer to the printed manual: Getting Started.
- Do not place any object on the Document Cover. It will fall into the Rear Tray when the Document Cover is opened and cause the machine to malfunction.
- When opening the Scanning Unit (Cover), lift it with the Document Cover closed.
- Do not touch the metallic parts or other parts inside the machine.
-
If the Scanning Unit (Cover) is left open, the FINE Cartridge Holder moves to the right. In this case, close and reopen the Scanning Unit (Cover).
-
Remove the empty FINE Cartridge.
(1) Pinch the tabs and open the Ink Cartridge Locking Cover.
(2) Remove the FINE Cartridge.


Important
● Handle FINE Cartridges carefully to avoid staining of clothing or the surrounding area.
- Discard empty FINE Cartridges according to the local laws and regulations regarding disposal of consumables.
- Prepare the new FINE Cartridge.
(1) Take a new FINE Cartridge out of its package and remove the orange protective tape (D) gently.

(D)

Important
- If you shake a FINE Cartridge, ink may spill out and stain your hands and the surrounding area. Handle a FINE Cartridge carefully.
- Be careful not to stain your hands and the surrounding area with ink on the removed protective tape.
- Do not reattach the protective tape once you have removed it. Discard it according to the local laws and regulations regarding disposal of consumables.
-
Do not touch the electrical contacts or print head nozzles on a FINE Cartridge. The machine may not print properly if you touch it.
-
Install the FINE Cartridge.
(1) Put a new FINE Cartridge in the FINE Cartridge Holder.
The Color FINE Cartridge should be installed into the left slot and the Black FINE Cartridge should be installed into the right slot.
(2) Close the Ink Cartridge Locking Cover to lock the FINE Cartridge into place.
Push down the Ink Cartridge Locking Cover until it clicks.

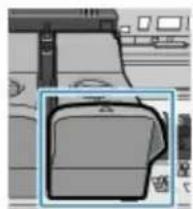
(3) Confirm that the Ink Cartridge Locking Cover is closed correctly.

Note
- If the Ink Cartridge Locking Cover is not closed correctly, push down the Ink Cartridge Locking Cover until it clicks.

(E) Closed correctly
(F) Not closed correctly (the cover is tilted)
(E)

(F)

Important
- The machine cannot print unless both the Color and Black FINE Cartridges are installed. Be sure to install both the FINE Cartridges.
- Lift the Scanning Unit (Cover) slightly to set the Scanning Unit Support back to its original position, and gently close the Scanning Unit (Cover).

Caution
- When setting the Scanning Unit Support back to its original position, be sure to hold the Scanning Unit (Cover) firmly, and be careful not to get your fingers caught.

Note
- If the Alarm lamp lights or flashes orange after the Scanning Unit (Cover) is closed, refer to "Troubleshooting" in the on-screen manual: Advanced Guide.
- When you start printing after replacing the FINE Cartridge, the machine starts cleaning the Print Head automatically. Do not perform any other operations until the machine completes the cleaning of the Print Head.
- If printed ruled lines are misaligned or the print head position is misaligned, adjust the print head position.
See Aligning the Print Head.

Basic Guide
Advanced Guide Troubleshooting
Contents > Routine Maintenance > Replacing a FINE Cartridge > Checking the Ink Status
■ Checking the Ink Status
You can check the ink status with the Ink lamps on the Operation Panel or with the computer screen.

Note
- The ink level detector is mounted on the machine to detect the remaining ink level. The machine considers as ink is full when a new FINE Cartridge is installed, and then starts to detect a remaining ink level. If you install a used FINE Cartridge, the indicated ink level of it may not be correct. In such case, refer to the ink level information only as a guide.
● With the Ink Lamps on the Operation Panel
Make sure that the LED is in the copy standby mode. You can confirm the ink status with the Ink lamps.
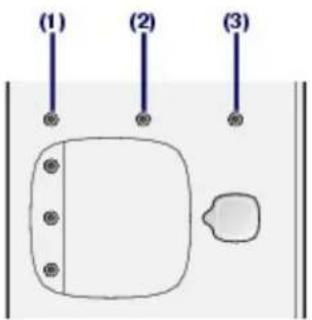
(1) Alarm lamp
(2) Color Ink lamp
(3) Black Ink lamp
Color Ink lamp or Black Ink lamp lights
Ink is low. You can continue printing for a while, but we recommend you to have a new FINE Cartridge available.
Color Ink lamp or Black Ink lamp flashes, while Alarm lamp lights
- If "E, 1, 6" appears on the LED, ink has run out.
Refer to "Troubleshooting" in the on-screen manual: Advanced Guide. - If "E, 1, 3" appears on the LED, ink may have run out.
Refer to "Troubleshooting" in the on-screen manual: Advanced Guide.
Color Ink lamp or Black Ink lamp flashes, while Alarm lamp is off
The function for detecting the remaining ink level is disabled.
- With the Computer Screen
You can confirm the ink status with the printer status monitor (Windows) or Canon IJ Printer Utility (Macintosh).


![Canvas (I) Printer Utility - MF270 series Ink Level Information (A) Press the [About ink] button to view the information about the ink tank. Press the [Update] button to check the current remaining ink level. Ink Details About Ink Update Quit](/content/2026/06/1260153/images/8d87a006377171914cbec2c7983d32e0e2e55d742118ecd8c4d892b7912393d5.jpg)
(A) Check if any symbol appears on the screen.
The ink with ⚙ (Ink low) is running low. You can continue printing for a while, but we recommend you to have a new FINE Cartridge available.

Note
- An error message may appear while printing. Confirm the message and take an appropriate action.
Follow the procedure below to open each of the confirmation screens.
Windows
- Open the printer driver setup window from Control Panel.
Refer to the on-screen manual: Advanced Guide.
- Click View Printer Status on the Maintenance sheet.
To confirm the FINE Cartridge information, click the Ink Details menu.

Note
- You can also display the printer status monitor by clicking Canon XXX Printer (where "XXX" is your machine's name) which appears on the taskbar while printing.
Macintosh
- Open the Canon IJ Printer Utility.
Refer to the on-screen manual: Advanced Guide.
- Select Ink Level Information in the pop-up menu.
To confirm the FINE Cartridge information, click Ink Details.

Basic Guide
Advanced Guide Troubleshooting
Contents > Routine Maintenance > Cleaning the Machine
Cleaning the Machine
This section describes how to clean the inside of the machine.
→ Cleaning the Paper Feed Roller
→ Cleaning the Inside of the Machine (Bottom Plate Cleaning)
→ Cleaning the Protrusions inside the Machine

↑ Page top
Basic Guide
Advanced Guide Troubleshooting
Contents > Routine Maintenance > Cleaning the Machine > Cleaning the Paper Feed Roller
■ Cleaning the Paper Feed Roller
If the Paper Feed Roller is dirty or paper powder is attached to it, paper may not be fed properly. In this case, clean the Paper Feed Roller. Cleaning will wear out the Paper Feed Roller, so perform this only when necessary.
You need to prepare: three sheets of A4 or Letter-sized plain paper
- Make sure that the power is turned on, and remove any paper from the Rear Tray.
- Open the Paper Output Tray gently, and open the Output Tray Extension.
- Clean the Paper Feed Roller.
(1) Press the 81 (Maintenance) button repeatedly until b appears.

(2) Press the Black or Color button. The Paper Feed Roller will rotate as it is cleaned.
- Clean the Paper Feed Roller with paper.
(1) Make sure that the Paper Feed Roller has stopped rotating, and load three sheets of A4 or Letter-sized plain paper in the Rear Tray.
(2) Make sure that b appears on the LED, then press the Black or Color button. The machine starts cleaning. The cleaning will be completed after the paper is ejected.
If the problem is not resolved after cleaning the Paper Feed Roller, contact the service center.

Note
- After the cleaning is completed, press the Stop/Reset button to return the LED to the copy standby mode.
Basic Guide
Advanced Guide Troubleshooting
Contents > Routine Maintenance > Cleaning the Machine > Cleaning the Inside of the Machine (Bottom Plate Cleaning)
■ Cleaning the Inside of the Machine (Bottom Plate Cleaning)
Remove stains from the inside of the machine. If the inside of the machine becomes dirty, printed paper may get dirty, so we recommend performing cleaning regularly.

Important
- Do not perform any other operations while performing the Bottom Plate Cleaning.
You need to prepare: a sheet of A4 or Letter-sized plain paper
- Make sure that the power is turned on, and remove any paper from the Rear Tray.
- Open the Paper Output Tray gently, and open the Output Tray Extension.
- Fold a single sheet of A4 or Letter-sized plain paper in half widthwise, and unfold the paper.
- Load only this sheet of paper in the Rear Tray with the open side facing you.

- Clean the inside of the machine.
(1) Press the 81 (Maintenance) button repeatedly until J appears.
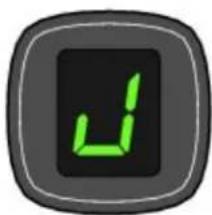
(2) Press the Black or Color button.
The paper cleans the inside of the machine as it feeds through the machine.
Check the folded area of the ejected paper. If it is smudged with ink, perform the Bottom Plate Cleaning again.
If the problem is not resolved after performing the Bottom Plate Cleaning twice, the protrusions inside the machine may be stained.
See Cleaning the Protrusions inside the Machine to clean them.

Note
- When performing the Bottom Plate Cleaning again, make sure to use a new piece of paper.

↑ Page top
Basic Guide
Advanced Guide Troubleshooting
Contents > Routine Maintenance > Cleaning the Machine > Cleaning the Protrusions inside the Machine
■ Cleaning the Protrusions inside the Machine

Caution
- Be sure to turn off the power and disconnect the power plug before cleaning the machine.
If the protrusions inside the machine are stained, wipe off any ink from the protrusions using a cotton swab or the like.


↑ Page top
Basic Guide
Advanced Guide Troubleshooting
Contents > Appendix
Appendix
Legal Limitations on Use of Your Product and Use of Images
Tips on How to Use Your Machine

↑ Page top
Basic Guide
Advanced Guide Troubleshooting
Contents > Appendix > Legal Limitations on Use of Your Product and Use of Images
Legal Limitations on Use of Your Product and Use of Images
It may be unlawful to make copies of, scan, print, or use reproductions of the following documents.
The list provided is non-exhaustive. When in doubt, check with a legal representative in your jurisdiction.
- Paper money
- Money orders
• Certificates of deposit - Postage stamps (canceled or uncanceled)
• Identifying badges or insignias - Selective service or draft papers
- Checks or drafts issued by governmental agencies
● Motor vehicle licenses and certificates of title - Traveler's checks
- Food stamps
Passports
Immigration papers - Internal revenue stamps (canceled or uncanceled)
- Bonds or other certificates of indebtedness
- Stock certificates
● Copyrighted works/works of art without permission of copyright owner

↑ Page top
Basic Guide
Advanced Guide Troubleshooting
Contents > Appendix > Tips on How to Use Your Machine
Tips on How to Use Your Machine
This section introduces the tips on how to use your machine and for printing with optimal quality.
■ Ink is used for various purposes.
- How is ink used for various purposes other than printing?
Ink may be used for purposes other than printing. Ink is not only used for printing, but also for cleaning the Print Head to maintain the optimal printing quality.
The machine has the function to automatically clean the ink jet nozzles to prevent clogging. In the cleaning procedure, ink is pumped out from the nozzles. Used ink for nozzle cleaning is limited to a small amount.
- Does black-and-white printing use color ink?
Black-and-white printing may use color ink depending on the type of printing paper or the settings of the printer driver. So, color ink is consumed even when printing in black-and-white.
■ Printing on special paper: How to print with optimal quality!?
- Tip!: Check the machine status before printing!
• Is the Print Head OK?
If print head nozzles are clogged, print will be faint and papers will be wasted. Print the nozzle check pattern to check the Print Head.
See When Printing Becomes Faint or Colors Are Incorrect.
• Is the inside of the machine smeared with ink?
After printing large quantities of paper or performing borderless printing, the area where papers go through may get smeared with ink. Clean the inside of your machine with the Bottom Plate Cleaning.
See Cleaning the Inside of the Machine (Bottom Plate Cleaning).
- Tip!: Check how to load the paper correctly!
• Is the paper loaded in the correct orientation?

Load paper in the Rear Tray with the printing side facing you.
• Is the paper curled?
The curled paper causes paper jam. Flatten the curled paper, then reload it.
Refer to "Troubleshooting" in the on-screen manual: Advanced Guide.
- Tip!: After loading paper, be sure to specify the paper settings!
After loading paper, be sure to select the loaded paper in Media Type of the printer driver or with the Paper button on the Operation Panel. If the type of paper is not selected, you may not be able to get the satisfactory print result.
See Copying, Printing from Your Computer, and Media Types You Can Use.
There are various types of paper: paper with special coating on the surface for printing photos with optimal quality and paper suitable for documents. Media Type of the printer driver has different settings for each type of paper in advance (such as using ink, ejecting ink, or distance from nozzles) so that you can print on each paper with the optimal image quality. The Paper button on the Operation Panel, which is used for making copies, also has some settings similar to Media Type of the printer driver. You can print with different settings in Media Type of the printer driver or with the Paper button on the Operation Panel, suitable for each type of loaded paper.
■ Use the Stop/Reset button to cancel printing!
- Tip!: Never press the ON button!
If you press the ON button while printing is in progress, the print data sent from the computer queues in the machine and you may not be able to continue to print. Press the Stop/Reset button to cancel printing.

Note
- If you cannot cancel printing by pressing the Stop/Reset button while printing from a computer, open the printer driver setup window to delete the unnecessary print jobs from the printer status monitor (Windows).
■ Does the machine need to be handled with care when using or transporting?
- Tip!: Do not use or transport the machine vertically or slanted!
If the machine is used or transported vertically or slanted, the machine may become damaged or ink may leak from the machine. Be sure not to use or transport the machine vertically or slanted.
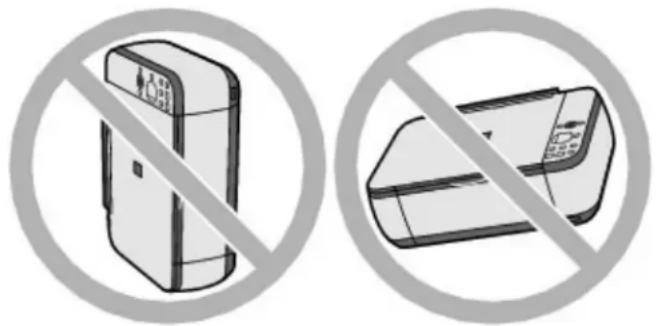
- Tip!: Do not place any object on the Document Cover!
Do not place any object on the Document Cover. It will fall into the Rear Tray when the Document Cover is opened and cause the machine to malfunction. Also, place the machine where objects will not fall on it.
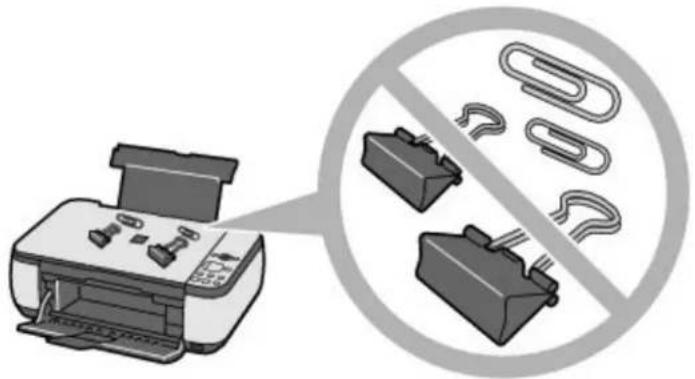
- Tip!: Carefully choose the area to place the machine!
Place the machine at least 5.91 inches / 15 cm away from other electrical appliances such as fluorescent lamps. If the machine is placed closer to those, it may not be able to work properly due to fluorescent noises.
■ How to maintain the optimal printing quality?
The key to printing with the optimal printing quality is to prevent the Print Head from drying or clogging. Always follow the following steps for optimal printing quality.
- Follow the procedure below to disconnect the power plug.
- Press the ON button on the machine to turn it off.
- Make sure that the Power lamp is not lit.
- Disconnect the power plug from the wall outlet, or turn off the extender cable connector.
If you press the ON button to turn off the power, the machine caps the Print Head (nozzles) automatically to prevent from drying. If you disconnect the power plug from the wall outlet or turn off the extender cable connector before the Power lamp is turned off, the Print Head will not be capped properly and this will cause drying or clogging.
To disconnect the power plug, be sure to follow this procedure.
- Print periodically!
Just as the tip of a felt pen becomes dry and unusable if it has not been used for a long time, even if it is capped, the Print Head too, may become dried or clogged if the machine has not been used for a long time.
We recommend you to use the machine at least once a month.

Note
- Depending on the type of paper, ink may blur if you trace the printed area with a highlight pen or paint-stick, or bleed if water or sweat comes in contact with the printed area.
■ Colors are uneven, and print results are blurred.
- Tip!: Print the nozzle check pattern to check if the nozzles are clogged.
If the print head nozzles are clogged, colors may become uneven or the print results may be blurred.

In this case

Print the nozzle check pattern
Check the printed check pattern to see if the nozzles are clogged. See When Printing Becomes Faint or Colors Are Incorrect.

↑ Page top
Canon
MC-3791-V1.00
MP270 series
MP250 series
Advanced Guide
Basic Guide

Printing
Scanning
Copying
Troubleshooting
How to Use This Manual
Printing This Manual
Maintenance
Changing the Machine Settings
Appendix
When you display this on-screen manual in a language environment other than English, some English descriptions may be displayed.
Printing
Printing from a Computer
Printing with the Bundled Application Software
What Is Easy-PhotoPrint EX?
Printing Photos
Starting Easy-PhotoPrint EX
Selecting a Photo
Selecting the Paper
Printing
Creating an Album
Starting Easy-PhotoPrint EX
Selecting the Paper and Layout
Selecting a Photo
Editing
Printing
Printing Calendars
Starting Easy-PhotoPrint EX
Selecting the Paper and Layout
Selecting a Photo
Editing
Printing
Printing Stickers
Starting Easy-PhotoPrint EX
Selecting the Paper and Layout
Selecting a Photo
Editing
Printing
Printing Layout
Starting Easy-PhotoPrint EX
Selecting the Paper and Layout
Selecting a Photo
Editing
Printing
Correcting and Enhancing Photos
Using the Auto Photo Fix Function
Using the Red-Eye Correction Function
Using the Face Brightener Function
Using the Face Sharpener Function
Using the Digital Face Smoothing Function
Using the Blemish Remover Function
Adjusting Images
Correct/Enhance Images Window
Questions and Answers
How Can I Move (or Copy) the Saved File?
Which Side of the Displayed Image Does the Printing
Start from?
How Do I Print with Even Margins?
What Is "C1" or "C4"?
Photo Print Settings
Printing Vivid Photos
Reducing Photo Noise
Cropping Photos (Photo Print)
Printing Dates on Photos (Photo Print)
Printing Multiple Photos on One Page
Printing an Index
Printing ID Photos (ID Photo Print)
Printing Photo Information
Saving Photos
Opening Saved Files
Other Settings
Changing Layout
Changing Background
Adding Photos
Swapping Positions of Photos
Replacing Photos
Changing Position, Angle and Size of Photos
Cropping Photos
Framing Photos
Printing Dates on Photos
Attaching Comments to Photos
Adding Text to Photos
Saving
Setting Holidays
Setting Calendar Display
Opening Saved Files
Printing with Other Application Software
Various Printing Methods
Printing with Easy Setup
Setting a Page Size and Orientation
Setting the Number of Copies and Printing Order
Setting the Stapling Margin
Borderless Printing
Fit-to-Page Printing
Scaled Printing
Page Layout Printing
Poster Printing
Booklet Printing
Duplex Printing
Stamp/Background Printing
Registering a Stamp
Registering Image Data to be Used as a Background
Printing an Envelope
Displaying the Print Results before Printing
Setting Paper Dimensions (Custom Size)
Changing the Print Quality and Correcting Image Data
Selecting a Combination of the Print Quality Level and a Halftoning Method
Printing a Color Document in Monochrome
Specifying Color Correction
Optimal Photo Printing of Image Data
Adjusting Colors with the Printer Driver
Printing with ICC Profiles
Adjusting Color Balance
Adjusting Brightness
Adjusting Intensity
Adjusting Contrast
Simulating an Illustration
Representing Image Data with a Single Color
Presenting Image Data with Vivid Colors
Smoothing Jagged Outlines
Changing Color Properties to Improve Coloration
Reducing Photo Noise
Overview of the Printer Driver
Printer Driver Operations
Canon IJ Printer Driver
How to Open the Printer Driver Setup Window
Maintenance Tab
Canon IJ Status Monitor
Canon IJ Preview
Printing Photographs Directly from a Compliant Device (MP270 series only)
Printing Photographs Directly from a Compliant Device (MP270 series only)
Printing Photographs Directly from a Compliant Device (MP270 series only)
About PictBridge Print Settings (MP270 series only)
Settings on a PictBridge Compliant Device
Scanning
Scanning
Scanning Images
Scanning Images
Before Scanning
Placing Documents
Saving Scanned Data to PC Using the Operation Panel of the Machine
Saving Scanned Data to PC Using the Operation Panel of the Machine
Appendix: Various Scan Settings
Selecting a Response to Commands from the Operation Panel Using MP Navigator EX
Scanning with the Bundled Application Software
What Is MP Navigator EX (Supplied Scanner Software)?
Let's Try Scanning
Starting MP Navigator EX
Scanning Photos and Documents
Scanning Multiple Documents at One Time
Scanning Images Larger than the Platen (Stitch Assist)
Easy Scanning with One-click
Useful MP Navigator EX Functions
Correcting/Enhancing Images Automatically
Correcting/Enhancing Images Manually
Adjusting Images
Searching Images
Classifying Images into Categories
Utilizing Images in MP Navigator EX
Saving
Saving as PDF Files
Creating/Editing PDF Files
Printing Documents
Printing Photos
Sending via E-mail
Editing Files
Setting Passwords for PDF Files
Opening/Editing Password-protected PDF Files
MP Navigator EX Screens
Navigation Mode Screen
Scan/Import Documents or Images Tab
View & Use Images on your Computer Tab
Custom Scan with One-click Tab
Photos/Documents (Platen) Screen (Scan/Import Window)
Scan Settings Dialog Box (Photos/Documents)
Save Dialog Box
Save as PDF file Dialog Box
PDF Settings Dialog Box
View & Use Window
Create/Edit PDF file Window
Print Document Dialog Box
Print Photo Dialog Box
Send via E-mail Dialog Box
Correct/Enhance Images Window
One-click Mode Screen
Auto Scan Dialog Box
Save Dialog Box (One-click Mode Screen)
Scan Settings Dialog Box
Save Dialog Box
Exif Settings Dialog Box
PDF Dialog Box
Save as PDF file Dialog Box
Mail Dialog Box
OCR Dialog Box
Custom Dialog Box
Preferences Dialog Box
General Tab
Scanner Button Settings Tab (Save)
Appendix: Opening Files Other than Scanned Images
Opening Images Saved on a Computer
Scanning with Other Application Software
What Is ScanGear (Scanner Driver)?
Scanning with Advanced Settings Using ScanGear
(Scanner Driver)
Starting ScanGear (Scanner Driver)
Scanning in Basic Mode
Scanning in Advanced Mode
Scanning in Auto Scan Mode
Scanning Multiple Documents at One Time with
ScanGear (Scanner Driver)
Correcting Images and Adjusting Colors with ScanGear
(Scanner Driver)
Correcting Images (Unsharp Mask, Reduce Dust
and Scratches, Fading Correction, etc.)
Adjusting Colors Using a Color Pattern
Adjusting Saturation and Color Balance
Adjusting Brightness and Contrast
Adjusting Histogram
Adjusting Tone Curve
Setting Threshold
ScanGear (Scanner Driver) Screens
Basic Mode Tab
Advanced Mode Tab
Input Settings
Output Settings
Image Settings
Color Adjustment Buttons
Auto Scan Mode Tab
Preferences Dialog Box
Scanner Tab
Preview Tab
Scan Tab
Color Settings Tab
Appendix: Useful Information on Scanning
Adjusting Cropping Frames
Resolution
File Formats
Color Matching
Other Scanning Methods
Scanning with WIA Driver
Scanning Using the Control Panel (Windows XP Only)
Copying
Printing Using the Operation Panel of the Machine
Copying
Making Copies
Reducing or Enlarging a Copy
Using Useful Copy Functions
Switching the Page Size between A4 and Letter
Copying without Borders (Borderless Copy)
Troubleshooting
Troubleshooting
If an Error Occurs
The Machine Cannot Be Powered On
An Error Code Is Displayed on the LED
Alarm Lamp is lit Orange
Power Lamp Flashes Green and Alarm Lamp Flashes Orange Alternately
LED Cannot Be Seen At All
Cannot Install the MP Drivers
Cannot Connect to Computer Properly
Print Results Not Satisfactory
Cannot Print to End of Job
No Printing Results/Printing Is Blurred/Colors Are Wrong/White Streaks
Colors Are Unclear
Lines Are Misaligned
Printed Paper Curls or Has Ink Blots
Paper Is Smudged/Printed Surface Is Scratched
Back of the Paper Is Smudged
Vertical Lines Are Printed on the Sides of the Printout
Colors Are Uneven or Streaked
Printing Does Not Start
Copying/Printing Stops Before It Is Completed
Machine Moves But Ink Is Not Ejected
Printing Speed Is Not as Fast as Expected
FINE Cartridge Holder Does Not Move to the Position for Replacing
Paper Does Not Feed Properly
Paper Jams
Paper Is Jammed in the Paper Output Slot or the Rear Tray In Other Cases
Message Appears on the Computer Screen
Error Number: B200 A printer error has occurred. Turn the printer off and unplug the power cord of the printer from the power supply. Then contact the service center. Is Displayed
Error Number: **** A printer error has occurred. Turn the printer off and then on again. If this doesn't clear the error, see the user's guide for more detail. Is Displayed
Writing Error/Output Error/Communication Error
Error Number: 300 Is Displayed
Error Number: 1700 Is Displayed
Ink Info Number: 1688 Is Displayed
Ink Info Number: 1686 Is Displayed
Error Number: 2001 Is Displayed (MP270 series only)
Error Number: 2002 Is Displayed (MP270 series only)
Other Error Messages
The Inkjet Printer/Scanner/Fax Extended Survey Program Screen Is Displayed
The Inkjet Printer/Scanner/Fax Extended Survey Program Icon Appears
For Windows Users
Printer Status Monitor Is Not Displayed
Error Message Appears on a PictBridge Compliant Device (MP270 series only)
Problems with Scanning
Scanner Does Not Work
ScanGear (Scanner Driver) Does Not Start
Error Message Appears and the ScanGear (Scanner Driver) Screen Does Not Appear
Scan Quality (Image Displayed on the Monitor) Is Poor
Scanned Image Is Surrounded by Extra White Areas
Cannot Scan Multiple Documents at One Time
Cannot Scan Properly in Auto Scan Mode
Slow Scanning Speed
"There is not enough memory." Message Is Displayed
Computer Stops Operating during Scanning
Scanner Does Not Work After Upgrading Windows
Software Problems
E-mail Software Program You Want to Use Does Not Appear in the Screen for Selecting an E-mail Software
Program
Scanned Image Is Printed Enlarged (Reduced)
Scanned Image Is Enlarged (Reduced) on the Computer Monitor
Scanned Image Does Not Open
MP Navigator EX Problems
Cannot Scan at the Correct Size
Position or Size of the Image Cannot be Detected
Correctly When Scanning Using the Operation Panel
Document Is Placed Correctly, but the Scanned Image Is Slanted
Document Is Placed Correctly, but the Orientation
Changes in the Scanned Image
If You Cannot Resolve the Problem
FAQs
Instructions for Use (Printer Driver)
General Notes (Scanner Driver)
Using Easy-PhotoPrint EX
Using MP Navigator EX
About Solution Menu
Advanced Guide
Advanced Guide > How to Use This Manual
How to Use This Manual
→ Operating the Contents Pane
→ Operating the Explanation Window
→ Printing This Manual
→ Using Keywords to Find a Document
→ Registering Documents to My Manual
Symbols Used in This Document
Trademarks
Advanced Guide
Advanced Guide > How to Use This Manual > Operating the Contents Pane
Operating the Contents Pane
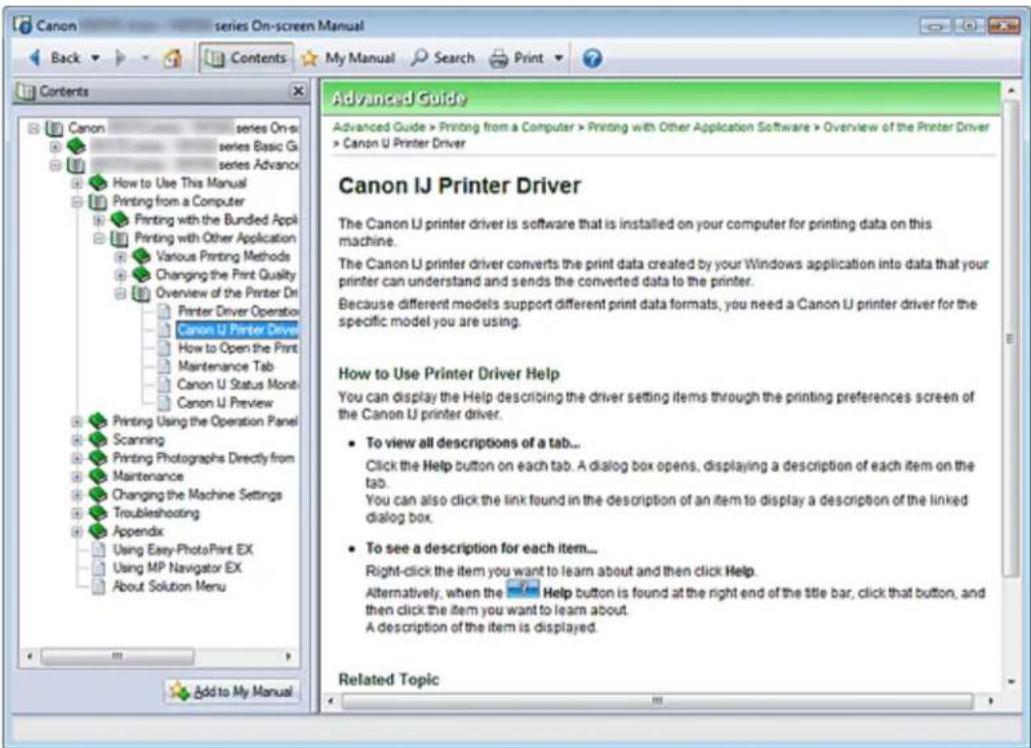
When you click a document title displayed in the contents pane found to the left of the on-screen manual, the documents of that title are displayed in the explanation window on the right side.
When you click found to the left of , the document titles found in the lower hierarchies are displayed.

Note
- Click to close or display the contents pane.
Advanced Guide
Advanced Guide > How to Use This Manual > Operating the Explanation Window
Operating the Explanation Window

(1) Click the green characters to jump to the corresponding document.
(2) The cursor jumps to the top of this document.

Note
The diagrams and computer screens in this guide refer to MP270 series.
The operations are exactly the same as those for the MP250 series, unless otherwise described.
- You may not be able to purchase some models in certain regions.
Advanced Guide
Advanced Guide > How to Use This Manual > Printing This Manual
Printing This Manual
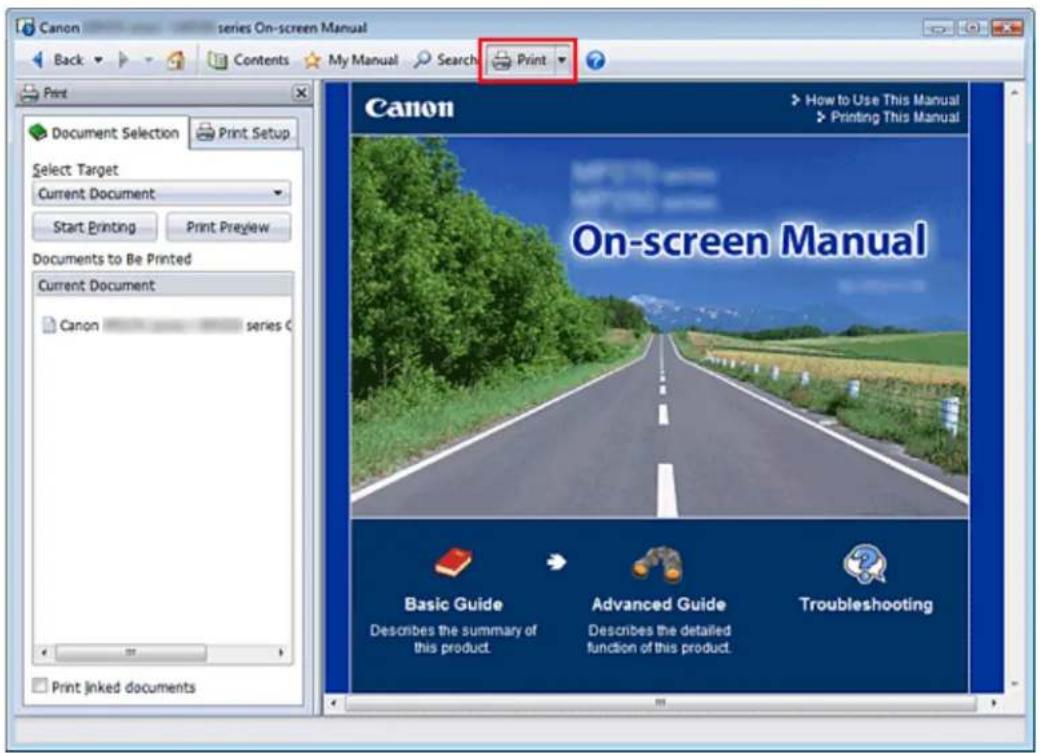
Click to display the print pane to the left of the on-screen manual.

Note
- Click to close or display the print pane.
- When you click □ and then click Page Setup, the Page Setup dialog box appears. You can then easily set up the paper to be used for printing.
- Click ▼ and then click Print Settings to display the Print dialog box. When the dialog box is displayed, select the printer to be used for printing. The Print Setup tab also allows you to select the printer to be used. After selecting the printer to be used, click Properties... to specify the print settings.
-
Click , and then click Option Settings to display the Option Settings dialog box. You can then set up the printing operation.
-
Print document title and page number When this check box is checked, the manual name and the page number are printed in the header (top of the document).
- Print background color and images When this check box is checked, the background color and the image are printed. Some images are printed regardless of whether this check box is checked or not.
- Check number of pages to be printed before printing When this check box is checked, the Print Page Count Confirmation dialog box is displayed before printing starts. This dialog box allows you to check how many pages will be printed.
On the Document Selection tab, select the method for printing the document. The following four methods of printing are available:
• Print Current Document
• Print Selected Documents
• Print My Manual
- Print All Documents

Note
- You can select the type to be printed, and then easily specify print settings on the Print Setup tab.
Print Current Document
You can print the currently displayed document.
1. From Select Target, select Current Document
The title of the currently displayed document is displayed in the Documents to Be Printed list.

Note
- By selecting Print linked documents, you can also print documents that are linked to the current document. The linked documents are added to the Documents to Be Printed list.
- Click Print Preview to display and check what the print results will look like before you actually print the document.
2. Click Print Setup tab
On the Page Setup tab, select the printer to be used and specify simple print settings, as necessary.
3. Click Start Printing
A message confirming the number of print pages is displayed.
4. Execute print
Confirm the number of pages to be printed, and then click Yes.
The documents that are currently displayed are printed.
Print Selected Documents
You can select and print the documents that you want printed.
1. From Select Target, select Selected Documents
The titles of all documents are displayed in the Documents to Be Printed list.
2. Select the documents to be printed
From the Documents to Be Printed list, select the title check boxes of the documents to be printed.

Note
- When you select the Automatically select documents in lower hierarchies check box, the check boxes of all document titles found in the lower hierarchies are selected.
- Click Select All to select the check boxes of all document titles.
Click Clear All to clear the check boxes of all document titles. - Click Print Preview to display and check what the print results will look like before you actually print the document.
3. Click Print Setup tab
On the Page Setup tab, select the printer to be used and specify simple print settings, as necessary.
4. Click Start Printing
A message confirming the number of print pages is displayed.
5. Execute print
Confirm the number of pages to be printed, and then click Yes.
All documents with selected check boxes are printed.
Print My Manual
You can select and print documents registered in My Manual.
For details about My Manual, see "Registering Documents to My Manual."
1. From Select Target, select My Manual
The titles of the documents that have been registered to My Manual are displayed in the Documents to Be Printed list.
2. Select the documents to be printed
From the Documents to Be Printed list, select the title check boxes of the documents to be printed.

Note
- Click Select All to select the check boxes of all document titles.
Click Clear All to clear the check boxes of all document titles. - Click Print Preview to display and check what the print results will look like before you actually print the document.
3. Click Print Setup tab
On the Page Setup tab, select the printer to be used and specify simple print settings, as necessary.
4. Click Start Printing
A message confirming the number of print pages is displayed.
5. Execute print
Confirm the number of pages to be printed, and then click Yes.
All documents with selected check boxes are printed.
Print All Documents
You can print all documents of the on-screen manual.
1. From Select Target, select All Documents
The titles of all documents are displayed in the Documents to Be Printed list, and the check boxes are automatically selected.

Note
- When you uncheck the check box of a document title, that document is not printed.
- Click Select All to select the check boxes of all document titles.
Click Clear All to clear the check boxes of all document titles. - Click Print Preview to display and check what the print results will look like before you actually print the document.
2. Click Print Setup tab
On the Page Setup tab, select the printer to be used and specify simple print settings, as necessary.
3. Click Start Printing
A message confirming the number of print pages is displayed.
4. Execute print
Confirm the number of pages to be printed, and then click Yes.
All documents are printed.

Important
A large amount of paper is necessary to print all documents. Before printing, be sure to check the number of print pages displayed in the Print Page Count Confirmation dialog box.
The Print Preview dialog box allows you to scale the printing to the paper width or to set the zoom rate. However, if the print data extends outside the paper because of the new zoom rate, that portion of the document will not be printed on the paper.
Advanced Guide
Advanced Guide > How to Use This Manual > Using Keywords to Find a Document
Using Keywords to Find a Document
You can enter a keyword to search for a target document.
All documents in the currently displayed on-screen manual are searched.

1. Click

The search pane is displayed to the left of the on-screen manual.

Note
- Click Search to close or display the search pane.
2. Enter a keyword
In Keyword, enter a keyword for the item to be checked.
When you want to enter multiple keywords, insert a space between the keywords.

Note
- You can enter up to 10 search keywords or up to 255 characters.
■ Uppercase and lowercase are not discriminated.
■ The program can also search for keywords that contain spaces.
A convenient way of quickly finding a document to be read is to enter keywords as described below.
■ To learn how to operate a function you are using:
Enter the menu name displayed on the operation panel of this machine or on the computer (for example, frame erase copy). - To find an explanation of the operation for a specific purpose:
Enter function + item to be printed (for example, print calendar).
3. Click Start Searching
The search is started, and the titles of documents containing the keyword are displayed in the search results list.
When you execute a search by entering multiple keywords, the search results are displayed as shown below.
[Documents Containing Perfect Match]
Documents containing the entire search character string (including spaces) exactly as entered (perfect match)
[Documents Containing All Keywords]
Documents containing all keywords that were entered
[Documents Containing Any Keyword]
Documents containing at least one of the keywords that were entered
4. Display the document that you want to read
From the search results list, double-click (or select and press Enter) the title of the document you want to read.
When the documents of that title are displayed, the keywords found on those documents are highlighted.

Note
If you modify the keyword entry and perform multiple searches, a search history remains. To delete the search history, click located to the right of Keyword, and select Clear History, which is displayed.
Advanced Guide
Advanced Guide > How to Use This Manual > Registering Documents to My Manual
Registering Documents to My Manual
Register frequently read documents as My Manual documents so that you can refer to those documents easily at any time.
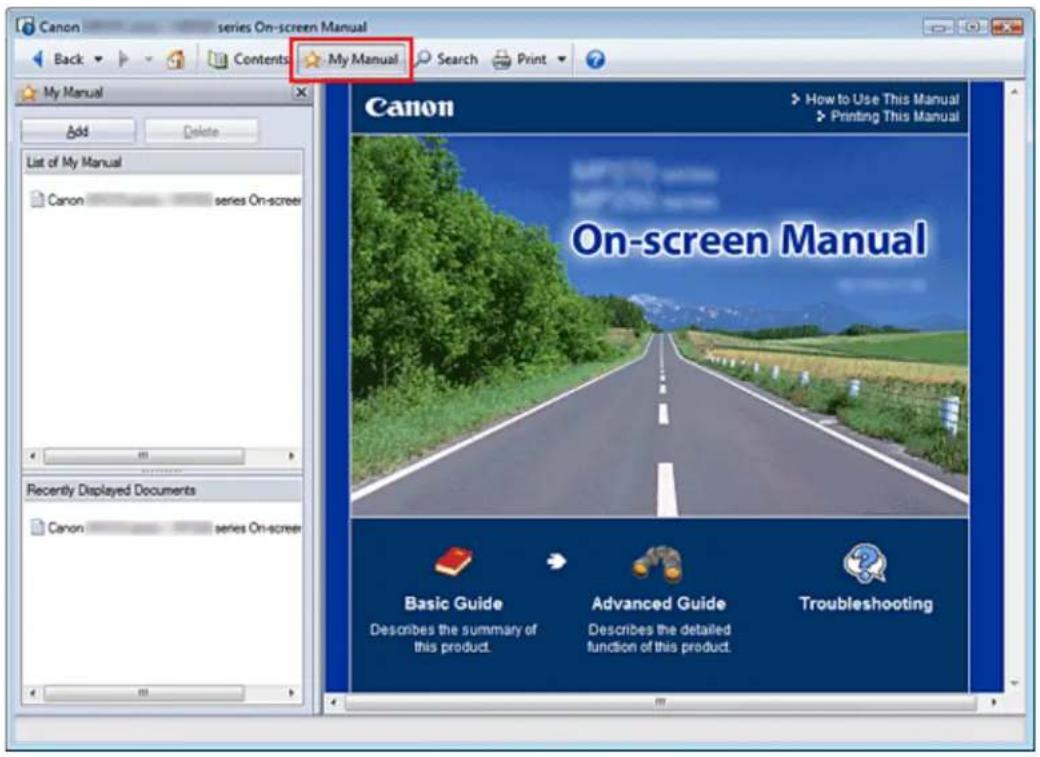
1. Display the document
Display the document to be added to My Manual.
2. Click
The My Manual pane is displayed to the left of the on-screen manual.

Note
- Click My Manual to close or display the My Manual pane.
3. Register the document to My Manual
Click Add.
The title of the currently displayed document is added to List of My Manual.

Note
■ You can also add documents to My Manual by the following methods. If you add a document to My Manual, a ☆ mark is displayed in the document icons in the contents pane.
- From the Recently Displayed Documents list, double-click the document title that you want to add to My Manual (or select the document and press Enter key) to display the title, and then click Add.
- Right-click the document title displayed in the contents pane or right-click the explanation window, and then select Add to My Manual from the right-click menu.
In the contents pane, select the document title that you want to add to My Manual, and then click Add to My Manual at the bottom right of the pane.
4. Display My Manual
When you double-click (or select and press Enter) a document title displayed in List of My Manual, that document is displayed in the explanation window.

Note
- To delete a document from List of My Manual, select that document title from the list, and then click Delete (or press Delete).
Page top ↑
Advanced Guide
Advanced Guide > How to Use This Manual > Symbols Used in This Document
Symbols Used in This Document
! Warning
Instructions that, if ignored, could result in death or serious personal injury caused by incorrect operation of the equipment. These must be observed for safe operation.
Caution
Instructions that, if ignored, could result in personal injury or material damage caused by incorrect operation of the equipment. These must be observed for safe operation.
Important
Instructions including important information. Be sure to read these indications.
Note
Instructions as notes for operation or additional explanations.
Windows
Indicates operations in Windows.
Macintosh
Indicates operations in Macintosh.
Advanced Guide
Advanced Guide > How to Use This Manual > Trademarks
Trademarks
- Microsoft is a registered trademark of Microsoft Corporation.
- Windows is a trademark or registered trademark of Microsoft Corporation in the U.S. and/or other countries.
- Windows Vista is a trademark or registered trademark of Microsoft Corporation in the U.S. and/or other countries.
- Internet Explorer is a trademark or registered trademark of Microsoft Corporation in the U.S. and/or other countries.
• Macintosh and Mac are trademarks of Apple Inc., registered in the U.S. and other countries. - Bonjour is a trademark of Apple Inc., registered in the U.S. and other countries.
- Adobe, Adobe Photoshop, Adobe RGB and Adobe RGB (1998) are either registered trademarks or trademarks of Adobe Systems Incorporated in the United States and or other countries.
Exif Print
This machine supports Exif Print.
Exif Print is a standard for enhancing the communication between digital cameras and printers. By connecting to an Exif Print-compliant digital camera, the camera's image data at the time of shooting is used and optimized, yielding extremely high quality prints.
Page top ↑
Advanced Guide
Advanced Guide > Printing from a Computer
Printing from a Computer
→ Printing with the Bundled Application Software
→ Printing with Other Application Software
Page top ↑
Advanced Guide
Advanced Guide > Printing from a Computer > Printing with the Bundled Application Software
Printing with the Bundled Application Software
What Is Easy-PhotoPrint EX?
→ Printing Photos
Creating an Album
→ Printing Calendars
→ Printing Stickers
→ Printing Layout
→ Correcting and Enhancing Photos
Questions and Answers
→ Photo Print Settings
→ Other Settings
Advanced Guide
Advanced Guide > Printing from a Computer > Printing with the Bundled Application Software > What Is Easy-PhotoPrint EX?
Easy-PhotoPrint EX
What Is Easy-PhotoPrint EX?
Easy-PhotoPrint EX allows you to create albums, calendars and stickers easily using photos taken with digital cameras.
You can also print borderless photos easily.

Important
- Easy-PhotoPrint EX does not support Windows 95, Windows 98, Windows Me, or Windows NT4.
- Easy-PhotoPrint EX can only be used with Canon inkjet printers. It does not support some printers, including Canon compact printers (SELPHY CP series).
If a printer that supports Easy-PhotoPrint EX is not installed, you cannot print items you create. - If Easy-PhotoPrint EX is installed on a computer that already has Easy-LayoutPrint installed, Easy-LayoutPrint will be replaced by Easy-PhotoPrint EX.

Note
- Printing on paper larger than A4 is available with supported printers only. See your printer manual for details.
- See Help of Easy-PhotoPrint EX for descriptions of Easy-PhotoPrint EX screens.
Click Help in a screen or dialog box, or select Easy-PhotoPrint EX Help... from the Help menu. Help appears.
About Exif Print
Easy-PhotoPrint EX supports "Exif Print." Exif Print is a standard for enhancing the communication between digital cameras and printers.
By connecting to an Exif Print-compliant digital camera, the image data at the time of shooting is used and optimized, yielding extremely high quality prints.
Starting Easy-PhotoPrint EX from Other Applications
Easy-PhotoPrint EX can be started from other applications.
See the application's manual for details on the procedure for starting.
The Photo Print function is available with the following applications:
• MP Navigator EX Ver.1.00 or later
- ZoomBrowser EX Ver.6.0 or later
• Digital Photo Professional Ver.3.2 or later

Important
- Easy-PhotoPrint EX is subject to the following restrictions when started from Digital Photo Professional:
- Menu does not appear in the step button area on the left side of the screen.
- Images cannot be corrected/enhanced.
- Image display order cannot be changed.
- Edited images cannot be saved.
- Options other than Enable ICC Profile cannot be selected for Color correction for printing on the Advanced tab of the Preferences dialog box. Therefore, you cannot use the Vivid Photo and Photo Noise Reduction functions.
The Album function is available with the following applications:
• MP Navigator EX Ver.1.00 or later
- ZoomBrowser EX Ver.5.8 or later
Supported Image File Formats (Extensions)
- BMP (.bmp)
- JPEG (.jpg, .jpeg)
• TIFF (.tif, .tiff) - PICT (.pict, .pct)
- Easy-PhotoPrint image files (.epp)

Important
- When selecting an image, if there is a TIFF file in the selected folder, the image may not be displayed correctly or Easy-PhotoPrint EX may shut down depending on the TIFF format. In such cases, move the TIFF file to another folder or recreate the file in a different file format, and then select the folder again.

Note
?
The thumbnails of files in unsupported formats are displayed as (Question Mark).
- When Easy-PhotoPrint EX is started from Digital Photo Professional, all image files supported by Digital Photo Professional will be displayed.
File Formats (Extensions) Supported by Easy-PhotoPrint EX
- Easy-PhotoPrint EX Photo Print file (.el6)
- Easy-PhotoPrint EX Album file (.el1)
- Easy-PhotoPrint EX Stickers file (.el2)
- Easy-PhotoPrint EX Calendar file (.el4)
- Easy-PhotoPrint EX Layout file (.el5)
Advanced Guide
Advanced Guide > Printing from a Computer > Printing with the Bundled Application Software > Printing Photos
Easy-PhotoPrint EX
Printing Photos
Easy-PhotoPrint EX allows you to print your favorite photos in a variety of layouts.
You can also create borderless photos easily.
Corrections suitable for photos will be applied automatically when printing.
Steps
- Starting Easy-PhotoPrint EX
- Selecting a Photo
- Selecting the Paper
- Printing
Try This
→ Correcting and Enhancing Photos
→ Printing Vivid Photos
→ Reducing Photo Noise
→ Cropping Photos (Photo Print)
→ Printing Dates on Photos (Photo Print)
→ Printing Multiple Photos on One Page
→ Printing an Index
→ Printing ID Photos (ID Photo Print)
→ Printing Photo Information
→ Saving Photos
→ Opening Saved Files
Questions and Answers
→ How Can I Move (or Copy) the Saved File?
Which Side of the Displayed Image Does the Printing Start from?
→ How Do I Print with Even Margins?
Page top↑
Advanced Guide
Advanced Guide > Printing from a Computer > Printing with the Bundled Application Software > Printing Photos > Starting Easy-PhotoPrint EX
Easy-PhotoPrint EX

Starting Easy-PhotoPrint EX
- From the Start menu, select (All) Programs > Canon Utilities > Easy-PhotoPrint EX > Easy-PhotoPrint EX.
Easy-PhotoPrint EX starts and Menu appears.


Advanced Guide
Advanced Guide > Printing from a Computer > Printing with the Bundled Application Software > Printing Photos > Selecting a Photo

Selecting a Photo
1. Click Photo Print from Menu.
The Select Images screen appears.

Important
■ The thumbnails (reduced images) displayed in the screen may appear as follows:
- A black line appears along an edge of the image.
- An edge of the image appears cropped.
However, such images will be displayed normally when enlarged or previewed, and print results will not be affected.
2. Select the folder that contains the image you want to print from the folder tree area.
The images in the folder will be displayed as thumbnails (miniatures).
Important
If Easy-PhotoPrint EX is started from another application (MP Navigator EX, ZoomBrowser EX or Digital Photo Professional), the folder tree area will not be displayed.
The images opened in the application will be displayed as thumbnails.
3. Click the image you want to print.
The number of copies appears as "1" below the clicked image, while the selected image itself will appear in the selected image area.
Note
- To delete an image in the selected image area, select the image you want to delete and click

(Delete Imported Image).

To delete all images from the selected image area, click (Delete All Imported Images).
■ To print two or more copies of an image, click
want is reached. To reduce the number of copies shown in the box, click
■ You can change the order of photos using the
(Down arrow).
You can select the printing order from Sort by Date and Sort by Name.


Note
- You can correct or enhance the selected image before printing.
→ Correcting and Enhancing Photos
■ See Help for details on the Select Images screen.

Advanced Guide
Advanced Guide > Printing from a Computer > Printing with the Bundled Application Software > Printing Photos > Selecting the Paper

Selecting the Paper
1. Click Select Paper.
The Select Paper screen appears.
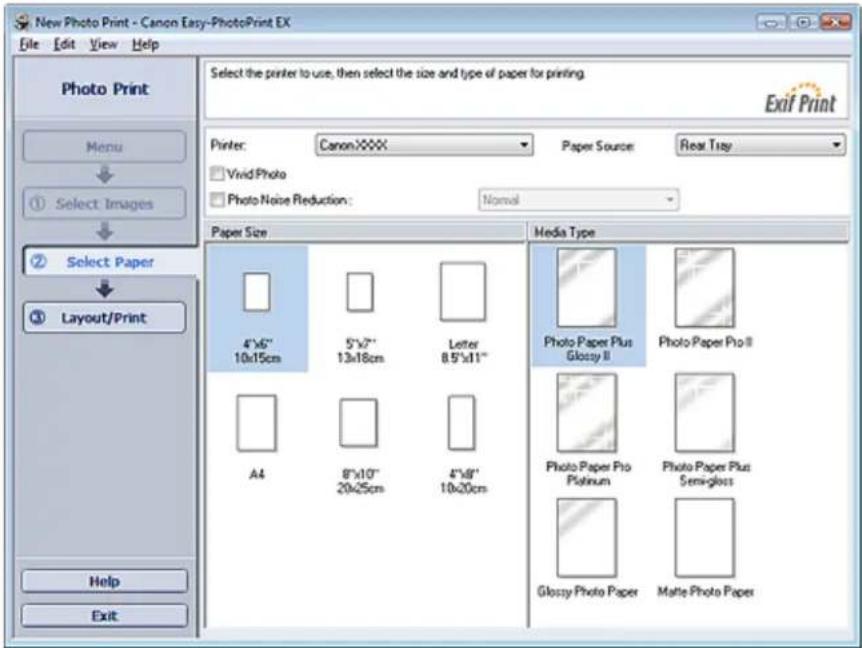
2. Set the following items according to the printer and paper to be used:
Printer
Paper Source
Paper Size
Media Type

Note
The paper sizes and media types may vary depending on the printer. See Help for details.
■ The paper sources may vary depending on the printer and the media type.

Note
- You can print photos with more vivid colors or you can reduce the photo noise.
→ Printing Vivid Photos
→ Reducing Photo Noise
■ See Help for details on the Select Paper screen.
Advanced Guide
Advanced Guide > Printing from a Computer > Printing with the Bundled Application Software > Printing Photos > Printing
Easy-PhotoPrint EX

Printing
1. Click Layout/Print.
The Layout/Print screen appears.


Important
■ The thumbnails (reduced images) displayed in the screen may appear as follows:
- A black line appears along an edge of the image.
- An edge of the image appears cropped.
However, such images will be displayed normally when enlarged or previewed, and print results will not be affected.
2. Select a layout you want to use.
Click a borderless layout to print borderless photos.

Note
The layouts that can be selected may vary depending on the printer, paper size, and media type.
3. Click Print.
Important
- When you print on large size paper such as A3/A3+, some computers cannot print properly if you print more than one page or copy at a time. It is recommended that you print page by page when you print on such paper.
While printing on paper larger than A4 or printing high-resolution images, data may be printed only to the middle if many images are printed at one time. In such cases, select the Spool print job page by page checkbox in the Preferences dialog box, and then print again.
To display the Preferences dialog box, click (Settings) or select Preferences... from the File menu.
The photo print settings will be discarded if you exit Easy-PhotoPrint EX without saving the settings. It is recommended that you save the printed image if you want to print it again.
→ Saving Photos
- When you print on a bordered layout, the margins on the left and right or the top and bottom may become wider than the other.
→ How Do I Print with Even Margins?

Note
■ You can crop images or print dates on photos.
→ Cropping Photos (Photo Print)
→ Printing Dates on Photos (Photo Print)
- You can correct or enhance the selected image before printing.
→ Correcting and Enhancing Photos
- You can specify advanced Photo Print settings (number of copies, print quality, etc.) in the Preferences dialog box.
To display the Preferences dialog box, click (Settings) or select Preferences... from the File menu.
■ See Help for details on the Layout/Print screen.

Advanced Guide
Advanced Guide > Printing from a Computer > Printing with the Bundled Application Software > Creating an Album
Easy-PhotoPrint EX
Creating an Album
Easy-PhotoPrint EX allows you to create your own personalized photo album.

Steps
- Starting Easy-PhotoPrint EX
- Selecting the Paper and Layout
- Selecting a Photo
- Editing
- Printing
Try This
→ Correcting and Enhancing Photos
→ Changing Layout
→ Changing Background
→ Adding Photos
→ Swapping Positions of Photos
→ Replacing Photos
→ Changing Position, Angle and Size of Photos
→ Cropping Photos
→ Framing Photos
→ Printing Dates on Photos
→ Attaching Comments to Photos
→ Adding Text to Photos
→ Saving
→ Opening Saved Files
Questions and Answers
→ How Can I Move (or Copy) the Saved File?
What Is "C1" or "C4"?
Advanced Guide
Advanced Guide > Printing from a Computer > Printing with the Bundled Application Software > Creating an Album > Starting Easy-PhotoPrint EX
Easy-PhotoPrint EX

Starting Easy-PhotoPrint EX
- From the Start menu, select (All) Programs > Canon Utilities > Easy-PhotoPrint EX > Easy-PhotoPrint EX.
Easy-PhotoPrint EX starts and Menu appears.


Advanced Guide
Advanced Guide > Printing from a Computer > Printing with the Bundled Application Software > Creating an Album > Selecting the Paper and Layout
Selecting the Paper and Layout
1. Click Album from Menu.
The Page Setup screen appears.

2. Set the following items in the General Settings section:
Paper Size
Orientation
Cover
Double page album
Page number

Note
■ See Help on the paper size that can be selected.
- You can select whether to display images on the inside of the front and back covers in the Cover Options dialog box. To display the Cover Options dialog box, select Front or Front & Back for Cover and click Options....
- Select the Double page album checkbox to enable the spread page layout (consisting of two-page master). In a double-page album, you can arrange an image across the left and right pages.
- You can customize the page numbers (position, font size, etc.) in the Page Number Settings dialog box. To display the Page Number Settings dialog box, select the Page number checkbox and click Settings....
- You can customize the margins of the front cover, inside pages and back cover in the Margin Settings dialog box. To display the Margin Settings dialog box, click Margins....
3. Select the theme you want to use from Theme in Sample Layout.
4. If you want to change the layout, click Layout....
The Change Layout dialog box appears.
In the Change Layout dialog box, you can change the layout or select whether to print the date (on which the picture was taken) on the photo.

Note
The layouts that can be selected may vary depending on the Paper Size, Orientation, Double page album, or the type of page selected (front cover, inside pages or back cover).
- You can customize the date (position, size, color, etc.) in the Date Settings dialog box. To display the Date Settings dialog box, select the Print date checkbox in the Change Layout dialog box and click Date Settings....
5. If you want to change the background, click Background....
The Change Background dialog box appears.
In the Change Background dialog box, you can paint the background in a single color or paste an image file to it.

Note
- See Help for details on the Page Setup screen.

Advanced Guide
Advanced Guide > Printing from a Computer > Printing with the Bundled Application Software > Creating an Album > Selecting a Photo
Selecting a Photo
1. Click Select Images.
The Select Images screen appears.

2. Select the folder that contains the image you want to print from the folder tree area.
The images in the folder will be displayed as thumbnails (miniatures).

Important
If Easy-PhotoPrint EX is started from another application (MP Navigator EX or ZoomBrowser EX), the folder tree area will not be displayed.
The images opened in the application will be displayed as thumbnails.
3. Select the image(s) you want to print, and click one of the buttons below.
The selected image(s) are displayed in the selected image area.
You can also select the image(s) you want to print by dragging them into the selected image area.

Note
- To delete an image in the selected image area, select the image you want to delete and click
(Delete Imported Image).

To delete all images from the selected image area, click

(Delete All Imported Images).

Note
■ See Help for details on the Select Images screen.

Page top↑
Advanced Guide
Advanced Guide > Printing from a Computer > Printing with the Bundled Application Software > Creating an Album > Editing
Editing
1. Click Edit.
The Edit screen appears.
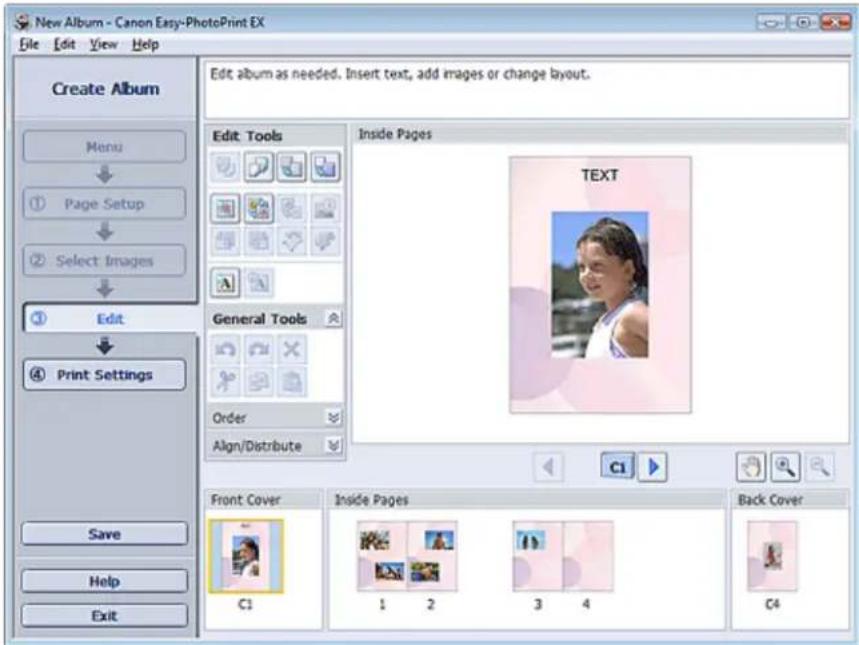
2. Edit your album if necessary.
→ Changing Layout
→ Changing Background
→ Adding Photos
→ Swapping Positions of Photos
→ Replacing Photos
→ Changing Position, Angle and Size of Photos
→ Cropping Photos
→ Framing Photos
→ Printing Dates on Photos
Attaching Comments to Photos
→ Adding Text to Photos
Important
- The edit information will be discarded if you exit Easy-PhotoPrint EX without saving the edited album. It is recommended that you save the item if you want to edit it again. The page numbers on the front and back covers of the album are displayed as follows:
C1: Front cover
C2: Inside the front cover
C3: Inside the back cover

Saving
C4: Back cover

Note
■ See Help for details on the Edit screen.

Page top↑
Advanced Guide
Advanced Guide > Printing from a Computer > Printing with the Bundled Application Software > Creating an Album > Printing

Printing
1. Click Print Settings.
The Print Settings screen appears.

2. Set the following items according to the printer and paper to be used:
Printer
Media Type
Copies
Paper Source
Print Quality
Borderless Printing

Note
■ The media types may vary depending on the printer and the paper size.
- Duplex Printing appears if the selected printer and media type support duplex printing. Select this checkbox to print on both sides of the paper.
■ Automatic appears if you select the Duplex Printing checkbox after selecting a printer that supports automatic duplex printing and media type that supports duplex printing. Select this checkbox to print on both sides of the paper automatically.
■ The paper sources may vary depending on the printer and the media type.
- You can set a custom print quality level in the Print Quality Settings dialog box. To display the Print Quality Settings dialog box, select Custom for Print Quality and click Quality Settings....
- Select the Borderless Printing checkbox to print borderless photos.
- You can specify the print range and the amount of extension for borderless printing in the Print Settings dialog box. To display the Print Settings dialog box, click Advanced....
3. Click Print.

Note
■ See Help for details on the Print Settings screen.

Page top↑
Advanced Guide
Advanced Guide > Printing from a Computer > Printing with the Bundled Application Software > Printing Calendars
Easy-PhotoPrint EX
Printing Calendars
Easy-PhotoPrint EX allows you to create your own calendar using your favorite photos.
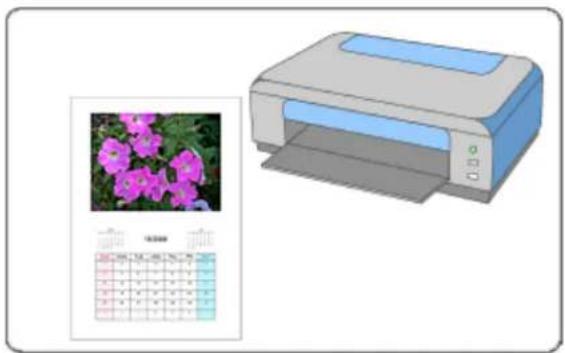
Steps
- Starting Easy-PhotoPrint EX
- Selecting the Paper and Layout
- Selecting a Photo
- Editing
- Printing
Try This
→ Correcting and Enhancing Photos
→ Changing Layout
→ Changing Background
→ Adding Photos
→ Swapping Positions of Photos
→ Replacing Photos
→ Changing Position, Angle and Size of Photos
→ Cropping Photos
→ Framing Photos
→ Printing Dates on Photos
→ Adding Text to Photos
Setting Calendar Display
Setting Holidays
Saving
→ Opening Saved Files
Questions and Answers
→ How Can I Move (or Copy) the Saved File?
Page top↑
Advanced Guide
Advanced Guide > Printing from a Computer > Printing with the Bundled Application Software > Printing Calendars > Starting Easy-PhotoPrint EX
Easy-PhotoPrint EX

Starting Easy-PhotoPrint EX
- From the Start menu, select (All) Programs > Canon Utilities > Easy-PhotoPrint EX > Easy-PhotoPrint EX.
Easy-PhotoPrint EX starts and Menu appears.
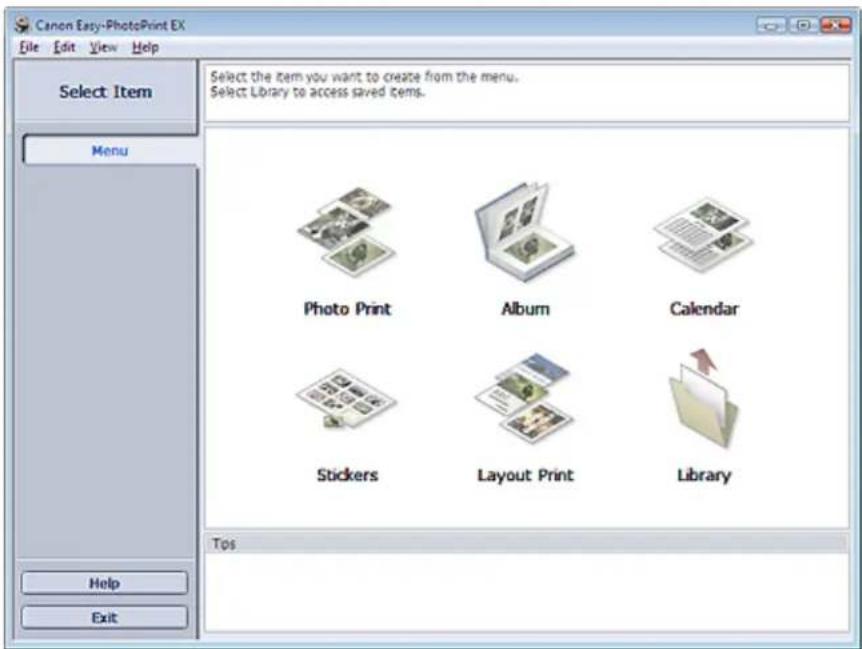

Advanced Guide
Advanced Guide > Printing from a Computer > Printing with the Bundled Application Software > Printing Calendars > Selecting the Paper and Layout
Easy-PhotoPrint EX

Selecting the Paper and Layout
1. Click Calendar from Menu.
The Page Setup screen appears.

2. Set the following items in the General Settings section:
Paper Size
Orientation
Start from
Period

Note
■ See Help on the paper size that can be selected.
■ You can add holidays to your calendar.
Setting Holidays
3. Select a layout for Design.
If necessary, make advanced settings on the calendar and set the background.

Note
- You can customize the calendar display (font colors of the dates and days of the week, position and size of the calendar, etc.).
Setting Calendar Display - You can paint the background in a single color or paste an image file to it in the Change Background dialog box. To display the Change Background dialog box, click Background....

Note
■ See Help for details on the Page Setup screen.

Page top↑
Advanced Guide
Advanced Guide > Printing from a Computer > Printing with the Bundled Application Software > Printing Calendars > Selecting a Photo

Selecting a Photo
1. Click Select Images.
The Select Images screen appears.

- Select the folder that contains the image you want to print from the folder tree area.
The images in the folder will be displayed as thumbnails (miniatures).
- Select the image(s) you want to print and click (Import to Inside Pages).
The selected image(s) are displayed in the selected image area.
You can also select the image(s) you want to print by dragging them into the selected image area.

Note
■ To delete an image in the selected image area, select the image you want to delete and click

(Delete Imported Image).
To delete all images from the selected image area, click

(Delete All Imported Images).

Note
■ See Help for details on the Select Images screen.
Advanced Guide
Advanced Guide > Printing from a Computer > Printing with the Bundled Application Software > Printing Calendars > Editing

Editing
1. Click Edit.
The Edit screen appears.
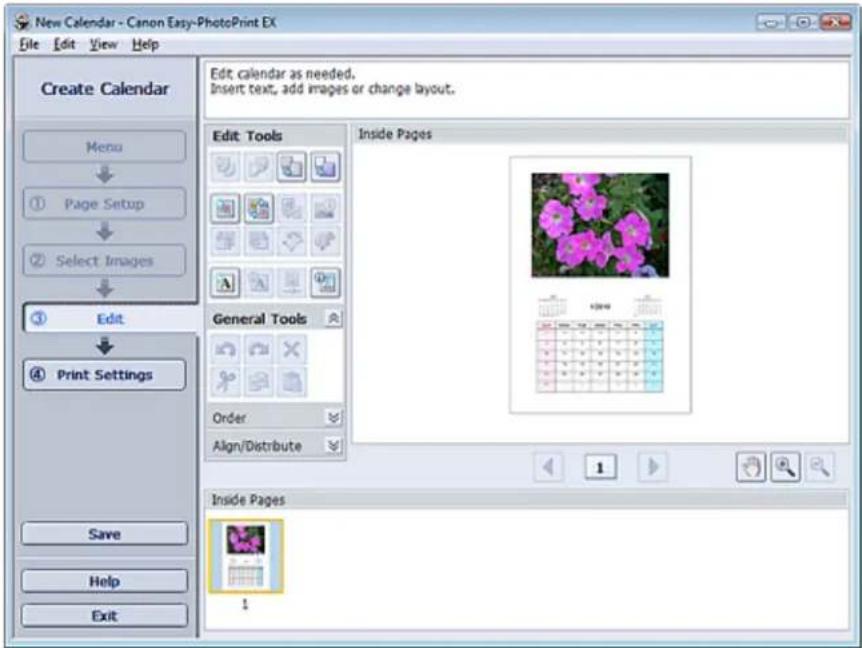
2. Edit the calendar if necessary.
→ Changing Layout
→ Changing Background
→ Adding Photos
→ Swapping Positions of Photos
→ Replacing Photos
→ Changing Position, Angle and Size of Photos
→ Cropping Photos
→ Framing Photos
→ Printing Dates on Photos
→ Adding Text to Photos
Setting Calendar Display
Setting Holidays
Important
The edit information will be discarded if you exit Easy-PhotoPrint EX without saving the edited calendar. It is recommended that you save the item if you want to edit it again.
Saving

Note
■ See Help for details on the Edit screen.

Page top↑
Advanced Guide
Advanced Guide > Printing from a Computer > Printing with the Bundled Application Software > Printing Calendars > Printing

Printing
1. Click Print Settings.
The Print Settings screen appears.

2. Set the following items according to the printer and paper to be used:
Printer
Media Type
Copies
Paper Source
Print Quality
Borderless Printing

Note
■ The media types may vary depending on the printer and the paper size.
- Duplex Printing appears if the selected printer and media type support duplex printing. Select this checkbox to print on both sides of the paper.
■ Automatic appears if you select the Duplex Printing checkbox after selecting a printer that supports automatic duplex printing and media type that supports duplex printing. Select this checkbox to print on both sides of the paper automatically.
■ The paper sources may vary depending on the printer and the media type.
- You can set a custom print quality level in the Print Quality Settings dialog box. To display the Print Quality Settings dialog box, select Custom for Print Quality and click Quality Settings....
- You can specify the print range and the amount of extension for borderless printing in the Print Settings dialog box. To display the Print Settings dialog box, click Advanced....
3. Click Print.

Note
■ See Help for details on the Print Settings screen.

Page top↑
Advanced Guide
Advanced Guide > Printing from a Computer > Printing with the Bundled Application Software > Printing Stickers
Easy-PhotoPrint EX
Printing Stickers
You can print your favorite photos on compatible sticker sheets.
Steps
- Starting Easy-PhotoPrint EX
- Selecting the Paper and Layout
- Selecting a Photo
- Editing
- Printing
Try This
→ Correcting and Enhancing Photos
→ Adding Photos
→ Swapping Positions of Photos
→ Replacing Photos
→ Changing Position, Angle and Size of Photos
→ Cropping Photos
→ Framing Photos
→ Adding Text to Photos
Saving
Opening Saved Files
Questions and Answers
→ How Can I Move (or Copy) the Saved File?
Advanced Guide
Advanced Guide > Printing from a Computer > Printing with the Bundled Application Software > Printing Stickers > Starting Easy-PhotoPrint EX
Easy-PhotoPrint EX

Starting Easy-PhotoPrint EX
- From the Start menu, select (All) Programs > Canon Utilities > Easy-PhotoPrint EX > Easy-PhotoPrint EX.
Easy-PhotoPrint EX starts and Menu appears.


Advanced Guide
Advanced Guide > Printing from a Computer > Printing with the Bundled Application Software > Printing Stickers > Selecting the Paper and Layout

Selecting the Paper and Layout
1. Click Stickers from Menu.
The Page Setup screen appears.
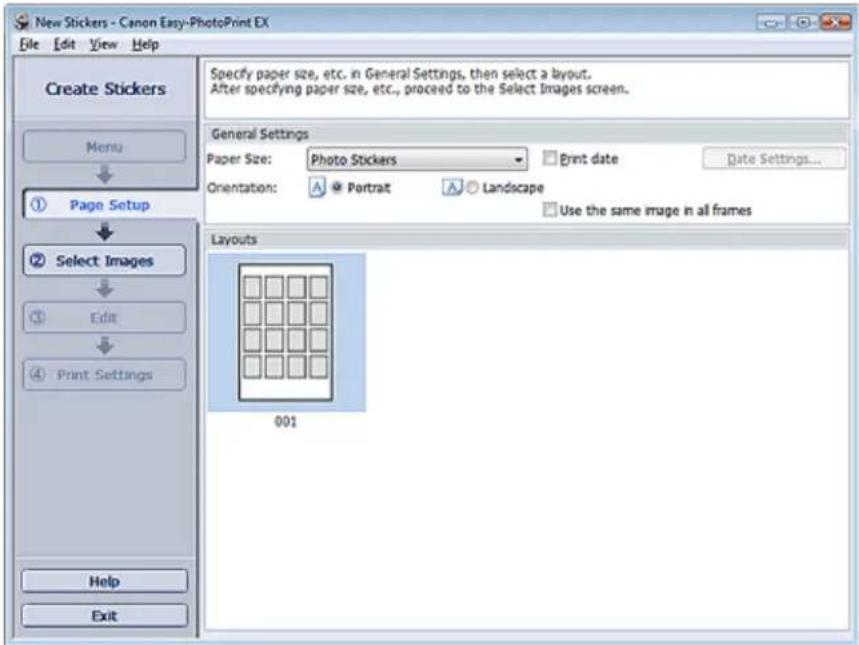
2. Set the following items in the General Settings section:
Paper Size
Orientation
Print date
Use the same image in all frames

Note
■ Paper sizes other than Photo Stickers cannot be selected.
- Select the Use the same image in all frames checkbox to use the same image in all the frames on the page.
- You can customize the date (position, size, color, etc.) in the Date Settings dialog box. To display the Date Settings dialog box, select the Print date checkbox and click Date Settings....

Note
■ See Help for details on the Page Setup screen.
Advanced Guide
Advanced Guide > Printing from a Computer > Printing with the Bundled Application Software > Printing Stickers > Selecting a Photo
Selecting a Photo
1. Click Select Images.
The Select Images screen appears.
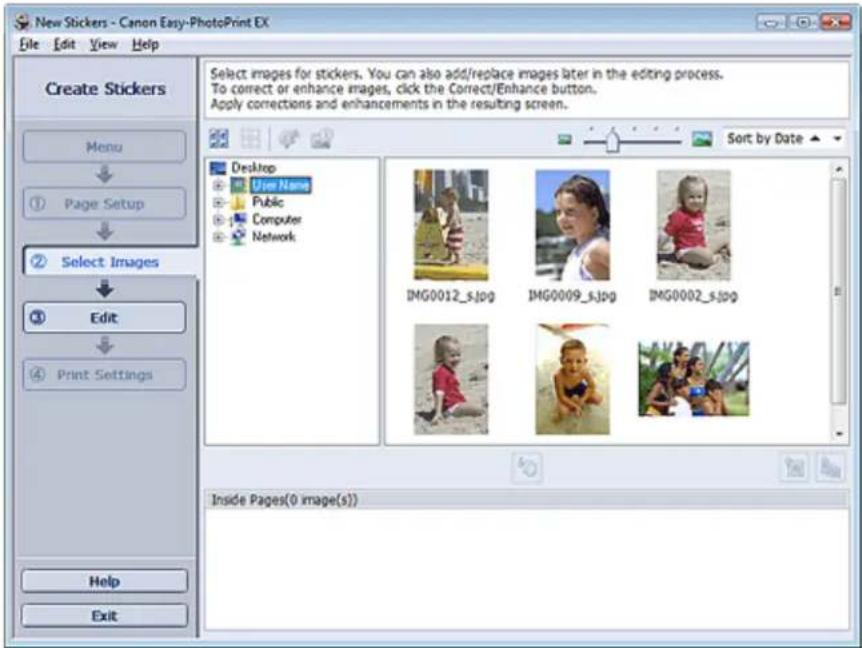
- Select the folder that contains the image you want to print from the folder tree area.
The images in the folder will be displayed as thumbnails (miniatures).
- Select the image(s) you want to print and click (Import to Inside Pages).
The selected image(s) are displayed in the selected image area.
You can also select the image(s) you want to print by dragging them into the selected image area.

Note
- To delete an image in the selected image area, select the image you want to delete and click

(Delete Imported Image).
To delete all images from the selected image area, click

(Delete All Imported Images).

Note
- See Help for details on the Select Images screen.
Advanced Guide
Advanced Guide > Printing from a Computer > Printing with the Bundled Application Software > Printing Stickers > Editing
Easy-PhotoPrint EX

Editing
1. Click Edit.
The Edit screen appears.

2. Edit the stickers if necessary.
→ Adding Photos
→ Swapping Positions of Photos
→ Replacing Photos
→ Changing Position, Angle and Size of Photos
→ Cropping Photos
→ Printing Dates on Photos
→ Adding Text to Photos
Important
The edit information will be discarded if you exit Easy-PhotoPrint EX without saving the edited stickers. It is recommended that you save the item if you want to edit it again.
Saving

Note
■ See Help for details on the Edit screen.
Advanced Guide
Advanced Guide > Printing from a Computer > Printing with the Bundled Application Software > Printing Stickers > Printing
Printing
1. Click Print Settings.
The Print Settings screen appears.

2. Set the following items according to the printer and paper to be used:
Printer
Media Type
Copies
Paper Source
Print Quality
Borderless Printing

Note
■ The media types may vary depending on the printer and the paper size.
■ The paper sources may vary depending on the printer and the media type.
- You can set a custom print quality level in the Print Quality Settings dialog box. To display the Print Quality Settings dialog box, select Custom for Print Quality and click Quality Settings....
- You can adjust the printing position in the Adjust Print Position dialog box. To display the Adjust Print Position dialog box, click Print Position....
- You can specify the print range and the amount of extension for borderless printing in the Print Settings dialog box. To display the Print Settings dialog box, click Advanced....
3. Click Print.

Note
■ See Help for details on the Print Settings screen.

Page top↑
Advanced Guide
Advanced Guide > Printing from a Computer > Printing with the Bundled Application Software > Printing Layout
Easy-PhotoPrint EX
Printing Layout
You can add text to your favorite photos and print them in a variety of layouts.
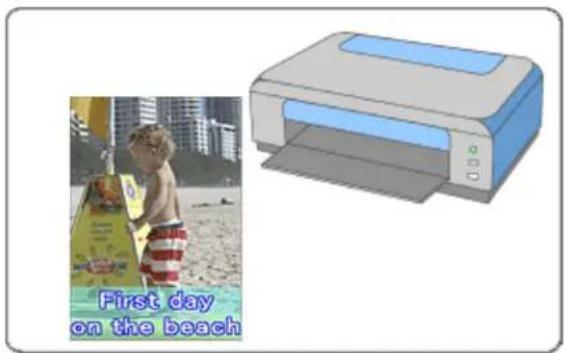
Steps
- Starting Easy-PhotoPrint EX
- Selecting the Paper and Layout
- Selecting a Photo
- Editing
- Printing
Try This
→ Correcting and Enhancing Photos
→ Changing Layout
→ Adding Photos
→ Swapping Positions of Photos
→ Replacing Photos
→ Changing Position, Angle and Size of Photos
→ Cropping Photos
→ Printing Dates on Photos
→ Adding Text to Photos
Saving
→ Opening Saved Files
Questions and Answers
→ How Can I Move (or Copy) the Saved File?
Advanced Guide
Advanced Guide > Printing from a Computer > Printing with the Bundled Application Software > Printing Layout > Starting Easy-PhotoPrint EX
Easy-PhotoPrint EX

Starting Easy-PhotoPrint EX
- From the Start menu, select (All) Programs > Canon Utilities > Easy-PhotoPrint EX > Easy-PhotoPrint EX.
Easy-PhotoPrint EX starts and Menu appears.


Advanced Guide > Printing from a Computer > Printing with the Bundled Application Software > Printing Layout > Selecting the Paper and Layout
Selecting the Paper and Layout
1. Click Layout Print from Menu.
The Page Setup screen appears.
2. Set the following items in the General Settings section:
Paper Size
Orientation
Print date
Note
See Help on the paper size that can be selected.
You can customize the date (position, size, color, etc.) in the Date Settings dialog box. To display the Date Settings dialog box, select the Print date checkbox and click Date Settings....
3. Select a layout from Layouts.
Note
The layouts may vary depending on the Orientation.
Note
See Help for details on the Page Setup screen.
Advanced Guide
Advanced Guide > Printing from a Computer > Printing with the Bundled Application Software > Printing Layout > Selecting a Photo

Selecting a Photo
1. Click Select Images.
The Select Images screen appears.
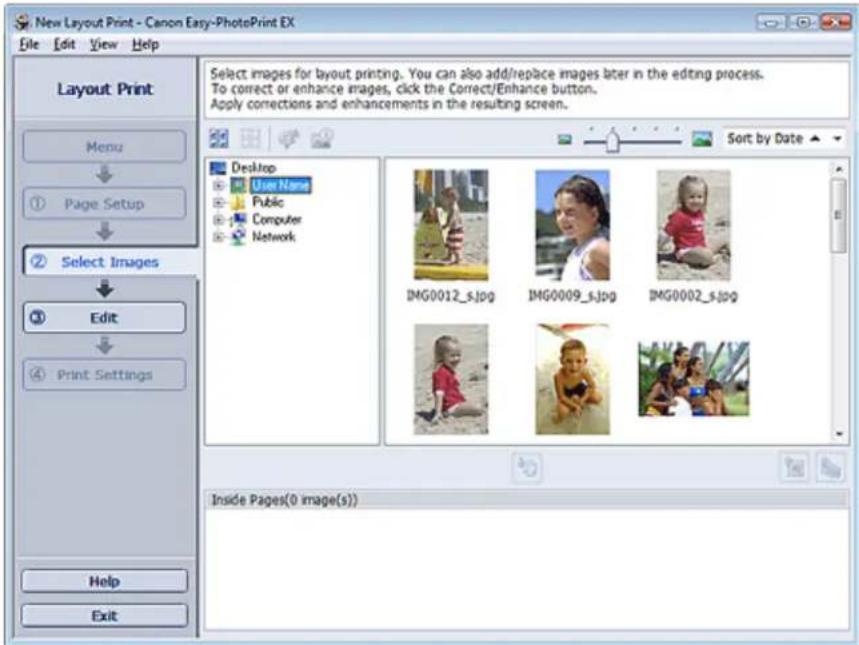
- Select the folder that contains the image you want to print from the folder tree area.
The images in the folder will be displayed as thumbnails (miniatures).
- Select the image(s) you want to print and click (Import to Inside Pages).
The selected image(s) are displayed in the selected image area.
You can also select the image(s) you want to print by dragging them into the selected image area.

Note
- To delete an image in the selected image area, select the image you want to delete and click

(Delete Imported Image).
To delete all images from the selected image area, click

(Delete All Imported Images).

Note
■ See Help for details on the Select Images screen.
Advanced Guide
Advanced Guide > Printing from a Computer > Printing with the Bundled Application Software > Printing Layout > Editing
Easy-PhotoPrint EX

Editing
1. Click Edit.
The Edit screen appears.
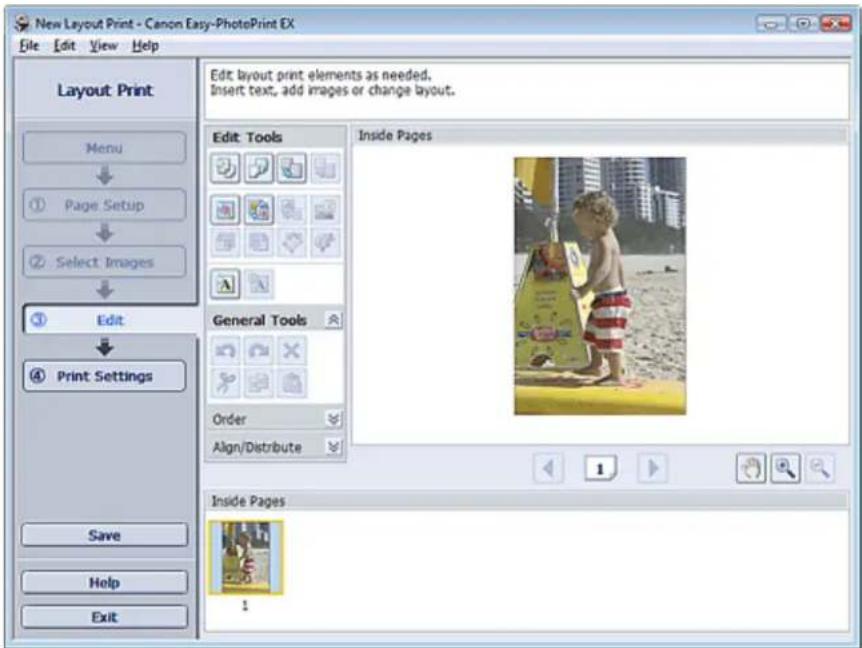
2. Edit the layout if necessary.
→ Changing Layout
→ Adding Photos
→ Swapping Positions of Photos
→ Replacing Photos
→ Changing Position, Angle and Size of Photos
→ Cropping Photos
→ Printing Dates on Photos
→ Adding Text to Photos
Important
- The edit information will be discarded if you exit Easy-PhotoPrint EX without saving the edited layout. It is recommended that you save the item if you want to edit it again.
Saving
Note
■ See Help for details on the Edit screen.
Advanced Guide
Advanced Guide > Printing from a Computer > Printing with the Bundled Application Software > Printing Layout > Printing
Easy-PhotoPrint EX

Printing
1. Click Print Settings.
The Print Settings screen appears.
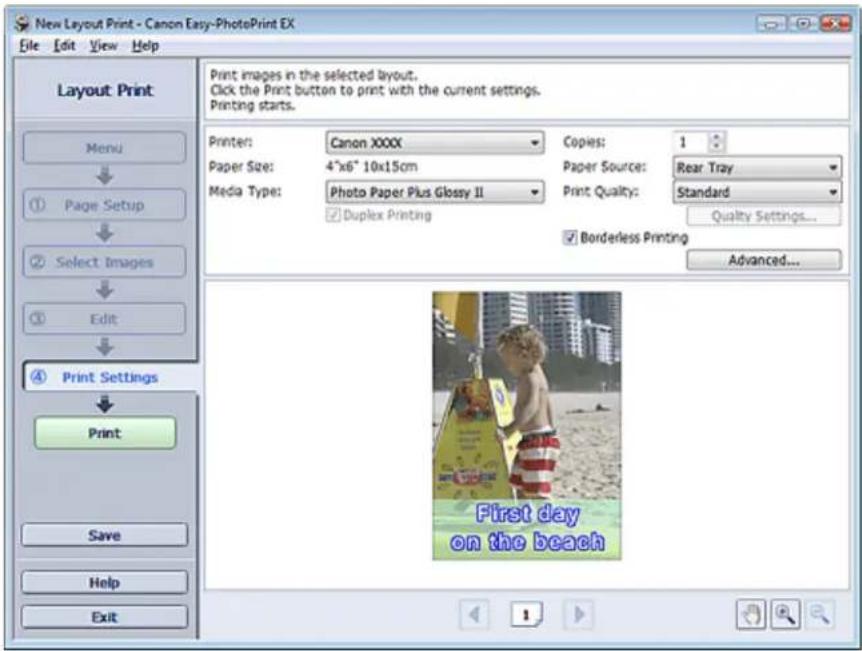
2. Set the following items according to the printer and paper to be used:
Printer
Media Type
Copies
Paper Source
Print Quality
Borderless Printing

Note
■ The media types may vary depending on the printer and the paper size.
- Duplex Printing appears if the selected printer and media type support duplex printing. Select this checkbox to print on both sides of the paper.
■ Automatic appears if you select the Duplex Printing checkbox after selecting a printer that supports automatic duplex printing and media type that supports duplex printing. Select this checkbox to print on both sides of the paper automatically.
■ The paper sources may vary depending on the printer and the media type.
- You can set a custom print quality level in the Print Quality Settings dialog box. To display the Print Quality Settings dialog box, select Custom for Print Quality and click Quality Settings....
- Select the Borderless Printing checkbox to print borderless photos.
- You can specify the print range and the amount of extension for borderless printing in the Print Settings dialog box. To display the Print Settings dialog box, click Advanced....
3. Click Print.

Note
■ See Help for details on the Print Settings screen.

Page top↑
Advanced Guide
Advanced Guide > Printing from a Computer > Printing with the Bundled Application Software > Correcting and Enhancing Photos
Easy-PhotoPrint EX
Correcting and Enhancing Photos
You can correct and enhance images.
Click (Correct/Enhance Images) in the Select Images or Edit screen, or in the Layout/Print screen of Photo Print. You can make the following corrections and enhancements in the Correct/Enhance Images window.
Important
- For Photo Print, if you select Enable ICC Profile in the Advanced tab of the Preferences dialog box, you cannot correct/enhance images.
Note
See "Correct/Enhance Images Window" for details on the Correct/Enhance Images window.
Auto Photo Fix
This function will automatically analyze the captured scene and apply suitable corrections.
→ Using the Auto Photo Fix Function
Red-Eye Correction Function
You can correct red eyes caused by a camera flash.
→ Using the Red-Eye Correction Function
Face Brightener Function
You can brighten dark faces caused by bright background.
→ Using the Face Brightener Function
Face Sharpener Function
You can sharpen out-of-focus faces in a photo.
→ Using the Face Sharpener Function
Digital Face Smoothing Function
You can enhance skin beautifully by removing blemishes and wrinkles.
→ Using the Digital Face Smoothing Function
Blemish Remover Function
You can remove moles.
→ Using the Blemish Remover Function
Image Adjustment
You can adjust brightness and contrast or sharpen the entire image.
You can also blur the outline of the subjects or remove the base color.
Adjusting Images
Page top↑
Advanced Guide
Advanced Guide > Printing from a Computer > Printing with the Bundled Application Software > Correcting and Enhancing Photos > Using the Auto Photo Fix Function
Easy-PhotoPrint EX
Using the Auto Photo Fix Function
Apply optimum corrections automatically to the photos used for an album, calendar, etc.

Important
The Auto Photo Fix function is not available for Photo Print. Photo Print allows you to automatically apply suitable corrections to all photos when printing, by selecting Auto Photo Fix in Color correction for printing on the Advanced tab of the Preferences dialog box. To display the Preferences dialog box, click (Settings) in the Layout/Print screen or select Preferences... from the File menu.
- Once image is corrected with Auto Photo Fix and saved, it cannot be corrected again with Auto Photo Fix.
Also, Auto Photo Fix may not be available for images edited using an application, digital camera, etc. manufactured by other companies.
- Select photos in the Select Images screen, then click (Correct/Enhance Images).
The Correct/Enhance Images window appears.


Note
-
You can also display the Correct/Enhance Images window by clicking (Correct/Enhance Images) in the Layout/Print or Edit screen. In that case, only the image displayed in Preview can be corrected/enhanced.
See "Correct/Enhance Images Window" for details on the Correct/Enhance Images window. -
Select the image you want to correct from the list displayed in the lower part of the Correct/Enhance Images window.
The image appears in Preview.

Note
If only one image is selected, the thumbnail does not appear below Preview.
-
Make sure that Auto is selected.
-
Click Auto Photo Fix, then click OK.
The entire photo is corrected automatically and the the upper left of the image.

(Correction/Enhancement) mark appears on

Note
- Click 📄 (Compare) to display the images before and after the correction side by side so that you can compare and check the result.
- Click Reset Selected Image to undo the correction operation.
If you want to apply the correction to all the selected images at once, select the Apply to all images checkbox. -
Select the Prioritize Exif Info checkbox to apply corrections primarily based on the settings made at the time of shooting.
Deselect this checkbox to apply corrections based on the image analysis results. It is recommended that you normally select this setting. -
Click Save Selected Image or Save All Corrected Images.
You can save corrected images as new files.

Note
■ To save only the image you like, click Save Selected Image. To save all images, click Save All Corrected Images.
■ Only JPEG/Exif file format is available for corrected images.
- Click Exit.

Important
The corrections will be lost if you exit before saving corrected images.
Advanced Guide
Advanced Guide > Printing from a Computer > Printing with the Bundled Application Software > Correcting and Enhancing Photos > Using the Red-Eye Correction Function
Easy-PhotoPrint EX
Using the Red-Eye Correction Function
You can correct red eyes caused by a camera flash.
You can perform the Red-Eye Correction function either automatically or manually.

Note
■ Photo Print allows you to automatically correct red eyes when printing. To correct automatically, select Enable Auto Photo Fix in Color correction for printing on the Advanced tab of the Preferences dialog box and select the Enable Red-Eye Correction checkbox.
- Select photos in the Select Images screen, then click (Correct/Enhance Images).
The Correct/Enhance Images window appears.
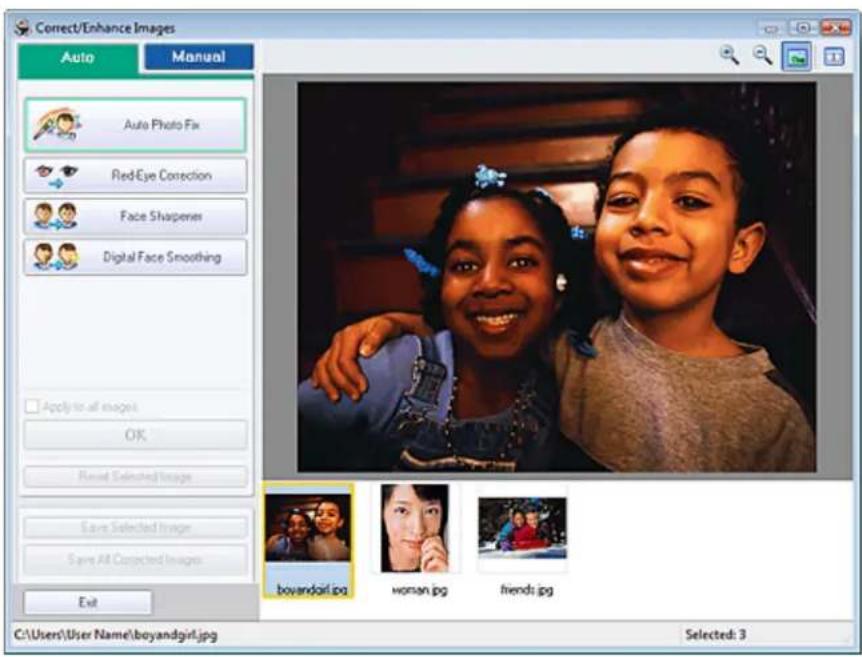

Note
-
You can also display the Correct/Enhance Images window by clicking (Correct/Enhance Images) in the Layout/Print or Edit screen. In that case, only the image displayed in Preview can be corrected/enhanced.
See "Correct/Enhance Images Window" for details on the Correct/Enhance Images window. -
Select the image you want to correct from the list displayed in the lower part of the Correct/Enhance Images window.
The image appears in Preview.

Note
If only one image is selected, the thumbnail does not appear below Preview.
Auto Correction
- Make sure that Auto is selected.
- Click Red-Eye Correction.
- Click OK.
Red eyes are corrected and the (Correction/Enhancement) mark appears on the upper left of the image.

Important
■ Areas other than the eyes may be corrected depending on the image.

Note
- Click 📄 (Compare) to display the images before and after the correction side by side so that you can compare and check the result.
- Click Reset Selected Image to undo the correction operation.
If you want to apply the correction to all the selected images at once, select the Apply to all images checkbox.
Manual Correction
- Click Manual, then click Correct/Enhance.
- Click Red-Eye Correction.


Note
■ Effect levels can be changed using the slider below Red-Eye Correction.
■ Move the cursor over the image. The shape of the cursor changes to (Paintbrush).
- Drag to select the red area you want to correct, then click OK that appears over the image.

Red eye is corrected and the (Correction/Enhancement) mark appears on the upper left of the image.

Note
- Click Undo to undo the preceding correction operation.
6. Click Save Selected Image or Save All Corrected Images.
You can save corrected images as new files.

Note
- To save only the image you like, click Save Selected Image. To save all images, click Save All Corrected Images.
■ Only JPEG/Exif file format is available for corrected images.
7. Click Exit.

Important
The corrections will be lost if you exit before saving corrected images.
Advanced Guide
Advanced Guide > Printing from a Computer > Printing with the Bundled Application Software > Correcting and Enhancing Photos > Using the Face Brightener Function
Easy-PhotoPrint EX
Using the Face Brightener Function
You can brighten dark faces caused by bright background.

Note
-
You can brighten dark photos caused by bright background automatically by selecting Auto Photo Fix. If the correction had not been made sufficiently, applying Face Brightener function is recommended. → Using the Auto Photo Fix Function
-
Select photos in the Select Images screen, then click 📄 (Correct/Enhance Images).
The Correct/Enhance Images window appears.


Note
- You can also display the Correct/Enhance Images window by clicking (Correct/Enhance Images) in the Layout/Print or Edit screen. In that case, only the image displayed in Preview can be corrected/enhanced.
-
See "Correct/Enhance Images Window" for details on the Correct/Enhance Images window.
-
Select the image you want to correct from the list displayed in the lower part of the Correct/Enhance Images window.
The image appears in Preview.

Note
If only one image is selected, the thumbnail does not appear below Preview.
- Click Manual, then click Correct/Enhance.
4. Click Face Brightener.
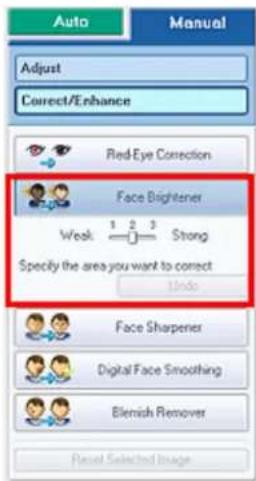

Note
■ Effect levels can be changed using the slider below Face Brightener.
■ Move the cursor over the image. The shape of the cursor changes to + (Cross).
5. Drag to select the area you want to correct, then click OK that appears over the image.

The entire image is corrected so that the selected area containing the face becomes brighter, and the ⚙ (Correction/Enhancement) mark appears on the upper left of the image.

Note
■ You can also drag to rotate the selected area.
- Click Undo to undo the preceding correction operation.
6. Click Save Selected Image or Save All Corrected Images.
You can save corrected images as new files.

Note
To save only the image you like, click Save Selected Image. To save all images, click Save All Corrected Images.
■ Only JPEG/Exif file format is available for corrected images.
7. Click Exit.

important
The corrections will be lost if you exit before saving corrected images.
Advanced Guide
Advanced Guide > Printing from a Computer > Printing with the Bundled Application Software > Correcting and Enhancing Photos > Using the Face Sharpener Function
Easy-PhotoPrint EX
Using the Face Sharpener Function
You can sharpen out-of-focus faces in a photo.
You can perform the Face Sharpener function either automatically or manually.
- Select photos in the Select Images screen, then click (Correct/Enhance Images).
The Correct/Enhance Images window appears.


Note
-
You can also display the Correct/Enhance Images window by clicking (Correct/Enhance Images) in the Layout/Print or Edit screen. In that case, only the image displayed in Preview can be corrected/enhanced.
See "Correct/Enhance Images Window" for details on the Correct/Enhance Images window. -
Select the image you want to correct from the list displayed in the lower part of the Correct/Enhance Images window.
The image appears in Preview.

Note
If only one image is selected, the thumbnail does not appear below Preview.
Auto Correction
- Make sure that Auto is selected.
4. Click Face Sharpener.

Note
■ Effect levels can be changed using the slider below Face Sharpener.
5. Click OK.
The face is sharpened and the (Correction/Enhancement) mark appears on the upper left of the image.

Note
- Click 📄 (Compare) to display the images before and after the correction side by side so that you can compare and check the result.
- Click Reset Selected Image to undo the correction operation.
If you want to apply the correction to all the selected images at once, select the Apply to all images checkbox.
Manual Correction
- Click Manual, then click Correct/Enhance.
- Click Face Sharpener.
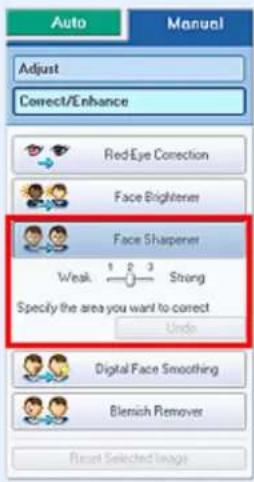

Note
■ Effect levels can be changed using the slider below Face Sharpener.
■ Move the cursor over the image. The shape of the cursor changes to + (Cross).
- Drag to select the area you want to correct, then click OK that appears over the image.

The facial area in and around the selected area is sharpened and the Enhancement) mark appears on the upper left of the image.
(Correction/

Note
- You can also drag to rotate the selected area.
- Click Undo to undo the preceding correction operation.
6. Click Save Selected Image or Save All Corrected Images.
You can save corrected images as new files.

Note
■ To save only the image you like, click Save Selected Image. To save all images, click Save All Corrected Images.
■ Only JPEG/Exif file format is available for corrected images.
7. Click Exit.

Important
The corrections will be lost if you exit before saving corrected images.
Advanced Guide
Advanced Guide > Printing from a Computer > Printing with the Bundled Application Software > Correcting and Enhancing Photos > Using the Digital Face Smoothing Function
Easy-PhotoPrint EX
Using the Digital Face Smoothing Function
You can enhance skin beautifully by removing blemishes and wrinkles.
You can perform the Digital Face Smoothing function either automatically or manually.
- Select photos in the Select Images screen, then click (Correct/Enhance Images).
The Correct/Enhance Images window appears.


Note
-
You can also display the Correct/Enhance Images window by clicking (Correct/Enhance Images) in the Layout/Print or Edit screen. In that case, only the image displayed in Preview can be corrected/enhanced.
See "Correct/Enhance Images Window" for details on the Correct/Enhance Images window. -
Select the image you want to enhance from the list displayed in the lower part of the Correct/Enhance Images window.
The image appears in Preview.

Note
If only one image is selected, the thumbnail does not appear below Preview.
Auto Enhancement
- Make sure that Auto is selected.
4. Click Digital Face Smoothing.

Note
■ Effect levels can be changed using the slider below Digital Face Smoothing.
5. Click OK.
Skin is enhanced beautifully and the (Correction/Enhancement) mark appears on the upper left of the image.

Note
- Click 📋 (Compare) to display the images before and after the enhancement side by side so that you can compare and check the result.
- Click Reset Selected Image to undo the enhancement operation.
If you want to apply the enhancement to all the selected images at once, select the Apply to all images checkbox.
Manual Enhancement
- Click Manual, then click Correct/Enhance.
- Click Digital Face Smoothing.
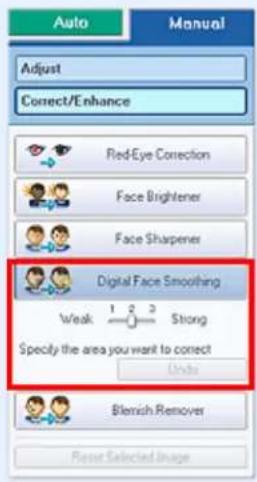

Note
■ Effect levels can be changed using the slider below Digital Face Smoothing.
■ Move the cursor over the image. The shape of the cursor changes to + (Cross).
- Drag to select the area you want to enhance, then click OK that appears over the image.

Skin in and around the selected area is enhanced beautifully and the (Correction/Enhancement) mark appears on the upper left of the image.

Note
- You can also drag to rotate the selected area.
- Click Undo to undo the preceding enhancement operation.
6. Click Save Selected Image or Save All Corrected Images.
You can save enhanced images as new files.

Note
■ To save only the image you like, click Save Selected Image. To save all images, click Save All Corrected Images.
■ Only JPEG/Exif file format is available for enhanced images.
7. Click Exit.

Important
The enhancements will be lost if you exit before saving enhanced images.
Advanced Guide
Advanced Guide > Printing from a Computer > Printing with the Bundled Application Software > Correcting and Enhancing Photos > Using the Blemish Remover Function
Easy-PhotoPrint EX
Using the Blemish Remover Function
You can remove moles.
- Select photos in the Select Images screen, then click 📋 (Correct/Enhance Images).
The Correct/Enhance Images window appears.


Note
-
You can also display the Correct/Enhance Images window by clicking (Correct/Enhance Images) in the Layout/Print or Edit screen. In that case, only the image displayed in Preview can be corrected/enhanced.
See "Correct/Enhance Images Window" for details on the Correct/Enhance Images window. -
Select the image you want to enhance from the list displayed in the lower part of the Correct/Enhance Images window.
The image appears in Preview.

Note
If only one image is selected, the thumbnail does not appear below Preview.
- Click Manual, then click Correct/Enhance.
- Click Blemish Remover.

Note
■ Move the cursor over the image. The shape of the cursor changes to + (Cross).
- Drag to select the area you want to enhance, then click OK that appears over the image.

Moles in and around the selected area are removed and the (Correction/Enhancement) mark appears on the upper left of the image.

Note
- Click Undo to undo the preceding enhancement operation.
- Click Save Selected Image or Save All Corrected Images.
You can save enhanced images as new files.

Note
To save only the image you like, click Save Selected Image. To save all images, click Save All Corrected Images.
■ Only JPEG/Exif file format is available for enhanced images.
- Click Exit.

important
■ The enhancements will be lost if you exit before saving enhanced images.
Advanced Guide
Advanced Guide > Printing from a Computer > Printing with the Bundled Application Software > Correcting and Enhancing Photos > Adjusting Images
Easy-PhotoPrint EX
Adjusting Images
You can make fine adjustments to the overall brightness, contrast, etc. of images.
- Select photos in the Select Images screen, then click 📋 (Correct/Enhance Images).
The Correct/Enhance Images window appears.
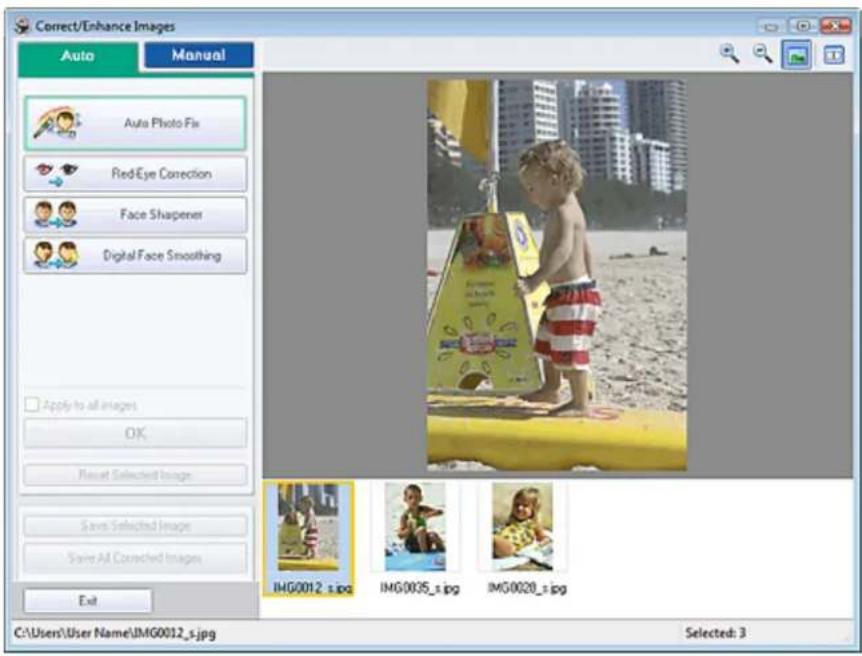

Note
-
You can also display the Correct/Enhance Images window by clicking (Correct/Enhance Images) in the Layout/Print or Edit screen. In that case, only the image displayed in Preview can be corrected/enhanced.
See "Correct/Enhance Images Window" for details on the Correct/Enhance Images window. -
Select the image you want to adjust from the list displayed in the lower part of the Correct/Enhance Images window.
The image appears in Preview.

Note
If only one image is selected, the thumbnail does not appear below Preview.
- Click Manual, then click Adjust.
- Move the slider of the item you want to adjust and set the effect level.
The following adjustments are available:
Brightness
Contrast
Sharpness
Blur
Show-through Removal
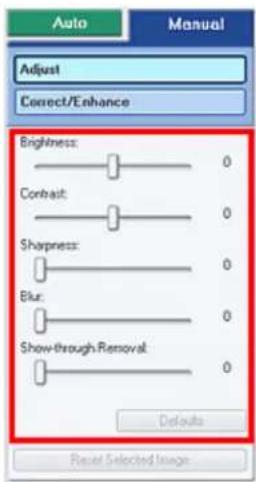

Note
- Click Defaults to reset all adjustments.
5. Click Save Selected Image or Save All Corrected Images.
You can save adjusted images as new files.

Note
■ To save only the image you like, click Save Selected Image. To save all images, click Save All Corrected Images.
■ Only JPEG/Exif file format is available for adjusted images.
6. Click Exit.

Important
■ The adjustments will be lost if you exit before saving adjusted images.
Advanced Guide
Advanced Guide > Printing from a Computer > Printing with the Bundled Application Software > Correcting and Enhancing Photos > Correct/Enhance Images Window
Easy-PhotoPrint EX
Correct/Enhance Images Window
You can correct/enhance images in this window.
To display the Correct/Enhance Images window, click (Correct/Enhance Images) in the Select Images or Edit screen, or in the Layout/Print screen of Photo Print.
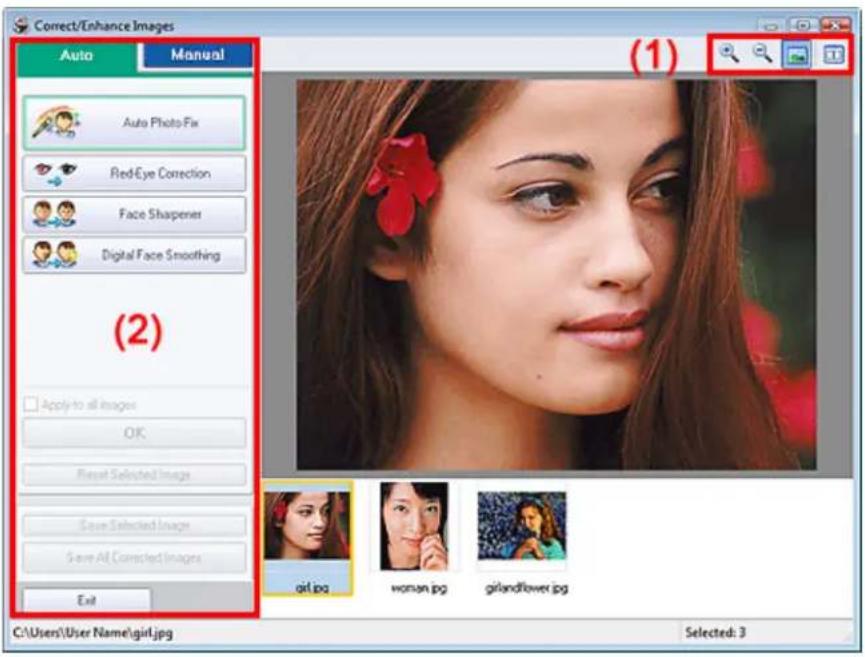
(1)Toolbar
Toolbar


(Zoom In/Zoom Out)
Displays the enlarged or reduced preview of the page.

(Full Screen)
Displays the entire image in Preview.

(Compare)
Displays the Compare Images window. You can compare the images before and after the correction/enhancement side by side.
The image before the correction/enhancement is displayed on the left, and the image after the correction/enhancement is displayed on the right.

(2)Task Area
Available tasks and settings may vary between the Auto and Manual tabs. Click Auto or Manual to display the corresponding tab.
Auto Tab
Select to correct automatically.
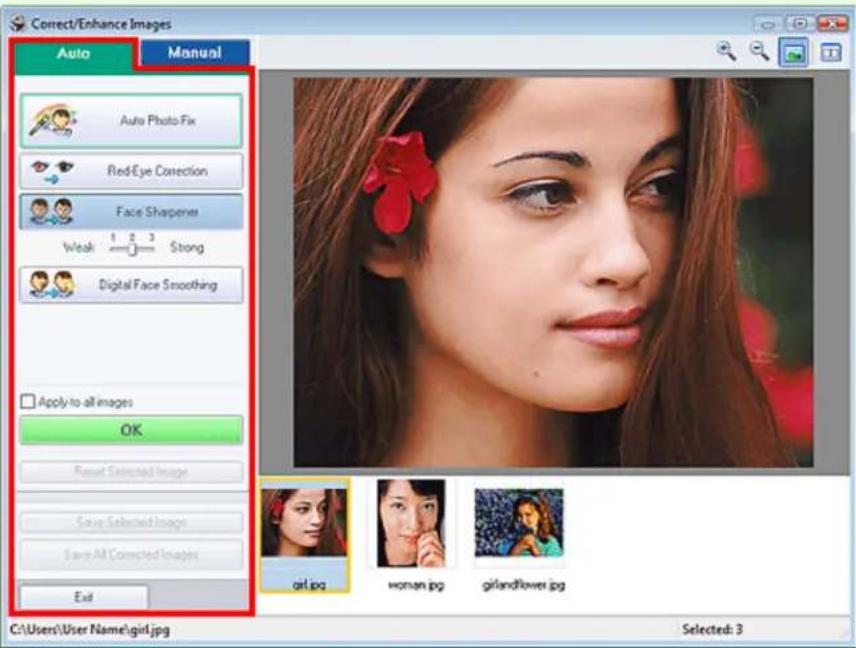
Auto Photo Fix
Applies automatic corrections suitable for photos.

Important
- The Auto Photo Fix function is not available for Photo Print. Photo Print allows you to automatically apply suitable corrections to all photos when printing. Select this option in Color correction for printing on the Advanced tab of the Preferences dialog box. To display the Preferences dialog box, click (Settings) in the Layout/Print screen or select Preferences... from the File menu.
Prioritize Exif Info
Select this checkbox to apply corrections primarily based on the settings made at the time of
shooting.
Deselect this checkbox to apply corrections based on the image analysis results. It is recommended that you normally select this setting.

Note
- Exif is a standard format for embedding various shooting data in digital camera images (JPEG).
- For Photo Print, you can apply suitable corrections based on Exif information automatically by selecting Enable Auto Photo Fix in Color correction for printing on the Advanced tab of the Preferences dialog box and selecting the Prioritize Exif Info checkbox.
Red-Eye Correction
Corrects red eyes.

Note
For Photo Print, you can also correct red eyes by selecting Enable Auto Photo Fix in Color correction for printing on the Advanced tab of the Preferences dialog box and selecting the Enable Red-Eye Correction checkbox.
Face Sharpener
Sharpens out-of-focus faces.
You can adjust the effect level using the slider.
Digital Face Smoothing
Enhances skin beautifully by removing blemishes and wrinkles.
You can adjust the effect level using the slider.
Apply to all images
Automatically corrects all the images displayed in the list.
OK
Applies the selected effect to the selected image or all images.
Reset Selected Image
Cancels all corrections and enhancements applied to the selected image.
Save Selected Image
Saves the selected image in the list that applied corrections and enhancements.
Save All Corrected Images
Saves all the images that applied corrections and enhancements displayed in the list.
Exit
Click to close the Correct/Enhance Images window.
Manual Tab
Select to correct manually.
Use Adjust to adjust brightness and contrast, or to sharpen the entire image.
Use Correct/Enhance to correct/enhance specific areas.
Adjust
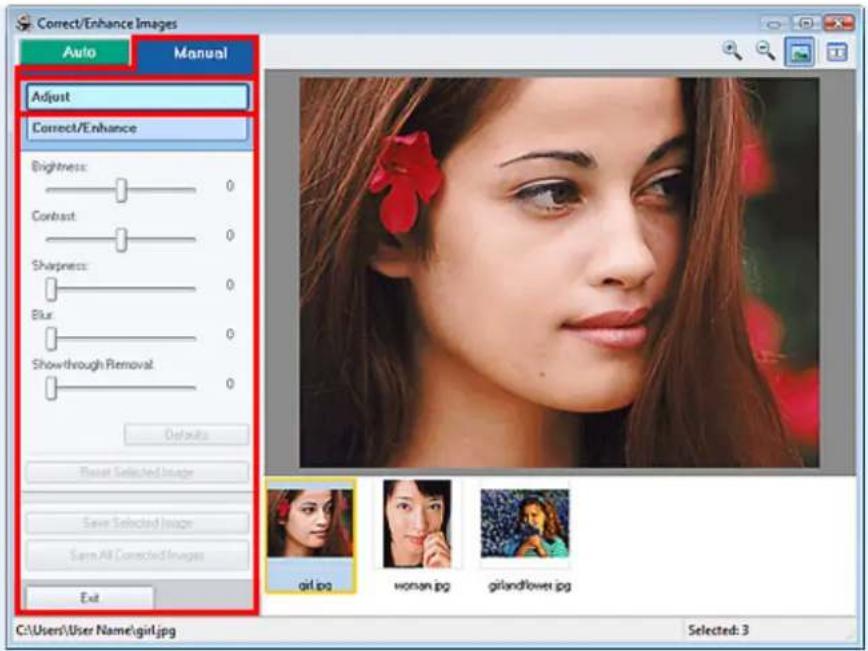
Brightness
Adjusts the overall image brightness.
Move the slider to the left to darken and right to brighten the image.
Contrast
Adjusts the contrast of the image. Adjust the contrast when the image is flat due to lack of contrast.
Move the slider to the left to decrease and right to increase the contrast of the image.
Sharpness
Emphasizes the outline of the subjects to sharpen the image. Adjust the sharpness when the photo is out of focus or text is blurred.
Move the slider to the right to sharpen the image.
Blur
Blurs the outline of the subjects to soften the image.
Move the slider to the right to soften the image.
Show-through Removal
Removes show-through of text from the reverse side or removes the base color. Adjust the show-through level to prevent text on the reverse side of thin document or the base color of the document from appearing on the image.
Move the slider to the right to increase the show-through removal effect.
Defaults
Resets each adjustment (brightness, contrast, sharpness, blur, and show-through removal).
Reset Selected Image
Cancels all adjustments applied to the selected image.
Save Selected Image
Saves the selected image in the list that applied adjustments.
Save All Corrected Images
Saves all the images that applied adjustments displayed in the list.
Exit
Click to close the Correct/Enhance Images window.
Correct/Enhance
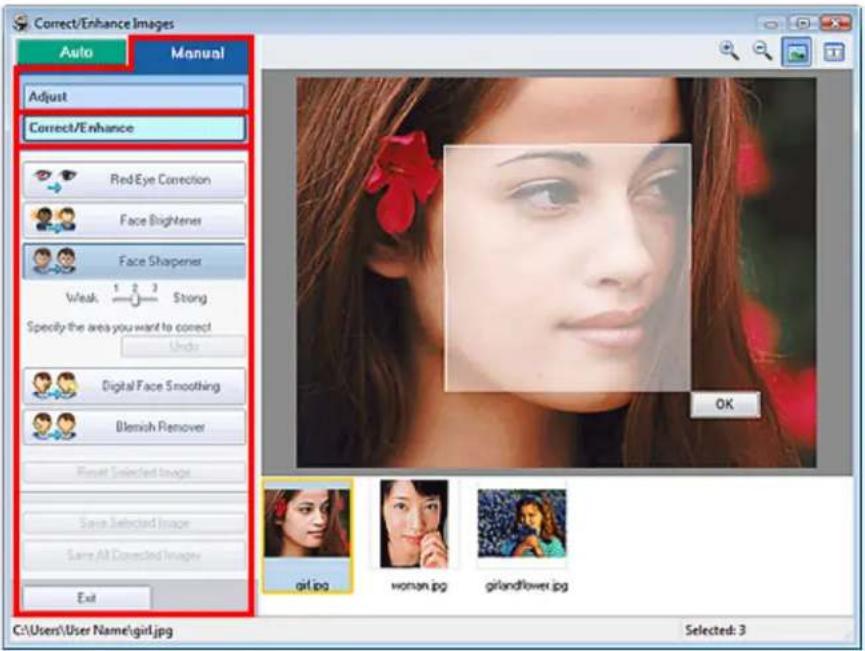
Red-Eye Correction
Corrects red eyes.
You can specify the area you want to apply the effect to. You can adjust the effect level using the slider.

Note
For Photo Print, red eyes are automatically corrected when Enable Auto Photo Fix is selected in Color correction for printing on the Advanced tab of the Preferences dialog box and the Enable Red-Eye Correction checkbox is selected. To disable the automatic correction, deselect the checkbox.
Face Brightener
Corrects the entire image so that the selected facial area is brightened.
You can adjust the effect level using the slider.
Face Sharpener
Sharpens out-of-focus faces.
You can specify the area you want to apply the effect to. You can adjust the effect level using the slider.
Digital Face Smoothing
Enhances skin beautifully by removing blemishes and wrinkles.
You can specify the area you want to apply the effect to. You can adjust the effect level using the slider.
Blemish Remover
Removes moles.
You can specify the area you want to apply the effect to.
OK
Applies the selected effect to the specified area.
Undo
Cancels the latest correction/enhancement.
Reset Selected Image
Cancels all corrections and enhancements applied to the selected image.
Save Selected Image
Saves the selected image in the list that applied corrections and enhancements.
Save All Corrected Images
Saves all the images that applied corrections and enhancements displayed in the list.
Exit
Click to close the Correct/Enhance Images window.
Page top↑
Advanced Guide
Advanced Guide > Printing from a Computer > Printing with the Bundled Application Software > Questions and Answers
Easy-PhotoPrint EX
Questions and Answers
→ How Can I Move (or Copy) the Saved File?
Which Side of the Displayed Image Does the Printing Start from?
→ How Do I Print with Even Margins?
What Is "C1" or "C4"?
Page top↑
Advanced Guide
Advanced Guide > Printing from a Computer > Printing with the Bundled Application Software > Questions and Answers > How Can I Move (or Copy) the Saved File?

How Can I Move (or Copy) the Saved File?
If you want to move (or copy) a file created and saved with Easy-PhotoPrint EX from one folder to another, you need to move (or copy) the folder that was automatically created when originally saving that file as well.
For example, when you save a file named "MyAlbum.el1," a folder named "MyAlbum.el1.Data" is automatically created in the same folder that contains the "MyAlbum.el1" file. If you want to move (or copy) the "MyAlbum.el1" file to another folder, move (or copy) the "MyAlbum.el1.Data" folder as well. The "MyAlbum.el1.Data" folder contains the photos used in the album.


MyAlbum.el1

Note
■ The icons may vary depending on the items.

Important
- Do not change the Data folder name; otherwise you will not be able to display the photos you edited with Easy-PhotoPrint EX.
Advanced Guide
Advanced Guide > Printing from a Computer > Printing with the Bundled Application Software > Questions and Answers > Which Side of the Displayed Image Does the Printing Start from?

Which Side of the Displayed Image Does the Printing Start from?
As shown below, printing starts from the left side of the image displayed in the Layout/Print screen.

Outputs the paper in the direction as the arrow indicates.
See your printer manual for details on how to load paper (to print on the front/back, etc.).
Advanced Guide
Advanced Guide > Printing from a Computer > Printing with the Bundled Application Software > Questions and Answers > How Do I Print with Even Margins?
Easy-PhotoPrint EX

How Do I Print with Even Margins?
When you print on a bordered layout, the margins on the left and right or the top and bottom may become wider than the other, depending on the image and printer.
To always print with even margins, select the Always crop images when selecting a layout with margins checkbox on the Advanced tab of the Preferences dialog box.
To display the Preferences dialog box, click (Settings) in the Layout/Print screen or select Preferences... from the File menu.
Crop the photo to apply even margins individually.
→ Cropping Photos (Photo Print)

Note
This setting is available for Photo Print only.
Advanced Guide
Advanced Guide > Printing from a Computer > Printing with the Bundled Application Software> Questions and Answers > What Is "C1" or "C4"?

What Is "C1" or "C4"?
When an album is printed, labels such as "C1" and "C4" are printed as page numbers.
The "C1" and "C4" represent the front cover and back cover, respectively.

C1: Front cover
C2: Inside the front cover
C3: Inside the back cover
C4: Back cover
Advanced Guide
Advanced Guide > Printing from a Computer > Printing with the Bundled Application Software > Photo Print Settings
Easy-PhotoPrint EX
Photo Print Settings
→ Printing Vivid Photos
→ Reducing Photo Noise
→ Cropping Photos (Photo Print)
→ Printing Dates on Photos (Photo Print)
→ Printing Multiple Photos on One Page
→ Printing an Index
→ Printing ID Photos (ID Photo Print)
→ Printing Photo Information
Saving Photos
→ Opening Saved Files
Advanced Guide
Advanced Guide > Printing from a Computer > Printing with the Bundled Application Software > Photo Print Settings > Printing Vivid Photos

Printing Vivid Photos
Select the Vivid Photo checkbox in the Select Paper screen to boost the colors in a photo before printing.

Important
This function is available only with a printer that supports Vivid Photo.
This function is not available when Enable ICC Profile is selected on the Advanced tab of the Preferences dialog box.
Note
Even if you select the Vivid Photo checkbox, this effect applies only to the print result. The original image or preview image will not be affected.
Advanced Guide
Advanced Guide > Printing from a Computer > Printing with the Bundled Application Software > Photo Print Settings > Reducing Photo Noise
Reducing Photo Noise
When a photo is taken in a dark location such as night scene using digital camera, noise may appear in the image.
Select the Photo Noise Reduction checkbox in the Select Paper screen to reduce noise in the image and make the printed photos more vivid.
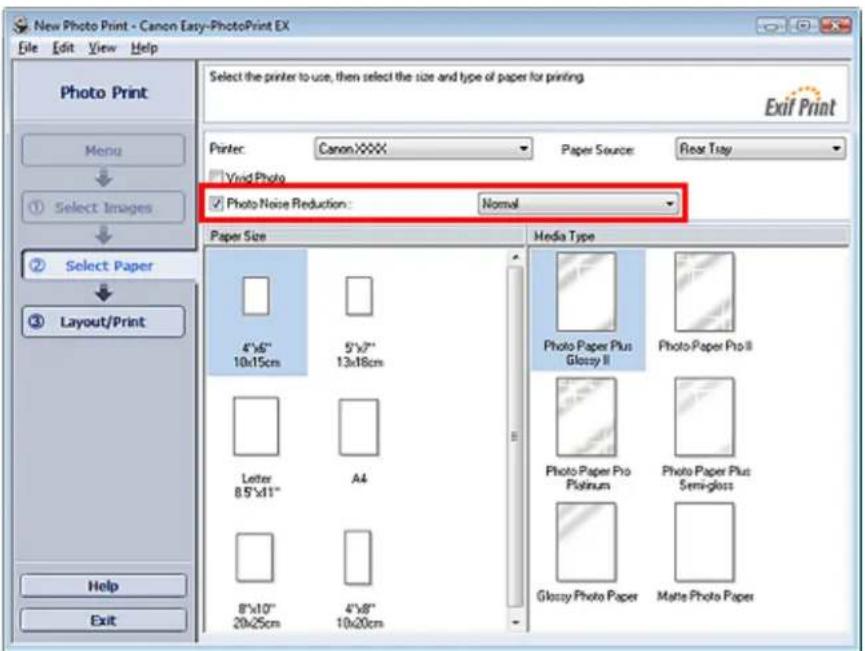
Important
This function is not available when Enable ICC Profile is selected on the Advanced tab of the Preferences dialog box.
Note
■ When the noise is severe, change Normal to Strong.
The noise reduction effect applies only to the print result. The original image or preview image will not be affected.
Advanced Guide
Advanced Guide > Printing from a Computer > Printing with the Bundled Application Software > Photo Print Settings > Cropping Photos (Photo Print)
Easy-PhotoPrint EX

Cropping Photos (Photo Print)
Cropping a photo is the act of removing the unnecessary portions of the photo by selecting the necessary portions.
Click (Crop Image) in the Layout/Print screen or double-click the preview image.

Move the white frame to the portion to print and click OK.

Note
- To move the cropping area, place the cursor within the white frame and drag it. Drag the white lines to enlarge/reduce the cropping area.
- Select the The Rule of Thirds checkbox to display white broken lines. To create a balanced composition, drag any of the intersecting points (white squares) or white broken lines over the main subject of the photo.

- The cropping effect applies only to the print result. The original image will not be cropped.
■ See Help for details on the Crop window.
Advanced Guide
Advanced Guide > Printing from a Computer > Printing with the Bundled Application Software > Photo Print Settings > Printing Dates on Photos (Photo Print)
Easy-PhotoPrint EX

Printing Dates on Photos (Photo Print)
To print the date the photo was taken on the photo, click (Date Settings) in the Layout/Print screen, then select the Print date checkbox in the Date Settings dialog box.


Note
The date is displayed in the short date format (mm/dd/yyyy, etc.) specified in your operating system.
■ See Help for details on setting dates.
Advanced Guide
Advanced Guide > Printing from a Computer > Printing with the Bundled Application Software > Photo Print Settings > Printing Multiple Photos on One Page
Printing Multiple Photos on One Page
You can print multiple photos on one page by selecting a multiple-photo layout in the Layout/Print screen.


Note
- See the following section for details on how to select photos.
→ Selecting a Photo
The available number of photos and layout may vary depending on the media type.
■ Photos are arranged in the following order.
Example: Borderless (x4)
| 1 | 3 |
| 2 | 4 |
- You can change the printing order in Printing Order on the Print tab of the Preferences dialog box. You can select the printing order from By Date, By Name and By Selection.
To display the Preferences dialog box, click (Settings) or select Preferences... from the File menu.
Advanced Guide
Advanced Guide > Printing from a Computer > Printing with the Bundled Application Software > Photo Print Settings > Printing an Index
Printing an Index
You can print an index of selected photos. An index print shows the thumbnails of the photos in one page. It is convenient for managing your photos.
To print an index, select Index from the layouts in the Layout/Print screen.
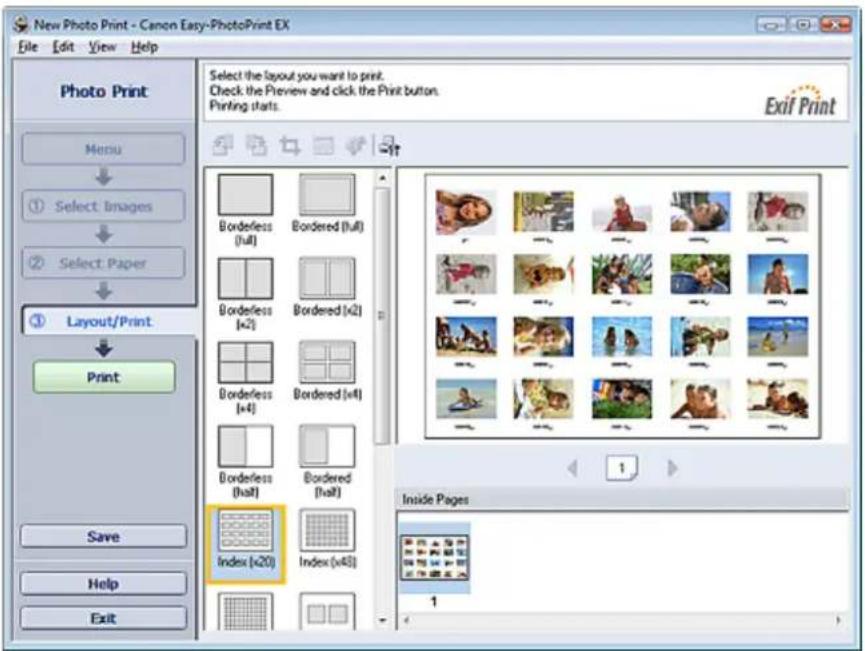
Important
- Index print will be disabled if you select any of the following paper sizes.
- Credit Card
- You can print up to 80 images on one page.
Note
■ See the following section for details on how to select photos.
→ Selecting a Photo
■ Photos are arranged in the following order. Example: Index (x20)
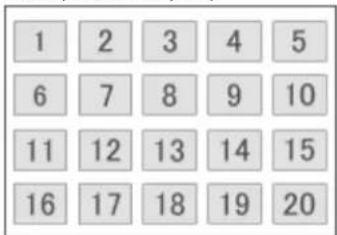
- You can change the printing order in Printing Order on the Print tab of the Preferences dialog box. You can select the printing order from By Date, By Name, and By Selection.
To display the Preferences dialog box, click (Settings) or select Preferences... from the File menu.
Page top↑
Advanced Guide
Advanced Guide > Printing from a Computer > Printing with the Bundled Application Software > Photo Print Settings > Printing ID Photos (ID Photo Print)
Printing ID Photos (ID Photo Print)
You can print a variety of ID photos.

Important
The photo may not qualify as an official ID photo depending on its use. For details, contact the party to whom you will be submitting the photo.
To print ID photos, select 4"x6" 10x15cm for Paper Size in the Select Paper screen, and select a layout of the ID photo from the layouts in the Layout/Print screen.


Note
- See the following section for details on how to select photos.
→ Selecting a Photo
■ Photos are arranged in the following order. Example: ID Photo 3.5x4.5cm
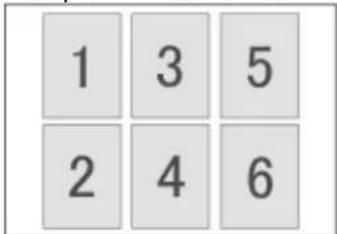
- You can change the printing order in Printing Order on the Print tab of the Preferences dialog box. You can select the printing order from By Date, By Name, and By Selection.
To display the Preferences dialog box, click (Settings) or select Preferences... from the File menu.
■ ID photos can only be printed on 4"x6" 10x15cm paper.
Page top↑
Advanced Guide
Advanced Guide > Printing from a Computer > Printing with the Bundled Application Software > Photo Print Settings > Printing Photo Information
Easy-PhotoPrint EX

Printing Photo Information
You can print the photo and the Exif information side by side.
To print them, select Letter 8.5"x11" or A4 for Paper Size in the Select Paper screen, and select Captured Info from the layouts in the Layout/Print screen.


Note
- See the following section for details on how to select photos.
→ Selecting a Photo
This function is available only on paper sizes Letter 8.5"x11" and A4.
Advanced Guide
Advanced Guide > Printing from a Computer > Printing with the Bundled Application Software > Photo Print Settings > Saving Photos
Easy-PhotoPrint EX

Saving Photos
You can save edited photos. The information of cropping and layout can be saved.
Click Save in the Layout/Print screen.

When the Save As dialog box appears, specify the save location and file name, then click Save.
Important
If you edit a saved file and save it again, the file will be overwritten.
To save a file again with a new name or to a different location, select Save As... from the File menu and save.

Note
- Save will not be displayed in the Select Images or Select Paper screen.
Advanced Guide
Advanced Guide > Printing from a Computer > Printing with the Bundled Application Software > Photo Print Settings > Opening Saved Files

Opening Saved Files
You can open files created with Easy-PhotoPrint EX.
1. Click Library from Menu.

The Open dialog box appears.
You can check files created and saved with Easy-PhotoPrint EX by icon view (only for Windows Vista) or thumbnail view.

Important
- When using 64bit Edition of Windows Vista or Windows XP, the contents of files cannot be displayed on Explorer.
2. Select the file you want to open and click Open.
The Layout/Print screen appears.

Note
- Easy-PhotoPrint EX supports the following file format (extension). - Easy-PhotoPrint EX Photo Print file (.el6)
3. Edit the file if necessary.

Note
- You can open files created with Easy-PhotoPrint EX with the following methods, besides from Library in Menu.
- Double-click or click the file. - From the File menu, click Open..., then select the file you want to edit.
- You can also open a recently used file by clicking the file name shown in the File menu.
Page top↑
Advanced Guide
Advanced Guide > Printing from a Computer > Printing with the Bundled Application Software > Other Settings
Easy-PhotoPrint EX
Other Settings
→ Changing Layout
→ Changing Background
→ Adding Photos
→ Swapping Positions of Photos
→ Replacing Photos
→ Changing Position, Angle and Size of Photos
→ Cropping Photos
→ Framing Photos
→ Printing Dates on Photos
Attaching Comments to Photos
→ Adding Text to Photos
Saving
Setting Holidays
Setting Calendar Display
→ Opening Saved Files
Advanced Guide
Advanced Guide > Printing from a Computer > Printing with the Bundled Application Software > Other Settings > Changing Layout

Changing Layout
You can change the layout of each page separately.
Select the page you want to change the layout of in the Edit screen, then click (Change Layout). Select the layout you want to use in the Change Layout dialog box and click OK.
Album
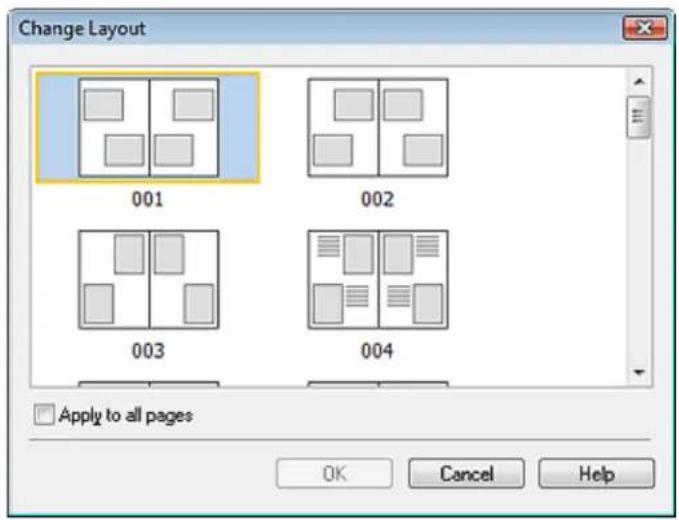
Important
If the new layout has a different number of frames per page from the current layout, the following will happen:
If the number of layout frames is increased
: Images will move from the subsequent pages to fill all the frames in the new layout.
If the number of layout frames is decreased
: Pages with the new layout will be added until all the images on the pages with the current layout can be fitted.
If you change the current layout for the front or back cover to one that has fewer layout frames, any image that does not fit in the new layout will be deleted, starting with the last image that was added to the former layout page.
Note
The layouts that can be selected may vary depending on the Paper Size, Orientation, or the type of page selected (front cover, inside pages or back cover).
- Select the Apply to all pages checkbox to change the layouts of all pages to the one you newly selected.
Calendar


Important
■ The layouts of all pages are changed to the selected layout.
- All images that do not fit in the new layout will be collected on the last page.
Note
The layouts that can be selected may vary depending on the Paper Size and Orientation.
Layout Print


Important
- If the new layout has a different number of frames per page from the current layout, the following will happen:
If the number of layout frames is increased
: Images will move from the subsequent pages to fill all the frames in the new layout.
If the number of layout frames is decreased
: Pages with the new layout will be added until all the images on the pages with the current layout can be fitted.
Note
The layouts that can be selected may vary depending on the Paper Size and Orientation.
- Select the Apply to all pages checkbox to change the layouts of all pages to the one you newly selected.
Advanced Guide
Advanced Guide > Printing from a Computer > Printing with the Bundled Application Software > Other Settings > Changing Background
Easy-PhotoPrint EX
Changing Background
You can change the background of each page.

Important
- You cannot change the background of the Photo Print, Stickers, and Layout Print.
Click Background... in the Page Setup screen or select the page you want to change the background of in the Edit screen, then click (Change Background).

Note
The screens for Album printing are used as examples in the following descriptions. The screens may vary depending on what you create.


Select the type of background you want to use in the Change Background dialog box.
When Select from samples is Selected
Select the image you want to use from Samples and click OK.

Note
- Select from samples will be displayed only if Album has been selected.
- Various backgrounds are available on our website besides those saved in the application.
Click Search backgrounds... to access the Canon website from which you can download additional materials for free.
- Internet connection is required to access the website. Internet connection fees apply.
This function may not be available in some regions.
■ Exit Easy-PhotoPrint EX before installing backgrounds.
When Single color is Selected
Select the color you want to use from Standard color or Custom color and click OK.
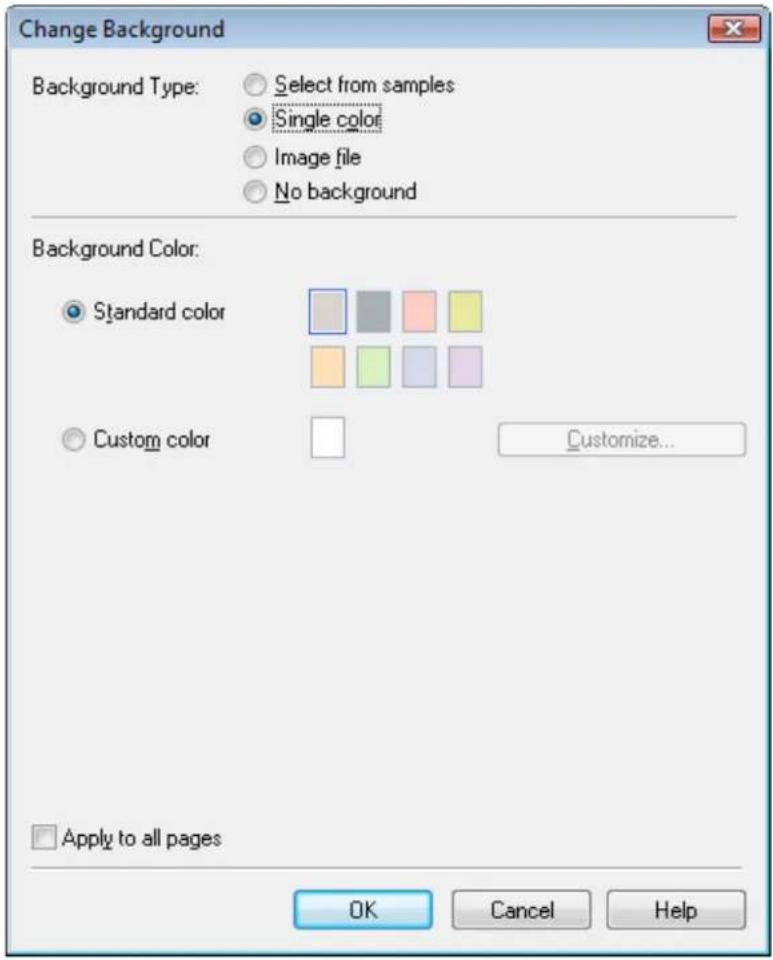
When Image file is Selected
Set Image File Path and Image Layout, then click OK.
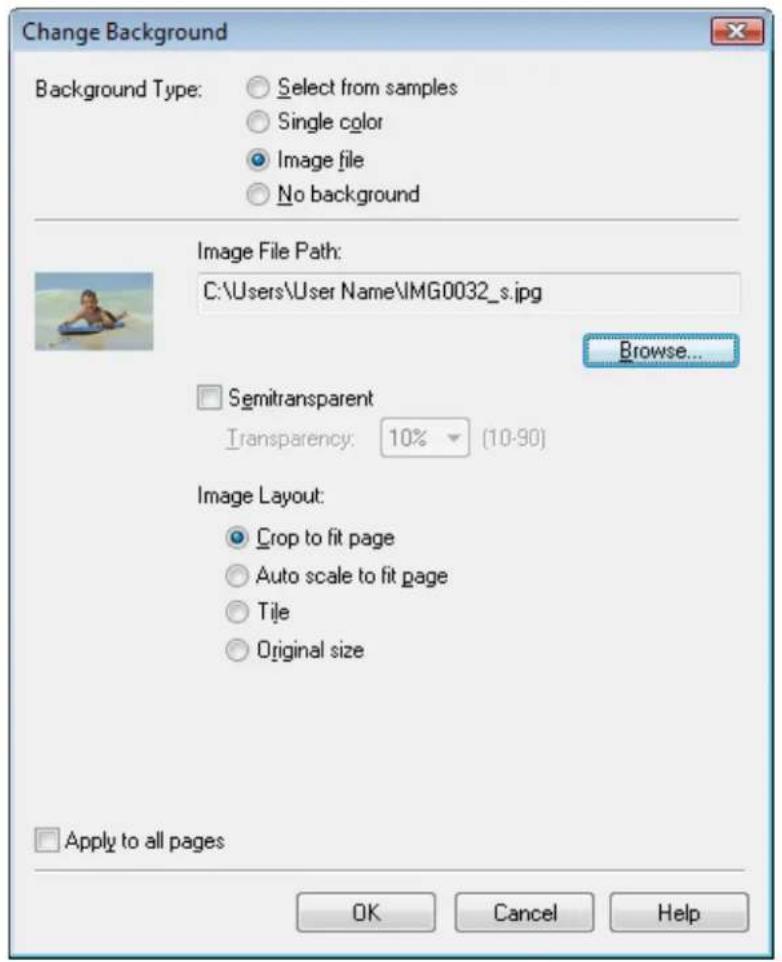

Note
- See Help for details on how to set the background in the Change Background dialog box.
Advanced Guide
Advanced Guide > Printing from a Computer > Printing with the Bundled Application Software > Other Settings > Adding Photos

Adding Photos
You can add images to pages.
Select the page you want to add photos in the Edit screen, then click (Add Image).

Note
- The screens for Album printing are used as examples in the following descriptions. The screens may vary depending on what you create.

Select the folder containing the image you want to add from the folder tree area on the left of the Add Image dialog box, and select the image you want to add from the thumbnail window on the right.

Note
- Click an image to select it (background turns blue) or deselect it (background turns white). You can also select multiple images.
Select an option for Add to and click OK.
Important
- You can add up to 20 images at one time to a single page.
■ Up to 99 of the same images can be added to all pages combined. - You cannot add two or more of the same image at one time. Add it one at a time.
- When the number of pages increases due to added images, you cannot add images beyond page 400.
Note
In the Add Image dialog box, you can select all images at one time or change the display size and order of the thumbnails. See Help for details.
Advanced Guide
Advanced Guide > Printing from a Computer > Printing with the Bundled Application Software > Other Settings > Swapping Positions of Photos

Swapping Positions of Photos
You can swap the positions of images.
Click

(Swap Image Positions) in the Edit screen.

Note
The screens for Album printing are used as examples in the following descriptions. The screens may vary depending on what you create.
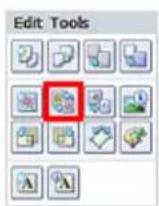

Select the target and source images you want to swap, then click Swap. When you finish swapping all images you want to swap, click Back to Edit.
Advanced Guide
Advanced Guide > Printing from a Computer > Printing with the Bundled Application Software> Other Settings > Replacing Photos

Replacing Photos
You can replace an image with another image.
Select the image you want to replace in the Edit screen, then click (Replace Selected Image).

Select the folder containing the image you want to replace with from the folder tree area on the left of the Replace Image dialog box.
Select the image you want to replace with from the thumbnail window on the right of the screen and click OK.
If you want to select from the images already imported, click the Imported Images tab and select the image you want to replace with from the thumbnail window and click OK.
Important
- You cannot select multiple images in the Replace Image dialog box.
Note
If you select multiple images in the Edit screen and use the replacement function, all the images selected in the Edit screen will be replaced with the image selected in the Replace Image dialog box.
- When images are replaced, the following settings of the old image are inherited to the new image.
- Position
- Size
- Frame
- Position and size of the date
The cropping information and image orientation are not inherited.
In the Replace Image dialog box, you can change the display size and order of the thumbnails. See Help for details.
Advanced Guide
Advanced Guide > Printing from a Computer > Printing with the Bundled Application Software > Other Settings > Changing Position, Angle and Size of Photos

Changing Position, Angle and Size of Photos
You can adjust the position, angle and size of images.
Select the image of which you want to change the position or size in the Edit screen and click Image) or double-click the image.

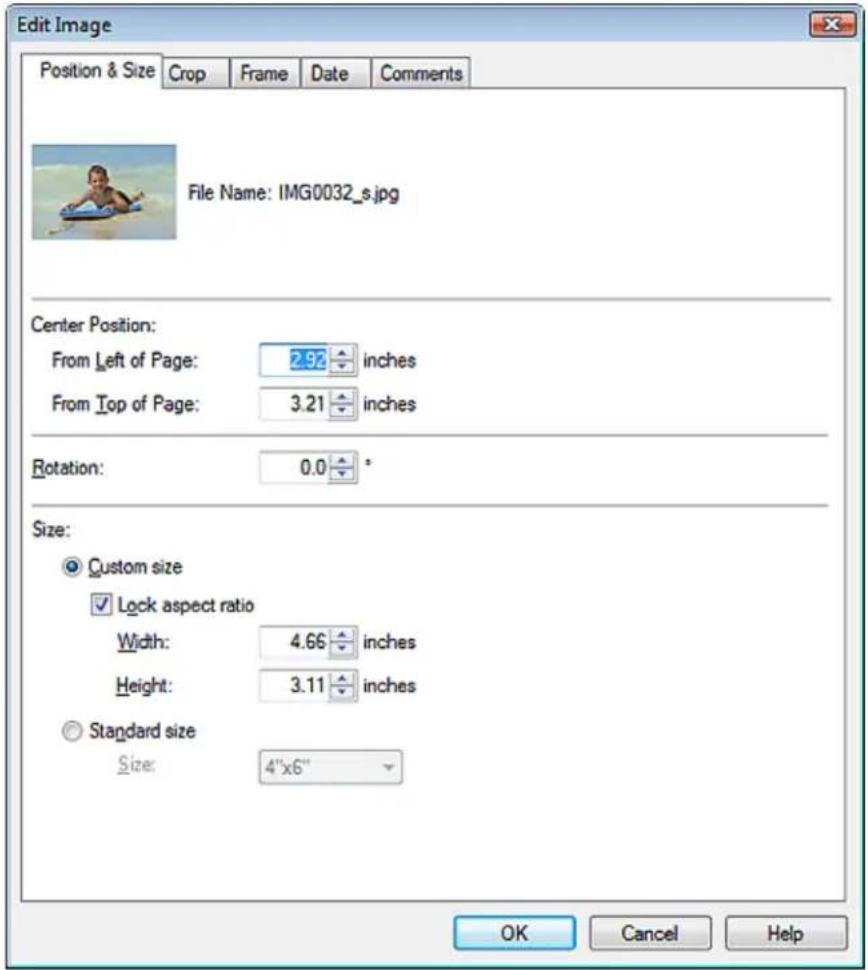
Set the Center Position, Rotation and Size, then click OK.

Note
- You can also change the position and size of an image by dragging it in the Edit screen.
- Select an image in the Edit screen, then click (Free Rotate) and drag a corner of the image to rotate it.
- See Help for details on the position and size of images.
Advanced Guide
Advanced Guide > Printing from a Computer > Printing with the Bundled Application Software > Other Settings > Cropping Photos
Easy-PhotoPrint EX

Cropping Photos
Cropping an image is the act of removing the unnecessary portions of the image by selecting the necessary portions.
Select the image you want to crop in the Edit screen and click (Edit Image) or double-click the image.
Click the Crop tab in the Edit Image dialog box.

Drag the white squares on the image to change the area to be cropped and click OK.

Note
■ See Help for details on cropping.
Advanced Guide
Advanced Guide > Printing from a Computer > Printing with the Bundled Application Software > Other Settings > Framing Photos
Easy-PhotoPrint EX


Framing Photos
You can add frames to images.

Important
- You cannot add frames to images in Photo Print, Stickers, and Layout Print.
Select the image you want to frame in the Edit screen and click (Edit Image) or double-click the image.
Click the Frame tab in the Edit Image dialog box.
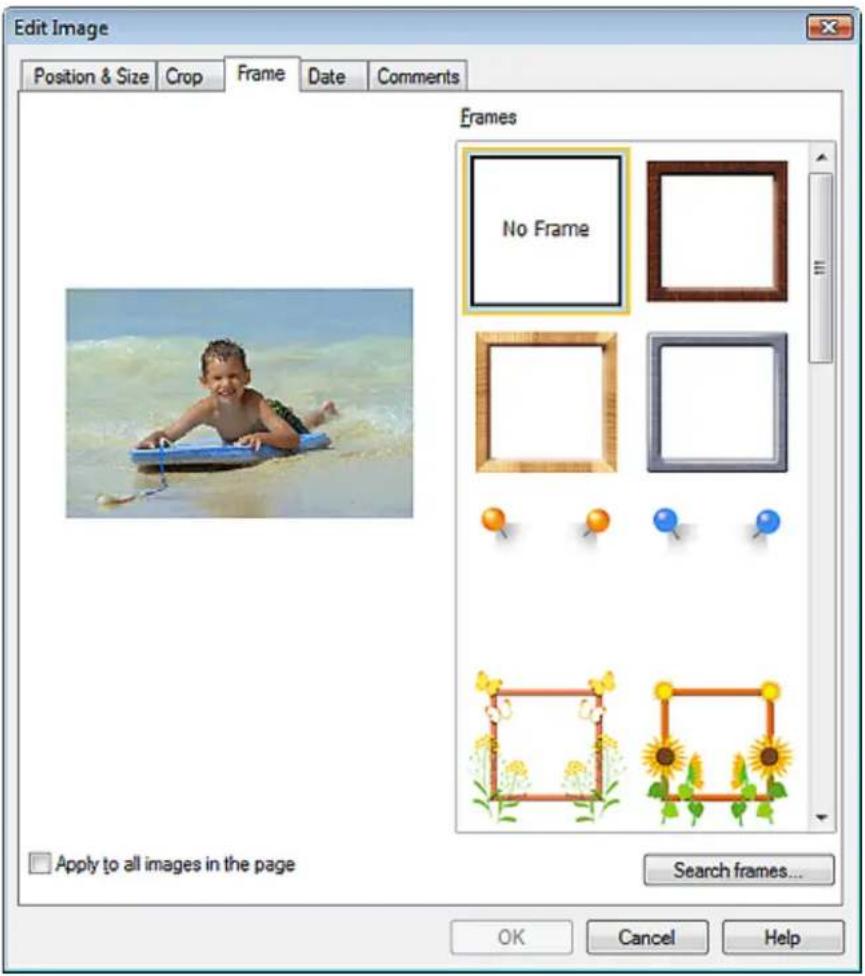
Select the frame you want to use from Frames and click OK.

Important
- You cannot print dates on framed photos.

Note
- Select the Apply to all images in the page checkbox to add the same frame to all the images on a
selected page at one time.
- Various frames are available on our website besides those saved in the application.
Click Search frames... to access the Canon website from which you can download additional materials for free. - Internet connection is required to access the website. Internet connection fees apply.
■ This function may not be available in some regions.
■ Exit Easy-PhotoPrint EX before installing frames. - Search frames... will be displayed only if Album has been selected.
■ See Help for details on frames.
Advanced Guide
Advanced Guide > Printing from a Computer > Printing with the Bundled Application Software > Other Settings > Printing Dates on Photos

Printing Dates on Photos
You can print dates on images.
Select the image you want to print the date in the Edit screen and click (Edit Image) or double-click the image.
Click the Date tab in the Edit Image dialog box.

Select the Show date checkbox.
Set the Text Orientation, Position, Font Size and Color, then click OK.
Important
- You cannot print dates on framed images.
Note
The date is displayed in the short date format (mm/dd/yyyy, etc.) specified in your operating system.
■ See Help for details on setting dates.
Page top↑
Advanced Guide
Advanced Guide > Printing from a Computer > Printing with the Bundled Application Software> Other Settings > Attaching Comments to Photos

Attaching Comments to Photos
You can attach comments to images and display them in your album. The photo name, shooting date and comments are displayed (from top to bottom) in a comment box.

A memory of summer 09/20/08 Family playing with sa nd.
Important
- You cannot attach comments to Photo Print, Calendar, Stickers, and Layout Print.
Select the image you want to attach comments to in the Edit screen and click double-click the image.

Click the Comments tab in the Edit Image dialog box.
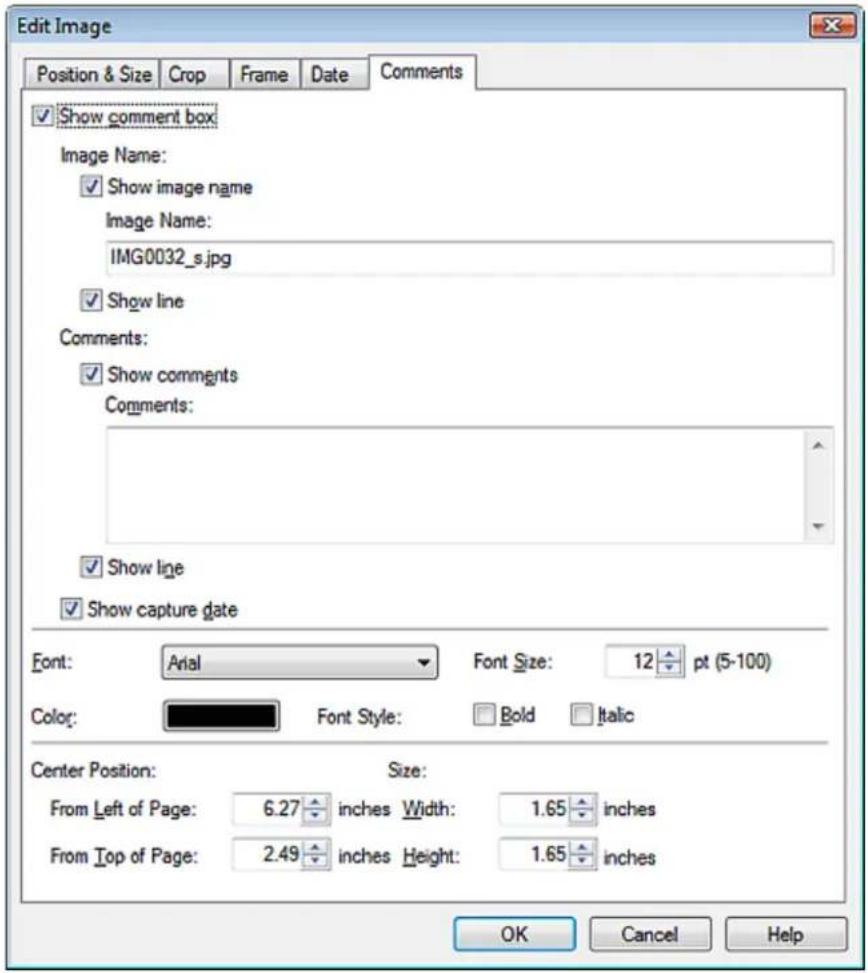
Select the Show comment box checkbox.
Select the checkboxes of the items you want to display, and enter comments.
Set the size and color of font, and position of the comments, etc., then click OK.

Note
■ See Help for details on comments.
Advanced Guide
Advanced Guide > Printing from a Computer > Printing with the Bundled Application Software > Other Settings > Adding Text to Photos

Adding Text to Photos
You can add text to photos.

Click (Add Text) in the Edit screen and drag the mouse over the area in which you want to add text.
Note
- The screens for Album printing are used as examples in the following descriptions. The screens may vary depending on what you create.
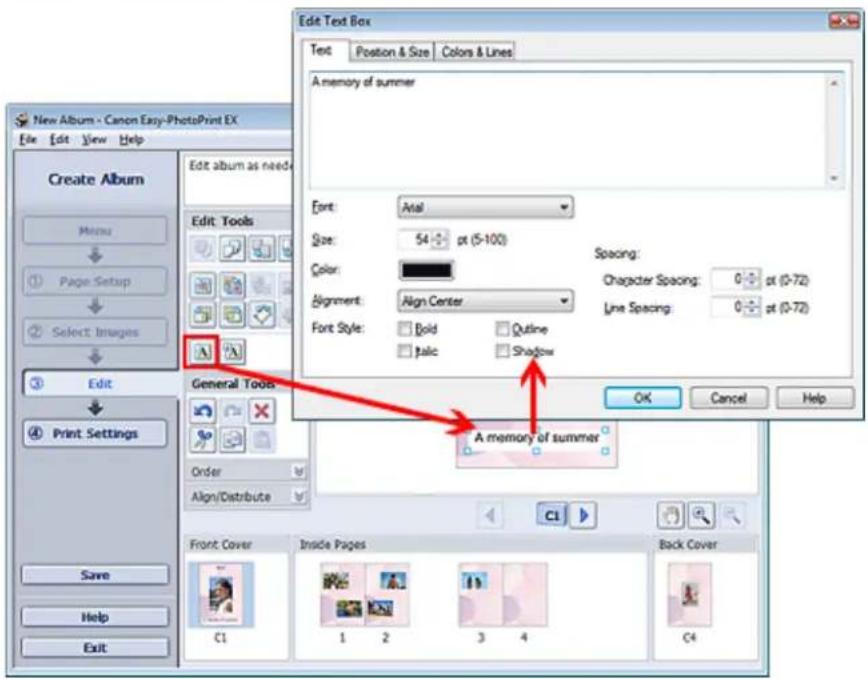
Select the Text tab in the Edit Text Box dialog box and enter text.
Note
In the Edit Text Box dialog box, you can change the position, angle and size of the text. You can also set the color and line of the text box. See Help for details.
To change the entered text, select it and click (Edit Text Box). The Edit Text Box dialog box appears. You can change the text.
Advanced Guide
Advanced Guide > Printing from a Computer > Printing with the Bundled Application Software > Other Settings > Saving

Saving
You can save edited items.
Click Save in the Edit or Print Settings screen.

Note
The screens for Album printing are used as examples in the following descriptions. The screens may vary depending on what you create.

When the Save As dialog box appears, specify the save location and file name, then click Save.
Important
If you edit a saved file and save it again, the file will be overwritten. To save a file again with a new name or to a different location, select Save As... from the File menu and save.
Note
- Save will not be displayed in the Page Setup or Select Images screen.
Advanced Guide
Advanced Guide > Printing from a Computer > Printing with the Bundled Application Software > Other Settings > Setting Holidays
Easy-PhotoPrint EX

Setting Holidays
You can add holidays to your calendar.
Click Set Holidays... in the Page Setup screen of Calendar, or click (Setup Period/Holiday) in the Edit screen and click Set Holidays... in the Calendar General Settings dialog box to display the Holiday Settings dialog box.

To add a holiday, click Add.... The Add/Edit Holiday dialog box appears. To edit a saved holiday, select it and click Edit....
To delete a holiday, select it and click Delete. To delete all the saved holidays within your calendar period, click Clear.

Enter the name in Holiday Name and specify the date.
Select the Set as Holiday checkbox to display that day as a holiday in your calendar.

Note
■ See Help for details on each dialog box.
Advanced Guide
Advanced Guide > Printing from a Computer > Printing with the Bundled Application Software > Other Settings > Setting Calendar Display
Easy-PhotoPrint EX

Setting Calendar Display
You can customize the calendar display (fonts, lines, colors, position, size, etc.).
Click Settings... in the Page Setup screen of Calendar, or select a calendar in the Edit screen and click

(Setup Calendar) to display the Calendar Settings dialog box.
Important
- The Position & Size tab is displayed only when the Calendar Settings dialog box is displayed from the Edit screen.


Note
■ See Help for details on the Calendar Settings dialog box.
Advanced Guide
Advanced Guide > Printing from a Computer > Printing with the Bundled Application Software > Other Settings > Opening Saved Files

Opening Saved Files
You can open files created with Easy-PhotoPrint EX.
1. Click Library from Menu.

The Open dialog box appears.
You can check files created and saved with Easy-PhotoPrint EX by icon view (only for Windows Vista) or thumbnail view.

Important
- When using 64bit Edition of Windows Vista or Windows XP, the contents of files cannot be displayed on Explorer.
2. Select the file you want to open and click Open.
The Edit screen appears.

Note
■ Easy-PhotoPrint EX supports the following file formats (extensions).
- Easy-PhotoPrint EX Album file (.el1)
- Easy-PhotoPrint EX Stickers file (.el2)
- Easy-PhotoPrint EX Calendar file (.el4)
- Easy-PhotoPrint EX Layout file (.el5)
3. Edit the file if necessary.

Note
- See the following sections for details on the editing procedures.
Editing Album
→ Editing Calendar
→ Editing Stickers
→ Editing Layout Print

Note
- You can open files created with Easy-PhotoPrint EX with the following methods, besides from Library in Menu.
- Double-click or click the file.
- From the File menu, click Open..., then select the file you want to edit.
- You can also open a recently used file by clicking the file name shown in the File menu.
Advanced Guide
Advanced Guide > Printing from a Computer > Printing with Other Application Software
Printing with Other Application Software
→ Various Printing Methods
→ Changing the Print Quality and Correcting Image Data
→ Overview of the Printer Driver
Advanced Guide
Advanced Guide > Printing from a Computer > Printing with Other Application Software > Various Printing Methods
Various Printing Methods
→ Printing with Easy Setup
Setting a Page Size and Orientation
Setting the Number of Copies and Printing Order
Setting the Stapling Margin
→ Borderless Printing
→ Fit-to-Page Printing
→ Scaled Printing
→ Page Layout Printing
→ Poster Printing
→ Booklet Printing
→ Duplex Printing
Stamp/Background Printing
Registering a Stamp
Registering Image Data to be Used as a Background
→ Printing an Envelope
→ Displaying the Print Results before Printing
Setting Paper Dimensions (Custom Size)
Advanced Guide
Advanced Guide > Printing from a Computer > Printing with Other Application Software > Various Printing Methods > Printing with Easy Setup
Printing with Easy Setup
The simple setup procedure for carrying out appropriate printing on this machine, is as follows:
- Open the printer driver setup window
- Select a frequently used profile
In Commonly Used Settings on the Quick Setup tab, select a printing profile suited for the purpose. When you select a printing profile, the Additional Features, Media Type, and Printer Paper Size settings are automatically switched to the values that were preset.
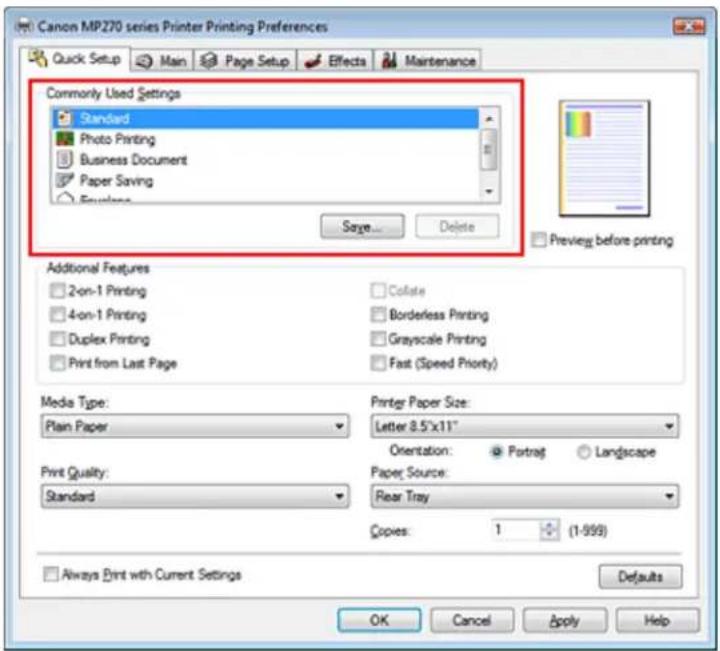
- Select the print quality
Select High, Standard, or Fast that matches your purpose for Print Quality.
- Complete the setup
Click OK.
When you execute print, the document is printed with settings that matches your purpose.
Important
- When you check the Always Print with Current Settings check box, all settings on the Quick Setup, Main, Page Setup, and Effects tabs are saved, and you can print with the same settings from the next time as well.
- Click Save... to register the specified settings. For instructions on registering settings, see "Registering a Frequently Used Printing Profile."
Advanced Guide
Advanced Guide > Printing from a Computer > Printing with Other Application Software > Various Printing Methods > Setting a Page Size and Orientation
Setting a Page Size and Orientation
The paper size and orientation are essentially determined by the application. When the page size and orientation set for Page Size and Orientation on the Page Setup tab are same as those set with the application, you do not need to select them on the Page Setup tab.
When you are not able to specify them with the application, the procedure for selecting a page size and orientation is as follows:
You can also set page size and Orientation on the Quick Setup tab.
- Open the printer driver setup window
- Select the paper size
Select a page size from the Page Size list on the Page Setup tab.

- Set Orientation
Select Portrait or Landscape for Orientation. Check Rotate 180 degrees check box when you want to perform printing with the original being rotated 180 degrees.
- Complete the setup
Click OK.
When you execute print, the document will be printed with the selected page size and the orientation.
Advanced Guide
Advanced Guide > Printing from a Computer > Printing with Other Application Software > Various Printing Methods > Setting the Number of Copies and Printing Order
Setting the Number of Copies and Printing Order
Default Setting

Collate
Print from Last Page

Print from Last Page + Collate


The procedure for specifying the number of copies and printing order is as follows: You can also set the number of copies on the Quick Setup tab.
- Open the printer driver setup window
- Specify the number of copies to be printed
For Copies on the Page Setup tab, specify the number of copies to be printed.
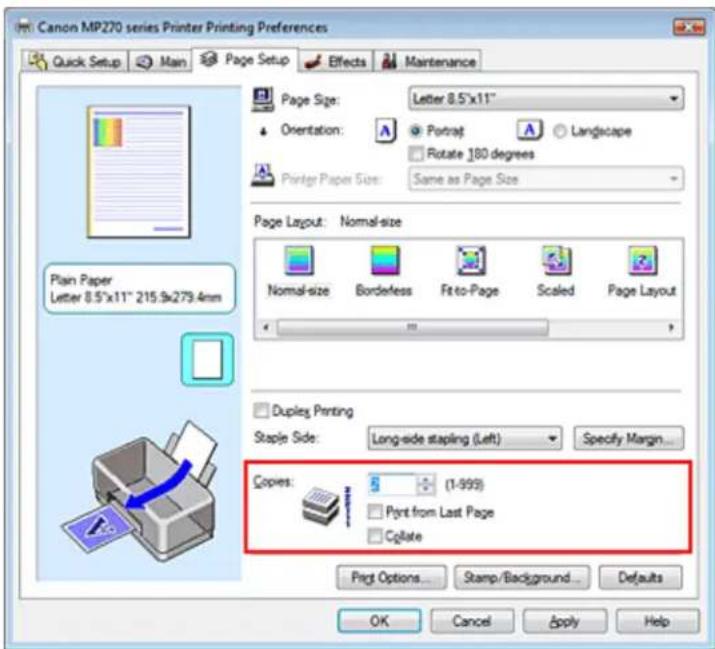
- Specify the print order
Check the Print from Last Page check box when you want to print from the last page in order. When you do this, you do not need to sort pages into their correct order after printing.
- Set up collated printing when you specify multiple copies in the Copies box
Check the Collate check box when you are specifying multiple copy together.
Uncheck this check box to print all pages with the same page number together.
5. Complete the setup
Click OK.
The specified number of copies will be printed with the specified printing order.

Important
- When the application software that you used to create the document has the same function, give priority to the printer driver settings. However, if the print results are not acceptable, specify the function settings on the application software. When you specify the number of copies and the printing order with both the application and this printer driver, the number of copies may be multiplied numbers of the two settings or the specified printing order may not be enabled.
- Print from Last Page and Collate appear grayed out and are unavailable when Booklet is selected for Page Layout.
- Print from Last Page appears grayed out and is unavailable when Poster is selected for Page Layout.

Note
- By setting both Print from Last Page and Collate, you can perform printing so that papers are collated one by one starting from the last page. These settings can be used in combination with Borderless, Normal-size, Fit-to-Page, Scaled, Page Layout, and Duplex Printing.
Advanced Guide
Advanced Guide > Printing from a Computer > Printing with Other Application Software > Various Printing Methods > Setting the Stapling Margin
Setting the Stapling Margin

The procedure for setting the staple side and the margin width is as follows:
- Open the printer driver setup window
- Specify the side to be stapled
Check the position of the stapling margin from Staple Side on the Page Setup tab. The printer analyzes the Orientation and Page Layout settings, and automatically selects the best staple position. When you want to change the setting, select from the list.

- Set the margin width
If necessary, click Specify Margin... and set the margin width, and then click OK.

4. Complete the setup
Click OK on the Page Setup tab.
When you execute print, the data is printed with the specified staple side and margin width.

Important
- Staple Side and Specify Margin... appear grayed out and are unavailable when:
• Borderless, Poster, or Booklet is selected for Page Layout. - Scaled is selected for Page Layout (When Duplex Printing is also selected, only Staple Side is selectable).
Advanced Guide
Advanced Guide > Printing from a Computer > Printing with Other Application Software > Various Printing Methods > Borderless Printing
Borderless Printing
The borderless printing function allows you to print data without any margin by enlarging the data so that it extends slightly off the paper. Without the borderless printing function, a margin is provided around the printed data. When you want to print data such as a photo without providing any margin around it, select borderless printing.

The procedure for performing borderless printing is as follows:
You can also set borderless printing in Additional Features on the Quick Setup tab.
Setting Borderless Printing
- Open the printer driver setup window
- Set borderless printing
Select Borderless from the Page Layout list on the Page Setup tab.

Click OK when the confirmation message appears.
When a message prompting you to change the media type appears, select a media type from the list and click OK.
- Check the paper size
Check the Page Size list. When you want to change, select another page size from the list. The list displays only sizes that can be used for borderless printing.
4. Adjust the amount of extension from the paper
If necessary, adjust the amount of extension using the Amount of Extension slider.
Moving the slider to the right makes the amount larger and moving the slider to the left makes the amount smaller.
It is recommended to set the slider at the second position from the right for most cases.


Important
- When you set the slider at the rightmost position, the back side of the paper may become smudged.
5. Complete the setup
Click OK.
The data will be printed without any margins on the paper.

Important
- When a page size that cannot be used for borderless printing is selected, the size is automatically changed to the valid page sizes for borderless printing.
- When High Resolution Paper, T-Shirt Transfers, or Envelope is selected from the Media Type list on the Main tab, you cannot perform borderless printing.
- When Borderless is selected, the Printer Paper Size, Staple Side (when Duplex Printing is not selected) settings, and the Stamp/Background... button on the Page Setup tab appear grayed out and are unavailable.
- Print quality may deteriorate or the sheet may be stained at the top and bottom depending on the type of the media used.
- When the ratio of the height to the width differs from the image data, a portion of the image may not be printed depending on the size of the media used.
In this case, crop the image data with an application software according to the paper size.

Note
- When Plain Paper is selected for Media Type on the Main tab, borderless printing is not recommended, and therefore the dialog box for media selection appears.
When you are using plain paper for test printing, select Plain Paper, and click OK.
Expanding the Range of the Document to Print
Specifying a large amount of extension allows you to perform borderless printing with no problems. However, the portion of the document that extends off the paper range will not be printed. Subjects around the perimeter of a photo may not be printed.
Try borderless printing once. If you are not satisfied with the result of borderless printing, reduce the amount of extension. The extension amount becomes shorter as the Amount of Extension slider is moved to the left.

Important
- When the amount of extension is shortened, an unexpected margin may be produced on the print, depending on the size of the paper.

Note
- When the Amount of Extension slider is set to the leftmost position, image data will be printed in the full size.
- When Preview before printing is checked on the Main tab, you can confirm before printing whether there will be no border.
Page top ↑
Advanced Guide
Advanced Guide > Printing from a Computer > Printing with Other Application Software > Various Printing Methods > Fit-to-Page Printing
Fit-to-Page Printing
![graph LR A["The 10th Anniversary Festival\nCome and join us!"] --> B["The 10th Anniversary Festival\nCome and join us!"]](/content/2026/06/1260153/images/f4848578ebbb30e948b2831f4ea4109cd7ae1753f31bfac8d572bb58b63db0bd.jpg)
The procedure for printing a document that is automatically enlarged or reduced to fit the page size to be used is as follows:
- Open the printer driver setup window
- Set fit-to-page printing
Select Fit-to-Page from the Page Layout list on the Page Setup tab.

- Select the paper size for the data
Using Page Size, select the page size that is set with your application.
- Select the print paper size
Select the size of the paper loaded in the machine from the Printer Paper Size list.
When the Printer Paper Size is smaller than the Page Size, the page image will be reduced. When the Printer Paper Size is larger than the Page Size, the page image will be enlarged.
The current settings are displayed in the settings preview on the left side of the printer driver.

5. Complete the setup
Click OK.
When you execute print, the document will be enlarged or reduced to fit to the page size.
Advanced Guide
Advanced Guide > Printing from a Computer > Printing with Other Application Software > Various Printing Methods > Scaled Printing
Scaled Printing

The procedure for printing a document with pages enlarged or reduced is as follows:
- Open the printer driver setup window
- Set scaled printing
Select Scaled from the Page Layout list on the Page Setup tab.

- Select the paper size for the data
Using Page Size, select the page size that is set with your application.
- Set the scaling rate by using one of the following methods:
- Select a Printer Paper Size
When the printer paper size is smaller than the Page Size, the page image will be reduced. When the printer paper size is larger than the page size, the page image will be enlarged.
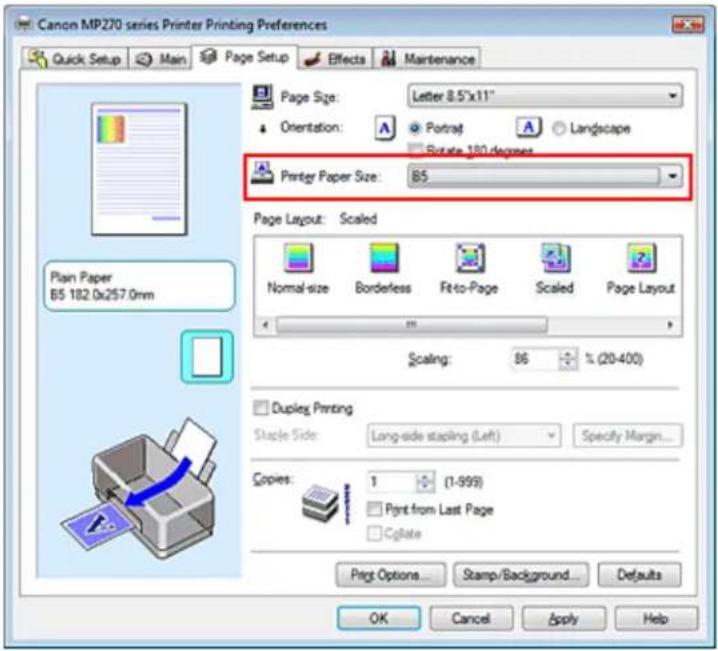
- Specify a scaling factor
Directly type in a value into the Scaling box.

The current settings are displayed in the settings preview on the left side of the printer driver.
5. Complete the setup
Click OK.
When you execute print, the document will be printed with the specified scale.
Important
- When the application software with which you created the original has the scaled printing function, configure the settings on your application software. You do not need to configure the same setting in the printer driver.
- When Scaled is selected, the Staple Side list box appears grayed out and is unavailable (when Duplex Printing is not selected).

Note
- Selecting Scaled changes the printable area of the document.
Advanced Guide
Advanced Guide > Printing from a Computer > Printing with Other Application Software > Various Printing Methods > Page Layout Printing
Page Layout Printing
The page layout printing function allows you to print more than one page image on a single sheet of paper.
![graph LR A["1: Document 1"] --> B["2: Document 2"] B --> C["3: Document 3"] C --> D["4: Document 4"] D --> E["Final Image 1"] style A fill:#f9f,stroke:#333 style B fill:#bbf,stroke:#333 style C fill:#bfb,stroke:#333 style D fill:#ffb,stroke:#333 style E fill:#fff,stroke:#333](/content/2026/06/1260153/images/9213a6e49c2228cbb9766963504e4e1cd0e2d2134fe2dde9f2cd84236a779651.jpg)
The procedure for performing page layout printing is as follows:
- Open the printer driver setup window
- Set page layout printing
Select Page Layout from the Page Layout list on the Page Setup tab.
The current settings are displayed in the settings preview on the left side of the printer driver.
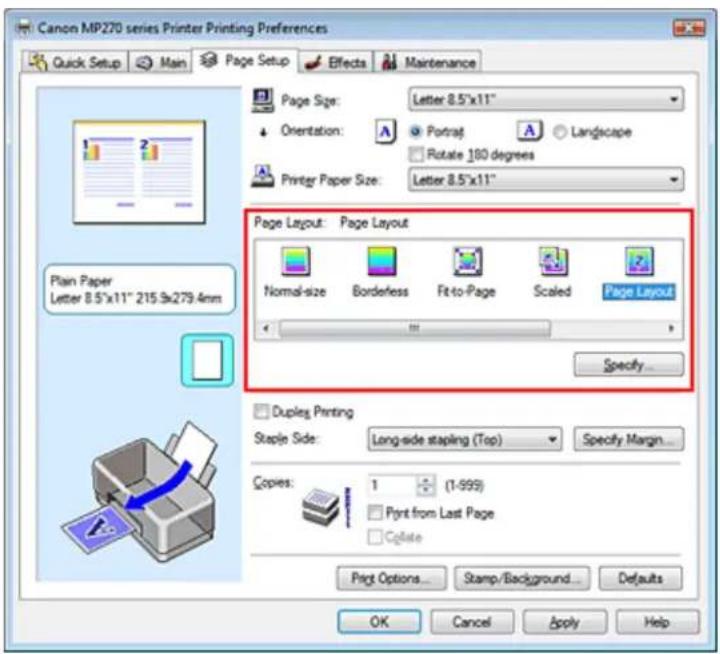
- Select the print paper size
Select the size of the paper loaded in the machine from the Printer Paper Size list.
Setting the layout of two pages of the document from left to right is complete.
- Set the number of pages to be printed on one sheet and the page order
If necessary, click Specify..., specify the following settings in the Page Layout Printing dialog box, and click OK.

Pages
To increase the number of pages to be included on a single sheet of paper, select a desired number of pages from the list.
You can also set 2-Page Print or 4-Page Print on the Quick Setup tab.
Page Order
To change the page arrangement order, select an icon from the list to change the page placement order.
Page Border
To print a page border around each document page, check this check box.
5. Complete the setup
Click OK on the Page Setup tab.
When you execute print, the specified number of pages will be arranged on each sheet of paper in the specified order.
Advanced Guide
Advanced Guide > Printing from a Computer > Printing with Other Application Software > Various Printing Methods > Poster Printing
Poster Printing
The poster printing function allows you to enlarge image data, divide it into several pages, and print these pages on separate sheets of paper. When the pages are pasted together, they form a large print like a poster.
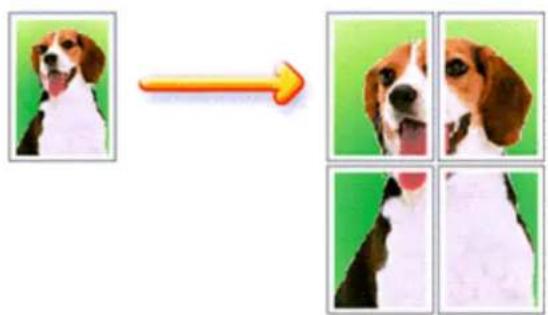
The procedure for performing poster printing is as follows:
Setting Poster Printing
- Open the printer driver setup window
- Set poster printing
Select Poster from the Page Layout list on the Page Setup tab.
The current settings are displayed in the settings preview on the left side of the printer driver.
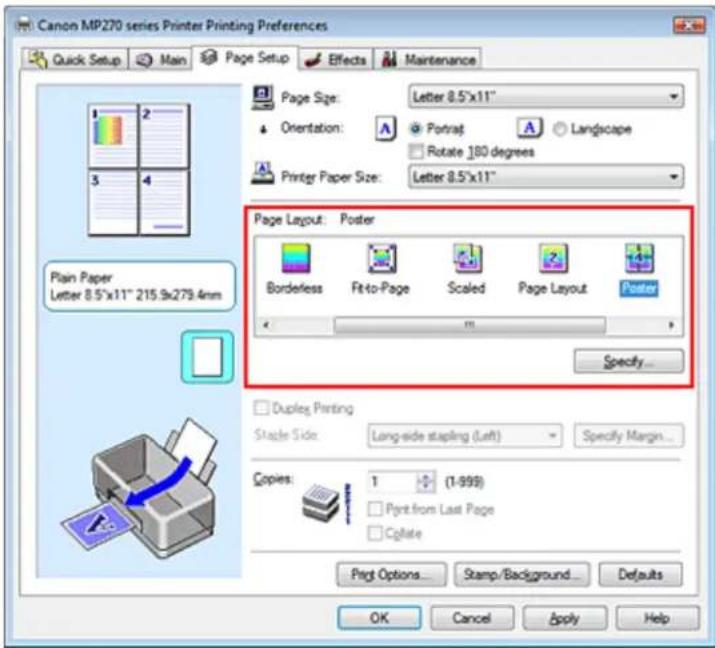
- Select the print paper size
Select the size of the paper loaded in the machine from the Printer Paper Size list.
Setting 2 by 2-page poster printing is complete.
4. Set the number of image divisions and the pages to be printed
If necessary, click Specify..., specify the following settings in the Poster Printing dialog box, and then click OK.

Image Divisions
Select the number of divisions (vertical x horizontal). As the number of divisions increases, the number of sheets used for printing increases, allowing you to create a larger poster.
Print "Cut/Paste" in margins
To leave out words "Cut" and "Paste", uncheck this check box.

Important
This feature is unavailable when the 64-bit printer driver is used.
Print "Cut/Paste" lines in margins
To leave out cut lines, uncheck this check box.
Pages
To reprint only specific pages, enter the page number you want to print. To print multiple pages, specify by separating the pages with commas or entering a hyphen between the page numbers.

Note
- You can also specify the print range by clicking the pages in the settings preview.
5. Complete the setup
Click OK on the Page Setup tab.
When you execute print, the document will be divided into several pages during printing.
After all poster pages have been printed, paste the pages together to create a poster.
Printing Only Specific Pages
If ink becomes faint or runs out during printing, you can reprint specific pages by following the procedure below:
1. Set the print range
In the settings preview on the left of the Page Setup tab, click the pages that do not need to be printed.
The pages that were clicked are deleted, and only the pages to be printed are displayed.


Note
- Click the deleted pages to display them again.
■ Right-click the settings preview to select Print all pages or Delete all pages.
2. Complete the setup
After completing the page selection, click OK. When you execute print, only specified pages will be printed.

Important
- When Poster is selected, the Duplex Printing, Staple Side and Print from Last Page appear grayed out and are unavailable.
■ Since poster printing enlarges the document when printing it, the print results may become coarse.
Advanced Guide
Advanced Guide > Printing from a Computer > Printing with Other Application Software > Various Printing Methods > Booklet Printing
Booklet Printing
The booklet printing function allows you to print data for a booklet. Data is printed on both sides of the paper. This type of printing ensures that pages can be collated properly, in page number order, when the printed sheets are folded and stapled at the center.

The procedure for performing booklet printing is as follows:
- Open the printer driver setup window
- Set booklet printing
Select Booklet from the Page Layout list on the Page Setup tab.
The current settings are displayed in the settings preview on the left side of the window.

- Select the print paper size
Select the size of the paper loaded in the machine from the Printer Paper Size list.
- Set the margin for stapling and the margin width
Click Specify... and specify the following settings in the Booklet Printing dialog box, and then click OK.

Margin for stapling
Select which side should the stapling margin be on when the booklet is completed.
Insert blank page
To leave one side of a sheet blank, check the check box, and select the page to be left blank.
Margin
Enter the margin width. The specified width from the center of the sheet becomes the margin width for one page.
Page Border
To print a page border around each document page, check the check box.
5. Complete the setup
Click OK on the Page Setup tab.
When you execute print, the document will be printed on one side of a sheet of paper. When the printing of one side is complete, set the paper correctly by following the message and click OK. When the printing of the other side is complete, fold the paper at the center of the margin and make a booklet.
Important
■ Booklet cannot be selected when a media type other than Plain Paper is selected for Media Type.
- When Booklet is selected, Duplex Printing, Staple Side, Print from Last Page, and Collate appear grayed out and are unavailable.

Note
- The stamp and background are not printed on blank sheets inserted with the Insert blank page function of Booklet Printing.
Advanced Guide
Advanced Guide > Printing from a Computer > Printing with Other Application Software > Various Printing Methods > Duplex Printing
Duplex Printing
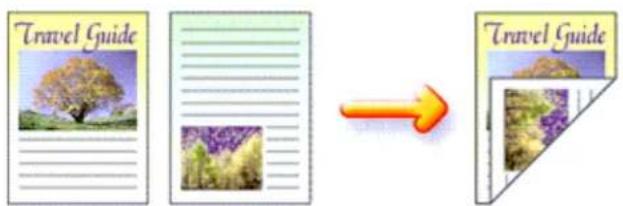
The procedure for printing data on both sides of a sheet of paper is as follows: You can also set duplex printing in Additional Features on the Quick Setup tab.
- Open the printer driver setup window
- Set duplex printing
Check the Duplex Printing check box on the Page Setup tab.
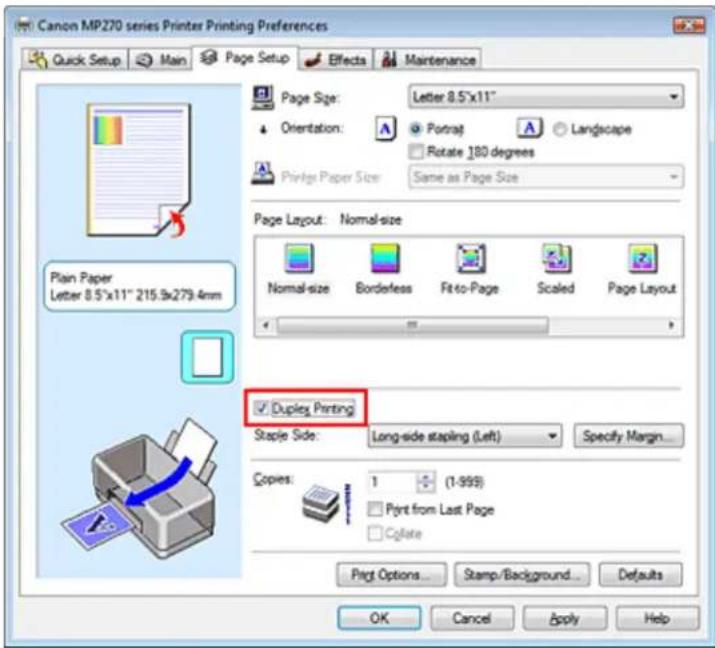
- Select the layout
Select Normal-size (or Fit-to-Page, Scaled, or Page Layout) from the Page Layout list.
- Specify the side to be stapled
The printer analyzes the Orientation and Page Layout settings, and automatically selects the best Staple Side. When you want to change the setting, select another value from the list.
- Set the margin width
If necessary, click Specify Margin... and set the margin width, and then click OK.
- Complete the setup
Click OK on the Page Setup tab.
When you execute print, the document will be printed on one side of a sheet of paper. When the printing of one side is complete, load the paper correctly by following the message and click OK. The document will be printed on the opposite side.
Important
- Duplex Printing appears grayed out and is unavailable when:
- A media type other than Plain Paper is selected from the Media Type list.
- Poster is selected from the Page Layout list.
- When Booklet is selected from the Page Layout list, Duplex Printing and Staple Side appear grayed out and are unavailable.

Note
- When you select borderless printing during duplex printing, a dialog box for media type selection may appear. If that happens, select Plain Paper.
If the back side of the paper becomes smudged during duplex printing, perform Bottom Plate Cleaning in the Maintenance tab.
Advanced Guide
Advanced Guide > Printing from a Computer > Printing with Other Application Software > Various Printing Methods > Stamp/Background Printing
Stamp/Background Printing
This feature is unavailable when the 64-bit printer driver is used.
The Stamp function allows you to print a stamp text or a bitmap over or behind document data. It also allows you to print date, time and user name. The Background function allows you to print a light illustration behind the document data.
The procedure for performing stamp/background printing is as follows:
Printing a Stamp
"CONFIDENTIAL," "IMPORTANT," and other stamps that are used often in companies are pre-registered.
- Open the printer driver setup window
- Click Stamp/Background... on the Page Setup tab

The Stamp/Background dialog box opens.

- Select a stamp
Check the Stamp check box, and select a desired stamp from the list.
The current settings are displayed in the settings preview on the left side of the Page Setup tab.
4. Set the stamp details
If necessary, specify the following settings, and then click OK.
Place stamp over text
To print the stamp on the front of the document, check this check box.

Note
The stamp is given priority because the stamp is printed over the document data in the sections where the stamp and the document data overlap. When this check box is unchecked, the stamp is printed behind the document data and may be hidden in the overlapping sections depending on the application used.
Stamp first page only
To print the stamp only on the first page, check this check box.
Define Stamp... button
To change the stamp text, bitmap, or position, click this (refer to Registering a Stamp).
5. Complete the setup
Click OK on the Page Setup tab.
When you execute print, the data is printed with the specified stamp.
Printing a Background
Two bitmap files are pre-registered as samples.
- Open the printer driver setup window
- Click Stamp/Background... on the Page Setup tab
The Stamp/Background dialog box opens.
- Select the background
Check the Background check box, and select a desired background from the list.
The current settings are displayed in the settings preview on the left side of the Page Setup tab.
- Set the background details
If necessary, complete the following settings, and then click OK.
Background first page only
To print the background only on the first page, check this check box.
Select Background... button
To use another background or change the layout or density of a background, click this (refer to
Registering Image Data to be Used as a Background).
5. Complete the setup
Click OK on the Page Setup tab.
When you execute print, the data is printed with the specified background.

Important
- When Borderless is selected, the Stamp/Background... button appears grayed out and is unavailable.

Note
The stamp and background are not printed on blank sheets inserted with the Insert blank page
Related Topics
→ Registering a Stamp
→ Registering Image Data to be Used as a Background

Page top ↑
Advanced Guide
Advanced Guide > Printing from a Computer > Printing with Other Application Software > Various Printing Methods > Stamp/Background Printing > Registering a Stamp
Registering a Stamp
This feature is unavailable when the 64-bit printer driver is used.
You can create and register a new stamp. You can also change and register some of the settings of an existing stamp. Unnecessary stamps can be deleted at any time.
The procedure for registering a new stamp is as follows:
Registering a New Stamp
- Open the printer driver setup window
- Click Stamp/Background... on the Page Setup tab

The Stamp/Background dialog box opens.

- Click Define Stamp...
The Stamp Settings dialog box opens.
![Stamp Settings: [Not Saved] Stamp Placement Save settings Stamp Type: Text Stamp Text: TrueType Font: Anali Style: Regular Size: 36 Outline: Square Color RGB: 192, 192, 192 Select Color... Defaults OK Cancel Help](/content/2026/06/1260153/images/de7ee78c8f2e142f17c4b0daab69416da973eb54080c8ec37efbe994354900e0.jpg)
4. Configure the stamp while viewing the preview window
- Stamp tab
Select Text, Bitmap, or Date/Time/User Name that matches your purpose for Stamp Type.
- For Text registration, the characters must already be entered in Stamp Text. If necessary, change the TrueType Font, Style, Size, and Outline settings. You can select the color of the stamp by clicking Select Color....
- For Bitmap, click Select File... and select the bitmap file (.bmp) to be used. If necessary, change the settings of the Size and Transparent white area.
- For Date/Time/User Name, the creation date/time and user name of the printed object are displayed in Stamp Text. If necessary, change the settings of TrueType Font, Style, Size, and Outline. You can select the color of the stamp by clicking Select Color....

Important
- Stamp Text appears grayed out and is unavailable when Date/Time/User Name is selected.
- Placement tab
Select the stamp position from the Position list. You can also select Custom from the Position list and specify coordinates for X-Position and Y-Position.
You can also change the stamp position by dragging the stamp in the preview window.
To change the stamp position angle, type a value in the Orientation box directly.
5. Save the stamp
Click the Save settings tab and enter a title in the Title box, and then click Save.
Click OK when the confirmation message appears.
6. Complete the setup
Click OK. The Stamp/Background dialog box opens again.
The registered title appears in the Stamp list.
Changing and Registering Some of Stamp Settings
1. Select the stamp for which the settings are to be changed
Check the Stamp check box in the Stamp/Background dialog box, and then select the title of the stamp to be changed from the Stamp list.
- Click Define Stamp...
The Stamp Settings dialog box opens.
-
Configure the stamp while viewing the preview window
-
Overwrite save the stamp
Click Save overwrite on the Save settings tab.
When you want to save the stamp with a different title, type a new title in the Title box and click Save.
Click OK when the confirmation message appears.
- Complete the setup
Click OK. The Stamp/Background dialog box opens again.
The registered title appears in the Stamp list.
Deleting an Unnecessary Stamp
-
Click Define Stamp... in the Stamp/Background dialog box The Stamp Settings dialog box opens.
-
Select the stamp to be deleted
Select the title of the stamp you want to delete from the Stamps list on the Save settings tab. Then click Delete.
Click OK when the confirmation message appears.
- Complete the setup
Click OK. The Stamp/Background dialog box opens again.

Advanced Guide
Advanced Guide > Printing from a Computer > Printing with Other Application Software > Various Printing Methods > Stamp/Background Printing > Registering Image Data to be Used as a Background
Registering Image Data to be Used as a Background
This feature is unavailable when the 64-bit printer driver is used.
You can select a bitmap file (.bmp) and register it as a new background. You can also change and register some of the settings of an existing background. An unnecessary background can be deleted at any time.
The procedure for registering image data to be used as a background is as follows:
Registering New Background
- Open the printer driver setup window
- Click Stamp/Background... on the Page Setup tab

The Stamp/Background dialog box opens.
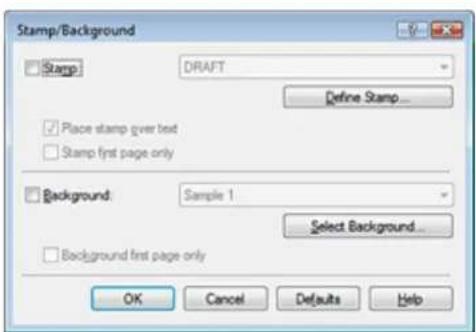
- Click Select Background...
The Background Settings dialog box opens.
![Background Settings: [Not Saved] Background Save settings Flg: Select File... Layout Method: Fill page X Positions: (-100 - +100) Y Positions: (-100 - +100) Intensity: Defaults OK Cancel Help](/content/2026/06/1260153/images/e5cf868fe4e7932455e4bec20cfb15e9a714201d7d670ecdb582e928347882a7.jpg)
- Select the image data to be registered to the background
Click Select File.... Select the target bitmap file (.bmp), and then click Open.
- Specify the following settings while viewing the preview window
Layout Method
Select how the background image data is to be placed.
When Custom is selected, you can set coordinates for X-Position and Y-Position.
You can also change the background position by dragging the image in the preview window.
Intensity
Set the intensity of the background image data with the Intensity slider. To lighten the background, move the slider to the left. To darken the background, move the slider to the right. To print the background at the original bitmap intensity, move the slider to the rightmost position.
- Save the background
Click the Save settings tab and enter a title in the Title box, and then click Save. Click OK when the confirmation message appears.
- Complete the setup
Click OK. The Stamp/Background dialog box opens again. The registered title appears in the Background list.
Changing and Registering Some Background Settings
- Select the background for which the settings are to be changed
Check the Background check box in the Stamp/Background dialog box, and then select the title of the background you want to change from the Background list.
- Click Select Background...
The Background Settings dialog box opens.
-
Specify the items on the Background tab while viewing the preview window.
-
Save the background
Click Save overwrite on the Save settings tab. When you want to save the background with a different title, enter a new title in the Title box and click Save.
Click OK when the confirmation message appears.
5. Complete the setup
Click OK. The Stamp/Background dialog box opens again.
The registered title appears in the Background list.
Deleting an Unnecessary Background
- Click Select Background... in the Stamp/Background dialog box
The Background Settings dialog box opens.
- Select the background to be deleted
Select the title of the background you want to delete from the Backgrounds list on the Save settings tab, and then click Delete.
Click OK when the confirmation message appears.
- Complete the setup
Click OK. The Stamp/Background dialog box opens again.

Advanced Guide
Advanced Guide > Printing from a Computer > Printing with Other Application Software > Various Printing Methods > Printing an Envelope
Printing an Envelope
For details on how to load an envelope into the machine, refer to "Loading Paper in the Rear Tray" in the manual: Basic Guide.
The procedure for performing envelope printing is as follows:
1. Fold down the paper support

2. Load an envelope into the machine
Fold down the envelope flap.
Orient the envelope so that the flap is on the left and the folded surface is facing down, and load in the rear tray.
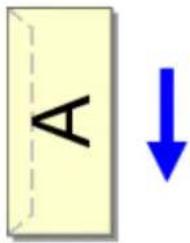
3. Open the printer driver setup window
4. Select the media type
Select Envelope from Commonly Used Settings on the Quick Setup tab.

5. Select the paper size
Select Youkei 4, Youkei 6, Comm.Env. #10, or DL Env. in the Envelope Size Setting dialog box, and then click OK.
6. Set the orientation
To print the addressee horizontally, select Landscape for Orientation.
7. Select the print quality
Select High or Standard that matches your purpose for Print Quality.
8. Complete the setup
Click OK.
When you execute print, the information is printed on the envelope.
Advanced Guide
Advanced Guide > Printing from a Computer > Printing with Other Application Software > Various Printing Methods > Displaying the Print Results before Printing
Displaying the Print Results before Printing
You can display and check the print result before printing.
The procedure for displaying the print result before printing is as follows:
You can also set the print results display on the Quick Setup tab.
- Open the printer driver setup window
- Set the preview
Check the Preview before printing check box on the Main tab.
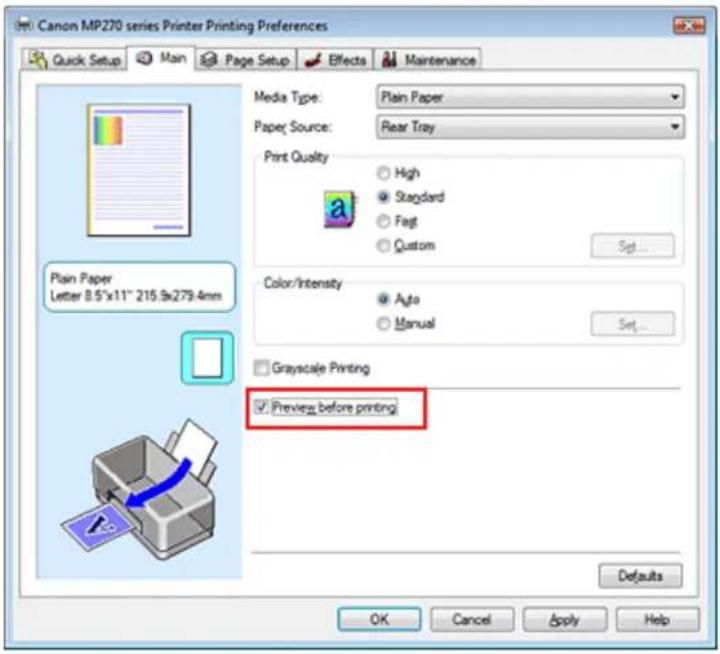
- Complete the setup
Click OK.
The Canon IJ Preview will start and the print result will be displayed before printing.
Related Topic
Canon IJ Preview
Advanced Guide
Advanced Guide > Printing from a Computer > Printing with Other Application Software > Various Printing Methods > Setting Paper Dimensions (Custom Size)
Setting Paper Dimensions (Custom Size)
You can specify the height and width of paper when its size cannot be selected from the Page Size. Such a paper size is called a custom size.
The procedure for specifying a custom size is as follows:
You can also set a custom size in Printer Paper Size on the Quick Setup tab.
1. Set the custom size in the application software
On your application's paper size feature, specify the custom size.
Important
- When the application software that created the document has a function for specifying the height and width values, use the application software to set the values. When the application software does not have such a function or if the document does not print correctly, use the printer driver to set the values.
2. Open the printer driver setup window
3. Select the paper size
Select Custom... for Page Size on the Page Setup tab.
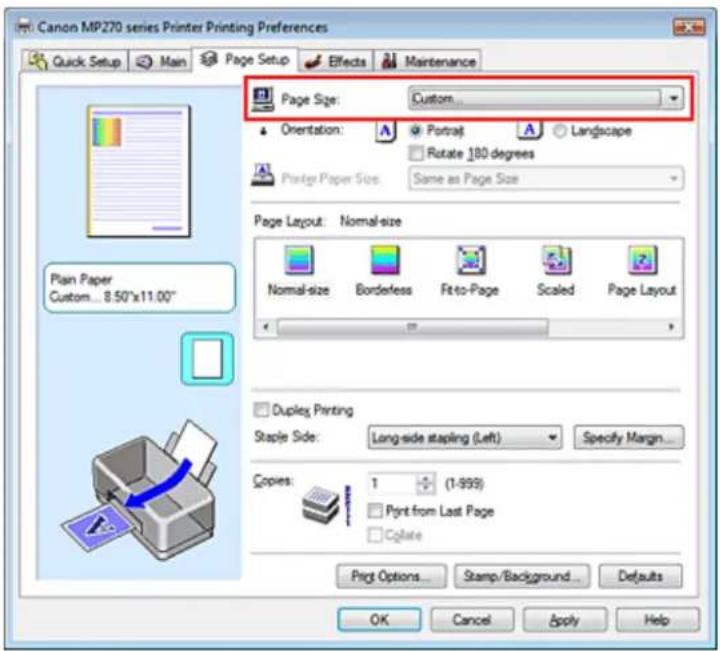
The Custom Paper Size dialog box opens.

4. Set the custom paper size
Specify Units, and enter the Width and Height of the paper to be used. Then click OK.
5. Complete the setup
Click OK on the Page Setup tab.
When you execute print, the data is printed with the specified paper size.
Page top ↑
Advanced Guide
Advanced Guide > Printing from a Computer > Printing with Other Application Software > Changing the Print Quality and Correcting Image Data
Changing the Print Quality and Correcting Image Data
Selecting a Combination of the Print Quality Level and a Halftoning Method
→ Printing a Color Document in Monochrome
→ Specifying Color Correction
→ Optimal Photo Printing of Image Data
→ Adjusting Colors with the Printer Driver
→ Printing with ICC Profiles
Adjusting Color Balance
Adjusting Brightness
Adjusting Intensity
Adjusting Contrast
→ Simulating an Illustration
→ Representing Image Data with a Single Color
→ Presenting Image Data with Vivid Colors
→ Smoothing Jagged Outlines
→ Changing Color Properties to Improve Coloration
→ Reducing Photo Noise
Advanced Guide
Advanced Guide > Printing from a Computer > Printing with Other Application Software > Changing the Print Quality and Correcting Image Data > Selecting a Combination of the Print Quality Level and a Halftoning Method
Selecting a Combination of the Print Quality Level and a Halftoning Method
You can individually set the combined representation method for the print quality level and the halftoning method.
The procedure for setting the print quality level and the halftoning method is as follows:
- Open the printer driver setup window
- Select the print quality
Select Custom for Print Quality on the Main tab, and click Set....

The Custom dialog box opens.

3. Setting the print quality and halftone expression method
Move the Quality slider to select the quality level.
Select the expression method in Halftoning and click OK.

Note
- Halftones refer to color shades between the darkest color and the brightest color.
The printer replaces the color shades with a collection of small dots to express the halftones. Dither arranges the dots according to fixed rules to express the halftones. Diffusion places the dots randomly to express the halftones. When you select Auto, the data is printed with the optimal halftoning method for the selected print quality.
4. Complete the setup
Click OK on the Main tab.
When you execute print, the data is printed with the specified quality level and halftoning method.

Important
■ Certain print quality levels and halftoning methods cannot be selected depending on the settings of Media Type.

Note
- When the part of the object is not printed, selecting Diffusion for Halftoning may solve the problem.
Related Topics
→ Specifying Color Correction
Adjusting Color Balance
Adjusting Brightness
Adjusting Intensity
Adjusting Contrast
Advanced Guide
Advanced Guide > Printing from a Computer > Printing with Other Application Software > Changing the Print Quality and Correcting Image Data > Printing a Color Document in Monochrome
Printing a Color Document in Monochrome

The procedure for printing a color document in monochrome is as follows:
You can also set a grayscale printing in Additional Features on the Quick Setup tab.
- Open the printer driver setup window
- Set grayscale printing
Check the Grayscale Printing check box on the Main tab.

- Complete the setup
Click OK.
When you execute print, the document is converted to grayscale data. It allows you to print the color document in monochrome.
Important
- When the Grayscale Printing check box is checked, the printer driver processes image data as sRGB data. In this case, actual colors printed may differ from those in the original image data. When using the grayscale printing function to print Adobe RGB data, convert the data to sRGB data using an application software.
Note
During Grayscale Printing, color inks may be used as well as black ink.
Advanced Guide
Advanced Guide > Printing from a Computer > Printing with Other Application Software > Changing the Print Quality and Correcting Image Data > Specifying Color Correction
Specifying Color Correction
You can specify the color correction method suited to the type of document to be printed.
Normally, the printer driver adjusts the colors by using Canon Digital Photo Color so that data is printed with color tints that most people prefer. This method is suitable for printing sRGB data.
When you want to print by using the color space (Adobe RGB or sRGB) of the image data effectively, select ICM. When you want to use an application software to specify a printing ICC profile, select None.
The procedure for specifying color correction is as follows:
You can also set color correction on the Quick Setup tab by choosing Photo Printing under Commonly Used Settings, and then choosing Color/Intensity Manual Adjustment under Additional Features.
- Open the printer driver setup window
- Select the manual color adjustment
On the Main tab, select Manual for Color/Intensity, and click Set....

The Manual Color Adjustment dialog box opens.
- Select color correction
Click Matching tab, select Color Correction setting that matches your purpose from the following, and click OK.

Driver Matching
By using Canon Digital Photo Color, you can print sRGB data with color tints that most people prefer. Driver Matching is the default setting for Color Correction.
ICM
You can print by using the color space (Adobe RGB or sRGB) of the image data effectively.
None
The printer driver does not perform color correction. Select this value when you are specifying an individually created printing ICC profile or a printing ICC profile for special Canon paper in an application software to print data.
4. Complete the setup
Click OK on the Main tab.
When you execute print, the data is printed with the specified color correction method.
Important
- When ICM is disabled in the application software, ICM is unavailable for Color Correction and the printer may not be able to print the image data properly.
- When the Grayscale Printing check box on the Main tab is checked, Color Correction appears grayed out and is unavailable.
Related Topics
→ Optimal Photo Printing of Image Data
Adjusting Colors with the Printer Driver
→ Printing with ICC Profiles

Advanced Guide
Advanced Guide > Printing from a Computer > Printing with Other Application Software > Changing the Print Quality and Correcting Image Data > Specifying Color Correction > Optimal Photo Printing of Image Data
Optimal Photo Printing of Image Data
When people print images taken with digital cameras, they sometimes feel that the printed color tones differ from those of actual image or those displayed on the monitor.
To get the print results as close as possible to the desired color tones, you must select a printing method that is best suited to the application software used or to your purpose.
Color Management
Devices such as digital cameras, scanners, monitors, and printers handle color differently. Color management (color matching) is a method that manages device-dependent "colors" as a common color space. For Windows, a color management system called "ICM" is built into the operating system. Adobe RGB and sRGB are popularly used as common color spaces. Adobe RGB has a wider color space than sRGB.
ICC profiles convert device-dependent "colors" into a common color space. By using an ICC profile and carrying out color management, you can draw out the color space of the image data within the color reproduction area that the printer can express.
Selecting a Printing Method Suited to the Image Data
The recommended printing method depends on the color space (Adobe RGB or sRGB) of the image data or the application software to be used. There are two typical printing methods. Check the color space (Adobe RGB or sRGB) of the image data and the application software to be used, and then select the printing method suited to your purpose.
Adjusting Colors with the Printer Driver
Describes the procedure for printing sRGB data by using the color correction function of the printer driver.
• To print using Canon Digital Photo Color
The printer prints data with color tints that most people prefer, reproducing colors of the original image data and producing three-dimensional effects and high, sharp contrasts.
• To print by directly applying editing and touch-up results of an application software
When printing the data, the printer brings out subtle color difference between dark and light areas, while leaving the darkest and lightest areas intact.
When printing the data, the printer applies fine adjustment results, such as brightness adjustments made with an application software.
Printing with ICC Profiles
Describes the procedure for printing by using the color space of Adobe RGB or sRGB effectively.
You can print with a common color space by setting up the application software and the printer driver so that the color management matches the input ICC profile of the image data.
The method for setting up the printer driver differs depending on the application software to be used.

Advanced Guide
Advanced Guide > Printing from a Computer > Printing with Other Application Software > Changing the Print Quality and Correcting Image Data > Specifying Color Correction > Adjusting Colors with the Printer Driver
Adjusting Colors with the Printer Driver
You can specify the color correction function of the printer driver to print sRGB data with color tints that most people prefer through the use of Canon Digital Photo Color. When printing from an application software that can identify ICC profiles and allows you to specify them, use a printing ICC profile in the application software, and select settings for color management.
The procedure for adjusting colors with the printer driver is as follows:
- Open the printer driver setup window
- Select the media type
Select the type of paper loaded in the machine from the Media Type list on the Main tab.

- Select the print quality
Select High, Standard, or Fast that matches your purpose for Print Quality.
- Select the manual color adjustment
Select Manual for Color/Intensity, and click Set.... The Manual Color Adjustment dialog box opens.
- Select color correction
Click Matching tab, and select Driver Matching for Color Correction.

6. Set the other items
If necessary, click Color Adjustment tab, and adjust the color balance of Cyan, Magenta, Yellow, and adjust Brightness, Intensity, and Contrast settings, and then click OK.
7. Complete the setup
Click OK on the Main tab.
When you execute print, the printer driver adjusts the colors when printing the data.
Related Topics
Selecting a Combination of the Print Quality Level and a Halftoning Method
→ Specifying Color Correction
Adjusting Color Balance
Adjusting Brightness
Adjusting Intensity
Adjusting Contrast

Advanced Guide
Advanced Guide > Printing from a Computer > Printing with Other Application Software > Changing the Print Quality and Correcting Image Data > Specifying Color Correction > Printing with ICC Profiles
Printing with ICC Profiles
When the image data has a specified input ICC profile, you can print by using the color space (Adobe RGB or sRGB) of the data effectively.
The printer driver setting procedure varies depending on the application software used to print.
Specify an ICC Profile from the Application Software and Print the Data
When you print the editing and touch-up results of Adobe Photoshop, Canon Digital Photo Professional, or any application software that allows you to specify input and printing ICC profiles, you print by effectively using the color space of the input ICC profile specified in the image data.
To use this printing method, use your application software to select color management items and specify an input ICC profile and a printing ICC profile in the image data.
Even if you print using a printing ICC profile that you created yourself or one for special Canon paper from your application software, be sure to select color management items from your application software. For instructions, refer to the manual of the application software you are using.
- Open the printer driver setup window
- Select the media type
Select the type of paper loaded in the machine from the Media Type list on the Main tab.

- Select the print quality
Select High, Standard, or Fast that matches your purpose for Print Quality.
- Select the manual color adjustment
Select Manual for Color/Intensity, and click Set.... The Manual Color Adjustment dialog box opens.
- Select color correction
Click Matching tab, and select None for Color Correction.

6. Set the other items
If necessary, click Color Adjustment tab, and adjust the color balance of Cyan, Magenta, Yellow, and adjust Brightness, Intensity, and Contrast settings, and then click OK.
7. Complete the setup
Click OK on the Main tab.
When you execute print, the printer uses the color space of the image data.
Specify an ICC Profile with the Printer Driver, and then Print
Print from a program that cannot identify input ICC profiles or does allow you to specify one by specifying input ICC profiles from printer profiles of the printer driver. When printing Adobe RGB data, you can print the data with the Adobe RGB color space even if the application software does not support Adobe RGB.
- Open the printer driver setup window
- Select the media type
Select the type of paper loaded in the machine from the Media Type list on the Main tab.

3. Select the print quality
Select High, Standard, or Fast that matches your purpose for Print Quality.
4. Select the manual color adjustment
Select Manual for Color/Intensity, and click Set.... Manual Color Adjustment dialog box opens.
5. Select color correction
Click Matching tab, and select ICM for Color Correction.
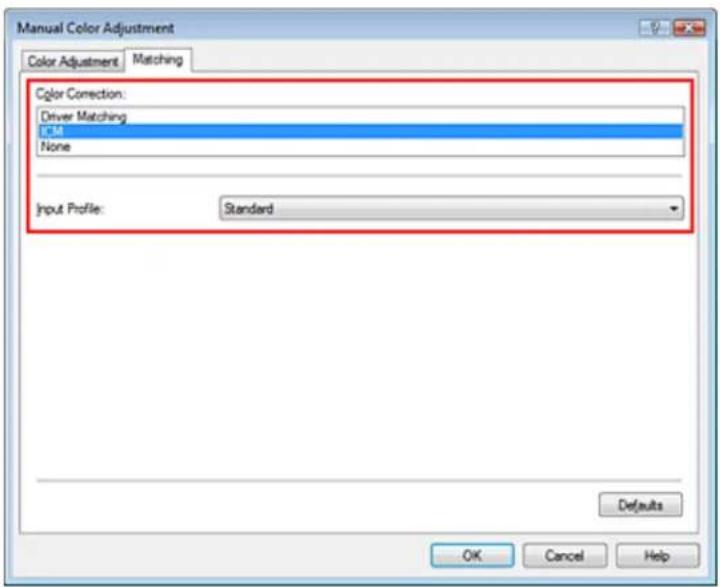
6. Select the input profile
Select an Input Profile that matches the color space of the image data.
- For sRGB data or data without an input ICC profile:
Select Standard. - For Adobe RGB data:
Select Adobe RGB (1998).

Important
- When the application software specifies an input profile, the input profile setting of the printer driver becomes invalid.
- When no input ICC profiles are installed on your computer, Adobe RGB (1998) is not displayed. You can install ICC profiles from the Setup CD-ROM that accompanies the machine.
7. Set the other items
If necessary, click Color Adjustment tab, and adjust the color balance of Cyan, Magenta, Yellow, and adjust Brightness, Intensity, and Contrast settings, and then click OK.
8. Complete the setup
Click OK on the Main tab.
When you execute print, the data is printed with the color space of the selected image data.
Related Topics
→ Selecting a Combination of the Print Quality Level and a Halftoning Method
→ Specifying Color Correction
Adjusting Color Balance
Adjusting Brightness
Adjusting Intensity
Adjusting Contrast

Advanced Guide
Advanced Guide > Printing from a Computer > Printing with Other Application Software > Changing the Print Quality and Correcting Image Data > Adjusting Color Balance
Adjusting Color Balance
You can adjust the color tints when printing.
Since this function adjusts color balance of the output by changing the ink ratios of each color, it changes the total color balance of the document. Use the application software if you want to change the color balance significantly. Use the printer driver only when you want to adjust the color balance slightly.
The following sample shows the case when color balance is used to intensify cyan and to diminish yellow so that the overall colors are more uniform.

No adjustment

Adjust Color Balance
The procedure for adjusting color balance is as follows:
You can also set color balance on the Quick Setup tab by choosing Photo Printing under Commonly Used Settings, and then choosing Color/Intensity Manual Adjustment under Additional Features.
- Open the printer driver setup window
- Select the manual color adjustment
On the Main tab, select Manual for Color/Intensity, and click Set....
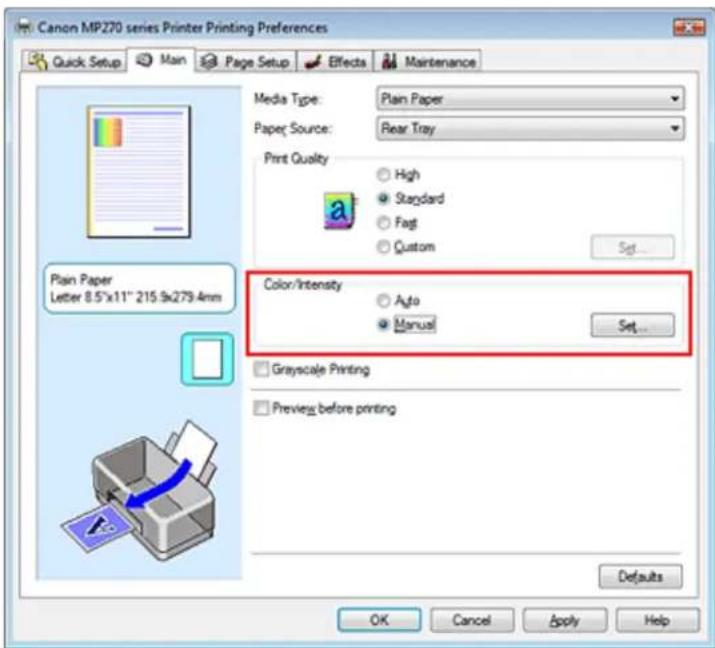
The Manual Color Adjustment dialog box opens.
- Adjust color balance
There are individual sliders for Cyan, Magenta, and Yellow. Each color becomes stronger when the corresponding slider is moved to the right, and becomes weaker when the corresponding slider is
moved to the left. For example, when cyan becomes weaker, the color red becomes stronger. You can also directly enter a value linked to the slider. Enter a value in the range from -50 to 50. After adjusting each color, click OK.
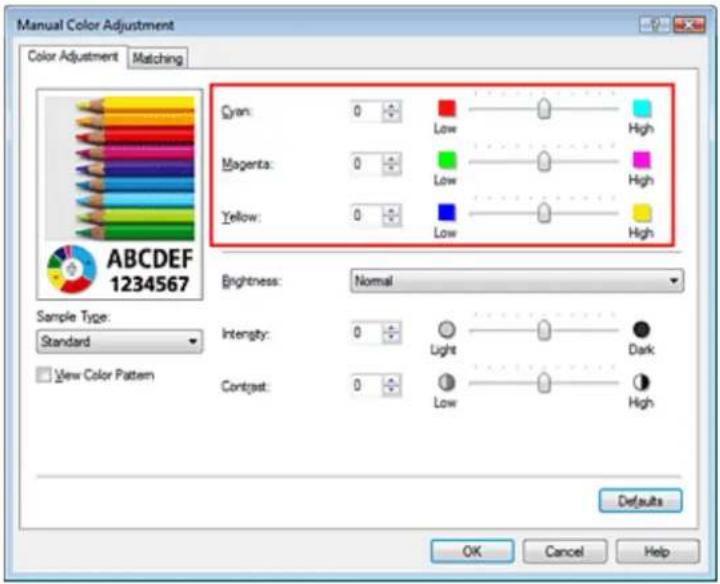

Important
■ Adjust the slider gradually.
4. Complete the setup
Click OK on the Main tab.
When you execute print, the document is printed with the adjusted color balance.

Important
- When the Grayscale Printing check box on the Main tab is checked, Cyan, Magenta, and Yellow appear grayed out and are unavailable.
Related Topics
Selecting a Combination of the Print Quality Level and a Halftoning Method
→ Specifying Color Correction
Adjusting Brightness
Adjusting Intensity
Adjusting Contrast
Advanced Guide
Advanced Guide > Printing from a Computer > Printing with Other Application Software > Changing the Print Quality and Correcting Image Data > Adjusting Brightness
Adjusting Brightness
You can change the brightness of the overall image data during printing.
This function does not change pure white or pure black but it changes the brightness of the intermediate colors.
The following sample shows the print result when the brightness specification is changed.

Light is selected Normal is selected


Dark is selected
The procedure for adjusting brightness is as follows:
You can also set brightness on the Quick Setup tab by choosing Photo Printing under Commonly Used Settings, and then choosing Color/Intensity Manual Adjustment under Additional Features.
- Open the printer driver setup window
- Select the manual color adjustment
On the Main tab, select Manual for Color/Intensity, and click Set....

The Manual Color Adjustment dialog box opens.
- Specify the brightness
Select Light, Normal, or Dark for Brightness, and click OK.
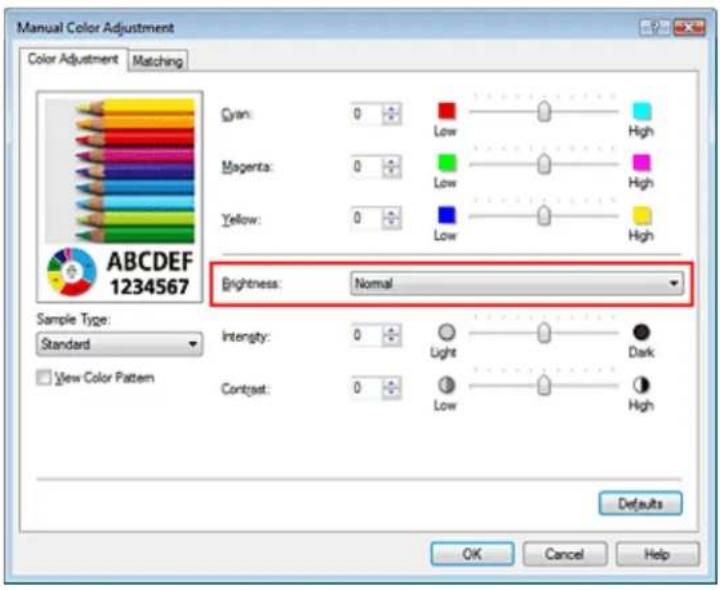
4. Complete the setup
Click OK on the Main tab.
When you execute print, the data is printed at the specified brightness.
Related Topics
Selecting a Combination of the Print Quality Level and a Halftoning Method
→ Specifying Color Correction
Adjusting Color Balance
Adjusting Intensity
Adjusting Contrast
Advanced Guide
Advanced Guide > Printing from a Computer > Printing with Other Application Software > Changing the Print Quality and Correcting Image Data > Adjusting Intensity
Adjusting Intensity
You can dilute (brighten) or intensify (darken) the colors of the overall image data during printing.
When you want to sharpen the print results, you should intensify the colors.
The following sample shows the case when the intensity is increased so that all colors become more intense when the image data is printed.
No adjustment

Higher Intensity
The procedure for adjusting intensity is as follows:
You can also set intensity on the Quick Setup tab by choosing Photo Printing under Commonly Used Settings, and then choosing Color/Intensity Manual Adjustment under Additional Features.
- Open the printer driver setup window
- Select the manual color adjustment
Select Manual for Color/Intensity on the Main tab, and click Set....

The Manual Color Adjustment dialog box opens.
- Adjust intensity
Moving the Intensity slider to the right intensifies (darkens) the colors. Moving the slider to the left dilutes (brightens) the colors.
You can also directly enter a value linked to the slider. Enter a value in the range from -50 to 50.
After adjusting each color, click OK.
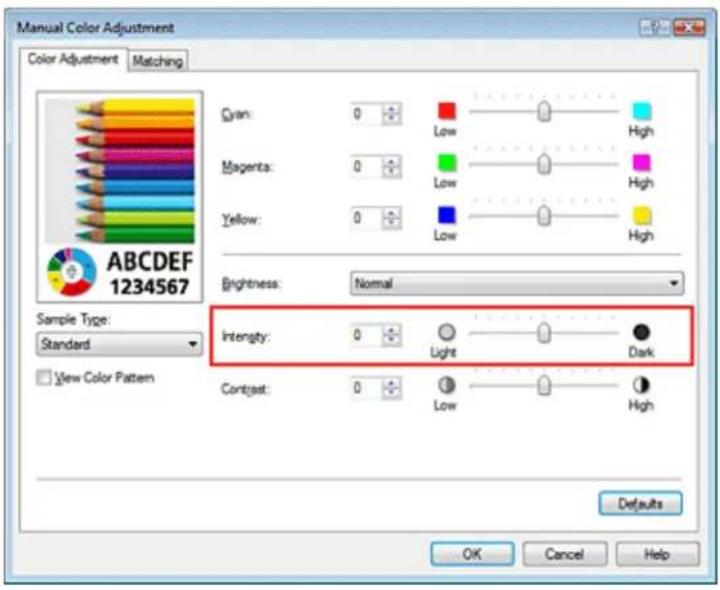

Important
■ Adjust the slider gradually.
4. Complete the setup
Click OK on the Main tab.
When you execute print, the image data is printed with the adjusted intensity.
Related Topics
→ Selecting a Combination of the Print Quality Level and a Halftoning Method
→ Specifying Color Correction
Adjusting Color Balance
Adjusting Brightness
Adjusting Contrast
Advanced Guide
Advanced Guide > Printing from a Computer > Printing with Other Application Software > Changing the Print Quality and Correcting Image Data > Adjusting Contrast
Adjusting Contrast
You can adjust the image contrast during printing.
To make the differences between the light and dark portions of images greater and more distinct, increase the contrast. On the other hand, to make the differences between the light and dark portions of images smaller and less distinct, reduce the contrast.

No adjustment
Adjust the contrast
The procedure for adjusting contrast is as follows:
You can also set contrast on the Quick Setup tab by choosing Photo Printing under Commonly Used Settings, and then choosing Color/Intensity Manual Adjustment under Additional Features.
- Open the printer driver setup window
- Select the manual color adjustment
On the Main tab, select Manual for Color/Intensity, and click Set....

The Manual Color Adjustment dialog box opens.
- Adjust the contrast
Moving the Contrast slider to the right increases the contrast, and moving it to the left decreases the contrast.
You can also directly enter a value linked to the slider. Enter a value in the range from -50 to 50.
After adjusting each color, click OK.


Important
■ Adjust the slider gradually.
4. Complete the setup
Click OK on the Main tab.
When you execute print, the image is printed with the adjusted contrast.
Related Topics
→ Selecting a Combination of the Print Quality Level and a Halftoning Method
→ Specifying Color Correction
Adjusting Color Balance
Adjusting Brightness
Adjusting Intensity
Advanced Guide
Advanced Guide > Printing from a Computer > Printing with Other Application Software > Changing the Print Quality and Correcting Image Data > Simulating an Illustration
Simulating an Illustration
With the Simulate Illustration function, you can print full-color or 256-color image data so that it looks like a hand-drawn illustration. This function adds different effects to the original profile and colors.

The procedure for performing Simulate Illustration is as follows:
- Open the printer driver setup window
- Set the Simulate Illustration
If necessary, check the Simulate Illustration check box on the Effects tab, and adjust the Contrast. Moving the slider to the right lightens the image data and moving the slider to the left darkens the image data.
The current settings are displayed in the settings preview on the left side of the printer driver.

- Complete the setup
Click OK.
When you execute print, the image will be printed so that it looks hand-drawn.
Advanced Guide
Advanced Guide > Printing from a Computer > Printing with Other Application Software > Changing the Print Quality and Correcting Image Data > Representing Image Data with a Single Color
Representing Image Data with a Single Color
With the Monochrome Effects function, you can benefit from coloring effects such as changing a photograph to a sepia tone image.
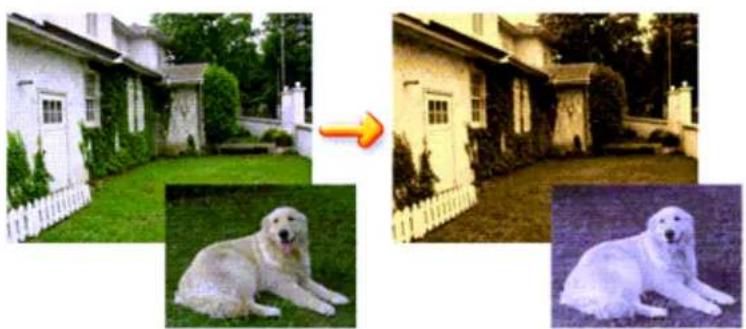
The procedure for performing Monochrome Effects is as follows:
- Open the printer driver setup window
- Set Monochrome Effects
Check the Monochrome Effects check box on the Effects tab and select your desired color. When you use Select Color, move the Color slider to specify the color you want. The current settings are displayed in the settings preview on the left side of the printer driver.
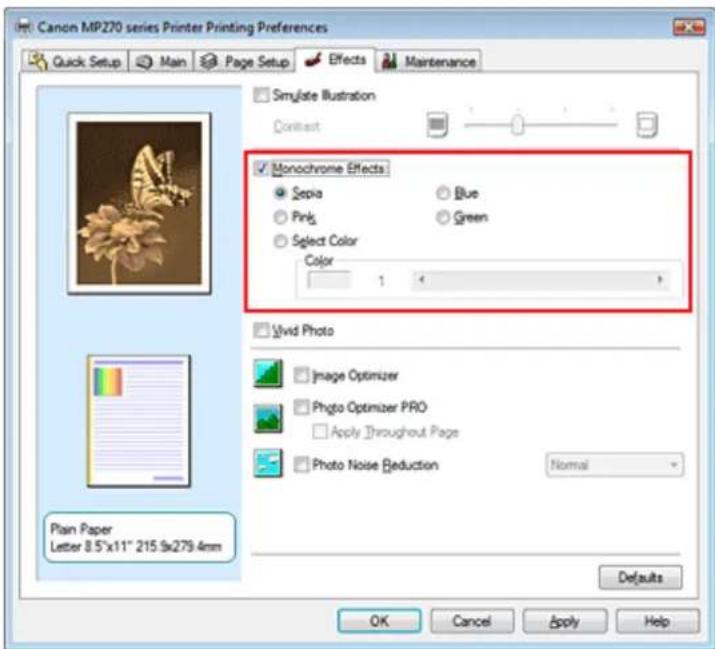
- Complete the setup
Click OK.
When you execute print, the image will be printed with a single color.
Important
- When the Grayscale Printing check box on the Main tab is checked, Monochrome Effects appears
grayed out and is unavailable.
Page top ↑
Advanced Guide
Advanced Guide > Printing from a Computer > Printing with Other Application Software > Changing the Print Quality and Correcting Image Data > Presenting Image Data with Vivid Colors
Presenting Image Data with Vivid Colors
The Vivid Photo function allows you to print image data with vivid colors.
The vivid photo function emphasizes the colors in background scenarios while maintaining the human skin color natural. By using this function, you can make vivid hues appear even more vivid.

The procedure for performing Vivid Photo is as follows:
You can also set vivid photos on the Quick Setup tab by choosing Photo Printing under Commonly Used Settings, and then choosing Additional Features.
- Open the printer driver setup window
- Set Vivid Photo
Check the Vivid Photo check box on the Effects tab.

- Complete the setup
Click OK.
When you execute print, the image will be printed with vivid colors.
Advanced Guide
Advanced Guide > Printing from a Computer > Printing with Other Application Software > Changing the Print Quality and Correcting Image Data > Smoothing Jagged Outlines
Smoothing Jagged Outlines
The Image Optimizer function allows you to smooth jagged outlines in photos and graphics that have been enlarged with your application. This feature is especially useful when printing low-resolution images from Web pages.
The procedure for performing Image Optimizer is as follows:
- Open the printer driver setup window
- Set Image Optimizer
Check the Image Optimizer check box on the Effects tab.

- Complete the setup
Click OK.
The photos and graphics will be printed with jagged outlines smoothed.

Note
■ Depending on application software or resolution of image data, the Image Optimizer may have no discernible effects.
It may take longer to complete printing when the Image Optimizer is used.
Page top ↑
Advanced Guide
Advanced Guide > Printing from a Computer > Printing with Other Application Software > Changing the Print Quality and Correcting Image Data > Changing Color Properties to Improve Coloration
Changing Color Properties to Improve Coloration
The Photo Optimizer PRO function corrects colors of digital camera images or scanned images. It is specially designed to compensate for color shift, overexposure, and underexposure.
The procedure for performing Photo Optimizer PRO is as follows:
- Open the printer driver setup window
- Set Photo Optimizer PRO
Check the Photo Optimizer PRO check box on the Effects tab.

Normally there is no need to check the Apply Throughout Page check box. Images within each page are optimized on an image-by-image basis.

Note
- Check the Apply Throughout Page check box when printing image data that has been processed, such as being cropped or rotated. In this case the entire page will be treated as a single image to be optimized.
- Complete the setup
Click OK.
When you execute print, the images will be printed with color compensation.

Important
■ Photo Optimizer PRO does not function when:
- Background is set in the Stamp/Background dialog box on the Page Setup tab.
- Define Stamp... is selected in the Stamp/Background dialog box on the Page Setup tab, and the bitmapped stamp is configured.

Note
■ Depending on images, the Photo Optimizer PRO may have no discernible effect.
Advanced Guide
Advanced Guide > Printing from a Computer > Printing with Other Application Software > Changing the Print Quality and Correcting Image Data > Reducing Photo Noise
Reducing Photo Noise
With the Photo Noise Reduction function, you can reduce the digital camera noise and improve the image quality of the digital print.

The procedure for performing Photo Noise Reduction is as follows:
- Open the printer driver setup window
- Set Photo Noise Reduction
Check the Photo Noise Reduction check box on the Effects tab and select Normal or Strong for the level.

- Complete the setup
Click OK.
When you execute print, the image will be printed with the digital camera noise being reduced.

Note
It is recommended to select Normal for most cases. Select Strong if you have selected Normal and the noise still bothers you.
■ Depending on application software or resolution of image data, effects of digital camera noise reduction may not be obvious.
- When this function is used for other than photos taken by digital cameras, image may be distorted.
Advanced Guide
Advanced Guide > Printing from a Computer > Printing with Other Application Software > Overview of the Printer Driver
Overview of the Printer Driver
Printer Driver Operations
Canon IJ Printer Driver
→ How to Open the Printer Driver Setup Window
→ Maintenance Tab
Canon IJ Status Monitor
Canon IJ Preview
Printer Driver Operations

MA-5385-V1.00
| Instructions for Use (Printer Driver) | How to Use This Manual | Printing This Manual |
Various Printing Methods
Printing with Easy Setup
Setting a Page Size and Orientation
Setting the Number of Copies and Printing Order
Setting the Stapling Margin
Borderless Printing
Fit-to-Page Printing
Scaled Printing
Page Layout Printing
Poster Printing
Booklet Printing
Duplex Printing
Stamp/Background Printing
Printing an Envelope
Displaying the Print Results before Printing
Setting Paper Dimensions (Custom Size)
Changing the Print Quality and Correcting Image Data
Selecting a Combination of the Print Quality Level and a Halftoning Method
Printing a Color Document in Monochrome
Specifying Color Correction
Adjusting Color Balance
Adjusting Brightness
Adjusting Intensity
Adjusting Contrast
Simulating an Illustration
Representing Image Data with a Single Color
Presenting Image Data with Vivid Colors
Smoothing Jagged Outlines
Changing Color Properties to Improve Coloration
Reducing Photo Noise
Changing Machine Settings from Your Computer
Changing the Print Options
Registering a Frequently Used Printing Profile
Setting the Ink Cartridge
Managing the Machine Power
Reducing the Machine Noise
Changing the Machine Operation Mode
Performing Maintenance from a Computer
Cleaning the Print Heads
Cleaning the Paper Feed Rollers
Aligning the Print Head Position
Checking the Print Head Nozzles
Cleaning Inside the Machine
Overview of the Printer Driver
Canon IJ Printer Driver
How to Open the Printer Driver Setup Window
Maintenance Tab
Canon IJ Status Monitor
Canon IJ Preview
Updating the MP Drivers
Obtaining the Latest MP Drivers
Deleting the Unnecessary MP Drivers
Before Installing the MP Drivers
Installing the MP Drivers
Appendix
Deleting the Undesired Print Job
Sharing the Printer on a Network
Advanced Guide
Advanced Guide > Printing from a Computer > Printing with Other Application Software > Overview of the Printer Driver > Canon IJ Printer Driver
Canon IJ Printer Driver
The Canon IJ printer driver is software that is installed on your computer for printing data on this machine.
The Canon IJ printer driver converts the print data created by your Windows application into data that your printer can understand and sends the converted data to the printer.
Because different models support different print data formats, you need a Canon IJ printer driver for the specific model you are using.
How to Use Printer Driver Help
You can display the Help describing the driver setting items through the printing preferences screen of the Canon IJ printer driver.
• To view all descriptions of a tab...
Click the Help button on each tab. A dialog box opens, displaying a description of each item on the tab.
You can also click the link found in the description of an item to display a description of the linked dialog box.
• To see a description for each item...
Right-click the item you want to learn about and then click Help.
Alternatively, when the ☐ Help button is found at the right end of the title bar, click that button, and then click the item you want to learn about.
A description of the item is displayed.
Related Topic
→ How to Open the Printer Driver Setup Window

Advanced Guide
Advanced Guide > Printing from a Computer > Printing with Other Application Software > Overview of the Printer Driver > Canon IJ Printer Driver > How to Open the Printer Driver Setup Window
How to Open the Printer Driver Setup Window
The printer driver setup window can be displayed through the application software in use or the Start menu of the Windows.

Note
This guide mainly describes operations on the Windows Vista. Operations may differ depending on versions of the Windows.
Open the Printer Driver Setup Window through the Application Software
Follow the procedure below to configure printing profile when printing.
- Select the command you perform printing on the application software in use In general, select Print on the File menu to open the Print dialog box.
- Select your model name and click Preferences (or Properties)
The printer driver setup window appears.

Note
- Depending on application software you use, command names or menu names may vary and there may be more steps. For details, refer to the user's manual of your application software.
Open the Printer Driver Setup Window through the Start Menu
Follow the procedure below to perform maintenance operations such as print head cleaning, or to configure printing profile that are common for all application software.
-
Select items from the Start menu as shown below:
-
In Windows Vista, select the Start menu -> Control Panel -> Hardware and Sound -> Printers.
- In Windows XP, select the Start menu -> Control Panel -> Printers and Other Hardware -> Printers and Faxes.
-
In Windows 2000, select the Start menu -> Settings -> Printers.
-
Right-click your model name icon, and then select Printing Preferences... from the displayed menu
The printer driver setup window appears.

Important
- Opening the printer driver setup window through Properties displays such tabs regarding the Windows functions as the Ports (or Advanced) tab. Those tabs do not appear when opening through Printing Preferences... or application software. For tabs regarding Windows functions, refer to the user's manual for the Windows.
Advanced Guide
Advanced Guide > Printing from a Computer > Printing with Other Application Software > Overview of the Printer Driver > Canon IJ Printer Driver > Maintenance Tab
Maintenance Tab
The Maintenance tab allows you to perform machine maintenance or change the settings of the machine.

Features
→ Cleaning the Print Heads
→ Cleaning the Paper Feed Rollers
→ Aligning the Print Head Position
→ Checking the Print Head Nozzles
→ Cleaning Inside the Machine
Setting the Ink Cartridge
→ Managing the Machine Power
Related Features
→ Reducing the Machine Noise
→ Changing the Machine Operation Mode

Advanced Guide
Advanced Guide > Printing from a Computer > Printing with Other Application Software > Overview of the Printer Driver > Canon IJ Status Monitor
Canon IJ Status Monitor
The Canon IJ Status Monitor is an application software that shows the status of the printer and the progress of printing on the Windows screen. You will know the status of the printer with graphics, icons, and messages.
Launching the Canon IJ Status Monitor
The Canon IJ Status Monitor launches automatically when data is sent to the printer. When launched, the Canon IJ Status Monitor appears as a button on the task bar.


Click the status monitor button displayed on the task bar. The Canon IJ Status Monitor appears.


Note
- To open the Canon IJ Status Monitor when the printer is not printing, open the printer driver setup window and click View Printer Status... on the Maintenance tab.
When Errors Occur
The Canon IJ Status Monitor is automatically displayed if an error occurs (e.g., if the printer runs out of paper or if the ink is low).

In such cases, take the appropriate action as described.
Advanced Guide
Advanced Guide > Printing from a Computer > Printing with Other Application Software > Overview of the Printer Driver > Canon IJ Preview
Canon IJ Preview
The Canon IJ Preview is an application software that displays what the print result will look like before a document is actually printed.
The preview reflects the information that is set within the printer driver and allows you to check the document layout, print order, and number of pages. You can also change the media type settings.
When you want to display a preview before printing, open the printer driver setup window, click the Quick Setup tab or the Main tab, and check the Preview before printing check box.
When you do not want to display a preview before printing, uncheck the check box.
Related Topic
→ Displaying the Print Results before Printing
Advanced Guide
Advanced Guide > Printing Using the Operation Panel of the Machine
Printing Using the Operation Panel of the Machine
→ Copying
Page top ↑
Advanced Guide
Advanced Guide > Printing Using the Operation Panel of the Machine > Copying
Copying
→ Making Copies
→ Using Useful Copy Functions
Advanced Guide
Advanced Guide > Printing Using the Operation Panel of the Machine > Copying > Making Copies
Making Copies
For the basic procedure to make copies, refer to Copying.
→ Reducing or Enlarging a Copy
→ Using Useful Copy Functions
Advanced Guide
Advanced Guide > Printing Using the Operation Panel of the Machine > Copying > Making Copies > Reducing or Enlarging a Copy
Reducing or Enlarging a Copy
- Make sure that the machine is turned on.
- Load plain paper on the Rear Tray.
- Load the original on the Platen Glass.
- Press the Paper button to select A4 or 8.5"x11" Plain Paper.

Note
- You can switch the size of paper loaded on the Rear Tray between A4 and Letter. → Switching the Page Size between A4 and Letter
- Press the Fit to Page button.
The Fit to Page lamp lights up. To cancel Fit to Page copying, press the Fit to Page button again.

Note
- You can use the Fit to Page button only when you are using the copy function.
-
Copied images are automatically reduced or enlarged in the lengthwise/widthwise direction to fit the page size you select.
-
Press the + button repeatedly to specify the number of copies.

Note
By pressing the + button repeatedly, F will be displayed on the LED. The number of copies will be set as 20.
- When you want to make 10 to 19 copies, specify the number of copies to 20, then load the same number of pieces of paper. In this case, the machine will stop copying in an error. Press the Stop/Reset button to release the error.
- Pressing the Stop/Reset button returns the number of copies to 1.
- Press the Color button for color copying, or the Black button for black & white copying.
The machine starts Fit to Page copying. Remove the original on the Platen Glass after copying is complete.
• To make high speed copying
- Hold down the Color or Black button for longer than 2 seconds.
The LED flashes once.
- Release the button.
The machine starts high speed copying.

Important
- Do not open the Document Cover or remove the original from the Platen Glass until copying is complete.

Note
- High speed copying is suitable for printing text-only documents on plain paper. If the quality is not as good as expected, try normal copying.
- When you want to make 10 to 19 copies, specify the number of copies to 20, then load the same number of pieces of paper. In this case, the machine will stop copying in an error. Press the Stop/Reset button to release the error.
■ To cancel copying, press the Stop/Rest button.
Advanced Guide
Advanced Guide > Printing Using the Operation Panel of the Machine > Copying > Using Useful Copy Functions
Using Useful Copy Functions
- Borderless copy
You can copy images so that they fill the entire page without borders.
→ Copying without Borders (Borderless Copy)
Page top ↑
Advanced Guide
Advanced Guide > Printing Using the Operation Panel of the Machine > Copying > Using Useful Copy Functions > Switching the Page Size between A4 and Letter
Switching the Page Size between A4 and Letter
You can switch the size of paper loaded on the Rear Tray between A4 and Letter.
- Press the Maintenance button repeatedly until d appears.
- Press the Black button to select A4, or the Color button to select Letter.

Note
- You can switch the size of paper selected when the machine is turned on between A4 and Letter.
Page top ↑
Advanced Guide
Advanced Guide > Printing Using the Operation Panel of the Machine > Copying > Using Useful Copy Functions > Copying without Borders (Borderless Copy)
Copying without Borders (Borderless Copy)
You can copy images so that they fill the entire page without borders.

- Load photo paper on the Rear Tray.
- Press the Paper button to select the page size you loaded on the Rear Tray.

Note
- You can switch the size of paper loaded on the Rear Tray between A4 and Letter. → Switching the Page Size between A4 and Letter
-
When A4 or 8.5"x11" Plain Paper is selected, borderless copying is not available.
-
Press the Fit to Page button.
The Fit to Page lamp lights up. To cancel borderless copying, press the Fit to Page button again.

Note
- You can use the Fit to Page button only when you are using the copy function.
-
Copied images are automatically reduced or enlarged to fit the page size you select for borderless copying.
-
Press the + button repeatedly to specify the number of copies.

Note
- By pressing the + button repeatedly, F will be displayed on the LED. The number of copies will be set as 20.
- When you want to make 10 to 19 copies, specify the number of copies to 20, then load the same number of pieces of paper. In this case, the machine will stop copying in an error. Press the Stop/Reset button to release the error.
-
Pressing the Stop/Reset button returns the number of copies to 1.
-
Press the Color button for color copying, or the Black button for black & white copying.
The machine starts borderless copying.

Important
- Do not open the Document Cover or remove the original from the Platen Glass until copying is complete.

Note
- Slight cropping may occur at the edges since the copied image is enlarged to fill the whole page.
■ To cancel copying, press the Stop/Reset button.
Advanced Guide
Advanced Guide > Scanning
Scanning
→ Scanning Images
Saving Scanned Data to PC Using the Operation Panel of the Machine
→ Scanning with the Bundled Application Software
→ Scanning with Other Application Software
→ Other Scanning Methods
Advanced Guide
Advanced Guide > Scanning > Scanning Images
Scanning Images
→ Scanning Images
Before Scanning
→ Placing Documents
Advanced Guide
Advanced Guide > Scanning > Scanning Images > Scanning Images
Scanning Images
You can scan images from the machine to a computer without printing them and save them in popular file formats, such as JPEG, TIFF, bitmap, or PDF.
Select the scanning method according to your purpose.
Saving Scanned Data to PC Using the Operation Panel of the Machine
→ Scanning with the Bundled Application Software
→ Scanning with Other Application Software
Advanced Guide
Advanced Guide > Scanning > Scanning Images > Before Scanning
Before Scanning
Before scanning images, confirm the following:
- Does the original to be scanned meet the requirements for an original to be set on the Platen Glass?
Refer to Placing Documents for requirements and how to load the original on the Platen Glass.
Page top
Advanced Guide
Advanced Guide > Scanning > Scanning Images > Placing Documents
Placing Documents
Learn how to place documents on the machine's Platen. Place documents correctly according to the type of document to be scanned. Otherwise, documents may not be scanned correctly.
Important
- Do not place objects on the Document Cover. The objects may fall into the machine when the Document Cover is opened. This may damage the machine.
Placing Documents
Place documents as described below to allow the machine to detect the document type or size automatically.
Important
- When scanning by specifying the document type or size in MP Navigator EX or ScanGear (scanner driver), align an upper corner of the document with the corner at the arrow (alignment mark) of the Platen.
- Photos that have been cut to various shapes and documents smaller than 1.18 inches (3 cm) square cannot be cropped accurately when scanning.
■ Reflective CD/DVD labels may not be scanned properly.
■ Close the Document Cover when scanning.
When Scanning Photos, Postcards, Business Cards or CD/DVD

Placing a Single Document
Place the document face-down on the Platen, with 3/8 inches (1 cm) or more space between the edges of the Platen and the document. Portions placed on the diagonally striped area cannot be scanned.

Important
■ Large documents (such as A4 size photos)
When Scanning Magazines, Newspapers or Text Documents

Place the document face-down on the Platen and align an upper corner of the document with the corner at the arrow (alignment mark) of the Platen. Portions placed on the diagonally striped area cannot be scanned.

that cannot be placed away from the edges/arrow (alignment mark) of the Platen may be saved as PDF files. To save in a format other than PDF, scan by specifying the file format.
Placing Multiple Documents
Allow 3/8 inches (1 cm) or more space between the edges of the Platen and documents, and between documents. Portions placed on the diagonally striped area cannot be scanned.
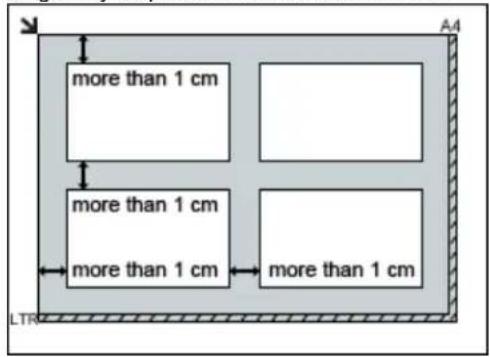

Note
■ You can place up to 12 documents.
■ Positions of slanted documents (10 degrees or less) are corrected automatically.
Advanced Guide
Advanced Guide > Scanning > Saving Scanned Data to PC Using the Operation Panel of the Machine
Saving Scanned Data to PC Using the Operation Panel of the Machine
Saving Scanned Data to PC Using the Operation Panel of the Machine
Appendix: Various Scan Settings
Advanced Guide
Advanced Guide > Scanning > Saving Scanned Data to PC Using the Operation Panel of the Machine > Saving Scanned Data to PC Using the Operation Panel of the Machine
Saving Scanned Data to PC Using the Operation Panel of the Machine
You can save scanned data to PC using the Operation Panel of the machine.
Before saving scanned data to PC, confirm the following:
- The necessary application software (MP Drivers and MP Navigator EX) are installed.
If the application software (MP Drivers and MP Navigator EX) are not yet installed, insert the Setup CD-ROM into the computer's disc drive, then perform Custom Install and select MP Drivers and MP Navigator EX.
• The machine is connected to a computer correctly.
Make sure that the machine is connected to the computer correctly.
Do not plug or unplug the USB cable when scanning images with the machine, or when the computer is in the sleep or standby mode.
- The operation after scanning the original is specified in MP Navigator
EX.
MP Navigator EX enables you to specify the response resulting from pressing the SCAN button on the machine. You can specify the response individually for each event. For details, refer to Selecting a Response to Commands from the Operation Panel Using MP Navigator EX.
- Macintosh Set the starting application.
If you are using Mac OS X v.10.5.x or Mac OS X v.10.4.x:
This operation is not necessary.
If you are using Mac OS X v.10.3.9:
You need to set MP Navigator EX as the starting application software in Image Capture under Applications of Mac OS X.
Select Applications on the Go menu, then double-click the Image Capture icon. Click Options at the lower left of the scanner window, select MP Navigator EX 3 in Application to launch when the scanner button is pressed:, then click OK. To quit Image Capture, select Quit Image Capture on the Image Capture menu.
Important
If Options is not displayed, select Preferences on the Image Capture menu, click Scanner, and click Use TWAIN software whenever possible to clear the option. Then quit Image Capture and restart it.
-
Make sure that the machine is turned on.
-
Load the original on the Platen Glass.

Note
■ Refer to Placing Documents for how to load the original on the Platen Glass.
- Press the SCAN button.
The settings configured by MP Navigator EX are applied when scanning.
5. Windows To specify MP Navigator EX 3.0
If you are using Windows Vista:
The program selection screen may be displayed after pressing the SCAN button. In this case, select MP Navigator EX Ver3.0 and click OK.
You can set MP Navigator EX to launch whenever pressing the SCAN button. For details, see For Windows Users:
If you are using Windows XP:
The program selection screen may be displayed after pressing the SCAN button for the first time. In this case, specify MP Navigator EX Ver3.0 as the application software to use, select Always use this program for this action, then click OK. From the next time, MP Navigator EX is automatically started.
Important
If the position or size of an image is not scanned correctly depending on the type of the original, refer to Scanning Photos and Documents and change Document Type and Document Size settings of MP Navigator EX to match the original being scanned.
- If You Want to Edit or Print the Scanned Images
MP Navigator EX enables you to edit the scanned images, such as optimizing or trimming.
You can also start application software from MP Navigator EX to edit or print the scanned images.
Let's Try Scanning
- If You Want to Scan Originals with Advanced Settings
ScanGear enables you to scan originals with advanced settings such as the resolution.
→ Scanning with Advanced Settings Using ScanGear (Scanner Driver)

Note
- You can use a TWAIN- or WIA- (Windows Vista and Windows XP only) compliant application software and the Control Panel (Windows Vista and Windows XP only) to scan originals with this machine. For details, refer to Other Scanning Methods.
Advanced Guide
Advanced Guide > Scanning > Saving Scanned Data to PC Using the Operation Panel of the Machine > Appendix: Various Scan Settings
Appendix: Various Scan Settings
- Specifying how to respond when scanning using the Operation Panel of the machine
Selecting a Response to Commands from the Operation Panel Using MP Navigator EX
Page top↑
Advanced Guide
Advanced Guide > Scanning > Saving Scanned Data to PC Using the Operation Panel of the Machine > Appendix: Various Scan Settings > Selecting a Response to Commands from the Operation Panel Using MP Navigator EX
MP Navigator EX
Selecting a Response to Commands from the Operation Panel Using MP Navigator EX
MP Navigator EX enables you to specify the response resulting from pressing a button for scanning on the Operation Panel of the machine. You can specify the response individually for each event.
- Start MP Navigator EX.
Starting MP Navigator EX
- Click Preferences.

The Preferences dialog box opens.

Note
- The Preferences dialog box can also be opened by clicking Preferences in the One-click Mode screen.
- On the Scanner Button Settings tab, specify Actions.


Note
■ See the section below for details.
Scanner Button Settings Tab (Save)
4. Click OK.
The operation will be performed according to the settings when you press the SCAN button on the machine.
Page top↑
Advanced Guide
Advanced Guide > Scanning > Scanning with the Bundled Application Software
Scanning with the Bundled Application Software
What Is MP Navigator EX (Supplied Scanner Software)?
Let's Try Scanning
→ Useful MP Navigator EX Functions
Utilizing Images in MP Navigator EX
→ MP Navigator EX Screens
Appendix: Opening Files Other than Scanned Images
Advanced Guide
Advanced Guide > Scanning > Scanning with the Bundled Application Software > What Is MP Navigator EX (Supplied Scanner Software)?
MP Navigator EX
What Is MP Navigator EX (Supplied Scanner Software)?
MP Navigator EX is an application that enables you to easily scan photos and documents. It is suitable even for beginners.

Important
- MP Navigator EX may not start from the Operation Panel of the machine. In that case, restart the computer.
- Use the default display font size of the OS. Otherwise, software screens may not appear correctly.
What You Can Do with This Software
This software allows you to scan multiple documents at one time, or scan images larger than the Platen. You can also save scanned images, attach them to e-mail or print them using the supplied applications.
Screens
Main Menus
There are two types of MP Navigator EX Main Menu: Navigation Mode screen and One-click Mode screen.
Navigation Mode Screen
You can start various tasks from the Navigation Mode screen, including simple scanning, scanning using ScanGear (scanner driver), and enhancing/correcting images.

One-click Mode Screen
You can complete from scanning to saving, etc. at one time by simply clicking the corresponding icon in the One-click Mode screen.

Scan/Import Window
Use the Scan/Import window to scan photos and documents.
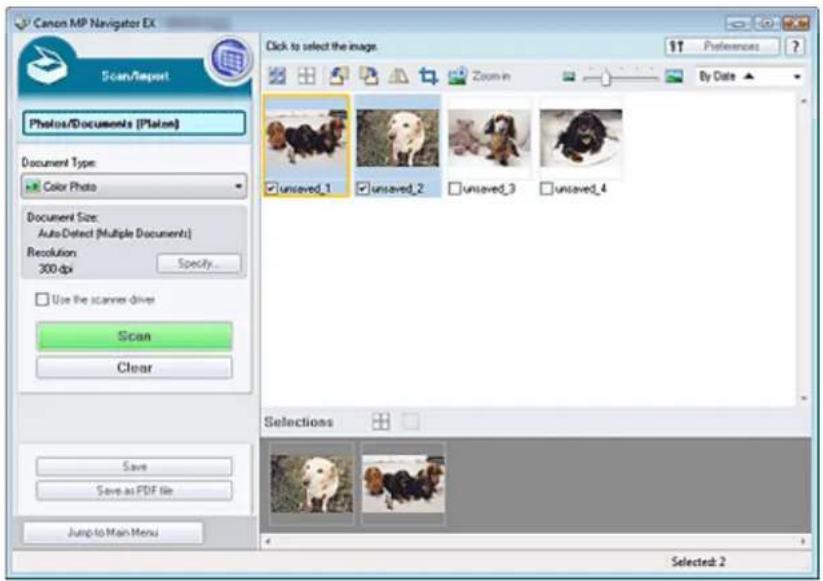
View & Use Window
Use the View & Use window to select what you want to do with the scanned images.

Advanced Guide
Advanced Guide > Scanning > Scanning with the Bundled Application Software > Let's Try Scanning
MP Navigator EX
Let's Try Scanning
Try scanning using MP Navigator EX.
- Starting MP Navigator EX
Starting MP Navigator EX - Scanning documents, photos, magazines, etc. from the Platen
→ Scanning Photos and Documents - Scanning two or more photos (small documents) at one time
→ Scanning Multiple Documents at One Time
• Scanning images larger than the Platen
→ Scanning Images Larger than the Platen (Stitch Assist) - Scanning easily according to purpose (scan and save, attach to e-mail, etc.)
→ Easy Scanning with One-click
Advanced Guide
Advanced Guide > Scanning > Scanning with the Bundled Application Software > Let's Try Scanning > Starting MP Navigator EX
MP Navigator EX
Starting MP Navigator EX
Starting MP Navigator EX
- Double-click Canon MP Navigator EX 3.0 icon on the desktop.
MP Navigator EX starts.


Note
Alternatively, from the Start menu, select (All) Programs > Canon Utilities > MP Navigator EX 3.0 > MP Navigator EX 3.0.
Starting One-click Mode
- Click (Switch Mode) at the bottom left of the screen.

The One-click Mode screen appears.
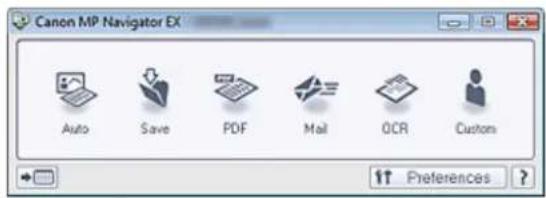

Note
- Select the Show this window at startup checkbox in the Navigation Mode screen to always open the Navigation Mode screen at startup. If this checkbox is not selected, the last used screen appears at startup.
Page top↑
Advanced Guide
Advanced Guide > Scanning > Scanning with the Bundled Application Software > Let's Try Scanning > Scanning Photos and Documents
MP Navigator EX
Scanning Photos and Documents
Scan photos and documents placed on the Platen.
- Start MP Navigator EX and open the Navigation Mode screen.
Starting MP Navigator EX
- Point to Scan/Import and click Photos/Documents (Platen).

- Place the document on the Platen, then select Document Type.
→ Placing Documents


Note
- When you select Magazine(Color), the Descreen function will be enabled and scanning takes longer than usual. To disable the Descreen function, deselect the Descreen checkbox in the
Scan Settings dialog box.
- Select Text(OCR) to extract the text in the image and convert to editable text data using MP Navigator EX.
-
Color scanning is not available for Text(OCR). To scan in color, use OCR in One-click and scan with Color Mode set to Color.
-
Click Specify... to set the document size and scanning resolution as required.
When setting is completed, click OK.
→ Scan Settings Dialog Box (Photos/Documents)

Important
- When scanning a large document (such as an A4 size photo), align its corner with the corner at the arrow (alignment mark) of the platen and specify the document size in the Scan Settings dialog box.
- Click Scan.
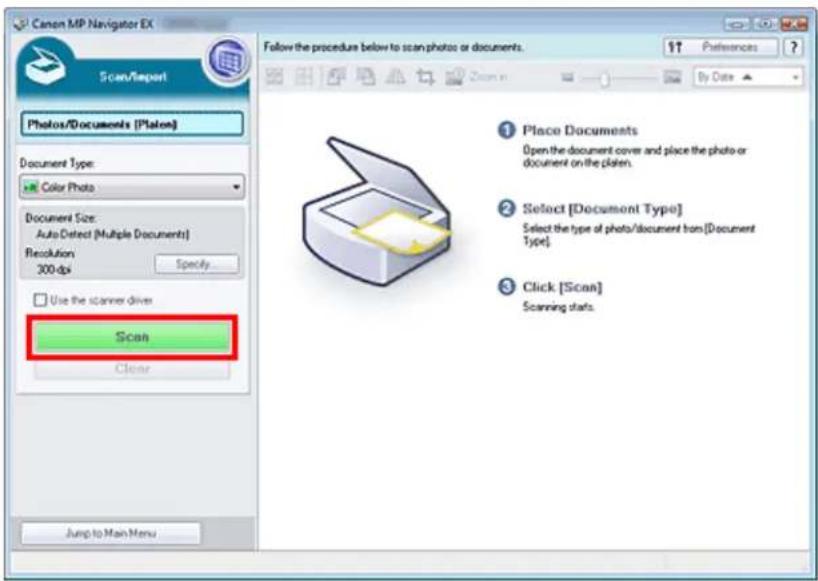
Scanning starts.
When scanning is completed, the Scan Complete dialog box opens. Select Scan or Exit. Select Scan to scan the next document, or select Exit to end.
The scanned images appear in the Thumbnail window.
![Canon MP Navigator EX Scan/Report Photos/Documents (Platen) Document Type: Color Photo Document Size: Auto-Detect (Multiple Documents) Resolution: 300 dpi Use the scanner driver Scan Clear Scan Complete Scan completed. Click [Ext] to end. To continue scanning, load the next document and click [Scan]…](/content/2026/06/1260153/images/6290d2883f8146206eaa1febd463e602f26235cf34d70086ddaabd2e9d7b3549.jpg)
6. Edit the scanned images as required.
Use Edit Tools to rotate images, select a part of an image, etc.
See the Edit Tools in "Photos/Documents (Platen) Screen (Scan/Import Window)" for details.

Note
- First select images to edit. (Selected images are outlined in orange.) Drag the mouse or use Shift + arrow keys to select multiple images.
7. Save the scanned images.
Saving
Saving as PDF Files
Advanced Guide
Advanced Guide > Scanning > Scanning with the Bundled Application Software > Let's Try Scanning > Scanning Multiple Documents at One Time
MP Navigator EX
Scanning Multiple Documents at One Time
You can scan two or more photos (small documents) at one time by setting Document Size to Auto Detect (Multiple Documents) in the Scan Settings dialog box of MP Navigator EX.

Important
The following types of documents may not be cropped correctly. In that case, start ScanGear (scanner driver), then adjust the cropping frames (scan areas) in whole image view and scan again.
- Photos that have a whitish border
- Documents printed on white paper, hand-written text, business cards, etc.
- Thin documents
- Thick documents
→ Scanning Multiple Documents in Whole Image View
- Place the document on the Platen.
→ Placing Documents
- Start MP Navigator EX and open the Navigation Mode screen.
Starting MP Navigator EX
- Point to Scan/Import and click Photos/Documents (Platen).
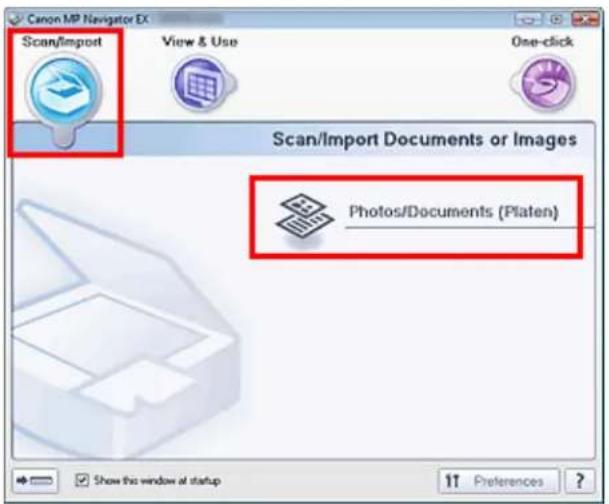
- Select Document Type according to the document to be scanned.

5. Click Specify....
Select Auto Detect (Multiple Documents) for Document Size.
When setting is completed, click OK.
→ Scan Settings Dialog Box (Photos/Documents)

6. Click Scan.
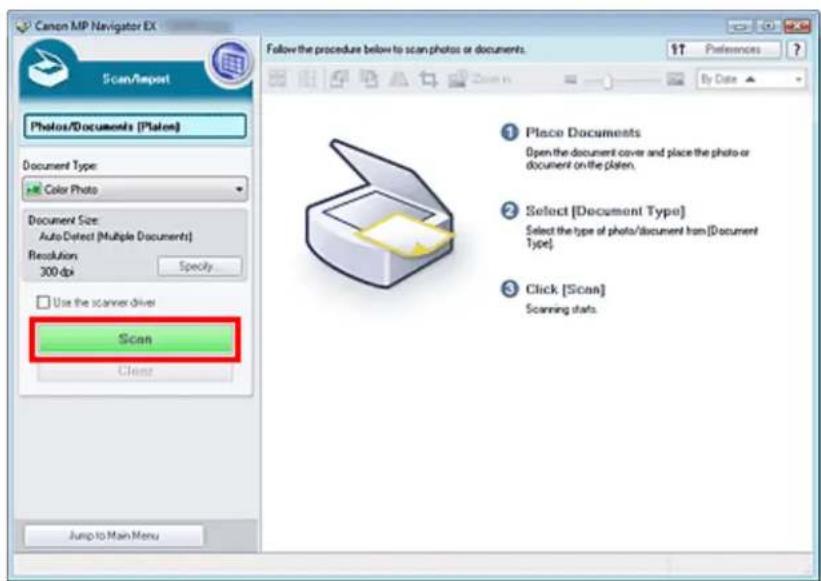
Multiple documents are scanned at one time.
When scanning is completed, the Scan Complete dialog box opens. Select Scan or Exit. Select Scan to scan the next document, or select Exit to end.
The scanned images appear in the Thumbnail window.
![Canon MP Navigator EX Scan/Import Photos/Documents (Platen) Document Type: Color Photo Document Size: Auto-Defect (Multiple Documents) Resolution 300 dpi Use the scanner driver Scan Clear Scan Complete Scan completed. Click [Ext] to end. To continue scanning, load the next document and click [Scan].…](/content/2026/06/1260153/images/6eca7af71bbd273b4be26d3b396e92f98824d6e4a89353d36eeb4dc86043f84c.jpg)
7. Edit the scanned images as required.
Use Edit Tools to rotate images, select a part of an image, etc.
See the Edit Tools in "Photos/Documents (Platen) Screen (Scan/Import Window)" for details.

Note
- First select images to edit. (Selected images are outlined in orange.) Drag the mouse or use Shift + arrow keys to select multiple images.
8. Save the scanned images.
Saving
Saving as PDF Files

Note
If you want to preview the images before scanning, use ScanGear (scanner driver).
→ Scanning Multiple Documents at One Time with ScanGear (Scanner Driver)
Advanced Guide
Advanced Guide > Scanning > Scanning with the Bundled Application Software > Let's Try Scanning > Scanning Images Larger than the Platen (Stitch Assist)
MP Navigator EX
Scanning Images Larger than the Platen (Stitch Assist)
Stitch Assist allows you to scan the left and right halves of a large document separately and combine the scanned images back into one image. You can scan documents that are up to twice as large as the Platen.
- Start MP Navigator EX and open the Navigation Mode screen.
Starting MP Navigator EX

Note
- You can complete from scanning to saving, etc. at one time by simply clicking the corresponding icon in the One-click Mode screen. Stitch Assist is available from the One-click Mode screen as well, by changing the document size. Click the corresponding icon and select Stitch Assist for Document Size. Then skip ahead to Step 5.
- Point to Scan/Import and click Photos/Documents (Platen).
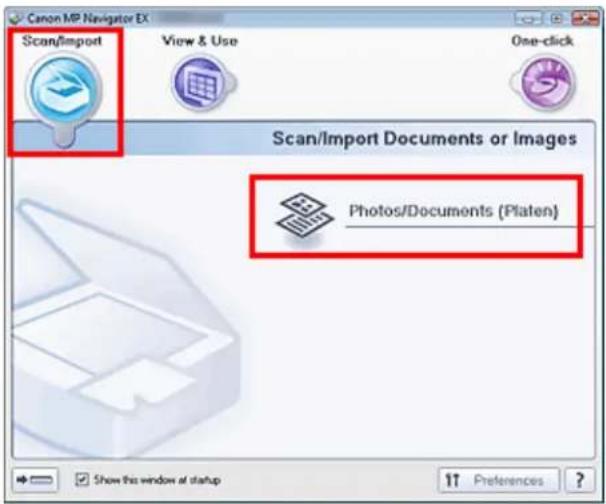
- Select Document Type according to the document to be scanned.
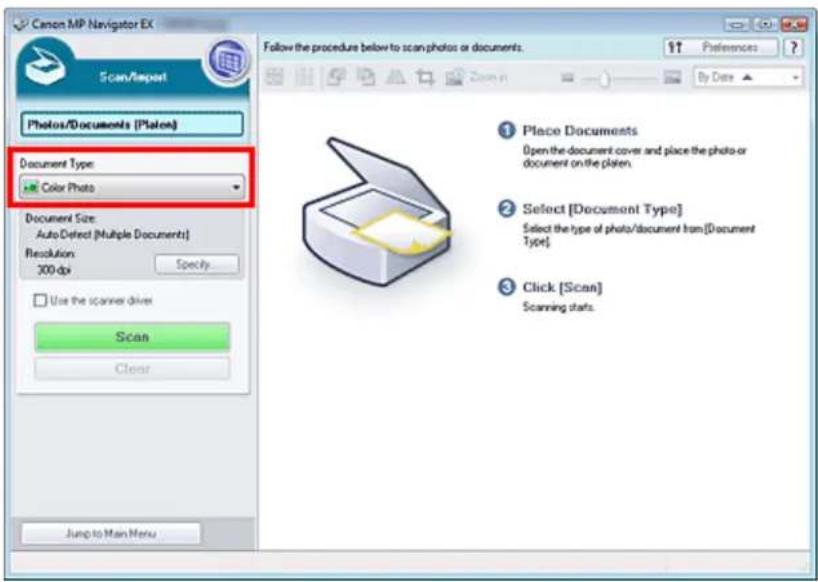
4. Click Specify....
Select Stitch Assist for Document Size, then specify the scanning resolution as required. When setting is completed, click OK.
→ Scan Settings Dialog Box (Photos/Documents)

5. Click Scan.

The Stitch-assist window opens.
![Stitch-assist 1/4 Scans the left side of the document. Place it and click [Scan] Rotate 100° 1 2 Scann Cancel Back Next](/content/2026/06/1260153/images/e755fd469f6f42e4d339c7b4a813e557ad2823cae81932694d0e9242abb7e185.jpg)
- Place the left half of the document face-down on the Platen.
- Click Scan.
The left half of the document is scanned and appears in the Stitch-assist window.
![Stitch-assist 2/4 Scans the right side of the document. Place it and click [Scan] Rotate 100° Flower Calenc 2 45 Scan Cancel Back Next](/content/2026/06/1260153/images/24c50a2de2ebfbf0d331da88c7cb829785c17d61b95e13770104cf0a26d1cebe.jpg)
- Place the right half of the document face-down on the Platen.
- Click Scan.
The right half of the document is scanned.
- Adjust the scanned image as required.
Use the icons to swap the left and right halves, rotate the image 180 degrees or enlarge/reduce the image.
![Stitch-assist 3/4 Adjust the position for image synthesis. If you want to continue. Click [Next] Rotate 100° Flower Calendar Cancel Back Next](/content/2026/06/1260153/images/ec2db009f91e1ce860d15c5251684b6a0ee87bece9dcff812029140ffe2a772a.jpg)
• (Swap Left & Right)
Swaps the left and right halves.
Important
This function is not available while the image is enlarged/reduced.
- Rotate 180° Rotate 180°
Rotates right half of the image 180 degrees.
Important
This function is not available while the image is enlarged/reduced.
• (Enlarge)
Enlarges the displayed image.
• (Reduce)
Reduces the displayed image.
• (Full-screen)
Enlarges/reduces the image to display it full-screen.
Note
■ Enlarge/Reduce does not affect the actual size of the scanned image.
- When the document is scanned upside down, the image displayed in the Stitch-assist window will also be upside down. Click Rotate 180° to rotate the image to the correct orientation.
- You can drag the right half of the image from right to left or up and down to adjust the position.
If the left and right halves do not match due to a slanted document, place the document correctly and click Back, then scan again.
- Click Next.
- Drag the mouse to specify the area to be saved, then click OK.

The combined image appears in the Thumbnail window.
When scanning is completed, the Scan Complete dialog box opens. Select Scan or Exit. Select Scan to scan the next document, or select Exit to end.
![Canon MP Navigator EX Scan/Export Photos/Documents (Platon) Document Type: Color Photo Document Size: Stitch-assist (A3) Resolution 300 dpi Use the scanner driver Scan Clear Scan Complete Scan completed. Click [Ext] to end. To continue scanning, load the next document and click [Scan]. Scan Exit Sel…](/content/2026/06/1260153/images/f624383568019805826caf0cddbc2c390df36240067153945d67e4b0d09de885.jpg)
13. Save the scanned images.
→ Saving
Saving as PDF Files
Advanced Guide
Advanced Guide > Scanning > Scanning with the Bundled Application Software > Let's Try Scanning > Easy Scanning with One-click
MP Navigator EX
Easy Scanning with One-click
You can complete from scanning to saving, etc. at one time by simply clicking the corresponding icon.
- Place the document on the Platen.
→ Placing Documents
- Start MP Navigator EX.
Starting MP Navigator EX
The MP Navigator EX Navigation Mode screen or One-click Mode screen appears. Navigation Mode Screen

One-click Mode Screen

Note
- Skip ahead to Step 4 if One-click Mode screen is open.
- Point to One-click.

- Click the corresponding icon.
→ Custom Scan with One-click Tab
One-click Mode Screen
- Select Document Type according to the document to be scanned.
- Set the document size and scanning resolution as required.
- Start scanning.
Scanning starts.
Advanced Guide
Advanced Guide > Scanning > Scanning with the Bundled Application Software > Useful MP Navigator EX Functions
MP Navigator EX
Useful MP Navigator EX Functions
With MP Navigator EX, you can correct/enhance scanned images beautifully, and search saved images quickly.
- Correcting/enhancing images automatically
→ Correcting/Enhancing Images Automatically - Correcting/enhancing images manually
→ Correcting/Enhancing Images Manually - Adjusting color characteristics such as brightness and contrast
Adjusting Images - Searching for lost images
→ Searching Images
• Classifying and sorting images
Classifying Images into Categories
Advanced Guide
Advanced Guide > Scanning > Scanning with the Bundled Application Software > Useful MP Navigator EX Functions > Correcting/Enhancing Images Automatically
MP Navigator EX
Correcting/Enhancing Images Automatically
MP Navigator EX will analyze and correct/enhance scanned images automatically.
- Scan documents into MP Navigator EX and save them, then open the View & Use window from the Navigation Mode screen and select the photos you want to correct/enhance.

Note
See "Let's Try Scanning" to scan images into MP Navigator EX.
- You can also select images saved on a computer.
→ Opening Images Saved on a Computer
- Click Edit/Convert, then click Fix photo images on the list.

The Correct/Enhance Images window opens.

Note
The Correct/Enhance Images window can also be opened by clicking (Image Correction/ Enhancement) on the Toolbar or in the Zoom in dialog box. In that case, only the target image (outlined in orange) can be corrected/enhanced.
- See "Correct/Enhance Images Window" for details on the Correct/Enhance Images window.
- Select the image you want to correct/enhance from the thumbnail list.
The selected image appears in Preview.

Note
If you selected only one image in the View & Use window, the thumbnail list does not appear and only the preview image appears.
- Make sure that Auto is selected.
- Click Auto Photo Fix, Face Sharpener or Digital Face Smoothing.

Important
Once image is corrected with Auto Photo Fix and saved, it cannot be corrected again with Auto Photo Fix. Auto Photo Fix may not be available for images edited using an application, digital camera, etc. manufactured by other companies.
Note
- The Face Sharpener and Digital Face Smoothing effect levels can be changed using the slider that appears by clicking the corresponding buttons.
- When you apply Auto Photo Fix, dark backlit photos will be corrected automatically. If the image is not corrected enough using Auto Photo Fix, it is recommended that you apply Face Brightener on the Manual tab.
→ Correcting/Enhancing Images Manually
6. Click OK.
The entire image is corrected/enhanced automatically and (Correct/Enhance) appears on the upper left of the thumbnail and preview image.

Note
- Click Reset Selected Image to undo the correction/enhancement.
- Select the Apply to all images checkbox to correct/enhance all selected images.
7. Click Save Selected Image or Save All Corrected Images.
You can save corrected/enhanced images as new files.

Note
To save only the images you like, select them and click Save Selected Image. To save all images, click Save All Corrected Images.
■ The file format of corrected/enhanced images is JPEG/Exif.
■ Adobe RGB images are saved as sRGB images.
8. Click Exit.

Important
- The corrections/enhancements will be lost if you exit before saving corrected/enhanced images.
Advanced Guide
Advanced Guide > Scanning > Scanning with the Bundled Application Software > Useful MP Navigator EX Functions > Correcting/Enhancing Images Manually
MP Navigator EX
Correcting/Enhancing Images Manually
You can correct/enhance scanned images manually.
- Scan documents into MP Navigator EX and save them, then open the View & Use window from the Navigation Mode screen and select the photos you want to correct/enhance.

Note
See "Let's Try Scanning" to scan images into MP Navigator EX.
- You can also select images saved on a computer.
→ Opening Images Saved on a Computer
- Click Edit/Convert, then click Fix photo images on the list.

The Correct/Enhance Images window opens.

Note
■ The Correct/Enhance Images window can also be opened by clicking
(Image Correction/
Enhancement) on the Toolbar or in the Zoom in dialog box. In that case, only the target image (outlined in orange) can be corrected/enhanced.
- See "Correct/Enhance Images Window" for details on the Correct/Enhance Images window.

- Select the image you want to correct/enhance from the thumbnail list.
The selected image appears in Preview.

Note
If you selected only one image in the View & Use window, the thumbnail list does not appear and only the preview image appears.
- Click Manual, then click Correct/Enhance.
- Click Face Brightener, Face Sharpener, Digital Face Smoothing or Blemish Remover.
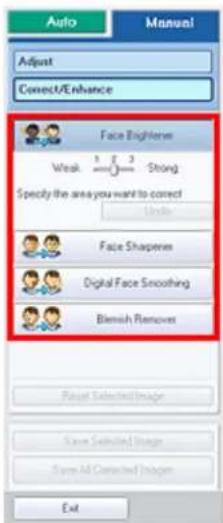
Note
-
The Face Brightener, Face Sharpener and Digital Face Smoothing effect levels can be changed using the slider that appears by clicking the corresponding buttons.
■ Move the cursor over the image. The shape of the cursor changes to + (Cross). -
Drag to select the area you want to correct/enhance, then click OK that appears over the image.

The portion in and around the selected area is corrected/enhanced and (Correct/Enhance) appears on the upper left of the thumbnail and preview image.

Note
■ You can also drag to rotate the rectangle.
- Click Undo to undo the latest correction/enhancement.
- Click Reset Selected Image to cancel all corrections, enhancements and adjustments applied to the selected image.
7. Click Save Selected Image or Save All Corrected Images.
You can save corrected/enhanced images as new files.

Note
- To save only the images you like, select them and click Save Selected Image. To save all images, click Save All Corrected Images.
■ The file format of corrected/enhanced images is JPEG/Exif.
8. Click Exit.

important
■ The corrections/enhancements will be lost if you exit before saving corrected/enhanced images.
Advanced Guide
Advanced Guide > Scanning > Scanning with the Bundled Application Software > Useful MP Navigator EX Functions > Adjusting Images
MP Navigator EX
Adjusting Images
You can make fine adjustments to the overall brightness, contrast, etc. of images.
- Scan documents into MP Navigator EX and save them, then open the View & Use window from the Navigation Mode screen and select the photos you want to adjust.

Note
- See "Let's Try Scanning" to scan images into MP Navigator EX.
-
You can also select images saved on a computer.
Opening Images Saved on a Computer -
Click Edit/Convert, then click Fix photo images on the list.

The Correct/Enhance Images window opens.

Note
The Correct/Enhance Images window can also be opened by clicking (Image Correction/Enhancement) on the Toolbar or in the Zoom in dialog box. In that case, only the target image (outlined in orange) can be corrected/enhanced.
See "Correct/Enhance Images Window" for details on the Correct/Enhance Images window.
- Select the image you want to adjust from the thumbnail list.
The selected image appears in Preview.


Note
If you selected only one image in the View & Use window, the thumbnail list does not appear and only the preview image appears.
- Click Manual, then click Adjust.
- Move the slider of the item you want to adjust and set the effect level.
When you move a slider, (Correct/Enhance) appears on the upper left of the thumbnail and preview image.


Note
- Click Defaults to reset all adjustments.
-
Click Reset Selected Image to cancel all corrections, enhancements and adjustments applied to the selected image.
-
Click Save Selected Image or Save All Corrected Images.
You can save adjusted images as new files.

Note
To save only the images you like, select them and click Save Selected Image. To save all images, click Save All Corrected Images.
■ The file format of adjusted images is JPEG/Exif.
7. Click Exit.

Important
- The adjustments will be lost if you exit before saving adjusted images.
Page top↑
Advanced Guide
Advanced Guide > Scanning > Scanning with the Bundled Application Software > Useful MP Navigator EX Functions > Searching Images
MP Navigator EX
Searching Images
In the View & Use window of the Navigation Mode screen, you can search images saved on your computer and open them in MP Navigator EX. Opened images can be printed, edited, etc.

Note
- Search images in My Box (Scanned/Imported Images), Recently Saved Images or a selected folder and its subfolders. You can also specify folder and search in Specify Folder.
- See "Starting MP Navigator EX" to start MP Navigator EX.
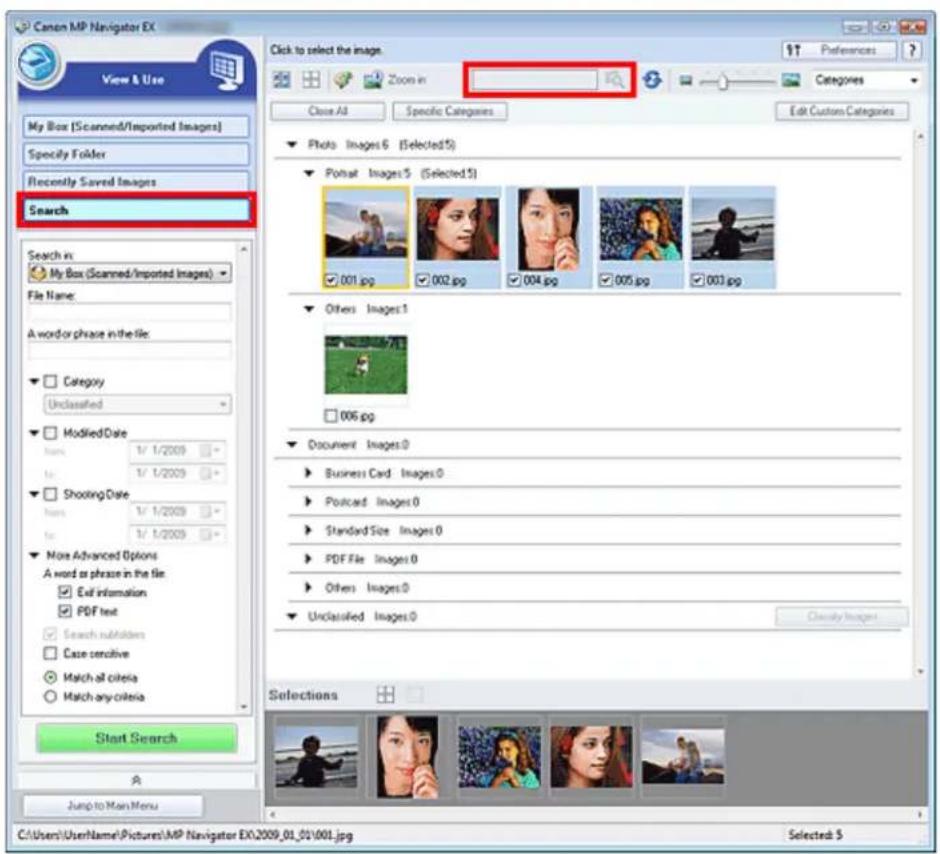
Quick Search


(Text box) on the Toolbar, enter a word or phrase included in the file
name, Exif information or PDF text of the image you want to search for, then click (Search button). For Exif information, text in Maker, Model, Description and User Comment is searched.
Advanced Search
Click Search on the left of the screen to open search options. Enter information of the image you want to search for, then click Start Search.

Start Search
- Search in
If you know where to look for, select the drive, folder or network from Specify Folder.
- File Name
If you know the file name, enter it.
• A word or phrase in the file
Enter a word or phrase included in the items selected in More Advanced Options.

Important
For PDF files, you can only search for those created with MP Navigator EX. You cannot search PDF files created or edited in other applications. Also, searching PDF files is available only when keyword search is set.
For details of creating PDF files that enables keyword search, see "PDF Settings Dialog Box."
■ Password-protected PDF files cannot be searched.
- Category
You can search for images by category.
- Modified Date
To search for images that have been updated in a specific time period, enter the first and last dates of the period.
- Shooting Date
To search for images captured in a specific time period, enter the first and last dates of the period.

Note
Captured date is the date and time of data creation, which are included in the document's Exif information.
• More Advanced Options
• A word or phrase in the file
In A word or phrase in the file, select the items to search. If you select the Exif information
checkbox, text in Maker, Model, Description and User Comment is searched. If you select the PDF text checkbox, text in PDF files is searched.

Important
■ Text in password-protected PDF files cannot be searched.
- Search subfolders
Select this checkbox to search subfolders.
- Case sensitive
Select this checkbox to match case.
- Match all criteria
Searches for files that meet all the specified criteria.
- Match any criteria
Searches for files that meet any of the specified criteria.
- Start Search
Starts search.
Related Topic
▶ View & Use Window
Advanced Guide
Advanced Guide > Scanning > Scanning with the Bundled Application Software > Useful MP Navigator EX Functions > Classifying Images into Categories
MP Navigator EX
Classifying Images into Categories
Display images scanned with MP Navigator EX by category. You can classify unclassified images automatically, and also create custom categories. You can drag and drop an image to move it from one category to another.

Note
If you have classified the images in MP Navigator EX 2.0 or later and then upgrade MP Navigator EX to the latest version, the classification information on the second latest version is transferred upon initial startup. After the initial startup, the classification information cannot be transferred.
- Scan documents into MP Navigator EX and save them, then open the View & Use window from the Navigation Mode screen.

Note
■ See "Let's Try Scanning" to scan images into MP Navigator EX.
- You can also select images saved on a computer.
Opening Images Saved on a Computer
- In
Categories

(Sort by), select Categories.
Images are automatically sorted by category and appear in the Thumbnail window.

Images are sorted into the following categories.
Photos: Portrait, Others
Documents: Business Card, Postcard, Standard Size, PDF File, Others
Custom categories: Displays your custom categories.
To create custom categories, see "Creating Custom Categories."
Unclassified: Displays images that have not yet been classified.

Note
- Click Classify Images to classify images displayed in Unclassified automatically. Click Cancel to stop.
■ Classification may take time if there are many images to classify.

Important
Even if you classify images saved in removable media such as USB flash drive and external hard disk, the classification information will be deleted once you remove the media. From the next time, the images are classified to Unclassified.
Images cannot be classified when Recently Saved Images is selected in the View & Use window.

Note
Some images may not be detected correctly and thus may be classified into wrong categories. In that case, drag and drop the image to the correct category.
■ Images saved in network folders may not be classified.
- You can search for images by category. See "Searching Images" for details.
Creating Custom Categories
- In the View & Use window, sort images by category and click Edit Custom Categories.
The Edit Custom Categories dialog box opens.
- Click Add to List.
The Add Category dialog box opens.
- Enter Category name and click OK.

Note
■ You can create up to 20 custom categories.
■ Up to 50 single-byte characters can be used for a category name.
■ Double-click a created category to open the Change Category Name dialog box in which you can change the category name.
- Select a custom category and click Delete to delete it.
Related Topic
▶ View & Use Window
Page top↑
Advanced Guide
Advanced Guide > Scanning > Scanning with the Bundled Application Software > Utilizing Images in MP Navigator EX
MP Navigator EX
Utilizing Images in MP Navigator EX
You can scan images using MP Navigator EX and edit or print the saved images.
See the corresponding sections below for details on saving scanned images.
• Saving scanned images to computer
Saving
- Saving scanned image as PDF Files
Saving as PDF Files
See the corresponding sections below for details on using images/files.
- Creating/editing PDF files from scanned images
Creating/Editing PDF Files - Printing multiple scanned images at one time or printing at specific size, quality, etc.
→ Printing Documents - Printing scanned photos
→ Printing Photos - Sending scanned images via e-mail
→ Sending via E-mail - Correcting/enhancing scanned images or converting them to text
Editing Files
- Setting passwords for created PDF files
Setting Passwords for PDF Files Opening/Editing Password-protected PDF Files
Advanced Guide
Advanced Guide > Scanning > Scanning with the Bundled Application Software > Utilizing Images in MP Navigator EX > Saving
MP Navigator EX
Saving
Save images scanned with MP Navigator EX to a computer.
- Select the checkboxes of the images you want to save, then click Save.

- In the Save dialog box, specify the save settings.
Specify the destination folder, file name and file type.
Save Dialog Box
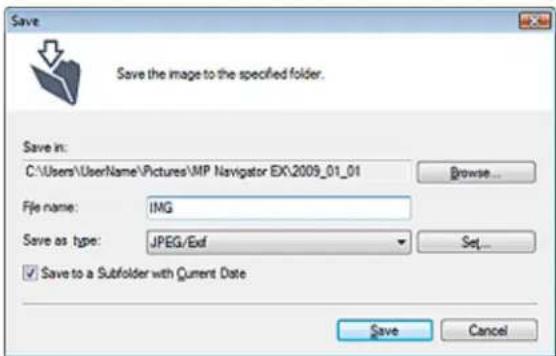
Important
- You cannot select JPEG/Exif when Document Type is Text(OCR).
Note
By default, the following folders are specified as the destination folders. Windows Vista: MP Navigator EX folder in Pictures folder Windows XP: MP Navigator EX folder in My Pictures folder Windows 2000: MP Navigator EX folder in My Pictures folder
3. Click Save.
Scanned images are saved according to the settings.
To further use/edit the scanned images on MP Navigator EX, click Open saved location in the Save Complete dialog box.
Creating/Editing PDF Files
→ Printing Documents
→ Printing Photos
→ Sending via E-mail
Editing Files
Advanced Guide
Advanced Guide > Scanning > Scanning with the Bundled Application Software > Utilizing Images in MP Navigator EX > Saving as PDF Files
MP Navigator EX
Saving as PDF Files
Save images scanned with MP Navigator EX as PDF files.
- Select the checkboxes of the images you want to save, then click Save as PDF file.
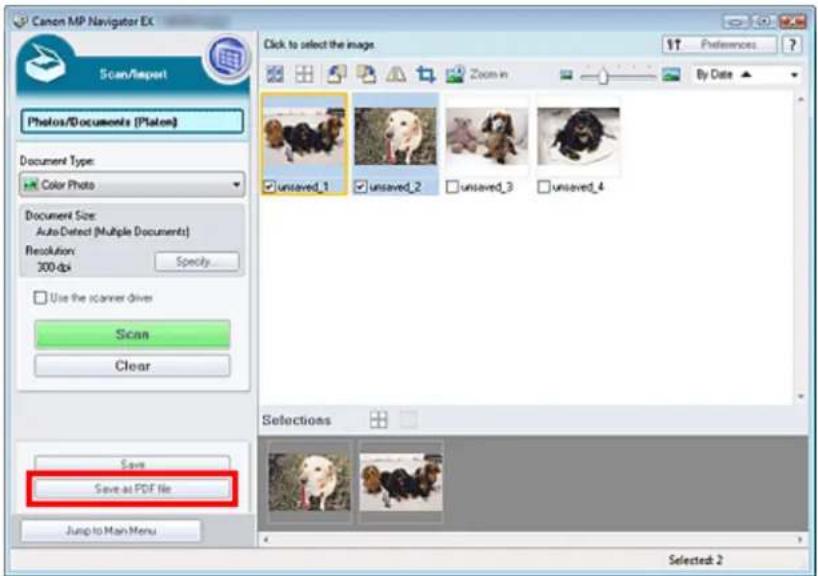
- In the Save as PDF file dialog box, specify the save settings.
Specify the file type, file name and destination folder.
Save as PDF file Dialog Box
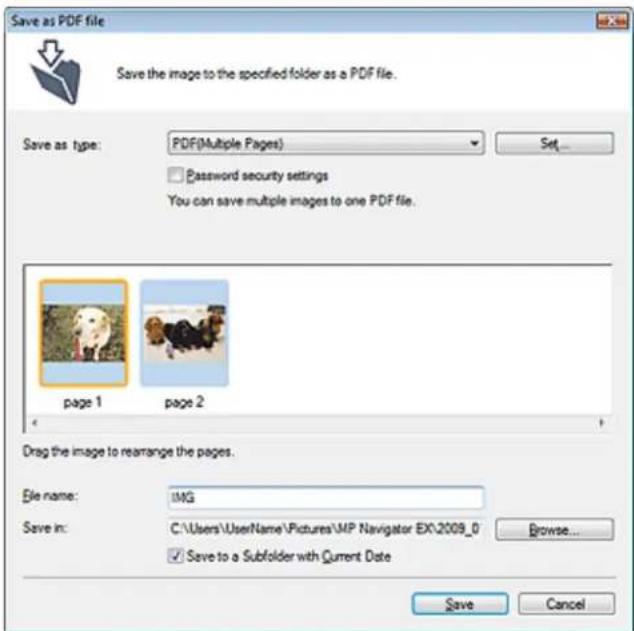
Select from the following PDF file types:
Save each of the selected images as a separate PDF file.
- PDF(Multiple Pages)
Save multiple images in one PDF file.

Note
- PDF(Multiple Pages) is displayed when multiple images are selected.
- PDF(Add Page)
Add the scanned images to a PDF file. The images are added to the end of the PDF file. You cannot rearrange the pages of the PDF file to which the images are added.

Important
Images can only be added to PDF files created with MP Navigator EX. You cannot specify PDF files created with other applications. PDF files edited in other applications cannot be specified as well.
If a password-protected PDF file is edited, the passwords will be deleted. Reset the passwords.

Note
- By default, the following folders are specified as the destination folders.
Windows Vista: MP Navigator EX folder in Pictures folder
Windows XP: MP Navigator EX folder in My Pictures folder
Windows 2000: MP Navigator EX folder in My Pictures folder - You can set passwords for PDF files.
Setting Passwords for PDF Files
3. Click Save.
Scanned images are saved according to the settings.
To further use/edit the scanned images on MP Navigator EX, click Open saved location in the Save Complete dialog box.
Creating/Editing PDF Files
→ Printing Documents
→ Printing Photos
→ Sending via E-mail
→ Editing Files
Advanced Guide
Advanced Guide > Scanning > Scanning with the Bundled Application Software > Utilizing Images in MP Navigator EX > Creating/Editing PDF Files
MP Navigator EX
Creating/Editing PDF Files
Create/edit PDF files using MP Navigator EX. After scanning documents and saving them, open the View & Use window to create PDF files and add/delete pages, rearrange the page order, etc.

Important
- You can create or edit up to 99 pages using MP Navigator EX.
Note
- See "Let's Try Scanning" to scan images into MP Navigator EX.
- You can also select images saved on a computer.
Opening Images Saved on a Computer
Creating/Editing PDF Files with MP Navigator EX
1. Select images and click PDF.

Note
■ You can select PDF, JPEG, TIFF and BMP files.
2. Click Create/Edit PDF file on the list.

Important
For PDF files, you can only edit those created with MP Navigator EX. You cannot edit PDF files created with other applications. PDF files edited in other applications cannot be edited as well.

Note
If a password-protected PDF file is selected, you will be prompted to enter the password.
→ Opening/Editing Password-protected PDF Files
3. Add/delete pages as required.
To add an existing file, click Add Page and select the file. To delete a page, select it and click Delete Selected Pages.


Note
■ You can add PDF, JPEG, TIFF and BMP files.
- When adding a password-protected PDF file, you will be prompted to enter the password.
4. Rearrange the page order as required.
Use the icons to rearrange the order. Alternatively, drag and drop the thumbnail to the target location.

Note
- See "Create/Edit PDF file Window" for details on the Create/Edit PDF file window.
5. Click Save Selected Pages or Save All Pages.
The Save as PDF file dialog box opens.
Save as PDF file Dialog Box

Important
- You cannot save images scanned at 10501 pixels or more in the vertical and horizontal directions.
If a password-protected PDF file is edited, the passwords will be deleted. Reset the passwords in the Save as PDF file dialog box.
Setting Passwords for PDF Files
6. Specify the save settings in the Save as PDF file dialog box, then click Save.
Images are saved according to the settings.
Opening PDF Files in an Application
You can open PDF files created with MP Navigator EX in an associated application and edit or print them.
1. Select PDF files and click PDF.

Important
For PDF files, you can only select those created with MP Navigator EX. You cannot select PDF files created with other applications. PDF files edited in other applications cannot be selected
as well.
2. Click Open PDF file on the list.
The application associated with the .pdf file extension by the operating system starts.

Important
- Password-protected PDF files cannot be opened in applications not supporting PDF security.
- Files may not open if an application that can be associated with PDF files is not installed.
3. Use the application to edit/print the file.
For details, refer to the application's manual.

Important
In some applications, the commands (print, edit, etc.) restricted by Permissions Password may differ from those in MP Navigator EX.
Advanced Guide
Advanced Guide > Scanning > Scanning with the Bundled Application Software > Utilizing Images in MP Navigator EX > Printing Documents
MP Navigator EX
Printing Documents
You can print multiple scanned images at one time, print at specific quality, etc. using MP Navigator EX.
- Scan documents into MP Navigator EX and save them, then open the View & Use window from the Navigation Mode screen and select images.

Note
- See "Let's Try Scanning" to scan images into MP Navigator EX.
-
You can also select images saved on a computer.
Opening Images Saved on a Computer -
Click Print, then click Print Document on the list.


Important
If a password-protected PDF file is selected, you will be prompted to enter the password.
→ Opening/Editing Password-protected PDF Files
- Specify print settings as required.
In the displayed dialog box, specify print count, quality, scale, etc.
→ Print Document Dialog Box
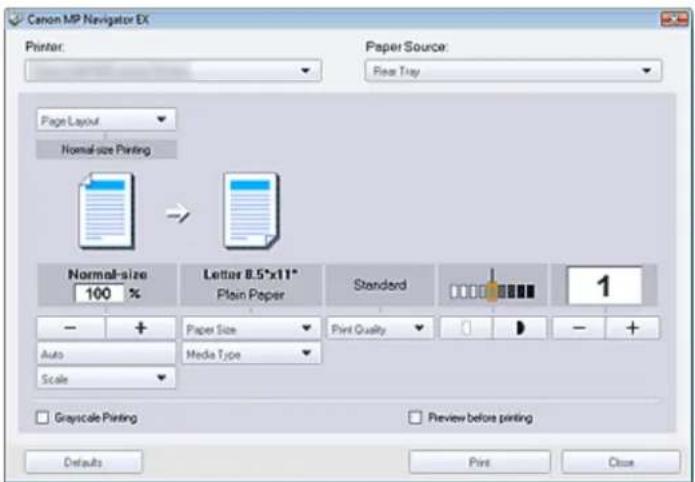

Important
At normal-size (100%), some images may be printed small or with some portions cropped. In that case, select Auto to resize the print in proportion to the paper size.
4. Click Print.
Printing starts.

Note
- When printing a multiple-page PDF file via Print Document, printing may take time depending on your computer. In that case, follow these steps and change settings.
- From the Start menu, select Control Panel.
- Click Printers.
- Right-click the icon of your printer and click Properties.
The printer properties dialog box opens. - Click the Advanced tab.
- Select Spool print documents so program finishes printing faster.
- Select Start printing after last page is spooled.
- After printing, return the setting on the Advanced tab to Start printing immediately.
- To cancel while spooling, click Cancel. To cancel while printing, click Cancel Printing in the confirmation window for the printer status. To open a confirmation window for the printer status, click printer icon on the taskbar.
Advanced Guide
Advanced Guide > Scanning > Scanning with the Bundled Application Software > Utilizing Images in MP Navigator EX > Printing Photos
MP Navigator EX
Printing Photos
You can print photos using MP Navigator EX or an application that accompanies the machine. After scanning documents and saving them, open the View & Use window to select how you want to print the photos.
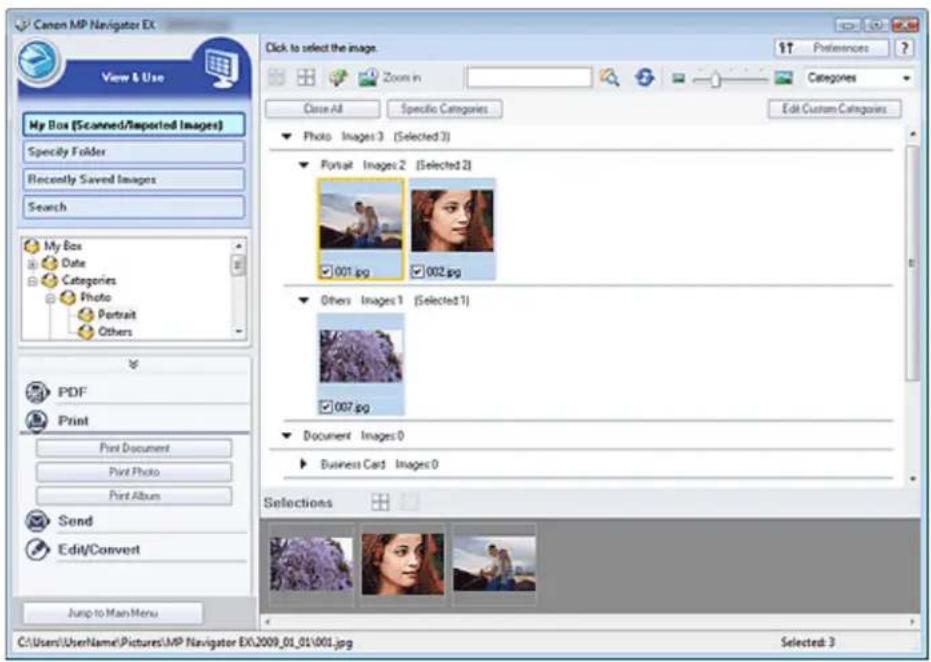

Note
- See "Let's Try Scanning" to scan images into MP Navigator EX.
- You can also select images saved on a computer.
Opening Images Saved on a Computer
When Printing Photos Using Easy-PhotoPrint EX
You can use Easy-PhotoPrint EX to print scanned photos at high quality or to layout and print images.
- Select images and click Print.
- Click Print Photo or Print Album on the list.
Easy-PhotoPrint EX starts. See "Printing Photos" for details.

Note
If Easy-PhotoPrint EX is not installed, print with MP Navigator EX.
When Printing Photos Using MP Navigator EX
- Select images and click Print.
- Click Print Photo on the list.
3. Specify print settings as required.
In the displayed dialog box, specify paper size, print count, etc.
→ Print Photo Dialog Box

4. Click Print.
Printing starts.

Note
- To cancel while spooling, click Cancel. To cancel while printing, click Cancel Printing in the confirmation window for the printer status. To open a confirmation window for the printer status, click printer icon on the taskbar.
Advanced Guide
Advanced Guide > Scanning > Scanning with the Bundled Application Software > Utilizing Images in MP Navigator EX > Sending via E-mail
MP Navigator EX
Sending via E-mail
Send scanned images via e-mail.

Important
■ MP Navigator EX is compatible with the following e-mail software programs:
- Windows Mail (Windows Vista)
- Outlook Express (Windows XP/Windows 2000)
- Microsoft Outlook
(If an e-mail software program does not operate properly, check that the program's MAPI is enabled. To enable MAPI, refer to the manual of the e-mail software program.)
- Scan documents into MP Navigator EX and save them, then open the View & Use window from the Navigation Mode screen and select images.

Note
- See "Let's Try Scanning" to scan images into MP Navigator EX.
-
You can also select images saved on a computer.
Opening Images Saved on a Computer -
Click Send, then click Attach to E-mail on the list.
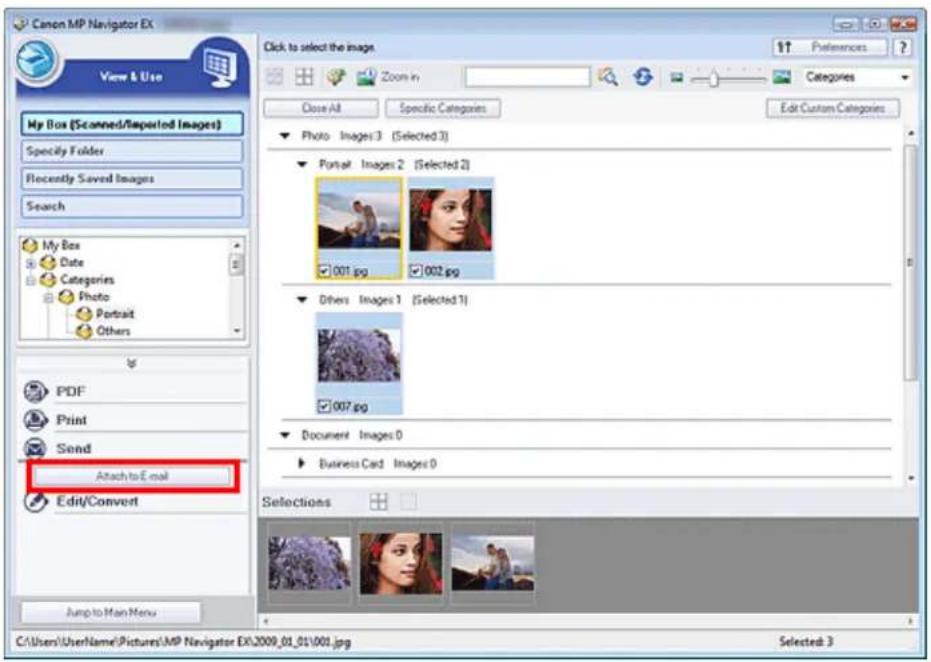
- Set save options as required.
Specify the destination folder and file name.
→ Send via E-mail Dialog Box


Note
- You can select a compression type when sending JPEG images via e-mail. Click Set... to open a dialog box and select a compression type from High(Low Compression), Standard or Low(High Compression).
- Click OK.
Files are saved according to the settings, and the e-mail software program starts.
- Specify the recipient, enter the subject and message, then send e-mail.
For details, refer to the manual of the e-mail software program.
Page top↑
Advanced Guide
Advanced Guide > Scanning > Scanning with the Bundled Application Software > Utilizing Images in MP Navigator EX > Editing Files
MP Navigator EX
Editing Files
You can edit images or convert them to text using MP Navigator EX or an application that accompanies the machine. After scanning documents and saving them, open the View & Use window to select what you want to do with the images.


Note
See "Let's Try Scanning" to scan images into MP Navigator EX.
- You can also select images saved on a computer.
Opening Images Saved on a Computer
Correcting Photo Images
You can correct/enhance images in the Correct/Enhance Images window.
- Select images and click Edit/Convert.
- Click Fix photo images on the list.
The Correct/Enhance Images window opens.
- Correct/enhance images in the Correct/Enhance Images window.

Note
See "Correct/Enhance Images Window" for details on the Correct/Enhance Images window.
- See the corresponding sections below for correcting/enhancing images.
→ Correcting/Enhancing Images Automatically
→ Correcting/Enhancing Images Manually
Converting Documents to Text
Scan text in scanned magazines and newspapers and display it in Notepad (included with Windows).

Important
■ PDF files cannot be converted to text.
-
Select images and click Edit/Convert.
-
Click Convert to text file on the list.
Notepad (included with Windows) starts and editable text appears.

Note
- Only text written in languages that can be selected on the General tab can be extracted to Notepad (included with Windows). Click Set... on the General tab and specify the language according to the language of the document to be scanned.
When scanning multiple documents, you can collect the extracted text into one file.
→ General Tab
■ Text displayed in Notepad (included with Windows) is for guidance only. Text in the image of the following types of documents may not be detected correctly. - Documents containing text with font size outside the range of 8 points to 40 points (at 300 dpi)
- Slanted documents
- Documents placed upside down or documents with text in the wrong orientation (rotated characters)
- Documents containing special fonts, effects, italics, or hand-written text
- Documents with narrow line spacing
- Documents with colors in the background of text
- Documents containing multiple languages
Advanced Guide
Advanced Guide > Scanning > Scanning with the Bundled Application Software > Utilizing Images in MP Navigator EX > Setting Passwords for PDF Files
MP Navigator EX
Setting Passwords for PDF Files
Set passwords for opening, editing and printing PDF files.
You can set two passwords: one for opening the file and one for editing/printing it.

Important
In Windows 2000, Internet Explorer 5.5 Service Pack 2 or later is required to use this function.
- You will not be able to open/edit the file if you forget the password. Record your passwords in a safe place for future reference.
- Password-protected PDF files cannot be opened in applications not supporting PDF security.
In some applications, the commands (print, edit, etc.) restricted by Permissions Password may differ from those in MP Navigator EX.
- Password-protected PDF files cannot be searched by text from the View & Use Window.
- Scan documents into MP Navigator EX, then click Save as PDF file.
Alternatively, edit existing files in the Create/Edit PDF file window, then click Save Selected Pages or Save All Pages.
The Save as PDF file dialog box opens.

Important
Passwords cannot be set when images are automatically saved after scanning, such as when scanning from the One-click Mode screen or scanning using the Operation Panel of the machine.

Note
■ See "Let's Try Scanning" to scan images.
- See "Creating/Editing PDF Files" to create PDF files from existing images or to edit files.
- Select the Password security settings checkbox.


The Password Security -Settings dialog box opens.

Note
- You can also open the Password Security -Settings dialog box by clicking Set..., then selecting Password Security for Security in the PDF Settings dialog box.

- Select the Require a password to open the document or Use a password to restrict printing and editing of the document and its security settings checkbox, then enter a password.
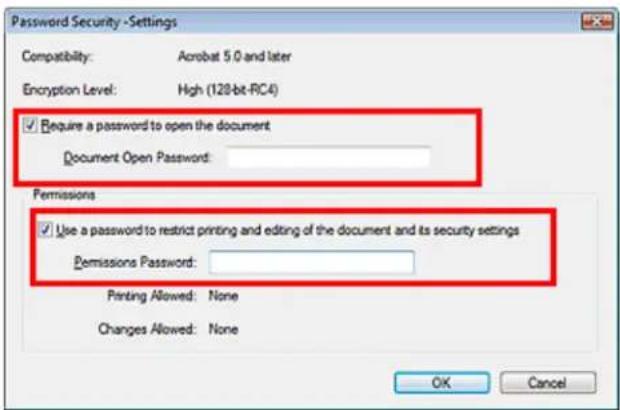

Important
- Up to 32 single-byte alphanumeric characters can be used for the password. Passwords are case sensitive.
-
Select both checkboxes to set both Document Open Password and Permissions Password. You cannot use the same password for both.
-
Click OK.
The Confirm Document Open Password or Confirm Permissions Password dialog box opens.
Document Open Password
Permissions Password

5. Re-enter the password and click OK.
The Save as PDF file dialog box returns.

Important
If you close the Save as PDF file dialog box without clicking Save, the settings in the Password Security -Settings dialog box will be deleted.
Passwords are deleted once the file is edited. Reset the passwords when saving edited files.

Note
If you set the passwords via the PDF Settings dialog box, the PDF Settings dialog box returns. Click OK. The Save as PDF file dialog box returns.
6. Click Save.
Files are saved according to the settings.
Related Topic
Opening/Editing Password-protected PDF Files
Advanced Guide
Advanced Guide > Scanning > Scanning with the Bundled Application Software > Utilizing Images in MP Navigator EX > Opening/Editing Password-protected PDF Files
MP Navigator EX
Opening/Editing Password-protected PDF Files
Enter a password to open or edit/print password-protected PDF files.
Password entry method varies by operation. The following procedures are examples only.

Important
- You can open, edit or print only PDF files whose passwords were set with MP Navigator EX. You cannot edit PDF files edited in other applications or whose passwords were set with other applications. Only MP Navigator EX version 1.1 and 2.0 or later supports opening, editing and printing password-protected PDF files.
In Windows 2000, Internet Explorer 5.5 Service Pack 2 or later is required to open, edit or print password-protected PDF files.
■ Passwords are case sensitive. - You can create or edit up to 99 pages using MP Navigator EX.
Entering a Password to Open a File
- In the View & Use window, select the PDF file you want to open and click Zoom in. Alternatively, double-click the PDF file.
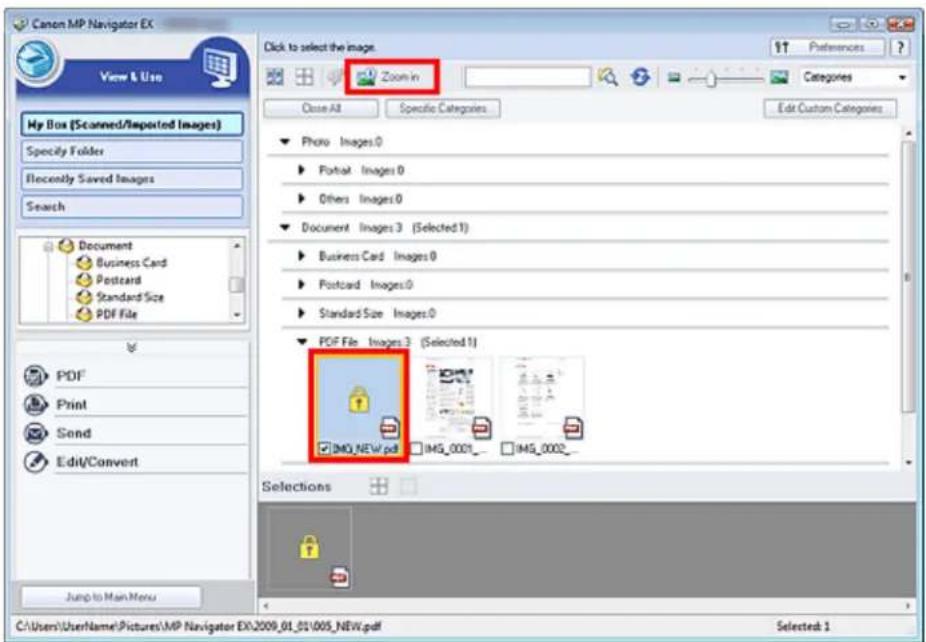

Note
- Only the Document Open Password will be required. The Permissions Password will not be required.
If the Zoom in dialog box with a lock icon opens, click Enter Password.

- The Password dialog box opens. Enter the password and click OK.

The PDF file opens in the Zoom in dialog box.

Note
- To reopen the file after closing the Zoom in dialog box, re-enter the password.
Entering a Password (Permissions Password) to Edit or Print a File
- In the View & Use window, select PDF files and click PDF or Print.

- To create a PDF file or edit the file, select Create/Edit PDF file on the list. To print the file, click Print Document.
In the Password dialog box, you will be prompted to enter a password.
!['IMG_0001.pdf' is protected. Please enter a 'permissions password'. Click [Cancel] to cancel the process. Enter Password: OK Cancel](/content/2026/06/1260153/images/550d631fac27f47d8b5350a6e92f924804d0da2c6c04ea8079353b8e66683f12.jpg)

Note
If the Document Open Password is set as well, the Document Open Password will be required, then the Permissions Password will be required.
- Enter the password and click OK.
The corresponding dialog box opens.

Important
If a password-protected PDF file is edited, the passwords will be deleted. Reset the passwords. Setting Passwords for PDF Files
Related Topic
Setting Passwords for PDF Files
Advanced Guide
Advanced Guide > Scanning > Scanning with the Bundled Application Software > MP Navigator EX Screens
MP Navigator EX
MP Navigator EX Screens
Learn about the screens and functions of MP Navigator EX.
Scan/Import Documents or Images Tab
→ Photos/Documents (Platen) Screen (Scan/Import Window)
- Scan Settings Dialog Box (Photos/Documents)
- Save Dialog Box
- Save as PDF file Dialog Box
View & Use Images on your Computer Tab
→ View & Use Window
• Create/Edit PDF file Window
• Print Document Dialog Box
• Print Photo Dialog Box
- Send via E-mail Dialog Box
• Correct/Enhance Images Window
Custom Scan with One-click Tab / One-click Mode Screen
Auto Scan Dialog Box
→ Save Dialog Box (One-click Mode Screen)
→ PDF Dialog Box
→ Mail Dialog Box
OCR Dialog Box
→ Custom Dialog Box
Preferences Dialog Box
→ General Tab
Scanner Button Settings Tab (Save)
Advanced Guide
Advanced Guide > Scanning > Scanning with the Bundled Application Software > MP Navigator EX Screens > Navigation Mode Screen
MP Navigator EX
Navigation Mode Screen
This is one of the startup screens of MP Navigator EX.
Point to the icon at the top of the screen to display each tab. Use each tab depending on what you want to do.

- Scan/Import
Scan Photos and Documents.
Scan/Import Documents or Images Tab
• View & Use
You can open images saved on a computer and print them or attach them to e-mail. You can also edit them using an application that accompanies the machine.
View & Use Images on your Computer Tab
- One-click
You can complete from scanning to saving, etc. at one time by simply clicking the corresponding icon.
→ Custom Scan with One-click Tab

(Switch Mode)
Switches to One-click Mode screen. In the One-click Mode screen, you can complete from scanning to saving, etc. at one time by simply clicking the corresponding icon.
One-click Mode Screen
• Show this window at startup
Select this checkbox to open the Main Menu at startup. If this checkbox is not selected, the last used screen appears.

Preferences
Preferences
The Preferences dialog box opens. In the Preferences dialog box, you can make advanced settings to MP Navigator EX functions.
→ Preferences Dialog Box

(Guide)
Opens this guide.
Advanced Guide
Advanced Guide > Scanning > Scanning with the Bundled Application Software > MP Navigator EX Screens > Scan/Import Documents or Images Tab
MP Navigator EX
Scan/Import Documents or Images Tab
Point to Scan/Import in the Navigation Mode screen to display the Scan/Import Documents or Images tab.
Scan Photos and Documents.
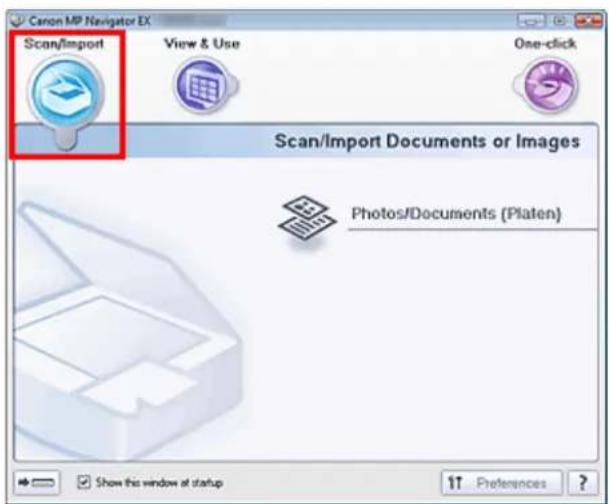
• Photos/Documents (Platen)
Opens the Scan/Import window. Scan photos and documents placed on the Platen.
→ Photos/Documents (Platen) Screen (Scan/Import Window)
• (Switch Mode)
Switches to One-click Mode screen. In the One-click Mode screen, you can complete from scanning to saving, etc. at one time by simply clicking the corresponding icon.
One-click Mode Screen
• Show this window at startup
Select this checkbox to open the Main Menu at startup. If this checkbox is not selected, the last used screen appears.
• Preferences Preferences
The Preferences dialog box opens. In the Preferences dialog box, you can make advanced settings to MP Navigator EX functions.
→ Preferences Dialog Box
• ? (Guide)
Opens this guide.
Advanced Guide
Advanced Guide > Scanning > Scanning with the Bundled Application Software > MP Navigator EX Screens > View & Use Images on your Computer Tab
MP Navigator EX
View & Use Images on your Computer Tab
Point to View & Use in the Navigation Mode screen to display the View & Use Images on your Computer tab.
You can open images saved on a computer and print them or attach them to e-mail. You can also edit them using an application that accompanies the machine.

• My Box (Scanned/Imported Images)
Opens the View & Use window with My Box (Scanned/Imported Images) selected.
You can open and use images saved in My Box.
My Box is a specific folder for saving images scanned with MP Navigator EX.

Note
■ The following folders are specified by default.
Windows Vista: MP Navigator EX folder in Pictures folder
Windows XP: MP Navigator EX folder in My Pictures folder
Windows 2000: MP Navigator EX folder in My Pictures folder
- Specify Folder
Opens the View & Use window with Specify Folder selected.
You can open and use images saved in specific folders.
• Recently Saved Images
Opens the View & Use window with Recently Saved Images selected.
You can open and use "Scanned/Imported Images" and images that have been "Attached to E-mail" or "Sent to Application" recently.
→ View & Use Window

(Switch Mode)
Switches to One-click Mode screen. In the One-click Mode screen, you can complete from scanning to saving, etc. at one time by simply clicking the corresponding icon.
One-click Mode Screen
• Show this window at startup
Select this checkbox to open the Main Menu at startup. If this checkbox is not selected, the last used screen appears.

Preferences
Preferences
The Preferences dialog box opens. In the Preferences dialog box, you can make advanced settings to MP Navigator EX functions.
→ Preferences Dialog Box

Opens this guide.
Related Topic
Opening Images Saved on a Computer
Page top↑
Advanced Guide
Advanced Guide > Scanning > Scanning with the Bundled Application Software > MP Navigator EX Screens > Custom Scan with One-click Tab
MP Navigator EX
Custom Scan with One-click Tab
Point to One-click in the Navigation Mode screen to display the Custom Scan with One-click tab.
You can complete from scanning to saving, etc. at one time by simply clicking the corresponding icon.

- Auto Scan
Scan documents by automatically detecting the document type. File format is automatically set. Files are saved to a computer. You can apply Auto Photo Fix as required.
When you click this icon, the Auto Scan dialog box opens and you can specify the save settings.
Auto Scan Dialog Box
- Save to PC
Scan documents or photos and save them to a computer. The document type can be detected automatically.
When you click this icon, the Save dialog box opens and you can specify the scan/save settings.
→ Save Dialog Box (One-click Mode Screen)
- Save as PDF file
Scan documents and save them as PDF files.
When you click this icon, the PDF dialog box opens and you can specify the scan/save and application settings.
→ PDF Dialog Box
- Attach to E-mail
Scan documents or photos and attach them to e-mail.
When you click this icon, the Mail dialog box opens and you can specify the scan/save and e-mail software program settings.
Mail Dialog Box
• OCR
Scan text documents then extract text in the image and display it in Notepad (included with Windows).
When you click this icon, the OCR dialog box opens and you can specify the scan/save settings.
OCR Dialog Box

Note
■ For further procedures, refer to the application's manual.
- Custom
Scan documents and open them in a specified application. Document type is automatically detected.
When you click this icon, the Custom dialog box opens and you can specify the scan/save and application settings.
→ Custom Dialog Box

Note
■ For further procedures, refer to the application's manual.
- Start scanning by clicking the button
Select this checkbox and click an icon to start scanning immediately.

(Switch Mode)
Switches to One-click Mode. The One-click Mode screen appears.
One-click Mode Screen
• Show this window at startup
Select this checkbox to open the Main Menu at startup. If this checkbox is not selected, the last used screen appears.

Preferences
Preferences
The Preferences dialog box opens. In the Preferences dialog box, you can make advanced settings to MP Navigator EX functions.
→ Preferences Dialog Box

(Guide)
Opens this guide.

Important
The following restrictions apply when you scan with Document Type set to Auto Mode in the Save or Custom dialog box. When you want to convert text in the scanned image to text data, specify Document Type (do not select Auto Mode).
Related Topic
▶ Easy Scanning with One-click
Advanced Guide
Advanced Guide > Scanning > Scanning with the Bundled Application Software > MP Navigator EX Screens > Photos/Documents (Platen) Screen (Scan/Import Window)
MP Navigator EX
Photos/Documents (Platen) Screen (Scan/Import Window)
Point to Scan/Import in the Navigation Mode screen and click Photos/Documents (Platen) to open the Photos/Documents (Platen) screen (Scan/Import window).
Open this window to scan documents from the Platen.

(1) Settings and Operation Buttons
(2) Toolbar
(3) Thumbnail Window
(4) Selected Images Area
Settings and Operation Buttons

(View & Use)
Click this when you want to open images and PDF files saved on your computer. The View & Use window opens.
→ View & Use Window
• Photos/Documents (Platen)
Displays the screen for scanning photos, documents, magazines and other printed materials.
- Document Type
Select the type of document to be scanned.
Scanning photos: Color Photo or Black and White Photo
Scanning text documents: Color Document, Black and White Document or Text(OCR)
Scanning magazines: Magazine(Color)

Important
- You cannot select Document Type if the Use the scanner driver checkbox is selected.
- Specify...
Specify the document size, resolution, and other advanced scan settings.
→ Scan Settings Dialog Box (Photos/Documents)
Important
- Specify... is not available if the Use the scanner driver checkbox is selected.
- Use the scanner driver
Select this checkbox when you want to scan with ScanGear (scanner driver). Use ScanGear (scanner driver) to correct images and adjust colors when scanning.
- Scan
Scanning starts.

Note
This button changes to Open Scanner Driver when you select the Use the scanner driver checkbox.
- Open Scanner Driver
ScanGear (scanner driver) starts.
See "ScanGear (Scanner Driver) Screens" for details on ScanGear (scanner driver) screens.

Note
This button changes to Scan when you deselect the Use the scanner driver checkbox.
- Clear
Delete all images in the Thumbnail window.

Note
Images not saved on a computer will be deleted. To keep important images, use Save or other methods to save them to a computer before clicking Clear.
- Save
Save the selected images. Click to open the Save dialog box and specify the save settings.
Save Dialog Box
- Save as PDF file
Save the selected images as PDF files. Click to open the Save as PDF file dialog box and specify the save settings.
Save as PDF file Dialog Box
Jump to Main Menu Jump to Main Menu
Jumps to the Main Menu.
Toolbar

Preferences
Preferences
The Preferences dialog box opens. In the Preferences dialog box, you can make advanced settings to MP Navigator EX functions.
Preferences Dialog Box
• ? (Guide)
Opens this guide.
- Edit Tools

(Select All)
Selects all images in the Thumbnail window.

(Cancel All)
Cancels all image selections in the Thumbnail window.

(Rotate Left)
Rotates the target image (outlined in orange) 90 degrees counter-clockwise.

(Rotate Right)
Rotates the target image (outlined in orange) 90 degrees clockwise.

(Invert)
Inverts the target image (outlined in orange) horizontally.

(Trimming)
Trims the target image (outlined in orange) in the Thumbnail window. Trimming is the act of selecting the area you want to keep in a photo and discarding the rest. Click this button to open the Crop window and specify the trimming frame.

Zoom in
Enlarges the target image (outlined in orange). You can also enlarge the image by double-clicking it.

(Display Size)
Changes the size of images in the Thumbnail window.


(Sort by)
Sorts the images in the Thumbnail window by category or by date (ascending or descending).
Thumbnail Window
- Thumbnail Window
Scanned images are displayed.
When you select the checkbox of an image, the image appears in the Selected Images area.

Note
- Thumbnails may appear as "?" when there is not enough memory to display the images.
When Images are Sorted by Categories
- Close All / Open All

Hides all images.

Displays all images.

Note
- Click Close All to change to Open All.
Selected Images Area

(Cancel All)
Cancels the selection of all images in the Selected Images area.

(Cancel Selection)
Cancels the selection of the target image (outlined in orange) in the Selected Images area.
- Selected Images Area
Images selected in the Thumbnail window are displayed.
Related Topic
▶ Scanning Photos and Documents
Page top↑
Advanced Guide
Advanced Guide > Scanning > Scanning with the Bundled Application Software > MP Navigator EX Screens > Scan Settings Dialog Box (Photos/Documents)
MP Navigator EX
Scan Settings Dialog Box (Photos/Documents)
The Scan Settings dialog box opens when you click Specify... in the Scan/Import window. In the Scan Settings dialog box, you can make advanced scan settings.

- Document Type
Select the type of document to be scanned.
Scanning photos: Color Photo or Black and White Photo
Scanning text documents: Color Document, Black and White Document or Text(OCR)
Scanning magazines: Magazine(Color)
Important
- To scan correctly, select a document type that matches the document to be scanned.
- Document Size
Select the size of the document to be scanned.
When you select Custom, a screen in which you can specify the document size appears. Select a Units, then enter the Width and Height and click OK.

Important
- When you select Auto Detect, the image may not be scanned at the correct position and size. In that case, change the size to the actual document size (A4, Letter, etc.) and align a corner of the document with the corner at the arrow (alignment mark) of the Platen.
- You cannot select Auto Detect (Multiple Documents) or Auto Detect when Document Type is Text(OCR).
- Scanning Resolution
Select the resolution at which to scan documents.
→ Resolution

Note
The following scanning resolutions can be specified when Document Type is Text(OCR). 300 dpi / 400 dpi
- Descreen
Select this checkbox to reduce moire patterns.
Printed photos and pictures are displayed as a collection of fine dots. "Moire" is a phenomenon where uneven gradation or a stripe pattern appears when such photos or pictures printed with fine dots are scanned. Descreen is the function for reducing this moire effect.

Important
- You cannot select this checkbox when Document Type is Color Photo, Black and White Photo or Text(OCR).

Note
■ Scanning takes longer than usual when you enable Descreen.
- Reduce Show-through
Select this checkbox to sharpen text in a document or reduce show-through in newspapers.

Important
- You cannot select this checkbox when Document Type is Color Photo, Black and White Photo or Text(OCR).

Note
- Select this checkbox when Document Type is text document and show-through is apparent in the scanned image.
- Unsharp Mask
Select this checkbox to emphasize the outline of the subjects and sharpen the image.

Important
- You cannot select this checkbox when Document Type is Text(OCR).
- Remove gutter shadow
Select this checkbox to correct shadows that appear between pages when scanning open booklets.

Important
- You cannot select this checkbox when Document Size is Auto Detect, Auto Detect (Multiple Documents) or Stitch Assist.
- Align the document correctly with the alignment mark on the Platen.

Note
- Use ScanGear's Advanced Mode tab to correct gutter shadows when scanning non-standard size documents or when custom cropping frames are set. For details, see Gutter Shadow Correction in "Image Settings" (ScanGear's Advanced Mode tab).
- Correct slanted document
Select this checkbox to detect the scanned text and correct the angle (within -0.1 to -10 degrees or +0.1 to +10 degrees) of the document.

Important
- You cannot select this checkbox when Document Type is Color Photo or Black and White Photo.
- You cannot select this checkbox when Document Size is Stitch Assist.
The inclination of the following types of documents may not be corrected, as the text cannot be detected correctly. - Documents in which the text lines are inclined more than 10 degrees or the angles vary by line
- Documents containing both vertical and horizontal text
-
Documents with extremely large or small fonts
-
Documents with small amount of text
- Documents containing figures/images or hand-written text
- Documents containing both vertical and horizontal lines (tables)

Note
■ Scanning takes longer than usual when you enable Correct slanted document.
- Detect the orientation of text documents and rotate images
Select this checkbox to detect the orientation of the document from the scanned text and rotate the scanned image to the correct orientation. Select the language of the document to be scanned in Document Language.

Important
- You cannot select this checkbox when Document Type is Color Photo or Black and White Photo.
- You cannot select this checkbox when Document Size is Stitch Assist.
This function may not work properly depending on the document language. Only text documents written in languages that can be selected from Document Language are supported.
The orientation of the following types of documents may not be corrected, as the text cannot be detected correctly. In that case, select the scanned image in the Thumbnail window of the "Photos/Documents (Platen) Screen (Scan/Import Window)" and rotate it with Edit Tools. - Resolution is outside the range of 300 dpi to 600 dpi
- Font size is outside the range of 8 points to 48 points
- Documents containing special fonts, effects, italics, or hand-written text
- Documents with patterned backgrounds

Note
■ Scanning takes longer than usual when you enable Detect the orientation of text documents and rotate images.
- Document Language
Select the language of the document to be scanned.

Important
- You cannot select this checkbox when Document Type is Color Photo or Black and White Photo.
- You cannot select this checkbox when Document Size is Stitch Assist.
- Defaults
Restores the default settings.
Advanced Guide
Advanced Guide > Scanning > Scanning with the Bundled Application Software > MP Navigator EX Screens > Save Dialog Box
MP Navigator EX
Save Dialog Box
The Save dialog box opens when you click Save in the Scan/Import window.
In the Save dialog box, you can make settings for saving images to a computer.

- Save in
Displays the folder in which to save the scanned images. To change the folder, click Browse... to specify another one.
The following folders are specified by default.
Windows Vista: MP Navigator EX folder in Pictures folder
Windows XP: MP Navigator EX folder in My Pictures folder
Windows 2000: MP Navigator EX folder in My Pictures folder
- File name
Enter the file name of the image to be saved (up to 64 characters). When saving multiple files, 4 digits are appended to each file name.
- Save as type
Select a file type to save the scanned images.
Select JPEG/Exif, TIFF or BMP.

Important
■ You cannot select JPEG/Exif when Document Type is Text(OCR).
- Set...
When Save as type is JPEG/Exif
You can specify a compression type for JPEG files. Select High(Low Compression), Standard or Low(High Compression).
- Save to a Subfolder with Current Date
Select this checkbox to create a subfolder in the folder specified in Save in with the current date and save scanned files in it. A subfolder with a name such as "2009_01_01" (Year_Month_Date) will be created.
If this checkbox is not selected, files are saved directly in the folder specified in Save in.
Advanced Guide
Advanced Guide > Scanning > Scanning with the Bundled Application Software > MP Navigator EX Screens > Save as PDF file Dialog Box
MP Navigator EX
Save as PDF file Dialog Box
In the Save as PDF file dialog box, you can make advanced settings for saving scanned images as PDF files. You can save multiple documents as one PDF file or add pages to a PDF file created with MP Navigator EX.

Important
- You cannot save images scanned at 10501 pixels or more in the vertical and horizontal directions.
Dialog box that opens when Save as PDF file in the Scan/Import window is clicked
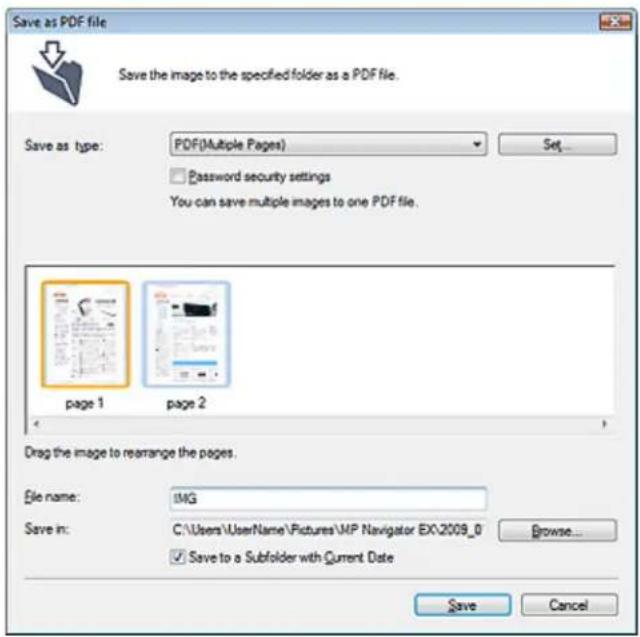
Dialog box that opens when Save Selected Pages or Save All Pages is clicked in the Create/Edit PDF file window

- Save as type
Select a PDF file type to save the scanned images.
Save each of the selected images as a separate PDF file.
- PDF(Multiple Pages)
Save multiple images in one PDF file.

Note
- PDF(Multiple Pages) is displayed when multiple images are selected.
- PDF(Add Page)
Add the scanned images to a PDF file. The images are added to the end of the PDF file. You cannot rearrange the pages of the PDF file to which the images are added.

Important
- Images can only be added to PDF files created with MP Navigator EX. You cannot specify PDF files created with other applications. PDF files edited in other applications cannot be specified as well.
If a password-protected PDF file is edited, the passwords will be deleted. Reset the passwords.
Setting Passwords for PDF Files
- Set...
Make advanced settings for creating PDF files. See "PDF Settings Dialog Box" for details.
- Password security settings
Select this checkbox to open the Password Security -Settings dialog box in which you can set passwords for opening, editing and printing created PDF files.
Setting Passwords for PDF Files
- Add to
This is displayed when you select PDF(Add Page) for Save as type and specify the PDF file to which images are added. To change the file, click Browse... to specify another one.

Important
Images can only be added to PDF files created with MP Navigator EX. You cannot specify PDF files created with other applications. PDF files edited in other applications cannot be specified as well.
- File name
Enter the file name of the image to be saved (up to 64 characters). When saving multiple files, 4 digits are appended to each file name.
- Save in
Displays the folder in which to save the PDF files. To change the folder, click Browse... to specify another one.
The following folders are specified by default.
Windows Vista: MP Navigator EX folder in Pictures folder
Windows XP: MP Navigator EX folder in My Pictures folder
Windows 2000: MP Navigator EX folder in My Pictures folder
- Save to a Subfolder with Current Date
Select this checkbox to create a subfolder in the folder specified in Save in with the current date and save scanned files in it. A subfolder with a name such as "2009_01_01" (Year_Month_Date) will be created.
If this checkbox is not selected, files are saved directly in the folder specified in Save in.
Advanced Guide
Advanced Guide > Scanning > Scanning with the Bundled Application Software > MP Navigator EX Screens > PDF Settings Dialog Box
MP Navigator EX
PDF Settings Dialog Box
In the PDF Settings dialog box, you can specify the PDF compression type and other advanced settings for creating PDF files.

- Enable keyword search
Select this checkbox to convert characters in a document to text data. This will enable an easy search by keyword.
- Document Language
Select the language of the document to be scanned.
- Detect the orientation of text documents and rotate images
Select this checkbox to detect the orientation of the document from the scanned text and rotate the scanned image to the correct orientation.
Important
This function may not work properly depending on the document language. Only text documents written in languages that can be selected from Document Language are supported.
- The orientation of the following types of documents may not be corrected, as the text cannot be detected correctly.
- Resolution is outside the range of 300 dpi to 600 dpi
- Font size is outside the range of 8 points to 48 points
- Documents containing special fonts, effects, italics, or hand-written text
- Documents with patterned backgrounds
- Correct slanted document
Select this checkbox to detect the scanned text and correct the angle (within -0.1 to -10 degrees or +0.1 to +10 degrees) of the document.
Important
The inclination of the following types of documents may not be corrected, as the text cannot be detected correctly.
- Documents in which the text lines are inclined more than 10 degrees or the angles vary by line
- Documents containing both vertical and horizontal text
- Documents with extremely large or small fonts
- Documents with small amount of text
- Documents containing figures/images or hand-written text
- Documents containing both vertical and horizontal lines (tables)
- PDF Compression
Select a compression type for saving.
- Standard
It is recommended that you normally select this setting.
• High
Compresses the file size when saving, allowing you to reduce the load on your network/server.

Important
- Highly compressed PDF images may degrade if you repeatedly save them with high compression.

Note
■ The following images can be compressed with high efficiency.
- Images with resolutions within the range of 75 dpi to 600 dpi.
- Security
Set passwords for opening, editing and printing the created PDF files.

Important
In Windows 2000, Internet Explorer 5.5 Service Pack 2 or later is required to use this function.
This function is not available when images are automatically saved after scanning, such as when scanning from the One-click Mode screen or scanning using the Operation Panel of the machine.

Note
- Select Password Security and set passwords in the Password Security -Settings dialog box.
Setting Passwords for PDF Files
Advanced Guide
Advanced Guide > Scanning > Scanning with the Bundled Application Software > MP Navigator EX Screens > View & Use Window
MP Navigator EX
View & Use Window
Point to View & Use in the Navigation Mode screen and click My Box (Scanned/Imported Images), Specify Folder or Recently Saved Images to open the View & Use window.
Open this window to display or use scanned images or images saved on a computer.

Important
For PDF files, only those created with MP Navigator EX are displayed. You cannot display PDF files created with other applications. PDF files edited in other applications cannot be displayed as well.

(1) Display Setting Items
(2) Image Handling Buttons
(3) Toolbar
(4) Thumbnail Window
(5) Selected Images Area
Display Setting Items

(Scan/Import)
Click this when you want to scan photos, documents, magazines and other printed materials. The
Scan/Import window opens.
→ Photos/Documents (Platen) Screen (Scan/Import Window)
• My Box (Scanned/Imported Images)
Displays folders of images (grouped by year, year/month and year/month/date) in My Box in tree view. Select a folder to display its contents in the Thumbnail window to the right. Image date is the scanned, captured or updated date.
- Specify Folder
Displays all hard disks and folders in tree view. Select a folder to display images in the Thumbnail window to the right. Selecting a folder and clicking it highlights the folder name, allowing you to rename it.
• Recently Saved Images
"Scanned/Imported Images" and images that have been "Attached to E-mail" or "Sent to Application" recently are displayed in tree view by date. Select a Month/Date/Year folder to display images by date in the Thumbnail window to the right. Image date is the scanned or sent date.
- Search
The advanced search options opens.
→ Searching Images
Jump to Main Menu Jump to Main Menu
Jumps to the Main Menu.
Image Handling Buttons
• Image Handling Buttons
Specify what to do with the selected images. See the corresponding sections below for details on each button.
Creating/Editing PDF Files
→ Printing Documents
→ Printing Photos
→ Sending via E-mail
Editing Files

Note
The buttons in Image Handling Buttons are displayed when the corresponding applications are installed.
Toolbar
• Preferences Preferences
The Preferences dialog box opens. In the Preferences dialog box, you can make advanced settings to MP Navigator EX functions.
Preferences Dialog Box
• ? (Guide)
Opens this guide.
- Edit Tools
• (Select All) Selects all images in the Thumbnail window.
• (Cancel All)
Cancels all image selections in the Thumbnail window.

(Image Correction/Enhancement)
Allows you to correct the target image (outlined in orange). Click this button to open the Correct/Enhance Images window in which you can correct/enhance images and also adjust the brightness, contrast, etc.
→ Correct/Enhance Images Window

Important
- Image correction/enhancement cannot be applied to PDF files or black and white binary files.

Zoom in
Enlarges the target image (outlined in orange). You can also enlarge the image by double-clicking it. You can check all pages when you select a PDF file.
You can also check file information such as file name, date, size and security setting. A lock icon appears for PDF files with Document Open Password set.
→ Opening/Editing Password-protected PDF Files

(Search)
Enter a word or phrase included in the file name, Exif information or PDF text of the image you
want to search for, then click (Search button). For Exif information, text in Maker, Model, Description and User Comment is searched.

Note
- Search images in My Box (Scanned/Imported Images), Recently Saved Images or a selected folder and its subfolders.

(Refresh)
Refreshes the Thumbnail window contents.

(Display Size)
Changes the size of images in the Thumbnail window.

(Sort by)
Sorts the images in the Thumbnail window by category, date (ascending or descending) or name (ascending or descending).
Images can be sorted by category only when My Box (Scanned/Imported Images) or Specify Folder is displayed.
Thumbnail Window
- Thumbnail Window
Scanned images are displayed.
When you select the checkbox of an image, the image appears in the Selected Images area.
Selecting an image and clicking the file name highlights the file name, allowing you to rename it.
Drag and drop an image to do the following things.
- Move from one category to another within the Thumbnail window
- Move to a category folder displayed in My Box (Scanned/Imported Images)
- Copy to a folder displayed in Specify Folder

Important
In Windows 2000, Internet Explorer 5.5 Service Pack 2 or later is required to open password-protected PDF files.
- You cannot change the extension (.jpg, .pdf, etc.) when renaming a file.
- You cannot move or copy images to the date folders displayed in tree view in My Box (Scanned/Imported Images) or Recently Saved Images.

Note
- A lock icon appears for PDF files with Document Open Password set.
■ Thumbnails may appear as "?" in the following cases. - Opening unsupported images
- File size is too large and there is not enough memory to display the image
- The file is corrupted
When Images are Sorted by Categories
Scanned images are displayed by category.

Note
Some images may not be detected correctly and thus may be classified into wrong categories. In that case, drag and drop an image and move it from one category to another.
• Category name Images: N (Selected: n)

- Category name
The following categories are provided.
Photos: Portrait, Others
Documents: Business Card, Postcard, Standard Size, PDF File, Others
Custom categories: Displays your custom categories.
Unclassified: Displays images that have not yet been classified.
- Images: N
The number of images classified into the category is displayed.
- (Selected: n)
The number of images with the checkbox selected is displayed.

Note
This portion is displayed only when one or more images are selected.
- Close All / Open All

Displays all images.

Note
- Immediately after opening the View & Use window or sorting images, all images appear and Close All is displayed.
- Click Close All to change to Open All.
• Specific Categories / All Categories
You can narrow down the categories to display only those containing images. If you narrow down the categories, more images are displayed in the Thumbnail List area, allowing you to find or move images easily.
This button is displayed only when My Box (Scanned/Imported Images) or Specify Folder is displayed.
• Specific Categories Specific Categories
Displays categories containing images, along with the contained images.
All Categories All Categories
Displays all categories and images.

Note
- Click Specific Categories to change to All Categories.
Edit Custom Categories
Edit Custom Categories
When My Box (Scanned/Imported Images) or Specify Folder is displayed, the Edit Custom Categories dialog box opens. In the Edit Custom Categories dialog box, you can add/delete categories displayed in Custom Categories. See "Classifying Images into Categories" for details.
Classify Images
Classify Images
Images imported from hard disks appear in Unclassified. Click Classify Images to classify them automatically. This button is displayed only when My Box (Scanned/Imported Images) or Specify Folder is displayed.

Note
■ Classification may take time if there are many images to classify.
Selected Images Area

(Cancel All)
Cancels the selection of all images in the Selected Images area.

(Cancel Selection)
Cancels the selection of the target image (outlined in orange) in the Selected Images area.
- Selected Images Area
Images selected in the Thumbnail window are displayed.
Related Topic
▶ Opening Images Saved on a Computer
Advanced Guide
Advanced Guide > Scanning > Scanning with the Bundled Application Software > MP Navigator EX Screens > Create/Edit PDF file Window
MP Navigator EX
Create/Edit PDF file Window
Click PDF in the View & Use window, then click Create/Edit PDF file on the list to open the Create/Edit PDF file window.
In the Create/Edit PDF file window, you can add/delete pages and rearrange the page order of PDF files created with MP Navigator EX.
Important
- You cannot save images scanned at 10501 pixels or more in the vertical and horizontal directions.
If a password-protected PDF file is edited, the passwords will be deleted. Reset the passwords.
Setting Passwords for PDF Files - You can create or edit up to 99 pages using MP Navigator EX.

- Rearrange Pages
You can move the selected image (outlined in orange).

- Moves the selected image to the top.

- Moves the selected image up one page.

- Moves the selected image down one page.

- Moves the selected image to the end.

Note
- You can also drag and drop the image to rearrange the order.
- Delete Selected Pages
Deletes the selected image.
- Add Page
Allows you to select and add an existing PDF file.

Note
- A password will be required to add a password-protected PDF file.
- Undo
Cancels the latest change made.
- Reset
Cancels all the changes made.
- Save Selected Pages
Opens the Save as PDF file dialog box. Specify the save settings. Only the selected page is saved.

Note
- When multiple pages are selected, a multiple-page PDF file is created.
- See "Save as PDF file Dialog Box" for details on the Save as PDF file dialog box.
- Save All Pages
Opens the Save as PDF file dialog box. Specify the save settings. All PDF files in the list will be saved as one PDF file.
- Finish
Closes the Create/Edit PDF file window.
- Toolbar

(Rotate Left)
Rotates the page 90 degrees counter-clockwise.

(Rotate Right)
Rotates the page 90 degrees clockwise.

(Preview Mode)
Switches to Preview Mode. The selected file appears in Preview.


(Enlarge)
Enlarges the image displayed in Preview.

(Reduce)
Reduces the image displayed in Preview.

(Full-screen)
Enlarges/reduces the image to display it fully in Preview.

(Thumbnail Mode)
Switches to Thumbnail Mode. Thumbnails of files are displayed.
Advanced Guide
Advanced Guide > Scanning > Scanning with the Bundled Application Software > MP Navigator EX Screens > Print Document Dialog Box
MP Navigator EX
Print Document Dialog Box
Click Print in the View & Use window, then click Print Document on the list to open the Print Document dialog box.
In the Print Document dialog box, you can make advanced settings for printing multiple scanned images at one time.

Note
- The setting items in the Print Document dialog box vary by printer.
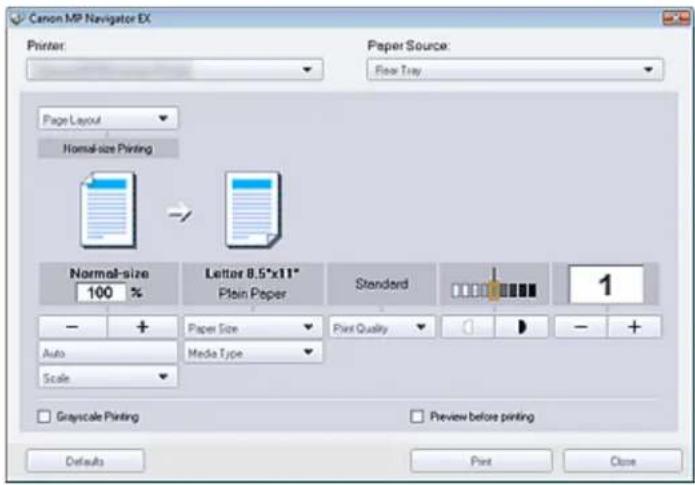
- Printer
Select the printer to use.
- Paper Source
Select paper source.
- Page Layout
Select a print type.
- Normal-size Printing
Print one image per sheet. - Scaled Printing
Print images at the selected scale (enlarged or reduced).
• Fit-to-Page Printing
Print an image at the paper size (enlarged or reduced). - Borderless Printing
Print the image on an entire sheet of paper without margins.
• Page Layout Printing (2 on 1)
Layout and print two images on a sheet of paper.
• Page Layout Printing (4 on 1)
Layout and print four images on a sheet of paper.
- Enlarge/Reduce
Enlarge or reduce images to print.

Print a reduced or enlarged image by specifying a scale in increments of 1%.
- Auto
Scale is adjusted automatically according to the detected paper width and the selected paper size. Image may be printed rotated 90 degrees depending on its size.
- Scale
Select a scale from the list.
Important
At normal-size (100%), some images may be printed small or with some portions cropped. In that case, select Auto to resize the print in proportion to the paper size.
- Paper Size
Select the size of paper for printing. Match the size to the size of the paper set in the machine.

Note
- Selectable paper sizes depend on the selected printer.
• Media Type
Select the type of paper for printing. Print quality may be fixed depending on the paper type.

Note
- Selectable paper types depend on the selected printer.
- Print Quality
Select the print quality.
- Density
Click (Density adjustment) to select the print density.
- Copies
Click (Copy setting) to select the number of copies to be printed.
- Grayscale Printing
Select this checkbox to print the document in black and white.
- Preview before printing
Select this checkbox to display the print result before printing.
- Defaults
Restores the default settings.
Start printing with the specified settings.

Note
- To cancel while spooling, click Cancel. To cancel while printing, click Cancel Printing in the confirmation window for the printer status. To open a confirmation window for the printer status, click printer icon on the taskbar.
Advanced Guide
Advanced Guide > Scanning > Scanning with the Bundled Application Software > MP Navigator EX Screens > Print Photo Dialog Box
MP Navigator EX
Print Photo Dialog Box
Click Print in the View & Use window, then click Print Photo on the list to open the Print Photo dialog box.

Important
The Print Photo dialog box will not open if Easy-PhotoPrint EX is installed. Easy-PhotoPrint EX starts instead.
■ PDF files cannot be printed.


Note
- Double-click an image to display it in a different window.
- Printer
Select the printer to use. - Properties...
Displays the selected printer's advanced setting screen. - Paper Size
Select the size of paper for printing. Match the size to the size of the paper set in the machine.
• Media Type
Select the type of paper for printing. Print quality may be fixed depending on the paper type.
- Page Layout
Select a print type.
• Normal-size Printing
Print one image per sheet.
• Fit-to-Page Printing
Print an image at the paper size (enlarged or reduced).
- Borderless Printing
Select this checkbox to print the image on an entire sheet of paper without margins.
Important
- Page Layout setting will be disabled when you select Borderless Printing.
This setting is only available with printers that support borderless printing.
- Orientation
Specify the print orientation.
Important
This setting is available only when Page Layout is Normal-size Printing. For others, the image is automatically rotated according to the aspect ratio of the paper.
- Copies
Specify the number of copies to print.
- Vivid Photo
Select this checkbox to print the image in vivid colors.
- Preview before printing
Select this checkbox to display the print result before printing.
Starts printing.

Note
- Only the images in the Thumbnail window with the checkbox selected are printed.
- Close
Closes the dialog box without printing the photo.
Advanced Guide
Advanced Guide > Scanning > Scanning with the Bundled Application Software > MP Navigator EX Screens > Send via E-mail Dialog Box
MP Navigator EX
Send via E-mail Dialog Box
Click Send in the View & Use window, then click Attach to E-mail on the list to open the Send via E-mail dialog box.
In the Send via E-mail dialog box, you can make advanced settings for attaching images to e-mail.

Important
■ MP Navigator EX is compatible with the following e-mail software programs:
- Windows Mail (Windows Vista)
- Outlook Express (Windows XP/Windows 2000)
- Microsoft Outlook
(If an e-mail software program does not operate properly, check that the program's MAPI is enabled.
To enable MAPI, refer to the manual of the e-mail software program.)
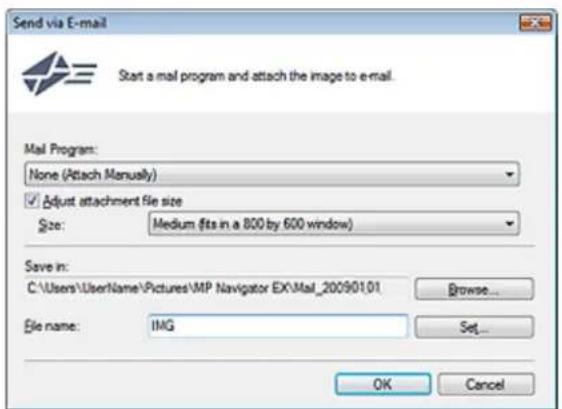
- Mail Program
The e-mail software program set up via Preferences in the Navigation Mode screen is displayed. Select the e-mail software program you want to use.
- Adjust attachment file size
When Save as type is JPEG, selecting this checkbox allows you to resize the images. Select a size from Size.
- Save in
Displays the folder in which to save the images. To change the folder, click Browse... to specify another one. If resized, the resized images are saved.
The following folders are specified by default.
Windows Vista: MP Navigator EX folder in Pictures folder
Windows XP: MP Navigator EX folder in My Pictures folder
Windows 2000: MP Navigator EX folder in My Pictures folder
- File name
Enter the file name of the image to be attached (up to 64 characters). When saving multiple files, 4 digits are appended to each file name.
- Set...
You can specify a compression type for JPEG files.
Select High(Low Compression), Standard or Low(High Compression).
Advanced Guide
Advanced Guide > Scanning > Scanning with the Bundled Application Software > MP Navigator EX Screens > Correct/Enhance Images Window
MP Navigator EX
Correct/Enhance Images Window
Click (Image Correction/Enhancement) in the View & Use window or click Fix photo images in the Task Button area to open the Correct/Enhance Images window.
In the Correct/Enhance Images window, you can make advanced settings including image correction/enhancement and brightness/contrast adjustment.
You can also display the source image and corrected image side by side for comparison.

Important
■ Image correction/enhancement cannot be applied to PDF files or black and white binary files.

Note
- The Correct/Enhance Images window can also be opened by clicking (Image Correction/ Enhancement) in the Zoom in dialog box.
It may take a while to correct large images.
See "View & Use Window" for details on the View & Use window.

(1) Task Area
(2) Toolbar
Task Area
Available tasks and settings vary between the Auto and Manual tabs.
Click Auto or Manual to open the corresponding tab.
Auto Tab
Use the functions in the Auto tab to apply corrections and enhancements to the entire image.
See "Correcting/Enhancing Images Automatically" for details.

- Auto Photo Fix
Applies automatic corrections suitable for photos.
- Prioritize Exif Info
Select this checkbox to apply corrections primarily based on the settings made at the time of shooting.
Deselect this checkbox to apply corrections based on the image analysis results. It is recommended that you normally select this setting.

Note
- Exif is a standard format for embedding various shooting data in digital camera images (JPEG).
- Face Sharpener
Sharpens out-of-focus faces.
You can adjust the effect level using the slider.
• Digital Face Smoothing
Enhances skin beautifully by removing blemishes and wrinkles.
You can adjust the effect level using the slider.
- Apply to all images
Applies the correction to all images displayed in the thumbnail list.
• OK
Applies the selected effect to the selected image or all images.
- Reset Selected Image
Cancels all corrections and enhancements applied to the selected image.
- Save Selected Image
Saves the corrected images selected.
- Save All Corrected Images
Saves all the corrected images displayed in the thumbnail list.
- Exit
Closes the Correct/Enhance Images window.
Manual Tab
Use Adjust to adjust brightness and contrast, or to sharpen the entire image.
Use Correct/Enhance to correct/enhance specific areas.
See "Correcting/Enhancing Images Manually" for details.
Adjustment

- Brightness
Adjusts the overall image brightness.
Move the slider to the left to darken and right to brighten the image.
- Contrast
Adjusts the contrast of the image. Adjust the contrast when the image is flat due to lack of contrast. Move the slider to the left to decrease and right to increase the contrast of the image.
- Sharpness
Emphasizes the outline of the subjects to sharpen the image. Adjust the sharpness when the photo is out of focus or text is blurred. Move the slider to the right to sharpen the image.
- Blur
Blurs the outline of the subjects to soften the image. Move the slider to the right to soften the image.
• Show-through Removal
Removes show-through of text from the reverse side or removes the base color. Adjust the show-through level to prevent text on the reverse side of thin document or the base color of the document from appearing on the image. Move the slider to the right to increase the show-through removal effect.
- Defaults
Resets all adjustments (brightness, contrast, sharpness, blur, and show-through removal).
- Reset Selected Image
Cancels all corrections, enhancements and adjustments applied to the selected image.
- Save Selected Image
Saves the corrected images selected.
- Save All Corrected Images
Saves all the corrected images displayed in the thumbnail list.
- Exit
Closes the Correct/Enhance Images window.
Correction/Enhancement

- Face Brightener
Corrects the entire image so that the selected facial area is brightened. You can adjust the effect level using the slider.
- Face Sharpener
Corrects the entire image to sharpen the face. You can specify the area you want to apply the effect to. You can adjust the effect level using the slider.
• Digital Face Smoothing
Enhances skin beautifully by removing blemishes and wrinkles. You can specify the area you want to apply the effect to. You can adjust the effect level using the slider.
- Blemish Remover
Removes moles. You can specify the area you want to apply the effect to.
• OK
Applies the selected effect to the specified area.
- Undo
Cancels the latest correction.
- Reset Selected Image
Cancels all corrections, enhancements and adjustments applied to the selected image.
- Save Selected Image
Saves the corrected images selected.
- Save All Corrected Images
Saves all the corrected images displayed in the thumbnail list.
- Exit
Closes the Correct/Enhance Images window.
Toolbar
- Toolbar

(Rotate Left)
Rotates the image 90 degrees counter-clockwise.

(Rotate Right)
Rotates the image 90 degrees clockwise.

(Invert)
Inverts the image horizontally.

(Trimming)
Trimming is the act of selecting the area you want to keep in a photo and discarding the rest. In the displayed window, drag the white frame to specify the trimming area. Move the cursor inside the white frame and drag to move the trimming area.


Note
- Place the main subjects along the broken white lines or at the intersections to create a balanced image.

(Enlarge)
Enlarges the displayed image.

(Reduce)
Reduces the displayed image.

(Full-screen)
Enlarges/reduces the image to display it full-screen.

(Compare)
Opens the source image for comparison.
The source image appears on the left and the corrected image appears on the right.

Advanced Guide
Advanced Guide > Scanning > Scanning with the Bundled Application Software > MP Navigator EX Screens > One-click Mode Screen
MP Navigator EX
One-click Mode Screen
Click (Switch Mode) at the bottom left of the Navigation Mode screen to display the One-click Mode screen.
You can complete from scanning to saving, etc. at one time by simply clicking the corresponding icon.

- Auto
Scan documents by automatically detecting the document type. File format is automatically set. Files are saved to a computer. You can apply Auto Photo Fix as required.
When you click this icon, the Auto Scan dialog box opens and you can specify the save settings.
Auto Scan Dialog Box
- Save
Scan documents or photos and save them to a computer. The document type can be detected automatically.
When you click this icon, the Save dialog box opens and you can specify the scan/save settings.
Save Dialog Box (One-click Mode Screen)
Scan documents and save them as PDF files.
When you click this icon, the PDF dialog box opens and you can specify the scan/save and application settings.
→ PDF Dialog Box
Scan documents or photos and attach them to e-mail.
When you click this icon, the Mail dialog box opens and you can specify the scan/save and e-mail software program settings.
→ Mail Dialog Box
• OCR
Scan text documents then extract text in the image and display it in Notepad (included with Windows). When you click this icon, the OCR dialog box opens and you can specify the scan/save settings.
OCR Dialog Box

Note
■ For further procedures, refer to the application's manual.
- Custom
Scan documents and open them in a specified application. Document type is automatically detected. When you click this icon, the Custom dialog box opens and you can specify the scan/save and application settings.
→ Custom Dialog Box

Note
■ For further procedures, refer to the application's manual.

(Switch Mode)
Switches to Navigation Mode. The Navigation Mode screen appears.
→ Custom Scan with One-click Tab
• Preferences Preferences
The Preferences dialog box opens. In the Preferences dialog box, you can make advanced settings to MP Navigator EX functions.
→ Preferences Dialog Box
• ? (Guide)
Opens this guide.
Important
- The following restrictions apply when you scan with Document Type set to Auto Mode in the Save or Custom dialog box. When you want to convert text in the scanned image to text data, specify Document Type (do not select Auto Mode).
Related Topic
Easy Scanning with One-click
Advanced Guide
Advanced Guide > Scanning > Scanning with the Bundled Application Software > MP Navigator EX Screens > Auto Scan Dialog Box
MP Navigator EX
Auto Scan Dialog Box
Click Auto Scan on the Custom Scan with One-click tab or click Auto in the One-click Mode screen to open the Auto Scan dialog box.

Important
The following types of documents cannot be scanned correctly. In that case, click another icon in One-click Mode or on the Custom Scan with One-click tab and specify the document type or size.
- Documents other than photos, postcards, business cards, magazines, newspapers, text documents and CD/DVD
- A4 size photos
- Text documents smaller than 2L (5 inches x 7 inches) (127 mm x 178 mm), such as paperback pages with the spine cut off
- Documents printed on thin white paper
- Long narrow documents such as panoramic photos
■ Reflective CD/DVD labels may not be scanned properly.
- Place documents correctly according to the type of document to be scanned. Otherwise, documents may not be scanned correctly.
See "Placing Documents" for details on how to place documents.
Note
To reduce moire, click another icon in One-click Mode or on the Custom Scan with One-click tab and set Document Type to Magazine.
Scan Settings
- Enable Auto Photo Fix
Select this checkbox to analyze the photo image and apply suitable corrections automatically. This function is available when Auto or JPEG/Exif is selected for Save as type in Save Settings.
Important
- When Save as type is Auto, the base color tone of the following types of documents may change from the source since they are corrected as photos. In that case, deselect the checkbox and scan. - Postcards and business cards
■ Text documents may not be scanned correctly since they may be corrected as photos depending on how you place the document. In that case, deselect the checkbox and scan.

Note
If you select a format other than JPEG/Exif for Save as type and then select this checkbox, a message appears and Save as type will be set to Auto.
Save Settings
- File name
Enter the file name of the image to be saved (up to 64 characters). When saving multiple files, 4 digits are appended to each file name.
- Save as type
Select a file type to save the scanned images.
Select Auto, JPEG/Exif, TIFF, BMP or PDF.

Important
- When Save as type is Auto, the file format may differ depending on how you place the document.
See "Placing Documents" for details on how to place documents.
Large documents (such as A4 size photos) that cannot be placed away from the edges/arrow (alignment mark) of the Platen may not be saved in the correct file format when Save as type is Auto. In that case, select a file format suitable for the document to be scanned.
■ Images cannot be added to password-protected PDF files.

Note
- When Auto is selected, files are saved in the following formats according to the document type.
Photos, postcards, CD/DVD and business cards: JPEG
Magazines, newspapers and text documents: PDF
You can change the file format from Set....
- Set...
When Save as type is Auto
You can specify the file format in which to save images. Select a file format for Document and Photo each.
When Save as type is JPEG/Exif
You can specify a compression type for JPEG files. Select High(Low Compression), Standard or Low(High Compression).
When Save as type is PDF
Make advanced settings for creating PDF files. See "PDF Settings Dialog Box" for details.
- Save in
Displays the folder in which to save the scanned images. To change the folder, click Browse... to specify another one.
The following folders are specified by default.
Windows Vista: MP Navigator EX folder in Pictures folder
Windows XP: MP Navigator EX folder in My Pictures folder
Windows 2000: MP Navigator EX folder in My Pictures folder
- Save to a Subfolder with Current Date
Select this checkbox to create a subfolder in the folder specified in Save in with the current date and save scanned files in it. A subfolder with a name such as "2009_01_01" (Year_Month_Date) will be created.
If this checkbox is not selected, files are saved directly in the folder specified in Save in.
- Start scanning by clicking the one-click button
Select this checkbox to start scanning when you click an icon.
- Apply
Saves and applies the specified settings.
Click Cancel instead of Apply to cancel the specified settings.
- Cancel
Cancels the specified settings. The current screen closes.
- Defaults
Returns all settings in the screen to their defaults.
- Scan
Scans and saves documents with the specified settings.
When Save as type is Auto, a confirmation appears. Click Open Manual to open this guide (if it is installed).
Page top↑
Advanced Guide
Advanced Guide > Scanning > Scanning with the Bundled Application Software > MP Navigator EX Screens > Save Dialog Box (One-click Mode Screen)
MP Navigator EX
Save Dialog Box (One-click Mode Screen)
Click Save to PC on the Custom Scan with One-click tab or click Save in the One-click Mode screen to open the Save dialog box.
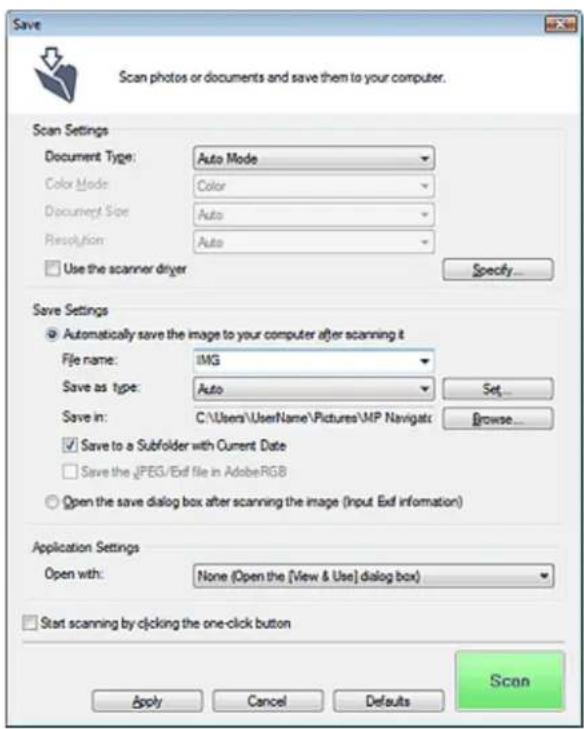
Scan Settings
- Document Type
Select the type of document to be scanned. When Auto Mode is selected, the document type is automatically detected. In that case, Color Mode, Document Size and Resolution are automatically set as well.
Important
- The following types of documents cannot be scanned correctly with Auto Mode. In that case, specify the document type or size.
- Documents other than photos, postcards, business cards, magazines, newspapers, text documents and CD/DVD
- A4 size photos
- Text documents smaller than 2L (5 inches x 7 inches) (127 mm x 178 mm), such as paperback pages with the spine cut off
- Documents printed on thin white paper
- Long narrow documents such as panoramic photos
■ Reflective CD/DVD labels may not be scanned properly. - Place documents correctly according to the type of document to be scanned. Otherwise, documents may not be scanned correctly.
See "Placing Documents" for details on how to place documents.

Note
■ To reduce moire, set Document Type to Magazine.
- Color Mode
Select how to scan the document.
- Document Size
Select the size of the document to be scanned.
When you select Custom, a screen in which you can specify the document size appears. Select a Units, then enter the Width and Height and click OK.


Important
- When you select Auto Detect, the image may not be scanned at the correct position and size. In that case, change the size to the actual document size (A4, Letter, etc.) and align a corner of the document with the corner at the arrow (alignment mark) of the Platen.
- Resolution
Select the resolution at which to scan documents.
→ Resolution
- Use the scanner driver
Select this checkbox to display the ScanGear (scanner driver) screen and make advanced scan settings.
Color Mode, Document Size, Resolution and other settings in the Save dialog box will be disabled. Specify these settings in the ScanGear (scanner driver) screen.
- Specify...
Click to open the Scan Settings dialog box in which you can make advanced scan settings.
→ Scan Settings Dialog Box
Save Settings
• Automatically save the image to your computer after scanning it
Select this to save the images to your computer as specified after scanning them. The File name, Save as type and Save in settings will be displayed.

Important
If you select this function, you will not be able to set passwords for PDF files.
- File name
Enter the file name of the image to be saved (up to 64 characters). When saving multiple files, 4 digits are appended to each file name.
- Save as type
Select a file type to save the scanned images.
Select Auto, JPEG/Exif, TIFF or BMP. Auto is displayed when Document Type is Auto Mode. When saving as PDF files, select PDF, PDF(Multiple Pages) or PDF(Add Page).

Important
- When Document Type is Auto Mode and Save as type is Auto, the file format may differ depending on how you place the document.
See "Placing Documents" for details on how to place documents.
Large documents (such as A4 size photos) that cannot be placed away from the edges/arrow (alignment mark) of the Platen may not be saved in the correct file format when Save as type is
Auto. In that case, select a file format suitable for the document to be scanned.
■ Images cannot be added to password-protected PDF files.
- You cannot select JPEG/Exif when Color Mode is Black and White.

Note
- When Auto is selected, files are saved in the following formats according to the document type.
Photos, postcards, CD/DVD and business cards: JPEG
Magazines, newspapers and text documents: PDF
You can change the file format from Set....
Images saved as PDF files may not open depending on the application. In that case, select an option other than Auto in Save as type.
If you select JPEG/Exif when Document Type is not Auto Mode, the Save the JPEG/Exif file in AdobeRGB checkbox will be selectable.
- Set...
When Save as type is Auto
You can specify the file format in which to save images. Select a file format for Document and Photo each.
When Save as type is JPEG/Exif
You can specify a compression type for JPEG files. Select High(Low Compression), Standard or Low(High Compression).
When Save as type is PDF, PDF(Multiple Pages) or PDF(Add Page)
Make advanced settings for creating PDF files. See "PDF Settings Dialog Box" for details.
- Save in
Displays the folder in which to save the scanned images. To change the folder, click Browse... to specify another one.
The following folders are specified by default.
Windows Vista: MP Navigator EX folder in Pictures folder
Windows XP: MP Navigator EX folder in My Pictures folder
Windows 2000: MP Navigator EX folder in My Pictures folder
- Save to a Subfolder with Current Date
Select this checkbox to create a subfolder in the folder specified in Save in with the current date and save scanned files in it. A subfolder with a name such as "2009_01_01" (Year_Month_Date) will be created.
If this checkbox is not selected, files are saved directly in the folder specified in Save in.
- Save the JPEG/Exif file in AdobeRGB
Select this checkbox to save the images in colors that correspond to Adobe RGB.

Important
This function is available only when Save as type is JPEG/Exif and Document Type is not Auto Mode.
This function is not available if the Adobe RGB profile is not installed.

Note
- You cannot select this setting if the Use the scanner driver checkbox is selected.
- When you save an image with the Save the JPEG/Exif file in AdobeRGB checkbox selected, an underscore is added to the beginning of the file name. (Example: _Image0001.jpg)
- Open the save dialog box after scanning the image (Input Exif information)
Select this to open the Save dialog box after scanning the images and specify the save settings such as destination folder, file name and Exif information.
→ Save Dialog Box

Note
- To set passwords for PDF files, select Open the save dialog box after scanning the image
(Input Exif information). After scanning, you can set the passwords in the Save dialog box.
Setting Passwords for PDF Files
Application Settings
- Open with
You can select whether to open the View & Use window or Explorer after saving the images.
- Start scanning by clicking the one-click button
Select this checkbox to start scanning when you click an icon.
- Apply
Saves and applies the specified settings.
Click Cancel instead of Apply to cancel the specified settings.
- Cancel
Cancels the specified settings. The current screen closes.
- Defaults
Returns all settings in the screen to their defaults.
- Scan
Scans and saves documents with the specified settings.
When Save as type is Auto, a confirmation appears. Click Open Manual to open this guide (if it is installed).
Advanced Guide
Advanced Guide > Scanning > Scanning with the Bundled Application Software > MP Navigator EX Screens > Scan Settings Dialog Box
MP Navigator EX
Scan Settings Dialog Box
Make advanced settings for scanning with one-click or scanning using the Operation Panel of the machine.
The Scan Settings dialog box opens when you click Specify... in a dialog box for making scan settings.
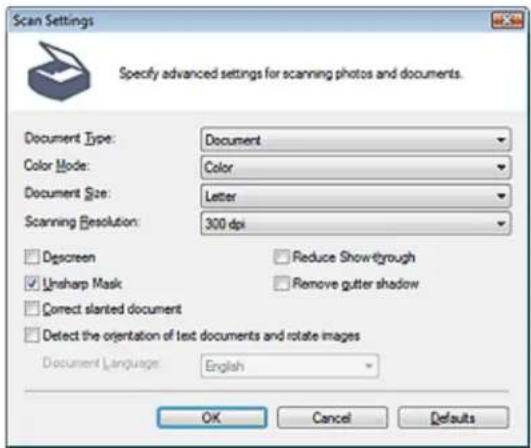

Note
■ The displayed items vary by document type and how the screen was opened.
- Document Type
Select the type of document to be scanned. When Auto Mode or Auto Scan is selected, the document type is automatically detected.
In that case, Color Mode, Document Size, etc. are automatically set as well.

Important
- To scan correctly, select a document type that matches the document to be scanned.
- When opened from the Scanner Button Settings tab in the Preferences dialog box, the Document Type specified in the Scanner Button Settings tab is displayed and cannot be changed in this dialog box.
- Color Mode
Select how to scan the document.
• Color
This mode renders the image in 256 levels (8 bit) of R(ed), G(reen), and B(lue).
- Grayscale
This mode renders the image in 256 levels (8 bit) of black and white.
- Black and White
This mode renders the image in black and white. The contrast in the image is divided at certain levels (threshold level) into black and white and is rendered in two colors.

Note
- Color Mode is not displayed in the Scan Settings dialog box opened from the Scanner Button Settings tab of the Preferences dialog box.
- Document Size
Select the size of the document to be scanned.
When you select Custom, a screen in which you can specify the document size appears. Select a Units, then enter the Width and Height and click OK.

Important
- When you select Auto Detect, the image may not be scanned at the correct position and size. In that case, change the size to the actual document size (A4, Letter, etc.) and align a corner of the document with the corner at the arrow (alignment mark) of the Platen.
- Scanning Resolution
Select the resolution at which to scan documents.
→ Resolution
- Descreen
Select this checkbox to reduce moire patterns.
Printed photos and pictures are displayed as a collection of fine dots. "Moire" is a phenomenon where uneven gradation or a stripe pattern appears when such photos or pictures printed with fine dots are scanned. Descreen is the function for reducing this moire effect.

Note
■ Scanning takes longer than usual when you enable Descreen.
- Reduce Show-through
Select this checkbox to sharpen text in a document or reduce show-through in newspapers.

Note
- Select this checkbox when Document Type is text document and show-through is apparent in the scanned image.
- Unsharp Mask
Select this checkbox to emphasize the outline of the subjects and sharpen the image.
- Remove gutter shadow
Select this checkbox to correct shadows that appear between pages when scanning open booklets.
Important
- You cannot select this checkbox when Document Size is Auto Detect, Auto Detect (Multiple Documents) or Stitch Assist.
- Align the document correctly with the alignment mark on the Platen.

Note
- Use ScanGear's Advanced Mode tab to correct gutter shadows when scanning non-standard size documents or when custom cropping frames are set. For details, see Gutter Shadow Correction in "Image Settings" (ScanGear's Advanced Mode tab).
- Correct slanted document
Select this checkbox to detect the scanned text and correct the angle (within -0.1 to -10 degrees or +0.1 to +10 degrees) of the document.
Important
-
You cannot select this checkbox when Document Size is Stitch Assist.
The inclination of the following types of documents may not be corrected, as the text cannot be detected correctly. -
Documents in which the text lines are inclined more than 10 degrees or the angles vary by line
- Documents containing both vertical and horizontal text
- Documents with extremely large or small fonts
- Documents with small amount of text
- Documents containing figures/images or hand-written text
- Documents containing both vertical and horizontal lines (tables)

Note
- Scanning takes longer than usual when you enable Correct slanted document.
- Enable Auto Photo Fix (When scanning with Auto Scan using the Operation Panel)
Select this checkbox to analyze the photo image and apply suitable corrections automatically. This function is available when Auto or JPEG/Exif is selected for Save as type in Save Settings on the Scanner Button Settings tab of the Preferences dialog box.

Important
- When Save as type is Auto, the base color tone of the following types of documents may change from the source since they are corrected as photos. In that case, deselect the checkbox and scan.
- Postcards and business cards
■ Text documents may not be scanned correctly since they may be corrected as photos depending on how you place the document. In that case, deselect the checkbox and scan.

Note
If you select a format other than JPEG/Exif for Save as type and then select this checkbox, a message appears and Save as type will be set to Auto.
- Detect the orientation of text documents and rotate images
Select this checkbox to detect the orientation of the document from the scanned text and rotate the scanned image to the correct orientation. Select the language of the document to be scanned in Document Language.

Important
- You cannot select this checkbox when Document Size is Stitch Assist.
This function may not work properly depending on the document language. Only text documents written in languages that can be selected from Document Language are supported.
The orientation of the following types of documents may not be corrected, as the text cannot be detected correctly. - Resolution is outside the range of 300 dpi to 600 dpi
- Font size is outside the range of 8 points to 48 points
- Documents containing special fonts, effects, italics, or hand-written text
- Documents with patterned backgrounds

Note
■ Scanning takes longer than usual when you enable Detect the orientation of text documents and rotate images.
- Document Language
Select the language of the document to be scanned.

Important
- You cannot select this checkbox when Document Size is Stitch Assist.
- Defaults
Restores the default settings.
Advanced Guide
Advanced Guide > Scanning > Scanning with the Bundled Application Software > MP Navigator EX Screens > Save Dialog Box
MP Navigator EX
Save Dialog Box
The Save dialog box opens when you scan from Save to PC on the Custom Scan with One-click tab or from Save in the One-click Mode screen after selecting Open the save dialog box after scanning the image (Input Exif information).
You can specify the file type and destination while viewing the thumbnails.

- Save as type
Select a file type to save the scanned images.
Select JPEG/Exif, TIFF, BMP, PDF, PDF(Multiple Pages) or PDF(Add Page).
Save each of the selected images as a separate PDF file.
- PDF(Multiple Pages)
Save multiple images in one PDF file.

Note
■ PDF(Multiple Pages) is displayed when multiple images are scanned.
- PDF(Add Page)
Add the scanned images to a PDF file. The images are added to the end of the PDF file. You cannot rearrange the pages of the PDF file to which the images are added.

Important
Images can only be added to PDF files created with MP Navigator EX. You cannot specify PDF files created with other applications. PDF files edited in other applications cannot be specified as well.
If a password-protected PDF file is edited, the passwords will be deleted. Reset the passwords.
Setting Passwords for PDF Files

Important
- PDF, PDF(Multiple Pages) and PDF(Add Page) cannot be selected for images scanned using the Operation Panel of the machine.
- You cannot select JPEG/Exif when Color Mode is Black and White.
- Set...
When Save as type is JPEG/Exif
You can specify a compression type for JPEG files. Select High(Low Compression), Standard or Low(High Compression).
When Save as type is PDF, PDF(Multiple Pages) or PDF(Add Page)
Make advanced settings for creating PDF files. See "PDF Settings Dialog Box" for details.
- Exif Settings...
When Save as type is JPEG/Exif, you can input Exif information into the file to be saved.
→ Exif Settings Dialog Box
- Password security settings
Select this checkbox to open the Password Security -Settings dialog box in which you can set passwords for opening, editing and printing created PDF files.
Setting Passwords for PDF Files

Note
This function is available only when Save as type is PDF, PDF(Multiple Pages) or PDF(Add Page).
- Add to
This is displayed when you select PDF(Add Page) for Save as type and specify the PDF file to which images are added. To change the file, click Browse... to specify another one.

Important
Images can only be added to PDF files created with MP Navigator EX. You cannot specify PDF files created with other applications. PDF files edited in other applications cannot be specified as well.
- Rotate Left 90°/Rotate Right 90°
Rotates scanned images 90 degrees counter-clockwise or clockwise.
Select the image you want to rotate and click Rotate Left 90° or Rotate Right 90°.
- File name
Enter the file name of the image to be saved (up to 64 characters). When saving multiple files, 4 digits are appended to each file name.
- Save in
Displays the folder in which to save the scanned images. To change the folder, click Browse... to specify another one.
The following folders are specified by default.
Windows Vista: MP Navigator EX folder in Pictures folder
Windows XP: MP Navigator EX folder in My Pictures folder
Windows 2000: MP Navigator EX folder in My Pictures folder
- Save to a Subfolder with Current Date
Select this checkbox to create a subfolder in the folder specified in Save in with the current date and save scanned files in it. A subfolder with a name such as "2009_01_01" (Year_Month_Date) will be created.
If this checkbox is not selected, files are saved directly in the folder specified in Save in.
Advanced Guide
Advanced Guide > Scanning > Scanning with the Bundled Application Software > MP Navigator EX Screens > Exif Settings Dialog Box
MP Navigator EX
Exif Settings Dialog Box
You can input Exif information into a file to be saved. Exif is a standard format for embedding various shooting data in digital camera images (JPEG). Embedding Exif information into scanned images allows you to organize and print them along with digital camera images.
The Exif Settings dialog box can be opened when Save as type is JPEG/Exif.
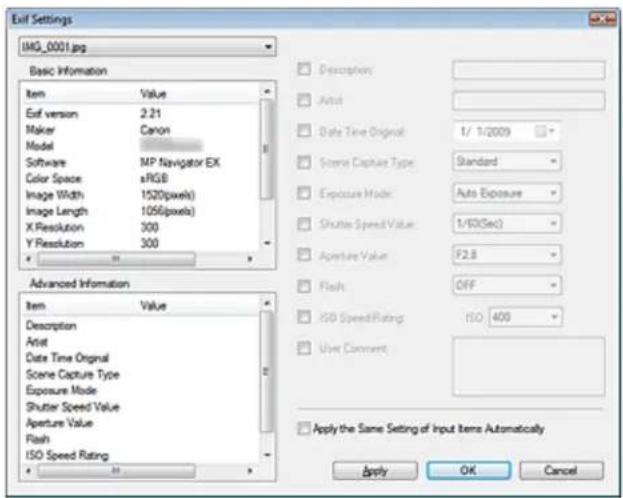
- Basic Information
Displays the information obtained automatically from the machine or software.
• Advanced Information
Displays the information specified on the right side of the screen.
• Advanced Information Settings Area
You can input Exif information such as the title and shooting data. Select the checkbox of the items you want to specify, and select or enter information.
- Apply the Same Setting of Input Items Automatically
Select this checkbox to automatically display the information you specified for the previous image.
- Apply
After specifying all the information you need, click Apply to embed it into the image. The information appears in Advanced Information.
• OK
Embeds the specified information into the image and closes the screen. The specified information is saved.
- Cancel
Cancels the settings and closes the screen.
Information is embedded when Cancel is clicked after clicking Apply.
Advanced Guide
Advanced Guide > Scanning > Scanning with the Bundled Application Software > MP Navigator EX Screens > PDF Dialog Box
MP Navigator EX
PDF Dialog Box
Click Save as PDF file on the Custom Scan with One-click tab or click PDF in the One-click Mode screen to open the PDF dialog box.

Scan Settings
- Document Type
Select the type of document to be scanned.
- Color Mode
Select how to scan the document.
- Document Size
Select the size of the document to be scanned.
When you select Custom, a screen in which you can specify the document size appears. Select a Units, then enter the Width and Height and click OK.
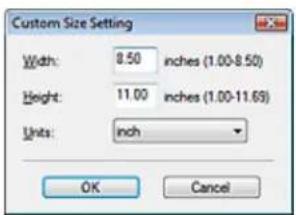
Important
- When you select Auto Detect, the image may not be scanned at the correct position and size. In that case, change the size to the actual document size (A4, Letter, etc.) and align a corner of the
document with the corner at the arrow (alignment mark) of the Platen.
- Resolution
Select the resolution at which to scan documents.
→ Resolution
- Specify...
Click to open the Scan Settings dialog box in which you can make advanced scan settings.
→ Scan Settings Dialog Box
Save Settings
- Automatically save the image to your computer after scanning it
Select this to save the images to your computer as specified after scanning them. The File name, Save as type and Save in settings will be displayed.

Important
If you select this function, you will not be able to set passwords for PDF files.
- File name
Enter the file name of the image to be saved (up to 64 characters). When saving multiple files, 4 digits are appended to each file name.
- Save as type
Select a file type to save the scanned images.
Select PDF, PDF(Multiple Pages) or PDF(Add Page).
Save each of the selected images as a separate PDF file.
- PDF(Multiple Pages)
Save multiple images in one PDF file.
- PDF(Add Page)
Add the scanned images to a PDF file. The images are added to the end of the PDF file. You cannot rearrange the pages of the PDF file to which the images are added.

Important
■ Images cannot be added to password-protected PDF files.

Note
- Click Set... to open the PDF Settings dialog box in which you can specify the PDF compression type and other advanced settings for creating PDF files.
→ PDF Settings Dialog Box
See "Creating/Editing PDF Files" to delete or rearrange the pages of saved PDF files.
- Save in
Displays the folder in which to save the scanned images. To change the folder, click Browse... to specify another one.
The following folders are specified by default.
Windows Vista: MP Navigator EX folder in Pictures folder
Windows XP: MP Navigator EX folder in My Pictures folder
Windows 2000: MP Navigator EX folder in My Pictures folder
- Save to a Subfolder with Current Date
Select this checkbox to create a subfolder in the folder specified in Save in with the current date and save scanned files in it. A subfolder with a name such as "2009_01_01" (Year_Month_Date) will be created.
If this checkbox is not selected, files are saved directly in the folder specified in Save in.
- Open the save dialog box after scanning the image
Select this to open the Save as PDF file dialog box after scanning the images and specify the save
settings such as destination folder and file name.
→ Save as PDF file Dialog Box

Note
- To set passwords for PDF files, select Open the save dialog box after scanning the image. After scanning, you can set the passwords in the Save as PDF file dialog box.
Setting Passwords for PDF Files
Application Settings
- Open with
Specify an application with which to open scanned images. Drag and drop the icon of an application that supports the file format displayed in Save as type. The specified application starts after images are scanned.

Important
■ Depending on the specified application, the images may not appear correctly or the application may not start.
- Reset
Cancels the application setting.
- Set...
Allows you to select an application to start.
- Start scanning by clicking the one-click button
Select this checkbox to start scanning when you click an icon.
- Apply
Saves and applies the specified settings.
Click Cancel instead of Apply to cancel the specified settings.
- Cancel
Cancels the specified settings. The current screen closes.
- Defaults
Returns all settings in the screen to their defaults.
- Scan
Scans and saves documents as PDF files with the specified settings.
Advanced Guide
Advanced Guide > Scanning > Scanning with the Bundled Application Software > MP Navigator EX Screens > Save as PDF file Dialog Box
MP Navigator EX
Save as PDF file Dialog Box
The Save as PDF file dialog box opens when you scan from Save as PDF file on the Custom Scan with One-click tab or from PDF in the One-click Mode screen after selecting Open the save dialog box after scanning the image.
In the Save as PDF file dialog box, you can make settings for saving images to a computer.
Important
- You cannot save images scanned at 10501 pixels or more in the vertical and horizontal directions.

- Save as type
Select a PDF file type to save the scanned images.
Save each of the selected images as a separate PDF file.
- PDF(Multiple Pages)
Save multiple images in one PDF file.

Note
■ PDF(Multiple Pages) is displayed when multiple images are scanned.
- PDF(Add Page)
Add the scanned images to a PDF file. The images are added to the end of the PDF file. You cannot rearrange the pages of the PDF file to which the images are added.
Important
Images can only be added to PDF files created with MP Navigator EX. You cannot specify PDF files created with other applications. PDF files edited in other applications cannot be specified as well.
■ PDF(Add Page) cannot be selected for images scanned using the Operation Panel of the machine.
If a password-protected PDF file is edited, the passwords will be deleted. Reset the passwords.
Setting Passwords for PDF Files
- Set...
Make advanced settings for creating PDF files. See "PDF Settings Dialog Box" for details.
- Password security settings
Select this checkbox to open the Password Security -Settings dialog box in which you can set passwords for opening, editing and printing created PDF files.
Setting Passwords for PDF Files
- Rotate Left 90° /Rotate Right 90°
Rotates scanned images 90 degrees counter-clockwise or clockwise.
Select the image you want to rotate and click Rotate Left 90° or Rotate Right 90°.
- File name
Enter the file name of the image to be saved (up to 64 characters). When saving multiple files, 4 digits are appended to each file name.
- Save in
Displays the folder in which to save the PDF files. To change the folder, click Browse... to specify another one.
The following folders are specified by default.
Windows Vista: MP Navigator EX folder in Pictures folder
Windows XP: MP Navigator EX folder in My Pictures folder
Windows 2000: MP Navigator EX folder in My Pictures folder
- Save to a Subfolder with Current Date
Select this checkbox to create a subfolder in the folder specified in Save in with the current date and save scanned files in it. A subfolder with a name such as "2009_01_01" (Year_Month_Date) will be created.
If this checkbox is not selected, files are saved directly in the folder specified in Save in.
Advanced Guide
Advanced Guide > Scanning > Scanning with the Bundled Application Software > MP Navigator EX Screens > Mail Dialog Box
MP Navigator EX
Mail Dialog Box
Click Attach to E-mail on the Custom Scan with One-click tab or click Mail in the One-click Mode screen to open the Mail dialog box.
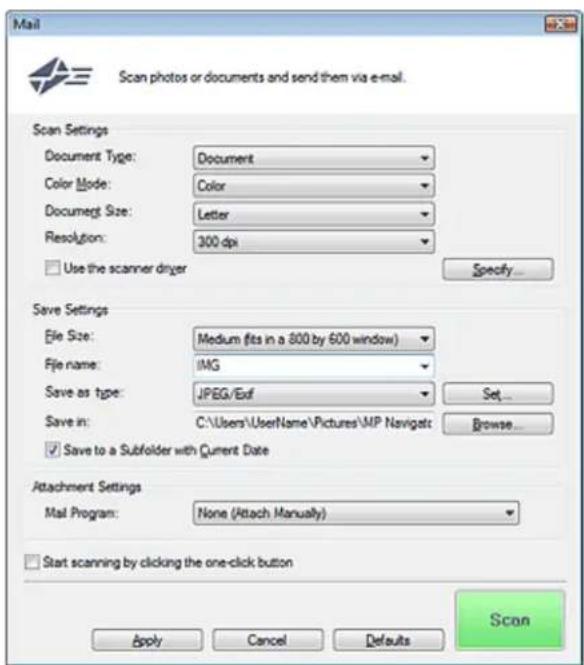
Scan Settings
- Document Type
Select the type of document to be scanned.
- Color Mode
Select how to scan the document.
- Document Size
Select the size of the document to be scanned.
When you select Custom, a screen in which you can specify the document size appears. Select a Units, then enter the Width and Height and click OK.

Important
- When you select Auto Detect, the image may not be scanned at the correct position and size. In that case, change the size to the actual document size (A4, Letter, etc.) and align a corner of the document with the corner at the arrow (alignment mark) of the Platen.
- Resolution
Select the resolution at which to scan documents.
→ Resolution
- Use the scanner driver
Select this checkbox to display the ScanGear (scanner driver) screen and make advanced scan settings.
Color Mode, Document Size, Resolution and other settings in the Mail dialog box will be disabled. Specify these settings in the ScanGear (scanner driver) screen.
- Specify...
Click to open the Scan Settings dialog box in which you can make advanced scan settings.
→ Scan Settings Dialog Box
Save Settings
- File Size
Select a size from Small (fits in a 640 by 480 window), Medium (fits in a 800 by 600 window), Large (fits in a 1024 by 768 window) and Original.
- File name
Enter the file name of the image to be saved (up to 64 characters). When saving multiple files, 4 digits are appended to each file name.
- Save as type
Select a file type to save the scanned images.
Select JPEG/Exif, PDF or PDF(Multiple Pages).

Important
- You cannot set passwords for PDF files.
- You cannot select JPEG/Exif when Color Mode is Black and White.
- Set...
When Save as type is JPEG/Exif
You can specify a compression type for JPEG files. Select High(Low Compression), Standard or Low(High Compression).
When Save as type is PDF or PDF(Multiple Pages).
Make advanced settings for creating PDF files. See "PDF Settings Dialog Box" for details.
- Save in
Displays the folder in which to save the scanned images. To change the folder, click Browse... to specify another one.
The following folders are specified by default.
Windows Vista: MP Navigator EX folder in Pictures folder
Windows XP: MP Navigator EX folder in My Pictures folder
Windows 2000: MP Navigator EX folder in My Pictures folder
- Save to a Subfolder with Current Date
Select this checkbox to create a subfolder in the folder specified in Save in with the current date and save scanned files in it. A subfolder with a name such as "2009_01_01" (Year_Month_Date) will be created.
If this checkbox is not selected, files are saved directly in the folder specified in Save in.
Attachment Settings
- Mail Program
Specify an e-mail software program.

Note
- Select Add... to open the Select Mail Program dialog box in which you can select an e-mail software program. If the e-mail software program you want to use is not listed, click Add to List and select it.

- Start scanning by clicking the one-click button
Select this checkbox to start scanning when you click an icon.
- Apply
Saves and applies the specified settings.
Click Cancel instead of Apply to cancel the specified settings.
- Cancel
Cancels the specified settings. The current screen closes.
- Defaults
Returns all settings in the screen to their defaults.
- Scan
Scans documents with the specified settings.
When scanning is completed, the e-mail software program starts automatically and a new message screen appears with the image attached.
Advanced Guide
Advanced Guide > Scanning > Scanning with the Bundled Application Software > MP Navigator EX Screens > OCR Dialog Box
MP Navigator EX
OCR Dialog Box
Click OCR on the Custom Scan with One-click tab or in the One-click Mode screen to open the OCR dialog box.
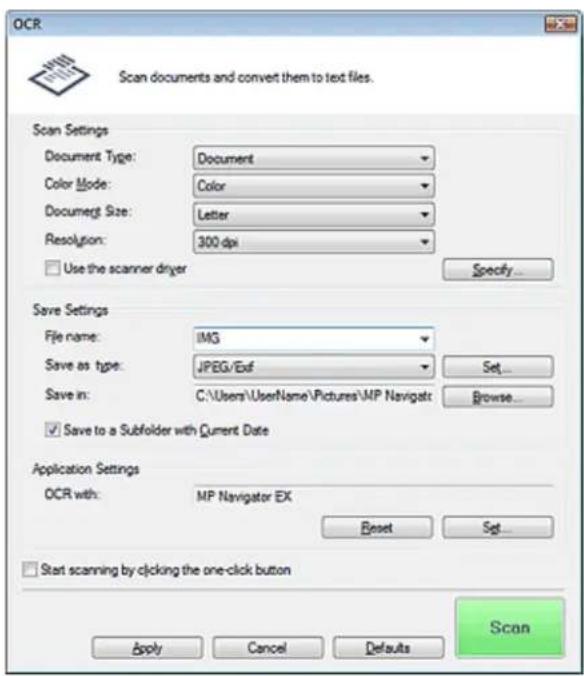
Scan Settings
- Document Type
Select the type of document to be scanned.
- Color Mode
Select how to scan the document.
- Document Size
Select the size of the document to be scanned.
When you select Custom, a screen in which you can specify the document size appears. Select a Units, then enter the Width and Height and click OK.

- Resolution
Select the resolution at which to scan documents.
→ Resolution
• Use the scanner driver
Select this checkbox to display the ScanGear (scanner driver) screen and make advanced scan
settings.
Color Mode, Document Size, Resolution and other settings in the OCR dialog box will be disabled. Specify these settings in the ScanGear (scanner driver) screen.
- Specify...
Click to open the Scan Settings dialog box in which you can make advanced scan settings. → Scan Settings Dialog Box

Note
- When scanning slanted documents, select the Correct slanted document checkbox to improve the text recognition accuracy.
Save Settings
- File name
Enter the file name of the image to be saved (up to 64 characters). When saving multiple files, 4 digits are appended to each file name.
- Save as type
Select a file type to save the scanned images. Select JPEG/Exif, TIFF or BMP.

Important
- You cannot select JPEG/Exif when Color Mode is Black and White.
- Set...
When Save as type is JPEG/Exif
You can specify a compression type for JPEG files. Select High(Low Compression), Standard or Low(High Compression).
- Save in
Displays the folder in which to save the scanned images. To change the folder, click Browse... to specify another one. The following folders are specified by default. Windows Vista: MP Navigator EX folder in Pictures folder Windows XP: MP Navigator EX folder in My Pictures folder Windows 2000: MP Navigator EX folder in My Pictures folder
- Save to a Subfolder with Current Date
Select this checkbox to create a subfolder in the folder specified in Save in with the current date and save scanned files in it. A subfolder with a name such as "2009_01_01" (Year_Month_Date) will be created. If this checkbox is not selected, files are saved directly in the folder specified in Save in.
Application Settings
- OCR with
Specify an OCR application.
When MP Navigator EX is specified, after the image is scanned, the text in the image is extracted and appears in Notepad (included with Windows).

Note
- Only text written in languages that can be selected on the General tab can be extracted to Notepad (included with Windows). Click Set... on the General tab and specify the language according to the language of the document to be scanned.
When scanning multiple documents, you can collect the extracted text into one file.
→ General Tab - Text displayed in Notepad (included with Windows) is for guidance only. Text in the image of the following types of documents may not be detected correctly.
-
Documents containing text with font size outside the range of 8 points to 40 points (at 300 dpi)
-
Slanted documents
- Documents placed upside down or documents with text in the wrong orientation (rotated characters)
- Documents containing special fonts, effects, italics, or hand-written text
- Documents with narrow line spacing
- Documents with colors in the background of text
- Documents containing multiple languages
- Reset
Cancels the application setting.
- Set...
Allows you to select an application.

Important
■ Depending on the specified application, the text may not be extracted correctly or the application may not start.
- Start scanning by clicking the one-click button
Select this checkbox to start scanning when you click an icon.
- Apply
Saves and applies the specified settings.
Click Cancel instead of Apply to cancel the specified settings.
- Cancel
Cancels the specified settings. The current screen closes.
- Defaults
Returns all settings in the screen to their defaults.
- Scan
Scans documents with the specified settings.
Advanced Guide
Advanced Guide > Scanning > Scanning with the Bundled Application Software > MP Navigator EX Screens > Custom Dialog Box
MP Navigator EX
Custom Dialog Box
Click Custom on the Custom Scan with One-click tab or in the One-click Mode screen to open the Custom dialog box.

Scan Settings
- Document Type
Select the type of document to be scanned. When Auto Mode is selected, the document type is automatically detected. In that case, Color Mode, Document Size and Resolution are automatically set as well.

Important
- The following types of documents cannot be scanned correctly with Auto Mode. In that case, specify the document type or size.
- Documents other than photos, postcards, business cards, magazines, newspapers, text documents and CD/DVD
- A4 size photos
- Text documents smaller than 2L (5 inches x 7 inches) (127 mm x 178 mm), such as paperback pages with the spine cut off
- Documents printed on thin white paper
- Long narrow documents such as panoramic photos
■ Reflective CD/DVD labels may not be scanned properly. - Place documents correctly according to the type of document to be scanned. Otherwise, documents may not be scanned correctly.
See "Placing Documents" for details on how to place documents.

Note
■ To reduce moire, set Document Type to Magazine.
- Color Mode
Select how to scan the document.
- Document Size
Select the size of the document to be scanned.
When you select Custom, a screen in which you can specify the document size appears. Select a Units, then enter the Width and Height and click OK.


Important
- When you select Auto Detect, the image may not be scanned at the correct position and size. In that case, change the size to the actual document size (A4, Letter, etc.) and align a corner of the document with the corner at the arrow (alignment mark) of the Platen.
- Resolution
Select the resolution at which to scan documents.
→ Resolution
- Use the scanner driver
Select this checkbox to display the ScanGear (scanner driver) screen and make advanced scan settings.
Color Mode, Document Size, Resolution and other settings in the Custom dialog box will be disabled. Specify these settings in the ScanGear (scanner driver) screen.
- Specify...
Click to open the Scan Settings dialog box in which you can make advanced scan settings.
→ Scan Settings Dialog Box
Save Settings
• Automatically save the image to your computer after scanning it
Select this to save the images to your computer as specified after scanning them. The File name, Save as type and Save in settings will be displayed.

Important
If you select this function, you will not be able to set passwords for PDF files.

Note
If an application to start is specified in Application Settings, the scanned image opens in the specified application.
- File name
Enter the file name of the image to be saved (up to 64 characters). When saving multiple files, 4 digits are appended to each file name.
- Save as type
Select a file type to save the scanned images.
Select Auto, JPEG/Exif, TIFF or BMP. Auto is displayed and selected by default when Document Type is Auto Mode.

Important
- When Document Type is Auto Mode and Save as type is Auto, the file format may differ
depending on how you place the document.
See "Placing Documents" for details on how to place documents.
- Large documents (such as A4 size photos) that cannot be placed away from the edges/arrow (alignment mark) of the Platen may not be saved in the correct file format when Save as type is Auto. In that case, select a file format suitable for the document to be scanned.
- You cannot select JPEG/Exif when Color Mode is Black and White.

Note
- When Auto is selected, files are saved in the following formats according to the document type. Photos, postcards, CD/DVD and business cards: JPEG
Magazines, newspapers and text documents: PDF
You can change the file format from Set....
Images saved as PDF files may not open depending on the application. In that case, select an option other than Auto in Save as type.
If you select JPEG/Exif when Document Type is not Auto Mode, the Save the JPEG/Exif file in AdobeRGB checkbox will be selectable.
- Set...
When Save as type is Auto
You can specify the file format in which to save images. Select a file format for Document and Photo each.
When Save as type is JPEG/Exif
You can specify a compression type for JPEG files. Select High(Low Compression), Standard or Low(High Compression).
- Save in
Displays the folder in which to save the scanned images. To change the folder, click Browse... to specify another one.
The following folders are specified by default.
Windows Vista: MP Navigator EX folder in Pictures folder
Windows XP: MP Navigator EX folder in My Pictures folder
Windows 2000: MP Navigator EX folder in My Pictures folder
- Save to a Subfolder with Current Date
Select this checkbox to create a subfolder in the folder specified in Save in with the current date and save scanned files in it. A subfolder with a name such as "2009_01_01" (Year_Month_Date) will be created.
If this checkbox is not selected, files are saved directly in the folder specified in Save in.
- Save the JPEG/Exif file in AdobeRGB
Select this checkbox to save the images in colors that correspond to Adobe RGB.

Important
This function is available only when Save as type is JPEG/Exif and Document Type is not Auto Mode.
This function is not available if the Adobe RGB profile is not installed.

Note
- You cannot select this setting if the Use the scanner driver checkbox is selected.
- When you save an image with the Save the JPEG/Exif file in AdobeRGB checkbox selected, an underscore is added to the beginning of the file name. (Example: _Image0001.jpg)
- Open the save dialog box after scanning the image (Input Exif information)
Select this to open the Save dialog box after scanning the images and specify the save settings such as destination folder, file name and Exif information.
→ Save Dialog Box
- Open with
Specify an application with which to open scanned images. Drag and drop the icon of an application that supports the file format displayed in Save as type. The specified application starts after images are scanned.

Important
■ Depending on the specified application, the images may not appear correctly or the application may not start.
- Reset
Cancels the application setting.
- Set...
Allows you to select an application to start.
- Start scanning by clicking the one-click button
Select this checkbox to start scanning when you click an icon.
- Apply
Saves and applies the specified settings.
Click Cancel instead of Apply to cancel the specified settings.
- Cancel
Cancels the specified settings. The current screen closes.
- Defaults
Returns all settings in the screen to their defaults.
- Scan
Scans and saves documents with the specified settings.
When Save as type is Auto, a confirmation appears. Click Open Manual to open this guide (if it is installed).
Advanced Guide
Advanced Guide > Scanning > Scanning with the Bundled Application Software > MP Navigator EX Screens > Preferences Dialog Box
MP Navigator EX
Preferences Dialog Box
Click Preferences to open the Preferences dialog box.
In the Preferences dialog box, you can make advanced settings to MP Navigator EX functions via the General and Scanner Button Settings tabs.


Note
- See the corresponding sections below for details on each tab.
→ General Tab
Scanner Button Settings Tab (Save)
Advanced Guide
Advanced Guide > Scanning > Scanning with the Bundled Application Software > MP Navigator EX Screens > General Tab
MP Navigator EX
General Tab
On the General tab, you can specify general MP Navigator EX settings.
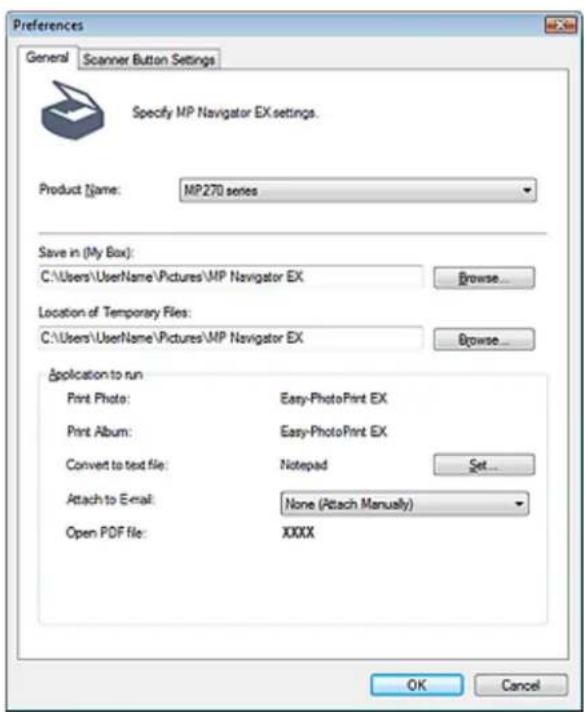
- Product Name
Displays the product name of the machine that MP Navigator EX is currently configured to use. If the displayed product is not the one you want to use, select the desired product from the list.
- Save in (My Box)
Displays the folder in which to save scanned documents. To change the folder, click Browse... to specify another one.
The following folders are specified by default.
Windows Vista: MP Navigator EX folder in Pictures folder
Windows XP: MP Navigator EX folder in My Pictures folder
Windows 2000: MP Navigator EX folder in My Pictures folder
- Location of Temporary Files
Displays the folder in which to save images temporarily. To change the folder, click Browse... to specify another one.
Important
An error may occur if you set the destination to the root directory of the drive on which the operating system is installed. Be sure to specify a folder.
- An error may occur if you set the destination to a network folder. Be sure to specify a local folder.
- Application to run
Displays the applications that can be started via MP Navigator EX. Install the applications from the Setup CD-ROM that accompanies the machine.
For Attach to E-mail, you can select an e-mail software program to start.
For Open PDF file, the application associated with the .pdf file extension by the operating system is displayed.

Important
- You can change which items are installed during installation from the Setup CD-ROM by selecting Custom Install. If you choose not to install some applications with Custom Install, the corresponding MP Navigator EX functions will be unavailable. To use those functions, install the corresponding applications.

Note
- For Convert to text file, Notepad (included with Windows) is displayed. Click Set... to open a dialog box, then specify Document Language and how to scan multiple documents.

- Document Language
Specify the language according to the language of the document to be scanned. Only text written in languages that can be selected in the Document Language can be extracted to Notepad.
• Combine multiple text conversion results
When scanning multiple documents, select the checkbox to collect the conversion results (text) into one file. This checkbox is selected by default.
When the checkbox is selected, you can scan up to 99 pages at one time.
Deselect the checkbox to display each conversion result (text) in a separate file.
When the checkbox is not selected, you can scan up to 10 pages at one time.
Advanced Guide
Advanced Guide > Scanning > Scanning with the Bundled Application Software > MP Navigator EX Screens > Scanner Button Settings Tab (Save)
MP Navigator EX
Scanner Button Settings Tab (Save)
On the Scanner Button Settings tab, you can specify the following settings.
You can specify how to respond when scanning using the Operation Panel of the machine.
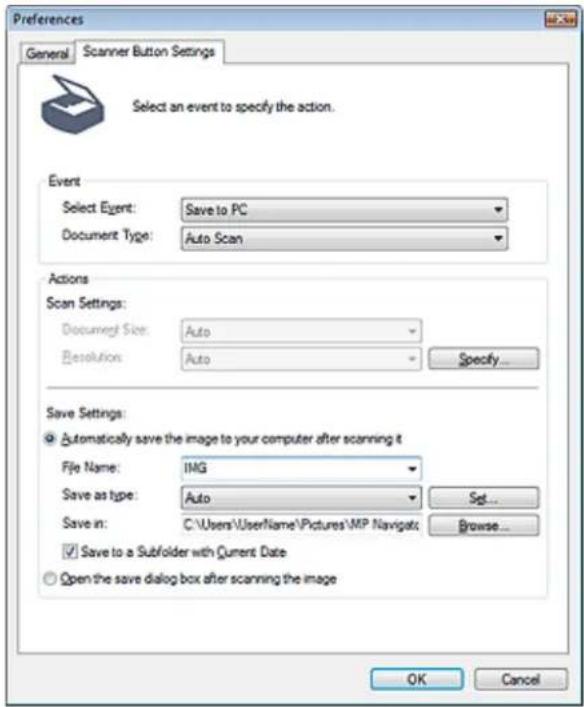
Event
- Select Event
Save to PC is set.
- Document Type
Auto Scan is set. The document type is automatically detected.

Important
The following types of documents cannot be scanned correctly with Auto Scan. In that case, specify the document type or size in MP Navigator EX.
See "Scanning Photos and Documents" to scan images using MP Navigator EX.
- Documents other than photos, postcards, business cards, magazines, newspapers, text documents and CD/DVD
- A4 size photos
- Text documents smaller than 2L (5 inches x 7 inches) (127 mm x 178 mm), such as paperback pages with the spine cut off
- Documents printed on thin white paper
- Long narrow documents such as panoramic photos
■ Reflective CD/DVD labels may not be scanned properly.
- Place documents correctly according to the type of document to be scanned. Otherwise, documents may not be scanned correctly.
See "Placing Documents" for details on how to place documents.
Actions
Scan Settings
- Document Size
This setting is automatically set. - Resolution
This setting is automatically set. - Specify...
→ Scan Settings Dialog Box
Click to open the Scan Settings dialog box in which you can make advanced scan settings.
Save Settings
- Automatically save the image to your computer after scanning it
Select this to save the images to your computer as specified after scanning them.
The File Name, Save as type and Save in settings will be displayed.

Important
If you select this function, you will not be able to set passwords for PDF files.
- File Name
Enter the file name of the image to be saved (up to 64 characters).
- Save as type
Select a file type to save the scanned images.
Select Auto, JPEG/Exif, TIFF or BMP. Auto is displayed by default.

Important
- When Document Type is Auto Scan and Save as type is Auto, the file format may differ depending on how you place the document.
See "Placing Documents" for details on how to place documents. - Large documents (such as A4 size photos) that cannot be placed away from the edges/arrow (alignment mark) of the Platen may not be saved in the correct file format when Save as type is Auto. In that case, select a file format suitable for the document to be scanned.

Note
If you select the Enable Auto Photo Fix checkbox in the Scan Settings dialog box and then select a format other than JPEG/Exif for Save as type, a message appears and the Enable Auto Photo Fix checkbox will be deselected.
- When Auto is selected, files are saved in the following formats according to the document type.
Photos, postcards, CD/DVD and business cards: JPEG
Magazines, newspapers and text documents: PDF
You can change the file format from Set....
- Set...
When Save as type is Auto
You can specify the file format in which to save images. Select a file format for saving Document and Photo each.
When Save as type is JPEG/Exif
You can specify a compression type for JPEG files. Select High(Low Compression), Standard or Low(High Compression).
- Save in
Displays the folder in which to save the scanned images. To change the folder, click Browse...
to specify another one.
The following folders are specified by default.
Windows Vista: MP Navigator EX folder in Pictures folder
Windows XP: MP Navigator EX folder in My Pictures folder
Windows 2000: MP Navigator EX folder in My Pictures folder
- Save to a Subfolder with Current Date
Select this checkbox to create a subfolder in the folder specified in Save in with the current date and save scanned files in it. A subfolder with a name such as "2009_01_01"
(Year_Month_Date) will be created.
If this checkbox is not selected, files are saved directly in the folder specified in Save in.
- Open the save dialog box after scanning the image
Select this to open the save dialog box after scanning the images and specify the save settings such as destination folder, file name and Exif information.

Note
- See "Save Dialog Box" for details.
Advanced Guide
Advanced Guide > Scanning > Scanning with the Bundled Application Software > Appendix: Opening Files Other than Scanned Images
MP Navigator EX
Appendix: Opening Files Other than Scanned Images
You can save or print data other than scanned images using MP Navigator EX.
• Using images saved on a computer
→ Opening Images Saved on a Computer
Page top↑
Advanced Guide
Advanced Guide > Scanning > Scanning with the Bundled Application Software > Appendix: Opening Files Other than Scanned Images > Opening Images Saved on a Computer
MP Navigator EX
Opening Images Saved on a Computer
You can open images saved on a computer and print them or attach them to e-mail using MP Navigator EX. You can also edit them using an application that accompanies the machine.
- Start MP Navigator EX and open the Navigation Mode screen.
Starting MP Navigator EX
- In the Navigation Mode screen, point to View & Use and click My Box (Scanned/Imported Images), Specify Folder or Recently Saved Images.
Click My Box (Scanned/Imported Images) to open images saved in My Box (Scanned/Imported Images), click Specify Folder to open images saved in a specific folder, or click Recently Saved Images to open recently saved images.
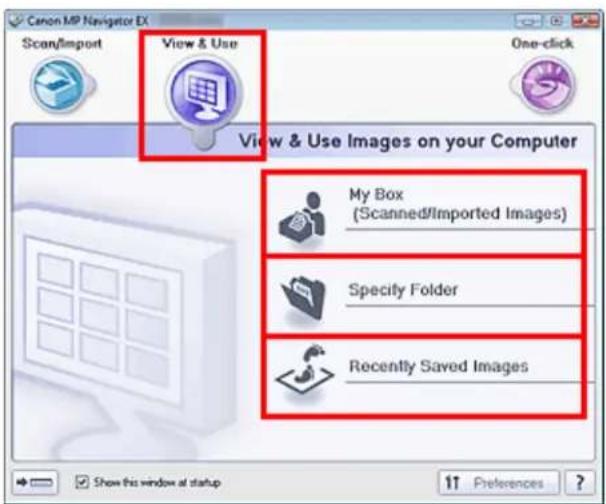

Note
If the Show this window at startup checkbox is not selected, the last used screen appears. If
the Scan/Import window is displayed, click (View & Use) on the upper left of the screen. The View & Use window opens.
- See "View & Use Images on your Computer Tab" for details on the View & Use Images on your Computer tab.
- Click the folder containing the images you want to open.
Images saved in the folder appear in the Thumbnail window.

- Select the images you want to use, then select what you want to do with them.
See the corresponding sections below for details on using images.
Creating/Editing PDF Files
→ Printing Documents
→ Printing Photos
→ Sending via E-mail
Editing Files
Advanced Guide
Advanced Guide > Scanning > Scanning with Other Application Software
Scanning with Other Application Software
What Is ScanGear (Scanner Driver)?
→ Scanning with Advanced Settings Using ScanGear (Scanner Driver)
→ Correcting Images and Adjusting Colors with ScanGear (Scanner Driver)
→ ScanGear (Scanner Driver) Screens
Appendix: Useful Information on Scanning
Advanced Guide
Advanced Guide > Scanning > Scanning with Other Application Software > What Is ScanGear (Scanner Driver)?
ScanGear
What Is ScanGear (Scanner Driver)?
ScanGear (scanner driver) is software required for scanning documents. It enables you to specify the output size and make image corrections when scanning.
ScanGear (scanner driver) can be started from MP Navigator EX or from other applications that are compatible with a standard interface called TWAIN. (ScanGear (scanner driver) is a TWAIN-compatible driver.)
What You Can Do with This Software
This software enables you to preview scan results or set document type and output size, etc. when scanning documents. It is useful when you want to scan in a specific color tone, as it allows you to make various corrections and adjust brightness, contrast, etc.
Screens
There are three modes: Basic Mode, Advanced Mode and Auto Scan Mode. Switch modes by clicking a tab on the upper right of the screen.
Basic Mode
Advanced Mode
Auto Scan Mode

Note
- ScanGear (scanner driver) starts in the last used mode.
■ Settings are not retained when you switch between modes.
Basic Mode
Use Basic Mode to scan easily by following three simple on-screen steps (1, 2 and 3).

Advanced Mode
Use Advanced Mode to specify color mode, output resolution, image brightness, color tone, etc. when scanning.

Auto Scan Mode
Use Auto Scan Mode to scan easily by simply placing the document on the Platen and clicking Scan.
![ScanGear Basic Mode | Advanced Mode | Auto Scan Mode Place paper and press [Scan] button. Placing Documents View scanned images Scan Instructions Preferences... Close](/content/2026/06/1260153/images/6ae6980903f549f6a449439942772bfc694dff6d694daf5f0f55e409d8cc702f.jpg)
Advanced Guide
Advanced Guide > Scanning > Scanning with Other Application Software > Scanning with Advanced Settings Using ScanGear (Scanner Driver)
ScanGear
Scanning with Advanced Settings Using ScanGear (Scanner Driver)
• Starting ScanGear (scanner driver)
Starting ScanGear (Scanner Driver)
- Scanning documents after making simple image corrections
→ Scanning in Basic Mode
- Scanning documents after making advanced image corrections and brightness/color adjustments
→ Scanning in Advanced Mode
- Scanning with a simple operation
→ Scanning in Auto Scan Mode
- Scanning multiple documents at one time after making image corrections and color adjustments
→ Scanning Multiple Documents at One Time with ScanGear (Scanner Driver)
Page top↑
Advanced Guide
Advanced Guide > Scanning > Scanning with Other Application Software > Scanning with Advanced Settings Using ScanGear (Scanner Driver) > Starting ScanGear (Scanner Driver)
ScanGear
Starting ScanGear (Scanner Driver)
Use ScanGear (scanner driver) to make image corrections and color adjustments when scanning. ScanGear (scanner driver) can be started from MP Navigator EX or an application.
Starting from MP Navigator EX
Navigation Mode Screen
Follow these steps to start ScanGear (scanner driver) from the Navigation Mode screen of MP Navigator EX.
- Start MP Navigator EX and open the Navigation Mode screen.
Starting MP Navigator EX
- Point to Scan/Import and click Photos/Documents (Platen).
The Scan/Import window opens.
- Select the Use the scanner driver checkbox, then click Open Scanner Driver.
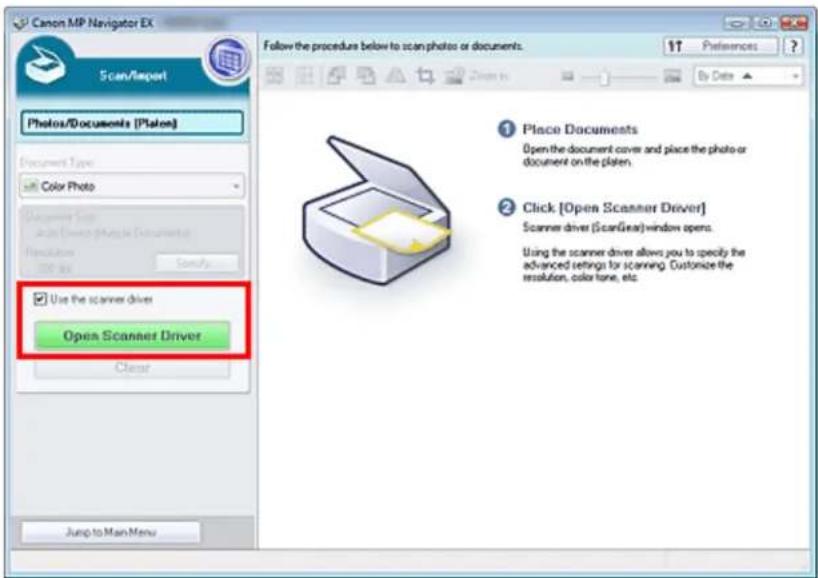
The ScanGear (scanner driver) screen appears.
One-click Mode Screen
Follow these steps to start ScanGear (scanner driver) from the One-click Mode screen of MP Navigator EX.
- Start MP Navigator EX and open the One-click Mode screen.
Starting MP Navigator EX
- Click the corresponding icon.
The corresponding dialog box opens.
- Select the Use the scanner driver checkbox in Scan Settings, then click Scan.

The ScanGear (scanner driver) screen appears.

Important
■ Use the scanner driver is not displayed in the PDF dialog box or Auto Scan dialog box.
Starting from an Application
Follow these steps (example) to start ScanGear (scanner driver) from an application.
The procedure varies depending on the application. For details, refer to the application's manual.
- Start the application.
- On the File menu of the application, select Select Source and select the machine.
- Select the command to scan a document (Scan/Import, Acquire image, etc.).
The ScanGear (scanner driver) screen appears.
Advanced Guide
Advanced Guide > Scanning > Scanning with Other Application Software > Scanning with Advanced Settings Using ScanGear (Scanner Driver) > Scanning in Basic Mode
ScanGear
Scanning in Basic Mode
In Basic Mode, you can scan easily by following the on-screen steps.
This section explains how to scan a single document.
See "Scanning Multiple Documents at One Time with ScanGear (Scanner Driver)" to scan multiple documents at one time.

Important
- The following types of documents may not be cropped correctly. In that case, click on the Toolbar to switch to whole image view and scan.

(Thumbnail)
- Photos that have a whitish border
- Documents printed on white paper, hand-written text, business cards, etc.
- Thin documents
- Thick documents
■ The following types of documents cannot be cropped correctly.
- Documents smaller than 1.18 inches (3 cm) square
- Photos that have been cut to various shapes
- Place the document on the Platen, then start ScanGear (scanner driver).
Starting ScanGear (Scanner Driver)

Important
Place the document face-down on the Platen and align an upper corner of the document with the corner at the arrow (alignment mark) of the Platen.
- Set Select Source according to the document placed on the Platen.


Note
■ To scan magazines containing many color photos, select Magazine(Color).
3. Click Preview.
Preview image appears in the Preview area.
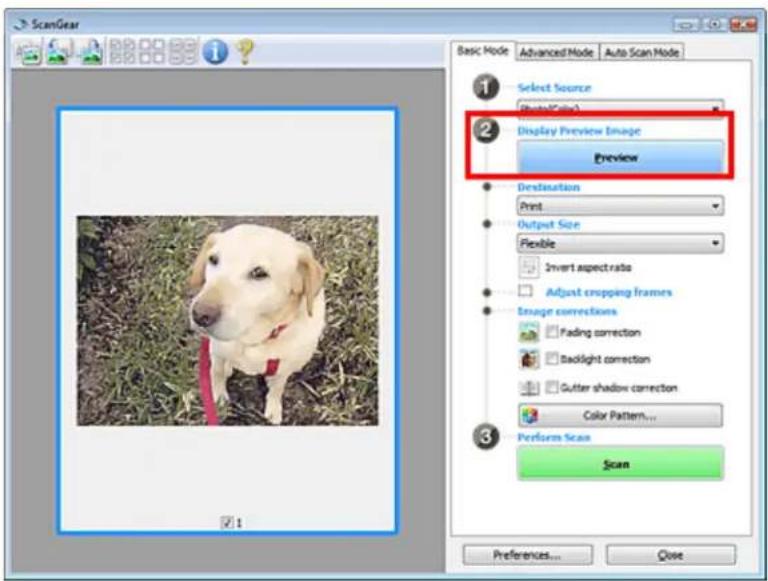

Note
- Colors are adjusted based on the document type selected in Select Source.
- Set Destination.
- Set Output Size.
Output size options vary by the items selected in Select Source and Destination.
- Adjust the scan area (cropping frame) as required.
Adjust the size and position of the cropping frame (scan area) on the preview image.
Adjusting Cropping Frames
- Set Image corrections as required.
- Click Scan.
Scanning starts.

Note

- Click (Information) to open a dialog box in which you can check the current scan settings (document type, etc.).
- ScanGear's response after scanning can be specified in Status of ScanGear dialog after scanning on the Scan tab of the Preferences dialog box.
→ Scan Tab
Related Topic
▶ Basic Mode Tab
Advanced Guide
Advanced Guide > Scanning > Scanning with Other Application Software > Scanning with Advanced Settings Using ScanGear (Scanner Driver) > Scanning in Advanced Mode
ScanGear
Scanning in Advanced Mode
In Advanced Mode, you can specify the color mode, output resolution, image brightness, color tone, etc. when scanning.
This section explains how to scan a single document.
See "Scanning Multiple Documents at One Time with ScanGear (Scanner Driver)" to scan multiple documents at one time.
Important
- The following types of documents may not be cropped correctly. In that case, click on the Toolbar to switch to whole image view and scan.

(Thumbnail)
- Photos that have a whitish border
- Documents printed on white paper, hand-written text, business cards, etc.
- Thin documents
- Thick documents
■ The following types of documents cannot be cropped correctly. - Documents smaller than 1.18 inches (3 cm) square
-
Photos that have been cut to various shapes
-
Place the document on the Platen, then start ScanGear (scanner driver).
Starting ScanGear (Scanner Driver)
Important
- Place the document face-down on the Platen and align an upper corner of the document with the corner at the arrow (alignment mark) of the Platen.
- Click Advanced Mode.
The Advanced Mode tab appears.
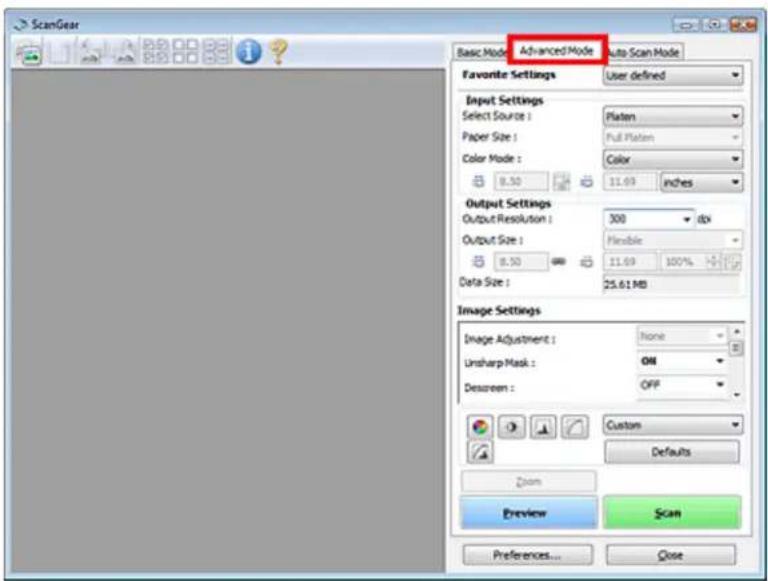

Note
■ Settings are not retained when you switch between modes.
3. Set Color Mode.
→ Input Settings
4. Click Preview.
Preview image appears in the Preview area.


Note
If you scan without preview, the show-through reduction function will be active. This function is useful when scanning magazines. However, when scanning photos, the color tone of the scanned image may differ from the source due to the show-through reduction function. In that case, use preview first.
5. Set Output Settings.
→ Output Settings
6. Adjust the cropping frame (scan area), correct image and adjust colors as required.
Adjusting Cropping Frames
→ Image Settings
→ Color Adjustment Buttons
7. Click Scan.
Scanning starts.

Note

- Click (Information) to open a dialog box in which you can check the current scan settings (document type, etc.).
- ScanGear's response after scanning can be specified in Status of ScanGear dialog after scanning on the Scan tab of the Preferences dialog box.
→ Scan Tab
Related Topic
▶ Advanced Mode Tab
Page top↑
Advanced Guide
Advanced Guide > Scanning > Scanning with Other Application Software > Scanning with Advanced Settings Using ScanGear (Scanner Driver) > Scanning in Auto Scan Mode
ScanGear
Scanning in Auto Scan Mode
You can scan easily in Auto Scan Mode of ScanGear (scanner driver) by letting it automatically determine the type of document placed on the Platen.

Note
■ Supported document types are photos, postcards, business cards, magazines, newspapers, text documents and CD/DVD. To scan other documents, specify the document type on the Basic Mode tab or the Advanced Mode tab.
→ Scanning in Basic Mode
→ Scanning in Advanced Mode
- Place the document on the Platen, then start ScanGear (scanner driver).
→ Placing Documents
Starting ScanGear (Scanner Driver)
- Click Auto Scan Mode.
The Auto Scan Mode tab appears.
![ScanGear Basic Mode Advanced Mode Auto Scan Mode Place paper and press [Scan] button. Placing Documents View scanned images Scan Instructions Preferences... Close](/content/2026/06/1260153/images/b84132ea17f463a3b9b785fb7f16e28dcbf20e12d8252f0ea2a4c3c89ce4d0a7.jpg)
- Click Scan.
Scanning starts.

Note
- ScanGear's response after scanning can be specified in Status of ScanGear dialog after scanning on the Scan tab of the Preferences dialog box.
→ Scan Tab
Related Topic
▶ Auto Scan Mode Tab
Page top↑
Advanced Guide
Advanced Guide > Scanning > Scanning with Other Application Software > Scanning with Advanced Settings Using ScanGear (Scanner Driver) > Scanning Multiple Documents at One Time with ScanGear (Scanner Driver)
ScanGear
Scanning Multiple Documents at One Time with ScanGear (Scanner Driver)
You can scan two or more photos (small documents) on the Platen at one time in Basic Mode and Advanced Mode of ScanGear (scanner driver).
This section explains how to scan multiple documents from the Basic Mode tab.
Important
- To scan multiple documents as a single image, scan in whole image view.
The following types of documents may not be cropped correctly. In that case, adjust the cropping frames (scan areas) in whole image view and scan. - Photos that have a whitish border
- Documents printed on white paper, hand-written text, business cards, etc.
- Thin documents
- Thick documents
→ Scanning Multiple Documents in Whole Image View
■ The following types of documents cannot be cropped correctly. - Documents smaller than 1.18 inches (3 cm) square
- Photos that have been cut to various shapes
Note
See "Scanning in Auto Scan Mode" to scan easily by automatically detecting the document type.
- You can also scan multiple documents at one time from the Advanced Mode tab. Use the Advanced Mode tab to make advanced scan settings such as the color mode, output resolution, image brightness and color tone.
- See the corresponding sections below for details on the Basic Mode tab and Advanced Mode tab.
→ Basic Mode Tab
→ Advanced Mode Tab
- Place the document on the Platen, then start ScanGear (scanner driver).
→ Placing Documents
Starting ScanGear (Scanner Driver)
- Set Select Source according to the document placed on the Platen.
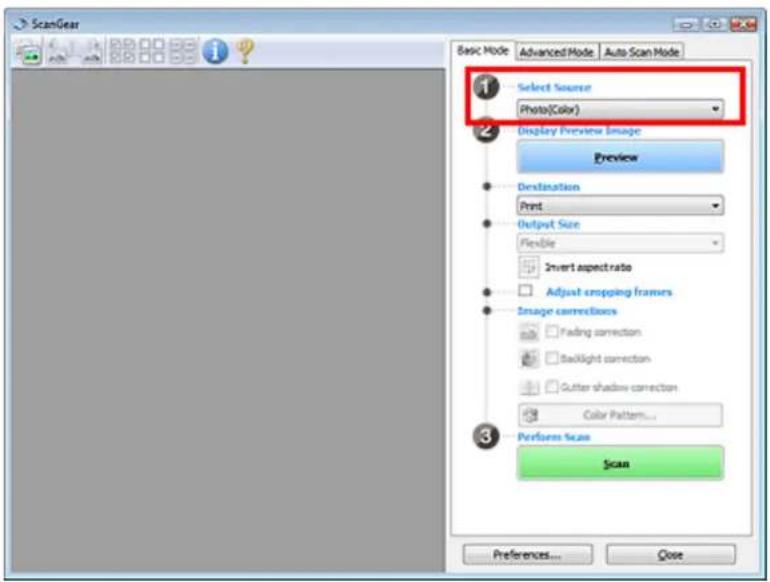
3. Click Preview.
Thumbnails of the preview images appear in the Preview area. Images are cropped (scan areas are specified) automatically according to the document size.

- Set Destination.
- Set Output Size.
- Adjust the scan areas (cropping frames) and set Image corrections as required.

Note
-
You can correct each image separately. Select the frame you want to correct.
In thumbnail view, you can only create one cropping frame (scan area) per image.
To create multiple cropping frames in an image, scan in whole image view.
→ Scanning Multiple Documents in Whole Image View -
Select the images you want to scan.
Select the checkboxes of the images you want to scan.
8. Click Scan.
Scanning Multiple Documents in Whole Image View
Follow these steps if thumbnails are not displayed correctly when previewed or if you want to scan multiple documents as a single image.

Note
■ Positions of slanted documents are not corrected in whole image view.
- After previewing images, click 📄 (Thumbnail) on the Toolbar. Switch to whole image view.


Note
■ When the whole image is displayed, the icon changes to

(Whole Image).
- Adjust the scan areas (cropping frames).
Adjust the size and position of the cropping frame (scan area) on the preview image. You can also create two or more cropping frames.
If an area is not specified, the document will be scanned at the document size (Auto Crop). If an area is specified, only the portion in the specified area will be scanned.
Adjusting Cropping Frames
- Set Destination.
- Set Output Size.
- Set Image corrections as required.
- Click Scan.
Areas framed by broken lines are scanned.

Note
- ScanGear's response after scanning can be specified in Status of ScanGear dialog after scanning on the Scan tab of the Preferences dialog box.
→ Scan Tab
Advanced Guide
Advanced Guide > Scanning > Scanning with Other Application Software > Correcting Images and Adjusting Colors with ScanGear (Scanner Driver)
ScanGear
Correcting Images and Adjusting Colors with ScanGear (Scanner Driver)
The following sections provide you with tips and know-how on advanced scanning techniques involving color/brightness adjustment, etc.
- Sharpening out-of-focus photos, reducing dust and scratches, and correcting faded colors
→ Correcting Images (Unsharp Mask, Reduce Dust and Scratches, Fading Correction, etc.) - Previewing and changing the color tone of the entire image to scan
Adjusting Colors Using a Color Pattern - Brightening colors that have faded with time or due to colorcast
Adjusting Saturation and Color Balance - Adjusting images that are too dark or bright, or too flat due to lack of contrast
Adjusting Brightness and Contrast - Adjusting the color tone using histogram (a graph showing brightness distribution)
Adjusting Histogram - Adjusting the image brightness using tone curve (a graph of brightness balance)
Adjusting Tone Curve - Sharpening characters in text documents or reducing show-through effects
Setting Threshold
Advanced Guide
Advanced Guide > Scanning > Scanning with Other Application Software > Correcting Images and Adjusting Colors with ScanGear (Scanner Driver) > Correcting Images (Unsharp Mask, Reduce Dust and Scratches, Fading Correction, etc.)
ScanGear
Correcting Images (Unsharp Mask, Reduce Dust and Scratches, Fading Correction, etc.)
The Image Settings functions in Advanced Mode tab of ScanGear (scanner driver) allow you to enhance the outline of the subjects, reduce dust/scratches and correct faded colors when scanning images.

Setting Items
Click (Arrow) of a function and select an item from the pull-down menu.
Reduce Dust and Scratches :
Fading Correction :
Grain Correction :
Radlight Correction :

Important
Do not apply these functions to images without moire, dust/scratches or faded colors. The color tone may be adversely affected.
- See "Image Settings" for details and precautions on each function.

Note
- See "Scanning in Advanced Mode" to start ScanGear (scanner driver) in Advanced Mode tab and scan.
Adjusting the image brightness and color tone
Set Image Adjustment to Auto, Photo, Magazine, Newspaper or Document according to the document type.

Sharpening slightly out-of-focus images
Set Unsharp Mask to ON.

Reducing gradations and stripe patterns
Set Descreen to ON.


Note
■ "Moire" is a phenomenon where uneven gradation or a stripe pattern appears when such photos or pictures printed with fine dots are scanned. Descreen is the function for reducing this moire effect.
Reducing dust and scratches
Set Reduce Dust and Scratches to Low, Medium or High according to the degree of dust and scratches.
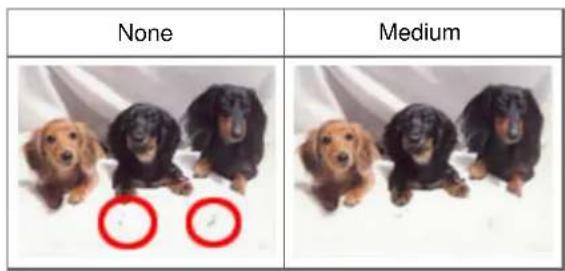
Correcting photos that have faded with time or due to colorcast
Set Fading Correction to Low, Medium or High according to the degree of fading or colorcast.
| None | Medium |
Reducing graininess
Set Grain Correction to Low, Medium or High according to the degree of graininess.
Correcting backlit images
Set Backlight Correction to Low, Medium or High according to the degree of backlight.

Correcting shadows that appear between pages when scanning open booklets
Set Gutter Shadow Correction to Low, Medium or High according to the degree of shadows.

Advanced Guide
Advanced Guide > Scanning > Scanning with Other Application Software > Correcting Images and Adjusting Colors with ScanGear (Scanner Driver) > Adjusting Colors Using a Color Pattern
ScanGear
Adjusting Colors Using a Color Pattern
You can preview color changes and reproduce natural colors by using the Color Pattern function in ScanGear's Basic Mode tab.
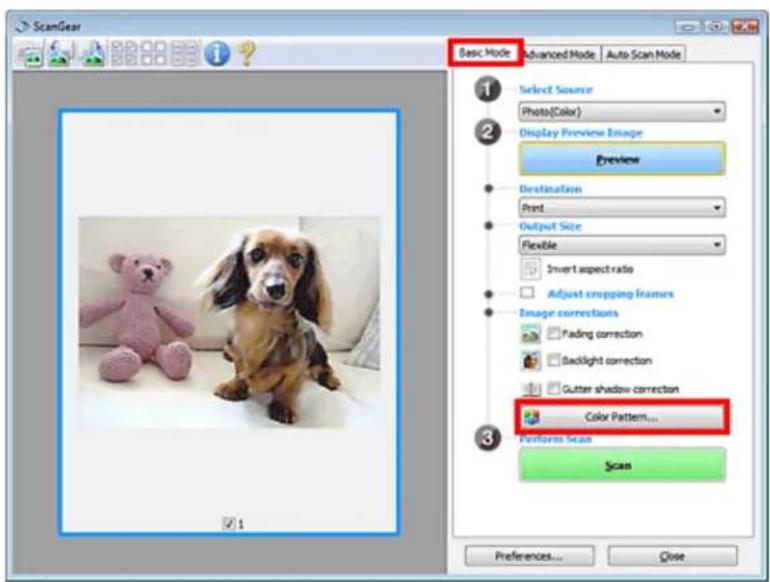

Color Adjustment
Correct colors that have faded with time or due to colorcast. Colorcast is a phenomenon where a specific color affects the entire picture due to the weather or ambient strong colors.
Click an arrow in Color Adjustment to emphasize the corresponding color.
Cyan & red, magenta & green and yellow & blue are complementary color pairs (each pair produces a shade of gray when mixed). You can reproduce the natural colors of the scene by reducing the cast color and increasing the complementary color.
It is recommended that you find a portion in the image where it should be white, and adjust the colors so that the portion turns white.
Preview image appears in the center. Preview image colors change as you adjust them.

Below is an example of correcting a bluish image.
Since Blue and Green are too strong, click the Yellow and Magenta arrows to correct.
| Before | After |
 |  |

Note
- Color adjustments are applied only to the scan area (cropping frame) or the frame selected in thumbnail view.
You can select multiple frames or cropping frames by clicking them while pressing the Ctrl key. - You can also select a color tone from the color pattern displayed on the left of the Color Pattern screen.
- You can also use this function to add a specific tint to an image. Increase the magenta to add a warm tint, and increase the blue to add a cool tint.
Advanced Guide
Advanced Guide > Scanning > Scanning with Other Application Software > Correcting Images and Adjusting Colors with ScanGear (Scanner Driver) > Adjusting Saturation and Color Balance
ScanGear
Adjusting Saturation and Color Balance
In ScanGear's Advanced Mode tab, click (Saturation/Color Balance).


Note
- Click Defaults to reset all adjustments in the current window.
Saturation
Adjust the image's saturation (vividness). You can brighten colors that have faded with time, etc.
Move ▲ (slider) under Saturation to the left to decrease the saturation (darken the image), and to the right to increase the saturation (brighten the image). You can also enter a value (-127 to 127).

| Saturation decreased | Original image | Saturation increased |
 |  |  |

Note
The natural color tone of the original image may be lost if you increase saturation too much.
Color Balance
Adjust images that have a colorcast. Colorcast is a phenomenon where a specific color affects the entire picture due to the weather or ambient strong colors.
Move ▲ (slider) under Color Balance to the left or right to emphasize the corresponding color.
Cyan & Red
Magenta & Green
Yellow & Blue
These are complementary color pairs (each pair produces a shade of gray when mixed). You can reproduce the natural colors of the scene by reducing the cast color and increasing the complementary color.
It is usually difficult to correct the image completely by adjusting only one color pair. It is recommended that you find a portion in the image where it should be white, and adjust all three color pairs so that the portion turns white.
You can also enter a value (-127 to 127).
Below is an example of an image in which the "Cyan & Red" pair has been adjusted.

Cyan is increased Red is increased


Advanced Guide
Advanced Guide > Scanning > Scanning with Other Application Software > Correcting Images and Adjusting Colors with ScanGear (Scanner Driver) > Adjusting Brightness and Contrast
ScanGear
Adjusting Brightness and Contrast
In ScanGear's Advanced Mode tab, click (Brightness/Contrast).


Note
- Click (Down arrow) to switch to detailed view. Click
(Up arrow) to return to the previous view. - Click Defaults to reset all adjustments in the current window.
Channel
Each dot of an image is a mixture of Red, Green and Blue in various proportions (gradation). These colors can be adjusted individually as a "channel."
- Master
Adjust the Red, Green and Blue combined. - Red
Adjust the Red channel.
- Green Adjust the Green channel.
- Blue Adjust the Blue channel.

Note
- Only Grayscale will be displayed in Channel when Color Mode is Grayscale.
Brightness
Adjust the image brightness. Move (slider) under Brightness to the left to darken and right to brighten the image. You can also enter a value (-127 to 127).
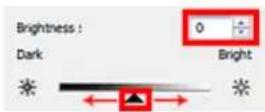
Darkened

Original image
Brightened


Note
■ Highlights may be lost if you brighten the image too much, and shadows may be lost if you darken the image too much.
Contrast
"Contrast" is the degree of difference between the brighter and darker parts of an image. Increasing contrast will increase the difference, thus sharpening the image. Decreasing contrast will decrease the difference, thus softening the image.
Move ▲ (slider) under Contrast to the left to decrease and right to increase the contrast of the image. You can also enter a value (-127 to 127).

Decreased contrast Original image


Increased contrast


Note
- Increasing the contrast is effective in adding a three-dimensional feel to soft images. However, shadows and highlights may be lost if you increase the contrast too much.
Advanced Guide
Advanced Guide > Scanning > Scanning with Other Application Software > Correcting Images and Adjusting Colors with ScanGear (Scanner Driver) > Adjusting Histogram
ScanGear
Adjusting Histogram
In ScanGear's Advanced Mode tab, click (Histogram).

Note
- Click Defaults to reset all adjustments in the current window.
Channel
Each dot of an image is a mixture of Red, Green and Blue in various proportions (gradation). These colors can be adjusted individually as a "channel."
- Master
Adjust the Red, Green and Blue combined.
- Red
Adjust the Red channel.
- Green
Adjust the Green channel.
- Blue
Adjust the Blue channel.

Note
- Only Grayscale will be displayed in Channel when Color Mode is Grayscale.
Reading Histograms
You can open Histogram of a specified area for each Channel. The higher the Histogram peak, the more data is distributed to that level.

| (1) Bright area (2) Dark | area (3) Whole image | |
 |  |  |
| More data is distributed to the highlight side. | More data is distributed to the shadow side. | Data is widely distributed between the highlight and shadow. |
Adjusting Histograms (Using the Slider)
Select a Channel, then move ▲(black-point Slider) or set as the shadow or highlight.
△ (White-point Slider) to specify the level to be

- All parts to the left of ▲ (Black-point Slider) will be black (level 0).
- The parts at △ (Mid-point Slider) will turn to the color exactly between the black-point and white-point.
- All parts to the right of △ (White-point Slider) will turn white (level 255).
Image Adjustment is Auto by default. Adjustments shown below are automatically performed.
Moving the Black-point and White-point Sliders
Move the Black-point Slider or White-point Slider to adjust brightness.
Images with more data distributed to the highlight side
Move the Black-point Slider toward the highlight side.

Images with more data distributed to the shadow side
Move the White-point Slider toward the shadow side.
Images with widely distributed data
Move the Black-point Slider toward the highlight side, and White-point Slider toward the shadow side.

Moving the Mid-point Slider
Move the Mid-point Slider to specify the level to be set as the middle of the tonal range.
Images with more data distributed to the highlight side
Move the Mid-point Slider toward the highlight side.

Images with more data distributed to the shadow side
Move the Mid-point Slider toward the shadow side.
Adjusting Histograms (Using the Droppers)
When you select a Channel and click the Black-point, Mid-point or White-point Dropper, the mouse pointer on the preview image changes to a dropper. Click a Dropper displayed below the histogram to change the setting.

- The point clicked with (Black-point Dropper) will be the darkest point. You can also enter a value (0 to 245).
- The point clicked with (Mid-point Dropper) will be the middle of the tonal range. You can also enter a value (5 to 250).
- The point clicked with (White-point Dropper) will be the brightest point. You can also enter a value (10 to 255).
- Click (Dropper) for Gray Balance and click the area you want to adjust the color in the preview image.
The clicked point will be set as the achromatic color reference, and the rest of the image is adjusted accordingly. For instance, if snow in a photo appears bluish, click the bluish part to adjust the whole image and reproduce natural colors.
Advanced Guide
Advanced Guide > Scanning > Scanning with Other Application Software > Correcting Images and Adjusting Colors with ScanGear (Scanner Driver) > Adjusting Tone Curve
ScanGear
Adjusting Tone Curve
In ScanGear's Advanced Mode tab, click (Tone Curve Settings).


Note
- Click Defaults to reset all adjustments in the current window.
Channel
Each dot of an image is a mixture of Red, Green and Blue in various proportions (gradation). These colors can be adjusted individually as a "channel."
- Master
Adjust the Red, Green and Blue combined.
- Red
Adjust the Red channel.
- Green
Adjust the Green channel.
- Blue
Adjust the Blue channel.

Note
- Only Grayscale will be displayed in Channel when Color Mode is Grayscale.
Reading Tone Curves
With ScanGear (scanner driver), scanning images via a scanner is the input, and displaying to a monitor is the output. "Tone Curve" shows the balance of tone input and output for each Channel.

Adjusting Tone Curve
In Select Tone Curve, select a tone curve from No correction, Overexposure, Underexposure, High contrast, Reverse the negative/positive image and Edit custom curve.
No correction (No adjustment)


Overexposure (Convex curve)
The midtone data of the input side is stretched toward the highlight of the output side, resulting in a bright-toned image when viewed on a monitor.

Underexposure (Concave curve)
The midtone data of the input side is stretched toward the shadow of the output side, resulting in a dark-toned image when viewed on a monitor.

High contrast (S curve)
The highlight and shadow of the input side are enhanced, resulting in a high-contrast image.

Reverse the negative/positive image (Downward-sloping line)
The input and output sides are reversed, resulting in a negative-positive inverted image.

Edit custom curve
You can drag specific points on the Tone Curve to freely adjust the brightness of the corresponding areas.
Page top↑
Advanced Guide
Advanced Guide > Scanning > Scanning with Other Application Software > Correcting Images and Adjusting Colors with ScanGear (Scanner Driver) > Setting Threshold
ScanGear
Setting Threshold
The brightness of color and grayscale images is expressed in a value between 0 and 255. However, in creating black and white images, all colors are mapped to either black (0) or white (255). "Threshold" is the borderline value that determines a color as black or white. By adjusting the threshold level, you can sharpen text in a document or reduce show-through in newspapers.
This function is available when Color Mode is Black and White.
In ScanGear's Advanced Mode tab, click (Threshold).
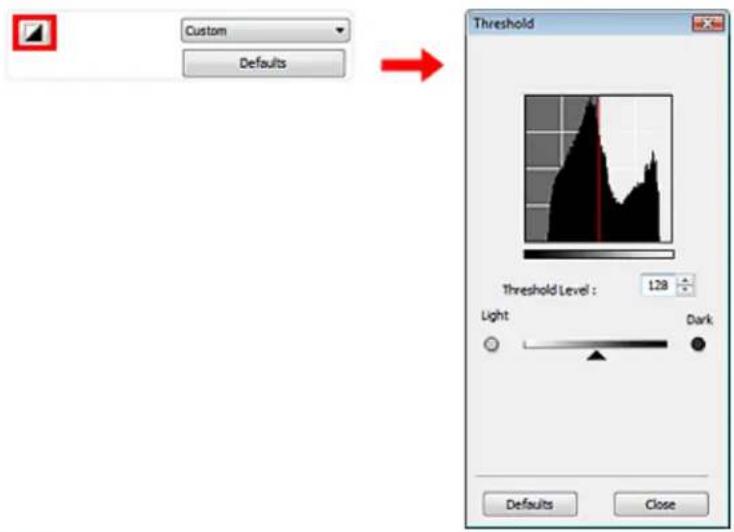

Note
- Click Defaults to reset all adjustments in the current window.
Adjusting Threshold
Move ▲ (slider) to the right to increase the threshold value and thus increase the black areas. Move the slider to the left to decrease the value and thus increase the white areas. You can also enter a value (0 to 255).

Advanced Guide
Advanced Guide > Scanning > Scanning with Other Application Software > ScanGear (Scanner Driver) Screens
ScanGear
ScanGear (Scanner Driver) Screens
The following sections describe ScanGear's screens and functions, and how to use ScanGear (scanner driver).
→ Basic Mode Tab
→ Advanced Mode Tab
- Input Settings
- Output Settings
- Image Settings
• Color Adjustment Buttons
Auto Scan Mode Tab
Preferences Dialog Box
- Scanner Tab
- Preview Tab
- Scan Tab
• Color Settings Tab
Advanced Guide
Advanced Guide > Scanning > Scanning with Other Application Software > ScanGear (Scanner Driver) Screens > Basic Mode Tab
ScanGear
Basic Mode Tab
This mode allows you to scan easily by following the on-screen steps.
This section describes the settings and functions available in Basic Mode.

(1) Settings and Operation Buttons
(2) Toolbar
(3) Preview Area

Note
■ The displayed items vary by document type and how the screen was opened.
Settings and Operation Buttons
- Select Source
- Photo(Color)
Scan color photos.
- Magazine(Color)
Scan color magazines.
- Newspaper(Grayscale)
Scan text and line drawings in black and white.
- Document(Grayscale)
Scan documents and photos in black and white.
Select this mode to create high-resolution black and white images.

Note
- When you select a document type, colors are adjusted based on the Unsharp Mask function or document type.
If you select Magazine(Color), the Descreen function will be active.
• Display Preview Image
- Preview
Performs a trial scan.


Note
- When using the machine for the first time, scanner calibration starts automatically. Wait a while until the preview image appears.
- Destination
Select what you want to do with the scanned image.
Select this to print the scanned image on a printer.
- Image display
Select this to view the scanned image on a monitor.
• OCR
Select this to use the scanned image with OCR software.
OCR software is software that converts text scanned as an image into text data that can be edited in word processors and other programs.
- Output Size
Select an output size.
Output size options vary by the item selected in Destination.
- Flexible
Allows you to freely adjust the cropping frames.
In thumbnail view
Drag the mouse over a thumbnail to display a cropping frame. When a cropping frame is displayed, the portion within the cropping frame will be scanned. When no cropping frame is displayed, each frame is scanned individually.
In whole image view
When no cropping frame is displayed, the entire Preview area will be scanned. When a cropping frame is displayed, the portion within the cropping frame will be scanned.
• Paper Size (L, A4, etc.)
Select an output paper size. The portion within the cropping frame will be scanned at the size of the selected paper size. You can drag the cropping frame to enlarge/reduce it while maintaining the aspect ratio.
• Monitor Size (1024 x 768 pixels, etc.)
Select an output size in pixels.
A cropping frame of the selected monitor size will be displayed and the portion within the cropping frame will be scanned. You can drag the cropping frame to enlarge/reduce it while maintaining the aspect ratio.
- Add/Delete...
Opens the Add/Delete the Output Size dialog box, in which you can specify custom output sizes. You can select this option when Destination is Print or Image display.

In the Add/Delete the Output Size dialog box, you can specify multiple output sizes and save them at one time. Saved items will be registered to the Output Size list and can be selected, along with the predefined items.
Add
To add a size, enter Output Size Name, Width and Height, then click Add. For Unit, you can select mm or inches when Destination is Print but you can only select pixels when Destination is Image display. The name of the added size appears in Output Size List. Click Save to save the items listed in Output Size List.
Delete
To delete an item, select it in Output Size List and click Delete. Click Save to save the items listed in Output Size List.

Important
- You cannot delete predefined output sizes such as A4 and 1024 x 768 pixels.

Note
■ Save up to 10 items.
An error message appears when you enter a value outside the setting range. Enter a value within the setting range.

Note
Whether or how the cropping frame is initially displayed on a preview image can be specified on the Preview tab of the Preferences dialog box. See Cropping Frame on Previewed Images in "Preview Tab."

Invert aspect ratio
This button is available when Output Size is set to anything but Flexible. Click this button to rotate the cropping frame. Click again to return it to the original orientation.
- Adjust cropping frames
You can adjust the scan area within the Preview area. If an area is not specified, the document will be scanned at the document size (Auto Crop). If an area is specified, only the portion in the cropping frame will be scanned.
Adjusting Cropping Frames

- Image corrections
- Fading correction Corrects and scans photos that have faded with time or have a colorcast.
- Backlight correction Corrects photos that have been shot against light.
- Gutter shadow correction Corrects shadows that appear between pages when scanning open booklets.

Important
For precautions on using this function, see Gutter Shadow Correction in "Image Settings" (Advanced Mode tab).
- Color Pattern...
Allows you to adjust the image's overall color. You can correct colors that have faded due to colorcast, etc. and reproduce natural colors while previewing color changes. → Adjusting Colors Using a Color Pattern
- Perform Scan
- Scan Scanning starts.

Note
- When scanning starts, the progress will be displayed. Click Cancel to cancel the scan.
- Preferences...
The Preferences dialog box opens and you can make scan/preview settings. → Preferences Dialog Box
- Close
Closes ScanGear (scanner driver).
Toolbar
- Toolbar
You can adjust or rotate preview images. The buttons displayed on the Toolbar vary by view.
In thumbnail view

In whole image view

• (Thumbnail)/ (Whole image view)
Switches the view in the Preview area.
→ Preview Area
• (Rotate Left)
Rotates the preview image 90 degrees counter-clockwise.
- The result will be reflected in the scanned image.
- The image returns to its original state when you preview again.
• (Rotate Right)
Rotates the preview image 90 degrees clockwise.
- The result will be reflected in the scanned image.
- The image returns to its original state when you preview again.
• (Auto Crop)
Displays and adjusts the cropping frame automatically to the size of the document displayed in the Preview area. The scan area is reduced every time you click this button if there are cropping area within the cropping frame.
• (Check All Frames)
This button is available when two or more frames are displayed. Selects the checkbox of the image in thumbnail view.
• (Uncheck All Frames)
This button is available when two or more frames are displayed. Deselects the checkbox of the image in thumbnail view.
• (Select All Frames)
This button is available when two or more frames are displayed. Selects the image in thumbnail view and the image will be outlined in blue.
• (Select All Cropping Frames)
This button is available when there are two or more cropping frames. All cropping frames will be displayed in thick broken lines. The settings will be applied to all the cropping frames.
• (Remove Cropping Frame)
Removes the selected cropping frame.
• (Information)
Displays the version of ScanGear (scanner driver) and the current scan settings (document type, etc.).
• ? (Open Guide)
This page appears.
Preview Area
- Preview Area
This is where a trial image is displayed after you click Preview. You can also check the results of the settings (image corrections, color adjustments, etc.) made in "Settings and Operation Buttons."
When (Thumbnail) is displayed on the Toolbar
Thumbnails of images cropped to the document size are displayed. Only the images with the
checkbox selected will be scanned.
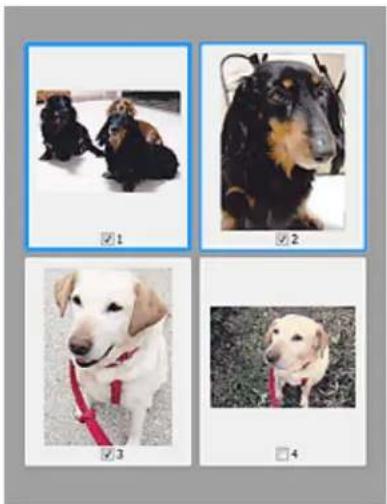

Note
- When multiple images are previewed, different outlines indicate different selection status.
- Focus Frame (thick blue outline): The displayed settings will be applied.
- Selected Frame (thin blue outline): The settings will be applied to the Focus Frame and Selected Frames simultaneously. You can select multiple images by clicking them while pressing the Ctrl key.
- Unselected (no outline): The settings will not be applied.
- Double-click a frame to zoom in on the image. Click (Frame Advance) at the bottom of the screen to display the previous or next frame. Double-click the frame again to return the display to its non-magnified state.
When (Whole Image) is displayed on the Toolbar
Items on the Platen are displayed as a single image. All portions in the cropping frames will be scanned.
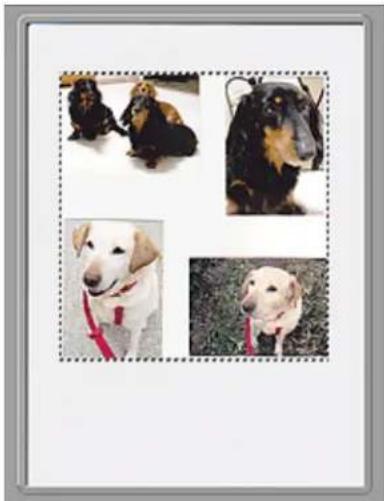

Note
- You can specify the scan area (cropping frame) on the displayed image. In thumbnail view, you can only create one cropping frame per image. In whole image view, you can create multiple cropping frames.
Adjusting Cropping Frames
Related Topic
▶ Scanning in Basic Mode
Page top↑
Advanced Guide
Advanced Guide > Scanning > Scanning with Other Application Software > ScanGear (Scanner Driver) Screens > Advanced Mode Tab
ScanGear
Advanced Mode Tab
This mode allows you to make advanced scan settings such as the color mode, output resolution, image brightness and color tone.
This section describes the settings and functions available in Advanced Mode.
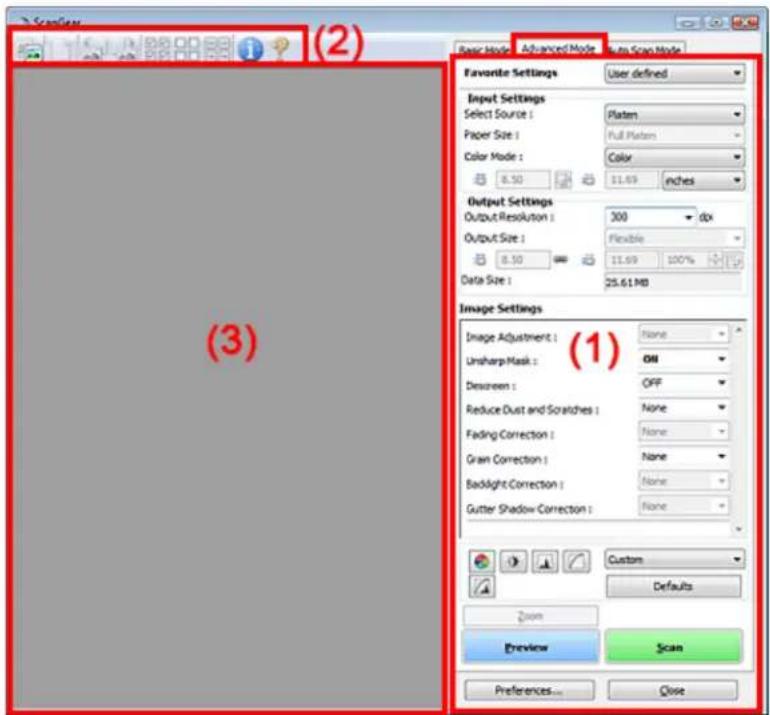
(1) Settings and Operation Buttons
(2) Toolbar
(3) Preview Area

Note
The displayed items vary by document type and how the screen was opened.
Settings and Operation Buttons
- Favorite Settings
You can name and save a group of settings (Input Settings, Output Settings, Image Settings and Color Adjustment Buttons) on Advanced Mode tab, and load it as required. It is convenient to save a group of settings if you will be using it repeatedly. You can also use this to reload the default settings.
Select Add/Delete... from the pull-down menu and the Add/Delete Favorite Settings dialog box opens.

Enter Setting Name and click Add. The name appears in Favorite Settings List.
When you click Save, the item appears in the Favorite Settings list and can be selected, along with the predefined items.
To delete an item, select it in Favorite Settings List and click Delete. Click Save to save settings displayed in Favorite Settings List.

Note
- You can set Add/Delete... in Favorite Settings after preview.
■ Save up to 10 items.
- Input Settings
Specify the input settings such as the document type and size.
→ Input Settings
- Output Settings
Specify the output settings such as the output resolution and size.
→ Output Settings
- Image Settings
Enable/disable various image correction functions.
→ Image Settings
• Color Adjustment Buttons
These buttons can be used to make fine corrections to the image brightness and color tones. You can adjust the image's overall brightness or contrast, and adjust its highlight and shadow values (histogram) or balance (tone curve).
→ Color Adjustment Buttons
- Zoom
Zooms in on an image or the portion within the cropping frame. When the image is zoomed in, Zoom changes to Undo. Click Undo to return the display to its non-magnified state.
In thumbnail view
Zooms in on the selected image. Click display the previous or next frame.

(Frame Advance) at the bottom of the screen to

Note
- You can also zoom in on an image by double-clicking the frame. Double-click the frame again to return the display to its non-magnified state.
In whole image view
Rescans the portion within the cropping frame at higher magnification.

Note
■ Zoom rescans the image and displays high-resolution image in Preview.
(Enlarge/Reduce) on the Toolbar zooms in on the preview image quickly. However, the solution of the displayed image will be low.

- Preview
Performs a trial scan.

- Scan
Starts scanning.

Note
- When scanning starts, the progress will be displayed. Click Cancel to cancel the scan.
- When scanning is completed, a dialog box prompting you to select the next action may open. Follow the prompt to complete. For details, see Status of ScanGear dialog after scanning in "Scan Tab" (Preferences dialog box).
It will take time to process the images if the total size of the scanned images exceeds a certain size. In that case, a warning message appears. It is recommended that you reduce the total size. To continue, scan in whole image view.
- Preferences...
The Preferences dialog box opens and you can make scan/preview settings.
→ Preferences Dialog Box
- Close
Closes ScanGear (scanner driver).
Toolbar
- Toolbar
You can adjust or rotate preview images. The buttons displayed on the Toolbar vary by view.
In thumbnail view

In whole image view


Switches the view in the Preview area.
Preview Area

(Clear)
Click this button to delete the preview image.
It also resets the Toolbar and color adjustment settings.

(Crop)
Allows you to specify the scan area by dragging the mouse.

(Move Image)
If an enlarged image is too large to fit in the Preview area, you can click this button and drag the image across the screen until the part you want to see is displayed. You can also move the image using the scroll bars.

(Enlarge/Reduce)
Click this button then click on the image to enlarge it (zoom in). Right-click on the image to reduce it (zoom out).

(Rotate Left)
Rotates the preview image 90 degrees counter-clockwise.
- The result will be reflected in the scanned image.
- The image returns to its original state when you preview again.

(Rotate Right)
Rotates the preview image 90 degrees clockwise.
- The result will be reflected in the scanned image.
- The image returns to its original state when you preview again.

(Auto Crop)
Displays and adjusts the cropping frame automatically to the size of the document displayed in the Preview area. The scan area is reduced every time you click this button if there are cropping area within the cropping frame.

(Check All Frames)
This button is available when two or more frames are displayed.
Selects the checkbox of the image in thumbnail view.

(Uncheck All Frames)
This button is available when two or more frames are displayed. Deselects the checkbox of the image in thumbnail view.

(Select All Frames)
This button is available when two or more frames are displayed.
Selects the image in thumbnail view and the image will be outlined in blue.

(Select All Cropping Frames)
This button is available when there are two or more cropping frames.
All cropping frames will be displayed in thick broken lines. The settings will be applied to all the cropping frames.

(Remove Cropping Frame)
Removes the selected cropping frame.

(Information)
Displays the version of ScanGear (scanner driver) and the current scan settings (document type, etc.).

(Open Guide)
This page appears.
Preview Area
- Preview Area
This is where a trial image is displayed after you click Preview. You can also check the results of the settings (image corrections, color adjustments, etc.) made in "Settings and Operation Buttons."
When (Thumbnail) is displayed on the Toolbar
Thumbnails of images cropped to the document size are displayed. Only the images with the checkbox selected will be scanned.


Note
- When multiple images are previewed, different outlines indicate different selection status.
- Focus Frame (thick blue outline): The displayed settings will be applied.
- Selected Frame (thin blue outline): The settings will be applied to the Focus Frame and Selected Frames simultaneously. You can select multiple images by clicking them while pressing the Ctrl key.
- Unselected (no outline): The settings will not be applied.
When (Whole Image) is displayed on the Toolbar
Items on the Platen are displayed as a single image. All portions in the cropping frames will be scanned.


Note
- You can specify the scan area (cropping frame) on the displayed image. In thumbnail view, you can only create one cropping frame per image. In whole image view, you can create multiple cropping frames.
Adjusting Cropping Frames
Related Topic
▶ Scanning in Advanced Mode
Advanced Guide
Advanced Guide > Scanning > Scanning with Other Application Software > ScanGear (Scanner Driver) Screens > Input Settings
ScanGear
Input Settings

Input Settings allows you to set the following items:
- Select Source
The type of document to be scanned is displayed.
- Paper Size
Select the size of the document to be scanned. This setting is available in whole film image view only. When you select a size, the Preview area size changes accordingly.
Important
- Some applications have a limit to the amount of scan data they can receive. ScanGear (scanner driver) can scan data that is of:
- 21000 pixels x 30000 pixels or less
If you change Paper Size after previewing, the preview image will be deleted.
Note
If you are not sure which size you should select for Paper Size, set Paper Size to Full Platen, then measure the size of the document and enter the values into (Width) and (Height).
- Color Mode
Select how to scan the document.
• Color
Select this mode to scan color documents or to create color images. This mode renders the image in 256 levels (8 bit) of R(ed), G(reen), and B(lue).
- Grayscale
Select this mode to scan black and white photos, or to create black and white images. This mode
renders the image in 256 levels (8 bit) of black and white.
- Black and White
Select this mode to scan photos and documents in black and white. This mode renders the image in black and white. The contrast in the image is divided at certain levels (threshold level)
into black and white and is rendered in two colors. The threshold level can be set with (Threshold).

- Input Size
In thumbnail view, the cropped document size is displayed after preview.
In whole image view, the Paper Size is displayed before preview, and the cropping frame (scan area) size is displayed after preview.
You can adjust the cropping frame size by entering the values into (Width) and (Height).
Click (Keep Aspect Ratio) and change it to (Locked) to maintain the aspect ratio when you specify the cropping frame size.

Important
- Input size settings are available only when Output Size in Output Settings is Flexible. If you select a size other than Flexible, a cropping frame calculated from Output Size and Output Resolution is displayed, and its aspect ratio is fixed.

Note
The values you can enter will be within the range of the selected document size. The minimum size is 96 pixels x 96 pixels when Output Resolution is 600 dpi, scaled at 100%.
- When Auto Crop is performed in whole image view, the aspect ratio will not be maintained since the size will be prioritized.
- See "Adjusting Cropping Frames" for details on cropping frames.
Advanced Guide
Advanced Guide > Scanning > Scanning with Other Application Software > ScanGear (Scanner Driver) Screens > Output Settings
ScanGear
Output Settings

Output Settings allows you to set the following items:
- Output Resolution
Select the resolution to scan at.
The higher the resolution (value), the more detail in your image.
Select a resolution from the options displayed by clicking the button, or enter a value within the range of 25 dpi to 19200 dpi (in 1 dpi increments).
→ Resolution
- Output Size
Select an output size.
Select Flexible to set custom sizes or select a size for printing or displaying. Select Add/Delete... to set custom size and save it as a new output size option.
- Flexible
You can specify the output resolution and scale, and adjust the cropping frame.
In thumbnail view
Drag the mouse over a thumbnail to display a cropping frame. When a cropping frame is displayed, the portion within the cropping frame will be scanned. When no cropping frame is displayed, each frame is scanned individually.
In whole image view
When no cropping frame is displayed, the entire Preview area will be scanned. When a cropping frame is displayed, the portion within the cropping frame will be scanned.

Note
■ To enlarge/reduce the scanned image, enter values into (Width) and (Height) in
Output Settings or specify a value (by 1%) for %. The maximum value available for % depends on the Output Resolution. % can be specified for up to 19200 dpi (the maximum available output resolution).
• Paper Size (L, etc.) & Monitor Size (1024 x 768 pixels, etc.)
Width, height and scale cannot be specified. The preview image will be cropped according to the selected output size and resolution. The portion within the cropping frame will be scanned at the size of the selected paper/monitor size. You can drag the cropping frame to enlarge, reduce or move it while maintaining the aspect ratio.
- Add/Delete...
Opens the Add/Delete the Output Size dialog box, in which you can specify custom output sizes.
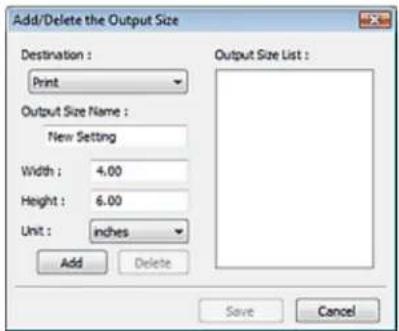
In the Add/Delete the Output Size dialog box, you can specify multiple output sizes and save them at one time. Saved items will be registered to the Output Size list and can be selected, along with the predefined items.
Add
To add a size, select Print or Image display for Destination, then enter Output Size Name, Width, and Height then click Add. The name of the added size appears in Output Size List. Click Save to save the items listed in Output Size List.
Delete
To delete an item, select it in Output Size List and click Delete. Click Save to save the items listed in Output Size List.

Important
- You cannot delete predefined output sizes such as A4 and 1024 x 768 pixels.

Note
■ Save up to 10 items for each destination.
An error message appears when you enter a value outside the setting range. Enter a value within the range displayed in the message.
Unit varies by Destination. For Print, select mm or inches. For Image display, the unit is pixels.

Note
- See "Adjusting Cropping Frames" for details on cropping frames.
Whether or how the cropping frame is initially displayed on a preview image can be specified on the Preview tab of the Preferences dialog box. See Cropping Frame on Previewed Images in "Preview Tab."

(Switch Aspect Ratio)
Click this button to rotate the cropping frame. Click again to return it to the original orientation.
- Data Size
An image file is created when the preview image is scanned. Its size when saved in BMP format is displayed.

Note
- When the file size exceeds a certain size, the value appears in red. In that case, a warning
message appears when you click Scan. It is recommended that you adjust the settings to reduce Data Size. To continue, scan in whole image view.
Page top↑
Advanced Guide
Advanced Guide > Scanning > Scanning with Other Application Software > ScanGear (Scanner Driver) Screens > Image Settings
ScanGear
Image Settings

Important
- Do not apply these functions to images without moire, dust/scratches or faded colors. The color tone may be adversely affected.
■ Image correction results may not be reflected in the preview image.
Note
- Selectable settings depend on color mode settings.
■ Scanning may take longer when you use Image Settings.
Image Settings allows you to set the following items:
• Image Adjustment
When Image Adjustment is set, the brightness of the specified portion of the image is optimized. Images can be adjusted according to the automatically detected document type or the specified document type. The result of the adjustment will be reflected in the entire image. This setting is Auto by default.
- None
Image Adjustment will not be applied.
• Auto
Applies Image Adjustment by automatically detecting the document type. It is recommended that you normally select this setting. - Photo
Select this to apply Image Adjustment to photos. - Magazine
Select this to apply Image Adjustment to magazines.
- Newspaper
Select this to apply Image Adjustment to newspapers.
- Document
Select this to apply Image Adjustment to text documents.

Important
- You can set Image Adjustment after preview.
- You can set this setting when Recommended is selected on the Color Settings tab of the Preferences dialog box.

Note
If the image is not adjusted properly with Auto, specify the document type.
The color tone may change from the source image due to the Image Adjustment. In that case, set Image Adjustment to None.
- Unsharp Mask
When this is set to ON, the outline of the subjects is emphasized to sharpen the image. This setting is ON by default.
- Descreen
Printed photos and pictures are displayed as a collection of fine dots. "Moire" is a phenomenon where uneven gradation or a stripe pattern appears when such photos or pictures printed with fine dots are scanned. Descreen is the function for reducing this moire effect. This setting is OFF by default.

Note
■ Even if Descreen is set to ON, some moire effects may remain if Unsharp Mask is set to ON. In that case, set Unsharp Mask to OFF.
- Selecting Magazine(Color) in Select Source in Basic Mode tab has the same effect as setting Descreen to ON in Advanced Mode tab.
- Reduce Dust and Scratches
Scanned photos may contain white dots caused by dust or scratches. Use this function to reduce such noise. This setting is None by default.
- None
Dust and scratches will not be reduced. - Low
Select this to reduce small dust particles and scratches. Large ones may remain.
- Medium
It is recommended that you normally select this setting.
• High
Select this to reduce small/large dust particles and scratches. Evidence of the reduction process may remain and may also remove delicate parts of the image.

Important
This function may not be effective for some types of photos.

Note
It is recommended that you select None when scanning printed materials.
- Fading Correction
Use this function to correct photos that have faded with time or have a colorcast. Colorcast is a phenomenon where a specific color affects the entire picture due to the weather or ambient strong colors. This setting is None by default.
- None
Fading correction will not be applied.
- Low
Select this to correct a small amount of fading and colorcast.
- Medium
It is recommended that you normally select this setting.
• High
Select this to correct a large amount of fading and colorcast. This can affect the tone of the image.

Important
- You can set Fading Correction after preview.
■ Fading Correction may not be effective if the scan area is too small. - You can set this setting when Recommended is selected on the Color Settings tab of the Preferences dialog box.
- Grain Correction
Use this function to reduce graininess (roughness) in photos taken with high-speed or sensitized film. This setting is None by default.
- None
Graininess will not be reduced. - Low
Select this when the photo is slightly grainy.
- Medium
It is recommended that you normally select this setting.
• High
Select this when the photo is very grainy. This can affect the gradation and sharpness of the image.

Important
- Grain Correction may not be effective if the scan area is too small.
- Backlight Correction
Use this function to correct photos that have been shot against light.
When you change the Backlight Correction setting, the result will be reflected in the preview image. This setting is None by default.
- None
Backlight correction will not be applied. - Low
Select this to correct slightly backlit photos. This will not affect the image contrast. - Medium
It is recommended that you normally select this setting. - High
Select this to correct strongly backlit photos. This can affect the image contrast.

Important
- You can set Backlight Correction after preview.
- You can set this setting when Recommended is selected on the Color Settings tab of the Preferences dialog box.
■ Backlight Correction may not be effective if the scan area is too small.

Note
- Noise patterns may appear when Backlight Correction is applied. Applying Grain Correction and
setting Unsharp Mask to OFF may reduce the noise patterns.
• Gutter Shadow Correction
Use this function to correct shadows that appear between pages when scanning open booklets.
When you set the Gutter Shadow Correction setting in the preview image, the result will be reflected. Preview the effects before scanning, as results vary depending on the type of document and how it is pressed.
Unclear or blurred text/lines caused by curved pages are not corrected. This setting is None by default.
- None
Gutter shadow will not be corrected.
- Low
Select this when the effect level is too strong with the medium setting.
- Medium
It is recommended that you normally select this setting.
• High
Select this when the effect level is too weak with the medium setting.

Important
Do not place items that weigh 4.4 lbs (2.0 kg) or more on the Platen. Also, do not press on the document with a force exceeding 4.4 lbs (2.0 kg). If you press heavily, the scanner may not work correctly or you might break the glass.
- Align the document with the edge of the Platen. If not, the shadow will not be corrected properly.

■ Shadows may not be corrected properly depending on the document. If the page background is not white, shadows may not be detected correctly or may not be detected at all.
■ While scanning, press down on the spine with the same amount of pressure you used to preview the scan. If the binding part is not even, the shadow will not be corrected properly.

How to place the document depends on your model and the document to be scanned.

Note
- Cover the document with black cloth if white spots, streaks, or colored patterns appear in scan results due to ambient light entering between the document and the Platen.
If the shadow is not corrected properly, adjust the cropping frame on the preview image.
Adjusting Cropping Frames
Advanced Guide
Advanced Guide > Scanning > Scanning with Other Application Software > ScanGear (Scanner Driver) Screens > Color Adjustment Buttons
ScanGear
Color Adjustment Buttons

The Color Adjustment Buttons allow you to make fine corrections to the image brightness and color tones. You can adjust the image's overall brightness or contrast, and adjust its highlight and shadow values (histogram) or balance (tone curve).
Important
- The Color Adjustment Buttons are not available when you select Color Matching on the Color Settings tab of the Preferences dialog box.
Note
- Selectable settings depend on color mode settings.
- When you adjust the image via the Color Adjustment Buttons, the results will be reflected in the preview image.
Click a Color Adjustment Button to set the following items:

(Saturation/Color Balance)
Adjust the vividness and color tone of the image. Use this function to brighten colors that have faded with time or due to colorcast. Colorcast is a phenomenon where a specific color affects the entire picture due to the weather or ambient strong colors.
Adjusting Saturation and Color Balance
• (Brightness/Contrast)
Adjust the brightness and contrast of the image. If the image is too dark or too bright, or if the image quality is flat due to lack of contrast, you can adjust the levels of brightness and contrast.
Adjusting Brightness and Contrast
• (Histogram)
A histogram allows you to see the data concentration at each brightness level of an image. You can specify the darkest level (shadow) and brightest level (highlight) within an image, cut the levels and expand the middle of the tonal range of the image.
Adjusting Histogram
• (Tone Curve Settings)
Adjust the brightness of an image by selecting the type of graph (tone curve) showing the balance of tone input and output. You can make fine adjustments to the brightness of a specific area.
Adjusting Tone Curve
• (Final Review)
Make a final check of color adjustments. The final synthesized tone curve and the histogram derived from the subsequent image processing will be displayed. There are no settings to make in this screen.
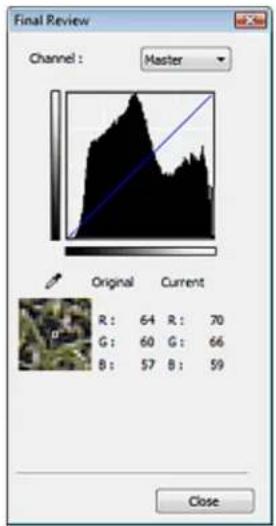
- For a color image, select a color in Channel to check either Red, Green or Blue, or select Master to check three colors together.
- If you place the cursor on the preview image, the portion will be enlarged and its RGB values (only K when Color Mode is Grayscale) before and after the adjustments will be displayed.
• (Threshold)
Set the boundary (threshold) at which black and white are divided. By adjusting the threshold level, you can sharpen text in a document or reduce show-through in newspapers.
Setting Threshold
- Custom
You can name and save a set of tone curve and threshold settings of the Color Adjustment Buttons. Select Add/Delete... from the pull-down menu. When Color Mode is set to anything but Black and White, the Add/Delete Tone Curve Settings dialog box opens. When Color Mode is Black and White, the Add/Delete Threshold Settings dialog box opens.
Enter Setting Name and click Add. The name appears in Tone Curve Settings List or Threshold Settings List.
Click Save to save.
You can load and apply the saved tone curve/threshold settings to a preview image. To load the settings, select the saved item from the pull-down menu.
To delete an item, select it in Tone Curve Settings List or Threshold Settings List and click Delete.
Click Save to save settings displayed in Tone Curve Settings List or Threshold Settings List.

Note
■ Save up to 20 items.
- Defaults
Reset all adjustments (saturation/color balance, brightness/contrast, histogram and tone curve).
Advanced Guide
Advanced Guide > Scanning > Scanning with Other Application Software > ScanGear (Scanner Driver) Screens > Auto Scan Mode Tab
ScanGear
Auto Scan Mode Tab
This mode allows you to scan easily by simply placing documents on the Platen and clicking a button. In Auto Scan Mode, documents are automatically detected. You do not need to specify cropping frames or make image corrections.
![ScanGear Basic Mode | Advanced Mode | Auto Scan Mode Place paper and press [Scan] button. Placing Documents View scanned images Scan Instructions Preferences... Close](/content/2026/06/1260153/images/2f666d2e002c5b3e2a855ba075d640cd76261e45733a6bbc67f3b096d645baa6.jpg)
• Supported Documents
Photos, postcards, business cards, magazines, newspapers, text documents and CD/DVD.
Important
The following types of documents cannot be scanned correctly. In that case, specify the document type or size on the Basic Mode tab or the Advanced Mode tab and scan again.
- Documents other than photos, postcards, business cards, magazines, newspapers, text documents and CD/DVD
- Text documents smaller than 2L (5 inches x 7 inches) (127 mm x 178 mm), such as paperback pages with the spine cut off
- Documents printed on thin white paper
- Long narrow documents such as panoramic photos
→ Scanning in Basic Mode
→ Scanning in Advanced Mode
■ Reflective CD/DVD labels may not be scanned properly.
- Place documents correctly according to the type of document to be scanned. Otherwise, documents may not be scanned correctly.
See "Placing Documents" for details on how to place documents.

Note
- Scan from the "Basic Mode Tab" or "Advanced Mode Tab" to reduce moire.
- Placing Documents

"Placing Documents" appears.
• View scanned images
Select this checkbox to display the thumbnails of scanned images in a different window.
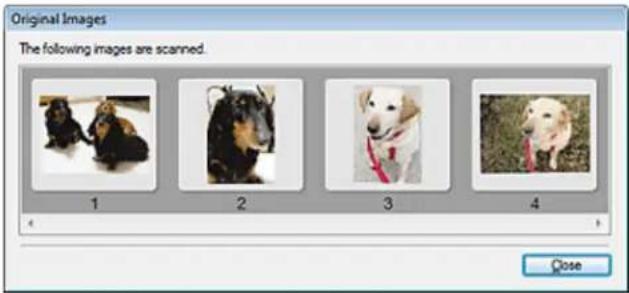
- Scan
Scanning starts.

Note
- When scanning starts, the progress will be displayed. Click Cancel to cancel the scan.
- When scanning is completed, a dialog box prompting you to select the next action may open.
Follow the prompt to complete. For details, see Status of ScanGear dialog after scanning in "Scan Tab" (Preferences dialog box).
- Instructions

This page appears.
- Preferences...
The Preferences dialog box opens and you can make scan/preview settings.
→ Preferences Dialog Box
- Close
Closes ScanGear (scanner driver).
Related Topic
▶ Scanning in Auto Scan Mode
Advanced Guide
Advanced Guide > Scanning > Scanning with Other Application Software > ScanGear (Scanner Driver) Screens > Preferences Dialog Box
ScanGear
Preferences Dialog Box
Click Preferences... in the ScanGear (scanner driver) screen to open Preferences dialog box.
In the Preferences dialog box, you can make advanced settings to ScanGear (scanner driver) functions via the Scanner, Preview, Scan and Color Settings tabs.

Scanner Tab
Allows you to specify a folder to save images temporarily and a music file to play during or at the end of a scan.
Scanner Tab
Preview Tab
Allows you to select what to do with Preview when ScanGear (scanner driver) is started and how to display cropping frames after previewing images. You can also select the cropping size for thumbnails of scanned documents.
Preview Tab
Scan Tab
Allows you to select what to do with ScanGear (scanner driver) after scanning images.
→ Scan Tab
Color Settings Tab
Allows you to select how to adjust color, and specify the monitor gamma value.
→ Color Settings Tab
Advanced Guide
Advanced Guide > Scanning > Scanning with Other Application Software > ScanGear (Scanner Driver) Screens > Scanner Tab
ScanGear
Scanner Tab
On the Scanner tab, you can specify the following settings.
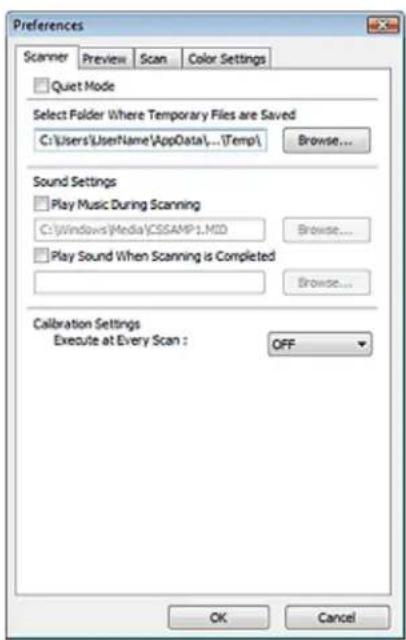
- Quiet Mode
Select this checkbox to reduce scanner sound by slowing down the scanner head when previewing or scanning documents. This checkbox is not selected by default.

Note
■ Scanning takes longer than usual when you enable this function.
- Select Folder Where Temporary Files are Saved
Displays the folder in which to save images temporarily. To change the folder, click Browse... to specify another one.
- Sound Settings
You can set the machine to play music during/at the end of a scan.
Select the Play Music During Scanning or Play Sound When Scanning is Completed checkbox, then click Browse... and specify a sound file.
You can specify the following files.
- MIDI file (*.mid, *.rmi, *.midi)
- Audio file (*.wav, *.aif, *.aiff)
- MP3 file (*.mp3)
- Calibration Settings
When you set Execute at Every Scan to ON, the scanner will be calibrated every time before previewing and scanning, to reproduce correct color tones in scanned images.

Note
Even when Execute at Every Scan is set to OFF, the scanner may be calibrated automatically in some cases (such as immediately after you turn the machine on).
■ Calibration may take time depending on your computer.
Page top↑
Advanced Guide
Advanced Guide > Scanning > Scanning with Other Application Software > ScanGear (Scanner Driver) Screens > Preview Tab
ScanGear
Preview Tab
On the Preview tab, you can specify the following settings.

- Preview at Start of ScanGear
Select what to do with Preview when ScanGear (scanner driver) is started. Display Saved Preview Image is selected by default.
• Automatically Execute Preview
ScanGear (scanner driver) will automatically start previewing at startup.
• Display Saved Preview Image
The previously previewed image will be displayed.
The Color Adjustment Button settings, the Toolbar settings, and the Advanced Mode tab settings are also saved.
- None
No preview image will be displayed at startup.

Note
■ Select None if you do not want to save the preview image.
- Cropping Frame on Previewed Images
Select how to display cropping frames after previewing images. Execute Auto Cropping on Previewed Images is selected by default.
• Execute Auto Cropping on Previewed Images
The cropping frame will automatically be displayed in the document size after previewing.
• Display the Last Frame on Previewed Images
A cropping frame of the same size as the last used cropping frame will be displayed after previewing.
- None
No cropping frame will be displayed after previewing.
- Cropping Size for Thumbnail View
Select the cropping size for thumbnails of scanned documents. Standard is selected by default.
- Larger
Displays 105% (in width and height) of the area displayed for the standard size.
- Standard
The standard size.
- Smaller
Displays 95% (in width and height) of the area displayed for the standard size.

Note
- When you change the Cropping Size for Thumbnail View setting, the preview images will be refreshed and cropped to the new size. As the preview images are refreshed, the color adjustments and other settings applied to them are reset.
Advanced Guide
Advanced Guide > Scanning > Scanning with Other Application Software > ScanGear (Scanner Driver) Screens > Scan Tab
ScanGear
Scan Tab
On the Scan tab, you can specify the following settings.

• Status of ScanGear dialog after scanning
Select what to do with ScanGear (scanner driver) after scanning images. Close ScanGear automatically is selected by default.
- Close ScanGear automatically
Select this to return to the original application when scanning is completed. - Do not close ScanGear automatically
Select this to return to the ScanGear (scanner driver) screen for another scan when scanning is completed.
• Display the dialog to select next action
Select this to open a screen and select what to do when scanning is completed.
![ScanGear Scanning is completed. Select the action you prefer to take: Retouch and save the image (Close ScanGear dialog) Scan other images (Do not close ScanGear) Do not display this dialog again You may modify this setting on [Scan] tab of [Preferences] dialog. OK](/content/2026/06/1260153/images/b2c4fa748e0b53da21b60711e93b9c56e8fed90bd9c07bc4627f9a531a58bf2c.jpg)

Note
Even if Do not close ScanGear automatically or Display the dialog to select next action is set, some applications may not support it.
Advanced Guide
Advanced Guide > Scanning > Scanning with Other Application Software > ScanGear (Scanner Driver) Screens > Color Settings Tab
ScanGear
Color Settings Tab
On the Color Settings tab, you can specify the following settings.

• Color Adjustment
Select either of the following. Recommended is selected by default. This function is available when Color Mode is Color or Grayscale.
- Recommended
Select this to vividly reproduce the tone of a document on the screen. It is recommended that you normally select this setting.
- Color Matching
Select this to automatically match the scanner, monitor and color printer colors, thus reducing time and trouble to manually match the monitor and printer colors.
Color Adjustment Buttons will be disabled.
This function is available when Color Mode is Color.
- Source(Scanner): Select scanner profile.
- Target: Select target profile.
- Monitor: Select this to display preview image with optimum correction for monitor.
- Defaults: Returns to the default Color Matching settings.
- None
Select this to disable color correction provided by ScanGear (scanner driver).

Note
- Color Matching is available when ScanGear (scanner driver), monitor, color management-compliant application (such as Adobe Photoshop) and printer are set up correctly. Refer to the corresponding manual for the monitor, printer and application settings.
- Monitor Gamma
By setting the gamma value of a monitor, you can adjust the input data to the brightness characteristics of the monitor. Adjust the value if your monitor's gamma value does not match the
default value set in ScanGear (scanner driver), and the colors of the original image are not accurately reflected in the monitor.
Click Defaults to return to the default Monitor Gamma value (2.20).

Note
- Refer to the manual of your monitor to check its gamma value. If it is not written in the manual, contact the manufacturer.
Page top↑
Advanced Guide
Advanced Guide > Scanning > Scanning with Other Application Software > Appendix: Useful Information on Scanning
Appendix: Useful Information on Scanning
- Adjusting the cropping frame (scan area)
Adjusting Cropping Frames - Selecting the best resolution
→ Resolution - Learning about file formats
→ File Formats
• Learning about Color Matching
→ Color Matching - Matching the colors between the document and monitor
See Monitor Gamma in the following section.
→ Color Settings Tab
Advanced Guide
Advanced Guide > Scanning > Scanning with Other Application Software > Appendix: Useful Information on Scanning > Adjusting Cropping Frames
Adjusting Cropping Frames
You can specify the scan area by creating a cropping frame on the image displayed in the Preview area of the ScanGear (scanner driver) screen. When you click Scan, only the portion within the cropping frame will be scanned and passed to the application.
Cropping Frame Types
(1)

(2)

(3)
(1) Focus Cropping Frame (rotating thick broken lines)
The settings in Basic Mode or Advanced Mode will be applied.
(2) Selected Cropping Frame (stationary thick broken lines)
The settings will be applied to the Focus Cropping Frame and Selected Cropping Frames simultaneously. You can select multiple cropping frames by clicking them while pressing the Ctrl key.
(3) Unselected Cropping Frame (stationary thin broken lines)
The settings will not be applied.

Note
■ Focus Cropping Frame and Selected Cropping Frames are displayed in whole image view.
Initial Cropping Frame
In thumbnail view
Cropping frame is not displayed initially. Drag the mouse over a frame to create a cropping frame.
In whole image view
A cropping frame (Focus Cropping Frame) is displayed automatically around the preview image according to the document size. You can also create a cropping frame by dragging the mouse in the Preview area.

Note
- Cropping frames are set according to the document size (Auto Crop) by default. For details, see Cropping Frame on Previewed Images in "Preview Tab" (Preferences dialog box).
Adjusting a Cropping Frame
The cursor will change into ⇌ ↗ ↘ (Arrow) when it is positioned over a cropping frame. If you click and drag the mouse in the direction of the arrow, the cropping frame will expand or contract accordingly.

The cursor will change into ✿ (Crosshair arrow) when it is positioned within a cropping frame. Click and drag the mouse to move the entire cropping frame.


Note
In Advanced Mode, you can specify the cropping frame size by entering the values into Width and Height in Input Settings.
→ Input Settings
- You can rotate a cropping frame 90 degrees by clicking (Switch Aspect Ratio). However, (Switch Aspect Ratio) is not available when Output Size is Flexible.
Creating Multiple Cropping Frames
In thumbnail view
You can only create one cropping frame per image.

In whole image view
Click and drag the mouse in a space outside the existing cropping frame to create a new cropping frame in the Preview area. The new cropping frame will be the Focus Cropping Frame, and the old cropping frame will be the Unselected Cropping Frame.

You can create multiple cropping frames and apply different scan settings to each cropping frame.
You can also select multiple cropping frames by clicking them while pressing the Ctrl key.
If you select multiple cropping frames and change the settings on a tab at the right of ScanGear (scanner driver), the settings will be applied to all the selected cropping frames.
When you create a new cropping frame, it retains the settings of the latest cropping frame.

Note
■ Create up to 12 cropping frames.
■ Scanning takes longer than usual when multiple cropping frames are selected.
Deleting Cropping Frames
In thumbnail view
To delete a cropping frame, click an area outside the cropping frame on an image.
In whole image view
To delete a cropping frame, select it and click (Remove Cropping Frame) on the Toolbar. Alternatively, press the Delete key.
When there are multiple cropping frames, all the selected cropping frames (Focus Cropping Frame and Selected Cropping Frames) are deleted simultaneously.
Advanced Guide
Advanced Guide > Scanning > Scanning with Other Application Software > Appendix: Useful Information on Scanning > Resolution
Resolution
What is Resolution?
The data in the image you have scanned is a collection of dots carrying information about brightness and color. The density of these dots is called "resolution", and resolution will determine the amount of detail your image contains. The unit of resolution is dots per inch (dpi). Dpi is the number of dots per square inch (2.54 cm square).
The higher the resolution (value), the more detail in your image; the lower the resolution (value), the less detail.

Setting the Resolution in MP Navigator EX
In MP Navigator EX, you can specify the resolution with Scanning Resolution in the Scan Settings dialog box.
Images for Printing
Images to be printed should be scanned at a resolution that corresponds to the resolution of the printer. For example, if you want to print using a 600 dpi black and white printer, you should set the resolution to 600 dpi.
With a color printer, specifying the resolution at half the resolution of the printer should be fine. For example, if you want to print scanned paper/photos using a 600 dpi color printer, you should set the resolution to 300 dpi. However, with a high-resolution printer, printing takes longer than usual if you set the resolution to half the resolution of the printer.
Example of Appropriate Resolution when Printing to Scale
If you print a document at twice the size both vertically and horizontally, the resolution of the document will be reduced by half. If the resolution of the original document is 300 dpi, the resolution of the enlarged document will be 150 dpi. If you print the document with a 600 dpi color printer, the lack of detail in the image may be obvious. In that case, if you scan at the Scanning Resolution of 600 dpi, the resolution will be 300 dpi even if you double the size of document and you can print the document with sufficient quality. Conversely, if you print a document at half scale, it should be sufficient to scan at half the resolution.
When Printing Color Photos at Twice the Size
 |  |  |
| Document resolution: 300 dpiScanning resolution: 600 dpiScale: 200% | Print at twice the sizeScanning resolution/actual scanning resolution: 600 dpi | Printing resolution: 300 dpi |
Setting the Resolution in ScanGear (Scanner Driver)
In ScanGear (scanner driver), you can specify the resolution with Output Resolution in Output Settings on
the Advanced Mode tab.
Example of Appropriate Resolution when Printing to Scale
The scanning resolution is automatically set so that the value set in Output Resolution will be the resolution of the scanned image. If you set Output Resolution to 300 dpi and scan at twice the size, the document will be automatically scanned at 600 dpi, and the resolution of the scanned image will be 300 dpi. You can print the document with sufficient quality using a 600 dpi color printer.
When Printing L Size (8.9 cm x 12.7 cm) Photos at Twice the Size
 |  |  |
| Document resolution: 300 dpiOutput resolution: 300 dpiScale: 200% | Scan at twice the sizeActual scanning resolution: 600 dpi | Image resolution/printing resolution: 300 dpi |
Appropriate Resolution Settings
Set the resolution according to the use of the scanned image.
For displaying on a monitor: 150 dpi
For printing: 300 dpi
When Output Size is set to Flexible in ScanGear's Advanced Mode tab (Select Source is Platen and the scale is 100%):
| Document | Use | Color Mode | Output Resolution |
| Color photo | Copying (Printing) | Color 300 dpi | |
| Creating a postcard | Color 300 dpi | ||
| Saving to a computer | Color | 75 dpi - 300 dpi | |
| Using on a website or attaching to e-mail | Color | 75 dpi - 150 dpi | |
| Black and white photo | Saving to a computer Grayscale | 75 dpi - 300 dpi | |
| Using on a website or attaching to e-mail | Grayscale | 75 dpi - 300 dpi | |
| Text document | Copying Color, Grayscale or Black | and White | 300 dpi |
| Attaching to e-mail Color, Grayscale | or Black and White | 300 dpi |
Important
If you double the resolution, the file size quadruples. If the file is too large, the processing speed will slow down significantly, and you will experience inconvenience such as lack of memory. Set the minimum required resolution according to the use of the image.
Note
Although you can change Output Resolution in ScanGear (scanner driver), it is recommended that you scan at the default value.
Advanced Guide
Advanced Guide > Scanning > Scanning with Other Application Software > Appendix: Useful Information on Scanning > File Formats
File Formats
You can select a file format when saving scanned images. You should specify the most suitable format according to how you want to use the image on which application.
Available file formats vary by application and computer (Windows or Macintosh).
See below for the characteristics of each image file format.
BMP (Standard File Extension: .bmp)
A standard file format for Windows.
BMP is often selected for images that are used only on Windows.
JPEG (Standard File Extension: .jpg)
A file format often used on websites and for digital camera images.
JPEG features high compression rates. JPEG images slightly degrade every time they are saved, and cannot be returned to their original state.
JPEG is not available for black and white images.
Exif (Standard File Extension: .jpg)
A file format supported by many digital cameras.
It adds information such as the date of image capture, camera model, shutter speed, shooting mode and comments to JPEG files.
The file format version must be Exif 2.2 or later in order to print on a Direct Print compatible printer.
TIFF (Standard File Extension: .tif)
A file format featuring a relatively high compatibility between various computers and applications. (Some TIFF files are incompatible.) TIFF is suitable for editing saved images.

Note
■ MP Navigator EX supports the following TIFF file formats.
- Uncompressed, black and white binary
- Uncompressed, RGB (8 bits per channel)
- Uncompressed, YCC (8 bits per component)
- Uncompressed, RGB (16 bits per channel)
- Uncompressed, YCC (16 bits per component)
- Uncompressed, Grayscale
PDF (Standard File Extension: .pdf)
A file format developed by Adobe Systems. It can be used on various computers and operating systems. Therefore, PDF files can be exchanged between people who use different operating systems, fonts, etc. regardless of the differences.

Important
- Only PDF files created with MP Navigator EX are supported. PDF files created or edited in other applications are not supported.
Advanced Guide
Advanced Guide > Scanning > Scanning with Other Application Software > Appendix: Useful Information on Scanning > Color Matching
Color Matching
Color Matching adjusts devices as shown below to match the colors of an image displayed on a monitor or a printed image with the colors of the original document.
Example: When sRGB is selected as the output profile (target)
![graph TD A["Input Profile (Source)"] --> B["Scanner"] B --> C["ScanGear (Scanner Driver)"] C --> D["Output Profile (Target)"] D --> E["sRGB"] E --> F["OS Application"] E --> G["Application Printer Driver"] F --> H["Monitor"] G --> I["Printer"]](/content/2026/06/1260153/images/1c5d7842cf633fe82b980e93e404e607462ef65491deb6e179358e5160963c63.jpg)
ScanGear (scanner driver) converts the image's color space from the scanner's color space to sRGB. When displaying on a monitor, the image's color space is converted from sRGB to the monitor's color space based on the operating system's monitor settings and the application's working space settings. When printing, the image's color space is converted from sRGB to the printer's color space based on the application's print settings and the printer driver's settings.
Advanced Guide
Advanced Guide > Scanning > Other Scanning Methods
Other Scanning Methods
→ Scanning with WIA Driver
→ Scanning Using the Control Panel (Windows XP Only)
Advanced Guide
Advanced Guide > Scanning > Other Scanning Methods > Scanning with WIA Driver
Scanning with WIA Driver
You can scan an image from a WIA-compliant application and use the image in that application.
The procedure varies depending on the application. The following procedures are examples only.
For details, refer to the application's manual.
Important
In Windows 2000, you cannot scan using the WIA driver.
Scanning with WIA Driver 2.0
The following is an example of scanning using Windows Photo Gallery.
- Place the document on the Platen.
→ Placing Documents
- In File, click Import from Camera or Scanner..., then double-click WIA Canon (model name).
The scan setting screen appears.
- Specify the settings.

- Scanner
The currently set product name is displayed. To change the scanner, click Change... and select the product you want to use.
- Profile
Select Photo (Default) or Documents according to the document to be scanned. To save a new Profile, select Add profile.... You can specify the details in the Add New Profile dialog box.
- Source
Select a scanner type.
- Paper size
This setting is not available for this machine.
- Color format
Select how to scan the document.
- File type
Select a file format from JPEG, BMP, PNG and TIFF.
- Resolution (DPI)
Enter the resolution. Specify a value between 50 dpi and 600 dpi. 300 dpi is set by default.
→ Resolution
- Brightness
Move the slider to adjust the brightness. Move it to the left to darken and right to brighten the image. You can also enter a value (-100 to 100).
- Contrast
Move the slider to adjust the contrast. Moving it to the left will decrease the contrast of the image, thus softening the image. Moving it to the right will increase the contrast of the image, thus sharpening the image. You can also enter a value (-100 to 100).
- Preview or scan images as separate files
Select this checkbox to preview or scan multiple images as separate files.
• See how to scan a picture
Click to open Windows Help and Support.
- Click Preview to preview the image.
The preview image appears on the right.
- Click Scan.
When scanning is completed, the scanned image appears in the application.
Scanning with WIA Driver 1.0
The following is an example of scanning using Paint.
- Place the document on the Platen.
→ Placing Documents
-
In File, click From Scanner or Camera.... (Select the command to scan a document in the application.)
-
Select an image type according to the document to be scanned.


Note
- To scan with the values previously set in Adjust the quality of the scanned picture, select Custom Settings.
- Click Adjust the quality of the scanned picture and set the preferences as required.

- Brightness
Move the slider to adjust the brightness. Move it to the left to darken and right to brighten the image. You can also enter a value (-127 to 127).
- Contrast
Move the slider to adjust the contrast. Moving it to the left will decrease the contrast of the image, thus softening the image. Moving it to the right will increase the contrast of the image, thus sharpening the image. You can also enter a value (-127 to 127).
- Resolution (DPI)
Enter the resolution. Specify a value between 50 dpi and 600 dpi.
→ Resolution
- Picture type
Select the type of scan you want for your document.
- Reset
Click to restore the original settings.
5. Click Preview to preview the image.
The preview image appears on the right. Drag to specify the scan area.
6. Click Scan.
When scanning is completed, the scanned image appears in the application.
Advanced Guide
Advanced Guide > Scanning > Other Scanning Methods > Scanning Using the Control Panel (Windows XP Only)
Scanning Using the Control Panel (Windows XP Only)
You can scan images via the Control Panel of Windows XP using the WIA driver.
Windows Image Acquisition (WIA) is a driver model implemented in Windows XP. It allows you to scan documents without using an application. Scan documents from a TWAIN-compliant application to specify advanced settings for scanning.
- From the Start menu, select Control Panel.
-
Click Printers and Other Hardware > Scanners and Cameras, then double-click WIA Canon (model name).
The Scanner and Camera Wizard dialog box opens. -
Click Next.
-
Select Picture type according to the document to be scanned.
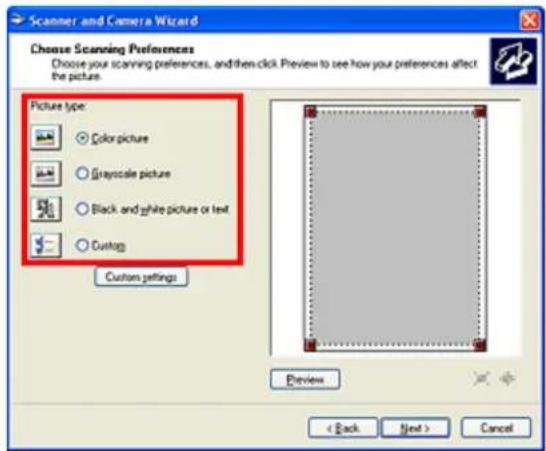

Note
■ To scan with the values previously set in Custom Settings, select Custom.
- Click Custom Settings to set the preferences as required.

- Brightness
Move the slider to adjust the brightness. Move it to the left to darken and right to brighten the image. You can also enter a value (-127 to 127).
- Contrast
Move the slider to adjust the contrast. Moving it to the left will decrease the contrast of the image, thus softening the image. Moving it to the right will increase the contrast of the image, thus sharpening the image. You can also enter a value (-127 to 127).
- Resolution (DPI)
Enter the resolution. Specify a value between 50 dpi and 600 dpi.
→ Resolution
- Picture type
Select the type of scan you want for your document.
- Reset
Click to restore the original settings.
6. Click Preview to preview the image.
The preview image appears on the right. Drag to specify the scan area.
7. Click Next and follow the instructions.
Advanced Guide
Advanced Guide > Printing Photographs Directly from a Compliant Device (MP270 series only)
Printing Photographs Directly from a Compliant Device (MP270 series only)
→ Printing Photographs Directly from a Compliant Device (MP270 series only)
Page top ↑
Advanced Guide
Advanced Guide > Printing Photographs Directly from a Compliant Device (MP270 series only) > Printing Photographs Directly from a Compliant Device (MP270 series only)
Printing Photographs Directly from a Compliant Device (MP270 series only)
→ Printing Photographs Directly from a Compliant Device (MP270 series only)
→ About PictBridge Print Settings (MP270 series only)
Advanced Guide
Advanced Guide > Printing Photographs Directly from a Compliant Device (MP270 series only) > Printing Photographs Directly from a Compliant Device (MP270 series only) > Printing Photographs Directly from a Compliant Device (MP270 series only)
Printing Photographs Directly from a Compliant Device (MP270 series only)
You can connect a PictBridge compliant device such as a digital camera, camcorder, or mobile phone connect to the machine using a USB cable recommended by the device's manufacturer, and print recorded images directly without using a computer.

Note
- When printing photos with the PictBridge compliant device connected to the machine, we recommend the use of the AC adapter supplied with the device. If you are using the device battery, be sure to charge it fully.
- Depending on the model or brand of your device, you may have to select a print mode compliant with PictBridge before connecting the device. You may also have to turn on the device or select Play mode manually after connecting the device to the machine.
Perform necessary operations on the PictBridge compliant device before connecting it to this machine according to instructions given in the device's instruction manual.
- Make sure that the machine is turned on.
- Load paper on the Rear Tray.
- Make sure that the PictBridge compliant device is turned off.
- Connect the PictBridge compliant device to the machine using a USB cable (A) recommended by the device's manufacturer.
The PictBridge compliant device turns on automatically.
If your device does not turn on automatically, turn it on manually.
When machine is correctly connected to the device, c will appear on the LED and the message that the machine is connected will be displayed on the LCD of the device. Refer to the device's instruction manual.

- Specify the print settings such as the paper type and layout.
You can perform settings using the menu on the LCD of your PictBridge compliant device. Select the size and type of paper that you loaded in the machine.
Settings on a PictBridge Compliant Device
- Start printing from your PictBridge compliant device.

Important
- Never disconnect the USB cable during printing unless when explicitly allowed to by the PictBridge compliant device. When disconnecting the USB cable between the PictBridge compliant device and machine, follow the instructions given in the device's instruction manual.
Page top ↑
Advanced Guide
Advanced Guide > Printing Photographs Directly from a Compliant Device (MP270 series only) > Printing Photographs Directly from a Compliant Device (MP270 series only) > About PictBridge Print Settings (MP270 series only)
About PictBridge Print Settings (MP270 series only)
Settings on a PictBridge Compliant Device
This section describes the PictBridge function of the machine. For the print settings on a PictBridge compliant device, refer to the instructions given in the device's instruction manual.

Note
In the following description, names of setting items are given according to those used in Canon-brand PictBridge compliant devices. Setting item names may be different depending on the brand or model of your device.
Some setting items explained below may not be available on some devices. When you cannot change print settings on a device, the machine prints images as follows:
Paper size: 4" x 6"/101.6 x 152.4 mm
Paper type: Photo
Bordered/Borderless: Follow camera's setting
Layout: 1-up
Print quality: Standard
Image Optimize: The Photo optimizer pro function will be used for optimized printing.
This section describes the print settings on a PictBridge compliant device. When operating the device, be sure to follow the instructions given in the device's instruction manual.
| Paper size | 4" x 6"/10 x 15 cm, 5" x 7"*1, 8" x 10"/ 20 x 25 cm, A4, 8.5" x 11"(Letter), 4" x 7.1"/ 10.1 x 18 cm*2*1 Can be selected only on certain Canon-brand PictBridge compliant devices.(May not be selected depending on the device.)*2 Hi Vision may appear on a non-Canon brand PictBridge compliant device. |
| Paper type | Default: Photo Paper Plus Glossy II PP-201Photo:Photo Paper Plus Glossy II PP-201/Glossy Photo Paper "Everyday Use" GP-501/Photo Paper Glossy GP-502/Photo Paper Plus Semi-gloss SG-201Fast Photo:Photo Paper Pro II PR-201Plain:A4/LetterWhen Paper type is set to Plain, borderless printing will be disabled even when Layout is set to Borderless. |
| Layout | Default (Borderless), Index, Bordered, Borderless, 4-up** Layout compatible with A4/Letter sized paper |
| Print date & file no. | Default (Off: No printing), Date, File No., Both, Off |
| Image optimize | Default *1, On (Exif Print), Off, Face*2, Red-Eye*2*1 Photos are optimized for printing using the Photo optimizer pro function.*2 Can be selected only on certain Canon-brand PictBridge compliant devices.(May not be selected depending on the device.) |
| Trimming | Default (Off: No trimming), On (follow the camera's setting), Off |
Advanced Guide
Advanced Guide > Maintenance
Maintenance
→ Cleaning Your Machine
Aligning the Print Head
→ Performing Maintenance from a Computer
Advanced Guide
Advanced Guide > Maintenance > Cleaning Your Machine
Cleaning Your Machine
→ Cleaning
→ Cleaning the Exterior of the Machine
→ Cleaning the Platen Glass and Document Cover
Advanced Guide
Advanced Guide > Maintenance > Cleaning Your Machine > Cleaning
Cleaning
This section describes the cleaning procedure that is needed to maintain your machine.
Important
- Do not use tissue paper, paper towels, rough-textured cloth, or similar materials for cleaning the exterior of the machine so as not to scratch the surface. Be sure to use a soft cloth.
- Never use volatile liquids such as thinners, benzene, acetone, or any other chemical cleaner to clean the machine, as this may cause a malfunction or damage the machine's surface.
→ Cleaning the Exterior of the Machine
→ Cleaning the Platen Glass and Document Cover
Advanced Guide
Advanced Guide > Maintenance > Cleaning Your Machine > Cleaning the Exterior of the Machine
Cleaning the Exterior of the Machine
Be sure to use a soft cloth such as eyeglasses cleaning cloth and wipe off dirt on the surface gently. Smooth out wrinkles on the cloth if necessary before cleaning.

Important
- Be sure to turn off the power and disconnect the power plug before cleaning the machine.
Do not use tissue paper, paper towels, rough-textured cloth, or similar materials, as this may scratch the surface.
Advanced Guide
Advanced Guide > Maintenance > Cleaning Your Machine > Cleaning the Platen Glass and Document Cover
Cleaning the Platen Glass and Document Cover

Important
- Be sure to turn off the power and disconnect the power plug before cleaning the machine.
With a clean, soft, lint-free cloth, wipe the Platen Glass (A) and the inner side of the Document Cover (white sheet) (B) gently. Be sure not to leave any residue, especially on the Platen Glass.


Important
The inner side of the Document Cover (white sheet) (B) is easily damaged, so wipe it gently.
Advanced Guide
Advanced Guide > Maintenance > Aligning the Print Head
Aligning the Print Head
→ Aligning the Print Head
Page top ↑
Advanced Guide
Advanced Guide > Maintenance > Aligning the Print Head > Aligning the Print Head
Aligning the Print Head
If printed ruled lines are misaligned or print results are otherwise unsatisfactory, adjust the print head position.

Note
If the remaining ink level is low, the print head alignment sheet will not be printed correctly. Replace the FINE Cartridge whose ink is low.
→ Routine Maintenance
- Make sure that the machine is turned on.
- Load a sheet of A4 or Letter-sized plain paper in the Rear Tray.
- Open the Paper Output Tray gently, and open the Output Tray Extension.
- Print the print head alignment sheet.
- Press the Maintenance button repeatedly until u (lowercase "u") appears.
- Press the Black or Color button.
The print head alignment sheet will be printed.
![graph TD A["Smart Home Control"] --> B["Home"] B --> C["Output"] D["Blue Bars"] --> E["Light Blue Bars"] F["Pink Bars"] --> G["Light Pink Bars"] H["Gray Bars"] --> I["Gray Bars"] J["Arrow to Home"] --> K["Arrow to Output"]](/content/2026/06/1260153/images/e9cd88a463688ca8bc273c93e7d13c8f4194e2f45530befa7cead8c0c4ac0992.jpg)

Important
- Do not touch any printed part on the print head alignment sheet.
-
Do not dirty the print head alignment sheet. If the sheet is stained or wrinkled, the pattern may not be scanned correctly.
-
Scan the sheet to adjust the print head position.
-
Place the print head alignment sheet on the Platen Glass, then close the Document Cover gently.
Place the print head alignment sheet with the printed side FACING DOWN and align the mark or the upper left corner of the sheet with the alignment mark ( ).


- Make sure that U (uppercase "U") appears on the LED, and press the Black or Color button.
The print head alignment sheet is scanned and the print head position is adjusted automatically.
When adjusting the print head position is complete, the LED returns to the copy standby mode. Remove the sheet on the Platen Glass.

Important
- Do not open the Document Cover or move the loaded print head alignment sheet until scanning is completed.
If adjusting the auto print head position has failed, the error code appears on the LED. → An Error Code Is Displayed on the LED

Note
If the print results are still not satisfactory after adjusting the print head position as described above, adjust the print head position manually from the computer.
→ Aligning the Print Head Position
- To print the current head position adjustment values, display L on the LED, then press the Black or Color button.
Advanced Guide
Advanced Guide > Maintenance > Performing Maintenance from a Computer
Performing Maintenance from a Computer
→ Cleaning the Print Heads
→ Cleaning the Paper Feed Rollers
→ Aligning the Print Head Position
→ Checking the Print Head Nozzles
→ Cleaning Inside the Machine
Advanced Guide
Advanced Guide > Maintenance > Performing Maintenance from a Computer > Cleaning the Print Heads
Cleaning the Print Heads
The print head cleaning function allows you to unclog clogged nozzles in the print head. Perform print head cleaning if printing is faint or a specific color fails to print, even though there is enough ink.
The procedure for cleaning the print heads is as follows:

Cleaning
- Open the printer driver setup window
- Click Cleaning on the Maintenance tab
The Print Head Cleaning dialog box opens. Follow the instruction shown in the dialog box. Click Initial Check Items to display the items you need to check before performing Cleaning.
- Execute cleaning
Make sure that the machine is on and then click Execute. Print head cleaning starts.
- Complete cleaning
The Nozzle Check dialog box opens after the confirmation message.
- Check the results
To check whether the print quality has improved, click Print Check Pattern. To cancel the check process, click Cancel. If cleaning the head once does not resolve the print head problem, clean it once more.

Deep Cleaning
Deep Cleaning is more thorough than cleaning. Perform deep cleaning when two Cleaning attempts do not resolve the print head problem.
- Open the printer driver setup window
- Click Deep Cleaning on the Maintenance tab
The Deep Cleaning dialog box opens. Follow the instruction shown in the dialog box. Click Initial Check Items to display the items you need to check before performing Deep Cleaning.
- Execute deep cleaning
Make sure that the machine is on and then click Execute. Click OK when the confirmation message appears. Print head deep cleaning starts.
- Complete deep cleaning
The Nozzle Check dialog box opens after the confirmation message.
5. Check the results
To check whether the print quality has improved, click Print Check Pattern. To cancel the check process, click Cancel.

Important
- Cleaning consumes a small amount of ink. Deep Cleaning consumes a larger amount of ink than Cleaning.
Cleaning the print heads frequently will rapidly deplete your printer's ink supply. Consequently, perform cleaning only when necessary.

Note
If there is no sign of improvement after Deep Cleaning, switch off the machine, wait 24 hours, and then perform Deep Cleaning again. If there is still no sign of improvement, refer to "Machine Moves But Ink Is Not Ejected."
Related Topic
→ Checking the Print Head Nozzles
Advanced Guide
Advanced Guide > Maintenance > Performing Maintenance from a Computer > Cleaning the Paper Feed Rollers
Cleaning the Paper Feed Rollers
Cleans the paper feed roller. Perform feed roller cleaning when there are paper particles sticking to the paper feed roller and paper is not fed properly.
The procedure for performing the feed roller cleaning is as follows:

Roller Cleaning
- Prepare the machine Remove all sheets of paper from the rear tray.
- Open the printer driver setup window
- Click Roller Cleaning on the Maintenance tab The confirmation message appears.
- Execute paper feed roller cleaning Make sure that the machine is on and click OK. Paper feed roller cleaning starts.
- Complete paper feed roller cleaning After the rollers have stopped, follow the instruction in the message, load three sheets of plain paper into the rear tray, and click OK. Paper will be ejected and feed roller cleaning will be completed.
Advanced Guide
Advanced Guide > Maintenance > Performing Maintenance from a Computer > Aligning the Print Head Position
Aligning the Print Head Position
Print head alignment corrects the installation positions of the print head and improves deviated colors and lines.
This machine supports two head alignment methods: automatic head alignment and manual head alignment.
To perform automatic head alignment, refer to "Aligning the Print Head" in the manual: Basic Guide and then execute the function from the operation panel of the machine.
The procedure for performing manual print head alignment is as follows:
Print Head Alignment
- Open the printer driver setup window
- Click Custom Settings on the Maintenance tab The Custom Settings dialog box opens.
-
Switch head alignment to manual Check the Align heads manually check box.
-
Transmit the settings Click Send, and click OK when the confirmation message appears.
-
Click Print Head Alignment on the Maintenance tab The Start Print Head Alignment dialog box opens.
-
Load paper in the machine Load three sheets of A4 size or Letter size plain paper into the rear tray.
-
Execute head alignment Make sure that the machine is on and click Align Print Head. Follow the instruction in the message.
-
Check the printed pattern Enter the numbers of the patterns with the least amount of streaks in the associated boxes. Clicking the patterns with the least amount of streaks in the preview window, will automatically set their numbers in the associated boxes.

When you have entered all the necessary values, click OK.

Note
If it is difficult to pick the best pattern, pick the setting that produces the least noticeable vertical white streaks.

(A) Less noticeable vertical white streaks
(B) More noticeable vertical white streaks
If it is difficult to pick the best pattern, pick the setting that produces the least noticeable horizontal white streaks.

(A) Less noticeable horizontal white streaks
(B) More noticeable horizontal white streaks
9. Confirm the displayed message and click OK
The second pattern is printed.

Important
- Do not open the Scanning Unit (Cover) while printing is in progress.
10. Check the printed pattern
Enter the numbers of the patterns with the least amount of streaks in the associated boxes. Clicking the patterns with the least amount of streaks in the preview window, will automatically set their numbers in the associated boxes.

When you have entered all the necessary values, click OK.

Note
If it is difficult to pick the best pattern, pick the setting that produces the least noticeable vertical white streaks.

(A) Less noticeable vertical white streaks
(B) More noticeable vertical white streaks
11. Confirm the displayed message and click OK
The third pattern is printed.

Important
- Do not open the Scanning Unit (Cover) while printing is in progress.
12. Check the printed pattern
Enter the numbers of the patterns with the least noticeable horizontal stripes in the associated boxes.
Clicking the patterns with the least noticeable horizontal stripes in the preview window, will automatically set their numbers in the associated boxes.

When you have entered all the necessary values, click OK.

Note
If it is difficult to pick the best pattern, pick the setting that produces the least noticeable horizontal white stripes.

(A) Less noticeable horizontal white stripes
(B) More noticeable horizontal white stripes

Note
- To print and check the current setting, open the Start Print Head Alignment dialog box, and click Print Alignment Value.
Advanced Guide
Advanced Guide > Maintenance > Performing Maintenance from a Computer > Checking the Print Head Nozzles
Checking the Print Head Nozzles
The nozzle check function allows you to check whether the print heads are working properly by printing a nozzle check pattern. Print the pattern if printing becomes faint, or if a specific color fails to print.
The procedure for printing a nozzle check pattern is as follows:
Nozzle Check
- Open the printer driver setup window
-
Click Nozzle Check on the Maintenance tab
The Nozzle Check dialog box opens.
To display a list of items that you should check before printing the check pattern, click Initial Check Items. -
Load paper in the machine
Load a sheet of A4 size or Letter size plain paper into the rear tray.
- Print a nozzle check pattern
Make sure that the machine is on and click Print Check Pattern. The nozzle check pattern is printed.
Click OK when the confirmation message appears. The Pattern Check dialog box opens.
- Check the print result
Check the print result. When the print result is normal, click Exit.
If the print result is smudged or if there are any unprinted sections, click Cleaning to clean the print head.
Related Topic
→ Cleaning the Print Heads
Advanced Guide
Advanced Guide > Maintenance > Performing Maintenance from a Computer > Cleaning Inside the Machine
Cleaning Inside the Machine
Perform bottom plate cleaning before you execute duplex printing to prevent smudges on the back side of the paper.
Also perform bottom plate cleaning if ink smudges caused by something other than print data appear on the printed page.
The procedure for performing bottom plate cleaning is as follows:
Bottom Plate Cleaning
- Open the printer driver setup window
- Click Bottom Plate Cleaning on the Maintenance tab The Bottom Plate Cleaning dialog box opens.
- Load paper in the machine
- Perform the bottom plate cleaning
Make sure that the machine is on and click Execute.
Bottom plate cleaning starts.
As instructed in the dialog box, fold the A4 size or Letter size plain paper in half horizontally, and then unfold the sheet.
Load the paper into the rear tray in the portrait orientation with the crest of the crease facing down.
Advanced Guide
Advanced Guide > Changing the Machine Settings
Changing the Machine Settings
→ Changing Machine Settings from Your Computer
Page top ↑
Advanced Guide
Advanced Guide > Changing the Machine Settings > Changing Machine Settings from Your Computer
Changing Machine Settings from Your Computer
→ Changing the Print Options
→ Registering a Frequently Used Printing Profile
Setting the Ink Cartridge
→ Managing the Machine Power
→ Reducing the Machine Noise
→ Changing the Machine Operation Mode
Advanced Guide
Advanced Guide > Changing the Machine Settings > Changing Machine Settings from Your Computer > Changing the Print Options
Changing the Print Options
You change the detailed print driver settings for print data that is sent from an application software. Specify this option if you encounter print failures such as part of an image data being cut off.
The procedure for changing the print options is as follows:
- Open the printer driver setup window
- Click Print Options... on the Page Setup tab

The Print Options dialog box opens.
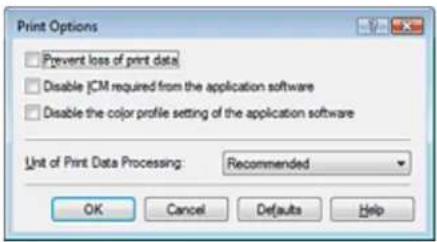
- Change the individual settings
If necessary, change the setting of each item, and then click OK. The Page Setup tab is displayed again.
Advanced Guide
Advanced Guide > Changing the Machine Settings > Changing Machine Settings from Your Computer > Registering a Frequently Used Printing Profile
Registering a Frequently Used Printing Profile
You can register the frequently used printing profile to Commonly Used Settings on the Quick Setup tab. Unnecessary printing profiles can be deleted at any time.
The procedure for registering a printing profile is as follows:
Registering a Printing Profile
- Open the printer driver setup window
- Set the necessary items
From Commonly Used Settings on the Quick Setup tab, select the printing profile to be used and if necessary, change the settings after Additional Features.
You can also set necessary items on the Main, Page Setup, and Effects tab.
- Click Save...

The Save Commonly Used Settings dialog box opens.
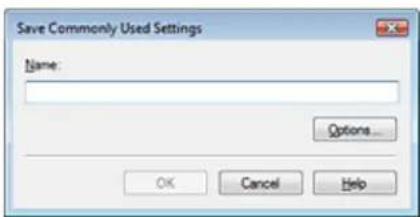
- Save the settings
Set Name, then click OK. If necessary, set the items in Options.... The printing profile is saved, and the Quick Setup tab is displayed again.
The name and icon are added to the Commonly Used Settings list.

Important
- To save the page size, orientation, and number of copies that was set in each sheet, click Options..., and check each item.

Note
- When you install the printer driver again or upgrade the version of the printer driver, the print settings you registered will be deleted from Commonly Used Settings. Registered print settings cannot be saved and preserved. If a profile is deleted, register the print settings again.
Deleting Unnecessary Printing Profile
1. Select the printing profile to be deleted
Select the printing profile you want to delete from the Commonly Used Settings list on the Quick Setup tab.
2. Delete the printing profile
Click Delete. When the confirmation message appears, click OK. The selected printing profile is deleted from the Commonly Used Settings list.

Note
- Printing profiles that are registered in the initial settings cannot be deleted.
Advanced Guide
Advanced Guide > Changing the Machine Settings > Changing Machine Settings from Your Computer > Setting the Ink Cartridge
Setting the Ink Cartridge
This feature enables you to specify the most appropriate ink cartridge among installed cartridges according to an intended use.
When one of the ink cartridges becomes empty and cannot be replaced immediately by a new one, you can specify the other ink cartridge that still has ink and continue printing.
The procedure for specifying the ink cartridge is as follows:

Ink Cartridge Settings
- Open the printer driver setup window
-
Click Ink Cartridge Settings on the Maintenance tab The Ink Cartridge Settings dialog box appears.
-
Select the ink cartridge to be used
Select the ink cartridge to be used for printing and click OK. The specified ink cartridge will be used from the next printing.
Important
- When the following settings are specified, Black Only does not function because the machine uses the color ink cartridge to print documents.
• Other than Plain Paper, Hagaki A, Hagaki, or Envelope is selected for Media Type on the Main tab - Borderless is selected from the Page Layout list on the Page Setup tab
- Do not detach an ink cartridge that is not in use. Printing cannot be performed while either ink cartridge is detached.
Advanced Guide
Advanced Guide > Changing the Machine Settings > Changing Machine Settings from Your Computer > Managing the Machine Power
Managing the Machine Power
This function allows you to manage the machine power from the printer driver.
The procedure for managing the printer power is as follows:
Power Off
The Power Off function turns off the machine. When you use this function, you will not be able to turn the machine on from the printer driver.
- Open the printer driver setup window
- Execute power off
Click Power Off on the Maintenance tab. When the confirmation message appears, click OK. The machine power switches off, and the Maintenance tab is displayed again.
Advanced Guide
Advanced Guide > Changing the Machine Settings > Changing Machine Settings from Your Computer > Reducing the Machine Noise
Reducing the Machine Noise
This function allows you to reduce the operating noise of the machine. Select when you wish to reduce the operating noise of the printer at night, etc. Using this function may lower the print speed.
The procedure for using the quiet mode is as follows:

Quiet Mode
- Open the printer driver setup window
-
Click Quiet Mode on the Maintenance tab The Quiet Mode dialog box opens.
-
Set the quiet mode
If necessary, specify one of the following items:
Do not use quiet mode
The operating noise of the machine is at normal volume.
Always use quiet mode
Select this option when you wish to reduce the operating noise of the machine.
Use quiet mode within specified time
The operating noise of the machine can be reduced during a specified period of time. Set the Start time and End time when you wish the quiet mode to be activated.

Important
The time specified in Start time and in End time must be different.
- Transmit the settings
Make sure that the machine is on and click Send. Click OK when the confirmation message appears. The settings are enabled hereafter.

Note
■ Depending on print quality settings, effects of the quiet mode may be less.
Advanced Guide
Advanced Guide > Changing the Machine Settings > Changing Machine Settings from Your Computer > Changing the Machine Operation Mode
Changing the Machine Operation Mode
If necessary, switch between various modes of machine operation.
The procedure for configuring settings is as follows:
Custom Settings
-
Open the printer driver setup window
-
Make sure that the machine is on, and then click Custom Settings on the Maintenance tab
The Custom Settings dialog box opens.

Note
If the machine is off or bi-directional communication is disabled, a message may appear because the computer cannot collect the machine status. If this happens, click OK to display the most recent settings specified on your computer.
- If necessary, complete the following settings:
Prevent paper abrasion
The printer can increase the gap between the print head and the paper during high-density printing to prevent paper abrasion.
Check this check box to use this function.
Align heads manually
The Print Head Alignment function on the Maintenance tab is normally set to automatic head alignment, but you can change it to manual head alignment. If the printing results are unsatisfactory even after you execute automatic head alignment, see "Aligning the Print Head Position," and execute manual head alignment.
Check this check box to perform the manual head alignment.
Ink Drying Wait Time
You can set the length of the machine rest time until printing of the next page begins. Moving the slider to the right increases the pause time and moving the slider to the left decreases the time. If the paper gets stained because the next page is ejected before the ink on the printed page dries, increase the ink drying wait time.
Reducing the ink drying wait time speeds up printing.
- Transmit the settings
Click Send, and click OK when the confirmation message appears.
The machine operates with the modified settings hereafter.
Advanced Guide
Advanced Guide > Troubleshooting
Troubleshooting
If an Error Occurs
→ The Machine Cannot Be Powered On
→ An Error Code Is Displayed on the LED
→ LED Cannot Be Seen At All
→ Cannot Install the MP Drivers
→ Cannot Connect to Computer Properly
→ Print Results Not Satisfactory
→ Printing Does Not Start
→ Copying/Printing Stops Before It Is Completed
→ Machine Moves But Ink Is Not Ejected
→ Printing Speed Is Not as Fast as Expected
→ FINE Cartridge Holder Does Not Move to the Position for Replacing
→ Paper Does Not Feed Properly
→ Paper Jams
Message Appears on the Computer Screen
For Windows Users
Error Message Appears on a PictBridge Compliant Device (MP270 series only)
→ Problems with Scanning
→ Software Problems
→ MP Navigator EX Problems
→ If You Cannot Resolve the Problem
FAQs
→ Instructions for Use (Printer Driver)
→ General Notes (Scanner Driver)
Advanced Guide
Advanced Guide > Troubleshooting > If an Error Occurs
If an Error Occurs
When an error occurs in printing such as the machine is out of paper or paper is jammed, a troubleshooting message is displayed automatically. Take the appropriate action described in the message. The message may vary depending on the version of your operating system.
Windows

Macintosh
• In Mac OS X v.10.5.x:

• In Mac OS X v.10.4.x or Mac OS X v.10.3.9:

Error Number : 1000
The following paper has run out.
"Media Type:Plain Paper"
"Paper Size :A4"
- Load paper. 2. Press the printer's Start button.
Delete Job
Stop All Jobs
Stop Job
Advanced Guide
Advanced Guide > Troubleshooting > The Machine Cannot Be Powered On
The Machine Cannot Be Powered On
- Check 1: Press the ON button.
- Check 2: Make sure that the power plug is securely plugged into the Power Cord Connector of the machine, then turn it back on.
- Check 3: Unplug the machine from the power supply, then plug the machine back in and turn the machine back on after leaving it for at least 2 minute.
If the problem is not resolved, contact the service center.
Advanced Guide
Advanced Guide > Troubleshooting > An Error Code Is Displayed on the LED
An Error Code Is Displayed on the LED
Alarm Lamp Is Lit Orange

When a machine error occurs, the Alarm lamp is lit orange and E and number (error code) are alternately displayed on the LED. Check the error code displayed on the LED and take the appropriate action to correct the error.
* Depending on the error occurred, the Alarm lamp is not lit.
| Error Code | Cause | Action |
| E, 0, 2 | The machine is out of paper. / Paper does not feed. | Reload the paper on the Rear Tray correctly and press the Black or Color button. |
| E, 0, 3 | Paper Output Tray is closed./Paper jam. | If the Paper Output Tray is closed, open it. The machine resumes printing.If opening the Paper Output Tray does not resolve the problem, or if the tray was open to begin with, the paper may be jammed. Remove the jammed paper, reload paper properly in the printer, then press the Black or Color button.Paper Jams |
| E, 0, 4E, 0, 5 | The FINE Cartridge cannot be recognized. | The FINE Cartridge may not be installed properly, or the Cartridge may not be compatible with this machine.Open the Scanning Unit (Cover) and install the appropriate FINE Cartridge.If the error is not resolved, contact the service center. |
| E, 0, 7 | FINE Cartridge is not installed in the correct position. | Make sure that each FINE Cartridge is installed in the correct position.Routine Maintenance |
| E, 0, 8 | Ink absorber is almost full. | Press the machine's Black or Color button to continue printing. Contact the service center. |
| E, 0, 9(MP270 series only) | The machine has not received a response from the digital camera. The digital camera or digital video camcorder connected is not compatible with this machine. | Check the device connected to the machine. Printing photos directly is possible only with a PictBridge compliant device.A communication time out occurs if an operation takes too long or if it takes too much time to send data. This may cancel printing. In such cases, disconnect and reconnect the USB cable.When printing from a PictBridge compliant device, depending on the model or brand of your device, you may have to select a PictBridge compliant print mode on thedevice before connecting it to the machine.You may also have to turn on your device or select Play mode manually after connecting the device to the machine. Perform necessary operations before connecting your device referring to its instruction manual.If the error is still not resolved, check if you can print another photograph. |
| E, 1, 3 | Ink level cannot be detected. | Ink may have run out.The function for detecting the remaining ink level will be disabled since the ink level cannot be correctly detected.If you want to continue printing without this function, press the machine'sStop (Reset)button for at least 5 seconds.Canon recommends to use new genuine Canon cartridges in order to obtain optimum qualities.Please be advised that Canon shall not be liable for any malfunction or trouble caused by continuation of printing under the ink out condition. |
| E, 1, 4 | The FINE Cartridge cannot be recognized. | The FINE Cartridge may not be compatible with this machine.Install the appropriate FINE Cartridge.→Routine Maintenance |
| E, 1, 5 | The FINE Cartridge cannot be recognized. | The FINE Cartridge may not be installed properly.Open the Scanning Unit (Cover) and install the FINE Cartridge properly.→Routine Maintenance |
| E, 1, 6 | Ink has run out. Ink has run out. Replace the ink cartridge and close the Scanning Unit (Cover).If printing is in progress and you want to continue printing, press the machine'sStop (Reset)button for at least 5 seconds with the ink cartridge installed. Then printing can continue under the ink out condition.The function for detecting the remaining ink level will be disabled.Replace the empty ink cartridge immediately after the printing. The resulting print quality is not satisfactory, if printing is continued under the ink out condition. | |
| E, 1, 9(MP270 series only) | PictBridge compliant device is connected via a USB hub. | If a PictBridge compliant device is connected via a USB hub, remove the hub and connect it directly to the machine. |
| E, 3, 0 | The size of the original cannot be correctly detected or the document is too small when the Fit-to-Page copying is selected. | Make sure that the original meets the requirements and is correctly loaded on the Platen Glass.Check the position and direction of the original loaded on the Platen Glass. |
| E, 3, 1 | The machine is not connected with the computer. | Connect the machine and the computer with a USB cable. |
| E, 5, 0 | Scanning the print head alignment sheet has failed. | Press theStop/Resetbutton to dismiss the error, then take the actions described below. |
- Make sure that the print head alignment sheet is set in the correct position and orientation on the Platen Glass.
- Make sure the Platen Glass and the print head alignment sheet are not dirty.
- Make sure the type and size of loaded paper is suitable for Automatic Print Head Alignment.
For Automatic Print Head Alignment, always load one sheet of A4 or letter-sized plain paper. - Make sure if Print Head nozzles are clogged.
Print the nozzle check pattern to check the status of the Print Head.
→ Routine Maintenance
If the error is not resolved, connect the machine to the computer and align the Print Head on the printer driver.
→ Aligning the Print Head Position
Power Lamp Flashes Green and Alarm Lamp Flashes Orange Alternately
When the Power and Alarm lamps flash alternately as shown below, and P and number (error code) are alternately displayed on the LED, an error requiring servicing might have occurred.
![graph TD A["Input Device 1"] --> B["Processing Unit"] B --> C["Output Unit"] style A fill:#f9f,stroke:#333 style B fill:#ccf,stroke:#333 style C fill:#cfc,stroke:#333](/content/2026/06/1260153/images/f26c82ab42e7f617fb8e0a48977ee25d5456fb7aab5994532a3866c14ea23956.jpg)
Error Code
P, 0, 2
Action
Cancel printing, turn off the machine. Then clear the jammed paper or protective material that is preventing the FINE Cartridge Holder from moving, and turn on the machine again.

Important
- Be careful not to touch the components inside the machine. The machine may not print out properly if you touch it.
If the problem is not resolved, contact the service center.
P, *, *
"*, *" depends on the error occurred.
• "P, 1, 0" is displayed:
Turn off the machine, and unplug the power cord of the machine from the power supply.
Contact the service center.
- "P, 0, 3" is displayed:
If any object is placed in front of the machine, remove it.
Open the Paper Output Tray gently, then turn the power off and back on.
• In other cases:
Turn off the machine, and unplug the power cord of the machine from the power supply. Plug the machine back in and turn the machine back on.
If the problem is not resolved, contact the service center.
Page top ↑
Advanced Guide
Advanced Guide > Troubleshooting > LED Cannot Be Seen At All
LED Cannot Be Seen At All
- If the Power lamp is off:
The machine is not powered on. Connect the power cord and press the ON button.
- If the Power lamp is lit:
The LED may be in the screen-saver mode. On the Operation Panel, press a button other than the ON button.
Page top ↑
Advanced Guide
Advanced Guide > Troubleshooting > Cannot Install the MP Drivers
Cannot Install the MP Drivers
- If the installation does not start even after the Setup CD-ROM is inserted into your computer's disc drive:

Start the installation following the procedure below.
- Click Start then Computer.
In Windows XP, click Start then My Computer.
In Windows 2000, double-click the

My Computer icon on the desktop.
- Double-click the CD-ROM icon on the displayed window.
If the contents of the CD-ROM are displayed, double-click MSETUP4.EXE.

Double-click the

CD-ROM icon on your desktop to start installation.
Note
If the CD-ROM icon is not displayed, try the following:
- Remove the CD-ROM from your computer, then insert it again.
- Restart your computer.
If the icon is still not displayed, try different discs and see if they are displayed. If other discs are displayed, there is a problem with the Setup CD-ROM. In this case, contact the service center.
- If you are unable to proceed beyond the Printer Connection screen:
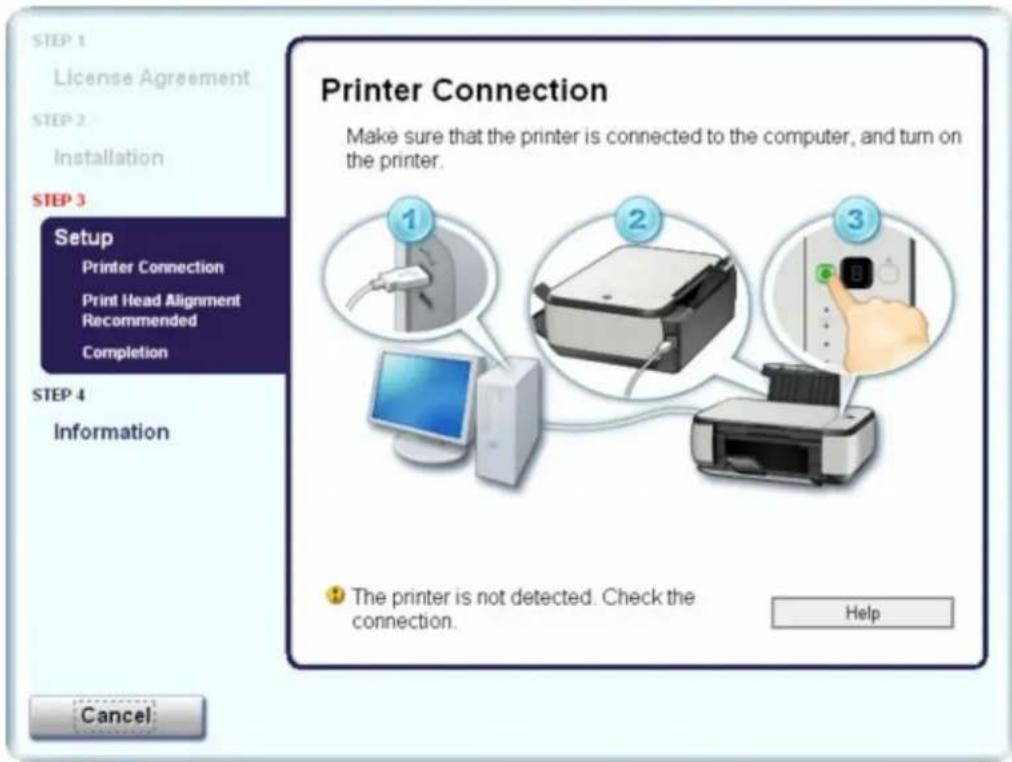
If you are unable to proceed beyond the Printer Connection screen, make sure that the USB cable is securely plugged into the USB port of the machine and is connected to the computer, and then follow the procedure below to reinstall the MP Drivers.

Note
In Windows Vista, The printer is not detected. Check the connection. may be displayed depending on the computer you use. In this case, wait for a while. If you still cannot proceed to the next step, follow the procedure below to reinstall the MP Drivers.
- Click Cancel on the Printer Connection screen.
- Click Start Over on the Installation Failure screen.
- Click Back on the screen that appears next.
- Click Exit on the PIXMA XXX screen, then remove the CD-ROM.
- Turn the machine off.
- Restart the computer.
- Make sure that you have no application software running.
- Insert the CD-ROM again, then perform Easy Install to install the MP Drivers.
• In other cases:
Follow the procedure described in your setup manual to reinstall the MP Drivers.
If the MP Drivers were not installed correctly, uninstall the MP Drivers, restart your computer, and then reinstall the MP Drivers.
→ Deleting the Unnecessary MP Drivers
If you reinstall the MP Drivers, perform Custom Install on the Setup CD-ROM, then select MP Drivers.

ndows

Note
If the installer was forced to be terminated due to a Windows error, the system may be in an unstable condition and you may not be able to install the drivers. Restart your computer before reinstalling.
Page top ↑
Advanced Guide
Advanced Guide > Troubleshooting > Cannot Connect to Computer Properly
Cannot Connect to Computer Properly
Printing or Scanning Speed Is Slow/Hi-Speed USB Connection Does Not Work/

"This device can perform faster" Message Is Displayed
If your system environment is not fully compatible with Hi-Speed USB, the machine will operate at a lower speed provided under USB 1.1. In this case, the machine operates properly but printing speed may slow down due to communication speed.
- Check: Check the following to make sure that your system environment supports Hi-Speed USB connection.
- Does the USB port on your computer support Hi-Speed USB connection?
- Do the USB cable, and the USB hub if you are using one, support Hi-Speed USB connection?
Be sure to use a certified Hi-Speed USB cable. We recommend that the cable is no longer than around 10 feet / 3 meters. - Does the operating system of your computer support Hi-Speed USB connection? Obtain and install the latest update for your computer.
- Does the Hi-Speed USB driver operate properly?
Obtain the latest version of the Hi-Speed USB driver compatible with your hardware and reinstall it on your computer.

Important
- For details on Hi-Speed USB of your system environment, contact the manufacturer of your computer, USB cable, or USB hub.
Advanced Guide
Advanced Guide > Troubleshooting > Print Results Not Satisfactory
Print Results Not Satisfactory
If the print result is not satisfactory due to white streaks, misaligned lines, or uneven colors, confirm the paper and print quality settings first.
- Check 1: Do the page size and media type settings match the size and type of the loaded paper?
When these settings are incorrect, you cannot obtain a proper print result.
If you are printing a photograph or an illustration, incorrect paper type settings may reduce the quality of the printout color.
Also, if you print with an incorrect paper type setting, the printed surface may be scratched.
In borderless printing, uneven coloring may occur depending on the combination of the paper type setting and the loaded paper.
- MP270 series only
| To copy by operating the machine | Confirm by using the Operation Panel on the machine.→ Copying |
| To print from a PictBridge compliant device | Confirm by using your PictBridge compliant device.→ Printing Photographs Directly from a Compliant Device (MP270 series only) |
| To print from a computer Confirm by using the printer driver.→ Printing with Easy Setup | |
- MP250 series only
| To copy by operating the machine Confirm by using the Operation Panel on the machine. Copying |
| To print from a computer Confirm by using the printer driver.Printing with Easy Setup |
- Check 2: Make sure that the appropriate print quality is selected
according to the media type and printing data using the printer driver.
Select a print quality option suitable for the paper and image for printing. If you notice blurs or uneven colors, increase the print quality setting and try printing again.
Confirm the print quality setting using the printer driver.
→ Changing the Print Quality and Correcting Image Data

Note
- For MP270 series only: You cannot change the print quality setting from a PictBridge compliant device.
- Check 3: If the problem is not resolved, there may be other causes.
See also the sections below:
→ Cannot Print to End of Job
No Printing Results/Printing Is Blurred/Colors Are Wrong/White Streaks
→ Colors Are Unclear
→ Lines Are Misaligned
→ Printed Paper Curls or Has Ink Blots
→ Paper Is Smudged/Printed Surface Is Scratched
→ Back of the Paper Is Smudged
→ Vertical Lines Are Printed on the Sides of the Printout
→ Colors Are Uneven or Streaked
Advanced Guide
Advanced Guide > Troubleshooting > Print Results Not Satisfactory > Cannot Print to End of Job
Cannot Print to End of Job
- Check 1: Is the size of the print data extremely large?

Click Print Options on the Page Setup sheet. Then, select the Prevent loss of print data check box in the displayed dialog.
- Check 2: Is the space of your computer's hard disk sufficient?
Delete unnecessary files to free disk space.
Page top ↑
Advanced Guide
Advanced Guide > Troubleshooting > Print Results Not Satisfactory > No Printing Results/Printing Is Blurred/Colors Are Wrong/White Streaks
No Printing Results/Printing Is Blurred/Colors Are Wrong/White Streaks
No Printing Results
Printing Is Blurred

Colors Are Wrong


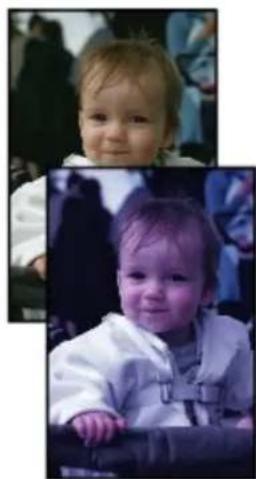
White Streaks

- Check 1: Did you confirm the paper and print quality settings?
→ Print Results Not Satisfactory
- Check 2: Is the FINE Cartridge installed properly?
If the Ink Cartridge Locking Cover is not closed securely, ink may not be ejected correctly.
Open the Scanning Unit (Cover), open the Ink Cartridge Locking Cover, then close the Ink Cartridge Locking Cover.
When you close the Ink Cartridge Locking Cover, push the Ink Cartridge Locking Cover until it clicks into place.

- Check 3: Print the Nozzle Check Pattern and perform any necessary maintenance operations such as Print Head Cleaning.
Print the Nozzle Check Pattern to determine whether the ink ejects properly from the print head nozzles.
Refer to Routine Maintenance for the Nozzle Check Pattern printing, Print Head Cleaning, and Print Head Deep Cleaning.
- If the Nozzle Check Pattern is not printed correctly: After performing the Print Head Cleaning, print the Nozzle Check Pattern and examine the pattern.
- If the problem is not resolved after performing the Print Head Cleaning twice: Perform the Print Head Deep Cleaning. If the problem is not resolved after performing the Print Head Deep Cleaning, turn off the machine and perform another Print Head Deep Cleaning after 24 hours.
- If the problem is not resolved after performing the Print Head Deep Cleaning twice: Ink may have run out. Replace the FINE Cartridge.
- Check 4: When a FINE Cartridge runs out of ink, replace it with a new one.
- Check 5: When using paper with one printable surface, make sure that the paper is loaded with the printable side facing up.
Printing on the wrong side of such paper may cause unclear prints or prints with reduced quality.
Refer to the instruction manual supplied with the paper for detailed information on the printable side.
- Check 6: Is the Platen Glass dirty?
Clean the Platen Glass.
→ Cleaning the Platen Glass and Document Cover
- When copying, see also the sections below:
- Check 7: Make sure that the original is properly loaded on the Platen Glass.
Loading Paper / Originals
- Check 8: Is the original loaded with the side to be copied facing down on the Platen Glass?
- Check 9: Did you copy a printout done by this machine?
For MP270 series only, print from the digital camera directly or reprint from the computer.
For MP250 series only, reprint from the computer.
If you copy a printout done by this machine, print quality may be reduced.
Page top ↑
Advanced Guide
Advanced Guide > Troubleshooting > Print Results Not Satisfactory > Colors Are Unclear
Colors Are Unclear
- Check 1: Enable color correction.
When printing photographs or other graphics, enabling color correction in the printer driver may improve color.

Select Vivid Photo in the Effects sheet in the printer properties dialog box.

Select Color Options in the pop-up menu in the Print dialog box, and then select Vivid Photo on the Color Mode.
In Mac OS X v 10.4.x or Mac OS X v 10.3.9, select Special Effects in the Print dialog box, and then select Vivid Photo.
- Check 2: Is the FINE Cartridge installed properly?
If the Ink Cartridge Locking Cover is not closed securely, ink may not be ejected correctly.
Open the Scanning Unit (Cover), open the Ink Cartridge Locking Cover, then close the Ink Cartridge Locking Cover.
When you close the Ink Cartridge Locking Cover, push the Ink Cartridge Locking Cover until it clicks into place.

- Check 3: When a FINE Cartridge runs out of ink, replace it with a new one.
- Check 4: Is the Nozzle Check Pattern printed properly?
Print the Nozzle Check Pattern to determine whether the ink ejects properly from the print head nozzles.
Refer to Routine Maintenance for the Nozzle Check Pattern printing, Print Head Cleaning, and Print Head Deep Cleaning.
- If the Nozzle Check Pattern is not printed correctly: After performing the Print Head Cleaning, print the Nozzle Check Pattern and examine the pattern.
- If the problem is not resolved after performing the Print Head Cleaning twice: Perform the Print Head Deep Cleaning. If the problem is not resolved after performing the Print Head Deep Cleaning, turn off the machine and perform another Print Head Deep Cleaning after 24 hours.
- If the problem is not resolved after performing the Print Head Deep Cleaning twice: Ink may have run out. Replace the FINE Cartridge.

Note
- Printed colors may not match screen colors due to basic differences in the methods used to
produce colors. Color control settings and environmental differences can also affect how colors appear on the screen.
Page top ↑
Advanced Guide
Advanced Guide > Troubleshooting > Print Results Not Satisfactory > Lines Are Misaligned
Lines Are Misaligned

- Check 1: Did you confirm the paper and print quality settings?
→ Print Results Not Satisfactory
- Check 2: Perform Print Head Alignment.
If you did not align the Print Head after installation, straight lines may be printed misaligned.
→ Aligning the Print Head

Note
If the problem is not resolved after performing the Print Head Alignment, perform Print Head Alignment manually referring to Aligning the Print Head Position.

indows
- Check 3: Is the size of the print data extremely large?
Click Print Options on the Page Setup sheet. Then, select the Prevent loss of print data check box in the displayed dialog.
- Check 4: Is the Page Layout Printing performed or the Binding margin
function used?
When the Page Layout Printing or Binding margin function is being used, thin lines may not be printed. Try thickening the lines in the document.
Advanced Guide
Advanced Guide > Troubleshooting > Print Results Not Satisfactory > Printed Paper Curls or Has Ink Blots
Printed Paper Curls or Has Ink Blots
Printed Paper Curls
Printed Paper Has Ink Blots
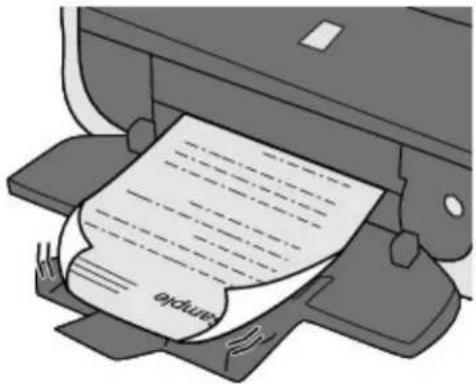
- Check 1: Did you confirm the paper and print quality settings?
→ Print Results Not Satisfactory
- Check 2: If the intensity is set high, reduce the Intensity setting in the printer driver and try printing again.
If you are using plain paper to print images with high intensity, the paper may absorb too much ink and become wavy, causing paper abrasion.
Confirm the intensity using the printer driver.
Adjusting Intensity
- Check 3: Is Photo Paper used for printing photographs?
When printing data with high color saturation such as photographs or images in deep color, we recommend using Photo Paper Plus Glossy II or other Canon speciality paper.
Loading Paper / Originals
Advanced Guide
Advanced Guide > Troubleshooting > Print Results Not Satisfactory > Paper Is Smudged/Printed Surface Is Scratched
Paper Is Smudged/Printed Surface Is Scratched
Paper Is Smudged

The Edges of Paper Are Smudged

Printed Surface Is Smudged
Printed Surface Is Scratched
- Check 1: Did you confirm the paper and print quality settings?
→ Print Results Not Satisfactory
- Check 2: Is the appropriate type of paper used? Check the followings:
- Check to see if the paper you are printing on is suitable for your printing purpose.
→ Loading Paper / Originals
- When performing Borderless Printing, make sure that the paper you are using is suitable for Borderless Printing.
If the paper you are using is not suitable for Borderless Printing, the print quality may be reduced at the top and bottom edges of the paper.
→ Printing Area
- Check 3: Load the paper after correcting its curl.
- For Plain Paper
Turn the paper over and reload it to print on the other side.
Leaving the paper loaded on the Rear Tray for a long time may cause the paper to curl. In this case, load the paper with the other side facing up. It may resolve the problem.
We recommend putting unused paper back into the package and keeping it on a level surface.
- For Other Paper
If the curl on the four corners of the paper is more than 0.1 inch / 3 mm (A) in height, the paper may be smudged or may not be fed properly. In such cases, follow the procedure described below to correct the paper curl.
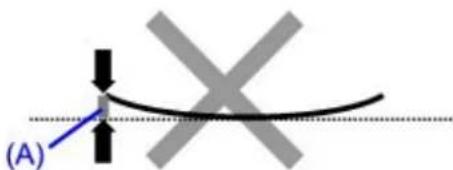
- Roll up the paper in the opposite direction to the paper curl as shown below.
![graph TD A["Start"] --> B{Step 1} B -->|Yes| C["Process Step"] B -->|No| D["End"]](/content/2026/06/1260153/images/b0486f4a57ee6b61adc38abbd3206af5d3233ccdbba8c03e39a940a3b3a8650f.jpg)
- Check that the paper is now flat.
We recommend printing curl-corrected paper one sheet at a time.

Note
- Depending on the media type, the paper may be smudged or may not be fed properly even if it is not curled inward. In such cases, follow the procedure described below to curl the paper outward within 0.1 inch / 3 mm (B) in height before printing. This may improve the print result.
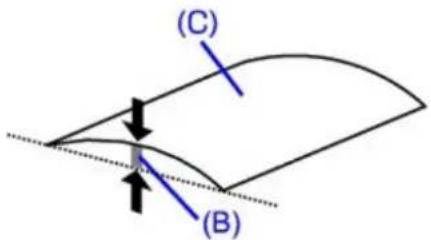
(C) Printing side
We recommend printing paper that has been curled outward one sheet at a time.
- Check 4: If you are printing on thick paper, select the Prevent paper abrasion setting.
Selecting the Prevent paper abrasion setting will widen the clearance between the Print Head and the loaded paper. If you notice abrasion even with the media type set correctly to match the loaded paper, set the machine to prevent paper abrasion by using the Operation Panel or the printer driver. Print speed is reduced if you are selecting the Prevent paper abrasion setting.
* Deactivate the Prevent paper abrasion setting once printing is complete. If not, this setting remains enabled for all subsequent print jobs.
• To set by using the Operation Panel
Press the Maintenance button repeatedly until r appears on the LED, then press the Black button to enable the Prevent paper abrasion function.
To disable the Prevent paper abrasion function, press the Maintenance button repeatedly until it appears on the LED, then press the Color button.
• To set by using the printer driver

indows
Open the printer properties dialog box, and in Custom Settings in the Maintenance sheet, select the Prevent paper abrasion check box, and then click Send.
To open the printer properties dialog box, see Opening the Printer Properties Dialog Box (Windows).

acintosh
In the Canon IJ Printer Utility, select Custom Settings in the pop-up menu, select the Prevent paper abrasion check box, and then click Send.
To open the Canon IJ Printer Utility, see Opening the Canon IJ Printer Utility (Macintosh).
- Check 5: If the intensity is set high, reduce the Intensity setting in the printer driver and try printing again.
If you are using plain paper to print images with high intensity, the paper may absorb too much ink and become wavy, causing paper abrasion.
Reduce the Intensity setting in the printer driver and try printing again.
Windows
- Open the printer properties dialog box.
→ Opening the Printer Properties Dialog Box (Windows)

Click Here for MP270 series: Printer Driver

Click Here for MP250 series: Printer Driver
* Before clicking here to open the printer properties dialog box, quit the running application software.
-
On the Main sheet, select Manual for Color/Intensity, and then click Set.
-
Drag the Intensity slide bar on the Color Adjustment sheet to adjust the intensity.
Macintosh
- Open the Print dialog box.
→ Opening the Page Setup and Print Dialog Box (Macintosh)
-
Select Color Options in the pop-up menu.
-
Drag the Intensity slide bar to set the intensity.
- Check 6: Is printing performed beyond the recommended printing area?
If you are printing beyond the recommended printing area of your printing paper, the lower edge of the paper may become stained with ink.
Resize your original document in your application software.
→ Printing Area
- Check 7: Is the Platen Glass dirty?
Clean the Platen Glass.
→ Cleaning the Platen Glass and Document Cover
- Check 8: Is inside of the machine dirty?
When performing duplex printing, the inside of the machine may become stained with ink, causing the printout to become smudged.
Perform the Bottom Plate Cleaning to clean the inside of the machine.
→ Routine Maintenance
Note
- To prevent the inside of the machine from stains, set the paper size correctly.
- Check 9: Set Ink Drying Wait Time longer.
Doing so gives the printed surface enough time to dry so that paper smudged and scratched are prevented.
Windows
-
Make sure that the machine is turned on.
-
Open the printer properties dialog box.
→ Opening the Printer Properties Dialog Box (Windows)
- Click the Maintenance tab and then Custom Settings.
- Drag the Ink Drying Wait Time slide bar to set the wait time, and then click Send.
- Confirm the message and click OK.
Macintosh
-
Make sure that the machine is turned on.
-
Open the Canon IJ Printer Utility.
→ Opening the Canon IJ Printer Utility (Macintosh)
-
Select Custom Settings in the pop-up menu.
-
Drag the Ink Drying Wait Time slide bar to set the wait time, and then click Send.
-
Confirm the message and click OK.
- Check 10: Is the paper scratched by other loaded paper?
Depending on the media type, the paper may be scratched by other loaded paper when feeding from the Rear Tray. In this case, load one sheet at a time.
Advanced Guide
Advanced Guide > Troubleshooting > Print Results Not Satisfactory > Back of the Paper Is Smudged
Back of the Paper Is Smudged

- Check 1: Did you confirm the paper and print quality settings?
→ Print Results Not Satisfactory
- Check 2: Perform the Bottom Plate Cleaning to clean the inside of the machine.
→ Routine Maintenance

Note
- When performing borderless printing, duplex printing, or too much printing, the inside may become stained with ink.
Advanced Guide
Advanced Guide > Troubleshooting > Print Results Not Satisfactory > Vertical Lines Are Printed on the Sides of the Printout
Vertical Lines Are Printed on the Sides of the Printout

- Check 1: Did you confirm the paper type and print quality settings?
→ Print Results Not Satisfactory
- Check 2: Is the size of the loaded paper correct?
The vertical lines may be printed in the margin if the size of the loaded paper is larger than that specified in the printer driver.
Set the paper size correctly according to the paper you loaded.
→ Print Results Not Satisfactory

Note
- The direction of the vertical line pattern may vary depending on the image data or the print setting.
This machine performs automatic cleaning when necessary to keep printouts clean. A small amount of ink is ejected for cleaning.
Although ink is usually ejected on the ink absorber, it may be ejected on the paper if you load paper larger than that specified with the printer driver.
Advanced Guide
Advanced Guide > Troubleshooting > Print Results Not Satisfactory > Colors Are Uneven or Streaked
Colors Are Uneven or Streaked
Colors Are Uneven

Colors Are Streaked
- Check 1: Did you confirm the paper and print quality settings?
→ Print Results Not Satisfactory
- Check 2: Print the Nozzle Check Pattern and perform any necessary maintenance operations such as Print Head Cleaning.
Print the Nozzle Check Pattern to determine whether the ink ejects properly from the print head nozzles.
Refer to Routine Maintenance for the Nozzle Check Pattern printing, Print Head Cleaning, and Print Head Deep Cleaning.
- If the Nozzle Check Pattern is not printed correctly: After performing the Print Head Cleaning, print the Nozzle Check Pattern and examine the pattern.
- If the problem is not resolved after performing the Print Head Cleaning twice: Perform the Print Head Deep Cleaning. If the problem is not resolved after performing the Print Head Deep Cleaning, turn off the machine and perform another Print Head Deep Cleaning after 24 hours.
- If the problem is not resolved after performing the Print Head Deep Cleaning twice: Ink may have run out. Replace the FINE Cartridge.
- Check 3: Perform Print Head Alignment.
→ Aligning the Print Head

Note
If the problem is not resolved after performing the Print Head Alignment, perform Print Head Alignment manually referring to Aligning the Print Head Position.
Advanced Guide
Advanced Guide > Troubleshooting > Printing Does Not Start
Printing Does Not Start
- Check 1: Make sure that the power plug is securely plugged in, then turn the machine on.
While the Power lamp is flashing green, the machine is initializing. Wait until the Power lamp stops flashing and remains lit green.

Note
- When printing large data such as a photo or graphics, it may take longer to start printing. While the Power lamp is flashing green, the computer is processing data and sending it to the machine. Wait until printing starts.
- Check 2: Make sure that the USB cable is securely plugged in to the machine and the computer, then check the followings:
- If you are using a relay device such as a USB hub, disconnect it, connect the machine directly to the computer, and try printing again. If printing starts normally, there is a problem with the relay device. Consult the reseller of the relay device for details. - There could also be a problem with the USB cable. Replace the USB cable and try printing again.
- Check 3: Restart your computer if you are printing from the computer.
If there are any unnecessary print jobs, delete them.
→ Deleting the Undesired Print Job
- Check 4: Make sure that your machine's name is selected in the Print dialog box.
The machine will not print properly if you are using a driver for a different printer. In Windows, make sure that your machine's name is selected in the Print dialog box. In Macintosh, make sure that your machine's name is selected in Printer in the Print dialog box.

Note
To make the machine the one selected by default, select Set as Default Printer (Windows), Default Printer or Make Default (Macintosh).
Windows
- Check 5: Configure the printer port appropriately.
Configure "USBnnn" (where "n" is a number) as the printer port.
- Log on as a user account with administrator privilege.
- Click Control Panel, then Printer under Hardware and Sound.
In Windows XP, click Control Panel, Printers and Other Hardware, then Printers and Faxes. In Windows 2000, click Control Panel then Printers. - Right-click the Canon XXX Printer icon, then select Properties.
- Click the Ports tab to confirm the port settings.
Make sure that a port named USBnnn (where "n" is a number) with Canon XXX Printer appearing in the Printer column is selected for Print to the following port(s).
If the setting is incorrect, reinstall the MP Drivers or change the printer port to the correct one.
- Check 6: Is the size of the print data extremely large?
Click Print Options on the Page Setup sheet. Then, select the Prevent loss of print data check box in the displayed dialog.
Page top ↑
Advanced Guide
Advanced Guide > Troubleshooting > Copying/Printing Stops Before It Is Completed
Copying/Printing Stops Before It Is Completed
- Check 1: Has the machine been printing continuously for a long
period?
If the machine has been printing continuously for a long time, the Print Head may overheat. To protect the Print Head, the machine may stop printing at a line break for a period of time and then resume printing.
In this case, interrupt your print session at a convenient time and turn the machine off for at least 15 minutes.
Additionally, if the machine has been printing graphics or photos with intense colors continuously over a period of time, the machine may stop printing to protect the Print Head. In this case, printing will not resume automatically. Turn the machine off for at least 15 minutes.
! Caution
The Print Head and the surrounding area can become extremely hot inside the machine. Never touch the Print Head or nearby components.
- Check 2: Is the paper loaded?
Make sure that paper is loaded in the Rear Tray.
If the machine has run out of paper, load paper.
- Check 3: Do the printing documents have lots of photographs or
illustrations?
Printing large data such as photos or graphics takes time for the machine and the computer to process, during which the machine may appear to have stopped operating.
In addition, when printing data that uses a large amount of ink continuously on plain paper, the machine may pause temporarily. In either case, wait until the process is complete.

Note
If you are printing a document with a large printing area or printing multiple copies of a document, printing may pause to allow the ink to dry.
- Check 4: If copying stops before it is completed, try to copy again.
If a certain time passes after some errors occurred while copying, the machine stops the operation.
Advanced Guide
Advanced Guide > Troubleshooting > Machine Moves But Ink Is Not Ejected
Machine Moves But Ink Is Not Ejected
- Check 1: Are the Print Head nozzles clogged?
Print the Nozzle Check Pattern to determine whether the ink ejects properly from the print head nozzles.
Refer to Routine Maintenance for the Nozzle Check Pattern printing, Print Head Cleaning, and Print Head Deep Cleaning.
- If the Nozzle Check Pattern is not printed correctly:
After performing the Print Head Cleaning, print the Nozzle Check Pattern and examine the pattern. - If the problem is not resolved after performing the Print Head Cleaning twice:
Perform the Print Head Deep Cleaning.
If the problem is not resolved after performing the Print Head Deep Cleaning, turn off the machine and perform another Print Head Deep Cleaning after 24 hours. - If the problem is not resolved after performing the Print Head Deep Cleaning twice: Ink may have run out. Replace the FINE Cartridge.
- Check 2: Is the FINE Cartridge installed properly?
If the Ink Cartridge Locking Cover is not closed securely, ink may not be ejected correctly.
Open the Scanning Unit (Cover), open the Ink Cartridge Locking Cover, then close the Ink Cartridge Locking Cover.
When you close the Ink Cartridge Locking Cover, push the Ink Cartridge Locking Cover until it clicks into place.

- Check 3: When a FINE Cartridge runs out of ink, replace it with a new one.
Advanced Guide
Advanced Guide > Troubleshooting > Printing Speed Is Not as Fast as Expected
Printing Speed Is Not as Fast as Expected
- Check 1: Is printing performed in Quiet Mode?
Print speed is reduced if you specified to print in Quiet Mode in the printer driver. For faster printing, do not print in Quiet Mode.
→ Reducing the Machine Noise
- Check 2: Is the print quality set too high?
Increase the printing speed setting in the printer driver. Setting to prioritize speed makes printing faster.
Windows
- Open the printer properties dialog box.
→ Opening the Printer Properties Dialog Box (Windows)

Click Here for MP270 series: Printer Driver

Click Here for MP250 series: Printer Driver
* Before clicking here to open the printer properties dialog box, quit the running application software.
- On the Main sheet, select Fast for the Print Quality setting.
Depending on the media type, the Fast option may not be available.
Macintosh
- Open the Print dialog box.
→ Opening the Page Setup and Print Dialog Box (Macintosh)
- Select Quality & Media in the pop-up menu and then select Fast for the Print Quality setting.
Depending on the media type, the Fast option may not be available.

Note
- Printing speed may not improve noticeably by following the instructions above, depending on your system environment.
Advanced Guide
Advanced Guide > Troubleshooting > FINE Cartridge Holder Does Not Move to the Position for Replacing
FINE Cartridge Holder Does Not Move to the Position for Replacing
- Check 1: Is the Power lamp off?
Check if the Power lamp is lit green.
The FINE Cartridge Holder will not move unless the power is on. If the Power lamp is off, close the Scanning Unit (Cover) and turn the machine on.
While the Power lamp is flashing green, the machine is initializing. Wait until the Power lamp stops flashing and remains lit green, and then open the Scanning Unit (Cover) again.
- Check 2: Is an error code displayed on the LED?
Close the Scanning Unit (Cover), confirm the error code is displayed, take the appropriate action to resolve the error, and then reopen it. For details on how to resolve the error, see An Error Code Is Displayed on the LED.
- Check 3: Has the Scanning Unit (Cover) been left open for 10 minutes or longer?
If the Scanning Unit (Cover) is left open for more than 10 minutes, the FINE Cartridge Holder moves to the right to prevent the Print Head from drying out. Close and reopen the Scanning Unit (Cover) to return the FINE Cartridge Holder to the left.
- Check 4: Has the machine been printing continuously for a long period?
Close the Scanning Unit (Cover), wait a while, then reopen it.
If the machine has been printing continuously for a long time, the FINE cartridge Holder may not move to the center since the Print Head may overheat.

Note
- Opening the Scanning Unit (Cover) while printing moves the FINE Cartridge Holder to the right. Close the Scanning Unit (Cover), and reopen it after printing is complete.
Advanced Guide
Advanced Guide > Troubleshooting > Paper Does Not Feed Properly
Paper Does Not Feed Properly
- Check 1: Make sure of the following when you load paper.
- When loading two or more sheets of paper, flip through the paper before loading.

- When loading two or more sheets of paper, make sure that the paper stack does not exceed the paper load limit. However, proper feeding of paper may not be possible at this maximum capacity depending on the type of paper or environmental conditions (either very high or low temperature and humidity). In such cases, reduce the sheets of paper you load at a time to less than half of the paper load limit.
• Always load the paper in portrait orientation, regardless of the printing orientation.
- When you load the paper on the Rear Tray, load the paper with the print side facing UP and slide the Paper Guides to align with the both sides of the paper.
Loading Paper / Originals
- Check 2: Check to see if the paper you are printing on is not too thick or curled.
Loading Paper / Originals
- Check 3: Make sure of the following when you load envelopes.
When printing on envelopes, refer to Loading Paper / Originals, and prepare the envelopes before printing.
Once you have prepared the envelopes, load them in portrait orientation. If the envelopes are placed in landscape orientation, they will not feed properly.
- Check 4: Make sure that there are not any foreign objects in the Rear Tray.
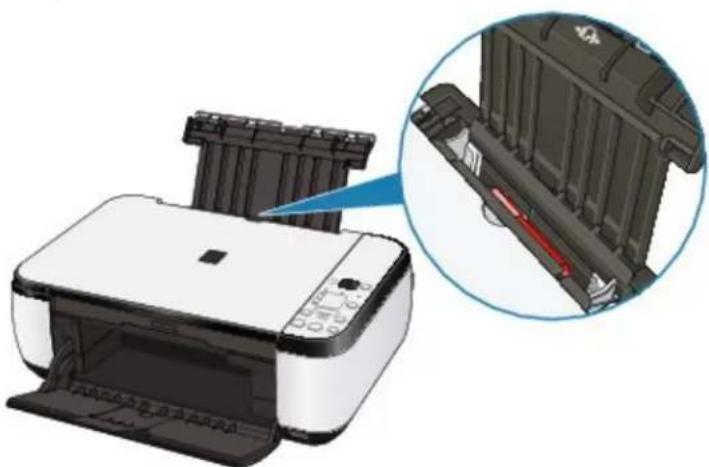
If the paper tears in the Rear Tray, see Paper Jams to remove it.
If there are any foreign objects in the Rear Tray, be sure to turn off the machine, unplug it from the power supply, then remove the foreign object.

Page top ↑
Advanced Guide
Advanced Guide > Troubleshooting > Paper Jams
Paper Jams

Note
If you need to turn off the machine to remove jammed paper during printing, press the Stop/Reset button to cancel print jobs before turning off the machine.
→ Paper Is Jammed in the Paper Output Slot or the Rear Tray
In Other Cases
Advanced Guide
Advanced Guide > Troubleshooting > Paper Jams > Paper Is Jammed in the Paper Output Slot or the Rear Tray
Paper Is Jammed in the Paper Output Slot or the Rear Tray
Remove the paper following the procedure below.
- Slowly pull the paper out, either from the Rear Tray or from the Paper Output Slot, whichever is easier.


Note
If the paper tears and a piece remains inside the machine, turn the machine off, open the Scanning Unit (Cover), and remove the paper. Be careful not to touch the components inside the machine.
After removing all paper, close the Scanning Unit (Cover), and turn the machine back on.
If you cannot pull the paper out, turn the machine off and turn it back on. The paper may be ejected automatically.
- Reload the paper, and press the Stop/Reset button on the machine.
If you turned off the machine in step 1, all print jobs in the queue are canceled. Reprint if necessary.

Note
- When reloading the paper, confirm that you are using the correct paper and are loading it correctly.
Loading Paper / Originals
A5 sized paper is suited to printing documents consisting mainly of text. We do not recommend using such paper to print documents with photos or graphics, since the printout may curl and cause paper exit jams.
If you cannot remove the paper or the paper tears inside the machine, or if the paper jam error continues after removing the paper, contact the service center.
Advanced Guide
Advanced Guide > Troubleshooting > Paper Jams > In Other Cases
In Other Cases
Make sure of the following:
- Check 1: Are there any foreign objects around the Paper Output Slot?
- Check 2: Are there any foreign objects in the Rear Tray?
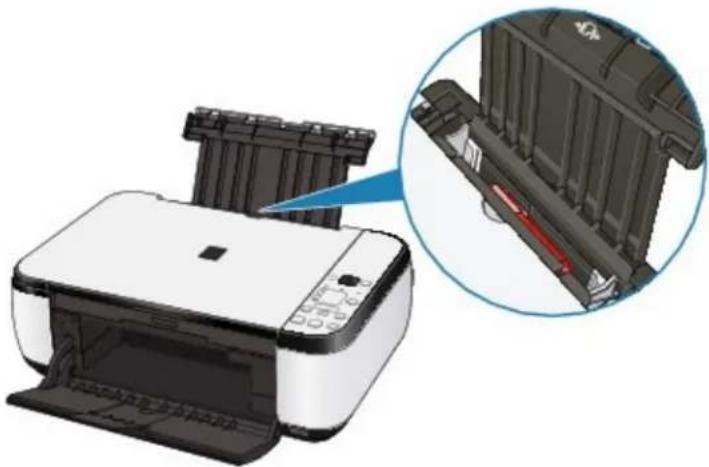
If there are any foreign objects in the Rear Tray, be sure to turn off the machine, unplug it from the power supply, then remove the foreign object.

- Check 3: Is the paper curled?
→ Check 3: Load the paper after correcting its curl.
Advanced Guide
Advanced Guide > Troubleshooting > Message Appears on the Computer Screen
Message Appears on the Computer Screen
Error Number: B200 A printer error has occurred. Turn the printer off and unplug the power cord of the printer from the power supply. Then contact the service center. Is Displayed
Error Number: **** A printer error has occurred. Turn the printer off and then on again. If this doesn't clear the error, see the user's guide for more detail. Is Displayed
→ Windows Writing Error/Output Error/Communication Error
→ Macintosh Error Number: 300 Is Displayed
Macintosh Error Number: 1700 Is Displayed
→ Macintosh Ink Info Number: 1688 Is Displayed
→ Macintosh Ink Info Number: 1686 Is Displayed
→ Macintosh Error Number: 2001 Is Displayed (MP270 series only)
→ Macintosh Error Number: 2002 Is Displayed (MP270 series only)
→ Windows Other Error Messages
→ Windows The Inkjet Printer/Scanner/Fax Extended Survey Program Screen Is Displayed
→ Macintosh The Inkjet Printer/Scanner/Fax Extended Survey Program Icon Appears
Error Number: B200 A printer error has occurred. Turn the printer off and unplug the power cord of the printer from the power supply. Then contact the service center. Is Displayed
Turn off the machine, and unplug the power cord of the machine from the power supply.
Contact the service center.
Error Number: **** A printer error has occurred. Turn the printer off and then on again. If this doesn't clear the error, see the user's guide for more detail. Is Displayed
"***** is displayed in the alphanumeric character and depends on the error occurred.
- 5100 Is Displayed
Confirm the movement of the FINE Cartridge Holder blocked.
Cancel printing from your computer, turn off the machine. Then clear the jammed paper or protective material that is preventing the FINE Cartridge Holder from moving, and turn on the machine again.
Important
- Be careful not to touch the components inside the machine. The machine may not print out properly if you touch it.
If the problem is not resolved, contact the service center.
- 6000 Is Displayed
If any object is placed in front of the machine, remove it.
Open the Paper Output Tray gently, then turn the power off and back on.
- Four-Digit Alphanumeric and "Printer error has occurred." Is Displayed
Turn off the machine, and unplug the power cord of the machine from the power supply.
Plug the machine back in and turn the machine back on.
If the problem is not resolved, contact the service center.

Writing Error/Output Error/Communication Error
- Check 1: If the Power lamp is off, make sure that the power plug is plugged in, then turn the machine on.
While the Power lamp is flashing green, the machine is initializing. Wait until the Power lamp stops flashing and remains lit green.
- Check 2: Make sure that the printer port is configured appropriately in the printer driver.
* In the following instructions, "XXX" signifies your machine's name.
- Log on as a user account with administrator privilege.
- Click Control Panel, then Printer under Hardware and Sound.
In Windows XP, click Control Panel, Printers and Other Hardware, then Printers and Faxes.
In Windows 2000, click Control Panel then Printers.
- Right-click the Canon XXX Printer icon, then select Properties.
- Click the Ports tab to confirm the port settings.
Make sure that a port named USBnnn (where "n" is a number) with Canon XXX Printer appearing in the Printer column is selected for Print to the following port(s).
If the port setting is not correct, reinstall the MP Drivers or change the port setting according to the interface you are using.
- Check 3: Make sure that the USB cable is securely plugged in to the machine and the computer.
- If you are using a relay device such as a USB hub, disconnect it, connect the machine directly to the computer, and try printing again. If printing starts normally, there is a problem with the relay device. Consult the reseller of the relay device for details.
- There could also be a problem with the USB cable. Replace the USB cable and try printing again.
- Check 4: Make sure that the MP Drivers are installed correctly.
Uninstall the MP Drivers following the procedure described in Deleting the Unnecessary MP Drivers, insert the Setup CD-ROM into the computer's disc drive and perform Custom Install and select MP Drivers to install again.
- Check 5: Check the status of the device on your computer.
Follow the procedure below to check the status of the device.
- Click Control Panel, Hardware and Sound, then Device Manager.
If the User Account Control screen is displayed, follow the on-screen instructions.
In Windows XP, click Control Panel, Performance and Maintenance, System, then click Device Manager on the Hardware sheet.
In Windows 2000, click Control Panel, System, then Device Manager on the Hardware sheet.
- Double-click Universal Serial Bus controllers then USB Printing Support.
If USB Printing Support is not displayed, make sure that the machine is correctly connected to the computer.
→ Check 3: Make sure that the USB cable is securely plugged in to the machine and the computer.
- Click the General tab and make sure that there is no indication of a problem with the device.
If a device error is displayed, refer to Windows help to resolve the error.

acintosh
Error Number: 300 Is Displayed
- Check 1: If the Power lamp is off, make sure that the power plug is plugged in, then turn the machine on.
While the Power lamp is flashing green, the machine is initializing. Wait until the Power lamp stops flashing and remains lit green.
- Check 2: Make sure that the USB cable is securely plugged in to the machine and the computer.
- If you are using a relay device such as a USB hub, disconnect it, connect the machine directly to the computer, and try printing again. If printing starts normally, there is a problem with the relay device. Consult the reseller of the relay device for details.
- There could also be a problem with the USB cable. Replace the USB cable and try printing again.
- Check 3: Make sure that your machine's name is selected in the Print dialog box.

Opening the Page Setup and Print Dialog Box (Macintosh)

acintosh
Error Number: 1700 Is Displayed
- See E, 0, 8 in An Error Code Is Displayed on the LED and take the appropriate action.

acintosh
Ink Info Number: 1688 Is Displayed
- See E, 1, 6 in An Error Code Is Displayed on the LED and take the appropriate action.

acintosh
Ink Info Number: 1686 Is Displayed
• See E, 1, 3 in An Error Code Is Displayed on the LED and take the appropriate action.

acintosh
Error Number: 2001 Is Displayed (MP270 series only)
- See E, 0, 9 in An Error Code Is Displayed on the LED and take the appropriate action.

acintosh
Error Number: 2002 Is Displayed (MP270 series only)
• See E, 1, 9 in An Error Code Is Displayed on the LED and take the appropriate action.

indows
Other Error Messages
- Check: If an error message is displayed outside the printer status monitor, check the following:
- "Could not spool successfully due to insufficient disk space" Delete any unnecessary files to increase the amount of free space on the disk.
- "Could not spool successfully due to insufficient memory" Quit other running applications to increase available memory. If you still cannot print, restart your computer and retry printing.
- "Printer driver could not be found" Uninstall the printer driver according to the procedure described in Deleting the Unnecessary MP Drivers, and then reinstall it.
- "Could not print Application name - File name" Try printing again once the current job is complete.
Windows
The Inkjet Printer/Scanner/Fax Extended Survey Program Screen Is Displayed
If the Inkjet Printer/Scanner/Fax Extended Survey Program is installed, a confirmation screen asking for permission to send the printer usage information will be displayed three months and then six months after the installation. After that, it will be displayed every six months for about four years.
Read the instructions on the screen and follow the procedure below.

- If you agree to participate in the survey program:
Click Agree, then follow the on-screen instructions. The printer usage information will be sent via the Internet. If you have followed the on-screen instructions, the information will be sent automatically from the second time onward and the confirmation screen will not be displayed again.

Note
- When the information is being sent, a caution screen such as an Internet security screen may be displayed. In this case, confirm that the program name is "IJPLMUI.exe", then allow it.
If you deselect the Send automatically from the next time check box, the information will not be sent automatically from the second time onward and a confirmation screen will be displayed at the time of the next survey. To send the information automatically, see Changing the confirmation screen setting:
- If you do not agree to participate in the survey program:
Click Do not agree. The confirmation screen will be closed, and the survey at that time is skipped. The confirmation screen will be displayed again three months later.
• To uninstall the Inkjet Printer/Scanner/Fax Extended Survey Program:
To uninstall the Inkjet Printer/Scanner/Fax Extended Survey Program, click Uninstall, then follow the on-screen instructions.
- Changing the confirmation screen setting:
-
Select items the Start menu as shown below.
-
In Windows Vista, select the Start menu > Control Panel > Uninstall a program.
- In Windows XP, select the Start menu > Control Panel > Add or Remove Programs.
- In Windows 2000, select the Start menu > Settings > Control Panel > Add/Remove Programs.

Note
In Windows Vista, a confirmation/warning dialog box may appear when installing, uninstalling or starting up software. This dialog box appears when administrative rights are required to perform a task. If you are logged on to an administrator account, click Continue or Allow to continue.
-
Select Canon Inkjet Printer/Scanner/Fax Extended Survey Program.
-
Select Change.
If you select Yes after you have followed the on-screen instructions, the confirmation screen will be displayed at the time of the next survey. If you select No, the information will be sent automatically.

Note
If you select Uninstall (or Remove), the Inkjet Printer/Scanner/Fax Extended Survey Program is uninstalled. Follow the on-screen instructions.

acintosh The Inkjet Printer/Scanner/Fax Extended Survey Program Icon Appears
If the Inkjet Printer/Scanner/Fax Extended Survey Program is installed, the printer usage information is scheduled to be sent three months and then six months after the installation. After that, it is scheduled to be sent every six months for about four years. The Inkjet Printer/Scanner/Fax Extended Survey Program icon appears in the Dock when it is time to send the printer usage information.
In Mac OS X v.10.3.9, the Inkjet Printer/Scanner/Fax Extended Survey Program is not installed. Read the instructions on the screen after clicking the icon, then follow the procedure below.
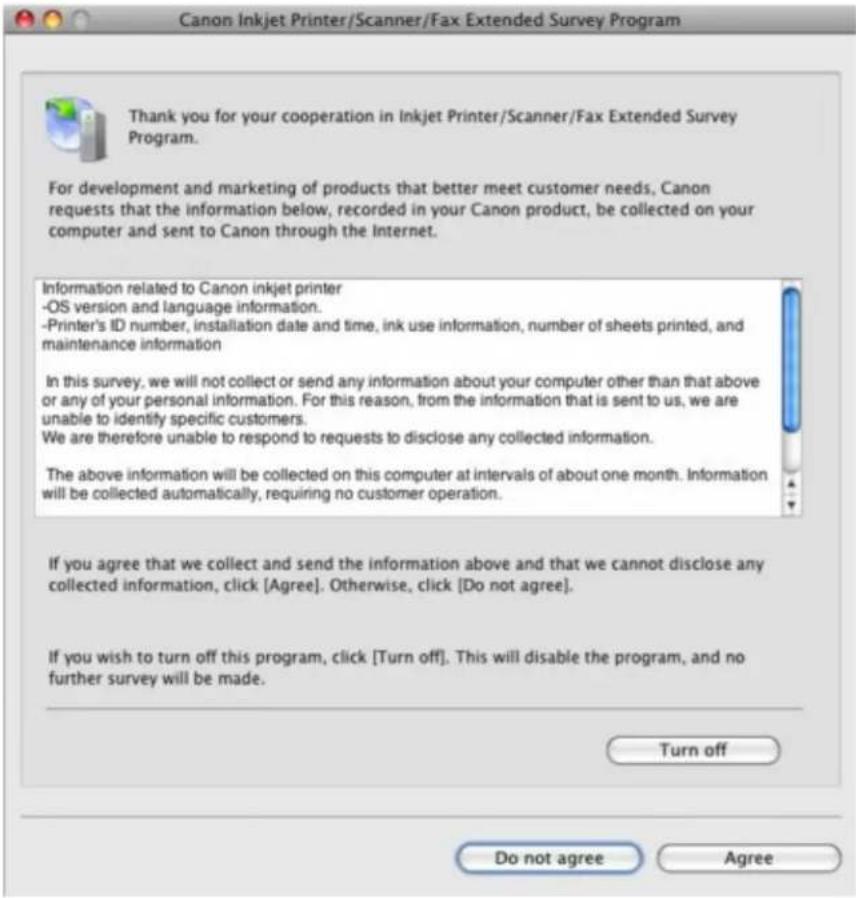
• If you agree to participate in the survey program:
Click Agree, then follow the on-screen instructions. The printer usage information will be sent via the Internet. If you have followed the on-screen instructions, the information will be sent automatically from the second time onward and the confirmation screen will not be displayed again.

Note
If you deselect the Send automatically from the next time check box, the information will not be sent automatically from the second time onward and the Inkjet Printer/Scanner/Fax Extended Survey Program icon will appear in the Dock at the time of the next survey.
- If you do not agree to participate in the survey program:
Click Do not agree. The confirmation screen will be closed, and the survey at that time is skipped. The confirmation screen will be displayed again three months later.
• To stop sending the information:
Click Turn off. The Inkjet Printer/Scanner/Fax Extended Survey Program is stopped, and the information will not be sent. To resume the survey, see Changing the setting:
• To uninstall the Inkjet Printer/Scanner/Fax Extended Survey Program:
- Stop the Inkjet Printer/Scanner/Fax Extended Survey Program.
→ Changing the setting: - Select Applications from the Go menu, and double-click the Canon Utilities folder, then the Inkjet Extended Survey Program folder.
- Place the Canon Inkjet Printer/Scanner/Fax Extended Survey Program.app file into the Trash.
- Restart the computer.
Empty the Trash and restart your computer.
- Changing the setting:
To display the confirmation screen every time the printer usage information is sent or to resume surveying, follow the procedure below.
- Select Applications from the Go menu, and double-click the Canon Utilities folder, then the Inkjet Extended Survey Program folder.
- Double-click the Canon Inkjet Printer/Scanner/Fax Extended Survey Program icon.
![Extended Survey Program Preferences General Do not display the confirmation screen when information is sent The survey program is turned on. Turn off If you wish to turn off this program, click [Turn off].](/content/2026/06/1260153/images/0134a3fa60f07749c020e4ee46e77ff6593b57d3a0e9a3e31f08d496cbfed858.jpg)
- Do not display the confirmation screen when information is sent: If the check box is selected, the information will be sent automatically. If the check box is not selected, the Inkjet Printer/Scanner/Fax Extended Survey Program icon will appear in the Dock at the time of the next survey. Click the icon, then follow the on-screen instructions.
- Turn off/Turn on button: Click the Turn off button to stop the Inkjet Printer/Scanner/Fax Extended Survey Program. Click the Turn on button to restart the Inkjet Printer/Scanner/Fax Extended Survey Program.
Advanced Guide
Advanced Guide > Troubleshooting > For Windows Users
For Windows Users
Printer Status Monitor Is Not Displayed
- Check: Is the printer status monitor enabled?
Make sure that Enable Status Monitor is selected on the Option menu of the printer status monitor.
- Open the printer properties dialog box.
Opening the Printer Properties Dialog Box (Windows)
- On the Maintenance sheet, click View Printer Status.
- Select Enable Status Monitor on the Option menu if it is not selected.
• If you are using Windows Vista:
Launching MP Navigator EX Whenever Pressing the SCAN Button on the Machine
- Check: Specify the response from pressing the SCAN button on the machine. Follow the procedure below to specify the response on your computer.
- Log on as a user account with administrator privilege.
- Click Control Panel, Hardware and Sound, then Scanners and Cameras.
- Select WIA Canon XXX ser, then click the Properties button. If the User Account Control screen appears, click Continue.
-
Click the Events tab on the WIA Canon XXX ser Properties screen.
-
Select Start this program for Actions, then select MP Navigator EX Ver3.0 from the pull-down menu.
Choose an event from the Select an event pull-down menu, then select MP Navigator EX Ver3.0 to launch for each event. If MP Navigator EX Ver3.0 is already selected for each event, click Cancel.
- Click OK.
Advanced Guide
Advanced Guide > Troubleshooting > Error Message Appears on a PictBridge Compliant Device (MP270 series only)
Error Message Appears on a PictBridge Compliant Device (MP270 series only)
The following are the possible errors that may occur when printing directly from a PictBridge compliant device and the countermeasures to clear them.

Note
This section describes errors that are indicated on Canon-brand PictBridge compliant devices. The error messages and operations may vary depending on the device you are using. For errors on non-Canon PictBridge compliant devices, check the error code on the LED and take the appropriate action to clear the error. For details, see An Error Code Is Displayed on the LED.
For the errors indicated on the PictBridge compliant device and their solution, also refer to the instruction manual of the device. For other troubles on the device, contact the manufacturer.
| Error Message on the PictBridge Compliant Device | Action |
| "Printer in use" If the machine is printing from the computer or warming up, wait until the job ends.When it is ready, the machine starts printing automatically. | |
| "No paper" Load paper on the Rear Tray, and select Continue* in the display on your PictBridge compliant device.* To resume printing, you can also press the Black or Color button on the machine instead of selecting Continue on the device. | |
| "Paper Error" | The Paper Output Tray is closed.Open the Paper Output Tray, then press the Black or Color button on the machine. |
| "Paper jam" | Select Stop in the display on your PictBridge compliant device to stop printing.Remove the jammed paper, load new paper, press the Black or Color button on the machine, and try printing again. |
| "Printer cover open" | Close the Scanning Unit (Cover) on the machine. |
| "No print head" The FINE Cartridge is not installed or the Cartridge may not be compatible with this machine.See E, 0, 4/E, 0, 5 in An Error Code Is Displayed on the LED and take the appropriate action. | |
| "Waste tank full"/"Ink absorber full" | The ink absorber is nearly full.See E, 0, 9 in An Error Code Is Displayed on the LED and take the appropriate action. |
| "No ink"/"Ink cassette error" | The FINE Cartridge has or may have run out of ink.The FINE Cartridge may not be installed properly or may not be compatible with this machine.Check the error code on the LED and take the appropriate action to resolve the error.An Error Code Is Displayed on the LED |
| "Hardware Error" FINE Cartridge errors have occurred.Replace the FINE Cartridge.Routine Maintenance | |
Advanced Guide
Advanced Guide > Troubleshooting > Problems with Scanning
Problems with Scanning
Scanner Does Not Work
→ ScanGear (Scanner Driver) Does Not Start
Error Message Appears and the ScanGear (Scanner Driver) Screen Does Not Appear
→ Scan Quality (Image Displayed on the Monitor) Is Poor
→ Scanned Image Is Surrounded by Extra White Areas
→ Cannot Scan Multiple Documents at One Time
→ Cannot Scan Properly in Auto Scan Mode
Slow Scanning Speed
"There is not enough memory." Message Is Displayed
→ Computer Stops Operating during Scanning
Scanner Does Not Work After Upgrading Windows
Advanced Guide
Advanced Guide > Troubleshooting > Problems with Scanning > Scanner Does Not Work
Scanner Does Not Work
Check 1: Make sure that the machine is turned on.
Check 2: Connect the USB cable to a different USB port on the computer.
Check 3: If the USB cable is connected to a hub, remove it from the hub and connect it to a USB port on the computer.
Check 4: Restart the computer.
Page top↑
Advanced Guide
Advanced Guide > Troubleshooting > Problems with Scanning > ScanGear (Scanner Driver) Does Not Start
ScanGear (Scanner Driver) Does Not Start
Check 1: Make sure that the MP Drivers are installed.
If it is not installed, insert the Setup CD-ROM into the computer's disc drive, then select Custom Install and install MP Drivers.
Check 2: On the File menu of the application, select Select Source and select the machine.
Important
- Do not select the model name that includes WIA in it.
Note
■ The operation may differ depending on the application.
Check 3: Start from a TWAIN-compliant application.
Advanced Guide
Advanced Guide > Troubleshooting > Problems with Scanning > Error Message Appears and the ScanGear (Scanner Driver) Screen Does Not Appear
Error Message Appears and the ScanGear (Scanner Driver) Screen Does Not Appear
Check 1: Make sure that the machine is turned on.
Check 2: Connect the USB cable to a different USB port on the computer.
Check 3: If the USB cable is connected to a hub, remove it from the hub and connect it to a USB port on the computer.
Check 4: Make sure that the MP Drivers are installed.
If it is not installed, insert the Setup CD-ROM into the computer's disc drive, then select Custom Install and install MP Drivers.
Check 5: On the File menu of the application, select Select Source and select the machine.

Note
■ The operation may differ depending on the application.
Check 6: Make sure that the application is TWAIN-compliant.
You cannot open ScanGear (scanner driver) from applications not supporting TWAIN.
Check 7: Exit ScanGear (scanner driver) if it is running on another application.
Advanced Guide
Advanced Guide > Troubleshooting > Problems with Scanning > Scan Quality (Image Displayed on the Monitor) Is Poor
Scan Quality (Image Displayed on the Monitor) Is Poor
Check 1: Increase the scanning resolution.
→ Resolution
Check 2: Set the scale to 100%.
Some applications do not display images clearly if the image is too small.
Check 3: If moire (stripe pattern) appears, take the following measures and scan again.
- On the Basic Mode tab of ScanGear (scanner driver), select Magazine(Color) in Select Source.
- On the Advanced Mode tab of ScanGear (scanner driver), set Descreen in Image Settings to ON.
→ Image Settings

Note
If moire appears when you scan a digital print photo, take the above measures and scan again.
- If you use MP Navigator EX, set Document Type to Magazine(Color) or enable Descreen in the Scan Settings dialog box and scan again.
→ Scan Settings Dialog Box (Photos/Documents)
Check 4: Check the monitor's color depth.
From the Start menu, select Control Panel > Appearance and Personalization > Adjust screen resolution to open the Display Settings dialog box. Set the color depth to Medium (16 bit) or Highest (32 bit).
- Windows XP:
From the Start menu, select Control Panel > Display to open the Display Properties dialog box. On the Settings tab, set Colors to Medium (16 bit) or Highest (32 bit).
- Windows 2000:
From the Start menu, select Settings > Control Panel > Display to open the Display Properties dialog box. On the Settings tab, set Colors to High Color (16 bit) or True Color (32 bit).
Check 5: Clean the Platen and Document Cover.
→ Cleaning the Platen Glass and Document Cover
Check 6: If the document is in poor condition (dirty, faded, etc.), use Reduce Dust and Scratches, Fading Correction, Grain Correction, etc. in Image Settings on the Advanced Mode tab of ScanGear (scanner driver).
→ Image Settings
Check 7: If the color tone of images is different from the original document, take the following measures and scan again.
- On the Advanced Mode tab of ScanGear (scanner driver), set Image Adjustment in Image Settings to None.
→ Image Settings - Open the Preferences dialog box from the Advanced Mode tab of ScanGear (scanner driver) and set Color Matching on the Color Settings tab.
→ Color Settings Tab
Advanced Guide
Advanced Guide > Troubleshooting > Problems with Scanning > Scanned Image Is Surrounded by Extra White Areas
Scanned Image Is Surrounded by Extra White Areas
Check: Specify the scan area.

Click (Auto Crop) in ScanGear (scanner driver) to automatically display the cropping frame (scan area) according to the document size. You can also manually specify the scan area, for example when there are white margins along the document or when you want to create custom cropping frames.
Adjusting Cropping Frames
Page top↑
Advanced Guide
Advanced Guide > Troubleshooting > Problems with Scanning > Cannot Scan Multiple Documents at One Time
Cannot Scan Multiple Documents at One Time
Check 1: Make sure that the documents are placed correctly on the Platen.
→ Placing Documents
Check 2: Scan each item individually.
Some applications do not support multiple image scanning.
Page top↑
Advanced Guide
Advanced Guide > Troubleshooting > Problems with Scanning > Cannot Scan Properly in Auto Scan Mode
Cannot Scan Properly in Auto Scan Mode
Check 1: Make sure that the documents are placed correctly on the Platen.
→ Placing Documents
Check 2: Multiple image scanning may not be supported.
Some applications do not support multiple image scanning. In that case, scan each item individually.
Page top↑
Advanced Guide
Advanced Guide > Troubleshooting > Problems with Scanning > Slow Scanning Speed
Slow Scanning Speed
Check 1: To view the image on a monitor, set the output resolution to around 150 dpi. To print, set it to around 300 dpi.
→ Resolution
Check 2: Set Fading Correction, Grain Correction, etc. to None.
→ Image Settings
Check 3: In MP Navigator EX, deselect the Correct slanted document checkbox and scan again.
→ Scan Settings Dialog Box
Check 4: In MP Navigator EX, deselect the Detect the orientation of text documents and rotate images checkbox and scan again.
→ Scan Settings Dialog Box
Advanced Guide
Advanced Guide > Troubleshooting > Problems with Scanning > "There is not enough memory." Message Is Displayed
"There is not enough memory." Message Is Displayed
Check 1: Exit other applications and try again.
Check 2: Reduce the resolution or output size and scan again.
→ Resolution
Page top↑
Advanced Guide
Advanced Guide > Troubleshooting > Problems with Scanning > Computer Stops Operating during Scanning
Computer Stops Operating during Scanning
Check 1: Restart the computer, reduce the output resolution in ScanGear (scanner driver) and scan again.
Check 2: Delete unnecessary files to obtain sufficient free hard disk space, then scan again.
Error message may appear if there is not enough hard disk space to scan and save, when the image size is too large (such as when scanning a large document at high resolution.)
Check 3: For Location of Temporary Files in MP Navigator EX, specify a folder on a drive with sufficient free space.
General Tab
Check 4: Multiple devices may be connected to USB ports.
Disconnect other devices.
Advanced Guide
Advanced Guide > Troubleshooting > Problems with Scanning > Scanner Does Not Work After Upgrading Windows
Scanner Does Not Work After Upgrading Windows
Check: Disconnect the machine from the computer, then uninstall and reinstall the MP Drivers and MP Navigator EX.
- Step 1: Uninstall the MP Drivers.
See "Deleting the Unnecessary MP Drivers" for details.
- Step 2: Uninstall MP Navigator EX.
- From the Start menu, select (All) Programs > Canon Utilities > MP Navigator EX 3.0 > MP Navigator EX Uninstall.
- When a confirmation appears, click Yes.
- When uninstallation is complete, click OK. MP Navigator EX is uninstalled.
- Step 3: Reinstall the MP Drivers and MP Navigator EX.
Insert the Setup CD-ROM into the computer's disc drive, then select Custom Install and reinstall the MP Drivers and MP Navigator EX.
Page top↑
Advanced Guide
Advanced Guide > Troubleshooting > Software Problems
Software Problems
E-mail Software Program You Want to Use Does Not Appear in the Screen for Selecting an E-mail Software Program
→ Scanned Image Is Printed Enlarged (Reduced)
→ Scanned Image Is Enlarged (Reduced) on the Computer Monitor
→ Scanned Image Does Not Open
Advanced Guide
Advanced Guide > Troubleshooting > Software Problems > E-mail Software Program You Want to Use Does Not Appear in the Screen for Selecting an E-mail Software Program
E-mail Software Program You Want to Use Does Not Appear in the Screen for Selecting an E-mail Software Program
Check 1: MP Navigator EX may not support the e-mail software program.
The following e-mail software programs are supported. (Image are attached to the mail message automatically.)
- Windows Mail (Windows Vista)
- Outlook Express (Windows XP/Windows 2000)
- Microsoft Outlook
Check 2: If an e-mail software program does not operate properly, check that the program's MAPI is enabled.
To enable MAPI, refer to the manual of the e-mail software program.
Check 3: If using an e-mail software program other than the ones listed above, select None (Attach Manually) when prompted to select a program and attach the scanned image manually.
Page top↑
Advanced Guide
Advanced Guide > Troubleshooting > Software Problems > Scanned Image Is Printed Enlarged (Reduced)
Scanned Image Is Printed Enlarged (Reduced)
Check: Set the printing size in the application.
Page top↑
Advanced Guide
Advanced Guide > Troubleshooting > Software Problems > Scanned Image Is Enlarged (Reduced) on the Computer Monitor
Scanned Image Is Enlarged (Reduced) on the Computer Monitor
Check 1: Change the display setting in the application.
You cannot reduce the display size in "Paint." To reduce the display size, open the images in an application.
For details, refer to the application's manual. If you have any questions, contact the manufacturer of the application.
Check 2: Change the resolution setting in ScanGear (scanner driver) and scan again.
The higher the resolution, the larger the resulting image will be.
→ Resolution
Page top↑
Advanced Guide
Advanced Guide > Troubleshooting > Software Problems > Scanned Image Does Not Open
Scanned Image Does Not Open
Check: If the file format is not supported by the application, scan the image again and save it in a popular file format such as JPEG.
For details, refer to the application's manual. If you have any questions, contact the manufacturer of the application.
Page top↑
Advanced Guide
Advanced Guide > Troubleshooting > MP Navigator EX Problems
MP Navigator EX Problems
→ Cannot Scan at the Correct Size
→ Position or Size of the Image Cannot be Detected Correctly When Scanning Using the Operation Panel
Document Is Placed Correctly, but the Scanned Image Is Slanted
→ Document Is Placed Correctly, but the Orientation Changes in the Scanned Image
Advanced Guide
Advanced Guide > Troubleshooting > MP Navigator EX Problems > Cannot Scan at the Correct Size
Cannot Scan at the Correct Size
Check 1: Make sure that the documents are placed correctly on the Platen.
→ Placing Documents
Check 2: Set Document Size to the actual document size and scan again.
If the matching size is not found, scan at a larger size and trim the image.
See the Toolbar (Trimming) in " Correct/Enhance Images Window " for details.
Page top↑
Advanced Guide
Advanced Guide > Troubleshooting > MP Navigator EX Problems > Position or Size of the Image Cannot be Detected Correctly When Scanning Using the Operation Panel
Position or Size of the Image Cannot be Detected Correctly When Scanning Using the Operation Panel
Check 1: Make sure that the documents are placed correctly on the Platen.
→ Placing Documents
Check 2: Check that the MP Navigator EX settings are correctly set according to the document.
If you cannot scan properly with Auto Scan using the Operation Panel, specify the document type or size in MP Navigator EX.
→ Scanning Photos and Documents
Page top↑
Advanced Guide
Advanced Guide > Troubleshooting > MP Navigator EX Problems > Document Is Placed Correctly, but the Scanned Image Is Slanted
Document Is Placed Correctly, but the Scanned Image Is Slanted
Check: In MP Navigator EX, deselect the Correct slanted document checkbox and scan again.
→ Scan Settings Dialog Box (Photos/Documents)
Page top↑
Advanced Guide
Advanced Guide > Troubleshooting > MP Navigator EX Problems > Document Is Placed Correctly, but the Orientation Changes in the Scanned Image
Document Is Placed Correctly, but the Orientation Changes in the Scanned Image
Check: In MP Navigator EX, deselect the Detect the orientation of text documents and rotate images checkbox and scan again.
→ Scan Settings Dialog Box (Photos/Documents)
Page top↑
Advanced Guide
Advanced Guide > Troubleshooting > If You Cannot Resolve the Problem
If You Cannot Resolve the Problem
If you cannot resolve the problem with any of the workarounds in this chapter, please contact the seller of the machine or the service center.
Canon support staff are trained to be able to provide technical support to satisfy customers.
! Caution
If the machine emits any unusual sound, smoke, or odor, turn it off immediately. Unplug the power cord from the outlet and contact the seller or the service center. Never attempt to repair or disassemble the machine yourself.
- Attempts by customers to repair or take apart the machine will invalidate any warranty regardless of whether the warranty has expired.
Before contacting the service center, confirm the following:
- Product name:
* Your machine's name is located on the front cover of the setup manual. - Serial number: please refer to the setup manual
• Details of the problem
• What you tried to solve the problem, and what happened
Advanced Guide
Advanced Guide > Troubleshooting > FAQs
FAQs
No Printing Results/Printing Is Blurred/Colors Are Wrong/White Streaks
→ Machine Moves But Ink Is Not Ejected
→ Cannot Install the MP Drivers
→ Printing Does Not Start
→ Copying/Printing Stops Before It Is Completed
→ Windows Writing Error/Output Error/Communication Error
→ Print Results Not Satisfactory
→ Paper Jams
→ Paper Does Not Feed Properly
Advanced Guide
Advanced Guide > Troubleshooting > Instructions for Use (Printer Driver)
Instructions for Use (Printer Driver)
This printer driver is subject to the following restrictions. Keep the following points in mind when using the printer driver.
Restrictions on the Printer Driver
- With some applications, the Copies setting in the Page Setup tab of the printer driver may not be enabled. In this case, use the copies setting in the Print dialog box of the application software.
- If the selected Language in the About dialog box does not match the operating system interface language, the driver screen may not be displayed properly.
-
Do not change the Advanced tab items of the printer properties. If you change any of the items, you will not be able to use the following functions correctly. Also, if Print to file is selected in the Print dialog box of the application software and with applications that prohibit EMF spooling, such as Adobe Photoshop LE and MS Photo Editor, the following functions will not operate.
-
Preview before printing on the Main tab
- Prevent loss of print data in the Print Options dialog box
-
Page Layout, Poster, Booklet, Duplex Printing, Specify Margin..., Print from Last Page, Collate, and Stamp/Background... on the Page Setup tab
-
Since the resolution in the preview display differs from the printing resolution, text and lines in the preview display may appear different from the actual print result.
- With some applications, the printing is divided into multiple print jobs. To cancel printing, delete all divided print jobs.
- If image data is not printed correctly, display the Print Options dialog box and change the setting of Disable ICM required from the application software. This may solve the problem.
-
Software windows may not appear correctly on Windows Vista when fonts are set to Larger scale. When you want to display the windows with Larger scale fonts, set the desktop theme to Windows Classic as follows:
-
Select Control Panel from the Start menu.
- Select Appearance and Personalization -> Personalization -> Theme. The Theme Settings dialog box opens.
- At the Theme Settings dialog box, click the Themes tab, and select Windows Classic from Theme.
- Click OK. Desktop changes to Windows Classic display.
Points to Note with Applications
• There are following restrictions in Microsoft Word (Microsoft Corporation).
- When Microsoft Word has the same printing functions as the printer driver, use Word to specify them.
-
When selecting Scaled, Fit-to-Page, or Page Layout from the Page Layout list on the Page Setup tab, the selected printing function may not be effective, depending on the version of Word. If this happens, follow the procedure below.
-
Open Word's Print dialog box.
- Open the printer driver setup window, specify Page Layout on the Page Setup tab, and click OK.
- Without starting printing, close the Print dialog box.
- Open Word's Print dialog box again.
- Open the printer driver setup window again and click OK.
- Start printing.
- Illustrator/Adobe Systems Inc.
If bitmap printing takes effect, printing may take time or some data may not be printed. Print after unchecking the Bitmap Printing check box in the Print dialog box.
Advanced Guide
Advanced Guide > Troubleshooting > General Notes (Scanner Driver)
General Notes (Scanner Driver)
ScanGear (scanner driver) is subject to the following restrictions. Keep these points in mind when using it.
Scanner Driver Restrictions
- When using the NTFS file system, the TWAIN data source may not be invoked. This is because the TWAIN module cannot be written to the winnt folder for security reasons. Contact the computer's administrator for help.
- Some computers (including laptops) connected to the machine may not resume correctly from standby mode. In that case, restart the computer.
- Do not connect two or more machines or multifunction printers with scanner function to the same computer simultaneously. If multiple scanning devices are connected, you cannot scan from the Operation Panel of the machine and also may experience errors while accessing the devices.
-
Software screens may not appear correctly on Windows Vista when font size is set to Larger scale. If you want to display the screens with Larger scale fonts, change the theme in Appearance and Personalization to Windows Classic as follows:
-
From the Start menu, select Control Panel.
- Select Appearance and Personalization > Personalization > Theme.
The Theme Settings dialog box opens. - On the Theme tab of the Theme Settings dialog box, select Windows Classic under Theme.
- Click OK.
Desktop changes to Windows Classic view.
- Use the default display font size of the OS. Otherwise, software screens may not appear correctly.
-
Scanning may fail if the computer has resumed from sleep or standby mode. In that case, follow these steps and scan again.
-
Turn off the machine.
- Exit ScanGear (scanner driver), then disconnect the USB cable from the computer and reconnect it.
-
Turn on the machine.
-
ScanGear (scanner driver) cannot be opened in multiple applications at the same time. Within an application, ScanGear (scanner driver) cannot be opened for the second time when it is already open.
- Be sure to close the ScanGear (scanner driver) window before closing the application.
- Make sure that you have adequate disk space available when scanning large images at high resolutions. For example, at least 300 MB of free space is required to scan an A4 document at 600 dpi in full-color.
- ScanGear (scanner driver) and WIA driver cannot be used at the same time.
- Do not enter the computer into sleep or hibernate state during scanning.
- Calibration may take time if the machine is connected via USB 1.1.
Applications with Restrictions on Use
- If you start Media Center included in Windows XP Media Center Edition 2005, you may not be able to scan using the Operation Panel of the machine. In that case, restart the computer.
- You cannot scan images with Media Center included in Windows Vista™ and Windows XP Media Center Edition 2005. Scan with other applications such as MP Navigator EX.
- In some applications, you may encounter a problem when you switch to thumbnail view in the Advanced Mode tab of ScanGear (scanner driver). In that case, scan each document individually,
changing Paper Size according to the document.
- In some applications, if you select the View scanned images checkbox in the Auto Scan Mode tab of ScanGear (scanner driver), the window displaying the thumbnails of the scanned images may close automatically.
- Some applications may not display the TWAIN user interface. In that case, refer to the application's manual and change the settings accordingly.
- Some applications do not support continuous scanning of multiple documents. In some cases, only the first scanned image is accepted, or multiple images are scanned as one image.
- When scanning platen size images into a Microsoft Office application (such as Word, Excel or PowerPoint), click Custom Insert in the Insert Picture from Scanner or Camera screen. Otherwise, images may not be scanned correctly.
- Images may not be scanned correctly in some applications. In that case, increase the operating system's virtual memory and retry.
- When image size is too large (such as when scanning large images at high resolution), your computer may not respond or the progress bar may remain at 0% depending on the application. In that case, cancel the action (for example by clicking Cancel on the progress bar), then increase the operating system's virtual memory or reduce the image size/resolution and retry. Alternatively, scan the image via MP Navigator EX first, then save and import it into the application.
Advanced Guide
Advanced Guide > Appendix
Appendix
→ Printing Area
→ How to Detach/Attach the Document Cover
→ Deleting the Undesired Print Job
→ Updating the MP Drivers
→ Uninstalling the On-Screen Manuals
→ Transporting the Machine
→ Opening the Printer Properties Dialog Box (Windows)
→ Opening the Page Setup and Print Dialog Box (Macintosh)
Opening the Canon IJ Printer Utility (Macintosh)
→ Sharing the Printer on a Network
Advanced Guide
Advanced Guide > Appendix > Printing Area
Printing Area
To ensure the best print quality, the machine allows a margin along each edge of media. The actual printable area will be the area inside these margins.
Recommended printing area : Canon recommends that you print within this area.
Printable area □: The area where it is possible to print.
However, printing in this area can affect the print quality or the paper feed precision.


Note
■ Borderless Printing
- By selecting Borderless Printing option, you can make prints with no margins.
- When performing Borderless Printing, slight cropping may occur at the edges since the printed image is enlarged to fill the whole page.
• For Borderless Printing, use the following paper:
• Glossy Photo Paper "Everyday Use" GP-501
• Photo Paper Glossy GP-502
• Photo Paper Plus Semi-Gloss SG-201
• Photo Paper Pro Platinum PT-101*
• Photo Paper Plus Glossy II PP-201
• Photo Paper Pro II PR-201
• Matte Photo Paper MP-101
* For MP270 series, this paper can be used only when printing from your computer. Performing Borderless Printing on any other type of paper may substantially reduce printing quality and/or result in printouts with altered color hues. Borderless Printing on plain paper may result in printouts with reduced quality. Use them only for test printing. You can perform Borderless Printing on plain paper only when printing from your computer.
• Borderless Printing is not available for legal, A5, or B5 sized paper, or envelopes.
- Depending on the type of paper, Borderless Printing may reduce the print quality at the top and bottom edges of the paper or cause these parts to become smudged.
Letter, Legal
Envelopes
→ Other Sizes than Letter, Legal, Envelopes
Advanced Guide
Advanced Guide > Appendix > Printing Area > Other Sizes than Letter, Legal, Envelopes
Other Sizes than Letter, Legal, Envelopes
| Size | Printable Area (width x height) |
| A5* | 5.56 x 7.95 inches / 141.2 x 202.0 mm |
| A4 | 8.00 x 11.38 inches / 203.2 x 289.0 mm |
| B5* | 6.90 x 9.80 inches / 175.2 x 249.0 mm |
| 4" x 6" / 10 x 15 cm | 3.73 x 5.69 inches / 94.8 x 144.4 mm |
| 4" x 8" / 10 x 20 cm* | 3.73 x 7.69 inches / 94.8 x 195.2 mm |
| 5" x 7" / 13 x 18 cm | 4.73 x 6.69 inches / 120.2 x 169.8 mm |
| 8" x 10" / 20 x 25 cm | 7.73 x 9.69 inches / 196.4 x 246.0 mm |
| Wide | 3.73 x 6.80 inches / 94.8 x 172.6 mm |
* For MP270 series, this page size can be used only when printing from your computer.

Recommended printing area
Printable area
Advanced Guide
Advanced Guide > Appendix > Printing Area > Letter, Legal
Letter, Legal
| Size | Printable Area (width x height) |
| Letter 8.00 x 10.69 inches / 203.2 x 271.4 mm | |
| Legal* | 8.00 x 13.69 inches / 203.2 x 347.6 mm |
* This page size can be used only when printing from your computer.

Recommended printing area
Printable area
Advanced Guide
Advanced Guide > Appendix > Printing Area > Envelopes
Envelopes
| Size | Recommended Printing Area (width x height) |
| European DL* | 4.06 x 7.07 inches / 103.2 x 179.5 mm |
| US Comm. Env. #10* 3.86 x 7.91 inches / 98.0 x 200.8 mm | |
* This page size can be used only when printing from your computer.

Recommended printing area
Page top ↑
Advanced Guide
Advanced Guide > Appendix > How to Detach/Attach the Document Cover
How to Detach/Attach the Document Cover
• Detaching the Document Cover:
Hold up the Document Cover vertically.
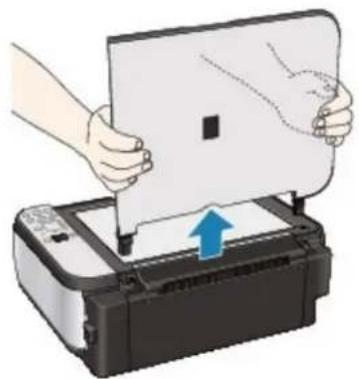
- Attaching the Document Cover:
Insert both hinges (A) of the Document Cover vertically into the holder (B) to attach the Document Cover as illustrated below.
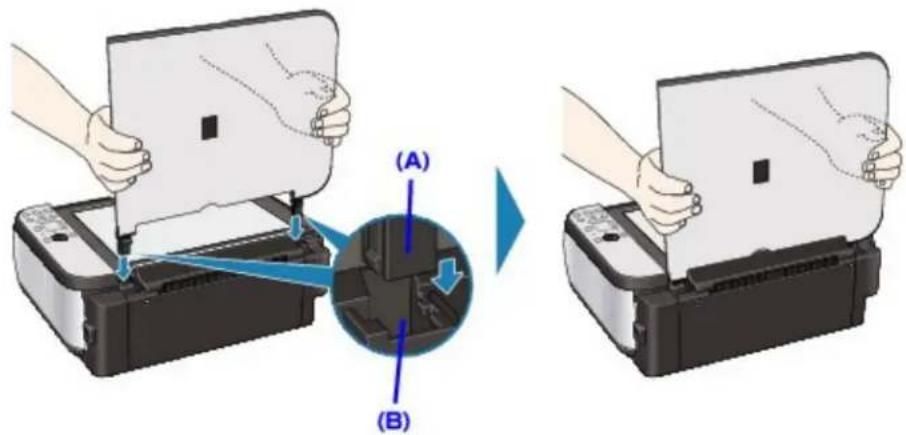
Advanced Guide
Advanced Guide > Appendix > Deleting the Undesired Print Job
Deleting the Undesired Print Job
If the printer does not start printing, the print job data cancelled or failed may be remaining. Delete the undesired print job by using the Canon IJ Status Monitor.
- Display the Canon IJ Status Monitor Click the status monitor button displayed on the task bar. The Canon IJ Status Monitor appears.
- Display the print jobs Click Display Print Queue.... The print queue window opens.
- Delete the print jobs Select Cancel All Documents from the Printer menu. When the confirmation message appears, click Yes. The deletion of the print job is complete.
Important
- Users who have not been granted access permission for printer management cannot delete the print job of another user.

Note
- When you perform this operation, all print jobs are deleted. If the print queue list contained a necessary print job, start the printing process over from the beginning.
Advanced Guide
Advanced Guide > Appendix > Updating the MP Drivers
Updating the MP Drivers
→ Obtaining the Latest MP Drivers
→ Deleting the Unnecessary MP Drivers
Before Installing the MP Drivers
→ Installing the MP Drivers
Advanced Guide
Advanced Guide > Appendix > Updating the MP Drivers > Obtaining the Latest MP Drivers
Obtaining the Latest MP Drivers
The MP Drivers include a printer driver and scanner driver (ScanGear).
By updating the MP Drivers to the latest version of the MP Drivers, unresolved problems may be solved.
Access our web site through the Internet and download the latest MP Drivers for your model.
Important
- You can download the MP Drivers for free, but any Internet access charges incurred are your responsibility.
Before installing the latest MP Drivers, delete the previously installed version. For information on how to delete the MP Drivers, refer to Deleting the Unnecessary MP Drivers.
Related Topics
Before Installing the MP Drivers
→ Installing the MP Drivers
Advanced Guide
Advanced Guide > Appendix > Updating the MP Drivers > Deleting the Unnecessary MP Drivers
Deleting the Unnecessary MP Drivers
The MP Drivers you no longer use can be deleted.
When deleting the MP Drivers, first exit all programs that are running.
The procedure to delete the unnecessary MP Drivers is as follows:
When There is an Uninstaller
1. Start the uninstaller
- In Windows Vista or Windows XP, select the Start menu -> All Programs -> "Your model name" -> MP Drivers Uninstaller.
- In Windows 2000, select the Start menu -> Programs -> "Your model name" -> MP Drivers Uninstaller.
The MP Drivers Uninstaller dialog box is displayed.

Important
In Windows Vista, a confirmation/warning dialog box may appear when installing, uninstalling or starting software.
This dialog box appears when administrative rights are required to perform a task.
When you are logged on to an administrator account, click Continue or Allow to continue.
Some applications require an administrator account to continue. When you are logged on to a standard account, switch to an administrator account, and restart the operation from the beginning.
2. Execute the uninstaller
Click Execute. When the confirmation message appears, click Yes.
When all the files have been deleted, click Complete.
The deletion of the MP Drivers is complete.
Important
- Printer driver and scanner driver (ScanGear) will be deleted when you uninstall the MP Drivers.
When There is No Uninstaller
When there is no uninstaller in the Start menu of Windows Vista, follow these steps:
1. Select the printer to be deleted
Select the Start menu -> Control Panel -> Hardware and Sound -> Printers.
Click the model to delete, then press the Alt key on your keyboard. On the File menu, click Delete.
2. Delete the printer
When the User Account Control dialog box appears, click Continue. Then when the confirmation message appears, click Yes.
The icon is deleted.
3. Select the printer driver to be deleted
Press the Alt key. On the File menu, select Run as administrator, and then click Server Properties....
When the User Account Control dialog box appears, click Continue.
Click the Drivers tab. In the Installed printer drivers list, click the printer to delete.
4. Delete the printer driver
When you click Remove..., Remove Driver And Package dialog box is displayed.
Select Remove driver and driver package, and then click OK.
In the confirmation dialog box, click Yes.
When data collection is completed in the Remove Driver Package dialog box, click Delete.
5. Click OK
The deletion of the printer driver is complete.
Important
- You may not be able to delete the printer driver properly from the Installed printer drivers list. If this happens, restart your computer, and try again.
Advanced Guide
Advanced Guide > Appendix > Updating the MP Drivers > Before Installing the MP Drivers
Before Installing the MP Drivers
This section describes the items that you should check before installing the MP Drivers. You should also refer to this section if the MP Drivers cannot be installed.
Checking the Machine Status
- Properly connect the personal computer and the machine. For details on connection instructions, refer to the "Install the Software" in the manual: Getting Started.
- Turn off the machine.
Checking the Personal Computer Settings
- Terminate all running applications.
- In Windows Vista, log on as a user who has the administrator rights. In Windows XP, log on as the computer administrator. In Windows 2000, log on as a member of the Administrators group.

Note
- When an old version of the MP Drivers is already installed, first delete (uninstall) that version. For instructions on deleting the MP Drivers, see Deleting the Unnecessary MP Drivers.
Related Topics
→ Obtaining the Latest MP Drivers
→ Installing the MP Drivers
Advanced Guide
Advanced Guide > Appendix > Updating the MP Drivers > Installing the MP Drivers
Installing the MP Drivers
You can access our web site through the Internet and download the latest MP Drivers for your model.
The procedure for installing the downloaded MP Drivers is as follows:
1. Turn off the machine

Important
- When you turn on the computer while the machine is on, the Windows Plug and Play function is executed automatically, and the Found New Hardware window (Windows Vista) or Found New Hardware Wizard window (Windows XP, Windows 2000) is displayed. In this case, click Cancel.
2. Start the installer
Double-click the icon of the downloaded file.
The installation program starts.

Important
In Windows Vista, a confirmation/warning dialog box may appear when installing, uninstalling or starting software. This dialog box appears when administrative rights are required to perform a task. When you are logged on to an administrator account, click Continue or Allow to continue. Some applications require an administrator account to continue. When you are logged on to a standard account, switch to an administrator account, and restart the operation from the beginning.
3. Install the driver
At the Welcome window, click Next.
Read the contents of the License Agreement window. After checking the contents, click Yes. Installation of the MP Drivers begins.
After the Installation Complete window is displayed, check that the machine and the computer are connected through a cable.
To select the connection port for your machine manually, check the Select printer port check box, and click Manual selection. At the Select printer port window, select the connection destination, and then click OK.
4. Complete the installation
Click Complete.
Turn on the machine, and wait awhile until the connection is recognized.
This procedure installs the MP Drivers is complete.
Depending on the environment you are using, a message prompting you to restart the computer may be displayed. To complete the installation properly, restart the computer.

Important
- You can download the MP Drivers for free, but any Internet access charges incurred are your responsibility.
Related Topics
→ Obtaining the Latest MP Drivers
Before Installing the MP Drivers
Advanced Guide
Advanced Guide > Appendix > Uninstalling the On-Screen Manuals
Uninstalling the On-Screen Manuals
Follow the procedure below to uninstall all of the installed on-screen manuals from your computer.
Before uninstalling the on-screen manuals, exit all on-screen manuals that are opening.
Windows
All of the installed on-screen manuals will be deleted at the same time.
-
Click Start > All Programs (Programs in Windows 2000) > Canon XXX Manual (where "XXX" is your machine's name) > Uninstall.
-
Click OK when the confirmation message appears.

Note
- When the message prompting you to restart your computer is displayed, click OK to restart your computer.
Macintosh
On-screen manuals other than printer driver's help and scanner driver's help are uninstalled at a time.
- Select Applications on the Go menu.
- Double-click the Canon Utilities folder, and then the IJ Manual folder.
- Drag the folder of your machine's name into the trash.
- Drag the Canon XXX On-screen Manual icon (where "XXX" is your machine's name) on your desktop into the trash.
Advanced Guide
Advanced Guide > Appendix > Transporting the Machine
Transporting the Machine
When relocating the machine, pack the machine using the original packing materials.
If you do not have the original packing materials, pack the machine carefully using protective material and place it inside a sturdy box.
Important
- Do not transport or store the machine slanted, vertically, or upside-down, as the ink may leak and damage the machine.
- Turn the machine off.
- Confirm that the Power lamp is off and unplug the machine.
Important
- Do not unplug the machine while the Power lamp is lit or flashing green, as it may cause malfunction or damage to the machine, making the machine unable to print.
-
Retract the Paper Support, then close the Paper Output Tray.
-
Disconnect the printer cable from the computer and from the machine, and then disconnect the power plug from the machine.
-
Use adhesive tape to secure all the covers on the machine to keep them from opening during transportation. Then pack the machine in the plastic bag.
-
Attach the protective material to the machine when packing the machine.
Important
- Pack the machine with the FINE Cartridges left installed in the machine.
Note
Clearly label the box as "FRAGILE" or "HANDLE WITH CARE".
Advanced Guide
Advanced Guide > Appendix > Opening the Printer Properties Dialog Box (Windows)
Opening the Printer Properties Dialog Box (Windows)
The printer driver setup window can be displayed through the application software in use or the Start menu of the Windows.
Open the Printer Properties Dialog Box through the Application Software
Follow the procedure below to configure print settings when printing.
- Select the command you perform printing on the application software in use.
In general, select Print on the File menu to open the Print dialog box.
- Select your model name and click Preferences (or Properties).
The printer properties dialog box opens.

Note
- Depending on application software you use, command names or menu names may vary and there may be more steps. For details, refer to the user's manual of your application software.
Open the Printer Properties Dialog Box through the Start Menu
Follow the procedure below to perform maintenance operations such as print head cleaning, or to configure print settings that are common for all application software.
- Select items from the Start menu as shown below.
In Windows Vista, select the Start menu > Control Panel > Hardware and Sound > Printers.
In Windows XP, select the Start menu > Control Panel > Printers and Other Hardware > Printers and Faxes.
In Windows 2000, select the Start menu > Settings > Printers.
- Right-click your model name icon and then select Printing Preferences from the displayed menu.
The printer properties dialog box opens.

Important
- Opening the printer properties dialog box through Properties displays such tabs regarding the Windows functions as the Ports (or Advanced) tab. Those tabs do not appear when opening through Printing Preferences or application software. About tabs regarding Windows functions, refer to the user's manual for the Windows.
Advanced Guide
Advanced Guide > Appendix > Opening the Page Setup and Print Dialog Box (Macintosh)
Opening the Page Setup and Print Dialog Box (Macintosh)
You can open the Page Setup dialog box and the Print dialog box from the application program you are using.
Opening the Page Setup Dialog Box
Open the Page Setup dialog box to specify page (paper) settings before printing.
- Select Page Setup... on the File menu in your application program.
The Page Setup dialog box opens.
Opening the Print Dialog Box
Open the Print dialog box to specify print settings before printing.
- Select Print... on the File menu in your application program.
The Print dialog box opens.
Advanced Guide
Advanced Guide > Appendix > Opening the Canon IJ Printer Utility (Macintosh)
Opening the Canon IJ Printer Utility (Macintosh)
To open the Canon IJ Printer Utility, follow the procedure below.
In Mac OS X v.10.5.x
- Select System Preferences on the Apple menu.
- Click Print & Fax.
- Select your machine's name in the Printers and click Open Print Queue....
The job list of your machine is displayed.
- Click Utility.
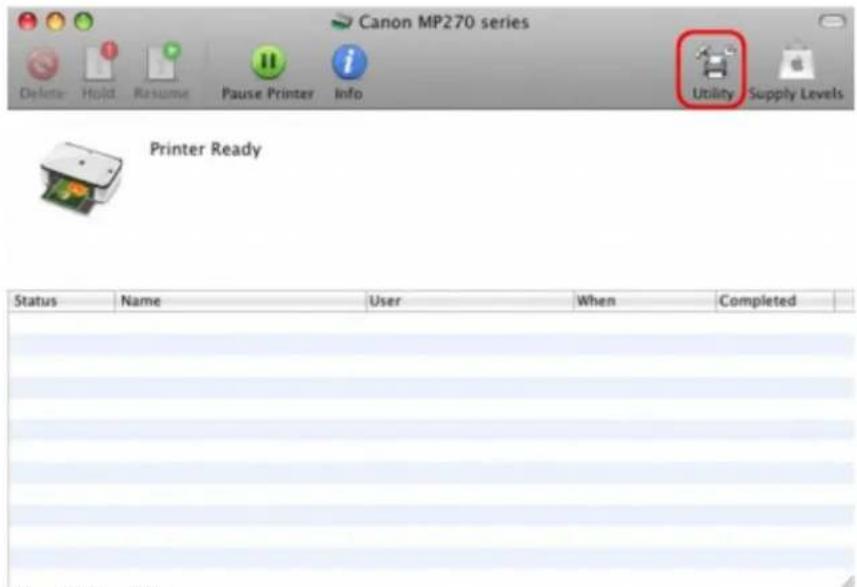
The Printer List opens.
- Select your machine's name in the Product list and click Maintenance.

The Canon IJ Printer Utility starts up.
In Mac OS X v.10.4.x or Mac OS X v 10.3.9
- Select Applications on the Go menu.
- Double-click the Utilities folder, and then double-click the Printer Setup Utility icon. The Printer List opens.
- Select your machine's name in the Name list and click Utility.

- Select your machine's name in the Product list and click Maintenance.

The Canon IJ Printer Utility starts up.
Advanced Guide
Advanced Guide > Appendix > Sharing the Printer on a Network
Sharing the Printer on a Network
When multiple computers are being used in the network environment, you can share the printer connected to one computer with the other computers.
The Windows versions of the computers connected to the network do not necessarily have to be the same.
![graph TD A["Print Server"] -->|USB cable| B["Printer"] B --> C["Client PC"] B --> D["Client PC"] B --> E["Client PC"] C --> F["Network"] D --> F E --> F](/content/2026/06/1260153/images/cf31fa307e2e75e7791802598d1188496170176a2121cbd4001076c0d820100a.jpg)
- Settings on Print Server
The procedure for setting up a computer directly connected to a printer with a USB cable is as follows:
- Settings on Client PC
The procedure for setting up those computers that will use this printer through the network is as follows:
When you execute print, the data is sent through the print server system to the printer.
Important
In case an error occurred when a document is printed by the client system to a shared printer, the error message of Canon IJ Status Monitor will be displayed both on the client system and the print server system. For regular printing, Canon IJ Status Monitor will be displayed only on the client system.
Note
- Install the printer driver from the Setup CD-ROM that accompanies the machine on the print server system and each of the client systems according to the OS of each system.
- You cannot share this printer with Macintosh computers.
Related Topic
→ Restrictions on Printer Sharing

Advanced Guide
Advanced Guide > Appendix > Sharing the Printer on a Network > Settings on Print Server
Settings on Print Server
When you use the printer on a network, set up the printer driver for sharing on the server system.
The procedure for setting up the print server systems is as follows:
- Install the printer driver on the print server system
For details on installation instructions, refer to the "Install the Software" in the manual: Getting Started.
-
Select items from the Start menu as shown below:
-
In Windows Vista, select the Start menu -> Control Panel -> Hardware and Sound -> Printers.
- In Windows XP, select the Start menu -> Control Panel -> Printers and Other Hardware -> Printers and Faxes.
- In Windows 2000, select the Start menu -> Settings -> Printers.
The Printers window (Windows Vista, Windows 2000) or Printers and Faxes window (Windows XP) is displayed.
-
Click the icon for the model name of printer to be shared
-
In Windows Vista, press the Alt key on your keyboard and then select Run as administrator -> Sharing... from the displayed File menu.
- In Windows XP or Windows 2000, select Sharing... from the File menu.
Important
In Windows Vista, a confirmation/warning dialog box may appear when installing, uninstalling, or starting software.
This dialog box appears when administrative rights are required to perform a task.
When you are logged on to an administrator account, click Continue or Allow to continue.
Some applications require an administrator account to continue. When you are logged on to a standard account, switch to an administrator account, and restart the operation from the beginning.
Note
Windows XP may display a message recommending the user to use the Network Setup Wizard to set up sharing.
When this message appears, choose not to use the wizard and then set up sharing.
- Set sharing
Select Share this printer (Windows Vista, Windows XP) or Shared as (Windows 2000) on the Sharing tab to set a shared name if necessary, and click OK.
The setup on the print server system is complete. Next, set up the client systems.
Advanced Guide
Advanced Guide > Appendix > Sharing the Printer on a Network > Settings on Client PC
Settings on Client PC
After setting up the print server system, set up the client system.
The procedure for setting up the client systems is as follows:
In Windows Vista
1. Install the printer driver on the client systems
To install the driver, load the Setup CD-ROM that comes with the machine, and select Custom Install. For details on connection instructions, refer to the "Install the Software" in the manual: Getting Started.

Note
During the installation, a screen prompting you to turn the printer on appears. Click Manual Selection and then select an appropriate port to complete your installation.
2. Start the wizard
Select the Start menu -> Network -> Add a printer. The Add Printer window appears.
3. Add a printer
Select Add a network, wireless or Bluetooth printer, and click the icon for the printer that you have configured on the print server system to be shared, and then click Next.

Note
If the icon for the printer is not displayed, check that the printer is actually connected to the print server.
It may take some time for the icon for the printer to appear.
4. Complete the setup
Take the appropriate action as described on the screen and then click Finish.
The icon for the shared printer will be created in the Printers window.
The setup on the client systems is complete. You can now share the printer in the network.
In Windows XP/Windows 2000
1. Install the printer driver on the client systems
To install the driver, load the Setup CD-ROM that comes with the machine, and select Custom Install.
For details on connection instructions, refer to the "Install the Software" in the manual: Getting Started.

Note
During the installation, a screen prompting you to turn the printer on appears. Click Manual Selection and then select an appropriate port to complete your installation.
2. Start the wizard
- In Windows XP, select the Start menu -> Control Panel -> Printers and Other Hardware ->
Printers and Faxes -> Add a printer.
- In Windows 2000, select the Start menu -> Settings -> Printers -> Add a printer.
When Welcome to the Add Printer Wizard screen appears, click Next.
3. Add a printer
Select A network printer, or a printer attached to another computer (Windows XP) or Network printer (Windows 2000), then click Next.
On the Specify a Printer window (Windows XP) or Locate Your Printer window (Windows 2000), click Next and then search for the print server system.
Click the icon for the printer that you have configured on the print server system to be shared, and then click Next.

Note
If the icon for the printer is not displayed, check that the printer is actually connected to the print server.
4. Complete the setup
Take the appropriate action as described on the screen and then click Finish.
The icon for the shared printer will be created in the Printers and Faxes window (Windows XP) or Printers window (Windows 2000).
The setup on the client systems is complete. You can now share the printer in the network.

Advanced Guide
Advanced Guide > Appendix > Sharing the Printer on a Network > Restrictions on Printer Sharing
Restrictions on Printer Sharing
These are restrictions that apply when you are using a printer in a network environment. Check the restrictions for the environment you are using.
When You Are Sharing a Printer in a Network
- A print completion message may be displayed. To disable the message display, follow the procedure below.
• In Windows Vista:
Press the Alt key from the Printers window on the client system. Open Run as administrator -> Server Properties... from the displayed File menu.
Uncheck Show informational notifications for network printers on the Advanced tab, and then restart the computer.
• In Windows XP or Windows 2000:
Open Server Properties from the File menu of the Printer and Faxes window (Windows XP) or the Printers window (Windows 2000) on the print server system.
Uncheck Notify when remote documents are printed on the Advanced tab, and then restart the computer.
- The bi-directional communication function is disabled and the correct printer status may not be recognized.
When a client user opens the printer driver properties and then clicks OK with the Enable bidirectional support check box on the Ports tab unchecked, the bi-directional function of the printer server system may also be disabled. In this case, check Enable bidirectional support check box on both the print server system and the client system.
- When you print from a client system, you cannot use Canon IJ Preview.
- When the functions on the Maintenance tab cannot be set properly from a client system, they may be grayed out. In this case, change the settings from the print server.
When you change the settings of the print server, you should delete the icon of the shared printer from the client system, and then specify the shared settings again in the client system.
When the Same Printer Driver is Installed in the Print Server System and the Client System as the Local Printer
- The net crawl function may automatically create a network printer icon on the client system.

Advanced Guide
Advanced Guide > Using Easy-PhotoPrint EX
Easy-PhotoPrint EX
Using Easy-PhotoPrint EX
--- Transforming Your Photos into Creative Works of Art ---
Easy-PhotoPrint EX allows you to create albums, calendars and stickers easily using photos taken with digital cameras.
You can also print borderless photos easily.
Start Easy-PhotoPrint EX

Click Here: Easy-PhotoPrint EX

Note
See the section below for details on how to use Easy-PhotoPrint EX.
→ Printing with the Bundled Application Software
Create a Personalized Photo Album
Creating a personalized photo album is an easy task if you use Easy-PhotoPrint EX!
All you need to do is select which photos to use, select a layout, then load paper into your printer and print. After you bind the printed sheets, you'll have the one and only album of your memories!


You can change the layout and background, and attach comments to photos.

You can also select the size and orientation.

You can arrange a photo across the left and right pages.
CHECK!
Select a theme (background design) to create a single-themed album.
Decorate Items with Text and Frames
You can add text and frames to photos. Attach a description of the photo in an album, and add a frame to enhance the photo's atmosphere.
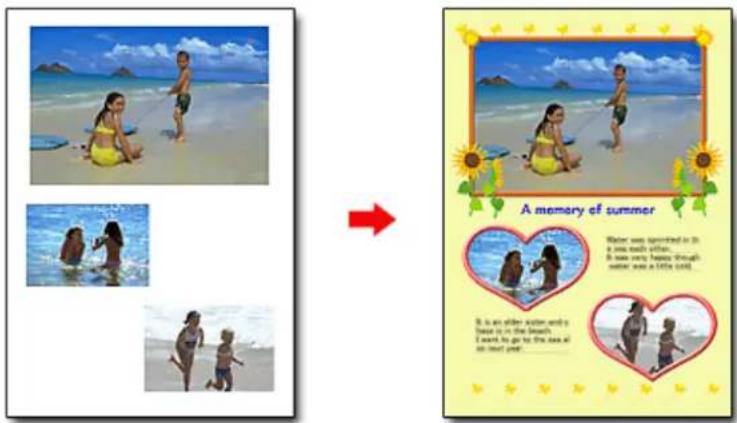
CHECK!
Select Album to add text and frames. You cannot decorate photos with Photo Print.
Create a Calendar Using Your Favorite Photos
Create calendars easily with Easy-PhotoPrint EX. Create your own calendar using your favorite photos! It'll be exciting to turn the calendar pages.

You can use all kinds of photos.
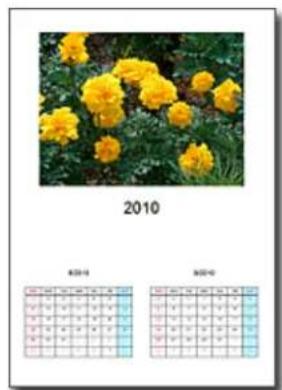
You can also create 2-month, 6-month and 12-month calendars.
Create Stickers
Create stickers easily with Easy-PhotoPrint EX!
Create stickers of your favorite photos and share them with your friends!

CHECK!
You can add text to photos.
Page top↑
Advanced Guide
Advanced Guide > Using MP Navigator EX
MP Navigator EX
Using MP Navigator EX
MP Navigator EX is an application that enables you to easily scan photos and documents. It is suitable even for beginners.
Start MP Navigator EX

Click Here: MP Navigator EX

Note
- See "Let's Try Scanning" for details on how to scan images using MP Navigator EX.
Scan Photos and Documents
You can scan easily by navigating through MP Navigator EX screens. You can also save/print scanned images using MP Navigator EX.
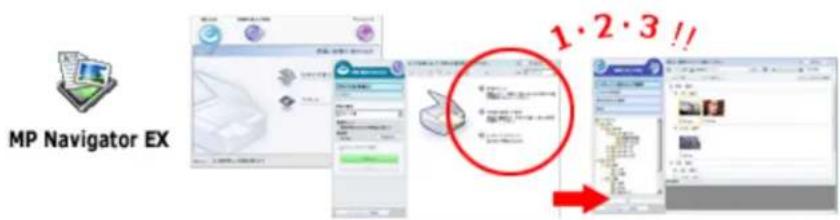
Scan Small Documents at One Time
You can scan multiple small documents (photos, cards, etc.) at one time. It is useful as you do not need to scan multiple times.

Scan Large Documents
You can easily scan documents that are larger than the Platen using MP Navigator EX. It allows you to scan the left and right halves of a document separately and combine them back into one image.

Scan with One-click
In One-click Mode, MP Navigator EX completes from scanning to saving, with a click of an icon. One-click Mode also allows you to scan and save images as PDF files or attach them to e-mail automatically.
![graph LR A["Image Input"] --> B["Process Step"] B --> C["Output Image"] C --> D["File Image"] C --> E["Yellow File"] B --> F["Print Copy"] B --> G["Print Copy & Copy"] B --> H["Print Copy & Copy & Copy"] B --> I["Print Copy & Copy & Copy & Copy"] B --> J["Print Copy & Copy & Copy & Copy"] B --> K["P…](/content/2026/06/1260153/images/99c88535bf093838736a4a5e4c372a0c33e57440e5ad730ffae0443dab8a467b.jpg)
Scan and Correct/Enhance Photos
You can easily correct/enhance scanned photos using MP Navigator EX. You do not need to use other applications.

For details on how to use MP Navigator EX, refer to " Scanning with the Bundled Application Software."
Advanced Guide
Advanced Guide > About Solution Menu
About Solution Menu
Quick Shortcut!! Solution Menu
Solution Menu is a menu window that provides quick access from your desktop to Canon applications, manuals, and online product information.
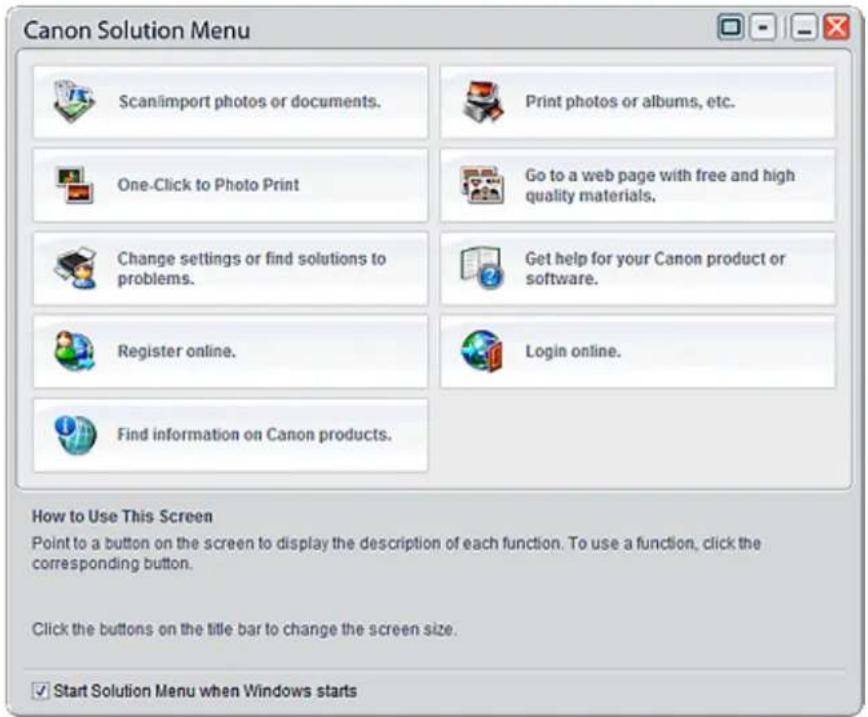
Important
- The number and types of buttons displayed in the window may vary depending on your printer and region.
Starting Solution Menu

Click Here: Solution Menu
To start from desktop, see below.
Double-click the Canon Solution Menu icon on the desktop. Alternatively, from the Start menu, select (All) Programs > Canon Utilities > Solution Menu > Solution Menu.
From the next time, Solution Menu starts when Windows starts.
If the Start Solution Menu when Windows starts checkbox at the bottom left of the window is not selected, Solution Menu does not start when Windows starts.

Note
■ Solution Menu will start automatically when you install it using the Setup CD-ROM that accompanies the printer.
Changing the Window Size
Click (window size: large) or (window size: small) on the title bar to change the window size
(large or small).
Solution Menu opens with the last used window size next time it is started.
- When screen size is small

Starting an Application
- Point to a button on the window to display the description of each application.
- By clicking each button, the introduced application starts.
Follow the same steps to view the manuals or online product information.

Important
- Internet connection is required to access the online information. Internet connection fees apply.
Exiting Solution Menu
Click (Close) on the title bar.
Restriction on Use of Solution Menu
This software is subject to the following restriction. Keep this point in mind when using it.
- All icons of the installed applications that support Solution Menu are displayed in the window. After the installation, you cannot rearrange the icons or delete only the icons.


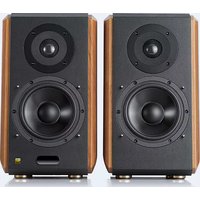
- ON-SCREEN MANUAL
- BASIC GUIDE
- ADVANCED GUIDE
- TROUBLESHOOTING
- CONTENTS
- OVERVIEW OF THE MACHINE
- COPYING
- SCANNING
- PRINTING FROM YOUR COMPUTER
- OTHER USAGES
- LOADING PAPER / ORIGINALS
- ROUTINE MAINTENANCE
- APPENDIX
- MAIN COMPONENTS
- FRONT VIEW
- NOTE
- PLATEN GLASS
- DIRECT PRINT PORT (MP270 SERIES ONLY)
- WARNING
- IMPORTANT
- REAR VIEW
- USB PORT
- POWER CORD CONNECTOR
- INSIDE VIEW
- OPERATION PANEL
- DISCONNECTING THE POWER PLUG
- POWER AND ALARM LAMPS
- LED (LIGHT EMITTING DIODE)
- [+] BUTTON
- INK LAMPS
- PAPER BUTTON
- SCAN BUTTON
- STOP/RESET BUTTON
- COLOR BUTTON
- BLACK BUTTON
- FIT TO PAGE BUTTON / FIT TO PAGE LAMP
- 81 (MAINTENANCE) BUTTON
- PAPER LAMP
- ALARM LAMP
- LED DISPLAY AND BASIC OPERATIONS
- NUMBER OF COPIES
- MAINTENANCE CODES
- ERROR CODES
- COPYING DOCUMENTS
- COPYING PHOTOS
- YOU NEED TO PREPARE
- PREPARE FOR COPYING
- TO MAKE 10 TO 19 COPIES
- TO SET THE PRINT QUALITY TO "FAST" (SPEED PRIORITY)
- SWITCHING THE PAGE SIZE BETWEEN A4 AND 8.5" X 11" (LETTER)
- PREPARE FOR COPYING A PHOTO
- START COPYING
- FIT-TO-PAGE COPYING
- SAVING SCANNED DATA ON THE COMPUTER
- PREPARING FOR SCANNING WITH THE OPERATION PANEL
- WHEN YOU ARE USING MAC OS X V.10.3.9
- PREPARE FOR SCANNING
- PRESS THE SCAN BUTTON TO START SCANNING
- WHEN YOU ARE USING WINDOWS VISTA
- WHEN YOU ARE USING WINDOWS XP
- PRINTING PHOTOS (EASY-PHOTOPRINT EX)
- PREPARE FOR PRINTING
- START EASY-PHOTOPRINT EX, AND SELECT PHOTO PRINT
- CLICK PHOTO PRINT
- SELECT A PHOTO TO PRINT
- CLICK SELECT PAPER
- NDEWS
- CLICK THE
- USING VARIOUS FUNCTIONS OF EASY-PHOTOPRINT EX
- CREATING YOUR OWN PRINTS
- CORRECTING IMAGES
- PRINTING DOCUMENTS (WINDOWS)
- SPECIFY THE REQUIRED PRINT SETTINGS
- MAKE SURE OF THE DISPLAYED SETTINGS
- CLICK OK
- START PRINTING
- PRINTING DOCUMENTS (MACINTOSH)
- FOR MAC OS X V.10.5.X
- SELECT THE PRINT QUALITY IN PRINT QUALITY
- PRINTING PHOTOS FROM A PICTBRIDGE COMPLIANT DEVICE (MP270 SERIES ONLY)
- CONNECTABLE DEVICES
- PRINTABLE IMAGE DATA FORMAT
- USEFUL SOFTWARE APPLICATIONS
- SOLUTION MENU
- DOUBLE-CLICK (SOLUTION MENU) ON THE DESKTOP
- CLICK (SOLUTION MENU) IN THE DOCK
- MY PRINTER
- DOUBLE-CLICK (MY PRINTER) ON THE DESKTOP
- EASY-WEBPRINT EX
- NOTES FOR INSTALLATION OF EASY-WEBPRINT EX
- LOADING PAPER
- LOADING ORIGINALS
- LOADING PLAIN PAPER / PHOTO PAPER
- PREPARE PAPER
- LOAD PAPER
- AFTER LOADING PAPER
- LOADING ENVELOPES
- PREPARE ENVELOPES
- LOAD ENVELOPES
- MEDIA TYPES YOU CAN USE
- MEDIA TYPES
- PAGE SIZES
- STANDARD SIZES
- NON-STANDARD SIZES
- PAPER WEIGHT
- NOTES ON STORING PAPER
- ● NOTES ON PAPER FOR FULL-PAGE BORDERLESS PRINTING
- MEDIA TYPES YOU CANNOT USE
- LOAD AN ORIGINAL ON THE PLATEN GLASS
- ORIGINALS YOU CAN LOAD
- TYPES OF ORIGINALS
- SIZE (W X L)
- WHEN PRINTING BECOMES FAINT OR COLORS ARE INCORRECT
- REPLACING A FINE CARTRIDGE
- CLEANING THE MACHINE
- BEFORE PERFORMING MAINTENANCE
- WHEN THE PRINT RESULTS ARE BLURRED OR UNEVEN
- STEP 1
- STEP 2
- STEP 3
- STEP 4
- PRINTING THE NOZZLE CHECK PATTERN
- YOU NEED TO PREPARE: A SHEET OF A4 OR LETTER-SIZED PLAIN PAPER
- EXAMINING THE NOZZLE CHECK PATTERN
- CLEANING THE PRINT HEAD
- CLEANING THE PRINT HEAD DEEPLY
- ALIGNING THE PRINT HEAD
- REPLACING PROCEDURE
- HANDLING FINE CARTRIDGES
- CAUTION
- CHECKING THE INK STATUS
- ● WITH THE INK LAMPS ON THE OPERATION PANEL
- COLOR INK LAMP OR BLACK INK LAMP LIGHTS
- COLOR INK LAMP OR BLACK INK LAMP FLASHES, WHILE ALARM LAMP LIGHTS
- COLOR INK LAMP OR BLACK INK LAMP FLASHES, WHILE ALARM LAMP IS OFF
- WITH THE COMPUTER SCREEN
- WINDOWS
- MACINTOSH
- CLEANING THE PAPER FEED ROLLER
- YOU NEED TO PREPARE: THREE SHEETS OF A4 OR LETTER-SIZED PLAIN PAPER
- CLEANING THE INSIDE OF THE MACHINE (BOTTOM PLATE CLEANING)
- CLEANING THE PROTRUSIONS INSIDE THE MACHINE
- ADVANCED GUIDE TROUBLESHOOTING
- LEGAL LIMITATIONS ON USE OF YOUR PRODUCT AND USE OF IMAGES
- TIPS ON HOW TO USE YOUR MACHINE
- PRINT THE NOZZLE CHECK PATTERN
- CANON
- PRINTING
- HOW TO USE THIS MANUAL
- PRINTING THIS MANUAL
- MAINTENANCE
- CHANGING THE MACHINE SETTINGS
- PRINTING FROM A COMPUTER
- PRINTING PHOTOGRAPHS DIRECTLY FROM A COMPLIANT DEVICE (MP270 SERIES ONLY)
- PRINTING USING THE OPERATION PANEL OF THE MACHINE
- OPERATING THE CONTENTS PANE
- OPERATING THE EXPLANATION WINDOW
- PRINT CURRENT DOCUMENT
- FROM SELECT TARGET, SELECT CURRENT DOCUMENT
- CLICK PRINT SETUP TAB
- CLICK START PRINTING
- EXECUTE PRINT
- PRINT SELECTED DOCUMENTS
- FROM SELECT TARGET, SELECT SELECTED DOCUMENTS
- SELECT THE DOCUMENTS TO BE PRINTED
- PRINT MY MANUAL
- FROM SELECT TARGET, SELECT MY MANUAL
- PRINT ALL DOCUMENTS
- FROM SELECT TARGET, SELECT ALL DOCUMENTS
- USING KEYWORDS TO FIND A DOCUMENT
- CLICK
- ENTER A KEYWORD
- CLICK START SEARCHING
- [DOCUMENTS CONTAINING PERFECT MATCH]
- [DOCUMENTS CONTAINING ALL KEYWORDS]
- [DOCUMENTS CONTAINING ANY KEYWORD]
- DISPLAY THE DOCUMENT THAT YOU WANT TO READ
- REGISTERING DOCUMENTS TO MY MANUAL
- DISPLAY THE DOCUMENT
- REGISTER THE DOCUMENT TO MY MANUAL
- DISPLAY MY MANUAL
- SYMBOLS USED IN THIS DOCUMENT
- TRADEMARKS
- EXIF PRINT
- PRINTING WITH THE BUNDLED APPLICATION SOFTWARE
- WHAT IS EASY-PHOTOPRINT EX
- ABOUT EXIF PRINT
- SUPPORTED IMAGE FILE FORMATS (EXTENSIONS)
- FILE FORMATS (EXTENSIONS) SUPPORTED BY EASY-PHOTOPRINT EX
- PRINTING PHOTOS
- STEPS
- TRY THIS
- QUESTIONS AND ANSWERS
- STARTING EASY-PHOTOPRINT EX
- SELECTING A PHOTO
- CLICK PHOTO PRINT FROM MENU
- SELECT THE FOLDER THAT CONTAINS THE IMAGE YOU WANT TO PRINT FROM THE FOLDER TREE AREA
- CLICK THE IMAGE YOU WANT TO PRINT
- SELECTING THE PAPER
- SET THE FOLLOWING ITEMS ACCORDING TO THE PRINTER AND PAPER TO BE USED
- CLICK LAYOUT/PRINT
- SELECT A LAYOUT YOU WANT TO USE
- CLICK PRINT
- CREATING AN ALBUM
- SELECTING THE PAPER AND LAYOUT
- CLICK ALBUM FROM MENU
- SET THE FOLLOWING ITEMS IN THE GENERAL SETTINGS SECTION
- SELECT THE THEME YOU WANT TO USE FROM THEME IN SAMPLE LAYOUT
- IF YOU WANT TO CHANGE THE LAYOUT, CLICK LAYOUT
- IF YOU WANT TO CHANGE THE BACKGROUND, CLICK BACKGROUND
- CLICK SELECT IMAGES
- SELECT THE IMAGE(S) YOU WANT TO PRINT, AND CLICK ONE OF THE BUTTONS BELOW
- EDITING
- CLICK EDIT
- EDIT YOUR ALBUM IF NECESSARY
- CLICK PRINT SETTINGS
- PRINTING CALENDARS
- CLICK CALENDAR FROM MENU
- SELECT A LAYOUT FOR DESIGN
- EDIT THE CALENDAR IF NECESSARY
- PRINTING STICKERS
- CLICK STICKERS FROM MENU
- EDIT THE STICKERS IF NECESSARY
- PRINTING LAYOUT
- CLICK LAYOUT PRINT FROM MENU
- SELECT A LAYOUT FROM LAYOUTS
- EDIT THE LAYOUT IF NECESSARY
- CORRECTING AND ENHANCING PHOTOS
- AUTO PHOTO FIX
- RED-EYE CORRECTION FUNCTION
- FACE BRIGHTENER FUNCTION
- FACE SHARPENER FUNCTION
- DIGITAL FACE SMOOTHING FUNCTION
- BLEMISH REMOVER FUNCTION
- IMAGE ADJUSTMENT
- USING THE AUTO PHOTO FIX FUNCTION
- USING THE RED-EYE CORRECTION FUNCTION
- AUTO CORRECTION
- MANUAL CORRECTION
- CLICK SAVE SELECTED IMAGE OR SAVE ALL CORRECTED IMAGES
- CLICK EXIT
- USING THE FACE BRIGHTENER FUNCTION
- CLICK FACE BRIGHTENER
- DRAG TO SELECT THE AREA YOU WANT TO CORRECT, THEN CLICK OK THAT APPEARS OVER THE IMAGE
- USING THE FACE SHARPENER FUNCTION
- CLICK FACE SHARPENER
- USING THE DIGITAL FACE SMOOTHING FUNCTION
- AUTO ENHANCEMENT
- CLICK DIGITAL FACE SMOOTHING
- MANUAL ENHANCEMENT
- USING THE BLEMISH REMOVER FUNCTION
- ADJUSTING IMAGES
- CORRECT/ENHANCE IMAGES WINDOW
- (1)TOOLBAR
- TOOLBAR
- (2)TASK AREA
- AUTO TAB
- PRIORITIZE EXIF INFO
- RED-EYE CORRECTION
- FACE SHARPENER
- DIGITAL FACE SMOOTHING
- APPLY TO ALL IMAGES
- OK
- RESET SELECTED IMAGE
- SAVE SELECTED IMAGE
- SAVE ALL CORRECTED IMAGES
- EXIT
- MANUAL TAB
- ADJUST
- BRIGHTNESS
- CONTRAST
- SHARPNESS
- BLUR
- SHOW-THROUGH REMOVAL
- DEFAULTS
- CORRECT/ENHANCE
- FACE BRIGHTENER
- BLEMISH REMOVER
- UNDO
- HOW CAN I MOVE (OR COPY) THE SAVED FILE
- WHICH SIDE OF THE DISPLAYED IMAGE DOES THE PRINTING START FROM
- HOW DO I PRINT WITH EVEN MARGINS
- WHAT IS "C1" OR "C4
- PHOTO PRINT SETTINGS
- PRINTING VIVID PHOTOS
- REDUCING PHOTO NOISE
- CROPPING PHOTOS (PHOTO PRINT)
- PRINTING DATES ON PHOTOS (PHOTO PRINT)
- PRINTING MULTIPLE PHOTOS ON ONE PAGE
- PRINTING AN INDEX
- PRINTING ID PHOTOS (ID PHOTO PRINT)
- PRINTING PHOTO INFORMATION
- SAVING PHOTOS
- OPENING SAVED FILES
- CLICK LIBRARY FROM MENU
- SELECT THE FILE YOU WANT TO OPEN AND CLICK OPEN
- EDIT THE FILE IF NECESSARY
- OTHER SETTINGS
- CHANGING LAYOUT
- ALBUM
- CALENDAR
- LAYOUT PRINT
- CHANGING BACKGROUND
- WHEN SELECT FROM SAMPLES IS SELECTED
- WHEN SINGLE COLOR IS SELECTED
- WHEN IMAGE FILE IS SELECTED
- ADDING PHOTOS
- SWAPPING POSITIONS OF PHOTOS
- REPLACING PHOTOS
- CHANGING POSITION, ANGLE AND SIZE OF PHOTOS
- CROPPING PHOTOS
- FRAMING PHOTOS
- PRINTING DATES ON PHOTOS
- ATTACHING COMMENTS TO PHOTOS
- ADDING TEXT TO PHOTOS
- SAVING
- SETTING HOLIDAYS
- SETTING CALENDAR DISPLAY
- PRINTING WITH OTHER APPLICATION SOFTWARE
- VARIOUS PRINTING METHODS
- PRINTING WITH EASY SETUP
- SETTING A PAGE SIZE AND ORIENTATION
- SETTING THE NUMBER OF COPIES AND PRINTING ORDER
- COMPLETE THE SETUP
- BORDERLESS PRINTING
- SETTING BORDERLESS PRINTING
- ADJUST THE AMOUNT OF EXTENSION FROM THE PAPER
- EXPANDING THE RANGE OF THE DOCUMENT TO PRINT
- FIT-TO-PAGE PRINTING
- SCALED PRINTING
- SPECIFY A SCALING FACTOR
- PAGE LAYOUT PRINTING
- PAGES
- PAGE ORDER
- PAGE BORDER
- POSTER PRINTING
- SETTING POSTER PRINTING
- SET THE NUMBER OF IMAGE DIVISIONS AND THE PAGES TO BE PRINTED
- IMAGE DIVISIONS
- PRINT "CUT/PASTE" IN MARGINS
- PRINT "CUT/PASTE" LINES IN MARGINS
- PRINTING ONLY SPECIFIC PAGES
- SET THE PRINT RANGE
- BOOKLET PRINTING
- MARGIN FOR STAPLING
- INSERT BLANK PAGE
- MARGIN
- DUPLEX PRINTING
- STAMP/BACKGROUND PRINTING
- PRINTING A STAMP
- SET THE STAMP DETAILS
- PLACE STAMP OVER TEXT
- STAMP FIRST PAGE ONLY
- DEFINE STAMP... BUTTON
- PRINTING A BACKGROUND
- BACKGROUND FIRST PAGE ONLY
- SELECT BACKGROUND... BUTTON
- RELATED TOPICS
- REGISTERING A STAMP
- REGISTERING A NEW STAMP
- CONFIGURE THE STAMP WHILE VIEWING THE PREVIEW WINDOW
- STAMP TAB
- PLACEMENT TAB
- SAVE THE STAMP
- CHANGING AND REGISTERING SOME OF STAMP SETTINGS
- SELECT THE STAMP FOR WHICH THE SETTINGS ARE TO BE CHANGED
- DELETING AN UNNECESSARY STAMP
- REGISTERING IMAGE DATA TO BE USED AS A BACKGROUND
- REGISTERING NEW BACKGROUND
- LAYOUT METHOD
- INTENSITY
- CHANGING AND REGISTERING SOME BACKGROUND SETTINGS
- DELETING AN UNNECESSARY BACKGROUND
- PRINTING AN ENVELOPE
- FOLD DOWN THE PAPER SUPPORT
- LOAD AN ENVELOPE INTO THE MACHINE
- OPEN THE PRINTER DRIVER SETUP WINDOW
- SELECT THE MEDIA TYPE
- SELECT THE PAPER SIZE
- SET THE ORIENTATION
- SELECT THE PRINT QUALITY
- DISPLAYING THE PRINT RESULTS BEFORE PRINTING
- RELATED TOPIC
- SETTING PAPER DIMENSIONS (CUSTOM SIZE)
- SET THE CUSTOM SIZE IN THE APPLICATION SOFTWARE
- SET THE CUSTOM PAPER SIZE
- CHANGING THE PRINT QUALITY AND CORRECTING IMAGE DATA
- SELECTING A COMBINATION OF THE PRINT QUALITY LEVEL AND A HALFTONING METHOD
- SETTING THE PRINT QUALITY AND HALFTONE EXPRESSION METHOD
- PRINTING A COLOR DOCUMENT IN MONOCHROME
- SPECIFYING COLOR CORRECTION
- DRIVER MATCHING
- ICM
- NONE
- OPTIMAL PHOTO PRINTING OF IMAGE DATA
- COLOR MANAGEMENT
- SELECTING A PRINTING METHOD SUITED TO THE IMAGE DATA
- ADJUSTING COLORS WITH THE PRINTER DRIVER
- TO PRINT USING CANON DIGITAL PHOTO COLOR
- TO PRINT BY DIRECTLY APPLYING EDITING AND TOUCH-UP RESULTS OF AN APPLICATION SOFTWARE
- PRINTING WITH ICC PROFILES
- SET THE OTHER ITEMS
- SPECIFY AN ICC PROFILE FROM THE APPLICATION SOFTWARE AND PRINT THE DATA
- SPECIFY AN ICC PROFILE WITH THE PRINTER DRIVER, AND THEN PRINT
- SELECT THE MANUAL COLOR ADJUSTMENT
- SELECT COLOR CORRECTION
- SELECT THE INPUT PROFILE
- ADJUSTING COLOR BALANCE
- ADJUSTING BRIGHTNESS
- ADJUSTING INTENSITY
- ADJUSTING CONTRAST
- SIMULATING AN ILLUSTRATION
- REPRESENTING IMAGE DATA WITH A SINGLE COLOR
- PRESENTING IMAGE DATA WITH VIVID COLORS
- SMOOTHING JAGGED OUTLINES
- CHANGING COLOR PROPERTIES TO IMPROVE COLORATION
- OVERVIEW OF THE PRINTER DRIVER
- PRINTER DRIVER OPERATIONS
- CHANGING MACHINE SETTINGS FROM YOUR COMPUTER
- PERFORMING MAINTENANCE FROM A COMPUTER
- UPDATING THE MP DRIVERS
- CANON IJ PRINTER DRIVER
- HOW TO USE PRINTER DRIVER HELP
- HOW TO OPEN THE PRINTER DRIVER SETUP WINDOW
- OPEN THE PRINTER DRIVER SETUP WINDOW THROUGH THE APPLICATION SOFTWARE
- OPEN THE PRINTER DRIVER SETUP WINDOW THROUGH THE START MENU
- MAINTENANCE TAB
- FEATURES
- RELATED FEATURES
- CANON IJ STATUS MONITOR
- LAUNCHING THE CANON IJ STATUS MONITOR
- WHEN ERRORS OCCUR
- CANON IJ PREVIEW
- MAKING COPIES
- REDUCING OR ENLARGING A COPY
- TO MAKE HIGH SPEED COPYING
- USING USEFUL COPY FUNCTIONS
- BORDERLESS COPY
- SWITCHING THE PAGE SIZE BETWEEN A4 AND LETTER
- COPYING WITHOUT BORDERS (BORDERLESS COPY)
- SCANNING IMAGES
- BEFORE SCANNING
- PLACING DOCUMENTS
- PLACING A SINGLE DOCUMENT
- PLACING MULTIPLE DOCUMENTS
- SAVING SCANNED DATA TO PC USING THE OPERATION PANEL OF THE MACHINE
- EX
- WINDOWS TO SPECIFY MP NAVIGATOR EX 3.0
- IF YOU WANT TO EDIT OR PRINT THE SCANNED IMAGES
- IF YOU WANT TO SCAN ORIGINALS WITH ADVANCED SETTINGS
- APPENDIX: VARIOUS SCAN SETTINGS
- SELECTING A RESPONSE TO COMMANDS FROM THE OPERATION PANEL USING MP NAVIGATOR EX
- SCANNING WITH THE BUNDLED APPLICATION SOFTWARE
- WHAT IS MP NAVIGATOR EX (SUPPLIED SCANNER SOFTWARE)
- WHAT YOU CAN DO WITH THIS SOFTWARE
- SCREENS
- MAIN MENUS
- NAVIGATION MODE SCREEN
- ONE-CLICK MODE SCREEN
- SCAN/IMPORT WINDOW
- VIEW & USE WINDOW
- LET'S TRY SCANNING
- STARTING MP NAVIGATOR EX
- STARTING ONE-CLICK MODE
- SCANNING PHOTOS AND DOCUMENTS
- EDIT THE SCANNED IMAGES AS REQUIRED
- SAVE THE SCANNED IMAGES
- SCANNING MULTIPLE DOCUMENTS AT ONE TIME
- CLICK SPECIFY
- CLICK SCAN
- SCANNING IMAGES LARGER THAN THE PLATEN (STITCH ASSIST)
- EASY SCANNING WITH ONE-CLICK
- USEFUL MP NAVIGATOR EX FUNCTIONS
- CORRECTING/ENHANCING IMAGES AUTOMATICALLY
- CORRECTING/ENHANCING IMAGES MANUALLY
- SEARCHING IMAGES
- QUICK SEARCH
- ADVANCED SEARCH
- START SEARCH
- SEARCH IN
- FILE NAME
- A WORD OR PHRASE IN THE FILE
- CATEGORY
- MODIFIED DATE
- SHOOTING DATE
- MORE ADVANCED OPTIONS
- CLASSIFYING IMAGES INTO CATEGORIES
- CREATING CUSTOM CATEGORIES
- UTILIZING IMAGES IN MP NAVIGATOR EX
- CLICK SAVE
- SAVING AS PDF FILES
- PDF(MULTIPLE PAGES)
- PDF(ADD PAGE)
- CREATING/EDITING PDF FILES
- CREATING/EDITING PDF FILES WITH MP NAVIGATOR EX
- SELECT IMAGES AND CLICK PDF
- CLICK CREATE/EDIT PDF FILE ON THE LIST
- ADD/DELETE PAGES AS REQUIRED
- REARRANGE THE PAGE ORDER AS REQUIRED
- CLICK SAVE SELECTED PAGES OR SAVE ALL PAGES
- SPECIFY THE SAVE SETTINGS IN THE SAVE AS PDF FILE DIALOG BOX, THEN CLICK SAVE
- OPENING PDF FILES IN AN APPLICATION
- SELECT PDF FILES AND CLICK PDF
- CLICK OPEN PDF FILE ON THE LIST
- USE THE APPLICATION TO EDIT/PRINT THE FILE
- PRINTING DOCUMENTS
- WHEN PRINTING PHOTOS USING EASY-PHOTOPRINT EX
- WHEN PRINTING PHOTOS USING MP NAVIGATOR EX
- SPECIFY PRINT SETTINGS AS REQUIRED
- SENDING VIA E-MAIL
- EDITING FILES
- CORRECTING PHOTO IMAGES
- CONVERTING DOCUMENTS TO TEXT
- SETTING PASSWORDS FOR PDF FILES
- RE-ENTER THE PASSWORD AND CLICK OK
- OPENING/EDITING PASSWORD-PROTECTED PDF FILES
- ENTERING A PASSWORD TO OPEN A FILE
- ENTERING A PASSWORD (PERMISSIONS PASSWORD) TO EDIT OR PRINT A FILE
- MP NAVIGATOR EX SCREENS
- SCAN/IMPORT DOCUMENTS OR IMAGES TAB
- VIEW & USE IMAGES ON YOUR COMPUTER TAB
- CUSTOM SCAN WITH ONE-CLICK TAB / ONE-CLICK MODE SCREEN
- PREFERENCES DIALOG BOX
- SCAN/IMPORT
- VIEW & USE
- ONE-CLICK
- (SWITCH MODE)
- SHOW THIS WINDOW AT STARTUP
- PREFERENCES
- (GUIDE)
- PHOTOS/DOCUMENTS (PLATEN)
- PREFERENCES PREFERENCES
- MY BOX (SCANNED/IMPORTED IMAGES)
- SPECIFY FOLDER
- RECENTLY SAVED IMAGES
- CUSTOM SCAN WITH ONE-CLICK TAB
- AUTO SCAN
- SAVE TO PC
- SAVE AS PDF FILE
- ATTACH TO E-MAIL
- OCR
- CUSTOM
- PHOTOS/DOCUMENTS (PLATEN) SCREEN (SCAN/IMPORT WINDOW)
- SETTINGS AND OPERATION BUTTONS
- (VIEW & USE)
- USE THE SCANNER DRIVER
- SCAN
- OPEN SCANNER DRIVER
- CLEAR
- SAVE
- EDIT TOOLS
- (ROTATE LEFT)
- (ROTATE RIGHT)
- (INVERT)
- (TRIMMING)
- ZOOM IN
- (DISPLAY SIZE)
- (SORT BY)
- THUMBNAIL WINDOW
- WHEN IMAGES ARE SORTED BY CATEGORIES
- CLOSE ALL / OPEN ALL
- SELECTED IMAGES AREA
- (CANCEL ALL)
- (CANCEL SELECTION)
- SCAN SETTINGS DIALOG BOX (PHOTOS/DOCUMENTS)
- DOCUMENT TYPE
- DOCUMENT SIZE
- SCANNING RESOLUTION
- DESCREEN
- REDUCE SHOW-THROUGH
- UNSHARP MASK
- REMOVE GUTTER SHADOW
- CORRECT SLANTED DOCUMENT
- DETECT THE ORIENTATION OF TEXT DOCUMENTS AND ROTATE IMAGES
- DOCUMENT LANGUAGE
- SAVE DIALOG BOX
- SAVE IN
- SAVE AS TYPE
- SET
- WHEN SAVE AS TYPE IS JPEG/EXIF
- SAVE TO A SUBFOLDER WITH CURRENT DATE
- SAVE AS PDF FILE DIALOG BOX
- PDF SETTINGS DIALOG BOX
- ENABLE KEYWORD SEARCH
- PDF COMPRESSION
- SECURITY
- DISPLAY SETTING ITEMS
- (SCAN/IMPORT)
- SEARCH
- IMAGE HANDLING BUTTONS
- (IMAGE CORRECTION/ENHANCEMENT)
- (SEARCH)
- (REFRESH)
- EDIT CUSTOM CATEGORIES
- CLASSIFY IMAGES
- CREATE/EDIT PDF FILE WINDOW
- REARRANGE PAGES
- DELETE SELECTED PAGES
- ADD PAGE
- RESET
- SAVE SELECTED PAGES
- SAVE ALL PAGES
- FINISH
- (PREVIEW MODE)
- (ENLARGE)
- (REDUCE)
- (FULL-SCREEN)
- (THUMBNAIL MODE)
- PRINT DOCUMENT DIALOG BOX
- PAPER SIZE
- MEDIA TYPE
- PRINT QUALITY
- DENSITY
- COPIES
- GRAYSCALE PRINTING
- PREVIEW BEFORE PRINTING
- PRINT PHOTO DIALOG BOX
- ORIENTATION
- VIVID PHOTO
- CLOSE
- SEND VIA E-MAIL DIALOG BOX
- MAIL PROGRAM
- ADJUST ATTACHMENT FILE SIZE
- TASK AREA
- ADJUSTMENT
- CORRECTION/ENHANCEMENT
- (COMPARE)
- AUTO
- AUTO SCAN DIALOG BOX
- SCAN SETTINGS
- SAVE SETTINGS
- WHEN SAVE AS TYPE IS AUTO
- WHEN SAVE AS TYPE IS PDF
- START SCANNING BY CLICKING THE ONE-CLICK BUTTON
- APPLY
- CANCEL
- SAVE DIALOG BOX (ONE-CLICK MODE SCREEN)
- COLOR MODE
- RESOLUTION
- SPECIFY
- AUTOMATICALLY SAVE THE IMAGE TO YOUR COMPUTER AFTER SCANNING IT
- WHEN SAVE AS TYPE IS PDF, PDF(MULTIPLE PAGES) OR PDF(ADD PAGE)
- SAVE THE JPEG/EXIF FILE IN ADOBERGB
- OPEN THE SAVE DIALOG BOX AFTER SCANNING THE IMAGE (INPUT EXIF INFORMATION)
- APPLICATION SETTINGS
- OPEN WITH
- SCAN SETTINGS DIALOG BOX
- ENABLE AUTO PHOTO FIX (WHEN SCANNING WITH AUTO SCAN USING THE OPERATION PANEL)
- EXIF SETTINGS DIALOG BOX
- PDF DIALOG BOX
- OPEN THE SAVE DIALOG BOX AFTER SCANNING THE IMAGE
- PASSWORD SECURITY SETTINGS
- ROTATE LEFT 90° /ROTATE RIGHT 90°
- MAIL DIALOG BOX
- FILE SIZE
- WHEN SAVE AS TYPE IS PDF OR PDF(MULTIPLE PAGES)
- ATTACHMENT SETTINGS
- OCR DIALOG BOX
- CUSTOM DIALOG BOX
- GENERAL TAB
- PRODUCT NAME
- SAVE IN (MY BOX)
- LOCATION OF TEMPORARY FILES
- APPLICATION TO RUN
- SCANNER BUTTON SETTINGS TAB (SAVE)
- EVENT
- ACTIONS
- APPENDIX: OPENING FILES OTHER THAN SCANNED IMAGES
- OPENING IMAGES SAVED ON A COMPUTER
- SCANNING WITH OTHER APPLICATION SOFTWARE
- SCANGEAR
- WHAT IS SCANGEAR (SCANNER DRIVER)
- BASIC MODE
- ADVANCED MODE
- AUTO SCAN MODE
- SCANNING WITH ADVANCED SETTINGS USING SCANGEAR (SCANNER DRIVER)
- STARTING SCANGEAR (SCANNER DRIVER)
- STARTING FROM MP NAVIGATOR EX
- STARTING FROM AN APPLICATION
- SCANNING IN BASIC MODE
- CLICK PREVIEW
- SCANNING IN ADVANCED MODE
- SET COLOR MODE
- SET OUTPUT SETTINGS
- ADJUST THE CROPPING FRAME (SCAN AREA), CORRECT IMAGE AND ADJUST COLORS AS REQUIRED
- SCANNING IN AUTO SCAN MODE
- SCANNING MULTIPLE DOCUMENTS AT ONE TIME WITH SCANGEAR (SCANNER DRIVER)
- SCANNING MULTIPLE DOCUMENTS IN WHOLE IMAGE VIEW
- CORRECTING IMAGES AND ADJUSTING COLORS WITH SCANGEAR (SCANNER DRIVER)
- CORRECTING IMAGES (UNSHARP MASK, REDUCE DUST AND SCRATCHES, FADING CORRECTION, ETC.)
- SETTING ITEMS
- ADJUSTING THE IMAGE BRIGHTNESS AND COLOR TONE
- SHARPENING SLIGHTLY OUT-OF-FOCUS IMAGES
- REDUCING GRADATIONS AND STRIPE PATTERNS
- REDUCING DUST AND SCRATCHES
- CORRECTING PHOTOS THAT HAVE FADED WITH TIME OR DUE TO COLORCAST
- REDUCING GRAININESS
- CORRECTING BACKLIT IMAGES
- CORRECTING SHADOWS THAT APPEAR BETWEEN PAGES WHEN SCANNING OPEN BOOKLETS
- ADJUSTING COLORS USING A COLOR PATTERN
- COLOR ADJUSTMENT
- ADJUSTING SATURATION AND COLOR BALANCE
- SATURATION
- COLOR BALANCE
- ADJUSTING BRIGHTNESS AND CONTRAST
- CHANNEL
- ADJUSTING HISTOGRAM
- READING HISTOGRAMS
- ADJUSTING HISTOGRAMS (USING THE SLIDER)
- MOVING THE BLACK-POINT AND WHITE-POINT SLIDERS
- MOVING THE MID-POINT SLIDER
- IMAGES WITH MORE DATA DISTRIBUTED TO THE HIGHLIGHT SIDE
- IMAGES WITH MORE DATA DISTRIBUTED TO THE SHADOW SIDE
- ADJUSTING HISTOGRAMS (USING THE DROPPERS)
- ADJUSTING TONE CURVE
- READING TONE CURVES
- NO CORRECTION (NO ADJUSTMENT)
- OVEREXPOSURE (CONVEX CURVE)
- UNDEREXPOSURE (CONCAVE CURVE)
- HIGH CONTRAST (S CURVE)
- REVERSE THE NEGATIVE/POSITIVE IMAGE (DOWNWARD-SLOPING LINE)
- EDIT CUSTOM CURVE
- SETTING THRESHOLD
- ADJUSTING THRESHOLD
- SCANGEAR (SCANNER DRIVER) SCREENS
- BASIC MODE TAB
- PREVIEW
- DESTINATION
- IMAGE DISPLAY
- OUTPUT SIZE
- FLEXIBLE
- IN THUMBNAIL VIEW
- IN WHOLE IMAGE VIEW
- PAPER SIZE (L, A4, ETC.)
- MONITOR SIZE (1024 X 768 PIXELS, ETC.)
- ADD/DELETE
- ADD
- DELETE
- INVERT ASPECT RATIO
- ADJUST CROPPING FRAMES
- PREVIEW AREA
- WHEN (WHOLE IMAGE) IS DISPLAYED ON THE TOOLBAR
- ADVANCED MODE TAB
- FAVORITE SETTINGS
- INPUT SETTINGS
- OUTPUT SETTINGS
- IMAGE SETTINGS
- COLOR ADJUSTMENT BUTTONS
- ZOOM
- (CLEAR)
- (CROP)
- (MOVE IMAGE)
- (ENLARGE/REDUCE)
- (AUTO CROP)
- (CHECK ALL FRAMES)
- (UNCHECK ALL FRAMES)
- (SELECT ALL FRAMES)
- (SELECT ALL CROPPING FRAMES)
- (REMOVE CROPPING FRAME)
- (INFORMATION)
- (OPEN GUIDE)
- WHEN (THUMBNAIL) IS DISPLAYED ON THE TOOLBAR
- BLACK AND WHITE
- INPUT SIZE
- OUTPUT RESOLUTION
- (SWITCH ASPECT RATIO)
- NEWSPAPER
- DOCUMENT
- REDUCE DUST AND SCRATCHES
- FADING CORRECTION
- GRAIN CORRECTION
- BACKLIGHT CORRECTION
- GUTTER SHADOW CORRECTION
- (SATURATION/COLOR BALANCE)
- (BRIGHTNESS/CONTRAST)
- (HISTOGRAM)
- (TONE CURVE SETTINGS)
- (FINAL REVIEW)
- (THRESHOLD)
- AUTO SCAN MODE TAB
- SUPPORTED DOCUMENTS
- VIEW SCANNED IMAGES
- SCANNER TAB
- PREVIEW TAB
- SCAN TAB
- COLOR SETTINGS TAB
- QUIET MODE
- SELECT FOLDER WHERE TEMPORARY FILES ARE SAVED
- SOUND SETTINGS
- CALIBRATION SETTINGS
- PREVIEW AT START OF SCANGEAR
- CROPPING FRAME ON PREVIEWED IMAGES
- CROPPING SIZE FOR THUMBNAIL VIEW
- STATUS OF SCANGEAR DIALOG AFTER SCANNING
- RECOMMENDED
- COLOR MATCHING
- MONITOR GAMMA
- APPENDIX: USEFUL INFORMATION ON SCANNING
- ADJUSTING CROPPING FRAMES
- INITIAL CROPPING FRAME
- ADJUSTING A CROPPING FRAME
- CREATING MULTIPLE CROPPING FRAMES
- DELETING CROPPING FRAMES
- WHAT IS RESOLUTION
- SETTING THE RESOLUTION IN MP NAVIGATOR EX
- IMAGES FOR PRINTING
- EXAMPLE OF APPROPRIATE RESOLUTION WHEN PRINTING TO SCALE
- SETTING THE RESOLUTION IN SCANGEAR (SCANNER DRIVER)
- APPROPRIATE RESOLUTION SETTINGS
- FILE FORMATS
- BMP (STANDARD FILE EXTENSION: .BMP)
- JPEG (STANDARD FILE EXTENSION: .JPG)
- EXIF (STANDARD FILE EXTENSION: .JPG)
- TIFF (STANDARD FILE EXTENSION: .TIF)
- PDF (STANDARD FILE EXTENSION: .PDF)
- OTHER SCANNING METHODS
- SCANNING WITH WIA DRIVER
- SCANNING WITH WIA DRIVER 2.0
- SCANNING WITH WIA DRIVER 1.0
- RESOLUTION (DPI)
- PICTURE TYPE
- CLICK PREVIEW TO PREVIEW THE IMAGE
- SCANNING USING THE CONTROL PANEL (WINDOWS XP ONLY)
- CLICK NEXT AND FOLLOW THE INSTRUCTIONS
- ABOUT PICTBRIDGE PRINT SETTINGS (MP270 SERIES ONLY)
- SETTINGS ON A PICTBRIDGE COMPLIANT DEVICE
- CLEANING YOUR MACHINE
- CLEANING
- CLEANING THE EXTERIOR OF THE MACHINE
- CLEANING THE PLATEN GLASS AND DOCUMENT COVER
- CLEANING THE PRINT HEADS
- DEEP CLEANING
- CHECK THE RESULTS
- CLEANING THE PAPER FEED ROLLERS
- ROLLER CLEANING
- ALIGNING THE PRINT HEAD POSITION
- PRINT HEAD ALIGNMENT
- CONFIRM THE DISPLAYED MESSAGE AND CLICK OK
- CHECK THE PRINTED PATTERN
- CHECKING THE PRINT HEAD NOZZLES
- NOZZLE CHECK
- CLEANING INSIDE THE MACHINE
- BOTTOM PLATE CLEANING
- CHANGING THE PRINT OPTIONS
- REGISTERING A FREQUENTLY USED PRINTING PROFILE
- REGISTERING A PRINTING PROFILE
- DELETING UNNECESSARY PRINTING PROFILE
- SELECT THE PRINTING PROFILE TO BE DELETED
- DELETE THE PRINTING PROFILE
- SETTING THE INK CARTRIDGE
- INK CARTRIDGE SETTINGS
- MANAGING THE MACHINE POWER
- POWER OFF
- REDUCING THE MACHINE NOISE
- CHANGING THE MACHINE OPERATION MODE
- CUSTOM SETTINGS
- PREVENT PAPER ABRASION
- ALIGN HEADS MANUALLY
- INK DRYING WAIT TIME
- IF AN ERROR OCCURS
- ERROR PERSISTS
- THE MACHINE CANNOT BE POWERED ON
- AN ERROR CODE IS DISPLAYED ON THE LED
- POWER LAMP FLASHES GREEN AND ALARM LAMP FLASHES ORANGE ALTERNATELY
- ERROR CODE
- ACTION
- LED CANNOT BE SEEN AT ALL
- CANNOT INSTALL THE MP DRIVERS
- IN OTHER CASES
- CANNOT CONNECT TO COMPUTER PROPERLY
- THIS DEVICE CAN PERFORM FASTER" MESSAGE IS DISPLAYED
- PRINT RESULTS NOT SATISFACTORY
- CHECK 1: DO THE PAGE SIZE AND MEDIA TYPE SETTINGS MATCH THE SIZE AND TYPE OF THE LOADED PAPER
- MP270 SERIES ONLY
- MP250 SERIES ONLY
- CHECK 2: MAKE SURE THAT THE APPROPRIATE PRINT QUALITY IS SELECTED
- ACCORDING TO THE MEDIA TYPE AND PRINTING DATA USING THE PRINTER DRIVER
- CHECK 3: IF THE PROBLEM IS NOT RESOLVED, THERE MAY BE OTHER CAUSES
- CANNOT PRINT TO END OF JOB
- NO PRINTING RESULTS/PRINTING IS BLURRED/COLORS ARE WRONG/WHITE STREAKS
- COLORS ARE UNCLEAR
- CHECK 1: ENABLE COLOR CORRECTION
- CHECK 2: IS THE FINE CARTRIDGE INSTALLED PROPERLY
- CHECK 3: WHEN A FINE CARTRIDGE RUNS OUT OF INK, REPLACE IT WITH A NEW ONE
- CHECK 4: IS THE NOZZLE CHECK PATTERN PRINTED PROPERLY
- LINES ARE MISALIGNED
- INDOWS
- FUNCTION USED
- PRINTED PAPER CURLS OR HAS INK BLOTS
- PRINTED PAPER CURLS
- PRINTED PAPER HAS INK BLOTS
- PAPER IS SMUDGED/PRINTED SURFACE IS SCRATCHED
- PAPER IS SMUDGED
- PRINTED SURFACE IS SCRATCHED
- CHECK 4: IF YOU ARE PRINTING ON THICK PAPER, SELECT THE PREVENT PAPER ABRASION SETTING
- ACINTOSH
- CHECK 5: IF THE INTENSITY IS SET HIGH, REDUCE THE INTENSITY SETTING IN THE PRINTER DRIVER AND TRY PRINTING AGAIN
- CHECK 10: IS THE PAPER SCRATCHED BY OTHER LOADED PAPER
- BACK OF THE PAPER IS SMUDGED
- VERTICAL LINES ARE PRINTED ON THE SIDES OF THE PRINTOUT
- COLORS ARE UNEVEN OR STREAKED
- COLORS ARE UNEVEN
- COLORS ARE STREAKED
- PRINTING DOES NOT START
- CHECK 6: IS THE SIZE OF THE PRINT DATA EXTREMELY LARGE
- COPYING/PRINTING STOPS BEFORE IT IS COMPLETED
- CHECK 1: HAS THE MACHINE BEEN PRINTING CONTINUOUSLY FOR A LONG
- PERIOD
- CHECK 2: IS THE PAPER LOADED
- CHECK 3: DO THE PRINTING DOCUMENTS HAVE LOTS OF PHOTOGRAPHS OR
- ILLUSTRATIONS
- CHECK 4: IF COPYING STOPS BEFORE IT IS COMPLETED, TRY TO COPY AGAIN
- MACHINE MOVES BUT INK IS NOT EJECTED
- CHECK 1: ARE THE PRINT HEAD NOZZLES CLOGGED
- PRINTING SPEED IS NOT AS FAST AS EXPECTED
- CHECK 1: IS PRINTING PERFORMED IN QUIET MODE
- CHECK 2: IS THE PRINT QUALITY SET TOO HIGH
- FINE CARTRIDGE HOLDER DOES NOT MOVE TO THE POSITION FOR REPLACING
- CHECK 1: IS THE POWER LAMP OFF
- CHECK 2: IS AN ERROR CODE DISPLAYED ON THE LED
- CHECK 3: HAS THE SCANNING UNIT (COVER) BEEN LEFT OPEN FOR 10 MINUTES OR LONGER
- CHECK 4: HAS THE MACHINE BEEN PRINTING CONTINUOUSLY FOR A LONG PERIOD
- PAPER DOES NOT FEED PROPERLY
- PAPER JAMS
- PAPER IS JAMMED IN THE PAPER OUTPUT SLOT OR THE REAR TRAY
- MESSAGE APPEARS ON THE COMPUTER SCREEN
- 5100 IS DISPLAYED
- 6000 IS DISPLAYED
- FOUR-DIGIT ALPHANUMERIC AND "PRINTER ERROR HAS OCCURRED." IS DISPLAYED
- WRITING ERROR/OUTPUT ERROR/COMMUNICATION ERROR
- ERROR NUMBER: 300 IS DISPLAYED
- ERROR NUMBER: 1700 IS DISPLAYED
- INK INFO NUMBER: 1688 IS DISPLAYED
- INK INFO NUMBER: 1686 IS DISPLAYED
- ERROR NUMBER: 2001 IS DISPLAYED (MP270 SERIES ONLY)
- ERROR NUMBER: 2002 IS DISPLAYED (MP270 SERIES ONLY)
- OTHER ERROR MESSAGES
- THE INKJET PRINTER/SCANNER/FAX EXTENDED SURVEY PROGRAM SCREEN IS DISPLAYED
- IF YOU AGREE TO PARTICIPATE IN THE SURVEY PROGRAM
- IF YOU DO NOT AGREE TO PARTICIPATE IN THE SURVEY PROGRAM
- TO UNINSTALL THE INKJET PRINTER/SCANNER/FAX EXTENDED SURVEY PROGRAM
- CHANGING THE CONFIRMATION SCREEN SETTING
- ACINTOSH THE INKJET PRINTER/SCANNER/FAX EXTENDED SURVEY PROGRAM ICON APPEARS
- CHANGING THE SETTING
- FOR WINDOWS USERS
- PRINTER STATUS MONITOR IS NOT DISPLAYED
- CHECK: IS THE PRINTER STATUS MONITOR ENABLED
- IF YOU ARE USING WINDOWS VISTA
- ERROR MESSAGE APPEARS ON A PICTBRIDGE COMPLIANT DEVICE (MP270 SERIES ONLY)
- PROBLEMS WITH SCANNING
- SCANNER DOES NOT WORK
- SCANGEAR (SCANNER DRIVER) DOES NOT START
- CHECK 1: MAKE SURE THAT THE MP DRIVERS ARE INSTALLED
- CHECK 2: ON THE FILE MENU OF THE APPLICATION, SELECT SELECT SOURCE AND SELECT THE MACHINE
- CHECK 3: START FROM A TWAIN-COMPLIANT APPLICATION
- ERROR MESSAGE APPEARS AND THE SCANGEAR (SCANNER DRIVER) SCREEN DOES NOT APPEAR
- SCAN QUALITY (IMAGE DISPLAYED ON THE MONITOR) IS POOR
- CHECK 1: INCREASE THE SCANNING RESOLUTION
- CHECK 2: SET THE SCALE TO 100
- CHECK 3: IF MOIRE (STRIPE PATTERN) APPEARS, TAKE THE FOLLOWING MEASURES AND SCAN AGAIN
- CHECK 4: CHECK THE MONITOR'S COLOR DEPTH
- CHECK 5: CLEAN THE PLATEN AND DOCUMENT COVER
- CHECK 6: IF THE DOCUMENT IS IN POOR CONDITION (DIRTY, FADED, ETC.), USE REDUCE DUST AND SCRATCHES, FADING CORRECTION, GRAIN CORRECTION, ETC. IN IMAGE SETTINGS ON THE ADVANCED MODE TAB OF SCANGEAR (SCANNER DRIVER)
- CHECK 7: IF THE COLOR TONE OF IMAGES IS DIFFERENT FROM THE ORIGINAL DOCUMENT, TAKE THE FOLLOWING MEASURES AND SCAN AGAIN
- SCANNED IMAGE IS SURROUNDED BY EXTRA WHITE AREAS
- CHECK: SPECIFY THE SCAN AREA
- CANNOT SCAN MULTIPLE DOCUMENTS AT ONE TIME
- CANNOT SCAN PROPERLY IN AUTO SCAN MODE
- SLOW SCANNING SPEED
- THERE IS NOT ENOUGH MEMORY." MESSAGE IS DISPLAYED
- COMPUTER STOPS OPERATING DURING SCANNING
- SCANNER DOES NOT WORK AFTER UPGRADING WINDOWS
- CHECK: DISCONNECT THE MACHINE FROM THE COMPUTER, THEN UNINSTALL AND REINSTALL THE MP DRIVERS AND MP NAVIGATOR EX
- SOFTWARE PROBLEMS
- E-MAIL SOFTWARE PROGRAM YOU WANT TO USE DOES NOT APPEAR IN THE SCREEN FOR SELECTING AN E-MAIL SOFTWARE PROGRAM
- SCANNED IMAGE IS PRINTED ENLARGED (REDUCED)
- SCANNED IMAGE IS ENLARGED (REDUCED) ON THE COMPUTER MONITOR
- CHECK 1: CHANGE THE DISPLAY SETTING IN THE APPLICATION
- CHECK 2: CHANGE THE RESOLUTION SETTING IN SCANGEAR (SCANNER DRIVER) AND SCAN AGAIN
- SCANNED IMAGE DOES NOT OPEN
- MP NAVIGATOR EX PROBLEMS
- CANNOT SCAN AT THE CORRECT SIZE
- POSITION OR SIZE OF THE IMAGE CANNOT BE DETECTED CORRECTLY WHEN SCANNING USING THE OPERATION PANEL
- DOCUMENT IS PLACED CORRECTLY, BUT THE SCANNED IMAGE IS SLANTED
- DOCUMENT IS PLACED CORRECTLY, BUT THE ORIENTATION CHANGES IN THE SCANNED IMAGE
- IF YOU CANNOT RESOLVE THE PROBLEM
- FAQS
- INSTRUCTIONS FOR USE (PRINTER DRIVER)
- RESTRICTIONS ON THE PRINTER DRIVER
- POINTS TO NOTE WITH APPLICATIONS
- GENERAL NOTES (SCANNER DRIVER)
- SCANNER DRIVER RESTRICTIONS
- APPLICATIONS WITH RESTRICTIONS ON USE
- PRINTING AREA
- ENVELOPES
- HOW TO DETACH/ATTACH THE DOCUMENT COVER
- DETACHING THE DOCUMENT COVER
- ATTACHING THE DOCUMENT COVER
- DELETING THE UNDESIRED PRINT JOB
- OBTAINING THE LATEST MP DRIVERS
- DELETING THE UNNECESSARY MP DRIVERS
- WHEN THERE IS AN UNINSTALLER
- START THE UNINSTALLER
- EXECUTE THE UNINSTALLER
- WHEN THERE IS NO UNINSTALLER
- SELECT THE PRINTER TO BE DELETED
- DELETE THE PRINTER
- SELECT THE PRINTER DRIVER TO BE DELETED
- DELETE THE PRINTER DRIVER
- BEFORE INSTALLING THE MP DRIVERS
- CHECKING THE MACHINE STATUS
- CHECKING THE PERSONAL COMPUTER SETTINGS
- INSTALLING THE MP DRIVERS
- TURN OFF THE MACHINE
- START THE INSTALLER
- INSTALL THE DRIVER
- COMPLETE THE INSTALLATION
- UNINSTALLING THE ON-SCREEN MANUALS
- TRANSPORTING THE MACHINE
- OPENING THE PRINTER PROPERTIES DIALOG BOX (WINDOWS)
- OPEN THE PRINTER PROPERTIES DIALOG BOX THROUGH THE APPLICATION SOFTWARE
- OPEN THE PRINTER PROPERTIES DIALOG BOX THROUGH THE START MENU
- OPENING THE PAGE SETUP AND PRINT DIALOG BOX (MACINTOSH)
- OPENING THE PAGE SETUP DIALOG BOX
- OPENING THE PRINT DIALOG BOX
- OPENING THE CANON IJ PRINTER UTILITY (MACINTOSH)
- IN MAC OS X V.10.5.X
- SHARING THE PRINTER ON A NETWORK
- SETTINGS ON PRINT SERVER
- SETTINGS ON CLIENT PC
- IN WINDOWS VISTA
- INSTALL THE PRINTER DRIVER ON THE CLIENT SYSTEMS
- START THE WIZARD
- ADD A PRINTER
- IN WINDOWS XP/WINDOWS 2000
- RESTRICTIONS ON PRINTER SHARING
- WHEN YOU ARE SHARING A PRINTER IN A NETWORK
- WHEN THE SAME PRINTER DRIVER IS INSTALLED IN THE PRINT SERVER SYSTEM AND THE CLIENT SYSTEM AS THE LOCAL PRINTER
- USING EASY-PHOTOPRINT EX
- START EASY-PHOTOPRINT EX
- CREATE A PERSONALIZED PHOTO ALBUM
- DECORATE ITEMS WITH TEXT AND FRAMES
- CREATE A CALENDAR USING YOUR FAVORITE PHOTOS
- CREATE STICKERS
- USING MP NAVIGATOR EX
- START MP NAVIGATOR EX
- SCAN PHOTOS AND DOCUMENTS
- SCAN SMALL DOCUMENTS AT ONE TIME
- SCAN LARGE DOCUMENTS
- SCAN WITH ONE-CLICK
- SCAN AND CORRECT/ENHANCE PHOTOS
- ABOUT SOLUTION MENU
- QUICK SHORTCUT!! SOLUTION MENU
- STARTING SOLUTION MENU
- CHANGING THE WINDOW SIZE
- STARTING AN APPLICATION
- EXITING SOLUTION MENU
- RESTRICTION ON USE OF SOLUTION MENU
Brand : EDIFIER
Model : MP250
Category : Loudspeaker