
KP3800 - Keyboard Unitech - Free user manual and instructions
Find the device manual for free KP3800 Unitech in PDF.


| Type de produit | Keyboard |
| Marque | Unitech |
| Modèle | KP3800 |
| Connectivité | Wired USB 2.0 |
| Nombre de touches | 104 (standard US layout) |
| Disposition | QWERTY |
| Rétroéclairage | No |
| Dimensions (L x W x H) | 440 x 140 x 30 mm |
| Poids | 0.75 kg |
| Alimentation | USB bus-powered (5V) |
| Systèmes d'exploitation supportés | Windows, macOS, Linux |
| Matériau du boîtier | ABS plastics |
| Longueur du câble | 1.5 m |
| Garantie | 1 an (standard) |
| Fonctions principales | Data entry, navigation, multimedia keys |
| Entretien et nettoyage | Wipe with a soft damp cloth; do not use solvents |
| Sécurité | Avoid liquids and extreme temperatures |
| Pièces détachées et réparabilité | Keycaps and cable replaceable; contact Unitech support |
| Informations générales | Designed for office and industrial environments |
Frequently Asked Questions - KP3800 Unitech
User questions about KP3800 Unitech
0 question about this device. Answer the ones you know or ask your own.
Ask a new question about this device
Download the instructions for your Keyboard in PDF format for free! Find your manual KP3800 - Unitech and take your electronic device back in hand. On this page are published all the documents necessary for the use of your device. KP3800 by Unitech.
USER MANUAL KP3800 Unitech
for PC type computers
General Advisory
Improper handling, storage, environmental influences and /or product modification can lead to problems during use.
This is particularly true if repairs and maintenance work are not performed by trained personnel.
We reserve the right to make technical modifications in accordance with technological advancements as they occur.
FCC Information
This device has been tested and found to comply with the limits for a Class A digital device, pursuant to Part 15 of the FCC Rules. These limits are designed to provide reasonable protection against harmful interference when the device is operated in a commercial environment. This device generates, uses, and can radiate radio frequency energy and, if not installed and used in accordance with the instruction manual, may cause harmful interference to radio communications.
Operation of this equipment in a residential area is likely to cause harmful interference, in which case the user will be required to correct the interference at his or her own expense.
TABLE OF CONTENTS
INTRODUCTION
Input Modes. 1
Reading Scanner and Magnetic Card Output ..... 2
Connecting an Undecoded Scanner 2
Connecting a Decoded Scanner . . . . . . . . . . . . . 2
Connecting an RS232 Device . . . . . . . . . . . . . . 2
Typical Applications 3
KEYBOARD CONFIGURATION MANAGER
Start It Up. 4
First Look. 6
Settings 7
Beeps and Delays.
Beep Tone 7
Intercharacter Delay 7
Interblock Delay 7
Keyboard Wedge
Function Code 8
Caps-Lock 8
Language. 8
Use Numeric Keypad 9
RS232
Baud Rate 10.
Parity 10
Data Bit 10
Receive Terminator 10.
Scanner Port
Terminator 11
Use Code ID 11
Double Verification 11.
Scanning Mode 12.
Label Type 12. . . . . . . . . . . . . . . . . . . . . . . Aim Function for Long Range Engine . . . . . . . . . . . . . 12
Aiming Time for Long Range Engine . . . . . . . . . . . . 13
Preamble 13.
Postamble 13.
Magnetic Reader
Track 1. 14
Track 2. 15
Track 3. 16
Setting Magnetic Reader Parameters ..... 17
Terminator. 17
Send Start/Stop Sentinel 17
Track Selection 17.
Track 2 Account Number Only . . . . . . . . . . . . . . . 18
TABLE OF CONTENTS, continued
Output Only When All Tracks Have Correct Data. . . . . 18
Separator Character 18
Track 1 Output Sequence ..... 19
Track 2 Output Sequence ..... 19
Bar Code Symbologies 20
Code 39 20.
Interleaved 2 of 5. . . . . . . . . . . . . . . . . . . . . . 21
Standard 2 of 5 / Toshiba Code ..... 21
Code 32 22
EAN 128 . . . . . . . . . . . . . . . . . . . . . . . . . . 22
Code 128. 22
MSI / Plessey Code . . . . . . . . . . . . . . . . . . . 23
Code 93 23
Codabar 24
UPC-A 24
UPC-E 25
EAN-13 25
EAN-8 25
Code 11 26
Delta Code 26
Supplement Code 26
Label Code IV and V 27
Data Editing 28
Qualifier 28.
Modifier 28
Arrange Formulas 30
The "Everything Else" Formula 30
KEY PROGRAMMING 31
Programming the Keys 31
Examples. 32
PROGRAMMING VIA SCANNER INPUT. . . . . . . . . . . . . 33
Quick Setup Bar Codes 34
Device Selection and Default. 36
Beeps and Delays 37.
Keyboard Interface 38.
Scanner Port 39.
Magnetic Reader 41.
Symbologies 43.
Code 39 43.
12 of 543.
S 2 of 5 43. . . . . . . . . . . . . . . . . . . . . .
Code 32 44.
Telpen 44.
UCC / EAN 128 44
TABLE OF CONTENTS, continued
Code 128 45. . . . . . . . . . . . . . . . . . . . . .
MSI / Plessey Code 45. . . . . . . . . . . . . . . . . . .
Code 93 45
Code 11 45.
Codabar 46
Label Code IV and V 46
UPC-A 47
UPC-E 47
EAN-13 47
EAN-8 47
Delta Distance Code 47
Data Editing 48
Function Codes 51
ASCII Chart 52
SPECIFICATIONS 56
Keyboard 56.
Magnetic Stripe Card Reader 56.
Bar Code Decoder Unit . . . . . . . . . . . . . . . . . . . . . . . 56
Scanner Port Pin Assignments 57. . . . . . . . . . . . . . .
TROUBLESHOOTING . . . . . . . . . . . . . . . . . . . . . . . . . . . . 58
Magnetic Card Reader 58
Bar Code Scanner 59
WARRANTY 61
Limited Hardware Warranty . . . . . . . . . . . . . . . . . . . . . . 61
BAR CODE TEST CHART . . . . . . . . . . . . . . . . . . . . . . . . 62
INTRODUCTION
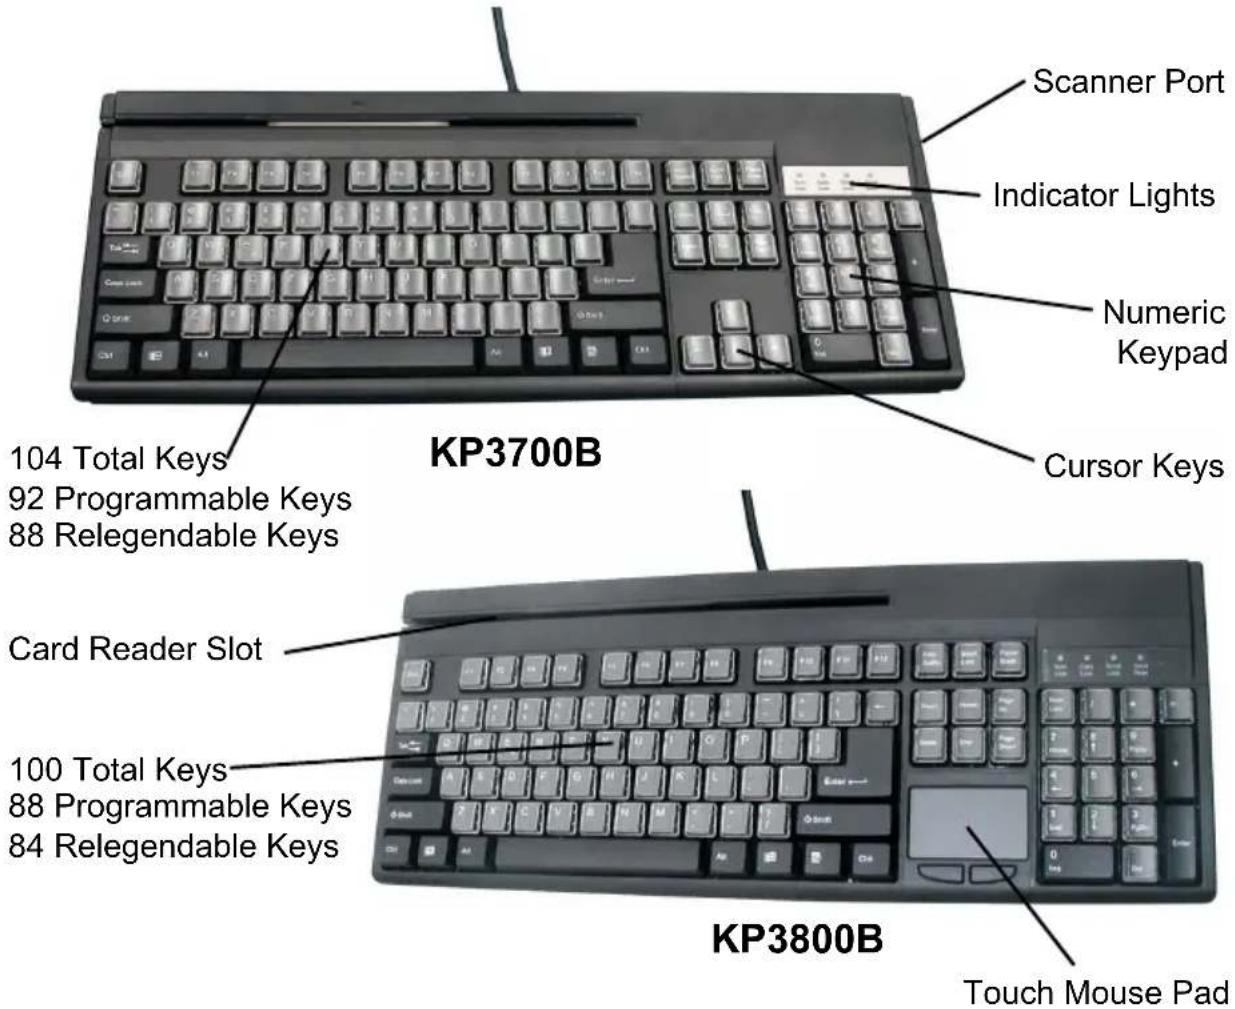
The KP3700/3800 is a family of multifunction keyboards with enhanced layout. The keyboards feature programmable keys (of which most are re-legendable), integrated magnetic stripe card reader (or optional bar code slot reader), and built-in bar code scanning input port. The keyboards also feature a minimal footprint and protection against damage from liquid spillage.
Input Modes
The keyboards have two modes to accept a variety of input devices.
- A DB-9 type squeeze release port at the upper right hand side of the keyboard supports undecoded (TTL) bar code scanner and RS232 input. Decoded scanners must be capable of Wand Emulation (undecoded scanner) output. Wand, CCD, and laser scanners are supported.
- A card-reader slot at the upper-left corner of the keyboard provides an enclosure for a built-in dual-track (track I & II) magnetic card reader (included). Alternatively, this card-reader slot can accommodate a triple-track magnetic card reader or a bar code slot reader.
Reading Scanner and Magnetic Card Output
Reading the output from the built-in magnetic card reader or attached scanner is easy. Simply open a text editor (Notepad or Word works well) and just swipe or scan. Whatever is encoded in the bar code or magnetic strip will appear as text, as if it had been typed on the keyboard.
Connecting an Undecoded Scanner
The following procedures should be followed when connecting an undecoded bar code scanner to the scanner port:
- Switch the computer off.
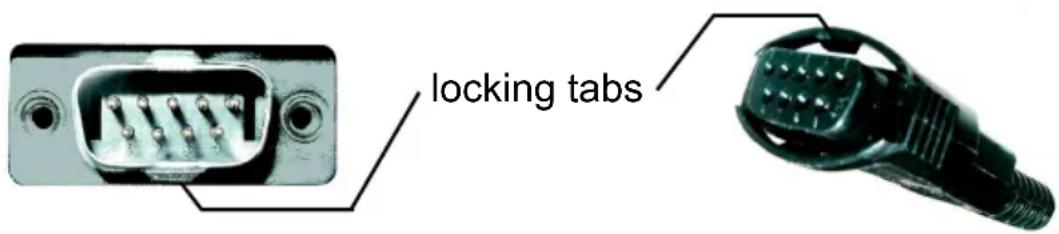
- Plug the connector of the scanner into the DB-9 port located on the right hand side of the keyboard. (Note the “squeeze release” locking mechanism on the port and the plug, shown below, and how it differs from a standard RS232 port/plug.)
- Switch the computer back on. The keyboard should emit a beep.
Connecting a Decoded Scanner
Since the KP3700/3800 keyboard features an onboard scanner decoder, the keyboard can only accept undecoded scanner (or RS232) input through the scanner port. Most currently available decoded scanners can be configured to operate in “Wand Emulation Mode”, however. If this is the case, the scanner must also connect to the scanner port via an undecoded (or wand) cable. Follow the steps listed in “Connecting an Undecoded Scanner”, above.
Connecting RS232 Devices
RS232 devices (scale, pole display, scanner, etc.) can be connected to the keyboard scanner port if the RS232 pinout is modified according to the table on page 57. Follow the steps listed in “Connecting an Undecoded Scanner”, above.
* Note: Because some computers provide less than 5 volts of power to the keyboard port, the keyboard might not be able to supply adequate power to attached RS232 devices. In this case, an external power supply would be required.
Typical Applications
- Point-of-sale (POS) systems
- Banking, financial and insurance data input
• ID entry and security - Industrial control and automated process applications
- Inventory control
- Shipping and receiving product identification
- Membership services
KEYBOARD CONFIGURATION MANAGER
Keyboard Configuration Manager software is the simplest and most foolproof way to configure your keyboard settings.
Start It Up
After loading and starting KCMSetup.exe, the icon to the right will appear on your desktop:

Click on the KCM icon and the following screen will appear:
As you can see, you are presented with a blank work area and a row of icons across the top. Following is an explanation of each of the icons:
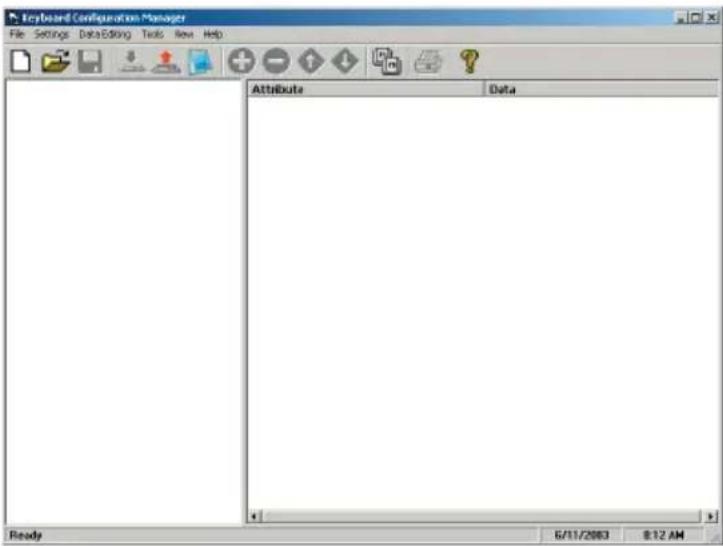


Above, from left to right, are the standard Windows icons for "New Document", Open File", and "Save File".
Keyboard Configuration Manager saves keyboard settings in .cfg files, so you can have access to a variety of different keyboard configurations that you've set up.
To reset the keyboard back to factory default, click on the “New Document” icon and download the unmanipulated setting to the keyboard (see below).


The above icons, from left to right, represent download settings (from computer to keyboard), and upload settings (from keyboard to computer). The third icon opens a Test Pad where you can view the actual keyboard/scanner/reader output.

The above four icons are used in the “Data Editing” feature of KCM. From left to right they are the “Add a Formula” icon, the “Remove a Formula” icon, and the right-hand two are the “Move Formula” icons that move selected formulas up or down in relation to each other. For information on data editing, see page 28.

Click this icon to begin re-programming the individual keys of the keyboard (see page 31).

Click this icon to print a series of bar codes that you can scan to configure your keyboard/scanner/reader to the current KCM settings. If printing to a PDF file is an option (via Acrobat), this configuration can be sent via e-mail to different locations where they can be scanned from a printed PDF file.

Help is just a click away.
First Look
Click the upload icon (see page 4) and the following pop-up screen will appear: (Or, click on the “New Document” icon, page 4, to start with the “Factory Default” setting on the second screen below)
Enter the keyboard product number (KP3700, for example), and click "OK". The "Good Read" LED on the keyboard will flash during the upload process.
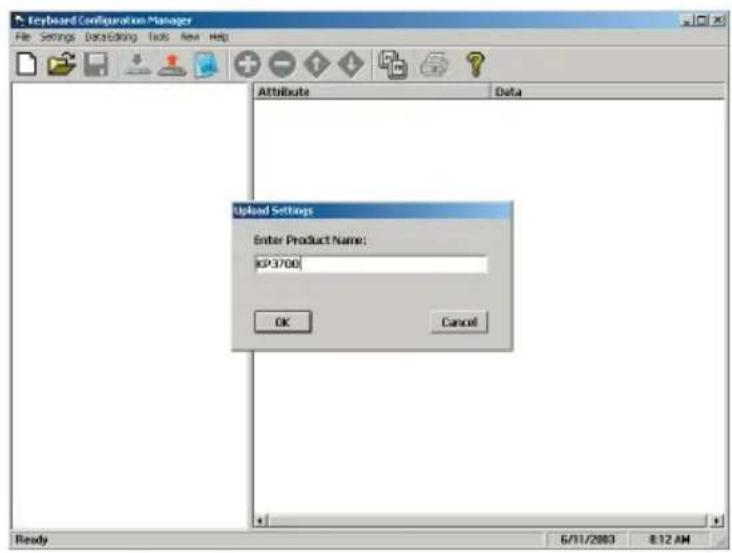
The screen to the right appears. Click on any of the selections under "Current Settings" to view its "Attributes".
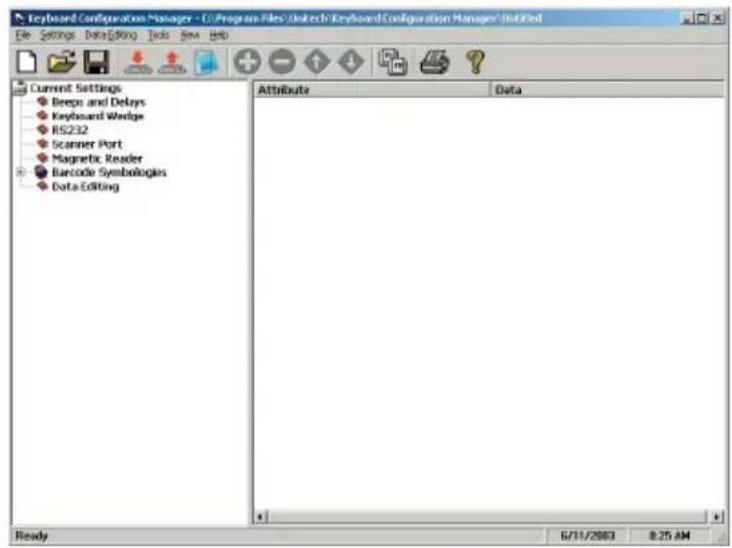
Double-click on any of the "Attributes" to edit that attribute. This is done via a drop-down menu.
After selecting your configuration settings, click on the Download icon (see page 4). The "Good Read" LED on the keyboard will flash during the download process. Afterwards, you
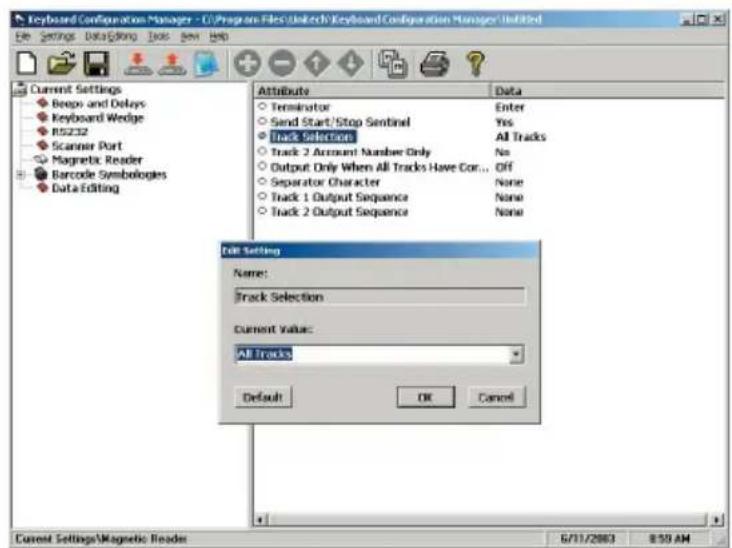
will be prompted to do an optional "Quick Test".
6 Keyboard Manual
Settings
Following is a detailed discussion of each of the settings, their attributes, and the effects each of these will have on data output from your Unitech keyboard.
Beeps and Delays
The three attributes for “Beeps and Delays” are: “Beep Tone”, “Intercharacter Delay”, and “Interblock Delay”.
Beep Tone
Select a value from “None” to “High” to set the loudness of the tone, or select “Low to High” or “High to Low” to set the characteristic of the tone.
Default is "Medium".
Interblock Delay
Interblock delay is the time duration that can be inserted between one block of data and another. This function is analogous to the time duration required between dialing a phone number's country code and the phone number itself. The interblock delay can be inserted via KCM's Data Editing function (see page 28).
Default is "10 ms".
Intercharacter Delay
Intercharacter Delay is the time duration between data characters sent from the keyboard to the computer, usually originating from an attached scanner or built-in magnetic stripe reader. Intercharacter delay is usually inserted when the data flow must be slowed down to accommodate a slower computer.
Default is "1 ms".
Keyboard Wedge
Your Unitech keyboard contains a built-in data decoder or “wedge” that translates raw bar code or magnetic stripe input into Keyboard Scan Code, with the result that scanner data, magnetic stripe data, and keyboard data exit the keyboard as if you had typed the text. The four keyboard wedge parameters are listed below.
Function Code
Function Code determines how function code characters from the scanner or magnetic stripe reader are output.
- If Yes is selected, then scanned function codes will output the same as if their corresponding function keys were pressed.
Scanning an F1 label will pop-up a "Help" box, F3 a "Find" pop-up box, etc. - If No is selected, the scanned function codes will output special character strings defined by Unitech for non-print character output.
Default is "Yes".
Caps-Lock
The Caps Lock function determines how the Caps Lock key controls the case of alphabetical characters. The three options below are available:
- Auto Trace automatically determines the Caps Lock key status and informs the decoder accordingly.
- Lower Case manually coordinates the physical state of the Caps Lock key with the Caps Lock state of the decoder. For example, if the Caps Lock LED is not lit, then “Lower Case” should be selected.
- Upper Case is the same as Lower Case (above) except that it applies to the upper case state. If the Caps Lock LED is lit, then "Upper Case" should be selected.
Default is "Auto Trace".
Language
Your Unitech keyboard can output characters using eleven different language sets, including:
Danish
U.S. English
U.K. English
French
German
Italian
Norwegian
Swedish
Spanish
Swiss
Alt Key Mode
Default is "U.S."
8 Keyboard Manual
Keyboard Wedge, continued
Use Numeric Keypad
The ASCII code for numeric input from the keypad part of the keyboard is different from that of the upper row of the keyboard proper. Some accounting programs specifically require keypad input, and for that reason, the keyboard decoder can output scanned or read numbers as either keypad or keyboard (upper row) output. Default is “No”.
RS232
The RS232 input characteristics of the keyboard's scanner port (see page 2) can be modified according to the following four parameters:
Baud Rate
Baud Rate (bits per second) refers to the speed of the data through the scanner/RS232 port. Normally, the baud rate of the port should match that of the input device.
Default is "9600 Baud".
Parity
A technique used to detect data transmission errors by adding an extra bit to each character. This scheme has been supplanted in modern communication devices by “error correction”.
Default (and the current universal standard) is "No Parity".
Data Bit
Number of bits per byte that are dedicated to data (minus start/stop bits).
Default (and the current universal standard) is "8 Data Bits".
Receive Terminator
A user-definable Receive Terminator can be inserted at the end of input data. Pre-defined receive terminators include:
: Tab
•: Carriage Return
•: Line Feed : Any Digit (not applicable to this function) - : Any Letter (not applicable to this function)
- <^*> : Interblock Delay (not applicable to this function)
- <">: " (quotation marks)
- : character in hexadecimal notation
- <<<: < (less than)
-
: > (greater than)
The above special characters must be bracketed by < > symbols as shown.
Function codes (F keys, Cursor up, Enter, etc.) can also be inserted via hexadecimal code (accessible in a linked menu) and must include surrounding brackets (<>).
Letters and numbers should be entered directly by keyboard input without surrounding brackets (<>).
Default is "None".
10 Keyboard Manual
Scanner Port
Terminator, Use Code ID, Double Verification, Scanning Mode, Label Type, Aim Function for Long-Range Engine, Aim Time for Long-Range Engine, Preamble, and Postamble are the parameters for Scanner Port configuration.
Terminator
The Terminator is a command that follows the input of bar code data. Four different terminators can be selected here: "Enter", "Return (on numeric keypad)", "Field Exit or Right Control", or "None". Alternative terminators (such as Tab) can be configured via the Postamble function (see page 13).
Default is "Enter"
Use Code ID
The Code ID function can be used to identify the type of bar code that is being scanned by inserting an identifying letter (refer to chart at right) at the beginning of the bar code output. For example, if the Code ID function is on, and a bar code value of "54321" was output as "M54321", the bar code would thus be identified as type Code 39.
Default is "No".
| UPC-A | A |
| UPC-EE | |
| EAN-13F | |
| FFEAN-8 | |
| I 2 of 5I | |
| S 2 of 5 | H |
| Code 39M | |
| CodabarN | |
| Code 93L | |
| Code 128K | |
| UCC/EAN1281C1 | |
| MSIO | |
| Code 32T | |
| Plessey CodeP | |
| Label Code IV, V B | |
| China Postal Code | C |
| Code 11 / TelpenJ |
Double Verification
Double Verification enables the scanner to verify the accuracy of the output by outputting only after a specified number (from 0 to 7) of identical results. For instance, if 3 is selected, the scanner will not output the bar code data until it's obtained 4 identical scan results. Because the scanner normally scans at a rate of 33 scans per second (unless it's a wand), this process should take less than a second, even for higher values.
Default is "0-Off"
Scanning Mode
Actual bar code scanning can occur in six different ways:
- Trigger scan causes the scanner light to remain on as long as the trigger is depressed, whether the bar code is recognized or not.
- Flashing (not supported by keyboard) causes the scanner to flash continuously after the trigger is pressed until it detects a bar code and outputs the data. The scanner light will remain on in anticipation of another bar code for approximately 12 seconds, after which it will begin flashing again. A second trigger press stops the scanning.
- Multiscan allows multiple scans while holding down the trigger.
- One Press One Scan causes the scanner light to remain on after the trigger is briefly depressed until a bar code is detected and output.
- Test (not supported by keyboard) is similar to the Flash setting except that the scanner outputs bar code data in a rapid-fire manner as long as a bar code is presented to the scanner.
- Old Laser Flash (not supported by keyboard) causes the scanner to flash continuously after the trigger is pressed and will scan each bar code only once per presentation. A second trigger press stops the scanning.
Default is "Trigger"
Label Type
Toggle between reading only Positive and both Positive and Negative bar codes. Reading both positive and negative bar codes can be useful in the graphics industry when negative images must be proofed.
Default is "Positive".
Aim Function for Long Range Engine
The Aim Function causes a laser scanner to output a “pin-point” aiming aid for a specified period of time (see next page) to enable the user to more easily scan distant bar code labels. This function can be toggled on or off.
Default is "No".
Aiming Time for Long Range Engine
The Aiming Time function specifies the duration of the Aim Function (see previous page). Length of duration can be specified from 500ms to 2 seconds, in half-second increments.
Default is "1 second".
Preamble
Insert a string of characters prior to the actual scanned data. Pre-defined characters include:
: Tab : Carriage Return : Line Feed - <">: " (quotation marks)
- : character in hexadecimal notation
- <<<: < (less than)
-
: > (greater than)
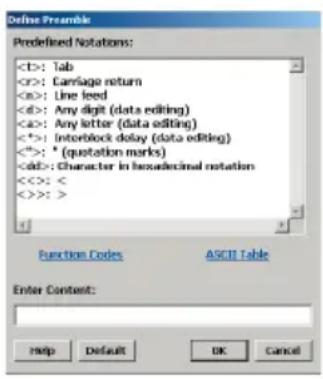
The above special characters must be bracketed by < > symbols as shown.
Function codes (F keys, Cursor up, Enter, etc.) can also be inserted via hexadecimal code (accessible in a linked menu) and must include surrounding brackets (<>).
Letters and numbers should be entered directly by keyboard input without surrounding brackets (<>).
Default is "None".
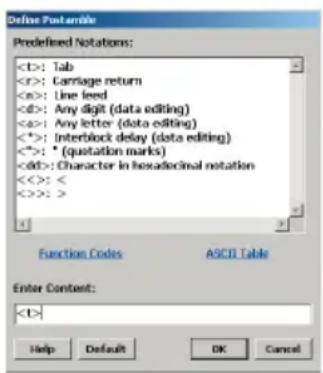
Postamble
Identical to Preamble (above), but characters are inserted after scanned data.
Default is "None".
A common postamble would be a “Tab” after the bar code input (usually in lieu of an “Enter” terminator). In this case, set the Terminator to “None” (see page 11) and input “
Magnetic Reader
The Magnetic Stripe Reader configuration parameters differ from the Scanner Port mainly in that magnetic cards adhere to only one standard defined by ANSI and ISO/IEC, while there are over a dozen different symbologies for bar codes.
Each magnetic stripe can contain three distinct parallel tracks, each 0.110" (2.794mm) wide. Each track's unique characteristics are described below.
Track 1
The recording density of Track 1 is defined as 210 bits per inch. The character configuration (encoding) is 6 bits plus 1 parity (odd) bit, which yields 64 unique alphanumeric and symbolic characters. The maximum information content is 79 characters, with the format defined by the Format Code letter:
- A is defined by the card issuer and is for their exclusive use.
- B developed by the International Air Transportation Association (IATA) contains alphanumeric information for banking and finance. The standard sequence for format B is listed below.
- C-M are reserved for use by ANSI Subcommittee X3B10.
- N-Z are available for use by individual card issuers.
Following is track 1 output and an explanation of the components.
%B987654321012300^UNITECH/JOE^0512896745280?
% B PAN ^ CC NAME ^ DATE SC PVV DD ? LRC
Start Sentinel - 1 character - always “%” for Track 1% B Format Code - 1 alphabetical character - in this case, “B” Primary Account Number - up to 19 digitsPAN Separator - 1 character - always “^” for Track 1^ Country Code - 3 digits (only for MasterCard)CC Cardholder Name - 2 to 26 alphabetical characters -NAME normally last name, then first name, separated by a “/” Separator - 1 character - always “^” for Track 1^
DATE Expiration Date - 4 digits - YYMM format
SC Service Code - 3 digits - defines transaction requirements
PVV PIN Verification Value - 0 to 5 digits
DD Discretionary Data - additional characters to fill out maximum record length
? End Sentinel - 1 character - always “?” for all tracks
LRC Longitudinal Redundency Check - 1 check character
14 Keyboard Manual
Track 2
The recording density of Track 2 is defined as 75 bits per inch.
The character configuration (encoding) is 4 bits plus 1 parity (odd) bit, which yields 16 unique characters (10 numeric digits plus 6 symbolic characters :;<=>?).
The maximum information content, defined by the American Bankers Association (ABA), is 40 characters arranged in the format below.
Following is track 2 output and an explanation of the components.
$$ ; 9 8 7 6 5 4 3 2 1 0 1 2 3 0 0 = 0 5 1 2 1 2 0 8 9 6 7 4 2 8? $$
; PAN = CC DATE SC PVV DD ? LRC
Start Sentinel - 1 character - always “;” for Track 2; Primary Account Number - up to 19 digitsPAN Separator - 1 character - always “=” for Track 2= Country Code - 3 digits (only for MasterCard)CC Expiration Date - 4 digits - YYMM formatDATE
SC Service Code - 3 digits - defines transaction requirements PIN Verification Value - 0 to 5 digitsPVV
DD Discretionary Data - additional characters to fill out maximum record length End Sentinel - 1 character - always “?” for all tracks? Longitudinal Redundency Check - 1 check characterLRC
Track 3
The recording density of Track 3 is defined as 210 bits per inch. The character configuration (encoding) is 4 bits plus 1 parity (odd) bit, which yields 16 unique characters (10 numeric digits plus 6 symbolic characters :;<=>?).
The maximum information content, defined by the Thrift Industry (THRIFT-TTS), is 107 characters arranged in the format below.
; FC PAN = CC CuC CE AA AR CB CL RC PINCP IC PANSR FSANSR SSANSR DATE CSN CScN FSAN = SSAN = RM CCD DD ? LRC
; Start Sentinel - 1 character - always “;” for Track 3
FC Format Code - 2 alphabetical characters
PAN Primary Account Number - up to 19 digits Separator - 1 character - always “=” for Track 3=
CC Country Code - 3 digits
CuC Currency Code - 3 digits
CE Currency Exponent - 1 digit
AA Amount Authorized Per Cycle - 4 digits
AR Amount Remaining This Cycle - 4 digits
CB Cycle Begin (Validity Date) - 4 digits - YYMM format Cycle Length - 2 digitsCL
RC Retry Count - 1 digit - number of remaining PIN tries
PINCP PIN Control Parameters - 6 digits
IC Interchange Control - 1 digit
PANSR PAN Service Restriction - 2 digits - describes the account
FSANSR FSAN Service Restriction - 2 digits - see FSAN below
SSANSR SSAN Service Restriction - 2 digits - see SSAN below Expiration Date - 4 digits - YYMM formatDATE
CSN Card Sequence Number - 1 digit
CScN Card Security Number - 9 digits
FSAN First Subsidiary Account Number - variable number of digits Separator - 1 character - always “=” for Track 3=
SSAN Second Subsidiary Account Number - variable number of digits Separator - 1 character - always “=” for Track 3=
RM Relay Marker - 1 digit
CCD Crypto Check - 1 digit
DD Discretionary Data - additional characters to fill out maximum record length
End Sentinel - 1 character - always “?” for all tracks?
Longitudinal Redundency Check - 1 check characterLRC
Setting Magnetic Reader Parameters
Keyboard Configuration Manager, shown left and outlined in detail below, enables the output from the keyboard's magnetic stripe reader to be modified to the user's requirements.
In a POS environment, normally only Track 2 is selected.
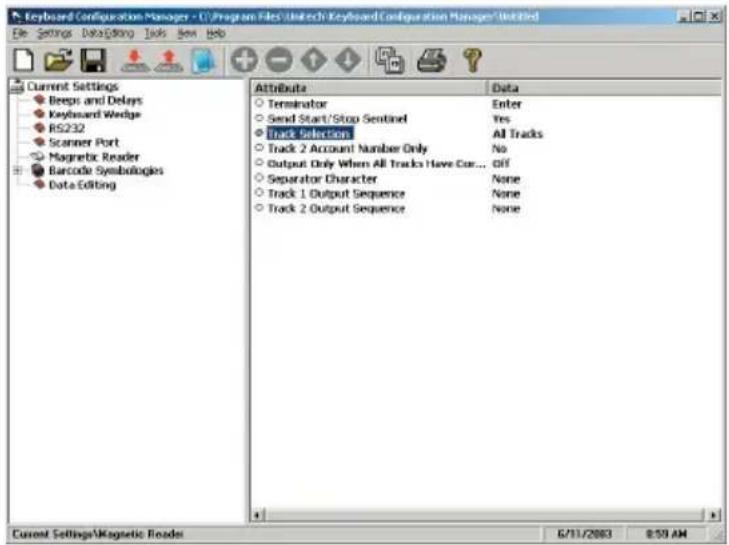
Terminator
The Terminator is a command that follows after the bar code data. Four different terminators can be selected here: “Enter”, “Return (on numeric keypad)”, “Field Exit or Right Control”, or “None”. To define a different terminator, use the “Data Editing” function (see page 28) Default is “Enter”.
Send Start/Stop Sentinel
Each magnetic stripe track begins with a start character and ends with a stop character (and an LRC character).
The start character for track 1 is a \% (percent sign), and for tracks 2 and 3 is a ; (semi colon).
The stop character for all three tracks is a ? (question mark).
Selecting the "No" option for this parameter strips the start/stop sentinels for each track from the output data.
Default is "Yes"
Track Selection
Select only one, all, or any combination of the available tracks.
Selections include:
- All Tracks
- Track 1 and Track 2
- Track 1 and Track 3
- Track 2 and Track 3
- Track 1 Output
- Track 2 Output
- Track 3 Output
Default is "All Tracks".
Magnetic Reader, continued
Track 2 Account Number Only
If only track 2 is enabled (see previous page), only the account number from track 2 and the start/stop sentinels are output.
If tracks other than track 2 are enabled, this parameter actually outputs all the other track's data, the account number from track 2, and their start/stop sentinels.
Default is "No".
Output Only When All Tracks Have Correct Data
A useful function for insuring data integrity, this function can cause trouble when the card reader tries to read more tracks than are on the card.
Default is "No".
Separator Character
Insert one character between each track's output.
Pre-defined characters include:
: Tab
•: Line Feed : Any Digit (not applicable to this function) - : Any Letter (not applicable to this function)
- <^*> : Interblock Delay (not applicable to this function)
- <">: " (quotation marks)
- : character in hexadecimal notation
• <<<: <
• <>>: >- : character in hexadecimal notation
The above special characters must be bracketed by < > symbols as shown.
Function codes (F keys, Cursor up, Enter, etc.) can also be inserted via hexadecimal code (accessible in a linked menu) and must include surrounding brackets (<>).
Letters and numbers should be entered directly by keyboard input without surrounding brackets (<>).
Default is "None".
Track 1 Output Sequence
Track 1 output sequence can be easily re-arranged to whatever sequence the user requires. Track 1 parameters include:
- Account Number
- Last Name
- First Name
- Expiration Year
- Expiration Month
- Discretionary Data
- All Information
- Delimiter / Text
Default is "None".
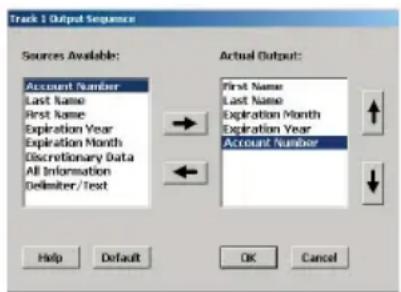
Highlight a parameter (such as “Account Number”) in the “Sources Available” area and click on the top horizontal arrow (shown right) to move it to the “Actual Output” area. Use the lower horizontal arrow to remove selections from the Actual Output area.
Use the up and down arrows to move selected parameters up or down in relation to the other parameters.
When the selected parameters are in the desired sequence, click the "OK" button.


Track 2 Output Sequence
Track 2 output sequence is arranged in the same manner as the Track 1 output sequence (above). Track 2 parameters include:
- Account Number
- Expiration Year
- Expiration Month
- Discretionary Data
- All Information
- Delimiter / Text
* Note that track 2 does not contain last name and first name data. Default is "None".
Bar Code Symbologies
Modify the output characteristics of 16 of the most popular bar code symbologies in current use. Following are the bar code symbologies and their modifiable parameters.
Code 39
- Enabled toggles the ability for the keyboard/scanner to read Code 39 on or off. Default is "Yes".
- Code ID (Standard) is a user-definable identification letter for Standard Code 39, which is referred to in the “Use Code ID” function (see page 11). Default is letter “M”.
- Code ID (Full ASCII) is the same as Code ID (Standard), above, except that the symbology is Full ASCII Code 39. Default letter is also the letter "M".
- Type toggles Code 39 between Standard and Full ASCII. Default is "Full ASCII".
- Check Digit defines whether or not a check digit (to insure data accuracy) is calculated, and if so, whether it should be sent or not. Default is “Not Calculate”.
- Send Start/Stop toggles sending or not sending start/stop sentinels (* in the case of Code 39). Default is "No Send".
- Minimum Length defines the minimum length the user will accept for a valid bar code. Default is "0".
- Maximum Length defines the maximum length the user will accept for a valid bar code. Default is "48".
Interleaved 2 of 5
- Enabled toggles the ability for the keyboard/scanner to read 12 of 5 on or off. Default is "Yes".
- Code ID is a user-definable identification letter for I 2 of 5, which is referred to in the “Use Code ID” function (see page 11). Default is letter “I”.
- Fix Length (by first 3 reads) fixes the length of acceptable subsequent bar code reads from the first three bar codes read. Useful as a data verification if all bar codes are of a consistent length. Default is “No”.
- Check Digit defines whether or not a check digit (to insure data accuracy) is calculated, and if so, whether it should be sent or not. Default is “Not Calculate”.
- Suppress Digit suppresses the output of the first or last bar code digit. Default is “Not Suppressed”.
- Minimum Length defines the minimum length the user will accept for a valid bar code. Default is "10".
- Maximum Length defines the maximum length the user will accept for a valid bar code. Default is "64".
Standard 2 of 5 / Toshiba Code
- Enabled toggles the ability for the keyboard/scanner to read S 2 of 5 / Toshiba Code on or off. Default is "No".
- S25 Code ID is a user-definable identification letter for S 2 of 5, which is referred to in the “Use Code ID” function (see page 11). Default is letter “H”.
- Toshiba Code ID is the same as S25 Code ID (above), but instead applicable to Toshiba Code. Default is letter "C".
- Fix Length (by first 3 reads) fixes the length of acceptable subsequent bar code reads from the first three bar codes read. Useful as a data verification if all bar codes are of a consistent length. Default is “No”.
- Check Digit defines whether or not a check digit (to insure data accuracy) is calculated, and if so, whether it should be sent or not. Default is “Not Calculate”.
- Minimum Length defines the minimum length the user will accept for a valid bar code. Default is "4".
- Maximum Length defines the maximum length the user will accept for a valid bar code. Default is "48".
Code 32
- Enabled toggles the ability for the keyboard/scanner to read Code 32 on or off. Default is "No".
- Code ID is a user-definable identification letter for Code 32, which is referred to in the “Use Code ID” function (see page 11). Default is letter “T”.
- Send Leading Character toggles sending or not sending a leading ("start bar code") character. Default is "Send".
- Send Tailing Character toggles sending or not sending a tailing ("stop bar code") character. Default is "Send".
EAN 128
- Enabled toggles the ability for the keyboard/scanner to read EAN 128 on or off. Default is "No".
- Code ID is a user-definable identification letter for EAN 128, which is referred to in the “Use Code ID” function (see page 11). Default is “None”.
- Enable Code ID determines whether or not to assign a Code ID. Default is "No".
- Field Separator is a user-definable character to insert between fields. Default is "None".
Code 128
- Enabled toggles the ability for the keyboard/scanner to read Code 128 on or off. Default is "Yes".
- Code ID is a user-definable identification letter for Code 128, which is referred to in the “Use Code ID” function (see page 11). Default is letter “K”.
- Minimum Length defines the minimum length the user will accept for a valid bar code. Default is "1".
- Maximum Length defines the maximum length the user will accept for a valid bar code. Default is "64".
MSI / Plessey Code
- Enabled toggles the ability for the keyboard/scanner to read MSI / Plessey Code on or off. Default is "Yes".
- MSI Code ID is a user-definable identification letter for MSI Code, which is referred to in the “Use Code ID” function (see page 11). Default is letter “O”.
- Plessey Code ID is the same as MSI Code ID (above), but instead applicable to Plessey Code. Default is the letter "P".
- Send Check Digit toggles whether or not to send a check digit. Default is "No Send".
- Check Digit Formula defines the formula to calculate the check digit. Options are: “Double Module 10”, Module 11 Plus 10”, and “Single Module 10”. Default is “Double Module 10”.
- Minimum Length defines the minimal length the user will accept for a valid bar code. Default is "1".
- Maximum Length defines the maximum length the user will accept for a valid bar code. Default is "16".
Code 93
- Enabled toggles the ability for the keyboard/scanner to read Code 93 on or off. Default is "Yes".
- Code ID is a user-definable identification letter for Code 93, which is referred to in the “Use Code ID” function (see page 11). Default is letter “L”.
- Minimum Length defines the minimal length the user will accept for a valid bar code. Default is "1".
- Maximum Length defines the maximum length the user will accept for a valid bar code. Default is "48".
Codabar
- Enabled toggles the ability for the keyboard/scanner to read Codabar on or off. Default is "No".
- Code ID is a user-definable identification letter for Codabar, which is referred to in the “Use Code ID” function (see page 11). Default is letter “N”.
- Send Start/Stop toggles sending or not sending start/stop sentinels. Default is "No Send".
- Check Digit defines whether or not a check digit (to insure data accuracy) is calculated, and if so, whether it should be sent or not. Default is “Not Calculate”.
- CLSI Format deletes the start and stop sentinels and outputs the data with spaces inserted after the 1st, 5th, and 10th characters. Default is “No”.
- Minimum Length defines the minimum length the user will accept for a valid bar code. Default is "3".
- Maximum Length defines the maximum length the user will accept for a valid bar code. Default is "48".
UPC-A
- Enabled toggles the ability for the keyboard/scanner to read UPC-A on or off. Default is "Yes".
- Code ID is a user-definable identification letter for UPC-A, which is referred to in the “Use Code ID” function (see page 11). Default is letter “A”.
- Send Leading Digit toggles sending or not sending a leading ("start bar code") digit. Default is "Send".
- Send Check Digit toggles whether or not to send a check digit. Default is "Send".
UPC-E
- Enabled toggles the ability for the keyboard/scanner to read UPC-E on or off. Default is "Yes".
- Code ID is a user-definable identification letter for UPC-E, which is referred to in the “Use Code ID” function (see page 11). Default is letter “E”.
- Send Leading Digit toggles sending or not sending a leading ("start bar code") digit. Default is "Send".
- Send Check Digit toggles whether or not to send a check digit. Default is “No Send”.
- Zero Expansion adds 0s to the bar code output to change the output format to UPC-A. Default is "No".
- Enable NSC=1 allows the output of a UPC-E bar code with a first digit of "1". Default is "No".
EAN-13
- Enabled toggles the ability for the keyboard/scanner to read EAN-13 on or off. Default is "Yes".
- Code ID is a user-definable identification letter for EAN-13, which is referred to in the “Use Code ID” function (see page 11). Default is letter “F”.
- Send Leading Digit toggles sending or not sending a leading ("start bar code") digit. Default is "Send".
- Send Check Digit toggles whether or not to send a check digit. Default is “Send”.
- Bookland EAN toggles whether or not to send the EAN-13 bar code data in Bookland EAN (ISBN) format. Default is "No".
EAN-8
- Enabled toggles the ability for the keyboard/scanner to read EAN-8 on or off. Default is "Yes".
- Code ID is a user-definable identification letter for EAN-8, which is referred to in the “Use Code ID” function (see page 11). Default is letters “FF”.
- Send Leading Digit toggles sending or not sending a leading ("start bar code") digit. Default is "Send".
- Send Check Digit toggles whether or not to send a check digit. Default is "Send".
Code 11
- Enabled toggles the ability for the keyboard/scanner to read Code 11 on or off. Default is "No".
- Code ID is a user-definable identification letter for Code 11, which is referred to in the “Use Code ID” function (see page 11). Default is letter “J”.
- Check Digit Number defines the check digit correct result to be either "1" or "2". Default is "2".
- Send Check Digit toggles whether or not to send a check digit. Default is "No Send".
- Minimum Length defines the minimum length the user will accept for a valid bar code. Default is "1".
- Maximum Length defines the maximum length the user will accept for a valid bar code. Default is "48".
Delta Code
- Enabled toggles the ability for the keyboard/scanner to read Delta Code on or off. Default is "No".
- Code ID is a user-definable identification letter for Delta Code, which is referred to in the “Use Code ID” function (see page 11). Default is letter “D”.
- Calculate Check Digit toggles whether or not to calculate a check digit. Default is "Yes".
- Send Check Digit toggles whether or not to send a check digit. Default is "Send".
Supplement Code (for UPC-E)
- Two Supplement Code toggles whether the two digit supplemental bar code is to be recognized. Default is "No".
- Five Supplement Code toggles whether the five digit supplemental bar code is to be recognized. Default is "No".
- Must Present toggles whether or not the supplemental bar code must be present in order to output data. Default is "Yes".
- Insert Space Separator toggles whether or not to output a space between the main and supplemental bar codes. Default is "No".
Bar Code Symbologies, continued
Label Code IV and V
- Enabled toggles the ability for the keyboard/scanner to read Label Code IV and V on or off. Default is "No".
- Code ID is a user-definable identification letter for Code IV and V, which is referred to in the “Use Code ID” function (see page 11). Default is letter “B”.
- Send Check Digit toggles whether or not to send a check digit. Default is "Send".
Data Editing
Data Editing is a powerful function that can give you tremendous control over how data is exported from the scanner/reader/keyboard.
After clicking on "Data Editing" the data editing icons become active.
Click on the icon with the blue circle and white plus sign.

The “Define Formula” pop-up box to the right appears, which is divided into two sections: “Qualifier” and “Modifier”.
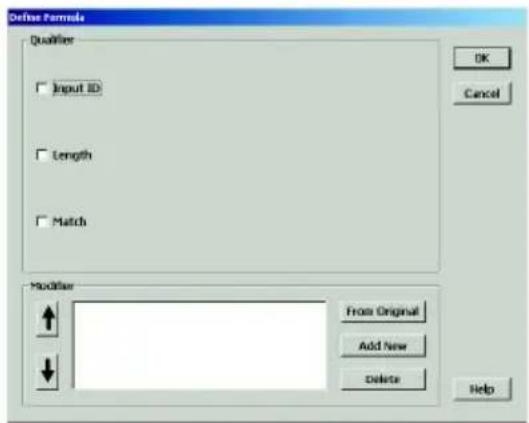
Qualifier
The Qualifier section defines the conditions that must be present for the bar code to be modified, such as what type of bar code it must be (Code 39, EAN-13, etc.), what length the bar code must be, or what characters (defined by a match string) the bar code must contain. When the conditions of the Qualifier are met, the bar code is then modified according to the rules defined in the “Modifier”, below.
Modifier
The Modifier section contains three selections: "From Original", "Add New", and "Delete".
From Original extracts the desired data from the existing bar code.
The Start Parameter defines the beginning of the string of data that is to be output. The start parameter can either be defined by position starting from the beginning ("From Position"), or a specific number of characters from the end of the string ("From Last Position"), or a specified number of characters before or after a user-defined character string ("After Matching").
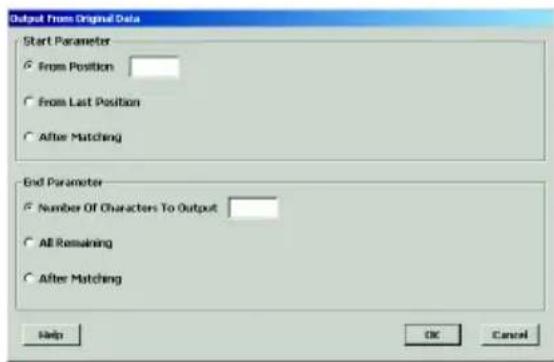
The End Parameter defines the end of the string of data that is to be output. Three options are available: "Number Of Characters To Output", "All Remaining", and "After Matching". The first two are self-explanatory. "After Matching" defines the end as a specified number of characters before or after a user-defined character string.
Data Editing, continued
Even if the original bar code data is not modified, if additional characters are to be added (see “Add New”, below) the original Start Parameter must be defined as From Position “1” and the End Parameter defined as “All Remaining”, otherwise, none of the original data will be output.
Add New adds characters (printing and non-printing) to the data output from the scanner/reader. These characters can be added before and/or after the actual scanned data (see "Move Up / Move Down", below). Pre-defined characters include:
: Tab : Carriage Return : Line Feed
•: Any Digit (data editing) - : Any Letter (data editing)
- <^*> : Interblock Delay (data editing)
- <">: " (quotation marks)
- : character in hexadecimal notation
- <<<: < (less than)
-
: > (greater than)
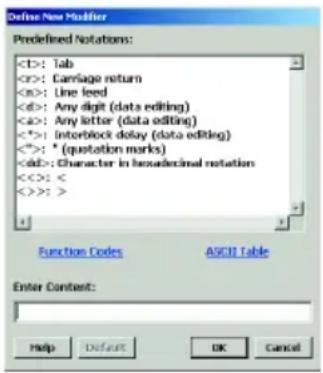
Characters must be bracketed by < > symbols.
Letters and numbers should be represented in hexadecimal format (accessible in a linked menu). For instance, the lower-case letter "t" should be entered as <74> and the numeral 5 should be entered as <35>.
Function codes (F keys, Cursor up, Enter, etc.) can also be inserted via hexadecimal code (accessible in a linked menu).
Delete deletes existing modifier strings.
Move Up / Move Down moves the modifiers up and down in relation to each other. The top modifier will be performed first and each one down the list will be performed in sequence. The original data (modified or unmodified) will be output according to its position in the modifier sequence.

Arrange Formulas
After the formulas have been created, they must be arranged in the optimum sequence by selecting formulas and using the "Move Formula" icons (see page 5). This sequence is usually according to their qualifier - from least likely to occur to most likely to occur.
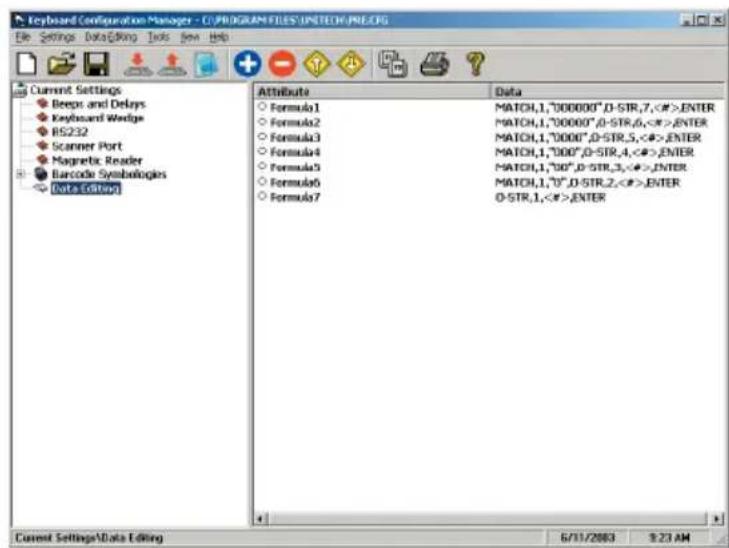
In the example pictured above, a series of formulas are designed to output all the data in a bar code that follows a series of “0”s. For instance, if the actual bar code is “000045678”, the desired output would be “45678” (the original minus all the 0s occurring at the beginning of the string). If there are six 0s (Formula 1), then the output starts at the seventh position. If there are five 0s (Formula 2), then the output starts at the sixth position, etc.
If, instead, we were to place the qualifier for two 0s above (before) the qualifier for six 0s, then the formula stipulating two 0s would activate even if there were six 0s in the bar code because the qualifier would stop looking for 0s after it had found two. In this case, all qualifiers with three or more 0s would be disregarded, which would not be a desirable result.
The “Everything Else” Formula
If a formula is entered into the Data Editing area, then all scanned bar codes will be evaluated according to this formula. If the scanned bar code does not satisfy the requirements of the Qualifier (see page 28), then no data is output. Practically speaking, the scanner has been set up to scan only bar codes that are defined by the Qualifier. You will not be able to scan other types of bar codes. The answer to this problem is to end the sequence of formulas with a formula that has no Qualifier and whose Modifier includes all the scanned data (starts at position 1 and outputs “all remaining”). An example of this can be seen as Formula 7 above.
KEY PROGRAMMING
92 of the 104 keys of your KP3700 keyboard (88 of the 100 keys on the KP3800) can be programmed to output characters, macros, or functions that the user defines. One common alternative key re-mapping scheme might be a Dvorak keyboard layout. Another example would be to assign price discount computation functions to specific key combinations.
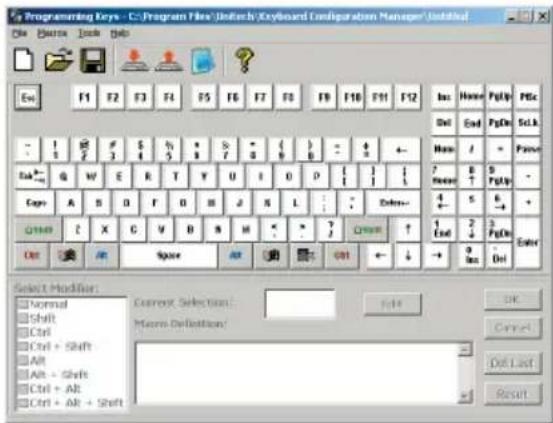
Click the Key Programming icon (see page 5) and the screen to the right appears. Across the top are the usual Windows icons of “New File” (or factory default), “Open File”, and “Save File”. In addition are the icons for “Download to Keyboard”, “Upload from Keyboard”, and “Test Pad”. Lastly there’s a “Help” icon.
Programming the Keys
Programming the keys is simple:
- In the program window, click on the key to be modified and its character appears in the "Current Selection" box. Gray colored keys (in the program window) cannot be modified.
- Select a modifier from the "Select Modifier" box. If the alphabetical keys are to be re-mapped (like a Dvorak layout), then both "Normal" and "Shift" modifiers need to be defined for lower and upper case. Only one modifier can be defined at a time, but each programmable key can be modified in 8 different ways. Each of the applied modifiers will have a checkmark in its corresponding box. View the effects of each of the modifiers in the "Macro Definition" area by selecting each of them.
- Click the "Edit" button. Define the new key output in the "Macro Definition" box either by keyboard or mouse (in the program window). If you make a mistake, click "Delete Last".
- Click the "Download to Keyboard" icon (see above). The "Good Read" LED on the keyboard will light up during file transfer. After a successful download, you will be asked if you want to perform a quick test.
Examples
To Re-Map One Key:
In the Key Programming program, click on the letter “T” on the keyboard graphic. The “T” key becomes red and the “Select Modifier” area becomes active. Make sure that only “Normal” is checkmarked in the “Select Modifier” area - if it isn’t, then double-click it. Click the “Edit” icon and click (on the software keyboard) the “Y”. Click “OK”.
Then double-click “Shift” in the “Select Modifier Area”. Click “Edit”, and click the “Shift” key - note that the shift key becomes dark to represent its depressed state. Click the “Y” key and then click the “Shift” key again to undepress the shift key. Click “OK”.
At this point you can program another key as above, or you can download the new settings to the keyboard by clicking the “Download” icon (see page 5). During download the “Good Read” LED on the keyboard will flash.
You have now programmed the "T" key to output a "Y".
To Assign Functions to Keys:
In the Key Programming program, click on the “F6” key. The “F6” key becomes red and the “Select Modifier” area becomes active. Double-click on the modifier if required, otherwise make sure that only “Normal” is selected. Click “Edit”, and using the software keyboard click “Tab”, “Tab”, and “Enter”. Click “OK” and then click the “Download” icon (see page 5) to download this new setting into the keyboard. Now, pressing the “F6” key on your keyboard will result in two tabs followed by an Enter.
Save Settings
Save your new settings to a file by clicking the “Save Program” icon (see page 4) and selecting a name and location for your new keyboard format. An unlimited number of different keyboard settings can be saved wherever you want and later accessed.
Reset to Factory Default
To reset your keyboard back to factory default, click the “New File” icon (see page 4). Name and save the current settings if necessary when prompted, and download the new file (factory default) by clicking the “Download” icon (see page 4).
PROGRAMMING VIA SCANNER INPUT
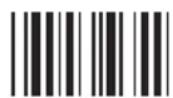
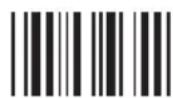
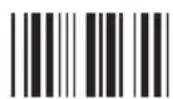
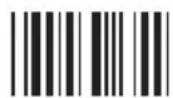
In addition to the Keyboard Configuration Manager software, your Unitech keyboard can also be configured via undecoded (TTL) bar code scanner input. See page 2 for scanner interface requirements.
The concept is fairly simple: Parameters are associated together into groups. For instance, on page 37, “Beep Tone”, “Interblock Delay”, and “Intercharacter Delay” form a group called “Beeps and Delays”.
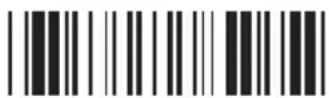
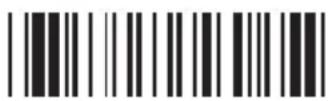
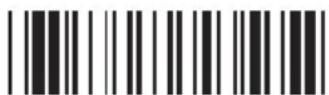
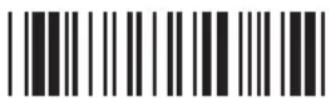
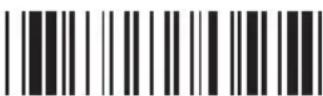
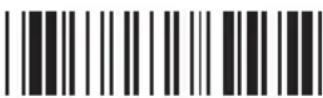
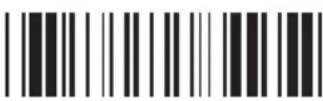
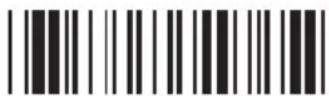
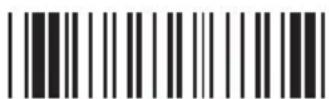
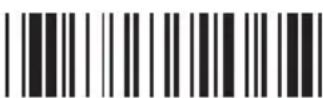
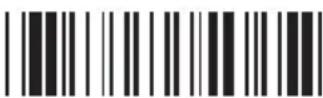
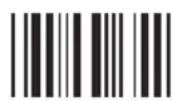
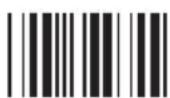
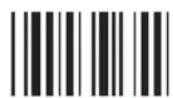
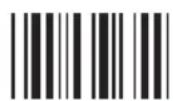
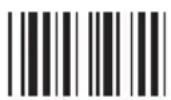
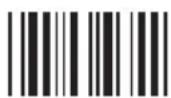
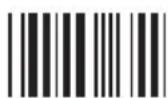
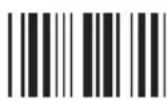
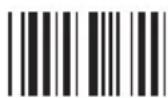
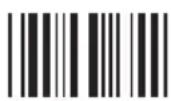
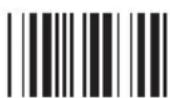
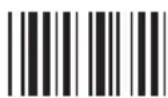
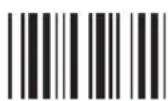
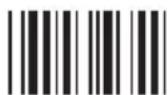
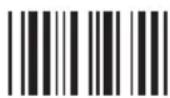
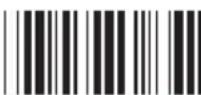
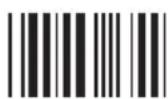
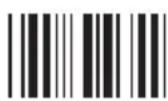
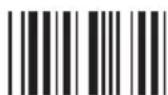
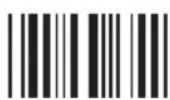
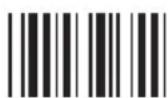
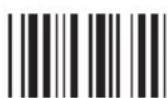
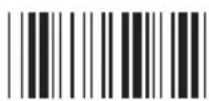
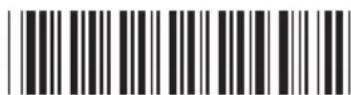
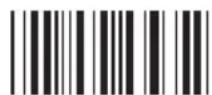
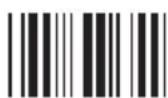
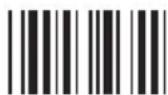
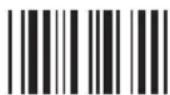
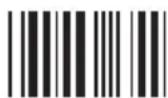
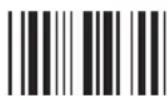
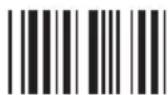
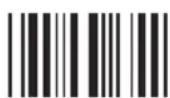
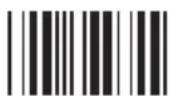
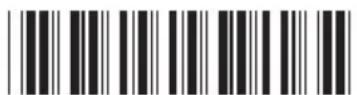
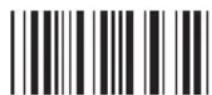
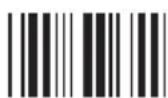
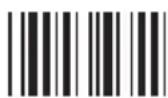
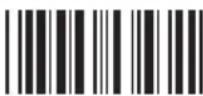
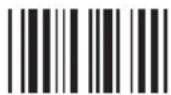
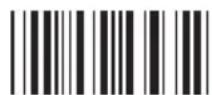
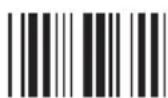
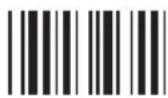
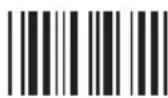
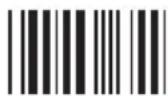
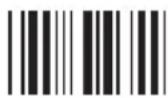
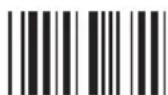
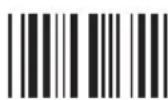
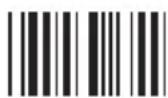
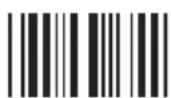
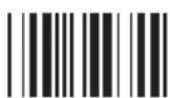
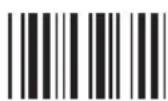
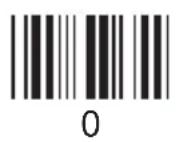
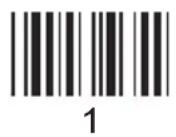
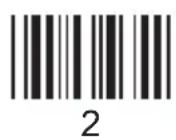
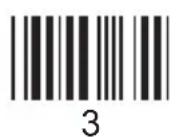
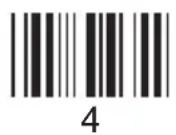
In order to modify a particular parameter, first you must scan an "Enter Group X" bar code to start the procedure. For instance, to change the Beep Tone, first you must scan the "Enter Group 2" bar code. The keyboard will beep three times and the "Good Read" light on the keyboard will begin to flash and will continue flashing as long as the keyboard is in configuration mode.
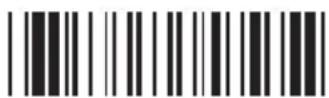
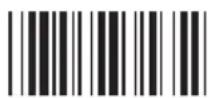
Then you must scan the bar code of the parameter you'd like to modify. To modify the Beep Tone, scan the "A1" label.
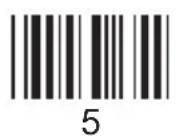
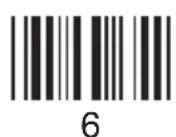
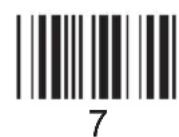
Then select a number along the left side of the page that corresponds with the modification you wish to make. To set the Beep Tone to "High", scan the "3" label. Please note that factory default settings are printed in bold face.
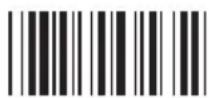
If you'd like to modify another parameter within the same group, scan another parameter label now. To change “Intercharacter Delay”, scan the “A3” label. Then scan the number that corresponds with your requirements.
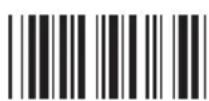
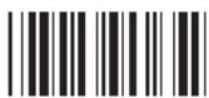
After you're finished modifying your selected parameters in “Beeps and Delays”, scan the “Exit” bar code at the bottom of the page to end the modification session. The keyboard will emit a double beep and the “good Read” light will stop flashing.
An easy alternative programming method is to simply scan in the bar codes in the Quick Setup labels on the next page, if appropriate.
Please note that it is preferred that you use an Undecoded Scanner to program your keyboard. If you must use a decoded scanner (with an undecoded wand type cable - not RS232 - see page 2), the scanner must be set to Wand Emulation or Undecoded mode. Please be aware that a few keyboard parameters cannot be modified by scanner input from a decoded scanner.
Quick Setup Bar Codes
Device Type
PC AT (PS/2)
USB
Code 39
Wand Emulation
PS/2
IBM Terminal

Serial Interface
Macintosh
Keyboardless
Terminal Wedge
Inter-Character Delay
1 ms
Scanner Mode Code

Trigger

Flash
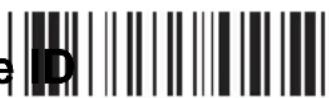
20 ms
Terminator
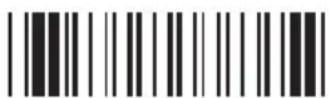
Enter
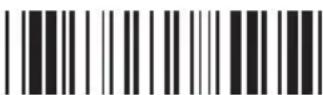
No
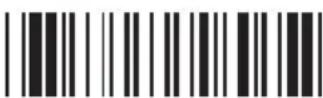
Yes
Beep

None
Medium
Field Exit
Scan Code
U.S.
Alt Key
34 Keyboard Manual
Quick Setup Bar Codes, continued
EAN-8
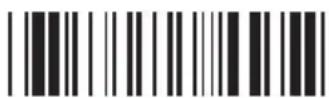
Default
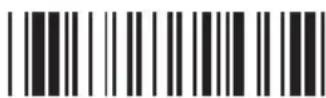
Cut Leading Digit
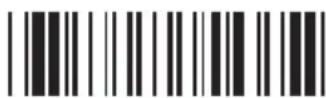
Cut Check Digit
UPC-A
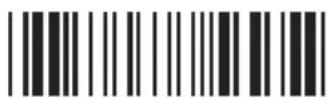
Default
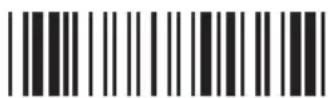
Cut Leading Digit
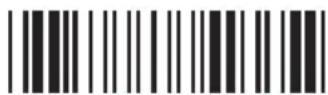
Cut Check Digit
EAN-13
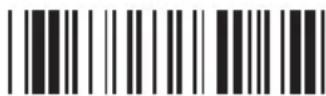
Default
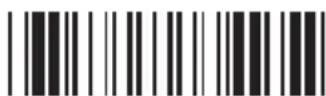
Cut Leading Digit
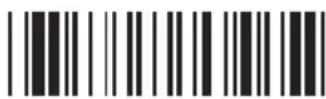
Cut Check Digit
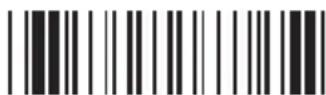
ISBN Conversion
Display Version

Display Version
UPC-E
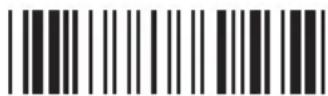
Default

Cut Leading Digit
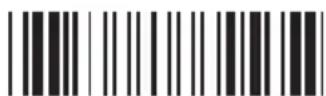
Send Check Digit
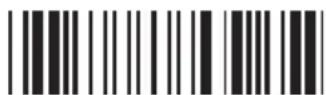
UPC-A Conversion
Menu Setup

Enable / Disable
Supplemental Code
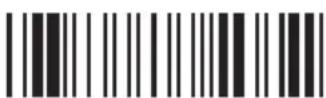
No
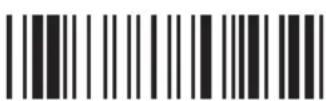
Yes
Factory Default
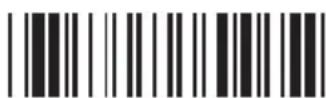
Factory Default
Device Selection and Default
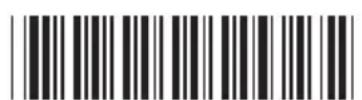
Enter Group 1
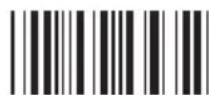
Group Default
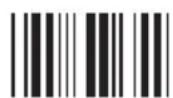
0
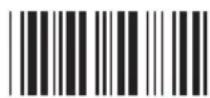
Factory Default
1
Device ID Device Type
00 - IBM PC/XT
01 - IBM PC/AT, PS/2 MOD 40, 60, 80, USB etc.
2
02 - IBM PS/2 MOD 30 (8086) 25, 56, 70, 90
03 - Macintosh (ADB Port)
04 - Serial Wedge

3
06 - Keyboardless Wedge (PC/AT, Notebook)
07 - Wand Emulation (with Code 39 output)
08 - IBM 3196 / 3197
4
09 - IBM 3476 / 3477
10 - IBM 3191 / 3192 / 3270PC
11 - IBM 3486 / 3487 / 3488
5
13 - IBM 3471 / 3472 (3179)
15 - IBM 3180
17 - IBM 3151
6
19 - IBM 5550-5P
20 - IBM 5550-6P
25 - Terminal Wedge
7
26 - Wand Emulation (Native Output)
32 - DEC VT220/320/420
27 - Dorio PC Keyboard
8
28 - Dorio ANSI Keyboard
35 - Serial TTL Inverted
9
Exit
Beeps and Delays
Enter Group 2
Group Default
0
1
2
3
4
5
6
7
8
9
Beep Tone: (see page 7)
2 - Medium
0 - None
1 - Low
3 - High
4 - Low to High
5 - High to Low
A1
Interblock Delay: (see page 7)
0 - 0 ms
1 - 10 ms
2 - 50 ms
3 - 100 ms
4 - 500 ms
5 - 1 seconds
6 - 3 seconds
7 - 5 seconds
A2
Intercharacter Delay:
(see page 7)
0 - 0 ms
1 - 1 ms
2 - 2 ms
3 - 5 ms
4 - 10 ms
5 - 30 ms
6 - 50 ms
7 - 100 ms

A3

Exit
Keyboard Interface
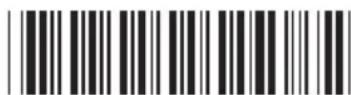
Enter Group 3
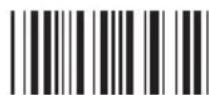
Group Default
0
Function Code: (see page 8)
0 - Off 1 - ON
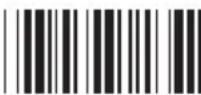
B1
1
Caps-Lock: (see page 8)
0 - Auto Trace (PC/AT)
1 - Lower Case 2 - Upper Case

B2
2
Language (For PC/AT): (see page 8)
0 - U.S. 1 - U.K. 2 - Swiss
3 - Swedish 4 - Spanish 5 - Norwegian
6 - Italian 7 - German 8 - French
9 - Alt Key Mode : - Danish
B3
3
Use Number Keypad Digits: (see page 9)
0 - Disable 1 - Enable

B8
4
5
6

7
8
9
:

Exit
Scanner Port
Enter Group 4
Group Default
0
Terminator: (see page 11)
0 - Enter 1 - Return (on keypad)
3 - None2 - Field Exit or Right Ctrl
1

Exit or Right Ctrl
2
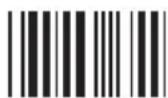
Code ID: (see page 11)
0 - disable 1 - Enable
Note: This setting does not affect EAN128
Code ID. EAN128 has its own Code ID setting on page 22.
D2
3
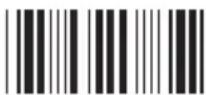
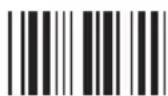
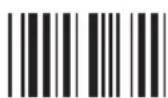
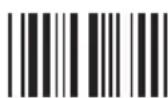
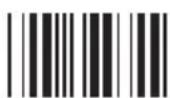
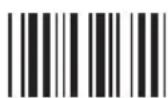
Define Code ID: (see pages 20 to 27)
00 - Code 39 Full ASCII 10 - Standard 2 of 5
01 - Code 39 Standard 11 - MSI Code
02 - EAN-13 12 - EAN 128
03 - UPC-A 13 - Code 32 (Italian pharmacy)
04 - EAN-8 14 - Delta Code
05 - UPC-E 15 - Label Code
06 - Interleaved 2 of 5 16 - Plessey Code
07 - Codabar 17 - Code 11 (Special)
08 - Code 128 18 - China Postal Code (Toshiba Code)
09 - Code 93
* Scan two digits to choose a code (symbology), then scan characters from the Full ASCII table (pages 52 to 55) to define the code ID.
D3
4
5
6
7

8
9
Double Verification: (see page 11)
0 - Off 1\~7 - On (Verify 1\~7 times)

D4
Scanning Mode: (see page 12)
0 - Trigger 1 - Flashing 2 - Multiscan
3 - One Press One Scan 4 - Test Mode
5 - Old Laser flash Mode 6 - Continuous

D5
Scanner Port, continued
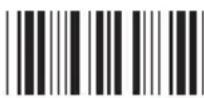
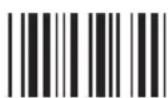
Label Type: (see page 12)
0 - Positive 1 - Positive and Negative
D6
0
1
2
3
4
5
6
7

8
9
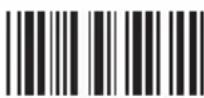
Aim Function for Long Range Laser
Engine: (see page 12)
0 - Disable 1 - Enable
D7
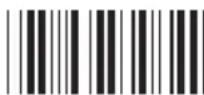
Data Length (Two Digits) Send:
0 - Disable 1 - Enable
D8
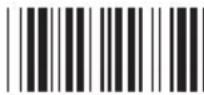
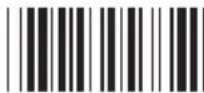
A Preamble or Postamble can be inserted before or after the scanned bar code output (a Tab, for instance).
To insert a postamble, scan the "Postamble" (00) bar code, scan your selected postamble from the Function Code (page 51) or ASCII Code (pages 52 to 55) charts, and then scan the "Postamble" (00) bar code once again.
To insert a preamble, follow the same procedure, but using the "PP" bar code.
Preamble
PP
Postamble
00
Exit
Magnetic Reader
Enter Group 5
Group Default
0
Terminator (see page 17)
0 - Enter 1 - Return (on digits keypad)
2 - Field Exit or Right Ctrl 3 - None

E1
1
Start/Stop Sentinel (see page 17)
0 - No Send 1 - Send
E2
2
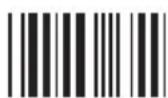
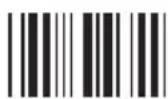
Track Selection (see page 17)
0 - All Tracks 1 - Track 1 & Track 2
2 - Track 1 & Track 3 3 - Track 2 & Track 3
6 - Track 34 - Track 1 5 - Track 2
3

E3
4
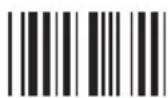
Track 2 Account Number Only
(see page 18)
0 - No 1 - Yes

E4
5
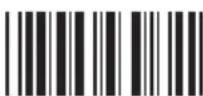
Separator Character (see page 18)
Scan a character from Full ASCII table
Default: None
E5
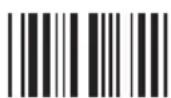
6
Output Data Even If Other Selected
Tracks May Have Errors (see page 18)
0 - No 1 - Yes

E6
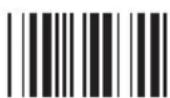
7

8
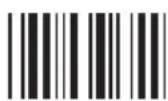
9
Magnetic Reader, continued
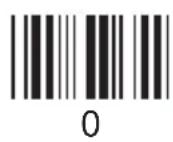
Track I Output Sequence:
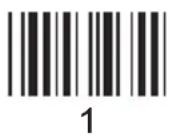
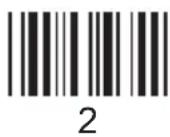
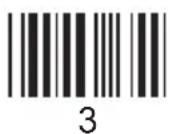
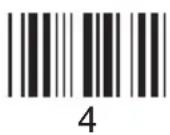
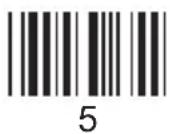
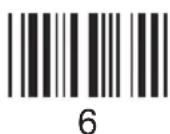
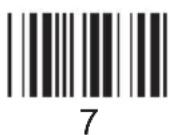
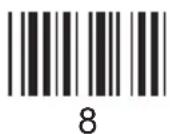
After scanning the PP label to the right, scan the numbers corresponding to the track parameters (table below) to arrange the Track 1 output sequence. To insert separator characters, also scan them among the sequence numbers from the ASCII Table (pages 52 to 55) or from the Function Code Table (page 51).
For example, to output First Name - Tab - Last Name, first scan the "PP" label, then scan the number 3, Tab, and number 2, and then scan "Exit". Maximum is 16 total characters. Default is "None"

| Number Track 1 Parameter | |
| 1 | Account Number |
| 2 | Last Name |
| 3 | First Name |
| 4 | Expiration Year |
| 5 | Expiration Month |
| 6 | Discretionary Data |
Track II Output Sequence:
Follow the procedure for Track 1 above, but using the parameter table below. Maximum is 8 total characters. Default is None.
| Number Track 2 Parameter | |
| 1 | Account Number |
| 2 | Expiration Year |
| 3 | Expiration Month |
| 4 | Discretionary Data |
Enter Group 6
Group Default
0
1
2
3
4
5
6

7
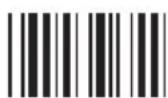
8
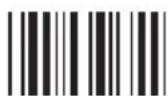
9
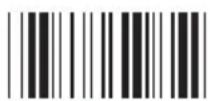
:
Code 39:
0/1 - Disable / Enable
2/3 - Full ASCII / Standard
4 - Check Digit Calculate & Send
5 - Check Digit Calculate, Not Send
6 - Check Digit Not Calculate
7/8 - Send / No Send Start/Stop
9/: - Double Labels Decoding Off / On
0 \~ 48 - Min. Length 0 / Max. Length 48
(See next page for Min./Max. Length procedure)

F1
Interleaved 2 of 5 (ITF):
0/1 - Disable / Enable
2/3 - Fix Length On / Off (by first three reads)
4 - Check Digit Calculate & Send
5 - Calculate Check Digit, Not Send
6 - Check Digit Not Calculate
7 - Suppress First Digit
8 - Suppress Last Digit
9 - Last Digit Not Suppressed
2 \~ 64 - Min. Length 10 / Max. Length 64
(See next page for Min./Max. Length procedure)
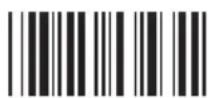
F2
Standard 2 of 5
China Postal Code (Toshiba Code):
0/1 - Disable/Enable
2/3 - Fix Length On / Off ( by first three reads)
4 - Check Digit Calculate & Send
5 - Check Digit Calculate, not send
6 - Check Digit not Calculate
1 \~ 48 - Min. Length 4 / Max. Length 48
(See next page for Min./Max. Length procedure)

F3
| Code 32 (Italian Pharmacy):0/1 - Disable / Enable2/3 - Leading Character Send / No Send4/5 - Tailing Character Send / No Send | 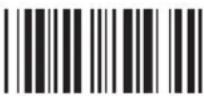 F4 F4 | |
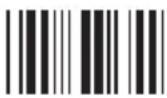 0 0 | Telepen:0/1 - Disable / Enable2/3 - Standard / Numeric Set | 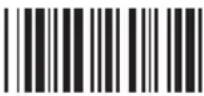 F5 F5 |
 1 1 | UCC/EAN 128:0/1 - Disable / Enable2/3 - Code ID Disable / EnableNote: If EAN128 is disabled, EAN128 labels will be decoded as Code 128 | 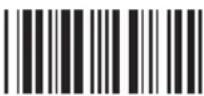 F6 F6 |
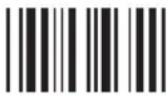 2 2 | ||
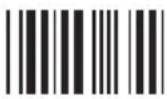 3 3 | Define the EAN128 Fields Separator:Scan from the ASCII Code chart (pages 50 to 53) to define a new fields separator | 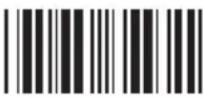 F7 F7 |
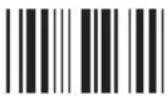 4 4 | Define a Separator for Double Labels:Scan from the ASCII Code chart (pages 52 to 55) to select a new separator for double labels |  F8 F8 |
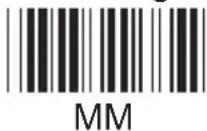
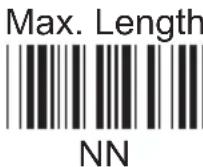
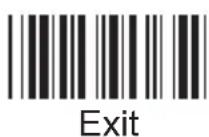
 5 5 | Define Minimum and Maximum LengthTo define minimum or maximum acceptable bar code data length, after scanning the parameter code (F1, F2, or F3) scan the “MM” or “NN” to the right, scan the number(s) to the left, and then scan the “MM” or “NN” again. Then scan “Exit” as usual. |   MM MM  NN NN |
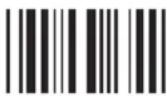 6 6 | ||
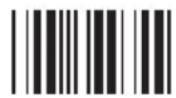 7 7 | ||
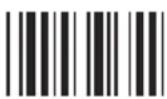 8 8 | ||
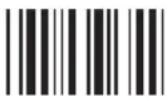 9 9 | 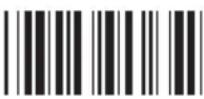 Exit Exit |
Symbologies: Code 128 / MSI / Code 93 / Code 11 / Codabar / Label Code
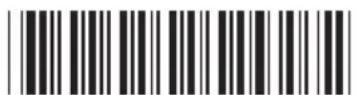
Enter Group 7
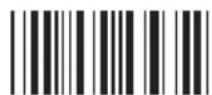
Group Default
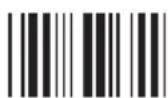
0
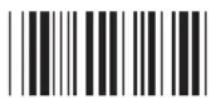
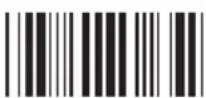
G1
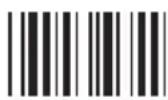
1
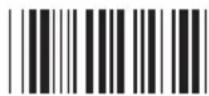
G2
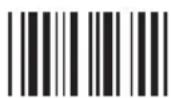
2
G3
3
4
G4
5
6
7

8
9
Code 128:
0/1 - Disable / Enable
1-64 - Min. Length 1 / Max. Length 64
(See next page for Min./Max. Length procedure)
MSI / Plessey Code:
0/1 - Disable / Enable
2/3 - Check Digit Send / No Send
4 - Check Digit Double Module 10
5 - Check Digit Module 11 plus 10
6 - Check Digit Single Module 10
1\~16 - Min Length 1 / Max Length 16
(See next page for Min./Max. length procedure)
Code 93:
0/1 — Disable/Enable
1-48 — Min Length 1 / Max Length 48
(See next page for Min./Max. Length procedure)
Code 11: (Special)
0/1 — Disable/Enable
2/3 — One / Two Check Digit
4/5 — Check Send / No Send
1-48 — Min Length 1 / Max Length 48
(See next page for Min./Max. Length procedure)
Codabar:
0/1 - Disable / Enable
2/3 - Start & Stop Send / No Send
4 - Check Digit Calculate & Send
5 - Check Digit Calculate but not Send
6 - Check Digit not Calculate
7/8 - CLSI Format On / Off
3 \~ 48 - Min Length 3 / Max Length 48
(See below for Min./Max. Length procedure)
Label Code IV and V:
0/1 - Disable / Enable
2/3 - Checksum send / No send
Define Minimum and Maximum Length
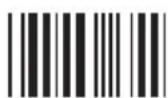
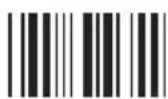
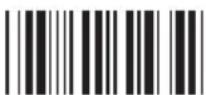
To define minimum or maximum acceptable bar code data length, after scanning the parameter code (G1 through G5) scan the "MM" or "NN" to the right, scan the number(s) to the left, and then scan the "MM" or "NN" again. Then scan "Exit" as usual.
Min. Length
Symbologies: UPC / EAN / Delta Code
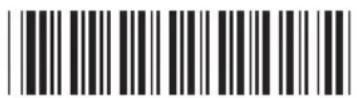
Enter Group 8
Group Default
0
UPC-A:
0/1 — Disable/Enable
2/3 — Leading Digit Send / No Send
4/5 — Check Digit Send / No Send
H1
1
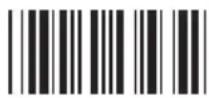
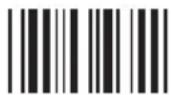
UPC-E:
0/1 - Disable / Enable
2/3 - Leading Digit Send / No Send
4/5 - Check Digit Send / No Send
6/7 - Zero Expansion On / Off
8/9 - Disable / Enable NSC=1
H2
2
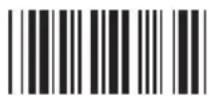
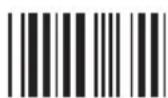
EAN-13:
0/1 - Disable / Enable
2/3 - Leading Digit Send / No Send
4/5 - Check Digit Send / No Send
6/7 - Bookland EAN (ISBN) Enable / Disable
H3
3
EAN-8:
0/1 - Disable / Enable
2/3 - Leading Digit Send / No Send
4/5 - Check Digit Send / No Send
H4
4
Supplement Code:
0/1 - Two Supplement Code Off / On
2/3 - Five Supplement Code Off / On
4 - Transmit if Present
5 - Must be Present.
6/7 - Insert Space Separator / Not Insert
H5
5
Delta Distance Code:
0/1 - Disable / Enable
2/3 - Check Digit Calculate / Not Calculate
4/5 - Check Digit Send / No Send
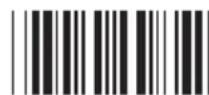
H6
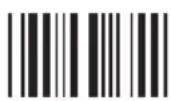
6

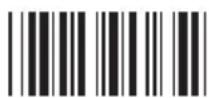
Exit
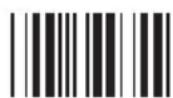
7
8
9
Data Editing:
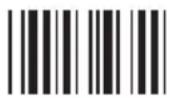
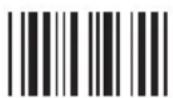
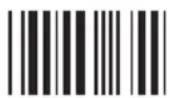
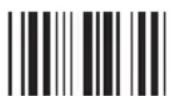
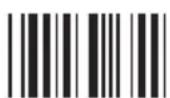
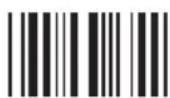
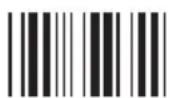
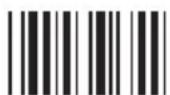
Data Editing allows you to manipulate the bar code data output into a format that you require by scanning in the bar codes on page 50 in addition to Function Codes and ASCII Codes on pages 51 to 55.
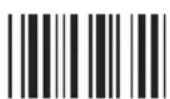
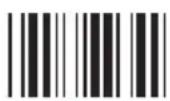
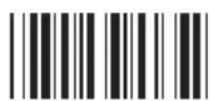
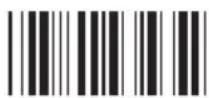
After scanning the “Enter Group 9” bar code, all the subsequent bar code input (except character string units) beginning with “IN_ID” must be separated by scanning comma bar codes, until you scan the final “Enter” followed by the “Exit” bar code. The “Enter Group 9” and the “Enter” barcodes are not followed by commas.
Parameters are grouped into Qualifiers and Modifiers.
Qualifiers specify the conditions that must be met in order for data editing to occur, be it minimum or maximum data length, specific symbologies, or specific character strings present.
Modifiers modify the data output according to pre-set rules by either removing specified parts of the data or adding user-defined data.
When programming the keyboard/scanner, qualifiers must precede modifiers.
Each programming parameter is input according to the following patterns:
Qualifiers:
Input ID - Specific bar code symbologies can be selected for special treatment. The programming bar codes must be entered in the following sequence: IN_ID, ID1, ID2, ..., IDX, - where "IN_ID" announces that the next bar code inputs refer to the various bar code symbologies according to their "Code Type" on page 48. For example, if UPC-A and Code 32 bar codes are to be singled out for data editing, the bar code scanning sequence should be "IN_ID, 3, 13",
Length - Bar codes of specific length can be selected. The programming bar codes must be entered in the following sequence:
LEN,MIN,MAX, - where "LEN" announces that the next bar code inputs refer to the minimum and maximum length bar codes allowable. For example, if we only want data editing to apply to bar codes between 6 and 12 characters long, then the bar code scanning sequence should be "LEN,6,12."
Match - Bar codes with specific character strings can be selected. The programming bar codes must be entered in the following sequence:
MATCH,P1,"S1",P2,"S2",...,PX,"SX", - where "MATCH" announces that the next bar code inputs will define where in the data a specific string will be located, and what characters the string consists of, surrounded by quotation marks. For example, if the bar code to be selected requires the string "efgh" beginning at the 3rd position, the bar code scanning sequence should be "MATCH,3,"efgh",". If we're looking for "efgh" anywhere within the bar code, the sequence should be "MATCH,"efgh", with the "*" character signifying that it could be anywhere in the string.
Modifiers:
Original Data - Part or all of the original data string can be selected. The programming bar codes must be entered in the following sequence:
O-STR,P,N, - where "O-STR" announces that the next bar code inputs refer to where the output should begin and how many characters should be output.
For example, if 7 characters are to be output beginning with the 4th character, the bar code scanning sequence should be "O-STR,4,7",. If we want all the characters after the 4th character output, the sequence should be "O-STR,4,#,", with the "#" character signifying that the entire string should be output. Should you decide that the last two characters should not be output, the sequence would be "O-STR,4,#-2,", with "#-2" specifying all remaining minus 2.
Additional Data - User-specified data can be added by simply surrounding it with quotation marks. For instance, if you want to follow the original data with the characters "123", then simply add "123", after the O-STR parameter. If the additional data is to be added before the original data, then it needs to precede the O-STR parameter. Additional data can be scanned in from the Function Code or ASCII Code pages (pages 51 through 55).
Special Characters
, Comma - Used as a separator between formula parameters, beginning with the IN_ID parameter and ending with the Enter parameter.
“ Quotation Mark - Used to begin and end a character string. A character string bounded by quotation marks is treated as a single unit, and would be written as “abcd”.
* Asterisk - Wild character used to specify any digit or any position.
# Hash Sign - Wild character used to specify any letter or last position.
Finally, end the programming sequence with the "Enter" bar code. Do not follow it with a comma. If you need to add another formula, do so now by scanning the "IN_ID" bar code directly, followed by the rest of the second formula's parameters. Lastly, scan the "Exit" bar code.
Thus, if we want to output just the first five characters only from UPC-A input and follow it with three "0"s, the scanning sequence would be the following:
Enter Group 9 IN_ID, 3, O-STR, 1, 5, "000", Enter Exit
If we only want to treat UPC-A this way, but still want other symbologies to output normally, the scanning sequence would be the following:
Enter Group 9 IN_ID, 3, O-STR, 1, 5, "000", Enter IN_ID, 19, O-STR, 1, #, Enter Exit
Data Editing, continued
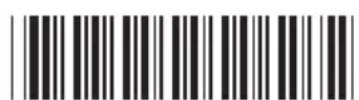
Enter Group 9
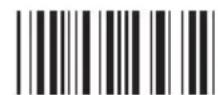
Group Default

0
1
2
3
4
5
6
7
8
9

+
Code Type:
0 - Code 39 Full 10 - S 2 of 5
1 - Code 39 Std. 11 - MSI Code
2 - EAN-13 12 - EAN 128
3 - UPC-A 13 - Code 32
4 - EAN-8 14 - Delta Code
5 - UPC-E 15 - Label Code
6 - 12 of 5 16 - Plessey Code
7 - Codabar 17 - Code 11(Special)
8 - Code 128 18 - China Postal Code
9 - Code 93 19 - All Inputs
Formula Format:
Input ID: IN_ID, ID1, ID2, ..., IDX,
Length: LEN, MIN, MAX,
Match: MATCH,P1,S1,P2,S2,...,PX,SX,
A-String: "abc...",
O-String: O-STR,P,N,
ID1, ID2, etc. = number for Code ID.
P1, P2, etc. = position.
S1, S2, etc. = string, "abc...".
P = number or string for start position.
N = number of char. or string to end position.
Special Characters in this section:
, - delimiter to separate parameters.
" - string specifier.
* - specify any digit or any position.
# - specify any letter or all input.
Review
IN_ID
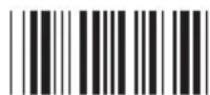
LEN
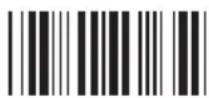
MATCH
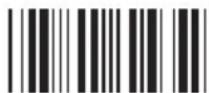
O-STR
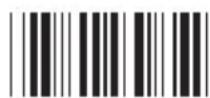
11
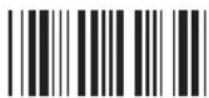
*
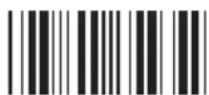
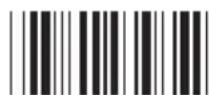
Enter
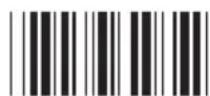
Backspace
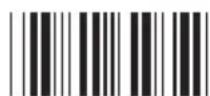
,
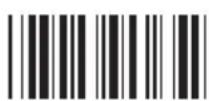
Exit
Function Codes for PC (Code 39)
(Characters in parentheses represent Code 39 bar code printing)
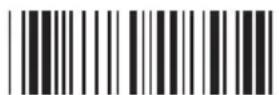
F1 (%VA)
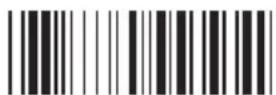
F2 (%VB)
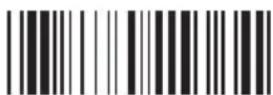
F3 (%VC)

F4 (%VD)

F5 (%VE)

F6 (%VF)
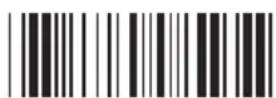
F7 (%VG)
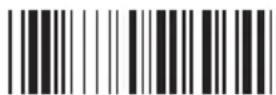
F8 (%VH)
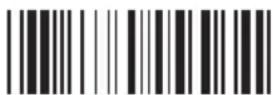
F9 (%VI)
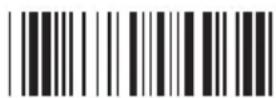
F10 (%VJ)
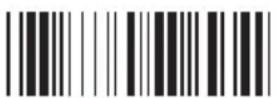
F11 (%VK)
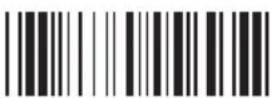
F12 (%VL)
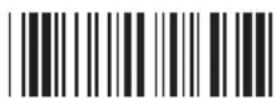
Esc (/FK)
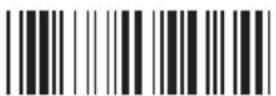
Cursor Up (/FE)
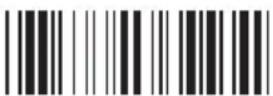
Delete (/FX)
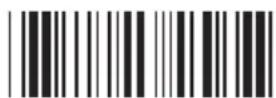
Tab (/FI)
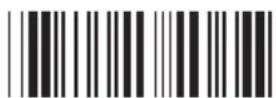
Cursor Down (/FF)
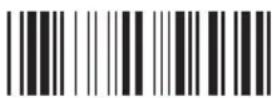
Left Enter (/FL)

Back Tab (/FJ)

Cursor Left (/FD)
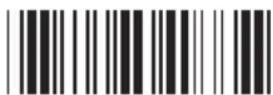
Right Enter (/FM)
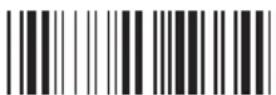
Shift Make (/FP)
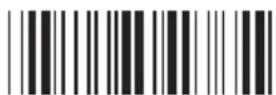
Cursor Right (/FC)

Page Up (/FG)

Shift Break (/FS)

Insert (/FW)
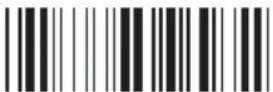
Page Down (/FH)

Ctrl Make (/FQ)
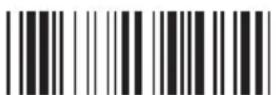
Alt Make (/FR)
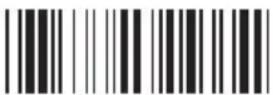
Right Ctrl (/FO)
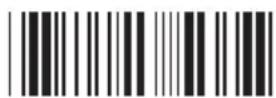
Ctrl Break (/FT)
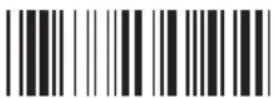
Alt Break (/FU)
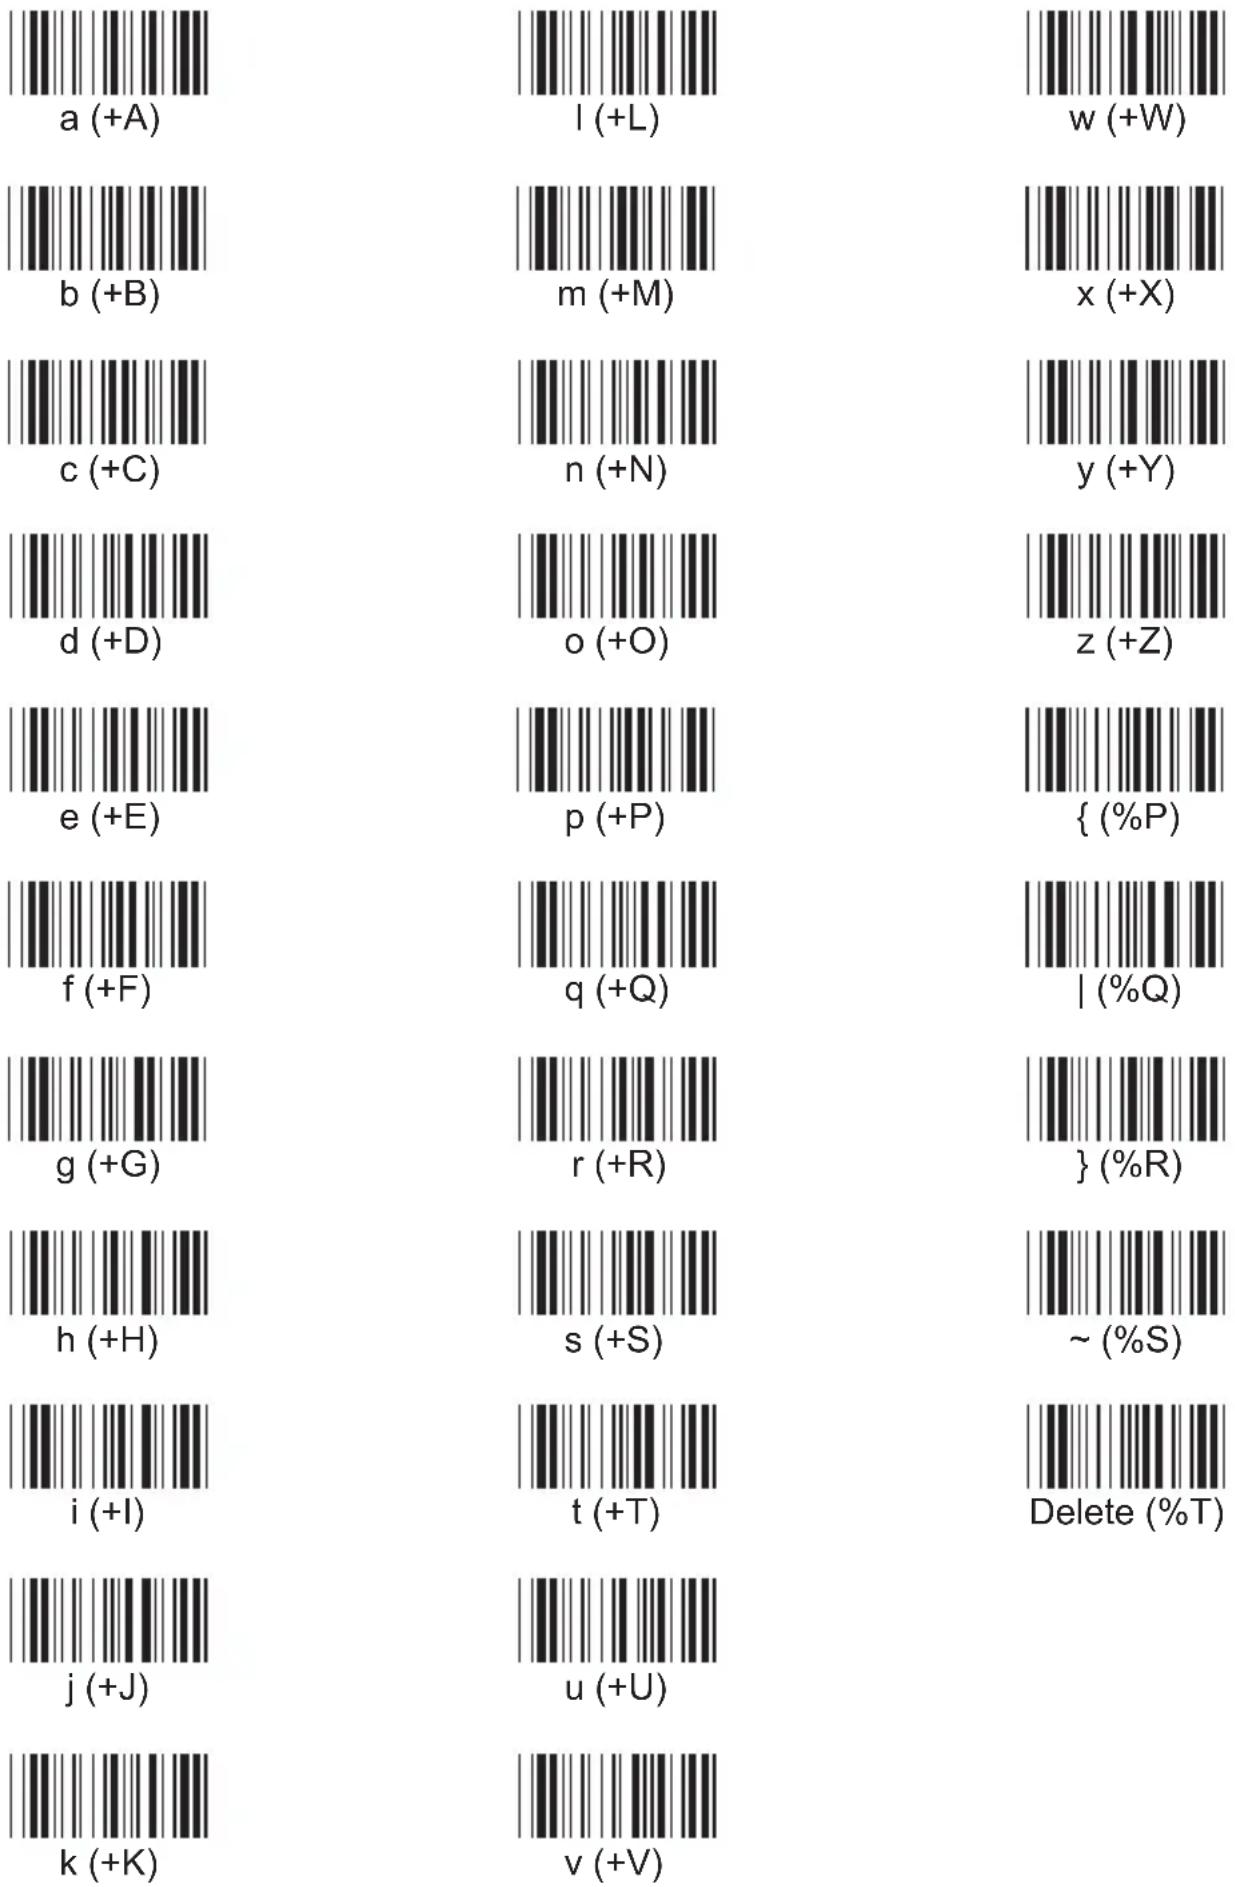
ASCII Chart
(Characters in parentheses represent Code 39 bar code printing)
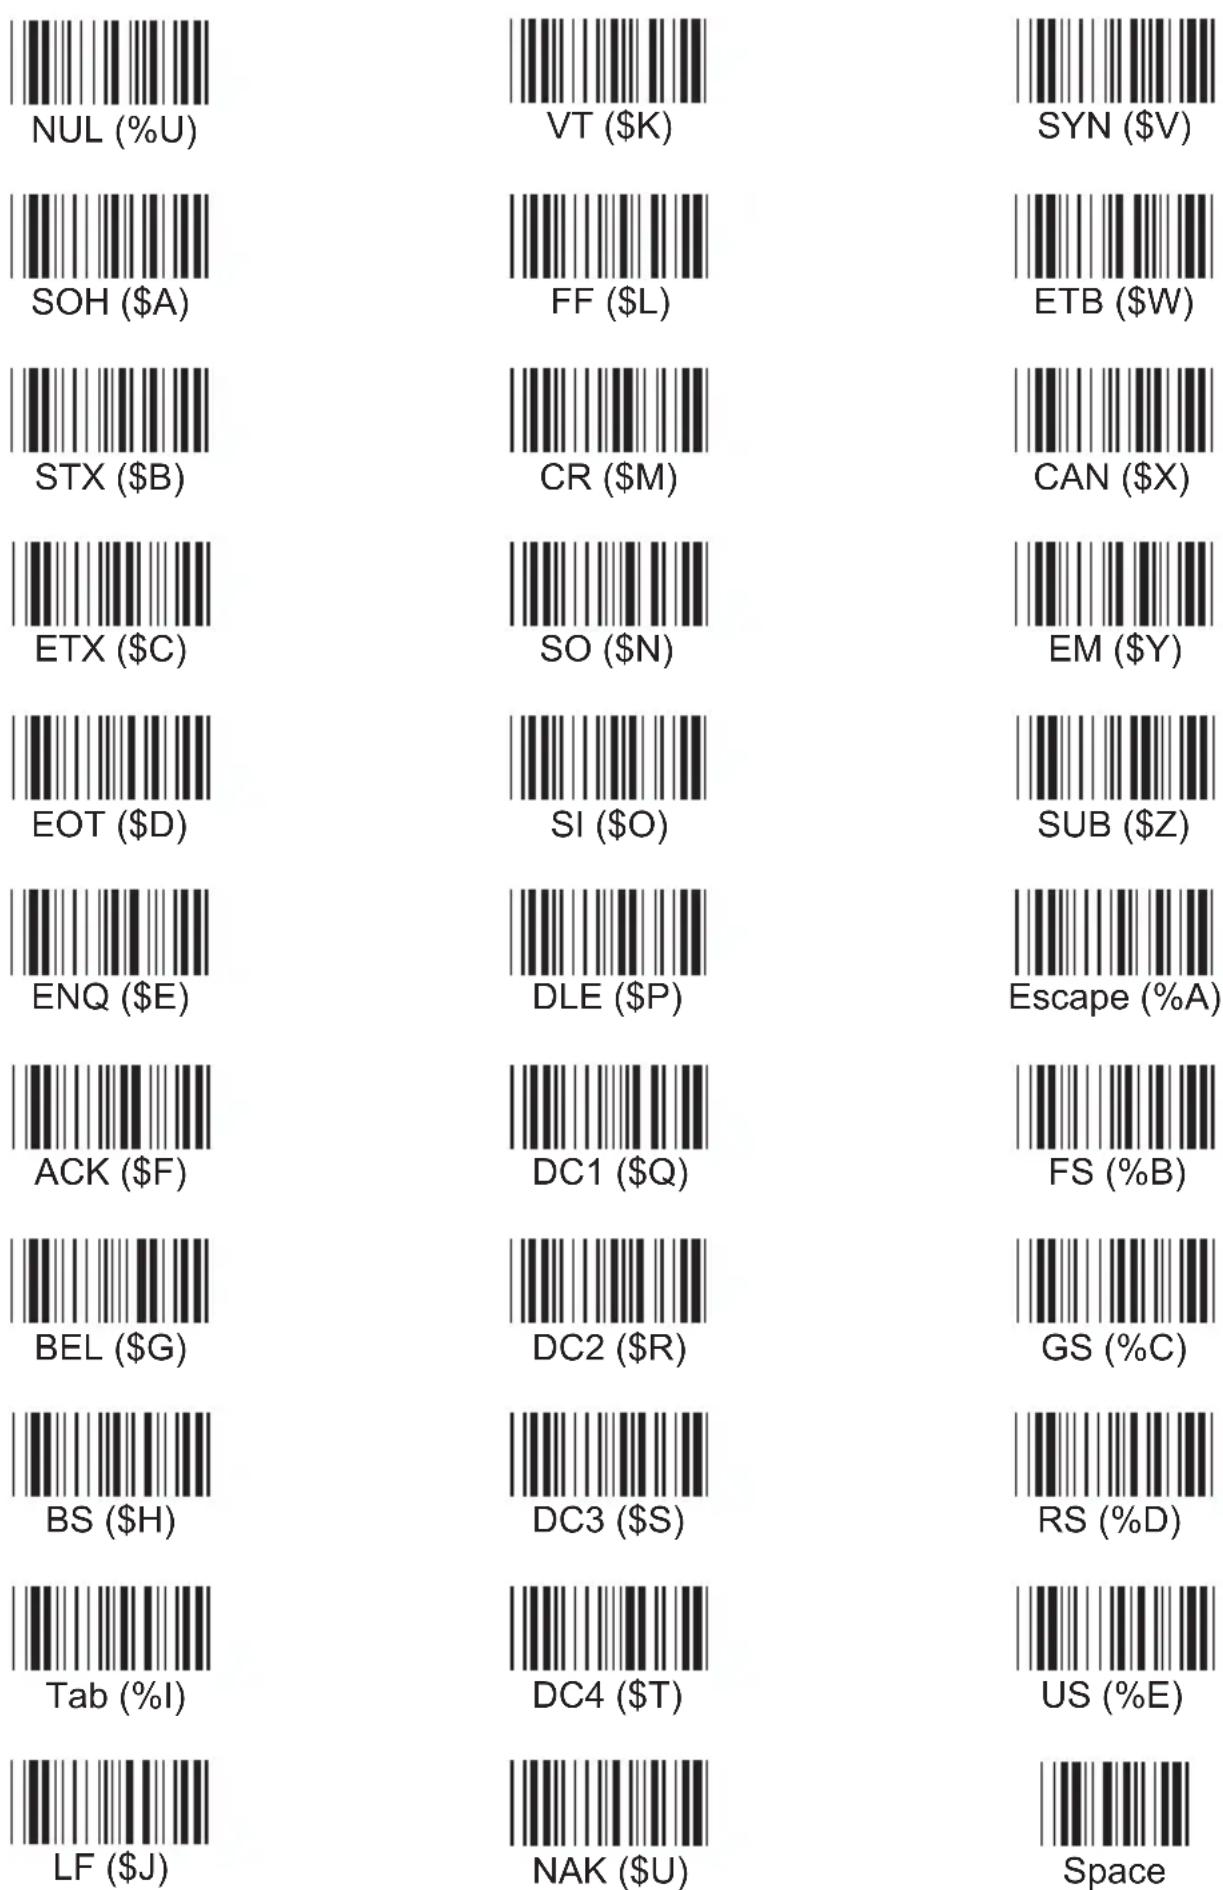
52 Keyboard Manual
ASCII Chart, continued
(Characters in parentheses represent Code 39 bar code printing)
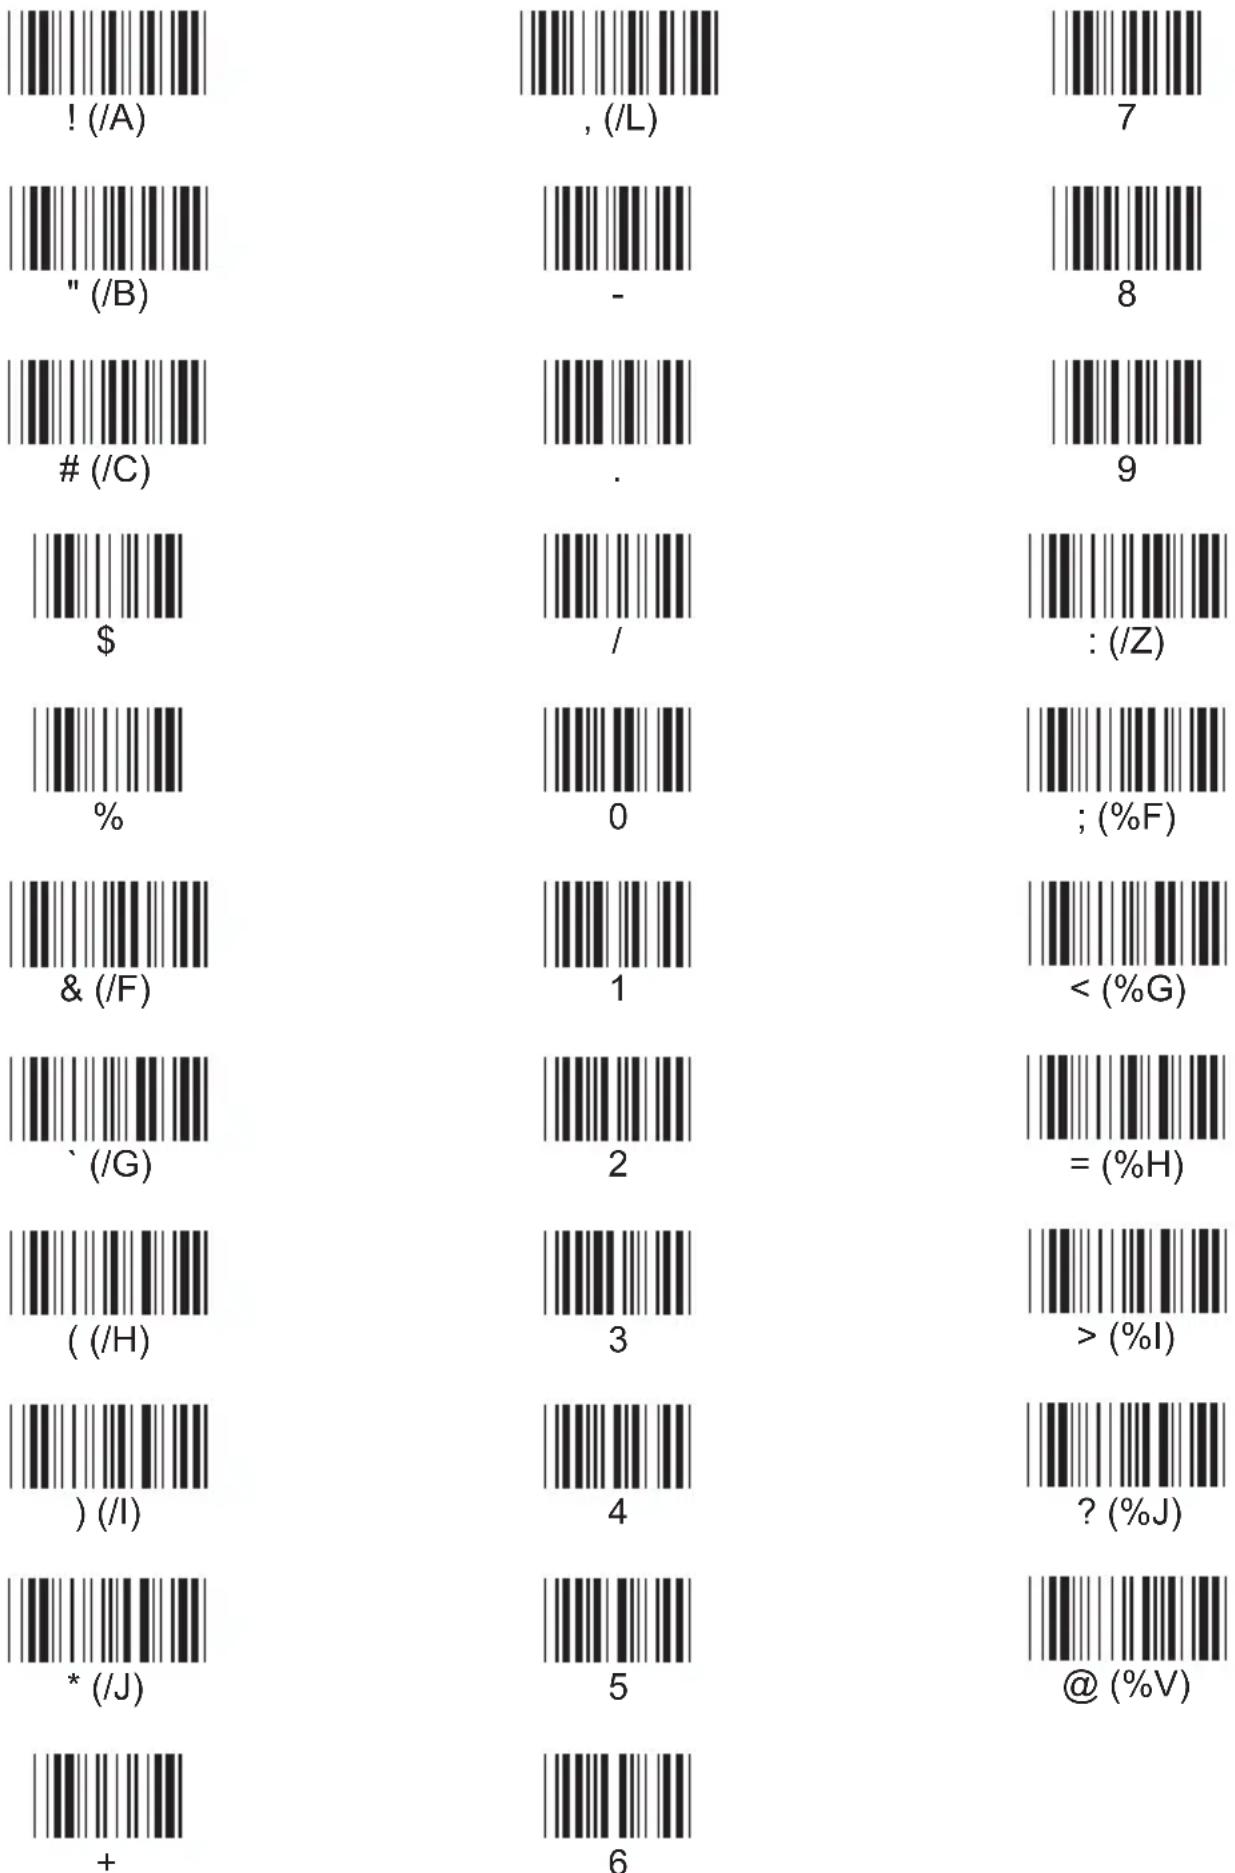
ASCII Chart, continued
(Characters in parentheses represent Code 39 bar code printing)
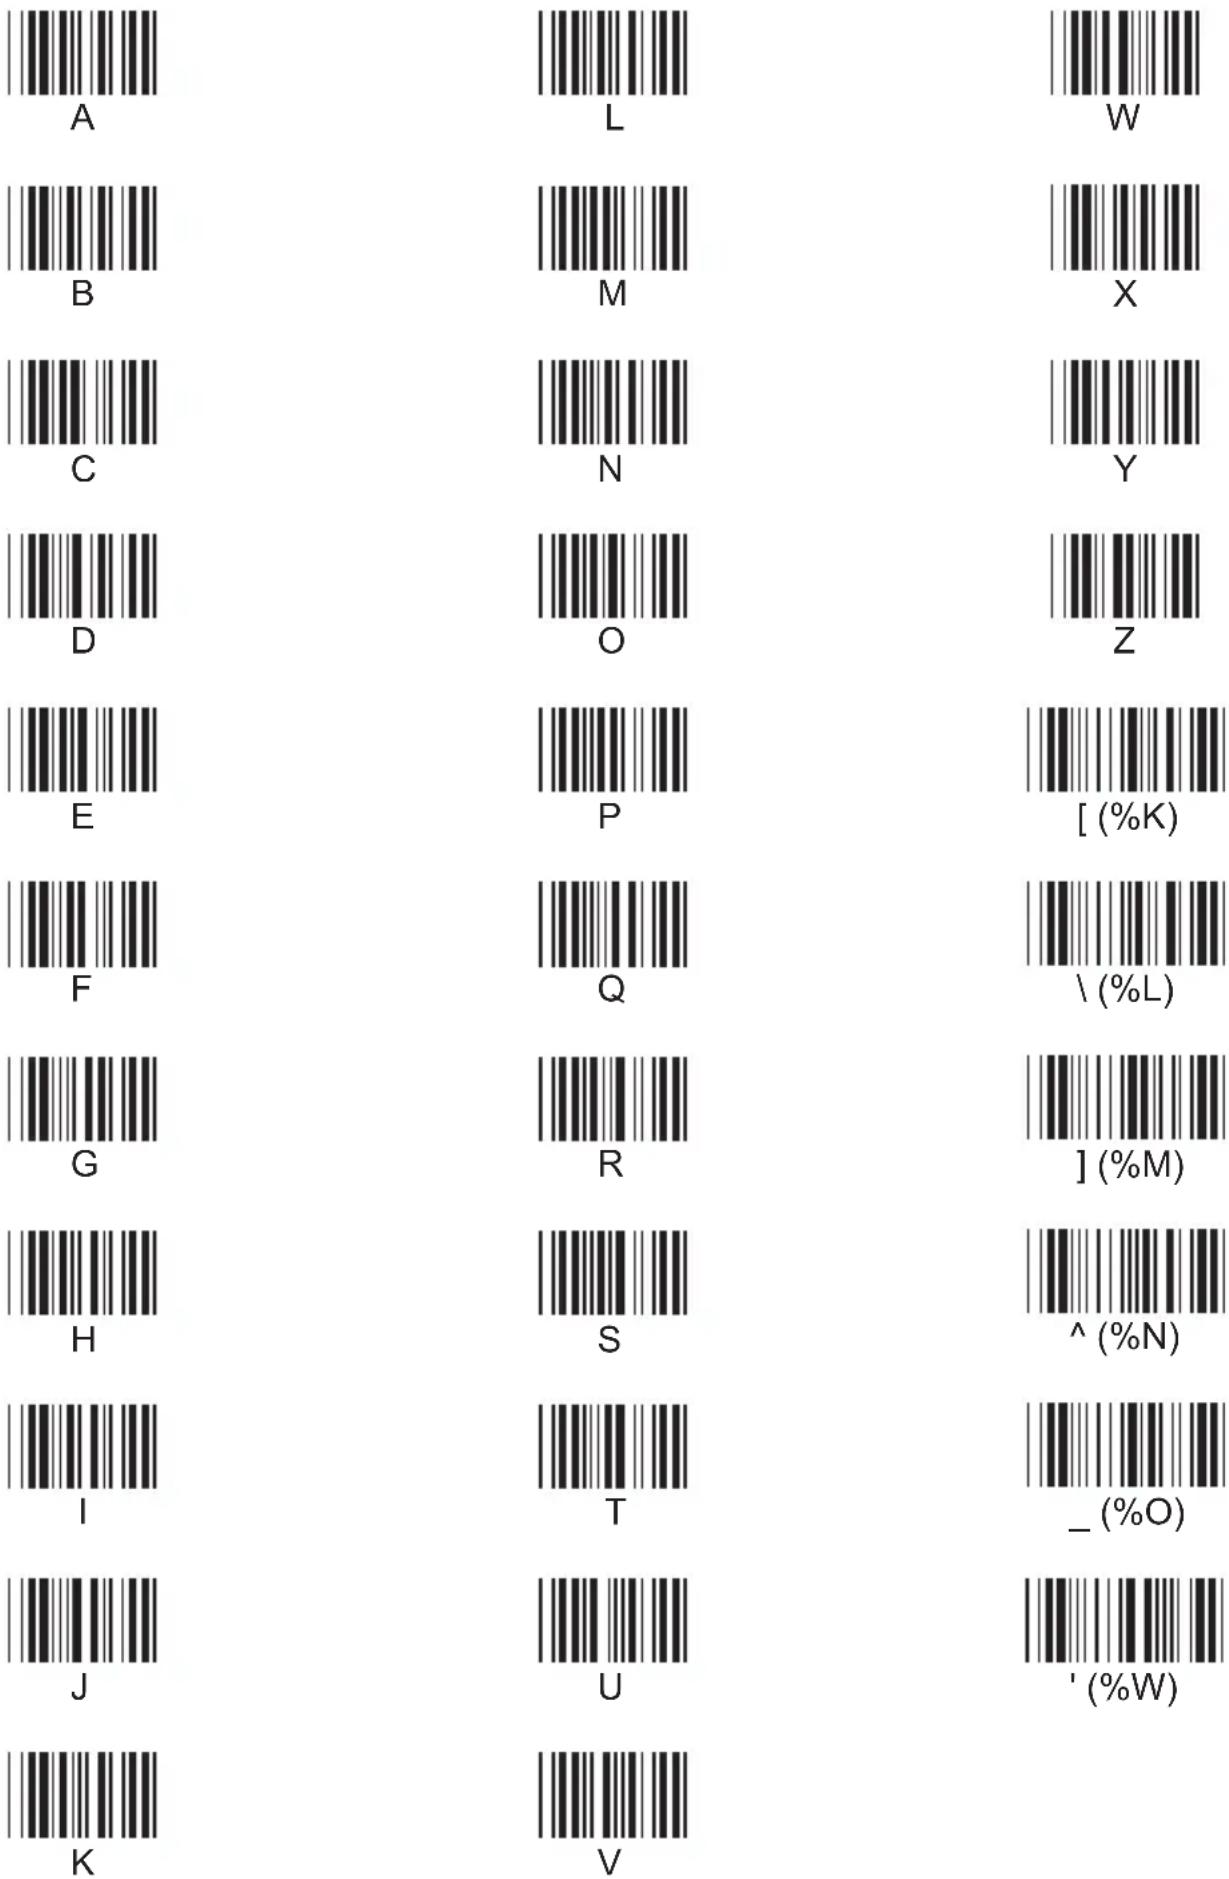
54 Keyboard Manual
ASCII Chart, continued
(Characters in parentheses represent Code 39 bar code printing)
SPECIFICATIONS
Keyboard
| KP3700 KP3800 | ||
| Interface: | Enhanced PS/2 keyboardStraight cable w/ 6-pinmini DIN male connector | Enhanced PS/2 keyboardY cable w/ 6-pin mini DINmale keyboard and mouse connectors |
| Keys: | 104 Total Keys 10092 Programmable Keys88 Relegendable Keys | Total Keys88 Programmable Keys84 Relegendable Keys |
| Cursor Control: Touch-Pad MouseCursor Keys | ||
| Power: | Voltage: 5 VDC +/- 5%Current: 250mA (including magnetic stripe reader) | |
| Dimensions: Length | Width Height17.5" (445mm) 6.75" (171mm) 1.375" (35 mm)2.86 lbs (1.30 kg)Net Weight: | |
| Operating: | Temperature: 32°F to 131°F (0°C to 55°C)Humidity: 10% to 90% RH | |
| Storage: | Temperature: -4°F to 131°F (-20°C to 55°C)Humidity: 10% to 95% RH | |
Magnetic Stripe Card Reader
| ISO 7811 / 2 through 5Card Standard: | |
| Track Configuration: | Read ISO Single Track, Dual Track, Triple TrackBi-direction for ISO cardCard Feed: |
| Card Swipe Speed: | 5 to 60 IPS (inch per second) |
| Bit Density: | Reads 75 to 210 BPI (bits per inch) |
| Reliability: | 300,000 passes in a clean environment (minimum) |
Bar Code Decoder Unit
| Connector: DB-9 male | |
| TTLInterface: | |
| Symbologies: | Code 39 Standard and Full ASCII, UPC\EAN,Codabar, Interleaved 2 of 5, Standard 2 of 5, MSI,Code 128, Code 93, MSI code, Code 32, DeltaDistance Code, Label IV & V, Toshiba Code, UCC/EAN128. |
Scanner Port Pin Assignments
Located on the right-hand side of the keyboard is a DB9 squeeze-release type port (see page 2) which will accept undecoded scanner (TTL) or RS232 input.
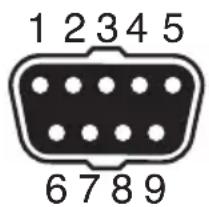
Wand
Pin Number Signal
| 2 | Data |
| 7 | GND |
| 9 | VCC |
CCD and Laser
Pin Number Signal
| 1 | Start of Scan |
| 2 | Data |
| 3 | Good Read |
| 4 N/C | |
| 5 Switch Detect | |
| 6 Power Control | |
| 7 GND | |
| 8 VCC | |
Pin 4 must be open (no connection) if an RS232 device is not used.
RS232
Pin Number Signal
| 4 | RXD |
| 7 | GND |
| 9 | VCC |
All other pins must be open (no connections) except when a scanner is used at the same time (by using a special Y-cable).
TROUBLE SHOOTING
Most problems that you might encounter with the KP3700/3800 keyboard can be solved by using the following three procedures:
- Reset to factory default. Open Keyboard Configuration Manager, click on the “New Program” icon (page 4), and download this setting into the keyboard (page 5). This procedure will erase any special configurations that have been programmed by the user. To save a special configuration, click on the “save file” icon (see page 4) and save it as a “cfg” file.
- Test the keyboard on other computers. Unitech keyboards are built to the highest standards, and a perceived keyboard malfunction may actually be a computer keyboard port malfunction. Test the keyboard on other systems to verify that the problem is in the keyboard and not in the host computer.
- Remove “upstream” devices. If a Unitech scanner is connected between the keyboard and the computer, KCM will program the scanner instead of the keyboard. To prevent this, temporarily remove the scanner before programming the keyboard.
Magnetic Card Reader
Problem: Magnetic Stripe Reader does not read.
Open up a word processor or Notepad session and try swiping the mag card. The mag card data should appear in the window.
If no read, try another mag card.
If still no read, unplug the keyboard and plug it back in.
Problem: Magnetic card reader reads incorrect data.
Most POS software programs are looking for unadul- terated track 2 data. Use KCM to set all the key- board parameters to “factory default” (see page 4), then select only track 2 under “Magnetic Reader” (see page 17).
Magnetic Card Reader, continued
Problem: Magnetic Reader outputs garbage.
Sometimes the computer cannot keep up with the output from the Magnetic Card Reader. Add some “Intercharacter Delay” (see page 7) to slow the output down a bit.
Problem: Magnetic Reader cannot be configured.
Your Unitech magnetic reader's configuration can be "locked" to prevent accidental modification by scanning the "Menu Setup" bar code in the Quick Setup Bar Codes on page 35. This bar code acts as an on/off toggle, so to unlock the magnetic reader, scan the "Menu Setup" bar code.
Bar Code Scanner
Problem: Scanner doesn't scan.
If the scanner does not emit a light when the trigger is depressed, check the interface connector. The connector should be the “squeeze release” type of DB9 connector (see page 2) - very similar to, but not to be confused with, an RS232 connector.
If the connector is the correct type, unplug the scanner and plug it back in. If that doesn't work, re-boot the computer.
If the scanner still doesn't scan, try the scanner/keyboard on another computer to insure that the fault isn't in the computer.
Problem: Scanner lights up but doesn't beep.
If the scanner emits a light, but doesn't beep while scanning a bar code, try bar codes of different symbologies. If other types of bar codes scan properly, then it might be that the scanner is not configured to scan your particular symbology.
If the scanner can scan other bar codes of the same symbology, then other parameters may have to be adjusted, like minimum or maximum length.
Bar Code Scanner, continued
Problem: No output from scanner.
If the scanner appears to scan (emits light and beeps), but does not output data, try scanning into a word processor or Notepad session to see if it's a software problem.
If still no output, make sure the scanner is operating in “undecoded” or “wand” mode.
Problem: Scanner outputs garbage.
Sometimes the computer cannot keep up with the output from the Bar Code Scanner. Add some "Intercharacter Delay" (see page 7) to slow the output down a bit.
Problem: Bar Code Scanner cannot be configured.
Your Unitech bar code scanner's configuration can be “locked” to prevent accidental modification by scanning the “Menu Setup” bar code in the Quick Setup Bar Codes on page 35. This bar code acts as an on/off toggle, so to unlock the bar code scanner, scan the “Menu Setup” bar code.
WARRANTY
Limited Hardware Warranty
The Limited Warranty terms described below are solely applicable to the Customer of Unitech America, Inc's (afterwards simply referred to as Unitech) products. This warranty applies to equipment only. All consumables and accessories are exempted.
Unitech warranties its products to be delivered free from defects in material and workmanship, from the date of purchase. All equipment except for cables, batteries, power supplies, and RF cards are warranted for a period of twelve months (beginning from the month of delivery). Some products may have longer warranties, but all products (except for cables, batteries, power supplies, and RF cards) carry at least a one year warranty. All cables, batteries, power supplies, and RF cards external to dedicated Unitech products carry a ninety day warranty.
During this warranty period Unitech will, at its sole discretion, replace or repair free of charge any product(s) which, in its opinion, is/are defective. Any merchandise that is to be returned must have a valid Return Merchandise Authorization (RMA) number clearly indicated on the outside of the returned package and on the accompanying packing list. Unitech cannot be held responsible for any package returned without an RMA number. To obtain an RMA number, please contact Unitech's Customer Service Department or a Sale Representative, by telephone (562) 490-9550 or by facsimile (562) 490-0320.
The Customer is responsible for packing the defective product properly, and for the cost of shipping the defective product to Unitech. Unitech is responsible for the cost of shipping back the product which is repaired or replaced. If any charges are borne by the Customer, the invoice for the repaired or replaced product(s) will be sent to the Customer based on the Customer's payment terms.
In the event that the product has been modified without Unitech's consent or if the product failure is the result of misuse, abuse, willful neglect or misapplication, Unitech has no obligation to repair or replace the product.
Except as expressly mentioned above, the hardware and accompanying written materials (including the user's manual) are provided "as is" without warranty of any kind, including the implied warranties of merchant ability and fitness for a particular purpose, even if Unitech has been advised of that purpose. In no event will Unitech be liable for any direct, indirect, consequential or incidental damages arising out of the use of or inability to use such product(s), even if Unitech has been advised of the possibility of such damages.
BAR CODE TEST CHART
Codabar
123456789-0
Code 11

AO23399013
Code 32
WEDGE
Code 39
UNITECHE
Code 39 with Check Digit
123ABC
Code 93
Unitech 128
Code 128
0123456
Delta Code
EAN-8
BAR CODE TEST CHART
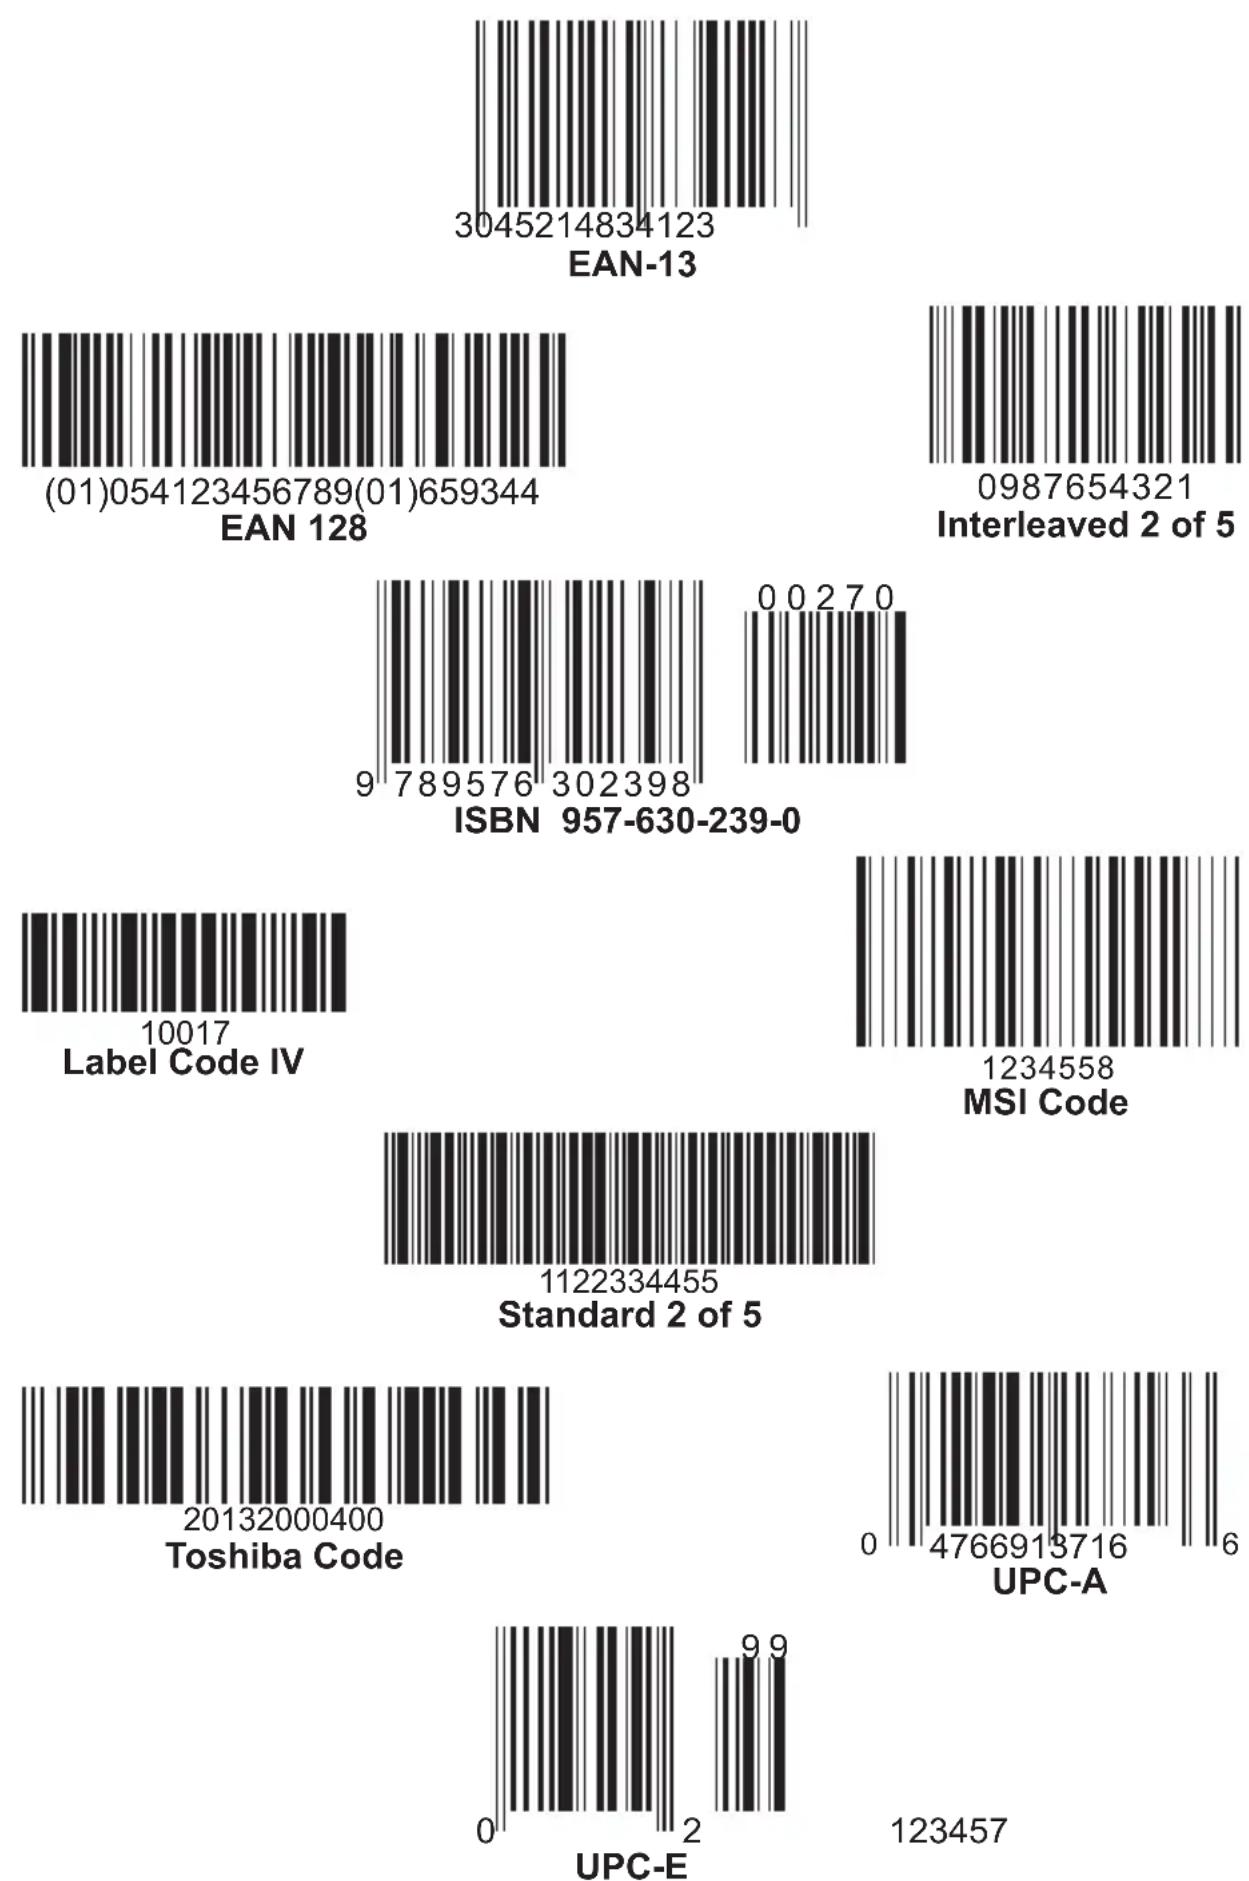
- General Advisory
- FCC Information
- TABLE OF CONTENTS
- INTRODUCTION
- KEYBOARD CONFIGURATION MANAGER
- Beeps and Delays.
- Keyboard Wedge
- RS232
- Scanner Port
- Magnetic Reader
- TABLE OF CONTENTS, continued
- Bar Code Symbologies 20
- Data Editing 28
- KEY PROGRAMMING 31
- PROGRAMMING VIA SCANNER INPUT. . . . . . . . . . . . . 33
- SPECIFICATIONS 56
- TROUBLESHOOTING . . . . . . . . . . . . . . . . . . . . . . . . . . . . 58
- WARRANTY 61
- BAR CODE TEST CHART . . . . . . . . . . . . . . . . . . . . . . . . 62
- Input Modes
- Reading Scanner and Magnetic Card Output
- Connecting an Undecoded Scanner
- Connecting a Decoded Scanner
- Connecting RS232 Devices
- Typical Applications
- Start It Up
- First Look
- Settings
- Beeps and Delays
- Beep Tone
- Interblock Delay
- Intercharacter Delay
- Function Code
- Caps-Lock
- Language
- Keyboard Wedge, continued
- Use Numeric Keypad
- Baud Rate
- Parity
- Data Bit
- Receive Terminator
- Terminator
- Use Code ID
- Double Verification
- Scanning Mode
- Label Type
- Aim Function for Long Range Engine
- Aiming Time for Long Range Engine
- Preamble
- Postamble
- Track 1
- Track 2
- Track 3
- Setting Magnetic Reader Parameters
- Send Start/Stop Sentinel
- Track Selection
- Magnetic Reader, continued
- Track 2 Account Number Only
- Output Only When All Tracks Have Correct Data
- Separator Character
- Track 1 Output Sequence
- Track 2 Output Sequence
- Bar Code Symbologies
- Code 39
- Interleaved 2 of 5
- Standard 2 of 5 / Toshiba Code
- Code 32
- EAN 128
- Code 128
- MSI / Plessey Code
- Code 93
- Codabar
- UPC-A
- UPC-E
- EAN-13
- EAN-8
- Code 11
- Delta Code
- Supplement Code (for UPC-E)
- Bar Code Symbologies, continued
- Label Code IV and V
- Data Editing
- Qualifier
- Modifier
- Data Editing, continued
- Delete deletes existing modifier strings.
- Arrange Formulas
- The “Everything Else” Formula
- KEY PROGRAMMING
- Programming the Keys
- Examples
- To Re-Map One Key:
- To Assign Functions to Keys:
- Save Settings
- Reset to Factory Default
- PROGRAMMING VIA SCANNER INPUT
- Quick Setup Bar Codes
- Quick Setup Bar Codes, continued
- Device Selection and Default
- Device ID Device Type
- Beep Tone: (see page 7)
- - Medium
- Interblock Delay: (see page 7)
- Intercharacter Delay:
- Keyboard Interface
- Scanner Port, continued
- Track I Output Sequence:
- Track II Output Sequence:
- Code 39:
- Interleaved 2 of 5 (ITF):
- Standard 2 of 5
- China Postal Code (Toshiba Code):
- Symbologies: Code 128 / MSI / Code 93 / Code 11 / Codabar / Label Code
- Code 128:
- MSI / Plessey Code:
- Code 93:
- Code 11: (Special)
- Codabar:
- Label Code IV and V:
- Define Minimum and Maximum Length
- Symbologies: UPC / EAN / Delta Code
- UPC-A:
- UPC-E:
- EAN-13:
- EAN-8:
- Supplement Code:
- Delta Distance Code:
- Data Editing:
- Qualifiers:
- Modifiers:
- Special Characters
- Code Type:
- Formula Format:
- Special Characters in this section:
- Function Codes for PC (Code 39)
- ASCII Chart
- ASCII Chart, continued
- SPECIFICATIONS
- Scanner Port Pin Assignments
- TROUBLE SHOOTING
- Magnetic Card Reader
- Problem: Magnetic Stripe Reader does not read.
- Problem: Magnetic card reader reads incorrect data.
- Magnetic Card Reader, continued
- Problem: Magnetic Reader outputs garbage.
- Problem: Magnetic Reader cannot be configured.
- Bar Code Scanner
- Problem: Scanner doesn't scan.
- Problem: Scanner lights up but doesn't beep.
- Bar Code Scanner, continued
- Problem: No output from scanner.
- Problem: Scanner outputs garbage.
- Problem: Bar Code Scanner cannot be configured.
- WARRANTY
- Limited Hardware Warranty
Brand : Unitech
Model : KP3800
Category : Keyboard