
Sedna - Mp3 player Sunstech - Free user manual and instructions
Find the device manual for free Sedna Sunstech in PDF.


| Product Type | MP3 Player |
| Brand | Sunstech |
| Model | Sedna |
| Dimensions (approx.) | 90 x 40 x 10 mm |
| Weight (approx.) | 30 g |
| Power Source | Built-in rechargeable battery |
| Charging | USB cable (5V) |
| Display | Color LCD screen |
| Supported Audio Formats | MP3, WMA, WAV, FLAC |
| Storage Capacity | 8 GB Internal (expandable via microSD) |
| Main Functions | Music playback, FM radio, voice recording, photo viewer |
| Battery Life | Up to 20 hours of audio |
| Connectivity | USB 2.0, 3.5mm headphone jack |
| Operating System Compatibility | Windows, Mac, Linux |
| Maintenance | Clean with a soft, dry cloth; avoid moisture |
| Safety | Keep away from water and extreme temperatures |
| Spare Parts | USB cable, earphones available as accessories |
| Repairability | Battery replacement by qualified technician recommended |
| General Information | Supports playlist, ID3 tags, equalizer presets |
Frequently Asked Questions - Sedna Sunstech
User questions about Sedna Sunstech
0 question about this device. Answer the ones you know or ask your own.
Ask a new question about this device
Download the instructions for your Mp3 player in PDF format for free! Find your manual Sedna - Sunstech and take your electronic device back in hand. On this page are published all the documents necessary for the use of your device. Sedna by Sunstech.
USER MANUAL Sedna Sunstech
sunstech ^12 SEDNA
Manual de usuario
DEFINICIONES DE LAS TECLAS......2
Ajuste de volumen
natural_image
Illustration of a device connected to a computer monitor with a small icon (no text or symbols)natural_image
Diagram showing a device connected to a computer monitor, with no visible text or symbols.- Power / Charge....3
- Basic functions to enter the menu..3
- Boot / Shutdown......5
- Key operation......6
- Music mode......8
- Sound recording......9
- Using the FM radio......12
- System Settings......14
- E-book....16
- Using a USB disk......16
- Other settings.....17
- Technical Specifications......21
KEY DEFINITIONS
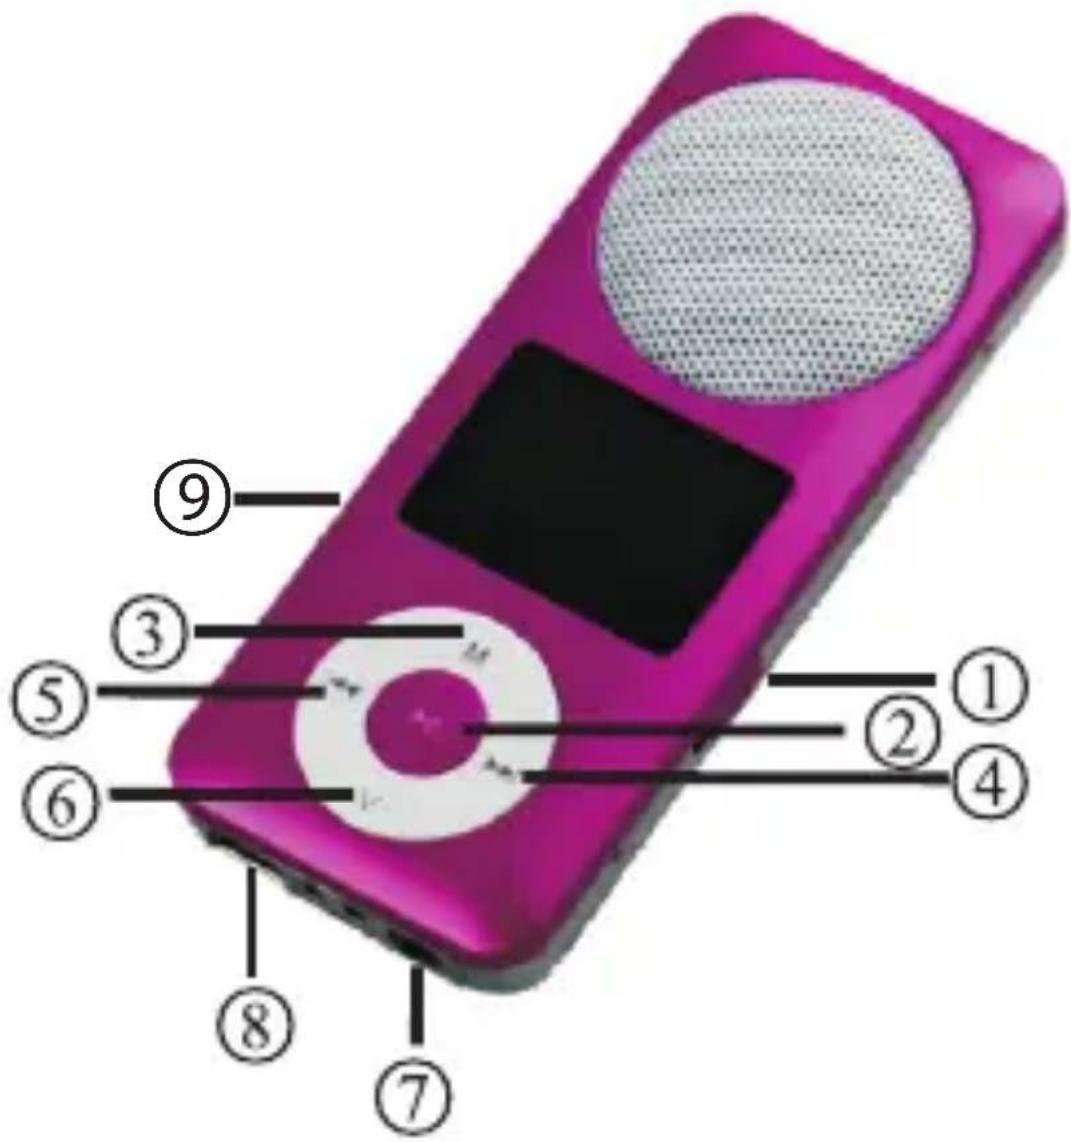
① Power ON/OFF
② Play: Play/Pause Button
③ MENU: Menu Button
④ NEXT: Next music
⑤ LAST: Previous music
⑥ VOL: VOL+/VOL-
⑦ Earphone jack
⑧ USB plug
⑨ Micro SD
1. Power / Charge
When the power is 3.8V, (Full battery charge) the power displays full. With the increase of use, the battery indicator will be reduced.
☐ When the power is almost completely run out, the power icon will show blank.
You must turn ON the power switch for charging. Otherwise, the player will not be able to respond to the charge task.
CHARGING THE UNIT
This unit recharges the battery when connected to a USB port, the battery will be fully charged in around 4 hour.
It is recommended a longer period of time for the first charging, around 6 hours
2. Basic functions to enter the menu
Press the Menu button (M) to access the menus. The menu is divided into main menu (short press to enter) (press and hold to exit) to play sub-menu (short press Enter) and stop the state erupted menu (short press
Enter).
Browse operations
choose to browse songs, menu items song playback, rewind or fast forward Enter different modes
From the main menu to enter a different functional mode.
Main Menu: (press the Menu button to enter)
Music mode:

Recording mode:

Voice recording:

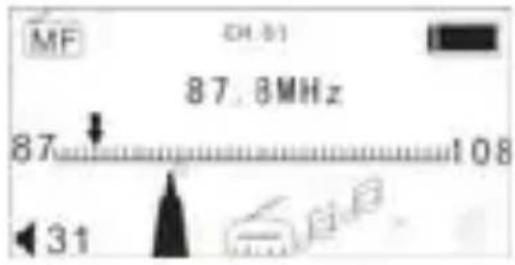
FM mode:
System settings:
| ⌘ | Lcd set |
| ⌘ | Language |
| ⌘ | Power off |
| ⌘ | Memory info |
| ⌘ | Firmware version |
| ⌘ | Exit |
EBOOK: File select
Test3.TXT
Connection to USB mode and PC:

Volume adjusting
Press the VOL key to enter the volume selection, short press Next / Last button to increase or decrease the volume level.
3. Boot / Shutdown
Turned off, long press the Play button. Turned on, long press the Play button, (Switch must be ON)
Play or stop (recording pause); exit from the submenu.
Music mode, press the Play button to play music.
Play music state, short press the Play button to pause playback. Long press to stop playback.
To start recording (short press) / stop recording (long press to M to exit and save the audio file)
Recording status, press the Play button to stop recording.
4. Key operation
KEY DEFINITIONS
① "ON/OFF": Power switch.
② Play / Pause / Stop ,hereinafter referred to as the "PLAY" button.
③ “MENU” Enter the main menu or previous menu.
④ “Next” : Next option, Fast-forward.
Volume increases, the fast increase.
⑤ “Last” : Previous option, Rewind., Volume reduction, and faster reduction.
⑥ “VOL” : Enter the volume interface.
⑦ “Headphone jack” : Headphone standard jack.
⑧ “USB” : USB plug.
⑨ "Micro SD": Micro SD
keystrokes definition
Keystrokes, including short press, long press, press and hold the single four methods of operation. Behind, unless otherwise specified, a short press.
Short press: Click on the keyboard, effective immediately.
Long press: press the button, let go of more than 1.2 seconds to take effect, and only take effect once.
Click: Press the button until you let go of the moment will only take effect.
Press and hold: the process of pressing the button to let go, the event came into effect several times with some frequency, such as fast forward, advance and retreat.
Music playing
Simple operation
placing the headphones into headphone hole.
Long press the M button to I into the "music mode", then press the Play button to start playing music.
Select Music: to select a musi Last: to select the previous music Next: select the next song
Volume Control: Press the button to enter the volume select, short press Next to increase the
volume, short press the Last button to decrease the volume.
5. Music mode
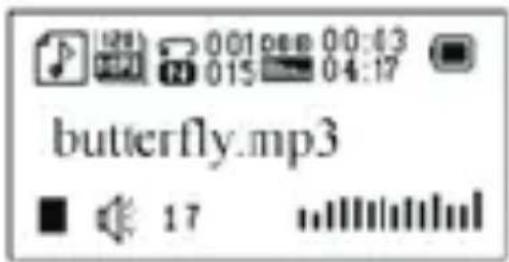
In music mode, there are the different menus available: one is pressing “M” while playing. It will appear the following menu:
-Equalizer
-Repeat: normal, repeat one, repeat all
-Replay
-Exit
a variety of sound effects (EQ specific menu as follows: Natura, Rock, Pop, Classical, Soft, Jazz, DBB.
⌘ Toggle the Next button to se short press Menu key to confirm.
The other menu will appears while pressing “M” key in the Stop or Pause mode, you will find the following menu: local folder, delete file, delete all and exit.
Synchronous lyrics display
The player supports "* LRC" lyrics files, lyrics and songs synchronous
playback.
How to use the lyrics file?
Lyrics file name and song name of the file.
For example:
The song file name is:
Kelly - Replace mp3
Lyrics file name is:
Kelly - Replace lrc.
Native songs match the appropriate lyrics are automatically read during playback. Do not need to press any key allows you to use with ease
6. Sound recording
Make sure there is enough power to record.
Native support for 99 recording files are stored for each directory.
In the recording mode to record
(1) Enter the main menu: "Record"
(2) Toggle the Next button to select the recording mode.
(3) Short press Menu key to enter the recording mode, the graphics are as follows:

(4) Short press the Play button to start recording.
During recording, short press the Play button to pause recording, long press the Play button to save the audio file. Long press Menu button to exit the recording mode and save the recording file.
The recording process only responds to the "Play" button and the Menu button.
To select the recording type
(1) In the recording stop interface
(2) Short press Menu key to enter record submenu
(3) Toggle the Next button, select the "REC" sub-menu item, press the Menu button to enter
| Fine recording wav | format, the sound quality is better. |
| Long-term recording | wav format, the sound quality is ordinary. |
| Super recording Wav format, high bit rate recording file |
(4) Press Next to select the right type of recording, and a short press Menu key to confirm the selected type.
(5) Press the Play button to start recording.
Play recording file
(1) Enter the main menu
(2) Toggle Next button, select "Voice"
(3) Press play
(4) Select the recording file.
Last button: Select the previous recording file.
Next button: Select the previous recording file.
(5) Short press upon M and it will appear: local folder, delete file, delete all, exit.
(6) If you want to delete file, select with M and with the arrows move upon Yes or No. If you choose Yes and press M, the file will be delete.
(7) Control the volume: Press the VOL button to enter the volume select, short press Next to increase the volume, short press the Last button to decrease the volume.
7. Using the FM radio
(1) Enter the main menu
(2) Toggle Next button, select "FM"
(3) Short press Menu key to enter "FM" mode

Automatic search
Press and hold the Last / Next button for 3 seconds player to 100KHz search forward or backward. If you want to stop the search, toggle Last / Next, stop the search. Into the radio sub-menu select "automatic station search"
Tips: Earphones have to always keep connected, since they work as an antenna.
Fine tuning
Toggle Last: backward single step 100KHz
Toggle the Next button: move forward a single step 100KHz
How to save manual frequen
Short press Menu key to enter FM submenu and you will find the following menu:
FM Mode
| ⌘ | Auto search |
| ⌘ | Save |
| ⌘ | Delete one |
| ⌘ | Delete all |
| ⌘ | REC |
| ⌘ | Exit |
Press the Menu button and select "save" to store the station and press M to confirm.
Choose to listen to the rad station has been saved
Press play key step by step until you find the desire radio station (showed at the top of the screen as "CH—")
Recording your favorite shc recorded into the sub-menu to select the "recording" subdirectory press the Menu button to start recording, press and hold the Menu button to save the recording file. The icon will appear on the screen during the recording time.
Tips: 32 memory slots are available to save radio stations (manual or auto).
Control the volume Press the VOL button to enter the volume, short press Next to increase the volume, short press the Last
button to decrease the volume.
8. System Settings
How to enter
Here you can set system parameters, the options change with the firmware upgrade.
(1) to enter the main menu
(2) toggle Next key to select "System"
(3) Short press Menu key to enter the "System Settings"
System
| ⌘ | Lcd set |
| ⌘ | Language |
| ⌘ | Power off |
| ⌘ | Memory info |
| ⌘ | Firmware version |
| ⌘ | Exit |
Each parameter project profiles
| LCD Set set the system to play / stop mode, the screen saver |
| Language to set a different languages |
| Power off to set a countdown time (minutes), the time will automatically shut down |
| Memory info | Shows device information |
| Firmware version | Display the firmware version of the player |
| (Exit) exit this interface | |
Detailed instructions for use System
| ⌘ | Lcd set |
| ⌘ | Language |
| ⌘ | Power off |
| ⌘ | Memory info |
| ⌘ | Firmware version |
| ⌘ | Exit |
LCD Set : Contrast adjustment
Language Selection
Shutdown Settings
Storage conditions : Indicate the total disk capacity, expressed as a
percentage of the space than has been used.
Firmware version : You can view the firmware version currently in use by the player.
Tips: after the option is set press the Menu button to exit or you can press the Play button to quickly exit the menu. Press the Play button to quickly exit the menu function on all
menus.
9. E-book
Under the main menu, select E-Book by pressing the M button.
File select
Test3.TXT
Directory options: Select the root directory of the removable disk.
Short press Menu key to enter the
"Select Directory" interface. Toggle the
Next button or Last button to select
the directory where the files you want to read. Short press the Play button to
open/access the selected file.
This unit only supports "txt" files.
10. Using a USB disk
This machine is a standard USB disk function, support Windows98 (need to install driver's), Windows 2K above (no need to install the driver) system, Mac OS 10.3 and above, Linux the Red hat
8.0 and above.
Native support for USB-powered small machine, without the battery can play.
In the wait state, short press the Menu button to exit to the main menu, then select the mode you want to work
into.
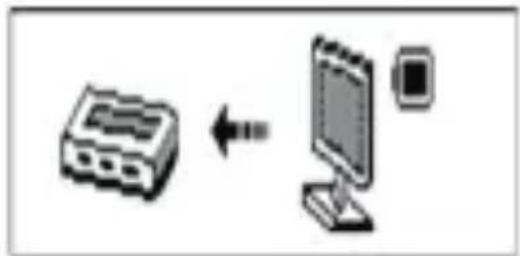
Native support for Suspend mode. Connected to the PC: The player has three display modes
- Waiting state

natural_image
Illustration of a device connected to a computer monitor and a small icon (no text or symbols)- Downloading information
natural_image
Diagram showing a device connected to a computer monitor, with an arrow indicating data transfer (no text or symbols present)- Uploading information

flowchart
graph LR
    A["Device"] --> B["Computer"]
11. Other settings
To select a different directory (Stop submenu)
Users to different files were placed in a different directory (the directory created in the computer you want to name the folder), so that files are class player and management. Native support for 9 identification of a subdirectory.
- Stop the interface. (The current example, the music mode, recording and Voice can choose the directory)
- Press the Menu button to enter the stop submenu
- then press the Menu button to enter the directory selection interface
- Press Next or Last button in the directory, select
- Press the Menu button to confirm the selected directory
Note: The music mode, recording mode and VOICE mode can be set corresponding to a separate directory. Three modes corresponding to be not necessarily the same directory.
Delete mode (Stop submenu)
In the music mode, Voice mode and FM mode, you can delete the corresponding files storage in the unit
- Stop interface. (FM did not stop the interface)
- Short press Menu key to enter the sub-menu
-
Toggle Next or Last button in the menu, and select "Delete Files" or "delete all"
-
short press Menu button to enter
into delete interface
-
Struck the Next button "NO" to "YES"
-
Press the Menu key to confirm start deleting
"Delete All" will the current directory under the current mode, delete all the files (such as in the music mode to delete all music files can only delete the audio file is not deleted).
FM, delete the interface is simple, will only appear to the third step. Delete the previously stored radio station.
Delete a document or files on your computer, please be sure to safely eject the player and then unplug the USB cable, otherwise the files are not deleted and the unit can result damage.
Play Mode (Play submenu)
Play music and play the audio file, you can choose different play mode (such as repeat)
Play sub-menu is the "Play Mode", select OK, the players will play in accordance with the rules set.
REPEAT
| (normal mode, Normal) | After the catalog of songs to play, continue to play after a catalog of music, stop until finished playing all the files. |
| (Repeat, Repeat One) | repeatedly play a single music file |
| (Full circle, Repeat All) | Repeatedly play all the music files |
Repeat mode (Play submenu) enter through the Play submenu:
A-B repeat
(1) Music playback or playback player.
(2) Press the Menu button to enter Play submenu.
(3) toggle the Next button to select the "repeat mode" menu item.
(4) Press the Menu button to enter the "repeat mode".
(5) struck the Next button to determine the starting point A,.
(6) Repeat the key icon in the "A"
blinking, waiting to determine the starting point B
(7) Toggle the Next button, to determine the starting point B.
(8) The repeat icon is fixed. AB points played repeatedly to exit repeat mode, press the Next button
12. Technical Specifications
| Dimensions | 84mm(L) * 35mm(W) * 12mm(H) | |
| Weight | 46.8g | |
| Display | dot-matrix (128 * 64),False OLED LCD display | |
| Connected computer | high-speed USB 2.0 (Read 1000K Byte, write 800K Byte) | |
| Memory | Flash Memory: 2GB-8GB | |
| Power | Power up to 6-8 hours playback time (Headphone)Power up to 1-2 hours playback time (Speakers) | |
| Recording | sampling rate | 8KHz |
| Recording Format | WAV (32K bps)、 | |
| Recording time | 35Hrs,ACT , 128M Flash) | |
| MP3, WMA, ASF | headphone output | (L) 10mW + (R) 10mW (320hm) |
| MP3 bit rate | 8K bps - 320K bps | |
| WMA, ASF bit rate | 5K bps - 384K bps | |
| Frequency Response | 20Hz to 20KHz | |
| Signal to noise ratio | 80dB | |
| FM radio | receiver frequency range | 76MHz - 90MHz / 87MHz - 108MHz |
| Storage units | 20+20 | |
| Maximum headphone output | (L) 10mW + (R) 10mW (320hm) | |
| Signal to noise ratio | 45dB | |
| Music formats | MP3 / WMA | |
| Use temperature | -5 to 40 degrees Celsius | |
| Sixteen States appear in the language | Simplified Chinese, English, Traditional Chinese, German, French, Italian, Spanish,etc. | |
Note: Product design and specifications are subject to change without notice 22
Warranty conditions
- The warranty of this product is for 2 years since the purchase date.
- The warranty will exclude breakdowns caused by bad use of the product, wrong installation or installation in not desirable places for a proper maintenance of the product, rips, updates of the products that are not the supplied by the brand, pieces wore away for its use or for not domestic or inappropriate use. Also are excluded breakdowns caused for manipulations of the products by people or companies alien to our company.
- For any request regarding the warranty terms, the purchase receipt must be attached.
sunstech ^12 SEDNA
Manual do Utilizador
① Power ON/OFF
② Play: Botão Reproduzir/Pausa
③ MENU: Botão Menu
④ SEGUINTE: Música seguinte
⑤ ÚLTIMA: Música anterior
⑥ VOL: VOL+/VOL-
⑦ Ficha de auscultador
⑧ Ficha USB
⑨ Micro SD
1. Potência / Carga
Ajuste de volume
During recording, short press the Play button to pause recording, long press the Play button to save the audio file. Long press Menu button to exit the recording mode and save the recording file.
natural_image
Illustration of a device connected to a computer monitor and a small icon (no text or symbols)natural_image
Diagram showing a device connected to a computer monitor and a small icon (no text or symbols)
- sunstech 12 SEDNA
- DEFINICIONES DE LAS TECLAS......2
- Ajuste de volumen
- KEY DEFINITIONS
- Power / Charge
- CHARGING THE UNIT
- Basic functions to enter the menu
- Browse operations
- EBOOK: File select
- Volume adjusting
- Boot / Shutdown
- Play or stop (recording pause); exit from the submenu.
- Key operation
- keystrokes definition
- Music playing
- Music mode
- Synchronous lyrics display
- Sound recording
- In the recording mode to record
- To select the recording type
- Play recording file
- Using the FM radio
- Tips: Earphones have to always keep connected, since they work as an antenna.
- System Settings
- E-book
- File select
- Using a USB disk
- Other settings
- Delete mode (Stop submenu)
- Play Mode (Play submenu)
- Repeat mode (Play submenu) enter through the Play submenu:
- Technical Specifications
- Warranty conditions
- Potência / Carga
- Ajuste de volume
Brand : Sunstech
Model : Sedna
Category : Mp3 player