
BQ1VD6T131 - Oven SAMSUNG - Free user manual and instructions
Find the device manual for free BQ1VD6T131 SAMSUNG in PDF.


| Product Type | Built-in Electric Oven |
| Brand | Samsung |
| Model | BQ1VD6T131 |
| Usable Volume | 70 L |
| Housing Dimensions (W x H x D) | 595 x 595 x 566 mm |
| Oven Interior (W x H x D) | 440 x 365 x 405 mm |
| Power Consumption | Max. 3650 W |
| Voltage / Frequency | 230 V ~ 50 Hz |
| Cooking Functions | Conventional, Convection, Top Heat + Convection, Bottom Heat + Convection, Small Grill, Large Grill, Steam Cook, Steam Assist Cook, Twin Cooking (Upper/Lower) |
| Automatic Programmes | 25 Single Oven Auto Cook Programmes, 15 Steam Auto Programmes, 5 Lower Oven Steam Auto Programmes, 5 Twin Oven Steam Auto Programmes |
| Cleaning Methods | Steam Cleaning, Catalytic Enamel (optional), Hand Cleaning, Descaling |
| Safety Features | Child Lock, Safety Shut-off, Electrical Safety (requires licensed electrician) |
| Display | Digital Clock, Timer, Water Level Indicator, Child Lock Indicator |
| Door | Removable door, removable inner glass (2-4 sheets) |
| Oven Light | Rear lamp (25 W, 230 V, 300°C heat-resistant), optional side lamp (halogen, 25-40 W) |
| Accessories Included | Divider, Big Grid, Small Grid (optional), Dripping Tray (optional), Baking Tray, Steam Container, Telescopic Slide Guide (optional) |
| Installation Type | Built-in, must be installed by a licensed electrician |
| Material / Finish | Stainless steel, white, black, glass (front panel options) |
Frequently Asked Questions - BQ1VD6T131 SAMSUNG
User questions about BQ1VD6T131 SAMSUNG
0 question about this device. Answer the ones you know or ask your own.
Ask a new question about this device
Download the instructions for your Oven in PDF format for free! Find your manual BQ1VD6T131 - SAMSUNG and take your electronic device back in hand. On this page are published all the documents necessary for the use of your device. BQ1VD6T131 by SAMSUNG.
USER MANUAL BQ1VD6T131 SAMSUNG


1:30
02 | Confirm cooking time

13:45
02 | Confirm end time
Installation in the cabinet
- Close the oven door.

Side lamp (optional)

Turn the selector knob, use the set setting.

03 | Set temperature
Press Temperature, the temperature number will blink.
single mode_7


double cooking

- Insert the steam container for steam cooking.
Turn the selector knob, set the time.
03 | Confirm time

1:30
02 | Confirm cooking time

13:45
02 | Confirm end time
Turn the selector knob, set the new temperature.
①
180
888
02 | Confirm temperature
Turn the selector knob, set the timer duration.

13:15
02 | Confirm alarm

Set recipe | 03 ———— 04 | Set weight
- Close the oven door.


REMOVING THE DOOR GLASS
- Rotate the side holder approximately 45°

The front of the superheater tilts downward.


CORRECT DISPOSAL OF THIS PRODUCT (WASTE FROM ELECTRICAL AND ELECTRONIC EQUIPMENT)
(Applies in countries with waste sorting)


1:30

- Close the oven door.


SAFE DISPOSAL OF THE PRODUCT (ELECTRONICS AND ELECTRICAL EQUIPMENT)

07 | Set the lowest temperature Press the Temperature button. The numbers for the lowest temperature blink.
8_double cooking

steam cooking

- Set the cooking time or end time.

1:30

13:45
Turn the selector knob. Set
new temperature.


Turn the selector knob. Set the timer time.

13:15
02 | Confirm alarm
CLOCK DISPLAY


- Close the door.

- Rotate the side rail approximately 45°.

- Pull and remove the side rail from the two holes at the bottom.

The front of the top heater tilts downward.


Oven side light (accessory)

This manual is made with 100% recycled paper.
imagine the possibilities
Thank you for purchasing this Samsung product.
Please register your product at
www.samsung.com
SAMSUNG
Using this manual
Thank you for choosing a SAMSUNG Built-In Oven.
This user manual contains important safety information and instructions intended to assist you in the operation and maintenance of your appliance.
Please take the time to read this owner's manual before using your oven and keep this book for future reference.
The following symbols are used in the text of this owner's manual:

WARNING or CAUTION Important Note


Safety instructions
Installation of this oven must be performed only by a licensed electrician. The installer is responsible for connecting the appliance to the mains power supply in observance of the relevant safety recommendations.
Electrical safety
If the oven has been damaged in transport, do not connect it.
- This appliance must be connected to the mains power supply only by a specially licensed electrician. In the event of a fault or damage to the appliance, do not attempt to operate it.
- Repairs should be performed by a licensed technician only. Improper repair may result in considerable danger to you and others. If your oven needs repair, contact a SAMSUNG Service Centre or your dealer.
- If the supply cord is defective, it must be replaced by a special cord or assembly available from the manufacturer or an authorised service agent. (Fixed wiring type appliance only)
- If the supply cord is damaged, it must be replaced by the manufacturer, its service agent or similarly qualified persons in order to avoid a hazard. (Power cord type appliance only) Electrical leads and cables should not be allowed to touch the oven.
- The oven should be connected to the mains power supply by means of an approved circuit breaker or fuse. Never use multiple plug adapters or extension leads. The rating plate is located on the right side of the door. The power supply of the appliance should be turned off when it is being repaired or cleaned. Take care when connecting electrical appliances to sockets near the oven.
- This appliance is not intended for use by persons (including children) with reduced physical, sensory or mental capabilities, or lack of experience and knowledge, unless they have been given supervision or instruction concerning use of the appliance by a person responsible for their safety.
- It should allow disconnection of the appliance from the supply after installation. The disconnection may be achieved by having the plug accessible or by incorporating a switch in the fixed wiring in accordance with the wiring rules.
If this appliance has a steam cooking function, do not operate this appliance when the water supply cartridge is damaged.
- When the cartridge is cracked or broken, do not use it and contact your nearest service center.
• Failing to do so may result in injury.

WARNING: Accessible parts may become hot during use. To avoid burns, young children should be kept away.

WARNING: The appliance and its accessible parts become hot during use. Care should be taken to avoid touching heating elements inside the oven. Children less than 8 years of age shall be kept away unless continuously supervised.

WARNING: Ensure that the appliance is switched off before replacing the lamp to avoid the possibility of electric shock.


SAFETY DURING OPERATION
• This oven has been designed only for cooking household foods. - During use, the oven interior surfaces become hot enough to cause burns. Do not touch heating elements or interior surfaces of the oven until they have had time to cool. • Never store flammable materials in the oven. - The oven surfaces become hot when the appliance is operated at a high temperature for an extended period of time. - When cooking, take care when opening the oven door as hot air and steam can escape rapidly. - When cooking dishes that contain alcohol, the alcohol may evaporate due to the high temperatures and the vapour can catch fire if it comes into contact with a hot part of the oven. • For your safety, do not use high-pressure water cleaners or steam jet cleaners. • Children should be kept at a safe distance when the oven is in use. - Frozen foods such as pizzas should be cooked on the Big grid. If the baking tray is used, it may become deformed due to the great variation in temperatures. - Do not pour water into the oven bottom when it is hot. This could cause damage to the enamel surface. • The oven door must be closed during cooking. - Do not line the oven bottom with aluminium foil and do not place any baking trays or tins on it. The aluminium foil blocks the heat, which may result in damage to the enamel surfaces and cause poor cooking results. - Fruit juices will leave stains, which can become indelible on the enamel surfaces of the oven. When cooking very moist cakes, use the deep pan. - Do not rest bakeware on the open oven door. • Young children should be supervised to ensure that they do not play with the appliance. - During use the appliance becomes hot. Care should be taken to avoid touching heating elements inside the oven. - If the supply cord is damaged, it must be replaced by the manufacturer, its service agent or similarly qualified persons in order to avoid a hazard. • Children should be supervised to ensure that they do not play with the appliance - appliances are not intended to be operated by means of an external timer or separate remote-control system. - Do not use harsh abrasive cleaners or sharp metal scrapers to clean the oven door glass since they can scratch the surface, which may result in shattering of the glass. - This appliance can be used by children aged from 8 years and above and persons with reduced physical, sensory or mental capabilities or lack of experience and knowledge if they have been given supervision or instruction concerning use of the appliance in a safe way and understand the hazards involved. Children shall not play with the appliance. Cleaning and user maintenance shall not be made by children without supervision. - For your safety, do not use high-pressure water cleaners or steam jet cleaners. • During cleaning conditions the surfaces may get hotter than usual and children should be kept away. - Excess spillage must be removed before cleaning and utensils which state in cleaning manual can be left in the oven during cleaning. - If this appliance has steam or self cleaning function, excess spillage must be removed before cleaning and all utensils should not be left in the oven during steam cleaning or self cleaning. - If this appliance has self cleaning function, during self cleaning the surfaces may get hotter than usual and children should be kept away.

WARNING: Do not disconnect the appliance from the main power supply even after the cooking process is completed.
DISPOSAL INSTRUCTIONS
Disposing of the packaging material
• The material used to package this appliance is recyclable. Dispose of the packaging materials in the appropriate container at your local waste disposal facility.
Disposing of old appliances

WARNING: Before disposing of old appliances, make them inoperable so that they cannot be a source of danger.
To do this, disconnect the appliance from the mains supply and remove the mains lead.
To protect the environment, it is important that old appliances are disposed of in the correct manner.
• The appliance must not be disposed of with household rubbish.
You can obtain information about collection dates and public refuse disposal sites from your local refuse department or council.
Oven controls


Front design
The front panel is available in various material and color options including stainless steel, white, black and glass. For purposes of quality improvement, the appearance may be subject to change.
Accessory
Your new Samsung oven comes with a lot of accessories that should become very helpful during the preparation of different meals.

CAUTION: Be sure to attach the accessory correctly to the shelf. Trays need to have at least 2 cm space towards the bottom of the oven, otherwise the enamel surface could be damaged.

Divider
The divider needs to be applied if you want to use the oven's twin cooking mode. It separates the upper and lower compartment and must be used in shelf level 3.
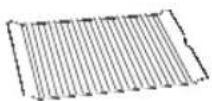
Small grid (Optional)
The small grid should be used for grilling and roasting meals. It can be used in combination with the dripping tray to prevent liquids from dropping onto the bottom of the oven.

Big grid
The big grid should be used for grilling and roasting meals. You could use it with casseroles and other baking pots.
4_oven controls

Dripping tray (Optional)
The (deep) dripping tray is good for roasting. It can be used in combination with the small grid to prevent liquids from dropping onto the bottom of the oven.
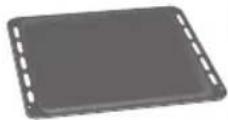
Baking tray
The (flat) baking tray could be used for the preparation of cakes, cookies and other pastries.

Steam container
The steam container is only for steam cook function.
Use the steam container on shelf level 1 only and ensure that the steam container is positioned so that it touches the rear wall of the oven cavity. It consists of 4 parts: glass lid, metal pan, steam tray, and steam nozzle.
The glass lid can be used as a baking and gratin dish.

Warning: When moving the steam container by hand, be careful not to drop it for your safety.

Warning: Sudden temperature changes could cause glass to break or shatter.

Telescopic slide guide (Optional)
- To insert the grid, baking or roasting pan, first slide out the telescopic guides for one particular level.
- Place the tray or pan on the guides and push them back completely into the oven.
Close the oven door only after you have pushed the telescopic guides into the oven.
Test dishes
According to standard EN 60350 and DIN44547
1. Grilling
Preheat empty oven for 5 minutes using the Large Grill function.
| Type of food | Dish & Notes | Shelf level | Cooking mode | Temp. (°C) | Cooking time (min.) |
| White bread toast | Big grid 5 Large Grill 270 °C 1st: 1-2 | 2nd: 1-1 1/2 | |||
| Beef burgers* (12ea) | Small grid + Dripping tray (to catch drippings) | 4 Large | Grill 270 °C 1st: 14-16 | 2nd: 4-6 | |
*Beef Burgers: Preheat the empty oven for 15 minutes using Large Grill function.
2. Baking
The recommendations for baking refer to a preheated oven.
| Type of food | Dish & Notes | Shelf level | Cooking mode | Temp. (°C) | Cooking time (min.) |
| Shortbread | Baking tray 3 Conventional 1 | 50-170 20-30 | |||
| 2 Convection 150-170 | 35-45 | ||||
| Baking tray + Dripping tray | 1+4 Convection 150-170 | 35-45 | |||
| Small cake | Baking tray 3 Conventional 1 | 60-180 15-25 | |||
| 2 Convection 150-170 | 30-35 | ||||
| Baking tray + Dripping tray | 1 + 4 Convection 150-170 | 30-40 | |||
| Fatless sponge cake | Springform cake tin on Big grid (Dark coated, ø 26 cm) | 2 Conventional 160-180 | 25-35 | ||
| 2 Convection 150-170 | 40-50 | ||||
| Apple Yeast Tray Cake | Baking tray 3 Conventional 1 | 150-170 | 65-75 | ||
| 2 Convection 150-170 | 70-80 | ||||
| Baking tray + Dripping tray | 1+4 Convection 150-170 | 75-85 | |||
| Apple pie | Big grid + 2 Springform cake tins * (Dark coated, ø 20 cm) | 1 Placed diagonally | Conventional 1 | 170-190 | 70-90 |
| Baking tray + Big grid + 2 Springform cake tins ** (Dark coated, ø 20 cm) | 1+3 Convection 170-190 | 80-100 | |||
* Two cakes are arranged on the grid at the back left and at the front right.
** Two cakes are arranged in the center on top of each other.
Functions
This oven offers various functions below. Depending on which operation mode you run the oven, twin cooking or single mode, you can choose between these functions:

Conventional
Heat is emitted from the top and bottom heating system. This function should be used for standard baking and roasting of almost any type of dish. Suggested temperature: 200°C

Convection
The heat generated by the convection is shared evenly in the oven by fans. This function should be used for frozen dishes and baking. Suggested temperature: 170°C
6 test dishes
 | Top Heat + ConvectionThe heat generated by the top heating system and the convection is shared evenly in the oven by fans. This function should be used for roasting crusty dishes like meat.Suggested temperature : 190 °C |
 | Bottom Heat + ConvectionThe heat generated by the bottom heating system and the convection is shared evenly in the oven by fans. This function should be used for pizzas, bread and cakes.Suggested temperature : 190 °C |
 | Small grillHeat is emitted from the small area grill. This function should be used for smaller dishes that need less heat, like fish and filled baguettes.Suggested temperature : 240 °C |
 | Large grillHeat is emitted from the large area grill. This function should be used for scalloped dishes like lasagne and grilling meat.Suggested temperature : 240 °C |
 | Steam cookPure steam is introduced into the steam container through the steam outlet at the rear, while the convection heat surrounds the steam container. This mode is suitable for steaming vegetables, fish and chicken as well as eggs. |
 | Steam assist cookThe heat generated by convection heaters and fans is continuously supported by the steam, provided by the outlet at the rear. The intensity of the steam can be adjusted to low, medium or high. This mode is suitable for baking puff pastries, yeast cakes, bread and pizza, and roasting meat and fish. |
Single mode
In single mode, the oven operates like a traditional oven. In single mode you can use all oven functions for larger amounts of food.
Select Single mode | 01
Remove divider from the oven to use Single mode.
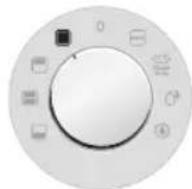
With the Single mode, you can choose from all oven functions.
SINGLE MODE

All functions are available with single mode. The single mode allows the traditional usage of the oven.


Set function | 02
Press Function key, function figure will blink.

Turn Selector knob, apply specific setting.

03 | Set temperature
Press Temperature key, temperature figure will blink.
single mode_7


twin cooking
This oven features the unique twin cooking system. It allows you to prepare two different meals at the same time using two different temperatures in the upper and lower compartment. Or you decide to cook either in the upper or lower compartment, which saves time and energy.
Select Twin cooking mode | 01
Inserted divider in shelf level 3 to use twin cooking.

Depending on the selected twin cooking mode, you can choose from these functions:
| UPPER MODE |  | Convection | Top Heat + Convection | Large grillThe upper mode saves time and energy while cooking smaller amounts of food. |
| TWIN COOKING |  | Upper and lower function in either compartmentTwin cooking allows you to cook two meals at different functions and temperature settings. |
| LOWER MODE |  | Convection | Bottom Heat + Convection | Steam assist cook | Steam cook The lower mode saves time and energy while cooking smaller amounts of food. |

NOTE : Use steps 03/04 for upper mode and steps 06/07 for lower mode only.

NOTE : You should select compartment by pressing Partition selector.

Select Compartment | 02 Press Partition selector, Compartment figure will blink.


03 | Set Upper function
Press Function key, upper function figure will blink.

Set Upper temperature | 04
Press Temperature key, upper temperature figure will blink.


Turn Selector knob, apply specific setting.
05 | Select Compartment
Press Partition selector, Compartment figure will blink.


Set Lower function | 06
Press Function key, lower function figure will blink.


07 | Set Lower temperature
Press Temperature key, lower temperature figure will blink.
8_twin cooking


steam cooking
This oven has a steam cooking function. The steam cooking function allows you to use of a wide range of recipes.
After any of the steam cooking functions, it is required to drain residual water. Operate draining function and check the water doesn't come out anymore
Available mode
The steam cooking function can be used with Single mode, Twin Cooking mode and Lower mode.


Warning: If you don't drain water after steam function, germs and other harmful material can contaminate the water left over in oven. Please drain all water inside oven after performing the steam cooking.
| STEAM COOK |  | Be sure to use steam container for steam cook.The steam container has to be placed on shelf level 1. |
| STEAM ASSIST COOK | Do not use steam container for steam assist cook.Select a steam assist level from 1 to 3. |

Warning : Do not use steam container with any other functions including steam assist cook.

Warning : Do not use steam cook function without steam container.
DISPLAY ICON INFORMATION
DISPLAY ICON in window display offers information to assist steam cooking.
| WATER LEVEL |  | Blinking: No water inside oven.Level 1 : LowLevel 2 : MediumLevel 3 : High |
| INTENSITY OF STEAM(Level 1~Level 3) |  | Select the steam assist level based on your taste or recipes for the steam assist cook function.Level 1 : LowLevel 2 : MediumLevel 3 : High |
| DRAIN WATER |  | Blinking : After steam cooking, drain all water from oven.Draining the hot water immediately after steam cooking is restricted to ensure your safety. When drain key is pressed on hot water state, window display shows the “Hot” message.NOTE : To remove blinking DISPLAY ICON, use draining function for at least 1 minute. |
| TIME TO DESCALE |  | Blinking : Descaling is necessaryThe descaling procedure consists of a total of 6 steps. Refer to the “Descaling cleaning” part in the manual. |
| STEAM ASSIST AUTO COOK |  | When using Steam assist auto cook, this DISPLAY ICON appears. |
steam cooking_9
STEAM COOKING PROGRESS

While the steam cooking function is running, water condensation occurs. This is a normal phenomenon.

Make sure that any residual water is removed before performing the steam cooking. Use drinking water for the steam cooking.

NOTE : Refer to next "Setting" part in the manual for detail instructions of keys.

1. Insert Steam Container for steam cook.
Use the Steam container on shelf level 1 only and ensure that the steam container is positioned so that it touches the rear wall of the oven cavity.

Warning: Do not use the steam container with any other functions, including steam assist cooking.
2. Select the steam cooking function.
Use the steam cooking function with Single mode, Twin cooking mode, or Lower mode.

3. Pour drinking water into the water inlet.
Open the water inlet by pressing it down, then pour drinking water into it.
Check the water level using the water level display icon in the window display.
Press the water inlet down again to close it.

Warning: When the water tank is full and an alarm sounds, stop adding water.

Cooking Time

End Time

Steam Assist Level
4. Set the cooking time or end time.
If using the steam assist cooking function, select the desired steam assist level from 1 to 3 by pressing the steam assist level key.

5. Drain all water after steam cooking.
After steam cooking, drain all water from the oven by pressing the drain key. Check that no more water comes out.

NOTE: Draining the hot water immediately after steam cooking is restricted to ensure your safety. When the drain key is pressed in the hot water state, the window display shows the "Hot" message.

Warning: Do not close the water inlet while draining water.

Warning: After performing steam cooking, open the door slowly. The steam inside the oven is hot enough to cause burns.

NOTE: After performing steam cooking, please open the door to allow the oven cavity to dry.
10_steam cooking

STEAM COOKING GUIDE

Use the settings and times in this table as guidelines for steam cooking in Single Mode. Use the Steam container, insert the perforated metal tray. Put food evenly on the metal tray. Put eggs upright into the small cavities of the tray. Cover with the glass lid. Insert the Steam container in shelf level 1 with the steam nozzle to the back. Make sure the nozzle is inserted well into the steam outlet at the back of the oven. We recommend always filling fresh drinking water into the water inlet. Remove residual water using the drain function before adding fresh water. When using this mode, the Steam container is supported by steam and the heat of convection. Always use oven gloves when taking it out carefully.
| Food item Shelf level | Accessory | Time (min.) | |
| Broccoli florets 1 Steam container | 10-15 | ||
| Sliced vegetables (Pepper, courgettes, fennel) | 1 Steam container 8-13 | ||
| Green beans 1 Steam container 15-20 | |||
| White asparagus 1 Steam container 17-22 | |||
| Whole vegetables (Whole cauliflower, corn on the cob) | 1 Steam container 28-33 | ||
| Peeled potatoes cut into halves 1 | Steam container 27-32 | ||
| Fish filet (Coalfish, hake, rose fish) | 1 Steam container 13-18 | ||
| Fillet of salmon 1 Steam container | 15-20 | ||
| Whole fish (Trout, perch, gilthead) | 1 Steam container 23-28 | ||
| Mussels 1 Steam container 10-15 | |||
| Chicken breast 1 Steam container | 23-28 | ||
| Boiled eggs 1 Steam container 15-20 | |||
steam cooking_11
STEAM ASSIST COOKING GUIDE

Use the settings and times in this table as guidelines for steam assist cooking in Single Mode. We recommend always filling fresh drinking water into the water inlet. Remove residual water using the drain function before adding fresh water.
| Food item Shelf level | Accessory | Steam assist mode (°C) | Time (min.) |
| Bread rolls 2 Baking tray Mode 3 / 180 °C | 15-20 | ||
| Puff pastry sticks with cheese | 2 Baking tray Mode 1 / 190 °C | 15-20 | |
| Homemade bread 2 Baking tray Mode 3 / 180 °C | 40-50 | ||
| Homemade pizza 2 Baking tray Mode 2 / 200 °C | 35-45 | ||
| Vegetable gratin 2 Baking tray Mode 2 / 180 °C | 25-35 | ||
| Frozen self-rising pizza 2 Baking tray Mode 2 / 205 °C | 15-20 | ||
| Roast lamb (1.0 -1.2 kg) | 2 Dripping tray with Small grid | Mode 1 / 160 °C | st stage: 40-502nd stage: 35-45 |
| Roast beef (1.0-1.2 kg) | 2 Dripping tray with Small grid | Mode 3 / 160 °C | st stage: 30-352nd stage: 20-25 |
| Roast chicken (1.0-1.2 kg) | 2 Dripping tray with Small grid | Mode 3 / 190 °C | st stage: 35-402nd stage: 25-30 |
| Oven fish (trout, perch, gilthead) | 2 Dripping tray with Small grid | Mode 2 / 220 °C | 20-25 |
| Small chocolate cakes 2 Baking tray Mode 1 / 160 °C | 25-30 | ||
| Roll of frozen apple pie 2 Baking tray Mode 2 / 200 °C | 35-40 |
12_steam cooking

settings

The twin cooking mode allows you to use different settings for the upper and lower compartments, such as various end times, cooking times, temperatures, and alarm settings. To apply or modify settings in either compartment, press the respective key:

Upper compartment Lower compartment

To apply or modify settings in Twin cooking mode, choose the compartment.
TIME SETTING
When connecting the power for the first time, please use the product after setting the time.

12:00
Set hours | 01
Press Time key, hours figure will blink.

13:00
Set minutes | 02
Press Time key, minutes figure will blink.

Turn Selector knob, set time.
03 | Confirm time
Press Time key again, to set the current time.
SET COOKING TIME

0:00
Set cooking time | 01
Press Cooking time key, cooking time figure will blink.


1:30
02 | Confirm cooking time
Press Cooking time key again, or wait 4~5 seconds.
Turn Selector knob, apply specific setting.
SET END TIME

12:00
Set End time | 01
Press End time key, end time figure will blink.
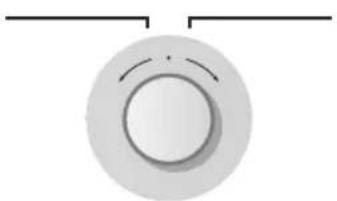

13:45
02 | Confirm End time
Press End time key again, or wait 3 seconds.
Turn Selector knob, set specific time.
settings_13
SET DELAY START
If the cooking time is entered after the end time has already been set, the oven starts and stops operation automatically at proper time.

- Press End time key to set desired end time of cooking.
- Press Cooking time key to set desired cooking time of your food.
The delay start point is automatically calculated and the oven is waiting until delay start point.

NOTE: Delay start will not be set in twin mode.
The cooking time, end time and delay start can be set after cooking function setting.

Warning: When you use delay start, do not leave the food for too long time in the oven as food may spoil. As delay start function is without pre-heating, cooking result can be a little different with normal cooking condition with pre-heating.
CHANGE TIMES SET

or or
Select time to change | 01
Press End time or
Cooking time key, time figure will blink.
Turn Selector knob.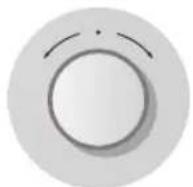


02 | Confirm changed time
Press End time or
Cooking time key, time figure will blink.
CHANGE TEMPERATURE


Set Temperature | 01
Press Temperature key, temperature figure will blink.
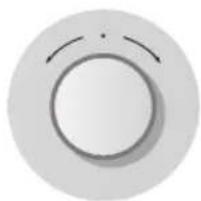
Turn Selector knob, set new temperature.


02 | Confirm Temperature
Wait 4~5 seconds, then the new temperature is set.
14_settings

SET ALARM

12:00
Set Alarm | 01
Press Alarm key, Alarm figure will blink.

Turn Selector knob, set timer time.

13:15
02 | Confirm Alarm
Press Alarm key again or wait 3 seconds, and Alarm is set.
DEACTIVATE ALARM

Press and hold the Alarm key for two seconds; the alarm figure will fade and the time will be displayed.
TIME DISPLAY

During the cooking process, press the Time key to see the clock time.
TONE SIGNAL


To activate or deactivate the tone signal, press and hold the Time and End time keys for 3 seconds.
LAMP

Press the Lamp key once for the lamp and twice to turn it off.
The lower lamp is optional.
Press the Lamp key once for full, twice for upper, three times for lower compartment lamp, and four times to turn it off.
CHILD LOCK


Press and hold the Partition selector and Lamp keys for 3 seconds. The child lock figure indicates that the child lock is active.
STEAM ASSIST LEVEL

To control the intensity of the steam in the steam assist cook function, press the Steam assist level key to select an intensity level from 1 to 3.
DRAIN

To start draining water, press and hold the Drain key for 3 seconds.
Press the Drain key again to stop draining water. To remove the blinking DISPLAY ICON, use the draining function for at least 1 minute.
NOTE: If you don't stop draining, the oven decides the proper time for draining water and automatically stops draining.
Automatic cooking
Automatic cooking
With the automatic cooking function, you can select desired auto programmes for cooking, roasting, and baking.
Select Auto cook mode | 01
Select the desired auto cook mode by turning the Operation Knob.
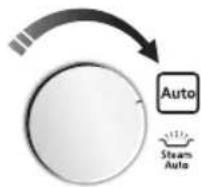
| Auto Cook Mode
| Steam Assist Auto Cook Mode

Set Mode | 02 Press the Function key to select the desired mode.


Set recipe | 03 ———— 04 | Set weight
Select the desired recipe by turning the Selector knob.
Select the desired weight by turning the Selector knob.

Warning: Do not use the steam container with the steam assist auto cook mode.
SINGLE OVEN AUTO COOK PROGRAMMES
The following table presents 25 Auto Programmes for Cooking, Roasting and Baking. These can be used in the single cavity of your oven. Always remove the divider. It contains quantities, weight ranges and appropriate recommendations. Cooking modes and times have been pre-programmed for your convenience. You can refer to these guidelines for cooking. Always insert food in a cold oven.
| No | Food item Weight | Weight/kg Accessory | Shelf Level | Recommendation |
| A-01 | Frozen pizza 0.3-0.60.7-1.0 | Big grid 2 | Put frozen | pizza in the middle of the big grid. |
| A-02 | Frozen oven chips 0.3-0.5 (thin)0.6-0.8 (thick) | Baking tray 2 | Distribute | frozen oven chips evenly on the baking tray. First setting is for thin French fries, the second setting is for thick oven chips. |
| A-03 | Frozen oven croquettes 0.3-0.50.6-0.8 | Baking tray 2 | Put frozen | potato croquettes on the tray. |
| A-04 | Homemade lasagne 0.3-0.50.8-1.0 | Big grid 3 | Prepare fresh | lasagne or use ready prepared product and put into a suitable sized ovenproof dish. Put dish in the centre of oven. |
| A-05 | Beef steaks 0.3-0.60.6-0.8 | Dripping tray with small grill | 4 Put | marinated beef steaks side by side on the small grid. Turn over as soon as the oven beeps. The first setting is for thin beef steaks, the second setting is for thick beef steaks. |
| A-06 | Roast beef 0.6-0.80.9-1.1 | Dripping tray with small grill | 2 Put | marinated roast beef on small grid. Turn over, as soon as the oven beeps. |
| No | Food item Weight | Weight/kg Accessory | Shelf Level | Recommendation |
| A-07 | Roast pork 0.6-0.8 | Dripping tray with small grill | 2 Put | marinated roast pork on small grid.Turn over as soon as the oven beeps. |
| A-08 | Lamb chops 0.3-0.4 | Dripping tray with small grill | 4 Marinate lamb chops. Put lamp chops on small grid. Turn over, as soon as the oven beeps.The first setting is for thin chops, the second setting is for thick chops. | |
| A-09 | Chicken pieces | Dripping tray with small grill | 4 Brush chicken pieces with oil and spices.Put chicken pieces side by side on the small grid. | |
| A-10 | Whole chicken | Dripping tray with small grill | 2 Brush whole chicken with oil and spices.Put chicken on the small grid. Turn over, as soon as the oven beeps. | |
| A-11 | Duck breast 0.3-0.5 | Dripping tray with small grill | 4 Prepare duck breast, put on the wire roast with the fat-side up. First setting is for one duck breast, the second setting is for 2 thick duck breasts. | |
| A-12 | Roll of turkey 0.6-0.8 | Dripping tray with small grill | 4 Put roll of turkey on the small grid.Turn over, as soon as the oven beeps. | |
| A-13 | Steamed fish 0.5-0.7 | Big grid 2 Rinse and clean fishes, such as whole trout, perch or sea bass. Put head to tail in an oval ovenproof glass dish. Add 2-3 tablespoon lemon juice. Cover with lid. | ||
| A-14 | Roast fish 0.5-0.7 | Dripping tray with small grill | 4 Put fishes head to tail on the small grid.First setting is for 2 fishes, the second setting is for 4 fishes. The programme is suitable for whole fishes, like trout, pikeperch or gilthead. | |
| A-15 | Salmon steaks | Dripping tray with small grill | 4 Put salmon steaks on the small grid.Turn over, as soon as the oven beeps. | |
| A-16 | Oven potatoes | Baking tray 2 Rinse potatoes, cut potatoes into halves.Brush with olive oil, herbs and spices.Distribute on the tray evenly.The first setting is for small potatoes (each 100 g), the second setting is for large oven potatoes (each 200 g). | ||
| A-17 | Roast vegetables | Dripping tray 4 Put vegetables, such as sliced courgette, pieces of pepper, sliced aubergine, mushrooms and cherry tomatoes into dripping tray. Brush with a mixture of olive oil, herbs and spices. | ||
| A-18 | Vegetable gratin | Big grid 2 Prepare vegetable gratin using an ovenproof round dish. Put dish in the centre of oven. | ||
| A-19 | Marble cake 0.5-0.6 | Big grid 2 Put dough into a suitable sized buttered baking dish for bundt cake. | ||
| A-20 | Fruit flan base | Big grid 2 Put dough into buttered baking dish for cake base. First setting is for one fruit flan base, the second setting is for 5-6 small tartlets. | ||
| No Food item Weight/kg Accessory | Shelf Level | Recommendation | |||
| A-21 | Sponge cake | 0.4-0.5 (midsize) 0.2-0.3 (small) | Big grid 2 | Put dough into a round black metal baking tin.First setting is for ∅ 26cm and the second setting is for small ∅ 18cm baking tin. | |
| A-22 | Muffins | 0.5-0.6 0.7-0.8 | Big grid 2 | Put dough into black metal baking dish for 12 muffins. First setting is for small muffins, the second setting is for large muffins. | |
| A-23 | Bread | 0.7-0.8 (white) 0.8-0.9 (wholemeal) | Big grid 2 | Prepare dough according to manufacturers instructions and put into a black metal rectangular baking dish (length 25 cm).The first setting is for white bread (0.7-0.8kg) and the second setting (0.8-0.9kg) is for wholemeal bread. | |
| A-24 | Homemade pizza | 1.0-1.2 1.3-1.5 | Baking tray 2 | But pizza on the tray. The weight ranges include topping such as sauce, vegetables, ham and cheese. Setting 1 (1.0-1.2 kg) is for thin pizzas and setting 2 (1.3-1.5kg) is for pizza with much topping. | |
| A-25 | Yeast dough Fermentation | 0.3-0.5 0.6-0.8 | Big grid 2 | The first setting is recommended for rising pizza yeast dough. The second setting is suitable for yeast dough for cake and bread dough. Put into a large round heat-resistant dish and cover with cling film. | |
SINGLE OVEN STEAM AUTO PROGRAMMES
The following table presents 15 auto programmes for steam assist baking and roasting.
These can be used in the single cavity of your oven. Always remove the divider.
It contains weight, accessory and shelf level guidance and appropriate recommendations.
Temperatures, modes and cooking times have been pre-programmed for your convenience.
You can refer to these guidelines for cooking. Always insert food in a cold oven.
| Code | Food item | Weight/ kg | Accessory | Shelf Level | Recommendation |
| S-01 | Dough proving 0.3-0.8 Big grid 2 | Put dough into bowl. | |||
| S-02 | Bread Rolls 0.2-0.4 Baking tray 2 | Put 4-8 ready to bake dough rolls side by side on baking paper. | |||
| S-03 | Croissants 0.2-0.4 Baking tray 2 | Follow instruction of food manufacturer and prepare 4-8 croissants of ready to bake dough. Put side by side on baking paper. | |||
| S-04 | Baguettes 0.4-0.8 Baking tray 2 | Prepare 2-3 baguettes and put widthways on baking paper. | |||
| S-05 | White Loaf Bread 0.7-0.8 Big grid 2 | Put bread dough into a black metal loaf tin with a length of 25 cm. Put widthways into the oven. | |||
| S-06 | Mixed Grain Bread/ French Salty Cake | 0.7-0.8 Big grid 2 | Put dough for bread or cake salé into a black metal loaf tin with a length of 25 cm. Put widthways into the oven. | ||
| S-07 | Wholemeal Bread | 0.7-0.8 Big grid 2 | Put dough into a black metal loaf tin with a length of 25 cm. Put widthways into the oven. |
| Code | Food item | Weight/kg | Accessory | Shelf Level | Recommendation |
| S-08 | Foccacia 0.4-0.8 Baking tray 2 | Prepare bread each 400 g, such as foccacia, pita or flat bread. Put side by side on baking paper. | |||
| S-09 | Homemade Pizza 1.0-1.2 Baking tray 2 | Prepare rectangular pizza, use baking paper. Distribute topping evenly on pizza. | |||
| S-10 | Frozen Self-rising Pizza | 0.3-0.5 Big grid 3 | Put pizza in the centre of the rack. | ||
| S-11 | Vegetable Gratin 0.8-1.0 Big grid 2 | Use flameproof round dish with a diameter of 25 cm. Put e.g. precooked potato slices, layer of courgette slices and sliced tomatoes into the dish, add cream, salt and pepper. Add grated cheese. | |||
| S-12 | Roast Beef 1.0-1.2 Dripping tray | with small grill | 2 | 2 | Brush meat (4-6 cm thick) with oil and spices. Put on small grid with the fat side down. Turn over as soon as the oven beeps. |
| S-13 | Roast Pork 1.0-1.2 Dripping tray | with small grill | 2 | 2 | Brush meat with oil and spices. Put on small grid with the fat side down. Turn over as soon as the oven beeps. |
| S-14 | Roast Chicken 1.0-1.2 Dripping tray | with small grill | 2 | 2 | Brush meat with oil and spices. Put on small grid with breast side down. Turn over as soon as the oven beeps. |
| S-15 | Roast Fish 0.6-0.8 Dripping tray | with small grill | 2 Put | 2-3 whole fish side by side, head to tail on the small grid. This programme is suitable for fish such as trout, gilthead, sole or pike perch. |
LOWER OVEN STEAM AUTO PROGRAMMES
Before using the lower steam assist auto function, insert the divider into the oven.
The following table presents 5 auto programmes for steam assist baking and roasting.
It contains weight, accessory and shelf level guidance and appropriate recommendations.
Temperatures, modes and cooking times have been pre-programmed for your convenience.
You can refer to these guidelines for cooking. Insert food in the lower cold oven.
| Code | Food item | Weight/kg | Accessory | Shelf Level | Recommendation |
| S-01 | Small Chocolate Cakes | 0.4-0.8 | Baking tray 1 | Pour 100 g dough into each ramekin with a diameter of 8 cm. Use 4-8 dishes. | |
| S-02 | Pasta Gratin | 0.4-0.6 | Big grid | 1 | Put chilled pasta gratin into a suitable sized ovenproof dish. |
| S-03 | Roast Lamb | 1.0-1.2 | Dripping tray with small grill | - | Brush meat with oil and spices. Put with fat side down on Small grid. Put Dripping pan with Small grid on bottom of oven. Turn meat over as soon as the oven beeps. |
| S-04 | Roast Duck Breast | 0.3-0.4 | Dripping tray with small grill | 1 | Put duck with fat side down on Small grid. Turnover as soon as the oven beeps. |
| S-05 | Roast Salmon Filet | 0.5-0.6 | Baking tray 1 | Put salmon filet on baking paper on tray. Put skin side up if you prefer crispy skin. |
automatic cooking_19
TWIN OVEN STEAM AUTO PROGRAMMES
Before using twin steam assist auto cook function insert the divider into the oven.
The following table presents 5 Twin steam assist auto programmes for baking and roasting. Using those programmes you will be able to cook your main dish & side dish or main dish & dessert simultaneously.
This table contains its weight, accessory and shelf level guidance and appropriate recommendations.
Temperatures, modes and cooking times have been pre-programmed for your convenience. Please refer to those guidelines for cooking. Always insert food in cold oven.
| Code | Twin oven | Food item | Weight/ kg | Accessory | Shelf Level | Recommendation |
| S-01 upper | upper Potato quarters | 0.4-0.5 B | Baking tray 4 | Prepare potato quarters and put on tray. | ||
| lower Duck breast 0.3-0.4 Dripping with small grill | 1 Put | duck breast with the skin side up on Small grid. | ||||
| S-02 upper | Roast fish filets | 0.4-0.6 D | Dripping tray with small grill | 4 | Put roast fish filets, such as pike perch filet, red mullet, hoki or wolffish filets with the skin side up on Small grid. | |
| lower Small chocolate cakes | 0.4-0.6 B | Baking tray 1 Pour | 100 g dough | rough into each ramekin with a diameter of 8 cm. Use 4-6 dishes. | ||
| S-03 upper | Vegetable tarte | 0.4-0.6 B | Big grid 5 Put dough | into flat | ceramic dish with a diameter of 25 cm. Add vegetables, salt and pepper. Put grated cheese on top. | |
| lower Crème 0.4-0.6 Baking tray 1 Pour crème mixture into 4-6 ramekins with a diameter of 8 cm. Pour 100 g in each dish. | ||||||
| S-04 upper | Frozen chicken wings | 0.4-0.6 D | Dripping tray with small grill | 4 Put | frozen chicken wings evenly on Small grid. | |
| lower Frozen puff Pastry Snacks | 0.4-0.6 B | Baking tray 1 Distribute frozen | 4 Put | puff pastry snacks evenly on tray. | ||
| S-05 upper | Chicken pieces | 0.4-0.8 D | Dripping tray with small grill | 4 Brush | sh chicken pieces with oil and spices and put on Small grid | |
| lower Clafoutis 0.8-1.0 Big grid 1 | Put batter into flat ceramic | quiche dish with a diameter of 25 cm. Arrange cherries evenly on top. This programme is suitable for a French style sweet fruit gratin. | ||||
20_automatic cooking
installation & maintenance
INSTALLATION

Safety instructions for the installation
This oven may be installed only by an approved electrician. The installer is responsible for connecting the appliance to the mains and in so doing for observing the relevant safety regulations.
- Ensure protection from live parts when installing the oven.
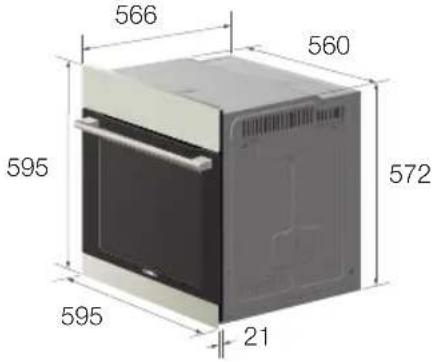
- The kitchen cabinet in which the oven is built in must satisfy stability requirements as specified in DIN 68930. 566
Technical specifications
| Input voltage / frequency | 230 V ~ 50 Hz |
| Volume (usable capacity) | 70 L |
| Weight with packaging | max. 3650 W |
| Housing (W x H x D) | 595 x 595 x 566 mm |
| Oven interior (W x H x D) | 440 x 365 x 405 mm |
Power connection
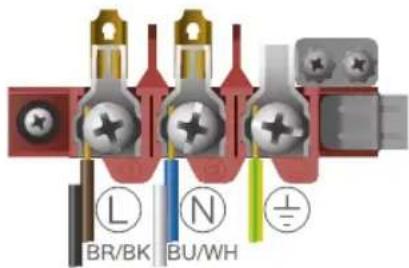
If the appliance is not connected to the mains with a plug, a multi-pole isolator switch (with at least 3 mm contact spacing) must be provided in order to satisfy safety regulations. The power cable (H05 RR-F or H05 VV-F, min. 1.5 m, 1.5 ~ 2.5 mm²) must be of sufficient length to be connected to the oven, even if the oven stands on the floor in front of its built-in cabinet. Open the rear connection cover of the oven with a screwdriver and loosen the screws of the cable clamp before you connect the power lines to the relevant connection terminals. The oven is earthed via the (⊥)-terminal. If the oven is connected to the mains with a plug, this plug must remain accessible after the oven is installed. Samsung will take no responsibility for accidents that originate from a missing or faulty earth connection.
Installation in the cabinet
This is a built-in oven, which needs to be installed into an upper or lower cabinet.
- Observe minimum distances. • Fix oven on both sides using screws. After installation, remove the vinyl protective film from the door to the appliance and the protective film from the interior surfaces of the oven.

Air flow

Before the oven is used for the first time, it should be cleaned thoroughly. Do not use any abrasive cleaning agents, cloths or substances, because they could damage the oven surfaces.
Use warm water, detergent and a soft clean cloth to clean the baking tray, dripping tray, grids and the other accessories, as well as the internal compartment and the guide rails at the oven sides. The front should be cleaned with a damp, soft and clean cloth.
Check if the oven clock is set correctly and remove all accessories from the oven. Run the oven in single mode with convection for one hour at 200 °C. This procedure will burn any remaining production substances in the oven with an unmistakable odour. This is normal, though make sure your kitchen is well ventilated during that time.
TROUBLESHOOTING
| PROBLEM SOLUTION | |
| What should I do if the oven doesn’t heat up? | The oven may not be switched on. Switch the oven on.The clock may not be set. Set the clock.Check to see if the required settings have been applied.A household fuse may have blown or a circuit breaker may has tripped.Replace the fuses or reset the circuit. If this happens repeatedly, call an electrician. |
| What should I do if the oven doesn’t heat up even after the function and temperature have been set? | There may be problems with the internal electrical connections. Call your local service centre. |
| What should I do if an error code appears and the oven does not heat up? | There is a fault in the internal electrical circuit connection. Call your local service centre. |
| What should I do if the time display is blinking? | There has been a power failure. Set the clock. |
| What should I do if the oven light doesn’t illuminate? | The oven light is faulty. Call your local service centre. |
| What should I do if the oven’s fan is running without having been set? | After use, the oven’s fan runs until the oven has cooled down. Call your local service centre if the fan continues to run after the oven has cooled down. |
INFORMATION CODES
| CODE PROBLEM SOLUTION | ||
 | Safety shut off. The oven continues operating at the set temperature for a prolonged time. | Turn oven off and remove food. Allow oven to cool before using it again. |
 | Key is pressed for over 10 seconds. Call your local SAMSUNG Customer Care Centre. | |
 | Divider Missing. Divider use is incorrect. Insert divider for upper, twin and lower mode. Remove divider for single mode. | |
 | An oven error may cause low performance and problems in safety. Stop using the oven immediately. | Call your local SAMSUNG Customer Care Centre. |
1) ** refers to all numbers. 22_installation & maintenance
cleaning & care
STEAM CLEANING (OPTIONAL)
If your oven is dirty and must be cleaned, you can use the built-in steam cleaning. Steam cleaning will be available after the oven has cooled down.

- Remove all accessories from the oven.

- Pour 400 ml (3/4 pint) of water onto the bottom of the oven.

- Close the oven door.

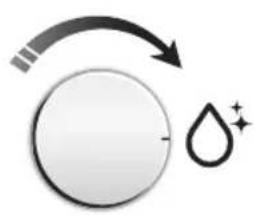
- Set the operation knob to steam cleaning. When the display starts to blink and a beep occurs, the operation is complete.

- Set the operation knob to Off to end the steam cleaning.

- Clean the oven interior with a soft, clean cloth.

Steam cleaning notes
- Take care when opening the door before the end of the steam cleaning procedure; the water on the bottom is hot.
- Open the oven door and remove the remaining water with a sponge.
- Never leave the residual water in the oven for a longer time, for example, overnight.
- Clean the oven interior with a sponge and detergent or a soft brush. Stubborn soil can be removed with a nylon scourer.
- Lime deposits can be removed with a cloth soaked in vinegar.
- Use a soft cloth and clear water to clean the interior. Do not forget to wipe under the oven door seal. • If the oven is heavily soiled, the procedure may be repeated after the oven has cooled.
- If the oven is heavily soiled with grease, for example, after roasting or grilling, it is recommended that you rub detergent into the stubborn soil before activating the oven cleaning function.
- Leave the oven door ajar at 15° after cleaning to allow the interior enamel surface to dry thoroughly.
DESCALING CLEANING
Using the steam cook function is required to perform periodic descaling. This oven counts steam cooking time and informs you of an appropriate moment for descaling.
01 | Select Descaling cleaning mode
When the DISPLAY ICON is blinking, perform the descaling 6 steps.

After completing the descaling 6 steps,
the blinking DISPLAY ICON will disappear.

Warning: With the blinking DISPLAY ICON, the steam cooking function is available for 2 hours max. If you do not perform the descaling 6 steps, you cannot use the steam cooking function.

Warning: Water scale is a normal phenomenon and it can affect the proper functioning of this oven.
Descaling liquid: Descaling product 125 ml + 1 L drinking water

Warning
• Use a descaling liquid product dedicated for steam ovens or coffee machines. - Do not use a descaling product for other machines such as washing machines.
02 | Descaling 6 steps
| d-1 |  | Drain remaining water inside oven. Press and hold Drain key for 3 seconds to start draining and wait until the d-2 step starts automatically. |
| d-2 |  | Fill water tank with descaling liquid to water level 3. When the descaling liquid approaches water level 3, the d-3 step starts automatically. |
| d-3 |  | d-3 step takes 3 hours for descaling.After 3 hours, the d-4 step begins automatically. |
| d-4 |  | Drain all descaling liquid inside oven.Press and hold the Drain key for 3 seconds to start draining and wait the d-5 step starts automatically. |
| d-5 |  | Fill water tank with clean water for rinse.When the clean water approaches water level 3, the d-6 step starts automatically. |
| d-6 |  | Drain all water inside oven for rinse.Press and hold Drain key for 3 seconds to start draining and wait until descaling cleaning is completed. |

Important: When you start descaling, proceed through all descaling 6 steps. If you do not, you must restart the descaling process from the beginning to use the steam cooking function again.
24 Cleaning & Care

RAPID DRYING
- Leave the oven door ajar at approximately 30°.
- Set the operation knob to single mode.
- Press the function button.
- Select convection with the selector knob.
- Set a cooking time of about 5 minutes and a temperature of 50°C.
- Switch the oven off at the end of this period.
CATALYTIC ENAMEL SURFACE (OPTIONAL)
The removable cover casing is coated with a dark gray catalytic enamel. This can become coated with oil and fat distributed by circulating air during convection heating. These deposits will burn off at oven temperatures of 200°C and higher, for example, while baking or roasting. Higher temperatures will result in faster burning.
- Remove all accessories from the oven.
- Clean all interior oven surfaces as described in the hand cleaning section.
- Set the oven to upper and lower heat.
- Set the heat to 250°C.
- Run the oven for approximately 1 hour. The length of time depends on the degree of soiling. Any remaining soil will gradually disappear with each subsequent use of the oven at high temperatures.
HAND CLEANING

CAUTION: MAKE SURE THE OVEN AND ACCESSORY IS COOL BEFORE CLEANING
Oven Interior
- For cleaning the interior of the oven, use a clean cloth and a mild cleaning agent or warm soapy water. • Do not hand-clean the door seal. • Do not use scouring pads or cleaning sponges. • To avoid damaging the enameled oven surfaces, use customary oven cleaners. • To remove stubborn soil, use a special oven cleaner.
Do not use abrasive cleaning agents, hard brushes, scouring pads or cloths, steel wool, knives or other abrasive materials.
Oven exterior
- For cleaning the exterior of the oven, use a clean cloth and a mild cleaning agent or warm soapy water. • Dry with kitchen roll or a dry towel.
- Do not use scourers, caustic cleaners or abrasive products.
Stainless steel oven fronts
- Do not use steel wool, scouring pads or other abrasives. They may damage the finish.
Aluminum oven fronts
- Wipe the surface gently with a soft clean cloth or micro fiber cloth and a mild window cleaning detergent.
Accessory
Wash the accessory after every use and dry it with a kitchen towel. If necessary, lay in warm soapy water for about 30 minutes for easier cleaning.
cleaning & care_25


DOOR REMOVAL
For normal use, the oven door must not be removed but if removal is necessary, for example, for cleaning purposes, follow these instructions.

CAUTION: The oven door is heavy.

- Open the door and flip open the clips at both hinges completely.

- Close the door by approximately 70°. With both hands, grasp the sides of the oven door at its middle and pull-lift until the hinges can be taken out.

ATTACHING: Repeat steps 1 and 2 in reverse order.
DOOR GLASS REMOVAL
The oven door is equipped with 2 EA-4 EA sheets of glass placed against each other. These sheets can be removed for cleaning.

- Remove the two screws on the left and right sides of the door.

- Detach the covering and remove glass 1 from the door.

- Lift glass 2 and remove the two holder glass rubber from the top of the sheet. Clean the sheets with warm water or washing-up liquid and polish dry them with a soft clean cloth.

ATTACHING: Repeat steps 1, 2 and 3 in reverse order.
The Door-Glass is different from 2 EA to 4 EA model by model.
When assembling the inner glass 1, put printing to direction below.
26_cleaning & care
DETACHING THE SIDE RUNNERS (OPTIONAL)

- Press the central part of the side runner top portion.

- Rotate the side runner by approximately 45 degrees.

- Pull and remove the side runner from the bottom two holes.

ATTACHING: Repeat steps 1, 2, and 3 in reverse order.
CLEANING THE TOP HEATER (OPTIONAL)
- Remove the upper circular nut by turning it anticlockwise while holding the top of the heater.

The front of the top heater inclines downwards.

- When cleaning has been done, lift the top of the heater back to its original level and turn the circular nut clockwise.
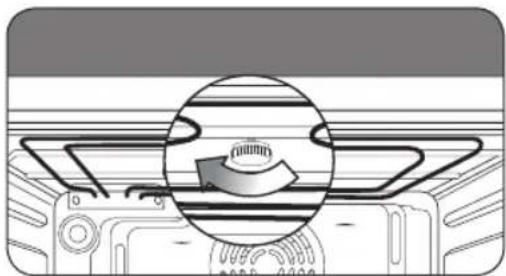

ATTACHING: Repeat steps 1 and 2 in reverse order.
BULB EXCHANGE

Danger of electric shock! Before replacing any of the oven bulbs, take the following steps:
- Switch oven off. • Disconnect the oven from the mains.
- Protect the oven light bulb and the glass cap by laying a cloth on the bottom of the oven compartment.
- Bulbs can be purchased from the SAMSUNG Service Centre.
Rear oven lamp
- Remove cap by turning anticlockwise and remove the metal ring, the sheet ring and clean the glass cap. If necessary, replace the bulb with a 25 watt, 230 V, 300 °C heat-resistant oven light bulb.
- Clean the glass cap, the metal ring and the sheet ring if necessary.
- Fit the metal and the sheet ring to the glass cap.
- Place glass cap where you have removed it in step 1 and turn it clockwise to keep it in place.

Oven side light (Optional)
- To remove the glass cover, hold the lower end with one hand, insert a flat sharp implement such as a table knife between the glass and the frame.
- Pop out the cover.
- If necessary, replace the halogen bulb with a 25-40 watt, 230 V, 300 °C heat resistant halogen oven light bulb.


Tip: Always use a cloth when handling a halogen bulb to prevent sweat from fingers being deposited on the bulb surface.
- Reattach the glass cover.

CORRECT DISPOSAL OF THIS PRODUCT (WASTE ELECTRICAL & ELECTRONIC EQUIPMENT)
(Applicable in countries with separate collection systems)
This marking on the product, accessories or literature indicates that the product and its electronic accessories (e.g. charger, headset, USB cable) should not be disposed of with other household waste at the end of their working life. To prevent possible harm to the environment or human health from uncontrolled waste disposal, please separate these items from other types of waste and recycle them responsibly to promote the sustainable reuse of material resources.
Household users should contact either the retailer where they purchased this product, or their local government office, for details of where and how they can take these items for environmentally safe recycling.
Business users should contact their supplier and check the terms and conditions of the purchase contract. This product and its electronic accessories should not be mixed with other commercial wastes for disposal.
28_cleaning & care


NOTE


NOTE


30_cleaning & care


NOTE


SAMSUNG
QUESTIONS OR COMMENTS
| COUNTRY | CALL | OR VISIT US ONLINE AT |
| AUSTRIA 0810 - SAMSUNG (7267864, € 0.07/min) | www.samsung.com | |
| BELGIUM 02-201-24-18 | www.samsung.com/be (Dutch)www.samsung.com/be_fr (French) | |
| DENMARK 70 70 19 70 | www.samsung.com | |
| FINLAND 030-6227 515 | ||
| FRANCE 01 48 63 00 00 | www.samsung.com/fr | |
| GERMANY 0180 5 SAMSUNG bzw.180 5 7267864* (*0,14 €/Min. aus dem dt.Festnetz, aus dem Mobilfunk max. 0,42 €/Min.) | www.samsung.com | |
| ITALIA 800-SAMSUNG(726-7864) | ||
| CYPRUS 8009 4000 only from landline(+30) 210 6897691 from mobile and land line | ||
| GREECE 80111-SAMSUNG (80111 726 7864) only from land line(+30) 210 6897691 from mobile and land line | ||
| LUXEMBURG 261 03 710 | ||
| NETHERLANDS 0900-SAMSUNG (0900-7267864) (€ 0,10/Min) | ||
| NORWAY 815 56480 | ||
| PORTUGAL 808 20-SAMSUNG(808 20 7267) | ||
| SPAIN 902-1 - SAMSUNG (902 172 678) | ||
| SWEDEN 0771 726 7864 (SAMSUNG) | ||
| SWITZERLAND 0848 - SAMSUNG(7267864, CHF 0.08/min) | www.samsung.com/ch (German)www.samsung.com/ch_fr (French) | |
| U.K 0330 SAMSUNG (7267864) | www.samsung.com | |
| EIRE 0818 717100 | ||
Code No.: DG68-00382F-02
- INSTALLATION IN THE CABINET
- SIDE LAMP (OPTIONAL)
- SET TEMPERATURE
- DOUBLE COOKING
- REMOVING THE DOOR GLASS
- CORRECT DISPOSAL OF THIS PRODUCT (WASTE FROM ELECTRICAL AND ELECTRONIC EQUIPMENT)
- (APPLIES IN COUNTRIES WITH WASTE SORTING)
- SAFE DISPOSAL OF THE PRODUCT (ELECTRONICS AND ELECTRICAL EQUIPMENT)
- STEAM COOKING
- CONFIRM ALARM
- CLOCK DISPLAY
- OVEN SIDE LIGHT (ACCESSORY)
- IMAGINE THE POSSIBILITIES
- USING THIS MANUAL
- SAFETY INSTRUCTIONS
- ELECTRICAL SAFETY
- SAFETY DURING OPERATION
- DISPOSAL INSTRUCTIONS
- DISPOSING OF THE PACKAGING MATERIAL
- DISPOSING OF OLD APPLIANCES
- TO DO THIS, DISCONNECT THE APPLIANCE FROM THE MAINS SUPPLY AND REMOVE THE MAINS LEAD
- OVEN CONTROLS
- FRONT DESIGN
- ACCESSORY
- DIVIDER
- SMALL GRID (OPTIONAL)
- BIG GRID
- DRIPPING TRAY (OPTIONAL)
- BAKING TRAY
- STEAM CONTAINER
- TELESCOPIC SLIDE GUIDE (OPTIONAL)
- TEST DISHES
- GRILLING
- BAKING
- FUNCTIONS
- CONVENTIONAL
- CONVECTION
- SINGLE MODE
- SELECT SINGLE MODE
- SET FUNCTION
- TWIN COOKING
- SELECT TWIN COOKING MODE
- SET UPPER TEMPERATURE
- SET LOWER FUNCTION
- AVAILABLE MODE
- DISPLAY ICON INFORMATION
- STEAM COOKING PROGRESS
- INSERT STEAM CONTAINER FOR STEAM COOK
- SELECT THE STEAM COOKING FUNCTION
- POUR DRINKING WATER INTO THE WATER INLET
- COOKING TIME
- END TIME
- STEAM ASSIST LEVEL
- SET THE COOKING TIME OR END TIME
- DRAIN ALL WATER AFTER STEAM COOKING
- STEAM COOKING GUIDE
- STEAM ASSIST COOKING GUIDE
- SETTINGS
- TIME SETTING
- SET COOKING TIME
- SET END TIME
- SET DELAY START
- CHANGE TIMES SET
- CHANGE TEMPERATURE
- SET ALARM
- DEACTIVATE ALARM
- TIME DISPLAY
- TONE SIGNAL
- LAMP
- CHILD LOCK
- DRAIN
- AUTOMATIC COOKING
- SELECT AUTO COOK MODE
- SINGLE OVEN AUTO COOK PROGRAMMES
- SINGLE OVEN STEAM AUTO PROGRAMMES
- LOWER OVEN STEAM AUTO PROGRAMMES
- TWIN OVEN STEAM AUTO PROGRAMMES
- INSTALLATION & MAINTENANCE
- INSTALLATION
- SAFETY INSTRUCTIONS FOR THE INSTALLATION
- TECHNICAL SPECIFICATIONS
- POWER CONNECTION
- TROUBLESHOOTING
- INFORMATION CODES
- CLEANING & CARE
- STEAM CLEANING (OPTIONAL)
- STEAM CLEANING NOTES
- DESCALING CLEANING
- SELECT DESCALING CLEANING MODE
- WARNING
- DESCALING 6 STEPS
- RAPID DRYING
- CATALYTIC ENAMEL SURFACE (OPTIONAL)
- HAND CLEANING
- OVEN INTERIOR
- OVEN EXTERIOR
- STAINLESS STEEL OVEN FRONTS
- ALUMINUM OVEN FRONTS
- DOOR REMOVAL
- DOOR GLASS REMOVAL
- DETACHING THE SIDE RUNNERS (OPTIONAL)
- CLEANING THE TOP HEATER (OPTIONAL)
- BULB EXCHANGE
- DANGER OF ELECTRIC SHOCK! BEFORE REPLACING ANY OF THE OVEN BULBS, TAKE THE FOLLOWING STEPS
- REAR OVEN LAMP
- OVEN SIDE LIGHT (OPTIONAL)
- CORRECT DISPOSAL OF THIS PRODUCT (WASTE ELECTRICAL & ELECTRONIC EQUIPMENT)
- (APPLICABLE IN COUNTRIES WITH SEPARATE COLLECTION SYSTEMS)
- NOTE
- SAMSUNG
Brand : SAMSUNG
Model : BQ1VD6T131
Category : Oven