
Pane Deluxe - Bread maker FAKIR - Free user manual and instructions
Find the device manual for free Pane Deluxe FAKIR in PDF.


| Product Type | Bread Machine |
| Brand | Fakir |
| Model | Pane Deluxe |
| Dimensions (L x W x H) | Approx. 30 x 25 x 35 cm |
| Weight | Approx. 5 kg |
| Power Supply | 220-240 V, 50/60 Hz |
| Power Consumption | 600-800 W |
| Maximum Bread Weight | Up to 1.5 kg |
| Programs | Basic, Whole Wheat, French, Gluten-Free, Dough, Jam, Cake |
| Control Type | Digital LCD Display with Touch Buttons |
| Delayed Start Timer | Up to 15 hours |
| Crust Control | Light, Medium, Dark |
| Keep Warm Function | Up to 1 hour after baking |
| Baking Pan | Non-stick coated, removable |
| Viewing Window | Yes, with interior light |
| Exterior | Cool-touch stainless steel |
| Safety Features | Overheat protection, automatic shut-off |
| Cleaning and Maintenance | Wipe exterior with damp cloth; wash pan and kneading paddle with warm soapy water |
| Spare Parts Available | Replacement kneading paddle, baking pan, and measuring cups |
| Warranty | 2 years |
Frequently Asked Questions - Pane Deluxe FAKIR
User questions about Pane Deluxe FAKIR
0 question about this device. Answer the ones you know or ask your own.
Ask a new question about this device
Download the instructions for your Bread maker in PDF format for free! Find your manual Pane Deluxe - FAKIR and take your electronic device back in hand. On this page are published all the documents necessary for the use of your device. Pane Deluxe by FAKIR.
USER MANUAL Pane Deluxe FAKIR
natural_image
Exterior view of a modern electric food processor (no visible text or symbols)
natural_image
Simple line drawing of an open box with an upward arrow on the lid (no text or symbols)The BAKING program can be started immediately even when the appliance is still hot.
Information about the operating instructions 24
Liability 24
Notices in the operating instructions.... 24
CE Declaration of Conformity 25
Usage Area....25
Unauthorized use 25
Safety is Important....25
Safety Instructions 26
Accesories 27
Parts and Drawings 27
Control Panel 27
Unpacking and first use.... 28
CONTROL PANEL 28
-
DISPLAY 28
-
START / STOP key 28
-
TIMER keys 28
-
COLOR key 29
-
LOAF key....29
-
MENU key 29
CONTROL PANEL 30
Safety functions....30
BREAD BAKING MACHINE PROGRAM PHASES 30
-
Insert the baking tin 30
-
Put the ingredients 30
-
Select program 30
-
Mix and knead the dough 31
-
Leave the dough to rise.... 31
-
Baking....31
-
Warming 31
-
End of the program phases 31
Heating the appliance to make the dough rise 31
Cleaning and Maintenance.... 31
Questions & Answers on Baking 33
The dough spills over when it is left to rise.... 33
The bread rises and spills over anyway 33
Questions & Answers On Bread Baking Machines 35
Error with the prescriptions.... 36
Solutions for the problems.... 37
Remarks on the Recipes 37
-
Ingredients....37
-
Adapting the doses....39
-
Adding and measuring the ingredients and quantities...... 39
-
Recipes for the Pane Deluxe Automatic Bread Baking Machine 40
-
Bread weights and volumes 40
-
Baking results....40
RECIPIES....41
Waste Disposal....43
Dispatch....43
Thank you for purchasing Fakir Pane Deluxe Automatic Bread Baking Machine which has been designed and manufactured to give you many years of trouble-free service. You may already be familiar with using a similar product, but do please take time to read these instructions – they have been written to ensure you get the very best from your purchase.
Information about the operating instructions
These operating instructions are intended to enable the safe and proper handling and operation of the appliance.
Read these operating instructions carefully before using the appliance for the first time.
Keep the operating instructions in a safe place. Include these operating instructions when passing the appliance on to another user.
Liability
Fakir Elektrikli Ev Aletleri ve Dış Ticaret A.Ş. will accept no liability for damages resulting from failure to comply with the operating instructions.
Fakir Elektrikli Ev Aletleri ve Dış Ticaret A.Ş. cannot assume any liability in case the appliance is used for other purposes than its intended use or handled, repaired or serviced improperly.
Notices in the operating instructions

WARNING!
Indicates notices which, if ignored, can result in risk of in jury or death.

ATTENTION!
Indicates notices of risks that can result in damage to the appliance.

Emphasizes tips and other useful information in the operating instructions.
CE Declaration of Conformity
This appliance fulfills the requirements of the Appliance and Product Safety Law (GPSG) and the EU Directives 2004/108/EC “Electromagnetic Compatibility” and 2006/95/EC “Low-Voltage Directive.”
The appliance bears the CE mark on the rating plate.
Usage Area
This product designed for just household use. It is not suitable for Business and industry type. Otherwise it will be accepted as “out of warranty conditions” by our Authorized Services.
Unauthorized use
The examples of unauthorized use listed here can result in malfunctions, damage to the appliance or personal injury:
This appliance is not designed to be used by persons (including children) with limited physical, sensory or mental capacities or by persons lacking in experience and/or knowledge, unless they are supervised by someone who is responsible for their safety or have received instructions on how to use the appliance.
Children should be supervised to ensure that they do not play with the appliance. Electric appliances are not toys for children! Therefore, use and store the appliance away from the reach of children. Children do not recognize the danger involved with handling an electric appliance. Do not let the power cord dangle from the appliance.. Keep packaging films away from children - danger of suffocation!
Safety is Important
For yours and others safety please read the instructions before using the appliance. Please keep this instruction in a safe place for the further use. If you pass the appliance on, pass on the instructions too. Remove all packaging, but keep it until you are satisfied that the appliance is working.
This appliance is not designed to be used by persons (including children) with limited physical, sensory or mental capacities or by persons lacking in experience and/or knowledge, unless they are supervised by someone who is responsible for their safety or have received instructions on how to use the appliance.
Safety Instructions
Read all the instructions in the manual and follow them carefully!
-
Do not touch any of the appliance's hot surfaces, Use oven cloths! The bread making machine is very hot after baking.
-
Never dip the connection cable or the appliance in water or any other liquid.
-
Keep your eye on the appliance when children around! Unplug the appliance if it is not being used and before cleaning it. Before removing single parts of the appliance let it cool down.
-
Never use the appliance with a defective connection cable, after malfunctions or if the appliance happen to be damaged in any way whatsoever! In these cases have the Customer Service check and repair it if necessary. Never try to repair it yourself. The warranty is void in this latter case.
-
The use of accessories not recommended by the manufacturer can cause damage. Use the appliance exclusively for the envisaged purposes.
-
Lay the appliance firmly on the counter to avoid that it falls off during kneading of a thick dough. This is especially important when using the preprogram function and the appliance is not being watched. In the case of extremely smooth counters the appliance should be placed on a thin rubber mat to avoid any risk of falling.
-
The bread making machine must be kept at a distance of at least 10 cm from other objects when it is working. The appliance can be used only indoors.
-
Make sure that the power cable does not touch any hot surface and that it does not hang over a table edge thus avoiding, for example that children may grab it.
-
Never place the appliance either on or near a gas or electrical stove top or a oven.
-
Pay great attention when handling the appliance especially when it is full of hot liquids!
-
Never remove the baking tin while the appliance is still working.
-
Do not fill the baking tin with an amount of ingredients greater than that required by the recipe! If this should happen, bread will not bake evenly or the dough will overflow. Follow the instructions carefully.
-
Metal foils or other materials must not be put inside the appliance as these may cause a fire or a short circuit!
-
Never cover the appliance with towels or other materials during use! The heat and steam must be free to escape. Danger of fire if the appliance is covered with flammable materials or comes in contact with curtains, etc.
-
Before trying to bake a given type of bread overnight, try to recipe first while keeping an eye on it to make sure that the doses of ingredients are correct, heat the dough is not too thick or thin that the quantity is too much and the hence risk is overflowing.
-
The appliance has a heat-insulated cool touch housing. The metal part becomes hot during use. Leave the appliance to cool before putting it away.
Accesories:
1 measuring spoon
1 measuring beaker
Parts and Drawings
A- Cover, removable
B- Viewing Point
C- Vent
D- Baking tin.
E- Kneading pegs
F- Baking compartment
G- Control Panel
H- Stainless steel casing
I- Lateral vent
450 W
220-240 V
50/60Hz
Class: I
- LCD display it shows information on the desired program number, baking level and bread weight (indicated by an arrow and the time.)
- START/ STOP key To start and stop the program
- TIMER keys To set the program timer.
- COLOR key To start the desired level of browning.
- LOAF key To set 3 weight levels as described below.
- MENU key To select the programs described in the bread baking machine programs This appliance is designed to work with 450 W 230V AC / 50Hz Voltage. Using the appliance with different voltage may give damage to it. Usage life 10 years.
natural_image
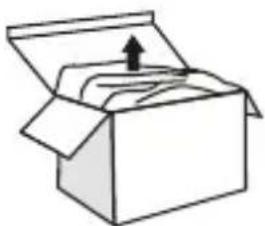
Simple line drawing of an open box with an upward arrow on the top face (no text or symbols)Unpacking and first use

WARNING!
Keep the packaging for storage and future transports (e.g. for moves, service).
CONTROL PANEL
1. DISPLAY
This displays signals when the appliance is ready for use. It corresponds to the normal program."1 3:25" appears on the display. The "1" specifies which program has been chosen and the "3:25" is the length of the program. The position of two markings shows the degree of browning that has been selected and the weight. The basic setting after switching the appliance on is "superior weight" and "medium browning level". during operation the course of the program can be read on the display. As the program proceeds the digits of the set time will decrease progressively. Other parts of the programme such as the timer, heating, kneading, pause, rising baking, keeping warm and programme end are also shown in the display.
2. START / STOP key
To start and stop the program. As soon as the START/STOP key pressed, the points of the time value start to blink. Use the START/STOP key to stop the program in any moment. Keep the key pressed until a signal beep is heard. The starting position of the aforementioned start program appears on the screen. If you want to use a different programme, please select this using the MENU buton before starting the programme.
3. TIMER keys
The following programs can be started with the timer: NORMAL (1), FRENCH (2), WHOLE WHEAT (3), SWEET BREAD (4) and DOUGH (7). The hours and minutes after which the preparation should be started need to be added to the relevant basic time for the specific program plus 1 hour of warning time (after the end of the baking process). The maximum time delay is 12 hours and 58 minutes per programme.
It is 8.30 p.m. and the bread must be ready for the next morning by 7.00 a.m., i.e, in 10 hours and 30 minutes. Press the TIME key until 10.30 appears, that is to say the time between now (8.30 p.m.) and when the bread must be ready.
When working with the timing function never use perishable ingredients such as milk, eggs, fruit, yogurt, onions, etc. !
4. COLOR key
The desired browning level is set with this key: LIGHT-MEDIUM-DARK
5. LOAF key
It provides for the following settings in the various programme(see table):
| LEVEL I | = for small bread weights up to 500 g |
| LEVEL II | = for medium bread weights up to 700 g |
| LEVEL III | = for large bread weights up to 900 g |
6. MENU key
Use this menu key to run one of the available programs described in detail in the "Bread Baking Machine Program Phases" table. Use the programs for the following specialities.
- BASIC For white and wheat rye bread This program is used the most.
- FRENCH For the preparation of particularly light white bread.
- WHOLEWHEAT For wholemeal bread
- SWEET BREAD for preparing sweet yeast dough for example
- QUICK for faster preparation of white and mixed wheat and rye bread
- GLUTEN FREE : For preparing gluten free bread
- DOUGH For the preparation of dough.
- PASTA DOUGH : For preparing pasta dough
- JAM To cook marmelades and jams
- BAKE To brown bread or cakes
CONTROL PANEL
Repeat function
If there is a brief power cut of cup to approximately seven minutes the programme position is stored and the machine can continue from this position when power is restored. This is possible only if the program was stopped before the kneading phase was reached. Otherwise you will have to start from the beginning.
Safety functions
If the temperature of the appliance is still too high for a new program after using the appliance previously, E 01 will appear on the display when pressing start again and an acoustic signal is given. If this is the case, press the START/STOP key until the E 01 messagee is deleted and the basic setting appears on the display. Remove the container and wait until the appliance has cooled.
The BAKING program can be started immediately even when the appliance is still hot.
BREAD BAKING MACHINE PROGRAM PHASES
1. Insert the baking tin
Place the non-stick coated baking tin exactly in the middle of the base inside the baking space. When the baking tin is pressed lightly in the centre the fixing device locks into place. To remove the baking tin pull w,th medium force on its carrying handle.

CAUTION!
The handle is hot after baking. Please use an oven cloth or similar item.
2. Put the ingredients
The ingredients must be put into the baking tin, the order specified in the relevant recipe.
3. Select program
Select the desired program with the SELECT<ON key. Choose the level corresponding to the selected program. Then select the desired degree of browning. Use the TIME key to set the time when the program is to be started. Press the START/STOP key.
4. Mix and knead the dough
The bread baking machine mixes and kneads the automatically until it reaches the right consistency.
5. Leave the dough to rise
After the last kneading cycle the bread baking machine is heated to the optimal temperature for the rising of the dough.
6. Baking
The bread baking machine sets the baking temperature and time automatically. If the bread is too light at the end of the baking program, use the BAKING program to let it brown more. To do so, press the START/STOP key, then select the BAKING program and start. When the desired degree of baking has been reached, stop the process.
7. Warming
Once the baking is over, the buzzer goes off to signal that the bread can be removed. The 1 hour warming time starts immediately. (Except dough menu.)
8. End of the program phases
Now remove the baking tin using an oven cloth, turn it over and if the loaf does not fall out onto the grid immediately-turn the kneading mechanism backwards and forwards a few times from underneath until the bread falls out. If the kneading hook becomes stuck in the bread, move it slightly upwards so that you can see the position of the propeller. The use a knife to cut along the propeller. You can easily remove the kneading hook.
Baking can be stopped at any time by pressing the START/STOP button. At the same time a sound is heard and control lamp goes off.
Heating the appliance to make the dough rise
The heating is switched only if the room temperature is lower than 25^ C. If the room temperature is above 25^ C the ingredients are already at the right temperature and there is no need for pre-heating. For the first and second rising the room temperature must be above 25^ C or high enough to make the dough rise without extra heating.
Cleaning and Maintenance
Before using the appliance for the first time wash the bread making machine's baking tin (never dip in the water) with a mild detergent and clean the kneading parts.
It is highly recommended to coat the new baking tin and the kneading pegs with heat resistant Grease before using them for the first time and let them heat in the oven for about 10 minutes. Once these have cooled down clean away (polish) the grease from the baking tin with a sheet of paper towel. This operation is to be performed to protect the non-stick coating. Operation can be repeated from time to time.
After use always leave the appliance to cool before cleaning it or putting it away. It takes about half an hour for the appliance to cool and to be ready again for baking and kneading.
Before cleaning pull out the plug and leave tha appliance to cool. Use a mild detergent. Never use chemical cleaning agents, gasoline, oven cleaners or any detergent that can scratch or ruin the coating.
Remove all the ingredients and crumb from the lid, casing and baking compartment with a moist towel. Never dip the appliance in water nor fill the baking compartment with water! For easy cleaning the lid can be removed by positioning it vertically and pulling it out.
Wipe the out side of the baking tin with a moist towel. The inside of the tin can be washed with some detergent liquid. Do not leave it too long dipped in water.
Both the kneading pegs and drive shaft needs to be cleaned immediately after use. If the kneading pegs remain in the tin, it becomes difficult to remove them afterwards. In this case fill the container with warm water and leave it to rest for 30 minutes. Then remove the kneading pegs.
The baking tin has a nonstick coating. Do not use metal objects that can scratch the surface when cleaning it. It is normal that the color of coating changes over the course of time. This change does not after it effectiveness in any way whatsoever.
Before putting the appliance away for storage, make sure that it is perfectly cool and dry. Put the appliance away with the lid closed.
Questions & Answers on Baking
The bread sticks to the container after baking
Leave the bread to cool for about 10 minutees after baking-turn the container upside down. If necessary move the kneading peg shaft back and forth. Grease the kneading pegs before baking.
How do you avoid forming of holes in bread owing to the presence of the kneading pegs
You can remove the kneading pegs with your fingers covered with flour before leaving the dough to rise for the last time. Depending on the program the display must still show a total time of approx. 1:30 hours. If you do not wish to do so, remove the hook after baking. If you proceed with caution, you can avoid the forming of a large hole.
The dough spills over when it is left to rise
This happens in particular when wheat flour is used owing its greater content of gluten.
Remedy:
a) Reduce the amount of flour and adjust the amounts of the other ingredients. When the bread is ready, It will still have a large volume.
b) Spread a tablespoon of heated liquefied margarine on the flour.
The bread rises and spills over anyway
a) If a V-shaped ditch forms in the middle of the bread, the flour does not have enough gluten. This means that the wheat contains too little protein. It happens during especially rainy summers) or that the flour is too moist.
Remedy:
add one tablespoon of wheat gluten for 500g of wheat.
b) If the bread has a tunnel shape in the middle, the possible cause can be one of the following:
- The water temperature was too high;
- Too much water used;
- The flour was poor in gluten
- Draft caused by opening the lid while baking.
When can the lid of the bread baking machine be opened during the baking?
Generally speaking, it is always possible while the kneading is underway. During this phase small quantities of flour or liquid can still be added.
If the bread must have particular aspect after baking, proceed as follows before the last rising phase (Depending on the program the display must stil mount to a total time of approximately 1:30 hours.) open the lid with caution and shortly and carve the bread crust while it is forming with a sharp pre-heated knifeiscatter cereals on it or spread a mixture of potato flour and water on the crust to give it a glossy finish. This is the last time that the lid can be opened, otherwise the bread will go down in the middle.
What must be done when using rye flour?
Rye flour does not contain any gluten and the bread hardly rises, in order to make it easily digestible a rye wholemeal bread with leaven is to be made.
The dough will rise only if one part of white flour is added four parts of rye flour without gluten.
What is the gluten in flour?
The higher the type number - the lower the gluten contents of the flour are and the less the dough will rise. The highest quantity of gluten is contained in white flour.
How can fresh bread be made easier to digest?
If a mashed boiled potato is added to the flour and kneaded in the dough the fresh bread is easier to digest.
What doeses of rising agent should be used?
For yeast and leaven which must be brought in different quantities follow the producer's instructions on the package and adapt the quantity to the amount of flour used.
What can be done if the bread tastes of yeast?
a) Reduce the amount of sugar if sugar is being used. The bread will be slightly lighter.
b) Add 1,5 tablespoon of vinegar for a small bread loaf and 2 tablespoons for a large loef to the water.
c) Use buttermilk or kefir instead of water. This is possible for all the recipes and it is recommended for the freshness of the bread.
Why does the bread made in an oven taste different from the bread made with the bread baking machine?
It depends on the different degree of humidity; the bread is baked drier in the oven owing to the larger baking space, while the bread made in the machine moister.
Questions & Answers On Bread Baking Machines
| Problem Cause Solution | ||
| Smoke comes out of the baking compartment or of the vents | The ingredients stick to the baking compartment or on the outside of the baking tin | Pull out the plug and clean the outside of the baking tin or the baking compartment. |
| The bread goes down in the middle and is moist on the bottom. | The bread is left too long in the tin after baking and warming. | Take the bread out off the baking tin before the warming function is over. |
| It is difficult to take the bread out of the baking tin. | The bottom of the total is stuck to the kneading peg. | Clean the kneading peg and shaft after the baking. If necessary, fill the baking tin with warm water for 30 minutes. Then the kneading pegs can be easily removed and cleaned. |
| The ingredients are not mixed or the bread is not baked correctly. | Incorrect program setting. | Check the selected menu and the other settings. |
| The START/STOP key was touched while the machine was working. | Do not use the ingredients and start over again. | |
| The lid opened several timers while the machine was working. | The lid is to be opened only if the time left on the display is more than 1:30 hours (only for programmes “1,2,3,4”) Make sure that lid was closed well after being opened. | |
| Long blackout while the machine was working. | Do not use the ingredients and start over again. | |
| The rotation of the kneading peg is blocked. | Check that the kneading pegs are blocked by grains,etc. Pull out the baking tin and check whether the drivers turn. If this is not the case,send the appliance to the customer service. | |
| The appliance does not start. The time acoustic signal goes off. The display shows E 01. | The appliance is still hot after the previous baking procedure. | Press the START/STOP button until the normal programme appears. Pull out the plug. Take out the baking tin and leave it to cool at room tempeature. Then insert the plug and start again. |
| “EEE” or a similar ssignal appears on the display. | Program or electronic error. | Start the test run by pulling out the plug, keeping the menu key pressed and inserting the plug again. Release the key. The menu performs a test run. Unplug again The normal program should appear on the display. If this is not the case, send the appliance to the Customer Service. |
Error with the prescriptions
| Problem Cause Solution | ||
| The bread rises too fast | - Too much yeast, too much flour, not enough salt or several of these causes | a / b |
| The bread does not rise at all or not enough | - No yeast at all or too little- Old or stale yeast- Liquid too hot- The yeast has come into contact with the liquid.- Wrong flour type or stale flour- Too much or not enough liquid- Not enough sugar | a / becdea / b / ga / b |
| The dough rises too much and spills over the baking tin | - If the water is too soft the yeast ferments more- Too much milk affects the fermentation of the yeast | fc |
| The bread goes down in the middle | - The dough volume is larger than the tin and the bread goes down- The fermentation is too short or too fast owing to the excessive temperature of the water or the baking chamber or to the excessive moistness.Warm liquids make the dough rise too quickly and loaf fall in before baking.- No salt or enough sugar.- Too much liquid. | a / fc / h / ia / bh |
| Heavy, lumpy structure - Not too much flour or not enough liquid- Not enough yeast or sugar- Too much fruit, wholemeal or of one of the other ingredients- Old or stale flour | a / b / ga / bbe | |
| The bread is not baked in the center | - Too much or not enough liquid- Too much humidity- Recipes with moist ingredients,e.g. yogurt | a / b / ghg |
| Open or coarse structure or too many holes | - Too much water- No salt- Great humidity,water too hot- Too much liquid | gbh / ic |
| Mushroom-like, unbaked surface | - Bread volume too big for the tin- Too much flour, especially for white bread- Too much yeast or not enough salt- Too much sugar- Sweet ingredients besides the sugar | a / ffa / ba / bb |
| The slices are uneven or there are clumps in the middle | - Bread not cooled enough (the vapor has not escaped) | j |
| Flour deposits on the bread crust | - The flour was not worked well on the sides during the kneading | g / i |
Solutions for the problems
a) Measure the ingredients correctly.
b) Adjust the ingredient doses and check that all the ingredients have been added.
c) Use another liquid or leave it to cool at room temperature. Add the ingredients specified in the recipe in the right order. Make a small ditch in the middle of the flour and put in the crumbled yeast or the dry yeast. Avoid letting the yeast and the liquid come into direct contact.
d) Use only fresh and correctly stored ingredients.
e) Reduce the total amount of the ingredients, do not use more than the specified amount of flour. Reduce all the ingredients by 1/3
f) Contact the amount of liquid. If ingredients containing water are used, the dose of the liquid to be added must be duly reduced.
g) in case of very humid weather remove 1-2 tablespoons of water.
h) In case of warm weather do not use the timing function. Use cold liquids.
i) Take the bread out of the tin immediately after baking and leave it on the grid to cool for at least 15 minutes before cutting it.
j) Reduce the amount of yeast or of all the ingredient doses by 1/4
k) Never grease the tin!
I) Add a tablespoon of wheather gluten to the dough.
Remarks on the Recipes
1. Ingredients
Since each ingredients plays a specific role for the successful baking of the bread, the measuring is just as important as the order in which the ingredients are added.
- The most important ingredients like the liquid, flour, salt, sugar and yeast (either dr yor fresh yeast can be used) affect the successful outcome of the preparation of the dough and the bread. Always use the right quantities in the right proportion.
- Use lukewarm ingredients if the dough needs to be prepared immediately. If you wish to set the program phase timing function, it is advisable to use cold ingredients to avoid that the yeast starts to rise too early.
- Margarine, butter and milk affect the flavor of the bread.
- Sugar can be reduced by 20% to make the crust lighter and thinner without affecting the successful outcome of the baking. If you prefer a softer and lighter crust replace the sugar with honey.
- Gluten which is produced in the flour during the kneading provides for the structure of the bread. The ideal flour mixture is composed of 40% wholemeal flour and 60% of white flour.
- If you would like to bake wholemeal bread with a low proportion of wheat gluten it may also be necessary to knead the bread by hand. See also the section "Questions on Baking".
- If you wish to add cereals grains, leave them to soak overnight. Reduce the quantity of flour and the liquid.(up to 1/5 less)
- Leaven is dispensable with rye flour. It contains milk and acetobacteria that make the bread lighter and ferment thoroughly. You can make your own leaven but it takes time. For this reason concentrated leaven powder is used in the recipes below. The powder is sold in 15g packets (for 1 kg of flour). Follow the instructions given in the recipes(1/2, 3/4 or 1 packet). If less leaven that requested is used the bread will crumble.
- If leaven powders with a different concentration (100g packet for 1 kg of flour) are used, the quantity of flour must be reduced by 80g for a 1kg of flour.
- Liquid leaven sold in bags is also available and it is suitable for use. Follow the doses specified on the package. Fill the measuring beaker with the liquid leaven and top it up with the other liquid ingredients in the right doses as specified in the recipe.
- Wheat leaven which often comes dry improves the workability of the dough, the freshnesss and the taste. It is milder that rye leaven.
- Use either the NORMAL or WHOLEWHEAT program when baking leavened bread.
- Baking ferment can used to replace the leaven. The only difference is in the taste. It is fit to be used in the bread baking machine.
- Wheat bran is added to the dough >f yo want particularly light bread rich in roughage. Use on tablespoon for 500g of flour and increase the quantity of liquid by 1/2 tablespoon.
- Wheat gluten is a natural additive obtained from wheat proteins. It makes the bread lighter and more voluminous. The bread falls in more rarely and it is more easily digestible. The effect can be easily appreciated when baking wholemeal and other bakery products made of home-milled flour.
2. Adapting the doses.
If the doses need to be increased or reduced, make sure that the proportions of the original recipe are maintained. To obtain a perfect result, the basic rules below for the adapting of the ingredient doses must be following:
- Liquids / flour: the dough ought to be soft (not too soft) and easy to knead without becoming stringy. A ball can be obtained by kneading it lightly. This is not the case with heavy doughs like rye wholemeal or cereal bread. Check the dough five minutes after the kneading. If it is to moist, add some four until the dough has reached the right consistency. If the dough is tto dry add a spoonful of water at a time during the kneading.
- Replacing liquids: when using ingredients containing liquids in a recipe (e.g. curd cheese, yogurt, etc.), the required amount of liquid must be reduced. When using eggs beat them in the measuring beaker and fill it with the other required liquid to the envisaged amount.
If you are living in aplace located at a high altitude (more than 750m) the dough rises faster. The yeast can be reduced in these cases by 1/2 to 1/4 of a teaspoon to proportionally reduce its rising. The same is true of places with particularly soft water.
3. Adding and measuring the ingredients and quantities
- Always put in first the liquid and the yeast at the end. To avoid that the yeast acts too fast (in particular when using the timing function), contact between the yeast and the liquid must be avoided.
- When measuring use the same measuring units, that is to say use either the measuring spoon supplied with the bread baking machine or a spoon used in your home when the recipes require doses measured in tablespoons and teaspoons.
- The measures in grams must be weighed precisely.
- For the millimeter indications you can use the supplied measuring beaker which has a graduated scale of 30 to 300 ml.
- Fruit, nuts or cereal ingredients. If you wish to add other ingredients, you can do so in specific programs (see the "Program Phase Timing" table), when you hear the acoustic signal. If you add the ingredients too early, they will be crushed during the kneading.
4. Recipes for the Pane Deluxe Automatic Bread Baking Machine
The following recipes are for various bread sizes. The total weight of the ingredients should not exceed 900 grams.
If no levels are specified in the recipe, it means that they are not envisaged in the proposed programs and that both small and large quantities cn be used.
5. Bread weights and volumes
- In the following recipes you will find exact indications regarding the bread weight. You'll see that the weight of pure white bread is less than that of wholemeal bread. This depends on the fact that white flour raises more and hence limits need to be posed.
- Despite the precise weight indications there may be slight differences. The actual bread weight depends much on the air humidity of the room at the moment of the preparation.
- All breads with a substantial portion of wheat reach a large volume and exceed the container edge after the last rising in the case of the highest weight class. But the bread does not spill over. The part of the bread outside the tin is more easily browned compared to the bread in the tin.
6. Baking results
- The result of the baking depends on the on site conditions (soft water-high air humidity-high altitude-consistency of the ingredients, etc.) Therefore, the recipe indications are reference points which can be adopted. If one recipe or another does not go straight the first time, do not let yourself be discouraged. Try to find thee cause and try it again by varying the proportions.
- If the bread is too pale after baking, you can leave it to Brown with the baking program.
- It is recommended to bake a test bread before actually setting the timing function for use overnight so that you can make it necessary change if necessary.
RECIPIES
| Basic Bread Recipe(1): | |||
| Ingredients: | Large (900 gr) | Regular (700 gr) | Small (500 gr) |
| Water | 330ML | 280ML | 190ML |
| Oil | 2 tbsp. | 2 tbsp | 1-1/2 tbsp |
| Salt | 1 tsp | 3/4 tsp | 1/2 tsp |
| Sugar | 2 tbsp | 1-1/2 tbsp | 1 tbsp |
| Milk powder | 2tbsp | 1 tbsp | 1 tbsp |
| Flour | 4 cup | 3-1/4 cup | 2-1/4 cup |
| Yeast | 1 tsp | 1 tsp | 1 tsp |
| French Bread Recipe (2): | |||
| Ingredients: | Large(900 gr) | Regular(700 gr) | Small(500 gr) |
| Lemon Juice | 1 tsp | 1 tsp | 1 tsp |
| Water | 320ML | 280ML | 150ML |
| Oil | 2 tbsp | 1-1/2 tbsp | 1 tbsp |
| Salt | 1 tsp | 1-1/4 tsp | 1 tsp |
| Sugar | 2 tbsp | 1-1/2 tbsp | 1 tbsp |
| Flour | 4 cup | 3-1/4 cup | 2-1/4 cup |
| Yeast | 1 tsp | 1 tsp | 1 tsp |
| Whole Wheat Bread Recipe (3): | |||
| Ingredients: | Large(900 gr) | Regular(700 gr) | Small(500 gr) |
| Water | 350ML | 270ML | 210ML |
| Oil | 3 tbsp | 2 tbsp | 1-1/2 tbsp |
| Salt | 1 tsp | 1 tsp | 1 tsp |
| White sugar | 2 tbsp | 2 tbsp | 2 tbsp |
| Milk powder | 3 tbsp | 1-1/2 tbsp | 2 tbsp |
| Flour | 3 cup | 3 cup | 2 cup |
| Whole wheat flour | 1 cup | 3/4 cup | 1/4 cup |
| Yeast | 1 tsp | 1 tsp | 1 tsp |
| Sweet Bread Recipe (4) | |||
| Ingredients: | Large(900 gr) | Regular(700 gr) | Small(500 gr) |
| Water | 320ML | 220ML | 160ML |
| Oil | 2 tbsp | 1 tbsp | 1 tbsp |
| Salt | 1-1/2 tsp | 1 tsp | 1/2 tsp |
| Sugar | 1/2 cup | 1/3 cup | 1/4 cup |
| Milk powder | 2 tbsp | 1-1/2 tbsp | 1 tbsp |
| Flour | 4-1/4 cup | 3-1/3 cup | 2-1/2 cup |
| Yeast | 1 tsp | 1 tsp | 1 tsp |
| Quick Bread Note:Water temperature 45°C-50°C | |
| Ingredients | |
| Water+Egg | 370ML |
| Oil | 2 tbsp |
| Salt | 1 tsp |
| Sugar | 2 tbsp |
| Milk powder | 3 tbsp |
| Flour | 4 cup |
| Yeast | 4 tsp |
| Pasta Dough | |
| Ingredients | |
| Water | 410ML |
| Oil | 2 tbsp |
| Salt | 2 tsp |
| Flour | 4,5 cup |
| Dough | |
| Ingredients | |
| Water | 410ML |
| Oil | 2 tbsp |
| Salt | 2 tsp |
| Sugar | 1 tbsp |
| Milk powder | 2 tbsp |
| Flour | 4-1/2 cup |
| Yeast | 1 tsp |
| Gluten Free | |
| Ingredients | |
| Water | 300ML |
| Sugar | 3 tbsp |
| Vinegar | 1 tsp |
| Soybean meal | 1/3 cup |
| Xanthan | 1 tbsp |
| Rice flour | 1 ölçek |
| Oil | 3 tbsp |
| Salt | 1/5 tsp |
| Egg | 3 |
| Potato Flour | 2/3 cup |
| Cassava Flour | 1/2 cup |
| Milk Powder | 1/2 cup |
| Flour | 2 cup |
| Yeast | 2 tsp |
| Orange Jam | |
| Ingredients | |
| Orange | 3 |
| Lemon | 1 |
| Sugar | 2 tbsp |
| Pektin | 1-1/4 cup |
If the service life of the device has ended, in particular if functional disturbances occur, make the worn-out device unusable by cutting through the power cable.
Dispose of the device according to the environmental regulations applicable in your country.
Electrical waste must not be disposed of together with household waste. Bring the worn-out device to a collection center. The packaging of the device consists of recycling-capable materials. Place these,
sorted out according to material, in the collectors provided, so that recycling can be carried out on them. For advice on recycling, refer to your local authority or your dealer.
This appliance fulfills the requirements of the 2002/96/EC WEEE regulations.
Dispatch:
Carry the appliance in the original package or a similar, well-padded package to prevent damage to the appliance.
This product is produced by Vesta Electrical Appliance Manufacturing (Zhongshan) Co., Ltd Changmingshui, Wuguishan Town, Zhongshan City, Guangdong China, Tel:(86)756 3390584 on behalf of Fakir Elektrikli Ev Aletleri Dış Tic. A.Ş.
natural_image
Simple line drawing of an open box with an upward arrow on the lid (no text or symbols)natural_image
Simple line drawing of an open box with an upward arrow on the top face (no text or symbols)Вскрытие коробки

- Information about the operating instructions
- Liability
- Notices in the operating instructions
- WARNING!
- ATTENTION!
- CE Declaration of Conformity
- Usage Area
- Unauthorized use
- Safety is Important
- Safety Instructions
- Accesories:
- Parts and Drawings
- CONTROL PANEL
- DISPLAY
- START / STOP key
- TIMER keys
- COLOR key
- LOAF key
- MENU key
- Repeat function
- Safety functions
- BREAD BAKING MACHINE PROGRAM PHASES
- Insert the baking tin
- CAUTION!
- Put the ingredients
- Select program
- Mix and knead the dough
- Leave the dough to rise
- Baking
- Warming
- End of the program phases
- Heating the appliance to make the dough rise
- Cleaning and Maintenance
- Questions & Answers on Baking
- The dough spills over when it is left to rise
- Remedy:
- The bread rises and spills over anyway
- When can the lid of the bread baking machine be opened during the baking?
- What must be done when using rye flour?
- What is the gluten in flour?
- How can fresh bread be made easier to digest?
- What doeses of rising agent should be used?
- What can be done if the bread tastes of yeast?
- Why does the bread made in an oven taste different from the bread made with the bread baking machine?
- Solutions for the problems
- Remarks on the Recipes
- Ingredients
- Adapting the doses.
- Adding and measuring the ingredients and quantities
- Recipes for the Pane Deluxe Automatic Bread Baking Machine
- Bread weights and volumes
- Baking results
- Dispatch:
- Вскрытие коробки
Brand : FAKIR
Model : Pane Deluxe
Category : Bread maker