
Car Camcorder X5 - Camcorder AIPTEK - Free user manual and instructions
Find the device manual for free Car Camcorder X5 AIPTEK in PDF.


| Product Type | Car Dash Cam |
| Brand | Aiptek |
| Model | Car Camcorder X5 |
| Dimensions | Approx. 70 x 50 x 30 mm |
| Weight | Approx. 100 g |
| Power Source | 12V car adapter (cigarette lighter) |
| Battery | Built-in rechargeable lithium-ion battery |
| Video Resolution | Full HD 1920x1080p |
| Frame Rate | 30 fps |
| Lens Angle | 120° wide angle |
| Storage | MicroSD card (up to 32 GB, Class 10) |
| Night Vision | Yes, with infrared LEDs |
| G-Sensor | Built-in for impact detection |
| Loop Recording | Yes, continuous recording with overwrite |
| Parking Mode | Motion detection when parked (requires hardwire kit) |
| Display | 2.7-inch TFT LCD |
| Connectivity | Mini USB for power, HDMI output |
| Mounting | Suction cup mount for windshield |
| Maintenance | Format SD card monthly; clean lens with microfiber cloth |
| Cleaning | Use a soft, dry cloth; avoid solvents |
| Safety Precautions | Do not obstruct airbags; mount securely |
| Spare Parts | Suction mount, USB cable, car charger |
| Repairability | Limited; contact Aiptek support for service |
| Operating Temperature | 0°C to 40°C |
| Certifications | CE, FCC |
Frequently Asked Questions - Car Camcorder X5 AIPTEK
User questions about Car Camcorder X5 AIPTEK
0 question about this device. Answer the ones you know or ask your own.
Ask a new question about this device
Download the instructions for your Camcorder in PDF format for free! Find your manual Car Camcorder X5 - AIPTEK and take your electronic device back in hand. On this page are published all the documents necessary for the use of your device. Car Camcorder X5 by AIPTEK.
USER MANUAL Car Camcorder X5 AIPTEK
Car Camcorder
User's Manual
Welcome:
Thank you for purchasing this fine product.Much investment in time and effort has gone into its development, and it is our hope that it will give you many years of trouble-free service.
Important Notice
- Do not drop, puncture or disassemble the device; otherwise the warranty will be voided.
- Avoid all contact with water. Dry your hands before using the device.
- Use the device with care. Avoid pressing hard on the device body.
- For your own safety, avoid using the device when there is a storm or lightning.
- Use only the accessories supplied by the manufacturer.
- Keep the device out of the reach of infants.
- When you get off the car, do not leave the device on the dashboard where it is subject to direct sunlight.
- For your own safety, do not operate the controls of the product while driving. This product is intended to be used as a car Camcorder aid only.
- The battery is integrated with the device. Do not dissemble and modify. The battery should be replaced by an authorized service center only.
- For more details, please download the complete user manual from the official website. (http://www.aiptek.tw/download.php)
FCC Compliance Statement:
This device complies with Part 15 of the FCC Rules. Operation is subjected to the following two conditions: (1) this device may not cause harmful interference, and (2) this device must accept any interference received, including interference that may cause undesired operation.

This equipment has been tested and found to comply with limits for a Class B digital device, pursuant to Part 15 of the FCC rules. These limits are designed to provide reasonable protection against harmful interference in residential installations. This equipment generates, uses, and can radiate radio frequency energy, and if not installed and used in accordance with the instructions, may cause harmful interference to radio communications. However, there is no guarantee that interference will not occur in a particular installation. If this equipment does cause interference to radio or television equipment reception, which can be determined by turning the equipment off and on, the user is encouraged to try to correct the interference by one or more of the following measures:
- Reorient or relocate the receiving antenna.
- Move the equipment away from the receiver.
- Plug the equipment into an outlet on a circuit different from that to which the receiver is connected.
- Consult the dealer or an experienced radio/television technician for additional suggestions.
You are cautioned that any change or modifications to the equipment not expressly approved by the party responsible for compliance could void your authority to operate such equipment.
If the time arises to throw away your product, please recycle all the components possible.




Batteries and rechargeable batteries are not to be disposed in your domestic waste! Please recycle them at your local recycling point.
Together we can help to protect the environment.


Introduction
Thank you for purchasing this advanced Car Recorder. This device is specifically designed for real time video and audio recording when driving.
Features
FULL HD 1080P(1920 x 1080) @ 30fps video resolution•
HD 720P (1280x720)@ 30 fps•
Wide angle lens 120°•
Convenient touch key operation•
Supports SD Card up to 32GB•
Supports TV playback via HDMI and AV interface•
Product Overview


-
Lens 2. Mini USB port
-
Bracket holder
-
GPS port
-
HDMI port
-
AV out port
-
LED indicator 8. SD card slot
-
Microphone
-
Emergency recording/Exit button (⚠️)
-
Record/Enter button/Stop Voice recording (On/Off) (REC)
-
Up button (▲)
-
Down button (▼)
-
Power button (⏻)
-
LCD display
Getting Started
Inserting the Memory Card
Insert the memory card with the gold contacts facing to the rear of the device. Push the memory card until it clicks into place.
To remove the memory card
Push to eject the memory card out of the slot.
IMPORTANT: Do not remove the memory card while recording. This may damage the memory card.

About SD Card
Please use SD card with the size/memory at least 4GB, Class 6 (up to •32GB).
We strongly recommend you that the memory card is strictly for the car • camcorder use only.
Be sure to format SD card using the device before the initial usage.
Video Storage Capacity as below (Note: The actual value of capacity may vary(up to +-30%) depending on the color saturation and complexity of your subject and surroundings.)
| SD Card Capacity | Video Resolution | |
| 1080P/30fps 720p/30fps | ||
| 8GB 100 minutes | 180 minutes | |
| 16GB 200 minutes | 360 minutes | |
| 32GB 400 minutes | 720 minutes | |
Make sure the memory card is not in write protection.
Must format the memory card before use by Car Camcorder or PC/NB.
Certain types of memory cards may not be recognized, take out the card and • inset again or just change to another card if this occurs.
Be sure to backup your data before overwriting the memory card.
Installing in Vehicles
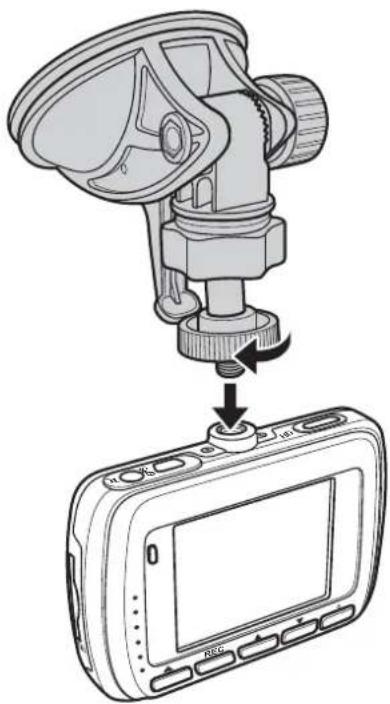
To securely mount the device on the windshield, do the following:
- Attach the device to the bracket base. Turn and tighten the car holder and the bracket base to make sure the device is securely locked in place.
-
With the suction-cup laying flat, position the suction-cup on the windshield.
-
Hold the base firmly on the windshield and press down the clamp to mount the car holder to the windshield.

- Adjust the device position.
Loose the knob to swivel the device vertically or horizontally (up to 360° ). Then tighten the knob to make sure the device is securely locked in place.


Connecting to Power
Use only the supplied car charger to power up the device and charge the built-in battery.
-
Connect one end of the car charger to the USB connector of the device.
-
Plug the other end of the car charger to the cigarette lighter socket of your vehicle. Once the vehicle engine is started, the device automatically turns on.

Powering the Device Automatically
Once the vehicle engine is started, the device automatically turns on. If the Automatic Record function is enabled (see page 6), the recording will automatically start right after the device turns on.
Once the vehicle engine shuts down, the device automatically saves the recording and turns off the power.
Powering the Device Manually
Turn on the power, press ⏻.
Turn off the power, pre• ss and hold or at least 2 seconds.
Setting the Clock/Time Zone
Before using the device, we recommend you to set up the correct date and time, to ensure the device can save the accurate recording time.
To make sure the GPS receiver (Optional) synchronizes correctly with your time zone, setup the Time Zone, e.g., GMT+0 for UK. Incorrect time zone will result in wrong time displayed in the video clips.
-
Press any keys to display the guide icons on the screen.
-
Press REC to display menu.
-
Press ▼ to enter the OSD menu.
-
Press ▲/▼ to select Clock and press REC enter Clock menu.
-
To adjust the field item, press REC to select the field.
-
Press ▲/▼ to adjust the value.
-
Repeat steps 5-6 to adjust other fields.
-
Press ⚠ to save your changes and return to OSD menu.
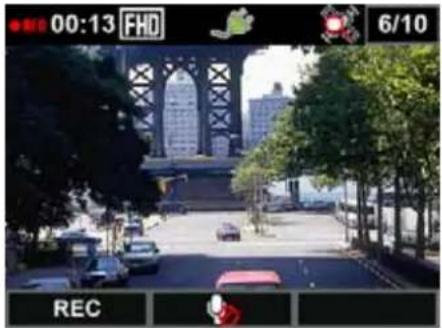


Enable Automatic Recording
-
After turn on the device power, press any keys to display the guide icons on the screen.
-
Press REC to display menu.
-
Press ▼ to enter the OSD menu.
-
Press ▲/▼ to select Automatic Recording and press REC to enter Automatic Recording menu.
-
Press ▲/▼ to select On and press REC confirm.

Using the Car Recorder
Recording Videos
Normal Recording
When the vehicle engine starts up, the device automatically turns on.
Press REC twice to start recording.

Recording will automatically stop when the engine is switched off. Or, press REC twice to stop recording manually.
Note:
- If the Automatic Recording function is enabled, the device automatically starts recording right after the device is turned on.
One video file is saved for every 5 minutes of recording.
The device saves the recording in the memory card. If the memory card • storage is full, the oldest file in the memory card is overwritten.
Emergency Recording
With this function, the device records the data 30 seconds before and after the event occurs. The system allocates 10 storage files for emergency events and these recorded files are protected without being overwritten.
Note: These event data are saved separately in an Emergency Record folder.
![graph TD A["Emergency recording"] --> B["30 seconds 30 seconds"] C["Return to normal recording"] --> B B --> D["Circling Recording"]](/content/2026/06/1257454/images/ea75a30cab693ba9f4cd07fe2b6f11b2d6ed9ac161d695f29cd43cd6b98013cc.jpg)
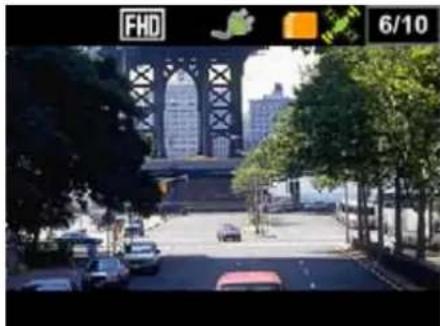
When an emergency or accident happens, press record the event immediately. An icon appears on the screen.

To stop the recording, press REbe system automatically saves the event data.
IMPORTANT:
To avoid data loss, when saving data (icon still appears on the top of the screen), do not turn off the device.
Do not opera• te the device until the data saving is complete.
Playback Videos
Playing Videos
-
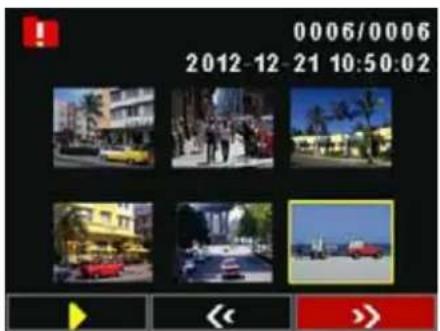
Press any keys to display the guide icons on the screen. If recording is in progress, press REC twice to stop recording. The standby screen is displayed.
-
Press ▲ to enter Playback mode.
-
Press ▲/▼ to select Last Record or Emergency Record and press REC.
-
Press ▲/▼ to browse for the desired video file.


Last Record Emergency Record
- Press REday the video in full screen.

To pause during playback, pres• REC To resume, press REC. To rewind/fast forward, pres• ▲/▼.
- Press ⚠️ to stop the playback.
Deleting Videos
To delete a file, do the following:
-
Select the file that you want to delete and press REC to play the video.
-
Press REC to pause the playback.
-
Press ▲ to enter the Delete screen.

- Press ▲ to delete the selected file.
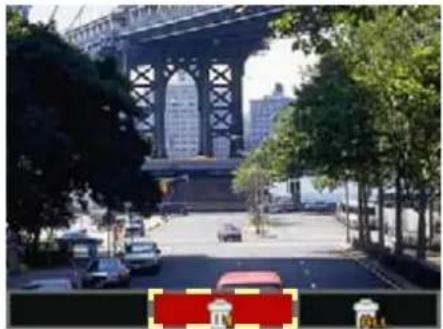
To delete all files, do the following:
-
Press REC to play one of the recorded videos.
-
Press REC to pause the playback.
-
Press ▲ to enter the Delete screen.
-
Press ▼ to delete all files.
-
A confirmation message appears on the screen. Select Yes to confirm deletion.

Protecting Videos
To lock a file, do the following:
-
Select the file that you want to lock and press REC to play the video.
-
Press REC to pause the playback.
-
Press ▼ to enter the Protect screen.
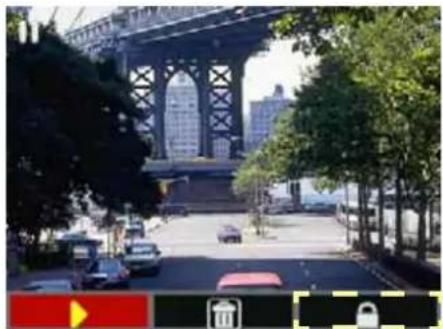
- Press ▲ to lock the file.

A lock icon (💡) is displayed on the screen to show that the file is protected.
To unlock a file, do the following:
-
Select the file that you want to unlock and press REC to play the video.
-
Press REC to pause the playback.
-
Press ▼ to enter the Protect screen.
-
Press ▼ to unlock the file.
The lock icon (💡) disappears when the file is unlocked.
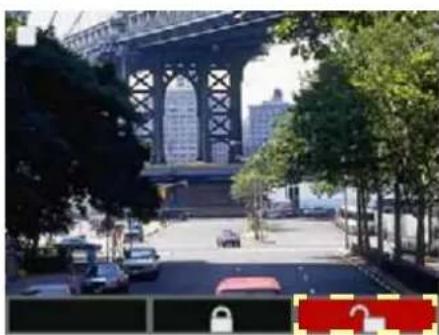
Adjusting the Settings
Using the Menu
You can customize the video recording, playback, and other general settings via the on-screen display (OSD) menus.
- Press any keys to display the guide icons on the screen.
- Press REC to display menu.
- Press ▼ to enter the OSD menu.
- Press ▲/▼ to select a menu option and press REenter the selected menu.

Page 1/4 Page 2/4

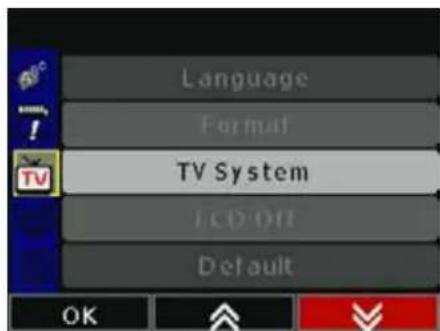

Page 3/4 Page 4/4
- Press ▲/▼ to select the desired setting and press REC to confirm the setting.
- Press ⚠ to exit the menu.
Menu Tree
Refer to the below table for details on menu items and available menu options.
| Menu option | Description and Available Option |
| Resolution | Set the video resolution.Available option: 1080P/30FPS / 720P/30FPS |
| Automatic Recording | Enable/Disable the device to automatically record video after the device is turned on.Available option: Off / On |
| Voice Recorder | Enable/Disable voice recording.Available option: Off / On |
| Bump Auto Record | Specify the G-sensor sensitivity level or disable the function. If this function is enabled and any collision is detected, the device will automatically trigger the emergency recording.Available option: Off/ High Sensitivity / Low Sensitivity |
| LDWS Enable/Disable the LDWS (Lane Departure Warning System) function. If this function is enabled and the system detects the vehicle begins to move out of its lane, a warning tone is automatically triggered to alert driver a danger of unintentional lane changes.Available option: Off / On | |
| FCWS Enable/Disable the FCWS (Forward Collision Warning System). After activating the function, when the system detects an inappropriate following distance, a warning beep is automatically emitted to alert driver keep a safe distance.Available option: Off / On | |
| GPS Status View | the GPS signal status. |
| Clock Set the date | and time. |
| Date Stamp Print | a date and time mark on the video.Available option: Off / On |
| Slide Show Enable/Disable an automatic video playback.Available option: Off / On | |
| Menu option Description and Available Option | |
| Volume Adjust the | volume level.Available option: Off / 20% / 40% / 60% / 80% / 100% |
| Monitor Mode The | function is based on motion detection mode. The device will automatically change to power saving mode if the recorded scene doesn't change for 60 seconds, and it will begin recording at 1fps. When the recorded scene changes, normal 30fps recording will resume and be saved in a new file. When this function is active, manual emergency recording is not possible. |
| Battery Mode | If the function is enabled, the system will enter battery mode after switching off the engine. if there is no any object movement for 60 seconds, LCD will be turned off and change to power saving mode, when the recorded scene changes, LCD will be turned on and return to normal recording, the action will works until the power is run out. |
| Motion detection Mode | Enable/Disable the motion detection. If this function is enabled and the device detects any object movement, it will automatically start the recording. |
| EV value Adjust the | exposure compensation value to lighten or darken the preview screen.Available option: -2 / -1.5 / -1 / -0.5 / 0 / 0.5 / 1 / 1.5 / 2 |
| Language Set the | on-screen display menu language.Available option: English / Traditional Chinese / Simplified Chinese / Russian / Japanese / German |
| Format Format the | memory card.Available option: Confirm / CancelNote that all files stored in the memory card will be gone. |
| TV System Set the | TV type based on your local region.Available option: NTSC / PALNTSC is suitable for America, Taiwan, Japan and Korea areas.PAL is suitable for Germany,England ,Italy, Netherlands, China and Hong Kong areas. |
| LCD OFF Set the | duration for the display to automatically turn off right after video recording starts. (Inactivate in Monitor Mode/Motion Detection Mode)Available option: 30 sec. / 3 min. / 5 min. / Always on |
| Default Reset all settings | settings to factory default settings.Available option: Confirm / Cancel |
| Version | View the device firmware version. |
Other Connections
Connecting to PC
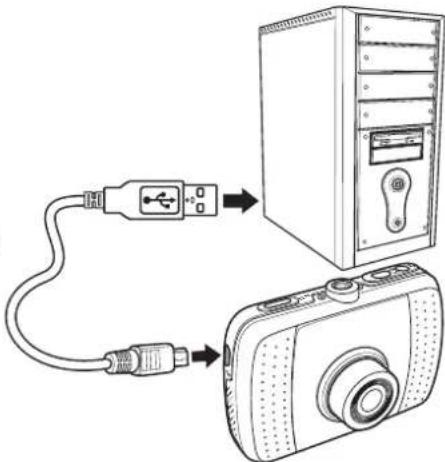
You can connect the device to a PC or notebook to transfer or view files as well as charge the device.
-
Connect one end of the USB cable to the device.
-
Connect the other end of the USB cable to an available USB port on your computer.
-
After the connection is established, a "Removable Disk" icon appears in My Computer. Click this icon to access the files in your device.
-
Copy the desired files to a folder on your computer.
Connecting to TV
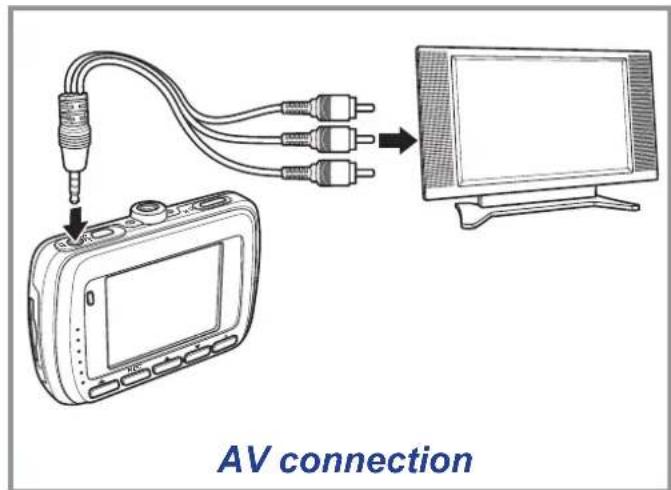
You can play files in your device on a TV using an HDMI cable or AV cable.

-
Connect one end of the HDMI cable to the device.
-
Connect the other end of the HDMI cable to an HDMI TV.
Note: For AV connection, connect your device and TV using the AV cable.
-
Turn on the TV, and then switch the input source of the TV to "HDMI" or "AV".
-
Turn on the device.
-
Follow the on-screen instructions to operate the device via the TV.
Appendix
Package Contents

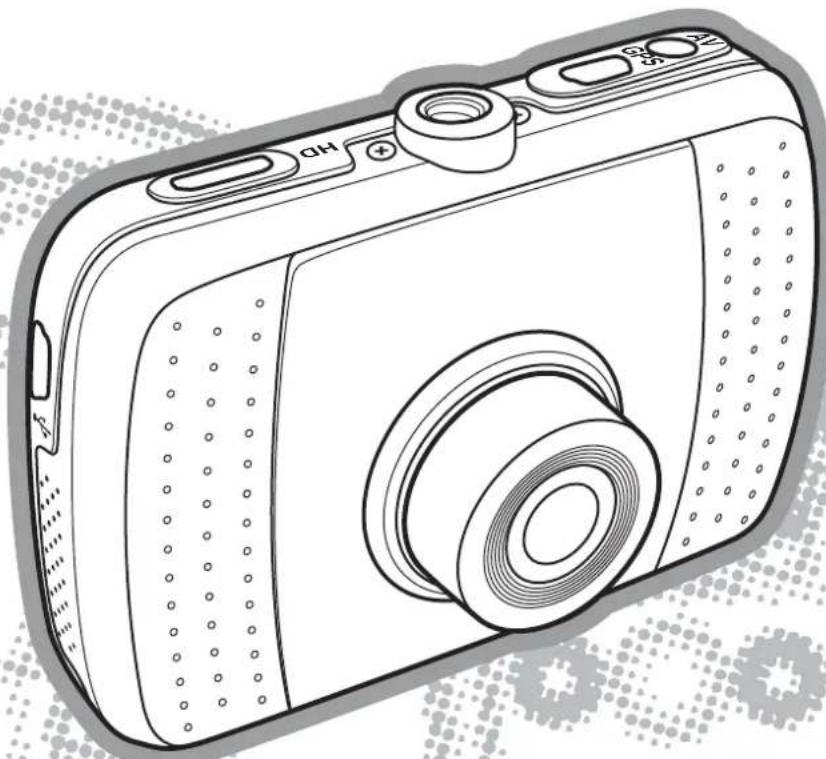
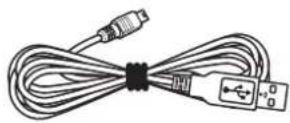
Car Recorder Car charger USB cable Suction cup bracket
(For X5; Optional)

Adhesive bracket (Optional)

AV cable (Optional)
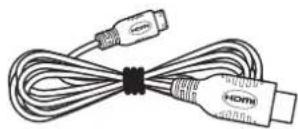
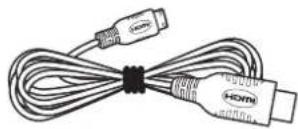
HDMI cable (Optional)

G-Mouse bracket (For X5G; Optional)

Quick Start Guide
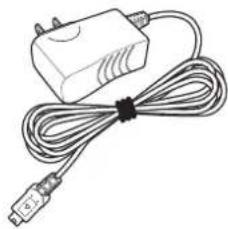
AC adapter (Optional)
* All parts shown in the illustration can be purchased separately from local distributor.
Using GPS Function
With the GPS function, this device logs the GPS position during the recording and the location information is stored with the recorded videos.
Connect the G-Mouse bracket (Optional) to the GPS port on the device.

The device will automatically search for the satellite signals and the GPS signal indicator will turn ✗ when the GPS signal is fixed.
Note: To acquire better accuracy of the positions, drive to a place where there is less cloud or a clear view of the sky.
Using the G-mouse
To start LDWS & FCWS functions, G-mouse must be connected.
■ Lane Departure Warning Systems (LDWS):
When the vehicle speed reaches to 60 km/hr, LDWS will warn the driver by Beep if the vehicle moves out of its roadway lane. Warning picture will also be displayed on the monitor as shown in Figure 1.

Figure 1
Enter Menu to set LDWS ON, return to recording mode. Please aim the red line to match the horizon line as shown in Figure 2.
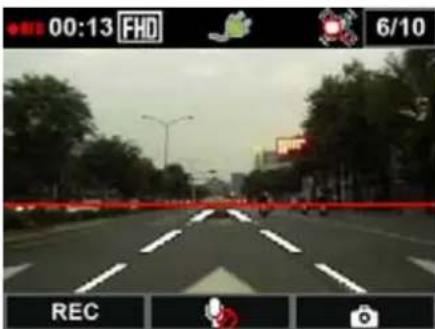
Figure 2
■ Forward Collision Warning System (FCWS):
FCWS alerts you to the possibility of a front-end collision.
When the vehicle speed reaches to 60 km/hr and the distance with the vehicle ahead close to 5\~7 meters, a warning beep is emitted and warning picture as Figure 3 will be shown on the monitor.

Figure 3
Enter Menu to set FCWS ON, return to recording mode. Please aim the red line to match the horizon line as shown in Figure 4.

Figure 4
DISCLAIMER:
The Lane Departure Warning System (LDWS) and the Forward Collision Warning System (FCWS) are driving assistance system. The functions realization of LDWS and FCWS will be subject to the actual environmental factors and user's personal operations. AIPTEK WILL MAKE NO ANY WARRANTIES OF SAFETY FOR A PARTICULAR PURPOSE, EXPRESS OR IMPLIED, BY OFFERING YOU THESE SYSTEMS CONTAINED HEREIN.
Attention:
- Please install the product in the central upper area of the windshield for better performance.
- The driver has the responsibility to avoid a collision by controlling the vehicle via braking and steering.
Installing the Media Player software
To install the software, do the following:
-
Insert a memory card and format it using the device. See "Adjusting the Settings" on page 12\~14.
-
Remove the memory card from the device. Then, insert the formatted memory card to the computer memory card slot (if applicable).
You can also use a card reader and plug it to the computer USB port.
-
After the connection is established, a "Removable Disk" icon appears in My Computer. Click this icon to access the files in your memory card. If the formatting is successful, you will see the Media Player installation file (Car Camcorder.exe).
-
To install the software, double-click Car_Camcorder.exe and follow the on-screen instructions to complete the installation.
Note:
To playback videos on your computer, you need a video codec installed on your system. You can get the nessesary free Codec from
- Apple: http://www.apple.com/quicktime
- K-lite: http://k-lite-codec-pack full.en.softonic.com
Reviewing GPS log

-
Install the Media Player software (Car_Camcorder.exe) into your computer.
-
Launch Media Player software.
-
Connect the device with the computer using the USB cable.
-
After the connection is established, a "Removable Disk" icon appears in My Computer. Click this icon to access the files in your device.
-
Select and import the videos that you want to view.
Specifications
| Item Specifications | |
| Image Sensor 3.1 Mega pixels | CMOS(2304Hx1536V), 1/3-inch |
| Video Resolution FULL HD 10 | 80P(1920x1080)@30fpsHD 720P(1280x720)@30fps |
| File format .MOV (AVC/H.264) | |
| Internal memory 128MB NAND Flash for firmware coding only | |
| External memory SDHC Memory card (up to 32GB), Min: 4GB, Class 6 | |
| LCD display 2.4-inch color LCD | |
| Fixed Lens Wide angle lens, FOV 120 (Diagonal) | |
| Aperture Range F/#2.0 | |
| Microphone Yes | |
| Speaker Yes | |
| Interface USB 2.0, HDMI/AV Output, SD slot, Microphone, Speaker | |
| Delay Power Off Mechanism | Battery or Gold-Capacitor |
| Time Stamp Keeping Time Up to 20days (w/ Battery) | |
| White Balance Auto | |
| Exposure Control Auto | |
| Automatically Recording | Yes |
| Recycled Recording | Yes |
| Emergency Recording | Yes |
| LCD Auto Off | Yes |
| G-Sensor | 3 Axis, 2~6G |
| GPS Tracking | Build in or external G-mouse |
| Operation Temperature | G-CAP: 0°C ~ 65°C; Battery: 0°C ~ 60°C |
| Storage Temperature | G-CAP: -20°C ~ 70°C; Battery: -20°C ~ 60°C |
| Dimensions (L x W x H) | 94.9 x 62.3 x 24.4 mm (build in GPS) or94.9 x 62.3 x 21.7 mm (w/ battery, ext. GPS) |
* Design and specifications are subject to change without prior notice.

Einleitung

Wichtig:
Videos schützen


AV-Kabel (optional)
HDMI-Kabel (optional)

GPS-Maus (optional)

Netzteil (optional)
Abbildung 1
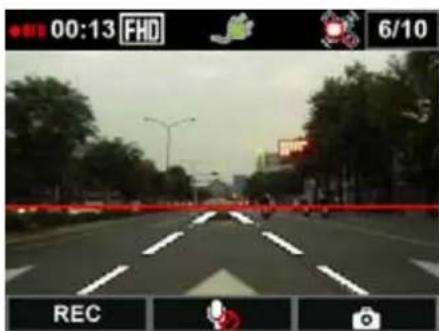
Abbildung 2
Abbildung 3

- CAR CAMCORDER
- USER'S MANUAL
- WELCOME
- IMPORTANT NOTICE
- FCC COMPLIANCE STATEMENT
- INTRODUCTION
- FEATURES
- PRODUCT OVERVIEW
- GETTING STARTED
- INSERTING THE MEMORY CARD
- TO REMOVE THE MEMORY CARD
- ABOUT SD CARD
- INSTALLING IN VEHICLES
- CONNECTING TO POWER
- POWERING THE DEVICE AUTOMATICALLY
- POWERING THE DEVICE MANUALLY
- SETTING THE CLOCK/TIME ZONE
- ENABLE AUTOMATIC RECORDING
- USING THE CAR RECORDER
- RECORDING VIDEOS
- NORMAL RECORDING
- NOTE
- EMERGENCY RECORDING
- IMPORTANT
- PLAYBACK VIDEOS
- PLAYING VIDEOS
- DELETING VIDEOS
- PROTECTING VIDEOS
- ADJUSTING THE SETTINGS
- USING THE MENU
- MENU TREE
- OTHER CONNECTIONS
- CONNECTING TO PC
- CONNECTING TO TV
- APPENDIX
- PACKAGE CONTENTS
- USING GPS FUNCTION
- USING THE G-MOUSE
- LANE DEPARTURE WARNING SYSTEMS (LDWS)
- FORWARD COLLISION WARNING SYSTEM (FCWS)
- DISCLAIMER
- ATTENTION
- INSTALLING THE MEDIA PLAYER SOFTWARE
- REVIEWING GPS LOG
- EINLEITUNG
- WICHTIG
- VIDEOS SCHÜTZEN
Brand : AIPTEK
Model : Car Camcorder X5
Category : Camcorder