
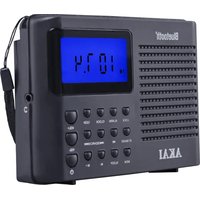
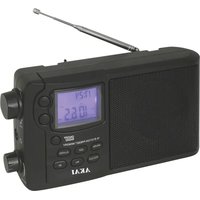
AR-180K - Radio AKAI - Free user manual and instructions
Find the device manual for free AR-180K AKAI in PDF.


| Product Type | Portable AM/FM Radio |
| Brand | AKAI |
| Model | AR-180K |
| Dimensions (L x H x D) | 20 x 12 x 6 cm |
| Weight | 0.5 kg |
| Power Supply | Mains 230 V AC or 4 AA batteries (not included) |
| Frequency Bands | AM (531-1602 kHz) and FM (87.5-108 MHz) |
| Speaker | Built-in dynamic speaker |
| Headphone Jack | 3.5 mm jack |
| Antenna | Telescopic antenna for FM |
| Controls | Volume, tuning, AM/FM selection |
| Additional Features | Sleep button, power indicator |
| Maintenance and Cleaning | Clean with a soft, dry cloth. Do not use abrasive products. |
| Safety | Do not expose to moisture. Unplug during thunderstorms. |
| Spare Parts and Repairability | Device not repairable by user. No spare parts available. |
| General Information | Made in China. CE certified. |
Frequently Asked Questions - AR-180K AKAI
User questions about AR-180K AKAI
0 question about this device. Answer the ones you know or ask your own.
Ask a new question about this device
Download the instructions for your Radio in PDF format for free! Find your manual AR-180K - AKAI and take your electronic device back in hand. On this page are published all the documents necessary for the use of your device. AR-180K by AKAI.
USER MANUAL AR-180K AKAI
FONCTION "SLEEP" – (SOMMEIL)
Please read through the operation manual carefully and thoroughly so that you will have a better understanding of the performance and features of this clock radio.

- Alarm off button
- Time set button
- Alarm set button
- Snooze button
- Hour set button
- Minute set button
- Sleep button
- Auto indicator
- High/low dimmer switch
- AC power Cord
- FM antenna wire
- On/Off/Auto function switch
- Band selection switch
- Clock display
- Volume/Buzzer control
- Tuning control
- Rating label (Bottom of unit)
- Battery compartment
POWER CONNECTION
Plug the AC Power cord to the household outlet. Make sure the voltage is correct for safety purpose and prevent plausible damages to the set. Connect one 9V battery (not included) to the battery terminals in the battery compartment. It maintains the clock continue function whenever the AC power is interrupted.
Please note : the display will not exhibit time during power failure but the clock will keep correct time.
RADIO OPERATION
- Set the On/off/Auto function switch to ON position.
- Set the Band selection switch to desired waveband.
- Tune to the desired station with TUNING CONTROL.
- Adjust the volume level with VOLUME CONTROL.
- To obtain better FM reception, lay out the FM antenna wire to it's full extent.
- The radio can be switched off by setting On/Off/Auto function switch to the 'OFF' position.
SETTING THE CLOCK TO THE TIME OF DAY
- Press the TIME SET BUTTON at the same time together with HOUR SET BUTTON for hour setting or MINUTE SET BUTTON for minute setting.
- Select the type of alarm (RADIO or BUZZER) and slide the ON/OFF/AUTO function switch to the AUTO position.
RADIO : Wake to radio, the radio must be tuned to a station which will be broadcasting at the alarm time and the volume adjusted to the desired level.
ALARM : To wake-up with Buzzer, slide volume control to minimum in BUZZ position.
INTERRUPTING THE ALARM (SNOOZE FUNCTION)
The alarm can be interrupted for 9 minutes by pressing SNOOZE BUTTON after which time the radio or the alarm will come on again.
TO SHUT ALARM OFF
To shut off the alarm, press the ALARM OFF button once and alarm time will be reset for the next day. Slide the ON/OFF/AUTO switch to the OFF position to turn off alarm and not set it for the next day.
- This clock radio is equipped with a ‘sleep time’ function which will switch off the radio automatically after a pre-selected period from 59 to 01 minute.
- Press SLEEP BUTTON, the display will show 0:59 sleep time. At the same time radio will come on and stay for 59 minutes.
- To shorter the 'SLEEP' time, press SLEEP BUTTON together with the minute button until the desired 'sleep' time is shown on display.
- After pre-selected ‘sleep’ time has elapsed, the radio will switch off automatically. To switch if off before the pre-selected ‘sleep’ time has elapsed, press SNOOZE BUTTON.
SLEEP TO RADIO AND WAKE TO RADIO
- Set the desired alarm time as described in 'SETTING THE ALARM TIME' and set ON/OFF/AUTO FUNCTION SWITCH to 'AUTO' position.
- Set sleep time as described in SLEEP TIMER OPERATION.
- The radio will switch off after the 'sleep' time has elapsed and radio alarm will switch on next day.
SLEEP TO RADIO AND WAKE TO BUZZER
Set as described in SLEEP TO RADIO AND WAKE TO RADIO. Set the ON/OFF/AUTO FUNCTION SWITCH to 'AUTO' position. Slide the volume control to minimum in BUZZ position.
DIMMER CONTROL
The dimmer switch (9) allows you to set the brightness of the LED display to HIGH or LOW.
TECHNICAL SPECIFICATIONS
Frequency range : AM 530 – 1600 kHz
FM 88 - 108 MHz
Battery backup : 9V battery (for clock)
Power source : AC 230V \~ 50Hz, 5 watt
WARNING
- No naked flame sources, such as lighted candles, should be placed on the apparatus.
- Do not place the product in closed bookcases or racks without proper ventilation.
- Where the mains plug is used as the disconnect device, the disconnect device shall remain readily operable.
- The ventilation should not be impeded by covering the ventilation openings with items, such as newspapers, table-cloths, curtains, etc;
- It shall not be exposed to dripping or splashing and that no objects filled with liquids, such as vases, shall be placed on the apparatus.
- Do not connect FM antenna to outside antenna.
- The unit should not be exposed to direct sunlight, very high or low temperature, moisture, vibrations or placed in dusty environment.
- Do not use abrasive, benzene, thinner or other solvents to clean the surface of the unit. To clean, wipe it will mild non-abrasive detergent solution and clean soft cloth.
- Never attempt to insert wires, pins or other such objects into the vents or opening of the unit.
- Batteries shall not be exposed to excessive heat such as sunshine, fire or the like.
CAUTION Danger of explosion if battery is incorrectly replaced Replace only with the same or equivalent type
End of Life Disposal

Warning ! This logo set on the product means that the recycling of this apparatus comes within the framework of the Directive 2002/96/CE of January 27, 2003 concerning the Waste of Electrical and Electronic Equipment (WEEE).
This symbol means that used electrical and electronic products should not be mixed with general household waste. There is a separate collection system for these products.
If you want to dispose of this equipment, please do not use the ordinary dust bin!
- The presence of dangerous substances in the electrical and electronic equipments can have potential consequences on the environment and human health in the cycle of reprocessing this product.
- Therefore, at the end of its lifetime, this product shall not be disposed with other non-recycled waste. Used electrical and electronic equipment must be treated separately and in accordance with legislation that requires proper treatment, recovery and recycling of used electrical and electronic equipment.
- Local authorities and resellers have set special procedures for the purpose of collecting and recycling this product (please contact your local authority for further details). You have the obligation to use the selective waste collection systems put in place by your local authority.
- If your used electrical or electronic equipment has batteries or accumulators, please dispose of these separately beforehand according to local requirements.
- By disposing of this product correctly you will help ensure that the waste undergoes the necessary treatment, recovery and recycling and thus prevent potential negative effects on the environment and human health which could otherwise arise due to inappropriate waste handling.

This unit complies with European Council Directive 2006 / 95 CE (Electromagnetic Compatibility & Low Voltage Directives)
ESPAÑOL
INTRODUCCION
AR-180
- FONCTION "SLEEP" – (SOMMEIL)
- POWER CONNECTION
- RADIO OPERATION
- SETTING THE CLOCK TO THE TIME OF DAY
- INTERRUPTING THE ALARM (SNOOZE FUNCTION)
- TO SHUT ALARM OFF
- SLEEP TO RADIO AND WAKE TO RADIO
- SLEEP TO RADIO AND WAKE TO BUZZER
- DIMMER CONTROL
- TECHNICAL SPECIFICATIONS
- WARNING
- End of Life Disposal
- INTRODUCCION
Brand : AKAI
Model : AR-180K
Category : Radio