
LFH9750 - Audio recorder PHILIPS - Free user manual and instructions
Find the device manual for free LFH9750 PHILIPS in PDF.


| Product Type | Digital Desktop Dictation/Transcription Station |
| Dimensions (W x D x H) | 232 x 135 x 45 mm |
| Weight | 1300 g |
| Power Supply | 12 V DC via Philips LFH 155 (included) |
| Acoustic Frequency Response | 300 – 6000 Hz |
| Output Power | 600 mW |
| Microphone Input | 2.5 mm jack for Philips LFH 276/278; Conference mic socket for LFH 9172 |
| Headphone Output | 3.5 mm stereo jack |
| Foot Control Connection | 3.5 mm jack for Philips LFH 2210 |
| Data Interface | Mini-USB 2.0 Full Speed |
| Media Storage | SD/SDHC memory card (not included) |
| Recording Formats | Standard Play (SP), Long Play Mobile (LPm) |
| Key Features | Voice-activated recording, insert recording mode, hands-free operation with foot control, keyword assignment, backspace adjustment, tone/speed/volume controls, display with position bar |
| Compatible Software | Philips SpeechExec Dictate (configuration, download, routing) |
| Power Save Mode | Automatic after 15 minutes of inactivity |
| Operating Temperature | 5° – 45° C (41° – 113° F) |
| Humidity Range | 10% – 90% |
| Certifications | FCC Part 15, CE, RoHS compliant |
| Spare Parts / Accessories | Optional: microphones LFH 276/278, headphones (various models), foot control LFH 2210, conference microphone LFH 9172, SD memory cards |
| Warranty | Warranty void if opened or repaired by unauthorized parties |
Frequently Asked Questions - LFH9750 PHILIPS
User questions about LFH9750 PHILIPS
0 question about this device. Answer the ones you know or ask your own.
Ask a new question about this device
Download the instructions for your Audio recorder in PDF format for free! Find your manual LFH9750 - PHILIPS and take your electronic device back in hand. On this page are published all the documents necessary for the use of your device. LFH9750 by PHILIPS.
USER MANUAL LFH9750 PHILIPS
natural_image
Black electronic device labeled 'PHILIPS' with a cable, shown against a white background (no other text or symbols visible)
natural_image
Black earbuds with black plastic bands, isolated on white background (no text or symbols)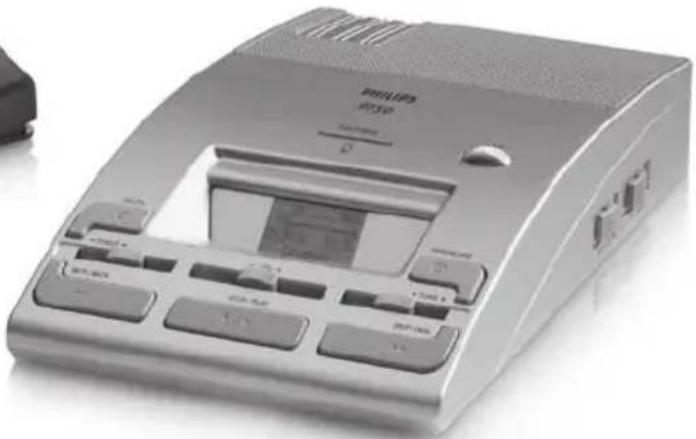
natural_image
Exterior view of a Philips POS card with control buttons and display (no visible text or symbols)For product information and support, visit
www.philips.com/dictation
EN User manual 3
1.1 What's in the box 4
2 Important 4
2.1 Safety 4
2.2 Disposal of your old product 4
3 Get started 5
3.1 Overview – controls and connections 5
3.2 Overview – display indicators and symbols 6
4 Use the Digital Desktop 7
4.1 Activation and power-save mode 7
4.2 Transcription 7
4.3 Use the foot control 7
4.3.1 Installation 7
4.3.2 Transcribe using the foot control 7
4.4 Use the Philips headphones 8
4.4.1 Change the ear cushions 8
4.4.2 Install the hanging bracket 8
4.5 Delete 9
4.5.1 Delete a file 9
4.5.2 Delete part of a recording 9
4.6 Menu settings 9
4.6.1 Menu list 10
5 Use more of your Digital Desktop 11
5.1 Overview of the Philips microphone LFH 276 and LFH 278 (optional) 11
5.2 Record with the microphone LFH 276/278 12
5.2.1 Record a spoken instruction 12
5.3 Hands-free recording 12
5.4 Use Philips SpeechExec software 13
5.4.1 Advanced configuration 13
5.4.2 Download recordings to the PC 14
6 Technical support and warranty 15
7 Technical data 16
Welcome1
Congratulations on your purchase and welcome to Philips!
To fully benefit from the support that Philips offers, visit our Website for support information such as user manuals, software downloads, warranty information and more: www.philips.com/dictation.
1.1 What's in the box

Digital Desktop
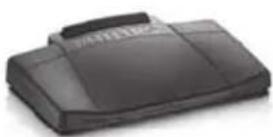
Foot Control
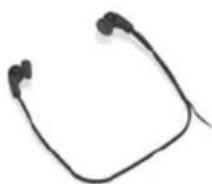
Headphones

CD-ROM
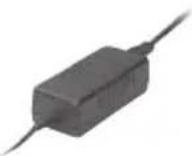
Power supply
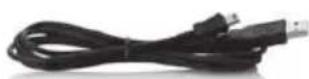
Mini USB cable
User manuals
Important2
Safety2.1
To avoid short circuit, do not expose the product to rain or water.
Do not expose the device to excessive • heat caused by heating equipment or direct sunlight.
Protect the cables from being pinched, • particularly at plugs and the point where they exit from the device.
Back up your files. Philips is not responsible • for any loss of data.
Disposal of your old product2.2
Your product is designed and manufactured with high quality materials and components,
that can be recycled and re-used. When this crossed-out wheeled bin symbol is attached to a product, it indicates that the product is covered by the European Directive 2002/96/Eo

Please become informed about the local • separate collection system for electrical and electronic products.
Please act according to your local rules and do not dispose of old products with your normal household waste. The correct disposal of old products will help prevent potential negative consequences for the environment and human health.
Get started3
Overview – controls and connections3.1

① Built-in speaker
② Automatic backspace (ABS)
③ Speaker selection (headphones/built-in speaker/microphone speaker)
④ Jog dial (file selection and menu navigation)
⑤ DOWNLOAD button (for PC download)
⑥ TONE slider (adjusts the playback tone)
⑦ SKIP/FWD button (fast forwarding and skipping to the end of the file)
⑧ VOL sllider ( playback volume)
⑨ STOP/PLAY button
⑩ SKIP/BACK button (fast rewinding and skipping to the start of the file)
11 SPEED slider ( playback speed)
⑫ DELETE button
13 Display
14 Memory card slot
15 Storage spaces for additional memory cards

⑯ USB socket (for PC download)
⑰ Conference microphone socket (for Philips LFH 9172)
18 Microphone socket (for Philips LFH 276/10 and LFH 278/10)
19 Foot control socket (for Philips LFH 2210)
20 Headphone socket (for Philips LFH 234 and LFH 334)
21 Power supply socket (for Philips LFH 155)
Overview – display indicators and symbols3.2

1 Recording format (Standard Play or Long Play mode)
2 Memory card is write-protected (locked)
3 Insert recording mode is activated
4 Voice-activated recording mode is enabled
5 Current time
6 Position bar
7 Remaining recording time (−) or used-up recording time (+) on the memory card
8 Keyword 1 (such as author name)
9 Recording / playback time
10 Recording is marked finished/locked (√) and has priority assignment (!)
11 Recording number
Use the Digital Desktop4
Activation and power-save mode4.1
The Digital Desktop is operated with a power supply (Philips LFH 155); the Digital Desktop is switched on and off by connecting or disconnecting the device from the power network.
If the device remains inactive for longer than 15 minutes, it automatically switches to the power save mode and the display is switched off. Reactivate the device by pressing any button.
Transcription4.2
Move the 10G DIAL 4 or press the SKIP/BACK 10 or SKIP/FWD button 7 while stopped to select the file to play and locate the beginning of the recording.
Press the 2 OP/PLAY button ⑨ to start playback.
A 3 djust the volume(8), tone (TONE 6) and speed (SPEED 11) during playback using the corresponding sliders.
To fast rewind, press and hold the 4 SKIP/ BACK button 10 while playing. Release the SKIP/BACK button to start playback.
To fast forward, press and hold the 5 SKIP/ FWD button ⑦ while playing. Release the SKIP/FWD button to start playback.
Press the 6 OP/PLAY button ⑨ to stop playback.

Note
You can set the value for the automatic backspace during playback of a recording with the ABS slider ②:
Playback does not begin where the • recording was stopped, rather a few seconds earlier.
- To turn off the automatic backspace, set the slider to 0.
4.3 Use the foot control
The Philips foot control is designed to offer an ergonomic, hands-free tool for playback and recording of files for transcription.
4.3.1 Installation
1 Connect the plug of the foot control to the foot control socket ⑲ of the Digital Desktop.
4.3.2 Transcribe using the foot control
The foot control 2210 has three pedals: fast rewind 1, fast forward 2 and playback 3.
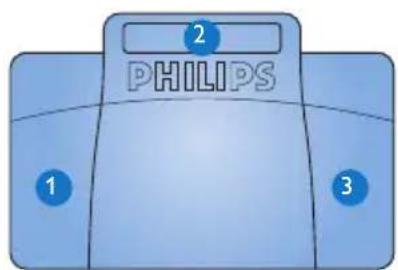
1 Press and hold the pedal for fast rewind. When rewinding reaches the desired position, release the pedal.
2 Press and hold the pedal to fast forward. When forwarding reaches the desired position, release the pedal.
3 The pedal starts playback. The behavior for starting and stopping playback depends on the setting of the playback switch on the underside of the foot control:
N (Neutral) position:• Press and hold the right pedal for playback. When the pedal is released, playback is stopped.
T (Toggle) position: • Press and release the right pedal to start continuous playback. Press the right pedal again to stop playback.
Change the ear cushions4.4.1
Follow the illustration below to change the ear cushions:

natural_image
Mechanical component diagram showing a wheel and shaft assembly with an arrow indicating direction (no text or symbols)
natural_image
Diagram showing a mechanical component with a highlighted section and an arrow indicating direction (no text or symbols)
natural_image
Diagram showing a mechanical assembly with concentric rings and a separate housing (no text or symbols)
natural_image
Diagram showing a mechanical component with a rotating wheel and a pin labeled '4' (no text or symbols on the diagram itself)
Use the Philips headphones4.4
The headphones are equipped with soft ear cushions for wearing comfort and a hanging bracket that attaches the headphone to a monitor.
Warning
Listen at a moderate volume to avoid hearing damage.
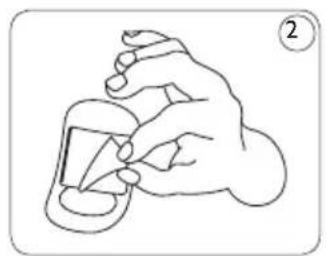
Install the hanging bracket4.4.2
Follow the illustration below to install the hanging bracket:

natural_image
Line drawing of a hand holding a small object, possibly a device or tool, with no visible text or symbols.
natural_image
Illustration of a computer monitor connected to a backpack, with a numbered circle highlighting the number 3 (no text or symbols on the device itself)
natural_image
Illustration of a computer monitor connected to a stethoscope, with an arrow pointing to the screen (no text or symbols present)Delete4.5
Delete a file4.5.1
Follow these steps to delete a file entirely:
Move the 10G DIAL 4 or press the SKIP/BACK 10 or SKIP/FWD button 7 while stopped to select the file to be deleted. Press and hold the 2ELETE button 12 for two seconds. The symbol is displayed. Press and hold the 3ELETE button again for two seconds to confirm the deletion or press the STOP/PLAY button 9 to exit without deleting.
Delete part of a recording4.5.2
Follow these steps to delete a section from a recording:
Navigate to the beginning of the section to be deleted by playback or forward/rewind. Press the 2 DELETE button 12 while stopped to mark the beginning of the section to be deleted.
Find the second mark position by playback 3 or forward / rewind and press the DELETE button.
Press and hold the 4-LETE button for two seconds to confirm the deletion or press the STOP/PLAY button⑨ to exit without deleting.
Menu settings4.6
The menu offers general and user-defined setting options to make dictation and transcription easier.
Press and hold the 1G DIAL 4 for two seconds to open the menu.
Move the 2G DIAL left or right to select the next/previous menu item.
Press the 3G DIAL to enter a sub-menu.
Press the DELETE button 12 to exit the menu.
Move the 4G DIAL left or right to select a function.
Press the ☑G DIAL to confirm a selection. A check mark next to a menu entry indicates that the setting is activated.

Note
Some settings, such as defining keywords or switching to the simple display mode, are available only through Philips SpeechExec Dictate. See Advanced configuration on page 13 for more information.
Menu list4.6.1
| Switch to insert recording mode to make additions to a recording. | |
| SPLP | The recording format determines the audio quality of recordings and affects the number of audio files that can fit on the memory card.Standard Play (SP) requires 1 megabyte for • 10 minutes of recording.Long Play mobile (LPm) requires 1 megabyte • for 15 minutes of recording. |
| 200810-13 | Set the date and the time |
| Set the microphone sensitivity for the environment and your recording preferences. | |
| Display backlight | |
| -02:59+03:05 | Display the remaining (-) or used-up (+) recording time |
| AUTHOR:JONES | One or more keywords, such as the author's name, can be assigned to every recording.Keywords can be used to identify recordings and automatic file routing in Philips SpeechExec software. |
| Device beep | |
| VA | Voice-activated recording is a convenience feature for hands-free recording. When voice-activated recording is enabled, recording will start when you begin speaking. When you stop speaking, the Digital Desktop will automatically pause recording after three seconds of silence, and resume only when you begin speaking again. |
| Display contrast |


Use more of your Digital Desktop5
Overview of the Philips microphone LFH 276 and LFH 278 (optional)5.1

① Microphone
② Insert index mark / spoken instruction
③ LFH 276: REC (record) button
LFH 278: FWD (forward) button
④ Slide switch
LFH 276: LFH 278:
| Fast forward | REC Record |
| Play | STOPSp |
| Stop | PLAY Play |
| Fast rewind | BACK Fast rewind |
⑤ Speaker
⑥ Microphone sensitivity (DICT=normal dictation environment / CONF=recording in conference situation)
⑦ Mark finished/locked (EOL/end-of-letter) / assign priority
5.2 Record with the microphone LFH 276/278
A memory card must be inserted into the 1 memory card slot and the microphone must be connected to the Digital Desktop.
To start recording: 2
On the • microphone LFH 278, move the slide switch to the REC position and start speaking.
On the • microphone LFH 276, press the REC button, move the slide switch to the ↑(play) position and start speaking.
To stop recording: 3
On the • microphone LFH 278, move the slide switch to the STOP position.
On the • microphone LFH 276, move the slide switch to the ▼ (stop) position and press the REC button.
Press the 4 button to lock the file and mark it as finished (EOL/end-of-letter). The √ symbol is displayed and the Digital Desktop automatically creates a new, empty file. To assign priority status to the recording, press the L/P button again within half a second. The ! symbol is displayed, indicating that the file has priority status. To make changes to the recording, press the L/P button again to remove the finished mark.

Note
For best results, speak clearly and keep the microphone about four inches (ten centimeters) away from your mouth. Press the 5 button during recording to insert an index mark.
Files are recorded in overwrite mode by • default. See Menu settings on page 9 for more information about switching to insert recording mode to make additions to a recording.
Press and hold the § button during recording to record a spoken instruction. See the next chapter for more information.
Record a spoken instruction5.2.1
Spoken instructions are recorded comments by the author that are directed to the person transcribing the dictation.
To insert a spoken instruction into a recording:
1 Press and hold the S button while recording.
2 Dictate the instruction.
3 Release the S button when the spoken instruction is complete. The spoken instruction is displayed as a solid line on the file position bar.
5.3 Hands-free recording
In this operating mode, you can control the dictation functions with the foot control to keep your hands free for your work.
1 Connect the plug of the foot control to the foot control socket of the Digital Desktop.
2 Set the switch on the underside of the foot control to the T position.
3 Option A: Connect the microphone LFH 276 or 278 (optional) to the MIC socket of the Digital Desktop. Press and hold the REC button on the microphone and press the
middle pedal of the foot control at the same time. HF is displayed on the screen. The Digital Desktop is “record standby” mode.
Option B: Connect the conference microphone LFH 9172 (optional) to the CONF. REC socket of the Digital Desktop. Press and hold both buttons DOWNLOAD and SKIP/FWD while pressing the middle pedal of the foot control. HF is displayed on the screen. The Digital Desktop is “record standby” mode.
To start recording, press the 4 right pedal of the foot control. For short pauses, press the right pedal of the foot control again. To continue recording, press the right pedal of the foot control again.
To stop recording, press the left pedal 5 of the foot control. To continue recording, press the middle pedal of the foot control to enter "record standby" mode and continue at step 4.
Press and hold the left pedal 6 of the foot control for fast rewind. When rewinding reaches the desired position, release the pedal.
When recording is stopped, press the right pedal of the foot control to start playback. Press the right pedal of the foot control again to stop playback.
Double click the left pedal of the foot 8 control during recording to finish/lock (EOL) the current recording and create a new file. To exit the hands-free mode, press the 9 STOP/PLAY button on the Digital Desktop.
Use Philips SpeechExec software5.4
Philips SpeechExec software can be used for advanced configuration of the Digital Desktop, automatic download, conversion and routing of dictation files.


Note
For detailed information about SpeechExec software, refer to the SpeechExec user manual.
Advanced configuration5.4.1
The Configuration Wizard is part of the Philips SpeechExec Dictate software. It guides users through the device configurations and settings of the Digital Desktop. The wizard assists in configuring time format, sound feedback, voice-activated recording, display appearance (standard or advanced display mode), recording format, microphone sensitivity, keywords, and file download to the PC.
1 Connect the Digital Desktop to the PC using a USB cable.
2 Start Philips SpeechExec Dictate software.
3 Click Settings > General settings on the menu bar of SpeechExec to open the settings
menu and select DPM/DT Configuration > DPM Wizard from the list on the left side.
Click the Cart Wizard... button to open the wizard. Follow the on-screen instructions to customize the Digital Desktop.
Click the 5ish button to close the wizard and confirm the transfer of the new settings to the Digital Desktop.

Note
When the Digital Desktop is connected to the PC for the first time, Windows detects the new hardware and automatically installs the required drivers. When the installation is complete, Windows may prompt you to restart the PC.
Download recordings to the PC5.4.2
With USB mass storage support, the Digital Desktop is automatically displayed as an external drive when it is connected to the computer. It can then be accessed easily with any Microsoft Windows program as a regular drive.
Use Philips SpeechExec software for automatic download, conversion, and routing of files.
1 Start Philips SpeechExec Dictate software. Connect the Digital Desktop to the PC 2 using the USB cable. Press the DOWNLOAD button ⑤ on the Digital Desktop to establish the connection. Press the DOWNLOAD button again to start the data transfer. By default, the recordings on the Digital Desktop will be moved to the
Finished dictations folder of the SpeechExec work list.
To leave the USB mode, press the STOP/PLAY button ⑨ on the Digital Desktop.

Note
How and which files are downloaded after a Digital Desktop is connected can be configured in the settings menu of SpeechExec or with the Configuration Wizard.
Technical support and 6
warranty
This Philips product was designed and manufactured to the highest quality standards. If your Philips product is not working correctly or is defective, contact your supplying Philips Speech Processing dealer who will provide you with the necessary information on how to proceed.
If you have questions that your dealer cannot answer or any other related question, visit www.philips.com/dictation to contact us.
No components are user-serviceable. Do not open or remove covers and do not insert objects not suitable for the specific connectors. Repairs may be made only by Philips service centers and official repair facilities. Failure to do so will void any warranty, stated or implied. Any operation expressly prohibited in this manual, any adjustments, or assembly procedures not recommended or authorized in this manual will void the warranty.
Technical data7
Digital Desktop 9750
Acoustic frequency response: •
300 - 6,000 Hz
Output power: 600 mW•
Earphone socket: 3.5 mm•
Microphone socket: 2.5 mm•
Socket for the microphone •
LFH 276/278
Data input/output socket: •
Mini-USB 2.0 full speed
Power Supply socket: 12 V DC•
Dimensions (W × D × H): •
232 × 135 × 45 mm
Weight: 1,300 g•
Headphones 334
Magnet type: Neodymium•
Diaphragm: PET dome•
- Impedance: 2 × 32 Ohm
• Maximum power input: 2 × 10 mW - Sensitivity: 103 dB
- Speaker diameter: 14 mm / 12 "
• Cable length: 3 m / 10 ft - Connector: 3.5 mm / 18 " stereo, right angled
- Dimensions (W × D × H):
160 mm × 150 mm × 18 mm
• Weight: 53 g
Foot control 2210
- Connector: 3.5 mm plug
• Dimensions (W × D × H): 195 × 130 × 35 mm - Weight: 660 g
SpeechExec Dictate Software
• Minimum: Pentium III, 500 MHz and 512 MB RAM
- Recommended: Pentium IV or similar, 1 GHz and 1 GB RAM
Hard disk space: 100 MB • for SpeechExec, 250 MB for Microsoft .NET Framework Sound card and headphone • output or speakers
- 1 free USB port
- Recommended minimum transfer rate for LAN: 100 Mbit/s
- Operating system: Windows Vista, XP (SP 2), 2000 (SP 4)
Green Specifications
- Compliant to 2002/95/EC (RoHS) Lead-free soldered product
Operation conditions
• Temperature: 5^ - 45^ C / 41^ - 113^ F
• Humidity: 10 % – 90 %
Optional accessories
• Microphone 276/10, 278/10
• Headphones 232, 233, 234, 236, 334, 2236
• Philips SD (Secure Digital)
memory card
Conference microphone 9172•
Disclaimer and Notices
Philips performs extensive testing with the most popular configurations. However, since PC add-ons and device drivers are updated continually, conflict-free operation cannot be guaranteed.

Declaration of Conformity
Tested to comply with FCC standards
FOR HOME OR OFFICE USE
Model Number: LFH 9750
Trade Name: Philips Digital Desktop 9750
Responsible Party: Philips Speech Processing
Address: 64 Perimeter Center East, Atlanta, GA 30346, USA
Telephone number: 888-260-6261
Website: www.philips.com/dictation
This device complies with Part 15 of the FCC Rules. Operation is subject to the following two conditions:
1) This device may not cause harmful interference.
2) This device must accept any interference received, including interference that may cause undesired operation.

The CE mark confirms that the device corresponds to the relevant guidelines of the European Union.

The cardboard used for packaging can be recycled. This electronic device contains recyclable material.

Discover the comprehensive range of professional dictation products from Philips www.philips.com/dictation
Specifications are subject to change without notice.
Trademarks are the property of Royal Philips Electronics or their respective owners.
© 2008 Royal Philips Electronics. All rights reserved.
Document Version 1.0, 17/10/2008.
5103 109 9526.6


- Important 4
- Get started 5
- Use the Digital Desktop 7
- Use more of your Digital Desktop 11
- Technical support and warranty 15
- Technical data 16
- Welcome1
- What's in the box
- Important2
- Safety2.1
- Disposal of your old product2.2
- Get started3
- Use the Digital Desktop4
- Activation and power-save mode4.1
- Transcription4.2
- Note
- Use the foot control
- Installation
- Transcribe using the foot control
- Change the ear cushions4.4.1
- Use the Philips headphones4.4
- Warning
- Install the hanging bracket4.4.2
- Delete4.5
- Delete a file4.5.1
- Delete part of a recording4.5.2
- Menu settings4.6
- Use more of your Digital Desktop5
- Overview of the Philips microphone LFH 276 and LFH 278 (optional)5.1
- Record with the microphone LFH 276/278
- Record a spoken instruction5.2.1
- Hands-free recording
- Use Philips SpeechExec software5.4
- Advanced configuration5.4.1
- Download recordings to the PC5.4.2
- Technical support and 6
- warranty
- Technical data7
- Digital Desktop 9750
- Headphones 334
- Foot control 2210
- SpeechExec Dictate Software
- Green Specifications
- Operation conditions
- Optional accessories
- Disclaimer and Notices
- Declaration of Conformity
Brand : PHILIPS
Model : LFH9750
Category : Audio recorder