PD3689 - Portable CD player Emerson - Free user manual and instructions
Find the device manual for free PD3689 Emerson in PDF.


| Product Type | Portable CD/MP3 Player with Digital Tuner, SD/MMC Card Reader, and USB Port |
| Brand | Emerson |
| Model | PD3689 |
| Power Supply | 120V 60Hz AC or 8 x C batteries (not included) |
| Disc Compatibility | CD, CD-R, CD-RW, MP3-CD |
| Radio Bands | FM (30 presets) and AM (10 presets) |
| Memory Card Support | SD/MMC flash memory cards (MP3 files only) |
| USB Port | Front panel USB port for MP3 playback from USB storage devices |
| Audio Output | Stereo headphone jack (3.5mm), built-in speakers, AUX IN R/L jacks |
| Remote Control | Ultra-slim 22-key remote with CR2025 battery (included) |
| Display | Multi-function LCD display |
| Equalizer | Preset EQ: Classic, Rock, Pop, Jazz; also DBBS bass boost |
| Special Features | Electronic Skip Protection (10 sec), Programmable playback (up to 64 tracks), Random, Intro Scan, Repeat (1/All/Album), Sleep and Wake Timer, Clock |
| Safety | Class 1 Laser Product; complies with FCC Part 15; polarized AC plug |
| Maintenance | Clean cabinet with dry cloth; clean CD with soft lint-free cloth; use CD cleaning kit if needed |
| Battery for Remote | CR2025 3V lithium button cell (replaceable) |
| Warranty | 90 days limited warranty (parts and labor) |
Frequently Asked Questions - PD3689 Emerson
User questions about PD3689 Emerson
0 question about this device. Answer the ones you know or ask your own.
Ask a new question about this device
Download the instructions for your Portable CD player in PDF format for free! Find your manual PD3689 - Emerson and take your electronic device back in hand. On this page are published all the documents necessary for the use of your device. PD3689 by Emerson.
USER MANUAL PD3689 Emerson
Portable CD-R/RW, MP3 Player with Digital Tuner, SD/MMC Flash Memory Card Reader and USB Port
OWNER'S MANUAL
PD3689
Visit our web site at www.emersonradio.com
CAUTION
TO PREVENT FIRE OR SHOCK HAZARD, DO NOT USE THIS PLUG WITH AN EXTENSION CORD, RECEPTACLE OR OTHER OUTLET UNLESS THE BLADES CAN BE FULLY INSERTED TO PREVENT BLADE EXPOSURE. TO PREVENT FIRE OR SHOCK HAZARD, DO NOT EXPOSE THIS APPLIANCE TO RAIN OR MOISTURE.

The lightning flash with arrowhead symbol, within an equilateral triangle is intended to alert the user to the presence of uninsulated 'dangerous voltage' within the product's enclosure that may be of sufficient magnitude to constitute a risk of electric shock to persons.
CAUTION
RISK OF ELECTRIC SHOCK DO NOT OPEN
WARNING: TO REDUCE THE RISK OF ELECTRIC SHOCK DO NOT REMOVE COVER (OR BACK), NO USER SERVICEABLE PARTS INSIDE REFER SERVICING TO QUALIFIED SERVICE PERSONNEL.

The exclamation point within an equilateral triangle is intended to alert the user to the presence of important operating and maintenance (servicing) instructions in the literature accompanying the appliance.
IMPORTANT SAFETY INSTRUCTIONS
1.) Read these instructions.
2.) Keep these instructions.
3.) Heed all warnings.
4.) Follow all instructions.
5.) Do not use this apparatus near water.
6.) Clean only with dry cloth.
7.) Do not block any ventilation openings. Install in accordance with the manufacturer's instructions.
8.) Do not install near any heat sources such as radiators, heat registers, stoves, or other apparatus (including amplifiers) that produce heat.
9.) Do not defeat the safety purpose of the polarized or grounding-type plug. A polarized plug has two blades with one wider than the other. A grounding type plug has two blades and a third grounding prong. The wide blade or the third prong is provided for your safety. If the provided plug does not fit into your outlet, consult an electrician for replacement of the obsolete outlet.
10.) Protect the power cord from being walked on or pinched particularly at plugs, convenience receptacles, and the point where they exit from the apparatus.
11.) Only use attachments / accessories specified by the manufacturer.
12.) Unplug this apparatus during lightning storms or when unused for long periods of time.
13.) Refer all servicing to qualified service personnel. Servicing is required when the apparatus has been damaged in any way, such as power-supply cord or plug is damaged, liquid has been spilled or objects have fallen into the apparatus, the apparatus has been exposed to rain or moisture, does not operate normally, or has been dropped.
14.) This appliance shall not be exposed to dripping or splashing water and no object filled with liquids such as vases shall be placed on the apparatus.
15.) Do not overload wall outlet. Use only power source as indicated.
16.) Use replacement parts as specified by the manufacturer.
17.) The product may be mounted to a wall only if recommended by the manufacturer.
18.) Upon completion of any service or repairs to this product, ask the service technician to perform safety checks.
Thank You....
for purchasing the Emerson Portable Multi-Media Audio System. This is the world's first compact audio system to include a card slot for SD/MMC flash memory cards. This allows you to play the MP3 music files which you have stored on SD or MMC flash memory cards. Simply remove the card from your solid state MP3 player and insert it into the convenient front panel card reader slot. Now you can enjoy your MP3 files through the speakers of this system instead of using headphones, which means you can share the music with all your friends.
We've also included a convenient USB port on the front panel as well. This allows you to connect and play MP3 music files stored on portable USB storage devices.
Of course the built in CD player also plays CD-R, CD-RW, and MP3 encoded CDs in addition to normal pre-recorded CDs. And the digital tuner will store up to 40 of your favorite stations (30 FM / 10 AM) for easy and immediate recall.
Finally, all functions of this system can be operated from the comfort of your favorite chair with the ultra-slim 22-key remote control.
Please be sure to read this manual carefully and completely to make sure you understand all of the exciting features and functions included in your new system. We have taken great care to make sure that this system was in perfect working order when it left our factory. If you experience any problem with the set-up or operation of this system please do not return it to the dealer. Please call the Emerson Customer Service Hotline. toll-free, at 800-898-9020. One of our representatives will try to diagnose and correct the problem for you. If that is not possible you will be advised how to obtain a replacement.
Once again, all of us at Emerson thank you for your purchase.
IMPORTANT NOTES
- Avoid installing this unit in places exposed to direct sunlight or close to heat radiating appliances such as electric heaters, on top of other stereo equipment that radiates too much heat, places lacking ventilation or dusty areas, places subject to constant vibration and/or humid or moist areas.
-
Do not attempt to clean this unit with chemical solvents as this might damage the finish. Use a clean dry cloth.
-
Operate controls and switches as described in the manual.
- Before turning 'On' the power, make certain that power cord is properly installed.
- Store your CDs, Memory Cards in a cool area to avoid damage from heat.
- When moving the set, be sure to first disconnect the power cord.
CLASS 1 LASER PRODUCT
CLASS 1 LASER PRODUCT APPAREIL Á LASER DE CLASSE 1 PRODUCTO LASER DE CLASE 1
CAUTION INVISIBLE LASER RADIATION WHEN OPEN AND INTERLOCKS DEFEATED. AVOID EXPOSURE TO BEAM

This product contains a low power Laser Device.
FCC INFORMATION
This equipment has been tested and found to comply with the limits for a Class B digital device, pursuant to Part 15 of the FCC Rules. These limits are designed to provide reasonable protection against harmful interference in a residential installation. This equipment generates, uses, and can radiate radio frequency energy and, if not installed and used in accordance with the instructions, may cause harmful interference to radio communications. However, there is no guarantee that interference will not occur in a particular installation. If this equipment does cause harmful interference to radio or television reception, which can be determined by turning the equipment off and on, the user is encouraged to try to correct the interference by one or more of the following measures:
- Reorient or relocate the receiving antenna.
- Increase the separation between the equipment and receiver.
- Connect the equipment into an outlet on a circuit different from that to which the receiver is connected.
- Consult the dealer or an experienced radio/TV technician for help.
This device complies with Part 15 of the FCC Rules. Operation is subject to the following two conditions:
(1) This device may not cause harmful interference, and
(2) This device must accept any interference received, including interference that may cause undesired operation.
PREPARATION FOR USE
Unpacking and Set Up
- Carefully remove the unit from the carton and remove all the packing material from the unit.
- Carefully remove any small strips of tape which may have been used to keep the CD door closed during shipment.
- Open the CD compartment by pressing the OPEN/CLOSE position at front of top cover. Inside the CD compartment you will see a dummy CD protection card which is used to prevent the laser pick-up from moving during shipment. Carefully remove this card and close the CD door.
- Please save the carton and packing materials in the event that your unit ever needs to be returned for service. The original carton and packing materials are the only way to protect the unit from damage during shipment.
- The AC power cord and the remote control handset are located inside the polyfoam packing material. Make sure that you do not accidentally discard the accessories with the packing material.
Protect Your Furniture
This model is equipped with non-skid rubber 'feet' to prevent the product from moving when you operate the controls. These 'feet' are made from non-migrating rubber material specially formulated to avoid leaving any marks or stains on your furniture. However certain types of oil based furniture polishes, wood preservatives, or cleaning sprays may cause the rubber 'feet' to soften, and leave marks or a rubber residue on the furniture. To prevent any damage to your furniture we strongly recommend that you purchase small self-adhesive felt pads, available at hardware stores and home improvement centers everywhere, and apply these pads to the bottom of the rubber 'feet' before you place the product on fine wooden furniture.


Power Sources
This unit is designed to operate on 8 "C" batteries, not included, or on normal 120V 60Hz AC house current. Operating this unit from any other power source may cause damage to the unit, and such damage is not covered by your warranty.
AC Operation
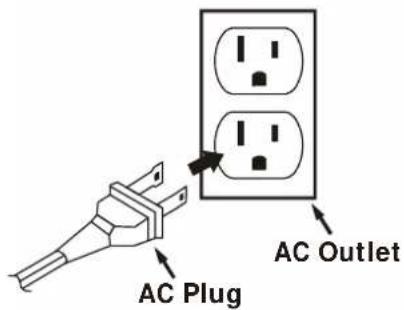
Connect the small end of the AC Power Cord to the AC socket on the back cabinet, then insert the plug in any convenient household 120V 60Hz AC outlet.

natural_image
Line drawing of a computer monitor with cable and power outlet, no text or symbols presentNote: This unit has a polarized AC plug with one wide blade and one narrow blade. This plug will only fit into a matching polarized AC outlet. This is a safety feature to reduce the possibility of electric shock.
If this plug will not fit in your AC outlet, you probably have an outdated non-polarized outlet. You should have your outdated outlet changed by a qualified, licensed electrician.
Do not file the wide blade on the plug, or use an adapter to make the plug fit into your outlet. This defeats the safety feature and could expose you to electric shock.

Battery Operation
The battery compartment is located on the bottom of the cabinet. Turn the unit upside down and place the unit on a soft surface such as a bed, a towel, or on the carpet, to avoid scratching the finish on the cabinet.
1.) Press down on the two "Arrow" marks on the battery compartment cover and slide the cover in the direction of the arrows, as shown, to remove the cover.

2.) Insert 8 "C" (UM-2) batteries, not included, in the battery compartment. We recommend that you use a well-known brand of alkaline batteries for longest life and best performance. Be sure that the batteries are positioned according to the polarity markings engraved in the battery compartment. If the batteries are inserted incorrectly the unit will not work.
3.) Replace the battery compartment cover.
Replacing the Batteries
When the sound of the unit becomes weak or distorted, or the unit fails to operate at all, remove the original batteries as soon as possible, dispose of them properly, and install new batteries.
Never leave exhausted batteries in the unit as the may eventually leak and cause damage to the unit. You warranty does not cover damage due to leaking batteries.
Note: In order to operate the unit on battery power the AC cord must be disconnected from the AC socket on the back cabinet.
Battery Precautions
- Replacement of batteries must be done by an adult.
- Do not mix old and new batteries.
- Do not mix alkaline, standard (carbon-zinc) or rechargeable (nickel-cadmium) batteries.
- The supply terminals are not to be short-circuited.
• Non-rechargeable batteries are not to be recharged. - Exhausted batteries are to be removed.
- Only batteries of the equivalent type are to be used.
- Batteries are to be inserted with the correct polarity.
- Dispose of batteries properly. Do not dispose of batteries in fire. The batteries may explode or leak.
Stereo Headphone Jack
This unit includes a stereo PHONES jack on the front panel. You may connect a set of stereo headphones, not included, to this jack for private listening without disturbing others.
The built in speakers are automatically shut off when headphones are connected to the PHONES jack. Make sure that the plug from your headphones is fully inserted into the headphone jack. If the plug is not fully inserted the sound may be intermittent, or you may only hear sound from one side of the headphones.
Important: To prevent hearing damage always set the volume control to a low level before you connect the headphones. Then connect the headphones, put them on, and very gradually increase the volume to a comfortable listening level. Remember that CDs may contain both very soft and very loud passages. Adjust the volume to a comfortable level using a louder passage, so that you always know what the maximum level will be.
Auxiliary Input Jacks
This system includes AUX IN R/L Jacks. These jacks allow you to connect external audio equipment to this system and listen to the sound from the external equipment through the speakers of this system.
Examples of the types of external equipment that may be connected are:
A cassette deck; the audio outputs from a VCR or DVD player; a personal cassette player, MP3 player, MD player, or a personal hard-disc audio jukebox device such as an iPod ^® .
Connect the audio output jack(s) or headphone jack of the external audio equipment to the AUX IN R/L jacks on the back panel of this system.
CONNECTION CABLES ARE NOT INCLUDED.
You may leave your external device permanently connected to this system if you wish. It is not necessary to disconnect the external device in order to listen to the Tuner or CD player in this system.
From External
Audio Source
Instructions for listening to your external device will be found at the end of this Owner's Manual.
LOCATION OF CONTROLS AND INDICATORS
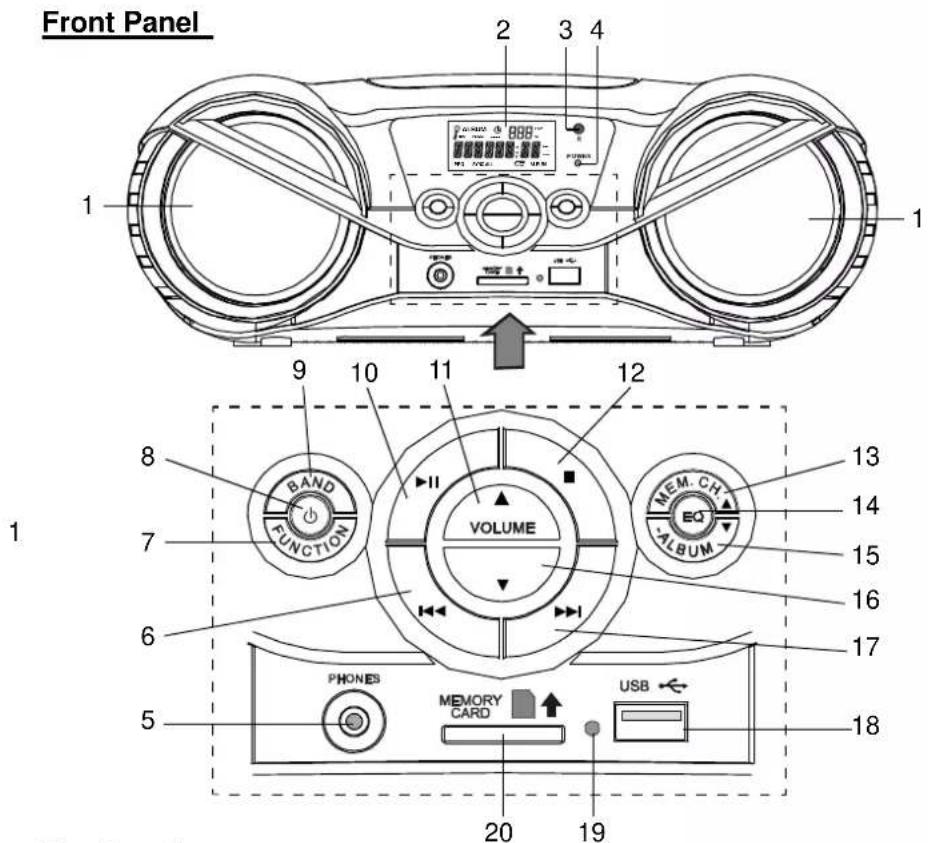
9



1.) Speakers.
2.) Multi Function LCD Display.
3.) Remote Sensor.
4.) POWER LED Indicator.
5.) PHONES Jack.
6.) Rev Skip / Search (Tuning) Button.
7.) FUNCTION Button.
8.) ⏻ Power 'On/Off' Button.
9.) BAND Button.
10.) Play / Pause Button.
11.) VOLUME ▲Button.
12.) ▪top Button.
13.) ALBUM / MEM. CH. ▲ Button.
14.) EQ Button.
15.) ALBUM / MEM CH. ▼ Button.
16.) VOLUME ▼Button.
17.) Fwd Skip / Search (Tuning) Button.
18.) USB - Port.
20.) SD/MMC MEMORY CARD Slot.
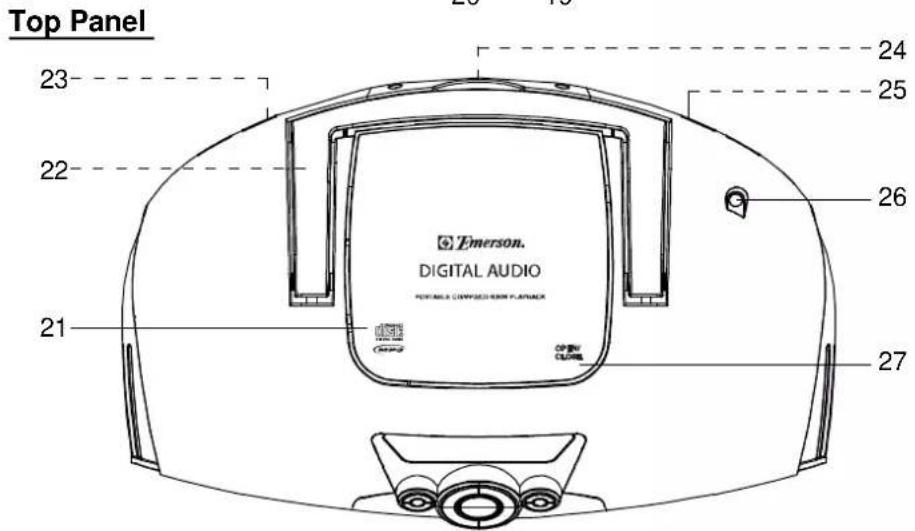
21.) CD Door.
22.) Carrying Handle.
23.) AC Power Cord Socket. (Back Cabinet)
24.) Battery Compartment. (Bottom Cabinet)
25.) AUX IN R / L Jacks. (Back Cabinet)
26.) FM Telescopic Antenna.
27.) CD Door OPEN / CLOSE Position.
19.) SD/MMC Memory Card / USB LED Indicator.


Remote Control
1.) DBBS Button.
2.) EQ Button.
3.) ALBUM / MEM CH. ▼ Button.
4.) MODE / FIND Button.
5.) ALBUM / MEM CH. ▲ Button.
6.) INTRO Button.
7.) REPEAT Button.
8.) ■TOP Button.
9.) FUNCTION Button.
10.) AUX Button.
11.) TIMER Button.
12.) IR (Infrared) Transmitter.
13.) POWER 'On/Off' Button.
14.) SLEEP Button.
15.) ▶ PLAY / PAUSE Button.
16.) ▶ SKIP / TUNING ▲ Button.
17.) SKIP / TUNING ▼ Button.
18.) RANDOM Button.
19.) PROGRAM / CLOCK Button.
20.) TUNER / BAND Button.
21.) MUTE Button.
22.) VOLUME ▲Button.
23.) VOLUME ▼Button.
24.) Battery Compartment.

Remote Control Battery
The remote control requires one "button-type" 3-volt Lithium battery, included. To extend the life of the original battery we have inserted a small clear plastic spacer tab between the lithium battery and the battery terminal.
You must remove this battery spacer tab before you can use the remote control.
To remove the tab, pull it in the direction of the arrow in the illustration as shown.
When the operation of the remote control becomes intermittent or unsatisfactory, replace the original battery with a new 3-volt Lithium battery.
The battery number is CR2025 or equivalent.
1.) To replace the battery, slide the battery holder out of the remote control in the direction of 'arrow'.
2.) Remove the original battery from the holder and install a new CR2025 battery with the "+" side facing up as shown in the illustration. Then slide the battery holder back into the remote control.

Dispose of the original battery properly. It should not be thrown into a fire as the battery may explode if incinerated. It should not be left around where small children or pets might play with, or swallow it.
If the battery is accidentally swallowed, contact a physician immediately.
OPERATING INSTRUCTIONS
- Make sure that you have removed the battery spacer from the remote control handset.
- Make sure that the unit is connected to an AC outlet that is always "live". Do not connect the unit to an AC outlet controlled by a wall switch.
General Controls
Most of the main functions of this unit can be operated by the controls on the front panel, or by the buttons on the remote control handset. If a specific function can only be operated by the remote handset, or by the front panel controls, this will be clearly indicated in the instructions.
When operating this unit with the remote control handset make sure that the IR (Infrared) transmitter on the front of the remote handset is pointed at the remote sensor on the front panel of the main unit.
The effective operating range of the remote control is approximately 15 feet. Please note that bright sunlight or room lighting may interfere with the remote control operation. If the remote is not operating properly try reducing the brightness of the room or moving closer to the main unit. If this does not solve the problem, it may be time to change the remote control battery.
Volume Controls
To increase or decrease the system volume press the VOLUME ▲ or VOLUME ▼ buttons on the front panel or the remote control.
The Volume Level Indicator will appear on the display when you change the volume level.
The level indicator ranges
from "00" (Minimum)
to "30" (Maximum).

The system remembers the volume level when the power is switched 'Off' and automatically returns to the same level when the power is switched 'On' again.
EQ (Electronic Preset Equalizer)
The preset equalizer allows you to adjust the sound characteristic for the most popular types of music.
Press the EQ button on the front panel or the remote control to cycle through the
following equalizer settings:
PASS (EQ 'Off'), CLASSIC, ROCK, POP, JAZZ.
CLASS IC
The appropriate EQ indicator briefly appears in the display to confirm your selection. The system remembers the EQ setting when the power is switched 'Off' and returns to the same setting when the power is switched 'On' again.
DBBS Control (On Remote Control Only)
Press the DBBS button on the remote control to increase the bass response.
Press again to cancel the Bass Boost function.

MUTE Button (On Remote Control Only)
Press the MUTE button on the remote control to shut off the speakers temporarily, for example, to answer the telephone.
The sound stops and the "MUTE" indicator flashes in the display.

Press the MUTE button again to cancel the mute function and restore the sound.
The "MUTE" indicator disappears.
The mute function will also be canceled automatically by pressing the VOLUME ▲
or VOLUME ▼buttons.
Setting The Clock
When the unit is connected to the AC outlet for the first time the “--:-” flashes on the display.

natural_image
Simple diagram with three vertical lines and dots, no text or symbols presentNote: Do not turn the main unit power 'On'. The clock can only be set while the main unit power is 'Off'. The clock can only be set with the Remote Control.
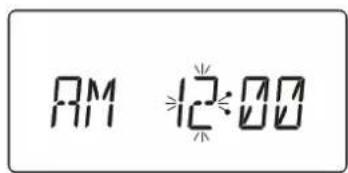
1.) Press and hold the PROGRAM/CLOCK button on the remote control.
"12 HOUR" flashes on display. Press the ▶ or ◀ SKIP/TUNING buttons to select between "24 HOUR" or "12 HOUR" modes if necessary.
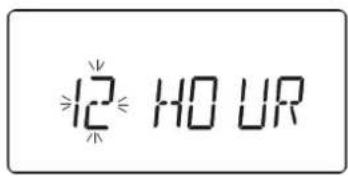


2.) Press the PROGRAM/CLOCK button again. Just the Hour digits will continue flashing.
3.) Press the ▶ or ◀ SKIP/TUNING buttons to set the display to the correct hour, AM or PM.
4.) Press the PROGRAM/CLOCK button again. The Minute digits will begin flashing.
5.) Press the ▶▶ or ◀◀ SKIP/TUNING buttons to set the display to the correct minutes.
6.) Press the PROGRAM/CLOCK button once more.
Only the ":" flashing and the clock begins to run.


Listening To The Radio
1.) Press the ⏻ POWER button to turn the unit 'On'.
The display lighting comes 'On' and the display briefly shows "HELLO".
HELLO
2.) Press the FUNCTION button to select the TUNER function.
An AM or FM frequency will appear on the display.
Press the TUNER/BAND button again to switch between the AM and FM bands if necessary.
AM 1400 kHz
3.) Tune to the desired station as follows:
- Manual Tuning
Repeatedly press the ▶▶I or ◀◀ SKIP/TUNING buttons until the display shows the exact frequency of the desired station. Use the Manual Tuning method to tune to weak or distant stations that are not strong enough to be recognized by the Automatic Tuning system.
- Automatic Tuning
Depress and hold the ▶ or ◀ SKIP/TUNING buttons until the display begins to move, then release the buttons. The Tuner will search up or down the band for the next strong signal and stop on that station. Repeat this procedure until the tuner stops on your desired station.
4.) If you tuned to an FM Stereo station the ST indicator will appear in the display. If the FM Stereo reception is noisy or weak, press the MODE/FIND button on the remote control to select the FM Mono mode.
FM 97.30 ^ST MHz
5.) Adjust the VOLUME, DBBS and EQ controls to the desired settings.
6.) When you are finished listening press the ⏻ POWER button to return the unit to the Standby (Off) mode. The display lighting goes 'Off' and the display changes from radio frequency to correct time.
Hints For Better Reception
FM: Extend and vary the direction of the FM telescopic antenna to find the position that provides the best reception.

AM: The AM bar antenna is inside the cabinet of the main unit. You may need to change the position of the main unit until you find the position that provides the best reception for your favorite AM stations.

natural_image
Line drawing of a portable electronic device with dual dials and control knobs, showing bidirectional arrows indicating rotation (no text or symbols)Presetting Stations In The Tuner Memory
You can store up to 40 of your favorite stations (30 FM / 10 AM) in the tuner memory for easy recall at any time.
Using either the Manual or Automatic tuning method described on page 16, tune to the first station you wish to memorize (Example: FM 103.50 MHz) and then:
1.) Press the PROGRAM/CLOCK button on the remote control.
The "PRG" indicator appears and the channel number "01" indicator flashes in the display.
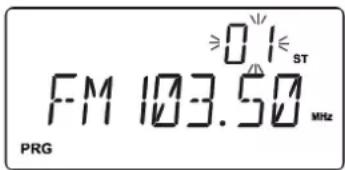
2.) Press the PROGRAM/CLOCK button again, the "01" indicator stops flashing, confirming that your station has been entered in preset channel number "01".
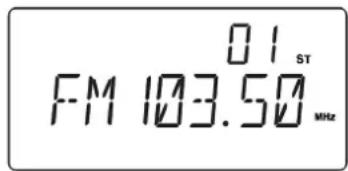
3.) Tune to the next station you wish to memorize.
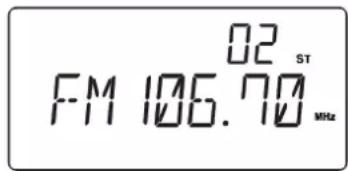
Example: FM 106.70 MHz.
Press the PROGRAM/CLOCK button. The preset channel number advances to flashing "02".
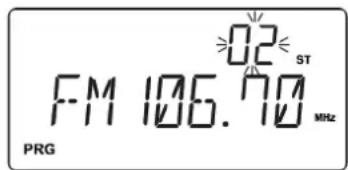
4.) Repeat Step 2-3 until you have stored up to 30 stations on the FM band, then press the TUNER/BAND button to switch to the AM band and follow the same procedure to enter up to 10 AM station in the tuner memory.



Recalling Preset Stations
1.) Turn the system 'On', press the FUNCTION and/or TUNER/BAND buttons to select the Tuner function and the desired band.
2.) Press the ALBUM/MEM CH. ▲ or ▼ button repeatedly until the desired preset number and frequency appears on the display.
Changing Preset Stations
1.) Tune to the new station you want to memorize.
2.) Press the PROGRAM/CLOCK button on the remote control.
3.) Repeatedly press ALBUM/MEM CH. ▲ or ▼ button to select the preset channel number you wish change.
4.) Press the PROGRAM/CLOCK button again. The new station is entered in the memory and the previous station is deleted.
Playing Compact Discs
Important: This CD player can play normal CDs plus CD Recordable (CD-R) and CD ReWritable (CD-RW) discs. However the playability of CD-R/RW discs may be affected by the type of software that was used in 'ripping' the tracks from the original discs and 'burning' the tracks onto the blank media. Playability may also be affected by the quality and condition of the blank media you use for recording. 100% compatibility cannot be guaranteed. This is not an indication of any problems with your player.
Normal Playback
1.) Press the ⏻ POWER button to turn the unit 'On'.
2.) Press the FUNCTION button to select CD function.
3.) Press the OPEN/CLOSE position on the CD door.
If you have not already done so, remove the "dummy CD" transit protection cards and discard it. You cannot play your own CD unless the card is removed.

4.) Load your own CD into the player with the printed 'label' facing up.

natural_image
Line drawing of a vintage car with visible front and rear wheels and a labeled 'Music' component (no text or symbols beyond the label)5.) Press the OPEN/CLOSE position to close the CD door.



The "READ" indicator flashes as the player reads the Table Of Contents on the disc.
After reading the disc the display will show the total tracks and playing time of the disc.

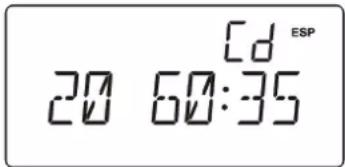
Note: The reading time may take longer if you are using a CD-RW disc or a disc encoded with MP3 audio files. This is normal and not an indication of any problem with your unit.
6.) Press the ▶I PLAY/PAUSE button to begin playback.
Note: This CD player is equipped with an automatic 10-second Electronic Skip Protection (ESP) memory system that will eliminate CD skipping if the unit is accidentally shaken or bumped during playback.
The ESP system turns 'On' automatically when you press the ▶II PLAY/PAUSE button and the ESP indicator begins flashing as the player stores 10 seconds of music in the memory. When the memory is full the ESP indicator stops flashing and remains 'On'.

If the unit is shaken or bumped for a few seconds you will not experience any skipping but the memory will be partially depleted and the ESP indicator will begin flashing until the memory is full again. Since the ESP system does draw additional power from the batteries you can shut the ESP system 'Off' if the unit is being used in a stable location and is not subject to shakes or bumps.
You may turn the ESP function 'Off' or 'On' again by pressing the MODE/FIND button on the remote control. There is no MODE/FIND button on the main unit.

7.) Adjust the VOLUME, DBBS and EQ controls as desired.
8.) Playback will continue until all tracks on the disc have been played, then the player stops and the display shows the total tracks and playing time on the disc.
To stop playback at any time, press the ■ STOP button.
9.) If you are finished listening, press the OPEN/CLOSE position to open the CD door, remove your disc from the player, re-close the door and press the ⏻ POWER button to return the unit to the Standby (Off) mode.
Pause Control
To pause temporarily during CD playback press the ▶I PLAY/PAUSE button again. The sound stops and the elapsed time flashes in the display, but the disc continues spinning.
Press the ▶I PLAY/PAUSE button once more to cancel Pause mode and resume playback at the same point, the elapsed time stops flashing.

Skip Track and High Speed Music Search
- During playback, repeatedly press the ▶ or ◀ SKIP/TUNING buttons to skip to higher or lower numbered tracks. Playback will begin on the selected track.
- During playback, depress and hold the ▶▶ or ◀◀ SKIP/TUNING buttons to search within a track at high speed to locate a specific musical passage.
Release the ▶ or ◀ SKIP/TUNING buttons when you hear the desired passage. Normal speed playback will resume at that point.
Repeat Playback (On Remote Control Only)
The Repeat function in this unit allows you to continuously repeat a single track, or the entire disc. The Repeat function can be activated during playback or while the player is stopped.
One Track Repeat
Select the track to be repeated and begin playback.
Press the REPEAT button on remote control once.
The Indicator appears in the display and the selected track will be repeated continuously.
![02 03:40 → [ d ]](/content/2026/06/1248851/images/7bb6939c4f94549426d07ab3de9568633fb5c0495741ef33722651c3e5e63bb4.jpg)
All Tracks Repeat
Load the disc in the player and begin playback.
Press the REPEAT button on the remote control twice.
The ALL indicators appear in the display. All tracks on the disc will be repeated continuously.

To cancel Repeat playback mode press the REPEAT button until the ALL ↩ indicators disappear from the display.
Repeat mode can also be canceled by opening the CD door, switching to the TUNER or AUX mode, or pressing the ⏻ POWER button to return the unit to the Standby (Off) mode.
Random Playback (On Remote Control Only)
The Random playback feature allows you play all the tracks on the disc in random order.
You can select random playback while the disc is playing or when the player is stopped.
Load a CD in the player as usual and then press the RANDOM button on the remote control handset.
The RNDM indicator appears in the display.

The player will randomly select a track from the disc and begin playback. Random playback will continue until all tracks have played once, then the player stops.
To stop Random playback, press the RANDOM button on the remote control again. The RNDM indicator disappears and normal playback will resume from that point.
INTRO Scan Playback (On Remote Control Only)
This feature allows you to play just the first 10 seconds of each track on the disc. This may be useful when you are trying to locate a specific song but you do not remember the title.
Load the disc as usual and wait until the display shows the total playing time and number of tracks.
Press the INTRO button on the remote control.
The INTRO indicator will appear in the display.

The player will play the first 10 seconds of each track automatically.
When the first 10 seconds of the last track has played the player stops and the display again shows the total playing time and number of tracks on the disc.
To cancel the Intro mode press the INTRO button once more until the INTRO indicator disappears.



Programmed Playback
The Programmed Playback feature allows you to program a total of up to 64 tracks in any desired order. You may program the same track to play several times within a program sequence if desired.
Note: You cannot program tracks during playback. If a disc is playing press the ■ STOP button first to stop playback before beginning the programming steps below.
1.) Load the disc in the player and wait until the player has read the Table of Contents of the disc.
2.) Press the PROGRAM/CLOCK button on the remote control.
The PRG indicator, Program Memory "P-01" and Track "00" will appear in the display.

3.) Then press the ▶ or ◀ SKIP/TUNING buttons to select the first track on the disc to be programmed.
(Example: Track 07).

4.) Press the PROGRAM/CLOCK button again to enter Track 07 in program memory #01.
The program memory number advances to "P-02".

5.) Repeat steps 3 and 4 selecting the desired Track number each time until you have entered up to 64 tracks in the CD program memory.




6.) Press the ▶II PLAY/PAUSE button to begin programmed playback.
The PRG indicator remains 'On'.
The player will play all the tracks that you programmed in the desired sequence.

- After the last programmed track has played the player stops, but the programmed sequence remains in the memory.
- To play the programmed sequence again, press the PROGRAM/CLOCK button then the ▶I PLAY/PAUSE button.
- To cancel the programmed sequence from the memory press the ■ STOP button at programming mode.
Programmed Repeat Playback
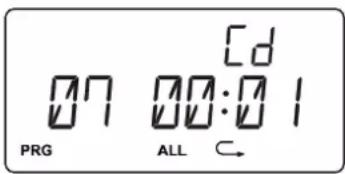
You can use the Programmed and Repeat Playback functions together to continuously repeat a programmed sequence.
First program up to 64 tracks as described above.
Then press the REPEAT button twice to activate "All Tracks Repeat" feature.
Press the ▶II PLAY/PAUSE button to begin Programmed Repeat Playback. The programmed sequence will be repeated continuously.
Playing MP3 Discs
CDs that contain compressed MP3 audio files can store approximately 10 times as much music as a normal CDs. It is possible to record up to 10 hours of music in MP3 format on a single disc.
Audio files may be downloaded from the Internet onto your computer's hard drive or 'ripped' from normal CDs. They are then compressed into MP3 format files by software on your computer and recorded or 'burned' onto blank discs.
Typically when making your own MP3 CDs you will organize the song titles into "Directories" or "Folders", also called "Albums", by artist, or by type of music.
Note: Because MP3 CDs contain so much more information than normal CDs this CD player will take longer to 'Read' all of the information on an MP3 disc.
You may see the flashing "READ" indicator for a minute or more before playback begins. This is normal and not an indication of any problem with your player.
![[C] ≥RE-AD]≤ ESP](/content/2026/06/1248851/images/1da29ebcabc36232067de9bc66f627ae613e4451a2e79d75b518450d829d24f2.jpg)
Most of the normal CD operations described in this manual also apply to MP3 CDs. However there are a few differences in MP3 CD playback functions, and these are described on the following pages.
MP3 CD "Reading" Time And Display Information
As mentioned above, because MP3 CDs contain much more information than normal CDs it takes longer for the player to 'Read' an MP3 disc and display the Table of Contents information.
After you load an MP3 CD in the player the player will read each of the "Directories" (or 'Albums') on the disc, one at a time, and display the Directory Number and the cumulative number of tracks in the directories that have already been read.
For example if we insert an MP3 CD containing 11 'Directories' (or 'Albums') and a total of 172 "files" or tracks, the display will show:


MP3 CD Playback
The ▶I PLAY/PAUSE, ▶I SKIP/TUNING, ◀SKIP/TUNING and ■STOP controls have the same functions for MP3 CDs as they do for normal CDs.
To skip quickly from a track in one Directory to a track in another Directory, proceed as follows:
1.) Load your MP3 CD in the player, wait until the reading process is completed.
2.) Example: Let's assume that you want to skip to Directory # 09/Track # 005.
- Press the ALBUM/MEM.CH button repeatedly to select Album "09". The track will show "001"
- Press the ◀ SKIP/TUNING button repeatedly until the display shows Track "005".
- Press the ▶II PLAY/PAUSE button to start playback.


- Press and hold the MODE/FIND button on the remote control to scroll through the "ID3 text" information. If the information was properly inserted when the files were created, the display will show the song TITLE, ARTIST name, and ALBUM name.

flowchart
graph LR
    A["FILE"] --> B["TITLE"]
    B --> C["ARTIST"]
    C --> D["ALBUM"]
- Press and hold the MODE/FIND button again to return to Track and Play-time display.

MP3 ID3 Support / Information Display
When you create a CD on your computer containing MP3 audio files, the software you use to create the disc will normally allow you to input the name of the "Artist", the name of the "Album", and the "Titles" of the individual songs. If the information is input properly when the disc is created, it will scroll across the bottom of the CD display during playback of the MP3 CD. Refer to previous page.
MP3 CD Repeat Playback (On Remote Control Only)
There are 3 Repeat Playback options with MP3 CDs. In addition to the "Repeat 1 Track" and "Repeat All Tracks" options which are the same for normal CDs, you may also select "Directory Repeat" mode to repeat all the tracks contained in a single Directory (Album).
• To repeat a single track on an MP3 CD
Select the track to be repeated and start playback as usual. Then press the
REPEAT button on the remote control once.
The indicator appears and the selected track will be repeated continuously.

• To repeat all the tracks on an MP3 CD
Begin playback as usual, then press the REPEAT button twice.
The ALL indicators appear on the display and all the tracks on the disc will be repeated continuously.
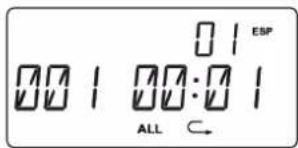
• To repeat all the tracks in a single Directory (or Album)
Press the ALBUM/MEM.CH button to select the desired Directory/Album number as usual. Press the REPEAT button 3 times.
Both the and ALBUM indicators appear in the display and all the tracks in the directory will be repeated continuously.

To cancel Repeat Playback, press the REPEAT button until the "ALL ⊆ ALBUM" indicators disappear.
MP3 CD Intro Scan And Random Playback Modes
(On Remote Control Only)
These functions operate the same way for MP3 CDs as they do for normal CDs.
Intro Scan
Load your MP3 CD in the player, wait until the reading process is completed.
Press the INTRO button.
The "INTRO" indicator appears in the display and begins Intro Scan playback.
The player will play the first 10 seconds of each track on the disc.

Random Playback
Load your MP3 CD in the player, wait until the reading process is completed.
Press the RANDOM button.
The "RNDM" indicator appears in the display.
The player will play all the tracks on the disc in Random order.
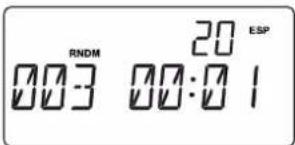
MP3 CD Programmed Playback
- When programming the tracks on an MP3 CD you must also select the Directory Number of the tracks being programmed.
- You can program up to 64 tracks on an MP3 CD, same as for a normal CD.
- Programming can only be done while the player is in the Stop mode. If the MP3 disc is playing, first press the ■ STOP button to stop playback, then follow the programming steps below.
In this example the MP3 CD contains a total of 11 Directories (Albums) and 172 Tracks (Files). Let's assume that the first track we want to program is Track #003 in Album #05.
1.) Press the PROGRAM/CLOCK button on the remote control.
The display shows Album "00" flashing. Track "000", Program Number "P-01" and "PRG" indicator appear.
2.) Press the ▶I SKIP/TUNING button repeatedly to select Album #05.
3.) Press the PROGRAM/CLOCK button to enter Album #05 in Program Memory "P-01". The track "000" flashes.
4.) Press the ▶ SKIP/TUNING button repeatedly to select Track # 003.
5.) Press the PROGRAM/CLOCK button to enter Track #003 in Program Memory P-01. The Program Number display advances to "P-02", the Album and Track Numbers return to "00" & "000".
6.) Repeat Steps 2 through 5 to enter up to 64 tracks in the program memory.
7.) After you have entered up to 64 tracks in the Program Memory, press the ▶ PLAY/PAUSE button to begin programmed playback.


This system allows you to search through a MP3 CD and select a specific "Album" (Directory), or even a specific "Song Title" (File) for immediate playback.
Notes:
A.) Title/Album Search can only be performed using the remote control handset.
B.) Title/Album Search can only be performed if the title and album information was properly encoded in the original MP3 files before they were "burned" (recorded) on the CD.
To search a MP3 CD for a specific song by "Title":
1.) Load the MP3 CD in the player and wait until the player reads the Table of Contents on the disc and shows the total number of "Albums" (Directories)
and "Tracks" (Files) on the disc.
For example in the illustration the disc contains 9 Albums and 56 Tracks.
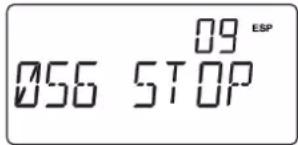
2.) Press the MODE/FIND button on the remote control once.
The Search symbol will flash in the display and the player will enter the alphabetical and numerical title search mode beginning with the letter "A".
The display will show the first song title beginning with the letter A.
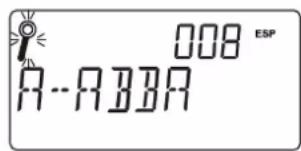
3.) Press the ▶ or ◀ SKIP/TUNING button repeatedly to scroll through all the song titles on the disc in 'Alphabetical' and 'Numerical' order.
When you see the desired "Song Title" on the display (Example: My Way), press the ▶ PLAY/PAUSE button to begin immediate playback of that title.
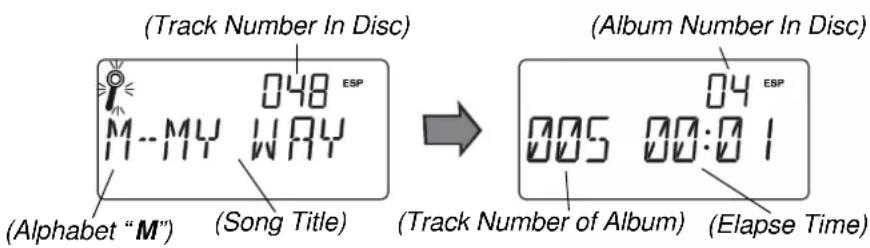
To search a MP3 CD for a specific "Album":
1.) Load the MP3 CD in the player and wait until the player reads the Table of Contents on the disc and shows the total number of "Albums" (Directories)
and "Tracks" (Files) on the disc.
For example in the illustration the disc contains 9 Albums and 56 Tracks.

2.) Press the MODE/FIND button on the remote control twice.
The Search Album symbol ⚙ ALBUM will appear in the display and the player will enter the Album Search mode beginning with Album "01".
The display will show the name of the Album.
Example: Judds

Note: If the album name is not recognized, or if the album was not properly named, the display will show "UNKNOWN".

3.) Press the ▶ or ◀ SKIP/TUNING buttons repeatedly to scroll through all the Albums on the disc in numerical order.
When you see the desired Album name on the display press the ▶ PLAY/PAUSE button to begin immediate playback of the first track in that "Album".
Playing MP3 Audio Files Stored On SD/MMC Memory Cards
Note: The card reader in this unit can only read files in MP3 format. It cannot read files in other compressed audio formats such as WMA, AAC, etc.
1.) Turn the unit 'On' as usual.
2.) Press the FUNCTION button repeatedly until the display shows "CARD - USB".

3.) Insert your "SD" or "MMC" flash memory card containing MP3 audio files into the SD/MMC MEMORY CARD slot as shown in the illustration.

natural_image
Line drawing of a hand inserting a USB into a device labeled 'PCB' (no text or symbols on the device itself)Note: The card can only be inserted one way. Push it in as far as it will go until it locks in place.
4.) The player will read the information on the card and the display will show the total number of files "Tracks" and directories (Albums) on the card. The reader LED indicator will light up.

5.) Press the ▶II PLAY/PAUSE button to begin playback.
- Adjust the VOLUME, EQ, and DBBS controls as desired.
- You can skip Tracks with the ▶ or ◀ SKIP/TUNING buttons just as you would with a normal CD.
- You can skip Albums with the ALBUM/MEM.CH ▲ or ▼ buttons.
- You may press the MODE/FIND button once to enter the "Album Search" mode, then press the ▶ or ◀ SKIP/TUNING buttons to search the desired Album.
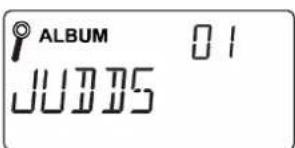



Note: If the album name is not recognized, or if the album was not properly named, the display will show "UNKNOWN".
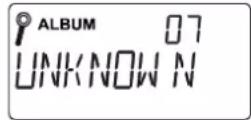
6.) Playback will continue until the last track has played and then the display will again show the total number of tracks, albums on the card.
You may also press the ■ STOP button to stop playback at any time.
7.) If you have finished listening and want to remove your memory card before the music ends, always press the ■ STOP button first and then remove your card.
If you remove the card before pressing the ■ STOP button you may cause an electro-static discharge (ESD) condition and this may prevent the card reader from operating properly until the ESD condition is cleared.
Playing MP3 Audio Files On Portable USB Storage Device
Note: The USB port in this system can only read files in MP3 format. It cannot read files in other compressed audio formats such as WMA, AAC, etc.
1.) Turn the system 'On' as usual.
2.) Press the FUNCTION button repeatedly until the display shows "CARD - USB".
![[AR]--U 5B](/content/2026/06/1248851/images/a17c08c807cddbbf2c1d6c3b1df8642221078fa302474e654b5a5b9138353751.jpg)
3.) Connect your portable USB storage device to the USB port on the front panel of this unit as shown in the illustration.

natural_image
Line drawing of a hand inserting a device into a device housing (no text or symbols)Note: The portable USB drive can only be connected one way, usually with the printed side facing up. If you have trouble connecting your USB storage device to the USB port, do not force it. This may damage the connector. Instead turn the device over and try connecting it again.
4.) The player will read the information on the external device and the display will show the total number of "Tracks", "Albums" on the device.
The reader LED indicator will light up.

5.) Press the ▶ PLAY/PAUSE button to begin playback.
- Adjust the VOLUME, EQ, and DBBS controls as desired.
- You can skip tracks with the ▶ or ◀ SKIP/TUNING buttons just as you would with a normal CD.
- You can skip albums with the ALBUM/MEM.CH ▲ or ▼ buttons.
- You may press the MODE/FIND button once to enter the "Album Search" mode, then press the ▶ or ◀ SKIP/TUNING buttons to search the desired Album.
Note: If the album name is not recognized, or if the album was not properly named, the display will show "UNKNOWN".
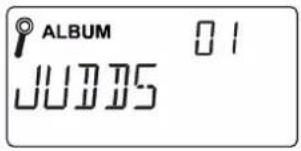
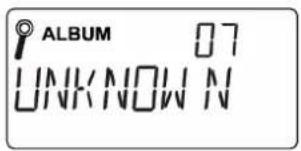
6.) Playback will continue until the last track has played and then the display will again show the total number of tracks, albums on the USB device.
You may also press the ■ STOP button to stop playback at any time.
7.) If you have finished listening and want to remove your USB device before the music ends, always press the ■ STOP button first and then remove your USB device.
If you remove the USB device before pressing the ■ STOP button you may cause an electro-static discharge (ESD) condition and this may prevent the USB port from operating properly until the ESD condition is cleared.
Special Functions
TIMER Operation (On Remote Control Only)
This unit includes a programmable Timer function. You can use the timer to wake you up to the TUNER, or to your favorite CD.
The timer can be programmed while the unit is in the Standby (Power Off) mode, the TUNER, CD, CARD-USB, or AUX modes.
To Set The TIMER The 1 ^ST Time
1.) Press and hold the TIMER button on the remote control.
The “-on” indicators appear and the Hour digits will begin flashing in the display.
2.) Press the ▶I or ◀SKIP/TUNING buttons to set the display to the desired turn 'On' hour, AM or PM.
3.) Press the TIMER button. The Minute digits begin flashing.
4.) Press the ▶I or ◀ SKIP/TUNING buttons to set the display to the desired turn 'On' minute.
5.) Press TIMER button again.
The “OFF” appears in the display, the Hour digits begins flashing.
Press the ▶I or ◀ SKIP/TUNING buttons to set the display to the desired turn 'Off' hour, AM or PM.
6.) Press the TIMER button. The Minute digits begin flashing.
7.) Press the ▶ or ◀ SKIP/TUNING buttons to set the display to the desired turn 'Off' minute.


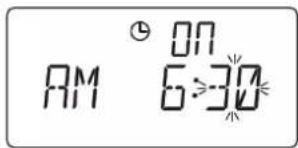


8.) Press the TIMER button again. The TUNER indicator flashes in the display. Press the ▶ or ◀ SKIP/TUNING buttons to select turn 'On' TUNER or CD mode as desired.
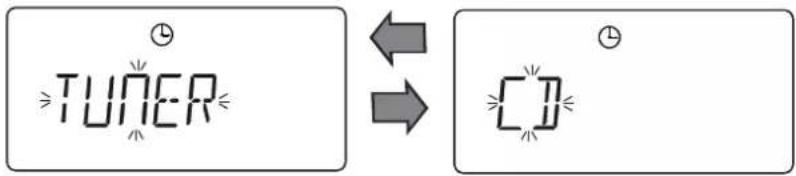
9.) Press the TIMER button.
"VOL 13" flashes in the display indicating that you may now adjust the turn 'On' Volume level.
Press the ▶ or ◀ SKIP/TUNING buttons to set the turn 'On' Volume level as desired.
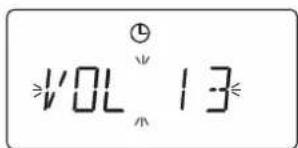
10.) Press the TIMER button again, the display will show the Timer settings in sequence once more, then return to correct time.
The ⏻ indicator remains 'On'.
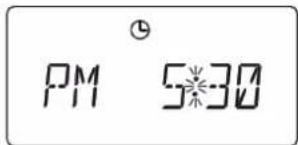
11.) At the selected Timer 'On' time, the unit will turn on.
The volume increases gradually to the preset level. It will sound until the turn 'Off' time is reached and the power shut off automatically.
12.) To stop the unit sooner, press the ⏻ POWER button.
The power turns 'Off', but the Timer remains set and will turn the unit 'On' again at the same time on the following day.
13.) If you do not want the Timer to turn the unit 'On' the following day, press the
TIMER button once.
The ⏻ indicator disappears in the display.



Notes:
- You may 'reactivate' the Timer again by pressing the TIMER button once. The ④ indicator will reappear.
- To re-program the Timer, press and hold the TIMER button until the Hour digits begin flashing. Then repeat the steps 2-10 on pages 38-39.
- If the unit turns on to CD function, it will only play until the end of the disc and then stops. If your CD is only 45 minutes, the unit will only play for 45 minutes but the power will remain 'On' until turn 'Off' time is reached.

SLEEP Timer (On Remote Control Only)
This unit includes a programmable Sleep Timer that allows you to fall asleep to between 10 and 90 minutes of music and then shuts the power 'Off' automatically.
To operate the sleep timer:
1.) Turn the unit 'On' and operate either the TUNER or CD function as usual.
2.) Press the SLEEP button on the remote control.
3.) The display will show "SLEEP 90" indicating that the sleep timer will shut the power 'Off' after 90 minutes.

Continue pressing the SLEEP button to decrease the amount of sleep timer operation.
Each time you press the SLEEP button you subtract 10 minutes to the sleep timer. The minimum sleep timer operation is 10 minutes.
4.) After a few seconds the Sleep Time display disappears and the normal Tuner or CD display returns.
The small SLEEP indicator remains in the display.

When the Sleep Timer counts down to "00", the power shuts off automatically.
Notes:
- You can shut the unit off manually before the Sleep Timer counts down to "00" by pressing the ⏻ POWER button at any time.
- If you are falling asleep to CD, the system will only operate until the CD ends.
If you set the Sleep Timer for 90 minutes but your CD is only 45 minutes long, the music will stop after 45 minutes.



Auxiliary Operation
You can listen to an auxiliary audio source connected to the AUX IN R/L jacks on the back panel of this unit (refer to page 8 for connection information.)
Press the FUNCTION button or AUX button on remote control to select the Aux function.
The AUX indicator appears in the display.
AUX
Operate the external device as you would normally.
When you hear the music from your external source adjust the VOLUME, EQ and DBBS controls of this system as desired.
CARE AND MAINTENANCE
Compact Disc Care
- To remove a disc from its storage case, press down on the center of the case and lift the disc out, holding it carefully by the edges.

natural_image
Illustration of a hand pressing a circular component with an upward arrow (no text or symbols)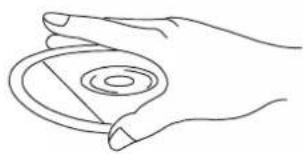
natural_image
Line drawing of a hand holding a circular object with concentric rings (no text or symbols)- Fingerprints and dust should be carefully wiped off the disc's recorded surface with a soft cloth. Unlike conventional records, compact discs have no grooves to collect dust and microscopic debris, so gently wiping with a soft cloth should remove most particles. Wipe in a straight line from the inside to the outside of the disc. Small dust particles and light stains will have absolutely no effect on reproduction quality.
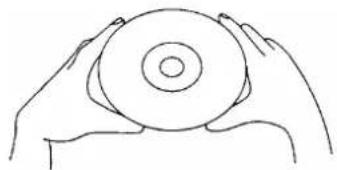
natural_image
Line drawing of two hands holding a circular object (no text or symbols)
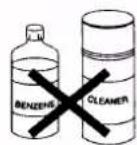
- Clean the disc periodically with a soft, lint-free, dry cloth. Never use detergents or abrasive cleaners to clean the disc. If necessary, use a CD cleaning kit.
- Never write on or affix labels to the surface of compact discs.
Care Of The Cabinet
If the cabinet becomes dusty wipe it with a soft dry dust cloth. Do not use any wax, polish sprays, or abrasive cleaners on the cabinet.
Caution
Never allow any water or other liquids to get inside the unit while cleaning.

natural_image
Color palette bar with grayscale shades and a small crosshair symbol (no text or symbols)


LIMITED WARRANTY
Emerson Radio Corp. warrants manufacturing defects in original material, including original parts and workmanship, under normal use and conditions, for a period of ninety (90) days from the date of original purchase in the U.S. With your dated proof of purchase, we will provide repair service at no charge for labor and parts at an authorized Depot Repair Facility, or replace the product in our discretion. For repair or replacement, pack your unit in a padded box, enclose your check or money order payable to Emerson Radio Corp. in the amount of \$9.00 (not required by California residents) to cover shipping and handling costs, and enclose a copy of your proof of purchase. Send your unit to:
Emerson Radio Corp.,
5101 Statesman Drive,
Irving, TX 75063.
This warranty does not cover damage from negligence, misuse, abuse, accident, failure to follow operating instructions, commercial use, rental, repairs by an unauthorized facility, or products purchased, used, serviced or damaged outside of the United States.
THIS WARRANTY GIVES YOU SPECIFIC LEGAL RIGHTS, AND YOU MAY ALSO HAVE OTHER RIGHTS WHICH VARY FROM STATE TO STATE.
AU898M
The serial number of your unit is located on a label on the bottom cabinet.
Please take a moment now to locate the serial number and write the number in the space provided below. You may be asked to provide this number when calling for product service.
Model Number: PD3689
Serial Number:

natural_image
Color palette bar with grayscale gradient and a crosshair symbol (no text or labels)


EMERSON
Part No. 16-3001
506-01
Printed in China
PD3689_062005.p65 20/6/2005, 16:1846

- CAUTION
- IMPORTANT SAFETY INSTRUCTIONS
- IMPORTANT NOTES
- CLASS 1 LASER PRODUCT
- FCC INFORMATION
- PREPARATION FOR USE
- Unpacking and Set Up
- Protect Your Furniture
- Power Sources
- AC Operation
- Battery Operation
- Replacing the Batteries
- Battery Precautions
- Stereo Headphone Jack
- Auxiliary Input Jacks
- Remote Control
- Remote Control Battery
- OPERATING INSTRUCTIONS
- General Controls
- Volume Controls
- EQ (Electronic Preset Equalizer)
- DBBS Control (On Remote Control Only)
- MUTE Button (On Remote Control Only)
- Setting The Clock
- Listening To The Radio
- Hints For Better Reception
- Presetting Stations In The Tuner Memory
- Recalling Preset Stations
- Changing Preset Stations
- Playing Compact Discs
- Normal Playback
- Pause Control
- Skip Track and High Speed Music Search
- Repeat Playback (On Remote Control Only)
- One Track Repeat
- All Tracks Repeat
- Random Playback (On Remote Control Only)
- INTRO Scan Playback (On Remote Control Only)
- Programmed Playback
- Programmed Repeat Playback
- Playing MP3 Discs
- MP3 CD "Reading" Time And Display Information
- MP3 CD Playback
- MP3 ID3 Support / Information Display
- MP3 CD Repeat Playback (On Remote Control Only)
- • To repeat a single track on an MP3 CD
- • To repeat all the tracks on an MP3 CD
- • To repeat all the tracks in a single Directory (or Album)
- MP3 CD Intro Scan And Random Playback Modes
- Intro Scan
- Random Playback
- MP3 CD Programmed Playback
- Notes:
- To search a MP3 CD for a specific song by "Title":
- To search a MP3 CD for a specific "Album":
- Playing MP3 Audio Files Stored On SD/MMC Memory Cards
- Playing MP3 Audio Files On Portable USB Storage Device
- Special Functions
- TIMER Operation (On Remote Control Only)
- To Set The TIMER The 1 ST Time
- SLEEP Timer (On Remote Control Only)
- To operate the sleep timer:
- Auxiliary Operation
- CARE AND MAINTENANCE
- Compact Disc Care
- Care Of The Cabinet
- LIMITED WARRANTY
Brand : Emerson
Model : PD3689
Category : Portable CD player