
CPCGM4F4021N - Hot plate CORBERO - Free user manual and instructions
Find the device manual for free CPCGM4F4021N CORBERO in PDF.


| Type de produit | Gas Hob (Cooktop) |
| Marque | Corbero |
| Modèle | CPCGM4F4021N |
| Dimensions (L x P x H) | 600 x 520 x 97 mm |
| Matériau de la surface | Verre trempé |
| Type d'allumage | Allumage électronique continu |
| Alimentation électrique | 220-240 V ~ 50/60 Hz, 0,6 W |
| Catégorie de gaz | I3+ (G30 Butane/Propane, G20/25 Gaz Naturel) |
| Raccordement gaz | Filetage G1/2 |
| Brûleurs et puissances | Triple couronne 3,8 kW, Semi-rapide 2,0 kW (x2), Auxiliaire 1,0 kW |
| Puissance totale nominale | 8,8 kW |
| Dispositif de sécurité | Dispositif de surveillance de flamme (thermocouple) |
| Accessoires inclus | Grilles (4), joints éponge (4), vis (4), injecteurs (4), raccord de conduite de gaz, manuel d'instructions |
| Type d'installation | Encastré dans plan de travail (découpe 560 x 480 mm minimum) |
| Distances de sécurité | ≥ 60 mm des parois latérales/arrière |
| Nettoyage | Détergent doux et chiffon non abrasif ; ne pas utiliser de nettoyeur vapeur |
| Réparabilité | Service après-vente agréé uniquement ; pièces détachées disponibles |
| Garantie | 36 mois à compter de la date d'achat (selon conditions) |
| Pays d'utilisation | Certifié pour les pays marqués sur la plaque signalétique |
Frequently Asked Questions - CPCGM4F4021N CORBERO
User questions about CPCGM4F4021N CORBERO
0 question about this device. Answer the ones you know or ask your own.
Ask a new question about this device
Download the instructions for your Hot plate in PDF format for free! Find your manual CPCGM4F4021N - CORBERO and take your electronic device back in hand. On this page are published all the documents necessary for the use of your device. CPCGM4F4021N by CORBERO.
USER MANUAL CPCGM4F4021N CORBERO
natural_image
Cartoon illustration of a car with a sad face and hand waving, next to a truck (no text or symbols)natural_image
Illustration of a hand cleaning a food item with bottles and a sad face (no text or symbols)Advertencias
natural_image
Diagram showing a curved arrow pointing to a square outline, with no text or symbols present.Thank you for choosing our gas cooktop.
To use this appliance correctly and prevent any potential risk, read these instructions before using the appliance.
Keep these instructions in a place where you can find them easily.
If you are unsure of any of the information contained in these instructions, please contact our customer care centre.
The manufacturer shall not be responsible for any damages to persons or property caused by incorrect installation or use of the appliance.
The appliance has been certified for use in countries other than those marked on the appliance.
The manufacturer also reserves the right to make any modifications to the products as may be considered necessary or useful, also in the interests of the user, without jeopardising the main functional and safety features of the products themselves.
The appliance is designed for a domestic environment and not a commercial one.
contents
Preface
Safety Warning
3 Safety Instructions
4 Installation
5 Child and People Safety
6 During Use
8 Cleaning and Service
8 Environmental Information
Instructions for use and maintenance
9 Description of the appliance
10 How to Use the appliance
11 Safety and Energy saving advice
12 Cleaning and Maintenance
Technical instructions
Safety Instructions
■ Please take the time to read this Instruction Manual before installing or using the appliance.
This instruction booklet must be kept with the appliance for any future reference. If the appliance is sold or transferred to another person, ensure the booklet is passed on to the new user.
■ The manufacturer declines any liability should these safety measures not be observed.
■ The following marks are made to be easily understood so that you can prevent any accident caused by misuse in advance, and use the appliance more conveniently.
- Read the following contents thoroughly and ensure you understand them.
| Danger/Warning | Neglect of this mark may result in severe personal injury or death. |
| Caution | Neglect of this mark may result in minor personal injury or property damage. |
■ The following marks are used in the Instruction Manual as follows:

Caution
No Access


No Fire Tool

Must Do

■ If gas seems to leak, take the actions as follow:
Installation

Warning
■ This appliance shall be installed in accordance with regulations in force and only used in a well ventilated space.
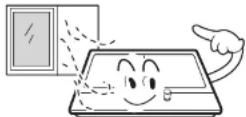
■ Prior to installation, ensure that the gas and electrical supply complies with the type stated on the rating plate.

■ Where this appliance is installed in marine craft or in caravans, it should not be used as a space heater.
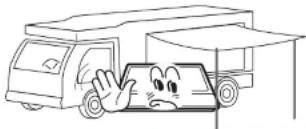
natural_image
Cartoon illustration of a car with a sad face and open trunk, no text or symbols present■ The gas pipe and electrical cable must be installed in such a way that they do not touch any parts or the appliance.
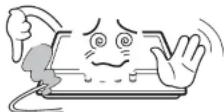

Caution
Child and People Safety

Warning
- Do not allow children to play near or with the appliance. The appliance gets hot when it is in use. Children should be kept away until it has cooled.


Caution
■ This appliance is designed to be operated by adults.
■ Children can also injure themselves by pulling pans or pots off the appliance.
This appliance is not intended for use by children or other persons whose physical, sensory or mental capabilities or lack of experience and knowledge prevents them from using the appliance safety without supervision or instruction by a responsible
During Use

Warning
■ Only use the appliance for preparing food.

■ Do not modify this appliance. Burner panel is not designed to operate from an external timer or separate remote control system.
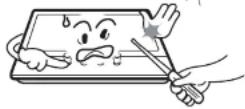
■ The use of a gas cooking appliance results in the production of heat and moisture in the room in which it is installed. Ensure that the kitchen is well ventilated: keep natural ventilation holes open or install a mechanical ventilation device (mechanical extractor hood).

■ Do not use this appliance if it comes in contact with water. Do not operate this appliance with wet hands.
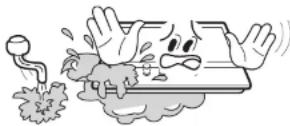
■ The heating and cooking surfaces of the appliance become hot when they
■ Do not use large cloths, tea towels or similar as the ends could touch the
During Use
■ Do not use or store flammable materials in the storage drawer near this appliance.
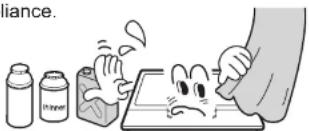
■ Perishable food, plastic items and aerosols may be affected by heat and should not stored above or below the appliance.

■ Do not spray aerosols in the vicinity of this appliance while it is in operaiton.

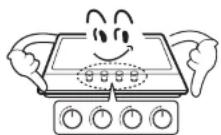
■ Ensure the control knobs are in the “” position when not in use.

Caution
■ This appliance is intended for domestic cooking only. It is not designed for commercial or industrial purposes.
■ Prolonged intensive use of the appliance may call for additional ventilation, for example opening of a window, or increasing the level of mechanical ventilation where present.
■ Use heat-resistant pot holders or gloves when handling hot pots and pans.
■ Do not let pot holders come near open flames when lifting cookware.
■ Take care not to let pot holders or gloves get damp or wet, as this causes heat to transfer through the material quicker with the risk of burning yourself.
Cleaning and Service

Warning
■ Never use abrasive or caustic cleaning agents.

■ This appliance should only be repaired or serviced by an authorised Service Engineer and only genuine approved spare parts should be used.


Caution
■ Before attempting to clean the appliance, it should be disconnected from the mains and cooled.
- You should not use a steam jet or any other high pressure cleaning equipment to clean the appliance.
Environmental Information
■ After installation, please dispose of the packaging with due regard to safety and the environment


Description of the appliance
| Top Plate | Dimension (W*D*H) mm | Ignition device | Gas Connection | Electric supply | Burner Feature | ΣQn |
| Glass | 600*520*97 | Continuous Ignition Type | G1/2 thread | 220-240Vac, 50Hz-60Hz, 0.6W | Triple-Crown(1), Semi-rapid(2), Auxiliary (1) | 8.8kW |
| Category Gas type | Position Left Front Rear Right | |||||
| Burner Wok-burner Auxiliary | Semi-rapid Semi-rapid | |||||
| 13+/13BP(30) | G30 Butane 28mbar | Rate power (kW) | 3.8 1.0 2.0 2.0 | |||
| Rate Flow (g/h) | 277.4 73 146 146 | |||||
Description of the appliance
Accessories

Bracket(4)

Sponge(4)

Screw(4)

Instruction Manual(1)

Injector (4)

Gas-pipe bend (1)
How to Use the appliance
The following symbols will appear on the control panel, next to each control handle :
Safety and Energy saving advice
- The diameter of the bottom of the pan should correspond to that of the burner.
| BURNERS | PANS | |
| min. | max. | |
| Triple-Crown | 200mm | 260mm |
| Rapid | 180mm 220mm | |
| Semi-Rapid | 180mm | 200mm |
| Auxiliary | 120mm | 180mm |

■ Do not use cookware that overlaps the edge of the burner.
| NO YES | |||
 | Do not use small diameter cookware on large burners.The flame should never come up the sides of the cookware. | Always use cookware that is suitable for each burner, to avoid wasting gas and discolouring the cookware. |  |
 | Avoid cooking without a lid or with the lid half off-as this wastes energy | Place a lid on the cookware. |  |
 | Do not use a pan with a convex or concave bottom. | Only use pots,saucepans and frying pans with a thick,flat bottom. |  |
 | Do not place cookware on one side of a burner,as it could tip over. | Always place the cookware right over the burners,not to one side. |  |
| Do not use cookware with a large diameter on the burners near the controls,which when placed on the middle of the burner may touch the controls or be so close to them that they increase the temperature in this area and may cause damage. | |||
| Never place cookware directly on top of the burner. | Place the cookware on top of | ||
Cleaning and Maintenance

■ Cleaning operations must only be carried out when the appliance is completely cool.
■ The appliance should be disconnected from your mains supply before commencing any cleaning process.
■ Clean the appliance regularly, preferably after each use.
■ Abrasive cleaners or sharp objects will damage the appliance surface; you should clean it using water and a little washing up liquid.
| Usable | Unusable | |||
 | Soft clothNeutral Detergent |  | Nylon Brush |  Metal Brush Metal Brush |
| Edible Oil | (NHD7) Acidic/Alkali Detergent | |||
 | Abrasive |  Thinner/Benzene Thinner/Benzene | ||
Pan support, Control handles
■ Take off the Pan support.
■ Clean these and the control handles with a damp cloth, washing up liquid and warm
- ... ▾ ... ▾ ▲ ▲ ... ... !? ... ... ... ▾ ▲ ▲ ▲ ... ▾
Cleaning and Maintenance
BURNERS
■ Remove the burner lids and Flame Spreaders by pulling them upwards and away from the top plate.
■ Soak them in hot water and a little detergent or washing up liqui.
■ After cleaning and washing them, wipe and dry them carefully. Make sure that the flame holes are clean and completely dry.
■ Wipe the fixed parts of the burner cup with a damp cloth and dry afterwards.
■ Gently wipe the ignition device and flame supervision device with a well wrung-out cloth and wipe dry with a clean cloth.
■ Before placing the burners back on the top plate, make sure that the injector is not blocked.
■ Re-assemble the Auxiliary, Semi-Rapid, Rapid and Triple-Crown burners as follows :

Using instructions
⚠Warnings
■ Do not modify this appliance.
■ This appliance must be installed by an authorised technician or installer.
■ Prior to installation, ensure that the local distribution conditions (nature of the gas and gas pressure) and the adjustment of the appliance are compatible.
■ The adjustment conditions for this appliance are stated on the label (or data plate).
This appliance is not connected to a combustion products evacuation device. It should be installed and connected in accordance with current installation regulations. Particular attention should be given to the relevant requirements regarding ventilaton.
■ Before installing, turn off the gas and electricity supply to the appliance.
■ All appliances containing any electrical components must be earthed.
■ Ensure that the gas pipe and electrical cable are installed in such a way that they do not touch any parts of the appliance which may become hot.
- Gas pipe or connector shouldn't be bent or blocked by any other appliances.
- Check the dimensions of the appliance as well as the dimensions of the gap to be cut in the kitchen unit.
Positioning
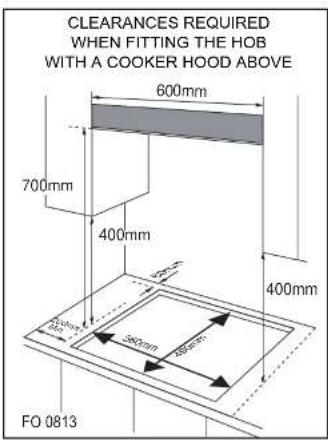
■ This appliance is to be built into a kitchen unit or 600mm worktop, providing the following minimum distances are allowed;
- The edges of the hob must be a minimum distance of 60 mm from a side or rear wall.
Installing the appliance

natural_image
Diagram showing a curved line on a shaded surface transforming into a square frame (no text or symbols)please follow the sequence to put on pan support
1.eput the left/right pan support on the glass follow the naile
2. Tear off the paper.
3. Stick the sponge round the edge of the cut-out hole.

- put the left/right pan support on the glass follow the nail
- put the middle pan support between them.


Do not use a silicon sealant to seal the appliance against the aperture.
Gas Connection

■ This appliance must be installed and connected in accordance with installation regulations in force in the country in which the appliance is to be used.
■ This appliance is supplied to run on LPG and natural gas. Conversion for use on LPG and natural gases must only be undertaken by a qualified person.
Gas supply replacement and installation guidelines:
LPG > NG
NG > LPG

olt is the law that all gas appliances are installed by competent persons in accordance with the current edition of the Gas Safety Installation and Use Regulations.
- It is in your interest and that of safety to ensure compliance with the law.
In the UK. GASSAFE registered installers work to safe standards of
Electrical Connection
■ This appliance must be earthed.
■ This appliance is designed to be connected to a 220-240V, 50Hz-60Hz AC electricity supply.
■ The wires in the mains lead are coloured in accordance with the following code;
- Green/yellow = Earth
- Blue = Neutral
- Brown = Live

■ The wire which is coloured green and yellow must be connected to the terminal which is marked with the letter E or by the earth symbol.
Gas adjustment

■ Take precautions on the operations and adjustments to be carried out when converting from one gas to another.
■ All work must be carried out by a qualified technician.
■ Before you begin, turn off the gas and electricity supply to the appliance.

Change the injector of the burners.

Remove the pan support, Burner lid and Flame spreader.
Unscrew the injector using a 7mm box spanner and replace it with the stipulated injector for new gas supply. Carefully reassemble the all components.
After injectors are replaced, it is advisable to strongly tighten the injector in place.

Adjustment of minimum level of the flame.

① Turn the taps down to minimum.
② Remove the knob from the tap and place a small bladed screwdriver in the centre of the tap shaft.
③ The correct adjustment is obtained when the flame has a length of about 3 - 4 mm.
- For butane/ propane gas, the adjusting screw must
- be tightly screwed in.
- Refit the control knob.
Trouble shooting
■ Repairs should be performed by a licensed technician only. Improper repair may result in considerable danger to you and others.
■ However, some minor problems can be resolved as follows :
| Problem | Probable cause | Solution |
| Not ignited | No Spark. | Check the electricity supply. |
| The burner lid is badly assembled. | Assemble the lid correctly. | |
| The gas supply is closed. | Open the gas supply completely. | |
| Badly ignited | The gas supply is not completely open. | Open the gas supply completely. |
| The burner lid is badly assembled. | Assemble the lid correctly. | |
| The ignition plug is contaminated with alien substance. | Wipe alien substance with a dry cloth. | |
| The burners are wet. | Dry the burners lids carefully. | |
| The holes in the flame spreader are clogged. | Clean the flame spreader. | |
| Noise made when combusted and ignited | The burner lid is badly assembled. | Assemble the burner lid correctly. |
| Flame goes out when in use. | The flame supervision device is contaminated with alien substance. | Clean the flame supervision device. |
| Product being cooked has boiled over and extinguished the flame. | Turn off burner knob.Wait one minute and reignite zone. |
CERTIFICADO DE GARANTÍA
The presentation of the purchase Invoice accompanied by this guarantee certificate is essential.
Covered Risks.
This appliance is guaranteed against any malfunction, provided that it is intended for domestic use, proceeding to its repair within the warranty period and only by the authorized SAT network.
Our Corberó appliances have the manufacturer's legal warranty that covers any breakdown or defect for 36 months, from the invoice date of January 1, 2022. If necessary, we take care of any possible incident whenever it is due to a defective component or manufacturing fault. Warranty Exceptions
Warranty Exceptions
- That the date of the certificate does not coincide with the date of sale of the original invoice.
• Faults produced by blow, by fall or any other cause of force majeure. - If the device has been manipulated by unauthorized personnel.
- Faults produced or derived as a consequence of improper use, installation defects, or modifications to the device that alter its operation.
- Start-up, maintenance, cleaning, components subject to wear, lamps, aesthetic parts, oxidation, plastics, rubbers, housings and crystals.
- Microwave ovens (with the exception of built-in ones) and tabletop ovens in the event of any incident of operation, they must be taken to the nearest technical service by the customer. They are not collected or repaired at home.
Electric thermos guarantee. 3-year warranty including travel and labor costs that correspond to the repair of the product, having to have maintenance once every 12 months. Especially if you have installed a gas appliance, keep in


- Advertencias
- contents
- Safety Warning
- Instructions for use and maintenance
- Safety Instructions
- Installation
- Warning
- Caution
- Child and People Safety
- During Use
- Cleaning and Service
- Environmental Information
- Description of the appliance
- Accessories
- How to Use the appliance
- Safety and Energy saving advice
- Cleaning and Maintenance
- Pan support, Control handles
- BURNERS
- Using instructions
- ⚠Warnings
- Positioning
- Installing the appliance
- Gas Connection
- Electrical Connection
- Gas adjustment
- Change the injector of the burners.
- Adjustment of minimum level of the flame.
- Trouble shooting
- CERTIFICADO DE GARANTÍA
- Covered Risks.
- Warranty Exceptions
Brand : CORBERO
Model : CPCGM4F4021N
Category : Hot plate