
KP1701 - Washing machine Kincrome - Free user manual and instructions
Find the device manual for free KP1701 Kincrome in PDF.


| Product Type | Washing Machine |
| Model | KP1701 |
| Brand | Kincrome |
| Capacity | 7 kg |
| Dimensions (H x W x D) | 850 x 600 x 600 mm |
| Weight | 65 kg |
| Power Supply | 220-240V ~50Hz |
| Power Consumption | 2000 W |
| Spin Speed | 1200 rpm |
| Number of Programs | 15 |
| Water Consumption | 50 L per cycle |
| Energy Efficiency Class | A |
| Noise Level (Spin) | 75 dB |
| Controls | Electronic with LED display |
| Drum Material | Stainless steel |
| Safety Features | Child lock, overflow protection |
| Maintenance | Clean lint filter regularly |
| Spare Parts | Available from Kincrome service |
| Included Accessories | Inlet hose, outlet hose, manual |
Frequently Asked Questions - KP1701 Kincrome
User questions about KP1701 Kincrome
0 question about this device. Answer the ones you know or ask your own.
Ask a new question about this device
Download the instructions for your Washing machine in PDF format for free! Find your manual KP1701 - Kincrome and take your electronic device back in hand. On this page are published all the documents necessary for the use of your device. KP1701 by Kincrome.
USER MANUAL KP1701 Kincrome
Original Instructions

Read the instructions before using the machine
Table of Contents
Know Your Product....1
General Safety Instructions 2
Additional Safety Instructions....3-4
Assembly....4
Operation....5-9
Troubleshooting & Spare Parts 9-10
Warranty....10
Know Your Product
- Carry Handle
- Power Cord
- ON/OFF Switch
- Wheels
- High Pressure Output Connector
- High Pressure Hose Holder
- On Board Accessory Storage
- Water Inlet Connector
- High Pressure Hose
- Quick Connect Gun
- Extension Lance
- Lance
- Adjustable Nozzle
- Turbo Nozzle
- Detergent Dispenser
- Hose Adaptor
- Nozzle Cleaning Pin
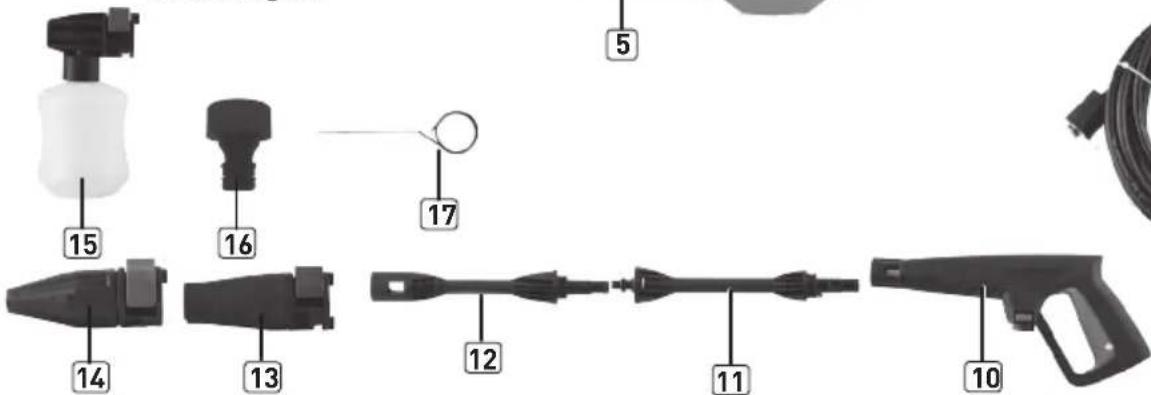
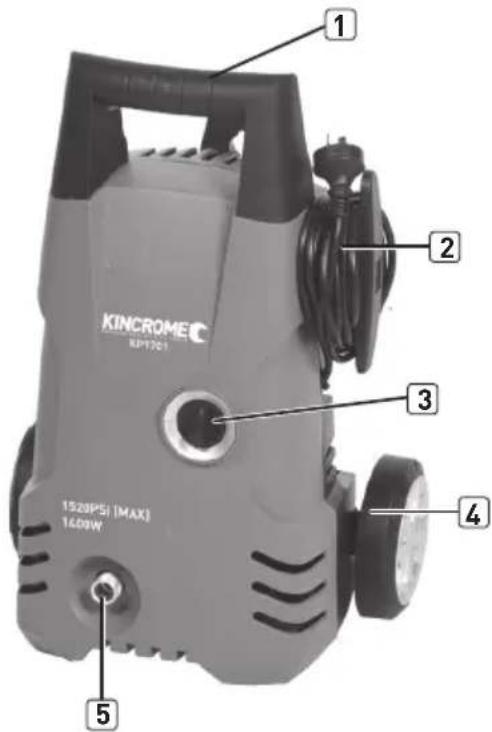

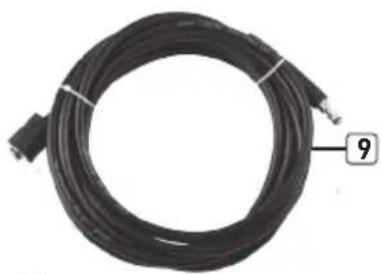
natural_image
Coiled black cable with connector, no visible text or symbolsPart No: KP1701
Description: Pressure Washer 1520psi (max)
Rated Power: 1400W
Power Supply Voltage: 240V
Frequency: 50Hz
Rated Pressure: 70bar / 7MPa/ 1015psi
Max Pressure: 105bar / 10.5MPa/ 1520psi
Flow Rate: 330l/h or 5.5l/m
Hose Length: 5 Meters
Maximum Input Temp: 5-50°C (41°F - 120°F)
Max Pressure Water Supply: 0.4MPa (4 Bar)
Motor Type: Carbon Brush Motor
Pump Construction:…… Aluminium Pump Housing
Autostop Function: Yes
Power Cord Length: 5 Meters
Sound dB Rating: 92dB
Weight: 6.00kg
Vibration: <2.5m/s²
General Safety Warnings

Save all warnings and instructions for future reference.
WARNING! Read all safety warnings and all instructions. Failure to follow the warnings and instructions may result in serious injury.
1) Work Area Safety
a) Keep work area clean and well lit. Cluttered or dark areas invite accidents.
b) Do not operate power tools in explosive atmospheres, such as in the presence of flammable liquids, gases or dust. Power tools create sparks which may ignite the dust or fumes.
c) Keep children and bystanders away while operating a power tool. Distractions can cause you to lose control.
d) This appliance is not intended for use by persons (including children) with reduced physical, sensory or mental capabilities, or lack of experience and knowledge, unless they have been given supervision or instruction concerning use of the appliance by a person responsible for their safety.
e) Children should be supervised to ensure that they do not plat with the appliance.
2) Electrical Safety
a) Power tool plugs must match the outlet. Never modify the plug in any way. Do not use any adapter plugs with earthed (grounded) power tools. Unmodified plugs and matching outlets will reduce risk of electric shock.
b) Avoid body contact with earthed or grounded surfaces such as pipes, radiators, ranges and refrigerators. There is an increased risk of electric shock if your body is earthed or grounded.
c) Do not expose power tools to rain or wet conditions. Water entering a power tool will increase the risk of electric shock.
d) Do not abuse the cord. Never use the cord for carrying, pulling or unplugging the power tool. Keep cord away from heat, oil, sharp edges or moving parts. Damaged or entangled cords increase the risk of electric shock.
e) When operating a power tool outdoors, use an extension cord suitable for outdoor use. Use of a cord suitable for outdoor use reduces the risk of electric shock.
f) If operating a power tool in a damp location is unavoidable, use a residual current device (RCD) protected supply. Use of an RCD reduces the risk of electric shock.
3) Personal Safety
a) Stay alert, watch what you are doing and use common sense when operating a power tool. Do not use a power tool while you are tired or under the influence of drugs, alcohol or medication. A moment of inattention while operating power tools may result in serious personal injury.
b) Use personal protective equipment. Always wear eye protection. Protective equipment such as dust mask, non-skid safety shoes, hard hat, or hearing protection used for appropriate conditions will reduce personal injuries.
c) Prevent unintentional starting. Ensure the switch is in the off position before connecting to power source and/or battery pack, picking up or carrying the tool. Carrying power tools with your finger on the switch or energising power tools that have the switch on invites accidents.
d) Remove any adjusting key or wrench before turning the power tool on. A wrench or a key left attached to a rotating part of the power tool may result in personal injury.
e) Do not overreach. Keep proper footing and balance at all times. This enables better control of the power tool in unexpected situations.
f) Dress properly. Do not wear loose clothing or jewellery. Keep your hair, clothing and gloves away from moving parts. Loose clothes, jewellery or long hair can be caught in moving parts.
g) If devices are provided for the connection of dust extraction and collection facilities, ensure these are connected and properly used. Use of dust collection can reduce dust-related hazards.
4) Power Tool Use And Care
a) Do not force the power tool. Use the correct power tool for your application. The correct power tool will do the job better and safer at the rate for which it was designed.
b) Do not use the power tool if the switch does not turn it on and off. Any power tool that cannot be controlled with the switch is dangerous and must be repaired.
c) Disconnect the plug from the power source and/or the battery pack from the power tool before making any adjustments, changing accessories, or storing power tools. Such preventive safety measures reduce the risk of starting the power tool accidentally.
d) Store idle power tools out of the reach of children and do not allow persons unfamiliar with the power tool or these instructions to operate the power tool. Power tools are dangerous in the hands of untrained users.
e) Maintain power tools. Check for misalignment or binding of moving parts, breakage of parts and any other condition that may affect the power tool's operation. If damaged, have the power tool repaired before use. Many accidents are caused by poorly maintained power tools.
f) Keep cutting tools sharp and clean. Properly maintained cutting tools with sharp cutting edges are less likely to bind and are easier to control.
g) Use the power tool, accessories and tool bits etc., in accordance with these instructions taking into account the working conditions and the work to be performed. Use of the power tool for operations different from those intended could result in a hazardous situation.
h) The electric motor has been designed for 230V and 240V only. Always check that the power supply corresponds to the voltage on the rating plate.
5) Service
a) Have your power tool serviced by a qualified repair person using only identical replacement parts. This will ensure that the safety of the power tool is maintained.
Additional Safety Instructions for Pressure Washers
a) High pressure jets can be dangerous if subject to misuse. The jet must not be directed at animals, persons, live electrical equipment or the machine itself.
b) Never put your hand, fingers or body directly in front of the spray nozzle.
c) Keep pets, children and bystanders a safe distance away from your work area. A minimum of 15m is recommended
d) Do not direct the jet against yourself or others in order to clean clothes or foot-wear.
e) Risk of explosion – Do not spray flammable liquids.
f) High pressure cleaners shall not be used by children or untrained personnel.
g) High pressure hoses, fittings and couplings are important for the safety of the machine. Use only hoses, fittings and couplings recommended by the manufacturer.
h) To ensure machine safety, use only original spare parts from the manufacturer or approved by the manufacturer.
i) Do not use the machine if a supply cord or important parts of the machine are damaged, e.g. safety devices, high pressure hoses, trigger gun.
j) Do not operate the product while under the influence of drugs, alcohol, or any medication.
k) Only operate the tool during broad daylight or with adequate artificial light.
I) Never clean sensitive surfaces or parts like motors or bearings. The high-pressure jet will damage sensitive parts or water will penetrate where it should not.
m) Never connect the high-pressure cleaner to a drinking water mains without backflow prevention.
n) Please notice the danger of the kickback force and the sudden torque on the spray assembly when opening the trigger gun.
o) Proper use of pressure switch and never use the machine when exceed ultimate pressure.
p) The electric supply connection shall be made by a qualified electrician and comply with IEC60364-1. It is recommended that the electric supply to this machine should include either a residual current device that will interrupt the supply if the leakage current to earth exceeds 30 mA for 30 ms or a device that will prove the earth circuit.
q) This machine has been designed for use with the cleaning agent supplied or recommended by the manufacturer. The use of other cleaning agents or chemicals may adversely affect the safety of the machine.
r) Do not use the machine within range of persons unless they wear protective clothing.
s) Water that has flowed through backflow preventers is considered to be non-potable.
t) Remove the plug from the socket-outlet during cleaning or maintenance and when replacing parts or converting the machine to another function.
u) Ensure that any exhaust emissions are not in the vicinity of air intakes.
Electrical Safety
Caution: In order to avoid a hazard due to inadvertent resetting of the thermal cut-out, this appliance must not be supplied through an external switching device, such as a timer, or connected to a circuit that is regularly switched on and off by the utility.
a) Inadequate extension cords can be dangerous. If an extension cord is used, it shall be suitable for outdoor use, and the connection has to be kept dry and off the ground. It is recommended that this is accomplished by means of a cord reel which keeps the socket at least 60 mm above the ground. Always use an approved extension lead suitable for the power input of this tool. Before use, inspect the extension lead for signs of damage, wear and ageing. Replace the extension lead if damaged or defective. When using an extension lead on a reel, always unwind the lead completely. Use of an extension lead not suitable for the power input of the tool or which is damaged or defective may result in a risk of fire and electric shock.
b) Always switch off the mains disconnecting switch when leaving the machine unattended.
c) Never touch the mains plug and the socket with wet hands or use the appliance in the rain.
Description of Symbols
The following symbols could be shown on the tool:
 | Read the instruction manual before use. Failure to follow the warnings and instructions may result in electric shock, fire and/or serious injury. |  | Risk of Explosion |
 | Wear Ear Protection Wear Eye Protection |  | |
| PSI | Pounds per square inch of pressure High-pressure water can  | be dangerous if used incorrectly. High- pressure water jets must not be directed at people, electrical equipment or the washer itself. | |
 | Warning Water that has passed through the back  | cannot be used for drinking. | |
| ~ | Alternating Current | V | Volts |
| A | Amps | Hz | Hertz |
| W | Watts | kg | Kilograms |
| MPa | Megapascals Your Pressure Washer is double insulated; | □ | therefore no earth wire is required. Always check that the mains voltage corresponds to the voltage on the rating plate. |
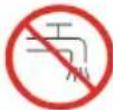 | Machine not suitable for connection to the potable water mains | ||
Unpacking
Unpack all the components from the box.
When unpacking the KP1701 Pressure Washer, carefully inspect for any damage that may have occurred during transit.
Check for loose parts, missing parts or damaged parts.
- Ensure all packaging materials are disposed of as per your local council guide lines.
Understanding Your Product
Auto Stop Motor Feature
The Pressure Washer motor is not designed to run continuously. The motor switches ON and OFF automatically when the trigger of the Quick Connect Gun (10) is squeezed. Auto Stop motor will assist in using less electricity & prevent excessive wear of the motor & pump assembly.
Nozzle Cleaning Pin
This cleaning pin can be used to dislodge any debris that may block the Pressure Washer nozzles from time to time.
Drawing from a Water Storage Device Terminology
This Pressure Washer includes a draw from bucket feature & allows for use of water from sources other than a mains pressure water tap i.e. from a bucket or water tank.
Caution: Do not use anything other than clean water (river, pond or muddy water containing sand granules will cause damage).
Failure to observe this may result in a premature failure and is not covered by the Kincrome warranty policy.
Draw from Mains Water Tap (Pressure Washer Input) - Refers to drawing water from a standard mains supply water tap or water tank pressure pump tap that can be located in or around your home/office/work area to supply the Pressure Washers intake requirements (Fig 1).
Draw from Bucket (Pressure Washer Input) - Refers to water being drawn from a standard bucket in or around your home/office/work area to supply the Pressure Washers intake requirements (Fig 2).
Draw from Tank/Storage Device (Pressure Washer Input) - Refers to water being drawn from a water tank or water storage device in or around your home/office/work area to supply the Pressure Washers intake requirements with water (Fig 3).

natural_image
Simple line drawing of a faucet and a tractor (no text or symbols)(Fig 1) (Fig 2)

natural_image
Illustration of a bucket and a pressure cooker (no text or symbols)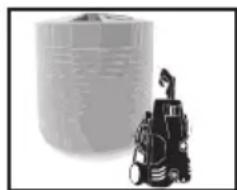
natural_image
Illustration of a cylindrical device with grid pattern next to a robotic arm (no text or symbols)(Fig 3)
Nozzles Supplied with the Pressure Washer

WARNING: To prevent damage of the surface you are cleaning & to select the appropriate nozzle for your application, always start cleaning your surface by using the lowest pressure possible. Insert the adjustable nozzle (13) and open the nozzle fully by rotating anti-clockwise first and start cleaning well away from your surface to ascertain if the nozzle type & distance from surface is appropriate for your cleaning needs.
Note: Always test the selected nozzle/cleaning distance in an inconspicuous spot in case of any damage to the surface is experienced.
After testing the cleaning nozzle selected/distance of cleaning you can change nozzles & cleaning distance as required based on your cleaning application.
Note: Any damage caused to your surface due to pressure cleaning will not be covered by Kincrome.
Your Pressure Washer comes complete with 2 assorted cleaning nozzles and a high pressured detergent dispenser. Each nozzle delivers a specific cleaning spray pattern for a particular cleaning application. The size & shape of the cleaning nozzles determine the Pressure Washers output capacity. The different output capacities will deliver different cleaning results.
Nozzle Selection Guide
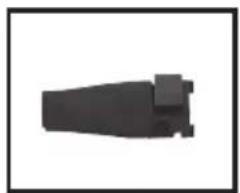
Adjustable Nozzle (13): This nozzle allows the user to adjust the Pressure Washers output from a tight jet of water (which is extremely powerful and ideal for cleaning hard surfaces such as concrete) to a wide spray (which is quite gentle, ideal for cleaning large surfaces)(Fig 4).
5 Note: DO NOT use this nozzle when adjusted to a tight jet on soft materials such as timber!
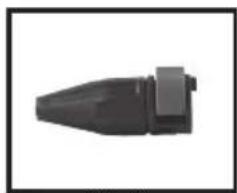
Turbo Nozzle (14): This nozzle rotates a powerful zero degree spray pattern in a circular motion. The spinning water jet hits the surface area from multiple angles, increasing the intensity of the Pressure Washers making it effortless to remove tough dirt and grime! This nozzle is ideal for cleaning large surfaces, such as driveways, concreted/paved areas, deckings, cars, boats and much, much more! (Fig 5).
Note: Care must be taken when using this nozzle to clean painted surfaces such as cars & boats. Ensure you begin cleaning these surfaces from an extended distance to avoid surface damage.
Detergent Dispenser (15): This nozzle is used when applying cleaning detergents onto your surface. This nozzle expels the detergent at a high pressure, making it ideal to clean deckings, walls, concreted areas, cars, boats and much much more! (Fig 6).
natural_image
Simple black mechanical component with a flanged end and rounded body (no text or symbols)(Fig 4)
natural_image
Black plastic connector component (no text or symbols visible)(Fig 5)

natural_image
White plastic spray bottle with black handle (no text or symbols visible)(Fig 6)
Assembly
Connecting the High Pressure Hose to the Pressure Washers Inlet
Note: Always ensure the original O-Ring seals are located on the end all connections when assembling components (Fig 7).
Note: Always ensure the O-Ring are well lubricated with the appropriate lubricant (eg. Moly Bond Grease) (Fig 7).
- Remove the cable ties off the high pressure hose (9).
- Remove the black/clear coloured transport cap from the high pressure output connector (5).
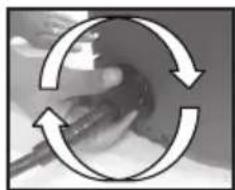
- On one end of the high pressure hose (9) is a female threaded connector. Locate the female threaded end and connect onto the high pressure output connector (5), by rotating clockwise (Fig 8) until secure.
- Remove the black/clear transport cap from the water inlet connector (8), located on the rear of the unit, then screw on the hose adaptor (16) by rotating clockwise (Fig 9) until secure.

natural_image
Close-up of a mechanical component with a cylindrical shaft and flange, shown with an arrow pointing to it (no text or symbols visible)(Fig 7)
natural_image
Abstract circular arrow diagram with no text or symbols(Fig 8)

natural_image
Close-up of a hand pressing a button with circular arrows indicating rotation (no text or symbols)(Fig 9)
Assembling the Quick Connect Gun, Lance(s) & Nozzle Pieces
-
The lance and gun comes in 3 peices;
-
1 piece quick connect gun (10)
- 1 piece extension lance (11)
-
1 piece lance (12)
-
Connect the extension lance (11) to the quick connect gun (10) by feeding the extension lance into the quick connect gun (Fig 10).
- Push in the extension lance (11) and turn clockwise, until locked into position (Fig 11).
- Locate the lance (12) and feed the male end into the female end of the lance previously installed, turn clockwise to lock into positon (Fig 12).
- Finally select the nozzle you require for the job at hand; adjustable nozzle (13), turbo nozzle (14) or the detergent dispenser (15).
- Once selected, push in the blue button located on the side of the nozzle, feed onto the end of the lance (12), and release the button. Ensure the nozzle is on securely (Fig 13).

natural_image
Close-up of a person's wrist with a wristband and wrist strap, showing motion direction (no text or symbols)
natural_image
Diagram showing a hand holding a rectangular object with circular arrows indicating rotation or cycle (no text or symbols)(Fig 10) (Fig 11) (Fig 12) (Fig 13)


Attaching/Detatching the Quick Connect Gun to the High Pressure Hose
- With your quick connect gun (10), extension lance (11) and lance (12) fully assembled, attach the high pressure hose (9).
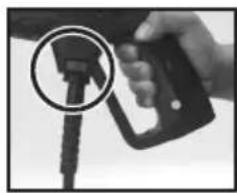
- Locate the male end of the high pressure hose (9) and align it to the quick connect gun (10) inlet port, as shown (Fig 14).
- Push the high pressure hose (9) end into the input port of the quick connect gun (10), until you hear it click into position (Fig 15).
- To remove the high pressure hose, push in the blue button located on the side of the quick connect gun (10) above the inlet port, to remove the high pressure hose (9) from the quick connect gun (10).

natural_image
Close-up of hands holding a mechanical component with arrows indicating direction (no text or symbols visible)(Fig 14)
natural_image
Close-up of a handheld electronic device with a circular inset highlighting a connector (no visible text or symbols)(Fig 15)
Attaching/Detaching the Detergent Dispenser to the Lance
- Push the blue quick release button located on the top of the installed nozzle (13 or 14) and pull the nozzle off the lance (12).
- To fit the detergent dispenser (15) push in the blue quick release button located on the side of the detergent dispenser (15) and feed it onto the lance (12) (Fig 16). Your detergent dispenser (15) is now ready to use (Fig 17)!
- To detach the detergent dispenser (15), repeat step 1.

(Fig 16)

natural_image
Close-up of a black spray gun dispensing white plastic bottle (no text or symbols visible)(Fig 17)
Attaching/Detaching an Inlet Hose to Your Pressure Washer and Mains Water Tap
Note: This Pressure Washer, doesnt come supplied with an inlet hose, you must purchase one at your own expense from your local hardware store. Depending on the hose purchased, you will also need to purchase an inlet coupler and an additional inlet hose adaptor. The hose should be a reinforced wall hose, to ensure the hose doesn't collapse, when the Pressure Washer is being used. It is recommended that the minimum inside diameter of this hose should be no less than 13mm (1/2").
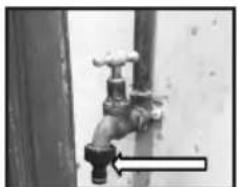
- Once you have your inlet hose, you must connect a male hose adaptor to your mains water tap or storage device. Make sure you have screwed the male hose adaptor securely (Fig 18).
- Once installed, you must fit a female inlet coupler (not supplied) to either end of your inlet hose. Ensure they are firmly secured to your inlet hose (Fig 19).
Note: Some hoses have adaptors preinstalled when purchased.
- Grab one end of your hose, and pull back the female inlet coupler and feed onto the male inlet adaptor located on your mains water tap. They should click into position [Fig 20].
- With the free end of your hose, feed the remaining female inlet coupler onto the hose adaptor (16) installed previously, located on the rear of the Pressure Washer (Fig 21).
- Your Pressure Washer is now ready to receive water!
- To Remove the inlet hose, repeat the above in reverse.
natural_image
Close-up of a pipe valve with a black arrow pointing to it, against a plain wall (no text or symbols visible)(Fig 18) (Fig 20) (Fig 21)

natural_image
Close-up of a hand holding a metallic mechanical connector (no visible text or symbols)(Fig 19)

natural_image
Close-up of a faucet with two arrows pointing upward, no visible text or symbols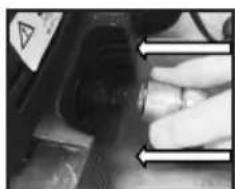
natural_image
Close-up of a mechanical component with two gloved hands pointing to a central opening (no visible text or symbols)Operation

WARNING! To prevent damage to your surface and to select the appropriate nozzle for your application, always start with the lowest pressure nozzle, and continue cleaning to the highest pressure nozzle until the best working result is achieved. Always turn the Pressure Washer OFF & lock the quick connect gun (10) before attempting to change the pressure nozzles.
Turning ON/OFF the Pressure Washer
- Located on the front face of the Pressure Washer is the ON/OFF switch (3).
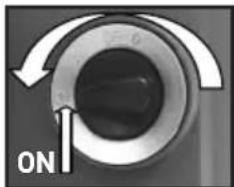
- To turn ON the Pressure Washer, you must rotate the ON/OFF switch (3) anti-clockwise, to the ON (I) position (Fig 23).
- To turn OFF the Pressure Washer, you must rotate the ON/OFF Switch (3) clockwise, to the OFF (0) position (Fig 24).
CAUTION: Always ensure your water supply is connected and turned ON prior to switching ON the Pressure Washer. Operating the Pressure Washer without water will damage the seals and pump.
- Plug in the power cord (2) to your mains power socket and turn it ON, then rotate the ON/OFF switch (3) to "ON" (I).
- Squeeze the trigger on the quick connect gun (10) (Fig 21) & wait until the water comes out of the lance (12), release the trigger and turn the Pressure Washer OFF (0).
- Attach the desired nozzle. Turn ON the Pressure Washer and pull the trigger to commence washing (Fig 25).

natural_image
Close-up of a rotary knob with curved arrows indicating rotation (no text or symbols)(Fig 23)

natural_image
Circular dial indicator with directional arrows and 'OFF' label, no readable text or symbols beyond the indicator itself(Fig 24)

natural_image
Close-up of a hand holding a black spray gun (no visible text or symbols)(Fig 25)
Pressure Washer to Receive Water From Mains Water Supply Tap
Note: Do not use anything other than clean water (such as a river, pond or muddy water containing sand granules).
Failure to observe this may result in a premature failure of the Pressure Washer and will not covered by the Kincrome warranty policy.
- Remove any cleaning nozzles (13, 14, 15) from the quick connect lance (12).
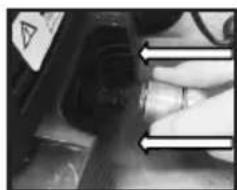
- With your water inlet hose (not supplied) already connected to your mains water tap and Pressure Washer, turn ON the tap to fill the hose with water (Fig 26).
- Rotate the ON/OFF switch (3) ON (1) position (Fig 27).
- Squeeze the trigger on the quick connect gun (10) (Fig 28) & wait until the water comes out of the lance (12), release the trigger and turn the Pressure Washer OFF (O).
Note: If water does not flow out of the Pressure Washer within two minutes, turn the unit OFF and check all connections. Loose connections will not allow the product to operate correctly.
-
Re-install a pressure nozzle (13, 14, 15) to the lance (12) (Fig 29).
-
You are now ready to clean!
natural_image
Close-up of a hand inserting a plug into a device (no visible text or symbols)(Fig 26) (Fig 27) (Fig 28) (Fig 29)
natural_image
Close-up of a rotary knob with curved arrows indicating rotation, labeled 'ON' (no other text or symbols)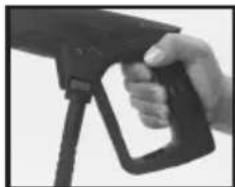
natural_image
Close-up of a hand holding a black spray gun on a tripod (no text or symbols visible)
Pressure Washer Draw from Bucket or Water Storage Device
Connecting The Pressure Washer To Your Water Storage Device. (Bucket, water tank or water storage device)
It is important that when using this feature as the water input supply for your Pressure Washer to provide adequate filtration when operating from alternative water sources. Always use a water filter (not supplied) when drawing water from an external water source such as a bucket or water storage device.
Pressure Washer Draw from Bucket or Water Storage Device (Continued)
Note: The hose required for this feature can be purchased from any hardware or hose supplier. Depending on the hose purchased, you will also need to purchase an inlet connector, which can be attached to the hose adaptor (16).
This hose should be a reinforced wall hose, to ensure the hose does not collapse, when the Pressure Washer is being used.
It is recommended that the minimum inside diameter of this hose should not be less than 13mm (1/2") but a 19mm (3/4") hose is recommended to provide sufficient water supply to the Pressure Washer.
Note: The maximum height between the water inlet connector (8) and surface of your water supply must be no more than 0.5 m; above this height, the Pressure Washer will not achieve suction correctly.
Note: If water does not flow out of the Pressure Washer within two minutes, turn the unit OFF and check all connections. Loose connections will not allow the product to operate correctly.
Note: For self-priming function, connect the suction hose (not included) to the Pressure Washers inlet connection only using the hose adaptor (16) included.
- Remove any nozzles (13, 14, 15) from the lance (12) connector (Fig 30).
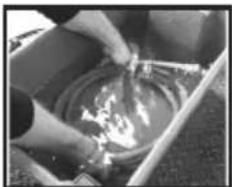
- Submerse your inlet hose (not supplied) in the water source to fill the hose with water (Fig 31).
- While keeping the inlet end of the suction hose submerged in the water storage device, connect the output end of the suction hose directly onto the hose adaptor (16) which has been installed on the water inlet connector (Fig 32).
- Turn the ON/OFF switch (3) ON (I) position and hold down the trigger on the quick connect gun (10).
- Wait until the water comes out of the lance (12) and turn the Pressure Washer OFF (0).
Note: Allow water to flow for 20-30 seconds to purge any air bubbles.
- Re-install a pressure nozzle (13, 14, 15) to the lance (12) (Fig 33) and you're now ready to clean!.

natural_image
Close-up of hands using a tool to clean or manage a circular object in a container (no visible text or symbols)
natural_image
Close-up of a person's hand holding a small object, with textured background (no visible text or symbols)
(Fig 30) (Fig 31) (Fig 32) (Fig 33)
Trouble Shooting
| Problem | Possible Causes | Solution |
| Motor does not start. | ·Device is not plugged into mains power outlet.·The power outlet is defective.·The power cord or extension cord is damaged.·Internal overheating protection activated. | ·Check the device is plugged in.·Try another power outlet socket.·Inspect power cord or your extension cord for damage·Let the device cool down for 5 minutes |
| Motor shuts down. | ·Internal overheating protection actuated.·Max pressure has been reached.·Nozzle may be blocked. | ·Let the device cool for 5 minutes.·Squeeze gun trigger to release pressure.·Clean the nozzles. |
| Erratic working pressure. | ·Partial obstruction (clogging) of the nozzle. | ·Clean the nozzle. |
| Fluctuation in pressure. | ·Air getting into the water hose or pump.·Irregular water supply (water may contain sand/dirt).·Clogged water filter.·Crimps or kinks in the water hose.·Pump sucking up air | ·Switch OFF the device, while holding the trigger of the quick connect gun and the water tap opened, water air bubbles are purged from the Pressure Washer.·Ensure that water supply meets the technical specifications of the device.·Clean the water filter.·Lay down the hose straight and kink-free.·Check that hoses and connections are air tight. |
| Motor runs but does not pressurize. | ·Frozen water within the Pressure Washer.·Water not reaching the devices water inlet.·Filter clogged.·Nozzle clogged.·Inlet hose may have a kink·Suction hose may be exposed to air. | ·Allow the pump, water hose or accessory to defrost.·Connect the device to the water supply.·Clean/replace the filter.·Clean the nozzle.·Ensure the inlet hose has no kinks.·Ensure suction hose is fully submerged. water supply has been turned on. |
| Weak but continuous water stream. | ·Worn nozzle.·Worn On / Off valve. | ·Replace the nozzle.·Contact Kincrome Customer Service |
| Spontaneous device start up. | ·Leakage in the pump or nozzle, hose gun or lances. | ·Check all connections for leaks·Tighten all fittings·Check all seals for signs of damage. |
| Pressure Washer leaking water. | ·Seals may be worn out | ·Discharge of 6 drops per minute is acceptable. In case of greater leakage, please contact Kincrome Customer Service |
Spare Parts
For a full list of available spare parts for this item visit the Kincrome website kincrome.com.au or alternatively contact Kincrome Customer Service.
Service
Have your product serviced by a qualified repair person using only identical replacement parts. This will ensure that the safety, reliability and performance of the Pressure Washer is maintained.
Office Contact Details

Phone: 1300 657 528

Fax: 1300 556 005

mail: enquiries@kincrome.com.au

/website: www.kincrome.com.au
Caring For The Environment

When a tool is no longer usable it should not be disposed of with household waste, but in an environmentally friendly way. Please recycle where facilities exist. Check with your local council authority for recycling advice.
Recycling packaging reduces the need for landfill and raw materials. Reuse of recycled material decreases pollution in the environment. Please recycle packaging where facilities exist. Check with your local council authority for recycling advice.
Cleaning & Maintenance

WARNING! Always ensure that the machine is not connected to the mains supply before you start any maintenance work.

WARNING! Never use solvents or other harsh chemicals for cleaning the non-metallic parts of the tool. These chemicals may weaken the plastic materials used in these parts. Use a cloth dampened only with water and mild soap. Never let any liquid get inside the tool; never immerse any part of the tool into a liquid.

WARNING! If the supply cord is damaged, it must be replaced by the manufacturer, its service agent or similarly qualified persons in order to avoid a hazard.
Cleaning Nozzles
If a blockage of the nozzle occurs simply remove the nozzle from the Pressure Washer lance & insert the nozzle cleaning pin (17) through the nozzles output (inserting the pin externally to press any debris out of the nozzle hole). Inserting the nozzle cleaning pin (17) will mean that any debris dislodged from the nozzle could remain in the lining of the nozzle. Flush the nozzle with clean water to ensure any debris is removed from inside the nozzle before re-installing the nozzle to your Pressure Washer lance.
Cleaning the Detergent Bottle
Please ensure that you thoroughly rinse the detergent bottle with water after each use.
Replacing Motor Brushes
Carbon brushes are a wearing component of the Pressure Washer therefore not covered under Kincrome warranty, please contact Kincrome Customer Service for a service agent closest to you.
Warranty
Warranty given by Kincrome Australia Pty Ltd of 3 Lakeview Drive, Caribbean Park, Scoresby, Victoria (Tel 1300 657 528). The applicable warranty period (12 months) commences on the date that the product is purchased. If this product has materials or workmanship defects [other than defects caused by abnormal or non warranted use] you can, at your cost, send the product to place of purchase, an authorised Kincrome service agent or one of Kincromes addresses for repair or replacement. Your rights under this warranty are in addition to any other rights you have under the Australian Consumer Law or other applicable laws. Our goods come with guarantees that cannot be excluded under the Australian Consumer Law. You are entitled to a replacement or refund for a major failure and compensation for any other reasonably foreseeable loss or damage. You are also entitled to have the goods repaired or replaced if the goods fail to be of acceptable quality and the failure does not amount to a major failure. For further details please visit www.kincrome.com.au or call us. Due to minor changes in design or manufacture, the product you purchase may sometimes differ from the one shown on the packaging.
Prohibited use of High Pressure Water Blasters (Pressure Washers)

WARNING! It is illegal to use a high pressure water blaster (pressure washers) on asbestos cement roofs, fences and walls. Check before you start - don't risk exposing yourself or others to airborne fibres.
Using Water Blasters (Pressure Washers) On Asbestos Materials:
- Destroys the surface, spreads asbestos fibres widely and puts your health and your neighbours health at risk
Solution:
- Instead of cleaning asbestos-containing materials, apply a fungicide and sealant. Visit your local roof restoration company, paint store or hardware store for product advice.

natural_image
Two industrial power cranes, one with a water heater and the other a KNOUWEC BPT01 electric water heater (no visible text or symbols on the devices themselves)What To Look Out For!!

natural_image
Black-and-white photo of terraced earthworks with visible soil layers and no text or symbols
natural_image
Exterior view of a modern building with a tiled roof and window (no signage or text visible)
natural_image
Black-and-white photo of a textured surface with vertical streaks and a small vertical structure on the right (no visible text or symbols)Super Six Asbestos Roof Shingle Absestos Roof Absestos Fence

natural_image
Close-up of a textured, irregularly shaped object with no visible text or symbols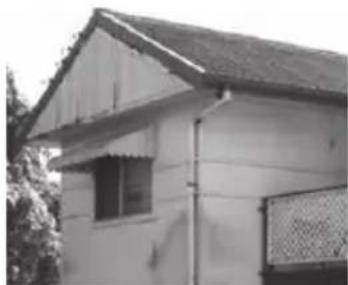
natural_image
Exterior view of a two-story building with a tiled roof and adjacent structure (no signage or text visible)Absestos Debris On Plants Absestos Wall Sheeting
For Additional Information
For information regarding asbestos materials relative to your state or territory, contact your local council or government authority for advice or specific requirements, or visit the below link.
www.safeworkaustralia.gov.au/sites/SWA/about/Publications/Documents/839/Guide-Managing-High-Pressure-Water-Jetting.pdf
For Queensland
www.qld.gov.au/asbestos


- Table of Contents
- Know Your Product
- General Safety Warnings
- 1) Work Area Safety
- 2) Electrical Safety
- 3) Personal Safety
- 4) Power Tool Use And Care
- 5) Service
- Additional Safety Instructions for Pressure Washers
- Electrical Safety
- Description of Symbols
- Unpacking
- Understanding Your Product
- Auto Stop Motor Feature
- Nozzle Cleaning Pin
- Drawing from a Water Storage Device Terminology
- Nozzles Supplied with the Pressure Washer
- Nozzle Selection Guide
- Assembly
- Connecting the High Pressure Hose to the Pressure Washers Inlet
- Assembling the Quick Connect Gun, Lance(s) & Nozzle Pieces
- Attaching/Detatching the Quick Connect Gun to the High Pressure Hose
- Attaching/Detaching the Detergent Dispenser to the Lance
- Attaching/Detaching an Inlet Hose to Your Pressure Washer and Mains Water Tap
- Operation
- Turning ON/OFF the Pressure Washer
- Pressure Washer to Receive Water From Mains Water Supply Tap
- Pressure Washer Draw from Bucket or Water Storage Device
- Connecting The Pressure Washer To Your Water Storage Device. (Bucket, water tank or water storage device)
- Pressure Washer Draw from Bucket or Water Storage Device (Continued)
- Spare Parts
- Service
- Office Contact Details
- Caring For The Environment
- Cleaning & Maintenance
- Cleaning Nozzles
- Cleaning the Detergent Bottle
- Replacing Motor Brushes
- Warranty
- Prohibited use of High Pressure Water Blasters (Pressure Washers)
- Using Water Blasters (Pressure Washers) On Asbestos Materials:
- Solution:
- What To Look Out For!!
- For Additional Information
Brand : Kincrome
Model : KP1701
Category : Washing machine