K10103 - Generator Kincrome - Free user manual and instructions
Find the device manual for free K10103 Kincrome in PDF.

| Product Type | Portable Generator |
| Brand | Kincrome |
| Model | K10103 |
| Dimensions (L x W x H) | 590 x 430 x 460 mm |
| Weight | 45 kg |
| Engine Displacement | 212 cc |
| Fuel Type | Petrol |
| Fuel Tank Capacity | 15 L |
| Rated Power | 3000 W |
| Peak Power | 3500 W |
| Output Voltage | 230 V / 110 V |
| Output Frequency | 50 Hz |
| Starting System | Recoil Start |
| Outlets | 2 x 230V Socket, 1 x 12V DC |
| Noise Level | 92 dB |
| Safety Features | Low Oil Shutdown, Overload Protection |
| Maintenance | Regular oil change, air filter cleaning |
| Spare Parts Availability | Available via authorized dealers |
| Repair Service | Authorized service centers |
| General Information | Portable generator suitable for backup power and outdoor use |
Frequently Asked Questions - K10103 Kincrome
User questions about K10103 Kincrome
0 question about this device. Answer the ones you know or ask your own.
Ask a new question about this device
Download the instructions for your Generator in PDF format for free! Find your manual K10103 - Kincrome and take your electronic device back in hand. On this page are published all the documents necessary for the use of your device. K10103 by Kincrome.
USER MANUAL K10103 Kincrome
KINCROME PROFESSIONAL QUALITY TOOLS
Owner's Manual Generator
natural_image
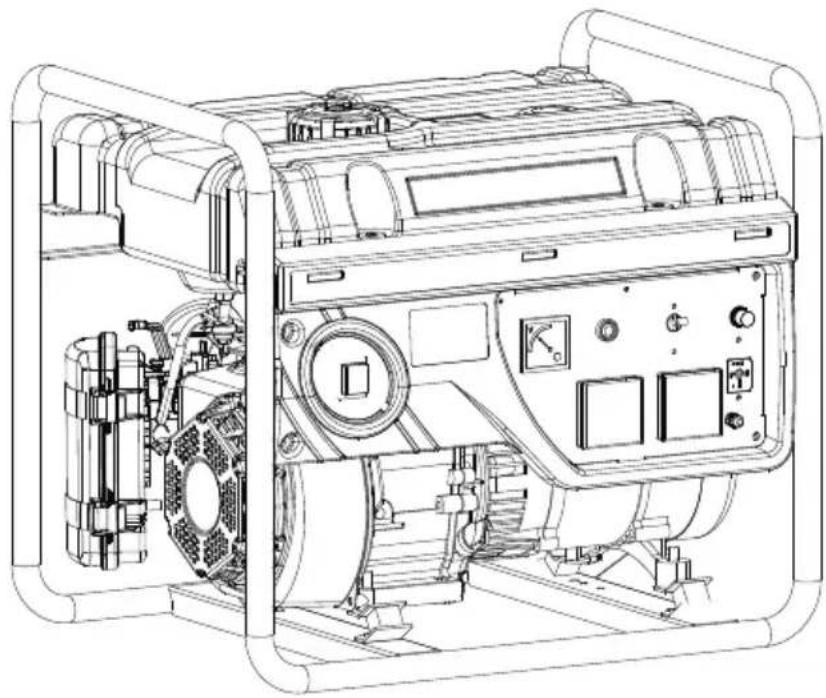
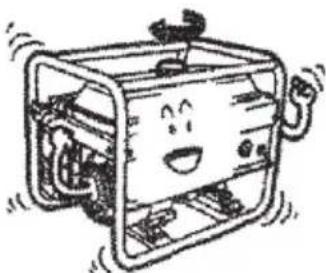
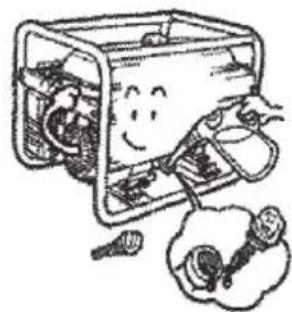
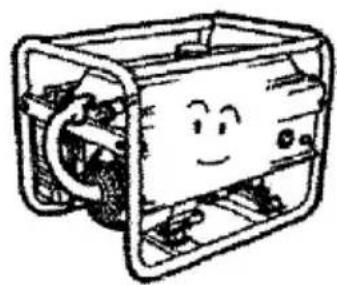
Technical line drawing of a portable electricity generator unit with visible control panel and motor (no text or labels)Selecting a Generator
You must know the rated and maximum wattage for appliances to be used with a generator. Appliances with electric motors may require 2-3 times the rated power when starting up, e.g. an appliance with a rated output of 200W can draw up to 600W at start up.
Rated Watts and Maximum Watts
Rated, or Running Watts, is the continuous power a generator can deliver, and the continuous power required by an appliance to operate correctly.
Maximum, or Starting Watts, is the maximum short term power a generator can deliver, and the start-up power required by an appliance when first being started simultaneously.
-
Determine which appliances are to be run at a given time by the generator. Add up the Rated Watts of each appliance. This total is the amount of power the generator must produce to keep the items running.
-
Determine the Start-up power required of each appliance and add up. This is the total start up power required by the generator to start-up each appliance.
| Application/Equipment | Rated Watts (Running) | Maximum Watts (Starting) |
| Light Bulb 75W 75 | 75 | |
| Refrigerator/Freezer 700 | 2200 | |
| TOTALS 775 22 | 75 |
The above example shows that for the selected appliances a generator with a minimum Rated Wattage of 775W and a minimum Maximum Wattage of 2275W is required.
Petrol Generator Manual
Part 1
GENERAL PRECAUTIONS
Part 2
PARTS AND COMPONENTS INTRODUCTION
Part 3
STOPPING OF GENERATOR
Part 6
PERIODIC CHECKS AND MAINTENANCE
Part 7
TROUBLESHOOTING GUIDE
Part 8
SPECIFICATION
Part 1 General Precautions
1.1 Work Area
- Keep your work area clean and well lit. Cluttered benches and dark areas invite accidents.
- Do not operate power tools in explosive atmospheres, such as in the presence of flammable liquids, gases, or dust. Generators create sparks which may ignite the dust or fumes.
- Keep bystanders, children, and visitors away while operating a generator. Provide barriers or shields as needed.
1.2 Electrical Safety
- Grounded tools must be plugged into an outlet properly installed and grounded in accordance with all codes and ordinances. Never remove the grounding prong or modify the plug in any way. Do not use any adapter plugs.
- Grounding provides a low-resistance path to carry electricity away from the user in the event of an electrical malfunction.
- Double insulated tools are equipped with a polarized plug where one blade is wider than the other. This plug fits in a polarized outlet only one way. If the plug does not fit fully in the outlet, reverse the plug. If it still does not fit, contact a qualified electrician to install a polarized outlet. Do not change the plug in any way. Double insulation eliminates the need for the three-wire grounded cord and grounded power supply system.
- Avoid body contact with grounded surfaces such as pipes, radiators, ranges, and refrigerators. There is an increasing risk of electric shock if your body is grounded.
- Do not expose generator to rain or wet conditions, Water entering a generator will increase the risk of electric shock.
- Do not abuse the power cord. Keep power cords away from heat, oil, sharp edges, or moving parts. Replace damaged power cords immediately.
Damaged power cords increase the risk of electric shock.
- When operating a power tool outside, use an outdoor extension cord
- All connections and conduits from the generator to the load must only be installed by trained and licensed electricians, and in compliance with all relevant local, state, and federal electrical codes and standards, and other regulations where applicable.
- The generator must be earth-grounded for fixed installations in accordance with all relevant electrical codes and standards before operation.
- Do not attempt to connect or dis connect load connections while standing in water, or on wet or soggy ground.
- Do not touch electrically energized parts of the generator and interconnecting cables or
conductors with any part of the body, or with any non-insulated conductive object.
- Connect the generator only to a load or electrical system that is compatible with the electrical characteristics and rated capacities of the generator.
- Before servicing equipment powered by the generator, disconnect the equipment from its power input.
- Keep all electrical equipment clean and dry. Replace any wiring where the insulation is cracked, cut abraded or otherwise degraded. Replace terminals that are worn, discolored, or corroded. Keep terminals clean and tight.
- Insulate all connections and disconnected wires.
- Guard against electric shock. Prevent body contact with grounded surfaces such as pipes, radiators, ranges, and refrigerator enclosures.
1.3 Personal Safety
- Stay alert. Watch what you are doing, and use common sense when operating a generator. Do not use generator while tired or under the influence of drugs, alcohol, or medication.
A moment of inattention while operating generators may result in serious personal injury.
- Dress properly. Do not wear loose clothing or jewelry. Contain long hair. Keep your hair, clothing, and gloves away from moving parts. Loose clothes, jewelry, or long hair can be caught in moving parts.
- Avoid accidental starting. Make sure the power switch is in “OFF” position, and disconnect the spark plug wire when not in use.
- Remove adjusting keys or wrenches before turning the generator on. A wrench or a key that is left attached to a rotating part of the generator may result in personal injury.
- Do not overreach. Keep proper footing and
balance at all times.
- Use safety equipment. Always wear eye protection. Wear approved safety impact eye goggles. Dust mask, non-skid safety shoes, hard hat, or hearing protection must be used for appropriate conditions.
- Do not force the generator. Use the generator correctly for your application. The correct usage will make your generator do the job better and safer at the rate for which it is designed for.
- Do not use the generator if the power switch can not be turned to ON or OFF Any generator that cannot be controlled with the power switch is dangerous and must be replaced.
1.4 Generator Use and Care
Make sure the power switch is in “OFF” position and disconnect the spark plug wire before making any adjustment, changing accessories, or storing
the generator. Such preventive safety measures reduce the risk of starting the generator accidentally.
Store idle generators out of reach of children and other untrained persons. Generators are dangerous in the hands of untrained users.
Maintain generators with care. Do not use damaged generator. Tag damaged generators "Do not use" until repaired.
Check for misalignment or binding of moving parts, breakage of parts, and any other condition that may affect the generator's operation. If the generator damage, have it serviced before using. Many accidents are caused by poorly maintained generators.
Use only accessories that are recommended by the manufacturer for your model. Accessories suitable for one generator may become hazardous when used on another generator.
1.5 Servicing
Maintain labels and name plates on the generator and engine. These carry important information. If they are unreadable or missing, contact local dealers immediately for a replacement.
Generator service must be performed only by qualified repair personnel. Service or maintenance performed by unqualified personnel could result in a risk of injury.
When servicing a generator, use only identical replacement parts. Follow all appropriate instructions in this manual. Use of unauthorized parts or failure to follow maintenance instructions may create a risk of electric shock or injury.
1.6 Installation
- Ensure installation meets all applicable safety, and local and national electrical codes. Have installation performed by a qualified, licensed electrician and building contractor.
- All electrical work, including the earth-ground connection, should be completed by a licensed electrician.
- Any separate fuel storage or generator supply facility must be built or installed in full compliance with all relevant local, state, and federal regulations.
text_image
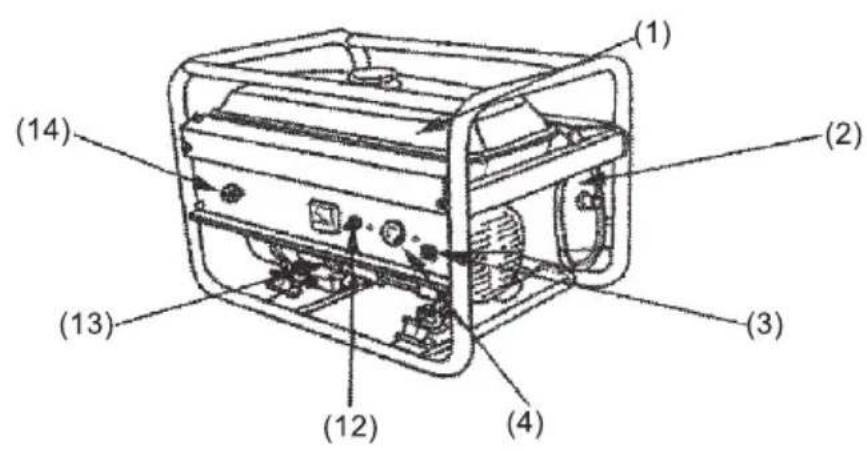
(1) (2) (3) (4) (12) (13) (14)
text_image
(11) (10) (9) (5) (6) (7) (8)- fuel tank
- muffler
- Earth terminal
- A.C plug/socket
- carburetor throttle valve
- starter handle
-
fuel cork
-
air cleaner
- pipe support
- spark plug
- fuel tank cap
- AC.breaker
- dipstick
- starter switch
Part 3 INSPECTION BEFORE OPERATION
3.1 Machine oil level
Always check the machine oil level after stopping generator on a level ground.
- Turn out the oil filter cap and clean the dipstick with a clean cloth.

natural_image
Simple line drawing of a computer monitor with a sad face and a thought bubble showing a finger pointing to it (no text or symbols)- Insert the dipstick back into the filter hole without turning.
natural_image
Cartoon illustration of a person using a computer with a magnifying glass (no text or symbols)- In the case that the oil level is below the lower level mark of the dipstick, refill to the upper level mark.

natural_image
Cartoon illustration of a smiling computer with hands and legs, no text or symbols present- Reinstall the oil filter cap.

natural_image
Cartoon illustration of a smiling computer with hands and a magnifying glass (no text or symbols)3.2 Fuel level
- Open the fuel tank cap.

natural_image
Simple line drawing of a distressed industrial device with no text or symbols- Check the fuel oil level, and refill if necessary.
natural_image
Cartoon illustration of a person using a tool on a device with a magnifying glass (no text or symbols)- Refill up to the shoulder of the fuel filter.

natural_image
Illustration of a person operating a portable electronic device with a magnifying glass above (no text or symbols visible)- Reinstall the fuel tank cap.
natural_image
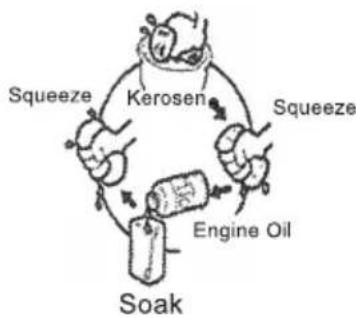
Cartoon illustration of a smiling industrial machine with wheels and control panels (no text or symbols)3.3 Air cleaner
- Remove the clip and dismantle the air cleaner housing or unscrew the nuts and air cleaner
cover.
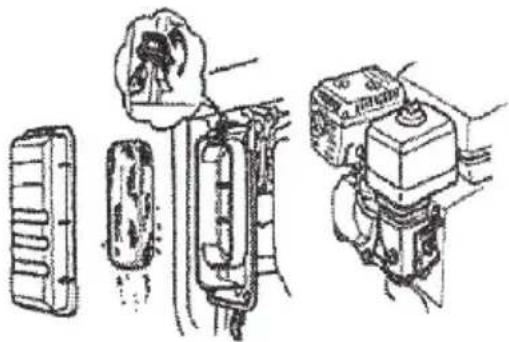
natural_image
Technical line drawing of mechanical components and parts, no visible text or symbols- Unscrew the nut and washer, and dismantle the filter element for several times.
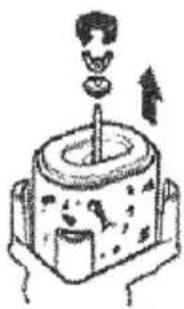
natural_image
Simple line drawing of a mechanical device with a central shaft and upward arrow (no text or symbols)- Dismantle the filter element.
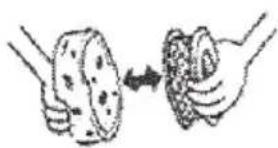
natural_image
Illustration of two hands holding a potato and a slice, with an arrow indicating the process (no text or symbols)- Wash
flowchart
graph TD
    A["Kerosen"] --> B["Squeeze"]
    B --> C["Engine Oil"]
    C --> D["Soak"]
    D --> A
- Slap the filter element.

natural_image
Illustration showing a hand holding a tool next to a device with a magnified view of its internal components (no text or symbols present)Part 4 STARTING OF GENERATOR
- Remove all the loads from A.C socket and switch off the A.C breaker.
- Set the fuel cork to "on" position.
- Push the choke lever to "open (choke)" position.
- Turn the generator start switch to "on" position.
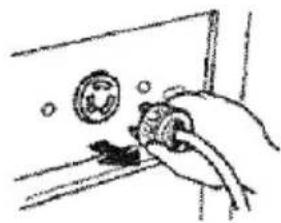
- Pull the starter handle until resistance is felt, then pull it out swiftly and thoroughly.
- Once the generator starts, set the choke level to "off" position.
natural_image
Hand holding a tool interacting with a circular component (no text or symbols visible)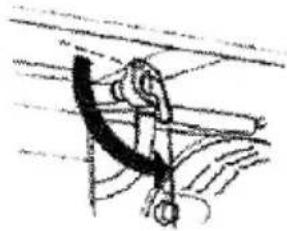
natural_image
Pure mechanical diagram showing a linkage mechanism without any text, numbers, or symbols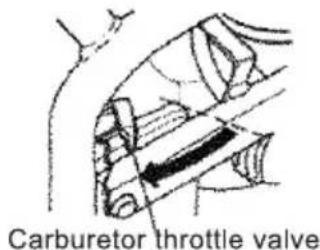
text_image
Carburetor throttle valve
natural_image
Simple line drawing of a pulley system with an arrow indicating motion direction (no text or symbols)
natural_image
Hand operating a fan blade with a handle, no visible text or symbols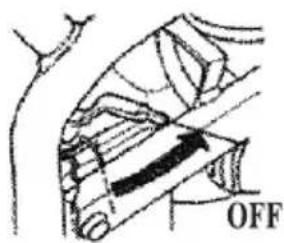
text_image
OFFTips and cautions for operating:
- Do not start two or more appliances simultaneously. Start them one by one.
-
Warm up the engine without load for about 3 minutes. If the generator is to supply power to more than one appliances, be sure to connect them one by one with higher current rated first. Most appliance motors require more than their rated wattage for start up. Do not exceed the current limit specified for any one socket.
-
Be sure that all appliances are in good working condition before connecting them to the generator. If an appliance is running abnormally from the beginning (becomes sluggish, or stops suddenly), turn off the generator main switch immediately. Then disconnect the appliance and examine it for signs of malfunction. If overloading of the circuit trips the AC circuit protector, reduce the electric load on the circuit. And wait a few minutes before resuming operation.
If the indication of voltmeter is too low or too high, stop the machine and examine it for cause of malfunction. The generator can load when the indicator of voltmeter show at 240V±10%(50 Hz) on the panel of control box.
- DC application: This device has a 12 V DC power outlet which is especially intended for connecting DC lamp or other DC output unit, it is not suitable to be used for charging 12 V automotive batteries. The DC circuit protector automatically shuts off the DC battery charging circuit when the DC charging circuit is overloaded, when there is a problem with the battery, or when the connections between the battery and the generator are improper.
WARNING
Be sure to read the special safety instructions for recharging batteries! The load function for 12V automotive batteries is an additional feature of the device and intended as a short-term solution for charging automotive batteries quickly!
This charging function cannot replace charging with a special battery charger! This device does not have a charging current regulator or an automatic shutdown when the battery is fully charged!
Be sure to inform yourself about the design of your automotive battery, as well as its proper charging and maintenance! Contact a qualified specialist! Strictly adhere to the safety rules and instructions of the battery manufacturer!
Measure the voltage regularly while recharging the automotive battery! When the voltage of the battery reaches 12.5 V, the battery is then fully charged!
- When connect the generator to home power circuit. Be sure that a skilled electrician does the job. Improper connecting between the generator and appliance may cause damage of the generator or appliance, and even a fire accident.
Warning: if the generator has to be connected to commercial power grid, make sure that the chief power switch must be shut off. Otherwise the sudden recovery of commercial power supply may cause damage to generator or appliance, and even a fire accident.
PART 5 STOPPING OF GENERATOR
- Switch off the AC breaker.
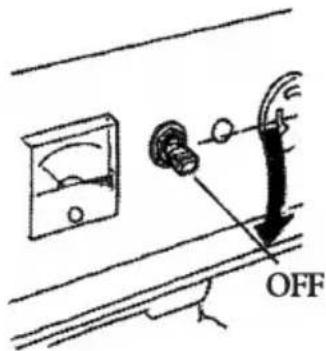
text_image
OFF- Turn the generator switch to "off" position.

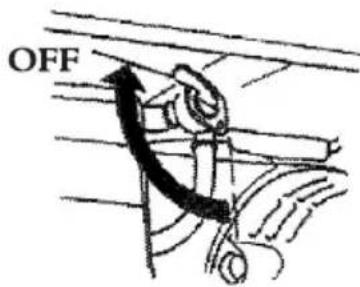
text_image
OFF- Set the fuel cork to "off" position.
text_image
OFFNote: To stop the generator in emergency. turn the generator switch to "off" position.
6.1 Periodic checks and maintenance
Periodic checks and maintenance are very important for keeping the engine in good condition and dependable. The generator consists of gasoline engine, alternator, control panel and frame, etc. Shut off the engine before performing any maintenance. If the engine must be ran, make sure the area is well ventilated. The exhaust contains poisonous carbon monoxide gas.
After engine has been used, clean it immediately with a cloth to prevent corrosion and remove sediment.
| Item | Daily check | 20hrs or first month | 50hrs or every 3 months | 100hrs or every 6 months | 300hrs or every 1 year |
| Machine oil check | ○ check | ||||
| Replace engine oil | ○ replace replace | ○ | |||
| Air cleaner check | ○ check | ||||
| Air cleaner wash | ○ clean | ||||
| Oil filter cup | ○ clean | ||||
| Oil filter | ○ clean | ||||
| Spark plug | ○ clean | ||||
| Valve clearance | Check/ adjust | ||||
| Cylinder cover wash | ○ clean | ||||
| Fuel tank wash | Wash if necessary, replace every 3 years. | ||||
6.2 Machine oil replacement
- Turn and then take out the dipstick.

natural_image
Illustration of a computer with a sad face and a hand holding a phone icon (no text or symbols present)- Turn off the drain plug, and empty the machine oil in the crankshaft.

text_image
Diagram illustrating a mechanical device with labeled parts and internal components, including a sad face and tool handle.- Screw on the drain plug.
natural_image
Illustration of a smiling industrial machine with a close-up view of its internal components (no text or symbols)- Fill machine oil up to the upper level.
natural_image
Cartoon illustration of a smiling computer with hands operating it, showing a close-up of the device (no text or symbols present)- Reinstall the dipstick.

natural_image
Cartoon illustration of a smiling device with a handle and earphones, no text or symbols presentMachine oil: 4 stroke petrol engine oil-SE, SF from API Service Classification or SAE 10W-30 equivalent to SG class.
Low air temperature (below 10^ C): recommended machine oil SAE10W-30
Frigid air temperature (below -15°C): SE, SF from API Service Classification or SAE10W-30 equivalent to SG class.
■ Air cleaner (refer to page 8:Air cleaner)
- Spark plug
- Dismantle the spark plug high-pressure cap.

text_image
Diagram showing a cloud connected to two devices, one with a plug and the other with a plug, illustrating a mechanical or electrical system concept.- Dismantle the spark plug.

natural_image
Simple line drawing of a mechanical device inside a circle (no text or symbols)- Clear away carbon residue.

natural_image
Illustration of hands holding a small object with a tool, enclosed in a circular frame (no text or symbols)- Measure the electrodes clearance.
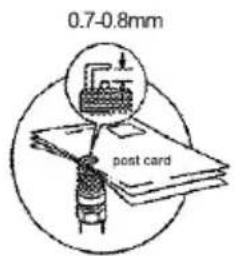
text_image
0.7-0.8mm post card- Reinstall the spark plug and high-pressure
cap.

6.3 Fuel filter maintenance
-
Set the fuel cork to "off" position, and dismantle the fuel filter cup.
-
Clean the fuel filter cup thoroughly.
-
Mount a new rubber ring and the filter cup securely.
natural_image
Cartoon illustration of a smiling industrial machine with visible internal components and wiring (no text or symbols)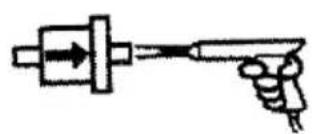
natural_image
Simple line drawing of a hand holding a syringe with an arrow pointing to it (no text or symbols)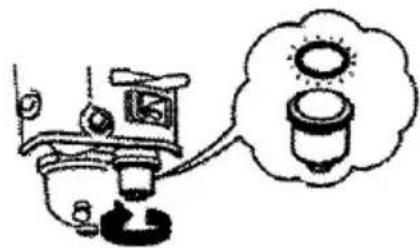
natural_image
Simple line drawing of a kitchen appliance with a thought bubble showing two cups (no text or symbols)6.4 Maintenance for long-term storage
If the generator needs to be stored for a long time, the following preparation should be made:
- Screw off the fuel drain plug, and empty the fuel inside the carburetor.
- Turn off the oil filter plug and oil drain plug, and empty the machine oil inside the crankcase.
- Reinstall the oil drain plug.
- Fill in the machine oil up to the upper level mark of the dipstick.
- Pull out the starter handle gently until resistance is felt.
| PROBLEM CAUSE CORRECTION | ||
| Engine is running, but no AC output is available. | 1.Circuit breaker is open.2.Poor connection or defective cord set.3-connected device is bad.4.Fault in generator. | 1.Reset circuit breaker.2.Check and repair.3.Connect another device that is in good condition.4.Contact Authorized Service Facility. |
| Engine runs good but bogs down when loads are connected. | 1.Short circuit in a connected load.2.Generator is overloaded.3.Engine speed is too slow.4.Shorted generator circuit. | 1.Disconnect shorted electrical load.2.See “Don't Overload the Generator”.3.Contact Authorized Service Facility.4.Contact Authorized Service Facility. |
| Engine will not start; or starts and runs rough. | 1.Dirty air filter.2.Out of petrol.3.Stale petrol.4.Spark plug wire not connected to spark plug.5.Bad spark plug.6.Water in petrol.7.Over-choking.8.Low oil level.9.Excessive rich fuel mixture.10.Intake valve stuck open or closed.11.Engine has lost compression. | 1.Clean or replace air filter.2.Fill fuel tank.3.Drain fuel tank and fill with fresh fuel.4.Connect wire to spark plug.5.Replace spark plug.6.Drain fuel tank; fill with fresh fuel.7.Put choke knob to No Choke position.8.Fill crankcase to proper level.9.Contact Authorized Service Facility.10.Contact Authorized Service Facility.11.Contact Authorized Service Facility. |
| Engine shuts down during operation. | 1.Out of petrol.2.Low oil level.3.Fault in engine. | 1.Fill fuel tank.2.Fill crankcase to proper level.3.Contact Authorized Service Facility. |
| Engine lacks power. | 1.Load is too high.2.Dirty air filter.3.Engine needs to be serviced. | 1.See “Don't Overload the Generator”.2.Replace air filter.3.Contact Authorized Service Facility. |
| Engine “hunts” or falters. | 1.Choke is opened too soon.2.Carburetor is running too rich or too lean. | 1.Move choke to halfway position until engine runs smoothly.2.Contact Authorized Service Facility. |
Part 8 SPECIFICATION
| Mode | K10101 | K10102 | K10103 |
| Alternator Type | Brush alternator with AVR | ||
| AC Frequency (Hz) | 50 | ||
| AC Output voltage (V) | 240 | ||
| Rated AC Output (KW) | 2.6 | 3.2 | 5.0 |
| Max. AC Output (KW) | 3.0 | 3.8 | 5.5 |
| Power Factor | 1.0 | 1.0 | 1.0 |
| Engine Number | UP170 | UP177 | UP188 |
| Engine Type | Four-Stroke, Air-cooled, OHV Petrol engine | ||
| Bore × Stroke | 70×54 | 70×58 | 88×64 |
| Displacement (cc) | 208 | 270 | 389 |
| Starting System | Recoil | Recoil or Electric | |
| Fuel Type | Petrol | ||
| Lubrication oil | SAE 10W/30 | ||
| Lubrication oil capacity (l) | 0.6 | 1.1 | 1.1 |
| Fuel Tank Capacity (l) | 15 | 25 | 25 |
| Max. Output (hp) | 7.0 | 9.0 | 13.0 |
| Max Output (rpm) | 3,600 | 3,600 | 3,600 |
| Continuous Work (h) | 11 | 10 | 10 |
| Weight (kg) | 44 | 69 | 84 |
Warranty given by Kincrome Australia Pty Ltd of 3 Lakeview Drive, Caribbean Park, Scoresby, Victoria (Tel 1300 657 528). If this product has materials or workmanship defects (other than defects caused by abnormal or non warranted use) you can, at your cost, send the product to place of purchase, an authorised Kincrome service agent or one of Kincromes addresses for repair or replacement. Your rights under this warranty are in addition to any other rights you have under the Australian Consumer Law or other applicable laws. Our goods come with guarantees that cannot be excluded under the Australian Consumer Law. You are entitled to a replacement or refund for a major failure and compensation for any other reasonably foreseeable loss or damage. You are also entitled to have the goods repaired or replaced if the goods fail to be of acceptable quality and the failure does not amount to a major failure. For further details please visit www.kincrome.com.au or call us.
KINCROME
TOOLS + EQUIPMENT™
Distributed by Kincrome Tools + Equipment 3
Lakeview Drive, Caribbean Business Park,
Scoresby, Vic 3179 Australia
www.kincrome.com.au