
BLA-32/124I - Television BLAUPUNKT - Free user manual and instructions
Find the device manual for free BLA-32/124I BLAUPUNKT in PDF.


| Product type | LED TV |
| Brand | Blaupunkt |
| Model | BLA-32/124I |
| Screen diagonal | 80 cm (32 inches) |
| Resolution | 1366 x 768 pixels (HD Ready) |
| Weight | Over 20 kg |
| Power supply | 220-240 V~, 50 Hz |
| Energy consumption | EcoHome mode: 15% reduction compared to standard mode |
| Reception system | DVB-T/T2, DVB-C, DVB-S/S2 |
| Connections | HDMI (x3), USB, SCART, VGA, YPbPr, RF, CI, headphone output, coaxial audio output |
| Main functions | PVR (USB recording), teletext, 7-day TV guide, 3D mode, parental control, key lock |
| Image format | 16:9, 4:3, Zoom, Auto |
| Audio power | 2 x 8 W (estimated) |
| Wall mounting | VESA 100 x 100 mm |
| Care and cleaning | Use a soft, damp cloth with clean water, no detergent or solvent |
| Safety | Do not open the casing, do not expose to moisture, disconnect before storm, maintain ventilation of at least 5 cm |
| Spare parts and reparability | No user-serviceable parts; contact the manufacturer or an authorized service |
| General information | Manual available in multiple languages; software update via USB |
Frequently Asked Questions - BLA-32/124I BLAUPUNKT
User questions about BLA-32/124I BLAUPUNKT
0 question about this device. Answer the ones you know or ask your own.
Ask a new question about this device
Download the instructions for your Television in PDF format for free! Find your manual BLA-32/124I - BLAUPUNKT and take your electronic device back in hand. On this page are published all the documents necessary for the use of your device. BLA-32/124I by BLAUPUNKT.
USER MANUAL BLA-32/124I BLAUPUNKT
3D* | DVB-T | DVB-C* | DVB-S2* | USB | PVR* | DVD*
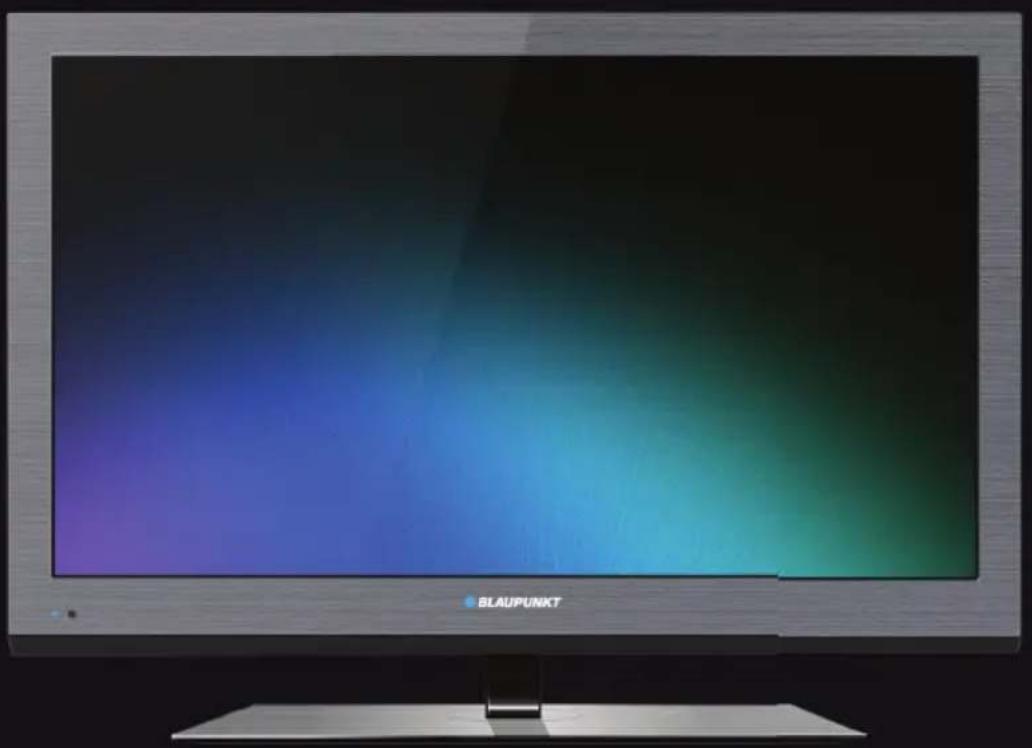

User guide
User guide
EN: for selected models only
USB Multimedia Player
Important safety instructions

Please read these safety instructions and respect the following warnings before operating the appliance:
This TV weighs more than 20 kg and must be lifted and carried by at least two people.
Be careful! This TV does not contain any parts that can be repaired by the user. In case of a fault, contact the producer or authorized service. Contact with certain parts inside the appliance might endanger your life. The guarantee does not cover faults caused by non-professional interactions!
Do not remove the rear part of the appliance.
To prevent fire spread, always keep candles and other open flames away from this product.

This appliance is designed for receiving and reproducing video and sound signals. Any other use is strictly forbidden.
The ideal distance to watch TV is approximately five times the diagonal of the screen. Light striking the screen from other light sources can cause reflections and make the picture quality worse. Please ensure sufficient ventilation and appropriate distance from other furniture. Install the product at least 5 cm from the wall for ventilation.
The TV set is designed to be used in moderate climates.
The TV set is designed exclusively for operation in a dry place. When using the appliance outside, make sure it is protected against moisture (rain, splashing water). Never expose the appliance to moisture. Do not place any containers with water on the appliance, such as vases, etc. These containers might get pushed over, which would endanger electric safety. Place the appliance exclusively on flat and stable surfaces. Do not place any objects such as newspapers or blankets, etc., on or under the appliance.
Make sure the appliance does not stand on any power cables as they might get damaged. Mobile phones and other devices such as WLAN adapters, monitoring cameras with wireless signal transmission, etc. might cause electromagnetic interference and should not be placed near the appliance.
Do not place the appliance near heating elements or in a place with direct sunshine as it has a negative effect on cooling of the appliance. Heat storage is dangerous and can seriously reduce the lifetime of the appliance. In order to ensure safety, ask a qualified person to remove dirt from the appliance.
Try to prevent damage to the mains cable or (if it is part of delivery) mains adapter. The appliance can only be connected with a supplied mains cable/adapter. Storms are dangerous for all electric appliances. If the mains or aerial wiring is struck by lightning, the appliance might get damaged, even if it is turned off. Thus you should disconnect all cables and connectors of the appliance before the storm. To clean the screen of the appliance use only a damp and soft cloth. Use only clean water, never detergents or in no case solvents.
Warning:
Never connect any external devices to a live appliance. Switch off not only the TV but also the devices which are being connected! Plug the appliance plug into the wall outlet after connecting the external devices and the aerial!
Always make sure there is free access to the appliance main switch and to its mains plug. The appliance is not designed for use in a workplace fitted with monitors. The systematic use of headphones at high volume might lead to irreversible hearing damage. Ensure environmental disposal of this appliance and any components including batteries. When in doubt, please contact your local authority for details of recycling. While installing the appliance, do not forget that furniture surfaces are treated with various varnishes, plastics, etc. or they might be polished. The additions contained in these products might cause destruction of the base material of the appliance stand. This will result in the holdovers of this material stuck to the furniture surface, which are difficult to remove, if not even impossible.
The screen of your TV responds to the top quality requirements and it was checked in detail for accidental faulty pixels several times. Due to the technological properties of the manufacturing process, it is not possible to eliminate the existence of a small number of faulty points on the screen for 100% (even with maximum care while production is provided). These faulty pixels are not considered faults in terms of guarantee conditions, if their extent is not greater than the boundaries defined by DIN norm.
Important information regarding use of video games, computers, captions and other fixed image displays.
The extended use of fixed image program material can cause a permanent "shadow image" on the LCD screen (this is sometimes incorrectly referred to as "burnout to the screen"). This shadow image is then permanently visible on the screen in the background. It is a partly irreversible damage. You can avoid such damage by respecting the following instructions:
Reduce the brightness/contrast setting to a minimum viewing level.
Do not display the fixed image for a long period of time. Avoid displaying of:
» Teletext time and charts,
» TV/DVD menu, e.g. DVD contents,
» In the "Pause" mode (hold): Do not use this mode for a long time, e.g. while watching a DVD or a video.
» Turn off the appliance if you are not using it.
Important safety instructions
Batteries
Observe the correct polarity when inserting the batteries.
Do not expose batteries to high temperatures and do not place them on locations where the temperature might increase quickly, e.g. near the fire or in direct sunshine.
Do not expose batteries to excessive radiant heat, do not throw them into the fire, do not disassemble them and do not try to recharge non-rechargeable batteries. They could leak out or explode.
» Never use different batteries together or mix new and old ones.
» Dispose of batteries in an environmentally friendly way.
» Most of the EU countries regulate the disposal of batteries by law.
Disposal
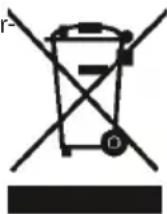
Do not dispose of this appliance as unsorted municipal waste. Return it to a designated collection point for the recycling of WEEE. By doing so, you will help to conserve resources and protect the environment. Contact your retailer or local authorities for more information.
Important safety instructions
3D Safety Information
If you watch the 3D imaging too closely or for a long period of time, it may harm your eyesight. - Watching the TV or playing video games that incorporate 3D imaging with the 3D glasses for a long period of time can cause drowsiness, headaches or fatigue to you and/or your eyes. If you have a headache, or otherwise feel fatigued or drowsy, stop watching the TV and take a rest. - Pregnant women, seniors, persons with heart problems or persons who experience frequent drowsiness should refrain from watching 3D TV.
Some 3D imaging may cause you to duck or dodge the image displayed in the video. Therefore, it is best if you do not watch 3D TV near fragile objects or near any objects that can be knocked over easily.
Please prevent children under the age of 5 from watching 3D TV as it may affect their vision development.
Warning for photosensitization seizure:
Some viewers may experience a seizure or epilepsy when exposed to certain factors, including flashing lights or images in TV or video games. If you or anybody from your family has a history of epilepsy or seizure, please consult with your doctor before watching 3D TV. Also certain symptoms can occur in unspecified conditions without any previous history. If you experience any of the following symptoms, immediately stop watching the 3D imaging and consult a doctor: dizziness or light headedness, visual transition or altered vision, visual or facial instability, such as eye or muscle twitching, unconscious action, convulsion, loss of conscience, confusion or disorientation, loss of directional sense, cramps, or nausea. Parents should monitor their children, including teenagers, for these symptoms as they may be more sensitive to the effects of watching 3D TV.
Risk of photosensitization seizure can be reduced with the following actions.
Take frequent breaks from watching 3D TV.
For those who have vision that is different in each eye, they should watch the TV after taking vision correction measures. - Watch the TV so that your eyes are on the same level as the 3D screen and refrain from sitting too closely to the TV. Do not watch the 3D imaging when tired or sick, and avoid watching the 3D imaging for a long period of time. Do not wear the 3D glasses for any other purpose than viewing 3D imaging on a 3D TV. Some viewers may feel disoriented after watching 3D TV. Therefore, after you watch 3D TV, take a moment to regain awareness of your situation before moving.
What is included in the box
Supply of this TV includes following parts:
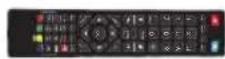
1x TV 1x Remote control

2x AAA batteries 1x User guide

1 x TV stand installation packet
3D glasses *
Attaching the Stand
Please follow the instructions in the Stand installation leaflet, located in the accessories bag.
Wall mounting the TV
This television requires a VESA 100 wall mount, or equivalent.
- Remove the four screws highlighted below.
- The wall mount can now be easily attached to the mounting holes on the rear of the TV. These holes are indicated in the picture below.
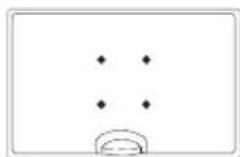
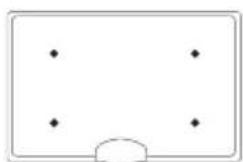
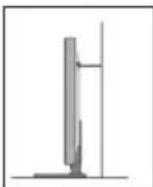
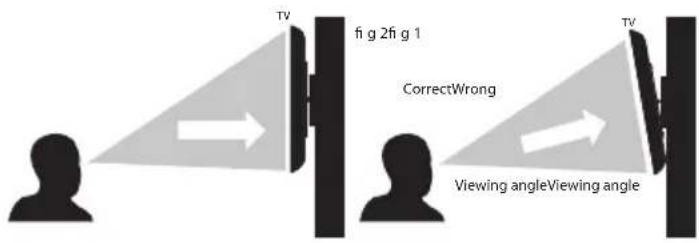
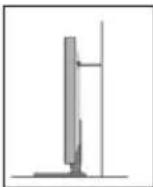
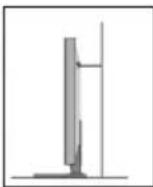
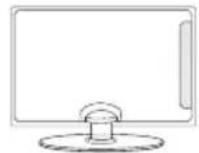
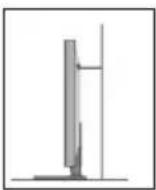
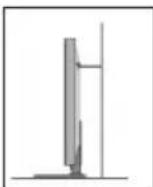
For optimum viewing, if wall mounting the TV higher than eye level, the TV should be tilted downwards so that the TV's screen is 'face on'. See fig 1 and 2
*- optional
Important Note
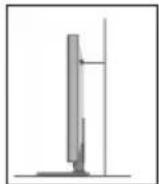
Position the TV close to the wall to avoid the possibility of it falling when pushed.
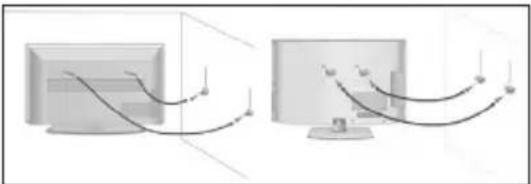
The instructions shown below are a safer way to set up the TV, by fixing it to the wall, avoiding the possibility of it falling forwards if pulled. This will prevent the TV from falling forward and causing injury. This will also prevent the TV from damage.
This method is used if the TV is placed on a glass surface or you do not wish to screw anything into your furniture.
Ensure that children do not climb or hang onto the TV.
For this type of installation you will need a fastening chord.
A) Using one/both of the top wall-mounting holes and screws (the screws are already supplied in the wall mounting holes) fasten one end of the fastening chord/s to the TV. B) Secure the other end of the fastening chord/s to your wall.
![graph LR A["1"] --> B["Switch"] B --> C["Monitor"] C --> D["Switch"] D --> E["Output"]](/content/2026/06/1243732/images/dcbf6af73dd7fda5405b9a20599f1ba3812f83121306524a28a79422e54af00f.jpg)

Getting started - initial set up
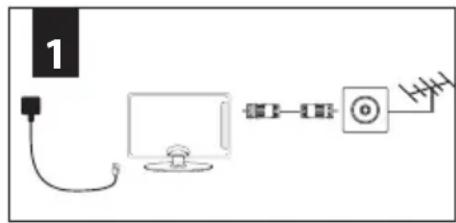
- Using the RF cable supplied, connect the TV to the TV Aerial wall socket. Connect the power cable to the Electrical outlet.
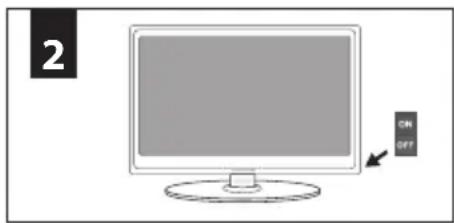
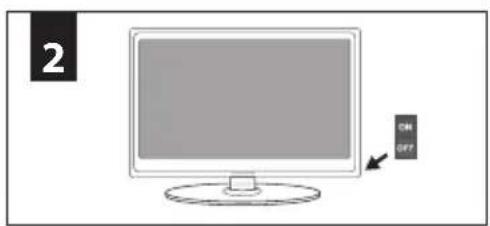
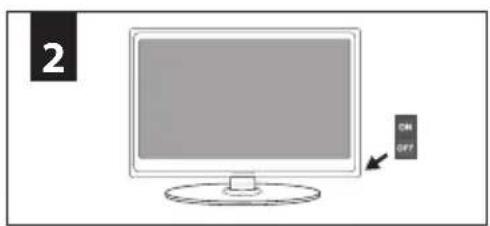
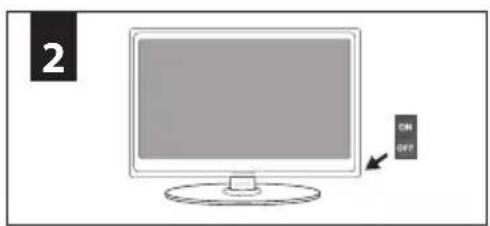
- Turn on the device with marked ON/OFF switch.
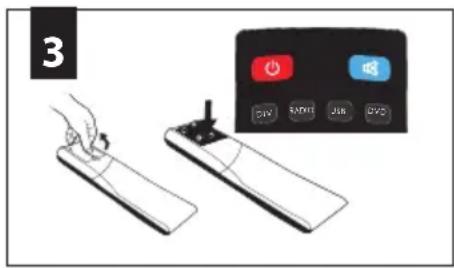
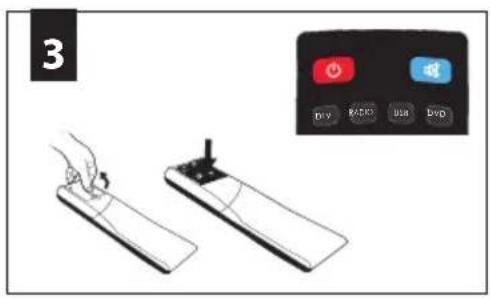
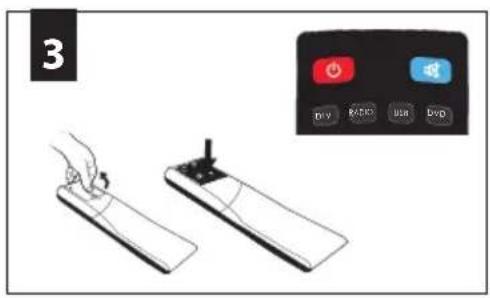
- Insert the batteries supplied into the Remote control and press the Standby button to power on the TV.
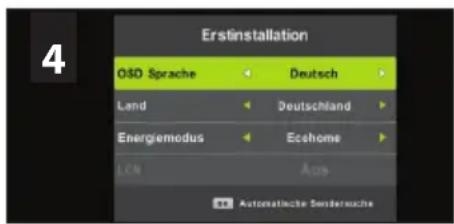
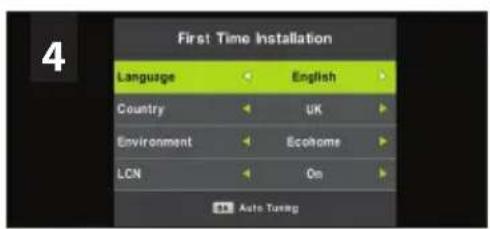
- You will now be welcomed with the initial set-up screen. If it does not appear, on the remote control, please press [MENU] then 8-8-8-8 and the menu will appear. Press OK on the remote control and tuning will start.
As part of our continuing efforts to reduce energy consumption, we added a new Ecohome feature (appears on the first installation screen). This function helps reduce energy consumption up 15% compared to other modes. The image brightness is reduced using Ecohome mode. If this setting does not suit your environment, you can choose from other modes (Note: the professional mode is the optimal default mode, but consumes 15% more than the Ecohome). Please select desired language, country and environment. Set LCN* to ON if you want to arrange found channels by cable provider preferences (only applies to DVB-C channels). Press [OK] button to start the tuning process.
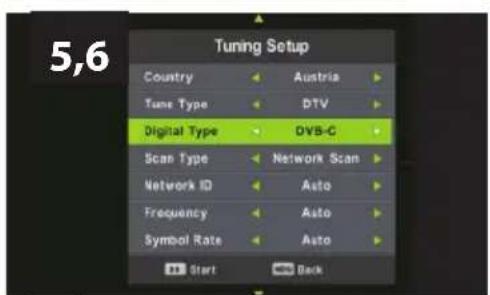
- In the next step select the type of digital broadcasting. You can choose between DVB-T (terrestrial), DVB-C (cable) or DVB-S2(satellite). The analog channel will be searched automatically, as most of the cable network includes analog channels.
- Select DVB-C if your TV is connected to a cable TV network. Keep all default settings as it is recommended. Then press [OK] to start the search. If DVB-C channels are not found, contact your network provider for the valid "Network ID". Then perform a new search. Press the [MENU], select "Network ID" and enter the network ID. Start your search by clicking [OK].
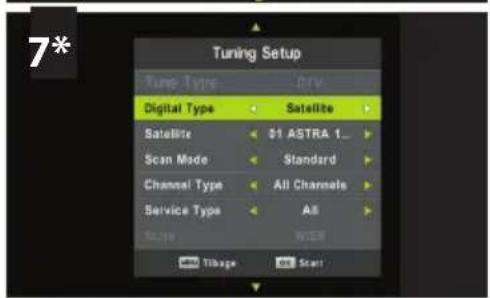
- Optional channel presets DVB-S2*: Select "Satellite" in the "Digital-type" in the menu for the optional channel presets. Here you can choose between the various satellites. Since selection completed, then the channel list of the exact satellite will be available to be imported into your TV system. This take several seconds. Confirm with [OK] button on the remote control, to start scanning. If you are missing channels, the reason for this is likely to be signal strength, you should consider connecting signal booster and re-tuning the TV.
Tip:
If the TV finds some, but not all, of the Digital channels, the TV is functioning correctly but the signal being received is not strong enough. (The signal strength needs to be above 85% - you can see the signal strength the TV is receiving when you change channels/programmes) you will need to increase the signal reception in order to receive all of the channels available. The most economical way to do this is by purchasing and connecting a 'signal booster' in between the TV and the TV aerial socket. If this does not solve the problem, you will need to upgrade the TV aerial to a digital hi-gain compatible aerial.
* - Only for models with DVB-S tuner
Remote control
STANDBY – Switch on TV when in standby or vice versa.
MUTE – Mute the sound or vice versa.
DTV- Switch to digital TV source.
RADIO - TV/RADIO – Switch to Digital and switch between TV and radio in Digital mode.
USB – Switch to USB source.
ATV-Switch to analog TV source.
DVD 1 – Switch to DVD mode
0 - 9 - to select a TV channel directly.
TV GUIDE – Opens the 7 Day TV Guide (Digital mode).
- To return to the previous channel viewed.
VOL ▲/▼ – To increase / decrease the sound level.
S.MODE - Scrolls through sound mode options
P.MODE - Scrolls through picture mode options.
FAV – To display the favourites menu.
CH ▲/▼ – To increase or decrease the channel being watched.
(▲/▼/◄/►/OK) – Allows you to navigate the on-screen menus and adjust the system settings to your preference.
MENU - To display the OSD menu.
EXIT – To exit all menus.
SOURCE – To display the input/source menu.
INFO – Press once for now/next channel information. Press twice for programme information about the current programme.
ASPECT – To switch the screen between the different picture formats.
SLEEP – Press repeatedly to cycle through the sleep options.
AUDIO - To change the audio language (if available).
SUBTITLE – To switch the dialogue at the bottom of the screen (on/off).
TEXT - Teletext mode - To enter Teletext.
TEXT HOLD - HOLD - Teletext mode - Hold the current page that is displayed.
TEXT/ DVD ZOOM - DVD mode - Teletext Mode - To zoom in.
ZOOM - DVD mode - Teletext Mode - To zoom in -
DISPLAY – To switch off the screen when listening to radio
DVD MENU 1 – DVD mode - To display the DVD disc menu
Rec 2 - PVR mode - PVR Record
DVD SETUP 1 – DVD mode - To display the DVD setup menu
Rec List 2 – PVR mode - Opens the list of recordings.
- To restart the current chapter
▶- To advance forward to the next chapter
■/▲- To stop the playback / Eject DVD.
◀- To play in fast rewind mode.
▶▶- To play in fast forward mode.
▶- To play/pause
GOTO 1 – DVD mode - To go to a specific chapter
A-B 1 – DVD mode - Press once to set point, press a second time to return to point
ANGLE 1 – DVD mode - Select different angle of DVD (if available)
REPEAT - DVD mode - USB mode - To repeat playback
REVEAL - Teletext mode - To reveal or hide the hidden words
SIZE - Teletext mode - To change the display size in Teletext mode
TITLE - To display the DVD disc menu
D. DIS - To display the current disc information
INDEX - Teletext mode - To display the index page
Red Green Yellow Blue button - Additional teletext and OSD functions
3D button - Switches between 3D type settings
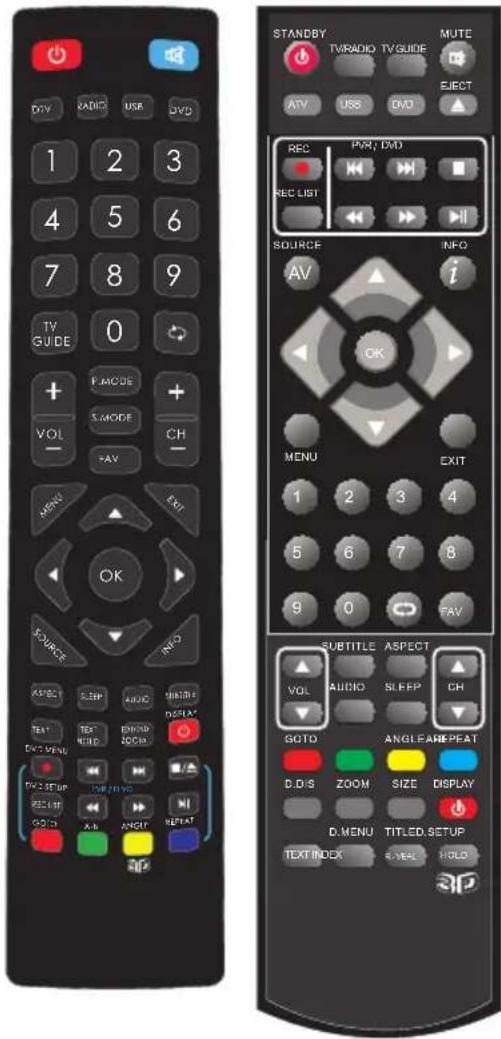
1 - available only for TVs with DVD players
2 - available only with PVR function
3 - Available only for TVs with 3D function
TV buttons & Source menu
| SATTU | (###) |
| ### | (###) |
| Vol+ Volume up and menu right | |
| Vol- Volume down and menu left | |
| CH+ Programme/Channel up and menu up | |
| CH- Programme/Channel down and menu down | |
| MENU Displays Menu/OSD | |
| SOURCE Displays the input source menu | |
| STANDBY Standby Power On/Off | |
Choosing Mode Input/Source

To switch between the different input/connections.
a) Using the buttons on the remote control:
- Press [SOURCE/ AV] - The source menu will appear.
- Press [▼] or [▲] to select the input you require.
- Press [OK].
b) Using the buttons on the Television:
- Press [SOURCE].
- Scroll up / down using CH+/CH- buttons to the input/source you require.
- Press Vol+ to change input/source to the one selected.
Connections
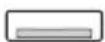 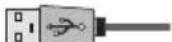 USBUSB-Input USBUSB-Input | 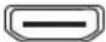 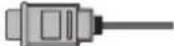 HDMI 1, 2*, 3* inHDMI-Input 1, 2, 3* HDMI 1, 2*, 3* inHDMI-Input 1, 2, 3* |
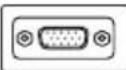 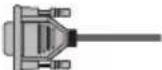 VGA(PC) *VGA PC-Input VGA(PC) *VGA PC-Input | [XSA4]  VGA (PC) Audio In *3.5mm PC audio input VGA (PC) Audio In *3.5mm PC audio input |
 R R 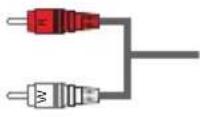 R/L - Video & YPbPr audio In *Component / Video audio input R/L - Video & YPbPr audio In *Component / Video audio input |   Video (CVBS) *VIDEO Input Video (CVBS) *VIDEO Input |
  Mini YPbPr *Mini Component HD Input Mini YPbPr *Mini Component HD Input |  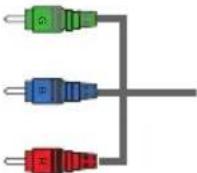 YPbPr *Component HD Input YPbPr *Component HD Input |
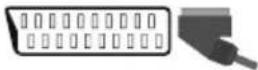 SCART *SCART-Input SCART *SCART-Input | 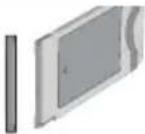 CI Card INSCART input CI Card INSCART input |
 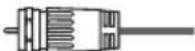 RF InRF / TV Aerial Input RF InRF / TV Aerial Input | [7DS2]  Sat In *Satellite Input Sat In *Satellite Input |
  COAX Audio Out *Digital Coax output COAX Audio Out *Digital Coax output |   HEADPHONES3.5mm Headphone output HEADPHONES3.5mm Headphone output |
* - Only on supported devices
Connections
Connecting a DVD Player/Recorder, Video Recorder or Cable/Satellite Box
TVs Input/Source should be set to SCART.
![graph LR A["Computer monitor"] --> B["SCART IN RF IN"] B --> C["RF inductors"] C --> D["SCART OUT RF OUT RF IN"] D --> E["RF inductors"] E --> F["Antenna with antenna"]](/content/2026/06/1243732/images/8ba72c7a1f715a37207420f83fb89c2f641d1c95eed83a22fc5d9810b484c337.jpg)
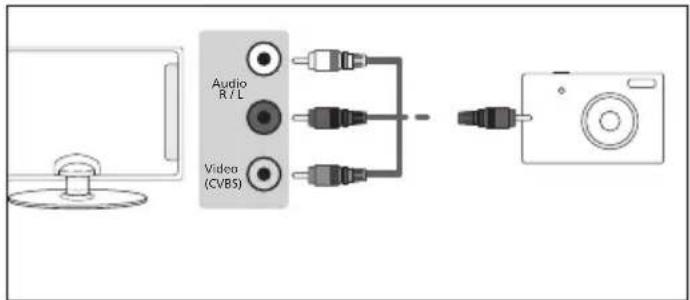
Connecting a Camcorder, Camera or Games Console
The TV's Input/Source should be set to Video.
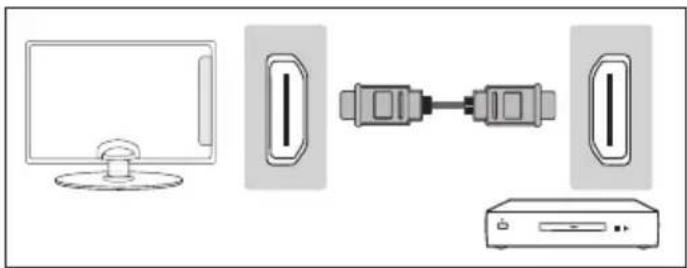
Connecting a High Definition (HD) Device by HDMI
Option 1 - via HDMI to HDMI cable. HDMI cable can output both video and audio and enables you to enjoy digital-quality video and audio with minimal loss of quality.
Option 2 - via Component cable.
If your TV set has component connectors (RED, GREEN, BLUE coloured sockets for video and RED & WHITE coloured sockets for sound), then use a YPrPb cable and RCA phono cable for video and sound connection. If the TV set is equipped with a mini Component connector, then you should use a mini YPrPb cable adapter for video signal connection, as shown in the picture. Note: Cables for component connection are not supplied.
![graph LR subgraph Device1 Y["Computer monitor"] -->|Y| A["Audio cable"] PB["Radio button"] -->|PB| A PR["Radio button"] -->|PR| A Mini["Mini Y/PD"] -->|Mini Y/PD| A L["L"] -->|L| A R["R"] -->|R| A end subgraph Device2 Y2["Audio cable"] -->|Y| A2["Audio cable"] PB2["Radio button"] -->|PB| A2 PR2["Rad…](/content/2026/06/1243732/images/8587594241bd22e5d8d52c1c22ef19b9c5213b38621778046b36fd1b1d2cd911.jpg)
Using the television as a computer monitor *
Connect the VGA cable (not supplied) to the TV and then to your PC or laptop. In order to use the TV speakers, connect your PC or laptop to the audio input IN of the TV, using a 3.5 mm jack (not included). The input source of the TV must be set to VGA.
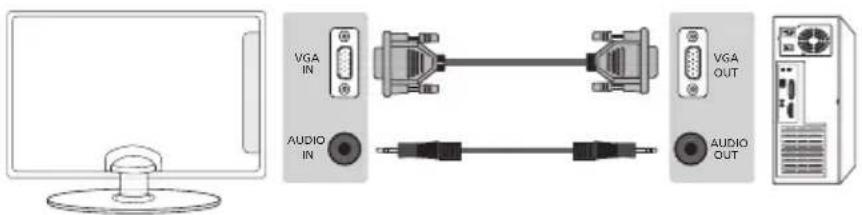
* - only for devices with VGA connector
NOTE:
The unit without VGA connector shall not be used as a computer monitor, as it would be possible via HDMI.
TV Menu operation
TV Menu navigation
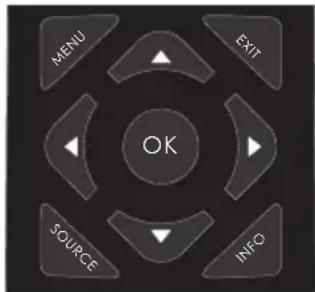
To access this menu, press [MENU] button on the remote control. To enter a menu press [OK].
If you wish to make changes to any of the default settings, use the scroll (▲/▼/◄/►) buttons. To confirm any settings press [OK] button.
To exit this menu at any time, press the [EXIT] button.
Channel
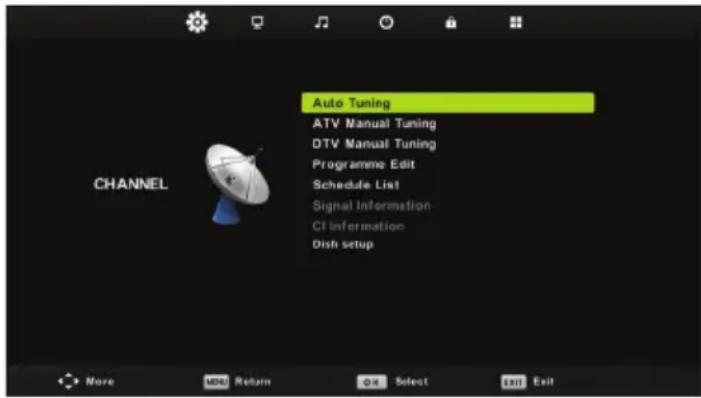
Auto Tuning - Allows you to retune the television for all digital channels, digital radio stations, and analogue channels.
ATV Manual Tuning - Allows you to manually tune your analogue signal.
DTV Manual Tuning - Allows you to manually tune your digital signal.
Programme Edit - Allows you to delete, skip, and add favourite channels.
Schedule List - Lists your programme reminders.
Signal Information - Information about the DVB signal.
CI Information - Pay-per-view services require a "smartcard" to be inserted into the TV. If you subscribe to a pay-per-view service, the provider will issue you with a 'CAM' and a "smartcard". The CAM can then be inserted into the COMMON INTERFACE PORT (CI Card In).
Dish Setup* - This menu is only available in DVB-S2 mode. You can select the type of satellite, your transponder, and your LNB type, etc.
Picture
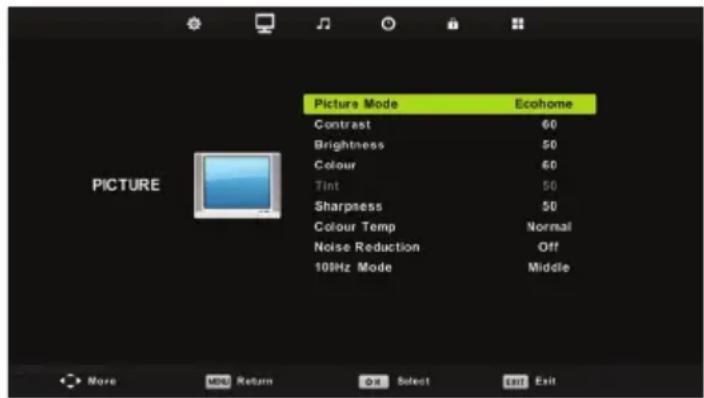
Picture Mode - Choose from the following presets.
| Standard Default settings |
| Dynamic Recommended settings for fast moving pictures |
| Mild Set to be lighter in colour and less bright |
| Personal Lets you manually alter all the settings |
| Ecohome Consume 15% less energy. |
Contrast - Switch the balance between black and white.
Brightness - Increase or decrease the brightness of the picture.
Colour - Increases the colour from black and white.
Tint - Lets you increase or decrease the level of tint within the picture.
Sharpness - Increase or decrease the sharpness of the picture.
Colour Temperature - Choose from the following presets.
| Normal Default settings |
| Warm Increases red within the picture |
| Cold Increases blue within the picturew |
Noise Reduction - Choose from the following presets.
| Off Turns noise reduction off | |
| Low Minor system adjustment | |
| Middle | Medium system adjustments |
| High | Maximum system adjustments |
| Default Default settings | |
* - Only for models with DVB-S tuner
TV Menu operation
3D Settings *
For the best 3D picture effect, watch your TV from vertical angle +/- 10°.
3D Type - When connecting a 3D product sometimes the picture maybe displayed incorrectly; choose from the following settings to correct this. You can toggle these settings by pressing the '3D' button on your remote (see page 119).
2D to 3D - Changes the picture from regular 2 dimensions to 3 (3D). Please note as content is being changed by the TV the effects are limited. 3D to 2D - Changes the picture from 3D to regular 2 dimensions (2D). 2D to 3D Depth - Depth of pictures converted from 2D to 3D.
| 3D off Turns 3D off | |
| Side by Side 3D Format | 3D format is commonly used in 3D broadcasting, works by halving the horizontal resolution of videos to store left and right eye images in each frame. It eff ectively displays up to 960 x 1,080-pixel pictures to each eye, enabling TV stations to telecast 3D content at a much lower bandwidth compared with 3D Blu-ray discs.Typical supported resolutions are limited to 720p and 1080i for 3D TV programs. Users will need to manually select the correct 3D format to properly display side-by-side 3D content on a 3D TV. |
| Top Bottom 3D Format | 3D format is alternative for 3D broadcast, which is pretty similar to side-by-side 3D except that it halves the vertical resolution instead. Available primarily up to 720p resolution, top-and-bottom 3D offers 1,280 pixels horizontally. The higher pixel count is generally considered more suitable for displaying panning motion in sports programs. |
| Frame Alternative | As its name suggests, this format stacks the left and right eye images in each frame to retain the content's original resolution for the best 3D pictures. Most, if not all, 1080p 3D Blu-ray movie discs and 720p PS3 3D games are produced utilizing this technique. Another key differentiator is that all 3D TVs should be able to automatically detect frame-packing 3D signals and correctly display the content without user intervention. |
| Line by Line The | the picture signals for left and right eyes are interleaved in alternate lines. The left clip's resolution is halved then placed in the odd lines of the video stream. Correspondingly, the right clip's resolution is halved then placed in the even lines of the video stream. When combined the video stream totals 1920×1080. |
Exchange 3D L/R - change picture sequence for different viewing
TV Menu operation
Sound

Sound Mode - Choose from the following presets:
| Standard Default settings | |
| Music Emphasises music over voices | |
| Movie Provides live and full sound for movies | |
| Personal Selects your personal sound settings | |
| Sports Emphasises sound for sports |
Tip: Treble and bass levels can only be adjusted when the sound mode 'Personal' is selected.
Treble - To adjust the level of high frequency within the sound.
Bass - To adjust the level of low frequency within the sound.
Balance - To switch the sound between the left and right speakers.
Auto Volume Level (AVL) - When 'on' is selected, the volume will stay at a constant level regardless of input/source.
Digital Output - This is the digital COAX Audio output. Choose from the following options:
| Off | Off |
| Auto Selects the best settings automatically | |
| PCM Select this option if you are connecting to a Stereo Hi-fi via coax cable (Pulse-code modulation (PCM) is a digital representation of an analogue signal) | |
AD Switch - Additional sound track for visually impaired. Available only on selected DTV shows.
Time
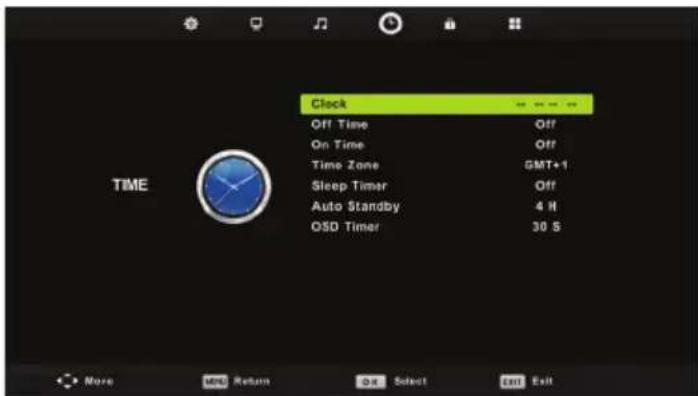
Clock - Set the date and time. Date and time is set up automatically in DVB mode.
Off Time - Allows you to set a specific time for your TV to turn off.
On Time - Allows you to set a specific time for your TV to turn on, the channel it will then display, the source it will be on and also the volume. This function can then be toggled to repeat every day or a certain day.
Time Zone - Change your current time zone.
Sleep Timer - Lets you set the sleep timer so the television automatically switches off after a set amount of time. Off -> 10min -> 20min -> 30min -> 60min -> 90min -> 120min -> 180min -> 240min.
Auto standby - Adjustment for the auto standby in hourly increments: Off -> 3h -> 4h -> 5h.
OSD Timer - Lets you adjust the amount of time the On Screen Menu stays on the screen before disappearing.
Lock
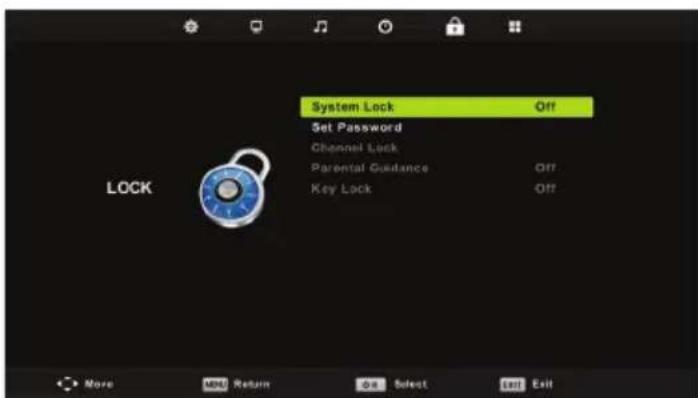
System Lock - Allows you to lock or unlock the menu. You will be asked to enter a 4 digit password. Use the ◀ button to quit the password input. Use the ▶ button to clear. Default password is 0000.
Set Password - Change the default password.
Channel lock - Lock specific TV channels.
Parental Guidance - Lock TV channels based on age restriction.
Key Lock - Lock the TV buttons.
TV Menu operation
Setup
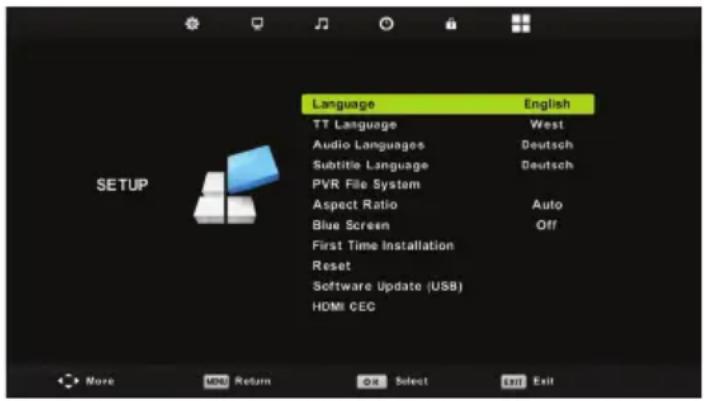
Language - Allows you to change the language of the menu.
TT Language - Encoding settings for the proper display of teletext characters.
Audio Languages - Allows you to change audio language on selected DVB channels.
Subtitle Language - Allows you to change subtitles language on selected DVB channels.
Hearing Impaired - If signal provides support for the hearing impaired, the subtitles can be displayed by pressing the "Subtitle". If you set Hearing Impaired ON and switch to a channel with supports for hearing impaired subtitles will be activated automatically.
Aspect Ratio - Within the EU the picture format varies depending on the channel/broadcast. There are a number of different options to best meet your needs.
| Auto Automatically displays the best picture format. So the picture is in the correct position. May have black lines at the top/bottom and/or sides. |
| 4:3 Displays the 4:3 picture in its original size.Side bars are shown to fi ll the 16:9 screen. |
| 16:9 Fills the screen with a regular 16:9 signal. |
| Zoom 1/2 The picture is the correct proportion but zoomed in to fi ll the screen. |
| Full Screen Stretch signal to fi ll the screen. |
Blue Screen - Changes the background when there is no input between transparent and a blue background (Only available on some sources).
First Time Installation - Starts the first time installation.
Reset - This resets the menus to factory settings.
Software Update (USB) - From time to time we may release new firmware to improve the operation of the television (available to download). This menu lets you install the new software/firmware onto the television. Further details of how to do this will be issued with the firmware. Contact the helpline or refer to the 'www.umc-slovakia.sk/products-support/' website.
HDMI CEC - Allows you to operate devices connected via HDMI with TV remote control.
Auto power - Automatically turn on/off connected devices via HDMI CEC
Device menu - Allows you to access devices menu and operate the menu using TV remote control.
HDMI ARC - Sends audio signal from terrestrial/satellite broadcast via HDMI to the AV receiver without using any additional audio cables, this function is available only on HDMI 2 output.
HDMI CEC must be supported by connected device.
PC Settings *
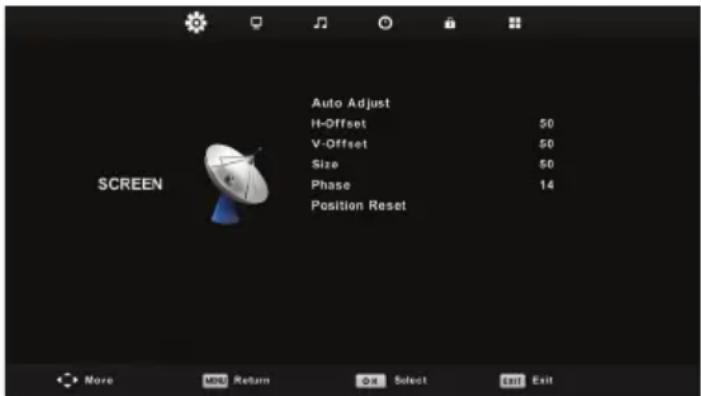
Auto Adjust - Lets you automatically configure the television to be used as a computer monitor.
H Offset - Changes the horizontal position of the picture.
V Offset - Changes the vertical position of the picture.
Size - increase picture size.
Phase - To adjust delay time of phase in order to reduce the noise of picture
Position Reset - Changes back to the original settings
Tip: If the computer is left inactive for a period of time, the television will switch into a 'sleep' state (the screen will power off to save power). To switch back on press the standby button.
Tip: If you do not press any buttons for 10 seconds, the menu will automatically exit. You can change the length of time before the menu exits automatically - see 'OSD Timer' section.
* only for devices with VGA connector
TV Menu operation
7 Day TV Guide
![7 Day TV GUIDE 10:00 - 12:00 05 Nov 2010 Sports After twice surrendering big leads before losing, Townsville showed they can grind out a win as Luke Schenscher led the Crocs over the Kings. They host defending champs Perth, who last beat the Hawks. [Program info © Ten] 05 Nov 2010 11:40:36 05 Nov 20…](/content/2026/06/1243732/images/c9ce7eebd88dd5f199d324b9a1c41eeb1b3f3977fb7caa9510df25600cc6fd68.jpg)
TV Guide is available in Digital TV mode. It provides information about forthcoming programmes (where supported by the Digital channel). You can view the start and end time of all programmes and on all channels for the next 7 days and set reminders.
- Press [TV GUIDE]. The following 7 Day TV Guide will appear.
- Navigate through the menu using ▲/▼/◄/►.
You can now:
Set a reminder by pressing GREEN.
View a previous day by pressing YELLOW.
View the next day by pressing BLUE.
[INFO] shows detailed information about the selected post
- Press [EXIT] to exit the 7 day TV Guide.
USB mode / Media player
USB mode offers playback of various different types of content that you have saved on your USB Memory Stick. On switching to USB source the USB mode menu screen will appear. The content will be divided into Photo, Music, Movie and Text based on file type.
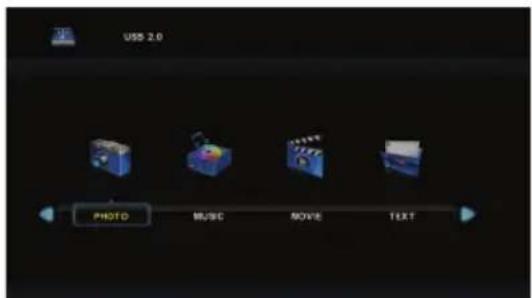
- You can navigate through the menus using the scroll ▲/▼/◄/► buttons. To confirm the item you wish to play/view press [OK] button.
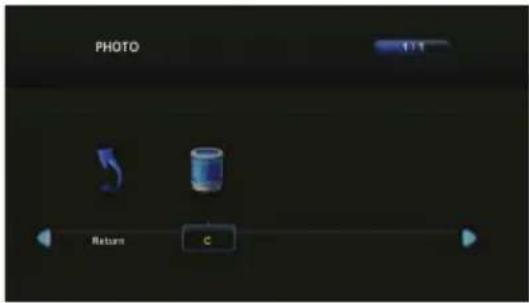
- Select the drive you require. (If your drive only has 1 partition you will only see 1 item).
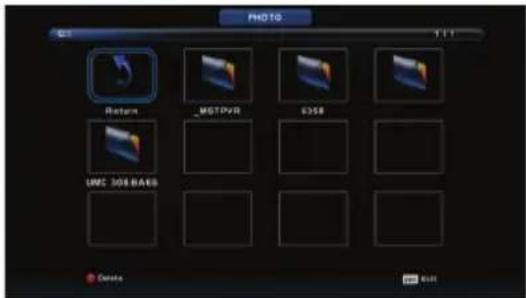
- You can now access the item. Press OK to view.
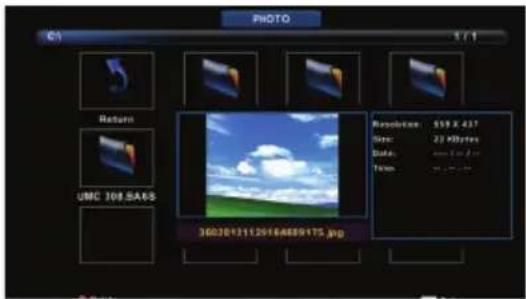
- While viewing you may control the item playback modes by using the remote control buttons

or by invoking playback navigation menu and selecting on-screen buttons ▲/▼/◄/► and [OK]
TV Menu operation
DVD Menu*
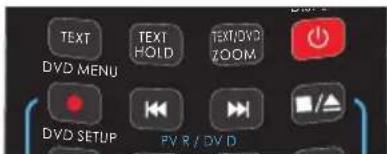
To access this menu, press [D. MENU] button on the remote control. If you wish to make changes to any of the default settings, use the scroll ▲/▼/◄/► buttons. To confirm any settings press [OK] button.
To exit this menu at anytime, press [EXIT] button.
General Setup Page
TV Display - Choose from the following options
| 4:3PanScan | PS Traditional picture format, often used on old fi lm |
| 4:3LetterBox | LB Traditional picture which has been adapted for widescreen |
| Wide Widescreen | picture format |
OSD Language - Select desired language
Audio Setup Page
Speaker Setup - Choose from the following options
| LT/RT Set LT/RT Downmix |
| Stereo Set Stereo Downmix |
Dolby Digital Page
Dual Mono
| Stereo Outputs | 2 channels of sound both left and right |
| Mono L Outputs | left side sound |
| Mono R Outputs | right side sound |
| Mix Mono Outputs | a single channel of sound but mix between right and left |
Dynamic Range - This is the difference between the quietest and loudest sounds. This setting works only with DVD discs recorded in Dolby Digital.
Preference Page
TV Type - Choose from the following options
| NTSC Normally used for discs from North America, Japan etc |
| PALThe standard for discs from UK/Europe, most of Asia, Australia etc |
| Multi For both NTSC and PAL |
Default - This option allows you to reset all DVD settings to factory settings.
Frequently Asked Questions
| General I would like to have louder sound by connecting additional speakers. | There are 2 options:1) Use Digital COAX output connected to an external amplifier/surround sound system.2) Use the 3.5mm headphone output and a 3.5mm to phono cable (available separately) to connect to an amplifier/surround sound system. |
| General Why are some options in the menu unavailable and greyed out. | Some options are only available in certain sources, i.e. HDMI, PC/VGA. They are unavailable in the other sources where they have no effect. |
| TV I have tuned in Digital TV but I am not receiving any or all of the channels and/or the channels I receive are breaking up. | 1) Check you are in an area that can receive Digital TV.2) Check you are using an aerial that is able to receive a good digital signal. In most cases, you will need an outdoor digital hi-gain/wideband aerial. In areas that have excellent digital coverage, you may be able to use a loft type aerial but it is highly likely that you will also need to connect a booster between the back of the TV and the TV aerial wall socket. Unfortunately, to receive a good enough digital signal, it is not possible to use a portable/indoor type aerial. |
| TV I have re-tuned my television but when I switch it off it is not storing the channels. | Complete a first time installation, please refer to the set-up menu section of the manual of how to do this. |
| VCR/DVD Recorder I have connected the TV to my VCR or DVD Recorder via SCART but it is not recording. | In addition to connecting via SCART, you should connect the aerial cable from the wall socket to your VCR/DVD Recorder and another aerial cable from the VCR/DVD Recorder to the TV. |
| Game Consoles I have connected my PS3 to the TV via HDMI, but I am not receiving any pictures or sound on my Television. | 1) Ensure the TVs source is on HDMI.2) Check your settings on your PS3 are as per the PS3 instruction manual. |
| Game Consoles I have connected my Xbox 360 to the TV via Component Cables (Red, Green & Blue) but I am not receiving any sound. | Component cables only provide HD Pictures. For the sound you will need to connect the Red & White audio cables on the Xbox to the Red & White phono inputs on the rear of the TV. Please refer to the 'Connections' pages. |
The software on your TV and the OSD layout can be changed without notice.
![graph LR A["1"] --> B["Switch"] B --> C["Monitor"] C --> D["Switch"] D --> E["Output"]](/content/2026/06/1243732/images/7ee994d2fdf5ccb9ef864b9f7baaaaeb2ef83137ca5ec3c6625846a903fa6f59.jpg)
![graph LR A["Computer"] --> B["SCART IN"] B --> C["RF IN"] C --> D["Switch"] D --> E["RF OUT RF IN"] E --> F["SCART OUT"] F --> G["Antenna"] G --> H["Wireless Cable"]](/content/2026/06/1243732/images/ff85eddd1947c34cccf67b37dd56bb04e22f66140cbd2bfdd6d50e9c7f448aab.jpg)

Size - Increase picture size.
Phase - To adjust delay time of phase in order to reduce the noise of picture.
Position Reset - Changes back to the original settings.
| G./D. Lt/Rt downmix |
| Stéréo Stereo downmix |
Dolby D Setting
Dual Mono -
![graph LR A["1"] --> B["Switch"] B --> C["Monitor"] C --> D["Switch"] D --> E["Output"]](/content/2026/06/1243732/images/060f3ee928234c188fe5bc32cb10f7cdf56de5fee4e05ab55818a77b291f0cd2.jpg)
![graph LR A["Computer"] --> B["SCART IN"] B --> C["RF IN"] C --> D["Switch"] D --> E["RF OUT RF IN"] E --> F["SCART OUT"] F --> G["Antenna"] G --> H["Wireless Cable"]](/content/2026/06/1243732/images/103ea7e2b8731e65ac5e4c62211483f26404bdb06567cbc3a0917953b8ef2c3e.jpg)
![graph TD A["Y"] --> B["Switch"] C["PB"] --> D["Switch"] E["PR"] --> F["Switch"] G["L"] --> H["Switch"] I["R"] --> J["Switch"] B --> K["Output"] D --> K F --> K H --> K J --> K style A fill:#f9f,stroke:#333 style C fill:#f9f,stroke:#333 style E fill:#f9f,stroke:#333 style G fill:#f9f,stroke:#333 styl…](/content/2026/06/1243732/images/8a48d6e1504c40720061180b2fb338f42278d21c575af1aca8de925312342014.jpg)

| Lt/Rt | Lt/Rt downmix |
| Stereo | Stereo downmix |
Base mounting
▶ I- Play/pause
Base mounting
To access this menu, press the [MENU] button on the remote control. To enter a menu, press [OK].
- USB MULTIMEDIA PLAYER
- IMPORTANT SAFETY INSTRUCTIONS
- PLEASE READ THESE SAFETY INSTRUCTIONS AND RESPECT THE FOLLOWING WARNINGS BEFORE OPERATING THE APPLIANCE
- WARNING
- IMPORTANT INFORMATION REGARDING USE OF VIDEO GAMES, COMPUTERS, CAPTIONS AND OTHER FIXED IMAGE DISPLAYS
- BATTERIES
- DISPOSAL
- D SAFETY INFORMATION
- WARNING FOR PHOTOSENSITIZATION SEIZURE
- RISK OF PHOTOSENSITIZATION SEIZURE CAN BE REDUCED WITH THE FOLLOWING ACTIONS
- WHAT IS INCLUDED IN THE BOX
- ATTACHING THE STAND
- WALL MOUNTING THE TV
- IMPORTANT NOTE
- FOR THIS TYPE OF INSTALLATION YOU WILL NEED A FASTENING CHORD
- GETTING STARTED - INITIAL SET UP
- TIP
- REMOTE CONTROL
- TV BUTTONS & SOURCE MENU
- CHOOSING MODE INPUT/SOURCE
- USING THE BUTTONS ON THE REMOTE CONTROL
- USING THE BUTTONS ON THE TELEVISION
- CONNECTIONS
- CONNECTING A DVD PLAYER/RECORDER, VIDEO RECORDER OR CABLE/SATELLITE BOX
- CONNECTING A CAMCORDER, CAMERA OR GAMES CONSOLE
- CONNECTING A HIGH DEFINITION (HD) DEVICE BY HDMI
- OPTION 2 - VIA COMPONENT CABLE
- USING THE TELEVISION AS A COMPUTER MONITOR
- ONLY FOR DEVICES WITH VGA CONNECTOR
- NOTE
- TV MENU OPERATION
- TV MENU NAVIGATION
- CHANNEL
- PICTURE
- D SETTINGS
- SOUND
- TIME
- LOCK
- SETUP
- PC SETTINGS
- DAY TV GUIDE
- YOU CAN NOW
- USB MODE / MEDIA PLAYER
- DVD MENU
- GENERAL SETUP PAGE
- AUDIO SETUP PAGE
- DOLBY DIGITAL PAGE
- PREFERENCE PAGE
- DOLBY D SETTING
- BASE MOUNTING
Brand : BLAUPUNKT
Model : BLA-32/124I
Category : Television