
PBH 1050 A1 - Drill PARKSIDE - Free user manual and instructions
Find the device manual for free PBH 1050 A1 PARKSIDE in PDF.


| Product type | Rotary hammer and breaker |
| Brand | Parkside |
| Model | PBH 1050 A1 |
| Rated power input | 1050 W |
| No-load speed | 0-980 min⁻¹ |
| Impact frequency | 0-5300 min⁻¹ |
| Impact energy per stroke | 3 Joules |
| Max. drilling diameter (steel) | 13 mm |
| Max. drilling diameter (wood) | 32 mm |
| Max. drilling diameter (concrete) | 26 mm |
| Protection class | II |
| Tool holder | SDS-Plus |
| Additional chuck | Quick-release chuck for round shank bits |
| Functions | Drilling, hammer drilling, chiseling, chisel position adjustment |
| Rotation direction | Right / left adjustable |
| Speed variator | Yes, via variable pressure switch |
| Speed preselection | Yes, via thumbwheel |
| Lighting | LED work light |
| Side handle | Yes, adjustable |
| Depth stop | Yes, adjustable |
| Sound power level | 102.26 dB(A) (hammer drilling) |
| Sound pressure level | 91.26 dB(A) (hammer drilling) |
| Vibrations (main handle, hammer drilling) | 9.853 m/s² (K=1.5 m/s²) |
| Vibrations (side handle, hammer drilling) | 8.967 m/s² (K=1.5 m/s²) |
| Delivery contents | Hammer, side handle, quick-release chuck with adapter, 3 drill bits, flat chisel, pointed chisel, depth stop, grease box, carrying case, instruction manual |
| Warranty | 3 years |
| Customer service (France) | Tel. 0800 919270, email: kompernass@lidl.fr |
| Customer service (Switzerland) | Tel. 0842 665566, email: kompernass@lidl.ch |
| Weight | Approximately 2.5 kg (estimated) |
Frequently Asked Questions - PBH 1050 A1 PARKSIDE
User questions about PBH 1050 A1 PARKSIDE
0 question about this device. Answer the ones you know or ask your own.
Ask a new question about this device
Download the instructions for your Drill in PDF format for free! Find your manual PBH 1050 A1 - PARKSIDE and take your electronic device back in hand. On this page are published all the documents necessary for the use of your device. PBH 1050 A1 by PARKSIDE.
USER MANUAL PBH 1050 A1 PARKSIDE
BOHR- UND MEISSELHAMMER PBH 1050 A1
DE AT CH
BOHR- UND MEISSELHAMMER
Operation and Safety Notes Translation of original operation manual

DE AT CH
Before reading, unfold the page containing the illustrations and familiarise yourself with all functions of the device.
GB Operation and Safety Notes Page 35


Einleitung
Directive CE Basse tension
(2006/95/EC)
Semi Uguzlu
Intended use....Page 36
Pictured components......Page 36
Scope of delivery....Page 36
Technical Data Page 36
General safety advice on power tools
-
Workplace safety......Page 37
-
Electrical safety......Page 37
-
Personal safety......Page 38
-
Handling and using the power tool Page 38
-
Service......Page 39
Safety notes for hammer drills....Page 39
Start-up
Pivot additional handle......Page 39
Depth stop Page 39
Inserting / removing tools......Page 39
Quick-release chuck for round shaft drills Page 39
Setting the function with the function selector switch....Page 40
Selecting the direction ......Page 40
Switching on and off....Page 40
Presetting the speed....Page 40
Maintenance and Cleaning......Page 40
Service Page 41
Warranty Page 41
Disposal Page 41
Declaration of Conformity / Manufacturer......Page 42
SDS-PLUS Hammer drill PBH 1050 A1
- Introduction
Congratulations on your new product. You have selected a high quality product. The instructions for use are a part of this product. They contain important information about safety, use and disposal. Before using the product, please familiarise yourself with all the operating and safety instructions. Only use the product as described and for the indicated purpose. When passing this product on to others please be sure to also include all of its documentation.
Intended use
The hammer drill and chisel hammer PBH 1050 A1 is suitable for:
- Hammer drilling bricks, concrete and stone
- Chiseling concrete, stone and plaster
- Drilling stone, wood and metal
Any other use or modifying the device is considered improper use and involves considerable accident risks. The manufacturer is not liable for damage caused by improper use.
The device is not intended for commercial use.
Pictured components
1 Wing screw
2 Clockwise/counter-clockwise switch
3 ON/OFF switch
3a Speed setting
4 ON / OFF switch locking button
5 Light emitting diode
6 Function selector switch
6a Release button for function selector switch
7 Additional handgrip
8 Tool holder
9 Dust cover
10 Locking sleeve
11 Depth stop
- Scope of delivery
1 SDS-PLUS Hammer drill PBH 1050 A1
1 Additional handgrip
1 Quick-release chuck with adapter (see Fig. A)
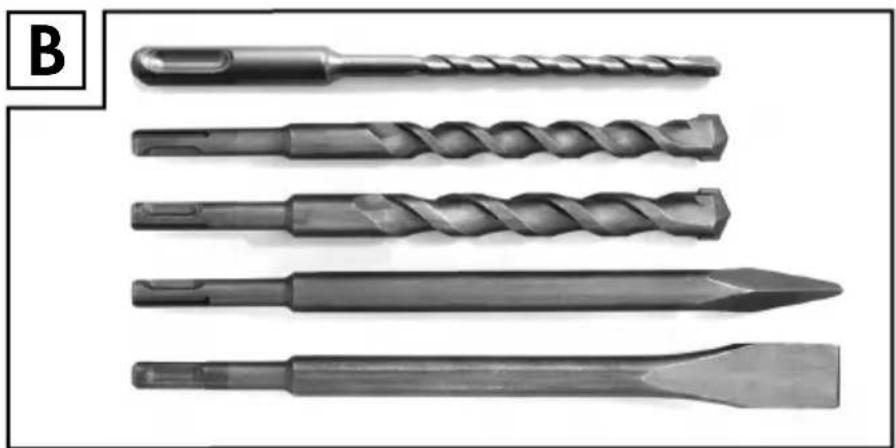
3 Drills (see Fig. B)
1 Flat chisel (see Fig. B)
1 Pointed chisel (see Fig. B)
1 Depth stop
1 Tin of lubricating grease
1 Carrying case
1 Set of operating instructions
Technical Data
Rated input power: 1050 W
Rated voltage: 230V\~, 50Hz
Idle speed: n 0-980/min
Impact frequency: 0–5300/min
Impact energy: 3 joules
Drilling capacity: max. 13 mm in steel
max. 32 mm in wood
max. 26 mm in concrete
Protection class: II/☐
Noise and vibration data:
Measured sound value determined according to EN 60745. The A-rated noise levels of the electrical power tool are typically at:
Hammer drilling:
Sound pressure level: 91.26 dB(A)
Sound power level: 102.26 dB(A)
Uncertainty K: 3 dB
Chiselling:
Sound pressure level: 93.44 dB(A)
Sound power level: 103.44 dB(A)
Uncertainty K: 3 dB
Wear hearing protection!
The total vibration (vector sum of three directions) is calculated in accordance with EN 60745:
Main handle
Hammer drilling in
Concrete: ah(HD) = 9.853m / s2, K = 1.5m / s2
Additional handle
Hammer drilling in
Concrete: ah(HD) = 8.967m / s2 , K = 1.5m / s2
Main handle
Chiselling: ah(CHeq) = 12.738 m/s2 , K = 1.5 m/ s2
Additional handle
Chiselling: ahCHeq = 8.278 m/s2 , K = 1.5 m/s 2
WARNING! The vibration level specified in these instructions was measured in accordance with an EN 60745 standardised measurement process and can be used to compare equipment. The vibration emission value specified can also serve as a preliminary assessment of the exposure.
The vibration level may change with the application of the tool and in some cases may be higher than the value specified in these instructions. Regularly using the electric tool in such a way may make it easy to underestimate the vibration.
Note: If you wish to make an accurate assessment of the vibration loads experienced during a particular period of work, you should also take into account the intervening periods of time when the device is switched off or is running but is not actually in use. This can clearly reduce the vibration load throughout the work period.
● General safety advice on power tools

WARNING! Please read all safety information and instructions.
Failure to observe the safety information
and instructions can result in electric shock, fire and/or serious injury.
Keep all safety advice and instructions in a safe place for future reference.
The term "power tool" as used in the safety advice refers to electrical tools powered by mains electricity (with mains lead) and electrical tools powered by rechargeable batteries (without mains lead).
1. Workplace safety
a) Keep your work area clean and well lit. Untidy or poorly lit work areas can lead to accidents.
b) Do not use the power tool in potentially explosive environments containing flammable liquids, gases or dusts. Power tools create sparks which can ignite dusts or fumes.
c) Keep children and other people away whilst operating the electrical tool.
Distractions can cause you to lose control of the device.
2. Electrical safety
a) The mains plug on the device must fit the mains socket. The plug must not be modified in any way. Never use adapter plug on earthed power tools.
Unmodified plugs and the correct sockets reduce the risk of electric shock.
b) Avoid touching grounded surfaces such as pipes, radiators, ovens, and refrigerators. There is a higher risk of electric shock if your body is earthed.
c) Keep the device away from rain or moisture. Water penetrating the electrical device increases the risk of an electric shock.
d) Do not use the mains lead for any purpose for which it was not intended, e.g. to carry the device, to hang up the device or to pull the mains plug out of the mains socket. Keep the mains lead away from heat, oil, sharp edges or moving equipment parts. Damaged or tangled cables increase the risk of an electric shock.
e) When using power tools outdoors always use extension cords approved
for outdoor use. Using an extension cable suitable for outdoor use reduces the risk of electric shock.
f) Use an earth leakage circuit breaker if operating the power tool in a moist environment cannot be avoided. Using an earth leakage circuit breaker reduces the risk of electric shock.
3. Personal safety
a) Remain alert at all times, watch what you are doing and always proceed with caution when using power tools. Do not use power tools when tired or under the influence of drugs, alcohol or medication. One moment of carelessness whilst using the power tool can result in serious injury.
b) Always wear protective equipment and safety glasses. Wearing personal protective equipment such as a dust mask, non-slip safety shoes, safety helmet or ear protectors, depending on the type and application of the power tool, reduces the risk of injuries.
c) Avoid accidental starting. Verify the power tool is switched off before connecting it to the mains, picking it up or carrying it. Carrying the power tool with your finger on the ON / OFF switch or with the device switched on can result in accidents.
d) Remove any adjusting tools or spanners before switching on the power tool. Leaving a tool or spanner attached to a rotating part of a device can lead to injury.
e) Avoid unnatural postures. Always maintain proper footing and balance.
This will ensure having better control over the power tool in unforeseen circumstances.
f) Wear suitable clothing. Do not wear loose clothing or jewellery. Keep your hair, clothing and gloves clear of moving parts. Loose clothing, jewellery or long hair can become trapped in moving parts.
g) When using vacuum dust extraction and collection devices remember to verify these are properly connected
and used. Using of such devices reduces the hazard presented by dust.
4. Handling and using the power tool
a) Do not overload the device. Always use a power tool intended for the task. By using the right power tool for the job you will work more safely and achieve a better result.
b) Do not use a power tool with a defective switch. Power tools that can no longer be switched on and off are dangerous and must be repaired.
c) Unplug from the mains before changing device settings or accessories, or setting the device down. This precaution will prevent the power tool from starting accidentally.
d) Always be sure to keep power tools out of reach of children when not in use. Do not let anyone use the device if he or she is not familiar with it or has not read the instructions and advice. Power tools are dangerous when used by inexperienced individuals.
e) Maintain the power tool with care. Check that moving parts are working properly and move freely. Check for any parts that are broken or damaged enough to detrimentally affect the function of the power tool. Have damaged parts repaired before using the unit. Many accidents are caused by poorly maintained power tools.
f) Keep cutting tools clean and sharp. Carefully maintained cutting tools with sharp cutting edges are less likely to jam and easier to control.
g) Use the power tool, accessories, inserted tools etc. according to these instructions. When doing so consider the working conditions and the application. Using power tools for purposes other than those intended can lead to dangerous situations.
5. Service
a) Only have the power tool repaired by qualified professionals using OEM spare parts. This ensures the safety of the power tool is maintained.
● Safety notes for hammer drills
■ Wear hearing protection. Exposure to noise can cause hearing loss.
Use the additional handle when using the device. Losing control can lead to injury.
Hold the device by the insulated handles when performing work n applications where a potential danger of the tool striking hidden electrical lines or its own power cable. Contact with a live wire could cause metal parts of the device to become live and lead to electric shock.
■ Wear a dust mask.
WARNING! TOXIC DUST! Working on materials which can produce harmful / toxic dusts presents a health risk to the user and people within close vicinity.
■ CAUTION - LEADS! DANGER! Verify you will not strike electric-, gas- or water lines whilst using the power tool. If necessary, first use a cable detector before drilling into or cutting open a wall.
- Start-up
- Pivot additional handle
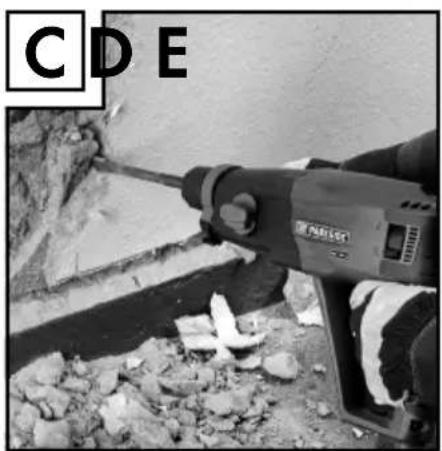
Note: For safety reasons this device must only be used with the additional handle 7 installed (also see Fig. C, D, E).
☐ The position of the additional handle 7 can be adjusted. Turn the wing screw 1 anti-clockwise and swivel the additional handle 7 into the desired position.
- Then tighten the wing screw 1 again. - This unit features an LED 5. It will light up once the unit is connected to the mains, indicating
the unit is energised and will immediately switch on when the ON / OFF switch 3 is activated.
- Depth stop
Open the wing screw 1.
☐ Insert the depth stop in the additional handle 7.
☐ Make sure that the toothing on the depth stop 11 is pointing downwards.
☐ Pull the depth stop 11 out as far as necessary so that the distance between the tip of the drill and the tip of the depth stop corresponds to the desired drilling depth.
□ Firmly tighten the wing screw 1.
- Inserting / removing tools
Inserting tools:
Lightly grease the tool holder before inserting the tool 8.
☐ To insert, pull back the locking sleeve 10 and insert the tool.
☐ Release the locking sleeve. This locks the tool holder. Pull the tool to ensure that it is firmly locked in place. The tool has some radial play inherent in the system.
Removing tools:
☐ To remove the tool pull back on the locking sleeve 10.
- Quick-release chuck for round shaft drills
WARNING! Do not use the quick-release chuck for round shaft drills for hammer drilling or chiseling applications!
☐ Set the function selector switch ☐ to the drill symbol ☐.
Start-up / Maintenance and Cleaning
Attaching the quick-release chuck for round shaft drills:
☐ To attach the additional chuck for round shaft drills (also see Fig. A) pull back the locking sleeve 10 and insert the additional chuck.
☐ Release the locking sleeve. This locks the tool holder. Pull the tool to ensure that it is firmly locked in place.
Removing the quick-release chuck for round-shaft drills:
To remove the additional chuck pull back the locking sleeve 10 and remove the additional chuck.
Inserting tools:
WARNING! RISK OF INJURY! Switch the device off and unplug from the mains socket before performing any work on the device.
- Setting the function with the function selector switch
☐ Press and hold the release button for the function selector switch 6a and turn the function selector switch 6 until the desired symbol locks in next to the arrow.
The functions are marked as follows:
| Function Symbol | |
| Drilling/screwing | |
| Hammer drilling | |
| Chiseling | |
| Chisel position adjustment |  |
Adjusting the chisel position:
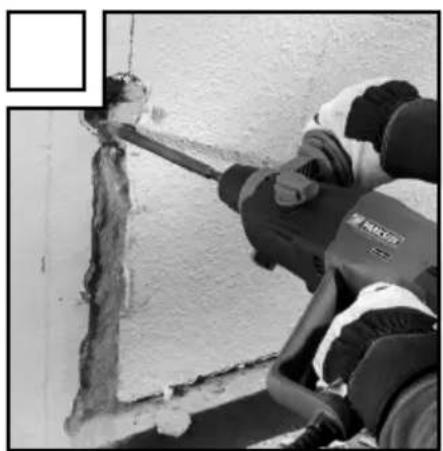
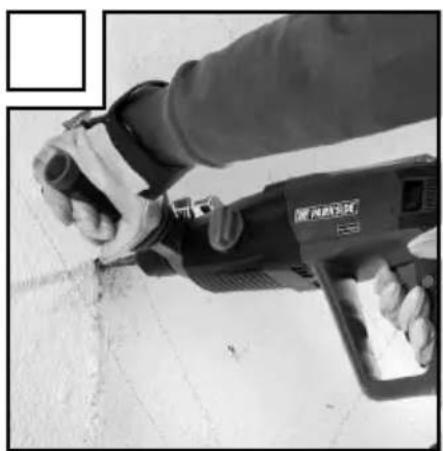
This function allows you to turn the tool to the necessary position for chiseling (also see Fig. C, D).
Turn the function selector switch to position
Turn the tool inside the tool holder to the necessary position.
To chisel, turn the function selector switch 6 to
- Selecting the direction
Select the direction of rotation by setting the direction switch 2.
WARNING! Only use / adjust the rotation switch 2 with the device stopped.
- Switching on and off
Switching on the device:
☐ Press the ON / OFF switch 3.
Switching the device off:
☐ Release the ON / OFF switch 3.
Activating permanent operation:
☐ Press the ON/OFF switch 3 and lock whilst pressed using the ON / OFF switch 4.
Deactivating permanent operation:
Press and release the ON / OFF switch.
- Presetting the speed
The speed dial 3a allows you to adjust the operating speed to specific speeds.
Which speed is most suitable depends on the material you will be working on. We recommend testing the speed to determine the correct setting.
Tip: These two basic rules about speeds are always helpful:
- larger bore diameter = lower speed and vice versa, smaller bore diameter = higher speed
- hard material = low speed
● Maintenance and Cleaning
WARNING! RISK OF INJURY! Switch the device off and unplug from the mains socket before performing any work on the device.
□ Always keep the device clean, dry and free of oil or grease.
Do not allow liquids to enter the hammer drill.
☐ Use a dry cloth to clean the housing.
☐ Regularly clean the tool hold.
CAUTION! PRETENSION! Pull the locking sleeve 10 back and release the dust cap 9.
□ Clean and grease components.
- Service
WARNING! Have your appliance repaired by qualified professionals using OEM parts only. This will maintain the safety of the device.
WARNING! If the connection cable needs to be replaced, this repair must be performed by the manufacturer or a representative to prevent safety hazards.
Warranty
The warranty for this appliance is for 3 years from the date of purchase. The appliance has been manufactured with care and meticulously examined before delivery. Please retain your receipt as proof of purchase. In the event of a warranty claim, please make contact by telephone with our Service Department. Only in this way can a post-free despatch for your goods be assured.
The warranty covers only claims for material and manufacturing defects, but not for transport damage, for wearing parts or for damage to fragile components, e.g. buttons or batteries. This product is for private use only and is not intended for commercial use.
The warranty is void in the case of abusive and improper handling, use of force and internal tampering not carried out by our authorized service branch. Your statutory rights are not restricted in any way by this warranty.
The warranty period will not be extended by repairs made unter warranty. This applies also to replaced and repaired parts. Any damage and defects extant on purchase must be reported immediately after unpacking the appliance, at the latest, two days after the purchase date. Repairs made after the expiration of the warranty period are subject to payment.
GB Service Great Britain
Tel.: 0871 5000 720 (0,10 GBP/Min.)
e-mail: kompernass@lidl.co.uk
IAN 79730
- Disposal

The packaging is made of environmentally friendly materials, which may be disposed through your local recycling facilities.
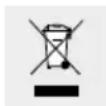
Do not dispose of power tools with household rubbish!
In accordance with European Directive 2002 / 96 / EC worn out power tools must be collected separately and taken for environmentally compatible recycling.
Contact your local refuse disposal authority for more details on the disposal of worn out electrical devices.
- Declaration of Conformity / Manufacturer €
We, Kompernaß GmbH, documentation officer: Mr Semi Uguzlu, Burgstr. 21, D-44867 Bochum, Germany, hereby declare this product to comply with the following standards, normative documents and EU Directives:
Machinery Directive (2006/42/EC)
EU Low Voltage Directive (2006/95/EC)
Electromagnetic Compatibility (2004/108/EC)
RoHS Directive (2011/65/EU)
applicable harmonised standards
EN 60745-1:2009+A11 EN 60745-2-6:2010 EN 55014-1:2006+A1+A2 EN 55014-2:1997+A1+A2 EN 61000-3-2:2006+A1+A2 EN 61000-3-3:2008
Type/Description of product: SDS-PLUS Hammer drill PBH 1050 A1
Year of manufacture: 12–2012 Serial number: IAN 79730
Bochum, 31.12.2012

Semi Uguzlu - Quality Manager -
We reserve the right to make technical modifications in the course of product development.
KOMPERNASS GMBH
Burgstraße21
D-44867Bochum
© by ORFGEN Marketing


- BOHR- UND MEISSELHAMMER PBH 1050 A1
- BOHR- UND MEISSELHAMMER
- DE AT CH
- EINLEITUNG
- GENERAL SAFETY ADVICE ON POWER TOOLS
- START-UP
- MAINTENANCE AND CLEANING......PAGE 40
- SDS-PLUS HAMMER DRILL PBH 1050 A1
- INTRODUCTION
- INTENDED USE
- PICTURED COMPONENTS
- SCOPE OF DELIVERY
- TECHNICAL DATA
- NOISE AND VIBRATION DATA
- HAMMER DRILLING
- CHISELLING
- WEAR HEARING PROTECTION
- MAIN HANDLE
- ADDITIONAL HANDLE
- ● GENERAL SAFETY ADVICE ON POWER TOOLS
- WARNING! PLEASE READ ALL SAFETY INFORMATION AND INSTRUCTIONS
- KEEP ALL SAFETY ADVICE AND INSTRUCTIONS IN A SAFE PLACE FOR FUTURE REFERENCE
- WORKPLACE SAFETY
- ELECTRICAL SAFETY
- PERSONAL SAFETY
- HANDLING AND USING THE POWER TOOL
- SERVICE
- INSERTING TOOLS
- REMOVING TOOLS
- START-UP / MAINTENANCE AND CLEANING
- ATTACHING THE QUICK-RELEASE CHUCK FOR ROUND SHAFT DRILLS
- REMOVING THE QUICK-RELEASE CHUCK FOR ROUND-SHAFT DRILLS
- ADJUSTING THE CHISEL POSITION
- SELECTING THE DIRECTION
- SWITCHING ON AND OFF
- SWITCHING ON THE DEVICE
- SWITCHING THE DEVICE OFF
- ACTIVATING PERMANENT OPERATION
- DEACTIVATING PERMANENT OPERATION
- PRESETTING THE SPEED
- ● MAINTENANCE AND CLEANING
- WARRANTY
- DISPOSAL
- DECLARATION OF CONFORMITY / MANUFACTURER €
- APPLICABLE HARMONISED STANDARDS
- KOMPERNASS GMBH
Brand : PARKSIDE
Model : PBH 1050 A1
Category : Drill