select 1528 - Sewing machine PFAFF - Free user manual and instructions
Find the device manual for free select 1528 PFAFF in PDF.

User questions about select 1528 PFAFF
0 question about this device. Answer the ones you know or ask your own.
Ask a new question about this device
Download the instructions for your Sewing machine in PDF format for free! Find your manual select 1528 - PFAFF and take your electronic device back in hand. On this page are published all the documents necessary for the use of your device. select 1528 by PFAFF.
USER MANUAL select 1528 PFAFF
text_image
PFAFF selectline Simply select & sew! IDTA™ Owner's manualPFAFF
Got the urge to sew?
Your select is ready to go!
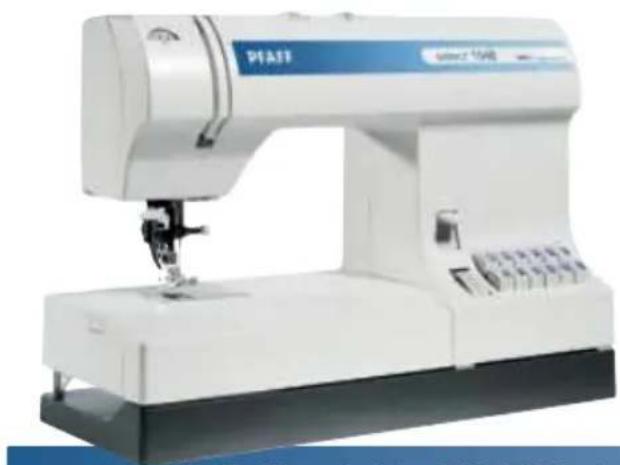
Let us introduce you to your select!
It's the perfect choice for anyone who is looking for a versatile sewing machine. Modern look, practical features, and so easy to use - that's the select from Pfaff.
What do you want to sew?
Your own fashion creations? Decorations for your home? Or would you just like to shorten a pair of trousers? Your select is ready to go!
Get acquainted with your select.
You'll want to start sewing! We guarantee it.

Some fabrics have a lot of excess dye which can cause discoloration on other fabric but also on your sewing machine. This discoloring may be very difficult or impossible to remove.
Fleece and denim fabric in especially red and blue often contain a lot of excess dye.
If you suspect that your fabric/ready-to-wear garment contains a lot of excess dye, always pre-wash it before sewing/embroidering to avoid the discoloring.
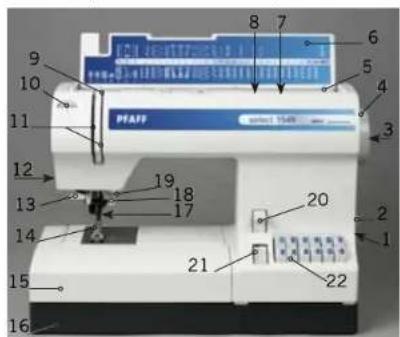
Parts of your select sewing machine
text_image
9 10 11 12 13 14 15 16 20 21 22 2 3 4 5 6 7 8 9 PFAFF select 15x8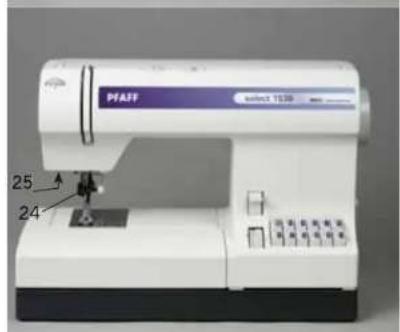
text_image
PFAFF select 1938 25 24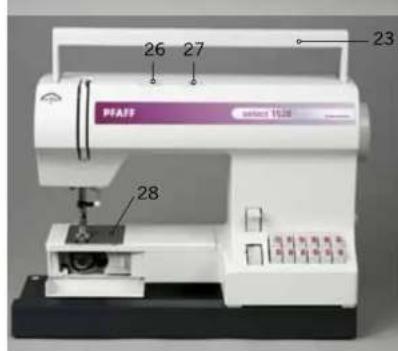
text_image
26 27 23 PFAFF select 10.28 281 Connection socket
"foot control with main cord"
2 Main switch
3 Handwheel release disk
4 Handwheel
5 Bobbin winder
6 Lid with stitches
7 Extra spool holder
8 Spool holder with spool cap
9 Take-up lever
10 Needle thread tension dial
11 Threading path
12 Thread cutter
13 Needle threader (1548)
14 Presser foot holder with
presser foot
15 Removable accessory tray
16 Base plate
17 IDT System / Integrated Dual Feed (1548/1538)
18 Needle holder with fixing screw
19 Presser foot lifter
20 Button for "reverse sewing"
21 Stitch length dial
22 Stitch selection
23 Carrying handle
24 Thread guide
25 Sewing lamp (max. 15 watt)
26 Stitch width dial
27 Needle position dial
28 Needle plate
Presser feet (normal accessories)
For more information about accessories, please contact your PFAFF dealer.
0 Standard Presser Foot with IDT
Part No. 820250-096 (pictured) (select 1548 and 1538)
Part No. 820258-096 (select 1528)
1 Fancy Stitch Foot, with IDT
Part No. 820253-096 (select 1548)
1 Clearview Foot
(Fancy-stitch foot without IDT)
Part No. 820229-096
3 Blindhem/Overlock Foot with IDT
Part No. 820256-096 (pictured) (select 1548 and 1538)
Part No. 820264-096 (select 1528)
4 Zipper Foot with IDT
Part No. 820248-096 (pictured) (select 1548 and 1538)
Part No. 820261-096 (select 1528)
5 Buttonhole Foot
Part No. 820295-096
6 Darning Foot
Part No. 820243-096 (select 1548)
7 Rolled Hem Foot, 3 mm
Part No. 820249-096 (select 1548)
8 Edge Guide/Quilting Guide
Part No. 820251-096


text_image
1 2 3 4 5 6 7 81 Felt pad
Part No. 93-033 064-05
2-4 Spool cap
-
Part No. 93-036-048-44
-
Part No. 93-035 050-44
-
Part No. 93-036 049-44
5 Extra spool pin
Part No. 93-033 063-44
6 Seam ripper
Part No.99-053-016-91
7 Brush
Part No. 93-847 979-91
8 Bobbins
Part No. 93-040 970-45
This household sewing machine is designed to comply with IEC/EN 60335-2-28 and UL1594.
IMPORTANT SAFETY INSTRUCTIONS
When using an electrical appliance, basic safety precautions should always be followed, including the following:
Read all instructions before using this household sewing machine.
DANGER - To reduce the risk of electric shock:
- A sewing machine should never be left unattended when plugged in. Always unplug this sewing machine from the electric outlet immediately after using and before cleaning.
• Always unplug before relamping. Replace bulb with same type rated 15 Watt.
WARNING - To reduce the risk of burns, fire, electric shock, or injury to persons:
- Do not allow to be used as a toy. Close attention is necessary when this sewing machine is used by or near children or infirm persons.
- Use this sewing machine only for its intended use as described in this manual. Use only attachments recommended by the manufacturer as contained in this manual.
- Never operate this sewing machine if it has a damaged cord or plug, if it is not working properly, if it has been dropped or damaged, or dropped into water. Return the sewing machine to the nearest authorized dealer or service center for examination, repair, electrical or mechanical adjustment.
- Never operate the sewing machine with any air openings blocked. Keep ventilation openings of the sewing machine and foot controller free from the accumulation of lint, dust, and loose threads.
- Keep fingers away from all moving parts. Special care is required around the sewing machine needle.
• Always use the proper needle plate. The wrong plate can cause the needle to break. - Do not use bent needles.
- Do not pull or push fabric while stitching. It may deflect the needle causing it to break.
- Switch the sewing machine off ("0") when making any adjustment in the needle area, such as threading needle, changing needle, threading bobbin, or changing presser foot, etc.
- Always unplug the sewing machine from the electrical outlet when removing covers, lubricating, or when making any other user servicing adjustments mentioned in the instruction manual.
- Never drop or insert any object into any opening.
- Do not use outdoors.
- Do not operate where aerosol (spray) products are being used or where oxygen is being administrated.
- To disconnect, turn all controls to the off ("0") position, then remove plug from outlet.
- Do not unplug by pulling on cord. To unplug, grasp the plug, not the cord.
SAVE THESE INSTRUCTIONS
Contents
Introduction
Stitch table V
1. Operate your Pfaff select
Electrical connection 1:2
Removable accessory tray 1:3
Bobbins 1:4
Bobbin case 1:8
Threading the needle 1:10
Needle threader 1:11
Bringing up the bobbin thread 1:12
Presser foot lifter 1:13
Thread cutter 1:12
Changing the presser foot 1:13
IDT System/Integrated Dual Feed 1:14
Changing the needle 1:15
Needle thread tension 1:15
Lowering the feed dog 1:15
Stitch width dial 1:16
Needle position dial 1:16
Reverse sewing 1:17
Stitch length dial 1:17
Stitch selection 1:18
2. Utility stitches and practical sewing
Sewing chart 2:2
General sewing aids 2:3
Non-elastic stitches 2:4
Elastic stitches 2:6
Overlockstiche 2:7
Shell edging 2:8
Buttonhole 2:9
Button sewing 2:10
Hemming with the twin needle 2:11
Free Motion Sewing 2:12
Sewing on zippers 2:13
Stabilizing edges 2:15
3. Maintenance and trouble-shooting
Changing the needle plate 3:2
Cleaning 3:2
Replacing the sewing blub 3:3
Trouble-shooting 3:4
natural_image
Exterior view of a white industrial sewing machine (no visible text or symbols)
text_image
G H I K L M A 3 B 4/2 C 1 D E F
text_image
As Bs Cs Doo En Fen Gen Gan Gen Gan Hwa In Ken Lan Men IGan XMan LGen LDen LGen Un EKan ELn FGen IDan Fn LKen LMKnMGen MDFan 0 1 3 4 5 6 7 stretch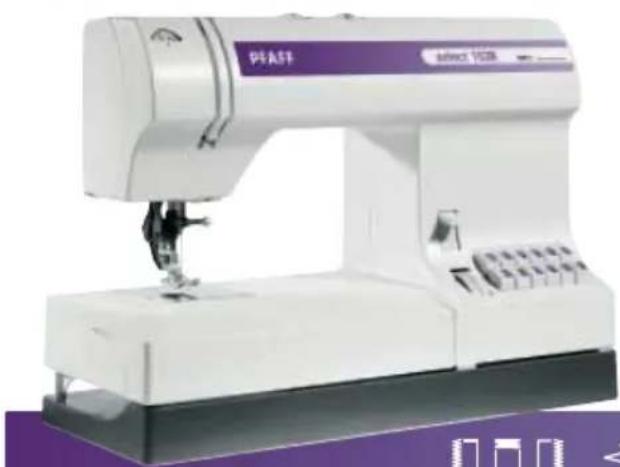
natural_image
Exterior view of a white industrial sewing machine (no visible text or symbols)
text_image
G H I K L M A 3 B 4/2 C 1 D E F
text_image
0 1 3 4 5 As Bs Cs Dew En Fin Gan Gan Gan Gen Herz Ian Kan Lan Man KMen Llen FGen LKan LMKen stretch
natural_image
Exterior view of a white sewing machine (no visible text or symbols on the device body)
text_image
G H I K L M A 3 B 4/2 C 1 D E F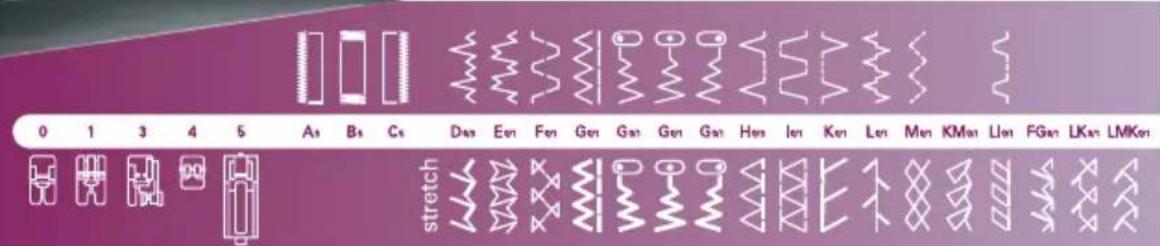
text_image
0 1 3 4 5 As Bs Cs Das Een Fen Gen Gan Gen Gan Gas Hes Ien Ken Len Men KMan Llan FGen LKan LMKer stretchStitch table
Non-elastic stitches
| Stitch table (non-elastic stitches) | ||||
| Stitch 15381548 1528 | Presser Foot | Application | ||
 | A/B/C | A/B/C | 5 | Standard buttonhole for blouses or bed linen |
| [32WX] | D | D 0/3 | For invisible hemming with simultaneous seam/overcasting. Especially for stretch material | |
 | E | E 0/1 | A traditional decorative stitch e.g. for towel borders | |
| [8ZH8] | F F | 0/1 | A traditional decorative stitch e.g. for towel borders | |
| [9355] | G G | 0/1 | For all straight stitching and topstitching work up to 6 mmFor serging and appliqué. Also suitable for tapering, eyelet embroidery and cording work | |
 | 0/1 | Straight stitch: For all sewing and top-stitching operations which require a left needle position.Zigzag stitch:For serging, appliqué and tapering. | ||
 | 0/1 | Straight stitch: For most sewing and top-stitching operations.Zigzag for most zigzag operations | ||
 | 0/1 | For all sewing and top-stitching operations which require a right needle position. Zigzag stitch:For serging, appliqué, tapering and cording work | ||
| [60K2] | H | H 0/3 | For invisible hemming on woven materials | |
 | I | I 0/1 | A traditional decorative stitch | |
 | K | K 0/3 | For fl at overlapped seams | |
 | L | L 0/1 | For overcasting, sewing on elastic, darning tears and inserting patches | |
| [D077] | M M | 0/1 | For overcasting, sewing on elastic, darning tears and inserting patches | |
| Stitch 1548 1538 1528 | Presser Foot | Application | ||
| IG | - 0/1 | A traditional decorative stitch | ||
| LC | - 0/1 | A dainty decorative stitch | ||
| LG | - 0/1 | A dainty decorative stitch | ||
| LI LI 0/1 | A traditional decorative stitch | |||
| MDF | - 0/1 | A traditional decorative stitch | ||
Stitch table
Stretch stitches
| Stitch table (stretch stitches) | ||||
| Stitch 15381548 1528 | PresserFoot | Application | ||
| [28CD] | D | D | 0/1 | Elastic closing and serging seam. The material must be turned by 180 degrees |
| [TBW3] | E | E 0/1 | For top-stitching and overstitching stretch materials, e.g. cuffs, hems and panels | |
 | F | F 0/1 | A decorative stitch for top-stitching or whip stitching hems, e.g. pajamas and sweatsuits | |
 | G G | 0/1 | For stretch seams, e.g. inside seams as well as seams on sportswear and workwearFor sewing elastic bands on elastic materials or seams on stretch materials | |
| [060Z] | For elastic seams which require a left needle position | |||
 | For elastic seams which require a center needle position | |||
 | A traditional decorative stitch e.g. for towel borders | |||
 | H H | 0/1 | Elastic closing and serging seams for jersey. The material must be turned by 180 degrees | |
 | I | I 0/3 | A closing and serging seam for materials which fray easily | |
 | K | K 0/3 | A closing and serging seam for sturdy materials or materials which do not fray easily | |
| [0H20] | L | L 0/1 | For joining two fi nished edges with a gap between, e.g. hemstitching. Also for crazy quilting | |
| [0XAC] | M | M 0/1 | For sewing on elastic thread, overstitching terry | |
| [6KBW] | IG | - | 0/1 | A decorative stitch also used as a covering stitch |
 | KM | KM 0/1 | A loose decorative stitch | |
| Stitch 1548 1538 1528 | Presser Foot | Application | ||
| LC | - 0/1 | A decorative stitch, e.g. for household textiles | ||
| LD | - 0/1 | A decorative stitch, e.g. for household textiles | ||
| LG | - 0/1 | A decorative stitch, e.g. for traditional embroidery | ||
| LI LI 0/1 | An ornamental stitch, e.g. for bath accessories | |||
| EK | - | 0/1 | A decorative stitch, e.g. for household textiles | |
| EL | - 0/1 | For top-stitching and overstitching stretch materials, i.e. cuffs, hems and panels | ||
| FG FG 0/1 | A top-stitching seam for patchwork and quilting | |||
| ID | - 0/1 | A decorative elastic stitch, e.g. for sportswear | ||
| IF | - 0/1 | A decorative, elastic stitch. For whip-stitching hems, e.g. on pajamas and sweatsuits. The material must be turned by 180 degrees | ||
| LK | LK 0/1 | A decorative, elastic stitch | ||
| LMK LMK 0/1 | A decorative, elastic stitch | |||
| MG | - 0/1 | A decorative, elastic stitch | ||
text_image
PFAFF 1. Operate your Pfaff select- Operate your Pfaff select
Carrying-case
Place the cords, foot control and instruction book in the front pocket of the carrying case.
Lid
Open the folding lid (6) upwards. The stitches of the sewing machine are illustrated on the inside of the lid.

natural_image
White portable electronic device with open lid and internal components (no visible text or symbols)
text_image
PFAFF select TConnecting the foot control
Connect the plug of the foot control to the connecting socket (1) of the sewing machine and to the wall socket. The sewing speed is regulated by pressing the foot control.
You can regulate the sewing speed by moving the slide on the front part of the foot control.
Position▶ = half speed
Position▶▶ = full speed
AE023 - 120V, USA and Canada
AE020 - 230V, Europe
AE024 - 240V, Australia
Main switch
When the main switch (2) is switched on, the sewing bulb lights up. The sewing machine is now ready to use.

natural_image
Close-up of a white electronic device with a coiled cable and a black box on top (no visible text or symbols)For the USA and Canada
This appliance has a polarized plug (one blade wider than the other). To reduce the risk of electric shock, this plug is intended to fi t in a polarized outlet only one way. If the plug does not fi t fully in the outlet, reverse the plug. If it still does not fi t, contact a qualifi ed electrician to install the proper outlet.
DO NOT modify the plug in any way.
natural_image
Disassembled electronic device with open casing and internal compartments, no visible text or symbolsAccessory tray
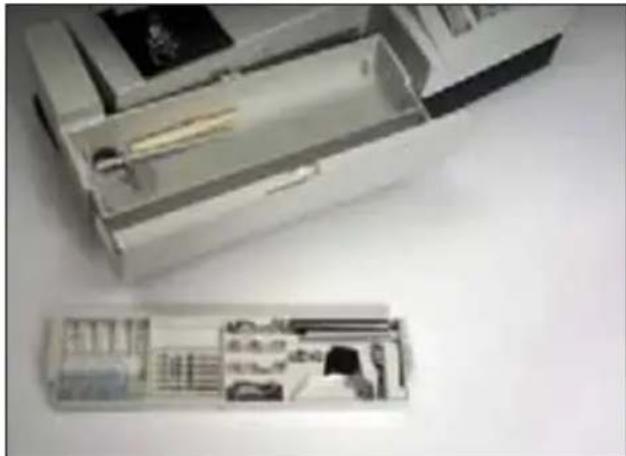
Your Pfaff select sewing machine has a removable accessory tray (15) which is also used as an extended work support.
Model 1548, has a special removable accessory organizer. The enclosed accessories are numbered. Sort the enclosed accessories into the corresponding sections of the accessory organizer.

natural_image
Close-up of a laboratory instrument with a white base and mechanical components (no visible text or symbols)Using the free arm
In order to sew with the free arm, you must remove the accessory tray. Using both hands, swing the accessory tray (15) to the left and lift it out of the hole.
When replacing the removable accessory tray to its proper position, ensure that it is flush with the free arm of the sewing machine.
Preparing the machine for bobbin winding
Hold the handwheel (4) firmly and turn the handwheel release disc (3) until it stops in the direction of the arrow. This stops the needle from moving while the machine is winding the bobbin.

natural_image
Close-up of hands operating a circular device with a knob (no visible text or symbols)Placing the bobbin

Switch off the main switch (2)
Place the empty bobbin so that the black pin of the bobbin winder (5) snaps into the slot of the bobbin. The Pfaff logo is facing up.

text_image
Diet Likee Lkei EKer Blue PGet Diet Fert Lkei UMKer MDEe MEFer Elect 1548Push the bobbin to the right
Note: The bobbin can only be wound when it is moved fully to the right.

text_image
100ar Llm 2Kan Bcat 7Gm 8Kan Bcat Llm 2MKan MLcat MEFat Oct 1548
text_image
Au Bz Cz Oxb Bus- Fax-Gan-Net-Got-Dye Map-In Kan Lan-Min-Net-KNin-Net-Cat (Den Uln-Lan PKar Blue-Pkin-Net-Pin-Luo (40kx Mdn) HOPa) PFAFF select 1548 RDTA
text_image
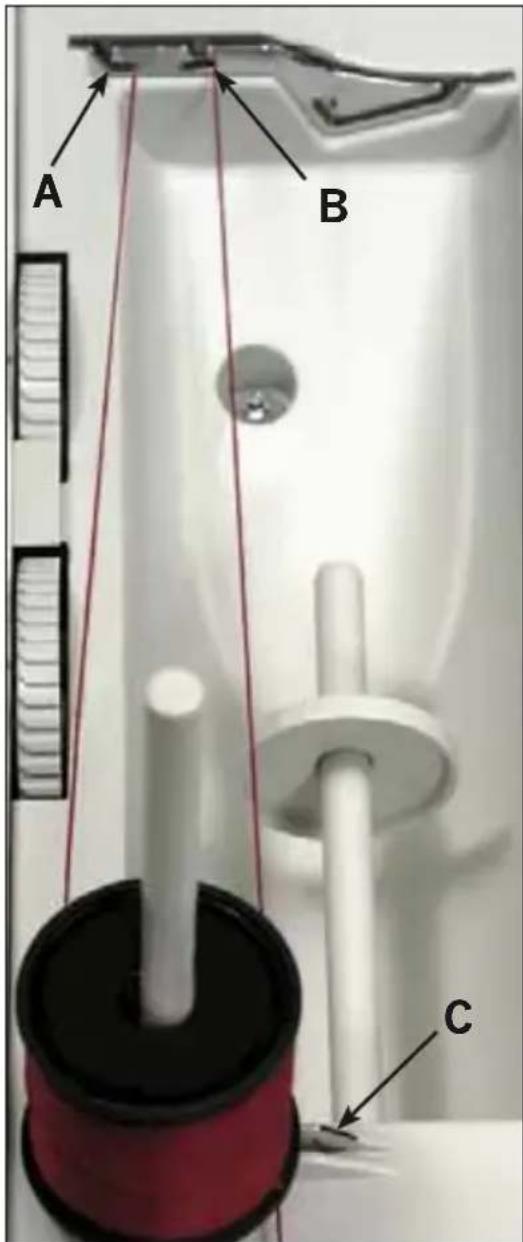
B A CWinding the bobbin from the spool holder
Place the sewing thread on the spool holder (8). To guarantee free movement of the thread and to give additional hold to the thread spool, fi t a spool cap corresponding to the size of the thread spool.
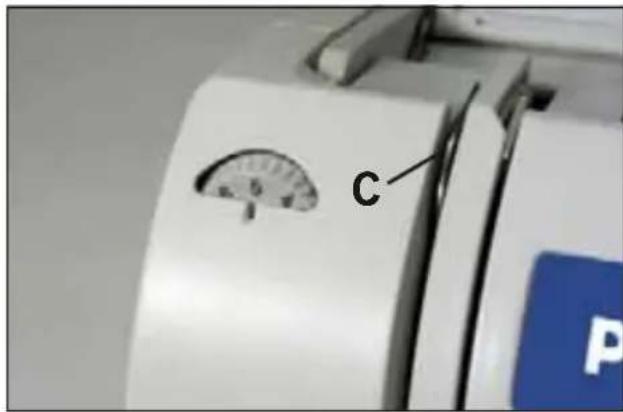
Threading
Place the thread into guide A and pull it through opening B and to the right under the hook C. Wind the thread clockwise a few times around in the bobbin.
Switch on the main switch.
Hold the end of the thread firmly and press the foot control. The winding action will stop automatically as soon as the bobbin is full. Cut the thread, push the bobbin to the left and remove it.
Don't forget:
Turn the handwheel release disk (3) fully back again. Then turn the handwheel (4) towards you until it snaps into place.

text_image
PFAFF select 1548Winding from the second spool holder
Push the second spool holder (7) into its hole and place a spool of thread with the corresponding spool cap on it.
Threading
Place the thread into guide A and pull it through opening B to the right under hook C. Wind the thread clockwise a few times around the bobbin.
Switch on the main switch.
Hold the end of thread firmly and press the foot control. The winding action will stop automatically as soon as the bobbin is full. Cut the thread, push the bobbin to the left and remove it.
Don't forget:
Turn the handwheel release disk (3) back again. Then turn the handwheel (4) towards you until it snaps into place.
TIP: If the machine is already threaded, you can easily wind thread from the second spool holder without having to unthread the machine.
text_image
A B C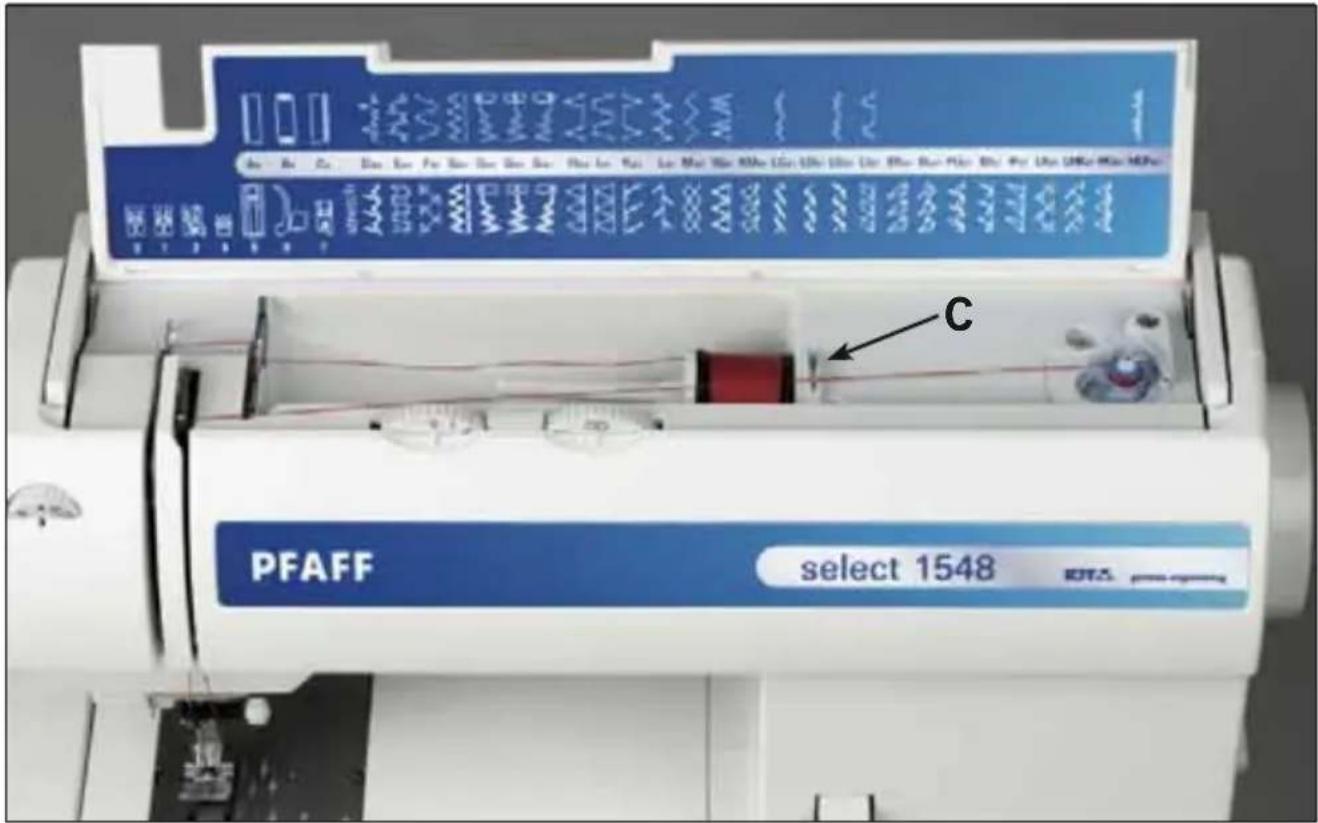
text_image
PFAFF select 1548 select 1548
natural_image
Close-up of a sewing machine needle with red wire and white base (no visible text or symbols)Winding through the needle
Even if the machine has been completely threaded, you can still wind the bobbin.
Raise presser foot lifter (19). Pass the needle thread through the presser foot and downwards; then through the right threading slot (11) and upwards.
Now, pull the thread into the take-up lever from left to right (9). The take-up lever must be positioned at its very top.
Pass the thread to the right under the hook C. Then wind the thread several times around the bobbin. Press the foot control and winding the bobbin.
Don't forget:
Make sure to stop the needle from moving while winding the bobbin (see page 1:4).
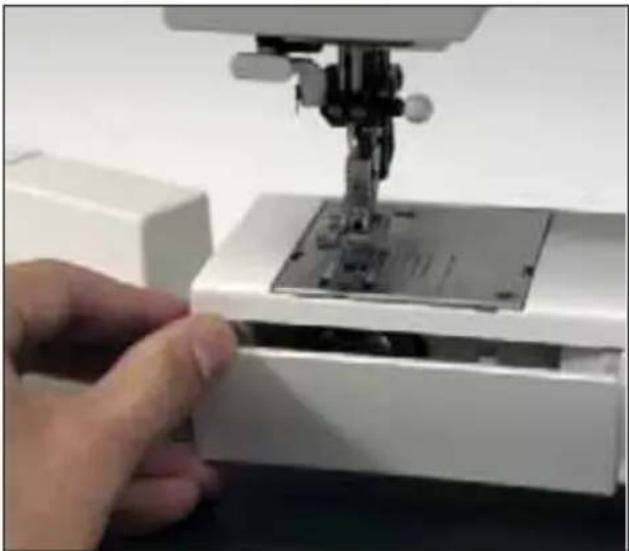
Bobbin Case/Hook Cover

Switch off the main switch.
Hold the side of the bobbin case/hook cover and open it towards you.
natural_image
Close-up of a hand operating a sewing machine needle into a white plastic box (no visible text or symbols)Removing the bobbin case
Raise the bobbin case lever and pull out the bobbin case. Release the lever and remove the empty bobbin.

natural_image
Hand inserting a small mechanical component into a white electronic device (no visible text or symbols)
natural_image
Illustration of a red wire spool and a mechanical component with no visible text or symbols
natural_image
Mechanical component diagram showing a clamping mechanism with labeled section A (no text or symbols beyond label)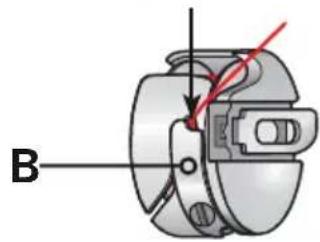
natural_image
Mechanical component diagram showing a housing with labeled point B and red directional arrows (no text or symbols beyond label)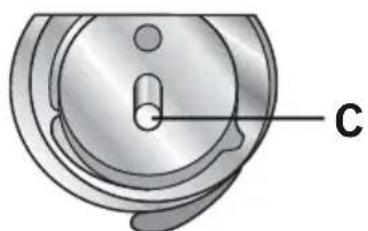
natural_image
Technical diagram of a mechanical component with labeled point C (no text or symbols beyond label)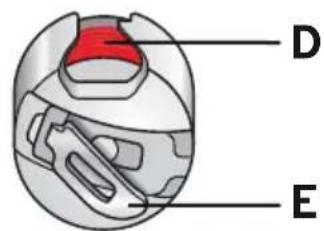
text_image
D EInserting the bobbin
Insert the full bobbin (with the Pfaff logo facing towards the bobbin case) into the bobbin case. In doing so, pull the thread sideways through slot A, then under the tension plate B until it rests in the opening (see arrow).
Check: When you look at the bobbin and pull the thread, the bobbin must turn clockwise.
Inserting the bobbin case
Lift lever E and slide the bobbin case onto the hook pin C as far as it will go. Opening D of the bobbin case must face upwards.
Check: Pull the bobbin thread sharply. The bobbin case must not fall out of the hook.
Threading the needle thread

Switch off the main switch
Raise the presser foot lifter (19) and turn the handwheel until the take-up lever (9) has moved to the top. Place the thread on the spool holder (8) and fit the corresponding spool cap.
Now, using both hands, pull the thread into guide A and under thread guide hook B. Pass the thread through the lefthand threading slot C and downwards. Pull the thread around stop D into the righthand threading slot and upwards E to the take-up lever F.
The thread must be pulled into the take-up lever F from left to right and downwards again in the right hand threading slot. Floss the thread from the side behind one of the two thread guides H.
To thread the needle, stick the thread from front to back through the needle eye.
To thread the needle using the needle threader, please refer to the next page.

text_image
A B F
text_image
F C E G D H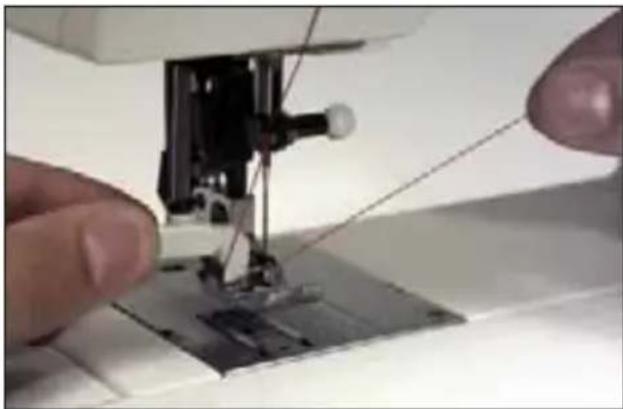
natural_image
Close-up of hands operating a sewing machine needle on a workbench (no visible text or symbols)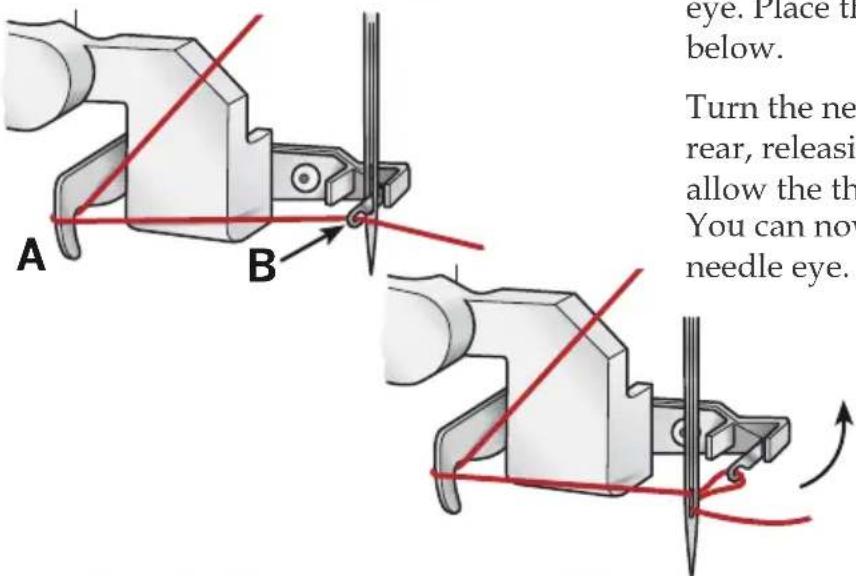
text_image
A B eye. Place th below. Turn the ne rear, releasi allow the th You can now needle eye.Needle threader (Model 1548)
To make threading the needle easier and quicker, use the PFAFF needle threader (13). Lower the presser foot. Turn the handwheel until the needle is at its highest position. Place the needle thread under hook A and hold it taut. Move the needle threader fully downwards and turn it towards the needle so that the small hook B goes through the needle eye. Place the thread into the hook from below.
Turn the needle threader towards the rear, releasing the thread carefully, and allow the threader to move upwards. You can now pull the thread through the needle eye.
text_image
C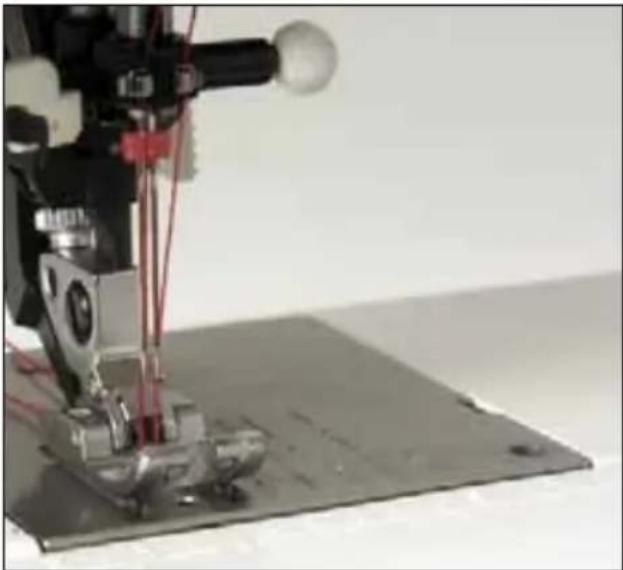
natural_image
Close-up of a sewing machine needle stitching metal fabric on a flat surface (no visible text or symbols)Threading the twin needle
Insert the twin needle.
Fit the second spool holder and place one spool of thread on each holder.
In the left threading slot (11) you will find tension disk C. During threading, make sure that you pass one thread left and one thread right over tension disk C.
Carry on threading in the usual way, but make sure the threads are not twisted with each other.
Pull the threads right and left into thread guide (24) and thread the needles.
Note: You cannot use the needle threader for a twin needle.
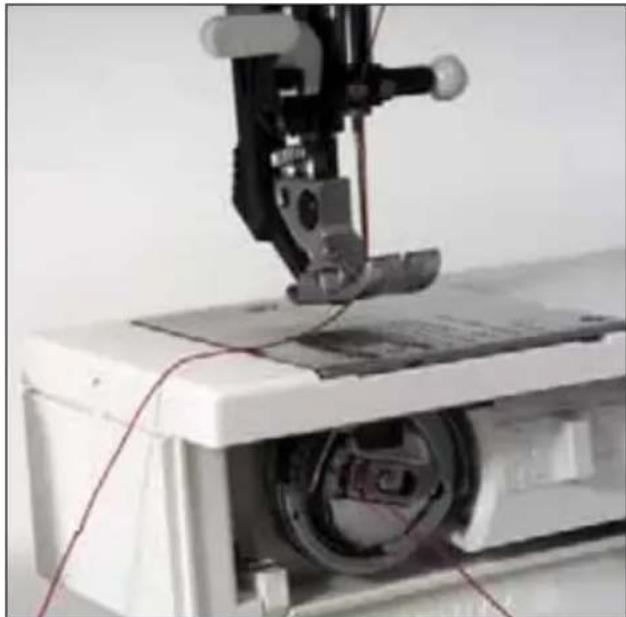
Bringing up the bobbin thread

Switch off the main switch.
Raise the presser foot. Hold the needle thread and turn the handwheel towards you until the needle is in the highest position and the bobbin thread has formed a loop. Pull the needle thread to bring up the bobbin thread.
natural_image
Close-up of a sewing machine needle stitching a circular mechanical component (no visible text or symbols)Bobbin thread
Close the bobbin case/hook cover and pull the thread under the presser foot to the left.
natural_image
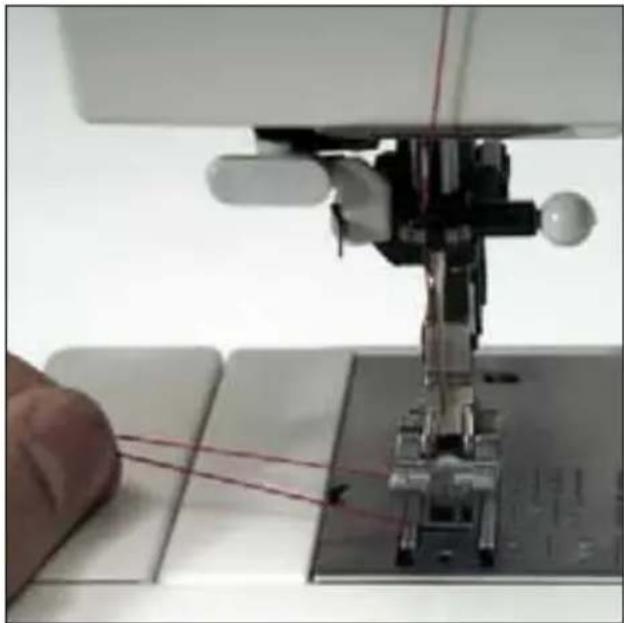
Close-up of a sewing machine needle stitching fabric, with a hand operating the work (no visible text or symbols)Thread cutter
Pull the threads from the back to the front over the thread cutter (12).
natural_image
Close-up of a sewing machine needle and base mount (no visible text or symbols)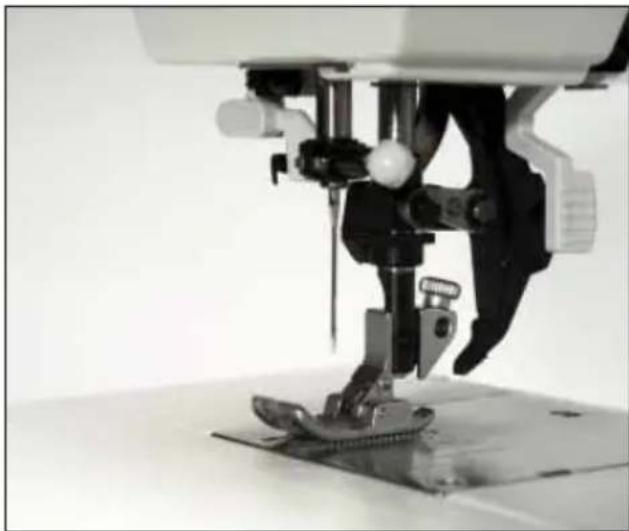
natural_image
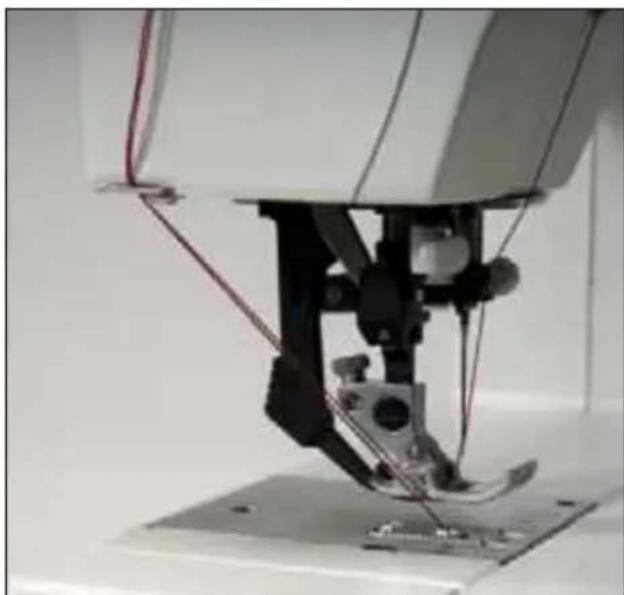
Close-up of a sewing machine needle stitching fabric (no visible text or symbols)Presser foot lifter
The presser foot is raised or lowered with the presser foot lifter (19).
natural_image
Close-up of hands operating a sewing machine needle on a workbench (no visible text or symbols)Removing the presser foot

Switch off the main switch.
Position the needle at its highest point. Press the presser foot upwards at the front and down at the back at the same time so that it disengages from the presser foot holder (14).

natural_image
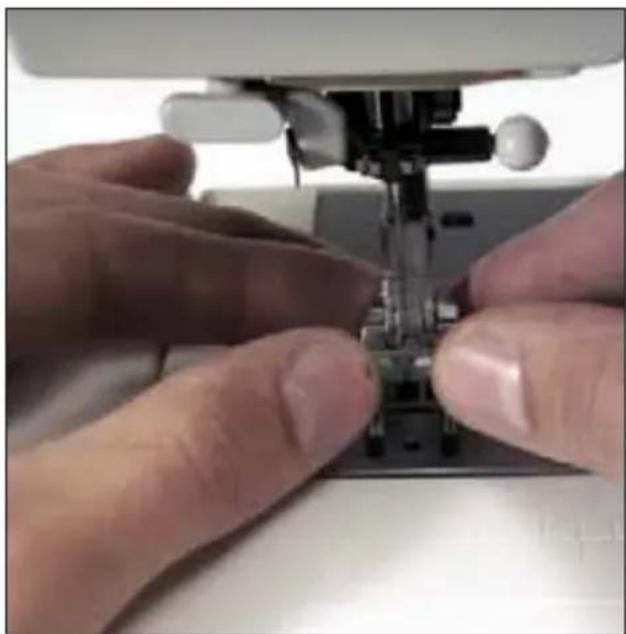
Close-up of a sewing machine needle stitching metal components (no visible text or symbols)Engaging the presser foot
Place the presser foot under the presser foot holder (14) so that when the presser foot lifter (19) is lowered, the pins of the foot engage in the presser foot holder.
Check: Please check that the presser foot is properly engaged by raising the presser foot lifter.
The Integrated dual feed/IDT System
(Models 1538 and 1548)
PFAFF offers the ideal solution for sewing diffi cult materials: the IDT. This system feeds the material from the top and bottom simultaneously as is done in industrial sewing machines. The fabric is fed precisely. When sewing light or diffi cult materials such as silk and rayon fabrics, the IDT prevents seam puckering.
Engaging the IDT
Important! For all sewing jobs with the IDT, only use sewing feet with cutout at the back.
Raise the presser foot. Then push the IDT (17) downwards until it snaps into place.
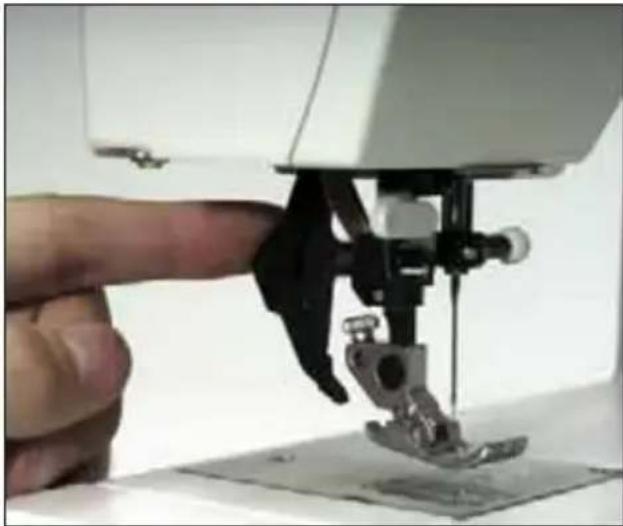
Disengaging the IDT
Hold the IDT with two fingers at the marked places. Push the IDT (17) down a little and out to the rear, and let it move slowly upwards.
The even feeding action also ensures perfect matching of checked and striped fabrics.
natural_image
Close-up of a sewing machine needle being adjusted, with a finger pointing to the component (no visible text or symbols)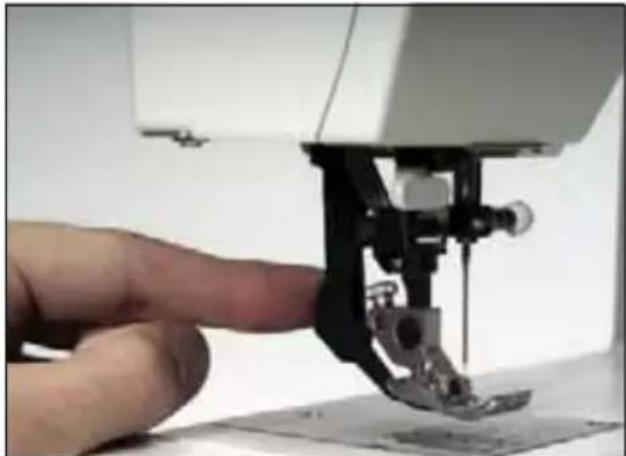
natural_image
Close-up of a hand operating a sewing machine needle, no visible text or symbols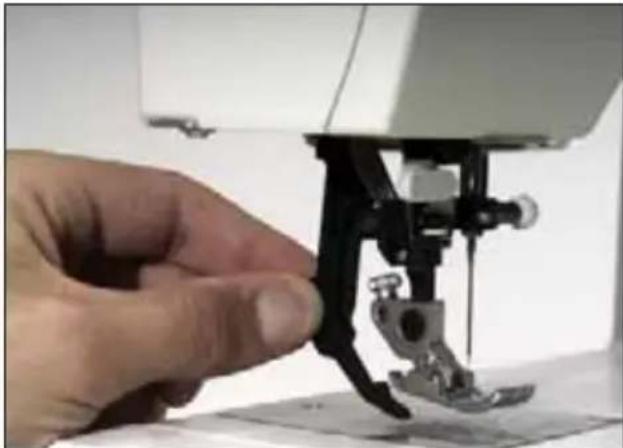
natural_image
Close-up of a hand operating a sewing machine needle, no visible text or symbols
natural_image
Abstract geometric pattern with blue and white diagonal stripes (no text or symbols)
natural_image
Close-up of hands operating a sewing machine needle on a fabric or mechanical component (no visible text or symbols)
Changing the needle

Switch off the main switch.
To remove: Lower the presser foot and move the needle to its highest point. Now loosen the needle screw (18) and pull the needle down.
To insert: The fl at side A of the needle must face to the rear. Lower the presser foot and insert the needle, pushing it up as far as it goes. Hold the needle and tighten the needle screw (18) firmly.
text_image
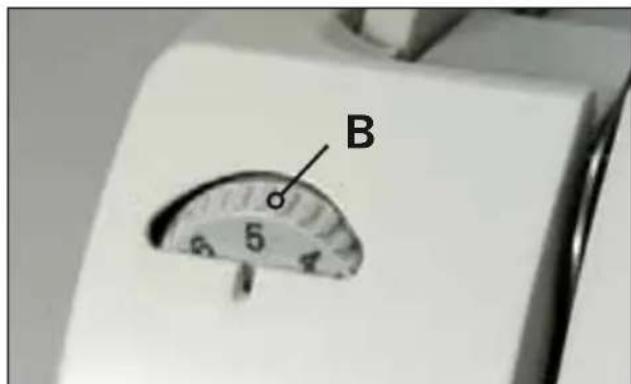
B 5 6 4Setting the needle thread tension
Set the required needle thread tension (10) with the help of the mark B.
The normal setting for sewing is 4 to 5.
For free-motion sewing, darning and buttonhole set the tension between 2 and 3.

natural_image
Close-up of a mechanical device with a circular component and a labeled component 'C' (no readable text or symbols beyond the label)Dropping the feed dog
For certain sewing work, e.g. darning or free-motion sewing the feed dog has to be dropped.
To do this, open the bobbin case/hook cover and move slide C fully to the right. Now the feed dog is dropped.
Stitch width dial
The stitch width can be adjusted with this dial (26). When selecting the width, the needle must not be in the material.
Basic setting: Turn the stitch width knob (26) to the symbol ▶ (maximum stitch width).
Exception: Straight stitch is sewn with stitch width 0.
In chapter "2. Utility stitches and practical sewing", you will find recommendations in the tables for the stitch width selection of individual stitches. During sewing you can also change the stitch width.
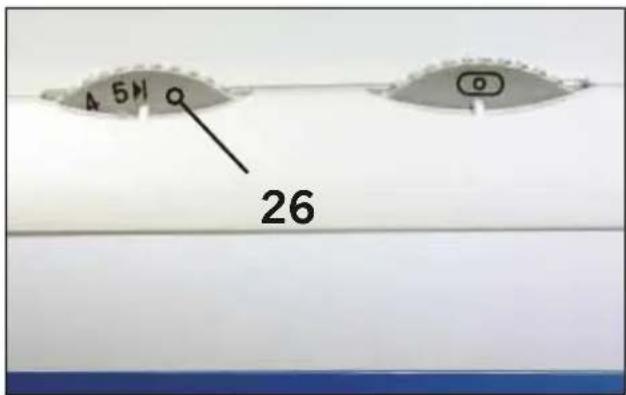
text_image
5H 26Needle position dial
In the center needle position 14 additional needle positions can be selected by turning the needle positioning dial (27) in increments to the left or right.
The furthest needle position to the left can be achieved by turning the dial (27) as far as it will go to the right. The furthest needle position to the right can be achieved by turning the dial as far as it will go the left. When the position of the needle is being changed, the needle must not be in the material.
Note: If you have selected the right needle position, you can now use the width dial (26) to increase or reduce the width of the left side of the stitch. The reverse applies also for needle position to the left.

text_image
5H 27
text_image
20 G H A B C
text_image
21 3 2 G H A B C D E
text_image
A G H K A B C D E 3 4/2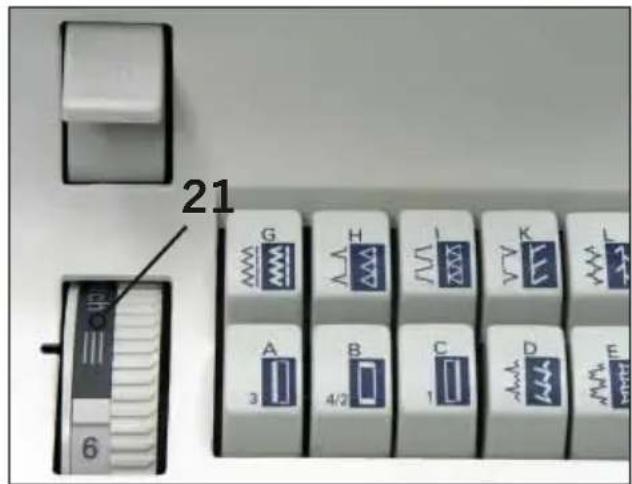
text_image
21 6Reverse sewing
The machine sews in reverse only as long as the reverse sewing button (20) is pressed.
Stitch length adjustment dial
With the stitch length adjustment dial (21) you can adjust the stitch length between 0 and 6 mm by turning the point marking on the button to the required length.
Between the numbers 0 and 1 you will find the "buttonhole" symbol. This area is the optimum stitch density for sewing buttonholes and embroidering.
The further you turn the dial to 0, the higher the density of the stitch.
To sew stretch stitches (dark background), you must turn the stitch length adjustment dial (21) as far as it will go in the grey area.
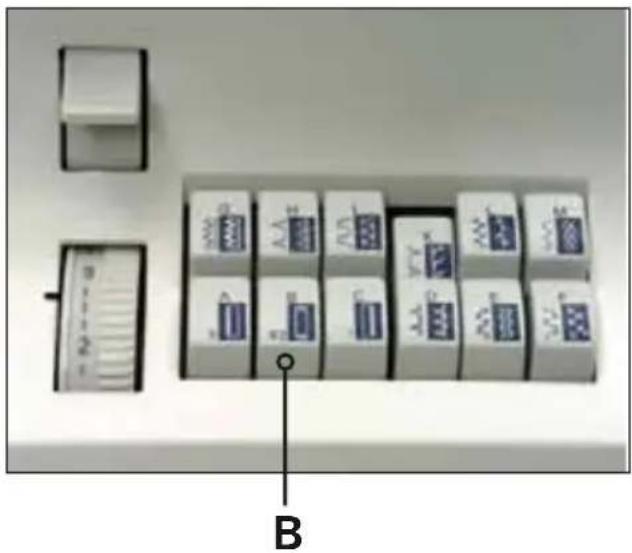
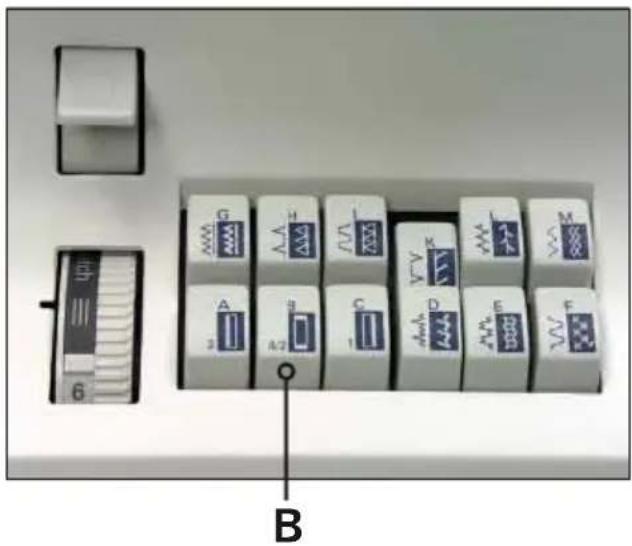
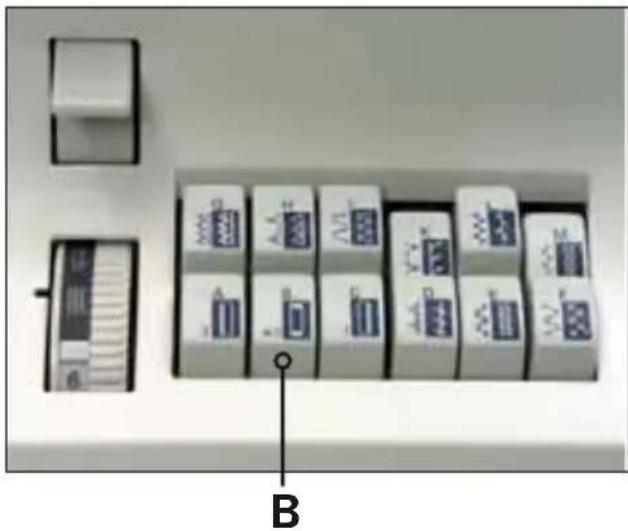
Stitch selection, Easy Select System
Utility stitches
Each stitch has been given a letter that you can find on the push button controls. By pressing the correct button, the stitch is selected and the machine is ready to sew. Button B releases the buttons that have been activated.
Under the lid (6) you will find the stitch table with all the utility stitches and stitch combinations.
text_image
BStretch stitches
All the stitches with a colored background are stretch stitches, i.e. they are suitable for stretch material. Press the selected button down and turn the stitch length dial (21) as far as it will go in the grey area.
Button B releases the button that have already been selected.
text_image
6 A B C D E F G H I J K L MUtility and stretch stitch combinations
By pushing two or several buttons you can create combinations in the utility stitch range.
The stitch length dial can either be in the normal sewing range or in the stretch range.
All the stitch combinations are illustrated on the stitch table in the lid. You can release buttons that are already activated with button B.
natural_image
Interior view of a room with numbered compartments and a labeled component 'B' (no readable text or symbols beyond label)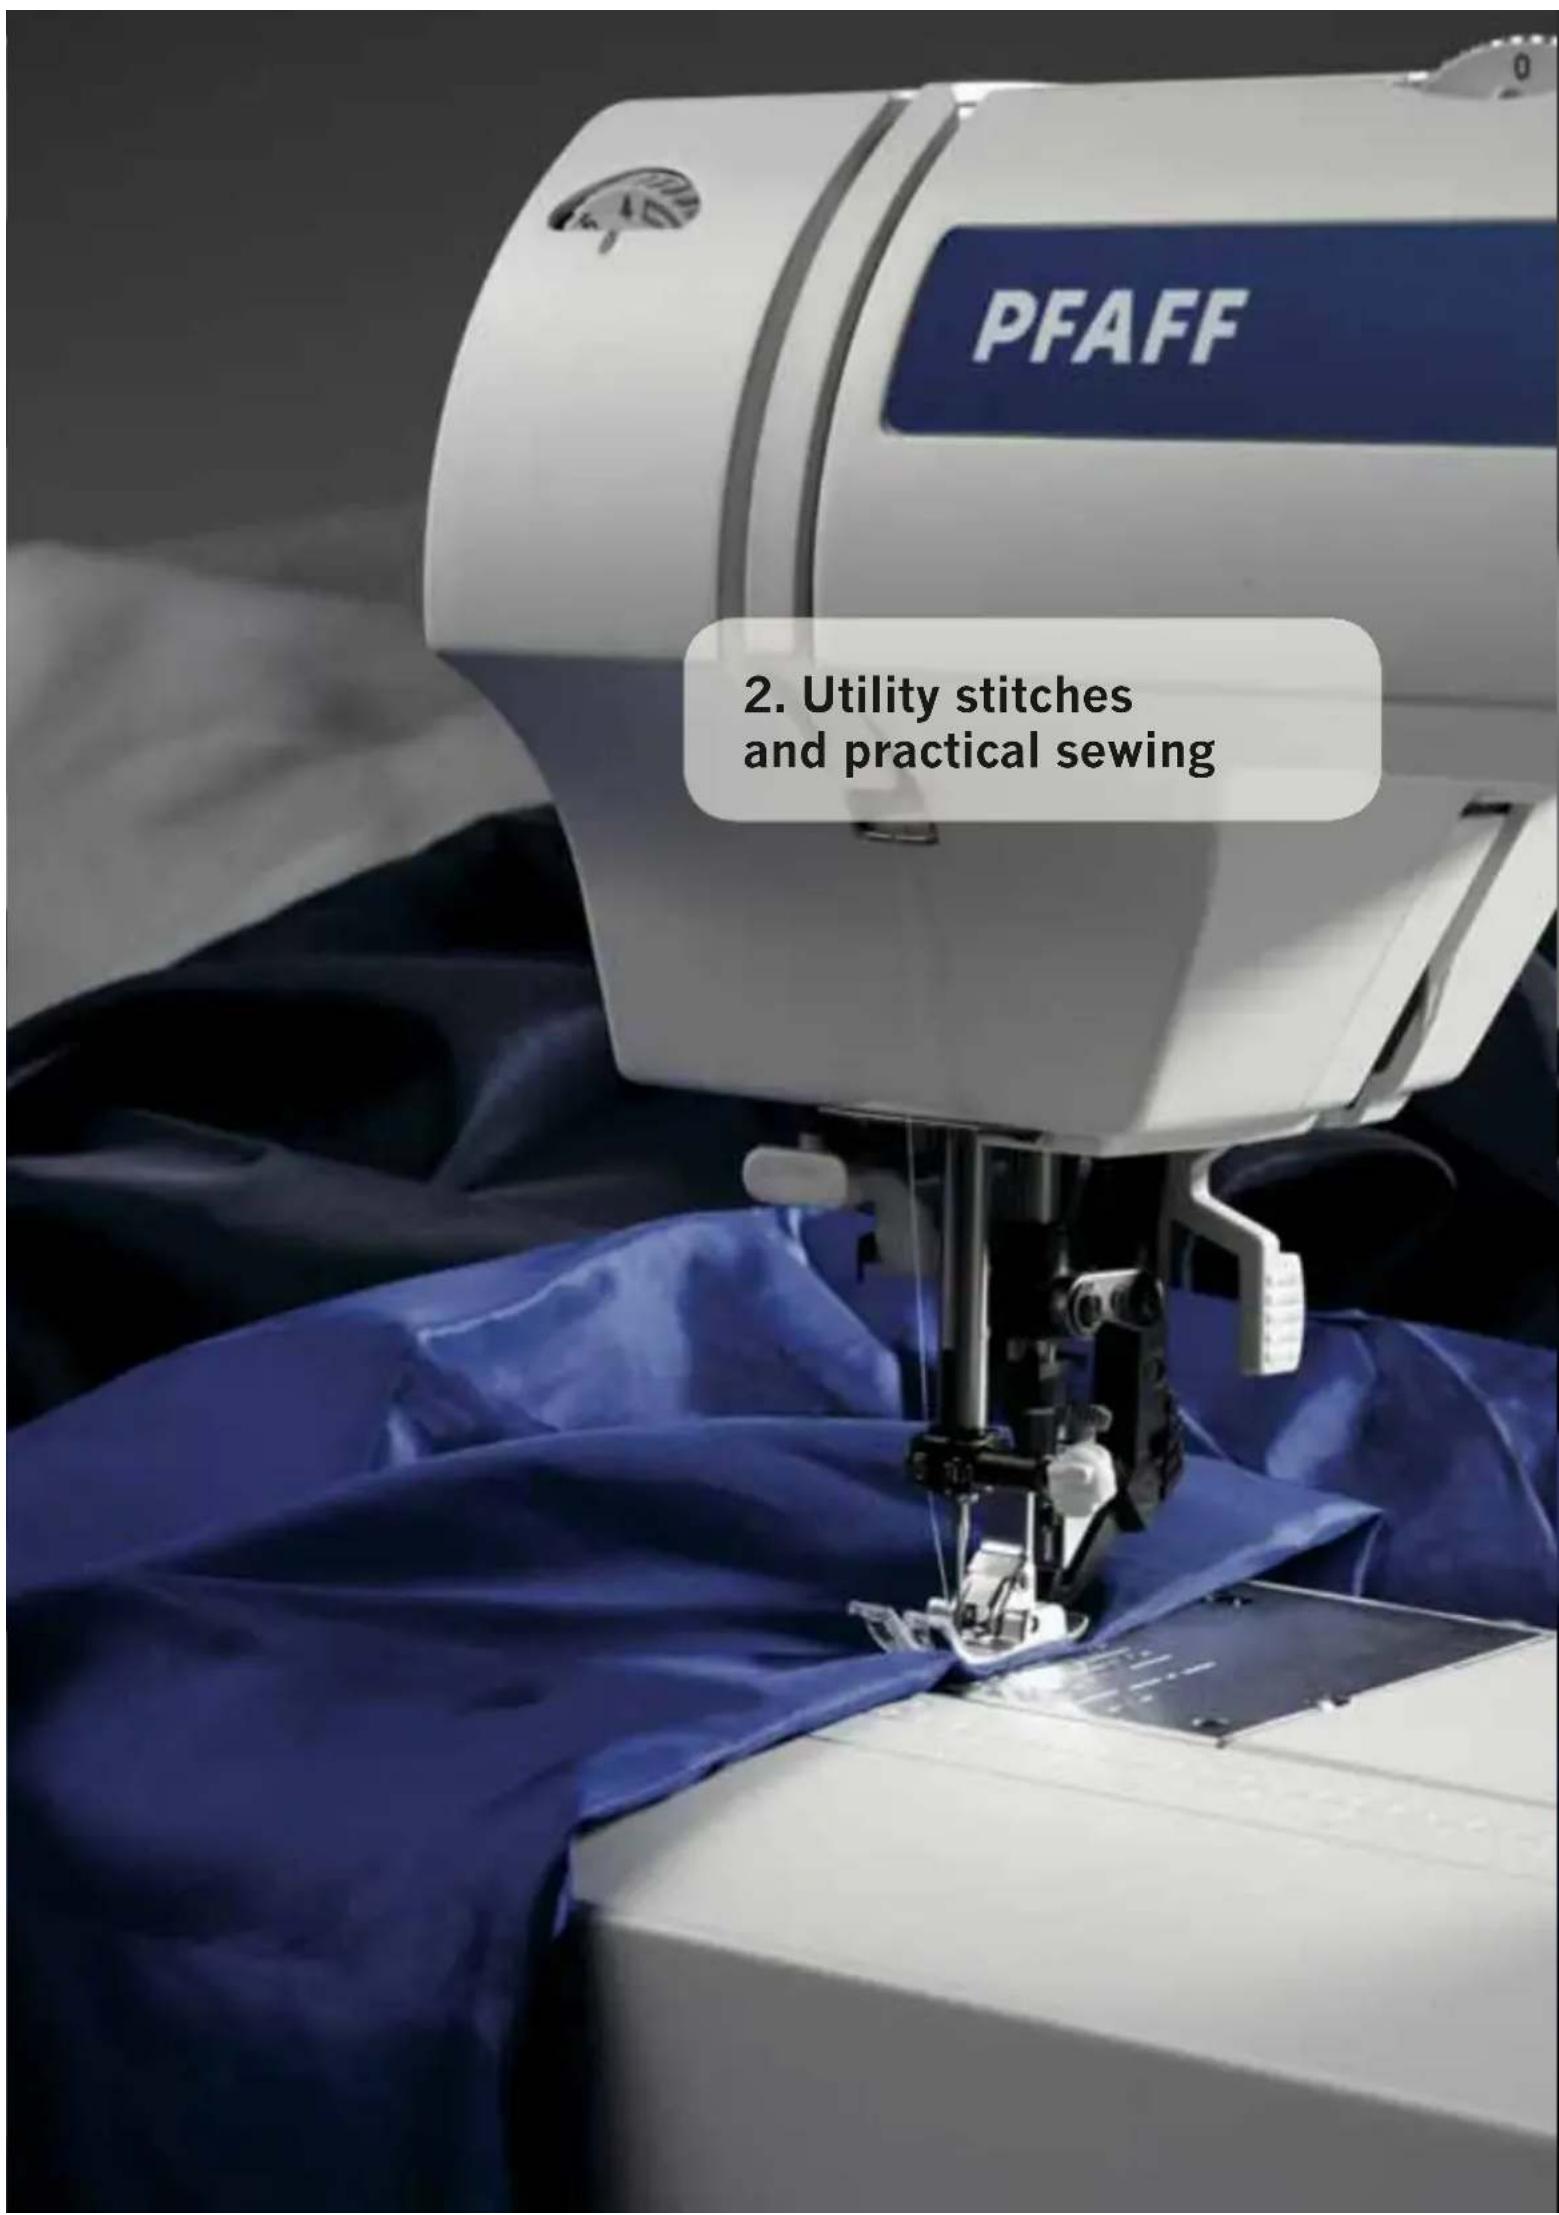
text_image
PFAFF 2. Utility stitches and practical sewing- Utility stitches and practical sewing
Explanation of the sewing chart
The following charts show the recommended settings for each stitch or technique.
These charts also provide you with instructions that are necessary when sewing the selected stitches.
The choice of the sewing foot, the setting of the needle thread tension and whether to use IDT or not.
Always use the "center" needle position if not otherwise specified in the instructions.
| stitch | ||||||
| 1548 | ||||||
| 1538 | ||||||
| 1528 | - |
stitch
Stitch number
Stitch width in mm

Stitch length in mm
IDT on =
off =


Thread tension

Presser foot number
natural_image
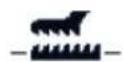
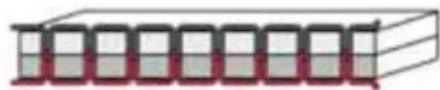
Pure diagram of a 3D rectangular block with internal square cutouts, no text or symbols presentPerfect tension

natural_image
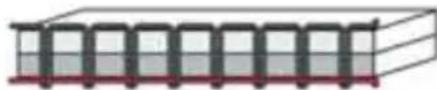
Pure diagram of a rectangular structure with red and green elements, no text or symbols present.Too high tension
natural_image
Pure structural diagram of a multi-story building facade with no text or symbolsToo low tension

text_image
A B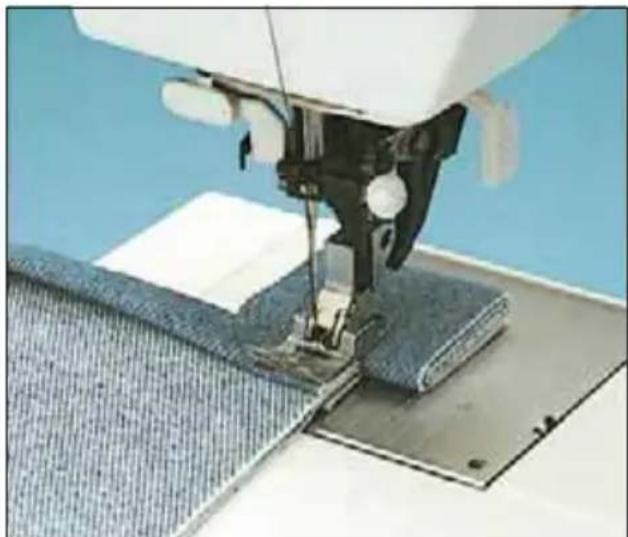
natural_image
Close-up of a sewing machine needle stitching fabric, no visible text or symbolsNeedle thread tension
To get perfect sewing results, the needle and bobbin thread tensions must be perfectly tuned to each other. The normal setting for utility stitches is in the range of 4-5.
Check the tension with a wide zigzag stitch. The threads must be interlaced between the two fabric pieces.
If the needle thread tension is too high the threads are interlaced above the top fabric. If the needle thread tension is too low, the threads are interlaced below the lower fabric.
The adjustment of the needle thread tension is described on page 1:15.
Topstitching
Straight stitch G can be sewn using any of 15 various needle positions in such a way that you can always guide the sewing foot along the fabric edge for top-stitching work. The top-stitch needle position is determined by the needle position dial. If you wish to top-stitch farther from the fabric edge, simply guide the fabric along the guide marks on the needle plate or use the edge guide (standard accessory No.8). The edge guide is inserted into hole A and is secured with fi xing screw B.
Sewing aid for thick seams
To ensure a consistent feed when beginning sewing at a thick seam, we recommend supporting the presser foot on a piece of fabric of the same height as the workpiece
natural_image
Plain white background with a vertical dashed line dividing the image (no text or symbols)| stitch | ||||||
| 1548 | G | 0 | 2,5 | ● | 3-5 | 0/1 |
| 1538 | G | 0 | 2,5 | ● | 3-5 | 0/1 |
| 1528 | G | 0 | 2,5 | - | 3-5 | 0/1 |
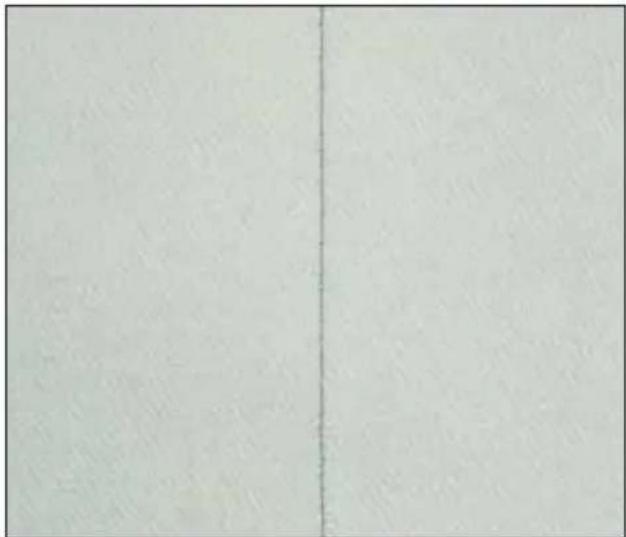
Straight stitch
Stitch G is the basic straight stitch. The stitch length can be increased up to 6 mm.
It is easier to do some sewing jobs by changing the needle position, e.g. top-stitching a collar or sewing in a zipper. You can select up to 15 different needle positions (see page 1:16).
Please ensure that the needle is at its highest position when adjusting the needle position.

text_image
A B C
natural_image
Close-up of a sewing machine needle stitching red fabric (no visible text or symbols)| stitch | ||||||
| 1548 | G | 2-▶ | 1-2 | ● | 3-5 | 0/1 |
| 1538 | G | 2-▶ | 1-2 | ● | 3-5 | 0/1 |
| 1528 | G | 2-▶ | 1-2 | - | 3-5 | 0/1 |
Zigzag stitch
In addition to overlock stitching, zigzag stitch G, stitch width 5▶, is also suitable for overcasting various materials. In this case, the material should only be positioned halfway under the sewing foot.
When overcasting the edge, make sure the needle goes into the material and over the edge alternately.
The width for overcasting can be reduced up to 2 mm.
For overcasting diffi cult materials, blind stitch foot No. 3 is very useful. When sewing, the thread lies over pin C, thus preventing curling of the fabric edge. In this way you can sew beautiful smooth seams.
The raw edge must be guided along edge guide B. You can adjust this edge guide with adjusting screw A.
Important: When the blindhem stitch foot is used for overcasting with the zigzag stitch, select the right needle position. Choose a stitch width in the range of 3-5 mm (do not use any other needle position).

text_image
Cropped image showing a red zigzag line and a vertical white line, likely from a technical or engineering drawing.| stitch | ||||||
| 1548 | D/H | 5-▶ | 1-2 | ● | 3-5 | 0/3 |
| 1538 | D/H | 5-▶ | 1-2 | ● | 3-5 | 0/3 |
| 1528 | D/H | 5-▶ | 1-2 | - | 3-5 | 0/3 |
Blindhem stitch
Blindhem stitch H is best suited for invisible hems; sewing by hand is no longer necessary. For wool fabrics Blindhem stitch H and for stretch fabrics Blindhem stitch D.
- Serge the edge of the hem
- Fold the edge inwards by the hem width.
- Now unfold the hem again so that the hem edge protrudes by about 1 cm
- Place the fabric under the sewing foot so that the crease line runs along edge guide B.
- Using the needle positioning knob 27, select the needle position to the right Ⓞ.
- When the needle enters the crease line, it must only pick up one fiber of the fabric.
Blindhem stitch (elastic)
Stitch D or H is a blind stitch for woven or elastic fabrics. The hem is sewn and overcast at the same time.

text_image
A BRemember!
If the stitches are visible on the right side, adjust edge guide B by turning adjusting screw A.
Tip: If you chose to sew Blindhem stitch H or Blidhem stitch D with stitch width less than 5, use foot nr.0.
natural_image
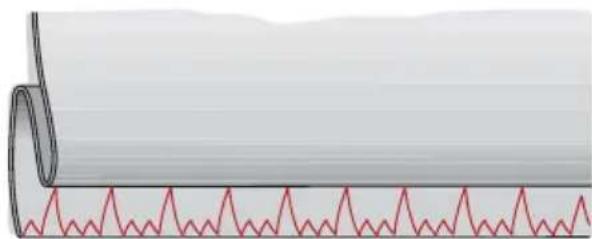
Diagram of a rolled-up cable with a red zigzag line beneath it, no text or symbols present.Stitch D
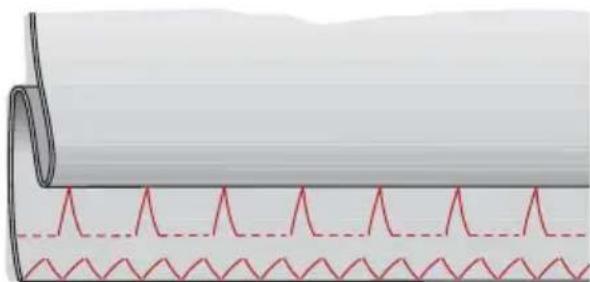
natural_image
Diagram of a waveform pattern with red oscillations and dashed lines, no text or symbols presentStitch H

natural_image
Close-up of layered material with wavy seam and pink texture (no text or symbols)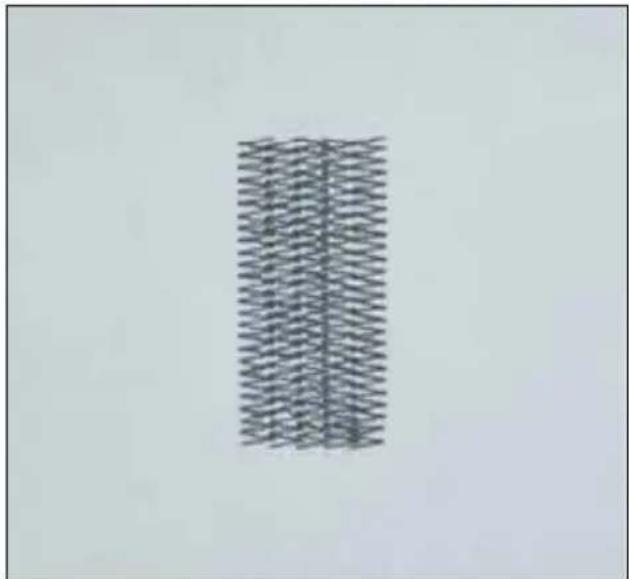
natural_image
Pure diagram of a vertical structure with repeating zigzag patterns, no text or symbols present| stitch | ||||||
| 1548 | M | 5-▶ | 1-2,5 | ● | 3-5 | 0/1 |
| 1538 | M | 5-▶ | 1-2,5 | ● | 3-5 | 0/1 |
| 1528 | M | 5-▶ | 1-2,5 | - | 3-5 | 0/1 |
Elastic stitch
Because of its high elasticity, this stitch can be used for sewing elastic on swimwear, skirts or lingerie.
• Mark elastic and fabric in quarters.
- Pin elastic to fabric at quarter markings.
- Place fabric and elastic under sewing foot.
- Stretch elastic to fit the fabric. Begin sewing.
Note: When stretching elastic, make sure to stretch from the front and back of the sewing foot.
| stitch | ||||||
| 1548 | M | 5-▶ | 0,2-1,5 | ● | 3-5 | 0/1 |
| 1538 | M | 5-▶ | 0,2-1,5 | ● | 3-5 | 0/1 |
| 1528 | M | 5-▶ | 0,2-1,5 | - | 3-5 | 0/1 |
Darning with the elastic stitch
Darn with the elastic stitch for repairing damaged areas.
- Sew over the damaged area in rows until it is well covered. Take care to ensure that the rows overlap.
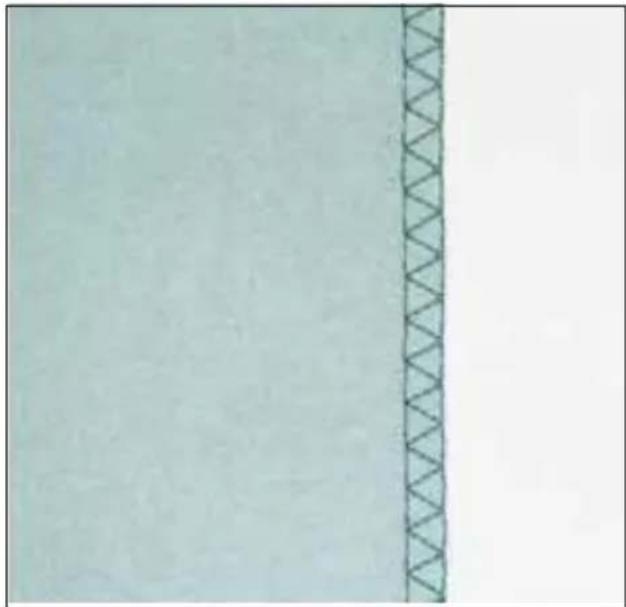
What is an overlock stitch?
For stretch fabrics, the select models offer overlock stitches which sew two fabric layers together and overcast simultaneously. They are more elastic than normal seams, very durable and quickly sewn.
Tip: We recommend using blindhem stitch foot No. 3 when sewing overlock seams. It guides particularly well and prevents the seam from puckering even on wide seams. Also remember to set the red marker on the foot to the right position. This to guide the fabric edge.
natural_image
Simple line drawing of a vertical wall with diagonal hatching and a horizontal base (no text or symbols)
natural_image
Yellow background with a vertical hatched line on the right edge (no text or symbols)| stitch | ||||||
| 1548 | K | 5-▶ | Stretch | ● | 3-5 | 0/3 |
| 1538 | K | 5-▶ | Stretch | ● | 3-5 | 0/3 |
| 1528 | K | 5-▶ | Stretch | - | 3-5 | 0/3 |
Open overlock stitch
With this stitch, thicker fabrics and fabrics which do not fray too much can be sewn together perfectly.
Tip: Make sure that the needle sews to the right of the fabric just over the edge and not in it.
| stitch | ||||||
| 1548 | I | 5-▶ | Stretch | ● | 3-5 | 0/3 |
| 1538 | I | 5-▶ | Stretch | ● | 3-5 | 0/3 |
| 1528 | I | 5-▶ | Stretch | _ | 3-5 | 0/3 |
Closed overlock stitch
The closed overlock stitch is perfect for sewing jersey knits. You can also sew sleeve cuffs and knit collars which are well-sewn and long-lasting.
Tip: Ensure that the sleeve cuff is stretched while it is being sewn.
Remember!
When overlocking, if you select stitch width other than 5▶ make sure the needle does not strike the bar of sewing foot 3.
Shell-edging
Shell-edging is attractive on thin, soft fabrics such as silk and Bastiste.
It is often used as a decorative edging on lingerie.
The higher the needle thread tension, the deeper the shell edge scallop.
- Serge the fabric edge and iron the seam allowance to the left.
• Take care that the fabric only runs half underneath the presser foot while sewing. This intensifi es the effect of the shell-edging.
natural_image
Close-up of a textured gray surface with a faint horizontal line and small white specks (no text or symbols)| select | ||||||
| 1548 | K | 4,5 | 1,5 | ● | 4-5 | 0/1 |
| 1538 | K | 4,5 | 1,5 | ● | 4-5 | 0/1 |
| 1528 | K | 4,5 | 1,5 | - | 4-5 | 0/1 |
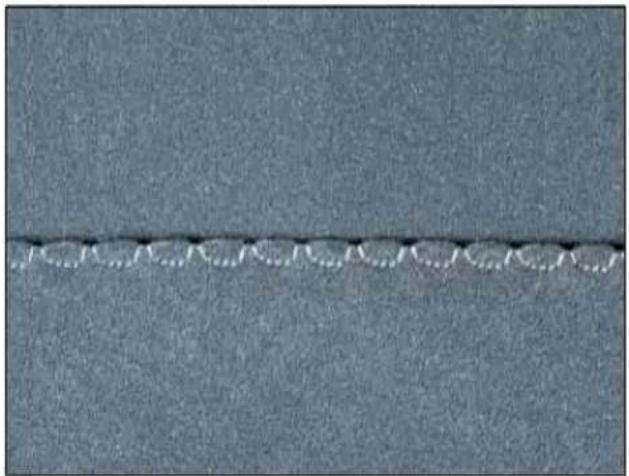
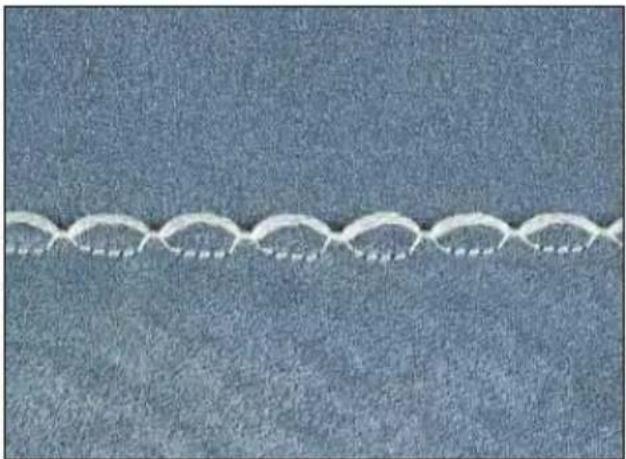
Tip: By sewing a colored woollen or 12 wt. cotton thread into the seam you strengthen the shell-edge while also creating an attractive contrast in the seam. A fine fabric of another color can also be used instead of a woollen thread.
Just lay the heavy thread against the edge of the fold and let the zigzag swing of the stitch catch the heavy thread forming a scallop.
natural_image
Close-up of a white knitted fabric edge against a dark blue textured background (no text or symbols)Buttonholes
Sewing buttonholes is very easy with all the models with push button controls since the fabric does not have to be turned.
Buttonholes are generally sewn onto a piece of doubled fabric. However, for some fabrics, e.g. silk, organza and viscose, it is necessary to use stabilizer to prevent the fabric from contracting while sewing.
To produce beautiful seams, embroidering or darning threads are ideal.
Mark the starting point of the buttonhole either with a magic pen or dress pin, and always sew a sample buttonhole fi rst.
Note: Before starting any buttonhole, always push the guide of the buttonhole foot fully to the front, i.e. so that the red arrow is at the first red mark. The red marks are arranged at an interval of 0.5 cm. They are a guide when determining the length of the buttonhole.

natural_image
Diagram of a tool interacting with a red-hatched surface, showing motion direction (no text or symbols)Carfully cut open your buttonhole with scissors or a seam ripper.
natural_image
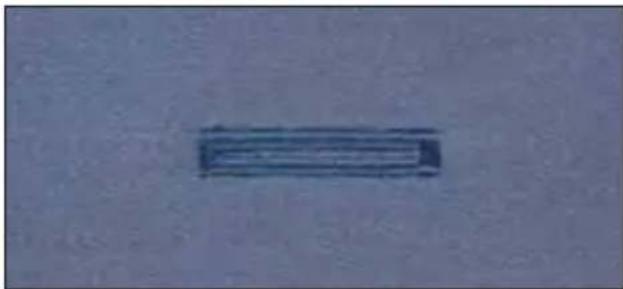
Simple rectangular object with a horizontal line inside, no visible text or symbols| stitch | ||||||
| 1548 | CBA | 5-▶ | ○ | 0/1 | ||
| 1538 | CBA | 5-▶ | ○ | 0/1 | ||
| 1528 | CBA | 5-▶ | ○ | 0/1 |
Standard buttonhole
- Insert the buttonhole foot and slide the foot forward as far as it will go.
- Select stitch 1 (C) and sew the right side of the buttonhole to the required length. Clip the top thread after a few stitches.
- Select stitch 2 (B) and hold the button down as you sew a few bartacks.
- Select stitch 3 (A) and sew the left side of the buttonhole until it matches the previous side in length.
- Select stitch 4 (B) and hold the button down as you sew a few bartacks.
- Release button B and sew a couple stitches to secure your buttonhole.
- Carefully cut open your buttonhole.
Tip: For fine buttonholes, you can reduce the buttonhole width with the stitch width dial (26) down to approx. 3 mm. Use the center needle position ☐.
natural_image
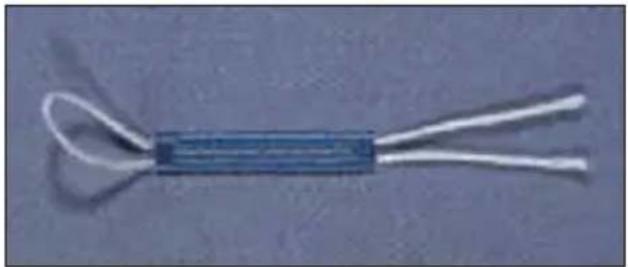
Close-up of a blue rectangular object with two white wires attached, resembling a coiled wire or connector (no text or symbols visible)Standard buttonhole with gimp thread
To sew especially durable buttonholes, on heavy fabrics, knits or sportswear, we recommend using a gimp thread.
On knits the gimp thread is particularly important to prevent the buttonhole from stretching.
- Lay the gimp thread over the rear protrusion A and pass the thread ends underneath the presser foot towards the front.
- Clamp the threads to the left and right of protrusion B.
- Slide the buttonhole runner as far forwards as possible and sew the buttonhole as described for your select model.
- Pull the loop of the gimp thread into the buttonhole and cut the threads.

natural_image
Mechanical assembly diagram showing a component with red and gray parts, labeled A and B (no text or symbols present)
natural_image
Close-up of a sewing machine needle stitching a green fabric background (no text or symbols visible)| stitch | ||||||
| 1548 | G | 4 | - | ○ | 2-3 | - |
| 1538 | G | 4 | - | ○ | 2-3 | - |
| 1528 | G | 4 | - | - | 2-3 | - |
Sewing on buttons
With zigzag stitch G (stitch width 4 mm) you can sew on two and four hole buttons.
- Remove the sewing foot and lower the feed dog.
- Turn the handwheel towards you and move the button so that the needle enters the left hole in the button.
- Now lower the presser foot lifter; this holds the button in place.
- Sew on the button. Take care to ensure that the needle also enters the right-hand hole in the button.
Securing
- Select straight stitch by turning the width dial (26) to 0.
- Change the needle position with the needle position dial (27) so that the needle enters one of the two holes.
- Sew a few securing stitches.

natural_image
Woman in blue shirt and white shorts holding a cushion with a large white and purple graphic (no text or symbols visible)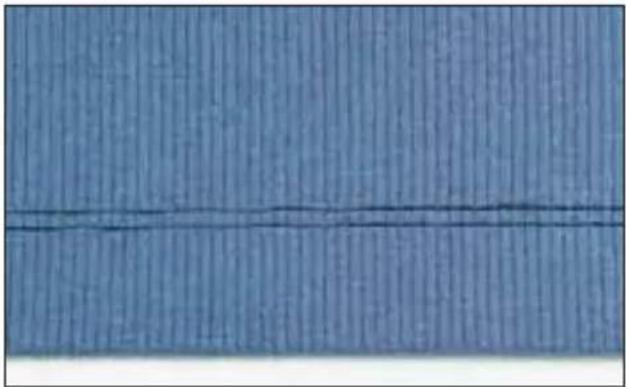
natural_image
Blue textured surface with vertical striations and a horizontal dark line (no text or symbols)| stitch | ||||||
| 1548 | G | 0 | 3 | ● | 3-5 | 0/1 |
| 1538 | G | 0 | 3 | ● | 3-5 | 0/1 |
| 1528 | G | 0 | 3 | - | 3-5 | 0/1 |
Hemming with the twin needle
Use the twin needle to make beatiful topstitch seams.
Using the twin needle you can add a professional touch to hems on stretch fabrics such as T-shirts, knitted articles or cycling shorts both quickly and easily.
Twin needles are available in different widths. The traditional width for topstitching is 4 mm. To prevent the needle from striking the needle plate, you must make sure that you select the center needle position ☐.
- First fold and iron the width of fabric desired for the hem.
- Then topstitch the hem from the right side.
• Finally, cut the protruding hem edge back to the seam.
Use only a stretch needle when sewing stretch fabric!
Tip: On difficult fabrics such as ribbed knitwear it is advisable to baste the hem before topstitching it.
On page 1:11 you will find a description of how to thread the twin needle.
text_image
Technical diagram of a sewing machine with labeled parts D, E, F, G, and C
text_image
Technical diagram showing a mechanical assembly with labeled parts A and B, likely illustrating a component or assembly.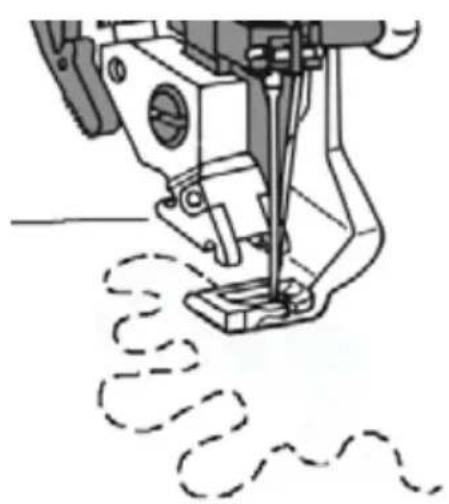
natural_image
Line drawing of a sewing machine needle stitching fabric (no text or symbols)| stitch | ||||||
| 1548 | G | - | - | ○ | 2-3 | 6 |
| 1538 | G | - | - | ○ | 2-3 | Optional |
| 1528 | G | - | - | - | 2-3 | Optional |
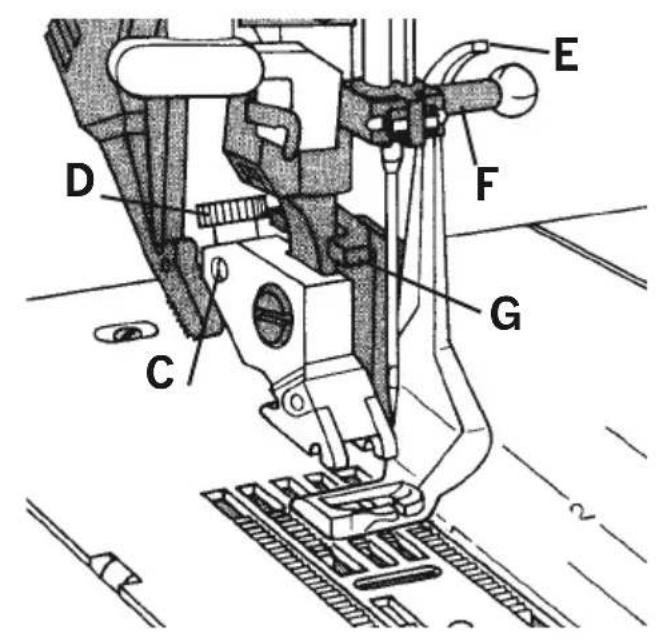
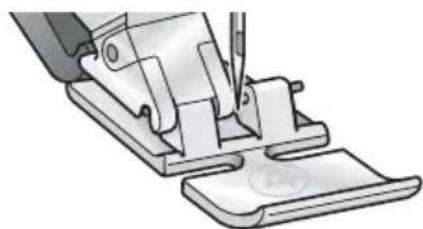
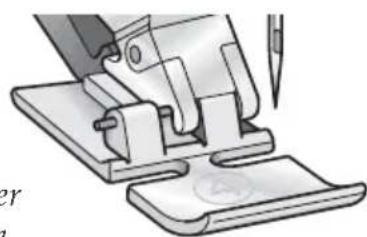
Free Motion Sewing
Insert the darning foot:
Loosen screw D. Set the needle at its highest point and push the pin of the darning foot fully into the hole C of the sewing foot holder. When doing this, the guide fork G should position itself around the presser bar. The lever E must be behind the fi xing screw F. Now tighten screw D.
Free Motion Position:
Lower the presser foot lifter (A) while pushing it lightly to the rear. This snaps the presser foot lifter into a notch (B) on the back side of the sewing machine into the free motion position.
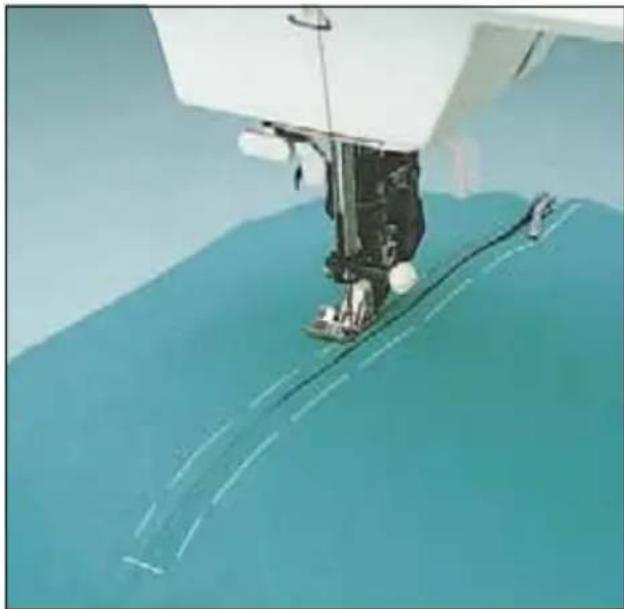
- Drop the feed dog.
- Select a straight stitch or a zigzag stitch.
- Keep an even speed, manually move your fabric.
Tip: For even stitches, move your fabric at a smooth even flow. Move the fabric so the stitching does not cross.

natural_image
Woman in blue and white outfit sitting on a bed with abstract graphic patterns (no text or symbols visible)Sewing on zippers
There are various methods of sewing on zippers. For skirts, we recommend the fully concealed zipper, for men's and ladies' trousers the semi concealed zipper. Various zippers are available. We recommend using a metal zipper for strong fabrics such as denim. For all other fabrics we recommend a plastic zipper.
It is important for all types of zippers to sew very close to the edge of the teeth of the zipper. This is why it is possible to insert the zipper foot either on the right or the left of the presser foot holder.
You can set the needle so that it enters close to the edge of the zipper teeth by using one of the 15 available needle positions. If the foot is engaged to the right, the needle must only be moved to the right. If the foot is engaged left, the needle must only be moved to the left.
| stitch | ||||||
| 1548 | G | 0 | 3 | ● | 3-5 | 4 |
| 1538 | G | 0 | 3 | ● | 3-5 | 4 |
| 1528 | G | 0 | 3 | - | 3-5 | 4 |
natural_image
Illustration of a sewing machine needle stitching a metal bracket (no text or symbols visible)Left presser foot position
natural_image
Illustration of a sewing machine needle stitching fabric, showing mechanical components and base (no text or symbols)Right presser foot position
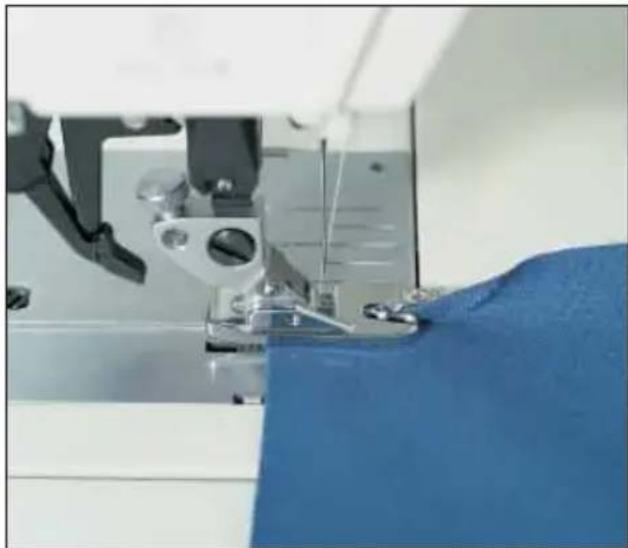
Fully concealed, sew-in zipper
- Insert the zipper foot on the right side.
- Baste in the zipper and lay it underneath the presser foot so that the teeth of the zipper run alongside the foot.
- Stitch in half of the zipper, leave the needle in the fabric, raise the presser foot and close the zipper.
- Now you can continue sewing the seam up to the end of the zipper and sew the cross seam.
natural_image
Close-up of a sewing machine needle stitching teal fabric, no visible text or symbols- Sew the second half of the zipper parallel at the same distance.
- Stop after the first half and leave the needle in the fabric. Raise the presser foot and open the zipper.
• Now you can fi nish sewing the seam.
natural_image
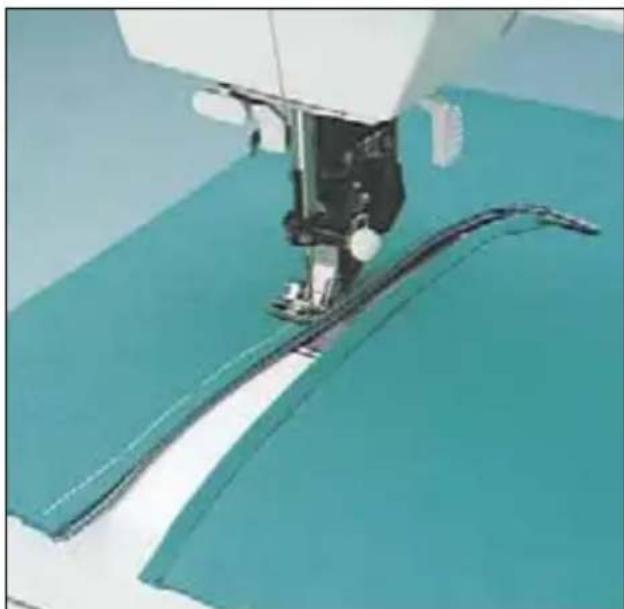
Close-up of a sewing machine needle stitching teal fabric (no visible text or symbols)Stabilizing edges
With the rolled hem foot you can hem blouses, silk scarves and valances with ease, without having to pre-iron the fabric edges. The hemming prevents the edges from fraying and a clean, durable edge is the result.
- Fold the beginning of the fabric edge over twice (approx. 2 mm)
- Lay the folded fabric edge underneath the hemmer and sew a few stitches.
- Leave the needle in the fabric, raise the presser foot and insert the fabric into the rolled hem foot scroll.
- Lower the presser foot and guide the fabric evenly into the rolled hem foot.
Take care that the fabric does not run under the right half of the presser foot.
natural_image
Close-up of a sewing machine needle stitching blue fabric, no visible text or symbols| stitch | ||||||
| 1548 | G | 0 | 3 | ○ | 3-5 | 7 |
| 1538 | G | 0 | 3 | ○ | 3-5 | Optional |
| 1528 | G | 0 | 3 | - | 3-5 | Optional |

natural_image
Close-up of a sewing machine needle stitching blue fabric, no visible text or symbolsTip: On silk, Bastiste and chiffon fabrics, the roll hem is particularly attractive with a zigzag stitch

natural_image
Close-up of a sewing machine needle stitching a beige fabric (no visible text or symbols)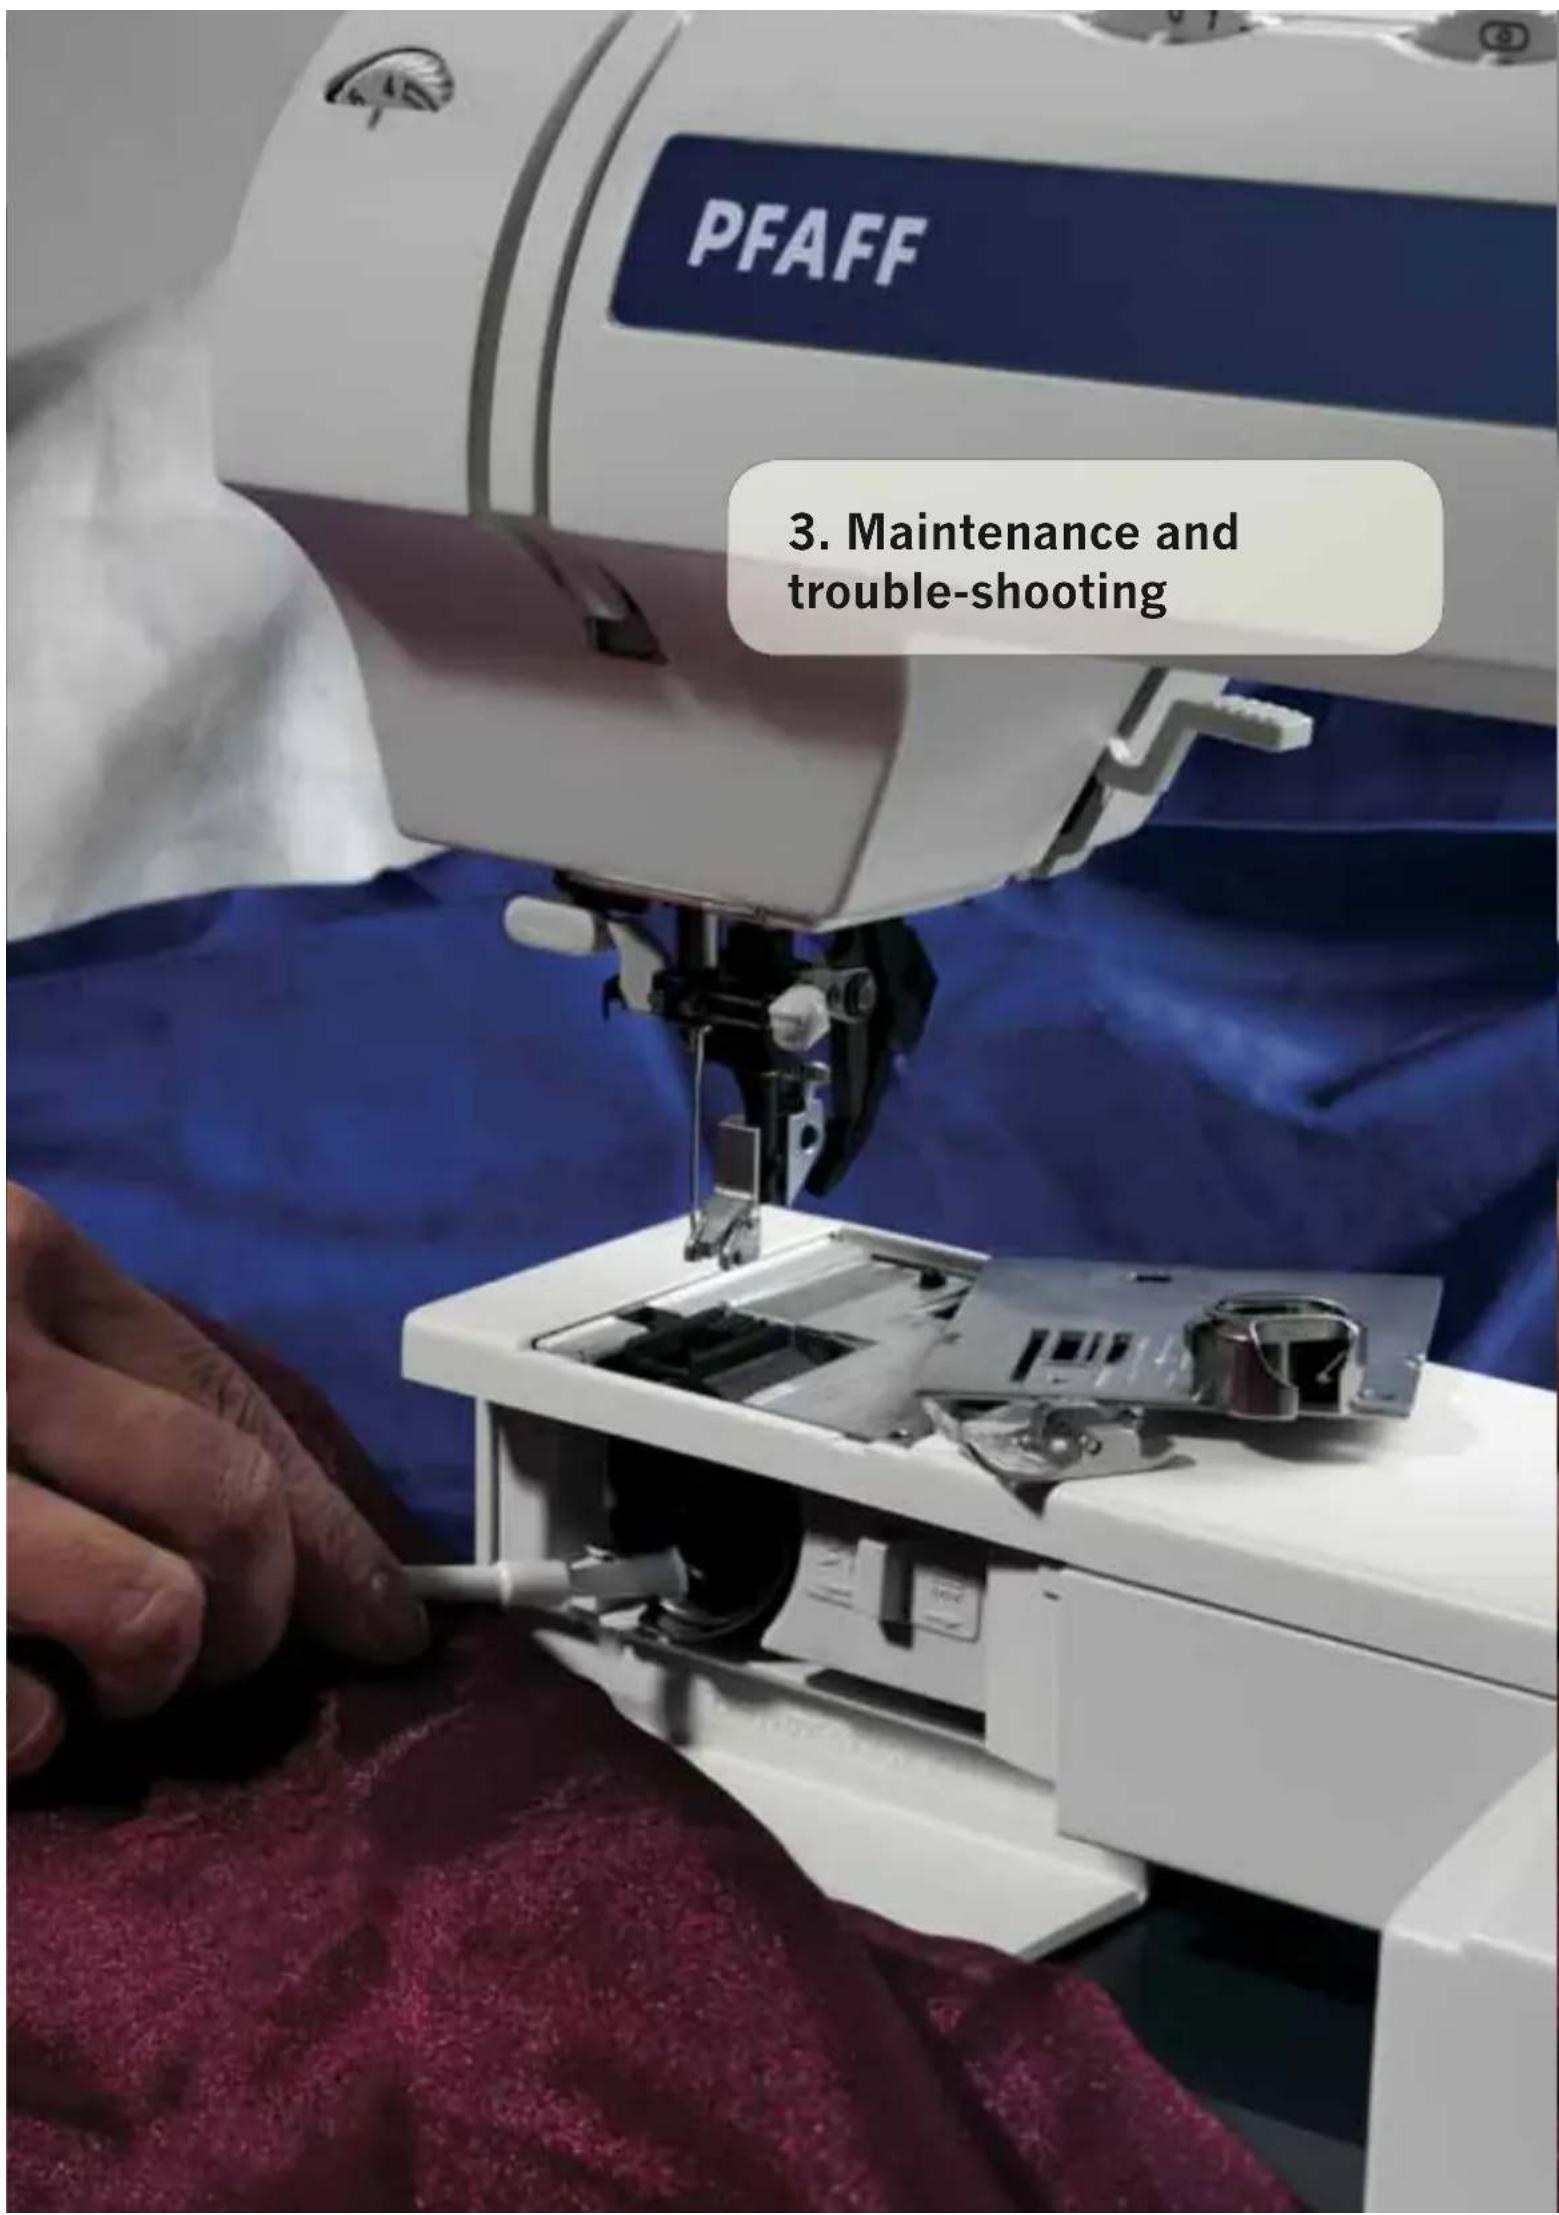
text_image
PFAFF 3. Maintenance and trouble-shootingPFAFF
3. Maintenance and trouble-shooting
Changing the needle plate

Switch off the main switch.
It is very important to clean your sewing machine, because it will reward you with a longer service life. The more often you use the machine, the more care it needs.
Removal:
- Raise the sewing foot and remove the removable accessory tray.
- Push the point of a small screwdriver into the opening between needle plate and sewing machine.
Twist it lightly to the right and the needle plate will snap half way out of its mounting. Now push the screwdriver into the left opening and take the needle plate out.
Replacing:
- Place the needle plate on fl at at the back and push it down with both hands at the front until you hear it snap in place. Before you start sewing, check that the needle plate is lying fl at.
Cleaning

Switch off the main switch.
- Remove the needle plate and lower the feed dog.
- Clean the feed dog and hook area with the brush.

natural_image
Close-up of a sewing machine needle stitching fabric, with a hand holding a screwdriver (no visible text or symbols)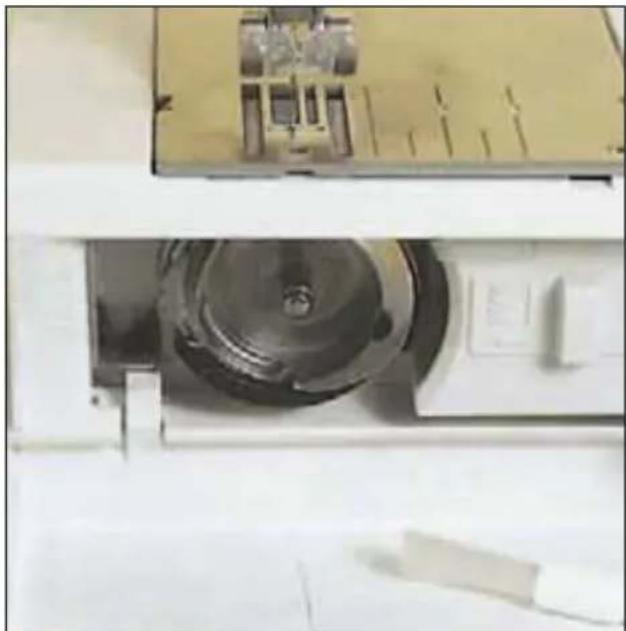
natural_image
Interior view of a washing machine with visible mechanical components and a central circular component (no text or symbols)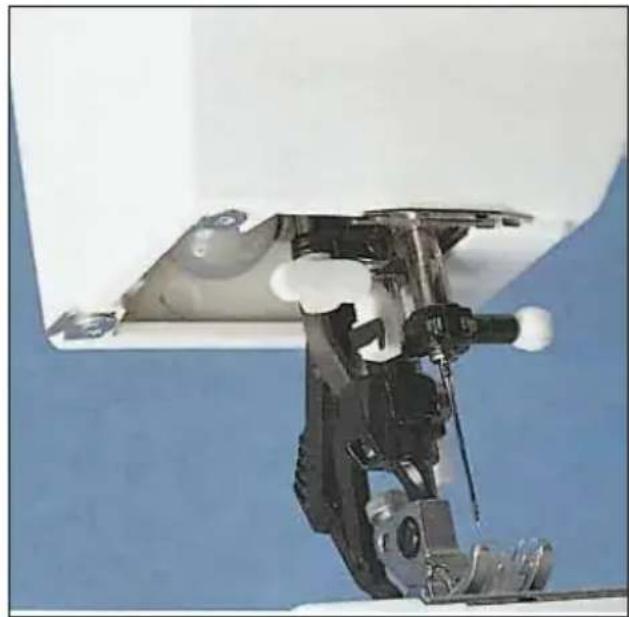
natural_image
Close-up of a mechanical assembly with no visible text or symbolsChanging the sewing bulb

Switch off the main switch.
- Disconnect the main plug and the foot control plug from the machine.
• Take off the removable accessory tray (15).
The sewing bulb is located inside the left side of the sewing machine.
Removal:
- Hold the sewing machine tightly.
- Push the bulb into its socket as far as it will go.
- At the same time, turn the bulb a half turn anti-clockwise and remove it.
Insertion:
- Insert the bulb in the diagonal socket and turn it so that both stops of the bulb engage.
- Now push the bulb fully into the socket and turn it clockwise so that it is held firmly.
Note: The bulb changer (available as a special accessory) will make changing the bulb much easier.
Important!
The maximum allowed wattage of the bulb with a plug-in socket is 15 watts!
Trouble-shooting
The machine skips stitches
| The needle is not properly inserted. | Push needle fully upwards, flat side facing the back. |
| The wrong needle is inserted. Use a needle system 130/705 H. | |
| Needle is bent or blunt. Insert a new needle. | |
| Machine is not properly threaded. Check how machine is threaded. | |
| Needle is too small for thread. Use a larger needle. | |
Needle thread breaks
| See reasons above. See above. | |
| Thread tension is too tight. Adjust thread tension. | |
| Thread is poor or has slubs in it, or has become dry after too-long storage. | Only use good threads. |
| Thread is too thick. | Use needle with large eye (System 130 N). |
Needle breaks off
| Needle is not pushed fully in. Insert new needle and push fully in. | |
| Needle is bent. Insert new needle. | |
| Needle is too thick or too thin. | Insert new needle. |
| Needle is bent, and has hit the needle plate because you are pulling or pushing the fabric. | Let the machine feed the fabric.Only guide the fabric lightly. |
| The bobbin case is not properly installed. When you insert the bobbin case, push it fully into the stop. | |
Seam is sewn unevenly
| The tension needs adjusting. Check needle thread tension. | |
| Thread is too thick, slubbed or hard. Only use perfect threads. | |
| The bobbin thread is unevenly wound. Do not wind thread free-hand, but run it on through the winding tension. | |
| Thread bunching at top or bottom side of fabric. | Thread up correctly. Check needle thread tension. |
Machine does not feed or feeds irregularly
| Sewing lint has collected between the feed dog teeth rows. | Remove needle plate, remove lint with brush. |
| Feed dog is lowered, slide A (see page 1:15) at right. | Push slide B (see page 1:15) to left. |
Machine is running with diffi culty
| There are thread remnants in the hook race. | Remove the threads. |
Important note!
Before you replace sewing feet or needles, you must switch off the main switch.
Do not start the threaded machine without fabric in it.
If you leave the machine, even for a short time, do not forget to switch off the main switch. This is important if children are nearby.
We reserve the right to change the machine equipment and the ass ort ment of accessories without prior notice, or make modifi cations to the performance or design.
Such modifications, however, will always be to the benefit of the user and the product.

Please note that on disposal, this product must be safely recycled in accordance with relevant National legislation relating to electrical/electronic products. If in doubt please contact your retailer for guidance.

natural_image
Woman in blue blouse sitting on a patterned cushion with white pants (no text or symbols visible)
natural_image
Close-up of a sewing machine needle stitching blue fabric (no visible text or symbols)
natural_image
Microscopic view of elongated structures on a textured surface (no visible text or symbols)
natural_image
Close-up of a robotic sewing machine needle stitching fabric (no visible text or symbols)
natural_image
Interior view of a white office appliance drawer with various compartments and accessories (no visible text or labels)