performance 2056 - Sewing machine PFAFF - Free user manual and instructions
Find the device manual for free performance 2056 PFAFF in PDF.

User questions about performance 2056 PFAFF
0 question about this device. Answer the ones you know or ask your own.
Ask a new question about this device
Download the instructions for your Sewing machine in PDF format for free! Find your manual performance 2056 - PFAFF and take your electronic device back in hand. On this page are published all the documents necessary for the use of your device. performance 2056 by PFAFF.
USER MANUAL performance 2056 PFAFF
text_image
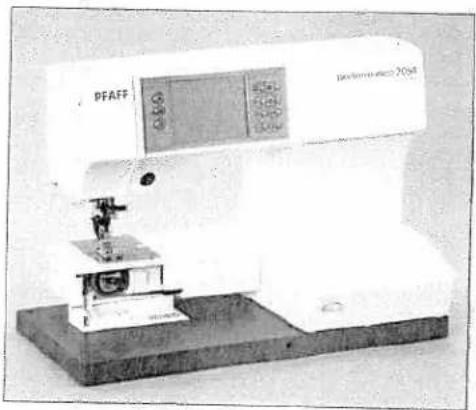
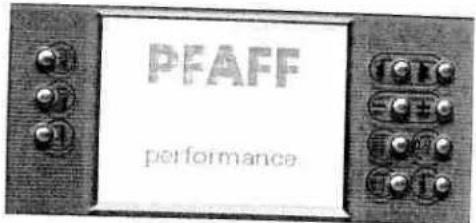
PFAFF PFAFF performance 2054 IDTX The real passion for sewing!
natural_image
Pure black background with no visible text, symbols, or identifiable objects

IMPORTANT SAFETY INSTRUCTIONS
When using an electrical appliance, basic safety precautions should always be followed, including the following:
Read all instructions before using this household Sewing machine.
DANGER - To reduce the risk of electric shock:
- A sewing machine should never be left unattended when plugged in. Always unplug this sewing machine from the electric outlet immediately after using and before cleaning.
• Always unplug before relamping. Replace bulb with same type rated 5 Watt.
WARNING - To reduce the risk of burns, fire, electric shock, or injury to persons:
- Do not allow to be used as a toy. Close attention is necessary when this sewing machine is used by or near children.
- Use this sewing machine only for its intended use as described in this manual. Use only attachments recommended by the manufacturer as contained in this manual.
- Never operate this sewing machine if it has a damaged cord or plug, if it is not working properly, if it has been dropped or damaged, or dropped into water. Return the sewing machine to the nearest authorised dealer or service center for examination, repair, electrical or mechanical adjustment.
- Never operate the sewing machine with any air openings blocked. Keep ventilation openings of the Sewing machine and foot controller free from the accumulation of lint, dust, and loose cloth.
- Keep fingers away from all moving parts. Special care is required around the Sewing machine needle.
• Always use the proper needle plate. The wrong plate can cause the needle to break. - Do not use bent needles.
- Do not pull or push fabric while stitching. It may deflect the needle causing it to break.
- Switch the sewing machine off ("0") when making any adjustment in the needle area, such as threading needle, changing needle, threading bobbin, or changing presser foot, etc.
- Always unplug the sewing machine from the electrical outlet when removing covers, lubricating, or when making any other user servicing adjustments mentioned in the instruction manual.
- Never drop or insert any object into any opening.
- Do not use outdoors.
- Do not operate where aerosol (spray) products are being used or where oxygen is being administrated.
- To disconnect, turn all controls to the off ("0") position, then remove plug from outlet.
- Do not unplug by pulling on cord. To unplug, grasp the plug, not the cord.
SAVE THESE INSTRUCTIONS

natural_image
Pure black horizontal bar with no text or symbols
natural_image
Black-and-white close-up of a person wearing a textured garment with visible seams and small bubbles (no text or symbols)
natural_image
Abstract black-and-white image with a textured horizontal band and a vertical bright line on the right (no text or symbols)
text_image
1 2 3 4 5 6 7 8 9 10 performance 2054 performance PFAFF performance 11 38 37 36 35 34 33 32 31 30 29 13 14 15 16 17 18 19 20 28 27 26 PFAFF performance 2054 25 24 23 22 21
natural_image
Grayscale abstract texture with horizontal gradient and no discernible text or symbols
natural_image
Grayscale abstract texture with no discernible text, symbols, or structured elements-
Needle button
-
Sew slowly button
-
Pattern start button
-
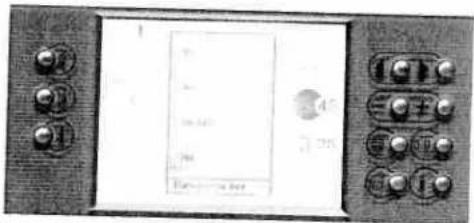
Touch screen (Welcome screen)
-
More options button
-
Main menu button, opens category selection
-
Adjust buttons, adjust + and -
-
Scroll buttons, scroll to next column or sewingpatter
-
0 - 9 button, opens pattern selection by numbers
-
Info button, opens information or the context menu
-
Handle
-
Handwheel
-
Connection socket, lead cord
-
Connection, foot control
-
Master switch
-
Slide for lowering feed dog
-
Spool holder with spool cap
-
Lid with stitch program chart
-
Hole for second spool holder
-
Bobbin winder
-
Bobbin door
-
Free arm
-
Needle plate
-
Thread cutter
-
Needle holder with retaining screw
-
Touchscreen
-
Take up lever
-
Thread guide
-
Knee lift attachment hole
-
Base plate
-
Removable accessory tray
-
Presser foot holder with presser foot
-
IDT - Integrated Dual Feed
-
Integrated needle threder
-
Presser foot lifter
-
Reverse sewing button
-
Threading slots
-
Needle thread tension
natural_image
Close-up of a curved metallic surface with a dark horizontal edge (no text or symbols visible)Stitch chart
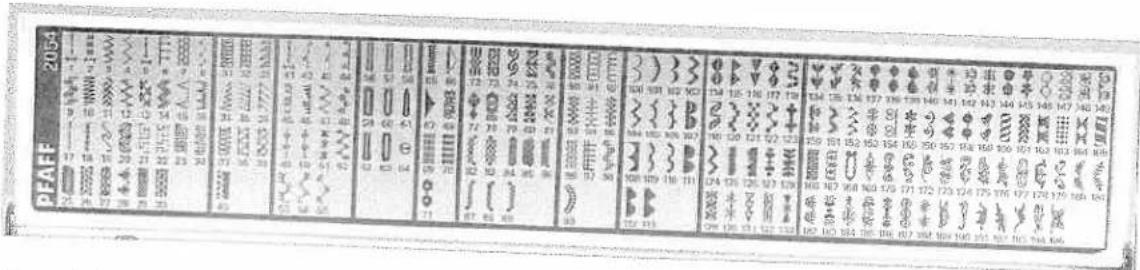
Utility stitches
| 1 | 2 | 3 | 4 | 5 | 6 | 7 | 8 | 9 | 10 | 11 | 12 | 13 | 14 | 15 |
| Stitch No. | Description | Application | Width up to mm |
| 1 | Straight stitch with 19 needle positions | For all straight stitch and topstitching jobs, stitch length can be increased up to 6 mm. 19 needle positions are available, for edge finishing or sewing in zippers. | - |
| 2 | Stretch triple straight stitch with 19 needle positions | For all straight stitch and topstitching jobs, particularly on stretch fabrics, e.g. trouser seams, sportswear and work wear. Stitch length can be increased up to 6 mm for decorative stitching. | - |
| 3 | Zigzag stitch | For finishing seams, overcasting, appliqué work, inserting lace etc. | 9 |
| 4 | Elastic stitch with two perforations | For sewing on elastic, darning tears and applying patches. | 9 |
| 5 | Reverse straight stitch | A durable reverse straight stitch. Suitable for stitch combinations in stitch sequences. See stitch No 1. | - |
| 6 | Shell-edging stitch | For decorative hems particularly on stretch fabrics, e.g. underwear. | 6 |
| 7 | Honeycomb stitch | For sewing on elastic thread, overstitching terry cloth seams and for ornamental hem seams (smocking effect). | 7 |
| 8 | Elastic stitch with one perforation | For sewing on elastic, darning tears and applying patches. 9 mm stitch length. | 7 |
| 9 | Stretch triple elastic stitch | For inserting elastic tape in sportswear and bathing suits. (Extremely durable seam for open-knit materials.) | 7 |
| 10 | Purl stitch | Particulary suitable for appliqué work thanks to its stitch density. | 9 |
| 11 | Faggoting stitch | For joining foundation garments. Provides a decorative hemstitching effect. | 7 |
| 12 | Decorative stitch | For overstitching elastic cords and wool threads as well as for gathering and smocking. | 6 |
| 13 | Cross-hem stitch | Provides a highly elastic, decorative seam for hem finishing on sportswear and casuals. | 7 |
| 14 | Stretch triple zigzag stitch | For sewing elastic tape on sportswear and bathing suits. Also suitable for hem finishing. | 7 |
| 15 | Blindhem stitch | For securing hems invisibly. | 6 |
| 16 | 17 | 18 | 31 | 32 | 33 | 34 | 35 | 36 | 37 | 38 | 39 | 40 | 56 | 57 |
| Stitch No. | Description | Application | Width up to mm |
| 16 | Stretch blindhem stitch | For securing hems invisibly on stretch fabrics. | 6 |
| 17 | Basting stitch | For basting cut-out parts together. | - |
| 18 | Stemstitch | Durable elastic seam, e.g. for working on leggings, and embroidery work. | 2 |
| 31 | Closed overedge stitch with selvage thread | For joining and serging very stretchy and easily fraying fabrics in one operation. | 7,5 |
| 32 | Closed overedge stitch | For joining and serging in one operation. | 6 |
| 33 | Edge binding stitch | For hemming and decorative edge finishing on stretch fabrics. | 7,5 |
| 34 | Zigzag stitch (needle position variablw from right to left) | For serging, applique work and inserting lace. (May be sewn from left to right or from right to left, using the stitch mirroring key.) | 9 |
| 35 | Open overedge stitch | Elastic serging with selvage thread, most suited for stretchy, easily fraying fabrics. | 7,5 |
| 36 | Open overedge stitch | For joining and serging light knit and open-knit fabrics in one operation. | 7,5 |
| 37 stitch | Light-knit fabric mending | Very elastic, durable stitch most suited for sewing and darning light-knit fabric. | 7,5 |
| 38 | Closed overedge stitch | For joining and serging stretch and non-stretch abrics in one operation. | 6 |
| 39 | Pullover stitch | Elastic assembly and serging seam for open-knit fabrics and jersey. | 7,5 |
| 40 | Cover stitch | For joining terry cloth and stretchy fabrics, for inserting patches. For overstitching hem seams and facings. | 7,5 |
| 56 | Linen buttonhole | Buttonhole for blouses, shirts and linen. | 5,5 |
| 57 | Standard buttonhole | Buttonhole for blouses and shirts. | 7 |

natural_image
Gray textured horizontal band with no visible text, symbols, or markingsUtility stitches

text_image
58 59 60 61 62 63 64 65 66 67 68 69 70 71| Stitch No. | Description | Application | Width up to mm |
| 58 | Stretch buttonhole | Buttonhole for stretch materials and knitwear | 5,5 |
| 59 | Cross-stitch buttonhole | Buttonhole for fine stretch materials, also suitable as decorative buttonhole. | 5,5 |
| 60 | Round buttonhole with longitudinal bar | Buttonhole for shirts, blouses and dresses. | 7 |
| 61 | Eylet buttonhole with tapered bar | Buttonhole for jackets, overcoats and trousers. | 8,5 |
| 62 | Eyelet buttonhole with crosswise bar | Buttonhole for jackets, overcoats and trousers. | 8,5 |
| 63 | Fancy buttonhole | Decorative buttonhole for shirts, blouses and dresses. | 8,5 |
| 64 | Program for sewing on buttons' | For two-hole or four-hole buttons. | 6 |
| 65 | Bartack | For reinforcing zippers or pocket openings on trousers. | 4 |
| 66 | Pocket tack | For reinforcing pocket openings on trousers. | 9 |
| 67 | Arrowed bartack | For reinforcing skirt vents. | 7 |
| 68 | Labyrinth | For darning damaged areas. Also suitable for embroidering. | 9 |
| 69 | Darning program, lengthwise | For darning damage areas. | 9 |
| 70 | Darning program, lengthwise and crosswise | For repairing little holes. | 9 |
| 71 | Automatic eyelet | Various sizes in the memory. Also suited for embroidery work. | 9 |

natural_image
Black and white abstract gradient band with no text or symbolsUtility stitches
text_image
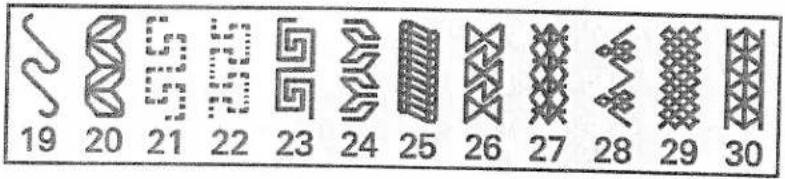
19 20 21 22 23 24 25 26 27 28 29 30Quilt stitches

text_image
41 42 43 44 45 46 47 48 49 50 51 52 53 54 55Cross stitches

text_image
72 73 74 75 76 77 78 79 80 81 82 83 84 85 86 87 88 89Hem stitches

text_image
90 91 92 93 94 95 96 97 98 99Scallop edgings

text_image
100 101 102 103 104 105 106 107 108 109 110 111 112 113Satin stitches

text_image
114 115 116 117 118 119 120 121 122 123 124 125 126 127 128 129 130 131 132 1Decorative stitches

text_image
134 135 136 137 138 139 140 141 142 143 144 145 146 147 148 149 150 151 152 153
text_image
154 155 156 157 158 159 160 161 162 163 164 165 166 167 168 169 170 171 172 173
text_image
174 175 176 177 178 179 180 181 182 183 184 185 186 187 188 189 190 191 192 193
Index of headings
Getting started
page
Carrying case 16
Lid 16
Electrical connection 17
Connecting the foot control 17
On / Off switch 17
Voltage switch 17
Accessory tray 18
Sewing with free arm 19
Preparing the machine 19
for bobbin winding
Winding the bobbin from the spool pin 20
Winding from the second spool pin 21
Inserting the bobbin 22
Taking out the bobbin case 22
Setting the needle thread tension 23
Threading the needle 24
Integrated Needle Threader 25
Changing the presser foot 27
Winding a bobbin through the needle 28
Threading the twin needle 29
Changing the needle 29
IDT (Integrated Dual Feed) 30
Lowering the feed dog 32
Electronic knee lift 33
Operating your performance 2054
page
Instructions on operating your Pfaff performance 2054 36
Function buttons 36
Sewing menu 38
Altering the stitch settings 38
More options for sewing 39
Selecting a stitch 43
Selection by category 43
All stitches selection 43
Selection by number 43
Direct selection 43
Exiting a sewing menu 43
The Context menu 44
The functions in the Context menu 44
Info system 46
Information in the main menu 47
Sequences
page
Available sewing functions in 50
the stitch sequence
Creating a stitch sequence 50
Editing a stitch sequence 52
Saving a Stitch Sequence 52
Creating a new stitch sequence 53
Opening a memory 53
Alphabets 54
Creating a word Sequence 55
Edit a word sequence in 55
the Stitch sequence menu
Utility stitches
page
Sewing in zippers - No 1 58
Straight stitch - No 1 58
Basting stitch - No 17 59
Top stitching - No 1 59
Elastic blind hem stitch - No 16 60
Blind hem stitch - No 5 60
Zig zag stitch - 3 61
Stretch triple zig zag stitch - 14 61

natural_image
A grayscale horizontal bar with a dark top and light edge, no text or symbols visible.Elastic stitch - No 4 62
Honeycomb stitch - No 7 62
Stretch triple straight stitch - No 2 62
Darning with the elastic stitch - No 4 63
Sewing-on patches - No 4 63
Repairing tears 63
Overlock stitches 64
Buttonholes 65
Sewing on buttons - No 64 68
Eyelets - No 71 68
Automatic darning - No 69 69
Free motion darning 70
Gathering with straight stitch - No 1 71
Gathering with elastic threads - No 7 71
Decorative sewing specialty techniques
page
Quilting 74
Free Motion Embroidery 79
Nostalgia /Heirloom 81
Home Decorating 83
Fashion 85
Eyelets 86
Hemstitching 87
Cross Stitch 88
Twin needle sewing 90
Tapering 91
Appliqué designs 93
Accessories
page
Standard presser feet 96
and accessories
Felling foot 98
Appliqué foot 98
Pintuck foot 99
Pintuck blade
Cording foot 1
Gathering foot 1
Knit edge/piping/beading foot 1
Ruffler 1
Open toe appliqué foot 1
Quilting guide 1
Eyelet plate 1
Bridging guide 1
1/4 inch Quilting foot with IDT
Quilting of the fabric layers 1
Free motion quilt foot 1
Bias binder 1
Pintuck Foot with
Decorative Stitch Guide
Non-stick Foot with IDT
7/9 Hole Cord Foot with IDT
Couching/Braiding Foot with IDT
Circular Embroidery Guide
Fringe Presser Foot with IDT
Fancy patterns with twin needles
Stabilizer
Maintenance
Changing the needle plate 1
Cleaning 1
Changing the light bulb 1
Bulb removal 1
Sewing problems and their solutions 1
Technical data 1
Package contents 1
Getting started
Carrying case 16
Lid 16
Electrical connection 17
Connecting the foot control 17
On / Off switch 17
Voltage switch 17
Accessory tray 18
Sewing with free arm 19
Preparing the machine
for bobbing winding 19
Winding the bobbin from the spool pin 20
Winding from the second spool pin 21
nserting the bobbin 22
Taking out the bobbin case 22
setting the needle thread tension 23
Threading the needle 24
ntegrated Needle Threader 25
Changing the presser foot 27
Winding a bobbin through the needle 28
Threading the twin needle 29
Changing the needle 29
DT (Integrated Dual Feed) 30
owering the feed dog 32
lectronic knee lift 33

natural_image
White rectangular object with a vertical line on top, resting on a flat surface (no text or symbols visible)Carrying case
Place the enclosed lead cord, the foot control and instruction book into the compartment of the carrying case.
text_image
PFAFFLid
Open the lid upwards.
text_image
PRAF 2004 17 9 1 25 16 10 33 11 20 44 50 28 55 21 31 30 65 34 44 75 23 33 85 31 43 95 32 53 105 33 63 115 34 73 125 35 83 135 36 93 145 37 103 155 38 113 165 39 123 175 40 133 185 41 143 195 42 153 205 43 163 215 44 173 225 45 183 235 46 193 245 47 203 255 48 303 265 49 313 275 50 323 285 51 333 295 52 343 305 53 353 315 54 363 325 55 373 335 56 383 345 57 393 355 58 403 365 59 413 375 60 423 385 61 433 395 62 443 405 63 453 415 64 463 425 65 473 435 66 483 445 67 493 455 68 503 465 69 513 475 70 523 485 71 533 495 72 543 505 73 553 515 74 563 525 75 573 535 76 583 545 77 593 555 78 603 565 79 613 575 80 623 585 81 633 595 82 643 605 83 653 615 84 663 625 85 673 635 86 683 645 87 693 655 88 703 665 89 713 675 90 723 685 91 733 695 92 743 705 93 753 715 94 763 725 95 773 735 96 783 745 97The stitches of the sewing machine are illustrated on the inside of the lid.

natural_image
Black and white abstract image with horizontal gradient and no discernible text or symbols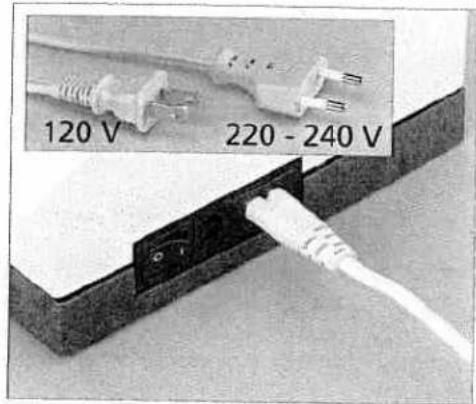
text_image
120 V 220 - 240 V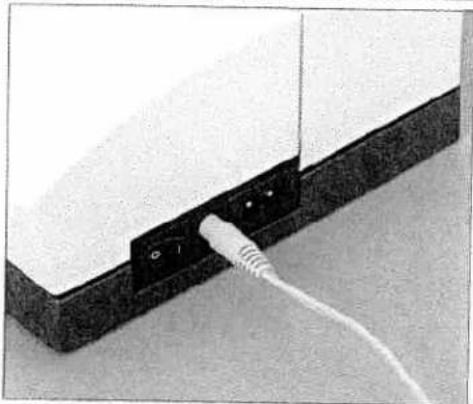
natural_image
Close-up of a white electronic device with a white cable inserted into a black terminal block (no text or symbols visible)
natural_image
Close-up of a white electronic device with two white cables inserted into a black terminal block (no visible text or symbols)
natural_image
Close-up of a vintage electronic device with buttons and ports (no visible text or symbols)Electrical connection
Connect the lead cord between the socket of the sewing mach and the wall outlet.
For the USA and Canada:
This sewing machine has a polarized plug (one blade wider than the other). To reduce the risk of electric shock, this plug is inte to fit in a polarized outlet only one way. If the plug does not fully in the outlet, reverse the plug. If it still does not fit, conta qualified electrician to install the proper outlet.
DO NOT modify the plug in any way!
Connecting the foot control
Connect the plug of the foot control to the connection socket of the sewing machine.
The sewing speed is controlled by pressing the foot control.
The foot control type ATK 0070 has to be used for this sewing machine.
On / Off switch
When the On / Off switch is switched on (switch function I) the sewing lamp lights up and the welcome screen appears on the touch screen.
The sewing machine is now ready to sew.
$$ " 0" = O F F $$
$$ " I" = O N $$
Voltage switch
220V - 240V or 120V
The sewing machine is set to the voltage for Europe 220 V - 240 V. To change the voltage to 120 V, you must remove the small plastic protection and slide the dual voltage switch to 120 V on the underside of your machine.

natural_image
Grayscale abstract texture with diagonal gradient and no visible text or symbols
natural_image
Close-up of a white rectangular object with a small mechanical component attached, placed on a flat surface (no visible text or symbols)Accessory tray
Open the accessory tray by placing your left index finger on the ridged area on the left of the lid and open the lid upwards and towards you.

natural_image
Black-and-white photo of a computer case with open box and accessories (no visible text or symbols)Arranging the accessories
The standard accessories are marked with numbers. Arrange the parts in the respective compartments of the accessory tray.

natural_image
Grayscale abstract texture with horizontal bands and no visible text or symbols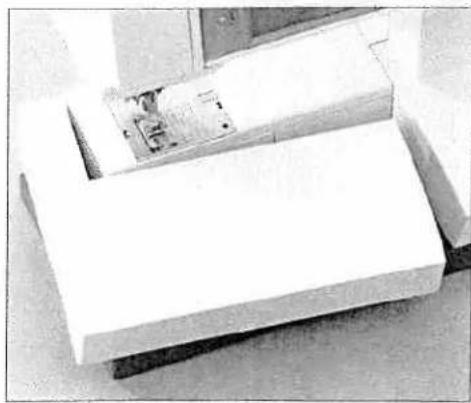
natural_image
Top-down view of a white rectangular object with a small inset showing a mechanical component (no visible text or symbols)Sewing with free arm
In order to sew using the free arm, swing the accessory tray to the left and lift it upwards out of the hole.
When replacing the tray, make sure it is flush with the free arm of the sewing machine.
natural_image
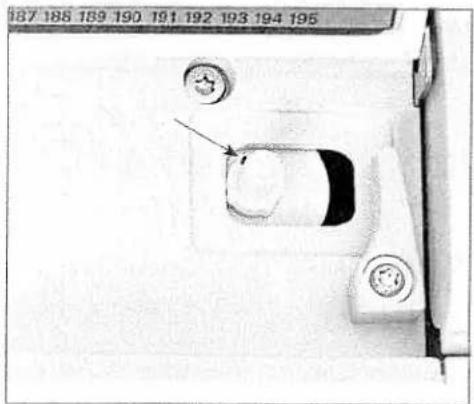
Close-up of a mechanical component with mounting holes and a highlighted part (no visible text or symbols)Preparing the machine for bobbing winding
Place an empty bobbin so that the black pin of the bobbin winder snaps into the slot of the bobbin.

natural_image
Close-up of a mechanical component with circular features and a central circular feature, no visible text or symbols.Push the bobbin to the right.
Note: The bobbin can only be wound if it is moved fully to the right

natural_image
Gray textured surface with a horizontal dark band at the top (no text or symbols)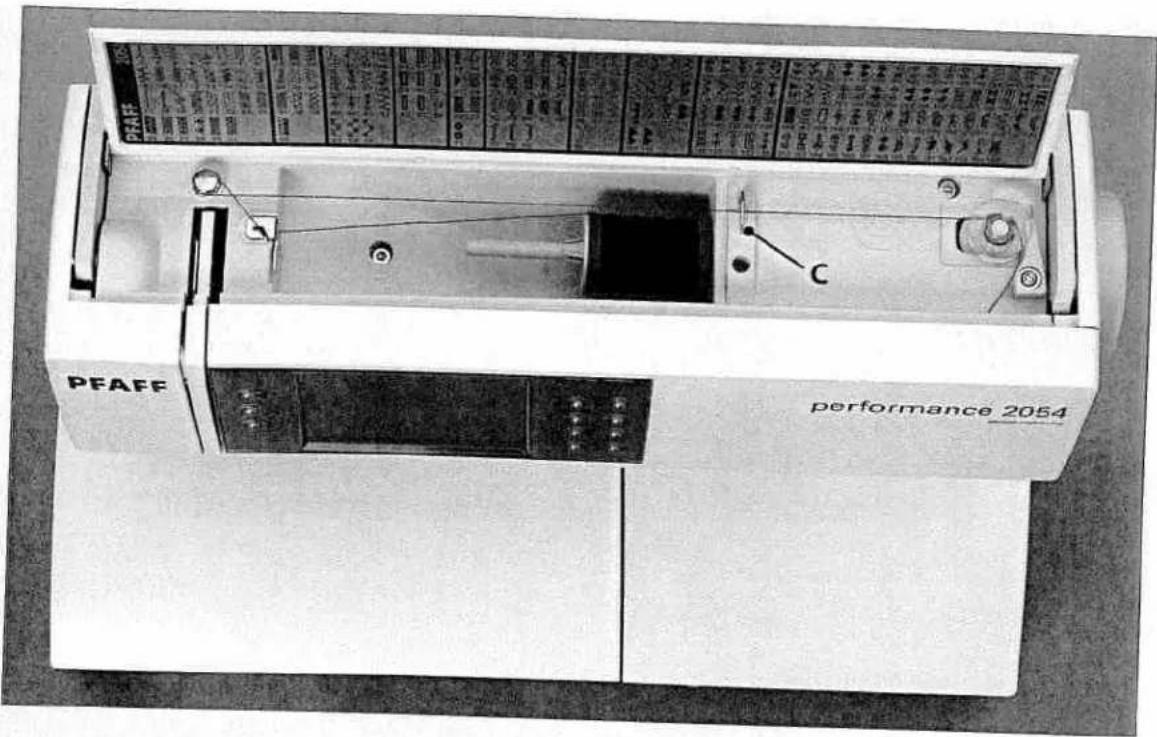
text_image
PEAFF performance 2054 CWinding the bobbin from the spool pin
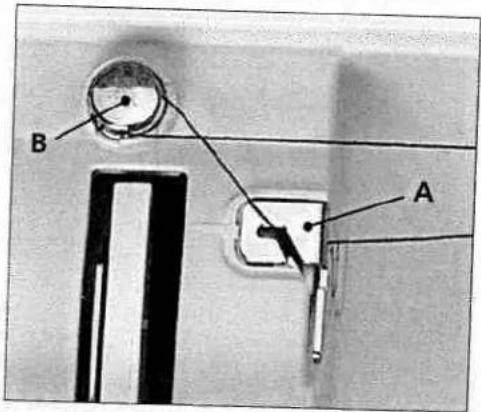
Place the sewing thread on the spool pin. Slide a spool cap, slightly larger than the spool, firmly against the spool.
Threading
Place the thread into guide A from the front and pull it counterclockwise around the pre-tension device B. Pull the thread under the thread guide C (from back to front). Wind the start of the thread around the bobbin several times in a clockwise direction.
Turn on the machine
Hold the end of the thread firmly and press the foot control. As soon as the bobbin is full, the winding action will be stopped automatically. Push the bobbin to the left, cut the thread and remove bobbin from the winder.
text_image
B A
text_image
PFAFF performance 2054Winding from the second spool pin
Insert the second spool pin in the hole provided.
text_image
B AThreading
Thread as shown on page 24.
Turn on the machine
Hold the end of the thread firmly and press the foot control. As soon as the bobbin is full, the winding action will stop automatically. Cut the thread, push the bobbin to the left and remove bobbin from the winder.

natural_image
Black and white abstract image with horizontal gradient bands, no text or symbols present
natural_image
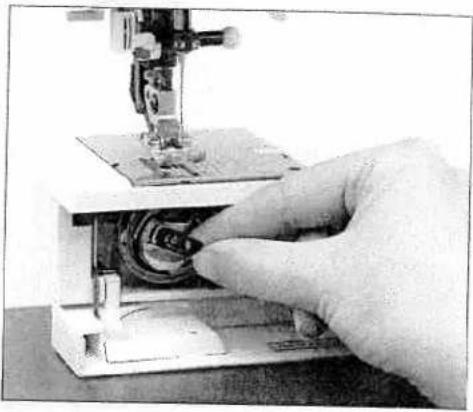
Laboratory setup with a mechanical device and circular chamber (no visible text or symbols)Bobbin door
Open the bobbin door at the left side swinging it open towards the front
natural_image
Close-up of a hand operating a sewing machine with visible circuitry and mechanical components (no text or symbols)Taking out the bobbin case
Lift the latch of the bobbin case and pull the bobbin case out of the machine. Release the latch and take the empty bobbin out of the bobbin case.
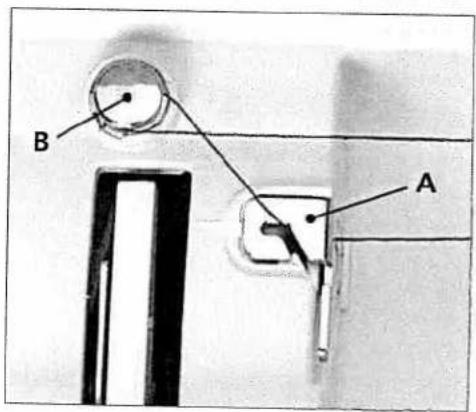
Inserting the bobbin
Insert the full bobbin in the bobbin case. When doing so, pull the thread through slot A, then under tension spring B until it rests in the opening (see arrow).
Check: When you pull the thread, the bobbin must turn clockwise.
Inserting the bobbin case
Lift latch E and push the bobbin case fully onto pin C of the sewing hook. Opening D of the bobbin case must face upwards.
Check: Pull the bobbin thread sharply. The bobbin case must not fall out of the hook.

text_image
Technical diagram showing exploded views of a mechanical component with labeled parts A through E
text_image
PFAFFSetting the needle thread tension
Set the required amount of the needle thread tension using the markings on the tension dial.
The normal setting for sewing is 4 - 5. For using decorative stitches, darning and buttonhole sewing 3.

natural_image
Pure technical line drawing of a 3D rectangular block structure without any text, numbers, or symbolsThread tension
For the best stitch appearance and durability make sure the needle and bobbin thread tensions are balanced with one another, i.e. the threads evenly meet between the two fabric layers.
The following is valid for general sewing work:
natural_image
Pure diagram of a rectangular block with a coiled spring, no text or symbols presentBobbin thread is visible on the top side of the fabric:
The needle thread tension is too tight or the bobbin thread tension is too loose.
The thread tension must be corrected.
natural_image
Pure technical line drawing of a rectangular structure with internal channels (no text or symbols)Top thread is visible on the underside of the fabric:
The needle thread tension is too loose or the bobbin thread tension is too tight.
The thread tension must be corrected.
For decorative stitches and buttonholes the top thread should be visible on the underside of the fabric.
Threading the needle
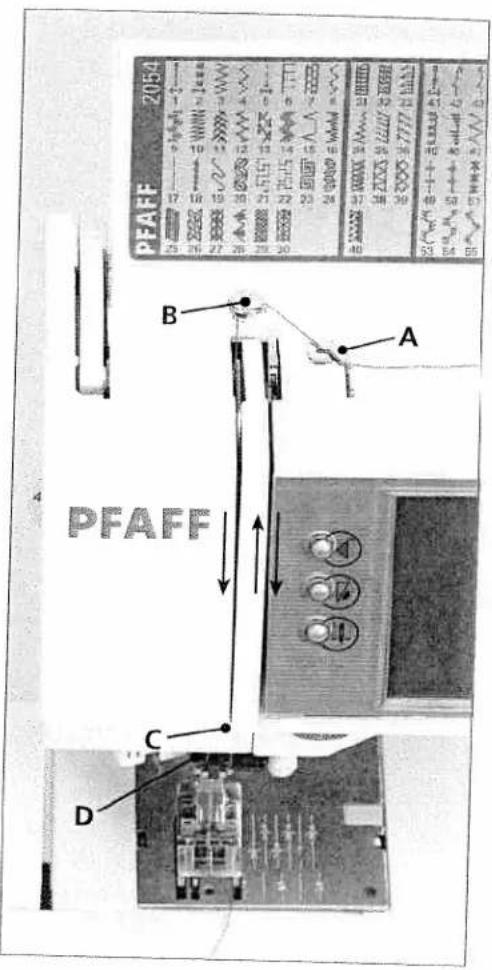
Raise the presser foot lifter. Place the thread on the spool pin and fit a spool cap.
Using both hands, pull the thread into thread guide A from the front. Place the thread from right to left into the pretension guide B.
Now pass it through the left threading slot downwards. Pull the thread around the stop C and into the right threading slot and upwards to the take-up lever. The thread must be pulled into the take-up lever from left to right Pass the thread downwards in the right-hand threading slot.
Pull the thread from the side behind one of the two thread guides D.
text_image
PFAFF 2054 A B C D PFAFF
natural_image
A grayscale horizontal bar with no visible text, symbols, or markings.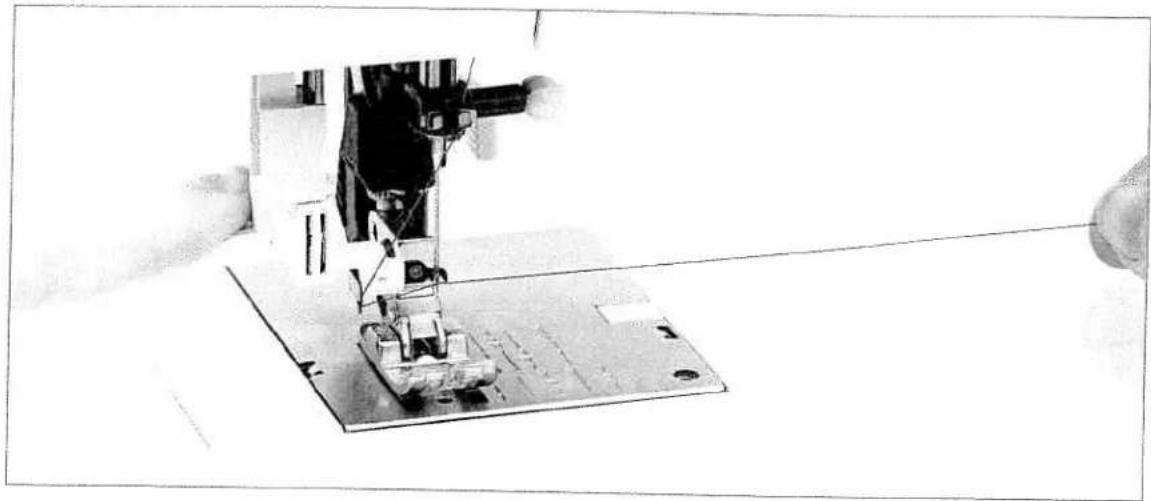
natural_image
Close-up of a sewing machine needle stitching metal sheet on a flat surface, with no visible text or symbols.Integrated Needle Threader
text_image
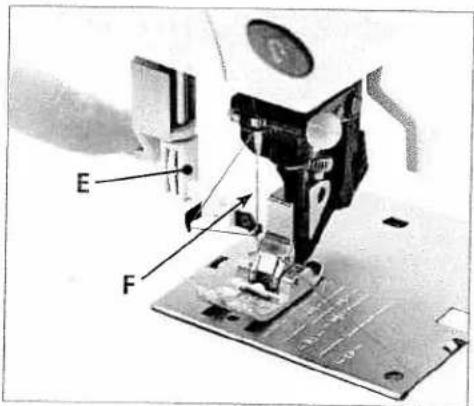
E FIn order to make threading the needle easier and quicker, use the PFAFF Integrated Needle Threader. Lower the presser foot. Press the threader down with the handle.
Threader hook F swivels through the needle eye. Place the thread over hook E and under the thread hook E and hold the end of the thread taut.

natural_image
Close-up of a sewing machine needle stitching fabric, with no visible text or symbolsReduce the pressure so that the needle threader slowly moves upwards. At the same time the threader hook swivels out of the needle eye and pulls the thread through the eye.
Release the end of the thread so a thread loop forms behind the needle. Release the threader and pull the rest of the thread end through the needle eye.
Presser foot lift
The presser foot is raised or lowered with the presser foot lifter.
Bringing up the bobbin thread
Raise the presser foot While holding the end of the needle thread, press the foot control so the needle moves down and up.
Pull the needle thread to draw up the bobbin thread.
Close the bobbin door and pull the top and bobbin threads under the presser foot to the left
Thread cutter
Pull the thread from the back to the front over the thread cutter.
natural_image
Close-up of a sewing machine needle stitching fabric, showing mechanical components and motion direction (no text or symbols visible)
natural_image
Mechanical device with a circular component mounted on a base, no visible text or symbols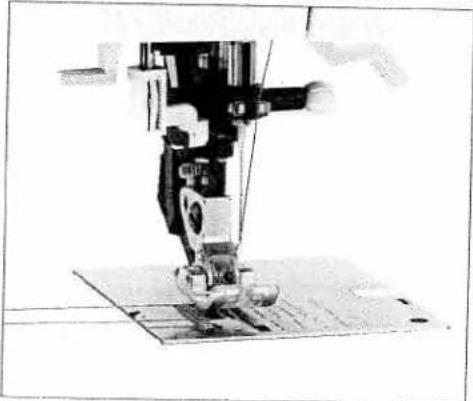
natural_image
Close-up of a sewing machine needle stitching fabric (no visible text or symbols)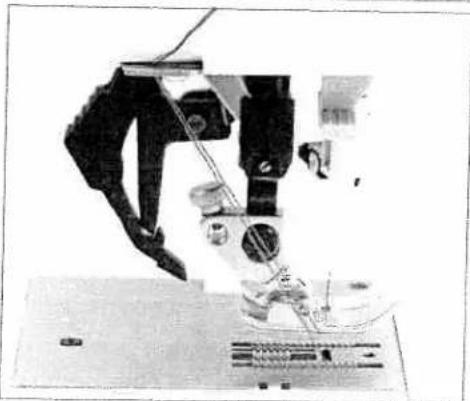
natural_image
Close-up of a microscope in operation, showing mechanical components and wiring (no visible text or symbols)
natural_image
A long, dark horizontal gray bar with no visible text or symbols.
natural_image
Close-up of hands operating a sewing machine needle on a fabric mat (no visible text or symbols)Changing the presser foot
Press the front part of the presser foot upwards and at the same time the rear part downwards until it disengages from the presser foot holder.
natural_image
Close-up of a sewing machine needle stitching fabric (no visible text or symbols)Snap on the presser foot
Place the presser foot under the presser foot shank, so that when the presser foot lifter is lowered, the pins of the foot snap in the presser foot shank.

natural_image
Close-up of a sewing machine on a metal base (no visible text or symbols)Check that the presser foot is properly attached by raising the presser foot lifter.
natural_image
Mechanical assembly diagram showing a robotic arm and base platform (no text or symbols visible)Winding a bobbin through the needle
It is possible to wind bobbins even when the machine is fully threaded.
Raise the presser foot lifter to the top position. Pull the needle thread underneath the presser foot and upward through the right-hand threader slot.

text_image
DPlace the thread from left to right through the take-up lever D.
Note: The take-up lever must be at its highest position.

text_image
PFAFF performance 2054 CGuide the thread to the right under thread guide C.
Wind the beginning of the thread several times around the bobbin in a clockwise direction. Hold the end of the thread firmly and press the foot control.

natural_image
Grayscale abstract image with horizontal gradient and no visible text or symbols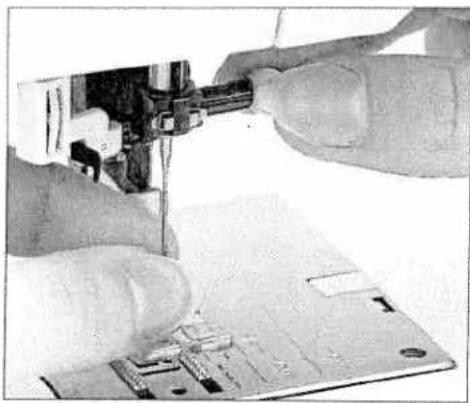
natural_image
Close-up of hands assembling electronic components on a circuit board (no visible text or symbols)Changing the needle
Turn off the machine.
To remove: Lower the presser foot and set the needle to its highest position. Loosen the needle screw and pull the needle out downwards.
To insert: The flat side A of the needle must face to the rear. Lower the presser foot and insert the needle, pushing it up as far as it will go. Hold the needle and tighten the needle screw firmly.

natural_image
Close-up of a sewing machine needle stitching fabric (no visible text or symbols)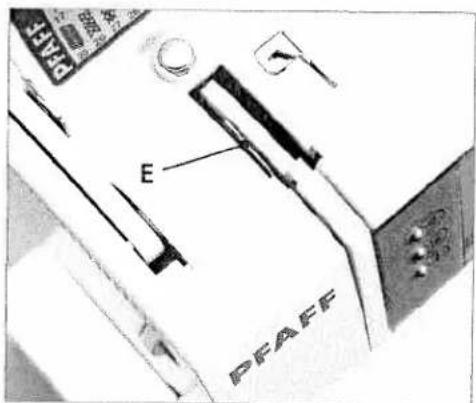
text_image
E PFAFFThreading the twin needle
Replace the sewing needle with a twin needle. Insert the second spool pin and place one spool of thread on each of the spool pins. When threading make sure to pass one thread to the left and one thread to the right side of tension disk E.
Continue threading in the usual manner, making sure the threads do not twist together.
Pull one thread into the right guide and one in the left thread guide above the needle, and thread the needles.
Note: It is not possible to use the Integrated Needle Threader with a twin needle.

natural_image
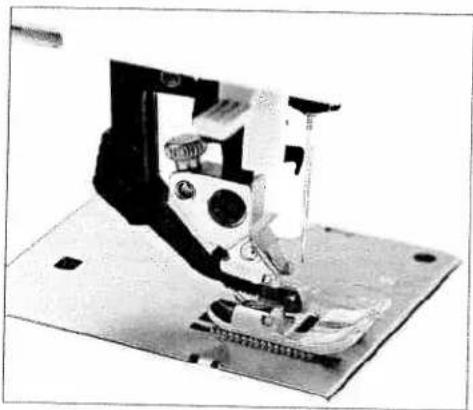
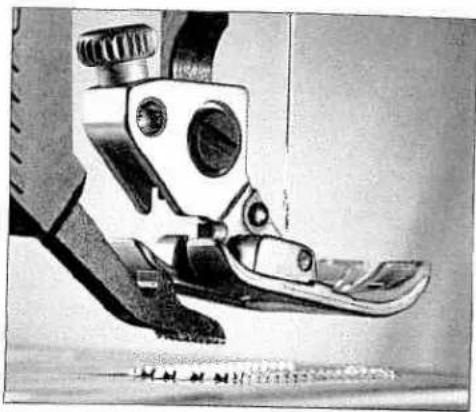
Gray textured horizontal band with no visible text, symbols, or markingsIDT (Integrated Dual Feed)
For sewing difficult materials PFAFF provides the ideal solution: the Integrated Dual Feed, IDT system.
As on industrial machines, the IDT feeds the fabric from the top and bottom at the same time. The material is fed precisely.
On light or difficult fabrics such as silk or rayon the dual fabric feed prevents puckering of the seam. The even feeding action also ensures perfect matching of checked and striped fabrics. The IDT keeps all layers of quilt projects aligned to prevent stretching of the top layers.
natural_image
Close-up of a mechanical foot and ankle mechanism (no visible text or symbols)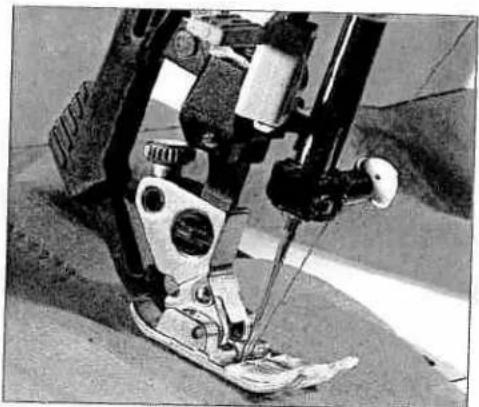
natural_image
Close-up of a sewing machine foot and arm mechanism (no visible text or symbols)
natural_image
Close-up of a robotic arm gripping a textured surface, no visible text or symbols
natural_image
Black and white abstract image with horizontal gradient and no discernible text or symbols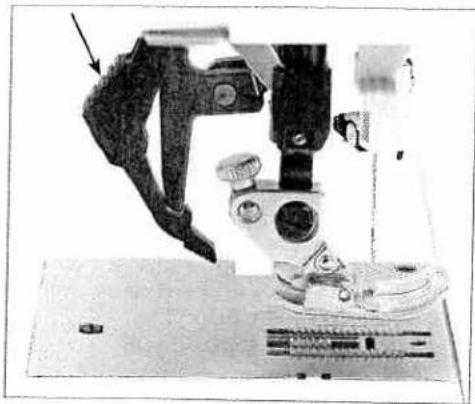
natural_image
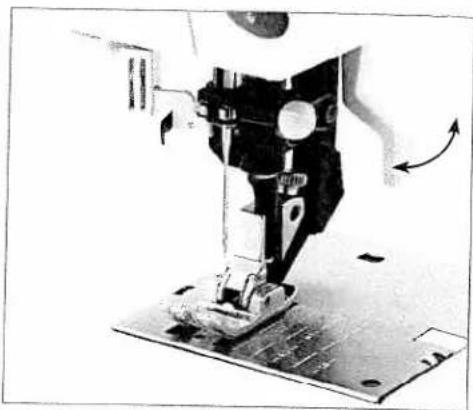
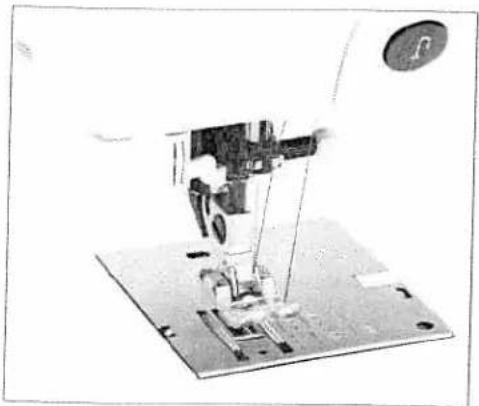
Close-up of a mechanical device with a mounted lens and baseplate (no visible text or symbols)Engaging the IDT
Important: For all sewing with the IDT - Integrated Dual Feed, use presser feet with the center back cut out.
Raise the presser foot. Press the black elbow of the IDT down until it engages.

natural_image
Close-up of a microscope with an arrow indicating motion or direction (no visible text or symbols)Disengaging the IDT
Hold the black elbow of the IDT with two fingers.
Pull the IDT down, then back away from the machine and release the IDT slowly upward.
natural_image
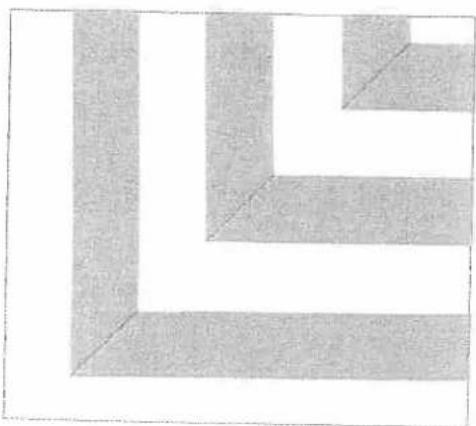
Abstract geometric pattern with L-shaped and rectangular blocks (no text or symbols)Stripes and plaids match perfectly due to the even feed of the IDT.
natural_image
Grayscale abstract texture with diagonal gradient and no visible text or symbols
natural_image
Close-up of a dark, textured surface with no visible text or symbols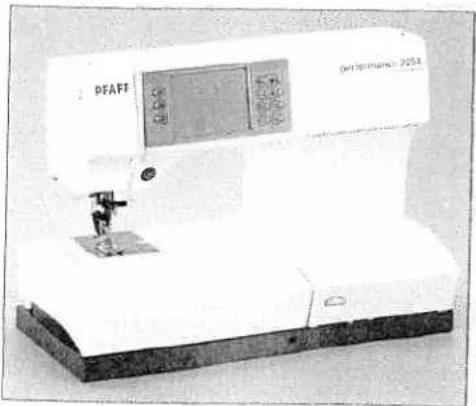
natural_image
Exterior view of a sewing machine (no visible text or symbols on the device body)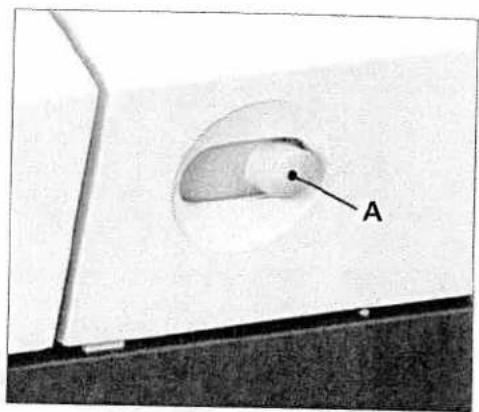
text_image
ALowering the feed dog
For certain sewing work such as free-motion quilting or darning the feed dog has to be lowered.
Raise the presser foot before lowering the feed dog. Push slide A to the left.
To bring the feed dog back up move the slide to the right.
natural_image
Exterior view of a PFAFF instrument with control panel and base (no visible text or symbols)
natural_image
Close-up of a mechanical component with labeled part B, showing internal structure and no readable text or symbols.You can also lower the feed dog by opening the hook cover and moving slide B to the right. To engage the feed dog move the slide to the left.

natural_image
A plain horizontal gray bar with no text, symbols, or markings.
natural_image
Close-up of a hand holding a small object with a black arrow pointing upward (no visible text or symbols)1.
natural_image
Diagram of a vertical rod suspended in a container with an upward arrow indicating motion (no text or symbols)2.

natural_image
Exterior view of a sewing machine (no visible text or symbols)Electronic knee lift
Your Pfaff performance 2054 is provided with an electronic knel lift for regulating the presser foot height.
- Push the knee lift fully into the provided hole on the machin Note: the flat side must face upwards.
- Adjust the rectangular bar on the knee lift until it is position at a comfortable height for you.
If you press the knee lift to the right, the presser foot will raise. Now you can guide the fabric with both hands.
To remove the knee lift, pull it gently out of the hole.
Operating your performance 2054
Instructions on operating your Pfaff
performance 2054 3
Function buttons 3
Sewing menu 3
Altering the stitch settings 3
More options for sewing 3
Selecting a stitch 4
Selection by category 4
All stitches selection 4
Selection by number 4
Direct selection 4
Exiting a sewing menu
The Context menu
The functions in the Context menu
Info system
Information in the main menu
Instructions on operating your Pfaff performance 2054
Turn on your machine and a welcome screen appears. Touch the screen to close it. Your machine is always ready to sew when main menu, stitch selection menu, sewing menu or stitch sequence menu is visible. Your Pfaff performance 2054 is operated by touching the appropriate icon on the touch screen.
Sewing functions for the machine can be individually altered.
Touch ok to close a window, save your altered settings and be able to select a new function.
Touch esc®, to continue without saving any settings.
Pop-up messages are closed simply by touching the screen. You can also close the messages by switching on the function or by pressing the foot control.
text_image
PFAFF performanceFunction buttons

Stitch re-start
Touch Stitch re-start to return to the start of a stitch sequence or program that has already been started.

Sew slow
Touch Sew slow to reduce sewing to half speed.

Needle up / down
Touch Needle up / down to set the needle to automatically stop in the lower position when you stop sewing. A window opens to set whether and how far the presser foot is raised when you take your foot off the foot control. The basic setting is to manually raise the presser foot.
You can choose between "No", "low" = 3 mm, "medium" = 6 mm and "high" = 9 mm.
When you press the foot control again, the presser foot is automatically lowered again. This allows you to pivot turn the fabric
If the ⚫ icon is touched the needle goes to the up position, when the reverse button is touched. But the needle down function remains active.
Press 📄 again to deactivate the function.
Tip: You can pre set the presser foot height in the context menu. See page xx-yy
text_image
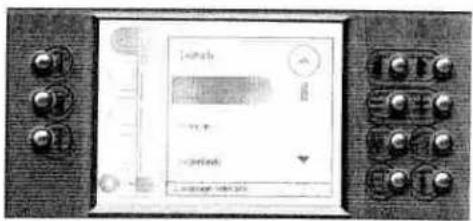
Control panel with display screen showing text and buttons, including a numeric input field and Chinese characters
natural_image
Black and white abstract image with horizontal gradient from dark to light (no text or symbols)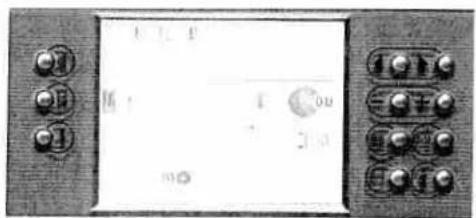
text_image
Front panel of a digital display with control buttons and display screen showing 'I' and 'OU'
Reverse sewing button
This button has several functions
- If you press this button while sewing, the machine sews in reverse for as long as you keep the button pressed.
- For permanent reverse, press this button before starting to set the machine sews in reverse until you press the button again. When the function is activated, a reverse sewing arrow appears on the touch screen.
- If you have activated the tie-off program, tie-off at the end is initiated via this button.
- In the "Patchwork", "Tapering" and "Darning" programs, yo determine the length of the seams with this button.
- If you are programming the length of a buttonhole, you determine the length of the buttonhole seam with this button.

These buttons have several functions
- Selection menus: Scrolls by column or by page to select a stit
- Sewing menus: Selects the next or the previous stitch in numerical order.
- Fonts. Moves the stitch sequence cursor after the input field been actively selected.
- Stitch sequence: Moves the stitch sequence cursor after the action field has been selected for changing a stitch. Stitch selection added to stitch sequence after the preview field has been actively selected.
- Info: If more than one information page is available, you scr page by page with this buttons.

Function field buttons
Touch stitch parameter icon or stitch balance on the display a adjust them with the Function field buttons.

Main menu
Touch this button to switch back step by step to the main me for selection of all stitches.

0-9 Button
Opens the stitch selection by number.

More options button
Opens the more options window, for processing or modifying selected stitch.

Info button / Context menu
Opens information or context menu.
Touch this button to open the info menu.
Touch and hold the button until the context menu opens.

natural_image
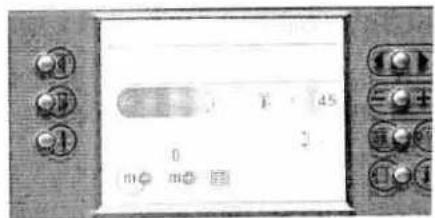
A grayscale horizontal bar with a dark top and light gray bottom, showing no text or symbols.Sewing menu
The sewing menu is divided into three sections.
- Status bar, where the activated sewing functions are shown. It is always active and is automatically updated by selecting or changing a sewing function.
- Action field, where the chosen stitch is displayed. In the stitch sequence the action field is activated by touching the screen for selecting and changing a stitch.
- Function field with function buttons and parameter setting. The figure in the upper left corner of the function field indicates the selected stitch number. In Sequence a preview field appears in the function field. More options window appear when the ☐ button is pressed.
Icon status
Inactive, the function cannot be selected.
Active, but can not be unactivated.
m Active, the function can be unactivated.
m+ Actively selected, the function is selected.
Altering the stitch settings
For straight stitch. Move the needle positions with the - + buttons. There are 19 needle positions available. + The needle moves to the right in nine positions. - The needle moves to the left in nine positions.
Stitch width. You can change the stitch width (max 9 mm) with the -+ buttons.
Stitch length. You can change the length (max 6 mm) of the pattern with the + buttons.
Pattern length. For decorative stitches, buttonholes, satin stitches, scallop stitches and some utility stitches. You can increase or reduce the length of the stitch with the buttons.
Balance. Fine tune your stitch balance with the - + buttons.
Density. change the stitch density, of satin stitches, scallop edges and buttonholes, with the - + buttons, without changing the patternlength or buttonhole length

text_image
1 2 3
natural_image
A grayscale horizontal bar with no visible text, symbols, or markings.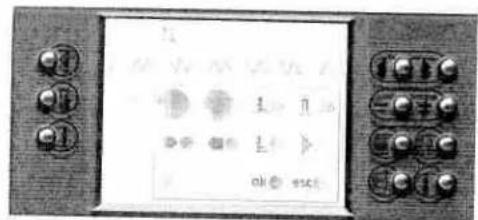
text_image
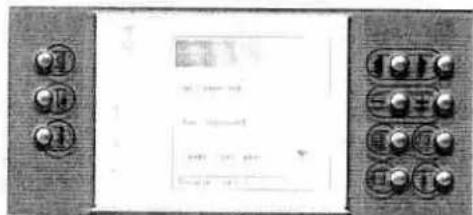
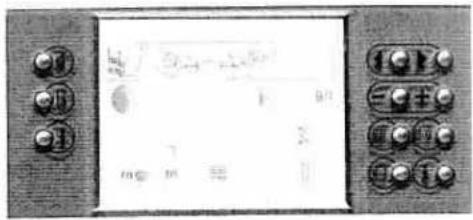
Digital display panel with control buttons and numeric keypad, showing function icons and status labels
text_image
Digital display panel with control buttons and a waveform display showing '1' and '0.5'Side to side mirroring. Mirror stitches and sequences side to side. Each stitch is mirrored individually.
End to end mirroring. Mirror stitches end to end.
m This icon stores the stitch in a stitch sequence. The stitch sequence menu appears automatically by actively selecting the "m+" icon.
An adjustment is reflected immediately on the screen. All setting can also be adjusted during sewing. With some Utility stitches that change takes place immediately, with all other stitches the chan occurs at the next repeat.
If you exit a screen, the stitch settings are reset to the default settings. For saving the basic settings, pre set it in context menu
More options for sewing
By touching ☐ you can call up a dialogue window with further functions for processing or modifying the stitch. Only sewing functions that can be selected are visible. Selected functions are displayed in the status bar.
Icons in the More options window
ok OK. The More options window closes and all settings are saved. You can also press the foot control. The More options window or another dialogue window remains open so that further settings can be made.
esc Closing without saving. You close a window without the modified settings being saved.
Tie off at start. The start of the seam or stitch is tied off with four stitches. This icon is only active at the start of a seam an usually after a new stitch is selected or when the Stitch re-sta button is touched.
Tie off at end. The end of the seam or stitch is tied off with four stitches. Touch the Reverse button to trigger the Tie off end function. The machine ties off and stops.
1 Raise presser foot. The machine will lower the presser foot at the start of the seam and raise it at the end of the seam automatically. If this function is active, the presser foot is alw raised 10.5 mm when the machine stops.
If the 📄 and 🔊 icons are selected, the presser foot is only raised at the end of the seam or pattern when the Reverse button 🔊 is pressed.
The Needle up / down overrides the Raise presser foot functi

natural_image
A plain gray rectangular strip with no visible text, symbols, or markings.Free motion sewing. When activated the presser foot is lowered automatically to the free motion position by stepping on the foot control.
Single stitch. Pattern and stitch sequences can be sewn as single stitches. You can also define a number of stitches as a single stitch. The number of repetitions are displayed in the status bar. Tie-off is automatically performed at the end of the seam or stitch.
Touch ▶ a little longer and a window appears, to change the number of repetitions with ⏻, confirm by touching the screen.
Twin needle safety. With this function, you reduce the width of your stitch in order to use a twin needle.
It remains active even after a stitch has been changed, including after the machine has been switched off and back on again. Touch the icon again to switch off the function.
This function must be switched off when you remove the twin needle from the machine.
pat Programmable seam length function. Specify a particular seam length for joining together several pieces of fabric of equal length.
Press the reverse button when you reach your desired length, it will be tied off. All subsequent seams are now automatically sewn in your specified length until pat is pressed to deactivate this function.
Symmetrical tapering (increase). The width of the zigzag stitch starts with 0 mm and becomes wider until it reaches (max) 9 mm.
Symmetrical tapering (reduce). The width of the zigzag stitch starts at (max) 9 mm and tapers to 0 mm when the reverse button is touched. It stops with the needle in the lower position
Asymmetrical tapering (increase). The width of the zigzag stitch starts with 0 mm and becomes wider until it reaches (max) 9 mm.
Asymmetrical tapering (reduce). The width of the zigzag stitch starts at (max) 9 mm and tapers to 0 mm when the reverse button is touched. It stops with the needle in the lower position

text_image
OK OK OK OK
text_image
Scanned image of an electronic device control panel with labeled buttons and display screen showing text and iconsNote. If you press the foot control once at this point, the corresponding sewing menu opens. If you press the foot control once more the machine starts to sew.
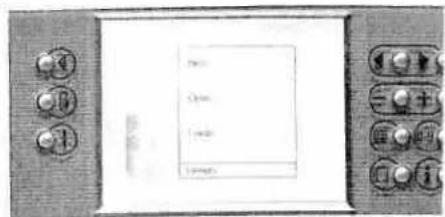
The selection menus
When the Welcome screen is turned off the main menu appears.
Utility stitches
Stitches 1 -30
This menu provides a selection of stitch types that you can use fc a variety sewing techniques.
Overcasting
Stitches 31 - 40
This menu provides a selection of all stitch types suitable for overcasting.
The closed overedge stitches can be used for joining and overcasting in one operation.
Antique quilt stitches
Stitches 41 -55
This menu provides a selection of quilt stitches suitable for crazy patch quilting.
Crosstitches
Stitches 72 -89
Pre-programmed cross stitches allow you to create traditional borders. Individual cross stitches allow you to program your own designs.
Decorative stitches
This menu includes a selection of decorative stitches.
They are sub-divided into four different categories for ease of selection.
- Hemstitches allow you to create heirloom stitches. Stitches 90 - 99
- Scalloped edging, for sewing decorative edges on table liner clothing. Stitches 100 - 113
- Satin stitches have a three-dimensional look that offer a wide range of options for embellishing garments or items for the home.
Stitches 114 - 133
- Decorative stitches. Stitches 134 - 145 are leaves and flowers which can be sewn individually to create larger motifs. They are ideal for decorative borders. Stitches 146 - 166 are pictorial or three-dimensional decorative stitches which can be combined. Stitches 167 - 188 are floral patterns. Stitches 189 - 195 are Animal stitches which are especially suitable for children's garments.
Stitches 134 - 195.
Buttonholes
Stitches 56 - 64
This menu provides a selection of 8 different buttonhole styles and one program for sewing on buttons. Each buttonhole style is designed for a specific application and fabric.
Darning and bartacks
Stitches 65 - 71
This menu provides a selection of bartacks, darning stitches. The various different bartacks are for reinforcing pocket corners, skirt plackets/slit and attaching belt loops.
The fully automatic darning programs are for repairing damaged areas and darning tears or small holes.
Alphabets
This menu provides a selection of various fonts. One font includes upper and lower case letters, numbers and symbols.
Stitch sequence
In this menu, you can create sewing sequences from the machine's stitches.
performance 2054
Manual
B

text_image
PFAFF PFAFF performance performance 2054 IDTM The real passion for sewing!
natural_image
Pure black horizontal bar with no text or symbols
natural_image
Front view of a vintage electronic device with control knobs and display screens (no visible text or symbols)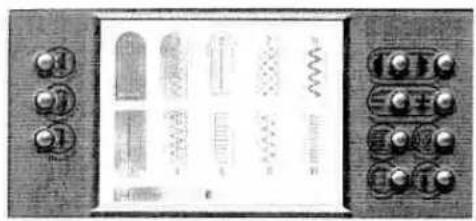
natural_image
Front view of a control panel with buttons and display panels (no readable text or symbols)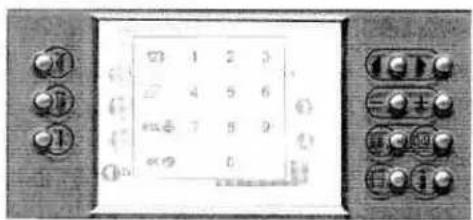
text_image
1 2 3 4 5 6 7 8 9 0
text_image
1 45 mSelecting a stitch
There are several ways to select a stitch.
Selection by category
Touch "Utility stitches".
This category contains 30 stitches that are suitable for utility sewing. You can browse one column at a time with the 📄 button.
You can touch any stitch to select it and open the screen for that stitch. When you open the screen the most important settings are visible.
All stitches selection
In this menu, all stitches are displayed one after another in numerical order.
Touch "All stitches" in the main menu.
You can browse through the menu one page at a time by pressing the 🎨 buttons.
To select a stitch, touch the icon for that stitch.
Selection by number
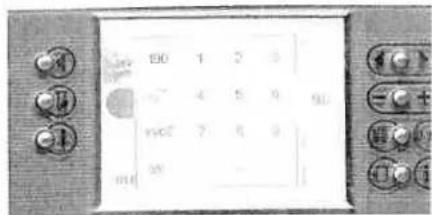
Touch 0-9 button to open to the selection by number menu.
Enter the stitch number and confirm by touching ok.
The delete 🔒 button deletes the right hand digit. If more than three digits are entered, they are deleted from the left. If a stitch that does not exist is entered, a message is displayed:
"Invalid stitch number!"
The pop up message is closed when the display is touched.
Direct selection
When in a sewing menu, a different stitch can be selected by pressing the ⏻ buttons. You can scroll back and forwards through the stitches in numerical order.
Exiting a sewing menu
- The main menu can be called up again at any time by touching twice.
- Scroll with the arrow buttons
- Touch the number selection button 0-9.

natural_image
A plain gray rectangular shape with no visible text, symbols, or markings.The Context menu
Adjust basic settings of the machine, such as "Language", or stitch settings. You can calibrate the touch screen and adjust the touch screen contrast.
All "context" Machine Settings are not available from all menus.
Open the "Info" menu by pressing the ⓘ button. Press and hold this button to open the Context menu.
Press this button again to close the menu.
If the Context menu is closed with the ⓘ button when a subordinate window is open, the menu is closed without settings being saved.
The functions in the Context menu
Windows for altering your basic settings or functions are opened with the various icons in the context main menu.
Language (available from main menu)
In this menu, you can select the language of your Pfaff performance 2054. Touch the "Language selection" icon. Touch the language of your choice.
Audio signal (available from all menus)
Different audio signals can be heard when you touch icons or when screen messages appear.
You can choose to have two different signals: One when you touch an icon and one for pop-up messages.
Calibration
If you want to adjust the sensitivity of the touch screen it is possible to do it here.
There are two possible ways to open the Calibration screen.
- Context menu (available from main menu)
Touch "Calibration" in the context machine settings menu.
In the upper left corner, a small circle appears in a larger, flashing circle. Touch the area inside the larger circle to fix the first point. Fix the two following points the same way.
The calibration display closes after finished calibration.
- When switching on the machine
If you press the ☐ button as you switch the machine on, the Calibration screen opens automatically.
text_image
Laser Ground
text_image
Unrealized back ch 320 control unit 2
natural_image
Front view of a vintage electronic device with control knobs and a blank screen (no visible text or symbols)
natural_image
Grayscale abstract texture with horizontal gradient and no discernible text or symbols
natural_image
Front view of a control panel with buttons and display screen (no readable text or symbols)Contrast (available from all menus)
Adjust the touch screen so the graphics are easy to see in the lig available.
Touch the contrast.
Adjust the contrast with the ⏻ or use the arrows on the touchscreen. Touch the contrast window outside the arrows to close it and save the settings.
Revert to original settings (available from main-, pattern selectic pattern- and sequence menu)
If the "Revert to original settings" icon is touched, the following message appears:
"Do you really want to delete all the changes you have made an restore the original settings?"
Pattern parameter (available from pattern- and sequence menu)
You can specify whether your pattern and / or sewing parameter settings are to be discarded ("Back to default setting"), or saved ("custom setting"). "Do not save" is the standard setting.
Show keyboard (available from alphabet menu)
You can specify how to choose letters in the "Alphabets menu", toggle between basic and keyboard view.
Selection view (available from sequence select menu)
Touch the button "Selection view" to toggle between the two different stitch sequence menus.
- 10 memory view, memory number are showed (M1, M2..).
- 5 memory view, graphical preview of the memories.
Raise presserfoot (available from main-, pattern- and sequence me) You can specify that the presser raises automatically to a certain pre set position every time the needle down, 📋, is selected. the following positions are available:
"Display window selection" is the standard setting.
Option for messages (available from main-, pattern- and sequence menu)
- You can switch off the messages that automatically appear in the machine.
- You can specify whether the machine should stop when a message appears.
An X in the icon means that the function is switched on. All functions are active as standard.
text_image
Control panel with labeled buttons and a display screen showing text and data fields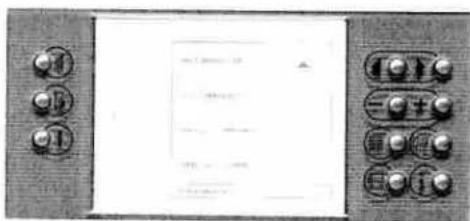
text_image
Scanned image of an electronic control panel with buttons and a display screen containing text.
text_image
Scanned image of an electronic device panel with buttons and a display screen showing text and symbols
natural_image
A plain horizontal gray bar with no visible text, symbols, or markings.Machine test (available from main menu)
This function is for Pfaff certified service technicians only.
Version (available from main menu)
The current software version number in your machine is shown here.
Software updates (available from main menu)
This function is for Pfaff certified service technicians only.
Welcome screen (available from main menu)
The welcome screen that appears when the machine is switched on can be deactivated. Touch the button "Welcome screen" to toggle on / off, the welcome screen is active if the button is highlighted. The setting is made when the context menu is closed.
Delete all (available from main menu)
This function will reset your performance settings to default settings. Use with care!
If the "Deleting memory" icon is touched, the following message appears: "Do you want to delete the pattern parameters plus all pattern sequences?"
Delete parameters (available from pattern selection menu)
This function deletes all changed parameters in all stitches.
Delete all stitch sequences (available from sequence select menu) This function deletes all stitch sequences.
Info system
There is an Info system function in your sewing machine to help you; it can be called up at any time by pressing the ⓘ button. The info system includes information on preparing the machine for sewing, using the sewing functions, recommendations regarding accessories and settings.
An "info" text may extend over several pages. Use the buttons to browse through the pages.
Touch ⓘ to close the Info system. If the "Context menu" is also open, the first touch closes the Context menu; the "Info" is closed with a second touch.
Depending on when you press the info button the information may appear in different ways.

text_image
Scanned image of an electronic device control panel with labeled buttons and a display screen showing text content.
natural_image
Grayscale abstract texture with horizontal bands and no visible text or symbols
text_image
Control panel interface with buttons and display screen showing text and symbols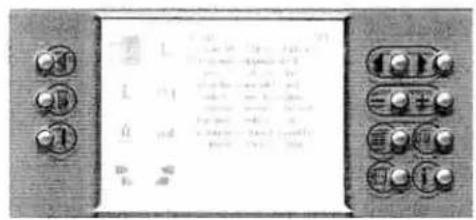
text_image
Cropped image of an electronic control panel with labeled buttons and a grid of text, likely part of a device interface.Information in the main menu
If you press the ⓘ button in the main menu the info system gives you the following information:
- Threading the top thread.
Threading the needles.
Winding the bobbin.
Winding through the needle.
Inserting the bobbin.
Touch the desired area.
Graphics and text will describe the function.
Press the ◀◀▶ buttons to scroll through multiple pages.
Information about individual patterns in the sewing menu If you press the ⓘ button when a stitch is selected the info system gives you the following information:
Needle size/type recommendation, to engage or disengage the IDT, recommended presser foot and upper thread tension.
For tapering, patchwork, buttonhole sewing, quilt stitches and darning program there is a more detailed information.
Information in the more options window
When you press the ⓘ button when the More options windo is open, an information window opens with information about different sewing functions.
There are eight areas to choose from:
Tie off
L Raise presser foot
1 Free motion sewing
▶1 Single stitch
Twin needle
pat Patchwork program
Tapering decrease
Tapering increase
Press the ↕ ↗ buttons to scroll through multiple pages.

natural_image
Grayscale abstract texture with curved edges and no visible text or symbols
natural_image
Close-up of a smooth, curved surface with a dark horizontal band above it (no text or symbols visible)| 1 | 2 | 3 | 4 | 5 | 6 | 7 | 8 | 9 | 10 | 11 | 12 | |
| 1 | 2 | 3 | 4 | 5 | 6 | 7 | 8 | 9 | 10 | 11 | 12 | |
| 48 |

natural_image
Black and white abstract pattern with no discernible text, symbols, or structured elementsStitch Sequences
Available sewing functions in the stitch sequence 50
Creating a stitch sequence: 50
Editing a stitch sequence* 52
Saving a Stitch Sequence 52
Creating a new stitch sequence 53
Opening a memory 53
Alphabets 54
Creating a word Sequence 55
Edit a word sequence in the Stitch sequence menu 55
Stitch sequences
Your performance 2054 offers you the possibility of storing stitch and word sequences in the memories of the machine. The stitch sequences are stored and remain in the memory until you overwrite or delete it.
Up to 99 stitches or letters can be stored in each of the 50 memories.
Available sewing functions in the stitch sequence
These sewing functions depend on the stitch type.
This sewing function is determined by the stitch type.
By pressing the ☐ key you can set the following sewing functions:

These now set the function for the entire stitch sequence.
Creating a stitch sequence
In a sewing menu each stitch can be saved in a stitch sequence by touching m the display changes to the stitch sequence display. The stitch can be sewn immediately and can later be stored in a permanent memory.
When the stitch is saved to sequence,
This display includes a preview field which shows every next stitch to add to the stitch sequence. To delete a selected stitch touch m. To insert a stitch through the insertion button, touch ☐ to open the main menu.
Note: Touch 📄 to call up stitches that you wish to add in the sewing sequence. Touch 📋 to exit stitch sequence menu and return to the main menu.

natural_image
Front view of a control panel with buttons and display screen (no readable text or symbols)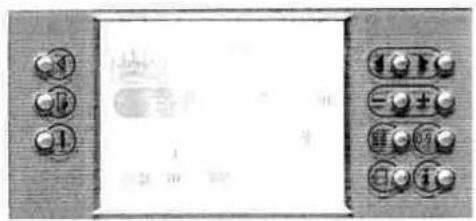
text_image
Control panel with buttons and display screen showing Chinese text and numeric keypad
natural_image
A plain gray rectangular shape with no visible text, symbols, or markings.Selecting another stitch
There are various ways to select another stitch in the stitch sequence.
1. Selection by number.
Touch 0-9 to open the selection by number menu.
If a stitch is selected that cannot be used in stitch sequence, for example, a buttonhole, a message is displayed.
2. Selection by Stitch selection keys.
Touch 🔊 to browse the stitches in the preview field.
3. Selection by category
Touch ☐ to open the stitch sequence selection menu. Only categories with stitches can be entered in a stitch sequence can be selected.
The selected stitch appears in the preview field and all specific parameters and sewing functions can be changed.
Touching mo inserts the stitch into the stitch sequence, following the position of the cursor. The cursor jumps to the end of the inserted stitch. The preview field remains active so that a new stitch can be chosen.
4. Selection by repetition
Touching the m inserts the same stitch once more with the same settings.
If the same stitch is to be saved with changed settings, these can be changed immediately.
The selected stitch appears in the preview field and all settings and sewing functions can be changed.
Touch m to insert the stitch into the action field following the position of the cursor.
If a stitch sequence extends over more than one display width, an arrow appears on the left border of the action field, indicating one or more preceding pages.
text_image
190 1 2 3 4 5 6 190 7 8 9 30 -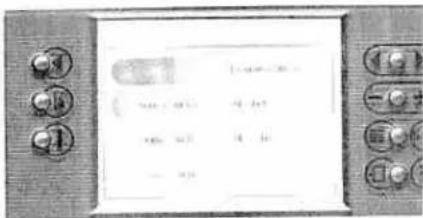
text_image
Scanned image of an electronic device control panel with labeled buttons and a display screen showing text.
text_image
Scanned image of a control panel with buttons and display screen showing text and symbols
natural_image
Close-up of a textured surface with no visible text, numbers, or symbols
natural_image
Close-up of a textured surface with a dark triangular edge and a small mark (no text or symbols visible)Editing a stitch sequence
The sequence can only be edited when the machine is idle and the action field is active. Activate the action field by touching it.
Touching ⬆ moves the cursor to the position where the sequence is to be edited. All settings and sewing functions of the selected stitch can be changed. Another stitch can be inserted behind the selected stitch, at the cursor itself.
Select the entire sequence by pushing the 🔒 button. When the entire sequence is selected it is possible so mirror the whole sequence horizontal or vertical.
If the cursor is moved backwards an arrow appears in the right border of the display, indicating that the sequence consists of further stitches.
text_image
Digital display panel with Chinese interface labels and numeric keypadSaving a Stitch Sequence
When you exit the Stitch sequence menu with 📄, your Pfaff performance 2054 asks if you want to say your sequence.
esc closes without saving. The main menu opens.
ok opens an empty memory so it can be selected.
The stitch sequence is automatically saved if an empty memory is selected. If an occupied memory is selected, the following message appears:
"Do you want to overwrite this memory?"
ok saves the stitch sequence.
esc closes the window so another memory can be selected.
The ⏻ key closes the stitch sequence memory selection menu without saving.

text_image
Scanned image of an electronic device panel with Chinese text labels and control buttonsCreating a new stitch sequence
If the "Stitch sequence" button is touched in the main menu and a memory is already full, a dialog window opens to "New", "Open" and "Delete" a stitch sequence. If "New" is touched the stitch sequence menu opens.
The stitch sequence buttons are active except for . The stitch 1, straight stitch, is displayed in the preview field.
All buttons and keys are active, ready to create a new stitch sequence.
text_image
Menu Open Load LoadOpening a memory
If the "Stitch sequence" button in the main menu is pressed, the stitch sequence memory menu opens. Memory 1 is actively selected.
To select another memory again touch the button, or touch the "Stitch selection buttons" and open it with the "More options" button.
If an empty memory is touched, an empty stitch sequence display opens. The straight stitch (stitch number1) is shown.
If a memory that is occupied is touched, a dialog window opens:
- If "New" is touched, the saved sequence is deleted and an empty stitch sequence display opens to create new sequences.
- If "Open" is touched, the saved stitch sequence is opened. The preview field is actively selected.
• If "Delete" is touched, the selected memory is deleted.
text_image
0 1 45 0 m m 2
natural_image
Close-up of a smooth, curved surface with no visible text or symbols
natural_image
Close-up of a smooth, curved surface with a dark horizontal band above it (no text or symbols visible)Alphabets
You can write an entire sequence of words using the built in fonts and save it permanently in the performance 2054 memory. All fonts should be sewn with the IDT - Integrated Dual Feed disengaged. All fonts include upper case letters, special characters and numbers. The Script font also include lower case letters.
Touch the "Alphabets" icon and select a font. The machine switches automatically to the stitch sequence menu. If only one letter is to be sewn, it must be sewn in the stitch sequence menu.
Available functions
ABC Upper case letter
abc Lower case letter
A00 Special characters
0.9 Numbers
Letter selection buttons. If ▷ is touched, characters are actively selected one after another. If ▷ is touched, the selection jumps 5 characters further on. You can scroll backwards and forwards.
9.0 Size setting button. Touch this button and set the font size with ⏻.
A selected character is saved in the stitch sequence field by touching this button.
Eraser. Deletes a selected character from the stitch sequence field - Happy Birthday. In this case the "y" is deleted and then the "a" is selected automatically.
m+ Save button. The stitch sequence menu opens when this button is touched.
Mirror image button. If the button is actively selected before the first character is entered or if the whole sequence is selected by pushing the "mirror image" refers to the whole sequence.

text_image
Control panel with labeled buttons and display screen showing Chinese text and numerical data
text_image
SAMPLE 1 2 3 4 5 6 7 8 9 10 11 12 13 14 15 16 17 18 19 20 21 22 23 24 25 26 27 28 29 30 31 32 33 34 35 36 37 38 39 40 41 42 43 44 45 46 47 48 49 50 51 52 53 54 55 56 57 58 59 60 61 62 63 64 65 66 67 68 69 70 71 72 73 74 75 76 77 78 79 80 81 82 83 84 85 86 87 88 89 90 91 92 93 94 95 96 97 98 99 100
text_image
Digital display panel with Chinese characters and numeric display, showing control buttons and numeric displayCreating a word sequence
Touch the "Alphabets" icon in the main menu.
Select a font.
When the menu is opened, the ABC, uppercase button, is selected by default.
When the sequence field is open, the character selection field is actively selected. The chosen font is displayed in the upper right corner.
Touch ▷ ▷ to choose the desired character. To "Show keyboard see page 45.
Touch ok to save the chosen character in the font input field.
If you enter a sequence that is longer than the input field the sequence moves to the left, and a small arrow appears on the edge of the display. Any further stitch will be added after the cursor. Cursor always selects the last entered character.
Touch the input field SAMLE to select it.
The stitch selection keys move the cursor to select another character or to subsequently delete or insert characters.
• The selected character is deleted.
• Insertions are made after the cursor line.
Touch the character selection field abcdefghiplmtopgrst and another character can be chosen.
You can alter the font size by touching 9.0 and set the size with - + . The font size refers to capital letters.
- When the size is set before characters are entered, the size is for the entire sequence.
- If one character is selected in [abcdef]hukimnoparst, the size of the individual character can be changed. The following character will also be saved in this size until a new size is set.
Edit a word sequence in the Stitch sequence menu
If m@ is touched in the word sequence menu, the stitch sequen display opens and displays the word sequence.
The letters entered are shown in the action field in the selected font type. Touch ⚙️ to change the size of the individual select characters with ⊖.
You can add stitches, letters and edit size. To save follow instructions under "Saving a Stitch Sequence".

natural_image
Close-up of a textured gray surface with no visible text, numbers, or symbolsUtility stitches
Sewing in zippers - No 1
Straight stitch-No 1
Basting stitch - No 17
Top stitching - No 1
Elastic blind hem stitch-No 16
Blind hem stitch-No 15
Zigzag stitch-No 3
Stretch triple zigzag stitch-No 14
Elastic stitch - No 4
Honeycomb stitch - No 7
Stretch triple straight stitch - No 2
Darning with the elastic stitch - No 4
Sewing-on patches-No 4
Repairing tears
Overlock stitches
Buttonholes
Sewing on buttons - No 64
Eyelets-No 71
Automatic darning-No 69 and 70
Free motion darning
Gathering with straight stitch-No 1
Gathering with elastic threads-No 7
Straight stitch - No 1
Stitch 1 is the basic straight stitch in center needle position. The stitch length can be increased up to 6 mm. Change the needle position of the straight stitch to sew in a zipper or topstitch along the edge of a collar. Your Pfaff performance 2054 has 19 needle positions that can be adjusted with the 📄0. icon and 🕒+ button.
natural_image
Close-up of a dark textured fabric with a vertical white line dividing it (no text or symbols)Tip: Use the "needle up / down" button to easily pivot at collar points.

natural_image
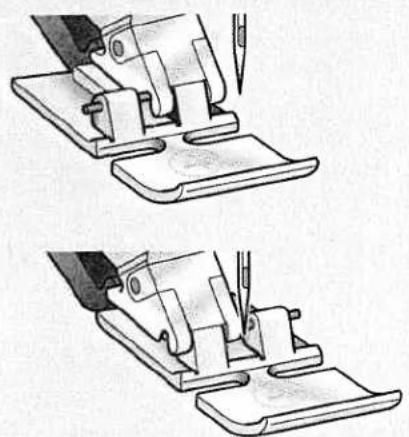
Abstract geometric pattern with intersecting lines and shaded regions (no text or symbols)Sewing in zippers - No 1
There are different ways to sew in zippers. Follow the directions included with your pattern for best results.
For all types of zippers it is important to sew close to the teeth of the zipper. The zipper foot can be snapped to the presser foot ankle on the left or right, depending on how you will insert your zipper. Then set the needle position so that it enters close to the edge of the zipper teeth by using one of the 19 needle positions available.
Note: If the presser foot is attached on the right side, the needle must be moved to the right. If the foot is attached on the left, the needle must be moved to the left.
natural_image
Two technical line drawings showing a sewing machine being cut with a tool, no text or symbols present.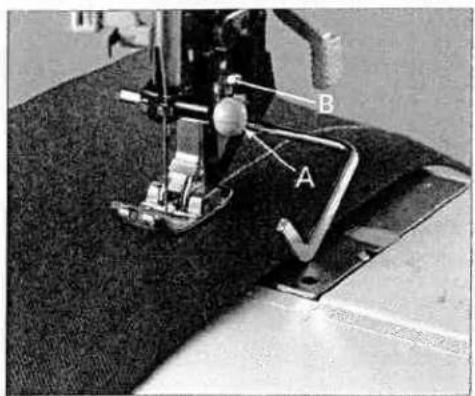
text_image
Close-up of a sewing machine with labeled parts A and B, showing fabric and mechanical components.Top stitching - No 1
The straight stitch can be sewn in 19 different needle positions allowing you to guide the presser foot along the fabric edge for top stitching. The distance between the rows of topstitching is determined by the needle positions.
Use the guide marks on the needle plate, or the edge guide to stitch further from the fabric edge. The edge guide is inserted hole A and is secured with set screw B.

natural_image
Close-up of a textured surface with faint rectangular patterns and white lines, no visible text or symbols.Basting stitch - No 17
With stitch 17 you can baste. When you press the foot control, machine will sew one stitch at a time. Press the foot control ag for each stitch.
• Lower the feed dog and disengage the IDT.
- Place the fabric under the presser foot.
- Sew one stitch, then move the fabric the required amount 1 the rear. Continue to sew one stitch at a time until you finish basting.
Tip: Light fabrics are easier to baste with long straight stitches (6 mm) such as No. 1.
natural_image
Close-up of a textured surface with a dark curved edge and a bright horizontal band (no text or symbols visible)Blind hem stitch - No 15
The blind hem stitch is used to make invisible hems on skirts, trousers and home decorating.
• Finish the edge of the hem.
• Fold and press the hem allowance to the wrong side.
- Fold the hem back on itself so approximately 3/8" (1 cm) of the finished edge extends beyond the fold. The wrong side of your project should now be facing up.
- Place the fabric under the presser foot so that the fold runs along edge guide A.
- When the needle swings into the fold it should catch a small amount of fabric. If the stitches are visible on the right side, adjust edge guide A by turning adjusting screw B, until the stitch that catches the hem just slightly barely shown.

text_image
A B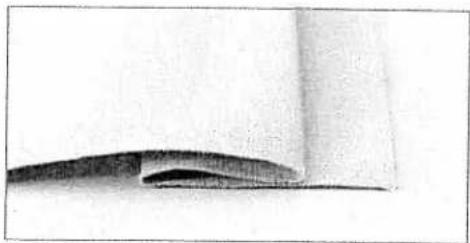
natural_image
Close-up of a curved surface with a dark horizontal band, possibly indicating a material or layer (no text or symbols visible)Elastic blind hem stitch - No 16
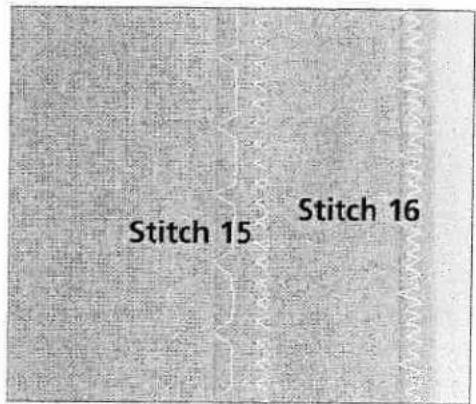
The elastic blind hem stitch is especially suitable for stretchy fabrics, because the zig zag in the stitch lets the stitch stretch. The hem is finished and sewn at the same time. There is no need to finish the raw edge first on most knits.
Create the blind hem as described above.
text_image
Stitch 15 Stitch 16
natural_image
A plain gray horizontal bar with no text, symbols, or markings.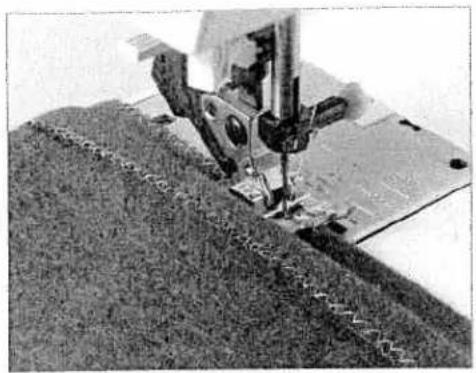
natural_image
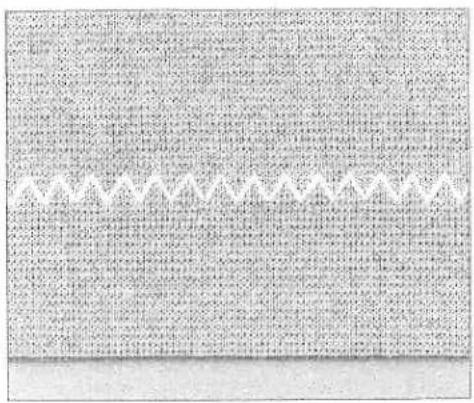
Close-up of a sewing machine stitching fabric on a metal sheet (no visible text or symbols)Zigzag stitch - No 3
Raw edges can be finished easily with zigzag stitch 3. Make sure the needle pierces the fabric on the left swing of the needle and overcasts the edge of the fabric on the right swing of the needle
text_image
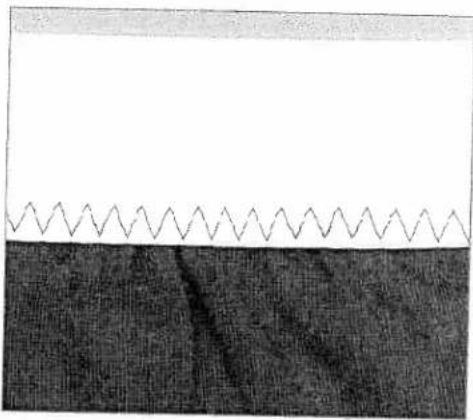
Scanned page of dense text with a decorative border and a small watermark at the bottom.Stretch triple zigzag stitch - No 14
The stretch triple zigzag stitch produces a highly elastic and decorative seam. This stitch can be used for T-shirt hems and wide decorative threads on denim.
- Fold up a hem the correct width.
- Topstitch the hem from the right side, or thread the top wit decorative thread and sew.
Tip: Use lower needle thread tension and stabilizer under the fabric for decora threads.

natural_image
A plain gray horizontal bar with no text, symbols, or markings visible.Stretch triple straight stitch - No 2
This stitch is used for sewing seams where strength is needed, such as under arm and crotch seams. The heavier the fabric, the longer the stitch length required. Your Pfaff performance 2054 has 19 needle positions that can be adjusted with the 0. icon and - + . button.

text_image
Scanned page of dense text with dense paragraphs and a small table of contents, likely from a legal or administrative document.Elastic stitch - No 4
Use stitch 4 to add elastic to pajamas, skirts and sportswear.
• To create a waistband, finish the top edge of the garment.
• Cut elastic to comfortably fit around waist.
- Sew the ends of the elastic together.
- Divide the garment edge and elastic into quarters.
- Stretch the elastic to fit the fabric. Sew on elastic.
natural_image
Abstract pattern with wavy line and textured base (no text or symbols)Honeycomb stitch - No 7
The honeycomb stitch is an elastic and decorative hem, which is very suitable for childrens clothes and lingerie.

natural_image
Close-up of a sewing machine needle stitching fabric (no visible text or symbols)
natural_image
A plain horizontal gray bar with no visible text, symbols, or markings.
text_image
Scanned page of dense text with dense, illegible characters and symbolsDarning with the elastic stitch – No 4
Use the elastic stitch to repair holes, tears and damaged areas.
- If the area is only slightly damaged, sew over it with several rows of stitching until it is well covered.
- For tears, frayed edges or small holes, place a piece of fabric slightly larger than the damaged area and of the same color on the wrong side of the fabric. Stitch over the damaged area then cut away the excess material close to the stitching on the back side of your repair.
text_image
Scanned text of contract clauses with dense table of contents and handwritten annotationsSewing-on patches – No 4
The best way to repair larger holes is to patch the damaged area with a new piece of fabric.
- Cut a piece of fabric slightly larger than the damaged area of hole.
- Stitch the fabric patch, over the damaged area, along the edge with the elastic stitch.
- Cut away the damaged fabric on the reverse side close to the stitching.

text_image
Scanned text of contract clauses with dense table of contents and handwritten annotationsRepairing tears
On tears, frayed edges or small holes place a piece of fabric un the reverse side of the tear. The underlayed fabric reinforces th workpiece and ensures perfect repair.
- Lay a piece of fabric underneath the damaged fabric. It must a little larger than the damaged area.
• Now sew over the damaged area.
• Cut the under layed piece of fabric close to the stitching.

natural_image
Grayscale abstract texture with no discernible text, symbols, or structured elements
Overlock stitches
For elastic, knits and stretch fabrics, your performance 2054 provide a selection of overlock stitches. These stitches join multiple layers of fabric and overcast them in one operation. These stitches can stretch and are more durable than standard stitches.
Closed overlock stitch - No 38
This stitch, in a single operation, is suitable for sewing and serging fabrics that fray easily. The closed overlock is also a good stitch for attaching knit cuffs and collars to garments.
Open overlock stitch - No 36
The open overlock stitch works well when joining or edge-finishing fabrics that do not fray excessively.
Tip: Use blind stitch foot No. 3 when sewing overcast seams. This guides the fabric more precisely and prevents tunneling of the seam at wider stitch widths. Adjust the stitch width and guide of the foot to ensure that the right swing of the needle clears the raw edge of the fabric and the pin of the presser foot.
Closed overlock stitch with edge thread - No 31
If you wish to sew a fabric that frays easily, select stitch 31. With this stitch an additional edge thread protects the fabric edge against further fraying.
Pullover stitch - No 39
This stitch can be used for open-knit and heavy knit fabrics. Garments can be joined effortlessly with this stitch.
Tip: To prevent the seam from stretching while sewing, overcast a woolen thread or twill tape in the seam.
natural_image
Simple line drawing of a rectangular area with a diagonal hatched line and a shaded bottom section (no text or symbols)
natural_image
Close-up of a textured fabric with a vertical seam or edge, no visible text or symbols
natural_image
Abstract grayscale pattern with vertical striped texture and horizontal gradient (no text or symbols)
natural_image
Close-up of a sewing machine needle stitching fabric (no visible text or symbols)
natural_image
Grayscale abstract texture with horizontal gradient and no discernible text or symbols
natural_image
Pencil sketch of a draped fabric with circular buttons, no text or symbols presentButtonholes
There are 8 buttonhole styles built-in to your Pfaff performance 2054. Each buttonhole is especially adapted for a particular use and fabric type.
Your performance 2054 is equipped with the Sensormatic buttonhole guide 10 and sensor technology to ensure that eve buttonhole is sized accurately. Beautiful buttonholes can be se on even the most difficult fabrics such as velvet, plush, knitted fabrics and heavy knits.
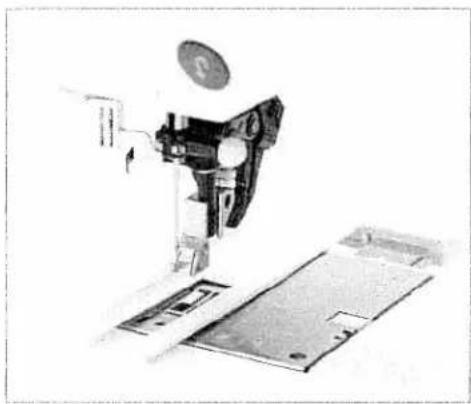
natural_image
Mechanical assembly diagram showing a sewing machine with a circular component and base plates (no text or symbols visible)Inserting the sensormatic buttonhole guide
Push the metal part of the buttonhole guide into the slot (between the two arrows) on the housing at the back of the needle plate. The white plastic part extends over the needle pl covering the feed dogs.
Slide the guide towards you until it lies against the rear of the arm. The guide will spring rear slightly so that there is a small g between the needle plate and the guide.
Inserting the sensormatic buttonhole guide activates the senso

natural_image
Close-up of a sewing machine needle cutting metal sheets (no visible text or symbols)Attaching buttonhole foot No 5:
(see "Changing the presser foot" page 27).
Snap on buttonhole foot No. 5.
Use buttonhole foot No. 5 to sew buttonholes.
Before starting to sew, pull the runner of the foot toward the front to the second red mark

natural_image
Gray textured surface with no visible text, symbols, or identifiable objectsButtonhole with gimp cord
Buttonholes that are sewn with gimp cord under the satin stitch columns are more stable, durable and professional appearing. Use pearl cotton or regular gimp thread.
Insert the Sensormatic buttonhole guide.
Place the center of a length of gimp cord over the metal hook extending from the center back of the buttonhole foot. Pass the cord ends under the foot and pull up into the right and left guides on the front of the presser foot.
Snap on the buttonhole foot. Before starting to sew, pull it backward as far as the second red mark.
Buttonhole 56, 57, 58 or 59 can now be sewn.
After completing the buttonhole, pull the ends of gimp cord until the loop of thread is hidden under the buttonhole bartack.
Thread the gimp cord ends into a hand sewing needle and pull them to the wrong side of the garment. Tie the gimp threads and cut off the excess thread.
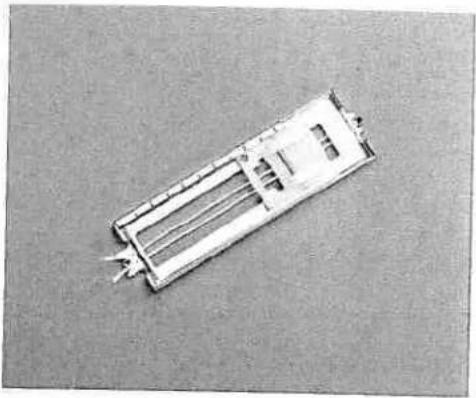
natural_image
Exterior view of a rectangular electronic component or enclosure with internal channels and connectors (no visible text or symbols)
natural_image
Close-up of a coiled cable or wire with two twisted ends, no visible text or symbolsEyelet buttonhole with gimp cords
Insert the Sensormatic buttonhole guide. Place the center of a length of gimp cord over the metal hook extending from the center front of the buttonhole foot. Pass the cord ends under the foot and pull up into the right and left guides on the back of the presser foot.
Snap on the buttonhole foot and pull it backward as far as the second red mark.
Before starting to sew, press the "needle down" button.
Sew the right side of the buttonhole.
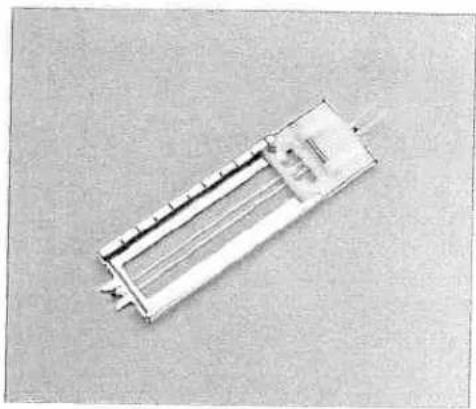
natural_image
Exterior view of a rectangular electronic component or enclosure with internal structure (no visible text or symbols)
natural_image
Grayscale abstract texture with horizontal gradient and no discernible text or symbols
natural_image
Top-down view of a mechanical assembly or vehicle component (no visible text or symbols)After the machine sews the first few stitches of the curved end the gimp cords down from the metal hook with a straight stitch pin.
Warning: The presser foot must not be raised from the fabric surface!
Pull the gimp cord on the left towards the rear until the loop is just in front of the needle. Carefully sew the curve, guiding the gimp cord under the stitching.
After sewing the curve, hold the gimp cords into a needle and them to the wrong side of the garment. Tie the gimp cords and off excess cord.
The round buttonhole with gimp cord is sewn in the same way
Tip: This buttonhole is particularly attractive when sewn with a heavier-weight thread.
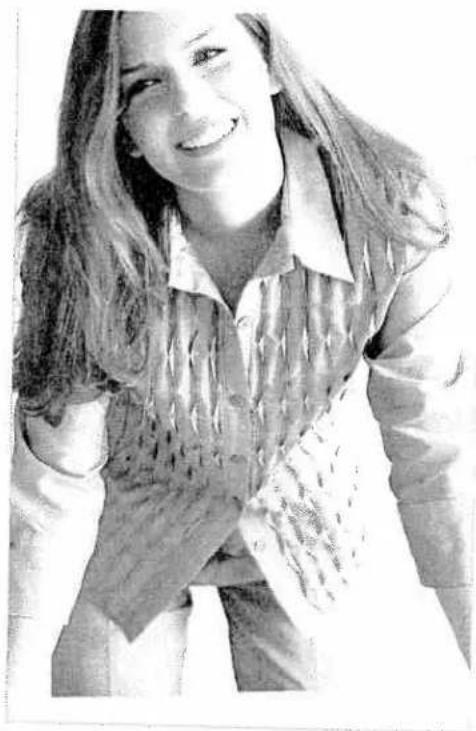
natural_image
Black-and-white photo of a smiling woman with long hair, wearing a collared shirt and jacket, holding an open book (no visible text or symbols)Buttonhole tips
Buttonholes that are to be sewn very close to a reinforced edge may sometimes not feed optimally with the buttonhole foot because of the bulk at the edge of the fabric. In this case, use presser foot 1A with the Integrated Dual Feed engaged.
Fabrics that shift or stretch easily should be reinforced with wa soluble or lightweight stabilizer.
Buttonholes are particularly stable and durable if a gimp cord is inserted while sewing (see "Buttonholes, with gimp cord").
Linen buttonholes are particularly attractive if you use a heavier weight thread through a topstitch needle.
Buttonholes are normally selected a little larger than the butto diameter. It is important to always sew a test buttonhole on the same fabric/stabilizer as your project.

natural_image
Gray textured horizontal band with no visible text, symbols, or markingsSewing on buttons - No 64
With Button sewing program 64 you can easily sew on two and four-hole buttons.
- Remove the presser foot and lower the feed dog. (Make sure the IDT is disengaged.)
- Mark the button position on your fabric. Place the button on the marked fabric.
- Turn the handwheel towards you and position the button so the needle enters the left hole in the button.
- Lower the presser foot lifter. The button will be held in place by the shank of the foot. Turn the handwheel to make sure the needle also enters the right hole of the button.
- Continue sewing on the button. The machine will complete the program for you.
Tip! Use the optional Sew on Button Foot to sew optimal buttons.
Sewing on buttons with shanks - No 64
- Attach the presser foot.
- Leave the feed dogs lowered. Place a toothpick between the holes of the button and sew it on as described on the left.
- Remove the toothpick and pull the button and fabric apart.
- Wrap the stem with sewing thread and knot it.
Tip! Use the optional Sew on Button Foot to sew optimal buttons with shanks.

natural_image
Close-up of a sewing machine needle stitching fabric (no visible text or symbols)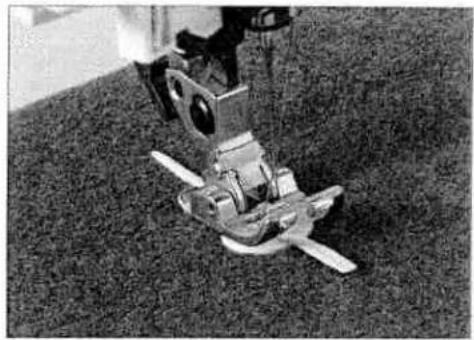
natural_image
Mechanical robotic device mounted on a textured surface (no visible text or symbols)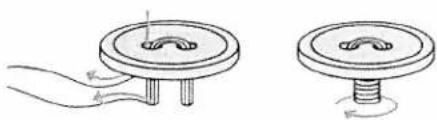
natural_image
Two mechanical diagrams showing a circular component with a central hub and two separate views of a flanged base (no text or symbols)Eyelets - No 71
To stitch eyelets on a belt or linen items, select stitch 71.
natural_image
Circular white object on a textured gray background, resembling a ring or particle (no text or symbols)
natural_image
Grayscale abstract image with horizontal gradient and no discernible text or symbolsAutomatic darning - No 69 and 70
Stitch 69 and 70 is for strengthening damaged areas of fabric and repairing tears.
- Stitch over the damaged area at the required length.
- Press the reverse key; the machine finishes sewing the darning program and the darning length is saved.
The saved darning length can now be repeated as often as needed.

text_image
Scanned page of dense text with a vertical black-and-white graphic, likely from a historical or literary manuscript.Depending on the type of fabric, the darning pattern may shift slightly out of square. You can straighten the pattern using the balance adjustment capability.
If the pattern shifts this way you have to correct the balance in the plus-section.
text_image
Scanned text of contract clauses with a large black-and-white grid pattern on the left.If the pattern shifts this way you have to correct the balance in the minus-section.

text_image
Scanned page from a Chinese document with dense text and a small black-and-white illustration of stacked books or documents.
natural_image
Gray horizontal line with no text, numbers, or symbolsFree motion darning
Attach darning foot No. 6. Make sure the needle is at its position highest position. With thumb and index finger press the darning foot together. Insert the pin of the darning foot as far as it will go into the hole of the presser foot holder. The "C-shaped" guide should place itself around the presser bar. The long, plastic arm must be behind the needle clamp/needle set screw.
Lower the feed dog.
Hoop your project to be repaired in a round embroidery hoop.
Select the straight or zigzag stitch. Touch ☐ and select ⊥.
As you begin sewing, the darning foot automatically engages in the darning position.
Draw up the bobbin thread and sew a few stitches to secure. Clip the threads close to the project and continue sewing.
Repair the damaged area/hole by guiding the fabric evenly forwards and backwards slightly longer than the length of the repair area.
When you have covered the damaged area, turn the fabric 90 degrees and stitch over the area again. Darning in both directions over a tear will produce a stronger repair.
Tip: Remember, when sewing with the feed dogs lowered, the stitch length is determined by you. An even, medium-to-fast sewing speed will allow you to sew a more consistent length of straight stitch. Sewing too slowly may cause small knots to appear on the reverse side of your work.
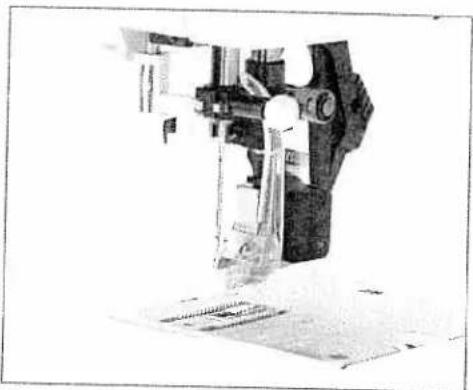
natural_image
Close-up of a mechanical device with no visible text or symbols
natural_image
Technical line drawing of a sewing machine needle stitching a grid pattern (no text or symbols)
natural_image
A horizontal black-and-white gradient bar with no text or symbols
natural_image
Close-up of a sewing machine needle stitching fabric (no visible text or symbols)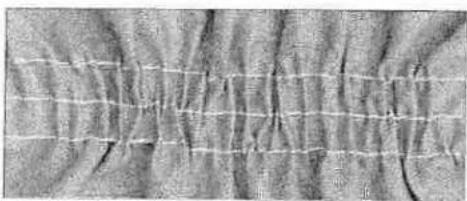
natural_image
Close-up of textured fabric with a grid pattern (no visible text or symbols)Gathering with straight stitch - No 1
A straight stitch can be used to gather sleeves, cuffs, skirts or valances. To obtain neat and even gathers you should sew two three rows of gathering stitches.
- Set your stitch length to 6.0 mm. Lower needle thread tensi to 3.
- Mark the first gathering line on the right side of the fabric along this line. Leave about 4 - 5 inches (10 - 13 cm) of thread the beginning and end of the seam.
- Sew 1 or 2 more rows of stitching, using the edge of the prefoot as a guide.
• Gather the fabric by pulling the bobbin (bottom) threads to desired fullness. - Distribute the gathers evenly and knot the thread ends together to secure the gathering.
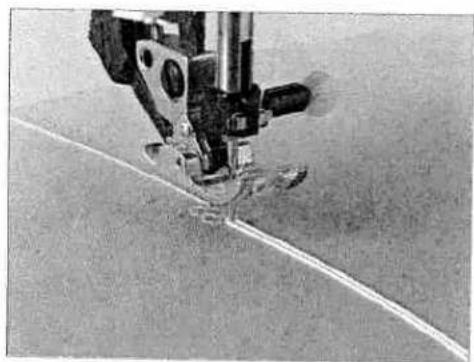
natural_image
Close-up of a sewing machine needle stitching fabric (no visible text or symbols)
natural_image
Close-up of a textured surface with a horizontal white line and circular patterns (no text or symbols)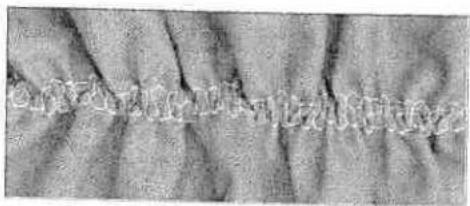
natural_image
Close-up of textured fabric with vertical folds and a faint horizontal line (no text or symbols)Gathering with elastic threads - No 7
Gathering with elastic thread is particularly suitable for visible, elastic gathering seams such as blouse sleeves, waist seams or necklines.
- Mark the first gathering row on the fabric. Sew a few stitch until the needle is in the middle of the presser foot. Turn th hand-wheel towards yourself until the needle is in the lowe position. Raise the presser foot and place the elastic thread around the back of the needle.
- Lower the presser foot and sew a few more stitches to secur the elastic thread to the fabric. Continue attaching elastic threads to fabric. Make sure you do not catch the elastic thr in the stitching.
- When you are finished attaching the elastic thread, pull on ends of the elastic threads to gather. The amount of gather is determined by the amount you pull on the elastic thread. Secure all thread ends.

natural_image
Grayscale abstract texture with diagonal gradient and irregular edges (no text or symbols)Decorative sewing/ Specialty techniques
Quilting 74
Free Motion Embroidery 79
Nostalgia /Heirloom 81
Home Decorating 83
Fashion 85
Eyelets 86
Hemstitching 87
Cross Stitch 88
Twin needle sewing 90
Tapering 91
Appliqué designs 93
Quilting
Patchwork
Patchwork and quilting are traditional hand craft techniques to make use of left-over fabric. Over the years it has developed into a creative hobby.
Traditionally patchwork was sewn by hand. Today your creative ideas can be realized in a much shorter time with your Pfaff performance 2054.
A quilt consists of three layers, two layers of fabric with a layer of batting sandwiched between.
Piecing the quilt top
Cut out the pieces of fabric for your quilt top using templates. A seam allowance of 14 " (6 mm) should already be included in the templates. Snap on the optional 14 " quilting foot. Sew the pieces together following the design instructions to piece the quilt top.
The seam allowance of quilts are usually pressed towards the darker fabric side. Baste the completed quilt top to the batting and backing. In traditional quilts these three layers of material are then sewn together by hand with small stitches. However, it is quicker and more practical with your Pfaff performance 2054, e.g. with stitch 41 using monofilament thread on top and regular or decorative thread in the bobbin.
When the quilting is finished simply bind the edges or make it into cushions, wearable art or other smaller projects.

natural_image
Black-and-white photo of a modern office space with a glass table, ceramic figurines, and a patterned chair (no visible text or symbols)
natural_image
Close-up of a textured surface with a vertical seam and a diagonal seam, no visible text or symbols.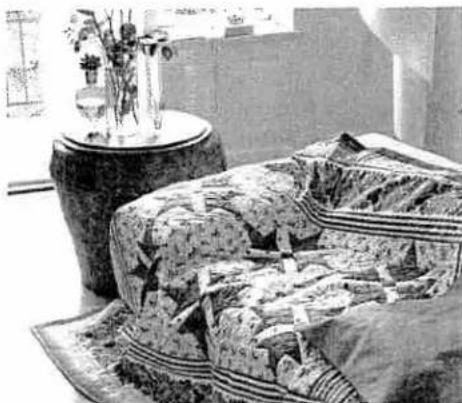
natural_image
Interior scene with patterned fabric and a vase, no visible text or symbols
natural_image
Close-up of a textured gray surface with no visible text, numbers, or symbols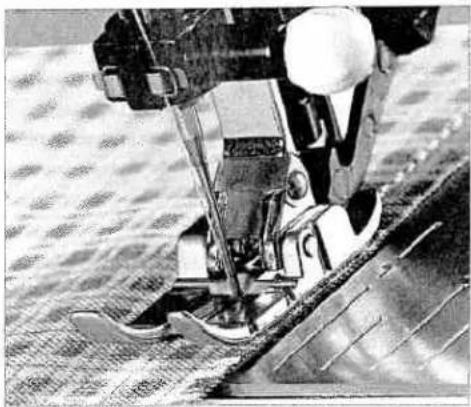
natural_image
Close-up of a sewing machine needle stitching fabric (no visible text or symbols)Quilt Piecing
Use the 14 " Quilting foot with IDT as an easy guide for optimal quilting. Set your Pfaff performance 2054 for center needle straight stitch and engage the IDT.
For optimal quilt piecing set up your Pfaff performance 2054 w a Straight Stitch (1), stitch length 2.5, Needle Position 4 to the right and your IDT engaged. The fabric pieces should meet und the right of presser foot 0. Moving the needle position gives yo scant 14 " seam.
Patch work program
Select Straight Stitch (1) and set up as above.
Select the Patchwork program in the more options menu and touch OK. Now sew your seam length. When you get to the end the seam, touch the reverse button. The seam is now tied off all ready to be sewn again. Continue to sew the fabric pieces of the size together.
When you are finished with this size, re-choose the Patchwork program and sew the next seam length.

natural_image
Abstract grayscale image with vertical lines and textured regions, no visible text or symbolsStitch in the Ditch
One way to hold the quilt top, batting and backing all together is using the stitch in the ditch method of quilting. Stitching in the Ditch means following the seams in the quilt blocks.
Set your Pfaff performance 2054 with a Straight Stitch (1), stitch length 2.5, Center needle position and the IDT engaged. Use the optional narrow edge foot for optimal guiding.
Begin by pin basting your quilt through all layers with safety pins - starting from the middle of your quilt and working out. Place a pin about every 6 - 8 inches (15 - 20 cm).
To begin quilting, start sewing from the middle of the quilt and continue out. Starting from the middle and sewing out will help keep layers in place. Plan which seams you will actually follow. This stitching will not only hold the quilt together it will also create the pattern on the quilt back. You do not need to follow every seam in the quilt, sew every 3 – 4 inches to keep the quilt in place. Of course you can sew more to create a more decorative pattern for the back.
Tip: Try using one of the Antique Applique quilt stitches (41 - 55) instead of the straight stitch to add interest to your quilt, using monofilament thread on top.
Change to a quilting or jeans needle when sewing through thick quilts. Test sew to make sure your stitching is proper before you start quilting your piece.
Use stitch 41 to make your stitch in the ditch look hand sewn.

natural_image
Close-up of a sewing machine stitching fabric with a patterned background (no visible text or symbols)Antique Quilt Stitches
Beutiful Crazy Patch quilting was originally sewn by hand. This hand stitched look can be accomplished faster and easier with the Pfaff Antique quilt stitches.
- Use invisible (monofilament) thread in the needle. Use a contrast or matching polyester or cotton thread in the bobbin.
- Set the needle thread tension to 7-9.
- When you sew the stitch on the three layers of your quilt, you should only see your bobbin thread. Create the stitch pattern on top of the fabric. The intermediate stitch disappears and thus produces a handstitched appearance. Adjust your needle tension as needed to produce the desired effect.

text_image
Ancient Chinese bamboo slips with vertical inscriptions, likely from a stele or calligraphic work.
natural_image
Grayscale abstract texture with horizontal gradient and no discernible text or symbols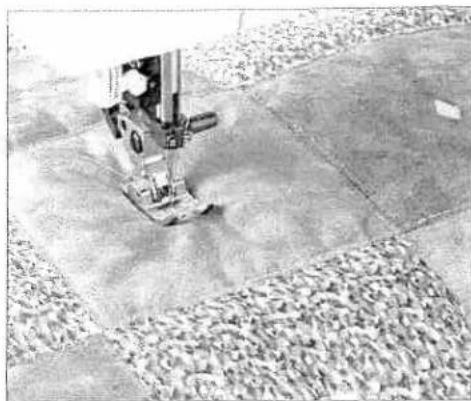
natural_image
Close-up of a sewing machine stitching fabric on a tiled floor (no visible text or symbols)Tying the Quilt
Tying a quilt is another way to hold the quilt top, batting and together. Previously done by hand, your Performance 2054 has great decorative stitches that will "tie" your quilt with ease.
Choose a decorative stitch that is a forward moving stitch, such 117 or 157. Set up your 2054 as explained in the information.
Prepare your quilt as explained in the Stitch in the Ditch method
Engage the Single Stitch Program for one stitch. Now sew this stitch every 3 – 4" (7 – 10 cm) all over the quilt. Again plan you stitch placement so that there is a nice pattern on the front an the back.
This is a very simple and beautiful way to secure a quilt.

natural_image
Black-and-white photo of a sewing machine stitching a patterned fabric (no text or symbols visible)Free Motion Stippling
Free Motion Stippling not only keeps the top, batting and back together, but it also adds texture and interest to your quilt.
Set your Pfaff performance 2054 for stippling with a Straight S (1) and the Free Motion Program. Attach the free motion quilt foot. Pin baste your quilt layers..
Prepare your quilt as explained in the Stitch in the Ditch method
Practice stippling on scraps of fabric and batting. When the fed dog is lowered, you move the fabric to determine the stitch let Sewing with a constant speed will help to keep the stitches ever
Begin near the center of your quilt. Take one stitch and pull th bobbin thread to the top of the quilt. Take a few stitches right next to one another to secure the threads. Now move the quilt that your stitching creates scrolls and swirls. The stitching shou not cross itself – but travel in swivling stitches all over the quilt
Tip: Use the Free Motion Guide grip to help move the quilt in a more consister way. The Quilting table and Free Motion Guide foot are extra accessories create make your stippling easier. See your authorized Pfaff dealer to purchase.
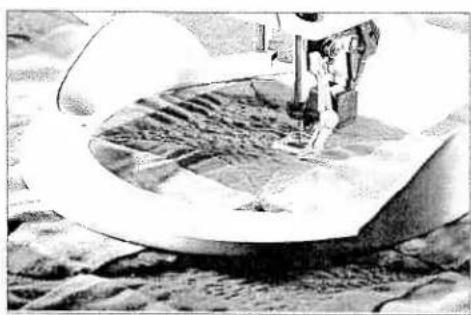
natural_image
Black-and-white illustration of a spacecraft landing on the moon's surface, showing landing gear and terrain (no text or symbols)
natural_image
Grayscale abstract texture with horizontal bands and a dark top edge (no text or symbols)Quilt Appliques
Appliques add a special touch to your quilt.
There are many different ways to stitch appliques to a quilt. One way is to add the applique to the block before the quilt is put together.
Set your performance 2054 for a satin stitch. Choose stitch 10, stitch length 0.4 - 0.5, stitch width 3 - 6, presser foot 2.
Fuse the applique piece to the block with invisible web. Place stabilizer under the block. Sew around the applique with the satin stitch. Make sure the stitch mostly on the applique – covering the raw edge of the applique.
Another way to add an applique to a quilt is to finish the edge of the applique and sew it on with the hand applique stitch (44).
First prepare the applique. Cut the applique shape out of fabric and a piece of light weight iron on interfacing. Place the right side of the fabric and the rough (iron-on) side of the interfacing together. Use a Straight Stitch (1), stitch length 2.0, center needle position and sew the fabric and interfacing together around the outside edge with a 14 " seam. Trim around the applique leaving 18 " seam allowance and clip into curves. Slash the interfacing and turn the applique right side out. Finger press the applique.
Place the applique on the quilt. When you are satisfied with the position, iron it down.
Select stitch 18, snap on applique foot and sew around the edge of the applique with the straight part of the hand applique stitch. Let the horizontal part of the stitch just catch into the applique. This is the part that will keep the applique in place.

natural_image
Black-and-white close-up of a patterned fabric or textile with floral and geometric designs (no text or symbols)
natural_image
A plain horizontal gray bar with no text, symbols, or markings.
natural_image
Black-and-white artistic illustration of a person wearing a patterned garment (no text or symbols visible)Free Motion Sewing
With Free Motion Sewing you can create the most fantastic wo It is possible to sew just as you would draw with a pencil, using the various types of threads that are on the market today and your performance 2054. You can also vary the shade of your Free Motion Sewing by sewing in different directions or patterns.
Top tension 2-3
Presser foot Darning foot
Feed dog Lowered
Stitch length 0
Stitch width 0-9
Fabric Cotton type fabric
Needle size 90-100
Stitch Straight stitch/
Zig zag
Free motion program On
Thread your machine with a good quality cotton or synthetic thread. You can use the same thread for bobbin thread, or an embroidery weight bobbin thread. Hoop your fabric tight as a drum into a round machine embroidery hoop. You can use a wooden ring hoop bound with tape for a better grip. Select either the straight stitch or the zig zag and set the stitch length to 0. From now on, you control the stitch length. The movement of hoop along with the sewing speed creates the stitch length.
Important: Never engage the IDT when free motion embroidering.

natural_image
Gray textured surface with no visible text, symbols, or markingsTouch 10 and select Darning/Quilting to activate the free motion function. When you press the foot control, the presser foot goes down to the Darning/Quilting position. Place your hooped fabric under the needle.
Make one complete stitch. Pull the bobbin thread up to the top of the fabric. Hold both threads and sew a few stitches to secure them. Clip the threads close to the fabric and continue sewing. Make sure that you hold the hoop on the machine bed and move it steadily. Experiment sewing different patterns and see what different stitch directions will do with the look of your embroidery. Try different stitch widths for shading effects. Also test different threads, such as variegated and metallic threads. You can also print, paint or apply fabric shapes on your fabric before embroidering. Finish your embroidery by adding free motion stitches over the edges.
Tip: Draw a straight line with a water or air dissapering marking pen on the fabric in your hoop. Keep this line parallel with the front of your machine.
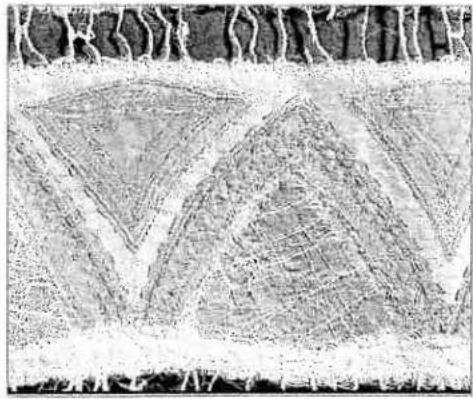
natural_image
Microscopic tissue section showing layered cellular structures (no text or labels visible)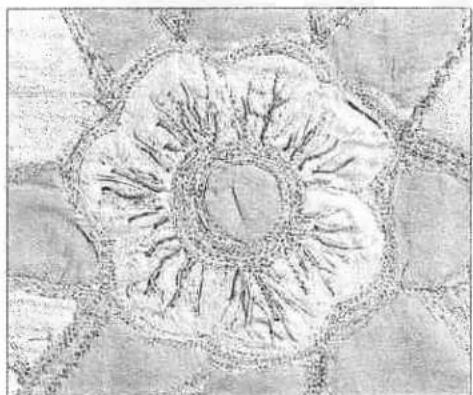
natural_image
Abstract sketch of a flower-like shape with radial lines and petal-like patterns (no text or symbols)
natural_image
Black-and-white photo of a traditional East Asian-style bag with decorative elements, no visible text or symbols.
natural_image
Circular pattern with concentric rings and a dark horizontal line on the right side (no text or symbols)Nostalgia /Heirloom
Wing Needle
Sewing with a wing needle creates the look of "hemstitching" woven natural fiber fabrics by creating "holes" where the need goes in and out of the fabric.
Replace standard needle with a wing needle. Choose any stitch that goes back and forth into the same holes several times (3, 992). Use the recommended presser foot for that stitch.
Thread the top and bottom with lightweight thread in color that matches the fabric you are using. (Remember you want to see the holes that are created and not the thread.)
Tip: For fine fabrics, place a lightweight tear away stabilizer under stitching.
Begin sewing. Use the Sew Slow button to reduce your speed while using the wing needle.
Gimping
Gimping adds texture to nostalgia projects. Previously done by hand, sewing over gimp cord with your performance 2054 will not only save time but add that special touch to bags, tablecloth handkerchiefs and more.
Set up your performance with a zig zag stitch (2), stitch length stitch width 2.0, presser foot 1A, IDT engaged.
Tip: Use the 7/9 hole cord foot to help guide your cord.
Thread your Performance with polyester or cotton thread that matches the color of your fabric in both the top and bobbin. (I decorative thread in the top if desired.) Use crochet cotton as t gimp cord.
Tip: Use a fade away or water soluble pen to mark your pattern before you see
Place the gimping cord under the presser foot, guiding the cor in the slot in the middle of the foot. Begin sewing over the cor Create curves and swirls as you sew. Sewing over the cord adds raised texture to your designs.

natural_image
A plain gray horizontal line with no text, numbers, or symbols.performance 2054
Manual
C
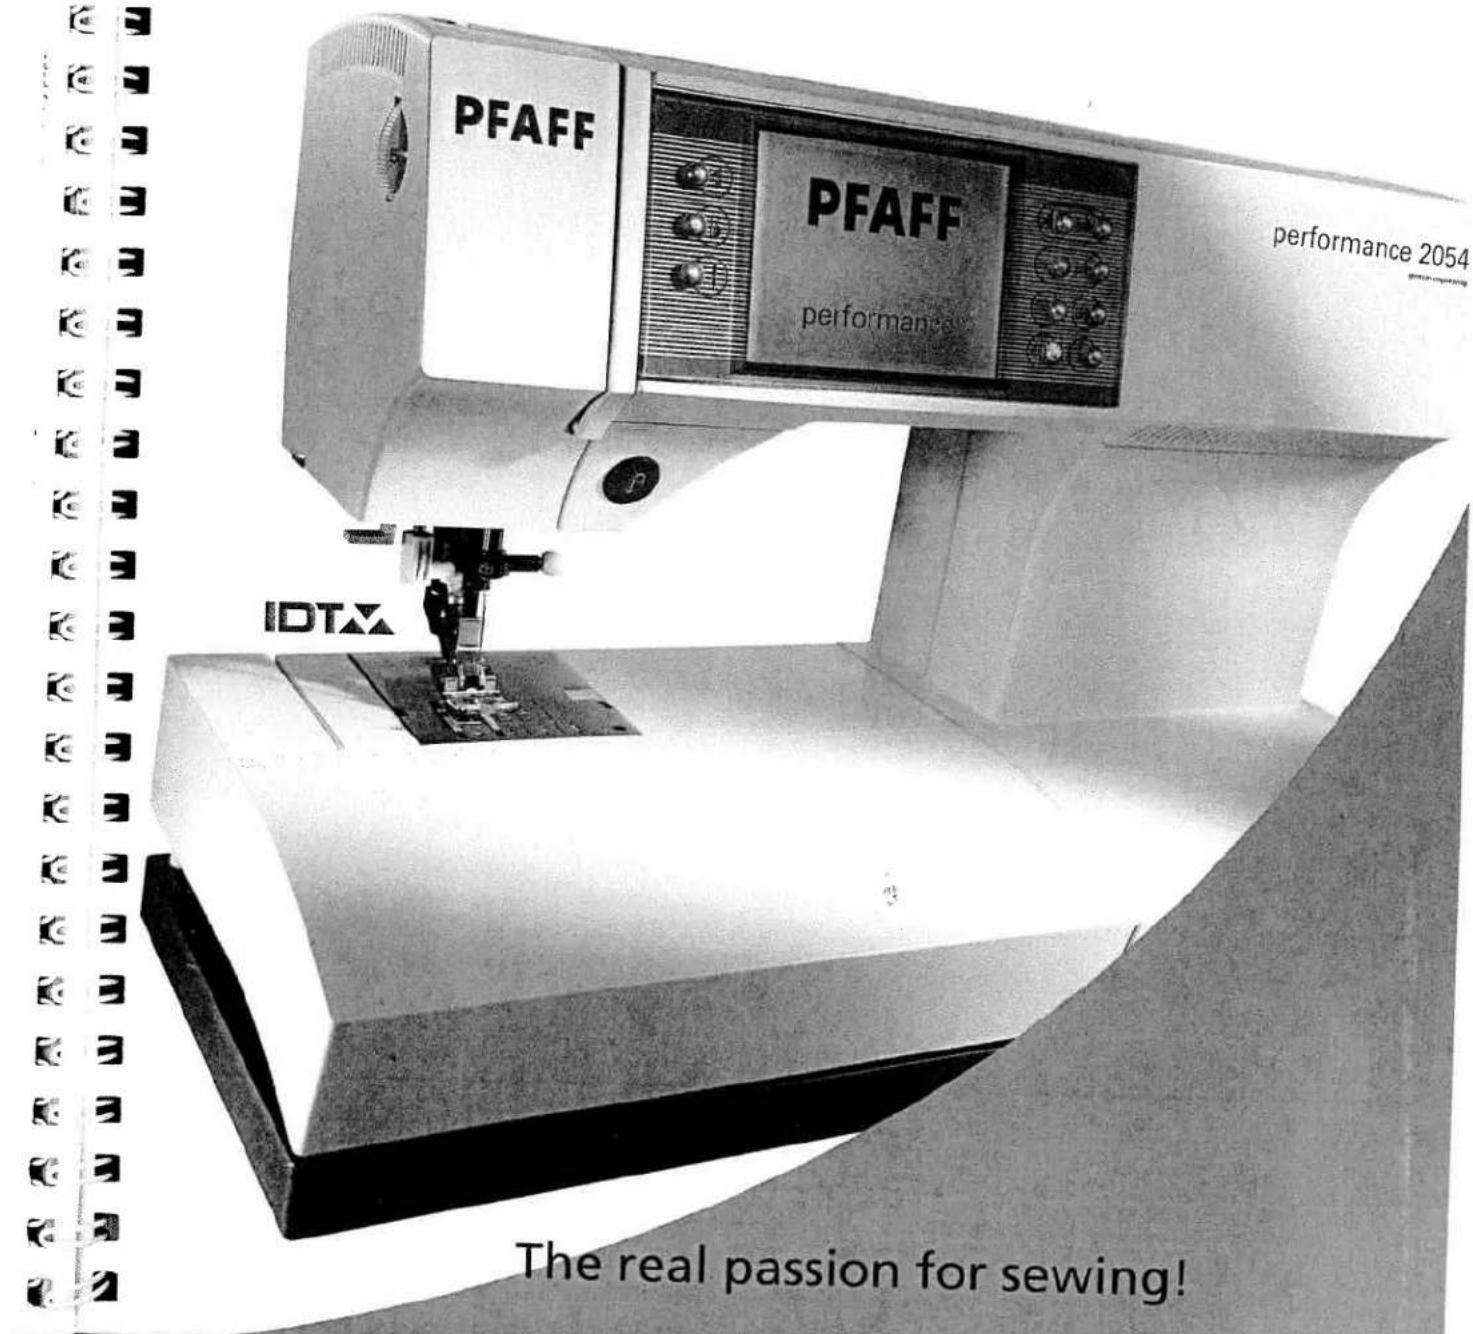
text_image
PFAFF PFAFF performance 2054 performance IDTX The real passion for sewing!
natural_image
Black rectangular object with a textured horizontal band, no visible text or symbolsTucks
Create a great nostalgic touch with Folded tucks or twin needle Pintucks.
Folded tucks are created by folding fabric and straight stitching to create the tuck.
Using a fade away or wash away fabric pen, mark the fabric with lines 3/4" apart. Fold the fabric wrong sides together along one line.
Set your performance 2054 for normal Straight Stitch (1), stitch length 2.0 - 2.5, presser foot 0, IDT engaged.
Thread both top and bobbin with thread to match the color of your fabric.
Sew with a center needle straight stitch, guiding the fold of the fabric along the right side of the presser foot. Unfold the fabric. Press the tuck to one side. Now fold the fabric along the next line as above. Sew the next tuck in the same way as described above. Continue until all tucks are sewn.
Important! Always sew tucks before cutting out garment pieces. Tucks can take up to double the amount of fabric depending upon how many tucks and how wide you make them.
Adjust the size of the tuck by adjusting the needle position to the left for larger tucks or to the right for smaller tucks.
Twin needle Pintucks
Twin needle Pintucks are created by placing a twin needle in the performance 2054.
Mark the first line of stitching with a fade away or wash away pen. Continue to mark lines or use one of the optional Pfaff Pintuck feet to easily guide your rows where needed.
Tip: Use the optional Pintuck blade and Pintuck feet to accentuate the tucks. See page xx-yy for directions using the Pintuck foot
Replace the standard sewing needle with a 2.0 mm twin needle.
Set your performance 2054 for normal Straight Stitch (1), stitch length 2.5 - 3.0, presser foot 2, IDT disengaged.
Thread the top and bobbin with thread matching the color of fabric. Use the extra spool pin for the second top spool. Remember to place one top thread in one side of the tension disk and the other thread on the other side of the tension disk.
Sew along the first line of stitching. Continue until all Pintucks are sewn.
natural_image
Abstract geometric shape with layered shading and no visible text or symbols
text_image
Black-and-white photo of a garment with visible printed text on the sleeve and side panels
natural_image
Abstract grayscale gradient with diagonal shading and a curved edge (no text or symbols)
natural_image
A plain horizontal gray bar with no text, symbols, or markings.
natural_image
Pencil sketch of a folded garment or fabric piece with no visible text or symbolsHome Decorating
"Square" Pillows
Create pillows beautiful pillows.
Choose a Straight Stitch (1), stitch length 2.5, presser foot 0, ID7 engaged.
Using a fade away or wash away marking pen, measure 3-4" (7 - 10 cm) from each corner and mark on each edge. Then measure 5/8" (4 cm) from each corner diagonally and mark.
Begin sewing around the pillow with a 5/8" (16 mm) seam, leave an opening on one edge to turn the pillow. Continue stitching to the 3-4" mark along one edge. Now sew toward the diagon, marking. Pivot and continue to sew to the other 3-4" mark. Do to each corner.
natural_image
Close-up of a textured, folded object with circular markings on its surface (no visible text or symbols)Criss-Cross Piping or Ruffle
Create an easy and attractive way to start and stop piping or a ruffle. This criss-cross method will add interest to any home decorating item.
Tip: Use the optional piping foot, ruffler or shirring foot to help create your pi or ruffle.
Create your piping or ruffle 6" (16cm) longer than what is need for your project.
Begin by placing your piping perpendicular (make a cross) with the front project piece. Pin. Curve the piping to become parallel (in line) with the project. Continue pinning the piping around project at the proper seam allowance. When the piping is back the start, simply place the end across the beginning, making both ends of the piping perpendicular with the piece.
Place the back of the project right sides together with the fror and piping. Sew, making sure to catch all layers. Your perform 2054 with IDT makes sewing through all the layers easy. The ID also keeps the layers even.

natural_image
A plain gray rectangular shape with no visible text, symbols, or markings.Envelope Closure
When making pillows, rather than leaving an opening along an edge that needs to be hand sewn, create an Envelope closure for the back.
Cut the pillow back 6" (16 cm) longer in one direction than the front, creating a rectangle. Cut the rectangle in half across the width. Finish the two cut edges.
Tip: Use the multiple Zig Zag (4), stitch length 1.0, stitch width 5.0, presser foot 0, IDT engaged as one possible finish to the edge.
Press under 2" (5 cm) on the finished edge. Stitch with a straight stitch (1), straight length 2.5, presser foot 0, IDT engaged, 1 1/2" from the folded edge on the right side.
Overlap the folded edges to create the pillow back in the same size as the front.
Tip: Use buttons and the sensormatic buttonholes to keep the envelope closed.

natural_image
Close-up of a fabric edge with visible seam and texture (no text or symbols)
natural_image
Close-up of a textured rectangular object with a central seam and two circular indentations, possibly a stone or concrete sample (no text or symbols visible)
natural_image
A grayscale horizontal bar with no visible text, symbols, or markings.
natural_image
Close-up of three white fabric strips on a textured surface (no text or symbols visible)
natural_image
Close-up of a white, textured surface with a curved edge against a plain gray background (no text or symbols)
natural_image
Close-up of a torn paper edge with visible stitching and texture (no text or symbols)
natural_image
Close-up of a white fabric with a small dark object on the left side (no text or symbols visible)Fashion
French Seams
Use a French Seam when working with lightweight, see through fabric that frays. The French seam encases the fabric edges.
Set your performance 2054 for a Straight Stitch (1), stitch length 2.0 - 2.5, presser foot 0, IDT engaged.
Follow the pattern instructions on how to construct the garme. Follow the directions below to create the seams.
With the wrong sides of the fabric together, sew with a 3/8" (10 mm) seam allowance. Trim near the stitching leaving 1/8" (3 mm) of the fabric seam allowance. Turn the garment with rid sides of the fabric together, press and then sew a 1/4" (6 mm) seam. The raw edges of the fabric are now encased in the seam
"Flat" shirt construction
One of the fastest ways to make a shirt or blouse is the "flat" construction technique. Use this when the top of the sleeve do not need to be gathered or eased. This method works well for sportswear.
Tip: Use stitch 37 for a decorative hem on the sleeve and garment bottom. Tur the hem and sew from the right side of the garment. Make sure to catch the h underneath.
Choose an overlock stitch (32, 36, 39) to make the garment. Us the presser foot and IDT recommendation for the stitch.
If making a t-shirt with a ribbed band, sew one shoulder seam add the neck band. Sew the other shoulder seam. Pin the sleav to the garment at the shoulder seam and matching the notche Sew with the sleeve down, against the feed teeth. Gently hold upper fabric as needed so the sleeve will ease into the garmen
Now finish the sleeves by sewing the sleeveseam and the sides of the garment in one long seam. Start at the sleeve edge.
natural_image
Grayscale abstract image with a curved, textured shape against a black background (no text or symbols)Twin Needle Top Stitching
Twin needle topstitching is great when you want two rows of straight decorative topstitching. Twin needle stitching can also be used for knit fabrics. The two straight stitches on top are connected with one bobbin thread creating a zig zag on the bottom and giving a small amount of stretch.
Replace the standard sewing needle with a 4.0 or 6.0 mm twin needle.
Set your performance 2054 for normal Straight Stitch (1), stitch length 2.5 - 3.0, presser foot 0, IDT engaged.
Thread the top with the contrasting thread and the bobbin with thread matching the fabric. Use the extra spool pin for the second top spool. Remember to place one top thread in one side of the tension disk and the other thread on the other side of the tension disk.
Touch the twin needle safety icon and enter the twin needle to limit the stitch width and prevent needle breakage.
Begin to sew. Make sure to tie off the beginning and end of the topstitching.
Eyelets
Eyelet sewing has a long tradition as linen embroidery and is popular for creating table linens and garments. Achieve great effects, using the eyelet plate and various stitches.
- Remove the presser foot, use a screwdriver to remove the presser foot shank.
- Place the eyelet plate onto the needle plate making sure that pin A fits into the middle cut out of the needle plate. Push the plate down at the front.
• Mark on you fabric where to sew the eylets.
• Tightly hoop the fabric. - With small scissors snip one or two of the fabric threads at the center of the marking and push the fabric over the pin of the eyelet plate. The fabric must fit tightly around the pin.
• Lower the presser foot lifter.
• Draw up the bobbin thread and hold it for the first few stitches. - Stitch around the cut with the desired stitch.
Important: While doing so, turn the hoop with the fabric slowly and evenly. The stitches should be very close to each other.
- Secure with a few straight stitches.
text_image
Eyelet plate A
natural_image
A grayscale horizontal bar with no visible text, symbols, or markings.Stitch examples for eyelets
a) Select stitch no. 34. Stitch slowly and evenly, manually turning the hoop. Then form a second circle with stitch no. 34. Set the stitch width to 2 mm. Then secure with a few stitches using reverse button.
b) Select stitch no. 6 with stitch mirroring. Finish the pattern w zigzag stitch no. 34, left needle position, 2 mm stitch width. Secure with a few stitches using the reverse button.
c) Slowly stitch around the cut using elastic blind stitch no. 16, mirrored. Secure with a few stitches using the reverse butto
d) Use stitch no.117 with a stitch width of 9 mm.
e) Use stitch no. 115 with a stitch width of 9 mm. Secure after petals.
f) Embroider with stitch no. 111 by turning the hoop steadily. Then stitch around the cut using zigzag stitch no. 34, mirror
g) Use zigzag stitch no. 3 with a width of 6 to 9 mm. Secure wi few straight stitches with the needle in right position.
natural_image
Abstract geometric shape with a white rectangular form on a gray background (no text or symbols)Hemstitching
This is a technique everyone recognizes as embroidered by hard With your Pfaff performance 2054, you can produce hemstitch much more quickly and easily. With ten special hemstitches and by changing the stitch length and width, you can create variati hemstitch effects.
A wing needle (a special needle with a wide, winglike shaft) is required for hemstitching work. When entering the fabric the wing needle forms holes which are typical for hemstitching. Hemstitching will be most successful on relatively coarse linen cotton fabrics from which single threads can be easily pulled.
If you pull additional threads and sew along the edges close to threads you have pulled out, you will achieve even more beau hemstitching effects as the remaining threads are bundled.

natural_image
A plain gray horizontal line with no text, numbers, or symbols.Hemstitching stitches
Stitch 93, 98 and 99.
For these stitches use wing needle size 100, 130/705 H Wing, without pulling threads.
Stitch no. 99 can also be used for curved edging and hem securing.
Tip: If you use the "sew slow" function, the needle will evenly enter the fabric and neatly bunch the threads.

text_image
Scanned document with dense Chinese characters arranged in a grid, possibly a form or table section"Ladder" hemstitching
Stitch no. 90, 91, 92, 94, 97.
- Pull out threads from the fabric until a desired width, the same as when hemstitching by hand.
- Sew along both fabric edges with any of the above stitches. When doing this, the needle must enter the pulled threads on both sides close to the edges, thus bundling the threads.
Tip: If you use the "sew slow" function, the needle will evenly enter the fabric and neatly bundle the threads.

natural_image
Grid of small triangular shapes with vertical lines, no text or symbols presentMaking a hem with a hemstitch seam
This seam provides a perfect edge finish to hemstitching work on table linen, napkins or towels.
Needle size 80, 130/705 H
Stitch 92, 94 and 97.
- Iron the hem folding twice to mark the desired width.
• Pull one or more of the threads just above the hem. - Using one of the hemstitches, sew along the pulled threads. When doing this, the needle must enter the right side of the hem and bundle the pulled threads to the left.

natural_image
Close-up of wooden flooring with visible grain and a textured surface (no text or symbols)
natural_image
A grayscale horizontal bar with no visible text, symbols, or markings.
natural_image
Black-and-white portrait of a man in formal attire with a patterned tie (no visible text or symbols)Cross Stitch
No other embroidery technique is as closely associated with the term "needlework" as cross-stitching. With your Pfaff perform 2054 and its wide range of cross stitches this traditional embroidery technique can be created remarkably easily and quickly. Whether you select one of the pre-programmed cross stitch borders or create your own combination with the cross stitches these look handsewn and lend a distinctive character table linens, towels or clothes.
Tips for cross stitch sewing:
- Always work using the "sew slow" and "needle up/down" functions.
- Attach decorative foot no. 2A. Its red guide-grooves are exa adapted to the size of the cross stitches.
Sew cross stitch borders with 72-81
These programs consist of small cross stitches and are especially suitable for borders. They have been pre-programmed into the machine with optimum stitch length and width. However, you change these settings as needed.
Sew cross stitch borders and cross stitch with 82-89
Combine the individual cross stitches using your imagination to achieve large areas of cross stitch or beautiful borders.
Enter these combinations into different memories and sew the succession.
Please note:
When combining cross stitches, the start and end points of the respective cross-stitch are important. A cross stitch that finishes on the right can always be combined with a cross-stitch that starts to the right. The starting and end points of the cross stitches are marked by a circle an a dot on the stitch lid.

natural_image
Gray textured surface with a horizontal dark band at the top (no text or symbols)Twin needle sewing
Stitch beautiful effects when sewing with the twin needle. Twin-needle sewing is particularly effective if you use decorative sewing threads in matching colors.
To sew with the twin needle, touch ☐.
For the default 2.5 mm twin needle touch quickly.
Touch ⌘ a little longer and a dialogue window opens. The needle width can be set with the -+ buttons.
This will limit the stitch width so the needle is not broken on decorative stitches. Touch the screen or step on the foot control to close the dialogue window.
The twin needle function remains active even when the stitch has been changed, even after the machine has been swithed off and back on. The twin needle function must be turned off when you remove the twin needle from the machine.
To turn the function off, touch ☐. Confirm with ok
(See page 29 for threading.)
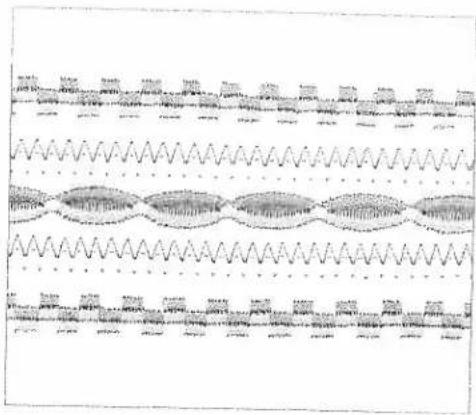
text_image
Diagram showing waveforms and labeled data points with annotations in English, including 'mean', 'shift', 'time', and 'shift value'.
natural_image
A long, textured horizontal gray bar with no visible text or symbols.
natural_image
Black-and-white portrait of a person wearing patterned jackets (no visible text or symbols)Tapering
The tapering program for the zigzag stitch allows you to put your creative ideas into action and create stitches with an attractive, three-dimensional appearance, which are very easy to sew.
When tapering the stitch width of the zig zag stitch is increased decreased during sewing to create symmetric or asymmetric tap. In stitch no. 3 and 10, the stitch width is altered from center ne position so that you can create satin points (symmetric tapers).
In stitch no. 34, the right position of the needle remains consta while the left position changes; using the mirror key you can reverse the needle position; this stitch is most suited for corners and borders (asymmetric tapers).
Tip: Select needle stop down when tapering.
Symmetrical stitch 3 and 10
Symmetrical tapering (increase). The width of the zigzag starts with 0 mm and becomes wider until it reaches 9 mm.
Symmetrical tapering (decrease). The width of the zigzag stitch starts at up to 9 mm and tapers to 0 mm and stops with the needle in the lower position when the reverse button is touched.
Asymmetric tapering stitch 34
Asymmetrical tapering (increase). Width 0 mm to 9 mm.
Asymmetrical tapering (decrease). Width 9 mm to 0 mm.
Use to reverse the needle position. The corner is turned in other direction.

natural_image
A plain gray rectangular strip with no visible text, symbols, or markings.Automatic tapering
Symmetric taper, stitch no. 3 or 10
Increasing the width
Select stitch no. 3 or 10 and press the ☐ button. Touch 📄. The zig zag starts from 0 mm and becomes wider until the preset stitch width is reached. Stitch the desired stitch length.
Reducing the width
Press the reverse button. The width of the zig zag is reduced to 0 mm. The machine stops with the needle in the fabric and you can pivot the fabric to stitch the corner. Press the foot control again, and the stitch width increases.
If you touch 📷, the taper begins with the preset stitch width.
Asymmetric taper, Stitch no. 34
Select stitch no. 34 and proceed as described above.
Decorative buttonhole
For beautiful decorative buttonholes, any length, select stitch 34. This buttonhole is suitable for terry cloth or for decorating jackets.
Tip: to create the decorative four color buttonhole as pictured, sew with decorative Rayon thread on top and change color at each pivot.
Select stitch no. 34.
- Touch needle stop down and program the presser foot lift according to the thickness of your fabric.
- Touch □ and touch 🔊.
- Set the stitch width to 6 mm.
- Sew the first buttonhole side in the desired length and touch the reverse button. The machine reduces the width to 0 mm.
- Turn the fabric 90° and sew the bartack. Sew about 1/4" (6 mm) and press the reverse button again; the machine reduces the width to 0 mm.
- Turn the fabric 90° again and sew the second buttonhole side. Touch reverse turn the fabric and sew the second bartack as described above.

natural_image
Simple line drawing of a rectangular object with textured surface (no text or symbols)
natural_image
A plain horizontal gray gradient bar with no text, symbols, or markings.
natural_image
Black-and-white portrait of a woman holding a handbag with floral patterns (no text or symbols visible)Appliqué designs
Appliqués are easily created and produce a beautiful effect. By using different fabrics and prints you create many different look. You can sew a perfect satin stitch with the optional applique for. The special cutout on the underside allows the extra thickness of a satin stitch zigzag to feed smoothly under the foot. Fusible we keeps the appliqué in place so you can easily stitch around the shape.
- Snap on the applique foot.
- Transfer your pattern to the paper side of the fusible webbir - remember that any letters or numbers have to be drawn as mirror image.
- Iron the paper-backed web to the wrong side of the appliqu fabric. Cut the motif out and pull off the paper.
- Place the appliqué pieces on base fabric and iron securely.
- Stitch around all appliqués with appliqué stitch (No. 44) or w a narrow, satin-stitch zigzag, stitch width 2 - 4 mm, stitch ler 0.2 to 0.6 mm. Make sure the stitch covers the outer edge of appliqué to prevent fraying.
TIP: If a taper is required you can narrow the satin stitch zigzag in 0.5 mm increments with the -/+ key a (see Tapering, page 91).

natural_image
Gray gradient horizontal band with no visible text, symbols, or markings
natural_image
Black horizontal bar with no visible text, symbols, or markingsAccessories and needles
Standard presser feet and accessories 96
Felling foot 98
Appliqué foot 98
Pintuck foot 99
Pintuck blade 99
Cording foot 100
Gathering foot 100
Knit edge/piping/beading foot 101
Ruffler 101
Open toe appliqué foot 102
Quilting guide 102
Eyelet plate 103
Bridging guide 103
1/4 inch Quilting foot with IDT 104
Quilting of the fabric layers 104
Free motion quilt foot 105
Bias binder 105
Pintuck Foot with
Decorative Stitch Guide 106
Non-stick Foot with IDT 106
7/9 Hole Cord Foot with IDT 107
Couching/Braiding Foot with IDT 107
Circular Embroidery Guide 108
Fringe Presser Foot with IDT 109
Narrow Edge Foot with IDT 109
Triple needle 110
Fancy patterns with twin needles 111
Stabilizer 112
Standard presser feet
and accessories
Standard presser foot No. 0A
natural_image
Close-up of a metallic mechanical component with no visible text or symbolsFancy stitch foot No. 1A
(for dual feed)

natural_image
Simple 3D-printed object resembling a vehicle or mechanical part, no visible text or symbolsFancy stitch foot No. 2A
(not for dual feed)

natural_image
Close-up of a small mechanical component with no visible text or symbolsBlind stitch and overlock foot No. 3

natural_image
Mechanical component with no visible text or symbolsZipper and edge presser foot No. 4
natural_image
Close-up of a metallic mechanical component with no visible text or symbolsButtonhole foot No. 5A
natural_image
Pure mechanical part diagram without any text, numbers, or symbols
natural_image
A plain horizontal gray gradient bar with no text, symbols, or markings.
natural_image
Close-up of a mineral specimen with a translucent white sample and dark irregular body (no text or symbols visible)Darning foot No. 6
natural_image
Metal mechanical component with two slots and a central slot (no visible text or symbols)Roll hemmer No. 7

natural_image
Metal tool with a pointed tip and rounded body, isolated on white background (no text or symbols)Edge guide No. 8

natural_image
White plastic electronic component with a rectangular cutout and a ruler for scale (no visible text or symbols)Sensormatic buttonhole guide No. 10

natural_image
Four white laboratory pipettes arranged horizontally on a plain background (no text or labels visible)Stylus
Second spool holder
Seam ripper
Brush
natural_image
Simple line drawing of a white object resembling a tool or device, with no text or symbols present.Bulb remover/Needle plate changer
2054
Felling foot
Flat felled seams are particularly strong and are commonly known as jeans seams. Seams on sportswear and children's wear, blouses and shirts are more durable with this technique. You can make these seams particularly decorative by using a sewing thread of a contrasting color. The felling foot is available in two different widths.
- Snap on the felling foot to the presser foot shank.
- Place the fabrics wrong sides together.
- Overlap the raw edge of the lower fabric by about 3/8 " to 5/8 "(1 - 1.5 cm).
- Place this overlapping edge over the tongue of the felling foot. The fabric must be placed fully under the presser foot.
- Sew along the folded edge with a straight stitch.
- Separate the fabric and feed the extending hem into the felling foot. The hem is turned by the foot and is stitched along the edge. Pull the two fabric layers taut during sewing.

natural_image
Close-up of a sewing machine needle stitching fabric (no visible text or symbols)Felling Foot, 6.5 mm
820219-096
Stitch: 1
Stitch length: 3
Tension: 1-5
Appliqué foot
Appliqués are easily sewn and always produce a beautiful effect. By using different materials and patterns you can create countless new designs. Sew dense satin stitches with the appliqué foot, which has a special cutout on the underside to feed over the the satin stitch.
- Snap on the appliqué foot.
- Transfer your drafted pattern to the paper side of a fusible, paper-backed webbing. Remember that any letters or numbers have to be drawn as mirror images.
- Iron the fusible paperbacked webbing on to the appliqué fabric. Cut out your appliqué and peel the paper from the back.
- Position and press your appliqué pieces in place on your base fabric.
- Place a stabilizer under your work area.
- Stitch all edges with a narrow satin stitch zigzag. Make sure that the needle sews over the outer edge so that no fraying occurs later.

natural_image
Close-up of a sewing machine needle stitching fabric (no visible text or symbols)Appliqué Foot
820214-096
Stitch: 3
Stitch length: 0.35
Stitch width: 1.5-2
Tension: 2 - 3

natural_image
A grayscale horizontal bar with no visible text, symbols, or markings.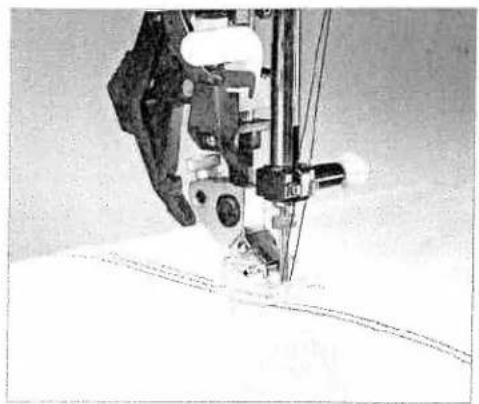
natural_image
Close-up of a sewing machine needle stitching fabric (no visible text or symbols)Pintuck foot 9 mm
820225-096
Stitch: 1
Stitch length: 2.5
Tension: 5
natural_image
Simple line drawing of a bell with diagonal stripes and a small rectangular object below (no text or symbols)Pintuck Blade
820223-096
Pintuck foot
This classic heirloom sewing technique can be easily duplicated on many types of fabric such as cotton and lightweight wooler. Undergarments and children's clothes are given a nostalgic tour by pintucking.
- Snap on the pintuck foot
- Insert a twin needle (e.g. 130/705 H-ZWI; 1.6 or 2.0 mm need spacing; size 80).
- Thread the two needles (see page xx-yy).
- Using a water-soluble marker, draw a placement line for you first pintuck.
- Sew your first pintuck. When you start on the second pintuck allow the first pintuck to run parallel in a groove in the foot. This will produce evenly spaced pintucks.
Tip: If you would like to emphasize the pintuck effect, you can attach a pir blade (special accessory) on the front edge of the needle plate. The pintuck blade pre-shapes the fabric prior to sewing and produces a better-defined pintuck.
Pintuck blade
For thin materials use the pintuck foot with 7 grooves and the small pintuck blade, for heavier materials use the pintuck foot with 5 grooves and the large pintuck blade.
Snap the round knob of the pintuck blade into the round hole the throat plate with the blade pointing towards the needle. will raise your fabric into the groove of the foot.
Gently pull the fabric taut while sewing the pintucks.

natural_image
A plain gray rectangular strip with no visible text, symbols, or markings.Cording foot
With the cording technique stitch over pearl thread or a fine cord to create a purl seam. Appliqué can also be more defined with this technique.
- Snap on the cording foot.
- Place the pearl thread in the foot so the front of it feeds through one of the grooves at the front and lies under the presser foot at the back.
• Overstitch the cord with a narrow satin stitch. This produces what is known as the purl seam.
Tip: You can also obtain a remarkable effect by overstitching a medium pearl thread with a thread of a different color.
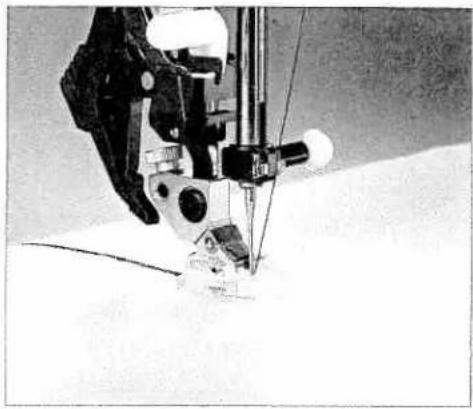
natural_image
Close-up of a sewing machine needle stitching fabric (no visible text or symbols)Three-groove Cording Foot
820234-096
Stitch: 34
Stitch length: 0.5 - 1.0
Stitch width: 2
Tension: 3
Gathering foot
Beautiful gathering can be achieved quickly and easily with the shirring foot, on lightweight children's wear or home decorating projects.
- Snap on the shirring foot by hooking the rear bar of the foot onto the rear groove of the foot shank. Push the foot up until it snaps onto the front bar.
- Place the fabric to be gathered, right side up, under the presser foot, and the fabric to remain flat, right side down, on the top through the foot cut out.
- Hold the top fabric slightly taut while sewing. The more you pull the greater the gathering effect.
- Be sure to guide the fabric edges evenly through the foot.
- Snap off the shirring foot by pushing it down at the front and remove it in the direction of the groove of the presser foot shank at the back.
Tip: Tighter gathers can be achieved by increasing the needle thread tension and the stitch length.
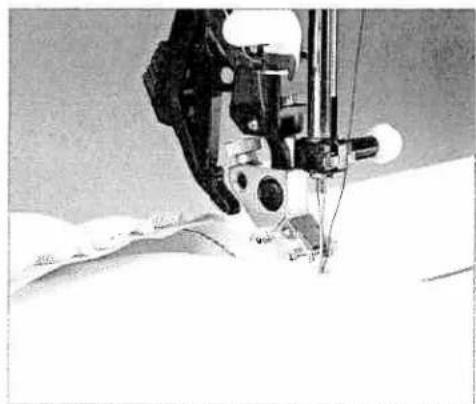
natural_image
Close-up of a sewing machine needle stitching fabric, no visible text or symbolsGathering foot
820231-096
Stitch: 1
Stitch length: 3
Tension: 3-5
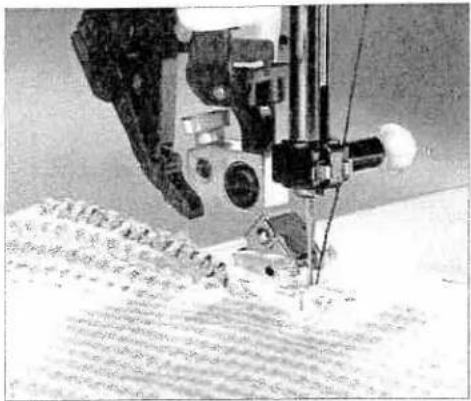
natural_image
Close-up of a sewing machine needle stitching fabric, no visible text or symbolsKnit-Edge/Piping/Beading Foot 820216-096
Stitch: 36
Stitch length: 6.0
Tension: 3-5
Knit edge/piping/beading foot
Thick seams in knitted fabrics or imitation furs can be sewn easily with the knit edge foot. In order to obtain a perfect seam on kri fabrics (e.g. shoulder seams), we recommend sewing over a cord ribbon, pulled slightly taut into the seam. This will give the seam additional strength and keep it from stretching out of shape.
Piping is easily inserted into a seam. Place the corded edge of the piping in the groove of the foot on the right side of one layer of fabric. Use a straight stitch moving the needle position to be cl to the corded edge. Baste using a long stitch length. Layer on top, your second piece of fabric with right sides together. Place the corded edge into the groove of the foot and stitch on top slightly to the right of the previously stitch line. Turn and press
For beading, place beads into groove. Note: Do not use beads larger than 4mm. Use a zigzag stitch 1 mm larger than the bead and stitch over the beads.
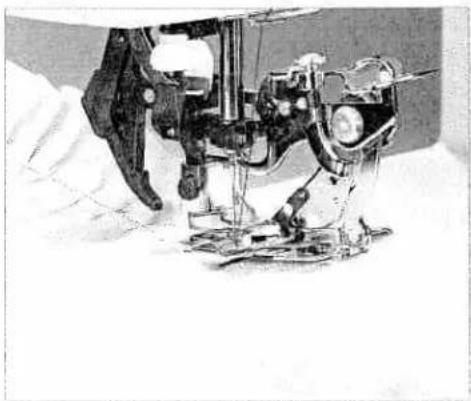
natural_image
Close-up of a sewing machine needle stitching fabric, no visible text or symbolsRuffler Attachment 820255-096
Stitch 1
Stitch length: 3
Tension: 3-5
Ruffler
With the ruffler you can make closely or widely spaced pleats automatically while sewing. This is very useful for ruffles, linen home decorating, etc.
The ruffler can be used in three different ways:
- Folding and securing pleats in fabric.
- Folding pleats in fabric and securing to a second fabric in or operation.
- Folding pleats in fabric, attaching lace and securing to anot fabric in one operation.
When you buy the ruffler from your PFAFF dealer, complete instructions are included.

natural_image
A plain gray horizontal bar with no text, symbols, or markings.Open toe appliqué foot
Appliqués are easy to sew and always produce a beautiful effect. Select stitch 18 for an appliqué that looks hand sewn..
- Cut out your appliqué pieces without any seam allowance.
- Iron a paper-backed fusible web onto the back of your base fabric, and peel the paper from the back. Position and press the appliqué pieces on the fabric.
- Snap on the open toe appliqué foot.
- Select stitch 18 and guide the edge of the appliqué along the right inner edge of the foot. The straight stitch will be almost entirely hidden, which creates the hand sewn look.
The open toe applique foot makes it very easy to see your edges.
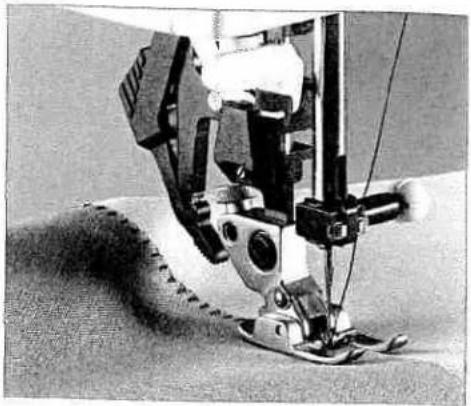
natural_image
Close-up of a sewing machine needle stitching fabric (no visible text or symbols)Open Toe Appliqué Foot 6 mm
820215-096
Stitch No: 18
Stitch length: 2.5 mm
Stitch width: 1.5 mm
Quilting guide
This guide is especially useful when quilting. The guide can be attached either to the left or to the right side of the presser foot. Insert the guide in the hole and tighten the screw.

natural_image
Close-up of a sewing machine needle stitching fabric, no visible text or symbolsQuilting guide
820279-096
Stitch No: Optional
Stitch lenght: According to the stitch
Stitch width: According to the stitch

natural_image
Close-up of a cylindrical object with textured surface and a circular hole on the right side (no visible text or symbols)
natural_image
Close-up of a mechanical device interacting with a circular surface with small holes (no text or symbols visible)Eylet plate 4,5 mm 820238-096
Eylet plate 6,5 mm 820237-096
Eylet plate 8,5 mm 820275-096
Optional utility or decorative stitches
Stitch length: according to the stitch
Stitch width: 7 mm

natural_image
Close-up of a sewing machine needle stitching fabric (no visible text or symbols)Bridging Guide, 3 mm and 5 mm 820228-096
Stitch No: 11
Stitch length: 2 mm
Stitch width: 6 - 9 mm
Eyelet plate
Using an eyelet plate you can create traditional eyeles. The eye plate is available in 4,5 mm, 6,5 mm and 8,5 mm sizes.
- Remove the presser foot and snap the eyelet plate onto the needle plate.
Make sure that the pin at the back of the plate fits into the middle cutout of the needle plate. Push the plate down at the front. - Tightly hoop your fabric. Use a stabilizer if necessary.
- With sharp scissors cut one or two of the fabric threads at the center of the eyelet area and push the fabric over the pin of eyelet plate. The fabric must fit snugly around the pin.
- To place the presser foot lifter in the darning position, select free motion icon.
• Pull up the bobbin thread and hold it for the first few stitch - Stitch around the eyelet cut with the desired stitch (e.g. stitch No. 6, 10, 111, 112, 113). While doing so, turn the hoop with the fabric slowly and evenly. The stitches should be very close each other.
- Secure with a few straight stitches.
Bridging guide
The bridging guide is used for sewing together two edges of fabrics with an open effect. It is available in 3 mm and 5 mm widths.
- Use standard presser foot 1 and insert the guide in the small hole at the front edge of the needle plate.
- If you work on non-fraying fabric you can simply join the op edges. If fabric frays, finish the fabric edges and press the se allowance to the wrong side.
- Place the bridging guide between the fabric edges. Sew the fabric edges together with stitch 11. The guide allows you to sew the openingthe edges at a consistent distance.
1/4 inch Quilting foot with IDT
A quilt consists of two layers of fabric with a layer of batting sandwiched between. Many pieces of fabric can be joined together in continually changing patterns to form the top layer of the quilt.
The 1/4 inch quilt foot is particularly suitable for joining your pieces of fabric. The clearance between the needle and the outer edge of the foot is 1/4" (6.3 mm) and between the needle and the inner edge of the foot 1/8" (3.15 mm).
- Attach the 1/4 inch quilt foot.
- Sew pieces of fabric together using stitch 1. For a seam allowance of 1/4" guide your fabric along the outer edge of the foot. For a seam allowance of 1/8" guide your fabric along the inner edge of the foot.
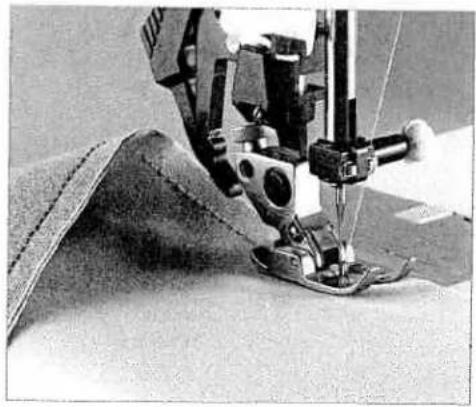
natural_image
Close-up of a sewing machine needle stitching fabric, no visible text or symbols1/4 Inch Quilting Foot with IDT 820211-096
Stitch: 1
Stitch length: 2.5
Tension: 3 - 5
Quilting multiple fabric layers
In traditional quilting, three layers of fabric are joined with small hand stitches. This hand-stitched look can be accomplished faster and easier with the sewing machine (stitch 11).
- Use invisible (monofilament) thread in the needle. Use a contrast or matching polyester or cotton thread in the bobbin.
- Set the needle thread tension to 7-9.
- When you sew the stitch on the three layers of your quilt, you should only see the triple stitch of your bobbin thread. The intermediate stitch disappears and thus produces a hand-stitched appearance. Adjust your needle thread tensions as needed to produce the desired effect.
Tip: You might want to purchase an accessory bobbin case for special techniques. Equipment loosing bobbin thread tension for this quilting.

natural_image
Close-up of a sewing machine needle stitching fabric (no visible text or symbols)Stitch: 11
Stitch length: 3
Tension: 9

natural_image
Grayscale abstract image with horizontal gradient and no discernible text or symbols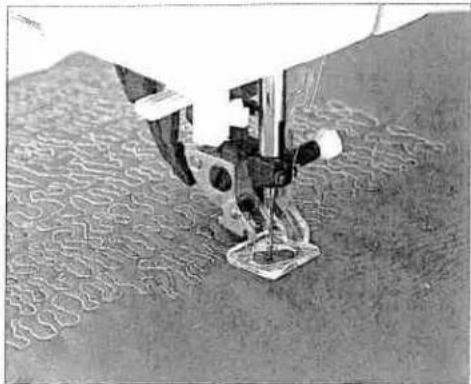
natural_image
Close-up of a sewing machine needle stitching fabric (no visible text or symbols)Free Motion Quilt Foot
820242-096
Stitch: 1
Stitch length: 2.5
Tension: 3-5
Free motion quilt foot
The free-motion quilt foot in combination with the straight stitch well suited for free-motion quilting. The three layers of your quilt are guided manually during free-motion quilting. The faster you the more consistent and uniform your stitches will become.
Practice this technique first on a test piece. Free-motion quilting possible in both curved and straight lines. For free-motion, straig line quilting (center needle position), with a spacing of 1/4 inch (6 mm), use the four red markings on the corners of the foot as a guide.
- Loosen the notched screw on the back of the presser foot shank.
- Press the free motion quilt foot gently together with thumb and index finger.
- Guide the pin of the free-motion quilt foot into the hole of presser foot holder as far as it will go. The long fork of the f motion quilt foot must be positioned behind the needle cla
• Tighten the notched screw. - Bring the free motion quilt foot into the darning position by selecting the free motion icon and lower the feed dog.
Tip: Free-motion embroidery can also be completed using the free-motion foot.
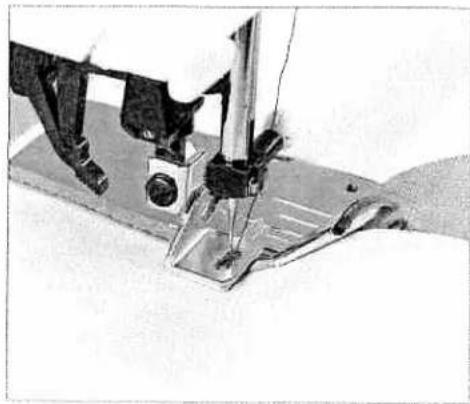
natural_image
Close-up of a sewing machine needle stitching metal fabric (no visible text or symbols)Bias binder
820245-096
Stitch: optional
Tension: 3-5
Bias binder
Binding with bias tape is a very easy method of fabric edges finished with a smooth and neat appearance. For this you need unfolded bias tape about 1" (24 mm) wide.
- Remove the presser foot and shank. Attach the bias binder.
• Cut the beginning of the bias tape at a diagonal. - Feed the tape into the scroll of the binder and pull out to the back.
- Adjust the binder and/or the needle position so that the neck pierces the fabric approximately 1/16" (1 - 1.5 mm) from the edge of the bias tape.
• Stitch about 1" (2.5 cm) along the bias tape. - Insert the edge of the fabric to be bound between the bias t edges into the slot of the binder. The bias tape will bind the raw edge automatically during sewing.
Tip: You can obtain an additional decorative effect by using a zigzag or decorative stitch.

natural_image
Grayscale abstract texture with horizontal gradient and no visible text or symbolsPintuck Foot with Decorative Stitch Guide, 9 mm
With this foot you can accurately sew pintucks with a spacing of 5 or 11 mm. The same foot allows you to precisely space decorative stitches up to 9 mm wide between the pintucks.
- Snap on the pintuck foot with guide. The foot can be snapped on with the guide pointing to the left or the right (turn foot around 180°).
- Insert a twin needle (1.6 or 2 mm space between needles).
- Thread the two needles. Set the needle thread tension tight (4 - 5) and sew one pintuck with or without gimp thread.
- Place the first pintuck under the groove in the extended guide. Sew a second pintuck. The second pintuck will automatically be spaced to allow a decorative stitch to be sewn in the area between pintucks.
- Sew all remaining pintucks.
- Replace the twin needles with a normal sewing needle.
- Set the needle thread tension to 3.
- Place stabilizer under sewing area.
- Place two pintucks in the guides on either side of the center of the foot. Embroider your desired decorative stitches in this space.
Note: Use the Pintuck Foot with Decorative Stitch Guide, 6mm for smaller decorative stitches up to 6mm.
Non-stick Foot with IDT
The synthetic coating on the underside of this foot makes it particularly suitable for sewing decorative and utility stitches up to 6 mm wide on leather, synthetic leather and vinyl. It may be helpful to back these fabrics with a fusible woven or knit interfacing. Due to the stretch of these fabrics, it is important to use a stabilizer under the fabric when sewing. A needle with a longer eye (system 130 N) is recommended for thicker leather. On softer leathers an embroidery needle works well.
- Snap on non-stick decorative stitch foot.
- Stitch leather as desired.
- Remove stabilizer.
WARNING! Carefully set stitch, i.e. short stitch length/tight stitch density, may cause leathers, synthetic leathers and vinyl's to perforate. It is important to remember that needle piercing points will remain visible in leather. Practice on scraps first.

natural_image
Black-and-white photo of a person climbing a slope with checkered and diamond-patterned stripes (no visible text or symbols)Pintuck Foot with Decorative Stitch Guide, 9 mm
820225-096
Stitch: 1
Stitch length: 2.5
Tension: 3-5

natural_image
Black-and-white photo of a sewing machine needle stitching a textured surface, with no visible text or symbols.Non-stick Foot with IDT Stitch: optional
820240-096

natural_image
Grayscale abstract texture with horizontal gradient from black to white (no text or symbols)
natural_image
Close-up of a sewing machine needle cutting through a metal sheet, with no visible text or symbols7/9 Hole Cord Foot with IDT 820222-096
Stitch: optional
Tension: 3
7/9 Hole Cord Foot with IDT
Beautiful decorative effects can easily be achieved with this prefoot. Up to 9 cords may be overstitched using decorative stitch and a variety of embroidery threads.
- Cut your cords to the desired length. Thread the cords through the holes in the foot from the top to the bottom. Lead the cords under the presser foot and out the back. Leave the three tails extending about 1 1/2 inches to 2 inches (4 - 5 cm) at the back,
- Attach the 7/9 hole foot
- Overstitch the threads with a stitch and thread of your choice Tip: Pearl thread or embroidery twist is well suited.

natural_image
Close-up of a sewing machine needle stitching metal fabric (no visible text or symbols)Couching/Braiding Foot with IDT 820230-096
Stitch: optional
Tension: 3
Couching/Braiding Foot with IDT
This special foot is best suited for overstitching heavy/bulky cor (e.g. loosely twisted wool) or a narrower tape/ribbon.
- Thread your cord or ribbon through the wire loop/guide at front of the foot. Feed it down through the hole in the cent of the foot and guide under the foot and to the back
- Attach the braiding foot to the machine.
- Select a stitch and decorative thread of your choice and overstitch the cord or ribbon.

natural_image
Gray horizontal line with no text, numbers, or symbolsCircular Embroidery Guide
The circular embroidery guide allows you to sew perfect circles. The creative possibilities are endless! Your fabric is automatically fed in a circle, allowing you to embellish your clothing and household items.
The guide is marked in 1 cm increments.
• Mark a center point with a fabric marker on your fabric.
- Insert the circular embroidery guide from the left into the hole at the back of the presser foot shank. The radius of the circle is determined by the placement of the guide in the holder. The full width of the circle will be equal to twice the distance between the needle and the rubber tip.
- The guide is secured with the screw on the presser foot holder.
- Place stabilize under your fabric.
- Place the center marked point of your fabric directly below the rubber tip of the embroidery guide.
- Select the desired decorative stitch pattern and begin sewing.
- Change the radius with every new circle by loosening the screw and sliding the circular embroidery guide to another mark on the guide arm.

natural_image
Close-up of a sewing machine stitching circular patterns on a textured surface (no visible text or symbols)Circular Embroidery Guide Stitch: optional
820246-096
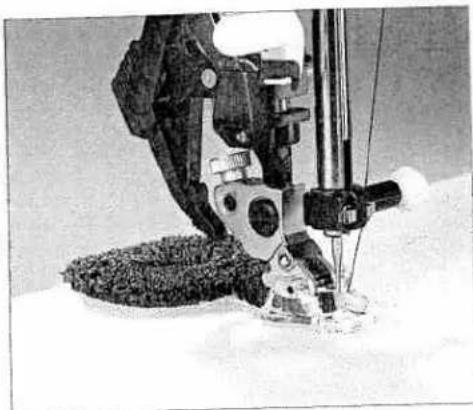
natural_image
Close-up of a sewing machine needle stitching fabric, no visible text or symbolsFringe Presser Foot with IDT
820232-096
Stitch: 3
Stitch length: 0.5 - 1
Stitch width: 1.5 - 2.5
Tension: 2 - 3
Stitch: 1
Stitch length: 2.5
Tension: 3-5
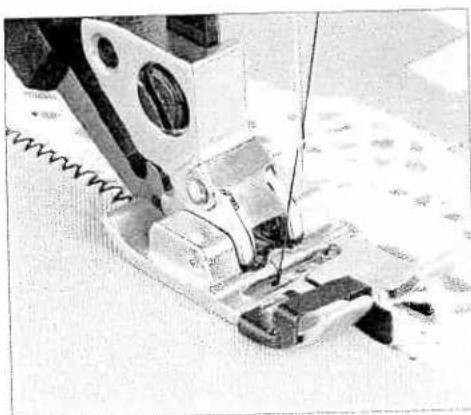
natural_image
Close-up of a sewing machine needle stitching fabric (no visible text or symbols)Stitch length: 1 - 3.0
Stitch width: 1.5 - 3.5
Tension: 3-5
Fringe Presser Foot with IDT
With this special foot for fringe stitching you can produce fantasy effects in no time.
• Mark your desired pattern with a fabric marking pen.
- Place a piece of stabilizer under the fabric.
- Snap on the fringe foot.
- Set the upper thread tension to 2 - 3.
- Sew the stitches row by row. For circles you must work from outside inwards.
- When using heavier threads, you should select a slightly long stitch length. Always sew a test sample first.
- When you have finished, pull the work carefully from the machine by holding the last loops. If you pull too quickly, you will pull the end loops flat/tight.
- Knot the beginning and end threads on the reverse side.
This presser foot makes narrow-edge topstitching easier and makes edge-joining fabric and lace pieces easy, i.e. attaching la to a finished fabric edge. The metal guide in the center of the keeps the two fabrics evenly spaced.
Topstitching with a narrow edge
For narrow edge topstitching place the center guide of the prefoot against the fabric edge. Move the needle into the desiredposition and topstitch.
Sewing lace to fabric
Place the folded/pressed edge of your fabric to the left of the center guide and the finished edge of your lace to the right of the center guide. Both fabric and lace should be placed under foot right side up. The center guide will keep the fabrics proper separated allowing for more precise stitching. Choose zigzag s No. 3 and sew catching the edge of the fabric and the lace. And the width and length of your zigzag as desired.

natural_image
A plain gray rectangular shape with no visible text, symbols, or markings.Needle guide
Using the correct needle guarantees better stitching of the fabric.
Change the needle often.
| Fabric weight light | Fabric weight medium | Fabric weight heavy |
| needle size60/70/75 | needle size80/90 | needle size100/110/120 |
Needle points
| System & No. | Profile | Point and eye | Suitable for |
| 130/705 HSize: 60-130 |  | Light ball point | Universal needle for synthetics, chiffon,batiste, organdy, woolens, velvet,fancy seams and embroidery work. |
| 130/705 H-SUKSize: 70-100 |  | Mediumball point | Coarse knitted fabrics. Latex, double-knitfabrics, Quiana and Simplex. |
| 130/705 H-PSSize: 75-100 |  | Mediumball point | Stretch-fabric needle developedespecially for Pfaff. Particularly suitablefor delicate stretch and knitted fabrics. |
| 130/705 H-SKFSize: 90-110 |  | Heavyball point | Wide-meshed corsetry. Lycra, Simplexand Latex |
| 130/705 H-JSize: 90 - 110 |  | Sharppoint | Twill, work wear, heavy linen, blue jeansand light canvas. |
| 130/705 H-LRSize: 80-100 |  | Narrow twistpoint (cuts right) | Leather, suede, calf and goatskin leathers |
| 130/705 H-PCLSize: 80 - 110 |  | Narrow twistpoint with lefttwist groove | Imitation leathers, plastic materials, plasticsheeting and oil cloth. |
| 130 H-NSize: 70-110 |  | Light ball point,long eye | Topstitched seams with buttonhole silkor No. 30/3 synthetic thread, metallic thread |
| 130/705 H-WINGSize: 100/120 |  | Hemstitchingpoint | Effective hemstitching on heavily dressedmaterials, organdy, glass cambric |
| 130/705 H-MSize: 60-80 |  | Acuteround point | Micro-fiber woven fabrics |
| 130/705 H-QSize: 80/90 |  | Light ball point | Topstitched seams for quilting |
| 130/705 H-ESize: 75-90 |  | Mediumball point | Embroidery work |
Needle chart
| Classification | Stitch length | Stitch width | Needle spacing | Suitable for | |
| 130/705 H-ZWI | 2.5 mm | - | 1.6 mm | normal pintucks | |
| Size: 80 | 2.5 mm | - | 2.0 mm | normal pintucks | |
| 130/705 H-ZWI | |||||
| Size: 80 | 2.5 mm | - | 2.5 mm | wide pintucks | |
| Size: 90 | 2.5 mm | - | 3.0 mm | extra wide pintucks | |
| Size: 100 | 3.0 mm | - | 4.0 mm | topstitching |
Fancy patterns with twin needles
Before sewing the desired embroidery stitches, check whether the needles can penetrate freely, by turning the handwheel. In this way, needle breakage is avoided as much as possible.
| Ornamental stitch patterns/zigzag patterns | |||||
| 130/705 H-ZWI | |||||
| Size: 80 | 0.5-1.5 mm | wide | 1.6 mm | decorative stitching | |
| Size: 80 | 0.5-1.5 mm | narrow | 2.0 mm | decorative stitching | |
| Size: 80 | 0.5-1.5 mm | narrow | 2.5 mm | decorative stitching | |
| Hem stitch/special twin needle | |||||
| 130/705H-ZWI-HOSize: 80Size: 100 | 2.3-3.0 mm2.0-3.0 mm | very narrowvery narrow | - | Decorative hem stitoeffect. Well finishedwoven fabric and firbatiste areparticularly suitable | |
Triple needle
Before sewing the desired embroidery stitches, check whether the needles can penetrate freely, by turning the handwheel. In this way, needle breakage is avoided as much as possible.
| 130/705 HSize: 80 Size: 80 | 0.5-1.5 mm 0.5-1.5 mm | very narrow very narrow | 2.5 mm 3.0 mm | decorative stitching decorative stitching |

natural_image
Gray textured surface with no visible text, symbols, or distinct featuresStabilizer
Always place stabilizer under the fabric before sewing any decorative stitch, applique satin stitch, buttonholes, or any other stitch that will build up thread to prevent puckering and ensure a smooth beautiful result. This is most important on lighter weight and stretchy fabric because when the fabric is not stable enough to support the stitch, it may distort and pucker. Stabilizer prevents this.
Stabilizers fall into basic categories:
Tear-away stabilizers are made from a fiber that will tear away from the fabric easily after stitching. Use tear-away stabilizers with stable woven fabrics. Place underneath the fabric before stitching. Tear away the excess stabilizer after stitching. The small amount left in the back of the stitching will not effect the wear. Experiment with different brands and weights of stabilizers to find the ones that give the best results on your projects. Try using several layers of lightweight stabilizer, then tear them away one at a time to keep stitches from pulling.
Iron on tear away is a paper stabilizer with a slick side that will iron on to fabric. It is recommended for knits and all unstable fabrics. Fuse it to the wrong side of the fabric before decorative stitching. Fusing stabilizes the fabric in the relaxed state and keeps it from stretching while stitching. For dense stitching, if the fusible tear away is punctured by the needle too many times it can pull away and no longer stabilize. Use cut away stabilizer for dense stitching on knits.
Cut away stabilizer is a soft non woven fabric recommended to stabilize dense stitching on knits and all unstable fabrics. It does not tear and is available in different weights. Decorative stitching on ready-to-wear T-shirts is often stabilized with cut away stabilizer. Place the cut away stabilizer under the knit. Stitch, then cut the excess stabilizer away. The cut away will remain in and around the stitching to stabilize it through washing and wearing.
natural_image
Black-and-white still life photo of bottles, a glass, and wrapped items with steam rising (no text or symbols visible)Water soluble stabilizer looks like a clear plastic sheet but this stabilizer will dissolve in water. Place it on the top of the fabric before sewing decorative stitching on textured, napped and looped fabrics such as terry cloth, velvet, and textured knits to keep the loops from coming through the stitching. Use water soluble stabilizer under the fabric for techniques like cutwork when it is important that all stabilizer residue be removed after stitching. Choose heavy or lightweight water soluble according your project. Fuse layers together with your iron for even heavy layers. After stitching, cut away the excess stabilizer and place t work in water to remove all residues. Water soluble stabilizer is also used to transfer pattern, especially onto dark fabrics. Trace pattern onto water soluble stabilizer with a fine line permanen marking pen then tape it to the garment for free motion embroidery, applique or other decorative applications.
Disintegrating stabilizer is a very stable loosely woven fabric that stabilizes specialty techniques such as cutwork and the crochet/tatting technique which is stitched off the edge of the fabric edge. Place it under fabric before stitching and then remove by press with a DRY iron set at cotton or linen. Disintegrating stabilizer turns to a dark ash and can be brushed away with a toothbrush CAUTION! Never let water or moisture near this stabilizer because water activates a chemical in the stabilizer that can disintegrate your fabric.
Your Pfaff performance 2054 features the most beautiful decorative stitches to create with. Be sure to place stabilizer ur the fabric before sewing for the best results.
| 114 |

text_image
Scanned text of a document with heavily distorted or low-resolution characters, likely from a scanned legal or official document.Maintenance
Changing the needle plate 116
Cleaning 116
Changing the light bulb 117
Bulb removal 117
Sewing problems and their solutions 118
Technical data 120
Package contents 120
Changing the needle plate
Switch off the main switch
Removal
- Raise the presser foot. Position the needle plate changer (lamp changer) as shown and press the needle plate up on the right, then on the left. It can now be easily removed.
Replacing
- Place the needle plate against the rear edge of the cut-out then press down at the front until you hear it snap in place. Before you start sewing, check that the needle plate is lying flat.
Tip: Lower the feed dog to make removing the needle plate easier.
natural_image
Close-up of a sewing machine needle stitching fabric (no visible text or symbols)Cleaning
- Switch off the main switch
- Remove the needle plate and lower the feed dog. Clean the feed dog and hook area with the brush.
- Clean the sewing machine every 10 - 15 hours of operation.
Cleaning the display
Wipe the display with a soft, lint-free dry cloth. DO NOT use aggressive cleansers or solvents!

natural_image
Black-and-white photo of a sculpted figure holding a tool, with no visible text or symbols.
natural_image
Person in full protective suit working on aircraft wing assembly (no visible text or symbols)Changing the light bulb
- Switch off the main switch. Disconnect the lead cord and the foot control plug from the machine.
- Remove the accessory tray. The light bulb is located inside the sewing machine near the needle threader.
Bulb removal
Push the bulb remover, as shown in the figure, up as far as it w go. Now turn the bulb half a rotation counter clock-wise and remove the bulb.
Insertion of the bulb
Insert the bulb in the lamp changer. Guide the bulb into the diagonal holder and turn it until the pins of the bulb engage. For the bulb upward into the holder as far as it will go and turn it I a rotation in a clock-wise direction. Remove the bulb changer if the bulb, the bulb is held firmly.
Important: The maximum wattage of the bulb is 5 watts.
Bulbs can be purchased from your PFAFF dealer
Sewing problems and their solutions
| Problem/Cause | Remedy |
| The machine skips stitches | |
| The needle is not properly inserted. | Push needle fully upwards. Flat side facing the back. |
| Wrong needle is in use. | Use needle system 130/705 H. |
| Needle is bent or blunt | Insert a new needle. |
| The machine is not properly threaded | Check how the machine is threaded. |
| Needle is too small for thread. | Use a larger needle |
| Needle thread breaks | |
| See reasons above. | See above. |
| Thread tension is too tight. | Adjust thread tension. |
| Thread is poor or has slubs in it orhas become dry after overlong storage. | Only use good quality threads. |
| Thread is too thick. | Use needle with large eye (system 130 N). |
| Needle breaks off | |
| Needle is not pushed fully in. | Insert new needle and push fully in. |
| Needle is bent | Insert different type of needle. |
| Needle is too thick or too thin. | See needle table (Page 92, 93) |
| Needle is bent, and has hit the needle plate because you are pulling or pushing the fabric. | Only guide the fabric lightly. |
| The bobbin case is not properly inserted. | When you insert the bobbin case, push it fully into the stop. Pull lightly on the end of the thread to make sure bobbin case is secure. |
| The seam is sewn unevenly | |
| The tension needs adjusting. | Check needle thread tension |
| Thread is too thick, stubbed or hard. | Only use good quality threads. |
| The bobbin thread is unevenly wound. | Do not wind thread by hand. Make sure thread is pulled solidly into bobbin tension spring. Check bobbin threading path. |
Thread loops at top or underside of fabric.
Re-thread machine, making sure presser foot is raised to its highest position. This ensures that needle thread is securely in thread tension system.
| Problem/Cause | Remedy |
| The machine does not feed or feeds irregularly | |
| Sewing lint has collected between the feed dog teeth rows | Remove needle plate, remove lint with brush. |
| Feed dog is lowered. | Raise feed dogs (see page xx-yy). |
| The machine is running with difficulty | |
| There are thread remnants in the hook | Remove the threads. |
| The machine does not sew the selected stitch | |
| Select the desired stitch again. Switch off the machine, wait 10 seconds and switch on again. | |
| Display incorrect or no display | |
| When static electricity is being discharged some segments of the display may fail. | Switch off the machine on completion of the sewing operation and then turn it back on again after approx. 10 seconds. Select the desired stitch again. |
| The contrast on the display may be disturbed | |
| When the machine is cleaned or is transported (display is illegible or dark) | Set the contrast using the contrast adjustment. |
If problems remain contact an authorized Pfaff dealer.
Have your Pfaff performance 2054 serviced regularly by your Pfaff dealer.
When leaving the machine, even for only a short time, switch off the main switch. This is important if there are any children nearby.
Technical data
Dimensions (w x h x d) 408 x 290 x 187 mm
Weight 8.3 kg
Nominal voltage (reversible) 120 V / 220 ... 240 V
Power consumption 85 W
Sewing lamp 12 V / 5 W
Sewing speed max. 950 stitches/min
min. 80 stitches/min
Stitching width 0 ... 9 mm
Stitching length 0 ... 6 mm
Presser foot lift 8 mm
Max. presser foot height 10.5 mm
Needle system 130/705 H
Package contents
Sewing machine
Carrying case
Foot control
Lead cord
Accessories
Instruction manual

natural_image
Black and white abstract texture with no discernible text, symbols, or structured elementsperformance 2054
The real passion for sewing!

natural_image
Close-up of a textured, irregularly shaped object with no visible text or symbols
natural_image
Exterior view of a modern office building (no signage)
natural_image
Black-and-white photo of a patterned rug with circular motifs, placed on a table (no visible text or symbols)VSM Group AB • SE-561 84 Huskvarna • SWEDEN
www.pfaff.com
