Freestyle 1527 - Sewing machine PFAFF - Free user manual and instructions
Find the device manual for free Freestyle 1527 PFAFF in PDF.

User questions about Freestyle 1527 PFAFF
0 question about this device. Answer the ones you know or ask your own.
Ask a new question about this device
Download the instructions for your Sewing machine in PDF format for free! Find your manual Freestyle 1527 - PFAFF and take your electronic device back in hand. On this page are published all the documents necessary for the use of your device. Freestyle 1527 by PFAFF.
USER MANUAL Freestyle 1527 PFAFF
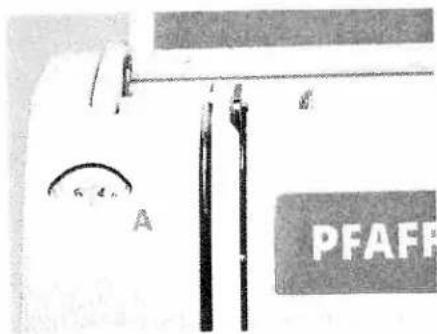
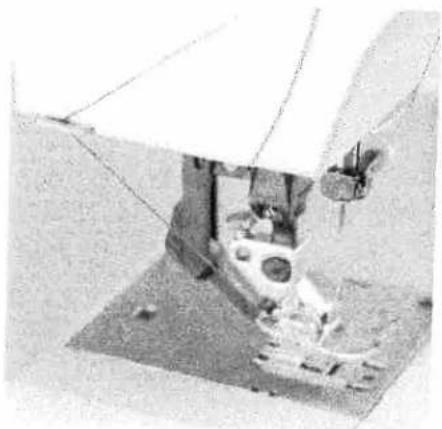
'arts of your FreeStyle sewing machine
Connection socket "foot control with main cord"
Main switch
Handwheel release disk
Handwheel
Bobbin winder
Lid with stitches
Extra spool holder
Spool holder with spool cap
Take-up lever
0 Needle thread tension dial
1 Threading path
2 Thread cutter
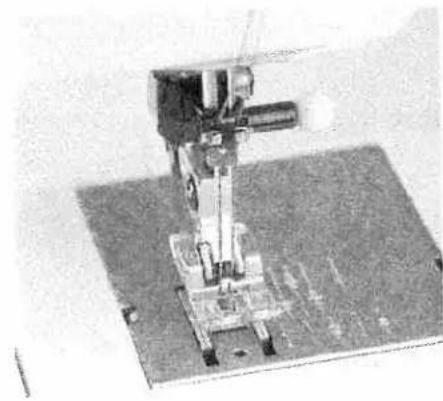
3 Presser foot holder with presser foot
4 Base plate
5 IDT System / Integrated Dual Feed
6 Needle holder with fixing screw
7 Presser foot lifter
8 Button for "reverse sewing"
9 Stitch length dial
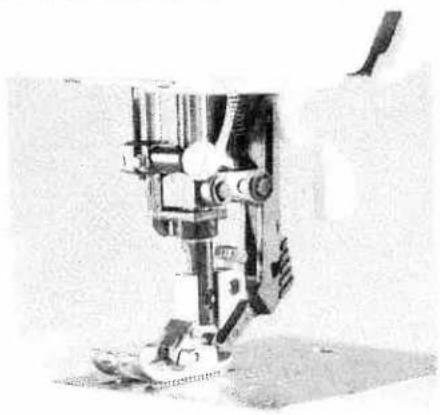
0 Carrying handle
1 Stitch selection
2 Thread guide
3 Sewing lamp (max. 15 watt)
4 Stitch width dial
5 Needle position dial
6 Needle plate
7 Removable accessory tray
For better understanding when reading this manual, please fold this page out
All you want, and nothing that you do not need!
FreeStyle
Congratulations! You have purchased a top quality Pfaff sewing machine which features unique advantages. Your new Pfaff can sew through almost any fabric – from thick to thin.
The design and technology incorporated in your new Pfaff FreeStyle is state-of-the-art. You will also discover that these instructions are just as easy to use as your PFAFF sewing machine itself.
Take the time to read through the instruction manual carefully.
A small investment of your time is worth it! This approach is the only way to really find all of the options your FreeStyle sewing machine has to offer and how to make the most of them.
If you have any questions – no problem! Your PFAFF dealer is always happy to help.
So get ready to have some fun! And have a great time turning your sewing ideas into reality.
IMPORTANT SAFETY INSTRUCTIONS
For the United States only
When you use an electrical appliance, basic safety precautions should always be adhered to us follows: Read all instructions before using this sewing machine.
DANGER To reduce the risk of electric shock:
- The sewing machine should never be left unattended when plugged in. Always unplug the appliance from the electric outlet immediately after using and before cleaning it.
- Always unplug before relamping. Replace bulb with same type rated 15 Watts.
- Do not reach for a sewing machine that has fallen into water. Unplug immediately.
- Do not place or store a sewing machine where it can fall or be pulled into a tub or sink. Do not place in or drop into water or other liquid.
WARNING To reduce the risk of burns, fire, electric shock, or injury to persons.
- Do not allow to be used as a toy. Close attention is necessary when this sewing machine is used by or near children.
- Use this sewing machine only for its intended use as described in this manual. Use only attachments recommended by the manufacturer as contained in this manual.
- Never operate this sewing machine if it has a damaged cord or plug, if it is not working properly, if it has been dropped or damaged, or dropped into water. Return the appliance to the nearest authorized dealer or service center for examination, repair, electrical or mechanical adjustment.
- Never operate the sewing machine with any air opening blocked. Keep ventilation openings of the sewing machine and foot control free from the accumulation of lint, dust, and loose cloth.
- Never drop or insert any object into any opening.
- Do not use outdoors.
- Do not operate where aerosol (spray) products are being used or where oxygen is being administered.
- To disconnect, turn all controls to off ("O") position, then remove plug, not the cord.
- Never operate on a soft surface such as a bed or couch where the air openings may be blocked.
- Do not unplug by pulling on cord. To unplug, grasp the plug, not the cord.
- Keep fingers away from all moving parts. Special care is required around the sewing machine needle.
- Always use the proper needle plate. The wrong plate can cause the needle to break.
- Do not use bent or blunt needles. Use needles recommended by the manufacturer only.
- Do not pull or push fabric while stitching. It may deflect the needle, causing it to break.
- Switch the sewing machine off ("O") when making any adjustments in the needle area, such as threading needle, changing needle, threading bobbin, or changing presser foot, etc.
- Always unplug sewing machine from the electric outlet when removing covers, lubricating, or when making any other user servicing adjustments mentioned in the instruction manual.
- Hold plug when rewinding into cord reel. Do not allow plug to whip when rewinding.
Please also observe the general safety notes on opposite page.
This sewing machine is designed and manufactured for HOUSEHOLD use only.
SAVE THESE INSTRUCTIONS
Notes on safety
Notes on safety for household sewing machines in accordance with
EN 60 335-2-28 and IEC 60 335-2-28
1 The user must exercise adequate caution with regard to the up and down movement of the needle and must constantly observe the sewing area while sewing.
2. When leaving the machine unattended, during maintenance work or when replacing mechanical parts or accessories, always disconnect the machine from the mains by pulling out the mains plug.
3. The maximum permissible wattage for the sewing lamp is 15 watts.
4. The tension of the drive belt must only be adjusted by a PFAFF mechanic.
5. The machine must be operated in accordance with the indications on the specification plate.
6. Do not insert any objects into openings on the machine.
7. Do not use the sewing machine if:
• there is visible damage
- its function is disturbed
- it is wet, eg with condensation which can occur when a cold machine is brought into a warm room.
- Do not pull the mains plug out of the socket by its cord.
- If this appliance is used for another purpose than that for which it is intended or if it is wrongly operated, we cannot accept any liability for any damage caused.
- To avoid the risk of electric shock, do not open the machine. There are no parts inside the machine which the user can repair. Repairs are solely the responsibility of our qualified service staff.
- Be sure to use only original PFAFF parts.
- The machine is designed for a mains supply with a nominal voltage of +/- 10% and a rated frequency of +/- 4%.
- When used properly the temperature of the outer components of a non-electronically controlled foot control can reach up to 85°C. Constant use at a low speed is therefore not permitted in order to avoid damage.
Environment
The recommended environment is:
Ambient temperature 10°C to 40°C
Humidity 20% to 80%
Storage temperature: -25°C to +60°C
The machine is suppressed and immune to interference; however, it should not be operated near electronic devices such as radios, TVs, PCs, broadcasting transmitters, etc.
This sewing machine is a high-quality electronic-mechanical device. It is a machine for supervised use in the home. It should not be subjected to: dust, dampness, direct sunlight, static electricity, heat-radiating objects, corrosive chemicals or liquids.
For ventilation purposes the machine must only be operated on an open surface which is both firm and horizontal.
Care of the machine
Always protect the machine from damage which may be caused by it being hit or dropped.
Cleaning
Housing and display:
To clean the housing, use only a clean, dry, soft, lint-free cloth. To remove any stubborn dirt use a soft cloth with alcohol.
Please note!
Do not use any insecticides or chemical products such as petrol or liquid chemicals to clean the housing.
Introduction
Contents
| Accessories and needles | 49-59 |
| Accessory tray | 3 |
| Appliqué | 44 |
| Appliqué foot | 56 |
| Bias-tape binder | 55 |
| Blind stitch | 23 |
| Bobbin case | 8-9 |
| Bobbin thread tension | 8-9 |
| Buttonholes | 26-27, 44 |
| Changing the needle plate | 62 |
| Changing the needle | 15 |
| Cleaning and oiling | 62 |
| Cording foot | 56 |
| Covering stitch | 30-31 |
| Darning with the elastic stitch | 32 |
| Darning with the straight stitch | 31 |
| Darning | 31-32 |
| Decorative sewing | 41-47 |
| Drawing up the bobbin thread | 12 |
| Dropping the feed dog | 15 |
| Elastic stitch | 25 |
| Elastic stitches | 24-25 |
| Electrical connection | 2 |
| Embroidering with a dense zigzag stitch | 41-44 |
| Eyelet embroidery | 45 |
| Felling foot | 53 |
| Free arm | 3 |
| Fringe foot | 57 |
| Gathering foot | 53 |
| Gathering with elastic thread | 30 |
| Gathering with the straight stitch | 30 |
| General information on sewing | 21 |
| Handwheel release disk | 4 |
| Hemming with the twin needle | 29 |
| Hemstitch seam | 47 |
| Honeycomb stitch | 25 |
| Inserting lace | 37 |
| Integrated Dual feed / IDT | 14 |
| Left needle position | 16 |
| Main switch | 2 |
| Maintenance and trouble-shooting | 61-64 |
| Monograms | 41 |
| Needle table | 58-59 |
| Needle thread tension | 15, 21 |
| Non-elastic stitches | 22 |
| Oiling the sewing machine | 62 |
| Optional accessories | 52-60 |
| Patchwork quilt | 46 |
| Placing sewing thread on spool holder | 5 |
| Practical sewing | 19-38 |
| Presser foot lifter | 13 |
| Quilt and patchwork foot | 57 |
| Quilting | 51, 57 |
Introduction
| Removable accessory tray | 3 |
| Removing the presser foot | 13 |
| Repairing tears | 32 |
| Reverse sewing | 17 |
| Richelieu | 45 |
| Right needle position | 16 |
| Ruffler | 55 |
| Selecting needle position | 16 |
| Selecting stitch width | 16 |
| Serging with zigzag stitch | 22 |
| Setting stretch stitches | 17-18 |
| Setting utility stitches | 17-18 |
| Sewing light | 63 |
| Sewing on buttons | 28 |
| Sewing on patches | 32 |
| Sewing on zippers | 34-35 |
| Sewing table | Introduction |
| Shirring foot | 53 |
| Smocking | 29 |
| Special accessories table | 52 |
| Stabilizing edges | 36 |
| Standard buttonhole | 27 |
| Standard buttonhole with gimp thread | 27 |
| Stitch density | 17 |
| Stitch length adjustment dial | 17 |
| Stitch selection dial | 18 |
| Straight stitch | 22 |
| Stretch triple straight stitch | 24 |
| Stretch triple zigzag stitch | 24 |
| Tapering | 42-51 |
| Thread tension | 8-9, 15 |
| Thread cutter | 12 |
| Threading the upper thread | 10 |
| Top feed (Integrated Dual Feed) | 14 |
| Top-stitching | 21 |
| Trouble-shooting | 64 |
| Twin needle | 11, 29 |
| Utility stitch table | Introduction |
| Winding from the second spool holder | 6 |
| Winding the bobbin | 4-7 |
| Winding through the needle | 7 |
| Zigzag stitch | 22 |
Stitch table (non-elastic stitches)

text_image
A B C B D E E E E F G H| Stitch | Description | Application |
| A/B/C | Buttonhole | Standard buttonhole for blouses or bed linens |
| H | Blind stitch with zigzag (elastic) | For invisible hemming with simultaneous seam/overcasting. Especially for stretch material |
| E | Straight stitch, 15 needle positions Stitch width dial set at 0 | For all straight stitching and top-stitching work up to 6 mm |
| Zigzag stitch, 15 needle positions, stitch width dial set at 0.5-5▶ | For serging and appliqué. Also suitable for tapering, eyelet embroidery and cording work | |
| ○ | Left needle position (for straight stitch and zigzag stitch) | Straight stitch: For all sewing and top-stitching operations which require a left needle position. Zigzag stitch: For serging, appliqué and tapering. |
| ○ | Center needle position | Straight stitch: For most sewing and top-stitching operations. Zigzag for most zigzag operations. |
| ○ | Right needle position (for straight stitch and zigzag stitch) | For all sewing and top-stitching operations which require a right needle position. Zigzag stitch: For serging, appliqué, tapering and cording work |
| F | Elastic stitch | For overcasting, sewing on elastic, darning tears and inserting patches |
| G | Decorative stitch | Decorative stitch e.g. for quilting |
Stitch table (stretch stitches)
| E | E | E | E | F | G | H |
| Stitch | Description | Application |
| E | Stretch triple straight stitch, 15 needle positions | For stretch seams, e.g. inside seams as well as seams on sportswear and workwear |
| Stretch triple zigzag stitch, 15 needle positions Stitch width knob 0.5 - 5 ▶ | For sewing elastic bands on elastic materials or seams on stretch materials | |
| ○ | Left needle position (for stretch triple straight and zigzag stitches) | For elastic seams which require a left needle position |
| ○ | Center needle position (for stretch triple straight and zigzag stitches) | For elastic seams which require a center needle position |
| ○ | Right needle position (for stretch triple straight and zigzag stitches) | For elastic seams which require a right needle position |
| F | Honeycomb stitch | For sewing on elastic thread, overstitching terry cloth seams and for ornamental hem seams. |
| G | Heavy open overlock stitch | A closing and serging seam on heavy materials |
| H | Decorative stitch | Embellishment |
Introduction
Operate your Pfaff FreeStyle
| Electrical connection | 2 |
| Removable accessory tray | 3 |
| Bobbins | 4-7 |
| Bobbin case | 8-9 |
| Bobbin thread tension | 9 |
| Threading the needle | 10 |
| Pulling up the bobbin thread | 12 |
| Presser foot lifter | 13 |
| Thread cutter | 13 |
| Changing the presser foot | 13 |
| IDT System/Integrated Dual Feed | 14 |
| Changing the needle | 15 |
| Needle thread tension | 15 |
| Lowering the feed dog | 15 |
| Stitch width dial | 16 |
| Needle position dial | 16 |
| Reverse sewing | 17 |
| Stitch length dial | 17 |
| Stitch selection | 18-19 |

natural_image
White rectangular electronic device with a small screen showing a circular feature, no visible text or symbols.Carrying-case
Place the cords, foot control and instruction book in the compartment of the carrying-case.

text_image
AF-ATF FreeSTop cover
Open the folding cover (6) upwards
The stitches of the sewing machine are illustrated on the inside of the top cover.
natural_image
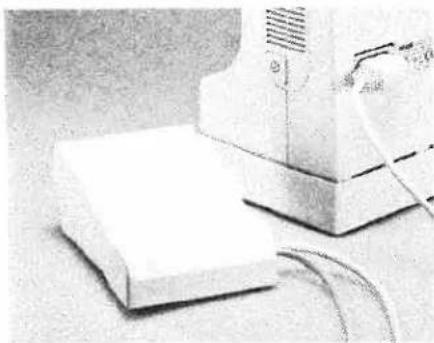
Two white electronic devices on a surface, one with a ventilation grille and the other with cables (no visible text or symbols)Connecting the foot control
Connect the plug of the foot control to the connecting socket (1) of the sewing machine and to the wall socket. The sewing speed is regulated by pressing the foot control.
Additionally, you can regulate the sewing speed by moving the slide on the front part of the foot control.
Position ▶ = half speed
Position ▶▶ = full speed
For this sewing machine, a foot controller typ AW 0253 or AE 013 must to be used.
text_image
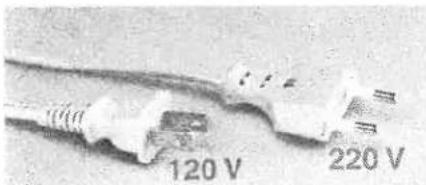
120 V 220 VMain switch
When the main switch (2) is switched on, the sewing lamp lights up.
The sewing machine is now ready to use.
This appliance has a polarized plug (one blade wider than the other). To reduce the risk of electric shock, this plug is intended to fit in a polarized outlet only one way. If the plug does not fit fully in the outlet, reverse the plug. If it still does not fit, contact a qualified electrician to install the proper outlet. Do not modify the plug in any way.
Operate your Pfaff FreeStyle
natural_image
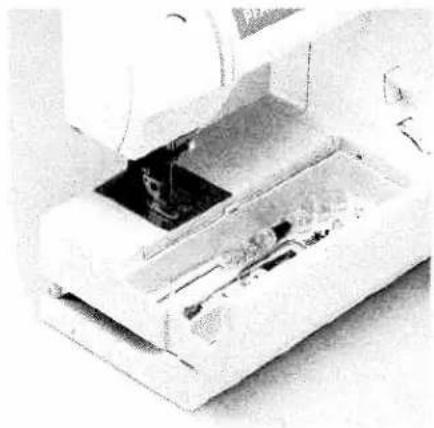
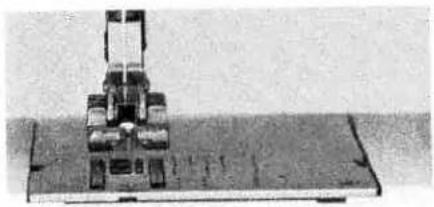
Close-up of a mechanical device with a central component and internal components (no visible text or symbols)Accessory tray
Your Pfaff FreeStyle sewing machine has a removable accessory tray (27) which is also used as an extended work support.
natural_image
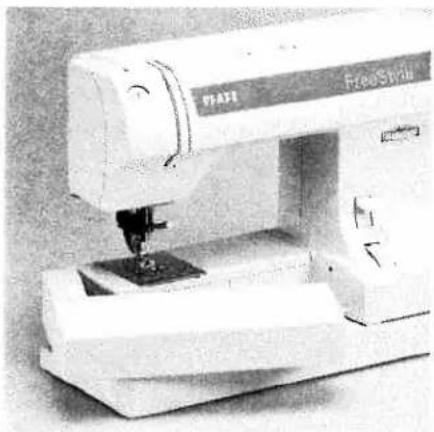
Exterior view of a FreeShiny sewing machine (no visible text or symbols on the device body)Using the free arm
In order to sew with the free arm, you must remove the accessory tray. Using both hands, swing the accessory tray (27) to the left and lift it out of the hole.
When replacing the removable accessory tray to its proper position, ensure that it is flush with the free arm of the sewing machine.

natural_image
Exterior view of a modern office building (no signage)
natural_image
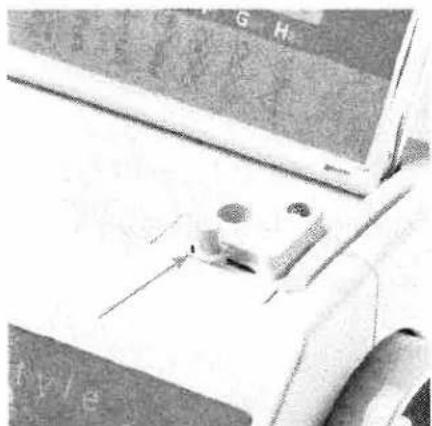
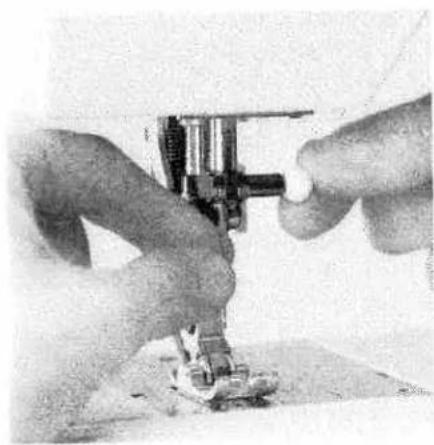
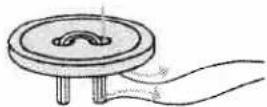
Close-up of hands operating a mechanical knob or dial (no visible text or symbols)Preparing the machine for bobbin winding
Hold the handwheel (4) firmly and turn the handwheel release disc (3) until it stops in the direction of the arrow. This stops the needle from moving while the machine is winding the bobbin.
natural_image
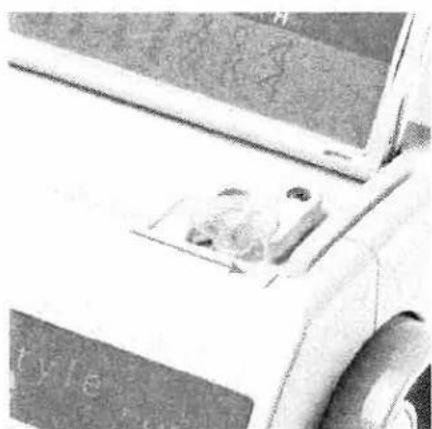
Close-up of a mechanical component with no visible text or symbolsPlacing the bobbin Switch off the main switch (2)
Place the empty bobbin so that the black pin of the bobbin winder (5) snaps into the slot of the bobbin.
natural_image
Close-up of a car's front wheel and side door, showing a small object on the side (no visible text or symbols)Push the bobbin to the right
Note: The bobbin can only be wound when it is moved fully to the right.
Operate your Pfaff FreeStyle

text_image
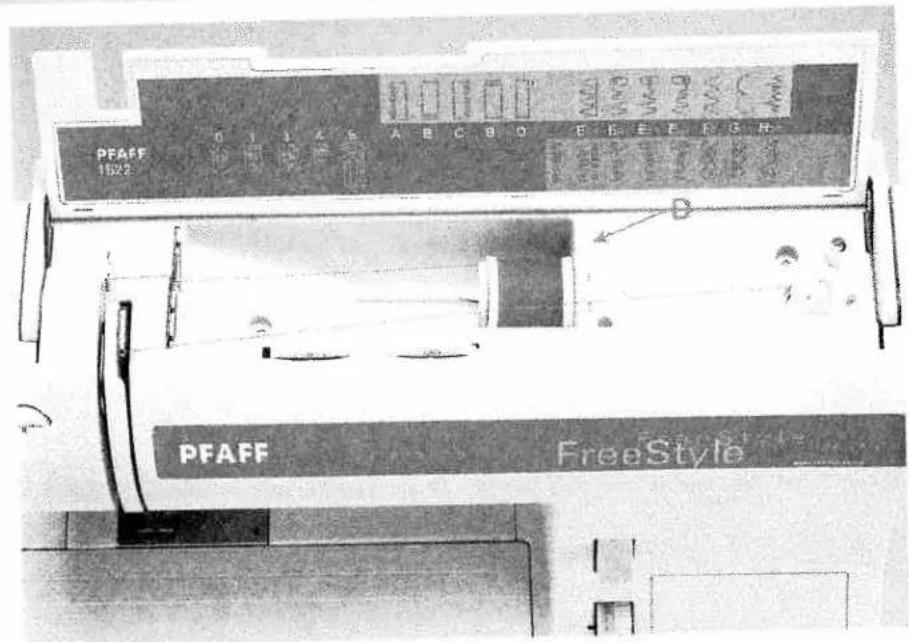
PFAFF 1522 0 1 3 4 5 A: B C B D E E F G H PFAFF FreeStyleFreeStyle
Winding the bobbin from the spool holder
Place the sewing thread on the spool holder (8). To guarantee free movement of the thread and to give additional hold to the thread spool, fit a spool cap corresponding to the size of the thread spool
Threading
Place the thread into guide A and pull it through opening B and to the right under the hook D. Wind the thread clockwise a few times around in the bobbin.
Switch on the main switch
Hold the end of the thread firmly and press the foot control. The winding action will stop automatically as soon as the bobbin is full. Cut the thread, push the bobbin to the left and remove it.
Don't forget:
Turn the handwheel release disk (3) fully back again. Then turn the handwheel (4) towards you until it snaps into place.
Operate your Pfaff FreeStyle
text_image
PEAFF NEO. S 1 40 3 2 1 A Q C S D F E E E F G H P/FEF FreeSIVIS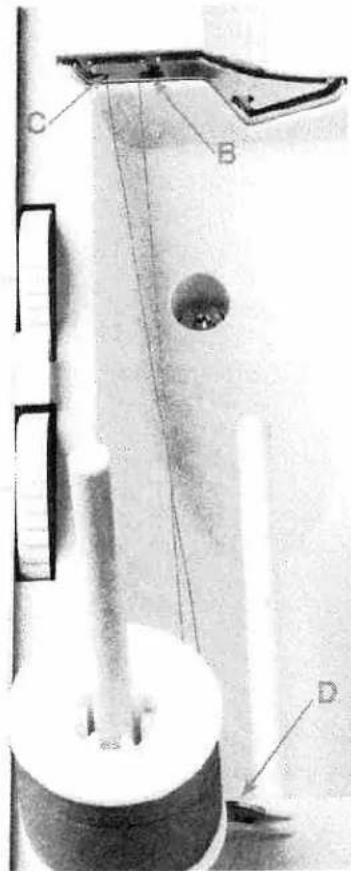
text_image
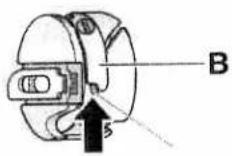
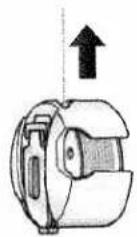
Labeled diagram of a scientific instrument with components A, B, C, and D marked for identification.Winding from the second spool holder
Push the second spool holder (7) into its hole and place a spool of thread with the corresponding spool cap on it.
Threading
Place the thread into guide C and pull it through opening B to the right under hook D. Wind the thread clockwise a few times around the bobbin.
Switch on the main switch
Hold the end of thread firmly and press the the foot control. The winding action will stop automatically as soon as the bobbin is full.
Cut the thread, push the bobbin to the left and remove it.
Don't forget:
Turn the handwheel release disk (3) fully back again. Then turn the handwheel (4) towards you until it snaps into place.
TIP: If the machine is already threaded, you can easily wind thread from the second spool holder without having to unthread the machine.
Operate your Pfaff FreeStyle
text_image
PFAFF 1022 PFAFF FreeStyle
natural_image
Mechanical device mounted on a flat base, no visible text or symbolsWinding through the needle
Even if the machine has been completely threaded, you can still wind the bobbin.
Raise presser foot lifter (17). Pass the needle thread through the presser foot and downwards; then through the right threading slot (11) and upwards.
Now, pull the thread into the take-up lever from left to right (9). The take-up lever must be positioned at its very top.
Pass the thread to the right under the guide hook D. Then wind the thread several times around the bobbin. Press the foot control and winding the bobbin.
Don't forget:
Make sure to stop the needle from moving while winding the bobbin (see page 4).

natural_image
Close-up of a hand operating a sewing machine with a fabric sample (no visible text or symbols)Bobbin Case/Hook Cover Switch off the main switch
Hold the side of the bobbin case/hook cover and open it towards you.

natural_image
Close-up of a robotic arm handling a mechanical component on a workbench (no visible text or symbols)Removing the bobbin case
Raise the bobbin case lever and pull out the bobbin case. Release the lever and remove the empty bobbin.

natural_image
Close-up of hands holding a small mechanical component (no visible text or symbols)Thread tension
To ensure perfect sewing and a durable seam, the top and bottom thread-tensions must be well adjusted to each other and the threads must be interlaced between the two fabric pieces. The interlacing should be visible from the underside of the material only when sewing decorative seams, buttonholes and darning.

natural_image
Technical illustration of a brake caliper assembly showing front and side views (no text or labels)Inserting the bobbin
Insert the full bobbin into the bobbin case. In doing so, pull the thread sideways through slot A, then under the tension plate B until it rests in the opening (see arrow).

text_image
ACheck: When you look at the bobbin and pull the thread, the bobbin must turn clockwise.
Checking the bobbin thread tension
Hold the bobbin case by the thread and pull the thread upwards sharply. The bobbin case must slip downwards a little with each hand movement.
Adjusting the setting:
Turn setting screw C to the left very slightly – the bobbin thread tension becomes weaker.

Turn setting screw C just a little to the right - the bobbin thread tension becomes stronger.

natural_image
Technical diagram of a mechanical component with labeled point D (no text or symbols beyond label)Inserting the bobbin case
Lift lever F and slide the bobbin case onto the hook pin D as far as it will go. Opening E of the bobbin case must face upwards.

Check: Pull the bobbin thread sharply. The bobbin case must not fall out of the hook.
text_image
PFAFF 1522 0 PFAF 22
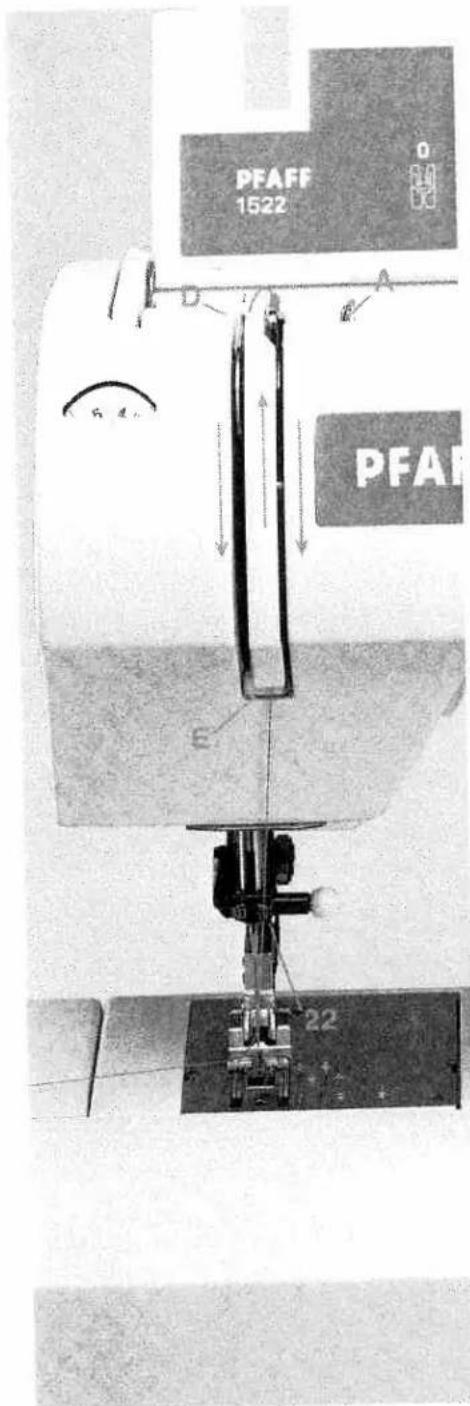
Threading the needle thread Switch off the main switch
Raise the presser foot lifter (17) and turn the handwheel until the take-up lever (9) has moved to the top. Place the thread on the spool holder (8) and fit the corresponding spool cap.
Now, using both hands, pull the thread into guide A and under thread guide hook D. Pass the thread through the lefthand threading slot (11) and downwards. Pull the thread around stop E into the righthand threading slot and upwards to the take-up lever (9).
The thread must be pulled into the take up lever (9) from left to right and downwards again in the righthand threading slot. Finally, pass the thread from the side behind one of the two thread guides (22).
To thread the needle, place the thread from front to back through the needle eye.
Operate your Pfaff FreeStyle
text_image
6 4 A PFAFFThreading the twin needle
Insert the twin needle.
Fit the second spool holder and place one spool of thread on each holder.
In the left threading slot (11) you will find tension disk A. During threading, make sure that you pass one thread left and one thread right over tension disk A.
Carry on threading in the usual way, but make sure the threads are not twisted with each other.
Pull the threads right and left into thread guide (22) and thread the needles.
natural_image
Close-up of a sewing machine on a metal base (no visible text or symbols)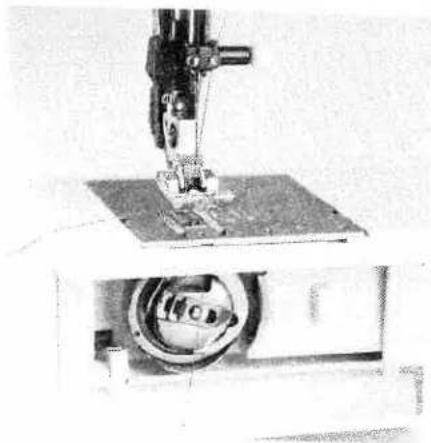
natural_image
Close-up of a sewing machine needle stitching fabric, no visible text or symbolsDrawing up the bobbin thread Turn off the main switch Raise the presser foot. Hold the needle thread and turn the handwheel towards you until the needle is at the top again and the bobbin thread has formed a loop. Pull the needle thread to draw up the bobbin thread.
natural_image
Mechanical sewing machine on a flatbed base (no visible text or symbols)Bobbin thread
Close the bobbin case/hook cover and pull the thread under the presser foot to the left.
natural_image
Close-up of a sewing machine needle with fabric and mechanical components (no visible text or symbols)Thread cutter
Pull the threads from the back to the front over the thread cutter (12).
Operate your Pfaff FreeStyle
natural_image
Close-up of a sewing machine needle and base mount (no visible text or symbols)Presser foot lifter
The presser foot is raised or lowered with the presser foot lifter (17).

natural_image
Close-up of hands assembling or adjusting a mechanical component (no visible text or symbols)Removing the presser foot Turn off the main switch
Position the needle at its highest point Press the presser foot upwards at the front and downwards at the back at the same time so that it disengages from the presser foot holder (13).
natural_image
Close-up of a mechanical sewing machine needle stitching fabric (no visible text or symbols)Engaging the presser foot
Place the presser foot under the presser foot holder (13) so that when the presser foot lifter (17) is lowered, the pins of the foot engage in the presser foot holder.
Check: Please check that the presser foot is properly engaged by raising the presser foot lifter.

natural_image
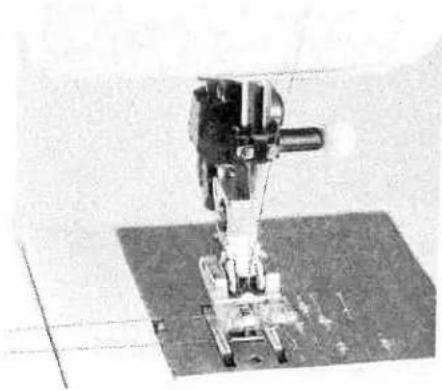
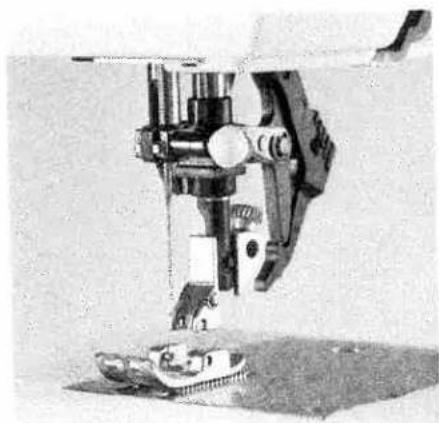
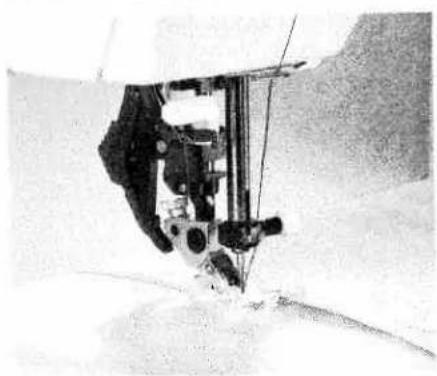
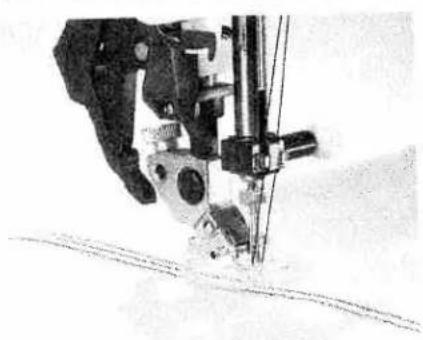
Close-up of a sewing machine needle stitching fabric (no visible text or symbols)The Intigrated dual feed/IDT System
PFAFF offers the ideal solution for sewing difficult materials: the integrated dual feed. This system feeds the material from the top and bottom simultaneously as is done in industrial sewing machines. The fabric is fed precisely. When sewing light or difficult materials such as silk and rayon fabrics, the dual feed prevents seam puckering.

natural_image
Close-up of a mechanical device with no visible text or symbolsEngaging the Intigrated Dual feed
Important! For all sewing jobs with the top feed, only use sewing feet with cutout at the back.
Raise the presser foot. Then push the top feed (15) downwards until it snaps into place.
natural_image
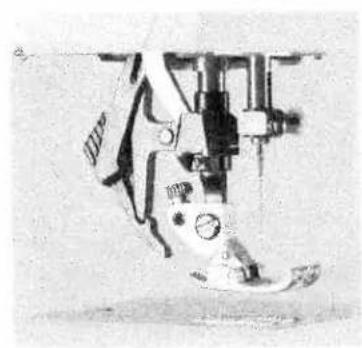
Close-up of a sewing machine needle with visible measurement scales and base mount (no text or symbols)Disengaging the Intigrated Dual Feed
Hold the dual feed with two fingers at the marked places. Push the top feed (15) down a little and out to the rear, and let it move slowly upwards.
natural_image
Abstract geometric pattern with interlocking L-shapes (no text or symbols)The even feeding action also ensures perfect matching of checked and striped fabrics.
Operate your Pfaff FreeStyle
natural_image
Close-up of hands operating a sewing machine needle (no visible text or symbols)
Changing the needle
Switch off the main switch
To remove: Lower the presser foot and move the needle to its highest point. Now loosen the fixing screw (16) and pull the needle downwards.
To insert: The flat side A of the needle must face to the rear. Lower the presser foot and insert the needle, pushing it up as far as it goes. Hold the needle and tighten the fixing screw (16) firmly.
text_image
ASetting the needle thread tension
Set the required needle thread tension (10) with the help of the mark A.
The normal setting for sewing is 4 to 5.
For embroidering, darning and buttonhole set the tension between 2 and 3.
natural_image
Top-down view of a mechanical assembly or machine component (no visible text or symbols)Dropping the feed dog
For certain sewing work, e.g. darning the feed dog has to be dropped. To do this, open the bobbin case/hook cover and move slide A fully to the right. Now the feed dog is dropped.

natural_image
Close-up of a mechanical component with a circular housing and a rectangular block, labeled 'A' (no readable text or symbols)
text_image
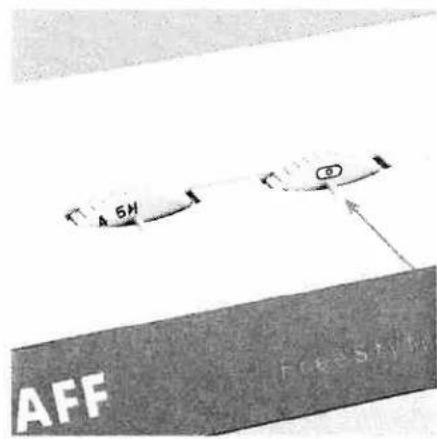
5H AFFStitch width dial
The stitch width can be adjusted with this dial (24). When selecting the width, the needle must not be in the material.
Basic setting: Turn the stitch width knob (24) to the symbol ▶ (maximum stitch width).
Exception: Straight stitch is sewn with stitch width 0.
In chapter "Utility stitches and practical sewing" (pages 19-38), you will find recommendations in the tables for the stitch width selection of individual stitches. During sewing you can also change the stitch width.
text_image
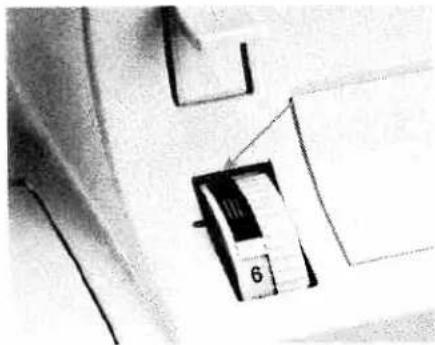
6W AFF 6WNeedle position dial
In the center needle position Ⓞ, 14 additional needle positions can be selected by turning the needle positioning dial (25) in increments to the left or right. The furthest needle position to the left Ⓞ can be achieved by turning the dial (25) as far as it will go to the right. The furthest needle position to the right Ⓞ can be achieved by turning the dial as far as it will go to the left. When the position of the needle is being changed, the needle must not be in the material.
Note: If you have selected the right needle position, you can now use the width dial (25) to increase or reduce the width of the left side of the stitch. The reverse applies also for needle position to the left (see page 42).
Operate your Pfaff FreeStyle
natural_image
Close-up of a mechanical component with a square bracket and an arrow pointing to it (no visible text or symbols)Reverse sewing
The machine sews in reverse only as long as the reverse sewing button (18) is pressed.

text_image
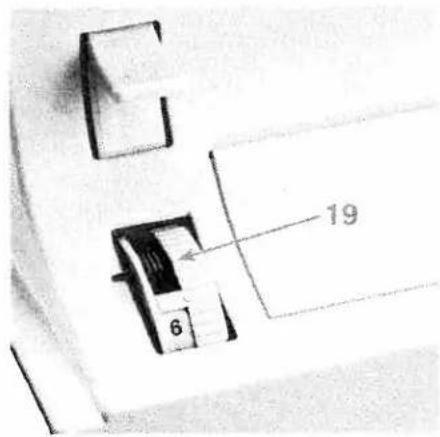
2Stitch length adjustment dial
With the stitch length adjustment dial (19) you can adjust the stitch length between 0 and 6 mm by turning the point marking on the button to the required length.
natural_image
Close-up of a mechanical device with a central component and a rectangular housing (no visible text or symbols)Between the numbers 0 and 1 you will find the "buttonhole" symbol. This area is the optimum stitch density for sewing buttonholes and embroidering.
The further you turn the dial to 0, the higher the density of the stitch.
natural_image
Close-up of a mechanical component with a numbered part (6) and a label (10), no readable text or symbols present.To sew stretch stitches (dark background), you must turn the stitch length adjustment dial (19) as far as it will go in the grey area.
Stitch selection, stitch dial

text_image
eeStyle A 21Utility stitches
Each stitch is identified by a letter. The stitches and their corresponding letters are shown on the inside of the lid, a chart is also found in the Introduction chapter.
Turn the dial (21) until the corresponding letter is positioned below mark A.
text_image
19 6Stretch stitches
All the stitches with a colored background are stretch stitches, i.e. they are suitable for stretch material.
Turn the dial (21) until the corresponding letter is positioned below mark A.
Turn the stitch length dial (19) as far as it will go in the grey area.
natural_image
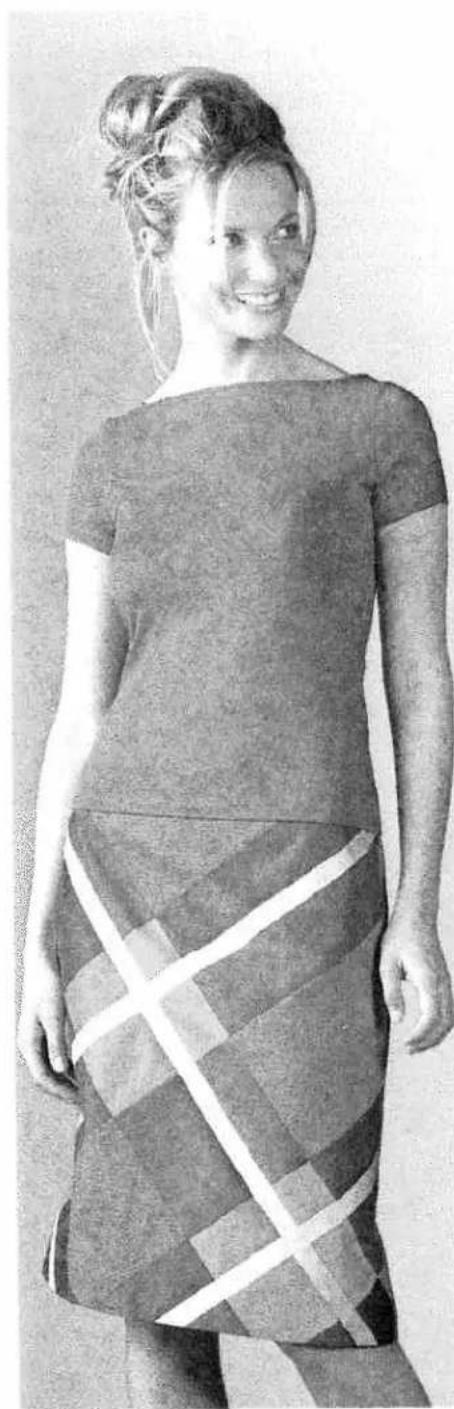
Black-and-white photo of a woman wearing a patterned dress with a checkered skirt (no text or symbols visible)Utility stitches and practical sewing
Sewing chart 20
General sewing aids 21
Non-elastic stitches 22
Elastic stitches 23-24
Buttonhole 26-27
Button sewing 28
Hemming with the twin needle 29
Smocking 29
Gathering 30
Darning 31-32
Sewing on zippers 33-35
Stabilizing edges 36
Sewing lace 37
Explanation of the sewing chart
The following charts show the recommended settings for each stitch or technique.
These charts also provide you with further instructions that are necessary when sewing the selected stitches.
The choice of the sewing foot, the setting of the needle thread tension and whether the sewing is carried out with the top feed switched on or off.
Always use the "center" needle position ☐ if not otherwise specified in the instructions.
| stitch | |||||
stitch
Stitch number

Stitch width in mm

Stitch length in mm

Dual feed on =
off = ○

Thread tension

Presser foot number

natural_image
Exterior view of a FreeStyle medical device (no visible text or symbols on the device body)Utility stitches and practical sewing
Needle thread tension
To ensure perfect sewing results, the needle and bobbin thread tensions must be perfectly tuned to each other. The normal setting for utility stitches is in the range of 4-5.
Check the tension with a wide zigzag stitch. The threads must be interlaced between the two fabric pieces.
If the needle thread tension is too high the threads are interlaced above the top fabric. If the needle thread tension is too low, the threads are interlaced below the lower fabric.
The adjustment of the needle thread tension is described on page 15 and the bobbin thread tension on page 8.

Perfect tension

Too high tension

Too low tension
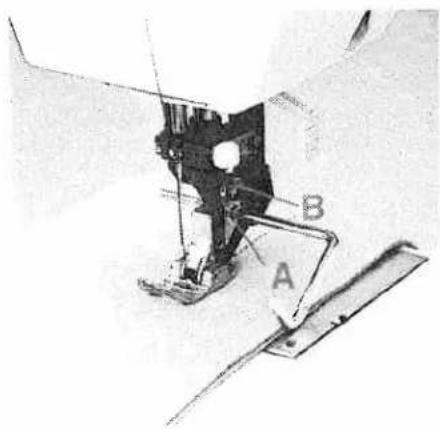
Topstitching
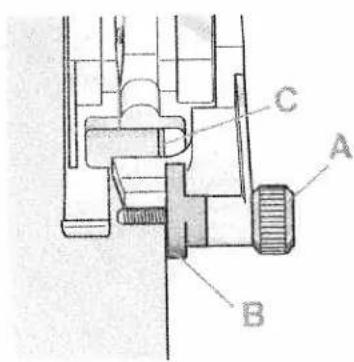
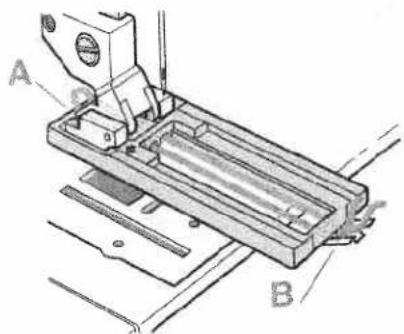
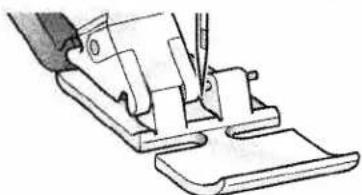
Straight stitch E can be sewn using any of 15 various needle positions in such a way that you can always guide the sewing foot along the fabric edge for top-stitching work. The top-stitch needle position is determined by the needle position dial. If you wish to top-stitch farther from the fabric edge, simply guide the fabric along the guide marks on the needle plate or use the edge guide (standard accessory No.8). The edge guide is inserted into hole A and is secured with fixing screw B.
natural_image
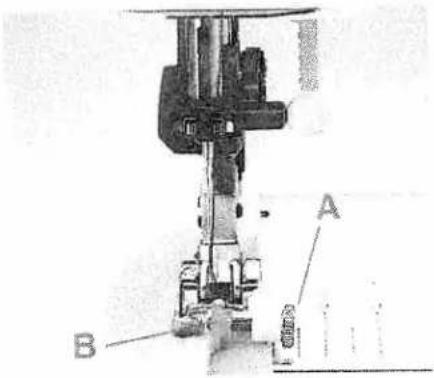
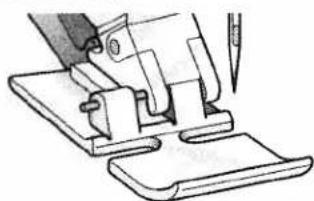
Close-up of a sewing machine needle with labeled parts A and B (no text or symbols beyond labels)Sewing aid for thick seams
To ensure a consistent feed when beginning sewing at a thick seam, we recommend supporting the presser foot on a piece of fabric of the same height as the workpiece.

natural_image
Close-up of a sewing machine needle stitching fabric (no visible text or symbols)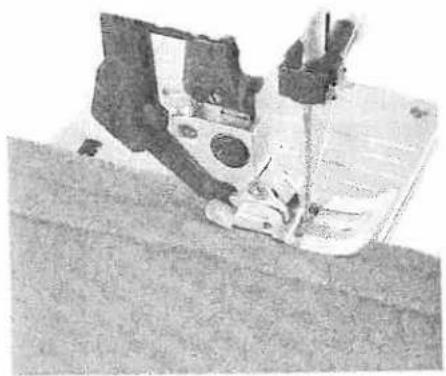
natural_image
Close-up of a sewing machine needle stitching fabric (no visible text or symbols)| stitch | |||||
| E | 0 | 2,5 | 3-5 | 0/1 |
Straight stitch
Stitch E is the basic straight stitch. The stitch length can be increased up to 6 mm if required.
It is easier to do some sewing jobs by changing the needle position, e.g. top-stitching a collar or sewing in a zipper. You can select up to 15 different needle positions (see page 16).
Please ensure that the needle is at its highest position when adjusting the needle position.
text_image
Technical diagram of a mechanical assembly with labeled parts A, B, and C| stitch | |||||
| E | 2-▶ | 1-2 | ● | 3-5 | 0/1 |
Zigzag stitch
In addition to overlock stitching, zigzag stitch E, stitch width 5▶, is also suitable for overcasting various materials. In this case, the material should only be positioned halfway under the sewing foot.
When overcasting the edge, make sure the needle goes into the material and over the edge alternately.
The width for overcasting can be reduced up to 2 mm.
For overcasting difficult materials, blind stitch foot No. 3 is very useful. When sewing, the thread lies over pin C, thus preventing curling of the fabric edge. In this way you can sew beautiful smooth seams.
The raw edge must be guided along edge guide B. You can adjust this edge guide with adjusting screw A.
Important: When the blind stitch foot is used for overcasting with the zigzag stitch, select the right needle position. Choose a stitch width in the range of 3-5 mm (do not use any other needle position).
text_image
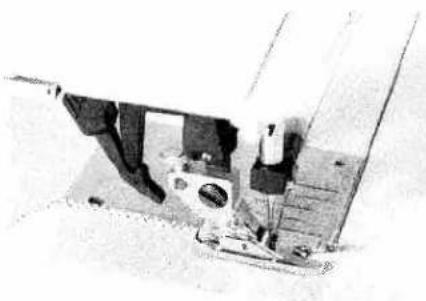
Technical diagram of a sewing machine with labeled parts A and BRemember!
When blind stitching, if you select a needle position other than right, Ⓞ and stitch width other than 5, make sure the needle does not strike the bar of presser foot 3.
If the stitches are visible on the right side, adjust edge guide B by turning adjusting screw A.
Use the needle position Ⓞ and the width dial (24) to regulate the penetration of the needle in the crease.
| stitch | |||||
| H | 5-▶ | 1-2 | ● | 3-5 | 0/3 |

natural_image
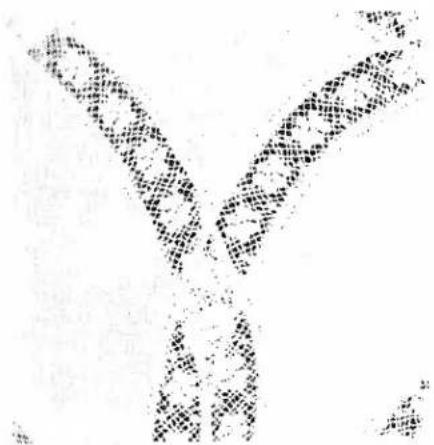
Simple line drawing of a curved object on a textured surface with triangular base (no text or symbols)Blind stitch (elastic)
Stitch H is a blind stitch for woven or elastic materials. The hem is sewn and overcast at the same time.
- Fold the edge inwards by the hem width.
- Now unfold the hem again so that the hem edge protrudes by about 1 cm
- Place the fabric under the sewing foot so that the crease line runs along edge guide B.
- Using the needle positioning knob 28, select the needle position to the right Ⓞ.
- When the needle enters the crease line, it must only pick up one fiber of the fabric.
Utility stitches and practical sewing
natural_image
Close-up of a curved, textured surface with a dark line, possibly indicating a boundary or crack (no text or symbols visible)
natural_image
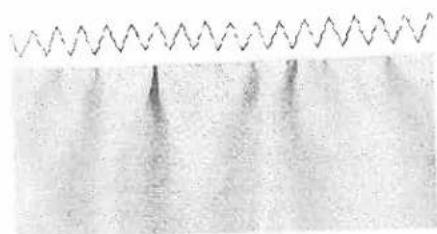
Pure zigzag line pattern on textured background (no text or symbols)| stitch | |||||
| E | 0 | Stretch | ● | 3-5 | 0/1 |
Stretch triple straight stitch
This stitch is used for sewing all seams where great strength is needed, e.g. inside trouser seams.
Turn the stitch length dial away from you as far as it will go for the longest stitch length.
| stitch | |||||
| E | 3-5▶ | Stretch | ● | 3-5 | 0/1 |
Stretch triple zigzag stitch
The stretch triple zigzag stitch is a highly elastic and decorative seam which is very suitable for hems on T-shirts and underwear.
- Serge the edge of the hem.
- Fold the hem inwards at the required width.
• Topstitch the hem from the right side.
Utility stitches and practical sewing
natural_image
Abstract pattern of wavy lines above a textured surface with vertical streaks (no text or symbols)
natural_image
Close-up of a sewing machine needle stitching fabric (no visible text or symbols)| stitch | |||||
| F | 5-▶ | 1-2,5 | ● | 3-5 | 0/1 |
Elastic stitch
Because of its high elasticity, this stitch can be used for sewing elastic on swimwear, skirts or lingerie.
• Mark elastic and fabric in quarters.
- Pin elastic to fabric at quarter markings.
- Place fabric and elastic under sewing foot.
- Stretch elastic to fit the fabric. Begin sewing.
| sitch | |||||
| F | 5-▶ | Stretch | ● | 3-5 | 0/1 |
Honeycomb stitch
The honeycomb stitch is an elastic and decorative hem which is particularly suitable for hems on T-shirts and childrens clothes.
- Fold the hem over double and overstitch it.
Note: When stretching elastic, make sure to stretch from the front and back of the sewing foot.
Buttonholes
Sewing buttonholes is very easy with all the models with pushbutton controls since the fabric does not have to be turned.
Buttonholes are generally sewn onto a piece of doubled fabric. However, for some materials, e.g. silk, organza and viscose, it is necessary to use stabilizer to prevent the material from contracting while sewing.
To produce beautiful seams, embroidering or darning threads are ideally suited to the purpose.
Mark the starting point of the buttonhole either with a magic pen or dress pin, and always sew a sample buttonhole first.
Note: Before starting any buttonhole, always push the guide of the buttonhole foot fully to the front, i.e. so that the red arrow is at the first red mark. The red marks are arranged at an interval of 0.5 cm. They are a guide when determining the length of the buttonhole.
Utility stitches and practical sewing
natural_image
Grainy texture with a single rectangular dark rectangle in the center (no text or symbols)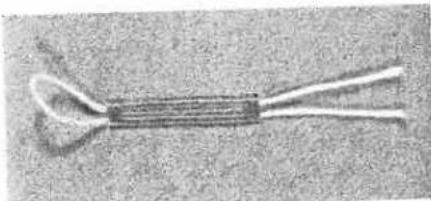
natural_image
Close-up of a coiled cable or wire with twisted ends, no visible text or symbols| sitch | |||||
| ABC | 5-▶ | ○ | 0/1 |
Standard buttonhole
- Insert the buttonhole foot and slide the loot forward as far as it will go.
- Select stitch A. Sew the left side of the buttonhole to the required length. Clip the top thread after a few stitches.
- Select stitch B and sew a few bartacks while holding the fabric securely.
- Select stitch C. Sew the right side of the buttonhole until it matches the previous side in length.
- Select stitch B and sew a few bartacks while holding the fabric securely.
- Select stitch D. Secure the buttonhole by sewing a few stitches.
- Carfully cut open your buttonhole with scissors or a seam ripper.
Tip: If you would like to sew very fine buttonholes, you can reduce the buttonhole width with the stitch width dial (24) down to approx. 3 mm. Use the center needle position ☐.
Standard buttonhole with gimp thread
To sew especially durable buttonholes, on heavy fabrics, knits or sportswear, we recommend using a gimp thread.
On knits the gimp thread is particularly important to prevent the buttonhole from stretching.
- Lay the gimp thread over the rear protrusion A and pass the thread ends underneath the presser foot towards the front.
- Clamp the threads to the left and right of protrusion B.
- Slide the buttonhole runner as far forwards as possible and sew the buttonhole as described for your select model.
- Pull the loop of the gimp thread into the buttonhole and cut the threads.
text_image
A B

natural_image
Close-up of a robotic arm with articulated joints and wires, resting on grass (no visible text or symbols)| stitch | |||||
| E | 4 | - | ○ | 2-3 | - |
Sewing on buttons
With zigzag stitch E (stitch width 4 mm) you can sew on two- and four-hole buttons.
- Remove the sewing foot and lower the feed dog
- Turn the handwheel towards you and move the button in such a way that the needle enters the left hole in the button
- Now lower the presser foot lifter; this holds the button off the blade.
- Sew on the button. Take care to ensure that the needle also enters the right-hand hole in the button.
Securing
- Select straight stitch by turning the width dial (24) to 0.
- Change the needle position with the needle position dial (25) so that the needle enters one of the two holes.
- Sew a few securing stitches.
natural_image
Close-up of a sewing machine needle stitching fabric (no visible text or symbols)Sewing on buttons with shanks
Insert the sewing foot.
- Place a match between the holes of the button and sew it on as described to the left.
- Remove the match and pull the fabric and the button apart.
- Wrap the shank you have just created with sewing thread and knot it. (See illustrations below).


natural_image
Close-up of a textured fabric surface with a horizontal seam line (no text or symbols)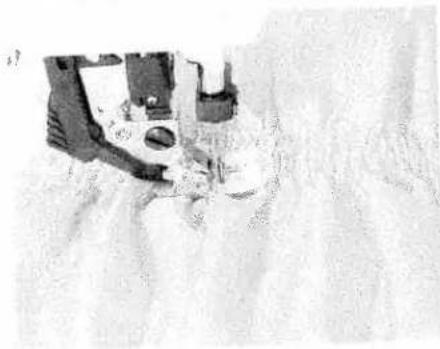
natural_image
Close-up of a sewing machine stitching fabric (no visible text or symbols)| sitch | |||||
| E | 0 | 3 | 3-5 | 0/1 |
| stitch | |||||
| E | 0 | 3-4 | 3-5 | 0/1 |
Hemming with the twin needle
Use the twin needle to make beatiful topstitch seams.
Using the twin needle you can add a professional touch to hems on stretch materials such as T-shirts, knitted articles or cycling shorts both quickly and easily.
Twin needles are available in different widths. The traditional width for topstitching is 4 mm. To prevent the needle from striking the needle plate, you must make sure that you select the center needle position ☐.
- First fold and iron the width of fabric desired for the hem.
- Then topstitch the hem from the right side.
• Finally, cut the protruding hem edge back to the seam.
Use only a stretch needle when sewing stretch material!
Tip: On difficult materials such as ribbed knit-wear it is advisable to baste the hem before topstitching it.
On page 11 you will find a description of how to thread the twin needle.
Smocking effect with elastic threads
Fine, light fabrics such as Batist, rayon and silk are particularly suitable for beautiful smocking work. For smocking work with the elastic thread, you should use an additional bobbin case and wind the bobbin by hand with the elastic thread. As the elastic thread is much stronger than the normal bobbin thread, the tension of the bobbin case must be set at very low.
Don't forget, the higher the bobbin thread tension, the more intense the gathering effect.
- Sew a test seam to determine the level of gather.
- Mark the first line on the right side of the fabric and sew along it.
• Each additional seam can be sewn at a presser foot's width from the first row. - When sewing several seams next to one another, you must stretch the fabric to its original length when sewing the subsequent seams. Otherwise, the gather will be irregular.
- Knot the threads at the beginning and end of the seam on the reverse side.
Utility stitches and practical sewing
natural_image
Close-up of a sewing machine needle stitching fabric, with a close-up inset showing the same pattern (no text or symbols visible)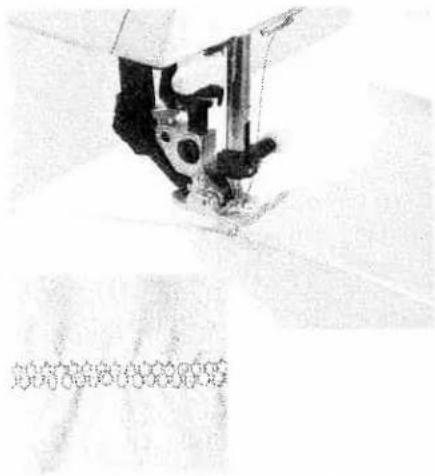
Gathering with the straight stitch
Using a straight stitch, you can gather sleeves, skirts and valances with a stitch length of 6 mm. To ensure consistent gathering you should sew two or three rows of gathering.
- Mark the first line on the right side of the fabric and sew along it. Allow the threads to extend approx. 10 – 20 cm.
• Each subsequent seam can be sewn one presser foot width from the last.
• Gather the piece of fabric by pulling the bobbin thread. You determine the amount of gather by how much you pull the thread. - Finally, the thread ends are knotted to secure the gather.
Tip: The cording foot (special accessory) is particularly suitable for gathering. Due to its guide grooves the elastic is fed evenly during the sewing process.
Gathering with elastic thread
Sleeve and waist seams can be gathered by sewing over an elastic thread.
- Mark the first gathering seam on the reverse side of the fabric.
- Sew a few stitches using stitch F. Leave the needle in the fabric. The needle must be in the center of the presser foot. Raise the presser foot and lay the elastic thread around the needle.
- Lower the presser foot and sew a few stitches. Then pull the elastic thread evenly at both ends.
• Determine the amount of gather by the amount you pull the threads. - The gather can also be altered after sewing by pulling the ends of the elastic threads.
• Finally, knot the threads.
Utility stitches and practical sewing

text_image
Technical diagram of a sewing machine with labeled parts including D, E, F, G, C, and B| stitch | |||||
| E | 0 | - | ○ | 2-3 | Optional |

text_image
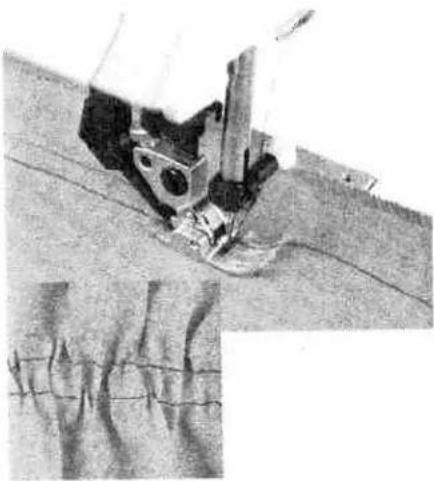
Technical diagram showing a mechanical assembly with labeled parts A and BDarning with the straight stitch
Insert the darning foot:
Loosen screw D. Set the needle at its highest point and push the pin of the darning foot fully into the hole C of the sewing foot holder. When doing this, the guide fork G should position itself around the presser bar. The lever E must be behind the fixing screw F. Now tighten screw D.
Darning position:
Lower the presser-foot lifter (A) while pushing it lightly to the rear. This snaps the presser foot lifter into a notch (B) on the back side of the sewing machine into the darning position.
- Place the darning work in the darning hoop.
- Drop the feed dog.
- Pull up the bobbin thread and hold the threads when you start sewing.
- Darn the damaged area by guiding the fabric back and forth evenly in the prescribed direction while ensuring that each line ends with a small curve. This helps to avoid the fabric ripping again.
- When you have finished sewing the damaged area, rotate the fabric again.
You determine the stitch length yourself by moving the fabric back and forth.

natural_image
Technical line drawing of a sewing machine needle stitching a grid-patterned surface (no text or symbols)
natural_image
Pure grid pattern with no text, numbers, or symbolsTip: If you move the fabric too slowly, small knots will appear on the reverse side of the fabric.
| stitch | |||||
| F | 5-▶ | 0,2-1,5 | ● | 3-5 | 0/1 |
Darning with the elastic stitch
Darning with the elastic stitch is especially suitable for repairing damaged areas.
- Sew over the damaged area in rows until it is well covered. Take care to ensure that the rows overlap.
natural_image
Pure electrical circuit lines without any symbols
natural_image
Square frame made of small wavy lines on a textured background (no text or symbols)Repairing tears
On tears, frayed edges or small holes it is useful to lay a piece of material under the reverse side of the fabric. The underlayed fabric reinforces the workpiece and ensures perfect repair.
- Lay a piece of fabric underneath the damaged fabric. It must be a little larger than the damaged area.
• Now sew over the damaged area. - Cut the under layed piece of material back to the seam.
Sewing on patches
To cover larger holes is it necessary to sew a new piece of fabric onto the damaged area.
- Baste the new piece of fabric onto the damaged area of the face side of the fabric.
- Sew over the fabric edges with the elastic stitch.
- Now cut the damaged area back to the seam from the reverse side of the fabric.
Utility stitches and practical sewing
natural_image
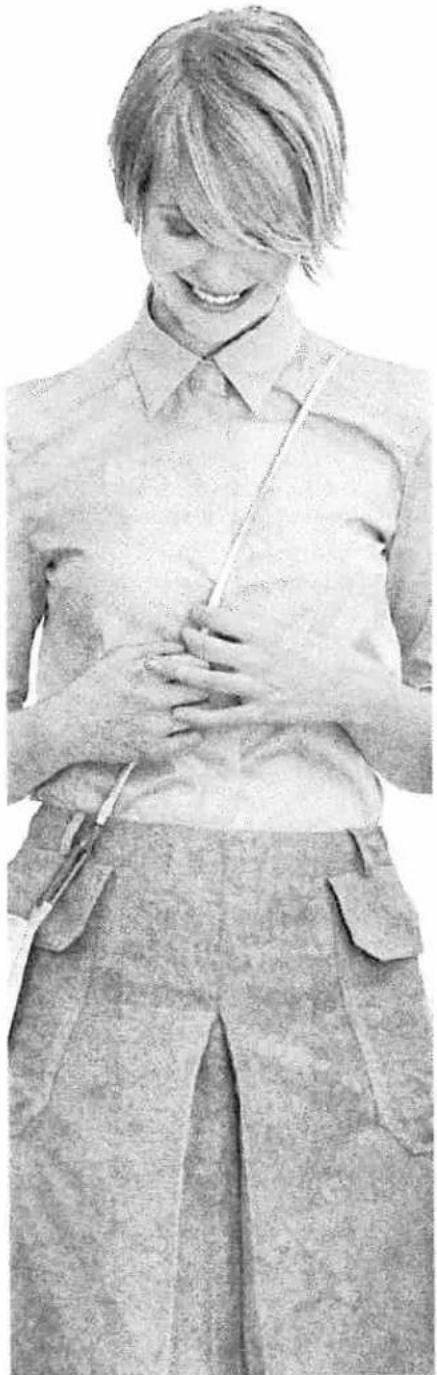
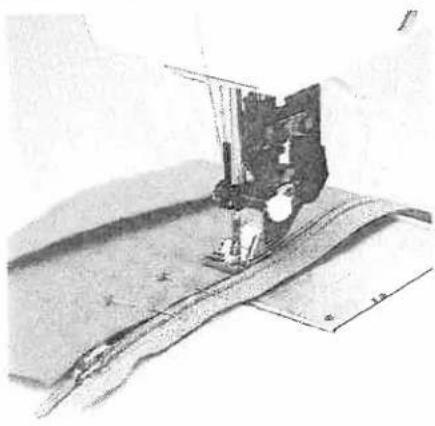
Black-and-white photo of a smiling woman in a collared shirt and trousers, holding hands with a pen (no visible text or symbols)Sewing on zippers
There are various methods of sewing on zippers. For skirts, we recommend the fully concealed zipper, for men's and ladies' trousers the semi concealed zipper. Various zippers are available. We recommend using a metal zipper for strong fabrics such as denim. For all other materials we recommend a plastic zipper.
It is important for all types of zippers to sew very close to the edge of the teeth of the zipper. This is why it is possible to insert the zipper foot either on the right or the left of the presser foot holder.
Additionally, you can set the needle so that it enters close to the edge of the zipper teeth by using one of the 15 available needle positions. If the foot is engaged to the right, the needle must only be moved to the right. If the foot is engaged left, the needle must only be moved to the left.
| stitch | |||||
| E | 0 | 3 | 3-5 | 4 |
natural_image
Technical line drawing of a sewing machine tool (no text or symbols visible)Left presser foot position
natural_image
Illustration of a sewing machine needle stitching fabric (no text or symbols visible)Right presser foot position
Utility stitches and practical sewing
natural_image
Close-up of a sewing machine needle stitching fabric (no visible text or symbols)
natural_image
Close-up of a sewing machine needle stitching fabric (no text or symbols visible)Fully concealed, sew-in zipper
- Insert the zipper foot on the right side.
- Baste in the zipper and lay it underneath the presser foot so that the teeth of the zipper run alongside the foot.
- Stitch in half of the zipper, leave the needle in the fabric, raise the presser foot and close the zipper.
-
Now you can continue sewing the seam up to the end of the zipper and sew the cross seam.
-
Sew the second half of the zipper parallel at the same distance.
- Stop after the first half and leave the needle in the fabric. Raise the presser foot and open the zipper.
• Now you can finish sewing the seam.
Utility stitches and practical sewing
natural_image
Close-up of a sewing machine needle stitching fabric (no visible text or symbols)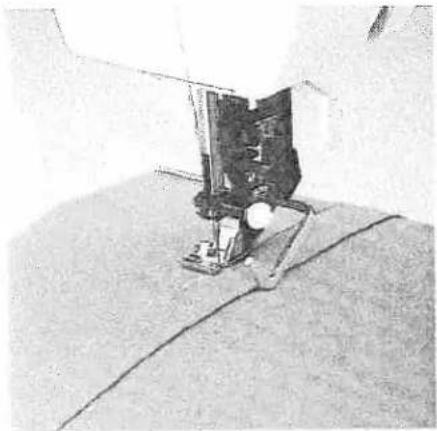
natural_image
Close-up of a sewing machine needle stitching fabric (no visible text or symbols)The trouser zipper
- Iron the seam allowances, taking care to ensure that the underlap extends by about 4 mm.
- Baste the zipper under the underlap so that the teeth are visible.
-
Insert the zipper foot on the right side and move the needle to the right needle position Ⓞ.
• Stitch along the edge of the zipper. -
Just before the end of the seam, open the zipper and finish sewing the seam.
- Close the zipper and baste the overlap evenly to the other half of the zipper.
• Then sew through the basted seam.
Tip: To achieve a perfect seam, we recommend using the edge guide.

natural_image
Close-up of a sewing machine needle stitching fabric (no visible text or symbols)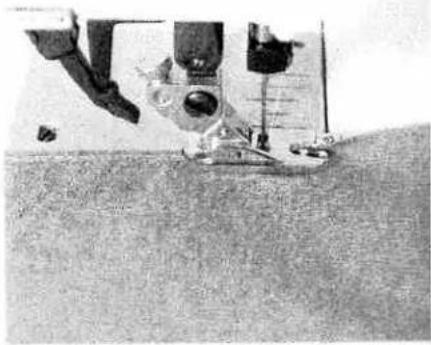
natural_image
Close-up of a sewing machine needle stitching fabric (no visible text or symbols)| stitch | |||||
| E | 0 | 3 | ○ | 3-5 | Optional |
Stabilizing edges
With the hemmer you can hem blouses, silk scarves and valances with ease, without having to pre-iron the fabric edges. The hemming prevents the edges from fraying and a clean, durable edge is the result.
- Fold the beginning of the fabric edge over twice (approx. 2 mm)
- Lay the folded fabric edge underneath the hemmer and sew a few stitches.
- Leave the needle in the fabric, raise the presser foot and insert the fabric into the hemmer foot scroll.
- Lower the presser foot and guide the fabric evenly into the hemmer.
Take care to ensure that the fabric does not run under the right half of the presser foot.
natural_image
Close-up of a sewing machine needle stitching fabric (no visible text or symbols)Tip: On silk, viscose and chiffon fabrics, the roll hem is particularly attractive with a zigzag stitch.
Utility stitches and practical sewing
natural_image
Abstract black-and-white pattern with diagonal and horizontal lines (no text or symbols)
natural_image
Decorative corner frame with floral border and blank space (no text or symbols)| stitch | |||||
| E | 0 | 2,5 | ● | 3-5 | 0/1 |
Inserting lace
You can achieve a beautiful effect by inserting lace, e.g. on babywear and children's clothing.
- First the lace is basted onto the right side of the fabric.
- Sew on both sides of the lace at a narrow margin.
- The fabric underneath the lace is cut down the middle and ironed to the side.
- Sew over both edges of the lace with a small, dense, zigzag stitch (stitch width 2-4 mm).
• Cut back the extra fabric.
Attaching lace
You can beautify and remodel home textiles with the desired suitable lace as often as you like.
Here's how it's done:
- First serge the cut edges.
- Sew the lace onto the face side of the fabric up to the first corner.
- Fold the corner and sew over it diagonally.
- Sew the following sides in the same way.
Utility stitches and practical sewing

natural_image
Black-and-white photo of a person's jacket with floral embroidery and a knitted sleeve (no text or symbols visible)Decorative sewing and embroidery techniques
Decorative sewing and embroidery techniques
Sewing table for decorative sewing 40
Monograms 41
Embroidering with the dense zigzag stitch/Tapering 42-44
Appliqué 44 Richelieu 45 Eyelet embroidery 45 Patchwork quilt 46 Hemstitching 47
Decorative stitches
To enhance home textiles or garments, you can produce decorations by selecting different stitches, using different thread/fabric colors or vary length and width of the stitches.
For decorative stitches we recommend using special embroidery threads which are available from your Pfaff dealer. Use stabilizer under the fabric to be decorated. This prevents the material from pulling. Use a magic pen or marking chalk to mark a line for your first row of stitching.
The following recommendations apply to all samples on the following pages.
The stitch length and stitch width can be varied as required.
Always use the center needle position ☐ if not otherwise indicated.
| stitch | |||||
| - | 5-▶ | 0.5-1 | ○ | 2-3 |
stitch
Stitch number

Stitch width in mm

Stitch length in mm

Dual feed on =

off = ○

Thread tension

Presser foot number

natural_image
Black-and-white portrait of a woman with blonde hair wearing a patterned blouse (no text or symbols visible)
natural_image
Abstract wavy line drawing with no text or symbolsWhether working with stretch or woven fabric, with the help of the darning foot and the stitch E, stitch width 2.5-5▶, you can embroider initials of your own design.
Sewing this way without a set pattern does, however, require a little practice.
- Draw the initials onto the fabric with an invisible-ink marker.
- Drop the feed dog. Insert the darning foot and bring it into darning position (see page 31).
- Place stabilizer under the fabric.
- Hoop the fabric in an embroidery hoop and embroider using the zigzag stitch.
- Tie off the threads and remove the stabilizer.
Tip: By sewing quickly and moving the material slowly, you will achieve dense stitches.
When embroidering on terry-cloth, the monogram must first be sewn with a narrow zigzag stitch and then stitched again with a wider zigzag stitch. In this way the terry-cloth loops are completely covered.
Embroidering block letters is somewhat easier. Here the feed dog is not dropped which means that free sewing is no longer necessary. You can simply sew along the lines with stitch E, stitch width 2.5-5.
- Place stabilizer under the fabric.
• Before sewing, draw the monogram onto the fabric. - Sew along the lines you have sketched using the zigzag stitch.

natural_image
Five abstract black-and-white line drawings with no text or symbolsEmbroidering with
a dense zigzag stitch/Tapering
Tapering is easy with your select sewing machine. By adjusting the width of this dense zigzag stitch you can create interesting embroidery.
Even embroidering
- Place stabilizer under the fabric.
- Set needle thread tension to "buttonhole", select zigzag stitch E, set stitch length to "buttonhole" and select the center needle position.
- Turn the width dial (24) smoothly and consistently from 0 to 5 mm and back again to 0 while sewing at a constant speed through the procedure.
Note: If you selected the right or left needle position, the stitch width will only change in one direction.
Uneven embroidering
- Place stabilizer under the fabric.
- Set needle thread tension to "buttonhole", select zigzag stitch E, set stitch length to "buttonhole" and select the center needle position Ⓞ.
- Increase or decrease the width of the stitch using the width dial (24).
Note: If you selected the right or left needle position, the stitch width will only change in one direction.

natural_image
Black-and-white illustration of stylized plant parts and leaves (no text or symbols)
natural_image
Abstract geometric shapes arranged in a symmetrical L-shape (no text or symbols)Floral embroidery
For this flower arrangement, only a dense zigzag stitch was used in combination with the variable stitch width and the various needle positions.
- Place stabilizer under the fabric.
- Draw the contours of a flower motif with a self-erasing textile pen.
- Set needle thread tension to "buttonhole", select zigzag stitch E, set stitch length to "buttonhole".
- Flowers: Select center needle position Ⓞ and embroider individual petals. Adjust the stitch width with the width dial (24) during sewing according to the contours of the flower.
• Leaves: Select right needle position ⓞ and embroider half of the leaf. Vary the stitch width using the width dial (24). Turn the handwheel towards you after finishing the first half of the leaf until the needle is positioned in the material.
• Turn the material 180 degrees and embroider the other half of the leaf.
Embroidering corners
By changing the stitch width during sewing of dense zigzag stitches you can embroider corners with 45 degree angles.
- Set needle thread tension to "buttonhole", zigzag stitch E, set stitch length to "buttonhole" and stitch width 5 mm.
- Select right needle position Ⓞ and embroider a straight line.
- Embroider corner: After the needle has penetrated the material to the right, reduce the stitch width using the width dial (24) by 0.5 mm to 4.5 mm. Sew a stitch.
- Reduce the width once again by 0.5 mm and sew a stitch. Continue in this manner until the stitch width is 0.5 mm.
- Turn the handwheel towards you until the needle penetrates the material. Turn the material 90 degrees and sew a stitch.
- Increase the width by 0.5 mm to 1.0 mm. Sew one stitch.
- Increase the width by 0.5 mm again and sew one stitch. Continue in this manner until the initial width is achieved. Now embroider a straight line.
If the corner is to continue in the opposite direction, use the outermost left needle position Ⓞ.

natural_image
Pencil sketch of a five-petal flower with visible petals and stamens (no text or symbols)Decorative buttonhole
This buttonhole is a beautiful alternative to the traditional buttonhole (see page 26-27). Since you determine the width of the buttonhole seam, the buttonhole can have a width of up to 10 mm.
- Sew two buttonhole seams about 1 mm apart using a dense zigzag stitch E, stitch width 3-5 ▶ mm). The needle thread tension is set to "buttonhole".
- Select the right needle position and sew over both ends of the buttonhole seam with a triangle. To do this, turn the stitch width dial (24) during sewing constantly from 0 to 5 ▶ and back to 0. The top of the triangle should meet the middle of both buttonhole seams.
Appliqué
Appliqués are quickly made and always produce a beautiful fancy effect. By using different materials and patterns you can sew many different variations. You can make a perfect, densely stitched seam with the appliqué foot (special accessories), because it has a special cutout on the underside for the buttonhole seam. Use a fusible backing fabric to iron the appliqué onto the material, making it easier for you to applique.
- Insert the appliqué foot in the sewing machine.
- Transfer your drafted pattern to the face side, smooth side, of the fusible backing fabric. Remember that e.g. letters have to be drawn as a mirror image.
- Now iron the backing fabric onto the appliqué material. Cut the motif out and pull the paper off.
- Place and iron on the appliqué parts on the base material.
- Sew over a appliqué material edges with the dense zigzag, stitch E, stitch width 2-4 mm, stitch length "buttonhole". The needle thread tension is in the "buttonhole" area. Make sure the needle stitches over the outer edge so that no fraying occurs later.
Tip: For appliqué pieces which are pointed at the ends, you can make the zigzag stitch narrower using the width dial (24) so that the ends are pointed.
natural_image
Close-up of a white, textured object with a flared edge, possibly a shell or fabric (no visible text or symbols)Richelieu
This especially artistic form of eyelet and insert embroidery is easy to sew with your sewing machine.
• Using a magic marker, draw your motif onto the right side of the fabric.
- Then place two layers of water-soluble stabilizer underneath the fabric to be embroidered and hoop both the fabric and the stabilizer into an embroidery hoop.
- Insert decorative embroidery foot number 1.
- To lend more durability to the embroidery, sew all of the contours twice using the straight stitch (stitch length approx. 1 mm).
- Then carefully cut out the fabric 2 mm next to the contour from the areas which are to be hollow. The stabilizer must not move.
- Embroider the contours with a dense zigzag stitch.
- Finally, simply dissolve the stabilizer fleece in cold water and your one-of-a-kind design is finished.

natural_image
Black-and-white illustration of a woman in a white dress sitting at a desk with a small object, no visible text or symbols.Eyelet embroidery
Traditional eyelet embroidery which previously had to be made laboriously by hand can now be made quite easily with the help of an eyelet plate (special accessory).
This is very effective on blouses, bed or table linen. Use utility stitches such as the zigzag stitch, blind stitch, or elastic stitch.
For classic eyelet embroidery, use stitch E. with a stitch width 3-5 mm.
- Remove the presser foot. Set the presser bar lifter at the darning position (see page 31).
- Place the eyelet plate on the needle plate, making sure pin A fits in the middle cutout of the needle plate. Then push the plate down at the front.
- Place the marked fabric taut in an embroidery hoop. Cut one or two of the fabric threads and push the fabric over the pin in the eyelet plate. The fabric must fit snugly around the pin.
- Draw up the bobbin thread and hold it for the first few stitches.
- Stitch around the cut with the selected stitch. It is important to turn the fabric slowly and evenly. The stitches should be very close to each other.
• Afterwards secure with straight stitch.
natural_image
Black-and-white sketch of a draped fabric or garment with geometric patterns, no visible text or symbols.
natural_image
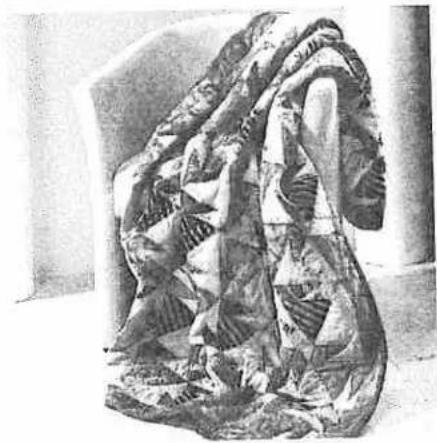
Abstract geometric pattern with overlapping triangles and diagonal stripes (no text or symbols)Patchwork quilt
Patchwork and quilting are traditional handicraft techniques which were originally used by North American pioneer women to make use of left-over fabric. Over the years it has developed into a creative hobby.
Traditionally patchwork was sewn by hand. Today your creative ideas can be realized in a much shorter time with your select sewing machine.
A patchwork quilt consists of three layers of fabric, two layers of fabric with a layer of batting sandwiched between. Many pieces of fabric are joined together in patterns to form the top layer of the quilt. This is tacked to a middle layer of polyester or cotton batting and a backing layer.
The quilt and patchwork foot (special accessory – see page 57) is particularly helpful for sewing patchwork and quilting. The distance of the needle to the outer edge of the foot is 1/4 inch (6 mm) and 1/8 inch (3 mm) to the inner edge).
And this is how it's done:
- Cut the pieces necessary for your quilt top, making sure to include a seam allowance of 1/4 inch (6 mm).
- Sew the pieces together as required by the block chosen. These squares will then be sewn together and will form the top of the quilt.
- Baste the finished top of the quilt onto the batting and the bottom quilt layer.
- Use your Pfaff select model to sew all layers together. Work from the inside of the quilt out. Use a straight stitch for long seams. Use stitches such as FG to add a decorative touch.
Experiment with other stitches on a scrap of fabric. Contact your Pfaff dealer, library, or bookstore for more information on quilting.
Decorative sewing and embroidery techniques
Hemstitch seam
The hemstitch seam is an embroidery technique and can be used to secure edges on table linen as well as for decoration on clothing. For hem stitching you will require a wing needle and natural fiber, woven fabric that you can easily pull single threads. Lightweight darning thread is particularly suitable. With the stretch zigzag stitch you can sew various hemstitching techniques such as the wale hemstitch seam, a hem sewn with the hemstitch and a hemstitch seam as an edge. Use the decorative stitch foot 1.

natural_image
Microscopic view of a layered material structure with repeating triangular features (no text or symbols)Hem edge sewn with hemstitch seam
- Iron the hem over twice and pull one or more threads out from above the hem.
- Using the stretch zigzag, stitch width 2-3 mm, sew the hem from the face side. The needle must perforate the hem on the right hand side and bundle the pulled threads on the lefthand side.

Hemstitching seam as edge
This edge is used for very fine, think materials. It is particularly suitable for valances and ruffles.
- Using the Stretch stitch (E), width 2-3 mm, sew at a presser foot's width along the edge of the fabric.
• Using a small pair of scissors, trim off the excess fabric on the hemstitch edge.

text_image
Scanned text of a document with dense, unreadable characters arranged in a horizontal line.Wale hemstitch seam
- As with the hand hemstitch seam the threads are pulled out to the desired width.
- Using stretch zigzag stitch, stitch width 2-3 mm, sew along both of the fabric edges. The needle must perforate the area of the pulled threads just next to the edges. This bundles the threads.
Decorative sewing and embroidery techniques
natural_image
Black-and-white portrait of a woman seated in a white dress, outdoors with blurred background (no text or symbols visible)Accessories and needles
text_image
Accessories and needles Presser feet (normal accessories) 50-51 Special accessories table 52 Felling foot 53 Gathering foot 53 Cording foot 54 Bias-tape binder 55 Ruffler 55 Cording foot 56 Applique foot 56 Fringe foot 57 Needle table 58-59Accessories and needles
natural_image
Aerial view of a vehicle with two large vehicles on top, no visible text or symbols.Presser feet (normal accessories)
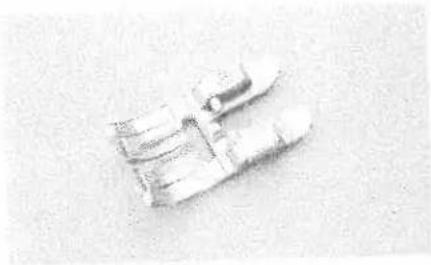
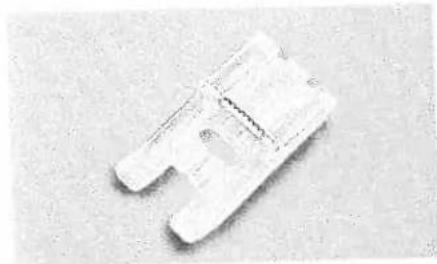
0 Standard presser foot
Part No. 98-694 816-00
natural_image
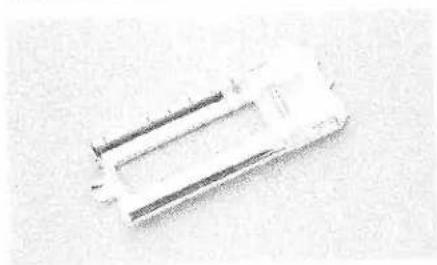
Close-up of a white plastic bag with a printed label (no visible text or symbols on the bag itself)1 Clear view foot
(Fancy-stitch foot not suitable for top feed)
Part No. 98-694 864-01
natural_image
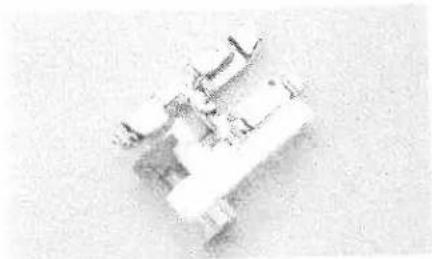
Close-up of a mechanical component with no visible text or symbols3 Blind stitch and overlock foot
Part No. 98-694-890-00

natural_image
Close-up of a small electronic component or device with no visible text or symbols4 Zipper-and edge-stitching foot
Part No. 98-694 884-00
natural_image
Close-up of a white plastic electronic component with no visible text or markings5 Buttonhole foot
Part No. 93-036 990-91
Accessories and needles

natural_image
Simple L-shaped metal rod or wire on a plain background (no text or symbols)8 Edge guide
Part No. 98-802 422-00

text_image
Labeled diagram of a mechanical or electrical component with numbered parts 1 through 91-3 Spool cap
-
Part No. 93-036 048-44
-
Part No. 93-035 050-44
-
Part No. 93-036 049-44
4 Brush
Part No. 93-847 979-91
5 Extra spool pin
Part No. 93-033 063-44
6 Seam ripper
Part No.99-053-016-91
7 Felt pad
Part No. 93-033 064-05
8 Oil tube
Part No. 93-035 910-91
9 Bobbins
Part No. 93-040 970-45
Presser feet (special accessory) for special sewing work. They are available at an extra charge from your dealer
| Accessory | Part No. | Sewing work |
| Appliqué foot | 93-042 941-91 | For appliqué work |
| Open appliqué foot | 93-036 931081 | |
| Bias tape binder (remove foot holder) | 98-054 484-91 | For binding edges with bias tape |
| Cording foot, 5 grooves (twin needle with needle spacing 1.6 to 2.0) | 93-042 950-91 | For cording work (needle size 80) |
| Cording foot, 7 grooves (twin needle with needle spacing 1.6 to 2.0) | 93-042 953-91 | |
| Cording tongue (2) | 93-035 952-45 | |
| Fringe foot | 93-042 943-91 | For sewing loop embroidery |
| Straight-stitch foot with round hole | 98-694 821-00 | Caution! Only use straight stitch in center needle position! |
| Needle plate with round hole | 98-694 822-00 | For topstitching seams and sewing very light and soft materials (silk jersey etc) |
| Felling foot 4.5 mm | 93-042 946-91 | For lap-felled seams |
| Felling foot 6.5 mm | 93-042 948-91 | |
| Gathering foot | 93-036 998-91 | For gathering valances |
| Multi-stitch gathering foot (remove sewing holder) | 98-999 650-00 | For placing dense or loose pleats on valances |
| Cording foot | 93-036 915-91 | For cording |
| Eyelet plate (graphic) 6mm | 93-036 947-45 | For eyelet embroidery |
| Eyelet plate (graphic) 8 mm | 93-036 948-45 | |
| Roll hemmer, 2 mm | 98-694 873-00 | For hemming edges |
| Hemmer, 4 mm (for top feed) | 98-694 823-00 | For hemming edges |
| Hemmer (not suitable for top feed) | 98-694 818-00 | |
| Knit-edge foot | 93-042 957-91 | For sewing knitted fabrics |
| Darning foot | 93-035 960-91 | For darning damaged pieces |
| Teflon foot | 93-036 917-91 | For sewing leather a. synth. |
| Decorative stitch foot | 93-036 962-91 | For embroidering leather a. synth |
| Compass guide | 93-036 953-91 | For circle-shaped embroidery |
| Fagotting guide | 93-036 952-46 | Foundation wear |
| Patchwork foot (without top feed) | 93-036 925-91 | Quilt and patchwork sewing |
| Patchwork foot (with top feed) | 93-036 927-91 | |
| Cording decorative stitch foot | 93-036 942-91 | Sewing spaces between cor. |
| Braiding foot | 93-036 936-91 | For overstitching cords |
| 7/9 hole foot | 93-036 946-91 | For sewing yarn and ribbon |
| Free-form embroidery foot | 93-936 963-91 | For embroidery work |
| Finger guard | 93-036 910-91 | All types of sewing |
| Lamp changer | 93-036 960-91 |
On the following pages you will find examples on some of the special accessory test
Accessories and needles
natural_image
Close-up of a sewing machine needle stitching fabric (no visible text or symbols)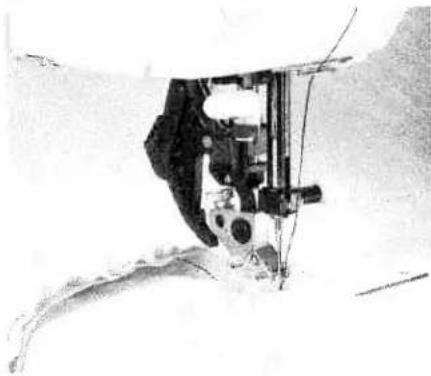
natural_image
Close-up of a sewing machine needle stitching fabric (no visible text or symbols)| SHOP | |||||
| E | 0 | 3 | ○ | 3-5 | Felling foot |
| stitch | |||||
| E | 0 | 3 | ○ | 3-5 | Shirring foot |
Felling foot
Flat felled seams are particularly strong and are commonly known as jeans seams. Seams on sportswear and children's wear, blouses and shirts are more durable with this technique. You can make these seams particularly decorative by using a sewing thread of a contrasting color. The felling foot is available in two different widths.
- Attach the felling foot to the presser foot holder.
- Place the fabrics' wrong sides together.
• Overlap the raw edge of the lower fabric by about 3/8" to 5/8" (1-1.5 cm). - Place this overlapping edge over the tongue of the felling foot. The fabric must be placed fully under the presser foot.
- Sew along the folded edge with a straight stitch.
- Separate the fabric and feed the protruding hem into the felling foot. The hem is turned over by the foot and is overstitched along the edge. Pull the two fabric layers taut during sewing.
Shirring foot
Beautiful gathering effects can be achieved quickly and easily with the shirring foot.
- Attach the shirring foot by hooking the rear bar of the foot into the rear groove of the foot holder. Push the foot upwards until it snaps into the front bar.
- Place the fabric to be gathered under the presser foot, and the fabric to remain flat on the top through the foot cut out. Make sure the fabrics are placed right sides together.
- Hold the top fabric slightly taut while sewing. The more you hold the top fabric the greater the gathering effect you will achieve.
- Be sure to guide the fabric edges evenly through the foot.
- Disengage the shirring foot by pushing it down at the front and remove it in the direction of the groove of the presser foot holder at the back.
Tip: Tighter gathers can be achieved by increasing the needle thread tension and the stitch length.
natural_image
Close-up of a sewing machine needle stitching fabric (no visible text or symbols)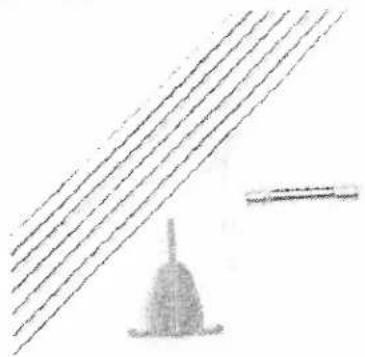
natural_image
Simple line drawing of a lamp with a triangular base and diagonal lines (no text or symbols)| stitch | |||||
| E | 0 | 2.5 | ○ | 5 | Pintuck foot |
Pintuck foot
This classic heirloom sewing technique can be easily applied to many types of fabric such as cotton and lightlinens. Undergarments, children's clothes and home decorating projects are given a nostalgic touch by pintucking.
- Attach the pintuck foot.
- Replace the sewing needle with a twin needle (e.g. 130/705 H-ZWI; 1.6 or 2.0 mm needle spacing; size 80).
• Thread the two needles (see page 11). - Increase the bobbin thread tension by turning the adjusting screw of the bobbin case slightly to the right (see chapter on "Bobbin thread tension"). This will help to form well-defined pintucks.
- Sew your first pintuck. When you start on the second pintuck, allow the first pintuck to run parallel in a groove in the foot. This will produce evenly spaced pintucks.
Tip: If you would like to emphasize the pintuck effect, you can attach a cording tongue (optional accessory) on the front edge of the needle plate. The cording tongue pre-shapes the fabric during sewing and produces a more-defined pintuck.
For thin materials use the pintuck foot with 7 grooves and the small cording tongue, for heavier materials use the pintuck foot with 5 grooves and the large cording tongue.
Inserting a gimp thread creates a similar optical effect by making the pintuck appear even more raised.
A cording tongue is not used when inserting a gimp thread in your pintucks.
- Remove the needle plate.
- Thread the gimp thread from below through the hole at the center front of the needle plate.
- Replace the needle plate. The notch between the needle plate and the sewing machine provides space for the gimp thread while sewing. Feed the gimp thread under the work support so that it does not become knotted during sewing.
- Gently pull the fabric taut while sewing the pintucks.
Accessories and needles

natural_image
Close-up of a sewing machine needle stitching a metal sheet (no visible text or symbols)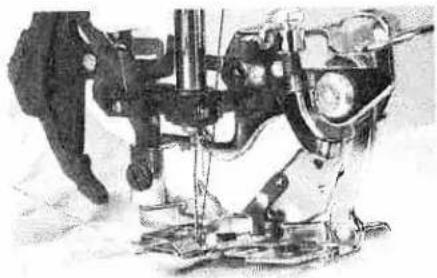
natural_image
Mechanical assembly diagram showing a motor and gear assembly (no text or labels visible)| E | 0 | 2.5 | ○ | 3-5 | Biastape binder |
| stich | |||||
| E | 0 | 3 | ○ | 3-5 | Ruffler |
Bias tape binder
Binding with bias tape is a very easy method of giving fabric edges a smooth and neat appearance. For this you need unfolded bias tape about 1" (2.5 cm) wide.
- Remove the presser foot and holder. Attach the bias binder.
- Cut the beginning of the bias tape at an angle.
- Feed the tape into the scroll of the binder and pull out to the back.
- Adjust the binder and/or the needle position so that the needle pierces the fabric approximately 1/16" (1-1.5 mm) from the folded edge of the bias tape.
- Sitch about 1" (2.5 cm) along the bias tape
- Insert the edge of the fabric to be bound between the bias tape edges into the slot of the binder. The bias tape will enclose the raw edge automatically during sewing.
Tip: You can obtain an additional decorative effect by using a zigzag stitch.
Ruffler
With the ruffler you can make closely or widely spaced pleats automatically while sewing. This is very useful for ruffles, home decorating, etc.
The ruffler can be used in three different ways:
- Folding pleats in fabric.
- Folding and securing pleats in fabric in one operation.
- Folding and securing pleats in fabric, while attaching lace in one operation.
When you buy the ruffler from your PFAFF dealer, full operating instructions are included.
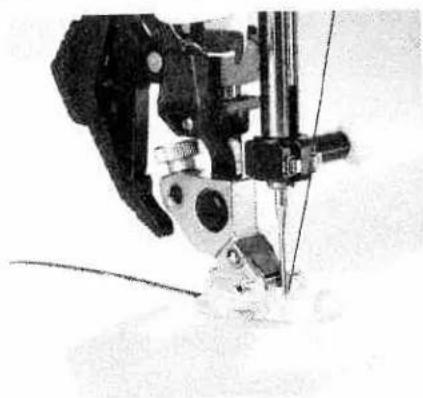
natural_image
Close-up of a sewing machine needle stitching fabric (no visible text or symbols)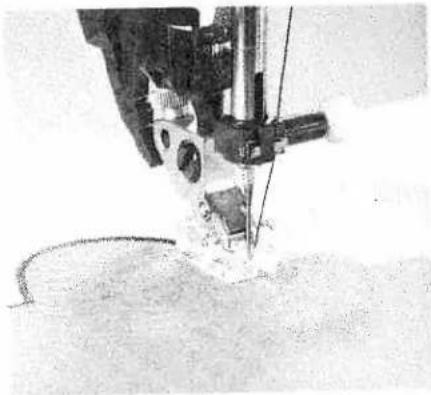
natural_image
Close-up of a sewing machine needle stitching fabric (no visible text or symbols)| stitch | |||||
| C | 2 | 0.35-1 | ○ | 3 | Cording foot |
Cording foot
Cording is a technique in which pearl thread or a fine cord is overstitched to produce a purl seam. With this you can obtain an effect similar to braiding.
- Attach the cording foot.
- Place the pearl thread in the foot so it leads through one of the grooves at the front and lies under the presser foot at the back.
• Overstitch the pearl thread with a narrow satin stitch. This produces what is known as the purl seam.
Tip: You can also obtain a remarkable effect by overstitching a medium pearl thread with a thread of a different color.
| stitch | |||||
| E | 2 | 0,35-1 | ○ | 2-3 | Appliqué foot |
Appliqué foot
Appliqués are easily sewn and always produce a beautiful effect. By using different materials and patterns you can create countless new designs. You can make a perfect, densely stitched seam with the appliqué foot, which has a special cutout on its sole for the satin-stitch seam.
- Attach the appliqué foot.
- Transfer your drafted pattern to the paper side of a fusible, paper-backed webbing. Remember that any letters or numbers have to be drawn as mirror images.
- Iron the fusible webbing onto the appliqué material. Cut out your motif and peel the paper from the back of the appliqué.
- Position and press your appliqué pieces in place on your base fabric.
- Place a stabilizer under your work area.
- Sew over the edges of the appliqué material with a narrow satin stitch zigzag. Make sure that the stitch covers the outer edge so that no fraying occurs later.
Accessories and needles
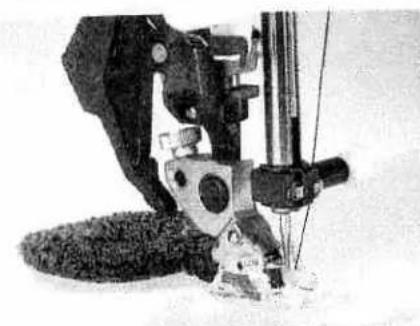
natural_image
Close-up of a sewing machine needle and foot (no visible text or symbols)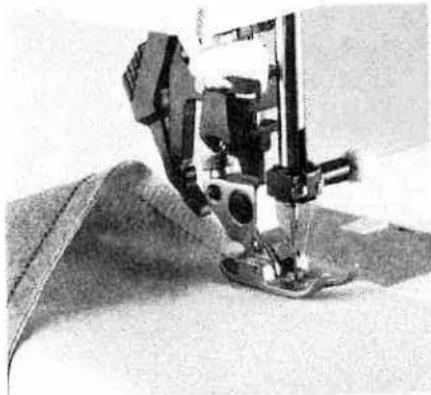
natural_image
Close-up of a sewing machine needle stitching fabric (no visible text or symbols)| stitch | |||||
| E | 2 | 0.35-1 | ○ | 2-3 | Fringe foot |
| stitch | |||||
| E | 0 | 0,25 | ● | 4-5 | Quilt & Patch-work foot |
Fringe foot
With this special foot for fringe embroidery you can produce fantastic effects in no time.
- Mark your desired pattern with a fabric-marking pen.
- Place a piece of stabilizer under the fabric.
- Attach the fringe foot.
- Embroider the motif row by row. For circles you must work from the outside in.
- When using heavier threads, you should select a slightly longer stitch length. Always sew a test seam first.
- When you have finished, pull the work carefully from the machine by holding the last loops. If you pull too quickly, you will pull the end loops flat/tight.
- Knot the beginning and end threads on the reverse side.
1/4 inch Quilt and patchwork foot
A quilt consists of two layers of fabric with a layer of batting sandwiched between. Many geometric pieces of fabric are joined together in continually changing patterns to form the top layer of the quilt. This is tacked to a middle layer of polyester or cotton batting and a backing layer.
The 1/4 inch quilt and patchwork foot is particularly suitable for joining your pieces of fabric. The clearance between the needle and the outer edge of the foot is 1/4" (6 mm) and between the needle and the inner edge of the foot 1/8" (3 mm).
- Attach the 1/4 inch quilt and patchwork foot.
- Sew together your pieces of fabric using stitch E. For a seam allowance of 1/4" guide your fabric along the outer edge of the foot. For a seam allowance of 1/8" guide your fabric along the inner edge of the foot.
Needle chart
Using the correct needle guarantees better stitching of the fabric.
| Fabric weight light | Fabric weight medium | Fabric weight heavy |
| Needle60 70 75 | Needle80 90 | Needle100 110 120 130 |
Needle points
| System & No | Profile | Point and eye | Suitable for |
| 130/705 HNeedle size:60-130 | Light ball point | Universal needle for synthetics, fine linen,chiffon, batiste, organdy, woolens, velvet,decorative seams and embroidery work | |
| 130/705 H-SUKNeedle size:70-110 | Medium ball point | Coarse knitted fabrics, Latex, double-knitfabrics, hosiery, Quiana and Simplex | |
| 130/705 H-PSNeedle size:70-100 | Medium ball point | Stretch-fabric needle developed especiallyfor Pfaff. Particularly suitable for delicatestretch and knitted fabrics | |
| 130/705 H-SKFNeedle size:90-110 | Heavy ball point | Wide-meshed corsetry, Lycra, Simplexand Latex | |
| 130/705 H-JNeedle size:90-110 | Acute ball point | Twill, work wear, heavy linen, blue jeansand light canvas | |
| 130/705 H-LRNeedle size:70-100 | Narrow twist point(cuts right) | Leather, suede, calf and goatskin leathers | |
| 130/705 H-PCLNeedle size:80-110 | Narrow twist point(left twist groove) | Imitation leather, plastic materials, plasticsheeting and oil cloth | |
| 130 NNeedle size:70-110 | Light ball point(long eye) | Topstitched seams with buttonhole silk orNo. 30/3 synthetic thread, metallic thread | |
| 130/705 H-WINGNeedle size:100/120 | Hemstitching point | Effective hemstitching on heavily dressedmaterials, organdy, glass cambric | |
| 130/705 H-MNeedle size:60-80 | Acute round point | Micro-liber woven fabrics | |
| 130/705 H-QNeedle size:80/90 | Light ball point | Topstitched seams for quilting | |
| 130/705 H-ENeedle size:80, 90 | Medium ball point | Embroidery work |
Accessories and needles

| Classification | Stitch length | Stitch width | Needle spacing | Suitable for |
| 130/705 H-ZWI | 2,5 mm | - | 1,6 mm | normal pintucks |
| size: 80 | 2,5 mm | - | 2,0 mm | |
| 130/705 H-ZWI | ||||
| size: 80 | 2,5 mm | - | 2,5 mm | wide pintucks |
| size: 90 | 2,5 mm | - | 3,0 mm | wide pintucks |
| size: 100 | 3,0 mm | - | 4,0 mm | extra wide pintucks |
Decorative sewing with twin needles
Before sewing the desired stitches, check whether needles can penetrate easily, by turning the handwheel. In this way, needle breakage is avoided as much as possible.

Zigzag sewing
| Classification | Stitch length | Stitch width | Needle spacing | Suitable for |
| 130/705 H-ZWI | ||||
| size: 80 | 0,5-1,5 mm | wide | 1.6 mm | decoration |
| size: 80 | 0,5-1,5 mm | narrow | 2,0 mm | decoration |
| size: 80 | 0,5-1,5 mm | narrow | 2,5 mm | decoration |

Hemstitch / special twin needle
| Classification | Stitch length | Stitch width | Needle spacing | Suitable for |
| 130/705H-ZWI-HO | Decorative hemstitch effect embroidery. Well- | |||
| size: 80 | 2,3-3,0 mm | very narrow | - | finished woven fabric and fine batiste are particu- |
| size: 100 | 2,0-3,0 mm | very narrow | - | larly suitable. |
Accessories and needles

natural_image
Black-and-white photo of a man and a woman embracing closely, both seated on a stone wall (no text or symbols visible)Maintenance and trouble-shooting
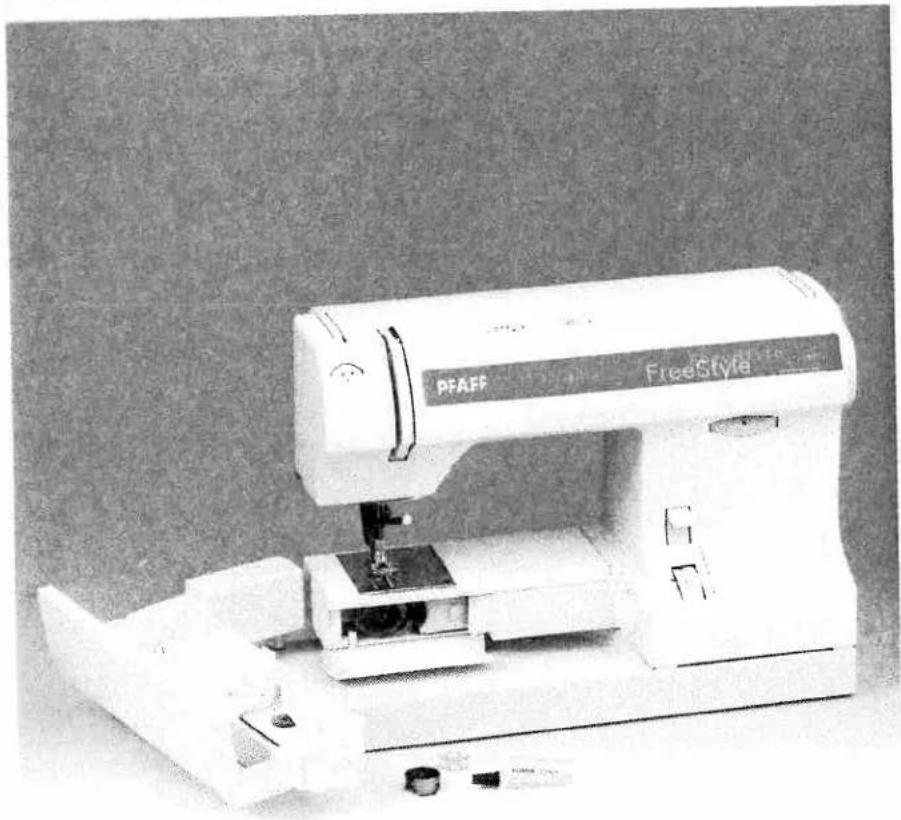
natural_image
Exterior view of a FreeStyle sewing machine (no signage or text visible on the device body)Maintenance and trouble-shooting
Changing the needle plate 62
Cleaning and oiling 62
Replacing the sewing lamp 63
Trouble-shooting 64
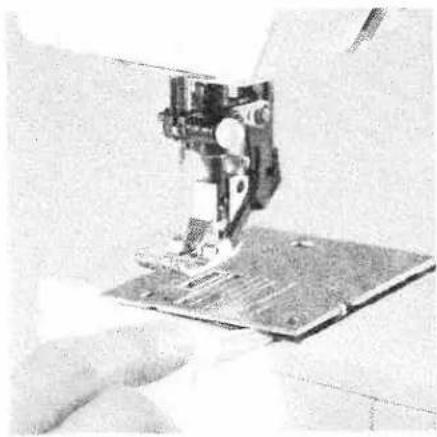
natural_image
Close-up of a sewing machine needle stitching fabric on a metal base, with no visible text or symbols.
Changing the needle plate Switch off the main switch
It is very important to clean and oil your sewing machine, because it will reward you with a longer service life. The more often you use the machine, the more care it needs.
Removal:
- Raise the sewing foot and remove the removable accessory tray.
- Push the point of a small screwdriver into the opening between needle plate and sewing machine. Twist it lightly to the right and the needle plate will snap half way out of its mounting. Now push the screwdriver into the left opening and take the needle plate out.
Replacing:
- Place the needle plate on flat at the back and push it down with both hands at the front until you hear it snap in place. Before you start sewing, check that the needle plate is lying flat.
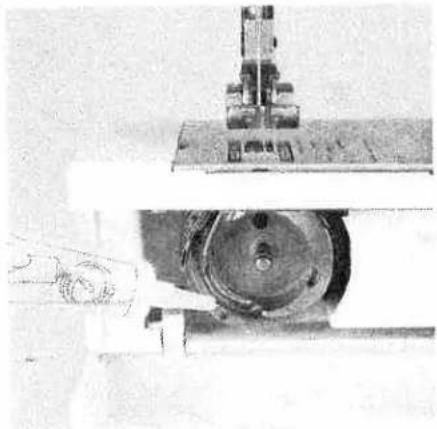
natural_image
Close-up of a mechanical device with a cylindrical component and mounting bracket (no visible text or symbols)
Cleaning and oiling
Switch off the main switch
- Remove the needle plate and lower the feed dog.
- Clean the feed dog and hook area with the brush.
- Apply a drop of oil (every 15 to 20 hours of operation) to the hook. You can see where to apply the oil in the illustration and on the provided oil bottle.
Otherwise, the machine is maintenance free and must not be oiled.
Maintenance and trouble-shooting

natural_image
Close-up of a robotic arm with visible mechanical components and a small animal on the base (no text or symbols)
natural_image
Abstract black-and-white sketch of a mechanical or architectural component (no text or symbols)
natural_image
Close-up of a hand holding a small object, possibly a tool or device, with no visible text or symbols.
Changing the sewing lamp
Switch off the main switch
- Disconnect the mains plug and the foot control plug from the machine.
• Take off the removable accessory tray (27).
The sewing lamp is located inside the left side of the sewing machine
Removal:
- Hold the sewing machine tightly.
- Push the lamp into its socket as far as it will go.
- At the same time, turn the lamp a half turn anti-clockwise and remove it.
Insertion:
- Insert the lamp in the diagonal socket and turn it so that both stops of the lamp engage.
- Now push the lamp fully into the socket and turn it clockwise so that it is held firmly.
Important!
The maximum permissible wattage of the lamp with a plug-in socket is 15 watts!
Note: The lamp changer (available as a special accessory) will make changing the lamp much easier.
Trouble-shooting
| Problem: | Remedy: |
| The machine skips stitches | |
| The needle is not properly inserted. | Push needle fully upwards, flat side facing the back. |
| The wrong needle is inserted. | Use a needle system 130/705 H. |
| Needle is bent or blunt. | Insert a new needle. |
| Machine is not properly threaded. | Check how machine is threaded. |
| Needle is too small for thread. | Use a larger needle. |
| Needle thread breaks | |
| See reasons above. | See above. |
| Thread tension is too tight. | Adjust thread tension. |
| Thread is poor or has slubs in it, or has become dry after too-long storage. | Only use good threads. |
| Thread is too thick. | Use needle with large eye (System 130 N). |
| Needle breaks off | |
| Needle is not pushed fully in. | Insert new needle and push fully in. |
| Needle is bent. | Insert new needle. |
| Needle is too thick or too thin. | See needle chart (pages 58-59) |
| Needle is bent, and has hit the needle plate because you are pulling or pushing the fabric. | Let the machine feed the fabric. Only guide the fabric lightly |
| The bobbin case is not properly installed. | When you insert the bobbin case, push it fully into the stop. |
| Seam is sewn unevenly | |
| The tension needs adjusting. | Check top and bottom tensions. |
| Thread is too thick, slubbed or hard. | Only use perfect threads |
| The bobbin thread is unevenly wound. | Do not wind thread free-hand, but run it on through the winding tension. |
| Thread bunching at top or bottom side of fabric. | Thread up correctly. Check needle and bobbin thread tensions |
| Machine does not feed or feeds irregularly | |
| Sewing lint has collected between the feed dog teeth rows | Remove needle plate, remove lint with brush. |
| Feed dog is lowered, slide A (see page 27) at right. | Push slide B (see page 27) to left. |
| Machine is running with difficulty | |
| There are thread remnants in the hook race. | Remove the threads and apply one drop of oil to the hook. |
Important note:
Before you replace sewing feet or needles, you must switch off the main switch.
Do not start the threaded machine without fabric in it.
If you leave the machine, even for a short time, do not forget to switch off the main switch. This is important if children are nearby.

natural_image
Blank white image with a vertical dotted line on the left edge (no text or symbols)
natural_image
Two parallel black vertical lines on white background, no text or symbols present29-424-003-51/000 - 171 - 1710000 - 208 - 2080000 - 60 - 6000000 - 6000000 - 6000000 - 6000000 - 6000000