creative 7570 - Sewing machine PFAFF - Free user manual and instructions
Find the device manual for free creative 7570 PFAFF in PDF.

User questions about creative 7570 PFAFF
0 question about this device. Answer the ones you know or ask your own.
Ask a new question about this device
Download the instructions for your Sewing machine in PDF format for free! Find your manual creative 7570 - PFAFF and take your electronic device back in hand. On this page are published all the documents necessary for the use of your device. creative 7570 by PFAFF.
USER MANUAL creative 7570 PFAFF
text_image
PFAFF creative 7570Instruction book
Please fold this page open to simplify the understanding of this instruction manual when reading it.

text_image
Warning symbol image with exclamation mark inside a triangleSafety rules
For the United Kingdom only
The leads must definitely not be connected to the safety-lead terminal I nor to a plug with three pins.
The wires in the mains lead are coloured according to the following code:
Blue: Neutral
Brown: Live
As the colours of the wires in the mains lead of this appliance may not correspond with the colour coding of the terminals in your plug, proceed as follows:
The wire which is coloured blue must be connected to the terminal which is marked with the letter N or coloured black.
The wire which is coloured brown must be connected to the terminal which is marked with the letter L or coloured red.
Cut off mains plugs are definitely not to be used, but disposed of immediately. Defective mains leads must be replaced complete.
Only 3 A spare fuses must be used as approved by ASTA according to BS 1362 and the fuse cover must be marked 3 A or with the corresponding colour code.
The plug must never be used without fuse cover. Spare fuse covers are available from electrical suppliers or the PFAFF agencies.
Please also observe the general safety notes on page 2.
text_image
Warning symbol image with exclamation mark inside a triangleImportant safety instructions
For the United States only
This sewing machine is designed and manufactured for HOUSEHOLD use only. When you use an electric appliance, basic safety precautions should always be adhered to as follows: Read all instructions before using this sewing machine.
DANGER To reduce the risk of electric shock:
- The sewing machine should never be left unattended when plugged in. Always unplug this appliance from the electric outlet immediately after using and before cleaning.
- Always unplug sewing machine before replacing bulb. Replace bulb with same type rated 15 watts.
- Do not reach for a sewing machine that has fallen into water. Unplug immediately.
- Do not place or store a sewing machine where it can fall or be pulled into a tub or sink. Do not place in or drop into water or other liquid.
WARNING To reduce the risk of burns, fire, electric shock, or injury to persons:
- Do not allow to be used as a toy. Close attention is necessary when this sewing machine is used by or near children.
- Use this sewing machine only for its intended use as described in this manual. Use only attachments recommended by the manufacturer as contained in this manual.
- Never operate this sewing machine if it has a damaged cord or plug, if it is not working properly, if it has been dropped or damaged, or dropped into water. Return the appliance to the nearest authorized dealer or service center for examination, repair, electrical or mechanical adjustment.
- Never operate the sewing machine with any air openings blocked. Keep ventilation openings of the sewing machine and foot control free from the accumulation of lint, dust, and loose cloth.
- Never drop or insert any object into any opening.
- Do not use out-of-doors.
- Do not operate where aerosol (spray) products are being used or where oxygen is being administered.
- To disconnect, turn all controls to off ("0") position, then remove plug from outlet.
- Never operate on a soft surface such as a bed or couch where the air openings may be blocked.
- Do not unplug by pulling on cord. To unplug, grasp the plug, not the cord.
- Keep fingers away from all moving parts. Special care is required around the sewing machine needle.
- Always use the proper needle plate. The wrong plate can cause the needle to break.
- Do not use bent or blunt needles. Use needles recommended by the manufacturer only.
- Do not pull or push fabric while stitching. It may deflect the needle, causing it to break.
- Switch the sewing machine off ("O") when making any adjustments in the needle area, such as threading needle, changing needle, threading bobbin, or changing presser foot, etc.
- Always unplug sewing machine from the electric outlet when removing covers, lubricating, or when making any other user servicing adjustments mentioned in the instruction manual.
- Hold plug when rewinding into cord reel. Do not allow plug to whip when rewinding.
Please also observe the general safety notes on page 2.
SAVE THESE INSTRUCTIONS

text_image
35 34 33 32 31 30 29 28 1 2 3 4 5 PFA FF creative 7570 26 25 27 6 7 8 9 10 11 12 13 22 23 20 18 17 16 15 14 23 24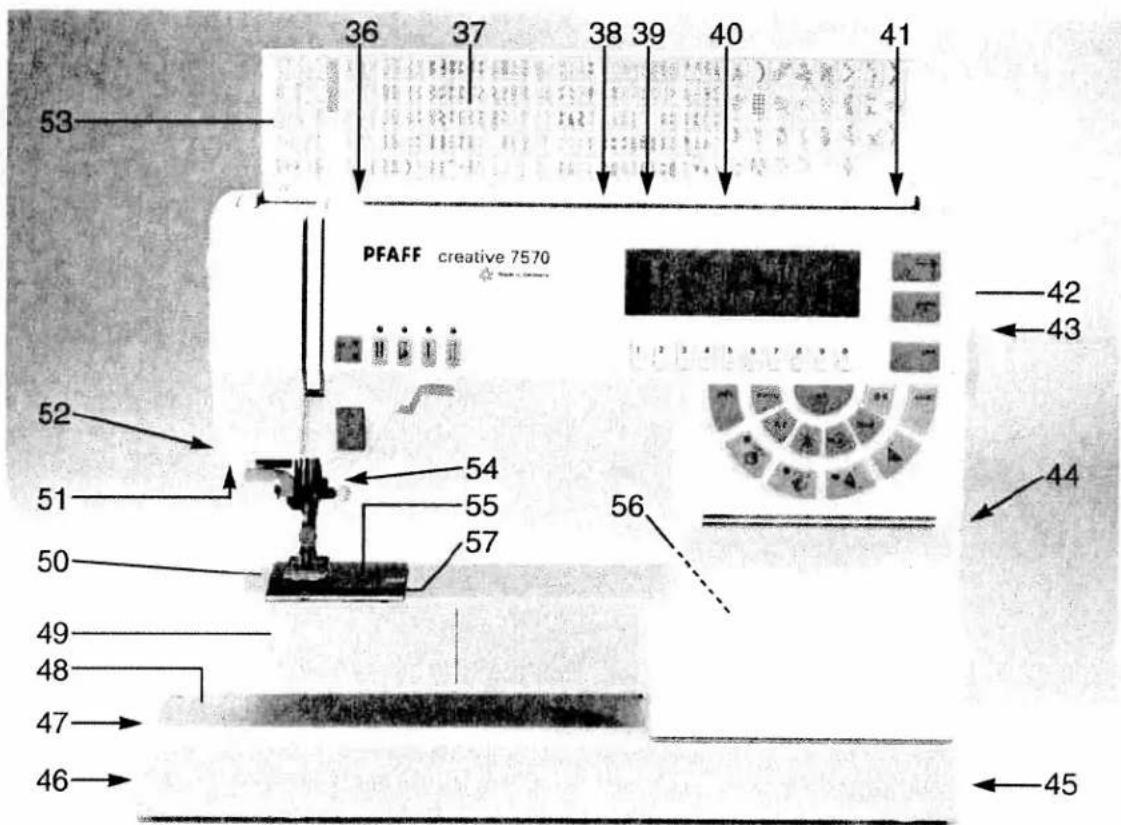
text_image
36 37 38 39 40 41 53 PFAFF creative 7570 52 51 50 49 48 47 46 42 43 44 54 55 57 56 45Parts of the creative 7570
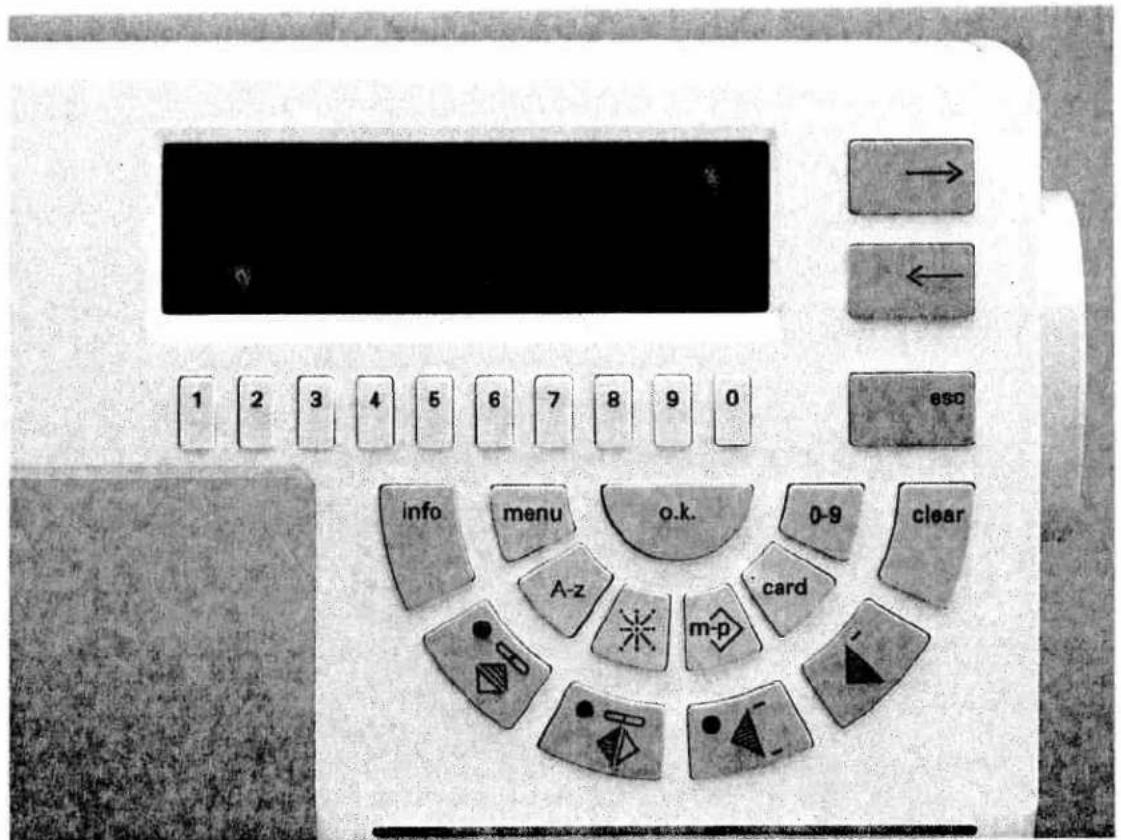
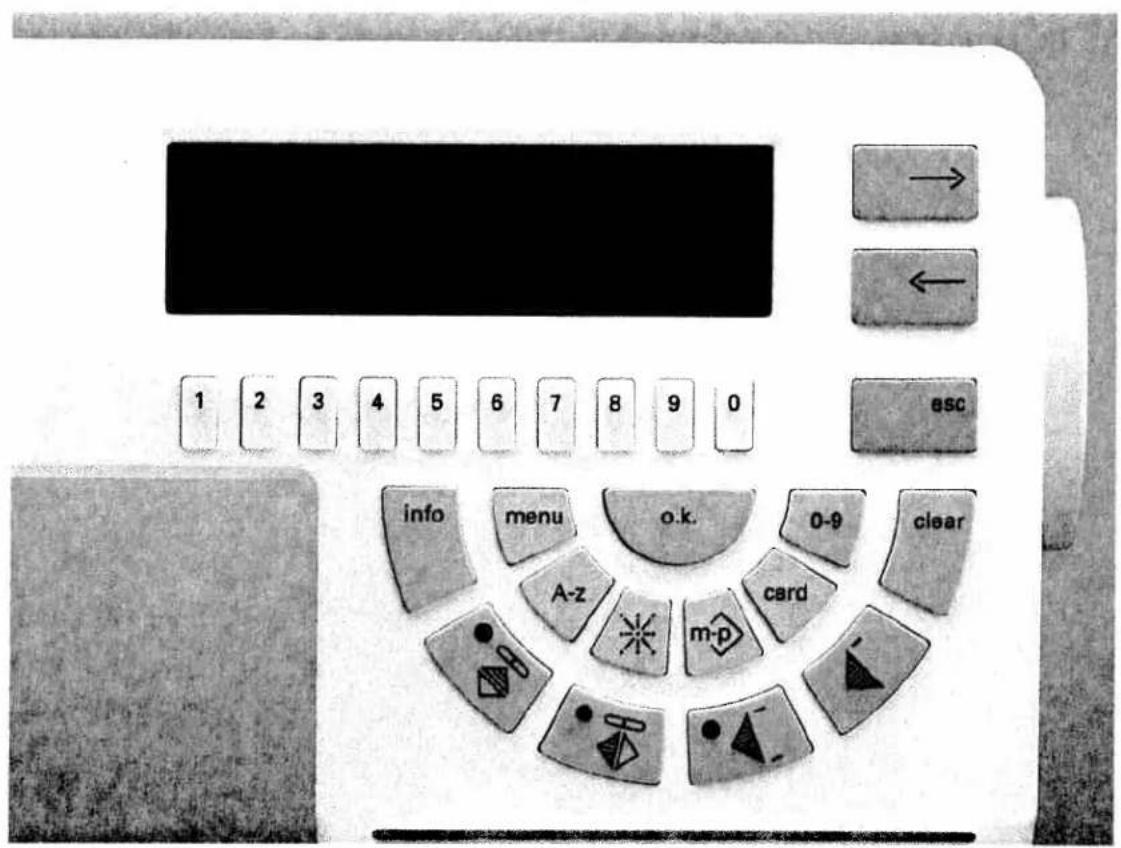
(1) Bobbin thread monitor and sewing function light "reverse sewing"
(2) "Twin needle" key
(3) "Slow sewing" key
(4) "Needle up/down" key
(5) "Tacking" key
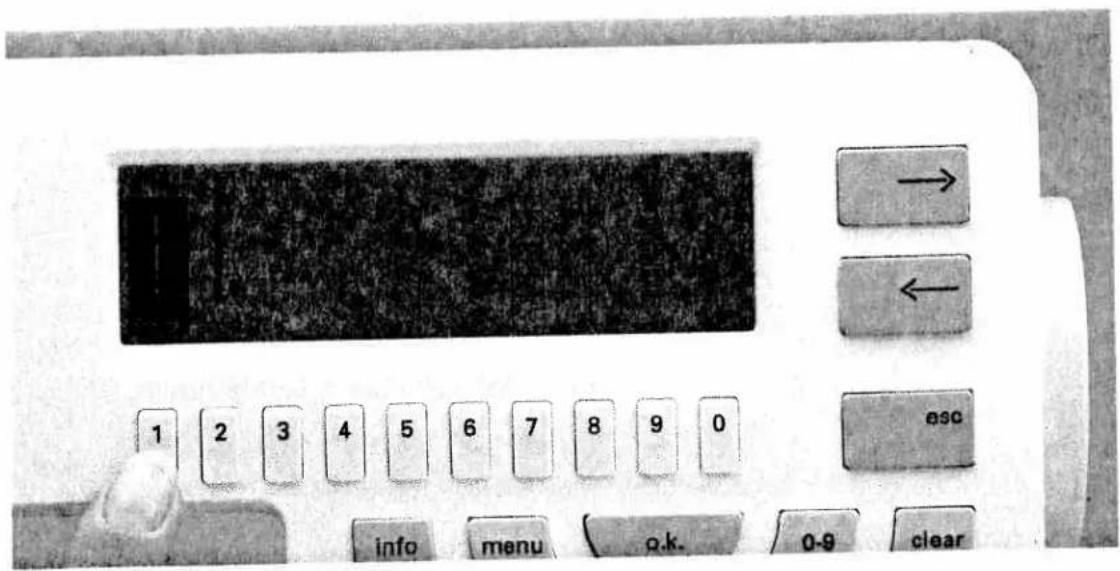
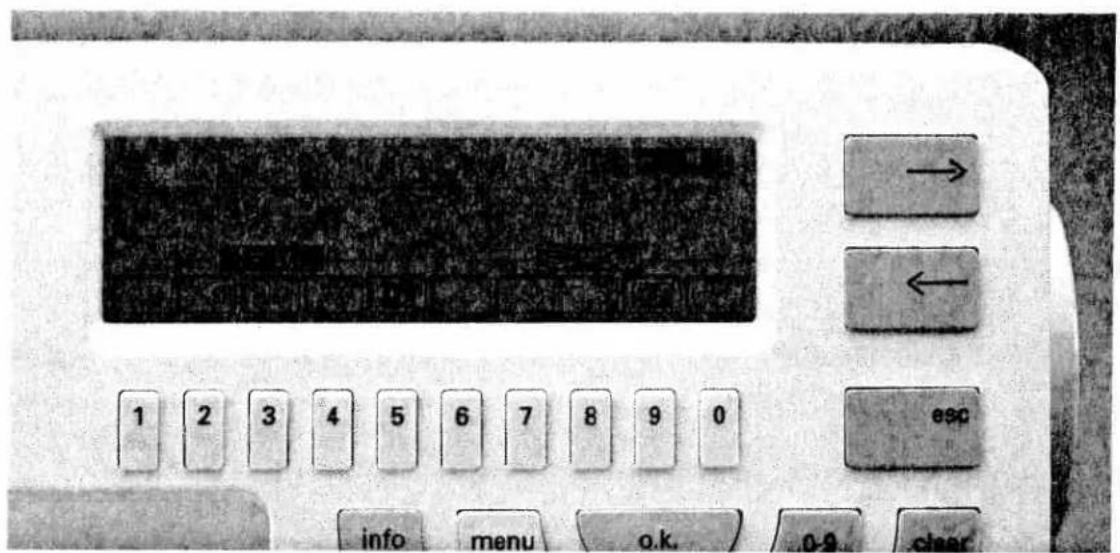
(6) Multi function display
(7) Number keys
(8) Cursor keys
(9) "esc" key
(10) "clear" key
(11) Key "0-9" for pattern selection
(12) "o.k." key
(13) "Pattern start" key
(14) "card" key
(15) "Single pattern" key
(16) "m-memory" and "p-memory" key
(17) "Pattern inversion" key (axial mirror image)
(18) "8-way feed stitches" key
(19) "Pattern inversion" key (lateral mirror image)
(20) "A-z" key for alphabet selection
(21) "Info" key
(22) "Menu" key
(23) Brightness control for the display
(24) Master switch
(25) "reverse" key "bartack" buttonhole key
(26) Sewing foot lifter
(27) Needle holder with retaining screw
(28) Detachable work support with accessory compartment
(29) Sewing foot holder with sewing foot
(30) Needle threader
(31) Thread guide
(32) Threading slots
(33) Needle thread tension
(34) Take-up lever
(35) Carrying handle
(36) Thread guide for bobbin winding
(37) Program table
(38) Reel holder with unwinding disk
(39) Second reel holder
(40) Hole for third reel holder (extra accessory)
(41) Bobbin winder
(42) Handwheel
(43) Handwheel release disk
(44) Connection socket "mains cord"
(45) Connection socket "foot control"
(47) Insertion slot for memory cards
(48) Base plate
(49) Hook cover (sewing hook behind)
(50) Free-arm
(51) Sewing lamp
(52) Thread trimmer
(53) Top cover
(54) Dual feed / IDT-System
(55) Needle plate
(56) Connection socket for embroidery device
(57) Feed dog

natural_image
Aerial black-and-white view of an industrial complex with factory buildings and a prominent chimney, surrounded by trees and hills under a cloudy sky.Modern and uncomplicated
- Computerized sewing -
Congratulations! You have bought a high-quality product that offers unique advantages. Your new sewing machine can take any material in its stride and will sew through thick and thin for you.
Its features are the very latest in design and technology and you will find that your PFAFF sewing machine is just as simple to operate as this instruction book is to read.
If you take a little time to read the instruction book thoroughly, nothing can go wrong.
It's worth it, because there is no other way to see everything the machine can do and to make full use of its features.
If you have any questions, no problem! Your PFAFF dealer is at your service with any help or advice you may need.
So now you can get started! We wish you many enjoyable hours creating your fashion ideas.
text_image
提醒 爆Notes on safety
Notes on safety for domestic sewing machines in accordance with EN 60335-2-28 and/or IEC 335-2-28
-
The user must exercise adequate caution with regard to the up and down moving needle and constantly observe the sewing area while working.
-
When leaving the machine, during maintenance work or when changing mechanical parts or accessories, always disconnect the machine from the mains by pulling out the mains plug.
-
The maximum permissible wattage for the sewing lamp is 15 watts.
-
The tension of the drive belt may only be adjusted by a Pfaff mechanic.
-
The machine is to be put into operation according to the indications on the specification plate.
-
Do not place any objects in openings on the machine.
-
Do not use the sewing machine if:
- there is visible damage
- its function is disturbed
-
it is wet, e.g. with condensation.
-
Do not pull the mains plug out of the socket by its cord.
-
No liability will be accepted for any damage caused if this machine is used for any purpose other than that for which it is intended or if it is operated incorrectly.
-
To avoid the risk of electric shock, do not open the machine. There are no parts inside the machine which the user can repair. This is solely the responsibility of our qualified service staff.
-
Only original PFAFF parts may be used.
Environment
The recommended environment is:
Ambient temperature 10 °C (50 °F) to 40 °C (140 °F)
Air humidity 20% to 80%.
This sewing machine is a high-quality electronic-mechanical appliance; it is a machine for supervised use in the home. It should be operated in such a way that it is not subjected to: dust, severe dampness, direct sunlight, static electricity, heat-producing objects, corrosive chemicals or liquids.
The machine is to be used on a firm and even surface which is open for ventilation purposes.
Treatment
Always protect the machine against damage which could be caused by it being hit or dropped.
Cleaning
Housing and display:
To clean the housing use a dry, clean, soft, lint-free cloth.
To remove any stubborn dirt, use a soft cloth moistened with alcohol.
Please note!
Do not use any insecticides or chemical products such as petrol or liquid chemicals to clean the housing.
Index
Accessories and needles.... 139–154
Accessory compartment.... 24
Alphabets 13,72–74
Applying patches 120
Arrowhead bartack 108
Automatic bartack.... 108
Automatic darning.... 109
A-z key 50
Balance 55,61-63
Basting stitch 101
Battery message 42
Bias tape binder 151
Blind stitch 102
Bobbin case.... 28
Bobbin thread 32
Bobbin thread monitor 48
Bobbin thread, raising the.... 32
Bobbin thread tension.... 29
Bobbin winding.... 25-27
Buttonholes.... 122-136
Buttonholes with gimp thread 133
Card....50
Carrying case.... 22
Changing a sewing foot 33
Changing stitch length and width. 80
Changing the batteries 156
Changing the needle.... 37
Changing the needle plate 157
Cleaning and oiling 157
Clear key 50
Code lock.... 64-66
Combined borders.... 166
Contrast (display) 43
Cording foot 146
Covering seams.... 113
Creative card 64-66
Cross stitch 167-170
Cursor function 85-87
Cursor keys 49
Darning 110-115
Deleting patterns.... 85-86
Detachable work support 24
Dual Feed 34
eight-way feed stitches....50,88-93
Elastic blindstitch 103
Electrical connection.... 22-23
Index
Embroidery stitch programs 11-13
Enabling/Disabling error messages.... 43-44
"esc" 49
Explanation for basic menu.... 45
Fagoting stitch.... 113
Fancy elastic stitch 114
Foot control cord....23
Fringe foot.... 145
Gathering. 112
General tips on embroidering 164
Hemstitching....172-174
Hook cover 28
IDT (Top feed) 35
info 49.56
inserting zippers 118–119
Keyhole buttonhole 131-132
Keyhole buttonhole with gimp thread 135
<knit-edge foot....147
"K" symbol 83
-ace work 111
Language selection 42
length and width settings 46.54
Letter width 73
light bulb 158
light knit mending stitch 114
Innen embroidery 171
lowering the feed dog 37
Maintenance and sewing faults 155-160
Master switch 23
Maxi Design cards....60
Maxi patterns 57-60
Maxi stitch combinations 83-84
Maxi stitches.... 13-14
Memories 75
Menu 49
1-memory 75
Monograms.... 13,72–74,182
Needle chart 152-153
Needle positions 46
Needle thread tension.... 37
Needle threader.... 31
Number keys....49
Index
"o.k." 49
Open appliqué foot 150
Operational help 56
Overlock stitches.... 105
Pattern combinations 69-96
Pattern length 45
Pattern mirroring 49
Pattern selection 49, 51–53
Pattern sequence 78-81
Pattern sequence symbols 81-84
Pattern start....50
Pattern stencils 181
Pattern width.... 54
Pintuck foot 145
Programmable seam length with straight stitch 47
Programs.... 22
Pullover stitch 106
Quilting 178-179
Quilting and patchwork foot 149
Quilt stitch.... 114
Reverse sewing 48
Richelieu 177
Roll-hemming 117
Round buttonhole 130
Ruffler 147
Sewing screen symbols 82
Sewing faults and their remedies 159
Sewing feet 137-152
Sewing foot lifter.... 32
Sewing functions 39-68
Sewing-function keys 48-50
Sewing lamp 158
Sewing on buttons 107
Sewing recommendations 56
Shirring foot 146
Single pattern 50
Smocking effect 116
Standard buttonhole.... 125-127
Start-up functions.... 42
Stitch density 55
Stitch length 46
Stitch width.... 46
Straight stitch 101
Stretch buttonhole 129
Stretch triple straight stitch 103
Stretch triple zigzag stitch 104
Index
Tacking key 48
Technical section. 19–38
Thread cutter 32
Thread tension 28
Threading the needle thread.... 30
Threading through the needle 36
Top cover.... 22
Top feed 35
Traditional embroidery techniques 161–182
Twin-needle cording foot 150
Twin-needle embroidery 180
Twin-needle key 48
Upper/lower case letters....74
Utility stitches 101-121
Utility stitch programs.... 8-10
Word sequence.... 75-77
Zigzag stitch 102
Utility stitch programs
| 00 | 01 | 02 | 03 | 04 | 05 | 06 | 07 | 08 | 09 | 10 | 11 | 12 | 13 | 14 | 15 | 16 |
| ↑ | ||||||||||||||||
| ←→ |
| Program No. | Description | Application | Width up to mm |
| 00 | Straight stitch center needle positions | For all straight stitch jobs and one 6 mm wide decorative topstitching stitch. | - |
| 01 | Stretch triple straight stitch, stitch length 1.5 - 6 mm | For highly durable seams where great strength is needed. The seams stretch with each stress without being broken.E.g. for trouser seams, sports and work wear and for decorative topstitching. | - |
| 02 | Zigzag stitch | For finishing seams, appliqué work, inserting lace, sewing with fringe foot, etc. | 9 |
| 03 | Elastic stitch a = 2 stitch points | For sewing on elastic, darning tears and inserting patches.Suitable for almost all fabrics. | 7 |
| 04 | Blind stitch | For securing seams invisibly and for shell edging. | 6 |
| 05 | Elastic Blind stitch | For sewing hems invisibly for stretch materials (edge securing). | 6 |
| 06 | Closed overlock stitch | For sewing and finishing seams with an edge thread. | 7.5 |
| 07 | Basting stitch | For basting your sewing cuttings. | - |
| 08 | Linen buttonhole | For sewing on buttons. | 5.5 |
| 09 | Program for sewing on buttons | For sewing on buttons. | 6 |
| 10 | Reverse straight stitch with central needle position | For stitch combinations in pattern sequences. | - |
| 11 | Quilt stitch with 15 needle positions | For topstitching when quilting. | - |
| 12 | Quilt and appliqué stitch | For appliqué work on quilts. | 6 |
| 13 | Elastic shell-edging stitch | For sewing shell edges and decorative hems. | 6 |
| 14 | Honeycomb stitch | For sewing on elastics threads, covering terry-cloth seams and for decorative hems (smocking effect). | 7 |
| 15 | Elastic stitch b = 1 stitch point | For sewing on elastic, darning tears and inserting patches.Suitable for almost all kinds of fabric. | 7 |
| 16 | Purl stitch | For sewing purls. | 6 |
Utility stitch programs
| 17 | 18 | 19 | 20 | 21 | 22 | 23 | 24 | 25 | 26 | 27 | 28 | 29 | 30 | 31 | 32 |
| Program No. | Description | Application | Width up to mm |
| 17 | Fagoting stitch | For joining corsetry parts. Provides a decorative hemstitching effect. | 7 |
| 18 | Fancy elastic stitch | For overstitching elastic and woollen threads, for shirring and smocking. | 6 |
| 19 | Cross stitch | Provides a highly elastic seam for sportswear. | 7 |
| 20 | Stem stitch, narrow | For embroidering in connection with the embroidery programs. | - |
| 21 | Stem stitch, wide | For embroidering in connection with the embroidery programs. | - |
| 22 | Stretch triple zigzag stitch | For sewing elastic tape onto elastic materials, e.g. sports and swim wear (extremely elastic seam for light-knit materials). | 6 |
| 23 | Stretch triple elastic stitch | For sewing elastic tape onto elastic materials, e.g. sports and swim wear (extremely elastic seam for light-knit materials). | 6 |
| 24 | Bartack | For bartacking pocket openings, belt loops, hanger loops and zipper ends. | 4 |
| 25 | Pocket tack | To reinforce side pockets on trousers. | 9 |
| 26 | Vent | To reinforce skirt vents. | 7 |
| 27 | Embroidery stitch program | 9 | |
| 28 | Darning program, lengthwise | To darn damaged areas. | 9 |
| 29 | Darning program, lengthwise and crosswise | To darn holes. | 9 |
| 30 | Closed overlock stitch | An assembly and serging seam. | 6 |
| 31 | Edge binding stitch | A decorative edge serging seam. | 7.5 |
| 32 | Zigzag stitch from right needle position | As for program 02 (zigzag from left needle position: press pattern inversion key). | 6 |
Utility stitch programs
| 33 | 34 | 35 | 36 | 37 | 38 | 39 | 40 | 41 | 42 | 43 | 44 | 45 | 46 | 47 | 48 |
| Program No. | Description | Application | Width up to mm |
| 33 | Open overlock stitch | Elastic serging seam. | 7.5 |
| 34 | Overlock stitch | With edge thread, also suitable on terry cloth for hemming and as assembly seam. | 7.5 |
| 35 | Light-knit fabric patching stitch | For sewing and patching light knit wear (underwear etc.) | 7.5 |
| 36 | Closed overlock stitch | For sewing decorative seams over hem edges while protecting the material. | 6 |
| 37 | Pullover stitch | Elastic assembly and serging seam for open-knit fabric and jersey. | 7.5 |
| 38 | Overlock stitch | For sewing and serging in one operation. | 7.5 |
| 39 | Cover stitch | To sew together terry cloth, jersey and to sew on patches. (Flat seam with double edge securing). | 9 |
| 40 | Linen buttonhole of 7.0 - 44 mm | For sewing buttonholes on linen.Note: When processing knit wear or very thin woven fabrics we recommend sewing foot No. 1a and Dual Feed for buttonhole sewing. | 5.5 |
| 41 | Stretch buttonhole, enforced | For buttonholes on open-knit fabrics. | 5.5 |
| 42 | Stretch buttonhole | For buttonholes on stretch materials (jersey etc.) | 5.5 |
| 43 | Round buttonhole with tapered bar | For buttonholes in leisure wear and trousers. | 7 |
| 44 | Round buttonhole with lengthwise tack | For buttonholes in light-weight outer wear. | 7 |
| 45 | Round buttonhole with cross bar | For buttonholes in heavy-weight outer wear.Note: When processing knit wear or very thin woven fabrics we recommend sewing foot No. 1a and Dual Feed for buttonhole sewing. | 7 |
| 46 | Eyelet buttonhole with tapered bar | For buttonholes in jeans, trousers and sports wear. | 8.5 |
| 47 | Eyelet buttonhole with lengthwise bar | For buttonholes in outer wear, lady's suits, coats etc. | 8.5 |
| 48 | Eyelet buttonhole with cross bar | For buttonholes in outer wear that is wxposed to particular stress. | 8.5 |
Embroidery stitch programs

text_image
49 50 51 52 53 54 55 56 57 58 59 60 61 62
text_image
63 64 65 66 67 68 69 70 71 72 73 74 75 76
text_image
77 78 79 80 81 82 83 84 85 86 87 88 89 90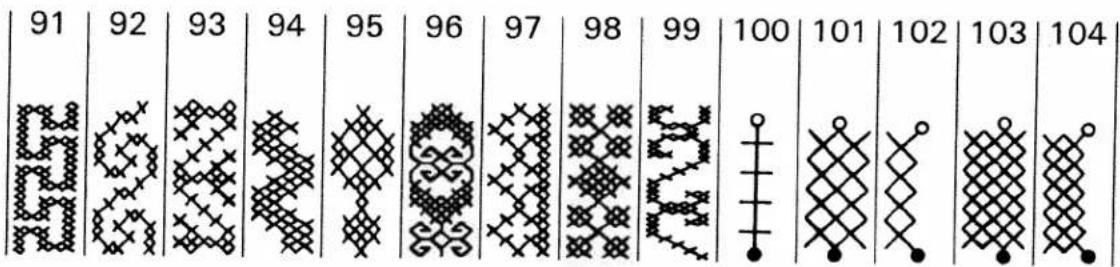
text_image
91 92 93 94 95 96 97 98 99 100 101 102 103 104
text_image
105 106 107 108 109 110 111 112 113 114 115 116 117 118Embroidery stitch programs

text_image
119 120 121 122 123 124 125 126 127 128 129 130 131 132
text_image
133 134 135 136 137 138 139 140 141 142 143 144 145 146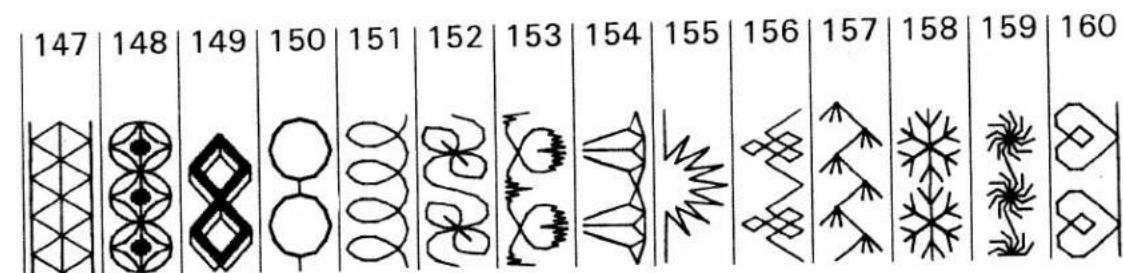
text_image
147 148 149 150 151 152 153 154 155 156 157 158 159 160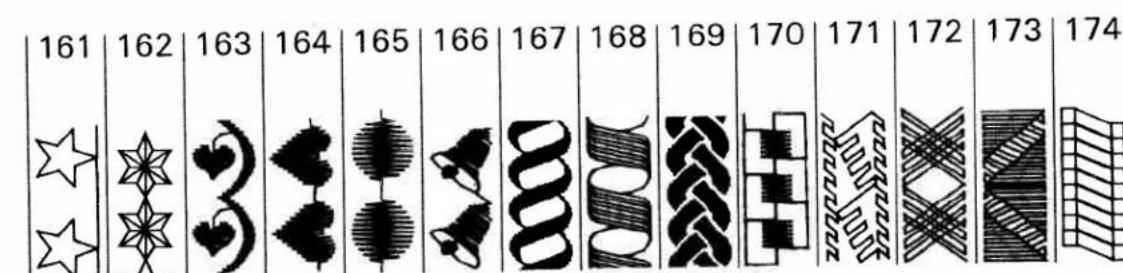
text_image
161 162 163 164 165 166 167 168 169 170 171 172 173 174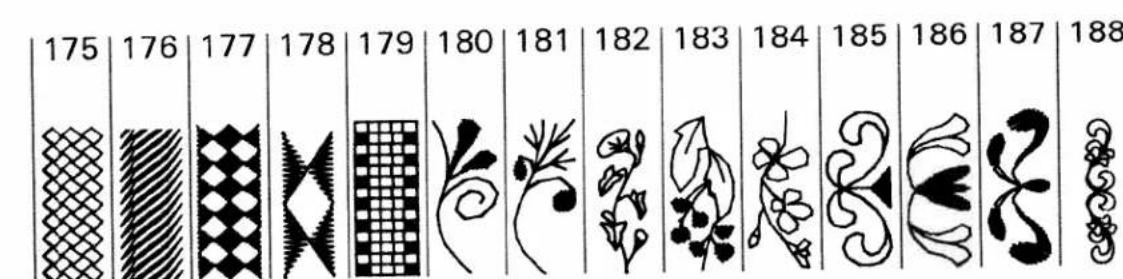
text_image
175 176 177 178 179 180 181 182 183 184 185 186 187 188Embroidery stitch programs
text_image
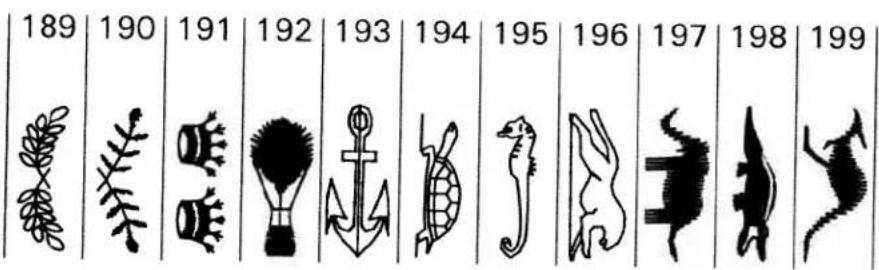
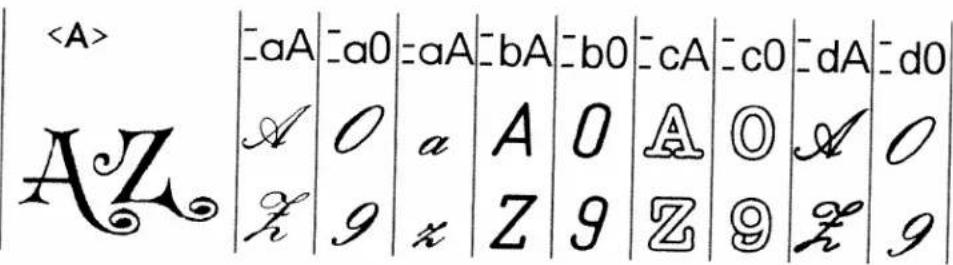
189 190 191 192 193 194 195 196 197 198 199Alphabets and monograms
Maxi stitches
text_image
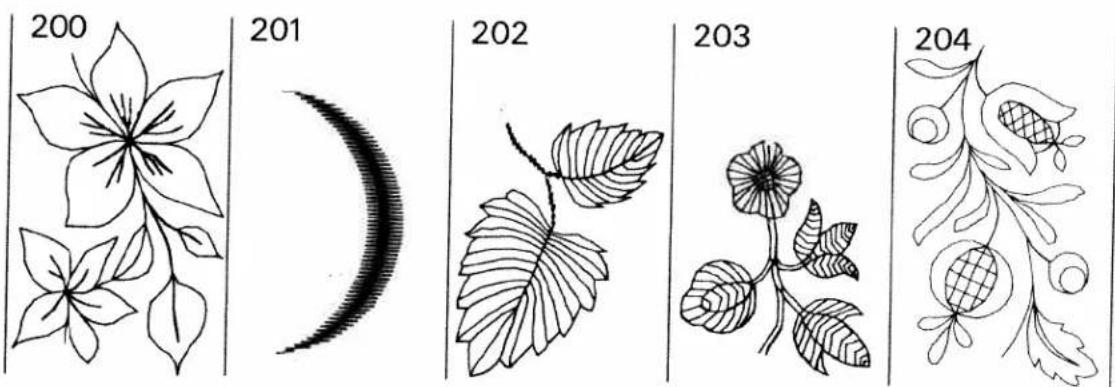
200 201 202 203 204
text_image
205 206 207 208 209Maxi stitches
creative fantasy

natural_image
Black-and-white photo of a young child standing outdoors, wearing patterned overalls and sneakers (no visible text or symbols)HOW CAN A SEWING
MACHINE POSSIBLY DO
SUCH EYE-CATCHING
EMBROIDERY?

natural_image
Illustration of a giraffe with palm trees and rocks in the background (no text or symbols)WITH
"creative fantasy"
OF COURSE,
THE ELECTRONICALLY
CONTROLLED
EMBROIDERY UNIT.
natural_image
Cartoon illustration of a duck wearing a hat and holding an object, sitting on grass (no text or symbols)
natural_image
Black-and-white photo of a young girl in traditional attire standing outdoors with a butterfly flying nearby (no visible text or symbols)ENJOY DOING VERY "CREATIVE"
PERFECT SEWING — ALL-OVER EMBROIDERY
The "creative 7570" is an absolutely top class sewing machine with everything amateur seamstresses could possibly wish for. And that isn't all by any means. With just one attachment – the electronically controlled "Creative fantasy" embroidery unit – you can in no time at all turn your "creative 7570" into a professional embroidering machine which can do the most incredible things: multi-coloured all-over embroidery, such as you have previously only seen on bought articles.

text_image
Original size: approx. 11 cm.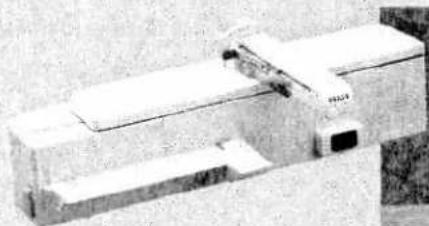
natural_image
Exterior view of a modern office building (no signage)
natural_image
Black-and-white photo of a sewing machine with fabric and cord (no visible text or symbols)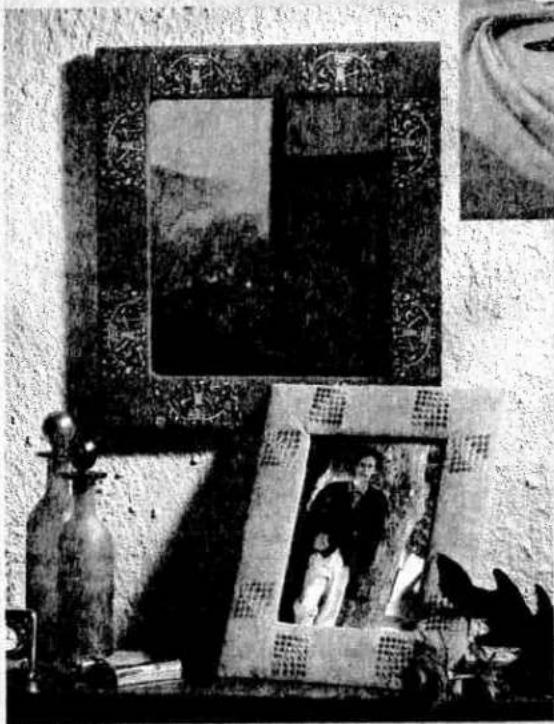
natural_image
Black-and-white photo of a vintage-style framed picture with decorative borders and a vase, no visible text or symbols.CREATIVE FANTASY
A combined sewing and embroidering machine. That should give you lots of ideas! Not only for fashionable clothes and accessories, but also for individual designs around the home.
The choice of embroidery patterns is quite staggering – for more information see over.
GO ALONG TO YOUR PFAFF DEALER, AND WE WILL SHOW YOU EVERYTHING IN DETAIL
SEWING AND EMBROIDERY
YOUR TICKET TO THE WORLD OF EMBROIDERY
No matter whether you need motifs for children, or plants, animals, borders, monograms, ethnic patterns or American-style designs: you will always find a suitable embroidery pattern on the Creative Fantasy.
You get card no. 1 straight away which contains a varied collection of 26 patterns and 2 complete alphabets. You can then gradually supplement your library with the cards which appeal to you most. Play with the patterns – vary the colours, shapes and sizes. Combine them, make mirror images, turn them round ... Just give free rein to your imagination ...

text_image
PFAFF PANTASY 1 PFAFF FANTASY creative fantasy 2 creative fantasy 3 PFAFF BROCCOLIST PFAFF SPORT creative fantasy 4 KUOTBALL 14 creative fantasy 9 The Cn re ch de on se Ge wo
The selection of patterns on the Creative Fantasy embroidery cards is really enormous, so it's hard to make a choice. What a good thing your Pfaff dealer has an outline of all the patterns on each card, because then you can select your favorite ones at leisure. Get the leaflets, and enter the creative world of embroidery!
natural_image
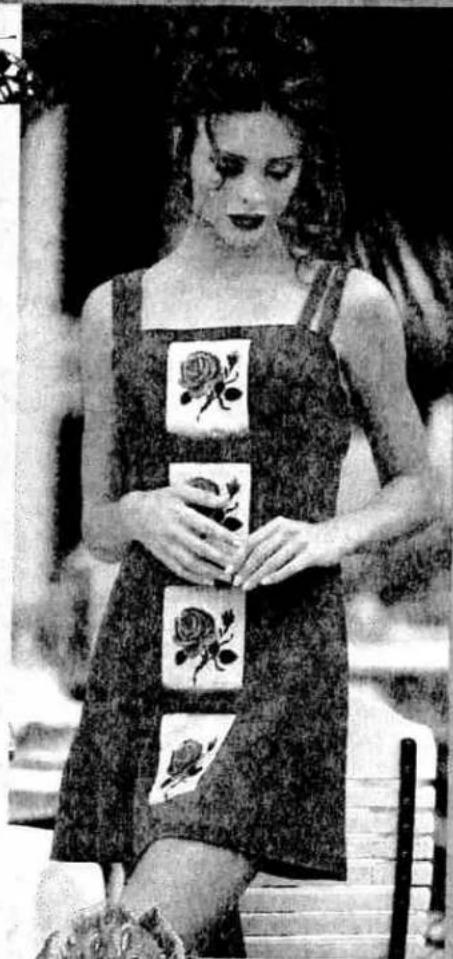
Black-and-white photo of a woman in a dress holding three patterned roses (no text or symbols visible)creative designer
text_image
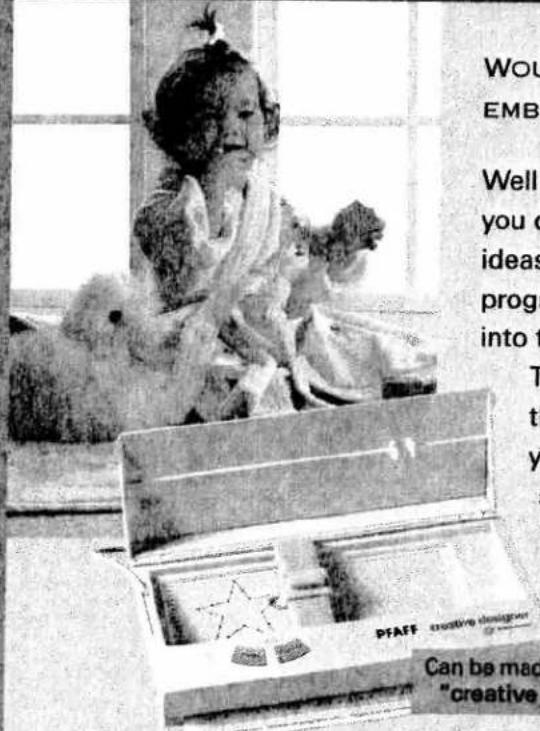
WOU EMB Well you c ideas progr into t T th y s PFAFF creative designer Can be mad "creativeWOULD YOU LIKE TO DESIGN
EMBROIDERY PATTERNS OF YOUR OWN?
Well you can! With the Creative Designer you can realize you own individual pattern ideas. Just draw your pattern on a programmable card and enter the stitches into the machine.
The "creative 7570" will then embroider the design you want. In the same way you can also alter the standard patterns sewn by the machine. Only the
"creative 7570" gives you such unlimited creative freedom.
Can be made complete with the "creative 7570" at any time.

natural_image
Hand holding a pen writing on paper, with a small building visible in the background (no text or symbols present)Draw the design on a programmable card ...
natural_image
Simple line drawing of a hand holding a small object, no text or symbols presentthen enter it into the machine using the "creative designer"...

text_image
CEECEEEEon the "creative 7570" the design is even shown on the display ...

natural_image
Close-up of a sewing machine needle stitching fabric (no visible text or symbols)and then just sew it!
The Creative Card – for storing your own designs
NEW
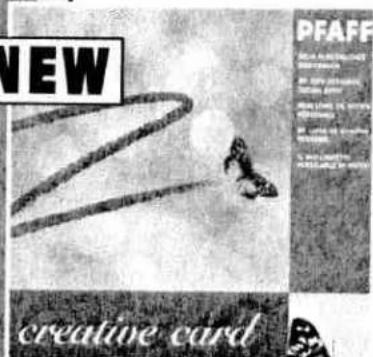
text_image
NEW PFAFF creative cardThe image is too blurry to recognize any text content.
[Unreadable]
[Unreadable]
"Blank" storage cards are now also available specially for the "creative 7570", with lots of room for your own designs.
Their storage capacity is enormous, and thus you can gradually build up your own personal library. Now who can claim that?
To enable you to establish your own individual filing system, there are adequate spaces which you can label as you wish. On the inside there is room for an index.
This way your creations can be safely and clearly filed.
creative 7570
Technical section
Pages 19–38

natural_image
Pure vertical black line on white background (no text or symbols)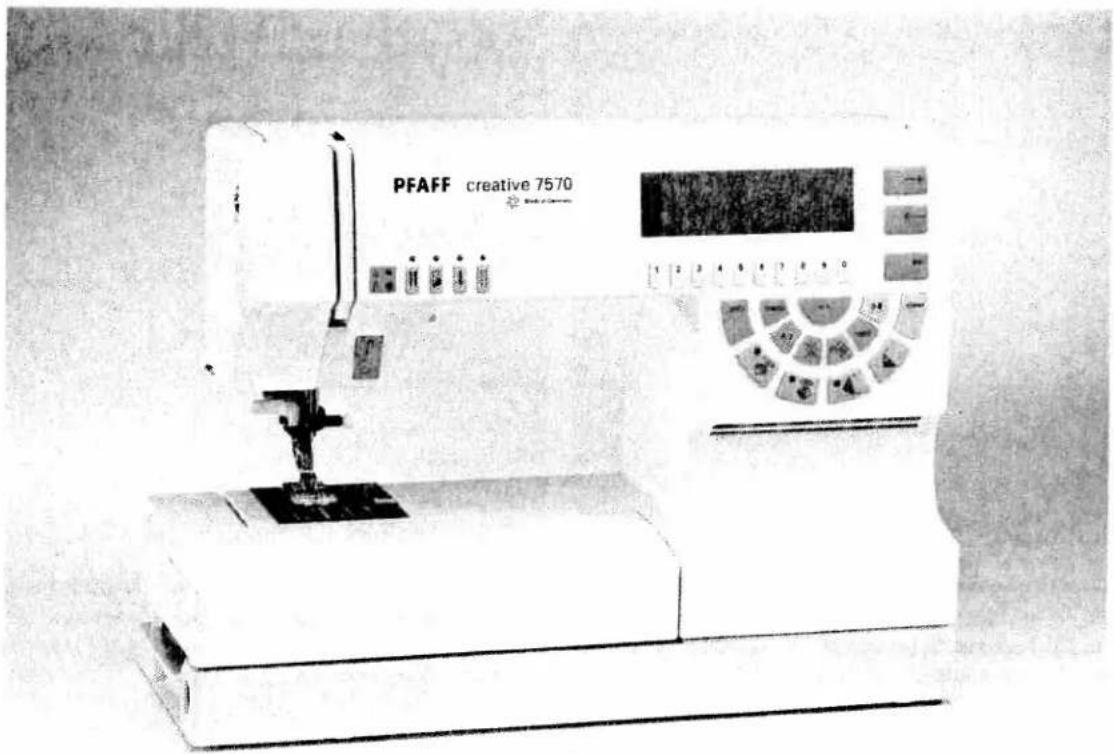
text_image
PFAFF creative 7570Contents
Electrical connection Pages 22–23
Detachable work support Page 24
Winding the bobbin Pages 25–27
Bobbin case Page 28
Bobbin thread tension Page 29
Threading the needle thread Page 30
Needle threader Page 31
Thread cutter Page 32
Sewing foot lifter Page 32
Pulling up the bobbin thread Page 32
Changing the sewing foot Page 33
Dual feed Page 34
Top feed Page 35
Threading through the needle Page 36
Changing the needle Page 37
Needle thread tension Page 37
Lowering the feed dog Page 37

Carrying case
Place the enclosed mains cord, the foot control, and the instruction book in the compartment of the carrying case.
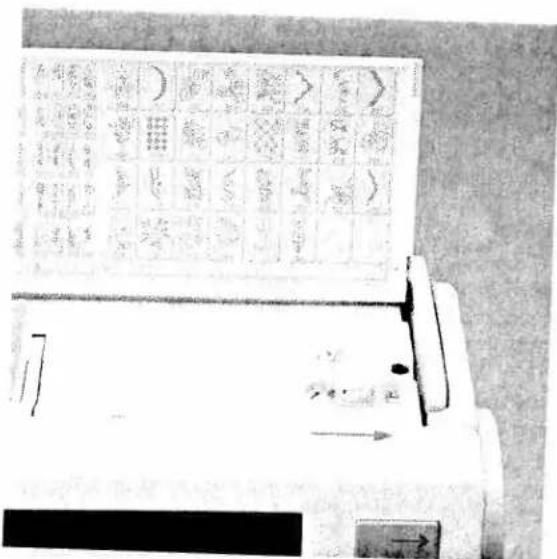
Top cover
Open cover (53) upwards.
Programs
The programs of the sewing machine are illustrated on the inside of the top cover.
Electrical connection
Connect the mains cord between the connection socket of the sewing machine (45) and the wall socket.
natural_image
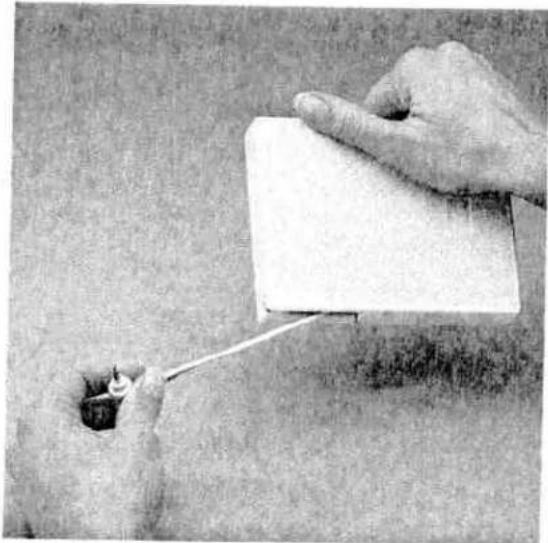
Close-up of hands holding a white rectangular object with a thin wire, no visible text or symbolsFoot control cord
Pull the foot control cord out of the foot control. The foot control has an automatic cord-rewind reel.
natural_image
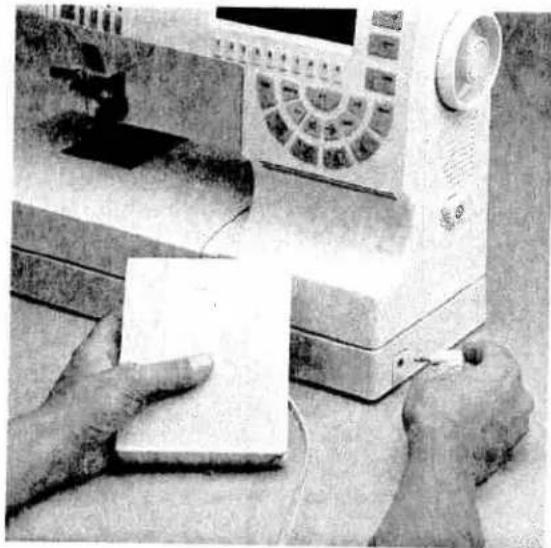
Close-up of hands operating a vintage typewriter with a white paper on a workbench (no visible text or symbols)Connecting the foot control
Connect the plug of the foot control with the connection socket of the sewing machine (45).

text_image
Diagram showing a curved line with a circled number 1 and a hand holding a tool, possibly indicating a measurement or step.Master switch
When the master switch (24) is switched on, the sewing lamp lights up. Press the "o.k." key, the sewing machine is now ready to use.

natural_image
Abstract black-and-white diagram with geometric shapes and no visible text or symbolsAccessory box
Open the accessory box (28).
Detachable work suport
Swing out the detachable work support (28) to the left.
natural_image
Interior view of a laboratory with equipment and a person operating equipment (no visible text or symbols)Sorting the accessories
The enclosed accessories are numbered. Sort them into the corresponding compartments of the accessory box.
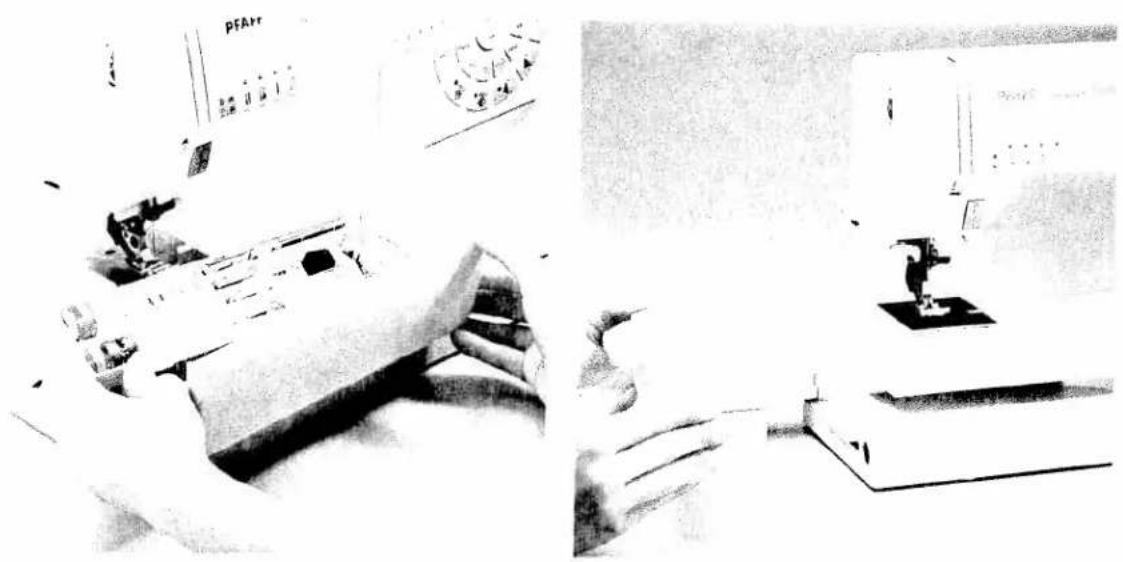
Removing the detachable work support (free-arm)
In order to sew with the free-arm, swing the detachable work support to the left and lift it out of the hole.
When you swing it back in again, make sure that the detachable work support is flush with the free-arm of the sewing machine.

natural_image
Close-up of hands using a sewing machine to press or install a coin (no visible text or symbols)Preparing the machine for bobbin winding Hold the handwheel (42) firmly and turn the release disk (43) in the direction of the arrow. The needle will not move during the bobbin-winding procedure.

text_image
Scanned image of a printed document with Chinese characters and a small cartoon character, likely from a book or magazine.Placing the bobbin
Switch off the master switch. Place the empty bobbin so that the black pin of the bobbin winder (41) snaps into the slot of the bobbin.
text_image
Scanned image of a traditional Chinese ink drawing machine with grid of calligraphy and annotationsPush the bobbin to the right.
Note:
The bobbin can only be wound if it is moved fully to the right.

text_image
PFAFF creative 7570 → ← esc info | menu | o.k. | 0-9 ) clearWinding the bobbin from the reel holder
Place the sewing thread on the reel holder (38). To guarantee free movement of the thread and to give additional hold to the thread reel, fit an unwinding disk corresponding to the size of the thread reel.
Threading
Place the thread into guide C and pull it under the thread tension disk B with both hands. Wind the thread end clockwise a few times around the bobbin. Push the bobbin to the right.
Switch on the master switch (24)
Hold the end of the thread firmly and press the foot control. The winding action will stop automatically as soon as the bobbin is full. Cut the thread, push the bobbin to the left and remove it.
Don't forget:
Turn the release disk (43) fully back again. Then turn the handwheel (42) towards you until it snaps into place.

natural_image
Abstract black-and-white graphic with geometric shapes and no visible text or symbols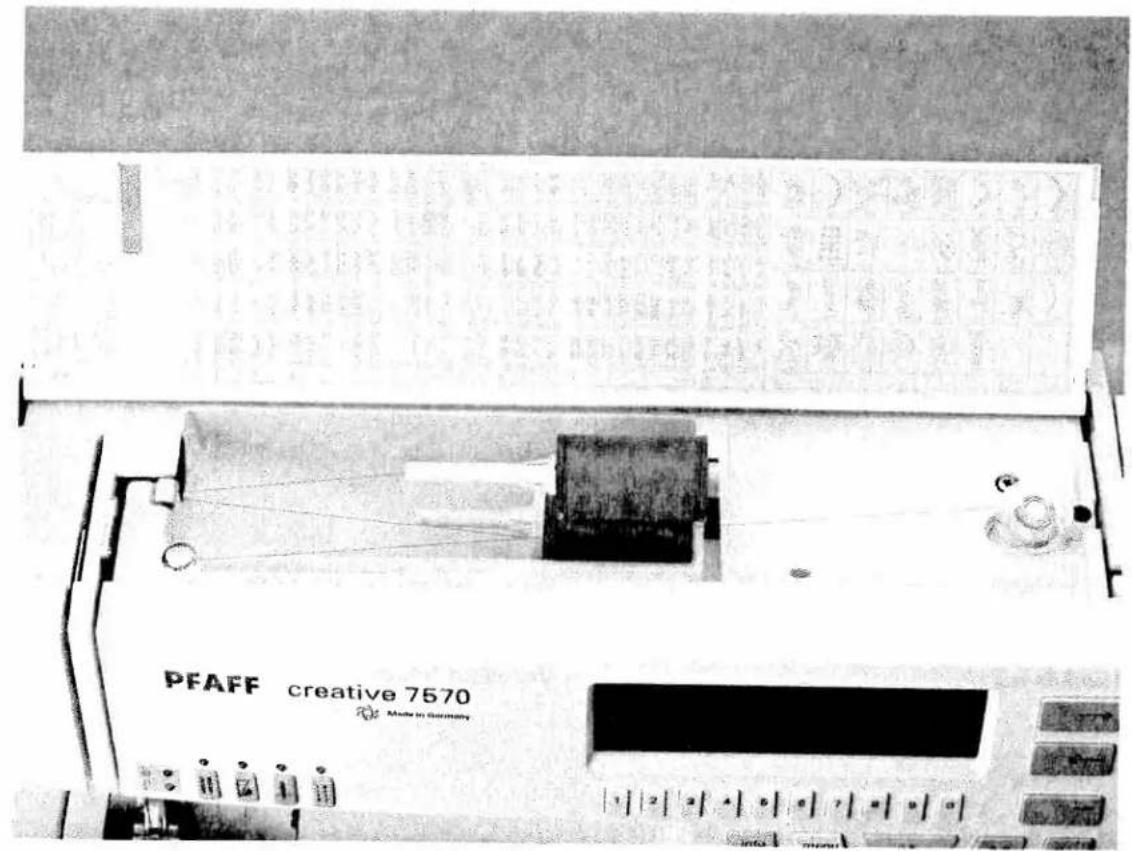
text_image
PFAFF creative 7570 Made in Germany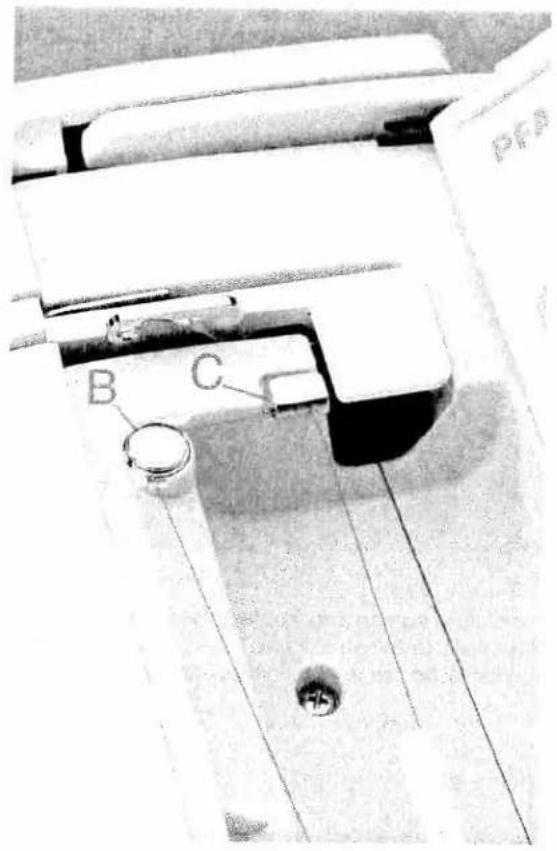
text_image
B C PFAWinding from the second reel holder
Swing the second reel holder (39) up and place a reel of thread with the corresponding unwinding-disk on it.
Threading
Place the thread into guide C and pull it under the thread tension disk B with both hands. Wind the thread clockwise a few times around the bobbin. Push the bobbin to the right.
Switch on the master switch
Hold the end of the thread firmly and press the foot control. The winding action will stop automatically as soon as the bobbin is full. Cut the thread, push the bobbin to the left and remove it.
Don't forget:
Turn the release disk (43) fully back again. Then turn the handwheel (42) towards you until it snaps into place.

natural_image
Two black-and-white photos showing mechanical devices and a device with a handle, no visible text or symbols.Hook cover
Switch off the master switch.
Hold the hook cover (49) at the side and open it towards the front.
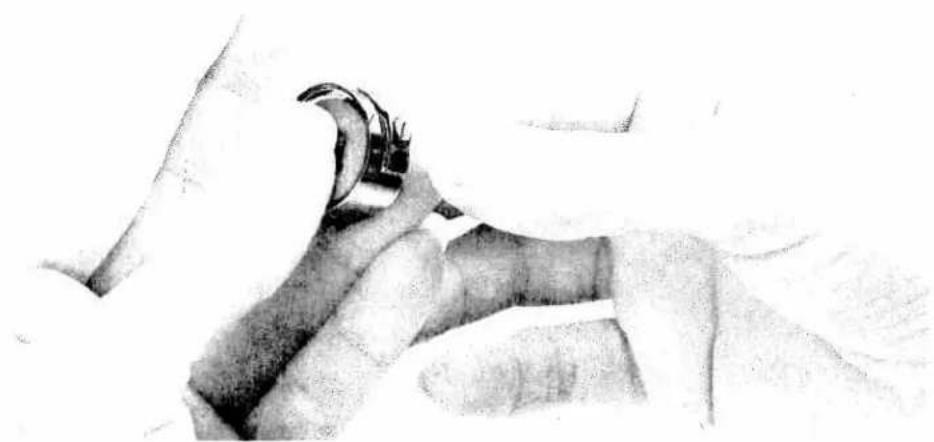
Taking out the bobbin case
Lift the latch of the bobbin case and pull the bobbin case out. Release the latch and take out the empty bobbin.
natural_image
Pencil sketch of a person's hand holding a medical device, no text or symbols presentThread tension
To obtain optimum seam appearance and durability, make sure needle and bobbin thread tensions are correctly adjusted to each other; i.e. the threads are interlaced between the two fabric plies. For fancy seams and buttonholes, the thread interlace should be visible on the reverse side of the fabric.
text_image
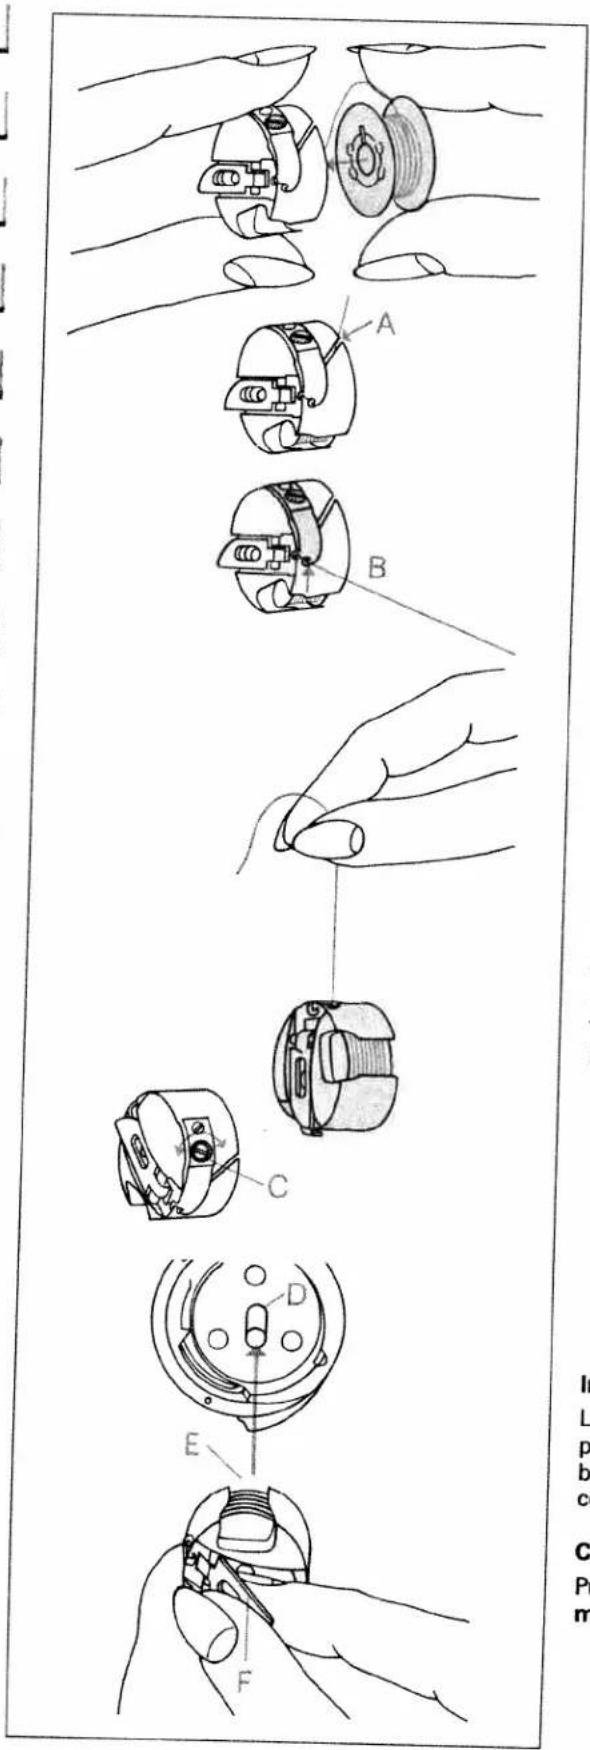
Technical diagram showing exploded view of a mechanical component with labeled parts A through FInserting the bobbin
Insert the full bobbin in the bobbin case. When doing so, pull the thread sideways through slot A and then under tension spring B so that it rests in the opening (see arrow).
Check:
When you pull the thread, the bobbin must turn clockwise.
Checking the bobbin thread tension
Hold the bobbin case by the thread and move your hand sharply upwards. The bobbin case must slip downwards a little with each hand movement.
Correcting the tension:
Turn adjusting screw C just a little to the left to decrease the bobbin thread tension. Turn adjusting screw C just a little to the right to increase the bobbin thread tension.
Inserting the bobbin case
Lift latch F and push the bobbin case fully onto pin D of the sewing hook. Opening E of the bobbin case must face upwards. Close the hook cover.
Check:
Pull the bobbin thread sharply; the bobbin case must not fall out of the hook.

text_image
Scanned document page with fragmented text and technical diagrams, including labeled sections and annotations like 'P' and '1'.Threading the needle thread
Switch off the master switch. Raise the sewing foot lifter (26) and turn the handwheel until the take up lever (34) has reached its highest position. Place the thread on the reel holder (38) and fit the corresponding unwinding disk.
Now pull the thread into guide A. Then pass the thread to the right or left along thread tension disk B and downwards through the left-hand threading slot (32). Pull the thread around stop E into the right hand threading slot and upwards to the take up lever (34). The thread must be pulled into the take up lever from left to right and downwards again in the right hand threading slot.
Finally, pass the thread from the side behind one of the two thread guides (31).
Threading the needle is described on the following pages.
natural_image
Close-up of hands operating a sewing machine needle, no visible text or symbols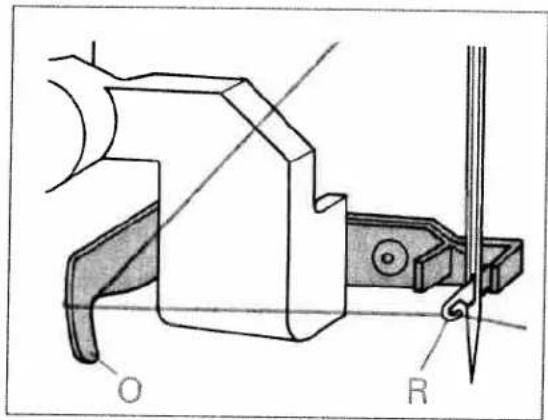
text_image
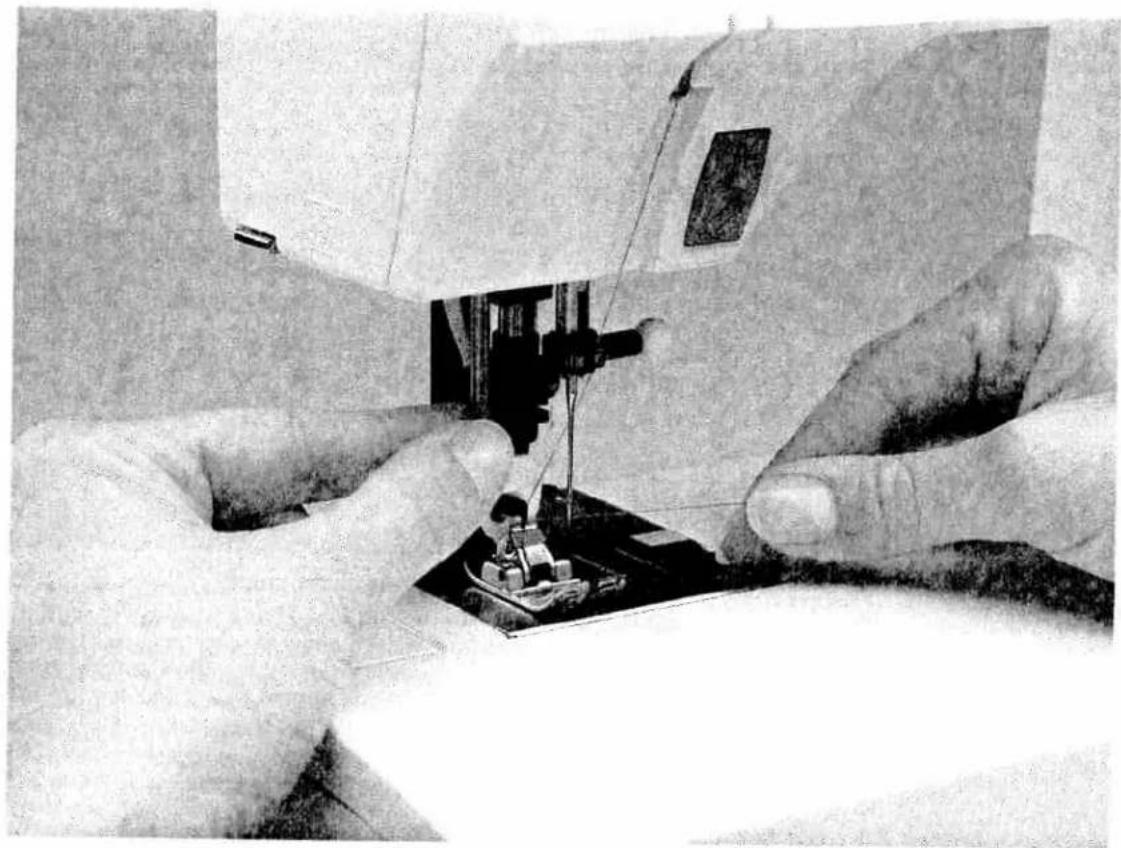
O RNeedle threader
In order to make the threading of the needle easier and quicker the PFAFF needle threader is provided. Lower the sewing foot (see next page). Turn the handwheel until the needle has reached its highest position. Place the needle thread over hook 0 and hold it taut. Move the needle threader (30) fully downwards and turn it towards the needle so that the small hook R goes through the needle eye. Place the thread into the hook from below.
Turn the needle threader towards the rear, releasing the thread carefully, and allow the threader to move upwards. You can now pull the thread through the needle eye.

natural_image
Technical line drawing of a mechanical device with a tool and motion arrows (no text or symbols)
natural_image
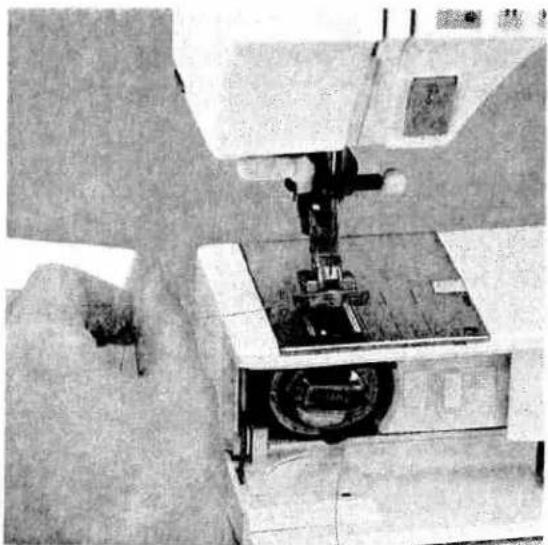
Close-up of a hand operating a sewing machine with a control panel and four buttons (no visible text or symbols)Presser foot lifter
The sewing foot is raised and lowered with the presser foot lifter (26).
natural_image
Close-up of a sewing machine needle stitching fabric, no visible text or symbolsPulling up the bobbin thread
Raise the sewing foot. Hold the needle thread and turn the handwheel towards you until the needle has reached its highest position and the bobbin thread has formed a loop. Pull the needle thread to bring up the bobbin thread.
natural_image
Close-up of a sewing machine needle stitching fabric, no visible text or symbolsBobbin thread
Close the hook cover (49) and pull the thread under the sewing foot to the left.

natural_image
Mechanical device with attached wires and a base plate (no visible text or symbols)Thread trimmer
Pull the threads from the back to the front over the thread trimmer (52).
natural_image
Close-up of hands operating a sewing machine (no visible text or symbols)
natural_image
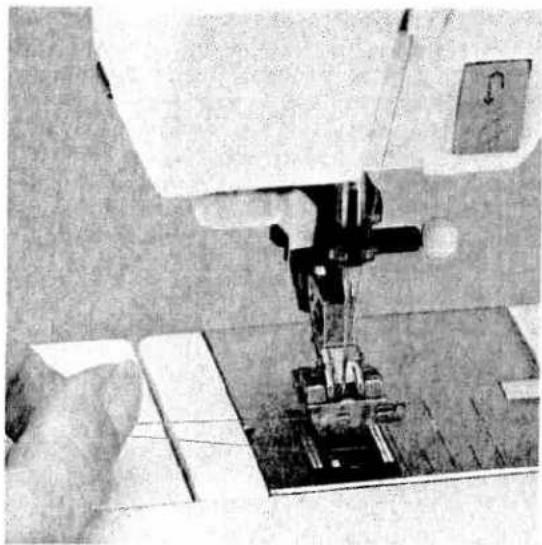
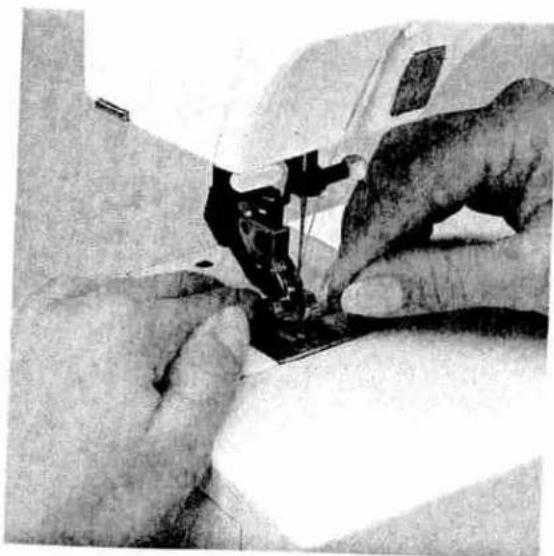
Black-and-white photo of a sewing machine in operation, no visible text or symbolsRemoving the sewing foot
Switch off the master switch.
Set the needle at its highest point. Raise the sewing foot and press the foot upwards at the front and downwards at the back at the same time until it snaps out of the sewing foot holder (29). When disengaging buttonhole foot 5A, the runner must be pulled to the back and pressed upwards.
Engaging the sewing foot
Place the sewing foot under the sewing foot holder (29) so that the pins of the foot snap into the sewing foot holder when the presser foot lifter (26) is lowered.
natural_image
Close-up of a sewing machine needle stitching fabric (no visible text or symbols)Check:
Please check that the sewing foot is properly engaged by raising the presser foot lifter.

natural_image
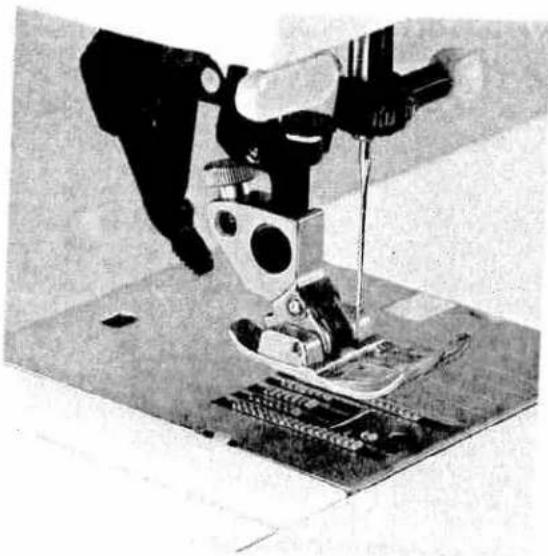
Close-up of hands operating a sewing machine (no visible text or symbols)The built in dual feed / IDT System
PFAFF offers the ideal solution for sewing difficult materials: the built in dual feed. This system feed the material from the top and the bottom simultaneously just the same as by industrial sewing machines. The fabric is fed precisely. On light or difficult materials such as silk and rayon fabrics, the dual feed prevents seam puckering. The even feeding action also ensures perfect matching of checked and striped fabrics.
natural_image
Mechanical assembly diagram showing a bow and rod mechanism (no text or labels)
natural_image
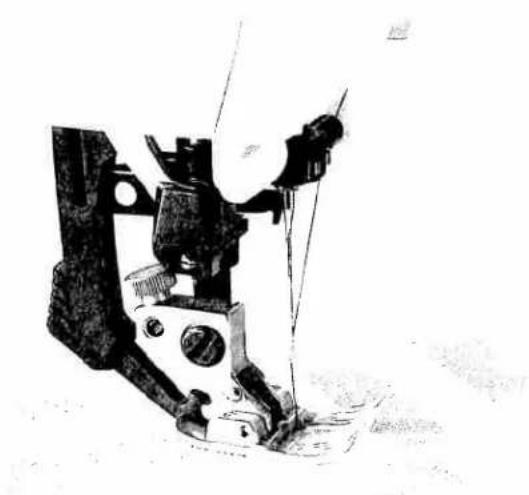
Close-up of a mechanical device with no visible text or symbolsEngaging the top feed
Raise the sewing foot. Then push the top feed (54) downwards until it snaps into place.
natural_image
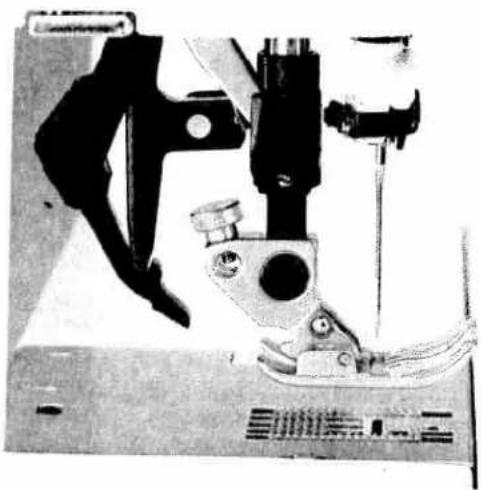
Close-up of a mechanical device with no visible text or symbolsDisengaging the top feed
Hold the top feed with two fingers at the marked places. Push the top feed (54) down a little and out to the rear, then let it move slowly upwards (see page 34).
natural_image
Black and white striped pattern with no visible text, numbers, or symbolsImportant!
For all sewing jobs with the top feed, only use sewing feet with cutout at the back (OA, 1A, 3, 4).

natural_image
Black-and-white photo of a sewing machine on a metal base, no visible text or symbols
natural_image
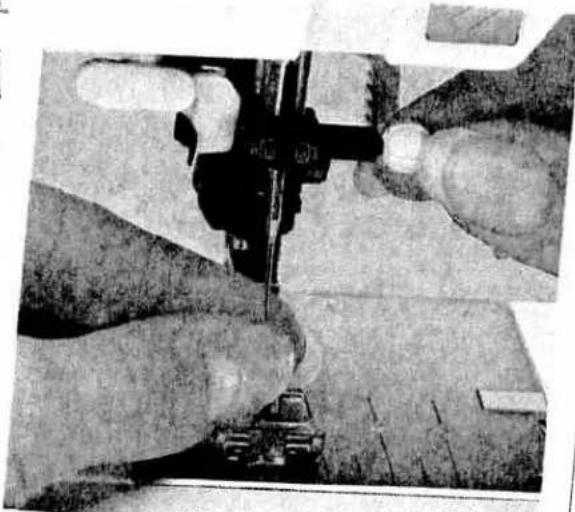
Abstract black-and-white sketch with curved shapes and faint lines (no text or symbols)Threading through the needle
Bobbin winding is also possible with a completely threaded machine. Raise sewing foot lifter (26). Pull the needle thread under the sewing foot and through the right-hand threading slot (32) upwards.
Now insert the thread from left to right in take-up lever (34).
The take-up lever must be at its highest position. Now pull the thread to the right and then wind it a few times around the bobbin. Press the foot control and the machine will start threading through the needle.
natural_image
Close-up of hands using a mechanical tool to cut a vehicle on a road (no visible text or symbols)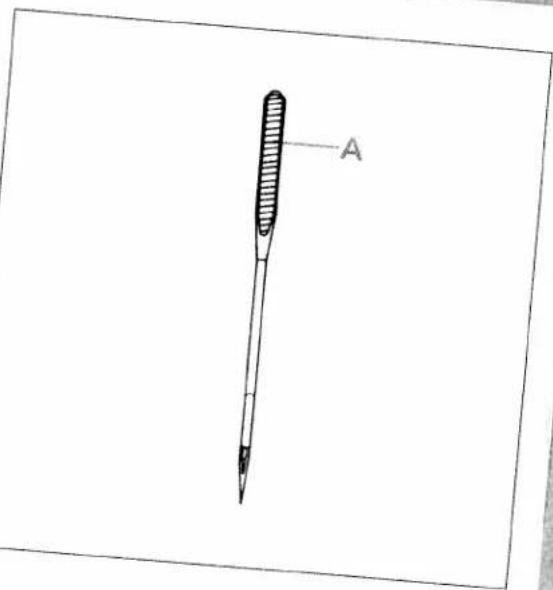
text_image
AChanging the needle
Switch off the master switch.
to remove: Lower the sewing foot and set the needle at its highest point. Now loosen the fixing screw (27) and pull the needle downwards.
To insert: The flat side A of the needle must face to the rear. Lower the sewing foot and insert the needle, pushing it up as far as it goes. Hold the needle and tighten the fixing screw (27) firmly.
natural_image
Close-up of a PFAF printer device with labeled ports and a marked part (B), no readable text or symbols beyond branding.
natural_image
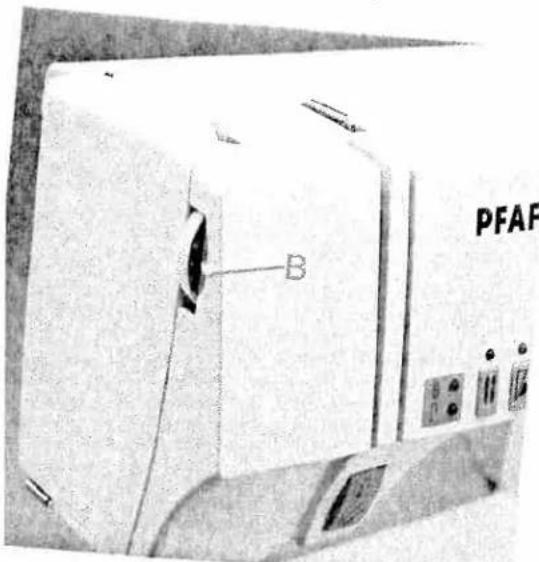
Cross-sectional view of a mechanical device showing internal components and a labeled component (no readable text or symbols)tting the needle thread tension
the required needle thread tension (33) with help of the marking B.
normal setting for sewing is 4 to 5. For broidering and buttonhole sewing it is veen 2 and 3.
Lowering the feed dog
For certain sewing work, e.g. darning, the feed dog (57) has to be dropped. To do this, open the hook cover (49) and press slide C fully to the right. Now the feed dog is dropped.
natural_image
Black-and-white photo of a woman seated in a wooden structure, no visible text or symbolsSewing functions
Pages 39–68

natural_image
Pure vertical black line with a white dashed extension, no text or symbols present
text_image
PFAFF creative 7570Contents
| Start-up functions | Page 42 |
| Language selection | Page 42 |
| Adjusting the contrast in the display | Page 43 |
| Enabling and disabling the help messages | Pages 43–44 |
| Explanation of the basic menu | Page 45 |
| Stitch length and width | Page 46 |
| Needle positions | Page 46 |
| Programmable seam length for straight stitch | Page 47 |
| Sewing function keys | Pages 48–50 |
| Pattern selection | Pages 51–53 |
| Pattern length and width | Page 54 |
| Stitch density and balance | Page 55 |
| Information and operational aid | Page 56 |
| Maxi pattern | Pages 57–60 |
| Maxi design cards | Page 60 |
| Balance | Pages 61–63 |
| Activating the code | Pages 64–66 |
text_image
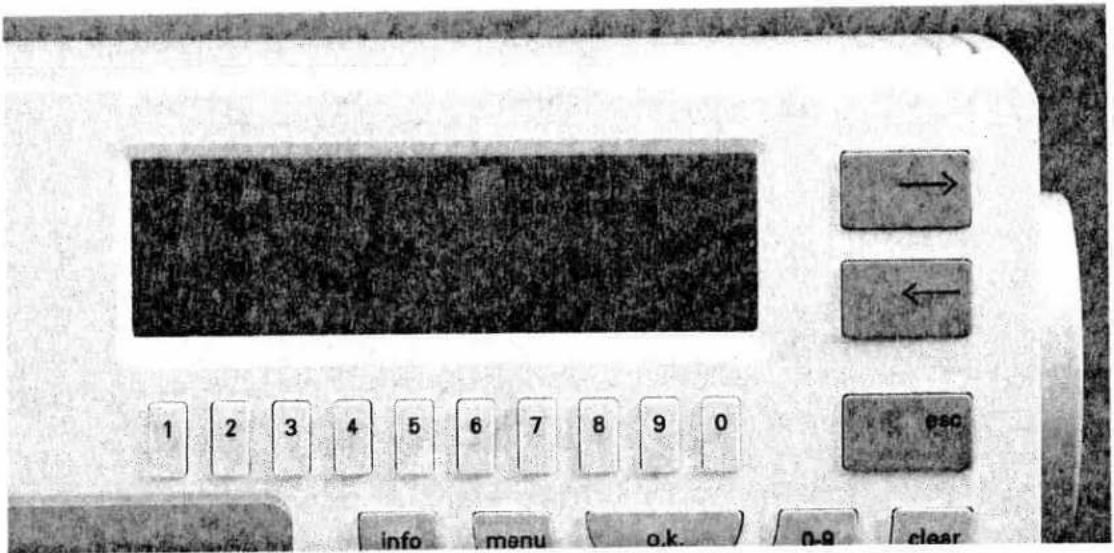
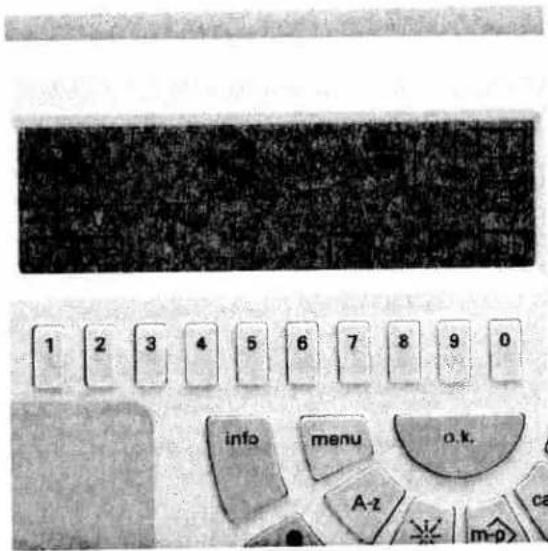
Close-up of an electronic device control panel with labeled buttons and a display screenLanguage selection
The program of the Creative can be displayed in four different languages. Hold key "1" pressed while turning on the sewing machine. The four languages appear in the display. Select the number of your desired language using keys "0-3".
From now on any description in the display will be shown in the selected language.

text_image
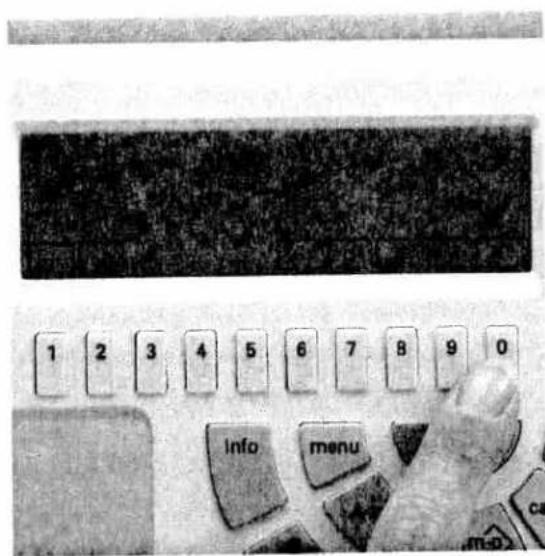
Bao Tel 200000001 1 2 3 4 5 6 7 8 9 0 BSC info menu o.k. 0-8 clearBattery message
If the batteries are weak or no batteries have been inserted, the message "Change batteries" will appear in the display when you switch the machine on. If the batteries are too weak, the programmed P-designs and the stored patterns in a pattern sequence will be lost. If there are no batteries in the machine, press the "o.k." key or activate the foot control. Then the machine will be ready to sew. (For battery change see page 156.)
Please note!
Batteries must not be disposed of together with the normal waste. Please bring them to battery collecting points or to special waste dumps.
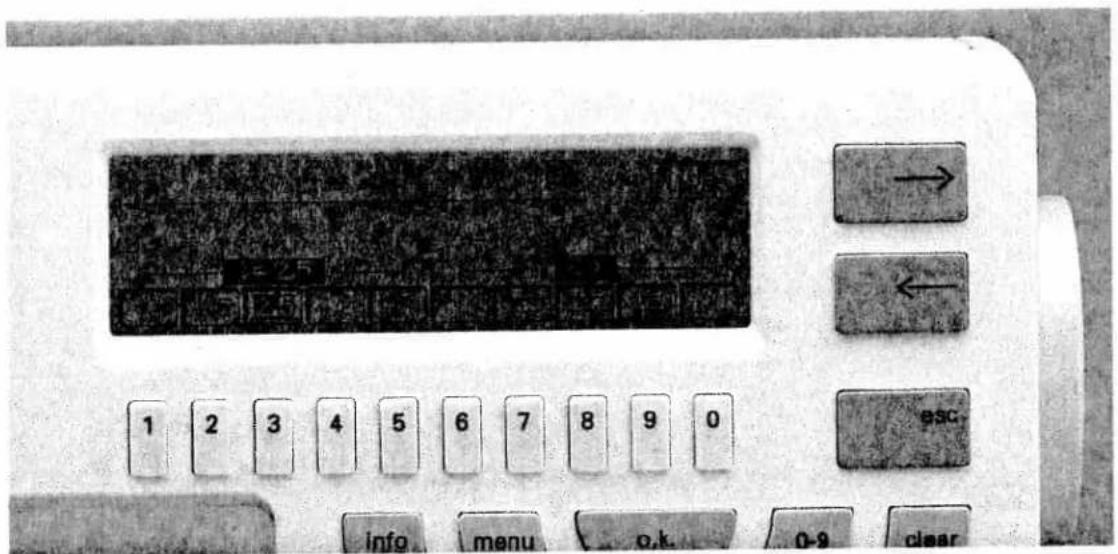
text_image
1 2 3 4 5 6 7 8 9 0 info menu o.k. 0-9 clear → ← ESC.Adjusting the contrast in the display
The contrast setting in the display may change after some use or due to the machine being transported.
This setting can be readjusted with the brightness regulator (23).

Enabling and disabling the error messages
An additional feature of the Creative is to recognize errors and to indicate them in the display.
The following errors are recognized:
- If you run out of needle thread or the needle thread breaks when sewing, embroidering or darning.
- If the sewing foot lifter is not in the correct position.
- If the feed dog is in an incorrect position.
In the basic setting this monitoring is disabled when sewing.
You can fade these error messages in or out.
To this end press key "menu" on the machine, straight stitch will be highlighted. Now press key "1" underneath straight stitch and then key "info".
A sewing recommendations display appears on the screen (for next step see page 44).

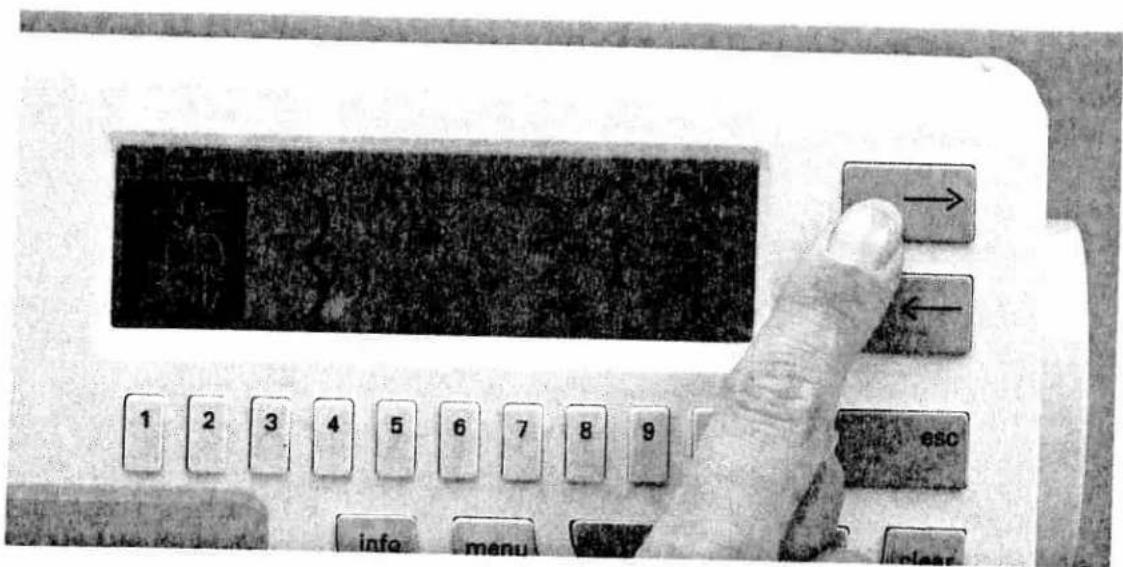
text_image
1 2 3 4 5 6 7 8 9 0 info menu o.k. 0.8 clear → ← ESCPress cursor key "→". The following is displayed on the screen:
Machine stop in case of needle thread message:
□ - in sewing mode
X - in embroidery mode
X - no machine operation due to incorrect sewing foot lifter and feed dog position.
Messages marked with a cross are enabled while the others are disabled. If you want to change the messages, e.g. disable the messages in
embroidery mode, you must select the corresponding box with key "1". It is highlighted. By pressing key "2" the cross in the box is deleted and the message is disabled. If you wish to, say enable the error message in the sewing mode, you must again select the box with key "1" and place the cross in the box with key "2", thus enabling the function.
By pressing keys "o.k." or "esc" you return to the straight stitch. If all functions are enabled, the machine messages are as follows:
- If the needle thread breaks (after 6 stitches max.):
- In case of incorrect feed dog position (when sewing) (not in programs 00, 07, 09):
- In case of incorrect feed dog position (when embroidering):
- In case of incorrect sewing foot lifter position:
- If you are running out of bobbin thread:
Warning: The needle thread is broken or used up.
OK?
Enable feed dog
OK?
Lower feed dog
OK?
Set sewing foot lifter at embroidery or darning position
OK?
You are running out of bobbin thread OK?
text_image
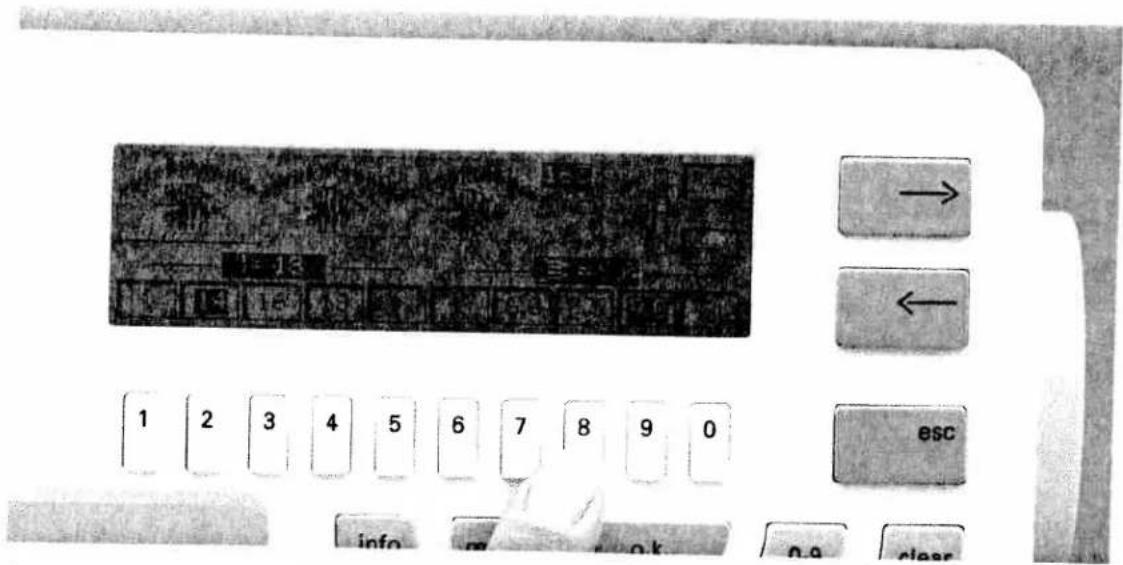
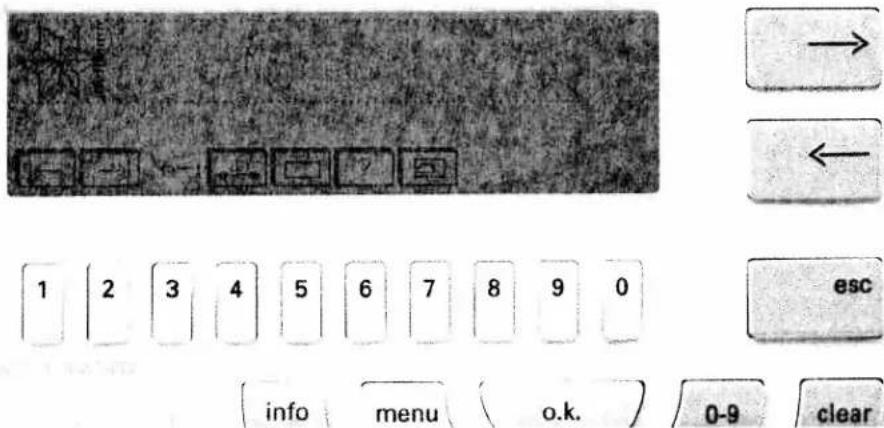
Close-up of an electronic device control panel with labeled buttons and a display screen showing text content.Explanation of the basic menu
The basic menu contains a selection of the stitches that are most often needed for practical sewing. It consists of 30 stitches divided upon groups of ten. Each group is shown on one screen page. When you switch the machine on, the first page with 10 sewing programs is shown
automatically. The straight stitch is highlighted and can be sewn immediately. If you want to sew another stitch, select it with the key underneath. It will then be highlighted.

text_image
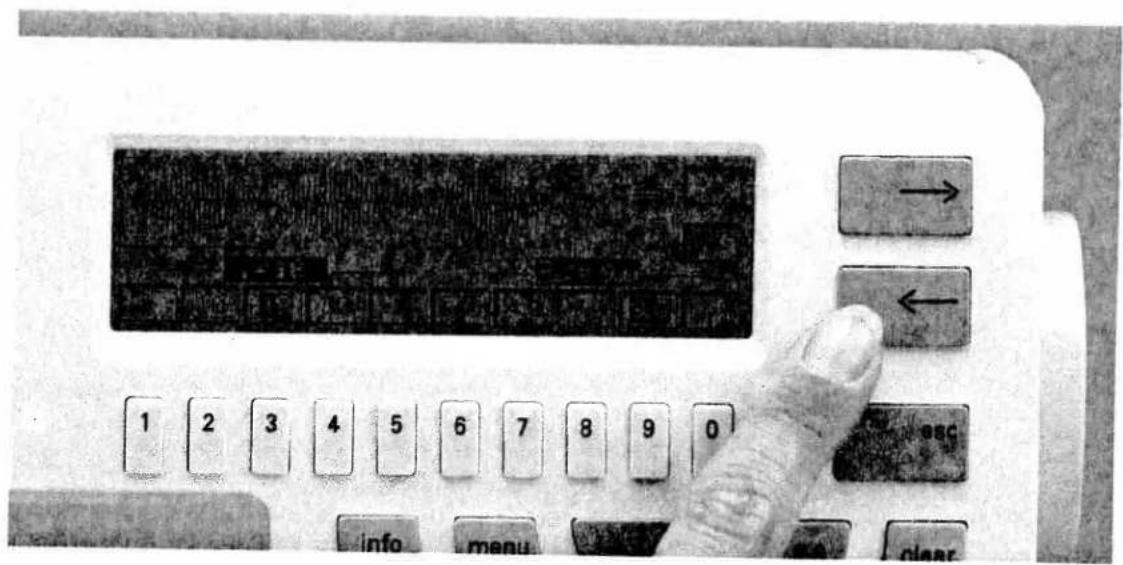
1 2 3 4 5 6 7 8 9 0 info menu o.k. o.oIf you wish to see the next screen page, press cursor key "→" (8). After the first 30 programs you will brouse automatically to the buttonhole and fancy stitch pages. Here too, each stitch can be selected with the key underneath.
Example:
In order to sew pattern No. 23 you must press cursor key "→" twice and then key "4" underneath pattern No. 23.
text_image
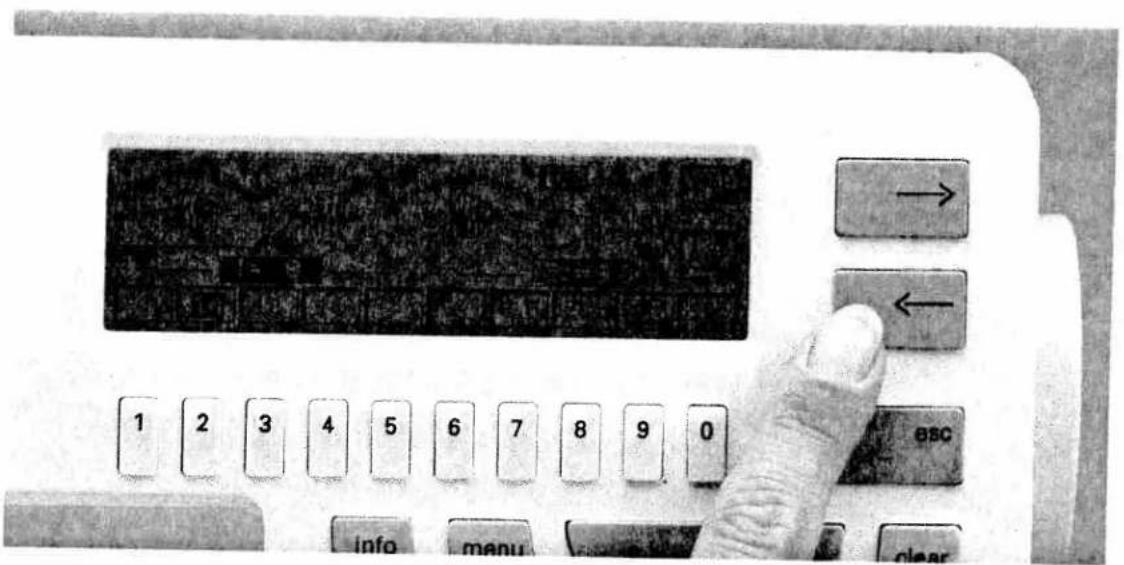
Cropped image showing a keyboard layout with labeled buttons and numeric keypad, including directional arrows and a 'ESC' button.Adjusting length and width for the selected pattern
As soon as you have select a pattern, this is highlighted in the display. The sewing machine is ready to sew since the pattern is programmed with optimum length and width setting in the machine memory.
In order to change these pre-programmed settings you must press the key underneath the pattern again or the "o.k." key. Now the sewing programm is displayed as a continuous pattern with a pattern number on the screen.

natural_image
Pure horizontal line with no text, numbers, or symbols
text_image
Scanned text of a historical document with dense vertical columns and horizontal lines, likely from a historical or literary manuscript.
text_image
Scanned text of a document with dense Chinese characters and small embedded tables or labels.
text_image
1 2 3 4 5 6 7 8 9 0 info menu o.k. A-z m-p car
text_image
1 2 3 4 5 6 7 8 9 0 info men o.k. car m-pThe bar on the left underneath the pattern shows the stitch length or pattern length of the single pattern. The settings on the bottom left are the pre-programmed length settings, the ones on the bottom right of the screen are the width settings. The highlighted figures are the default length and width settings that are stored in the machine memory for this program. You can change length and width with keys 1, 5, 6 and 0 underneath the arrow symbols "<" and ">". You can select the settings directly with the keys underneath the default settings.
Needle positions
With keys 7, 8 and 9 you can select needle positions left, center and right for the straight stitch programs. With the arrow keys "<" and ">" you can change the 19 (or 15 respectively) needle positions step by step.

text_image
1 2 3 4 5 6 7 8 9 0 info menuProgrammable seam length for straight stitch
If you wish to join several workpieces of the same size you can enter the seam length with straight stitch. The advantage is that you can repeat the seam with the same length as often as you want to. The machine will sew a tack at the seam start and seam end and then stop automatically.
After switching on the machine the basic menu appears on the screen with straight stitch highlighted. Then press key 1 or "o.k.", the straight
stitch is shown with its length settings. On the right of the screen "pat" is displayed. Now press the cursor key (8) →, the additional message "prog" will appear. Now the seam length can be programmed. To this end actuate the foot control, the machine will sew a few stitches for a tack at the seam start and then continue sewing. When the desired seam length has been reached, press the backwards key. The machine will sew a tack and then stop automatically.

text_image
1 2 3 4 5 6 7 8 9 0 esc info menu o.k 0-8 clearThe message "auto" for automatic appears in the display indicating that the desired seam length is now programmed and can be repeated as often as you wish.
If you want to interrupt this limited seam length to sew longer seams in between, press cursor key (8) →.
The "auto" message disappears; longer seams can be sewn.
If you wish to return to the limited seam length, press cursor key → (8) again. The message "auto" reappears in the display and you can continue to sew with the programmed straight stitch.
When changing the program or switching off the machine the programmed length is lost.

text_image
PFAFF creative 7570 Made in GermanyDescription of the sewing function keys

Reverse key (25)
When the reverse key is pressed, the green diode lights up and the machine sews backwards. By pressing this key again, the machine sews forwards.
To tie off, hold this key pressed for a moment while sewing. In addition, you can use this key to define the bartack for a buttonhole or the length of a darning pattern.

Bobbin thread monitor (1)
This function controls the bobbin thread. The red diode blinks when the bobbin thread is nearing its end (less than 2 m thread on the bobbin).

Twin needle (2)
Press this key to sew with the twin needle. The stitch width will automatically be decreased by 2 mm to avoid the needle hitting the sewing foot.

Slow sewing (3)
By pressing this key, the sewing speed of the machine is reduced by 50%.

Needle position up/down (4)
With this key you can determine whether the needle should stop in the fabric (down position) or at its highest point (up position) when releasing the foot control.

"Tacking" key (5)
By pressing this key, the beginning and end of your seam or pattern will be automatically tied-off.
text_image
1 2 3 4 5 6 7 8 9 0 info menu o.k. 0-9 clear A-z card m-p -→ Cursor keys (8)
With the cursor keys you can browse through the screen pages in backwards or forwards direction. Within a pattern these keys are used to adjust the balance.
"esc" (9)
By pressing the "esc" key the previous screen is displayed or a function is aborted.
1-0 Numbered keys (7)
With the numbered keys you select the patterns numerically. Within a selected pattern, you can use these keys to determine pattern length and width and the stitch length. In the alphabet, these keys can be used to select the letters.
0-9 Pattern selection (11)
After pressing key 0-9 you can enter the pattern number of your choice with the numbered keys.
"o.k." (12)
The "o.k." key confirms your selection.
menu (22)
By pressing the menu key you will always return to straight stitch.
"info" (21)
a) Using this key you can select a pattern by motif groups (see pattern selection).
b) "info" key as sewing recommendation.
After you have selected a pattern, by pressing the "info" key you will obtain information on the recommended thread tension, pattern mirroring, pattern start and end, the correct sewing foot and possible special accessories.
c) For certain sewing sections (buttonholes, m-p, card, alphabets and joining stitches), the help files under "info" can be called up. A description of the work step and a description of the next step appears in the display. This help file can be closed at any time by pressing the "esc" key.

Pattern mirroring (19) (lateral mirror image)
The selected pattern will be turned around, i.e. the end of the pattern will be sewn first.

Pattern mirroring (17)
The selected pattern will be sewn as a mirror image.
text_image
1 2 3 4 5 6 7 8 9 0 info menu o.k. 0-9 clear A-z card m-p
Single pattern (15)
When pressing this key an assembly seam will be tied off immediately and a fancy seam at the seam end.
After tying off the machine will stop automatically.

Pattern start (13)
a) Using this key you return to the beginning of an already started program.
b) For buttonhole and darning programs the programmed length will be deleted.
By pressing the "esc" key a selected function is aborted and you return to the previous menu.
clear (10)
a) If the wrong pattern number has been entered, you can delete the number from right to left with this key.
b) This key deletes the last pattern in a pattern sequence or the last stitch in a selected P-pattern.
card
Press this key if you wish to select patterns from the maxi design cards or from the Creative fantasy cards. Also press this key to file several patterns on one Creative card.
m-p
With this key you can directly select any m or p-memory.

Eight-way feed stitches (18)
By pressing this direct selection key the eight-way feed stitches are shown in the display as arrows.
A-z (21)
The A-z key is the direct selection key for all types of alphabet.
text_image
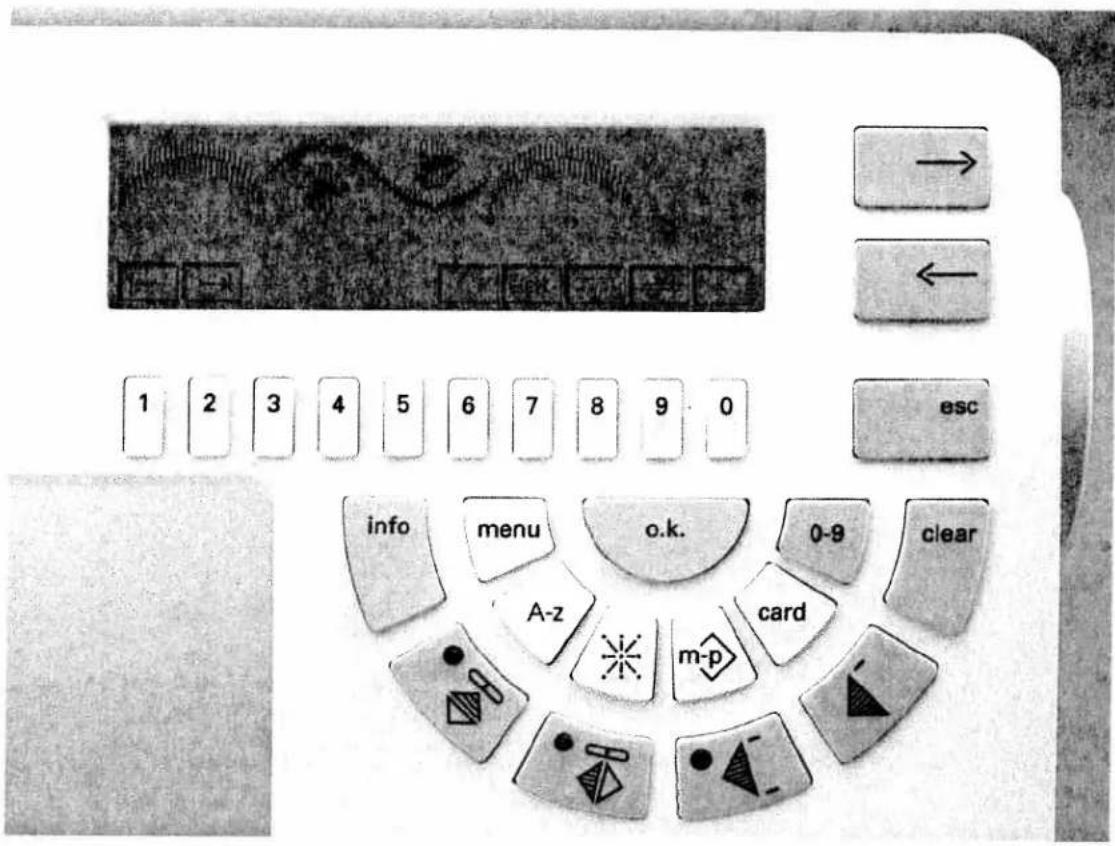
Close-up of an electronic calculator with numeric keypad and control buttons, showing a display screen and navigation arrows.Summary of the
options for pattern selection
You have various options to select a pattern of the creative.
a) Selection via the program keys:
As soon as you switch the machine on, the basic menu containing 30 frequently used patterns appears automatically. The first pattern of the basic menu, straight stitch, is highlighted and can be sewn immediately. In the display there are 10 patterns on each screen page. They can be selected by pressing the corresponding key underneath the screen. The selected pattern is always highlighted.

text_image
4 5 6 7 8 9 0 Info menu OK A-Z OKThe next 10 patterns can be called up with the cursor keys "→" and "←".

text_image
→ ← esc 1 2 3 4 5 6 7 8 9 0 info menu o.k. 0-9 clearb) Numerical pattern selection
You can also call up a pattern by entering the pattern number. When the key "0-9" is pressed, you will see in the display:
Enter the desired pattern number via the number keyboard "1-0" and press "o.k.". The display shows the selected program.
Pattern-No.: 0
Keys ←→: browse patterns
Key "info": selecting motifs
text_image
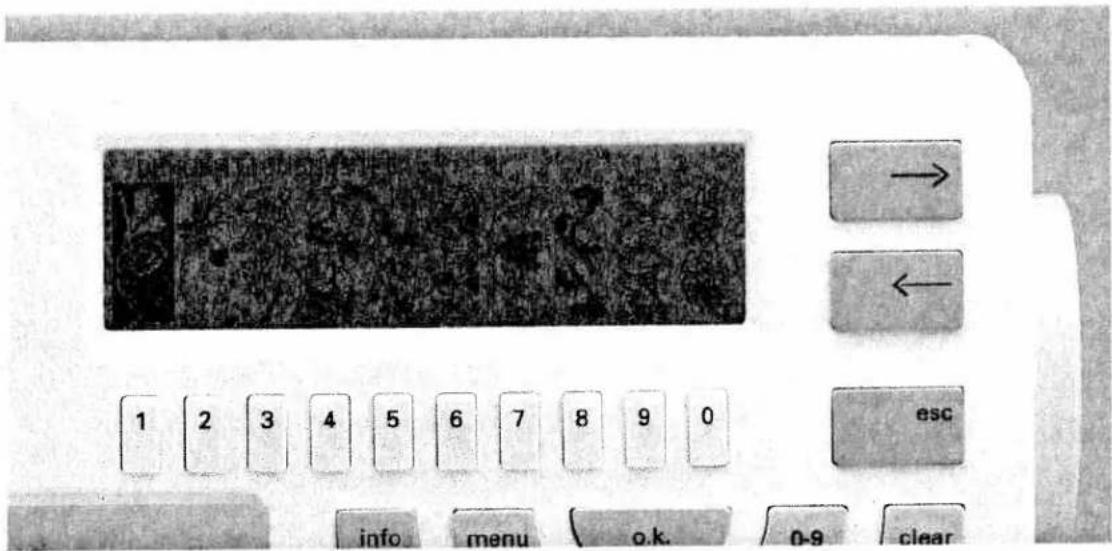
2= Kurspflichter 3= Festlandgaten 4= Verzschlag 5= Kreuzsliche → → ←
text_image
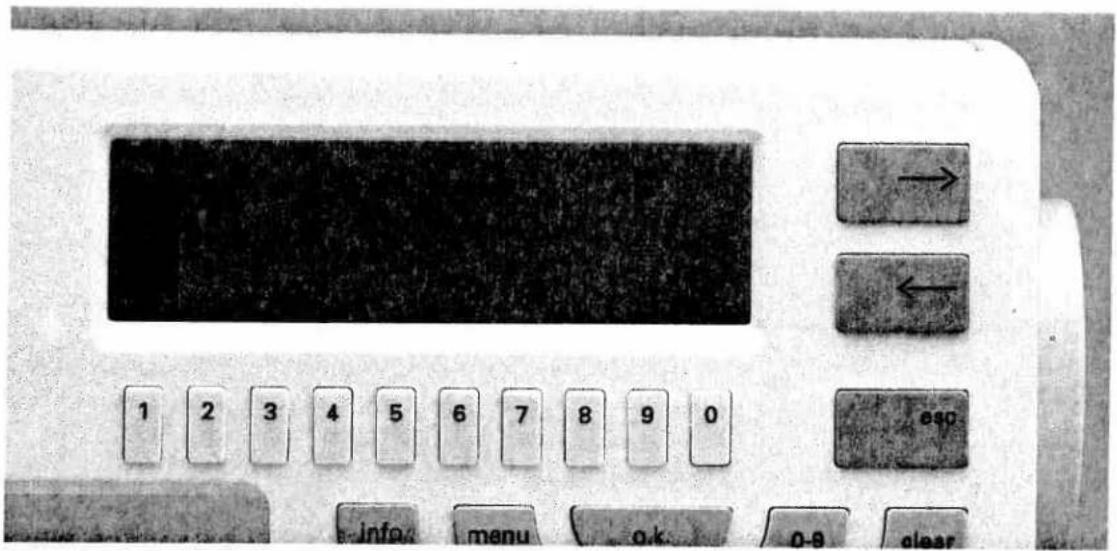
1 2 3 4 5 6 7 8 9 0 escc) Direct selection of pattern groups
With this pattern selection you can select a pattern according to pattern groups. Press key "0-9" and then the "info" key. 10 different motif groups appear in the display, which
can be selected with the corresponding keys "1-0".
text_image
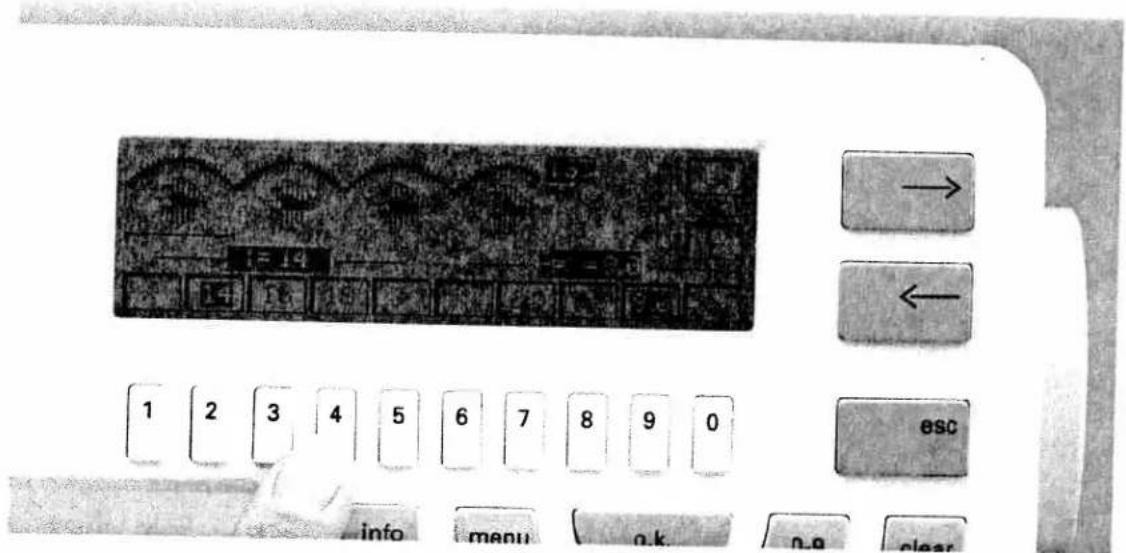
1 2 3 4 5 6 7 8 9 0 esc info menu o.k. 0-9 clearIf you select e.g. key "9" = "Decorative patterns", the corresponding patterns will be shown on the screen. The desired pattern can be selected with the key underneath it and can be sewn immediately. If you want to change the width and length settings, you must press the same key
again. The programming screen is displayed indicating the pattern and its settings for pattern width, length, and balance.

text_image
1 2 3 4 5 6 7 8 9 0 esc info menu o.k. o.e cleard) Selecting a group of 10 patterns
Enter a pattern of a group with keys "1-0" and press the cursor key. The group of 10 patterns containing the desired pattern is displayed. The pattern on the left is highlighted and can be sewn immediately. By pressing a key under-
neath another pattern, this pattern will be highlighted and ready to be sewn.
Example pattern Nr. 126.
Press key "0-9".
Enter 126 with keys "1-0".
Press cursor key "→". Now the group from 120 to 129 is displayed.
text_image
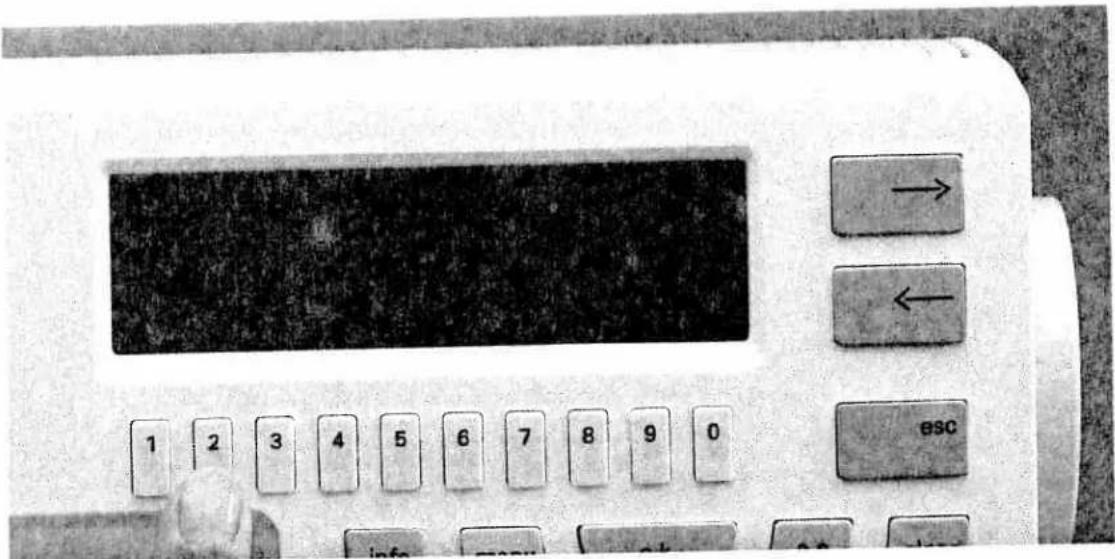
Cropped image of a computer control panel with labeled buttons and numeric keypad, showing navigation and function keys.Setting the pattern length
Example: Select pattern No. 163.
On the left-hand side below the pattern the symbol for pattern length is displayed along with the machine default setting of 14 mm. If you want to alter this setting, you can enter direct values by pressing number keys 2, 3 or 4.
These values are used most frequently, however, they can be reduced or enlarged with keys 1 under "<" and 5 under ">".
When changing the length setting the pattern on the screen is changed contemporarily so that you have an optical control over what you have changed.
text_image
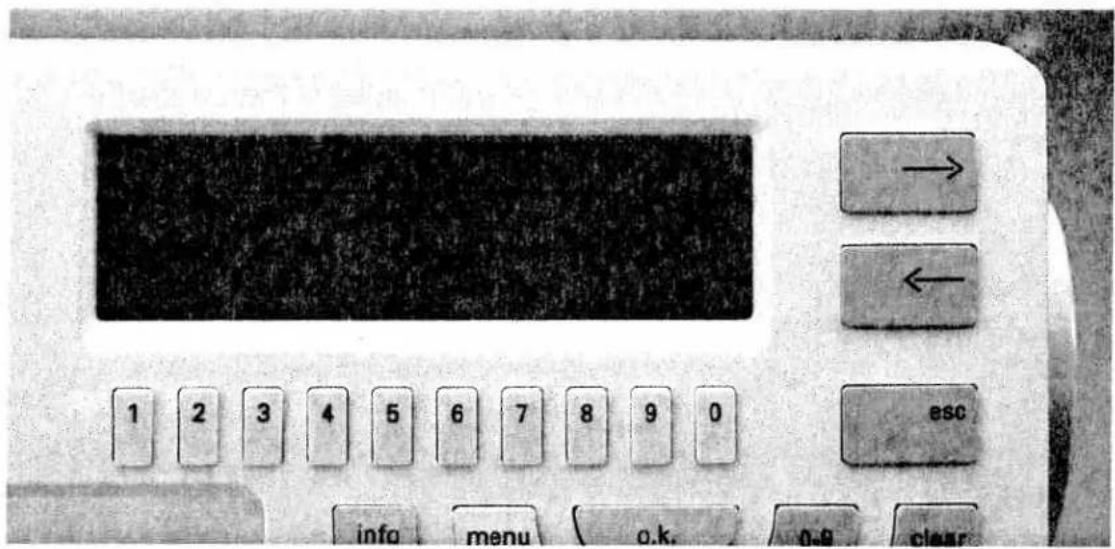
Cropped image of a computer control panel with labeled buttons and numeric keypad, showing navigation arrows and function keys.Setting the pattern width
On the right-hand side below the pattern the symbol for pattern width is displayed along with the machine default setting of 9 mm.
You can enter direct values by pressing number keys 7, 8 or 9 or reduce and enlarge these values with " >" or "<".
The pattern in the display is changed while carrying out the width adjustment.
text_image
Close-up of a hand pressing a button on a computer control panel with Chinese labels and numbersSetting the stitch density
Select e.g. number 65.
With the cursor keys it is possible to increase the stitch density of a pattern without altering the total pattern length.
On the right-hand side of the screen the symbol
for the stitch density is displayed along with the default setting of 0.35.

To increase use cursor key "→", to reduce use cursor key "←". This setting will also be visualized on the screen.
text_image
Close-up of a vintage computer control panel with labeled buttons and a hand pointing to the left button.Balance
For some patterns it is not possible to alter the stitch density. The following symbol will be displayed on the right of the screen:

In this case the balance can be altered (see page 59) instead.
text_image
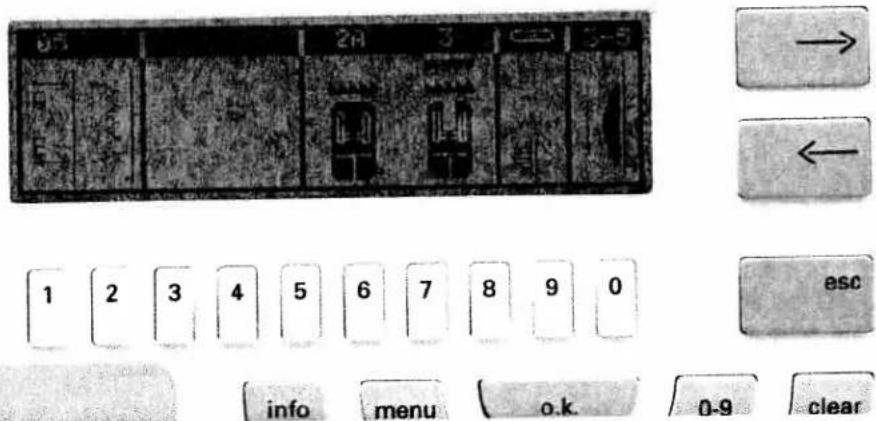
0-5 2H 3 ← 1 2 3 4 5 6 7 8 9 0 esc info menu o.k. 0-9 clearINFO
With the "info" key, you can call up the help file corresponding to any program. There are two types of help files: sewing recommendations and operational help.
Sewing recommendations
When you have selected a pattern directly it will be displayed in the programming screen. Now press the "info" key and you are given sewing recommendations for optimum sewing results. On the left-hand side of the display the pattern is shown in the direction in which it would be sewn by the machine. Pattern start and pattern end are marked by arrows. The areas next to this give information on the sewing feet to be used and on the Dual Feed, pattern mirroring and needle thread tension. As soon as the "esc" key is pressed, the sewing help switches off and the programming screen with the pattern settings is displayed automatically.
text_image
1 2 3 4 5 6 7 8 9 0 info menu o.k. 0-9 clearOperational help
For each function that can be activated with the pattern selection keys "menu", "A-z", "×", "m-p", "card" and "0-9", you can obtain information on the individual topics by pressing the "info" key. These details are operational guidelines and can be called up at any time. They describe the current program and provide help for continuing your work. If an arrow --> appears on the bottom
right-hand side of the display, the "info" key can be pressed again to obtain further information.
Press "esc" to return to the previous menu.
natural_image
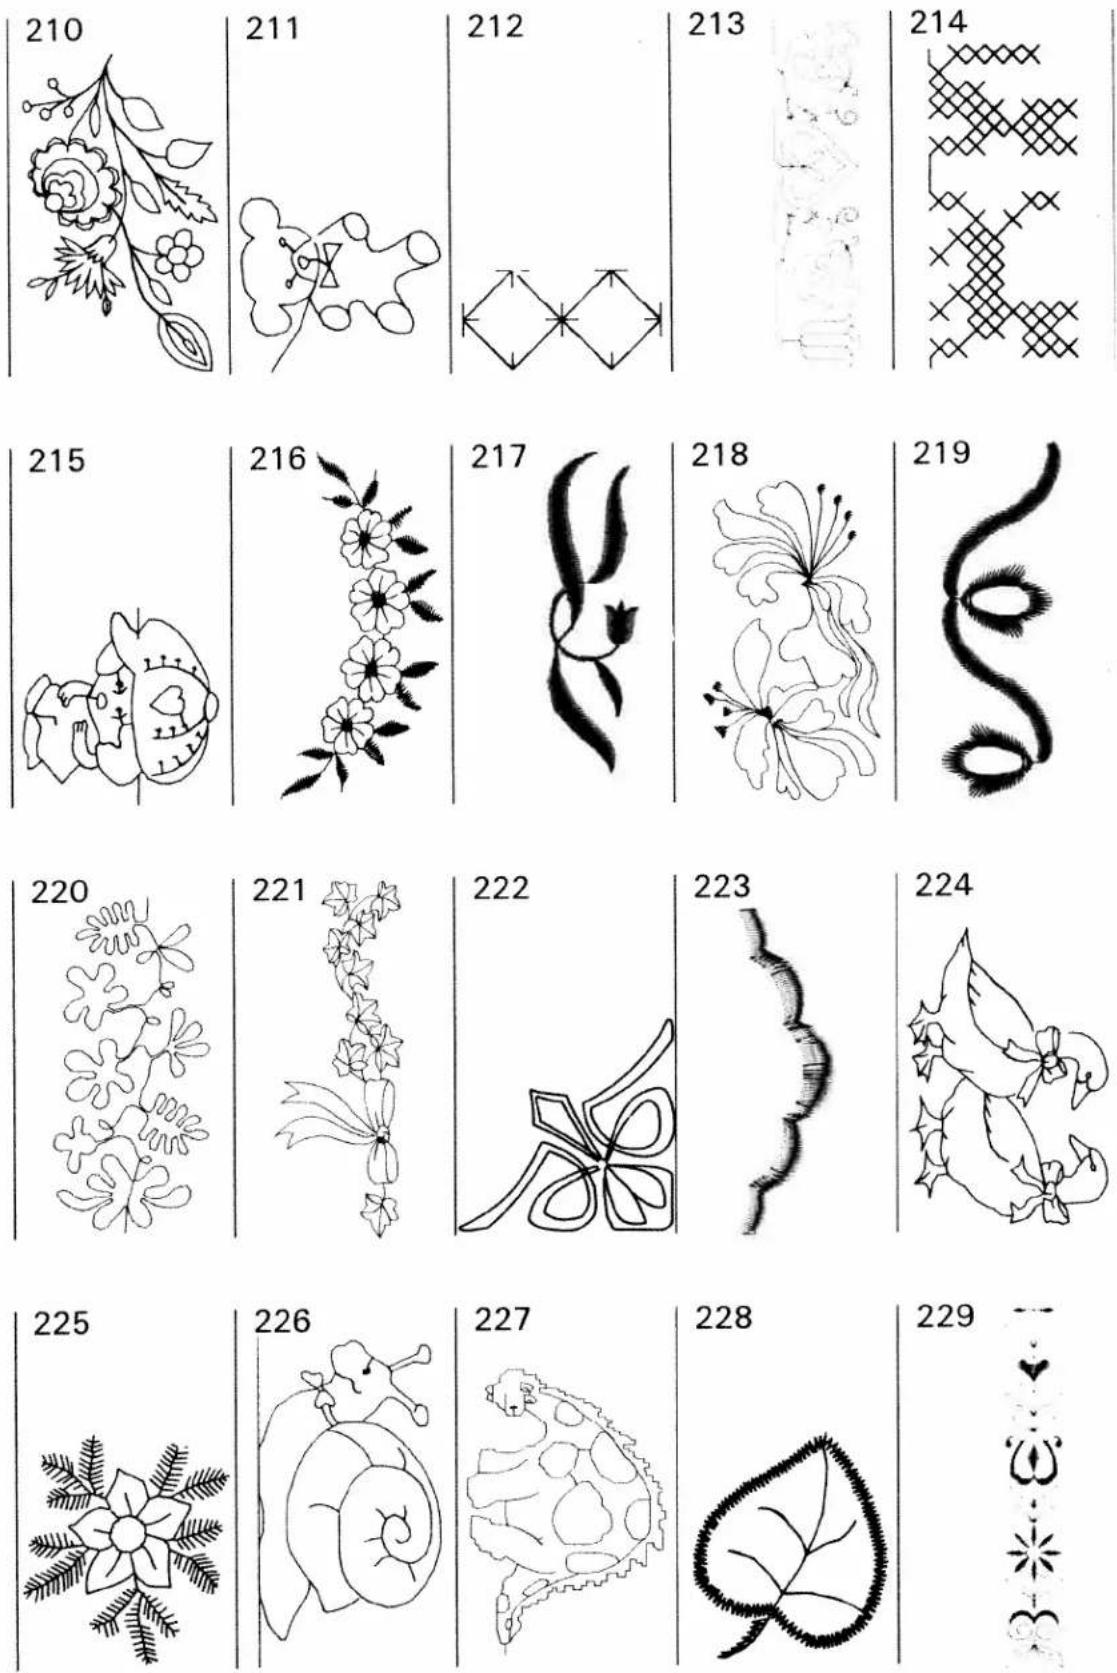
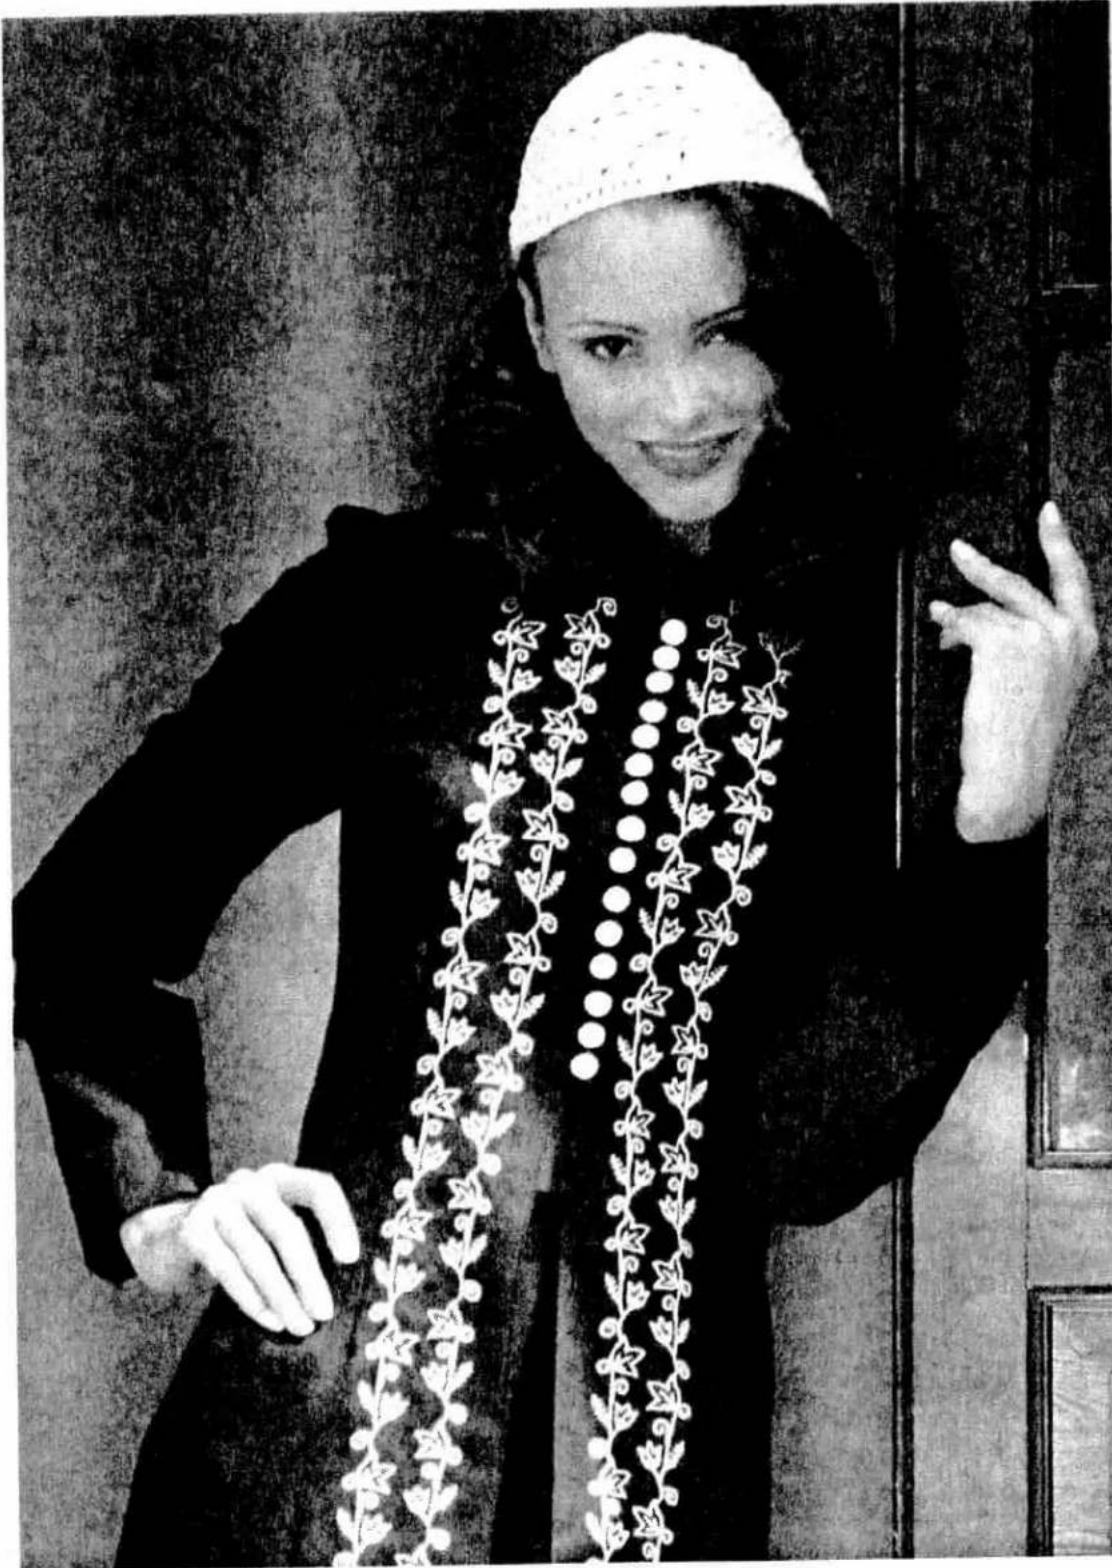
Black-and-white photo of a person wearing a white knitted hat and embroidered scarf, posing with one hand raised (no visible text or symbols)Maxi patterns (from the machine program)
There are 30 maxi patterns with numbers 200-229 at your disposal. These large-area embroidery patterns can be sewn with a width of up to 60 mm.
Moreover you can insert maxi design cards into the machine to enlarge the program. These cards contain 12 maxi patterns each.
text_image
1 2 3 4 5 6 7 8 9 0 info menu o.k. 0-9 clear → ← escIn order to select the maxi patterns you can use the cursor keys to scroll through all screen pages up to pattern 200, or you just press key "0-9". Now you can directly enter the desired pattern number with the number keys and confirm with "o.k.".
text_image
1 2 3 4 5 6 7 8 9 0 info menu o.k. p.o clear → ← escIf you press the "0-9" key and then the "info" key all available motif groups are listed on the screen. Press key "0" for maxi patterns and the first five maxi patterns will be displayed.
text_image
Close-up of a vintage computer control panel with labeled buttons and a hand pointing to the screen.You can scroll to the next patterns with cursor keys "→" and "←". By pressing a key underneath a pattern, the pattern will be highlighted which means that it will be ready to be sewn. If you press the key once again the pattern is shown as a continuous pattern along with the length, width
and correction settings (see section "Balance"). The length and width setting is carried out in the same way as for the 9-mm patterns.
natural_image
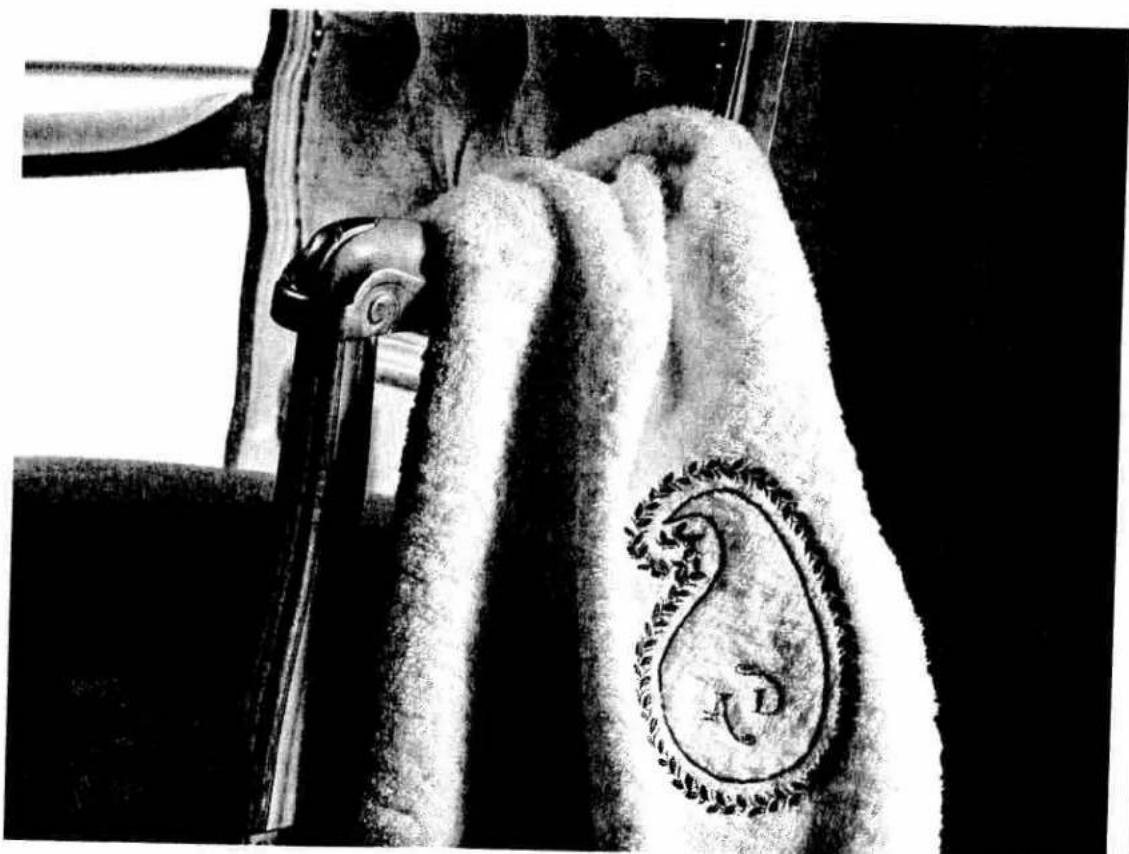
Black-and-white photo of a vintage mechanical device with fur-lined covers and a decorative emblem (no readable text or symbols)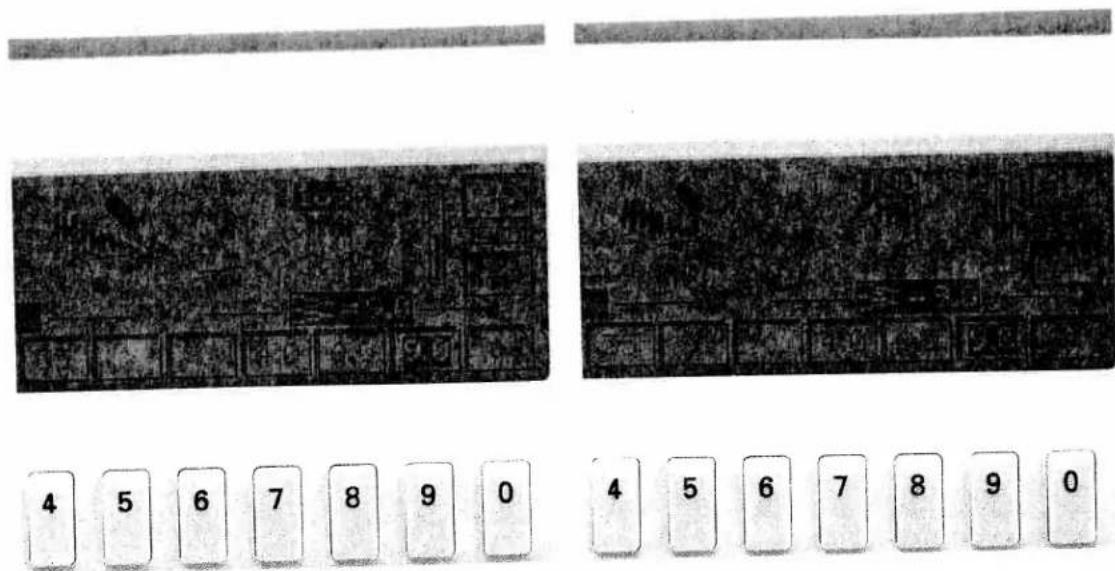
In the minus range, the reverse stitches become shorter. Patterns or programs are sewn in an extended fashion which stretches them.
In the plus range, the reverse stitches become longer. Patterns are sewn shorter and thus condensed.

text_image
Scanned document with two directional arrows pointing to text blocks, likely indicating movement or flow.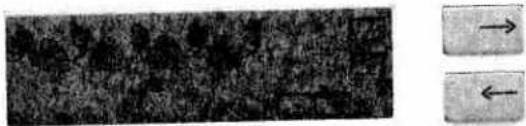
natural_image
Two rectangular buttons with arrows pointing to a textured, dark surface (no text or symbols)

text_image
1 2 3 4 5 6 7 8 9 0 esc info m o.k. 0-9 clear card m-p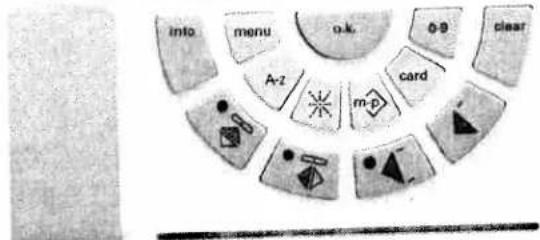
text_image
into menu o.k. φθ clear Ar2 m-p card2) Balancing maxi patterns - sideways correction
For maxi patterns not only the reverse feed but also the sideways feed can be adjusted. Select a pattern with number 200 or higher. On the right hand side of the programming screen the symbol "K" appears.
By pressing the cursor key a cross hairs appears on the screen.
The center of the cross hairs indicates the original position of the needle. Use the cursor keys "→" and "←" to determine the reverse correction, which is indicated on the axes of the bar cross and as numeric value "0-7" below symbols "+" and "-". For the sideways correction press key "8" underneath symbol "-" and key "9" underneath "+".

text_image
4 5 6 7 8 9 0This will move the line in the cross hairs to the left and right. The corresponding numeric value from "0-10" is indicated next to symbols "+" and "-". Confirm the setting by pressing "o.k.".
text_image
1 2 3 4 5 6 7 8 9 0 info menu o.k. A-2 m-p ca3) Correction of pattern and program combinations
Even pattern combinations that have already been saved can still be corrected using balance. In the p-memory (you need the additional Designer): As soon as the sewing screen is displayed, you will see on the right next to your draft an indicator scale for the reverse correction. Freely programmed 9-mm patterns can only be corrected with this balance.
text_image
1 2 3 4 5 6 7 8 9 0 Info menuIn the m-memory: As soon as the programming screen of an m-memory is displayed (see page 75), you will see the symbol "K" on the right hand side of the screen. By pressing key "0" underneath it you open the sub-menu. As long as you have saved only patterns with a width of up to 9 mm, the scale for the reverse correction will be displayed.

text_image
4 5 6 7 8 9 r info menu clearIf you have also combined maxi patterns in the sequence, the cross hairs are displayed when pressing key "O" underneath "K". The correction is carried out in the same way as for the maxi patterns.

text_image
BOWE DEBEN SIEVING REBEETMENT → ←
text_image
1 2 3 4 5 6 7 8 9 0 ESC


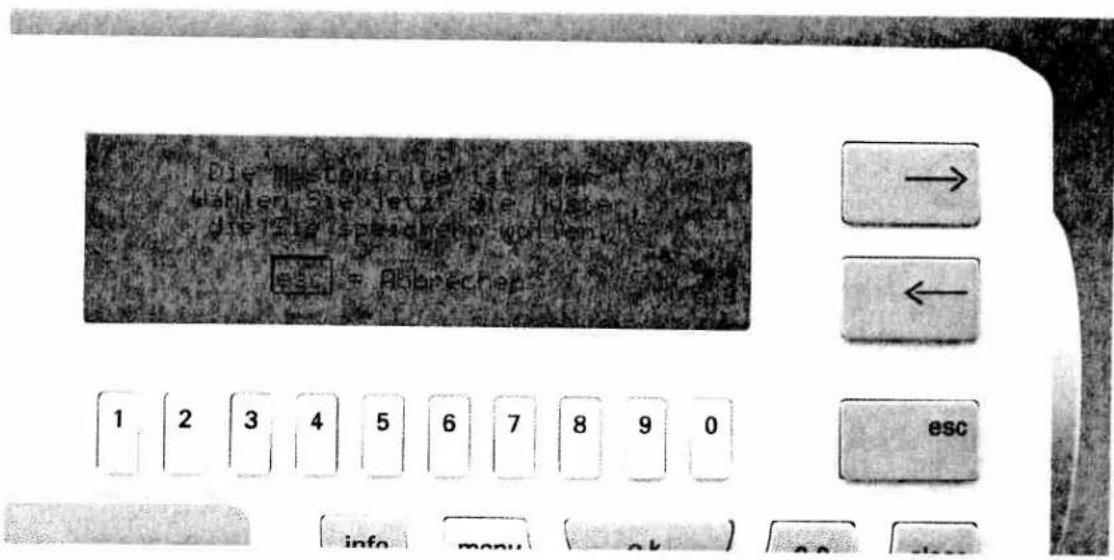
Activating the code
You can lock your creative 7570 (e.g. for child safety) by entering a numerical code. When entering the code for the first time, press the "info" key (21) and the master switch simultaneously.
The display shows the message:
"Please enter your code number"
* * * *

Press key "o.k." to confirm the input. The basic menu is displayed indicating that the code is saved in the machine memory. From now on each time the machine is switched on the following message will be displayed:
* * * *
"Please enter your code number"


text_image
Scanned text of a document with dense, low-resolution characters and possible OCR artifacts or low resolution.
text_image
Scanned text of a document with red handwritten annotations and a small logo or watermark.
text_image
1 2 3 4 5 6 7 8 9 0 info menu o.k. A-z ca
text_image
1 2 3 4 5 6 7 8 9 0 info menu o.k. m-pNow enter your combination. The numbers are not displayed, the symbol “*” simply changes to “+”.
If the correct code has been entered, the message appears:
"o.k." = continue
"esc" = delete code
"info" = change code
If the code entered is not correct, the message appears:
Wrong code! Machine locked.
In this case you must switch the machine off and on again. Now enter the correct combination.
text_image
Scanned text of a document with fragmented and low-resolution characters, possibly from a scanned or low-resolution document.


text_image
info menu o.k. A-zAs soon as you press the "o.k." key, the sewing machine switches to the basic menu and is ready to sew.
To delete the code, press the "esc" key. The machine switches to the basic menu and is ready to sew. The next time the machine is switched on, no code query is displayed.

natural_image
Grainy black-and-white textured surface with no discernible text, symbols, or structured elements.


text_image
info menu o.k. A-z m-pIf you wish to change the code, press the "info" key. The message
Enter your code number
* * * *
appears in the display. Having entered the new code, press "o.k.". The machine switches back to the basic menu.
Pattern combinations
Utility stitches
nonholes
Accessories and needles
Traditional
embroiden
Pattern combinations
Utility stitches
Accessories and
Traditional embroidery techniques

text_image
Si For The The As cov The or The or Cur mu On mu Thi sul PlePattern combinations
Pages 69-96

ALL
OVER
The
JNOROL
Contents
| Alphabets/monograms | Pages 72–74 |
| Changing the letter width | Page 73 |
| Switching from upper to lower case letters | Page 74 |
| M-memory | Page 75 |
| Creating a letter sequence | Pages 75–77 |
| Pattern sequences | Pages 78–80 |
| Symbols in the pattern sequence | Pages 81–84 |
| Correction of pattern sequences (deleting, inserting) | Pages 78/82–8386–88 |
| Maxi stitch combinations | Pages 83–84 |
| Cursor function | Pages 85–87 |
| Eight-way feed stitches (connecting stitches) | Pages 88–93 |
| Creative card | Pages 94–96 |
text_image
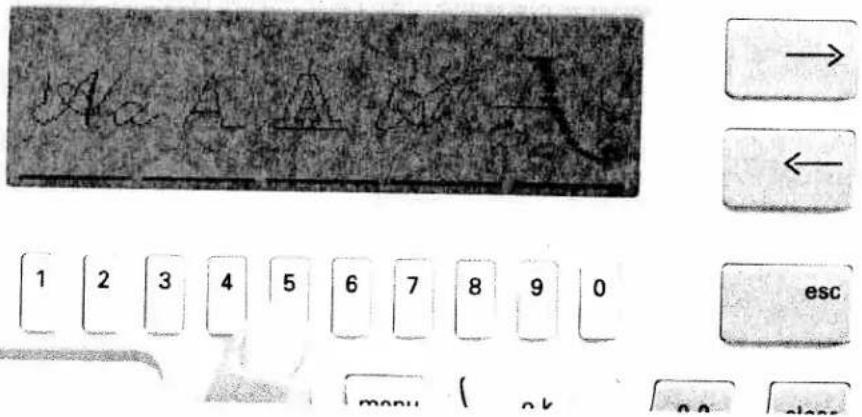
→ ← 1 2 3 4 5 6 7 8 9 0 esc info menu o.k. 0-9 clearAlphabets/monograms
When pressing key "A-z", five types of alphabet appear in the display: script letters in upper and lower case, block letters, the outline alphabet and a monogram alphabet in lower case. These styles can be sewn with a pattern width of up to 9 mm. Moreover they can be combined as word sequences in the m-memory.
The monogram on the right side of the screen is a crosswise feed pattern with a sewing width of 15 or 18 mm. The individual letters are always sewn as single pattern and word sequences in the m-memory are, therefore, not possible for this monogram style. As a consequence they are not displayed either.
text_image
→ ← 1 2 3 4 5 6 7 8 9 0 esc menu < ok no classSelecting a style
Below each alphabet style you will see a line on the display covering two numbered keys each. Select the desired alphabet style by pressing either of the two keys.

text_image
1 2 3 4 5 6 7 8 9 0 esc info menu o.k. 0-9 clearA menu appears on the screen with the letters of the alphabet, the numbers 0-9, punctuation marks such as full stop, comma, hyphen, and several special marks.
After selecting an alphabet style the letter "A" is automatically activated and can be sewn straight away. Any other letters have to be selected with
the numbered keys below the arrows. For confirmation, press the "o.k." key.
text_image
1 2 3 4 5 6 7 8 9 0 info menu o.k. 0-9 clearLetter width
To change the letter width press key "9". A menu appears on the screen displaying different stitch widths which can be selected by pressing the respective keys underneath.
By pressing the "o.k." key, the selected stitch width will be saved and you will return to the letter menu.
text_image
1 2 3 4 5 6 7 8 9 0 esc info menu ok 0.9 clearSwitching from upper case to lower case letters in the script alphabet
The script alphabet can be sewn in upper and lower case letters. By pressing the "A-z" key all alphabet styles appear on the screen with lines covering two keys each.
Select monogram style "A-a". The menu containing the full alphabet appears.
text_image
1 2 3 4 5 6 7 8 9 0 info menu → ← ESC A-0 clearThen press the "0" key. It is located below the description "A-a" and lets you switch from upper to lower case letters. Select the desired letters as described on the previous pages.
text_image
→ ← ESC 1 2 3 4 5 6 7 8 9 0 info → →M-memory
In order to create a pattern sequence, several letters must be combined in an M-memory. There are 32 M-memories at your disposal (M0 -M31). Up to 85 patterns can be programmed in each pattern sequence.
After pressing the "m-p" key (16), the message appears in the display:
Please select:
1 = Memory for self-programmed patterns (P-memory)
2=Memory for pattern sequences (M-memory)
Select "2" for M-memory by pressing the corresponding number key.

text_image
Close-up of an electronic device control panel with labeled buttons and a digital display screenCreating a word sequence in the M-memory
Below the description "M" and the number of the memory the key symbols "-" and "+" are indicated. By pressing these keys select a free memory (in this case M1). The selected memory is highlighted and must be confirmed with "o.k.".
After you have confirmed with the "o.k." key this message appears on the display:
The pattern sequence is empty...
"esc" = abort

text_image
Control panel interface with labeled buttons and numeric keypad, showing navigation and function keysTo this end press the "A-z" key. Select the desired alphabet with the keys below it and enter the required letters using the number keys.
Press the "o.k." key after each letter selection to confirm your choice.

text_image
Close-up of a hand pressing a button on a computer keyboard, showing numeric keypad and navigation buttons with arrows.Deleting and inserting letters
With the cursor keys "←" and "→" you can make changes in an already entered text. Using the cursor keys select the letter to be corrected. This letter will be highlighted and can be deleted with the "clear" key.
If you select another letter and confirm it with "o.k." it will be inserted right in front of the deleted one.

text_image
Digital calculator interface with numeric keypad and navigation buttonsBy pressing the "m-p" key (16) the word sequence will appear on the screen and will be saved. Press the key with the symbol "☐" if you wish to sew the sequence.
The stitch width set for the first letter will apply to all further letters in the sequence. In any case, the stitch width has to be changed before saving the sequence.
text_image
1 2 3 4 5 6 7 8 9 0 escDeleting letters within a pattern sequence
If you have already pressed key "m-p" (16) and you are in the pattern sequence screen, a correction can be carried out with the function "m-".
Place the cursor right in front of the letter to be deleted. By pressing number key 4 for symbol "↓" the letter is deleted (also see Pages 85-86).

text_image
Control panel interface with labeled buttons and numeric keypad, showing navigation and function keysPattern sequence
If you wish to create a pattern sequence form the different patterns of the machine, you must select a free M-memory (see Page 75). Then press key "0-9". The following message is displayed on the screen:
"Pattern No.: 0"
Keys "←→": Scroll through patterns
"info" key: Selection by motifs
text_image
1 2 3 4 5 6 7 8 9 0 info menu o.k. 0-9 clear → ← escNow enter, say, pattern number 162 via keys "1-0". Then confirm with "o.k.".
text_image
Close-up of an electronic device control panel with labeled buttons and a digital display screenNow you are in the programming screen. In the top right-hand side of the screen the pattern number and number of the selected memory are displayed, and below it the message appears: "Press "o.k." to save".

text_image
162 → 1 Speichem mit vol 1=10 3=90 6.0 7.5 8.0 9.0 10 < 6.0 7.5 9.0 > → ← 1 2 3 4 5 6 7 8 9 0 esc info ( n.k ) n.q clearChanging stitch length and width
The stitch width and stitch length can be changed by pressing the keys "1-0" underneath the screen before saving the pattern sequence.
text_image
Keyboard layout diagram with labeled keys and navigation buttons, including 'esc' and 'clear' optionsThen confirm by pressing the "o.k." key.
The selected pattern is displayed. Select the next pattern with key "0-9" again and proceed in the same manner. This way you can combine up to 85 9-mm patterns or maxi patterns in one memory.

text_image
1 2 3 4 5 6 7 8 9 0 esc info menu o.k. 0-9 clear A-z card m-pSymbols of the pattern sequence
You can edit a pattern within a pattern sequence using the following symbols:

Pressing the key below it you will return to the beginning of the pattern sequence. You can add a new pattern to the beginning of the sequence.

Pressing the key below it you will move to the end of the pattern sequence. You can now add a pattern at the end.

Deleting a pattern with the following functions:

With the key "4" you can delete the pattern which follows directly after the current cursor position.

Deleting the entire sequence: If you press the key under this symbol, the message appears: "Deleting entire sequence?".
Confirm by pressing the "o.k." key or abort by pressing "esc".
? When you select the key below the question mark, a window appears in which the cursor position and the number of entered patterns are displayed. By adding a maxi pattern the pattern width will also be displayed.
- The figure above the cursor shows the position of the cursor; the figure below it describes the pattern number or p-memory number in front of and behind the cursor. Monograms and alphabets are not displayed.
- The mm indication at the left arrow represents the pattern width starting from the stitch point.
- The mm indication at the right arrow of the pattern shows the maximum width of a maxi stitch.
- Pressing the "esc" or "o.k." key, you will quit this screen.
Now press the key below the "sewing machine" icon and your sewing machine is ready to sew.
text_image
1 2 3 4 5 6 7 8 9 0 esc info menu o.k. 0-9 clear A-z card m-pSymbols in the sewing screen
You will find the following symbols in the sewing screen:
"edt"
Pressing the key below it will bring you to the programming screen, where you can insert, add or delete patterns (see section "Cursor").
This symbol indicates that you can load the pattern sequences from the M-memory of the machine onto a Creative card (see Page 94).
This symbol represents the stitch density. By pressing key "9" below it the display shows:

You can increase or decrease the stitch density using the keys located below "-" and "+". Pressing the "o.k." key will bring you back to the sewing screen.
Symbol "K"
Pressing the "K" key will open another menu. Using the cursor keys you can correct the pattern (see section "Balance"). Pressing the "o.k." key will bring you back to the sewing screen.
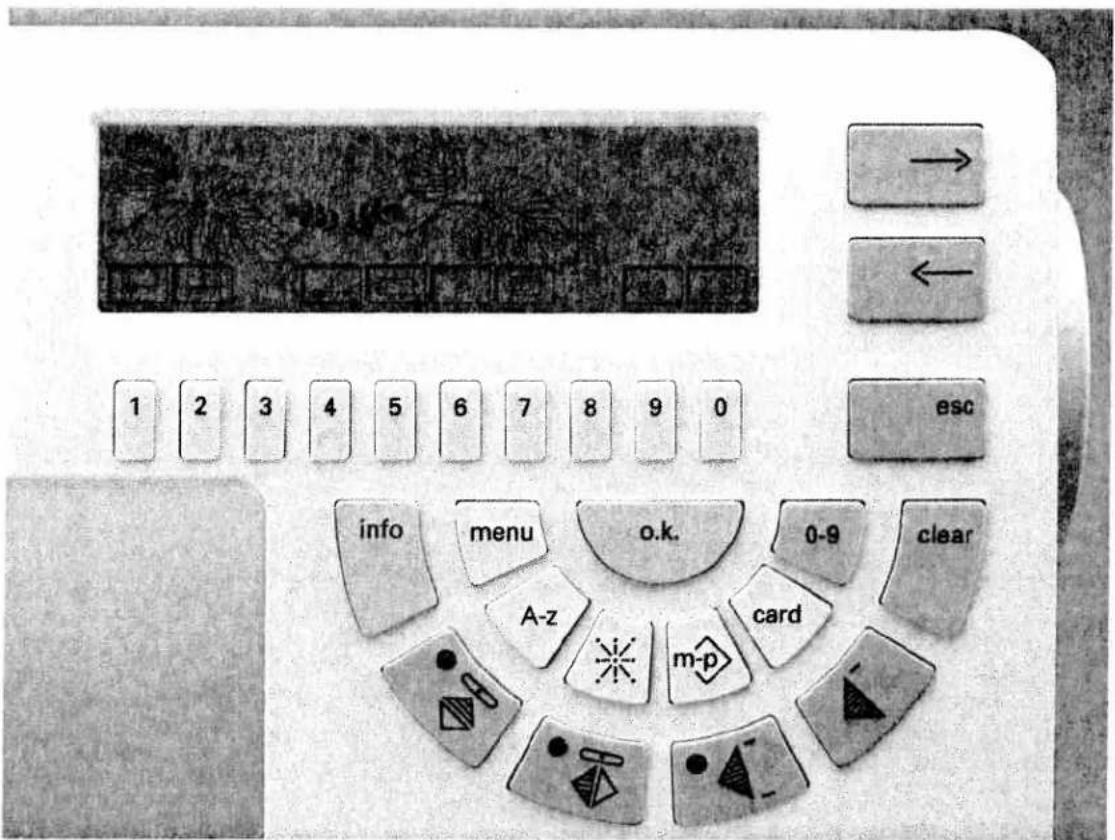
text_image
1 2 3 4 5 6 7 8 9 0 info menu o.k. 0-9 clear A-z card m-pWhen you combine maxi patterns in a sequence, in the programming screen you will see the symbols "zo" and "ZO" besides the icons described before.
By pressing the keys underneath you can reduce or enlarge (zoom) your saved pattern sequence. The pattern zooming is only a visual aid and has no influence on the sewn pattern.
If you wish to return to the originally displayed size of the pattern sequence after zooming it a few times, press the key below "ZO" several times. Pressing the key below "☐" you will return to the originally displayed size immediately. Then the sewing screen will be displayed.
Pressing the "edt" key will bring you back to the programming screen, the originally displayed size, however, remains.
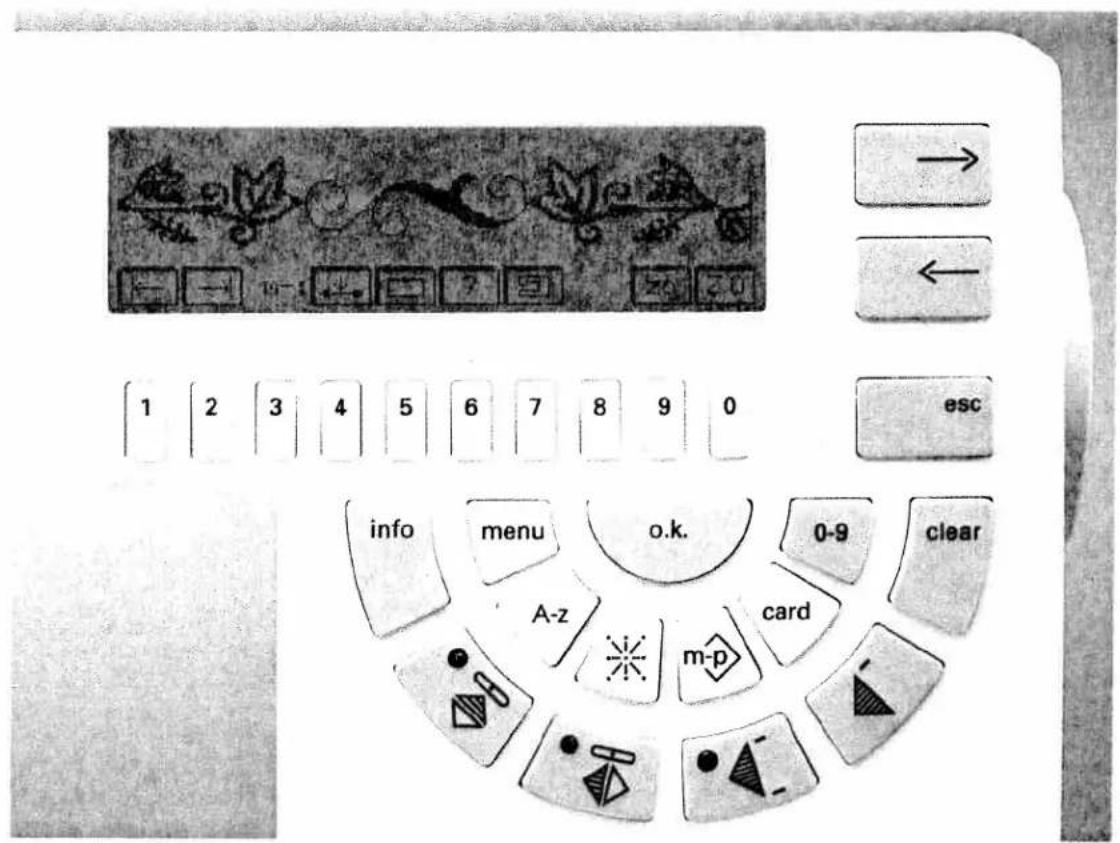
text_image
Diagram of a computer keyboard layout with labeled buttons, keys, and function keys in English and Chinese.Pattern sequences consisting of maxi patterns from Design Cards
Within an M-memory, pattern sequences can be created not only from the machine's maxi patterns but also from the maxi patterns of the Design Cards (see Page 60).
To this end select a free M-memory and open it by pressing "o.k.". Insert a Maxi Design Card in slot (47) on the machine and press the "card" key (14).
Select the desired pattern with the corresponding key. It will be highlighted. Confirm with "o.k."; the memory screen will be displayed. On the right hand side of the display you will see the message "Press o.k. to save".
Width and length can be changed before entering the pattern. After that press "o.k." to confirm. The pattern will appear in the programming screen. The next pattern is selected with the "card" key (14) again. The proceed in the same manner.

text_image
1 2 3 4 5 6 7 8 9 0 info → ← escDeleting/Inserting a pattern within a sequence
If you wish to delete or insert a pattern within a sequence, or check it, you need to use the cursor. When selecting a pattern within a pattern sequence the cursor is always positioned at the beginning of the sequence. Using the cursor key "←" you can move the cursor to the beginning of the sequence.
For all 9-mm patterns the cursor has the shape of an interrupted line. When adding or inserting a maxi pattern, the cursor appears in the form of a cross hairs. If you wish to delete or insert a pattern, use key "7" below "edt".
Now the cursor is positioned at the end of the pattern sequence.

text_image
Close-up of a vintage computer calculator with labeled buttons and a hand pointing to the function.Then move the cursor to the place where you want to delete or insert a pattern using the cursor keys "→" and "←".
text_image
53 >M 4 Speichern mit "ok" 1=18 ≡9.0 < 10 18 30 > < 4.0 6.0 9.0 > 1 2 3 4 5 6 7 8 9 0 esc info menu o.k. 0-9 clearInserting a pattern
Press teh "0-9" key and enter the number of your desired motif using the "1-0" keys. Confirm with "o.k.".
On the screen the message appears: "Store by pressing "o.k.". Press the "o.k." key. The new pattern will then be inserted into your sequence.
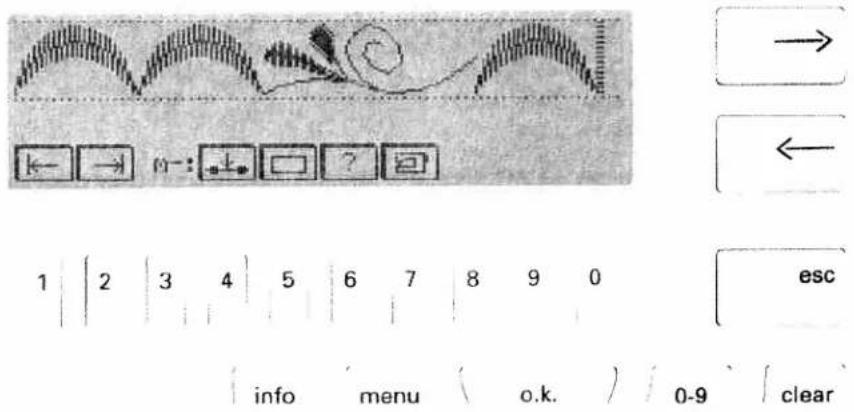
text_image
Diagram showing waveform and navigation controls with labeled buttons and a numeric keypad below, including 'esc' and 'clear' options.Deleting a pattern
If you wish to delete a pattern from a sequence, press key "7" below "edt". Using the cursor keys you can move the cursor to the left of the pattern to be deleted.
text_image
1 2 3 4 5 6 7 8 9 0 esc info menu ok app closeNow press key "4" below "↓" (delete pattern). The pattern will be deleted.
text_image
Close-up of an electronic device control panel with labeled buttons and a central display screen showing text.Select key "7" below". Your sewing machine is now ready to sew.

natural_image
Black-and-white illustration of two decorative pouches with floral patterns and a central label 'Lavendel' (no other text or symbols)Eight-way feed stitches
With the eight-way feed stitches or connecting stitches you can sew embroidery and utility stitch programs into different directions. By shifting the patterns, new shapes and large-area embroidery motifs will be created. The connecting stitches are stored in the sewing machine computer as crosswise, lengthwise and diagonal programs. You may have to use several connecting stitches to visually separate patterns from each other, e.g. 6 diagonal stitches for 9-mm patterns. Pattern start and end are particularly important when combining a pattern with connecting stitches. The connecting stitches are always sewn from the pattern end in the direction chosen, and continue from the last connecting stitch to the pattern start of the next embroidery program. You can achieve the most beautiful results if the connecting stitches are overstitched by the course of the pattern. It is much easier to create a pattern combination with connecting stitches if you mark the desired pattern on the fabric first, divide it into embroidery patterns and connecting stitches and enter them into a memory.
text_image
1 2 3 4 5 6 7 8 9 0 esc info menu o.k. 0-9 clearEight-way feed stitches
Example: Press the "m.p." key and key "2" for M-memory. On the screen the M-memory directory appears. Select an empty M-memory and confirm with the "o.k." key. On the screen the message appears:
"Empty pattern sequence ..."

text_image
Control panel interface with labeled buttons and a numeric keypad, showing navigation arrows and function keys.Now press the "0-9" key. Enter the desired pattern number, e.g. 53, and confirm it with the "o.k." key. The motif appears on the screen. Save the pattern by pressing the "o.k." key.

text_image
1 2 3 4 5 6 7 8 9 0 esc
natural_image
Uniform gray textured surface with no visible text, symbols, or distinct features
text_image
info menu o.k. 0-9 clear A-z m-p card
natural_image
Close-up of a textured, elongated surface with no visible text or symbolsNow press key "※" (18).
Eight arrows appear on the display representing the different sewing directions.
Press the key for the desired direction (for our example key "6"), and a sub-menu will appear. The selected direction will be highlighted. The top menu bar shows four additional options within this stitch direction. These can be selected using keys "9" and "0".
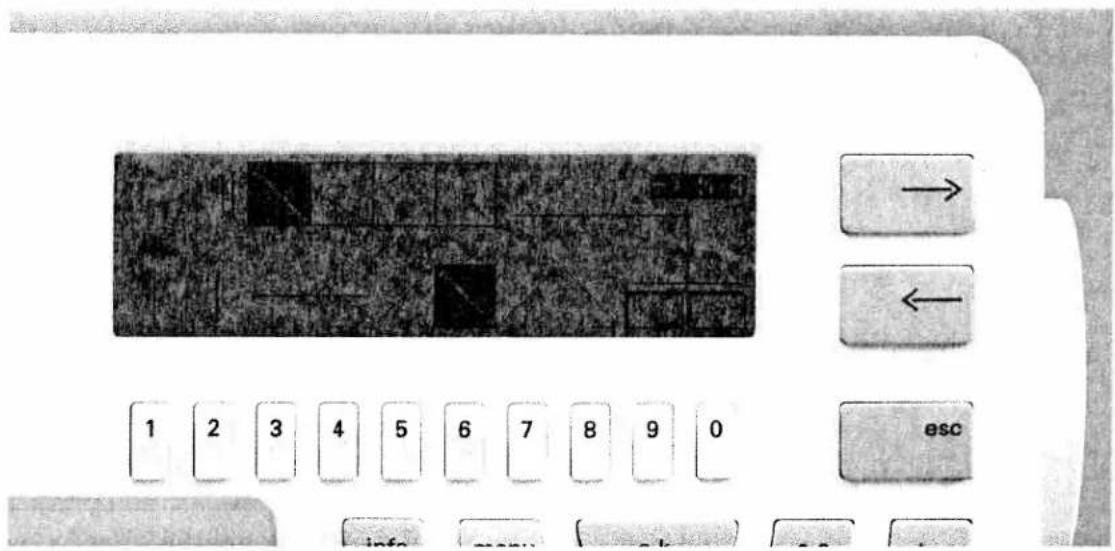
text_image
Digital display panel with navigation buttons and numeric keypad, showing a grid of keys and an 'esc' button.You can now save the connecting stitches using the "o.k." key. For our example, six stitches of the selected direction will be entered into the memory, i.e. you must press "o.k." six times.
Press the "0-9" key again. Enter the embroidery pattern again, and save it to the memory by pressing the "o.k." key.
Select the connecting stitches by pressing the "※" key, choose a direction and save it by pressing the "o.k." key.

natural_image
Three identical wavy black lines on a textured gray background, no text or symbols present.Continue in this manner until your pattern has been completed. Our example consists of:
53/10x direction 6
53/10x direction 6
53/10x direction 7
53/10x direction 7
This way, you can create a continuous embroidery pattern. If you wish to close up your pattern, add another pattern 53 at the end.
Press the key underneath "☐". Now you motif is ready to be sewn.

natural_image
Decorative line drawing of lotus flowers in a horizontal row (no text or symbols)Example No. 1:
1 x No. 139
5 x ↗
1 x No. 139
5×
1 x No. 139
5 x √
1 x No. 139
5 × √
natural_image
Decorative border pattern with repeating floral motifs and scrollwork (no text or symbols)Example No. 2:
1 x No. 138
6×
1 x No. 138
6×
1 x No. 138
6×
1 x No. 138
6×
natural_image
Decorative pattern with repeating floral motifs and small animal figures (no text or symbols)Example No. 3:
| 1 x No. 162 |
| 2 x ↑ |
| 4 x ↙ |
| 1 x No. 162 |
| 2 x ↑ |
| 4 x ↙ |
| 1 x No. 162 |
| 2 x ↓ |
| 4 x ↙ |
1 x No. 162
2×↓ 4×
Leaves: No. 190
Pattern length: 20
Pattern width: 6.0
Press key "Single pattern"
Bells:
- Select memory
- Enter by pressing "o.k."
• No. 166 without pattern inversion - Enter by pressing "o.k."
- No. 166 "Pattern inversion/lateral mirroring"

natural_image
Decorative floral border with ribbon and star motifs (no text or symbols)Example No. 4:
| 1 x No. 221 |
| 2 x ↑ |
| 4 x ↙ |
| 1 x No. 138 |
| 5 x ↙ |
| 1 x No. 138 |
| 2 x ← |
| 1 x No. 138 |
| 5 x ↙ |
1 x No. 138
4×
2×
1 x No. 221 "Pattern inversion/lateral mirroring"
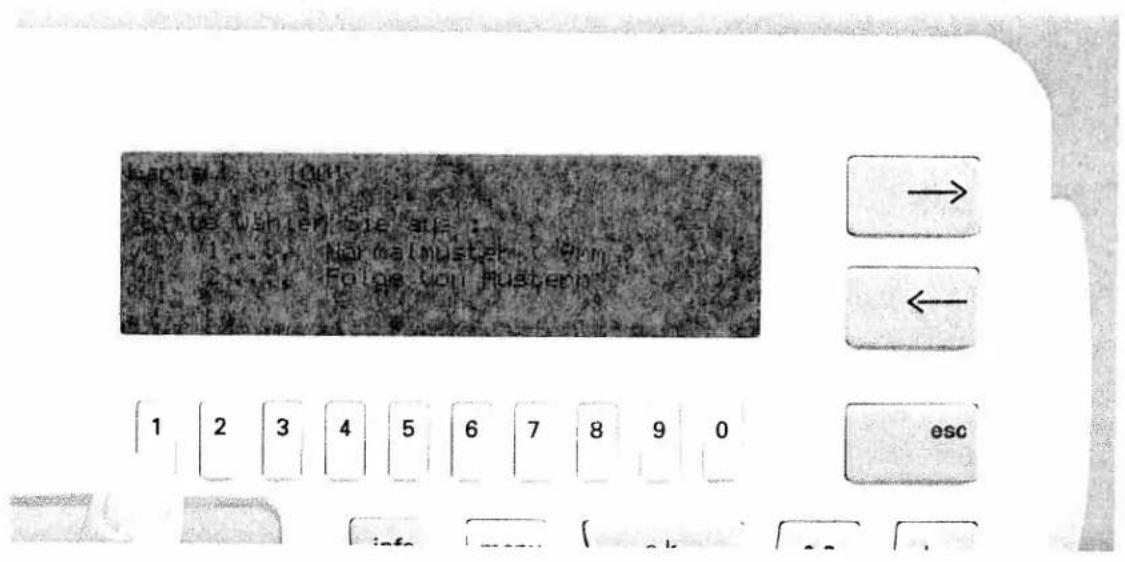
The Creative allows you to save up to 32 pattern sequences (9-mm patterns or maxi patterns), eight-way feed stitches, self-created patterns from the Designer (see Designer Instructions, page 47), and up to 56 embroidery patterns from the embroidery device on the "Creative card". This ensures that the patterns you have created yourself are saved for good. This way you can delete M and P-memories to make room for new patterns without having to fear the loss of a single pattern or pattern sequence.
A number must be assigned to each new "Creative card". This number must be entered since the
machine recognizes the card by its number. Never assign a number twice. Write the number onto the card's label for your information.
When inserting a Creative card in the slot which contains already some patterns, a menu with the stored pattern types is displayed, e.g.:
1... Normal patterns (9 mm)
2...Pattern sequence
In this case you must select the desired pattern type by pressing the corresponding number key.
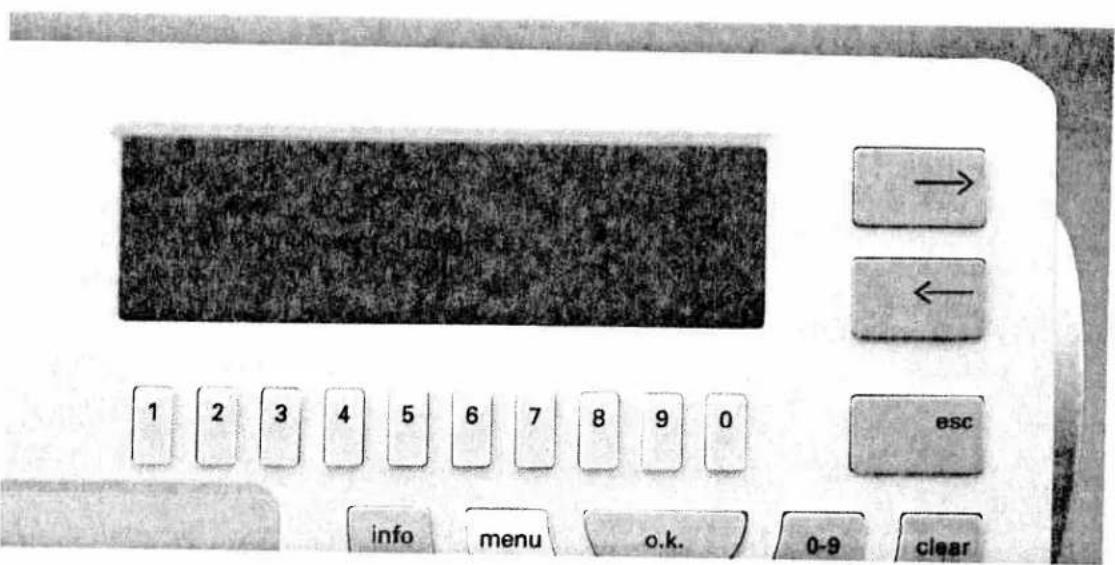
text_image
→ ← 1 2 3 4 5 6 7 8 9 0 esc info menu o.k. 0-9 clearAssigning numbers to Creative cards
Insert a Creative card in slot (47). Press the "card" key (14) on the sewing machine.
The display shows:
"Card number 1000+"
Now enter a figure with the number keys (7), e.g. 1 and press "o.k.". The new card number appears on the display, 1001 in our example, together with the query o.k.?
By pressing the "o.k." key again, the number is saved. The display shows:
Card 1001
The card is empty
Press "clear" to change the card number.
If you wish to change the card number, delete the figure last entered with clear key (10) and enter a new number.
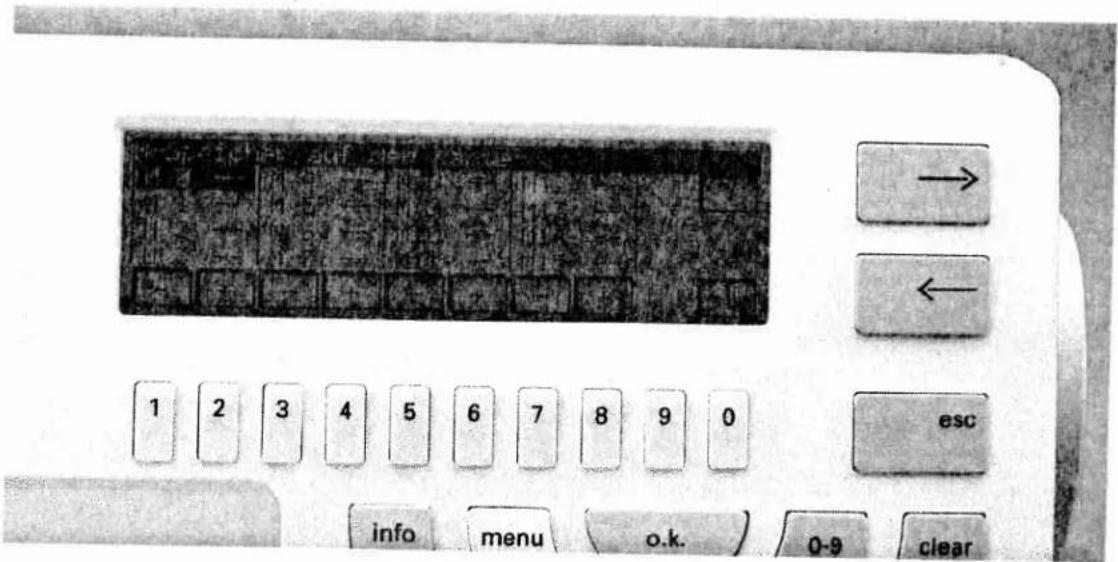
text_image
→ ← 1 2 3 4 5 6 7 8 9 0 esc info menu o.k. 0-9 clearSaving an M-pattern or a pattern sequence on the "Creative card"
After selecting an occupied M-memory the selected pattern appears on the sewing screen. By pressing the key underneath "card" the M-memory of the card will be displayed.
Select an empty M-memory and confirm by pressing "o.k.". The pattern sequence and the message "o.k." appear on the display. As soon as "o.k." has faded away, the pattern sequence is saved on the "Creative card".

text_image
1-Spischer M 0 -9 M 1 - M S - | M12 - | M 1 - | M 5 - | M 9 - | M13 - | M 2 - | M 6 - | M10 - | M14 - | M 3 - | M 7 - | M11 - | M15 - | + + + + + + + + → ← 1 2 3 4 5 6 7 8 9 0 esc info menu o.k. 0-9 clearSelecting a pattern from the Creative card
A pattern or a pattern sequence cannot be sewn straight from the "Creative card" but must be loaded first into an empty M-memory of the machine.
To this end press the "card" key (14) on the machine. The M-memories of the card are displayed. Select the desired M-memory and confirm with "o.k.".
The M-memories of the machine are displayed. Select an empty memory and confirm with "o.k." The pattern and the message ok are displayed. As soon as the message has faded away the pattern is ready to be sewn.

text_image
Der M-Speicher wird geldescht, OK? 1 2 3 4 5 6 7 8 9 0 esc info menu ( o.k. ) 0-9 clearDeleting a pattern from the "Creative card"
If you wish to delete a pattern from the "Creative card", press the "card" key (14) on the sewing machine. The screen will show the m-memories of the card, or a menu in case the card does not only contain patterns or pattern sequences. If a menu is displayed, select the required item with the number keys, e.g. "Pattern sequence".
If there is no menu, select the M-memory directly. The symbol "clr" appears on the right-hand side of the display. If you press number key 0 for clr, the query
"Deleting the M-memory" ok?
is displayed.
If you confirm by pressing "o.k.", the memory will be deleted.
If you press the "esc" key, the deleting procedure will be aborted.
Utility stitches Buttonholes
Pages 97-136
Utility stitches
Accessories and
aditional

natural_image
Black-and-white photo of a woman in a white shirt and black vest with star patterns, holding an object (no text or symbols visible)Contents
Utility stitches
Buttonholes
Sewing feet
Needle chart
Pages 101–121
Pages 122–136
Pages 137–152
Pages 152–153
text_image
suf Ple
natural_image
Blank white image with a vertical dotted line across the center (no text or symbols)Straight stitch
Program 00 is the basic straight stitch with center needle position. The stitch length can be increased up to 6 mm as required. Some sewing jobs can be done more easily by changing the needle position, e.g. topstitching a collar or sewing in a zipper. With keys 7, 8 and 9 you can select the Creative's 19 needle positions. When doing so make sure that the needle is in the highest position.

natural_image
Pure diagram of a rectangular panel with internal lines and dots, no text or symbols presentBasting stitch
With program 07 you can baste a garment before trying it on. When you press the foot control the machine will only make one stitch. For each further stitch you have to press the foot control each time.
- Lower the bottom feed and disengage the top feed.
- Place the fabric under the sewing foot.
Programmable seam length for straight stitch Program 00
If you wish to join patchwork parts of equal size, program 00 allows you to program the seam length. Place the fabrics right sides together under the sewing foot. Sew the first seam. When you have sewn the desired seam length, press the reverse key. A tack will be sewn automatically at the beginning and the end of the seam. Now the seam has been programmed and can be sewn with this length as often as you require (see page X for more detailed description).
- Sew one stitch, then pull the fabric the required amount to the rear.
- Repeat this as many times as you need to finish the seam.
TIP: To prevent the fabric plies from shifting, insert dress pins crosswise to the basting position. Light fabrics are easier to baste with long straight stitches (6 mm). In this case the bottom feed must not be lowered!
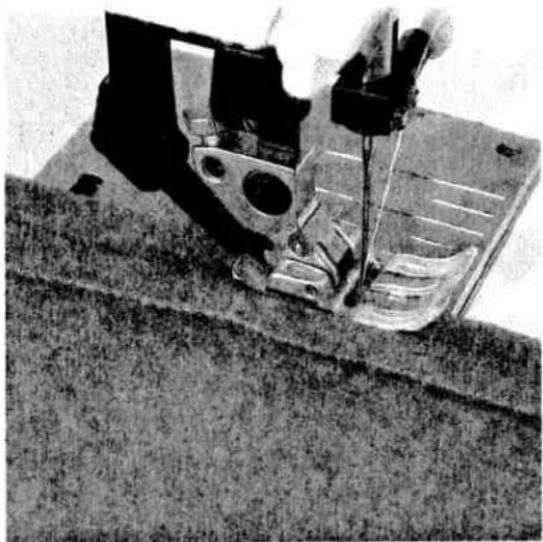
natural_image
Close-up of a sewing machine needle stitching fabric (no visible text or symbols)Zigzag stitch
Program 02
With zigzag stitch 02, all edges can be serged easily. Make sure that while serging an edge the needle goes into the fabric and over the edge alternately.
In program 32 the width of the zigzag stitch changes from the right needle position on.
If you press the key "", the stitch width changes starting from the left needle position, e.g. for eyelet embroidery and cording work.
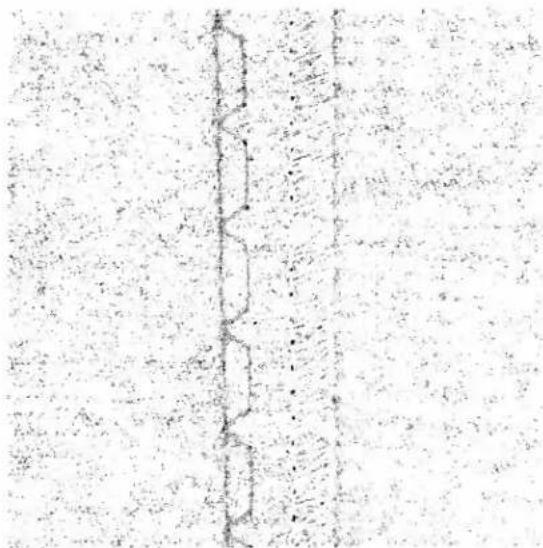
text_image
Scanned text of contract clauses with vertical lines and footnotesBlind stitch
Blind stitch 04 is best suited for invisible hems; sewing by hand is unnecessary.
- Serge the edge of the hem.
- Fold the edge inwards one hem width.
- Now unfold the hem again so that the hem edge protrudes by about 1 cm (1/2 inch).
- Now place the fabric under blind stitch foot no. 3 so that the crease line runs along edge guide B.
- When the needle enters the crease line it must only pick up one fibre of the fabric.

text_image
Technical diagram of a mechanical assembly with labeled components A and B, showing cross-sectional views and part numbers 3.If the stitch punctures are visible on the face side, stop B must be regulated with regulating screw A.
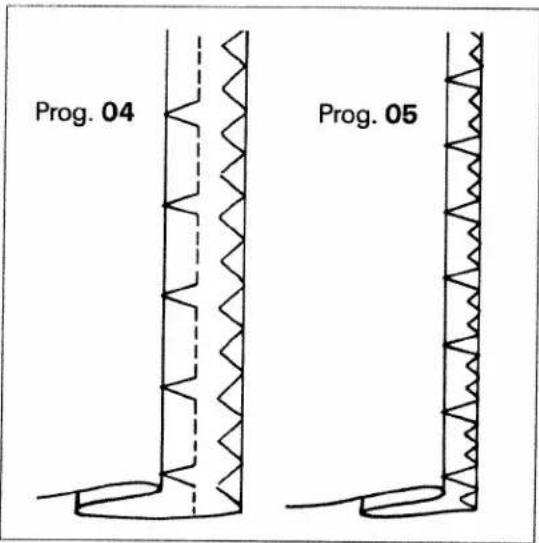
text_image
Prog. 04 Prog. 05Elastic blindstitch
Program 05
This special blindstitch is particularly suitable for elastic fabrics. It is not necessary to serge the fabric edge because of the integrated zigzag stitch.
- For instructions see description on the left.

natural_image
Close-up of a textured fabric with a curved seam or seam, no visible text or symbolsStretch triple straight stitch
Program 01
This program is used for sewing all seams where great strength is needed, e.g. inside trouser seams. The heavier the fabric, the longer the stitch length you need.

natural_image
Abstract geometric line drawing with irregular shapes and a diagonal line (no text or symbols)TIP: If you wish to topstitch a collar edge with program 01, use the function "needle down" and "single pattern". Do not press the single pattern key until you reach the last stitch before the corner. The machine thus stops after the stitch, and the needle stays in the material. Now turn the fabric and switch off the "single pattern" key.
Elastic blindstich
Stretch triple straight stroke
Accessories and
Traditional

natural_image
Abstract wavy line pattern with three vertical dark spikes below (no text or symbols)Stretch triple zigzag stitch
Program 22
The stretch triple zigzag stitch produces a highly elastic and decorative seam which is very suitable for hems on T-shirts and underwear.
- Serge the edge of the hem.
- Fold the hem inwards to the desired width.
- Topstitch the hem from the face side.
Elastic stitch
Program 03
Due to its high elasticity, this stitch is used for sewing elastic, e.g. on underwear.
- Cut off the old elastic close to the edge.
● Gather the fabric with a 6 mm long straight stitch. - Push the part that you have prepared in this way under the elastic or place it underneath, and pin it firmly in place.
- Sew it on with the elastic stitch. Leave the ends of the elastic tape overlapping a little and sew over them with elastic stitches.
- On skirts or trousers the elastic tape is sewn onto the prepared edge with the elastic stitch.
natural_image
Blank white image with a diagonal hatched border on the right edge (no text or symbols)Overlock stitches
Programs 06, 30–38
For knit and other stretch materials, the Creative offers a selection of overlock stitches. These join two plies of fabric and serge them in one operation. They have a higher elasticity than usual stitches, they are more durable and what is more, they are very quick to sew.
Open overlock stitch
Program 33
With this stitch it is easy to join firm materials or fabrics which do not fray too much.
TIP: Make sure that the needle at its farthest right-hand position just misses the edge of the material.
TIP: We recommend using blind stitch foot No. 3 when sewing overlock seams. This guides the fabric better and prevents tunneling of the seam at wider stitch widths.

natural_image
Close-up of a textured fabric with a vertical seam or seam, no visible text or symbolsClosed overlock stitch
Program 30
Select program 30 if you wish to process materials that fray very much. With this stitch an additional edge thread protects the fabric edge against fraying.

natural_image
Close-up of a mechanical device with circular components and textured surfaces (no visible text or symbols)Pullover stitch
Program 36
Program 31
Used together with the knit-edge foot (special accessories), this stitch can even be used for open-knit fabrics. Fashion-knit garment sections can also be joined effortlessly with this stitch.
TIP: To prevent the seam from stretching while sewing, it is advisable to add a woollen thread under light tension.

natural_image
Mechanical sewing machine needle stitching a circular base on a textured floor (no text or symbols visible)Sewing on buttons
Program 09
With program 09 you can sew on two- or four-hole buttons without any problems.
- Remove the sewing foot.
- Place the button on the place marked.
- Turn the handwheel towards you and position the button so that the needle enters the left hole in the button.
- Now lower the presser foot lifter; the button is now held by the shank.
- Now sew on the button. Make sure that the needle also enters the right hole in the button.
- The machine sews a tack and the program is completed.
TIP: By lowering the feed dog buttons can be sewn on even easier.
Linen buttonhole
With program No. 08 you can sew fully automatic linen buttonholes. The buttonhole size of 7–16 mm can be entered using the numbered keys (see section "buttonholes").

natural_image
Technical line drawing of a sewing machine needle stitching a fabric (no text or symbols)Sewing on buttons with stems
Program 09
- Insert the sewing foot
- Place a match between the holes of the button and sew it on as described on the left.

natural_image
Two mechanical diagrams showing a rotating knob with arrows indicating motion, no text or symbols present.- Remove the match and pull the button and fabric apart.
- Wrap the stem with sewing thread and knot it.

natural_image
Black-and-white abstract pattern with a diagonal white line and textured background (no text or symbols)Automatic bartack
Programs 24 + 25
With program No. 24 you can sew a fully automatic bartack for strengthening zippers or pocket openings or for attaching belt loops. If you choose a larger size bartack, the stitch density will automatically be increased.
With program No. 25 you can sew professional pocket bartacks as used in the apparel industry. It also provides a highly durable fastening for shoulder straps on handbags.
natural_image
Black triangular shape on a textured gray background, no text or symbols visibleArrowhead bartack
Program 26
The arrowhead bartack is always used for seam ends subjected to great strain and possible fraying, e.g. on skirt slashes or pockets. Using a thicker thread the arrowhead bartacks looks like hand-stitched. Using a thread in a contrast color you can achieve decorative effects.
Automatic darning
Program 28 is mainly for strengthening damaged areas of fabric.
- Stitch over the damaged area at the required length.
- Press the reverse key; the machine finishes sewing the darning program and the darning length is thus saved.
The saved darning length can now be repeated as often as needed.

text_image
Scanned text of a document with dense, vertically aligned Chinese characters arranged in a grid pattern.Depending on the type of material, the darning pattern may shift to one side. You can straighten the pattern again using the balance (see "balance" section).
If the pattern shifts this way you have to correct the balance in the plus-section.

text_image
Diagram showing a grid-like pattern with dashed lines and labels, possibly representing a mathematical or physical concept.If the pattern shifts this way you have to correct the balance in the minus-section.
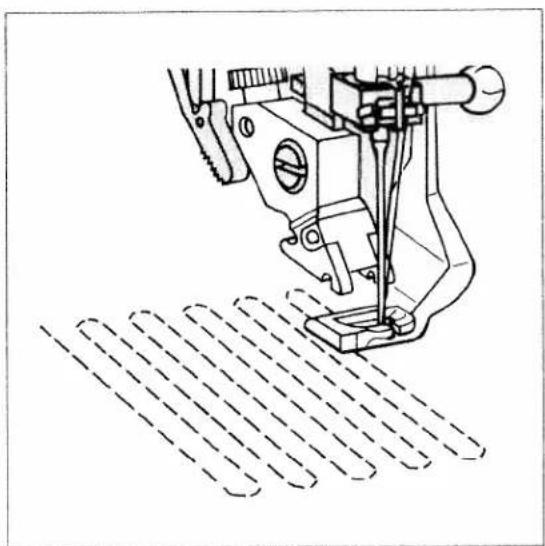
natural_image
Technical line drawing of a sewing machine needle stitching a patterned fabric (no text or symbols)
natural_image
Pure geometric grid pattern with dashed lines forming a grid-like structure (no text or symbols)Darning with straight stitch
Program 00
Fit darning foot No. 6.
Set the needle at its highest position by turning the handwheel, and push the pin of the darning foot fully into the hole of the sewing foot holder slightly pressing the darning foot between thumb and forefinger. When doing this, the guide fork should place itself around the presser bar and the wire must be behind the fixing screw.
Darning position:
Lower the presser foot lifter pressing it lightly to the rear until it snaps into the darning position.
Important! Only in this position you have the optimum thread tension for darning.
- Place the darning work in the darning hoop.
- Lower the feed dog.
- Pull up the bobbin thread and hold the threads when you start sewing.
- Now guide the fabric back and forth evenly; the length of the darn will be set by the size of the hole. As you are determining the stitch length yourself while sewing with the feed dog lowered, you should sew at an even speed. When you have reached the width of the damaged area, darn over the damaged area again from right to left.
This guarantees a durable darn.
TIP: The faster you sew, the easier and more even the darning will be. If you are moving the workpiece too slowly, small knots will appear on the wrong side of the fabric.

natural_image
Black and white decorative pattern with interlaced floral motifs (no text or symbols)
natural_image
Black and white abstract texture with no discernible text, symbols, or structured elementsLace trimmings
You can beautify table cloths, napkins or even garments with lace trimmings.
Lace edges
Program 02
Program 00
Serge the raw edges of the fabric with zigzag or overlock stitches. Place the lace onto the fabric so that the edges of the fabric and lace overlap slightly. Then stitch the lace onto the face side.
You can achieve a particularly flat seam if you are joining lace and fabric with a covering stitch. In this case, the lace and fabric edges should also overlap slightly. As the covering stitch will serge the fabric edge at the same time, you only need to cut back the waste material carefully along the seam.

natural_image
Black and white decorative corner with floral patterns (no text or symbols)Lace edges with corners
Program 02
Program 00
First serge the raw edges. Stitch the lace onto the face side up to the first corner. Fold the corner and stitch over it diagonally. Sew the lace continuously onto the next edge. All other sides are done in the same way.
Lace inserts
Program 02
Program 00
First baste the lace to the face side of the fabric. Stitch both edges of the lace at a narrow margin using straight stitch 00. Cut open the fabric under the lace at the middle and iron it over to the side. Stitch over both edges of the lace with small and dense zigzag stitches. Cut back the waste material on the wrong side of the lace.
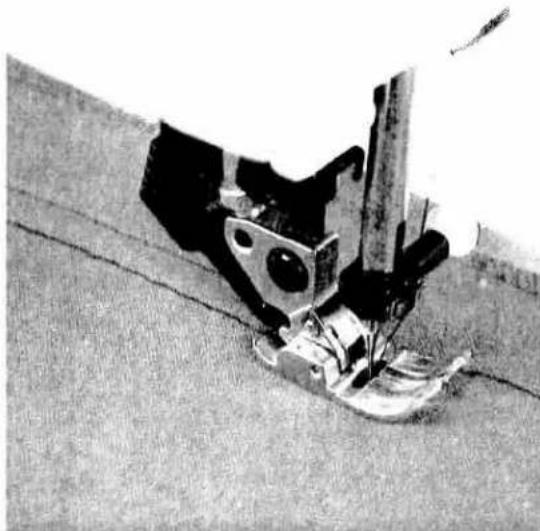
natural_image
Close-up of a sewing machine needle stitching fabric (no visible text or symbols)Gathering with straight stitch
Program 00
If you wish to gather sleeves, skirts, cuffs or valances, this technique is the easiest and most commonly used.
On the face side of the fabric mark the lines of the gathering seams. Sew the first seam holding the fabric a little taut as the fabric will gather easily at an increased stitch length. Leave about 10 cm (4 or 5 inches) of thread protruding at the beginning and end of the seam.
To obtain neat and even gather you should sew two or three gathering seams close to each other (approx. 0.5 cm = 1/8 of an inch apart). Now gather the part by pulling the bottom threads of the seams. You determine the amount of gather yourself. To avoid thread breakage while pulling the thread ends, do not use very fine threads. Distribute the thus produced pleats evenly and knot the threads on the wrong side.

natural_image
Mechanical assembly diagram showing components like gears and a lever (no visible text or labels)Gathering with elastic threads
Program 14
This kind of gathering is particularly suitable for visible, elastic gathering seams on blouse sleeves, waist seams or neck cutouts.
On the wrong side of the fabric mark the line of the gathering seam. When starting the seam let the needle penetrate into the fabric without lowering the sewing foot. Place the elastic thread around the needle so that two threads are over-stitched. Now lower the sewing foot. If you use the cording foot for gathering, the elastic threads should be inserted into the foot from the side and drawn into the grooves. While sewing the gathering seam, make sure that the elastic thread is not stretched or penetrated by the needle. After finishing the gathering seam you can determine the amount of gather yourself by pulling the ends of the elastic threads. Tie-off the threads.
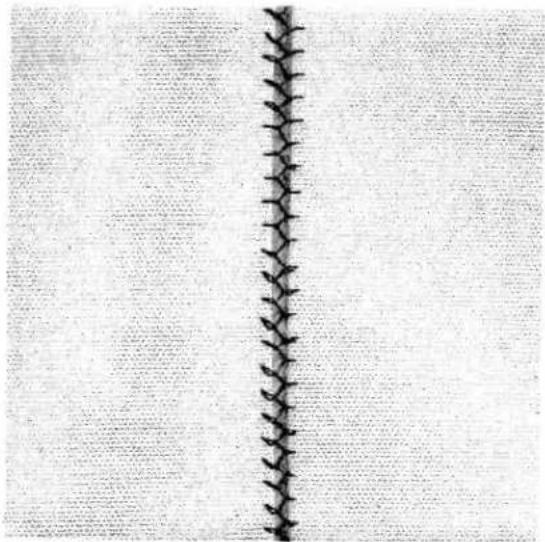
natural_image
Close-up of a vertical black zigzag pattern on a textured background (no text or symbols)Covering seams
Where seam allowances and serged edges are inconvenient, covering seams are used. These seams are extremely flat, they join bordering fabric plies and serge them at the same time. This produces the typical flatlock effect which lends a professional look to collar plackets or raglan seams.
Fagoting stitch
Program 17
With the fagoting stitch you can make very elastic seams with a hemstitching effect, for example on corsetry.
- Serge the fabric edges and tack-baste them onto the reverse side.
- Lay the edges to be sewn with about 3 mm between them under the sewing foot.
- Overstitch from the face side ensuring that the needle perforates both the right and left hand side pieces of material.
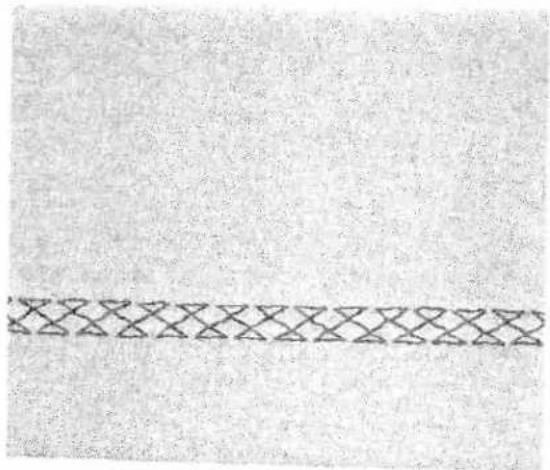
natural_image
Abstract pattern of interlocking triangles on a textured background (no text or symbols)Cross stitch
Program 19
Owing to its high elasticity, the cross stitch is very suitable for decorative hems, e.g. on T-shirts and underwear.
- Serge the fabric edge.
- Baste over the seam margin to the left.
- Stitch over the hem from the face side. When doing so, make sure the fabric edge is properly overstitched.

natural_image
Abstract zigzag line pattern with no text or symbolsFancy elastic stitch
Program 18
The fancy elastic stitch is very useful for materials that need a flat seam, for example terry cloth.
- Place the two fabric edges so that they overlap by about 2 cm (3/4 of an inch) and overstitch each edge with fancy elastic stitches.
natural_image
Grayscale abstract texture with no discernible text, symbols, or structured elementsQuilt stitch
Program 11
In traditional quilting three fabric layers are joined with small hand-made stitches. This is done quicker and more practical with the sewing machine, e.g. with program 11, see page 143 (Quilt and patchwork foot).
Light-knit mending stitch
Program 35
The light-knit mending stitch is a stretchable covering stitch. It is very suitable for overstitching cuffs in stretch materials, e.g. sweatshirts or sportswear.
- Sew the cuff onto the workpiece with an over-lock stitch.
- Now the seam allowance can be overstitched from the face side of the fabric. Make sure that the needle enters the fabric close against the seam.
The quilt stitch is equally suitable for topstitching jackets and coats. If you use quilt stitch combined with other fancy stitches, you can also produce beautiful pattern combinations.
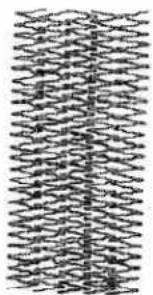
natural_image
Abstract pattern of interlocking curved lines forming a dense, wavy structure (no text or symbols)Darning with elastic stitch
Program 03
The elastic stitch is very suitable for repairing holes, tears and damaged areas.
Depending on the size of the damaged area, sew over this area with rows of elastic stitches until it is well covered. When doing so, make sure that the stitch rows overlap each other.
When mending tears, frayed edges or small holes, it is advisable to lay a piece of fabric of the same color which is slightly larger than the damaged area on the wrong side of the material. This piece of fabric strengthens the material and guarantees a perfect darn. Overstitch the damaged area as described above and cut back the piece of fabric on the wrong side as far as possible.

natural_image
Close-up of mechanical components with no visible text or symbols
natural_image
Abstract grayscale pattern with wavy, organic shapes and no discernible text or symbolsSmocking
Smocking is a technique with which several seams sewn parallel to each other produce a gathering effect which is mainly used for children's wear and corsetry. There are different techniques:
1) Smocking with gimp thread (non-elastic)
Gimp thread
Programs 14 or 18
For beautiful smocking effects you will need two and one half to three times the desired finished width of fabric.
The smocked section is usually made before the rest of the garment. Light, firm materials such as batiste or fine linen are best suited for this technique. Draw a straight line on the fabric as a guideline for the first gathering seam using a disappearing-ink marker or almost invisible non-greasy chalk. Insert the appliqué foot, loosen the screw at the rear end of the sewing foot holder, and push the edge guide through the opening. Place the fabric to be smocked face side up under the sewing foot and introduce the gimp thread under the sewing foot in such a way that it runs exactly along the groove in the foot. Now sew the first row of smocking and leave about 10 cm (4-5 inches) of thread protruding from the beginning and end of the seam. Then place the edge guide at the desired distance to the first row (approx. 2–2.5 cm = 1/2-3/4 of an inch). Varying the distance between rows creates different gathering effects. Now sew the next row of smocking using the edge guide on the first row as a guideline. Continue in this manner until you have sewn as many rows as the design requires. Then carefully pull the ends of the gimp thread and gather the fabric uniformly over its entire width.
2) Smocking with elastic thread Program 00
For this technique, elastic thread is wound onto the bobbin without tension. The needle thread is a regular sewing or embroidery thread. Since elastic threads are much thicker than normal bobbin threads, the tension on the bobbin case must be set extremely loose.
However, the tighter you set the bobbin-thread tension, the greater the gathering effect you obtain. We recommend that an additional bobbin case be used for this work. For this kind of smocking, fine and light materials such as light-knit fabric, silk or satin are also suitable.
TIP: Always sew a test seam first! Draw the first line on the face side of the fabric and then sew along this line. Make a knot in the thread at the beginning and end of the seam. In the following parallel seams the material must be stretched to its original length as otherwise the gathering would turn out irregular.
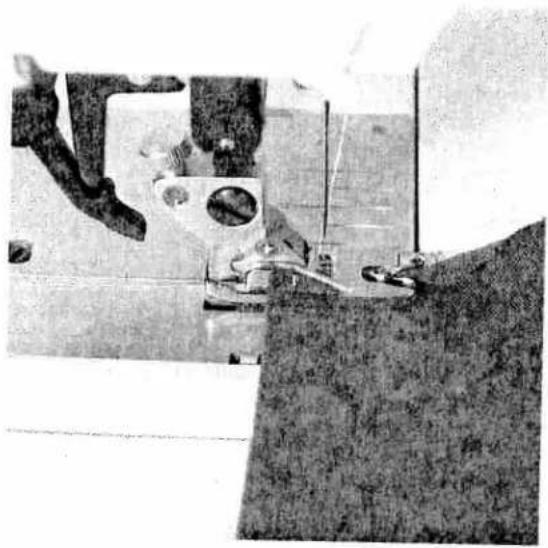
natural_image
Close-up of a sewing machine needle stitching fabric (no visible text or symbols)Roll hemming with hemmer No. 7 Program 00
Roll hemming secures the edges of chiffon, light-knit and nylon fabrics in a tidy and durable way.
Stretch the fabric before you start sewing. Doing this, you will see in which direction the fabric stretches because the hemming has to be sewn on this side.
Insert the hemmer. Lower the foot, sew a few stitches and pull the fabric into the scroll of the hemmer with the threads of the seam beginning. The zigzag stitch must be set at a width so that the inserted fabric edge is overstitched closely.
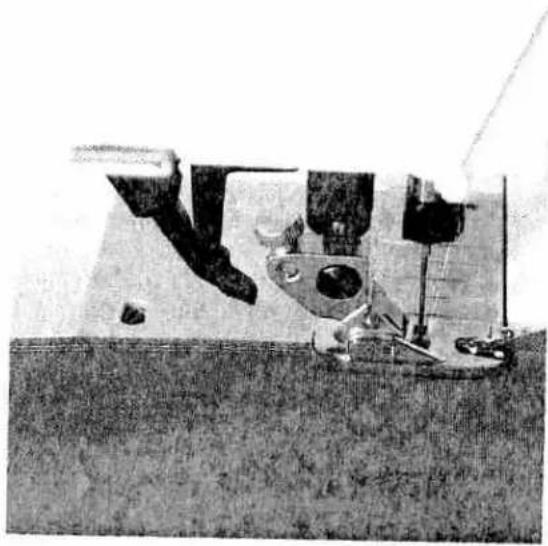
natural_image
Black-and-white photo of a sewing machine needle stitching fabric, no visible text or symbols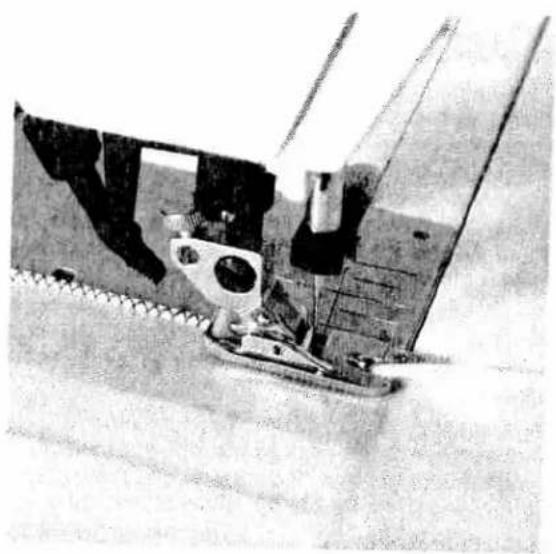
natural_image
Close-up of a sewing machine needle stitching fabric (no visible text or symbols)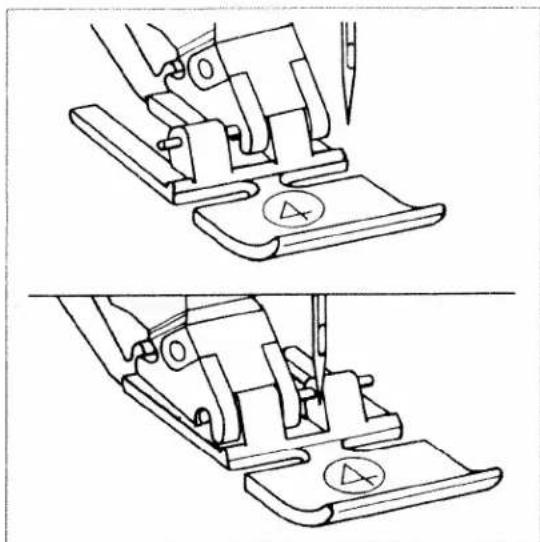
natural_image
Technical line drawing of a sewing machine tool, showing two sequential steps with no text or symbolsSewing in zippers
Program 00
There are different ways to sew in zippers. For skirts we recommend the zipper concealed on both sides, for ladies' or mens' trousers, the zipper concealed on one side. Several types of zippers are available at retail outlets. We recommend metal zippers for strong fabrics such as jeans. For all other materials we recommend a plastic zipper.
For all types of zippers it is important to sew right up close to the teeth of the zipper. This is why the zipper foot can be engaged on the left or the right side of the sewing-foot holder.
Additionally, you can set the needle so that it enters close to the edge of the zipper teeth by using one of the Creative's 19 needle positions. If the foot is engaged right, the needle must only be moved to the right. If the foot is engaged left, the needle must only be moved to the left.
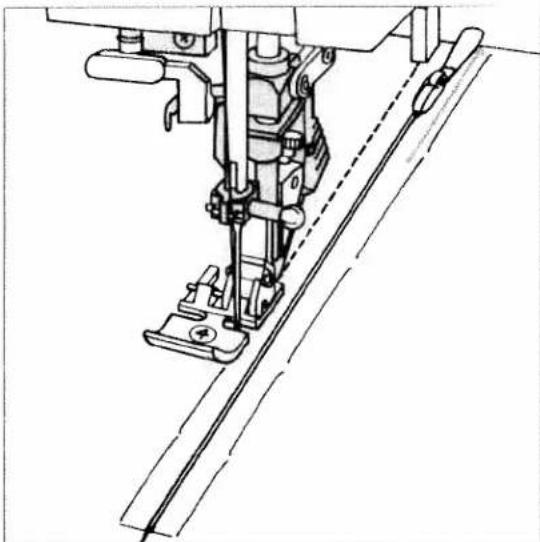
natural_image
Technical line drawing of a sewing machine needle and base (no text or symbols)Inserting zippers concealed on both sides
- Engage the zipper foot on the right side.
- Baste the zipper on and place it under the sewing foot so that the teeth run at the side of the foot. Bring the needle into the desired, right-hand position.
- Sew in half of the zipper, leave the needle in the material, raise the sewing foot and zip the zipper closed.
- Now you can sew the rest of the seam to the end of the zipper and stitch the crosswise seam.
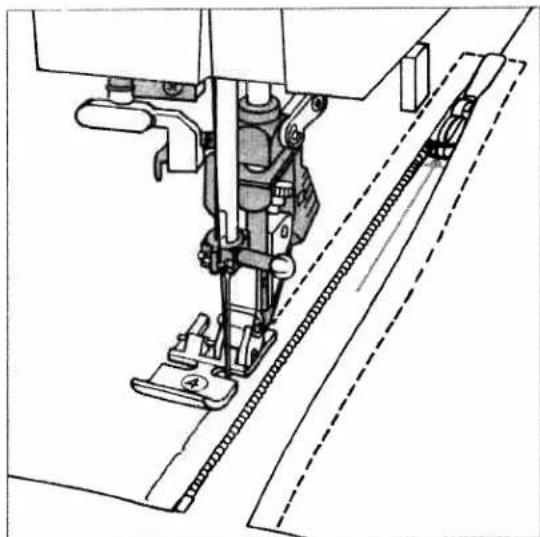
natural_image
Technical line drawing of a sewing machine needle and chain assembly (no text or symbols)- Sew in the second half of the zipper parallel and at the same distance.
- Stop shortly before the seam end and leave the needle in the material. Raise the sewing foot and open the zipper.
- Now the seam can be finished.
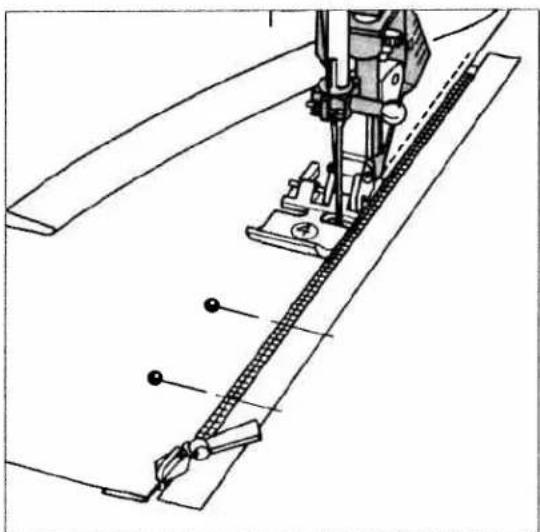
natural_image
Technical line drawing of a sewing machine needle and chain assembly (no text or symbols)
natural_image
Technical line drawing of a sewing machine needle and fabric (no text or symbols)Trouser zippers
- Iron a fold into the seam allowance on the zipper seam ensuring that the overlap protrudes about 4 mm.
- Baste the zipper under the overlapping edge so that the teeth are still visible.
- Engage the zipper foot on the right and set the needle at the required position.
-
Stitch along the edge of the zipper.
-
Shortly before the end of the seam, open the zipper and finish sewing the seam.
- Close the zipper and baste the overlap evenly onto the other zipper half.
- Then stitch along the basted seam.
TIP: Using the edge guide you will achieve an accurate seam.

text_image
Scanned text of mathematical expressions and equations in a grid-like formatSewing on patches
Program 15
The best way to darn larger holes is to cover the damaged area with a piece of new material of a matching color.
- Cut a piece of fabric that is bigger than the damaged area.
-
Enforce the wrong side of the patch with iron-on stabilizer.
-
Baste the piece of new material onto the damaged area.
• Overstitch its edges with elastic stitches. - Now cut back the damaged material up to the seam on the wrong side.
TIP: In order to turn at the corners more easily, use the "needle down" function.

text_image
Traditional Accessories and
natural_image
Black-and-white photo of a woman in a coat standing in front of a bar with bottles and shelves (no visible text or symbols)Buttonholes
The Creative 7570 offers you the perfect button-hole for all types of material and garment.
Whether you are sewing jackets, trousers, blouses or elastic materials, 5 different buttonhole styles lend a professional finish to your self-created fashions.
You only have to program your buttonhole in the required length once. All further buttonholes will be sewn in the saved length automatically.
Use buttonhole foot No. 5 for buttonhole sewing. Before starting to sew, always push the button-hole foot to the front up to the second red mark. This way, the buttonholes will be sewn to measure.
Set the needle thread tension at +3.
To ensure that every single buttonhole is exactly the right size, the Creative 7570 is equipped with the buttonhole guide No. 10 and sensor technology. Using this equipment you can sew perfect buttonholes even on the most difficult materials such as velvet, plush, heavy knit or woollen fabrics.
With the following tips you will sew perfect buttonholes even on the most difficult fabrics:
- Buttonholes which are sewn close to an edge cannot be fed optimally using the buttonhole foot. A better result can be achieved by using sewing foot No. 1A with the dual feed engaged.
● Materials that tend to stretch easily should be stabilized with Avalon stabilizer by Madeira or with backing paper.
- Keyhole buttonholes are particularly durable and prominent if sewn with a gimp thread (see section "keyhole buttonhole with gimp thread").
- Linen buttonholes look more dense and attractive when embroidery or darning thread is used.

natural_image
Black-and-white photo of a sewing machine needle stitching fabric, with no visible text or symbols.Inserting the buttonhole guide:
- Push the metal part of the buttonhole guide into the slot below the needle plate from the rear (between the two red arrows). The white plastic part is over the needle plate.
- Push the guide forwards until the catch lies against the rear of the free-arm. The guide must spring back a little to obtain a small distance between the needle plate and catch. Without this clearance, the second bartack of the buttonhole will not be sewn.
Inserting the buttonhole guide activates the sensor.
You can choose from the following buttonholes:
1. Standard buttonhole No. 40
(for blouses, shirts, dresses etc.)
a) fully automatic
b) semi-automatic
2. Stretch buttonhole No. 41
for highly elastic materials and heavy knit fabrics.
a) fully automatic
b) semi-automatic
3. Cross stitch buttonhole No. 42
for fine elastic materials and for decorative buttonholes.
a) fully automatic
b) semi-automatic
4. Blouse buttonhole No. 38 with
- wedge tack No. 43
- crosswise tack No. 44
● lengthwise tack No. 45
for ladies' fashion, especially blouses and dresses.

5. Keyhole buttonhole No. 39 with
- wedge tack No. 46
• crosswise tack No. 47
● lengthwise tack No. 48
for jackets, overcoats and trousers.


6. Eyelets No. 49
for belts or linens.
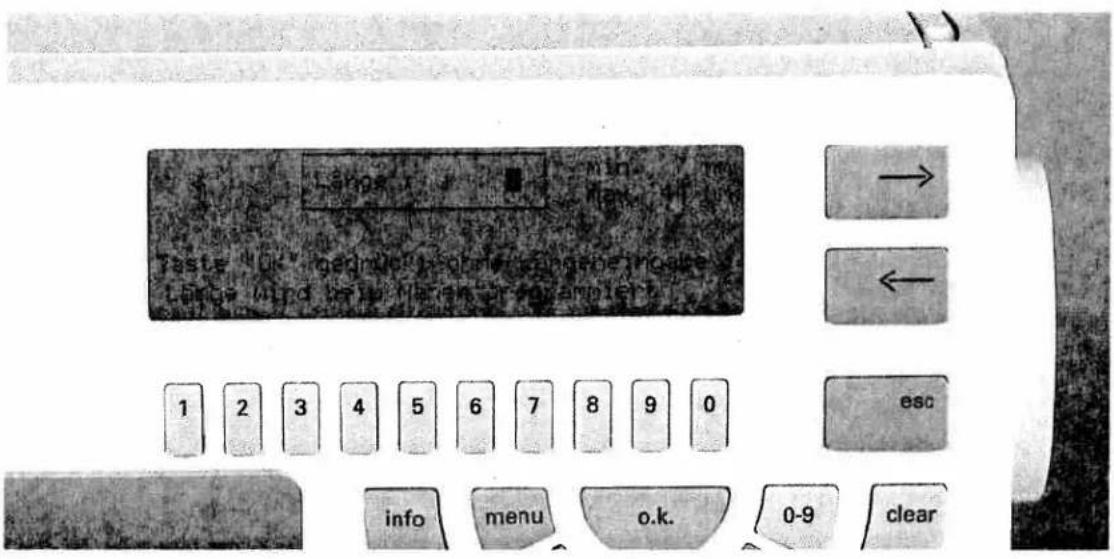
text_image
Lange Wind Tests Wind: 0.0% rated for the Capping Mode Lange Wind test: March's parameter 1 2 3 4 5 6 7 8 9 0 esc info menu o.k. 0-9 clearSewing the buttonhole
Standard buttonhole, fully automatic, with buttonhole guide No. 10 or buttonhole foot No. 5 A
- Select buttonhole No. 40.
On the display appears the above shown message.

text_image
Lamblay 12 12 = 2.0 → ← ESC 1 2 3 4 5 6 7 8 9 0- Using the numbered keys "1 - 0" you can enter the desired length of the buttonhole, e.g. "1" and "8" = 18 mm.

text_image
18 + 46 manvell beenden 0 + ±25 - 4.5 2 3 4 5 +5 man 1 2 3 4 5 6 7 8 9 0 escSelf-defining the second bartack with "man" If you wish to define the second bartack yourself, press key "6" below "man". The message "Finish manually" appears on the screen next to the buttonhole. The buttonhole will then be sewn automatically, however, the sewing machine will reduce the sewing speed before the buttonhole is finished. As soon as the second buttonhole seam is as long as the first seam, press the "reverse" key. The Creative will sew the second bartack and tie-off. Important: The self definition of the second bartack with "man" must be carried out for each buttonhole separately.
Tip: You can stop the slow sewing at the end of the reverse seam by removing your foot from the foot control. As soon as you re-engage the foot control, the machine finishes sewing the button-hole at normal speed.
Deleting the programming:
The programming of the buttonhole is deleted by selecting another program.

text_image
1 2 3 4 5 6 7 8 9 0 escIf you press the "o.k." key afterwards, a new screen will be displayed containing the length and width of the buttonhole. The standard width of 4.5 mm can be adjusted with keys "1-5". For heavy materials select a wide buttonhole width, for light-weight materials a narrow width.
- Now sew your buttonhole. The machine will automatically sew the entire buttonhole at the preset length and tie-off at the end.

text_image
1 2 3 4 5 6 7 8 9 0 escStandard buttonhole semi automatic
For this buttonhole the length and bartack are entered while sewing.
After having programmed the first buttonhole, the following buttonholes are sewn fully automatically.
For semi-automatic buttonholes, not only the buttonhole length and stitch width can be set, but also the stitch density.
- After selecting the buttonhole program 40 do not enter any buttonhole length, but press the "o.k." key. In the display you will see the programming screen along with length and width settings.
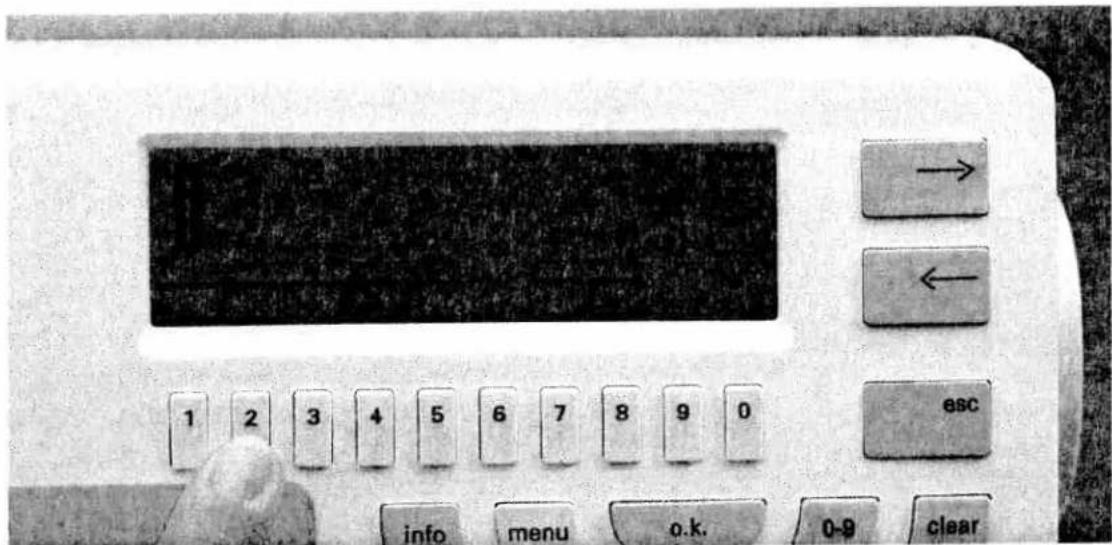
text_image
Close-up of an electronic device control panel with labeled buttons and a digital display screenYou can alter the default width of 4.5 mm with keys 1–5. The stitch length (= density of the purl seam) is set with keys 7+8. A purl density of 0.5 is the default setting for programmed buttonholes. If you require a particularly dense buttonhole, select the setting 0.35 or 0.3.

text_image
48 2450 9.5 半 50 2 3 4 5 + 5 man - + B + 2 25 -


text_image
1 2 3 4 5 6 7 8 9 0
The total length of the buttonhole is defined during the sewing operation with the help of the buttonhole foot No. 5A. Before you start sewing, pull the buttonhole foot to the front so that the red arrow is placed at the second mark. Sew the first buttonhole seam at the required length.
Watch the red marks on the buttonhole foot while sewing. Press the "reverse" key. The machine now sews the first bartack and the second buttonhole seam.
Shortly before the buttonhole is finished, the sewing machine reduces sewing speed. When the second buttonhole seam is the same length as the first one, the machine sews the second bartack and ties off. Note: This only applies when the buttonhole guide is used. When the buttonhole is finished, all following buttonholes can be sewn fully automatically in the same length. If desired, the second bartack can be self-defined by pressing the key below "man".

text_image
1 2 3 4 5 6 7 8 9 0 info menu o.k. 0-fAdjusting the buttonhole seam length with the balance
On highly slippery fabrics it may happen that the stitch density of the left seam turns out differently to that of the right seam. In this case, the seam density can be adjusted using the balance.
The balance appears on the right in the display and can be set with the cursor keys "←" and "→". This procedure can, however, only be applied fot semi-automatic buttonholes and engaged button-hole guide No. 10.
- Sew the first seam and the first bartack.
- While sewing the second seam adapt the stitch density with the balance (in the plus-section) to the first seam.
- Press key"
- Then press the "esc" key.
- Now program the buttonhole at the required length.
- Confirm by pressing "o.k.".
natural_image
Pure horizontal line pattern without any text, numbers, or symbols
text_image
Scanned text of a document with numbered sections and Chinese characters, likely from a form or table.

Stretch buttonholes / Cross stitch buttonholes
Stretch buttonhole No. 41 and cross stitch button-hole No. 42 can
- be sewn fully automatically or
- by self-defining the length and stitch width of the buttonhole (see standard buttonhole).
The procedure for the self-definition of the second bartack is the same as for the standard buttonhole. Seam length and stitch density of the second buttonhole seam can be set with the balance.
Important: Before you start the buttonhole, pull buttonhole foot No. 5A to the front up to the second red mark!
Round buttonhole
Important! The round buttonhole should be placed with the rounding facing the edge. The sewing of the buttonhole, however, begins at the bartack.
Mark the length of the buttonholes on the fabric first, making sure to measure from the starting point inwards.
Always sew the buttonholes from the inside outwards towards the edge.
The round buttonhole is automatically sewn between a length of 7 and 40 mm.
Press key 0-9.
- Select buttonhole No. 46-48.
- Press the "o.k." key.
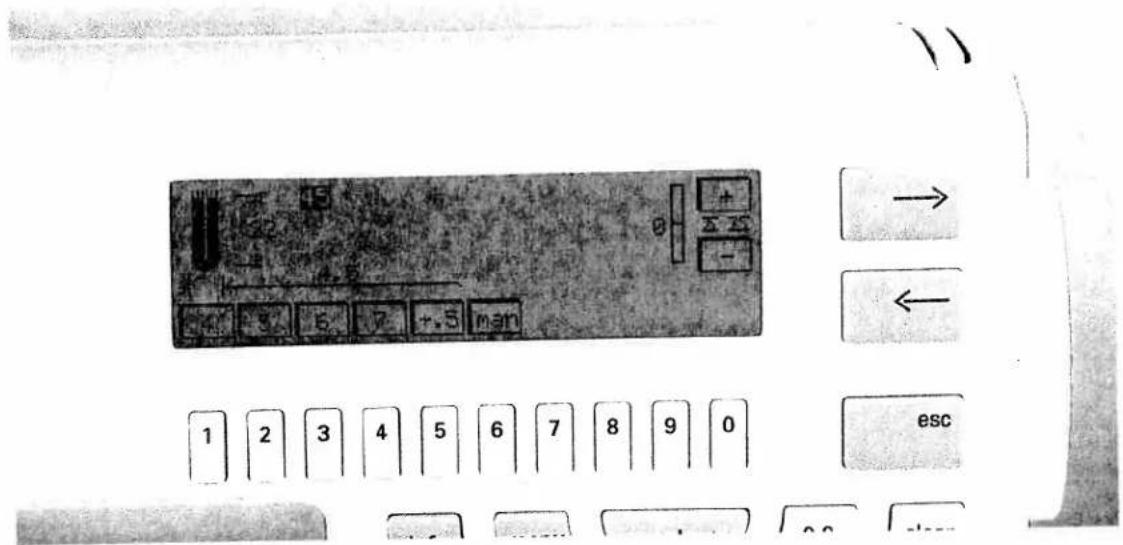
text_image
Cropped image of a computer keyboard layout with numeric keypad and navigation buttons, including Chinese text labels like 'esc' and directional arrows.- A pre-programmed buttonhole length of 22 mm appears on the display. If you wish, you can alter this length with the number keys 1–0.
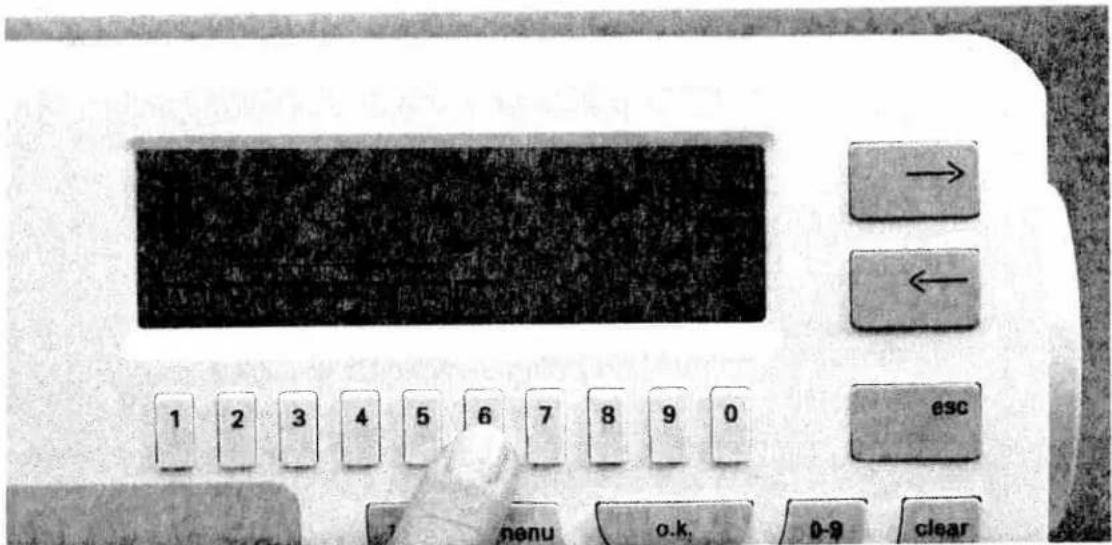
text_image
1 2 3 4 5 6 7 8 9 0 esc 7 nenu o.k. 0-9 clearThe second bartack can be self-defined using key "6".
The stitch density cannot be altered for this button-hole type. Therefore you should use a stronger thread or gimp thread if necessary (see "Button-hole with gimp thread").
The stitch density of the second purl seam can be set using the balance.
Caution: Before starting the buttonhole, pull buttonhole foot No. 5 A forwards up to the second red mark!

Keyhole buttonholes
Important! The keyhole buttonhole should be placed with the rounding facing the edge. The sewing of the buttonhole, however, begins at the bartack. Mark the length of the buttonholes on the fabric first, making sure to measure from the starting point inwards.
Always sew the buttonholes from the inside outwards towards the edge.
The keyhole buttonhole is automatically sewn between a length of 7 and 40 mm.
- Select buttonhole No. 46-48.
- Press the "o.k." key.
- A pre-programmed buttonhole length of 22 mm appears on the display. If you wish, you can alter this length with the number keys 1–0.
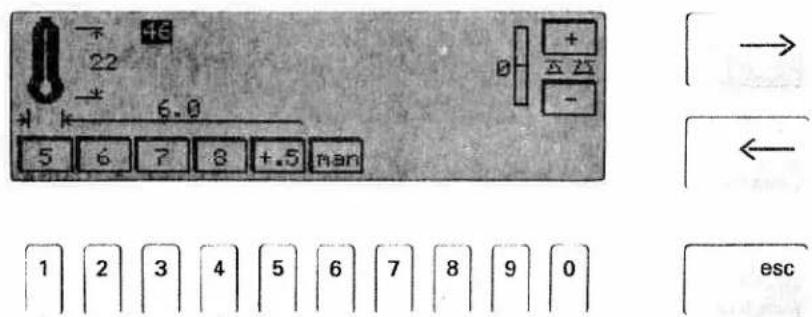
text_image
+ 22 - 6.0 5 6 7 8 +.5 man 1 2 3 4 5 6 7 8 9 0 esc- Press the "o.k." key. The buttonhole appears on the screen along with length, width and balance indications.
- For buttonholes on coats the stitch width can be increased up to 8.5 mm.
- The stitch density cannot be changed for this buttonhole. Therefore you should sew this buttonhole with a stronger thread or gimp thread if required (see section "Buttonholes with gimp thread").
The stitch density of the second seam can be adjusted with the balance.
Important! Before you start the buttonhole, push buttonhole foot No. 5A forwards up to the second red mark.
TIP: Cut open all buttonholes with the seam ripper. Use an awl to perforate the rounding of the keyhole buttonhole.

natural_image
Black-and-white photo of a rectangular electronic component with internal wires and a label (no readable text or symbols)
natural_image
Mechanical assembly diagram showing a lever mechanism with no visible text or symbolsButtonholes with gimp thread
Buttonholes which are sewn with a gimp thread are more durable and neater. Use pearl cotton or a regular gimp thread as available at specialized shops.
- Place the gimp thread over the front ridge of the buttonhole foot and clamp the thread ends to the right and left into the rear ridge.
- Push the runner forwards up to the second marking.
- Now sew buttonhole No. 40, 41 or 42.

natural_image
Close-up of a black cylindrical object with a coiled wire, possibly a resistor or connector (no visible text or symbols)- After finishing the buttonhole, pull the left thread until the loop is covered by the button-hole bartack.

text_image
Scanned text fragment with a single horizontal line, possibly indicating a measurement or symbol.- Cut off the loose ends close to the bartack.
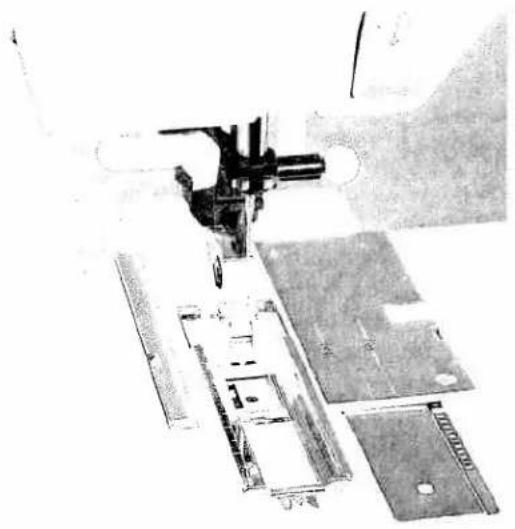
natural_image
Aerial view of a sewing machine needle stitching fabric pieces (no visible text or symbols)
natural_image
Sketch of a rectangular object with internal vertical lines and textured edges, no visible text or symbolsKeyhole buttonhole with gimp thread
- Push the buttonhole guide backwards.
- Place the gimp thread over the front ridge. Pull the thread ends taut backwards under the sewing foot. Clamp them right and left of the back ridge respectively.

natural_image
Top-down view of a mechanical device with a circular component and a cylindrical body, no visible text or symbols.- Push the runner forwards up to the second red mark.
- Before you start sewing, press the "needle down" key.
- Sew the first buttonhole seam.
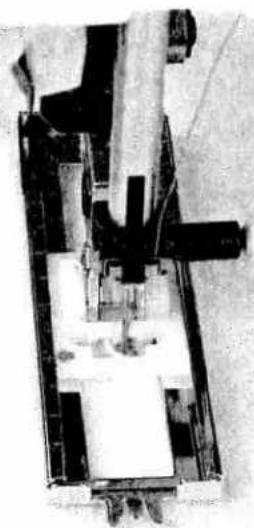
natural_image
Close-up of a mechanical device with internal components and no visible text or symbols- When the machine sews the first stitches of the rounding, pull down the gimp thread from the back ridge using an ordinary pin.
Important: The sewing foot must not be raised during this procedure!
- Pull the gimp thread to the left and backwards until the loop is just in front of the needle.
- Now sew the rounding carefully.

- Then, hold the gimp thread slightly tauter and finish sewing the buttonhole. Cut off the loose ends of the gimp thread. The round buttonhole with gimp thread is sewn in the same way.
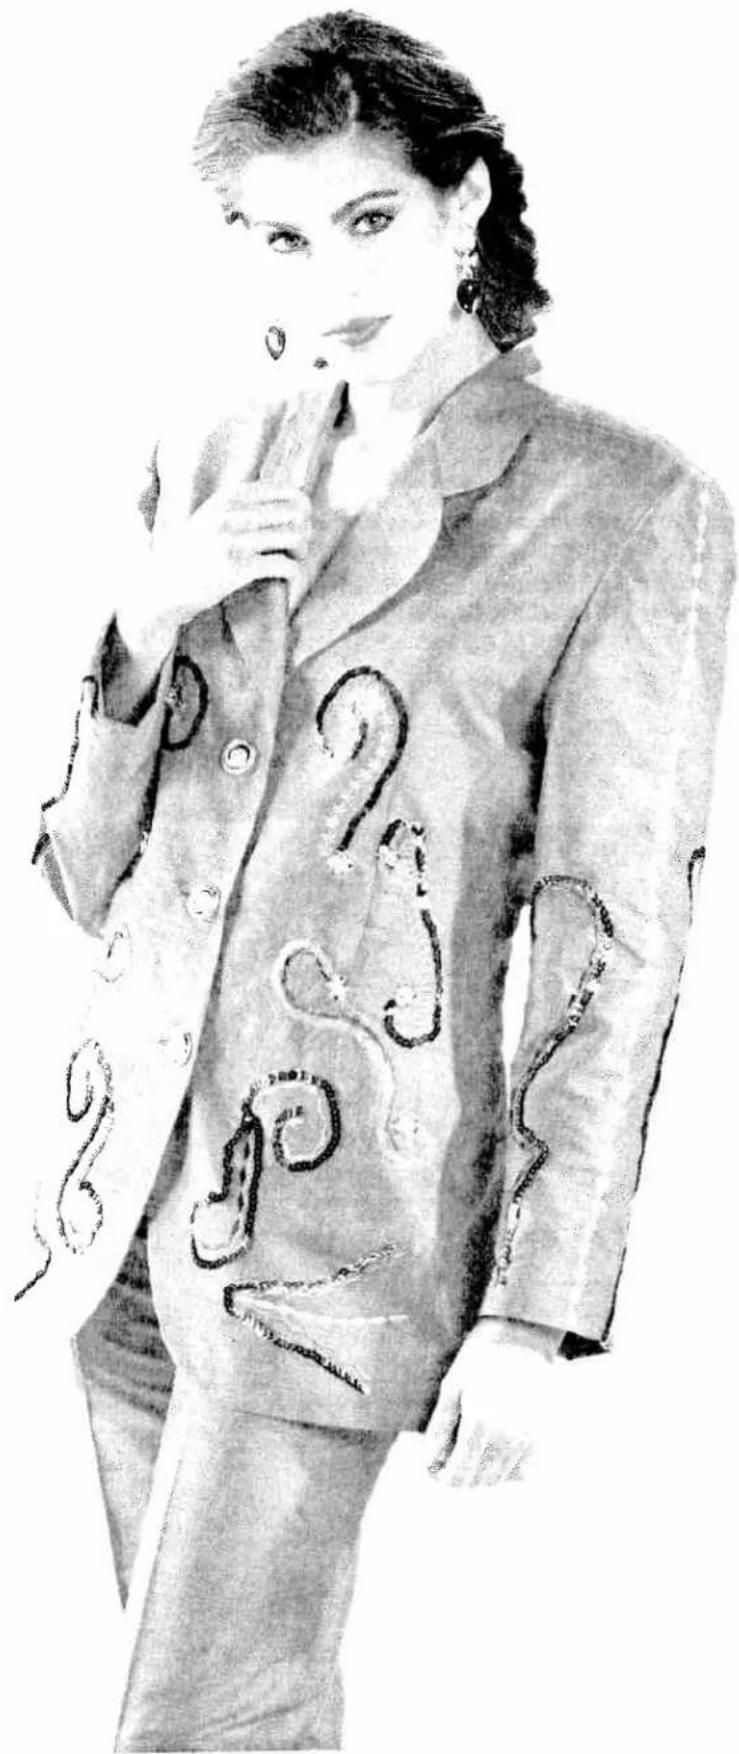
natural_image
Black-and-white illustration of a woman in a suit with embroidered swirls and earrings, posing with her hand (no text or symbols visible)Accessories and needles
Pages 139–154
Maintenance and Faults
Pages 155–160
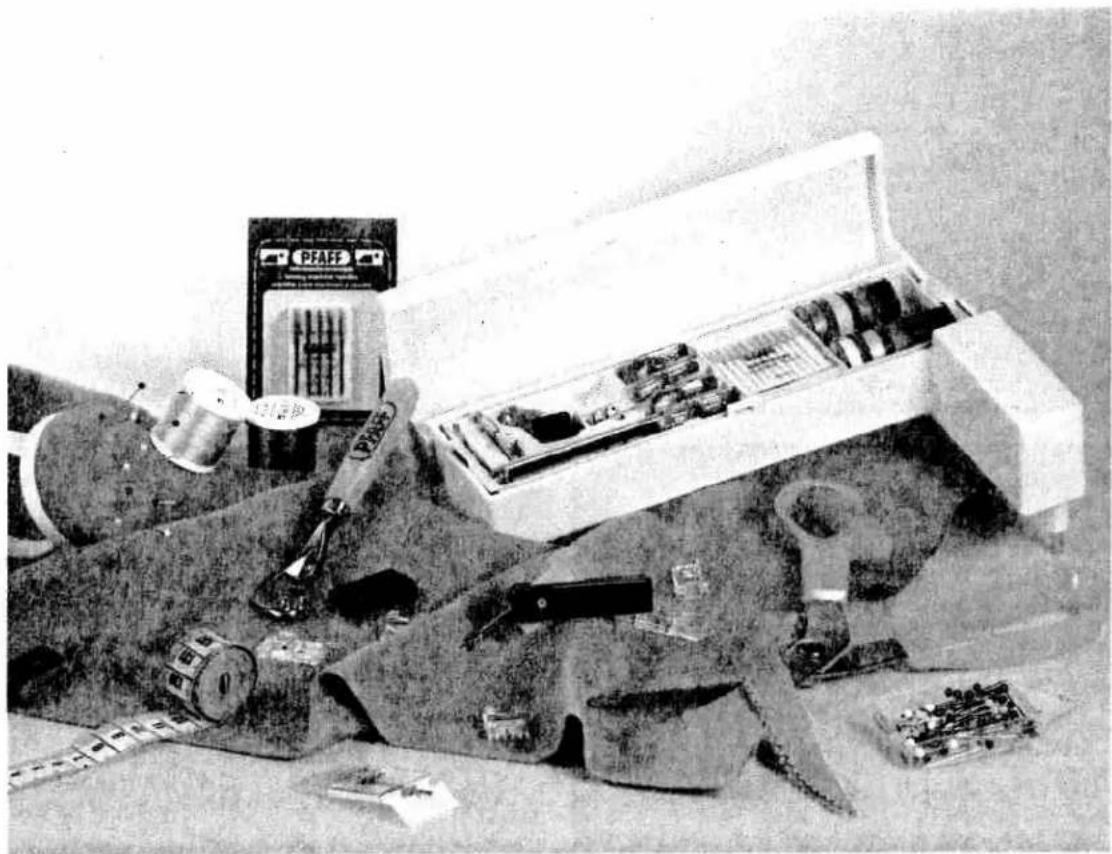
natural_image
Black-and-white photo of an open industrial machine with scattered components and a PFAE-branded box (no visible text or symbols)Accessories and needles
| Sewing feet (accessories) | Pages 140–142 |
| Special accessories table | Page 143 |
| Felling foot/Appliqué foot | Page 144 |
| Fringe foot/Pintuck foot | Page 145 |
| Cording foot/Shirring foot | Page 146 |
| Knit edge foot/Ruffler | Page 147 |
| 7/9 hole foot/Braiding foot | Page 148 |
| Quilt and patchwork foot | Page 149 |
| Twin needle cording foot | Page 150 |
| Open appliqué foot | Page 150 |
| Bias tape binder | Page 151 |
| Needle chart | Pages 152–153 |
Accessories and
naddice
Traditional
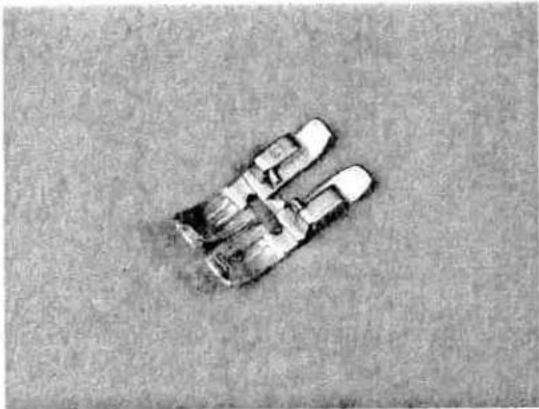
natural_image
Top-down view of a small car parked on a flat surface (no visible text or symbols)Standard sewing-foot No. 0A
Part No.: 98-694 828-00
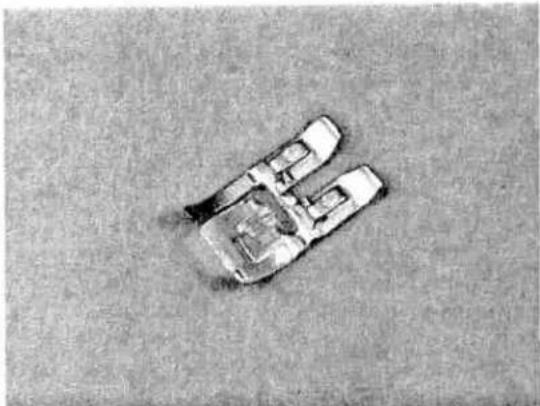
natural_image
Aerial view of a car on a flat surface, no visible text or symbols.Fancy stitch foot for top feed No. 1A
Part No.: 98-694 836-00

natural_image
Top-down view of a small electronic device with visible internal components (no text or symbols)Fancy stitch foot for sewing without top feed No. 2 A
Part No.: 98-694-838-00

natural_image
Aerial view of a mechanical device with two wheels and a central shaft, lying on a textured surface (no visible text or symbols)Blind stitch and overlock foot No. 3
Part No.: 98-694-890-00

natural_image
Black-and-white photo of a small electronic component or device on a textured gray surface (no visible text or symbols)Zipper and edge sewing foot No. 4
Part No.: 98-694-884-00
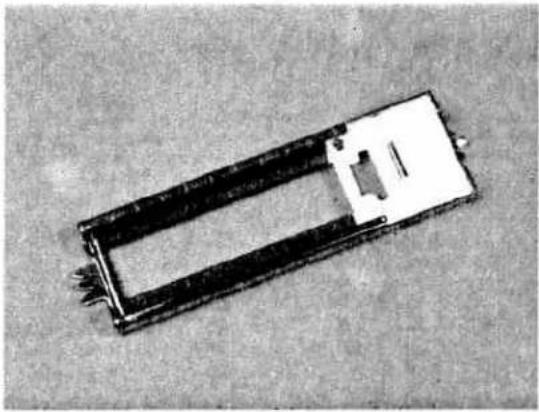
natural_image
Black-and-white photo of a rectangular electronic component with a central slot and mounting holes (no visible text or symbols)Buttonhole foot No. 5 A
Part No.: 98-694-830-00

natural_image
Black-and-white photo of a white electronic device with a metallic handle and screw base (no visible text or symbols)Buttonhole guide No. 10
Part No.: 93-037 595-91
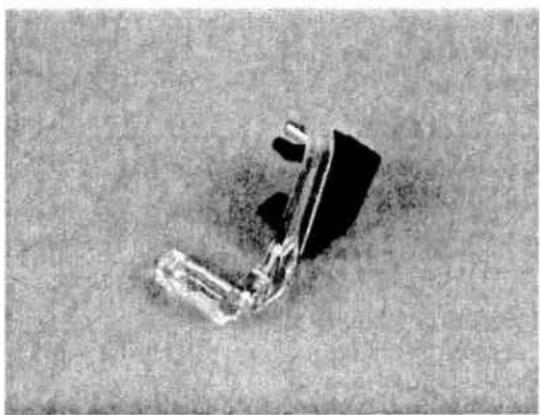
natural_image
Aerial view of a vehicle with a dark suspension or crash on the ground (no visible text or symbols)Darning foot No. 6
Part No.: 93-035 960-91
Accessories
Traditional
embroidery techniques

natural_image
Top-down view of a small electronic component or switch on a textured surface (no visible text or symbols)Roll hemmer foot No. 7
Part No.: 96-694 818-00
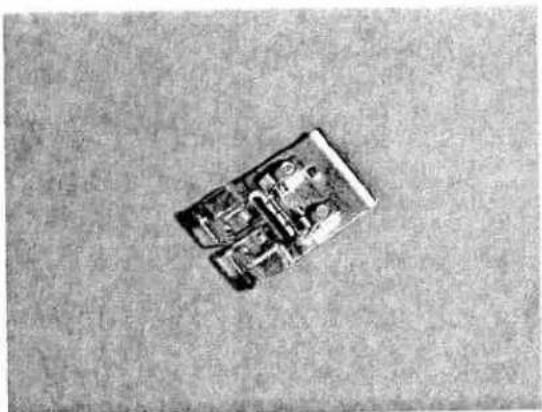
natural_image
Top-down view of a small electronic device on a textured surface (no visible text or symbols)Embroidery foot No. 8
Part No.: 98-694-840-00
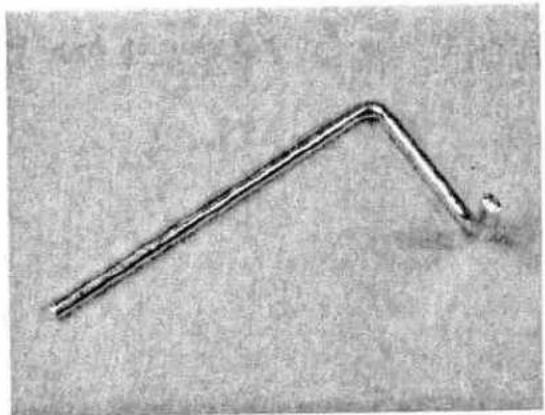
natural_image
Close-up of a metallic tool or wire with a pointed tip, lying on a textured surface (no text or symbols visible)Edge guide No. 3
Part No.: 98-802-422-00

natural_image
Black-and-white photo of white plastic tubes and a small toothpaste tube on a textured surface (no text or symbols visible)Oil
Soft brush
Seam ripper
3rd Spool holder to be placed on the pin (special accessories)
Sewing feet (special accessories)
The special accessories allow you to do special sewing work.
The listed sewing feet are available for a charge at your PFAFF dealer:
| Special accessory | Part No. | Sewing work |
| Appliqué foot | 93-042 941-91 | For appliqué work |
| Open appliqué foot for 9 mm width | 93-036 933-91 | For appliqué work (program 12) |
| Pintuck foot, 5 grooves(twin needle with needle spacing 1.6-2.0)130/705 H-ZWI | 93-042 950-91 | For cording work (needle size 80) |
| Pintuck foot, 7 grooves(twin needle with needle spacing 1.6-2.0)130/705 H-ZWI | 93-042 953-91 | |
| Cording tongue (2 pcs.) | 93-035 952-45 | |
| Twin-needle cording foot 9 mm | 93-036 944-91 | The spaces inbetween the cordings can be embroidered on. |
| Finger guard | 93-036 910-91 | For all sewing work |
| Fringe foot | 93-042 943-91 | For sewing loop embroidery |
| 3rd thread spool holder to be placed on the pin | 93-033 063-44 | For sewing with the triple needle |
| Straight stitch foot with round hole(for Dual Feed) | 98-694 821-00 | Caution! Only use straight stitch in center needle position |
| Felling foot, 4.5 mm | 93-042 946-91 | For lap felled seams |
| Felling foot, 6.5 mm | 93-042 948-91 | |
| Single-needle cording foot | 93-036 915-91 | For cording |
| Shirring foot | 93-036 998-91 | For shirring frills etc. |
| Braiding foot | 93-036 936-91 | For sewing over cords and thicker threads |
| 7/9 hole foot | 93-036 946-91 | For attaching threads and tapes |
| Eyelet plate | 93-036 977-45 | For eyelet embroidery |
| Eyelet plate 9 mm, diam. 6.5 | 93-036 949-91 | For placing pleats at regular intervals. |
| Eyelet plate 9 mm, diam. 8.5 | 93-036 950-91 | Caution! Only use straight stitch in center needle position |
| Ruffler | 98-999 650-00 | |
| Quilt and patchwork foot | 93-036 925-91 | For quilting and patchwork |
| Quilt and patchwork foot (for top feed) | 93-036 927-91 | For quilting and patchwork |
| Roll hemmer 2 mm | 98-694 873-00 | For hemming edges |
| Hemmer 4 mm (for top feed) | 98-694 823-00 | For hemming edges |
| Narrow edge foot | 93-036 939-91 | |
| Bias tape binder (remove foot holder) | 98-053 484-91 | For binding edges with bias tape |
| Needle plate with round hole | 98-694 422-00 | For topstitching seams and sewing very light and soft materials.Caution! Only use straight stitch in center needle position |
| Knit-edge foot | 93-042 957-91 | For sewing knitted fabrics |
| Teflon foot (for top feed)stitch width up to 6 mm | 93-036 917-91 | For sewing leather and plastic materials.Caution! Set a max. stitch width of 6 mm |
| Teflon fancy stitch foot(stitch width up to 9 mm) | 93-036 922-91 | For embroidering leather |
The following pages contain application examples of some special accessories.
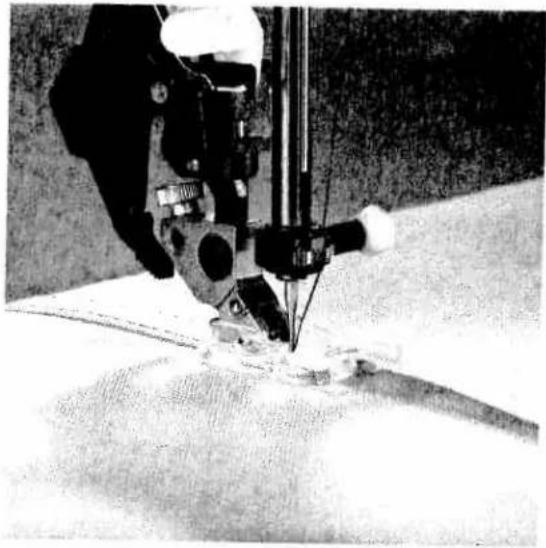
natural_image
Close-up of a sewing machine needle stitching fabric, no visible text or symbolsFelling foot
Lap-felled seams are particularly durable and therefore well known as the typical denim seam. They are also suitable for sportswear, children's wear, blouses and shirts. You can make these seams particularly decorative by using a sewing thread of a contrasting color. The felling foot is available in two different widths (for light-weight and heavy-weight fabrics).
- Engage the felling foot in the sewing foot holder.
- Place the fabric reverse side to reverse side.
- Overlap the raw edge of the lower ply by about 1–1.5 cm (3/8 to 5/8 inch).
- Now place this overlapping edge over the tongue of the felling foot. The fabric must be placed fully under the sewing foot.
- Sew along the folded edge with straight stitch.
- Afterwards, pull the fabric plies apart and feed the protruding hem into the felling foot. The hem is turned over by the foot and over-stitched along the edge. Pull the two fabric plies apart during sewing.
Program: 00
Stitch length: 3
Tension: 3-5

natural_image
Close-up of a sewing machine needle stitching fabric (no visible text or symbols)Appliqué foot
Appliqués are quickly done and always produce a beautiful effect. By using different materials and patterns you can create countless new designs. You can make a perfect, densely stitched seam with the appliqué foot which has a special cutout on the underside for the zigzag seam.
- Insert the appliqué foot into the sewing machine.
- Transfer your drafted pattern to the face side/ smooth side of the fusible backing fabric. Remember that any numbers or letters have to be drawn as a mirror image.
- Now iron the backing fabric onto the appliqué material. Cut the motif out and pull the paper off.
- Place and iron the appliqué parts onto the base material.
- Then overstitch all contours with narrow and dense zigzag stitches. When you reach a curve, use the "needle down" function to help you guide the work more easily. Also make sure that the needle stitches over the outer edge so that no fraying occurs later.
Program: 02 or 16
Stitch length: 0.35
Stitch width: 1.5-2.0
Tension: 2-3
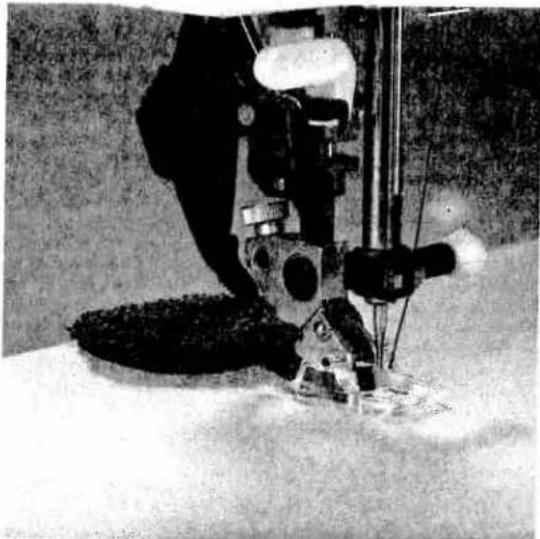
natural_image
Close-up of a sewing machine needle stitching fabric, no visible text or symbolsFringe foot
With this special foot for loop embroidery you can produce fantastic effects in no time. This foot is particularly effective on terry-cloth.
- Mark out your desired pattern with chalk or the magic pen.
- Use a stabilizer for the material.
- Insert the fringe foot.
- Embroider the motif row by row. For circles you have to work from the outside inwards.
- When using thicker threads you may have to select a longer stitch length; it is best to sew a test seam first.
- When you have finished, pull the work out of the machine carefully because if you pull too fast, you will pull the loops tight.
- Knot the threads on the reverse side.
Program: 02
Stitch length: 0.5-1
Stitch width: 1.5-2.5
Tension: 2-3
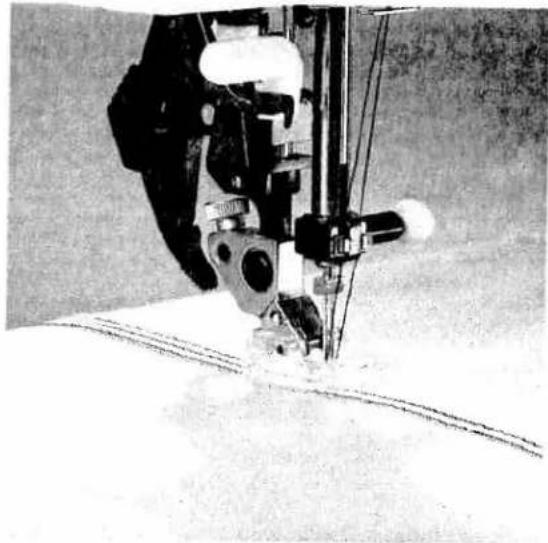
natural_image
Close-up of a sewing machine needle stitching fabric (no visible text or symbols)Pintuck foot
This classical sewing technique can be used perfectly well on many fabrics such as cottons and light woollens. With pintucks you can give a nostalgic touch to underwear and children's wear.
- Insert the pintuck foot.
- Swap the needle for a twin needle (1.6 or 2 mm needle clearance) e.g. 130/705 H-ZWI needle thickness 80.
- Thread up the two needles.
- Now set the needle thread tension quite tight (at about 5) to make the seam more prominent.
- Sew one pintuck. When you sew the second one you can let the first one run parallel in one of the foot's grooves. This ensures that the spaces between the pintucks always remain the same.
Tip: If you wish to emphasize the pintuck effect, you can fit a "cording tongue" on the front edge of the needle plate. Its guide shifts the fabric upwards thus making the pintucks look even more voluminous.
Sewing with a gimp thread makes a similar optical effect, it makes the pintuck even broader. However, with a gimp thread you work without a cording tongue.
- First remove the needle plate.
- Thread the gimp thread upwards through the hole in the needle plate.
- Return the needle plate to its position. The notch between the needle plate and the sewing machine provides space for the gimp thread. This thread must be fed under the detachable work support, so that it does not become tangled during sewing.
- While sewing the cording, the material must be pulled lightly.
Program: 00
Stitch length: 2.5
Tension: 5
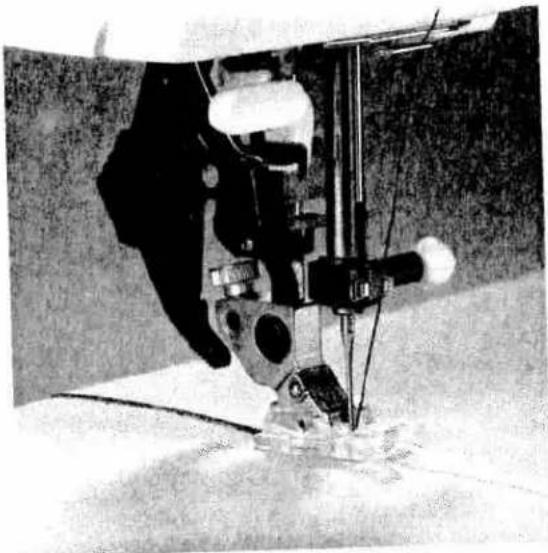
natural_image
Close-up of a sewing machine needle stitching fabric (no visible text or symbols)Single-needle cording foot
Cording is a technique in which pearl thread or a fine cord is overstitched to produce a purl seam. With this technique you can obtain a similar effect to braiding. Appliqués can also be made more impressive by this seam.
- Insert the cording foot.
- Place the gimp thread into the foot so that it leads through one of the grooves at the front and lies under the sewing foot at the back.
- Now overstitch the gimp thread with narrow, dense zigzag stitches.
Tip: You can obtain a remarkable effect by over-stitching a medium pearl thread with a thread of a different color.
| Program: | 32 |
| Stitch length: | 0.4–0.6 |
| Stitch width: | 1.5–2.0 |
| Tension: | 3 |

natural_image
Close-up of a sewing machine needle stitching fabric, no visible text or symbolsShirring foot
Beautiful gathering effects on, for example, children's wear or curtains, can be achieved quickly and easily with the shirring foot.
- Insert the shirring foot by hooking the rear bar of the foot into the rear groove of the foot holder. Push the foot upwards until it snaps into the front bar.
- Place the fabric to be gathered under the sewing foot and the fabric to remain free of gather downwards through the foot cutout. The fabric plies lie face side to face side.
- During sewing, you must pull the top fabric a little. The harder you pull, the greater the gathering effect on the bottom fabric.
- Be sure to guide the fabric edges evenly through the foot.
- Disengage the shirring foot by pushing it down at the front and remove it in the direction of the groove of the sewing foot holder at the back.
Tip: By increasing the needle thread tension and the stitch length, you can increase the gathering effect.
| Program: | 00 |
| Stitch length: | 3 |
| Tension: | 3-! |
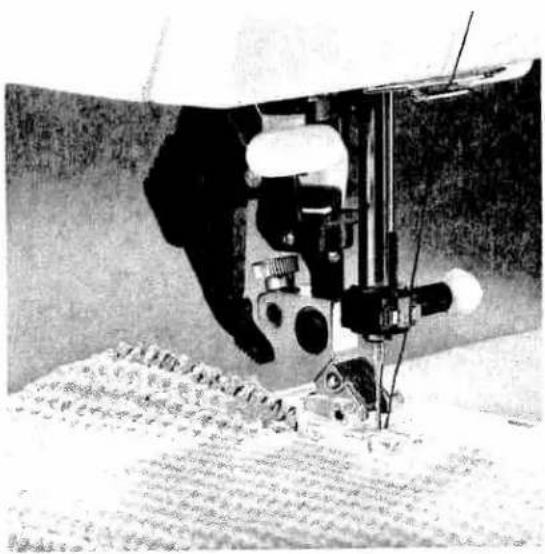
natural_image
Close-up of a sewing machine needle stitching fabric, no visible text or symbolsKnit-edge foot
The knit-edge foot makes it easy to sew thick seams on knitted fabrics or fur imitations. To obtain a perfect seam on shapecut parts, we recommend adding a wool thread under slight tension and overstitching it at the same time.
Program: 33
Stitch width: 6.0
Tension: 3-5
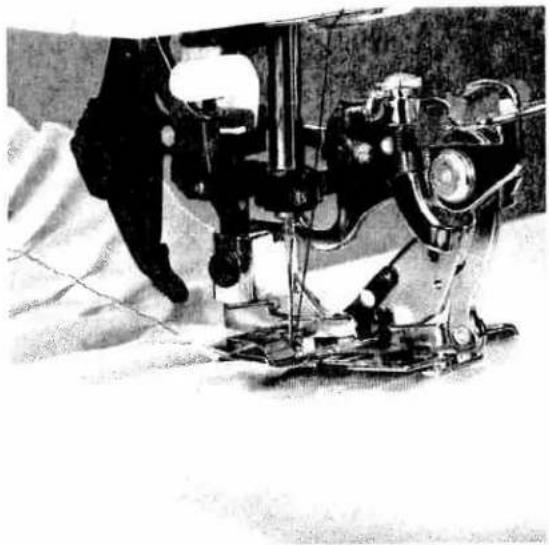
natural_image
Black-and-white photo of a sewing machine needle stitching fabric, no visible text or symbolsRuffler
With the ruffler you can make closely or widely spaced pleats automatically while sewing. This is very useful for ruffles, frills, home textiles etc.
The ruffler can be used in three different ways:
- Folding the fabric in pleats.
- Folding the fabric in pleats and sewing them on simultaneously.
- Folding the fabric in pleats, sewing them on and sewing lace on all at the same time.
When you buy the ruffler from your PFAFF dealer, you receive a full description with it.
Program: 00
Stitch length: 3
Tension: 3-5
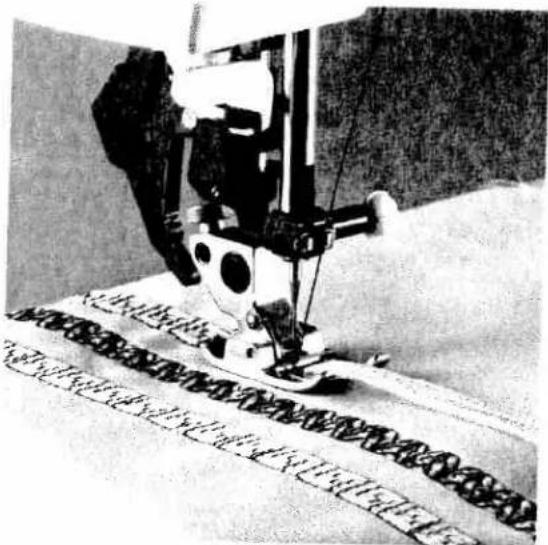
natural_image
Black-and-white photo of a sewing machine needle stitching fabric, no visible text or symbols7/9 hole foot
With this foot you can optain beautiful decorative effects with no problem at all.
Up to 9 threads or mercerized cotton are sewn over with various fancy stitches.
- Cut the threads to the desired lengths and thread it from above through the 9 holes. Then place the threads to the back under the sewing foot. Let the threads protrude by 4-5 cm at the back.
- Engage the sewing foot.
- Stitch over the 9 threads with the desired fancy stitch, e.g. Program 142 or 147.
Tip: Pearl thread or embroidery twist are best suited.
Program: 142
Stitch length: 11
Stitch width: 9
Tension: 3
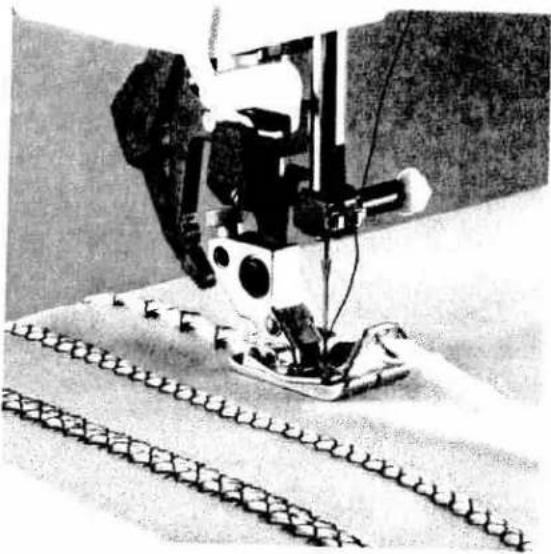
natural_image
Close-up of a sewing machine needle stitching a patterned fabric (no visible text or symbols)Braiding foot
This special foot is best suited to stitch over puffy thread (e.g. loosely spun wool) or a narrow tape.
- Thread your thread or tape from the front through the eyelet-type guide and pull it through the front hole backwards underneath the sewing foot.
- Insert the braiding foot.
- Select the desired fancy stitch, e.g. Program 17 and stitch over the thread or tape.
Program: 17
Stitch length: 2
Stitch width: 6
Tension: 3

natural_image
Close-up of a sewing machine needle stitching fabric (no visible text or symbols)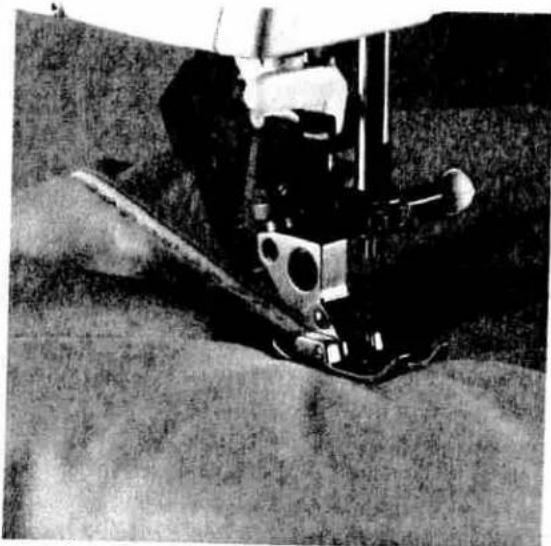
natural_image
Close-up of a mechanical device with a tool and mounting bracket, no visible text or symbolsQuilt and patchwork foot
A quilt always consists of three layers of material. Lots of geometrically shaped pieces of material are joined together in continually changing patterns to form the top layer of the quilt. This is then tacked to the middle layer made of polyester padding and connected to the back layer of the quilt that usually consists of one uniform piece of material.
The quilt and patchwork foot is particularly suitable for joining your pieces of fabric. The clearance between needle and outer edge of the foot is 14 of an inch (6,3 mm) and between the needle and the inner edge of the foot 18 of an inch (3,1 mm).
- Engage the quilt and patchwork foot.
- Join the pieces of fabric using program 00. With a seam allowance of 14 of an inch guide the pieces along the outer edge; with a seam allowance of 18 of an inch guide the pieces along the inner edge of the foot.
Program: 00
Stitch length: 2,5
Tension: 3-5
In traditional quilting the three fabric layers are joined by hand with small stitches – this can be done quicker and more practical with the sewing machine.
- Use invisible sewing thread (perlon yarn). Place polyester thread that matches the color of the fabric on the bobbin.
- Set the needle thread tension at 9 and the bobbin thread tension rather loose. It is best to use a second bobbin case.
- When you now sew over the three fabric layers, you will only see the triple stitch of the bobbin thread, the intermediate stitch will be invisible so that the quilt looks as if hand-made.
Program: 11
Stitch length: 3-4
Tension: 9
Quilt and
patchwork foot
Traditional
emhinderu technique
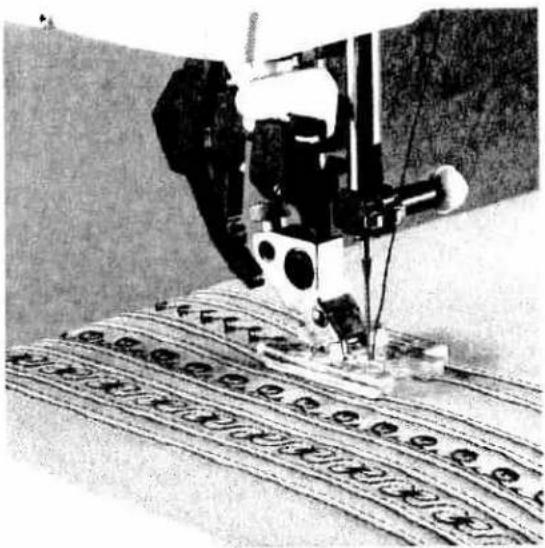
natural_image
Black-and-white photo of a sewing machine needle stitching fabric with patterned threads (no visible text or symbols)Twin-needle cording foot
Using this foot you can sew cordings with a clearance of 5 or 11 mm. You can use the same foot to embroider fancy stitches of 6 or 9 mm depending on the cording width.
- Engage the twin-needle cording foot. The foot can be engaged in both directions so that the second cording can be sewn on either side.
- Replace the sewing needle by a twin needle (needle gauge 1.6 or 2 mm).
- Then thread two needle threads (see page ???).
- Set the needle thread tension rather taut (5 approx.) and sew a cording (also see page ??? with or without gimp thread).
- If you sew a second cording, you can let the cording that you have already sewn run in the guide groove which is protruding on one side of the foot for this end. This way you obtain the larger clearance where a fancy stitch can be sewn.
- Topstitch all cordings.
- Now replace the twin needle by a normal sewing needle.
- Embroider the desired fancy stitch onto the wider clearance, e.g. program 86. To this end let the cordings run inside the guides of the sewing foot.
Program: 00
Stitch length: 2,5
Tension: 4-5

natural_image
Close-up of a sewing machine needle stitching fabric, no visible text or symbolsOpen appliqué foot
Appliqués are quickly made and always produce a beautiful effect. You can obtain an additional effect if you use program 12 in connection with the open appliqué foot. Your appliqué will look as if stitched by hand.
- Cut out the pieces of the motif without any seam allowance.
- Iron paper-backed fusing web onto the back of the pieces of the motif. Now pull the paper off the pieces to be appliquéd and iron these onto the fabric according to the motif.
- Engage the open appliqué foot.
- Select program 12 and guide the edge of the motif along the right-hand inner edge of the foot. This will make sure that the needle runs evenly along the edge of the motif, that the straight stitch is almost entirely sink-stitched and a hand-made effect is obtained.
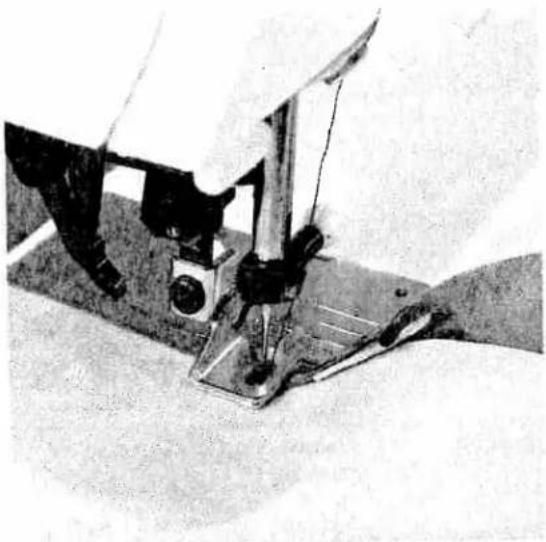
natural_image
Close-up of a sewing machine needle stitching fabric (no visible text or symbols)Bias tape binder
Binding with bias tape is a very easy method of giving fabric edges a smooth and neat appearance. For this you need unfolded bias tape about 24 mm (one inch) wide.
- Remove the foot holder with the sewing foot and screw on the binder.
● Cut the beginning of the bias tape at a diagonal. - Push the tape into the scroll of the binder and pull out to the back.
- Adjust the binder so that the needle enters at about 1–1.5 mm (1/16") from the folded-in edge of the bias tape. This can also be achieved by changing the needle position.
- Stitch a few centimetres (about an inch) along the bias tape.
- Insert the edge to be bound into the slot of the binder. The raw edge must be placed between the bias tape edges. The bias tape encloses the raw edge automatically during sewing.
Tip: You can obtain an additional effect by using zigzag stitches or fancy stitches.
| Program: | 00 |
| Stitch length: | 2.5 |
| Tension: | 3-5 |
| [205] | System and No. | Stitch length | Stitch width | Needle spacing | Suitable for |
| 130/705 H-ZWI Size: 80 | 2.5 mm2.5 mm | -- | 1.6 mm2.0 mm | Normal cording Normal cording | |
| 130/705 H-ZWI Size: 80Size: 90Size: 100 | 2.5 mm2.5 mm3.0 mm | -- | 2.5 mm3.0 mm4.0 mm | Wide cording Extra wide cording | |
| Decorative designs sewn with twin needles Before you start sewing, turn the handwheel and check to make sure the needles stitch into the fabric properly. In this way, needle breakage can be largely avoided. | |||||
 | Decorative and zigzag patterns | ||||
| 130/705 H-ZWI Size: 80Size: 80Size: 80 | 0.5-1.5 mm0.5-1.5 mm0.5-1.5 mm | widenarrownarrow | 1.6 mm2.0 mm2.5 mm | Ornamentations Ornamentations Ornamentations | |
| [42Y7] | Special hemstitching twin needle | ||||
| 130/705 H-ZWI-HO Size: 80Size: 80 | 2.3-3.0 mm2.0-3.0 mm | very narrowvery narrow | -- | Decorative hem-stitching effect.Heavily dressed fabrics and glass cambric are particularly suitable. | |
Needle chart
Using the correct needle guarantees a better processing of the material.
| Fabric weight light Needle size 60 70 75 | Fabric weight medium Needle size 80 90 | Fabric weight heavy Needle size 100 110 120 | ||
| Needle points | ||||
| System & No. | Profile | Needle point & eye | Suitable for | |
| 130/705 H Size: 70/80 |  | Light ball point | Universal needle for fine-meshed synthetics, fine linen, chiffon, batiste, organdy, woollens, velvet, fancy seams and embroidery work | |
| 130/705 H-SUK Size: 70/110 |  | Medium ball point | Coarse knitted fabrics, Lastex, double jersey fabrics, Quiana and Simplex | |
| 130/705 H-PS Size: 75 + 90 |  | Medium ball point | Stretch-fabric needle developed especially for Pfaff. Particularly suitable for delicate stretch and knitted fabrics | |
| 130/705 H-SKF Size: 70/110 |  | Heavy ball point | Wide-meshed corsetry, Lycra, Simplex and Lastex | |
| 130/705 H-J Size: 90-110 |  | Acute ball point | Twill, workwear, heavy linen, blue jeans and light canvas | |
| 130/705 H-LL Size: 70-120 |  | Narrow wedge point (cuts right) | Leather, suede, kid leather, goatskin | |
| 130/705 H-PCL Size: 80-110 |  | Narrow wedge point with left twist groove | Imitation leathers, plastics and oil cloth | |
| 130 H-N Size: 70-110 |  | Light ball point, long eye | Seams topstitched with buttonhole silk or No. 30/3 synthetic thread | |
| 130/705 H-WING Size: 100 |  | Hemstitching point | Attractive hemstitching on heavily dressed materials, organdy and glass cambric | |
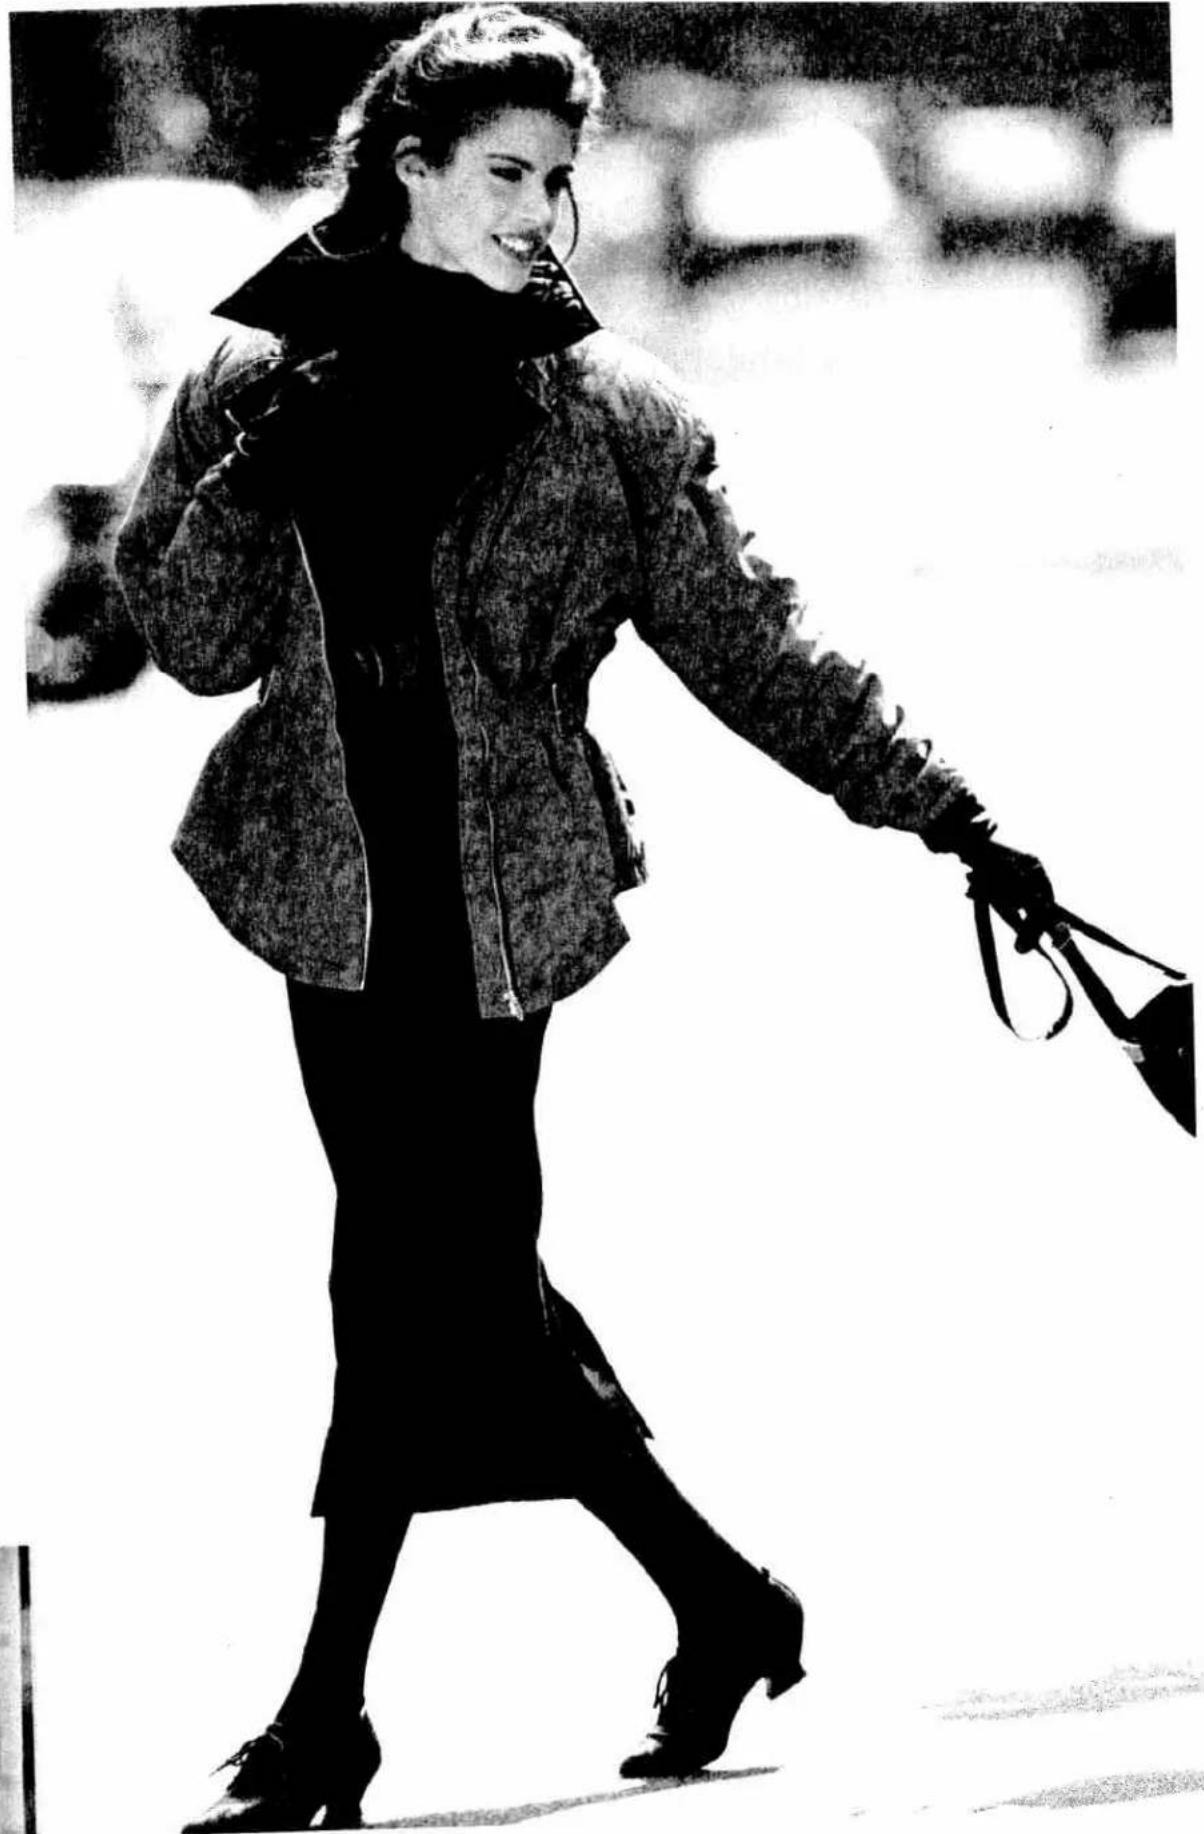
natural_image
Black-and-white photo of a woman in vintage attire walking, carrying a feathered bag (no visible text or symbols)
natural_image
Top-down view of a mechanical device with a circular component and a rectangular base (no visible text or symbols)Contents
Changing the batteries Page 156
Changing the needle plate Page 157
Cleaning and oiling Page 157
Changing the sewing lamp Page 158
Sewing faults and their removal Page 159

natural_image
Close-up of a white mechanical device with diagonal hatching and mounting holes (no visible text or symbols)Changing the batteries:
Switch on the sewing machine to avoid deleting the memories during the battery change. Tilt the machine over on the side as illustrated. The battery compartment is installed in the base. Using a screwdriver lightly push the catch into recess A, lift it, and remove the cover. Take out the batteries. Insert the new batteries E with the + side facing upwards. Insertion of the batteries is done in reverse order.
Note: After changing the batteries, the contents of the memories should be checked. Spare batteries: 2 Mignon cells 1.5 V; type LR 6. Only use leak-proof batteries!
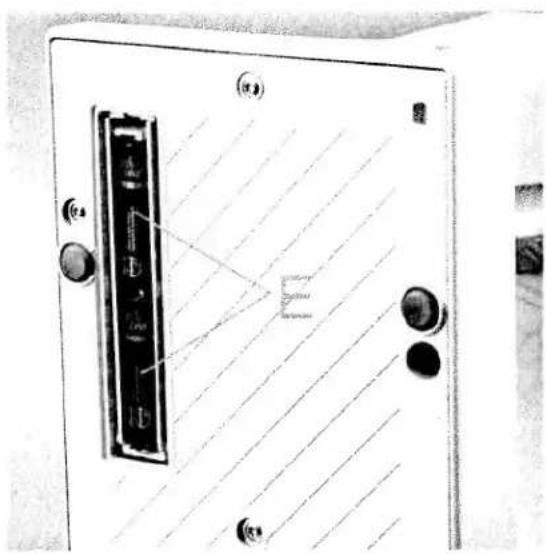
text_image
Diagram of a door panel with labeled components and a magnified inset showing a small rectangle, likely indicating a measurement or detail.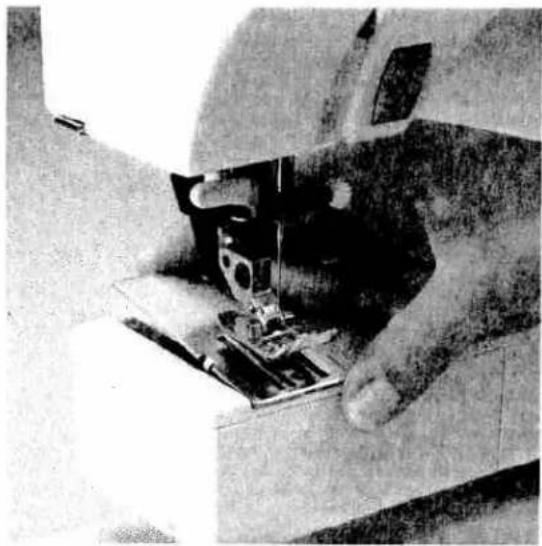
natural_image
Close-up of a sewing machine needle stitching fabric, no visible text or symbols
natural_image
Top-down view of a mechanical device with a mounted component and a circular component, no visible text or symbols.Changing the needle plate
- Switch off the master switch.
- Raise the sewing foot lifter.
- Pull the needle plate upwards at the back and remove it.
Replacement
- Lay the back of the needle plate down flat and push it down at the front until you hear it snap into place.
Before you start sewing, check that the needle plate is lying flat.
Cleaning and lubricating
- Switch off the master switch.
- Remove the needle plate and lower the feed dog.
- Clean the feed dog and hook area with the brush.
- Apply one drop of oil only to the hook as shown above. The machine is otherwise maintenance free and must not be oiled in other places.
- Clean and oil the sewing machine every 10 to 15 hours of operation.
Cleaning the display
When needed, clean the display, using a dry, soft, lint-free cloth. Do not use chemical cleaners or solvents!
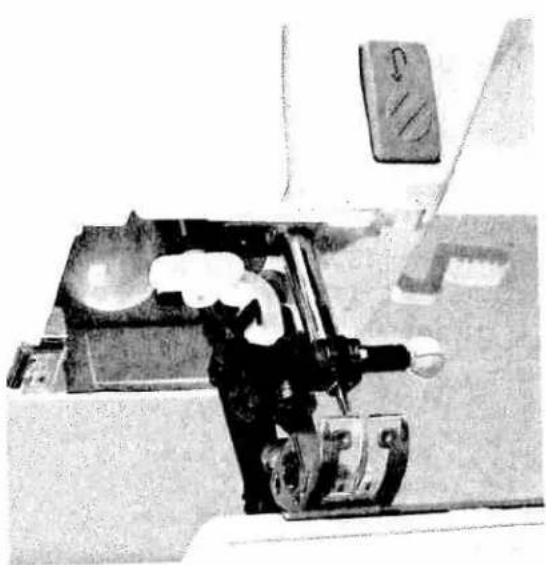
natural_image
Interior view of a vehicle's dashboard and steering wheel (no visible text or symbols)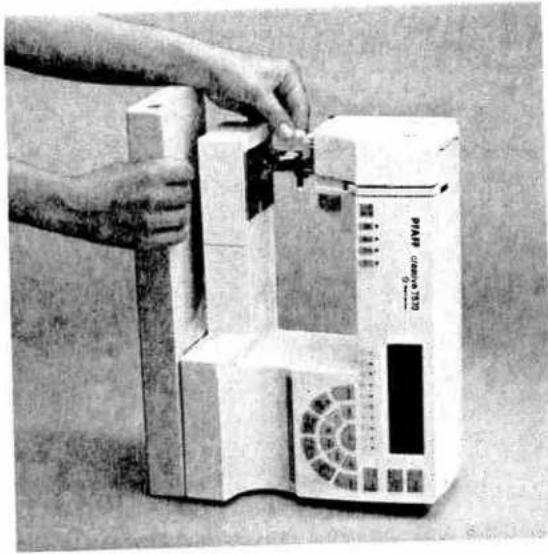
natural_image
Person assembling or adjusting a medical device with a digital display (no visible text or symbols)Changing the sewing lamp
- Switch off the master switch.
- Disconnect the mains plug and the foot control from the machine.
- Remove the detachable workplate.
The sewing lamp (bulb) is located inside the needle head of the sewing machine.
Removal
To make it easier to change the bulb, we recommend placing the sewing machine on the side as illustrated.
- Hold the machine securely.
- Push the bulb into its holder as far as it will go and turn it counter-clockwise (half a turn) to remove it.
Insertion
- Insert the bulb in the diagonal holder and turn it so that both stops of the bulb engage.
- Now push the bulb fully into the holder and turn it clockwise until it is held firmly.
Important
The maximum permissible bulb wattage is 15 Watts!
Sewing faults and their removal
Cause:
1. The machine skips stitches
Needle is not properly inserted.
A wrong needle has been inserted.
Needle is bent or blunt.
Machine is not properly threaded.
Needle is too small for the thread.
Removal:
Push needle fully upwards.
Flat side to the back.
Use needle system 130/705 H.
Insert a new needle.
Check the threading paths.
Use a larger needle.
2. The needle thread breaks
See 1.
Thread tension is too tight.
Thread is poor or has slubs in it or it has become dry after too long in storage.
Thread is too thick.
See 1.
Adjust thread tension.
Only use good threads.
Use a needle with a larger eye (System 130 N).
3. Needle breaks off
Needle not pushed in fully.
Needle is bent.
Needle is too thick or too thin.
Needle is bent and hits the needle plate because you are pulling or pushing the fabric.
The bobbin case is not properly inserted.
Insert new needle and push it fully in.
Insert new needle.
See needle chart (Pages 152/153).
Let the machine feed the fabric.
Only guide the fabric lightly.
Push the bobbin case in fully when inserting it.
4. Seam is sewn unevenly
The tension needs adjusting.
Thread is too thick, slubbed or hard.
The bobbin thread is unevenly wound.
Thread loops above or below the stitch
Check needle-thread and bobbin-thread tensions.
Use perfect threads only.
Do not wind free-hand. Run the thread through the primary tension.
Thread up correctly. Check needle-thread and bobbin-thread tensions.
5. The machine does not feed or feeds irregularly
Sewing lint has collected between the feed dog teeth rows.
Feed dog is lowered. Slide C (see page 37) is at right.
Remove needle plate, remove lint with brush.
Push slide C (see page 37) to the left.
6. Machine binds
Loose threads in the hook race
Remove loose thread and apply one drop of oil to the hook.
7. Machine does not sew the entered program
Switch off the machine and back on again after about 10 seconds. Enter desired program again.
Important notes:
Before changing the sewing feet or needles, you must switch off the master switch.
Do not start the threaded machine without fabric in it.
If you leave the machine, even for a short time, do not forget to switch off the master switch.
This is especially important when children are nearby.

natural_image
Black-and-white illustration of a celestial object with stars and crescent moon patterns, no visible text or symbolsTraditional embroidery techniques
Pages 161–182
The image contains no text. The horizontal lines are stylistic or background elements and must be ignored according to the rules.
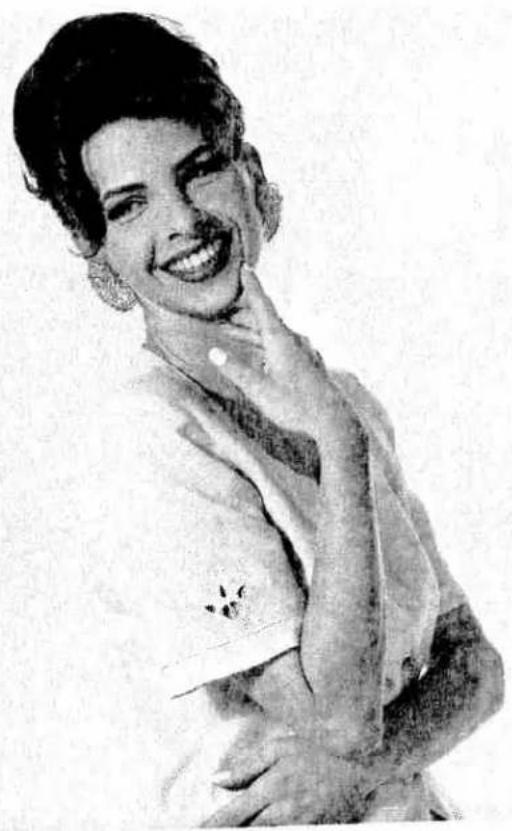
natural_image
Black-and-white portrait of a smiling woman in a collared shirt, no visible text or symbolsContents
| General tips on embroidering | Page 164 |
| Joined borders | Page 166 |
| Cross stitch | Pages 167–170 |
| Linen embroidery | Page 171 |
| Hemstitching | Pages 172–174 |
| Eyelet embroidery | Pages 175–176 |
| Richelieu | Page 177 |
| Quilting | Pages 178–179 |
| Twin needle sewing | Page 180 |
| Pattern stencils | Page 181 |
| Monograms | Page 182 |
Traditional
embroidery techniques

text_image
Jep Jensen at 1 week wellGeneral tips on embroidering
Embroidering does require some practise, but with the right tips and hints, it can be easy to achieve beautiful embroidery results.
Thread tension
In general, a looser thread tension is used for embroidery work than for utility sewing (±2).
In addition, the bobbin thread tension has to be increased by turning the adjusting screw on the bobbin case slightly to the right. This makes the embroidery more uniform and bolder.
Sewing feet
The most suitable sewing feet for embroidery work are No. 2A and 8A.
Caution! Never engage the top feed when doing embroidery work as this could cause a displacement in the embroidery pattern.
Balance
Each pattern in the machine is pre-programmed with its optimum length and width settings. If you are embroidering on difficult materials such as jersey, silk or heavy woollens however, you should (if necessary) adjust your pattern with the balance (see section Balance).
Stabilizing the fabric
Whether working on thick or thin materials, the result will be better if the fabric has been stabilized. Many materials tend to gather, particularly when using dense embroidery stitches. Therefore, we recommend:
Apply iron-on or tear-away stabilizer under the fabric to be embroidered. This will stabilize it and can be removed quickly and easily after the embroidery work has been completed.
Avalon is a transparent gelatine stabilizer which you apply onto the fabric and overstitch. After the embroidery work has been completed, this stabilizer can be effortlessly removed with a damp cloth. Alternatively, a gel stabilizer can be used to stabilize the fabric. The gel has a similar effect to spray-on starch. It has to dry after being applied but it becomes very stiff and can be embroidered on most materials without a paper underlay. After the completion of the embroidery work, the gel can be washed out easily.

natural_image
Black-and-white photo of embroidered boots and accessories on a textured surface (no visible text or symbols)Traditional
embroidery techniques

natural_image
Abstract pattern of wavy lines and geometric shapes, no text or symbols present
natural_image
Abstract wavy line patterns with no text or symbolsJoined borders
Here are some examples of how you can create borders of any width by combining various embroidery programs. Madeira embroidery-threads are particularly suitable here. They are available in many colors and thicknesses. You should however, always use threads of the same thickness when embroidering.

text_image
Scanned page of Chinese text with vertical columns and decorative leaf-like patternsYou can also achieve additional effects through the use of mottled embroidery thread. This is available in many different colors at your Pfaff dealer.

natural_image
Black-and-white photo of a pair of slip-on slippers with printed 'BAD' and 'C' symbols, resting on a cloth (no readable text or symbols beyond the graphic elements)Cross stitches
Cross stitch embroideries have always been an important subject within traditional, folkloristic embroidery techniques.
What used to be stitched by hand with a great deal of effort can now be sewn with the Creative 7570 surprisingly quickly and easily.
Whether you select the pre-programmed cross stitch borders or create your own combinations with the cross stitch programs, these patterns look as if they have been sewn by hand and lend a special touch to table linen, towels or garments.
Tips for cross stitch embroidering:
● Always sew your work using the "slow sewing" function (3).
- Use embroidery foot No. 2 A. Its red guide-grooves are exactly adapted to the size of the cross stitches.
- Use only special embroidery threads for cross stitching, e.g. Madeira Rayon No. 30 + 40, Madeira Cotona or MEZ embroidery and darning thread.
- Place a stabilizer under the fabric.
- We recommend using an embroidery hoop when working with very soft materials.
- You can also use Aida material as used for cross stitches done with the hand. You can change the length and width of the cross stitches of your Creative 7570 in accordance with the size of the Aida squares.
text_image
Image displaying a series of decorative or patterned text blocks, possibly from a document or label.Sewing pre-programmed cross stitch borders Embroidery programs No. 90-99 consist of small cross stitches and are especially suitable for border embroideries. They have been programmed into the machine with optimum stitch length and width, however you can change these settings if required.
Tip: Programs 91, 93, 94, 97 and 99 are symmetrical designs and are very suitable for sewing opposite one another.

natural_image
Repeating pattern of repeating black dots and curved lines on white background (no text or symbols)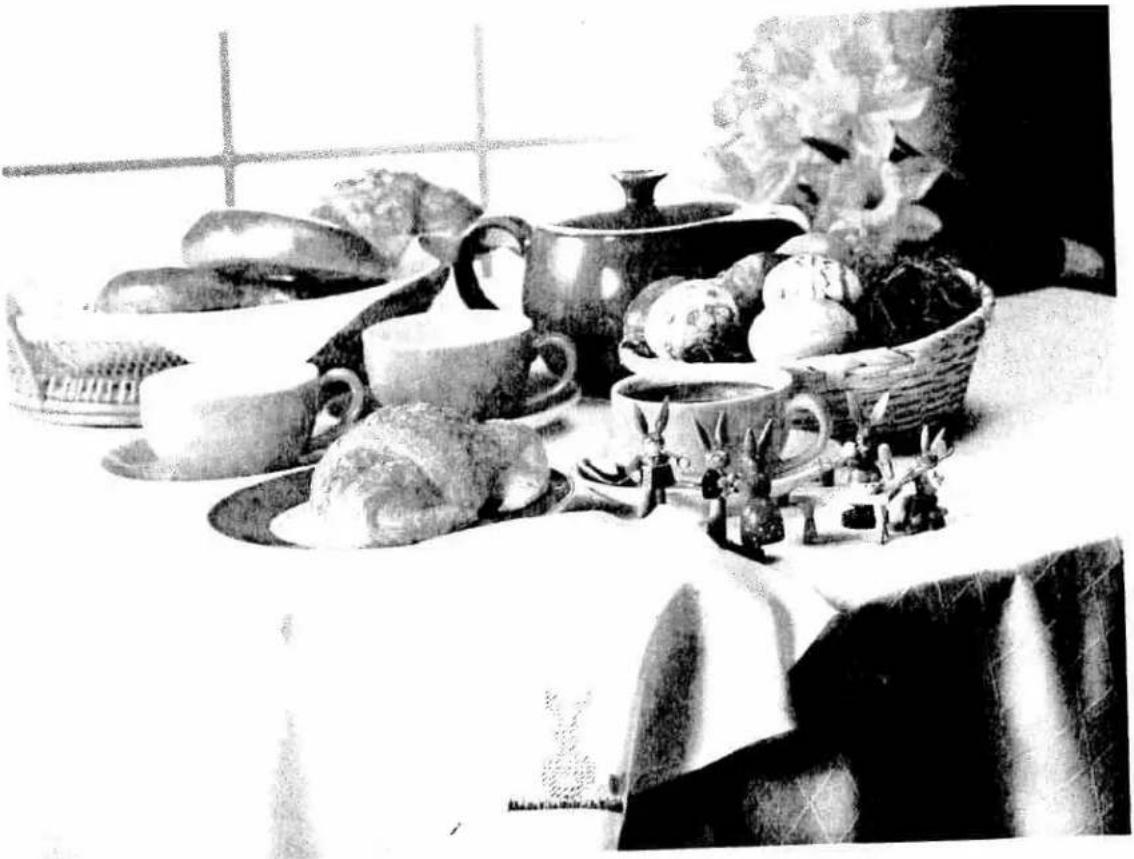
natural_image
Black-and-white still life photo of assorted vegetables and figurines on a table, no visible text or symbolsEmbroidering cross stitch motifs with programs 100-109
You can combine the individual cross stitch programs using your imagination to achieve large area cross stitch motifs or beautiful borders. These combinations are entered into different M-memories which are then sewn successively next to each other. To do this follow these steps:
- Draw the desired cross stitch motif on graph paper.
- Divide this motif into blocks which can be entered into the memories as pattern combinations.
- Now mark the starting point of the first cross stitch in each memory. The start and end points of the cross stitches are particularly important as they determine the stitch direction. A cross stitch that finishes on the right can only be combined with a cross stitch that starts on the right. The starting and end points of a cross stitch program will be indicated when pressing the "info" key in the help files. There, you will also find combination possibilities for each cross stitch program.
Tip: With the " 🔊 " key, you can transfer starting points from left to right and from right to left.
- Mark each memory with a number and arrows for the respective sewing direction.
- Press the "m" key for pattern sequence.
- Now enter the selected cross stitches into a free M-memory.
- To sew the pattern, recall the programmed memories successively by pressing the key "◀".
- When you start sewing the needle always stitches in the middle of the sewing foot. The marked starting point on the template corresponds to the sewing start.
-
After you have finished sewing the first memory, pull the threads to the wrong side of the fabric and knot them together.
-
Select the next memory. When you position the sewing foot, watch the crosswise lines on stitch foot 2 A. They should be aligned with the starting points of the adjoining cross stitches.
- Allow the left metal edge in the window of the foot to move exactly along the line of the previously sewn pattern. In this way you can avoid spacings between adjoining pattern sequences.
- Sew the individual memories one after the other. Then iron the embroidered motif on the reverse side of the fabric.
Cross stitch motif "hare"
For this motif, the following combination has been stored:
M1- 4×10⁵/106
M2- 2×10⁷/4×105/106/3×105/2×106/3×105/107
M3- 9×10⁶
M4- 2×10⁶/4×105/107/3×105/2×107/3×105/107
M5- 4×10⁵/107
M6- 107/5×105/107
M7- 3×10⁵

text_image
M8 M3 M8 M5 M7 M6 M1 M2 M4
natural_image
Black-and-white photo of a seated table with fork and plate, no visible text or symbolsLinen embroidery
Linen embroidering is a very well known and well-loved technique. For this special white-on-white embroidery, filled in embroidery designs are most suitable to make the embroidery more prominent. Always use special embroidery threads and tear-away stabilizer as an underlay. Transfer the desired pattern, i.e. an iron-on pattern or a pattern drawn with a disappearing-ink pen, onto the face side of the fabric. Our example consists of the following programs:
- For the petals select program No. 129.
Pattern length: 35 mm
Stitch width: 6 mm
- Using program No. 165, embroider the points at the top end of the petals.
Stitch width: ∅ 5 mm
- Now stitch the contours using zigzag stitch No. 02.
Stitch width: 2 mm
Stitch length: 0.35 mm
- For the flowers right and left of the motif use pattern No. 132.
Stitch width: 6 mm
Pattern length: 6 mm
- Embroider the edge of the napkin using zigzag stitch No. 02.
Stitch width: 4 mm
Stitch length: 0.35 mm
natural_image
Black-and-white portrait of a woman wearing a wide-brimmed hat, with floral arrangement in foreground (no visible text or symbols)Hemstitching
Everyone knows this technique – but only done by hand. With the Creative 7570, you can produce hemstitching much quicker and easier.
10 special hemstitching programs are at your disposal and by changing the stitch lengths and widths, you can achieve new effects every time. For hemstitching you need either a slitting needle or a wing needle. Only for very fine fabrics a normal sewing needle, size 80, is used. Coarse-weave fabric from which you can pull individual threads is the most suitable for hemstitching. Embroidery and darning thread, particularly cotton, is very suitable. Use the hemstitching programs of your Creative to produce different techniques.
text_image
Scanned text of contract clauses with dense black dots and horizontal lines, likely from a legal or administrative document.
text_image
Scanned page from a Chinese document with dense text and small black dots, likely a form or report.Hemstitching patterns
• Programs No. 110, 113, 118 and 119.
For these programs use wing needle 130/705 H
Wing, size 100, without pulling threads.
Program No. 119 can also be stitched as curved edging and hem strengthener.

natural_image
Pure electrical circuit lines without any symbols
natural_image
Abstract black-and-white diagram with dotted and solid lines forming a corner-like shape (no text or symbols)"Ladder" hemstitching
• Programs No. 111, 112, 114 and 117.
- Pull the threads at the desired width out of the fabric, the same as when hemstitching by hand.
- Embroider along both fabric edges with the respective programs. When doing this, the needle must enter at the side of the edges into the pulled threads thus bunching the threads.
Tip: Use the "slow sewing" function so that the needle stitches evenly and bunches the threads neatly.

natural_image
Close-up of a textured fabric with repeating dark and light patterns (no visible text or symbols)Making a hem with a hemstitch seam
This seam provides a perfect edge finish to hem-stitching work on table cloths, napkins or towels.
- Needle 130/705 H, size 80.
● Programs No. 112, 114 and 117. - Iron the hem over twice in the desired width.
- Pull one or more of the threads just above the hem.
- Using one of the above mentioned programs, sew along the pulled threads. When doing this, the needle must enter the right side of the hem and bunch the pulled threads to the left.
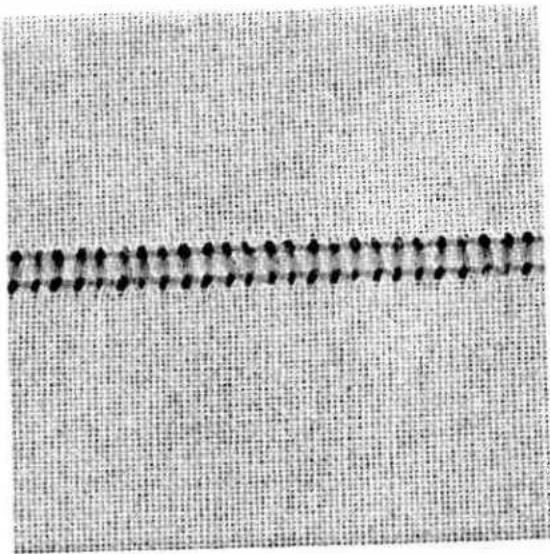
natural_image
Close-up of a textured fabric with repeating dark diamond-shaped patterns on a light background (no text or symbols)Traditional hemstitching
● Programs No. 111, 116.
- Sew the selected program onto a piece of waste fabric as a single pattern.
- Count the threads on the inside of the pattern to determine the pattern width.
- Pull 1-3 threads from the fabric to the right and left of the pattern width.
- Overstitch the remaining threads with the selected program. When you do this, the needle must enter the pulled threads on both sides close to the edges.
natural_image
Black-and-white photo of a decorative ceramic teapot and teacup on a plate, with a scalloped fabric background (no text or symbols)Eyelet embroidery
Eyelet embroidery refines your linens and can be produced very easily with your Creative. With the help of the eyelet plate and several utility and fancy stitches you can produce beautiful eyelet embroideries.
● Lower the feed dog.
- Installing the eyelet plate: Place the eyelet plate onto the needle plate making sure that the rear pin fits into the middle cutout of the needle plate. Then push the eyelet plate down at the front.
- Place the marked fabric taut in an embroidery hoop.
- Cut one or two fabric threads and push the fabric over the pin in the eyelet plate. The fabric must fit tightly around the pin.
- Remove the sewing foot.
- Place the sewing foot lifter in darning position.
- Pull up the bobbin thread and hold it for the first few stitches.
- Stitch around the cut with zigzag stitch No. 32. While doing so, turn the hoop with the fabric evenly and clockwise. The stitches must be very close to each other.
- Then secure with a few straight stitches.
And this is how it is done:
- Remove the sewing foot.
- Place the eyelet plate onto the needle plate making sure that pin A fits into the middle cutout of the needle plate. Then push the eyelet plate down at the front.
- Place the marked fabric taut in an embroidery hoop.
- Cut one or two fabric threads and push the fabric over the pin in the eyelet plate. The fabric must fit tightly around the pin.
- Place the sewing foot lifter in darning position.
- Pull up the bobbin thread and hold it for the first few stitches.
- Stitch around the cut with the selected program. While doing so, turn the hoop with the fabric slowly and evenly. The stitches must be very close to each other.
- Then secure with a few straight stitches.
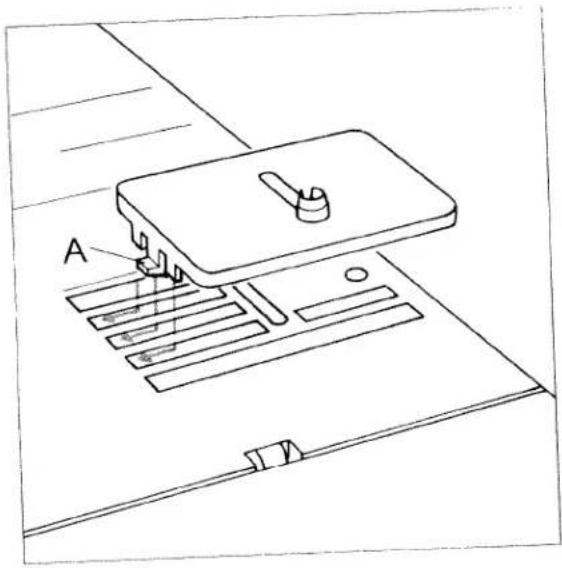
text_image
APattern example for eyelet embroidery
a) Select pattern No. 32.
a) Select pattern
Stitch slowly and evenly around the cut. Then form a second circle with pattern No. 32. Press key "☐". To this end set the stitch width at 2 mm. Then secure with a few stitches using the reverse key.
b) Select shell edging stitch No. 12 or 13. Finish the motif with zigzag stitch No. 32, left needle
position,"", 2 mm. Secure using the reverse key.
c) Slowly stitch around the cut using elastic blind stitch No. 05. Secure using the reverse key.
d) Use pattern No. 65 with a stitch width of 9 mm.
e) Use pattern No. 63 with a stitch width of 9 mm. Secure after 5 petals.
natural_image
Black-and-white close-up of a textured, frilly surface with no visible text or symbolsRichelieu
Even this very artistic form of bar and eyelet embroidery is easy to create with your sewing machine.
● Transfer your pattern onto the face side of the fabric using the disappearing-ink pen.
- Then place two plies of AVALON stabilizer under the area to be embroidered and tauten the fabric and backing in an embroidery hoop.
- To make the embroidery more stable, sew around all contours twice in straight stitch No. 00 (stitch length at approx. 1 mm).
Tip: It is even easier with function "needle down".
- Then carefully cut out the fabric from the areas that will form the cutouts at about 2 mm from their contours. Do not cut away the backing material!
- Embroider the contours with a dense zigzag stitch No. 02.
- The backing material provides this part of the work with much more shape and stability.
- Finally, all you have to do is dissolve the AVALON stabilizer in cold water and your piece of unique embroidery is ready.
natural_image
Black-and-white photo of a person in camouflage uniform standing on a curved surface, no visible text or symbols.Quilting
Quilting is a traditional sewing technique. This method which was developed by the wives of American settlers to make use of leftover materials, has become an artistic hobby with many enthusiasts worldwide.
A quilt always consists of three layers of material. Lots of geometrically shaped pieces of material are joined together in continually changing patterns to form the top layer of the quilt. This is then tacked to the middle layer made of polyester padding and connected to the back layer of the quilt that usually consists of one uniform piece of material.
The entire quilt is often also bordered with the back layer.
Of course, the work of piecing the individual bits of material together must be very precise. The dual feed (IDT system) is of great importance when doing this, so that the parts do not move and so that they join up to each other exactly. Even when sewing and embroidering over the three layered quilt, you achieve optimal sewing results with the dual feed. The quilt or patchwork foot (special accessories) is particularly suitable for quilting. Here the distance between the needle and the outer edge of the foot is 14 of an inch, e.g. 6.35 mm, and 18 of an inch to the inner edge.
Moreover, your Creative 7570 provides quilt stitch 03. Using this stitch you can do your quilting quickly and easily, however it will look as if made by hand! Use invisible sewing thread (perlon) as needle thread and polyester thread in a matching color for the bobbin.
Set the needle thread tension very taut for your quilt, e.g. 8–9, and select a rather loose bobbin thread tension. When you now stitch on the three layers of the quilt, you will only see the triple stitch of the polyester thread; the intermediate stitch will disappear thus producing the hand-made look (see page ??).

natural_image
Abstract geometric pattern with overlapping triangles and a central sketch (no text or symbols)And this is how it is done:
- Cut out the parts of your quilt with templates you have made or bought. A seam allowance of 6.35 mm should already be included in the templates.
-
Spread out the parts as in the pattern and form small squares that you can match together. These squares are then sewn together to form the surface of the quilt.
-
The seam allowances of quilts are not serged but ironed towards the darker side of the fabric.
- Tack your finished surface of the quilt onto the layer of polyester padding with the back layer of the quilt underneath.
- In traditional quilts, these three layers of material are sewn together by hand with small stitches but this is quicker and more practical with the sewing machine, e.g. with program No. 03. This program sews approx. 3 mm next to the seam.

natural_image
Black-and-white photo of a checkered pillow with visible stitching and texture (no text or symbols)When your quilt is finished, you can make it into a cushion, a wall hanging or a bedspread.
natural_image
Decorative square frame with black triangular and white patterns, no text or symbols presentEmbroidery stitches or free-hand machine quilting are particularly suitable for uni-colored materials. In free-hand machine quilting the fabric is guided by hand under the needle. Select program 00 and insert darning foot No. 6. The feed dog must be lowered. Using stencils you can mark the outlines of your motif beforehand.

natural_image
Abstract wavy line pattern with no text or symbolsTwin-needle embroidery
You can achieve beautiful effects when embroidering with the twin needle. Embroideries turn out best with a stitch width of 1.6 - 3 mm. Stretch seams are sewn up to 6 mm wide. Embroideries are particularly effective if two embroidery threads of the same color are chosen.
If you wish to sew embroidery programs with the twin needle, press the "twin needle" key (2). The stitch width is thus automatically reduced to avoid the needle hitting the sewing foot.
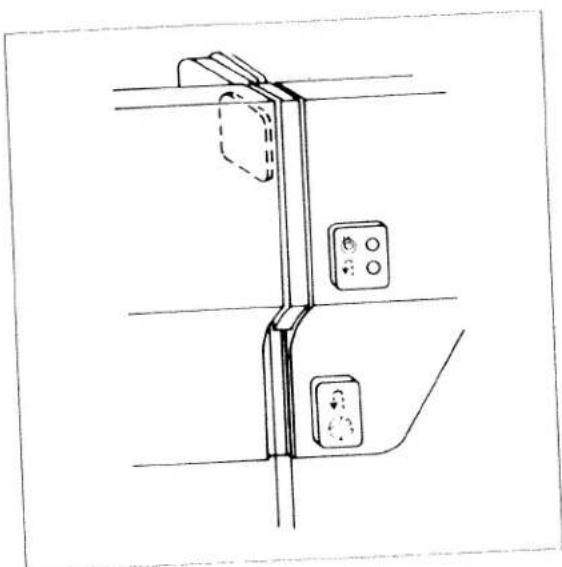
natural_image
Line drawing of a vertical cabinet or lift mechanism with control buttons and a hanging door (no text or symbols)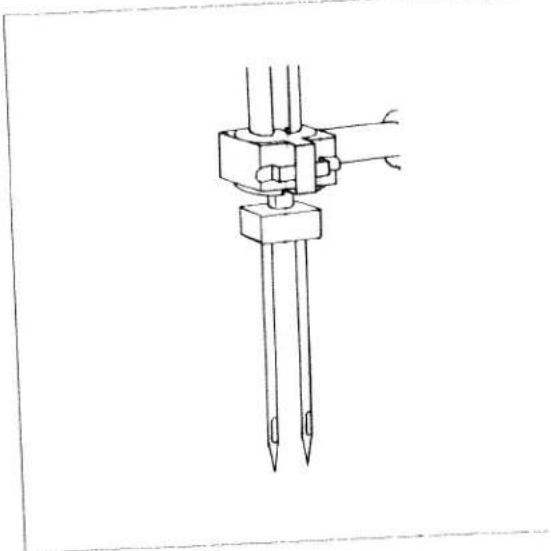
natural_image
Technical line drawing of a mechanical assembly with two vertical rods and a central connector (no text or symbols)Threading the twin needle
Replace the sewing needle with a twin needle.
- Swing the second bobbin holder up and place one bobbin on each of the bobbin holders.
-
The tension disk a is in the left threading slot (33). Take care when threading that one thread passes to the left and one to the right of this disk.
-
Thread the threads as usual, taking care not to get them tangled.
- Pull the threads into the thread guide (32), of to the left and one to the right, and thread the needles.
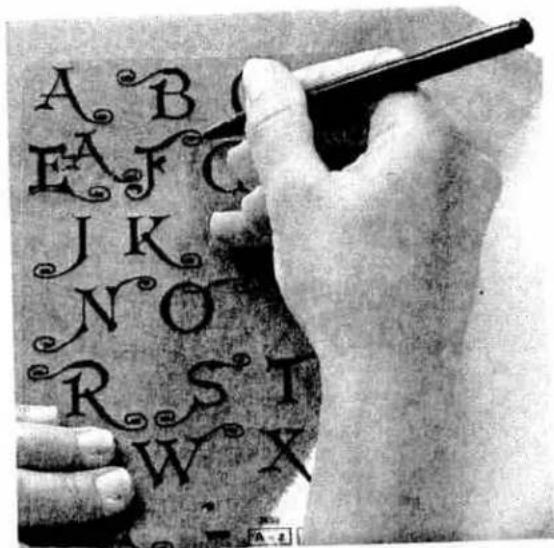
text_image
A B E A F C J K N O R S T W X
text_image
A F°Pattern stencils
The pattern and monogram stencils help you to place and combine patterns on the fabric precisely. Doing this, please take into consideration that the drawn pattern size does not always exactly correspond to the actually embroidered size. A pattern sewn on cotton will be fed differently by the machine than on velvet or woollen materials and will always turn out slightly different. And this is how the stencil should be used: The pattern start of the respective motif or monogram is marked on the stencil with a punched hole. Place the stencil on the fabric and mark the pattern start (fig. 1) with a disappearing-ink pen. Embroider the selected program. If you wish to add a second motif or monogram, you can now determine the opimum position using the stencils. Mark the starting point again and stitch the next pattern.
text_image
LMonograms
Whether working with terry-cloth or woven fabric, with the help of the darning foot and the program 02 you can embroider initials of your own design.
Free-hand guiding does, however, require a little practise.
Here is how it is done:
- Draw the initials onto the fabric with a disappearing-ink marker.
- Drop the feed dog and insert the darning foot (see page 37).
- Place Avalon under the fabric.
- Spread the fabric in an embroidery hoop and embroider in accordance with program 02. Do not forget the darning position.
- Knot the threads and remove the Avalon. (Any remaining pieces dissolve in water.)
TIP: By sewing quickly and moving the material slowly, you stitch densely.
When embroidering on terry-cloth, the monogram must first be sewn with a narrow zigzag stitch and then overstitched with a broader zigzag stitch. In this way the terry-cloth loops are completely sewn over.
Embroidering block letters is somewhat easier. Here the feed dog is not dropped which means that the free sewing is no longer necessary, you can simply sew along the lines with program 02.
- Iron the fabric or use a paper underlay.
- Draw the monogram onto the fabric.
- Sew along the lines you have sketched with program 02.
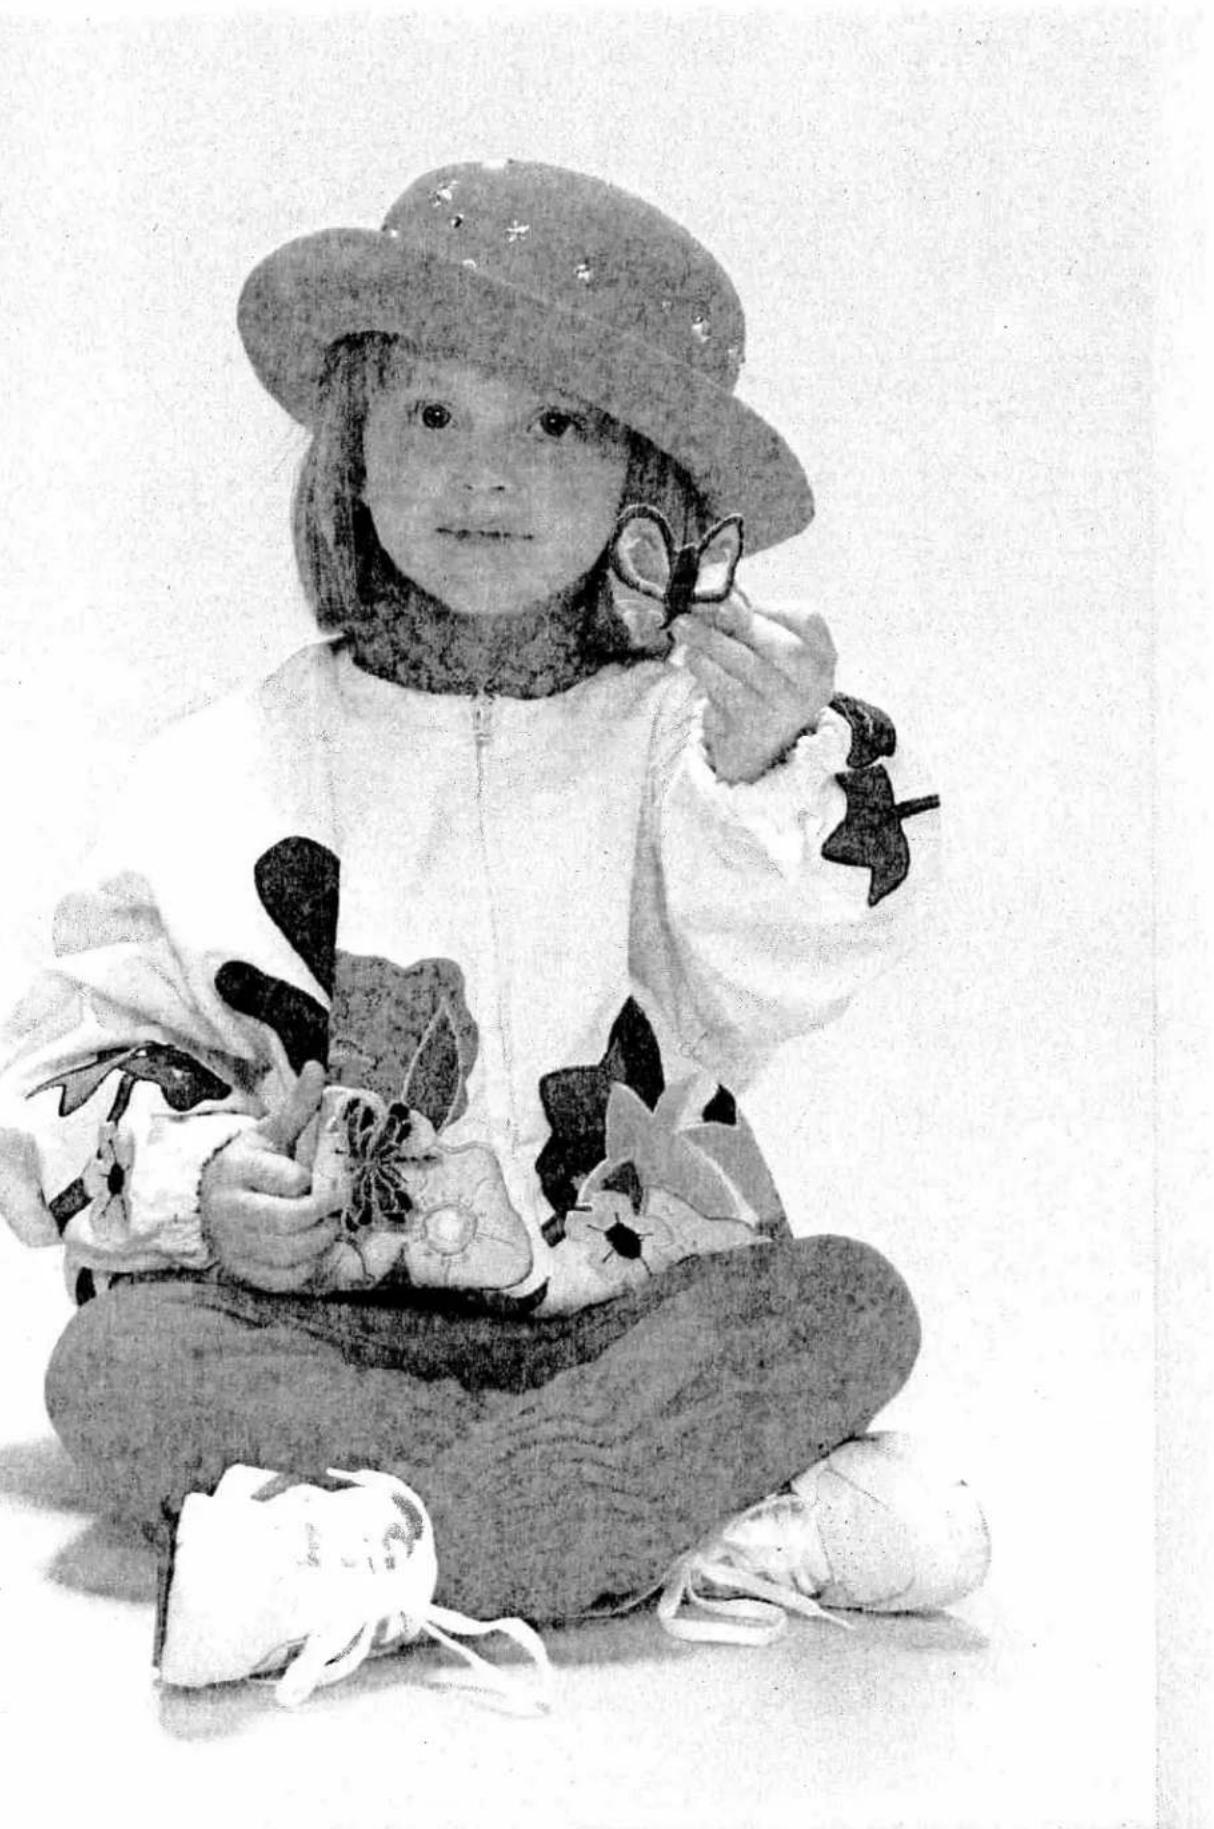
natural_image
Black-and-white photo of a young girl wearing a hat and holding a stuffed toy, with no visible text or symbols.PFAFF
Embroidery unit
7570
A
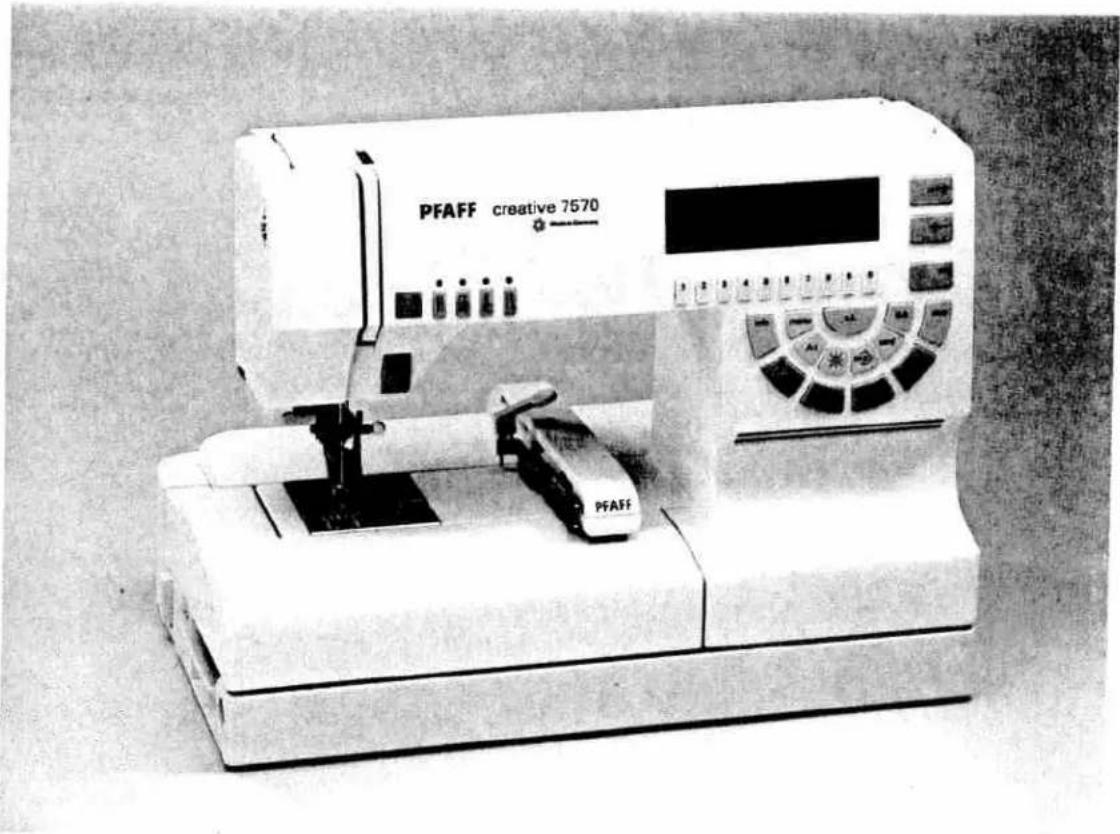
natural_image
Exterior view of a PFAFF creative 7670 laboratory instrument (no visible text or symbols on the device body)Instruction manual
Parts of the "creative fantasy" embroidery unit:
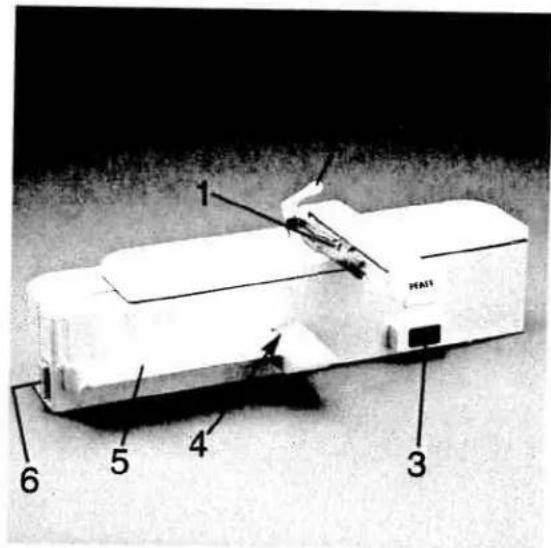
text_image
1 HAJI 6 5 4 3Embroidery unit from front
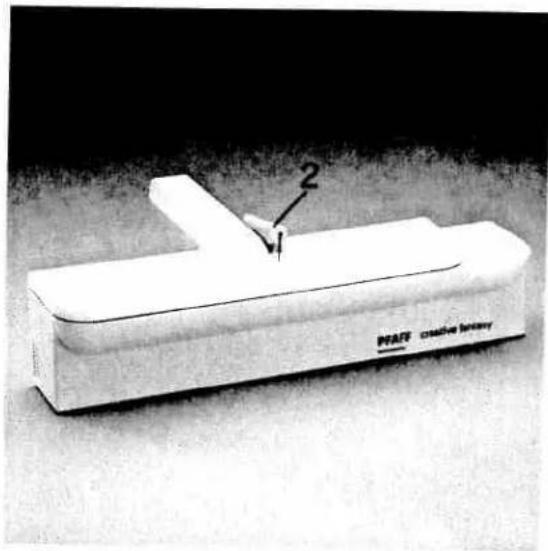
text_image
PFAF creative lenses 2Embroidery unit from rear

text_image
7 8 7 8 9 9Large and small frame
1 Metal track for attaching the frame
2 Release lever for removing the frame
3 Connection bushing for the machine
4 Fastening spigot for connecting to the machine
5 Guide strip for engaging the embroidery unit
6 Release lever for removing the embroidery unit
7 Engaging spigot
8 2 engaging spigots
9 Retaining screw for attaching the fabric
text_image
Warning symbol image with exclamation mark inside a triangleNotes on safety
- The sewing machine must be switched off before connecting or releasing the embroidery unit.
- Always store the PC-Card in its package.
- Never transport the sewing machine with the embroidery unit connected.
- The embroidery process is started with the foot pedal. After pressing the ok key the foot pedal can be released. The embroidery process then continues independently. The sewing machine is stopped by pressing any key except the "slow sewing" key. By pressing the foot pedal again the embroidery process is restarted.
- When carrying out maintenance work, alterations to mechanical parts or accessories or when leaving the machine unattended, the sewing machine must be removed from the power supply by pulling the mains plug out of the socket.
- The embroidery unit corresponds with the EC-Directive No.: 89/336 EEC
Handling:
Take care to ensure that the embroidery unit does not get bumped or dropped.
Cleaning:
When cleaning the housing use a dry, clean, soft, lint-free cloth. Severe stains can be removed with alcohol or paraffin.
Note:
Never use insecticides or chemical products such as petrol or liquid chemicals to clean the appliance.
Index
Page Appliqué 87
Calling up from the Creative Card 76
Capitals/lower case letters 41
Changing colours 26
Changing the embroidery foot 8
Combining monograms 38-40
Combining motifs 94, 95
Combining motifs to form a border 92, 93
Combining motifs with word sequences 60-68
Connecting / removing the embroidery unit 8
Connection bushing of the Creative 7570 8
Correcting monograms 46-51
Creating a word sequence 56.57
Creative Fantasy cards 14
Cursor keys 22,23
Deleting from the Creative Card 79
Embroidering 25
Embroidering a word sequence 96, 97
Embroidering a word sequence 96, 97
Embroidering borders 92, 93
Embroidering chiffon 88
Embroidering contours 102
Embroidering frotté 89, 90
Embroidering individual segments 28
Embroidering leather 99
Embroidering segments 28
Embroidering small fabric parts 91
Embroidering thin materials 88
Embroidering with the embroidery unit 14-17
Embroidering/multicoloured 26
Embroidering/multicoloured with repeating colours 27
Embroidering/single colour 25
Embroidery/darning position 10
Engaging/removing the embroidery frame 10
Entering the letters 59
Error messages in embroidery mode 29
Explanation of the symbols in the display 20-23
Index
Page
Fitting the fabric into the embroidery frame 18, 19
Info 24
Inserting / removing the embroidery pattern card 9
Lowering the feed dog 8
m-p key 36,37
Marking the fabric 18,19
Maxi pattern combinations from the card 98
Messages in the display 17
Mirroring patterns 20
Motif selection 14-16
Moving monograms 42-45
Moving patterns 22, 23
Needle-thread breakage monitor 29
Notes on safety 1
Opening the M-memory 37
Pattern sequence 36
Pattern size 20
Placing monograms in frames 52-55
Placing the pattern in the frame 22, 23
Release key of the embroidery unit 8
Richelieu 86
Rotating the pattern 20
Selecting an alphabet 58
Sewing foot lifter 17+29
Sewing monograms 47
Sewing recommendations 24
Sewing with the embroidery unit 30
Sticking on embroidered motifs 100, 101
Storing on the Creative Card 69-75
Symbols in the display 20-23
Symbols of the pattern sequence 43
Tips and examples of use 85-102

natural_image
Black-and-white photo of two people seated in a bed, one wearing a wide-brimmed hat and the other with floral patterns (no visible text or symbols)Technical section
Pages 7-10
Technical section
Swing functions
Pattern Sequence
ops and examples for use
text_image
6
natural_image
Black-and-white photo of a PFAFF creative 7570 laboratory instrument with control panel and mechanical components (no visible text or symbols on device body)Contents
Connecting/
removing the embroidery unit Page 8
Changing the sewing foot Page 8
Connecting the mains cord
and foot pedal Page 9
Switching the machine on Page 9
Lowering the feed dog Page 9
Inserting/
removing the embroidery card Page 9
Engaging/
removing the frame in/
from the embroidery unit Page 10
Bringing the sewing foot to
embroidery/
darning position Page 10
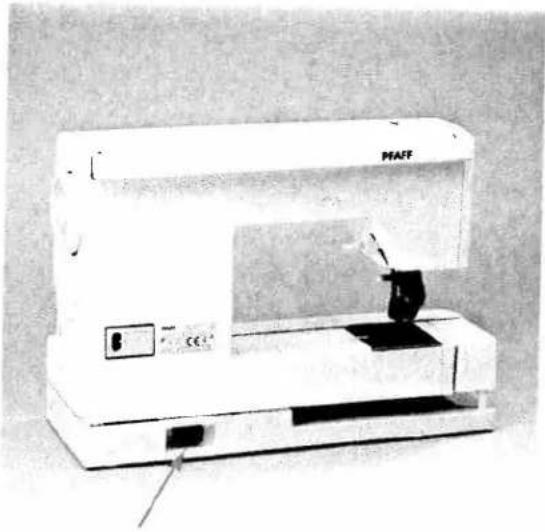
natural_image
Exterior view of a white industrial machine labeled 'PAAFF' with control panel and base (no visible text or symbols beyond branding)Bushing for connecting the embroidery unit to the Creative 7570.
If you try to call up a creative fantasy card when the embroidery unit is not connected the following message appears in the display:
"Please switch machine off and connect embroidery unit. ok"
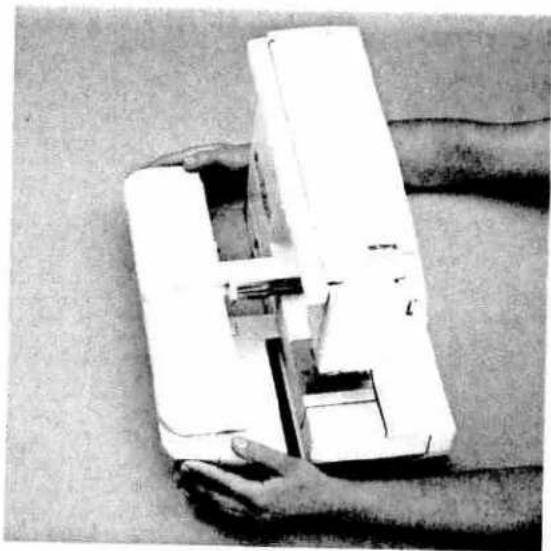
natural_image
Hand holding a white mechanical device with internal components, no visible text or symbolsAttention!
Only connect or remove the embroidery unit to/from the machine when the machine is switched off!
The embroidery unit is clicked into the bushing on the rear of the machine while being held parallel to the machine. Take care to ensure that the guide (5) is slid along between the floor plate and the free-arm as far as it will go.

natural_image
Close-up of a hand operating a sewing machine on a flat surface (no visible text or symbols)The embroidery unit is removed by pressing the release key (6) and pushing the unit away from the machine while holding it parallel to the machine.

natural_image
Close-up of a 3D printer in operation, showing mechanical components and base (no visible text or symbols)Remove the normal sewing foot 1A by clicking it out of its holder. Loosen the milled screw on the sewing foot holder and guide the embroidery foot as far as it will go into the hole of the sewing foot holder with the pin facing the left. Take care to ensure that the guide fork is lightly pushed against the plastic guide. Then tighten the milled screw again (see Instruction manual 7570 page 110 Darning).
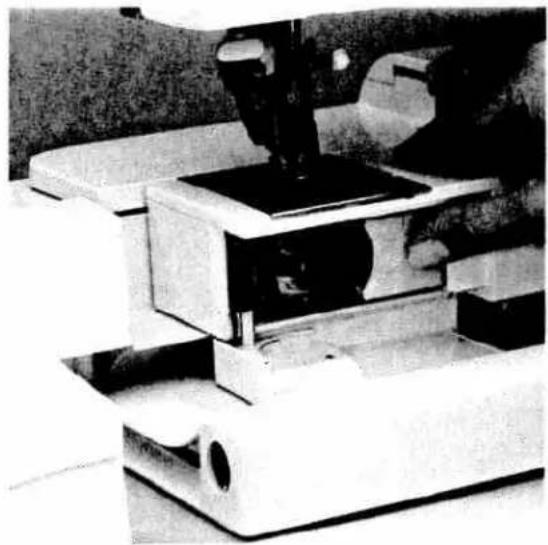
natural_image
Close-up of a microscope in operation, showing mechanical components and no visible text or symbolsPlug the mains cord into the foot pedal and switch the machine on at the on/off switch.
Open the swivel arm, followed by the hook flap and then lower the feed dog (see 7570 page 37).
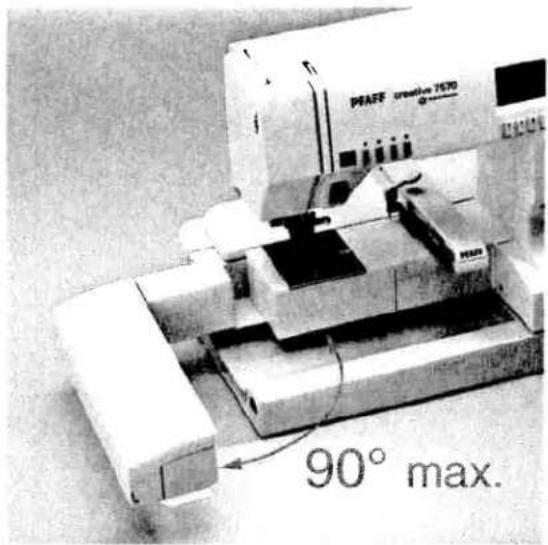
text_image
PFAFF creative 1570 90° max.Attention!
Take care that the swivel arm is not swung too far to the rear. Otherwise the embroidery unit could be pushed out of its connection bushing.
The maximum angle of the swivel arm should not exceed 90°.

natural_image
Close-up of a hand using a sewing machine to press or install a piece of fabric (no visible text or symbols)Slide an embroidery-pattern memory card into the slot in the base plate. The card is to be pushed into the slot as far as it will go. The release button springs out approx. 1/2 cm when the card is inserted properly.

natural_image
Close-up of a white electronic device with a curved panel and a cylindrical tube inserted, no visible text or symbols.To remove the memory card push the release button next to the slot.

natural_image
Close-up of hands operating a sewing machine with visible branding (no readable text or symbols)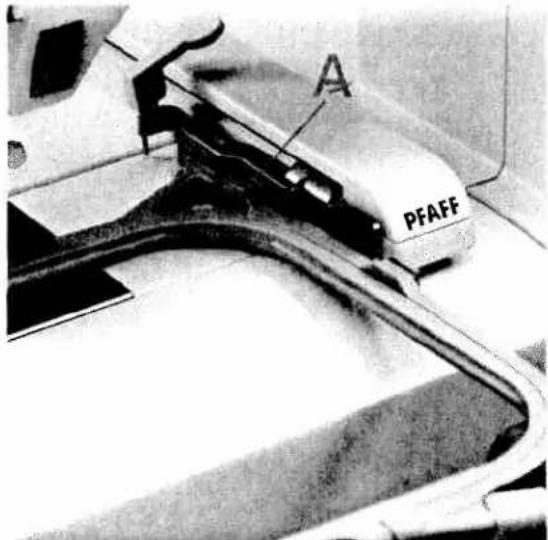
text_image
A PFAFFEngaging the frame in the embroidery unit
Pass the frame underneath the sewing foot by raising the sewing foot lifter as far as possible. The retaining screw (9) of the frame must be facing you and the guide spigot (8) must be pointing to the right.
Slide the frame along the metal guide (1) until it clicks into place behind the release lever (2) of the embroidery unit.
Take care to ensure that the first guide spigot (A) is pushed into the rear metal guide. The frame is now engaged in the embroidery unit.
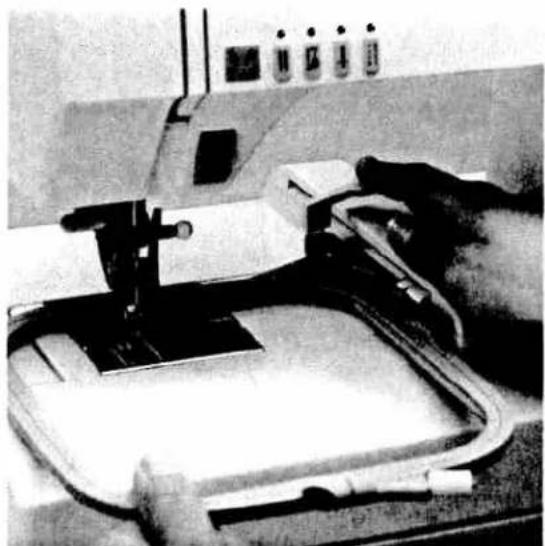
natural_image
Close-up of a sewing machine needle stitching fabric, with no visible text or symbols
natural_image
Industrial sewing machine with PFAFF branding, no visible text or symbols on the device itselfRemoving the frame
If you wish to remove the frame, push the release lever on the embroidery unit down and pull the frame forwards while keeping it parallel to the guide strip.
Bring the sewing foot holder to embroidery/darning position (see instruction manual page 110 embroidery/darning position).
Sewing functions
Pages 13-31
text_image
12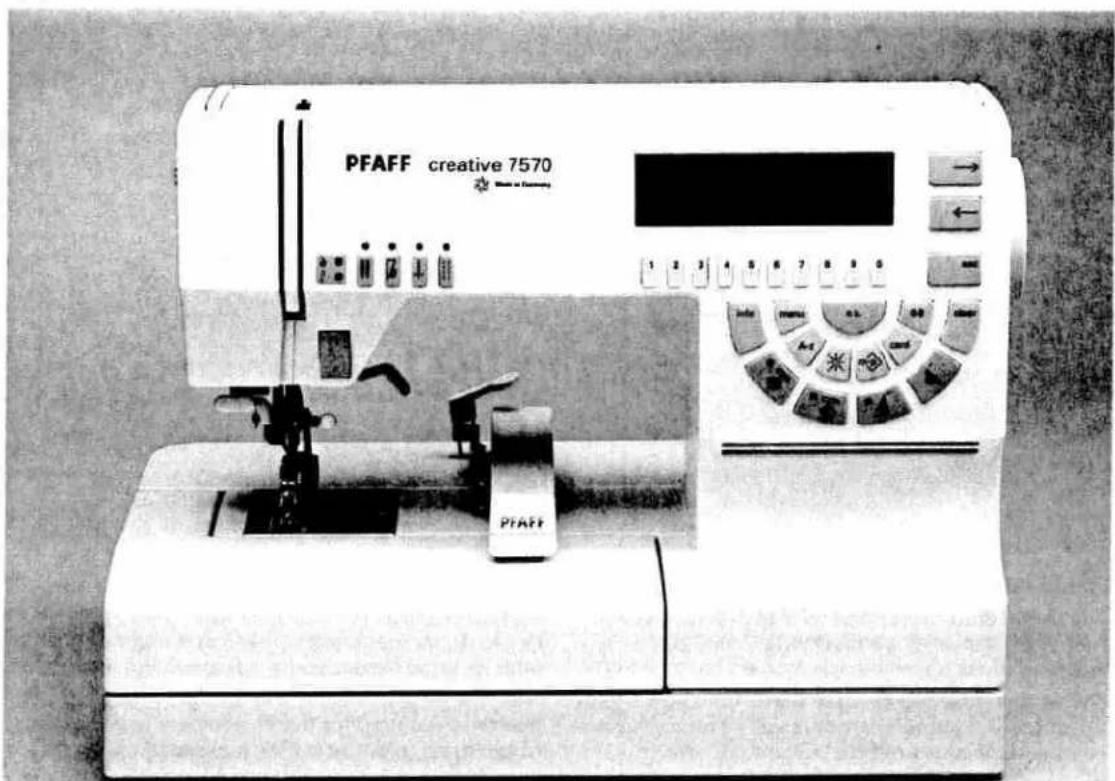
text_image
PFAFF creative 7570 PFAFFContents
Embroidering with the embroidery unit Pages 14-17
Messages in the display Page 17
Fitting the fabric into the embroidery frame Pages 18, 19
Explanation of the symbols in the display Pages 20-23
Info Page 24
Embroidery/single colour Page 25
Embroidery/multicolour Page 26
Multicoloured embroidery with repeating colours Page 27
Embroidering individual segments Page 28
Error messages in embroidery mode Page 29
Sewing with the embroidery unit Page 30

text_image
PFAFF creative 7570 Made in GermanyEmbroidering with the embroidery unit
Attach the embroidery unit to the machine (see Technical section page 8). Remember that the machine must be switched off to do so.
The various Creative Fantasy Cards offer you a large selection of embroidery motifs with which you can complement your Creative.
The first card, which contains 25 motifs and two embroidery monograms is included in the basic equipment of the Creative. This card is called 1/"Fantasy".
All further cards are available from your Pfaff dealer. In the card box you will find a pattern list with all the patterns on the card and the suggested colour combinations.
The time required for the embroidery and the size of the motif in cm or mm is also listed.
Use the pattern list to find the pattern you require.
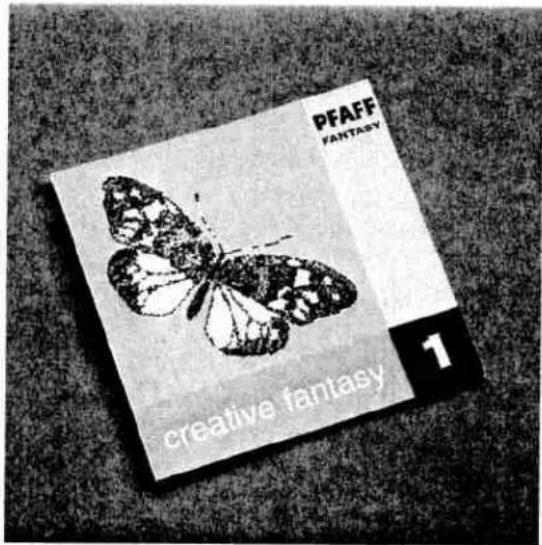
text_image
PFAFF FANTASY creative fantasy 1
text_image
1 2 3 4 5 6 7 8 9 0 info menu ok clear → ← REC 0-9 clearNow insert the card into the slot (47) in the machine. The machine can be left on while doing this. Then press the "Card" key (14).
The following message appears in the display:
1/Fantasy
Please select:
1 ... embroidery pattern
2 ... embroidery monograms
This message only appears with the card
1/Fantasy. On all further cards (except the monogram cards) the first 5 patterns are shown in the display.
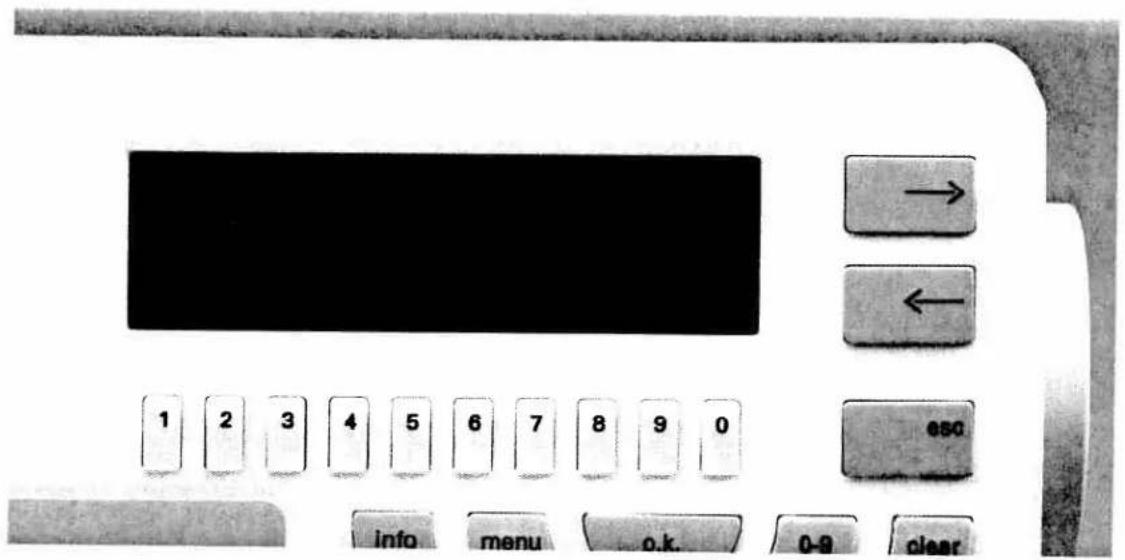
text_image
→ ← 1 2 3 4 5 6 7 8 9 0 ESC info menu o.k. 0-9 clearPress key 1 of the number keys for embroidery patterns. The first 5 patterns on the card appear in the display. In the top right of the display, the first page and any further pages which the card may contain are displayed. Choose a pattern with the aid of the motif list which is included with every card. The butterfly for example.
By scrolling with the cursor keys you can reach the next page.

text_image
1 2 3 4 5 6 7 8 9 0 info menu o.k. 0-9 clearMessages in the display
Then select the pattern on the machine with the corresponding number key. The embroidery frame normalizes, i.e. it searches for the starting position. At the same time the following messages appear in the display:
- Fit fabric in frame "120" (or "80") and insert
- Lower feed dog
- Insert full bobbin
- Attach embroidery foot and bring sewing foot lifter to embroidery position.
ok?
Fit fabric in frame "120" (or "80") and insert
This message appears on a dark background which illustrates the importance of this line. Either a 120 or an 80 frame must be fitted with material and inserted.
Lower feed dog
The feed dog must be lowered to be able to embroider with the embroidery unit. If this is not the case the machine does not start when the foot pedal is pushed and the following message appears:
Lower feed dog ok?
Insert full bobbin
It is recommended to insert a full bobbin before starting to embroider. We recommend using cotton garn with thickness 50 as the bobbin thread or a polyester yarn 100. The bobbin thread monitor display blinks when the bobbin thread is running out. The sewing machine stops and the following message is displayed:
Bobbin thread low ok?
Attach embroidery foot and bring sewing foot lifter to embroidery position
Before beginning to embroider, the embroidery foot must be attached (see Instruction manual 7570 page 110) and the sewing foot lifter must be in embroidering position. If this is not the case the machine stops when the foot pedal is pressed and elicits the message:
Sewing foot holder not in embroidery position ok?
Now lower the feed dog and insert a full bobbin. Attach the embroidery foot and set the sewing foot holder to the correct position (see 7570 Instructions page 110).
Important: The Integrated Dual Feed (top feed) must be switched off.
By pressing the "ok" key, the selected pattern is shown in the display. The embroidery frame goes to the pattern start.
If you wish to embroider another pattern, return to the selection menu with the "esc" key and select a new pattern.
Fitting the fabric into the embroidery frame
There are two different frames included with the embroidery unit. The smaller one is the 80 and the larger one is the 120 frame.
The 80 frame is for patterns sized up to 8 x 8 cm. The 120 frame is for patterns up to 11.5 x 12 cm.
80 frame: For smaller fabric parts which do not fit into the 120 frame. For very fine or stretch materials which must be fitted tightly so that they have no slack (e.g. fine knitted fabrics, silk etc.)
120 frame: For fabric parts which offer enough area for fitting. For all larger patterns which require the embroidery field.
The machine displays the frame size automatically for each selected pattern.
Now fit the material into the frame as described below.
To achieve an improved embroidery result we recommend placing embroidery fleece underneath the fabric and fitting it with the fabric as a support.

natural_image
Blank white square with a dashed border on a textured gray background (no text or symbols)- Mark the middle of the fabric with a cross. We recommend using a chalk that disappears when ironed or a self-erasing magic marker.

natural_image
Hands holding a wireframe object with a triangular cutout (no text or symbols visible)- Loosen the retaining screw (9). The inner frame can now be removed.

natural_image
Two hands holding a blank white sheet with a metal clip, placed on a textured surface (no text or symbols visible)- Lay the embroidery fleece and the fabric onto the outer frame. The side of the fabric onto which you wish to embroider must be facing upwards. When inserting the material into the frame, make sure that screw 9 is facing forwards and the guide spigots 8 are on the right.
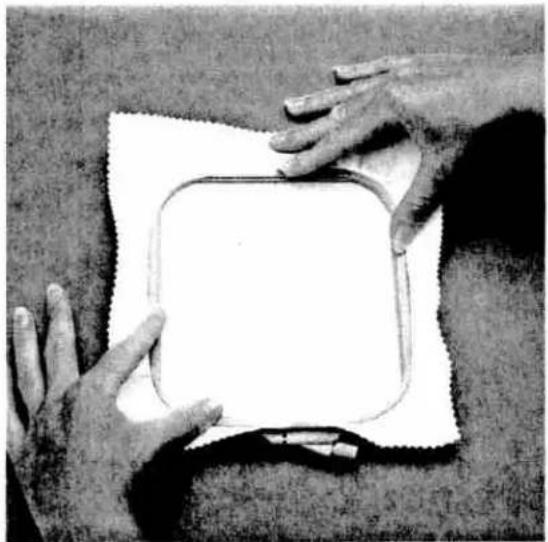
natural_image
Two hands holding a blank white rectangular object on a textured surface (no text or symbols visible)- Press the fabric into the outer frame with the inner frame. Pull the retaining screw lightly and tighten the fabric and the embroidery fleece. Then tighten the retaining screw.
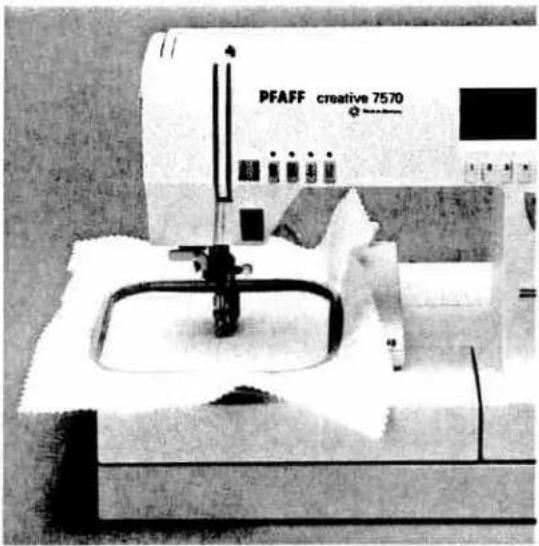
natural_image
Black-and-white photo of a PFAFF creative 7570 sewing machine with no visible text or symbols on the device itself.- Now attach the frame onto the embroidery unit of the sewing machine (see Technical section page 9).

text_image
1 2 3 4 5 6 7 8 9 0 info menu o.k. 0-9 clearExplanation of the symbols in the display
Press the "ok" key.
The selected pattern is now in the display. The following symbols are next to the pattern.
col 1...3
In this example the pattern can be embroidered with 3 colours.
91/92 mm
The size of the pattern is 91 mm x 92 mm.
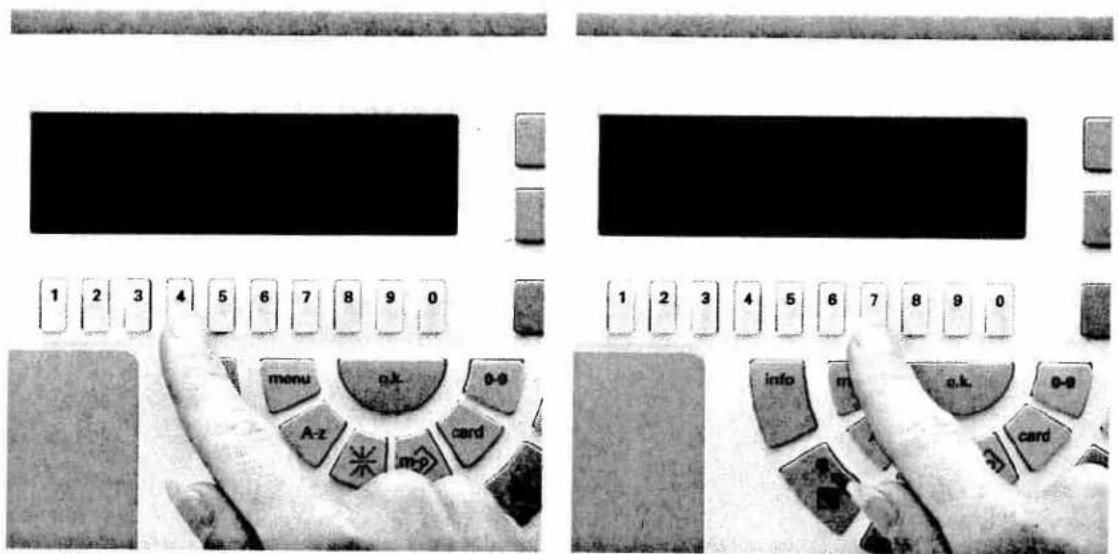
text_image
1 2 3 4 5 6 7 8 9 0 1 2 3 4 5 6 7 8 9 0 menu a.k. o-9 A-z card info m. a.k. o-9 card
With the keys underneath these symbols the size of the pattern can be altered by a number of different amounts.
With the number key 5 the pattern is enlarged, number key 4 reduces the size of the pattern.

120 This symbol shows the position and size of the pattern in the embroidery field. The spot in the dark field shows the middle of the pattern. Furthermore you can see if a 120 frame or an 80 frame is required.

Key 7 underneath this symbol allows the pattern to be rotated in 90° steps within the frame (90, 180, 270 or 360°). The rotation of the pattern is displayed visually in the display.
Furthermore the patterns can be mirrored with the pattern mirroring key (17). This alteration is also represented in the display.

text_image
1 2 3 4 5 6 7 8 9 0 info menu info clear
Pushing key 8 underneath this symbol once, allows the pattern to be embroidered with one colour (mono). "mono" appears in the display. By pressing this key repeatedly you can see the individual segments of the pattern which are embroidered with various colours. At the same time the number of the colour also appears; e.g. col 1, col 2, col 3 ...
It is also possible to embroider these segments individually (see page 28).
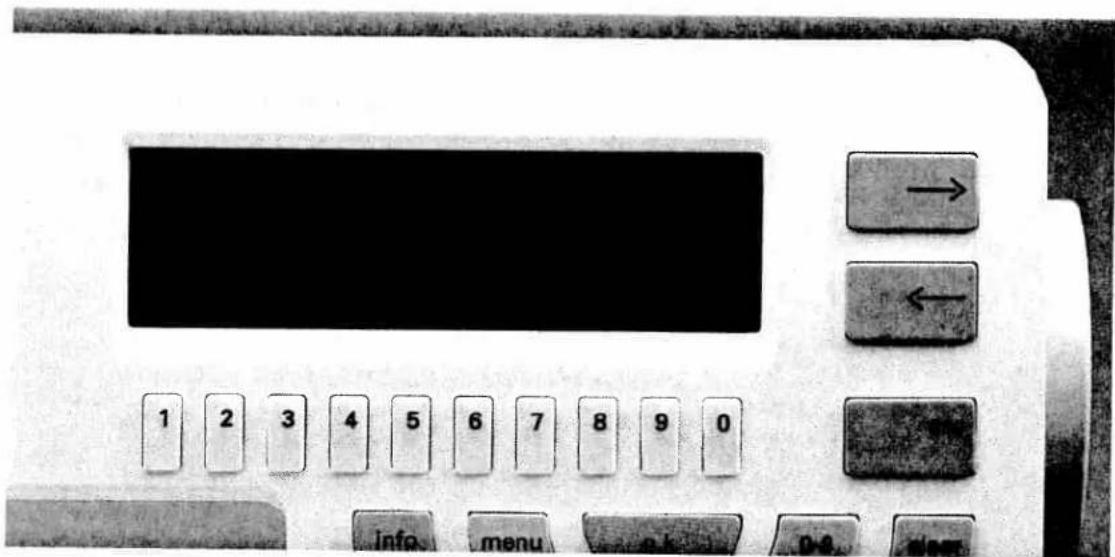
text_image
1 2 3 4 5 6 7 8 9 0 Info menu o-k p-o- news
Pressing key 9 underneath this symbol allows you to skip back 6 stitches, e.g. in the case of a thread breakage. After pressing this key the following message appears:
"Activate foot pedal, pattern skips back 6 stitches"
Press the foot pedal briefly. The machine skips back 6 stitches.
You can continue embroidering the pattern from this position.

Pressing key 0 underneath this symbol allows you to skip forwards one or more stitches. This is necessary when the starting position has been overshot when returning to the pattern start.
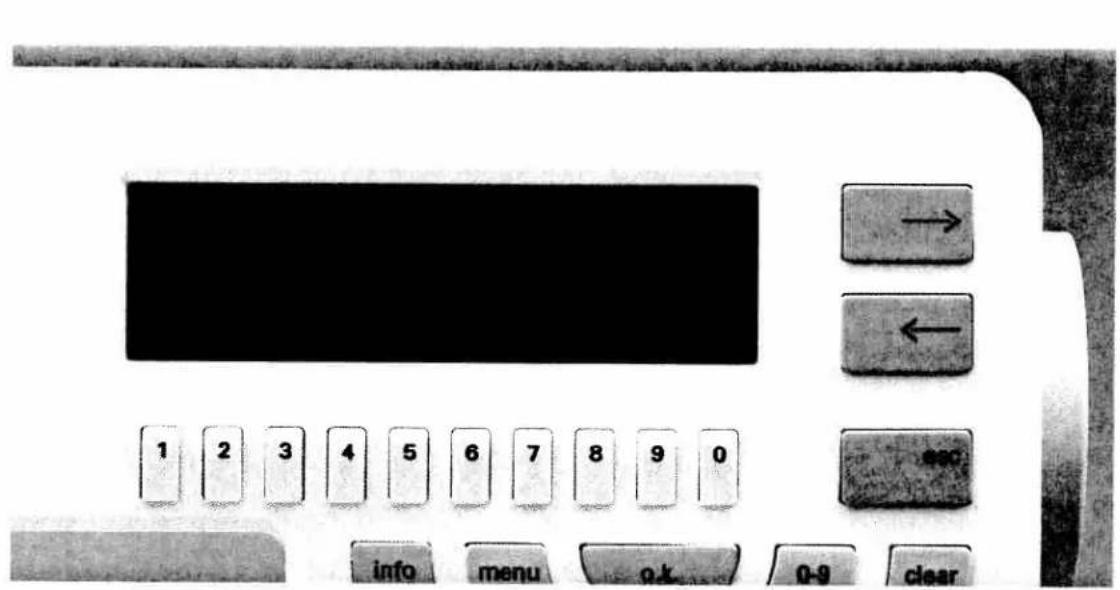
text_image
1 2 3 4 5 6 7 8 9 0 info menu 0-9 clear
Pressing the cursor key next to this symbol extends the menu (with esc or ok you return to the previous menu). The following symbols appear in the display:


text_image
1 2 3 4 5 6 7 8 9 0 info menu 0-9 clear → ← ESCWith the cursor keys (8) the pattern in the embroidery field can be moved to the right or the left. The grey field on the right of the display shows you the new position. To the left of this the change is displayed in 1mm steps. This is very helpful for placing the pattern on a desired point on the material.
The placing/movement within the embroidery frame always refers to the middle of the motif. The machines skips automatically to the pattern start when starting sewing.
Remember the change in position so that you can always find the position again when repeating the pattern: e.g. when decorating a number of napkins.
With keys 8 and 9 the pattern can be visibly moved up and down within the embroidery field.
Here too, the individual steps are represented numerically.
This symbol only appears on patterns for which an 80 frame is required. If, however, you wish to use a 120 frame instead you can switch to the larger frame by pressing number key 0. The embroidery frame repositions itself.
When you press key 7 underneath this symbol, the embroidery frame traces around the size and position of the pattern within the embroidery field. This is to check if the embroidery pattern is to be embroidered in the correct position.
To return to the previous symbols (from page 20) press the "esc" key.
PFAFF
B
Embroidery unit
7570

natural_image
Exterior view of a PFAFF creative 7570 laboratory instrument (no visible text or symbols on the device body)Instruction manual

text_image
1 2 3 4 5 6 7 8 9 0 esc Info menu ok 0-9 clearInfo
The info key enables you to give information on the thread thickness, needle system, needle thread tension and further operating steps in embroidery mode.
Once you have selected an embroidery pattern it appears in the display. If you now press the "info" key the embroidery recommendation appears.
In the left of the display you will see the recommendation for the thread thickness and in the right of the display the recommendation for the needle system, needle thickness and the needle thread tension.
If you then press the cursor key → the program of the error messages which can be switched on and off appears (see 7570 instructions page 43).

text_image
1 2 3 4 5 6 7 8 9 0 Info menuIf you press the cursor key → again you will be shown information on the processes in embroidery mode. They describe the individual symbols and further operational steps.
If an arrow appears in the bottom right of the display the cursor key has to be pressed in order to see further information.
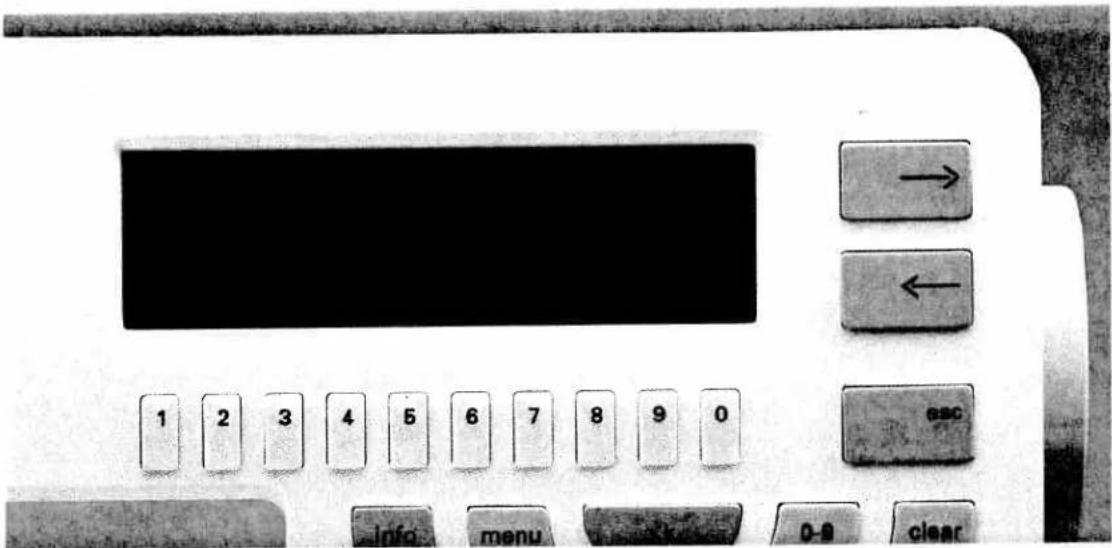
text_image
1 2 3 4 5 6 7 8 9 0 Info menu 0-9 clearEmbroidery/single colour
Tension: When embroidering we recommend tightening the bobbin thread tension a little so that the bobbin thread is not visible on the top of the material. The needle thread tension should be set between 2 and 3.
To embroider the selected pattern in one colour only, press key 8 until the word "mono" appears in the display. The pattern can now be embroidered. Take care to check that all patterns are embroidered the way they look in the display. Press the foot pedal a little, the machine sews a few stitches. This allows you to closely observe the beginning of the pattern.
If you release the foot control the machine stops and you can cut off the starting threads. Then reactivate the foot pedal and press the "ok" key while embroidering (after a few stitches). The foot pedal can now be released. The machine continues embroidering alone.
When the pattern is finished the machine stops and the message "Finished" appears in the display.
If you wish to select a new motif from the card simply press the "esc" key and select the number key of the desired pattern.
Attention:
If something unusual happens press any key and the machine will stop immediately.
If you press the foot pedal briefly and then release it the machine will also stop.

natural_image
Black-and-white line drawing of a floral crown with leaves and a dotted line above (no text or symbols)
text_image
1 2 3 4 5 6 7 8 9 0 esc info menu 0-9 clearEmbroidering/multicolour
The patterns can be embroidered with up to 12 different colours.
Select a pattern, e.g. the butterfly. The following messages appear in the display:
• Fit and insert frame 120
- Lower feed dog
- Insert full bobbin
- Attach embroidery foot and bring sewing foot lifter to embroidery position.
After you have carried out these steps press the "ok" key.
In the display you will see the pattern and the symbol "col 1...3". If you now press key 8 the various colour segments will be displayed. At the same time the message col 1, col 2... etc. appears for every segment.
In the pattern list you will find the pattern with various colour suggestions which you can of course change to suit your ideas.
Make sure you have the required threads prepared in the order listed.
Select the symbol "col 1...3" with key 8, thread the first thread and begin to embroider. The machine embroiders the first colour segment and stops with the message:
Thread-change colour 2
Change the needle thread and restart the machine by pressing the foot pedal again. After beginning sewing press the "ok" key then you can release the foot control. The machine continues embroidering until the next thread change. The following message appears:
Thread-change colour 3
Repeat the above procedure until all thread changes are completed. The machine finishes embroidering the last colour, displays "Finished" and goes to the middle of the pattern.

natural_image
Black-and-white line drawing of a butterfly with patterned wings (no text or symbols)
text_image
1 2 3 4 5 6 7 8 9 0 Info menu o.k 0-9 clearMulticoloured embroidery with repeating colours
If a pattern has several colours which repeat themselves in the pattern, follow the following procedure: Select pattern No. 13 for example.
In the display you will see "col 1...4" for multi-coloured embroidery. In the pattern list you will see the order of the colours. Organize the colours in accordance with the order and begin with the first colour as described on page 26. After the first colour the machine stops and displays the message:
Thread-change colour 2
After the second colour change you will see the message:
Thread-change colour 3
etc. If a colour is to be repeated, e.g. colour 2, you will see in the display:
Thread-change colour 2
Thread the first colour again. The machine embroiders this segment. Then you will see the message:
Thread-change colour 4
Thread the fourth colour and embroider this segment. When all segments are embroidered the machine stops and elicits the following message:
"Finished".

natural_image
Black-and-white decorative floral and vine pattern with leaves and flowers (no text or symbols)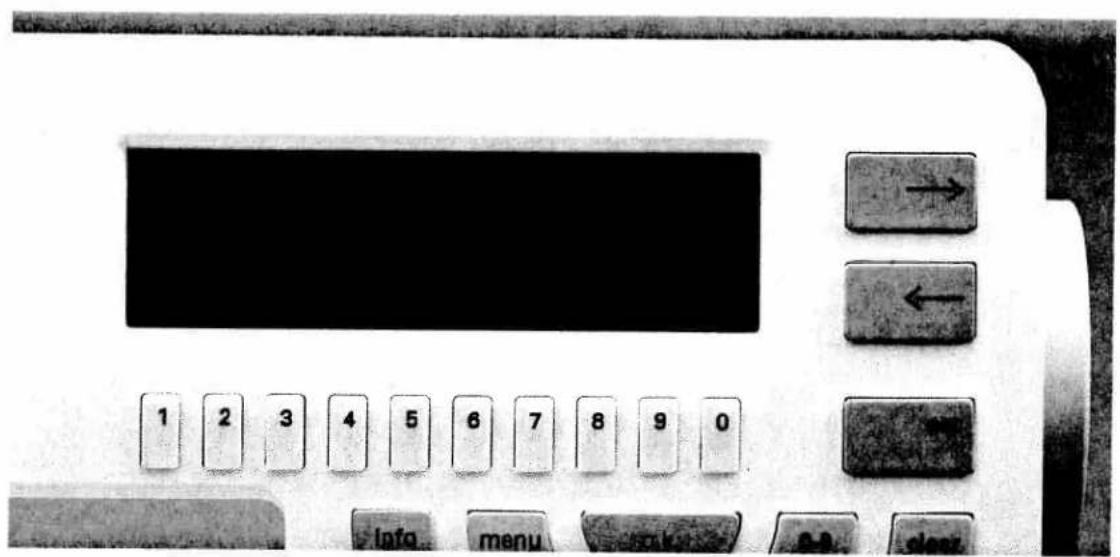
text_image
1 2 3 4 5 6 7 8 9 0 Info menu start ←Embroidering individual segments
It is also possible to embroider individual segments of a pattern. For example, if you wish to embroider only the blossom of pattern 7, select this segment with key 8, e.g. col 2 and embroider it.
After finishing the segment you will see the message "Finished" in the display.
If you wish to return to the beginning of this segment after finishing the embroidery, press the pattern start key (13) or key 8. In the display you will see the following message:
Return to beginning of this colour! ok?
By pressing the "ok" key the frame moves to the beginning of the segment.
To select another pattern press the "esc" key.
With this method you can also embroider only the contours of a motif such as the teddy bear or the dinosaur (see page 102).
natural_image
Simple line drawing of six flower-like shapes arranged in a triangular pattern (no text or symbols)
text_image
1 2 3 4 5 6 7 8 9 0 info menu o-9 clearError messages in embroidery mode
- Needle thread broken or empty
If the needle thread breaks or runs out the machine stops after max. 6 stitches and elicits the message:
Attention: Needle thread is broken or supply is empty ok?
To resume embroidering at the position at which the thread breakage occurred, press number key 9 and press the foot pedal. The machine now skips back 6 stitches. You can repeat this procedure as often as you wish. Then thread the needle thread and and press the foot pedal. By pressing the ok key the machine finishes embroidering the pattern automatically.
- Check the bobbin thread
The bobbin thread supply display blinks when the bobbin thread is running low. The machine stops and this message appears in the display:
Bobbin thread running low ok?
You can continue sewing if you think that the bobbin thread is sufficient for the rest of the section, however the bobbin thread supply display continues to blink. The display remains lit until a full bobbin has been inserted and you continue to sew.
- Sewing foot lifter
The sewing foot lifter must be brought to embroidery position before beginning to embroider. If it is not, the machine will not sew when you press the foot pedal and the message appears:
Bring sewing foot lifter to embroidering/darning position ok?
- Lower feed dog
If the feed dog is not lowered for embroidering, the machine does not embroider when the foot pedal is pressed and the message appears:
Lower feed dog ok?
The feed dog must be lowered in embroidery mode.

text_image
PFAFF creative 7570 PIAFFSewing with the embroidery unit
You have the option of changing from the embroidery program to the sewing program without removing the embroidery unit or having to remove the card from the slot. The embroidery frame, however, must be removed.
Turn the feed dog back on and attach the appropriate sewing foot. Then press the "menu" key (22), the embroidery unit moves to its position on the right so that as much room as possible is left for sewing. This is however, only recommended for shorter sewing periods. When sewing longer periods or larger pieces of fabric it is better to remove the embroidery unit.

text_image
Tips and examples for use Pattern Sequence
natural_image
Black-and-white photo of two children in traditional attire, one smiling and holding the other's hand (no visible text or symbols)Pattern Sequence
Pages 35-81
Pattern Sequence
Tips and examples for use
text_image
34
text_image
WINDBREAK MAKEERContents
m-p key Pages 36, 37
Combining monograms Pages 38-45
Correcting monograms (deleting inserting) Pages 46–51
Placing monograms in frames Pages 52–55
Creating a word sequence Pages 61-68
Storing pattern sequences or monograms on the Creative Card Pages 69–78
Deleting pattern sequences etc. from the Creative Card Pages 79–81
Pattern sequence
If you combine several patterns in one M-memory, this is called a pattern sequence.

natural_image
Close-up of a hand using a sewing machine to adjust or install a component (no visible text or symbols)Insert the card (e.g. card 1) into the slot.

text_image
1 2 3 4 5 6 7 8 9 0 info menu o.k. 0-9 clear A-z card m-pWith the m-p key you open the M or P-memory.
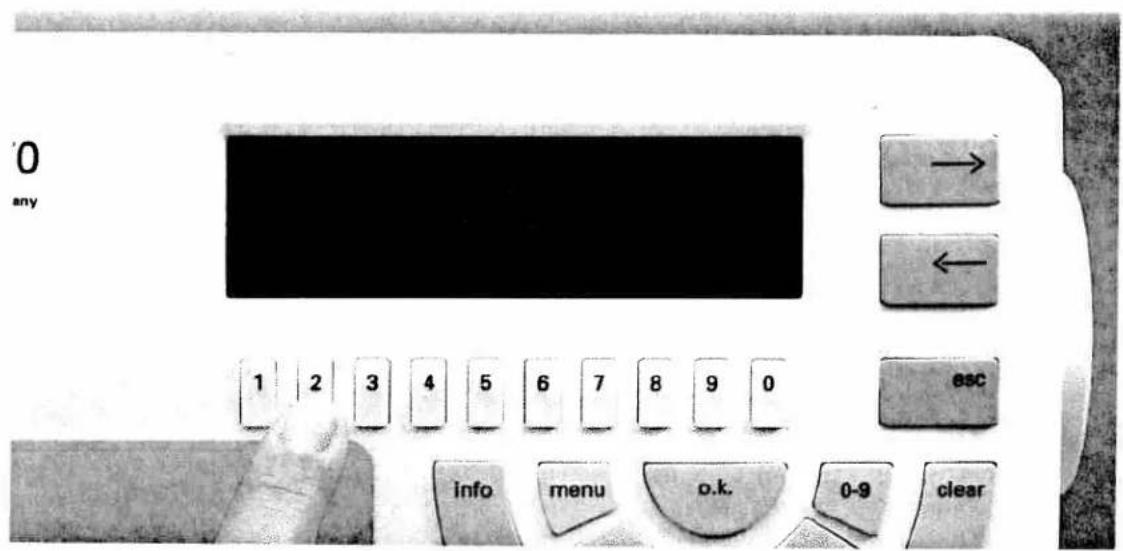
text_image
0 any 1 2 3 4 5 6 7 8 9 0 esc info menu o.k. 0-9 clearAfter pressing the m-p key select with the number keys
1 = Memory for self-programmed patterns (P-memory)
2 = Memory for pattern sequence (M-memory)
Select key 2.
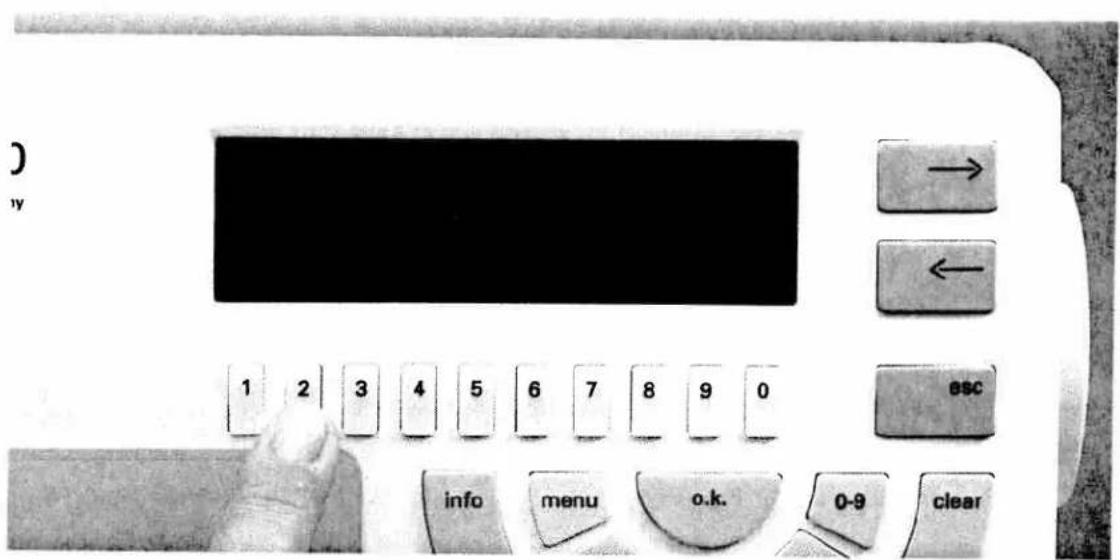
text_image
y 1 2 3 4 5 6 7 8 9 0 esc info menu o.k. 0-9 clearThen you will see the first 16 of 32 M-memories. Under M and the number of the memory you will find the key names "-" and "+". Use the number keys to select a free memory.

text_image
'0 any 1 2 3 4 5 6 7 8 9 0 → ← esc info menu o.k. 0-9 clearAfter confirming with the "ok" key you will see in the display:
This pattern sequence is empty ...
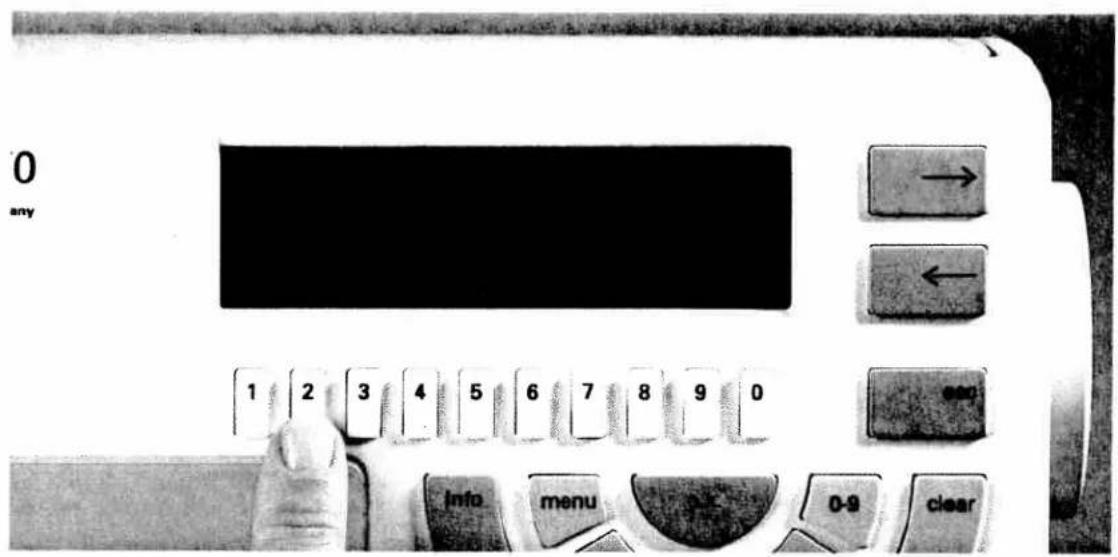
text_image
0 any 1 2 3 4 5 6 7 8 9 0 info menu 0-9 clearNow press the card key.
Select the desired pattern group with the number keys e.g.
2 ... Embroidery monograms.

text_image
0 any 1 2 3 4 5 6 7 8 9 0 → ← esc info menu o.k. 0-9 clearThis is a summary of the monograms on pattern card 1.
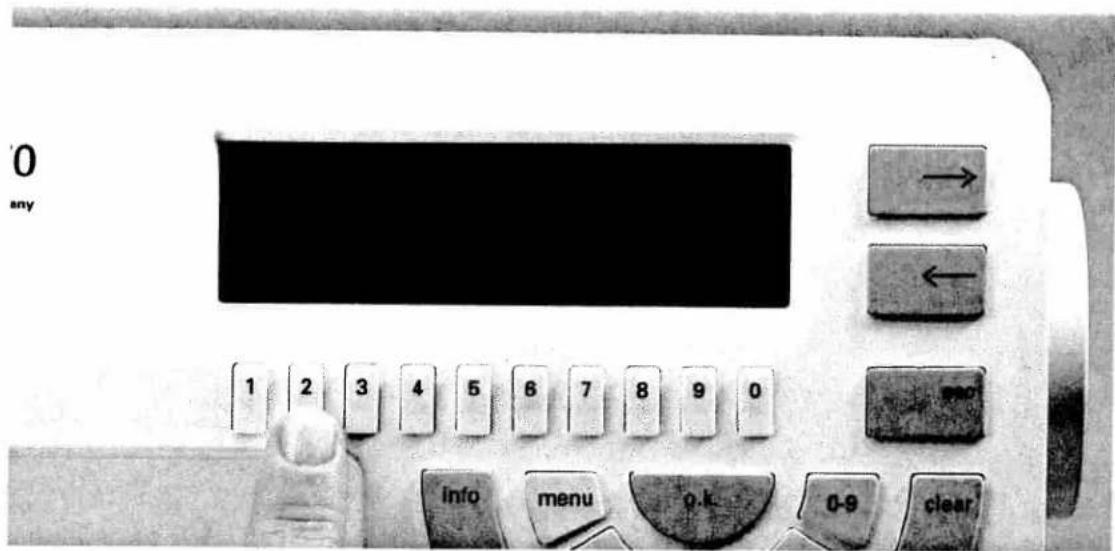
text_image
0 any 1 2 3 4 5 6 7 8 9 0 info menu o.k. 0-9 clearSelect the desired alphabet with the keys below it. (e.g. key 1 or 2)
70
nany

text_image
08CDEF 140E 24 INOPORT 01-24 STUDUS 140E 24A 356788 → ←
text_image
1 2 3 4 5 6 7 8 9 0 ESCThen select the required letters with the number keys and confirm their selection with the ok key (e.g. BM). Incorrect entries can be corrected with the clear key.
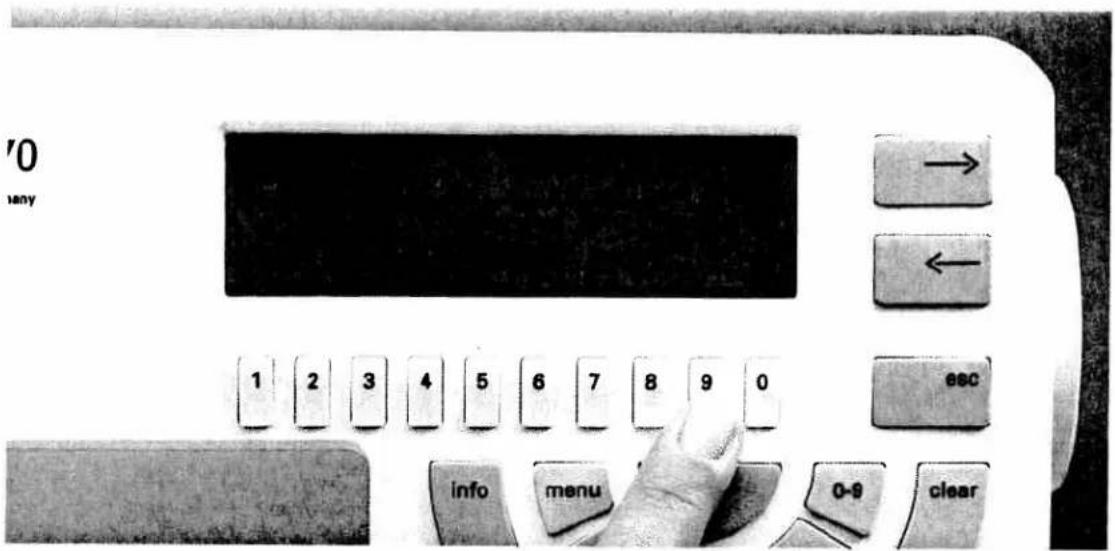
text_image
'0 any 1 2 3 4 5 6 7 8 9 0 esc info menu 0-9 clearIf you wish to enlarge or decrease the size of the writing, use key 9.

text_image
'0 any 1 2 3 4 5 6 7 8 9 0 isc ir ienu o.k. 0-9 clearWith keys 5 and 6 you can now determine the size of the alphabet. You can return with escape.

text_image
'0 any 1 2 3 4 5 6 7 8 9 0 BSC info menu 0-9 clearIf you press key 0 underneath the symbol A-a, you will be given the lower case letters of the respective alphabet. This function is not available for all alphabets.
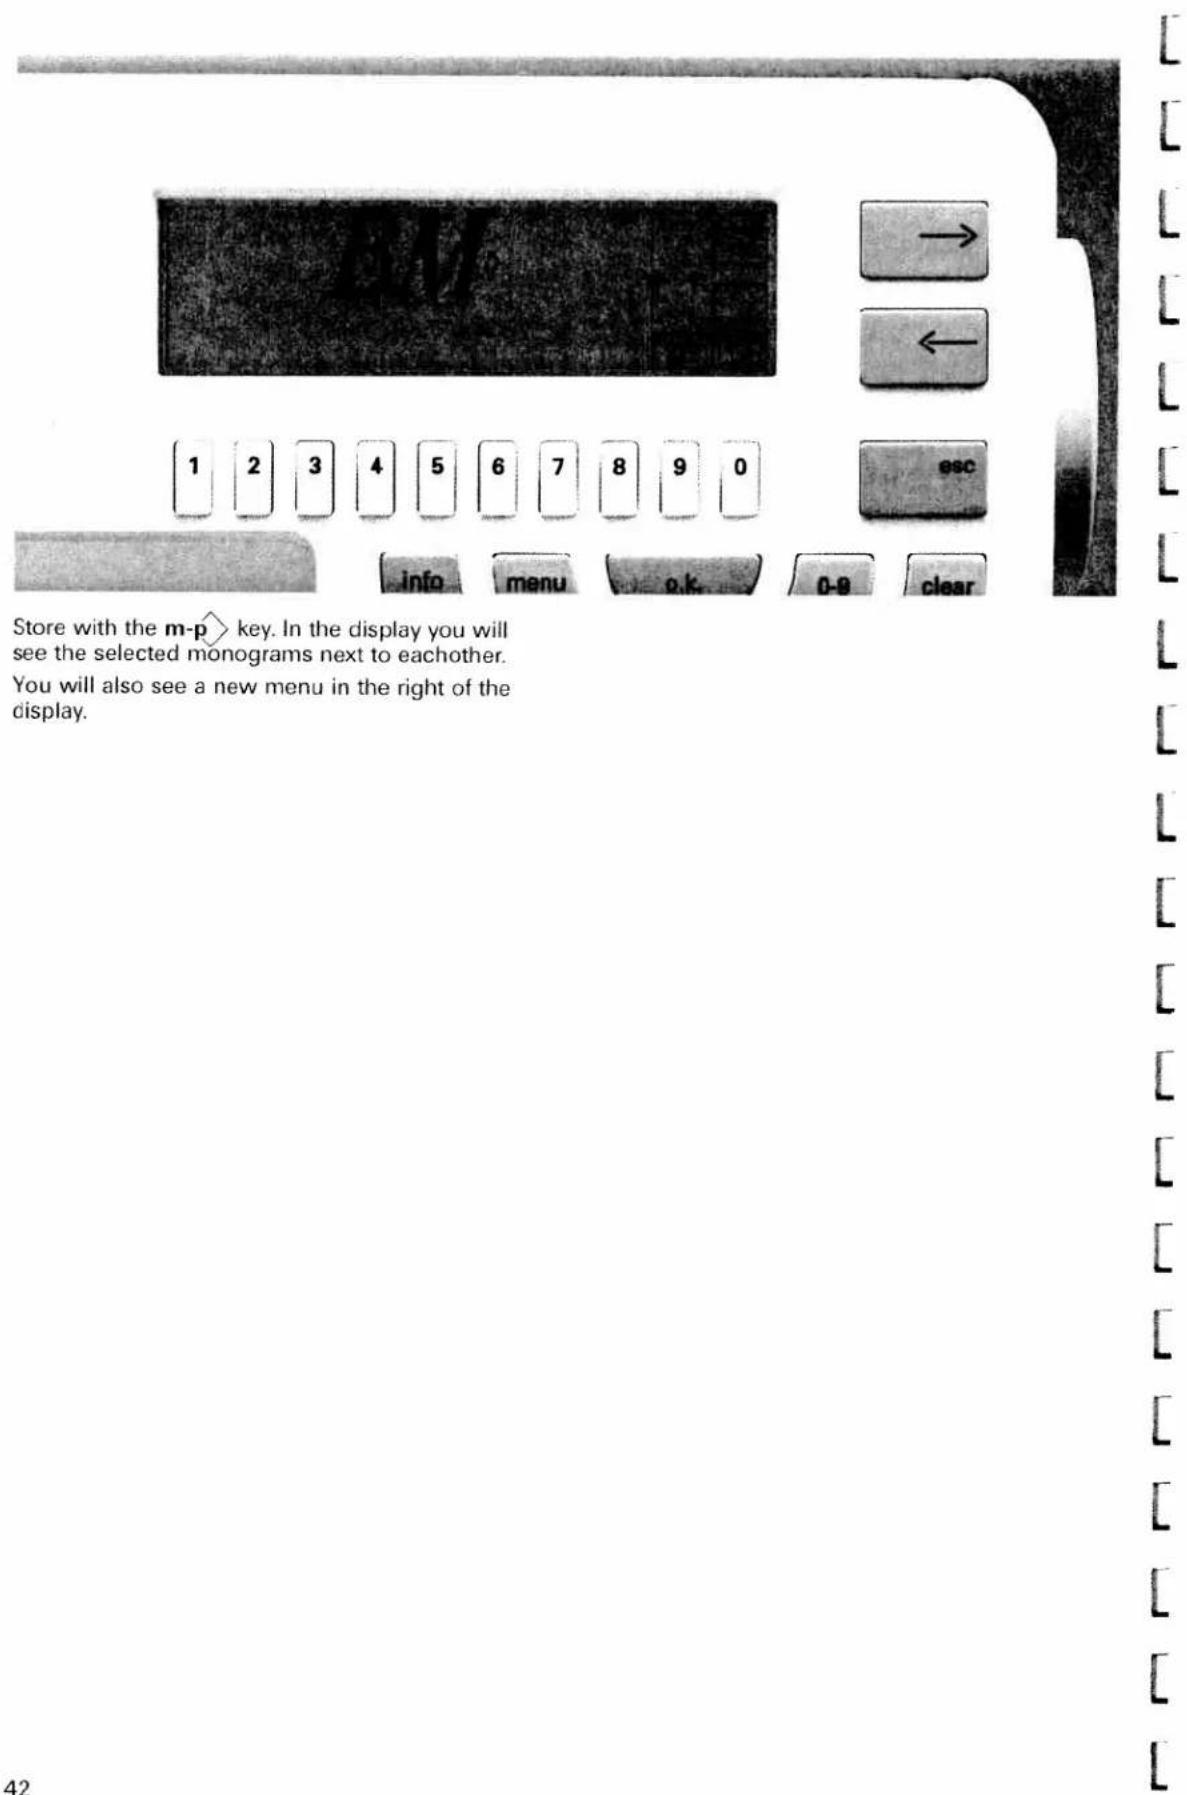
text_image
Store with the m-p key. In the display you will see the selected monograms next to eachother. You will also see a new menu in the right of the display.With the following symbols you can process the monograms or patterns within a pattern sequence.

Reduce the size of the motif for a picture in the display. Zooming has no effect on the pattern sewn, it is merely a visual aid.

The key with the two arrowheads left and right opens a new menu. With the cursor keys next to the letters x and y you move the arrow in the display in order to then move the letters together in the same way.

With the 0 key you access a new menu.
With both the large arrow keys.
< (cursor keys) You move the arrow in the display, thus selecting a monogram.

With the 0 key you can move the screen up and down in the display.

With the 9 key underneath the symbol m- you can access another new menu. This symbol stands for delete pattern. The following functions can be activated.

With the key underneath this symbol you delete the pattern which has an arrow in the display.

Delete entire sequence? If you press the 0 key underneath the symbol the message appears: "Delete entire sequence?"
Confirm with the "ok" key or quit this command with the "esc" key.

With the 9 key under the sewing machine symbol you access the sewing screen.
All further symbols and their functions are described on pages 20-23.

text_image
BM x= -- y= -- 1. OK 1 2 3 4 5 6 7 8 9 0 info menu o.k.If you wish to move the letters closer together, press the arrow key (cursor key) next to the symbol ><. This opens a new menu.
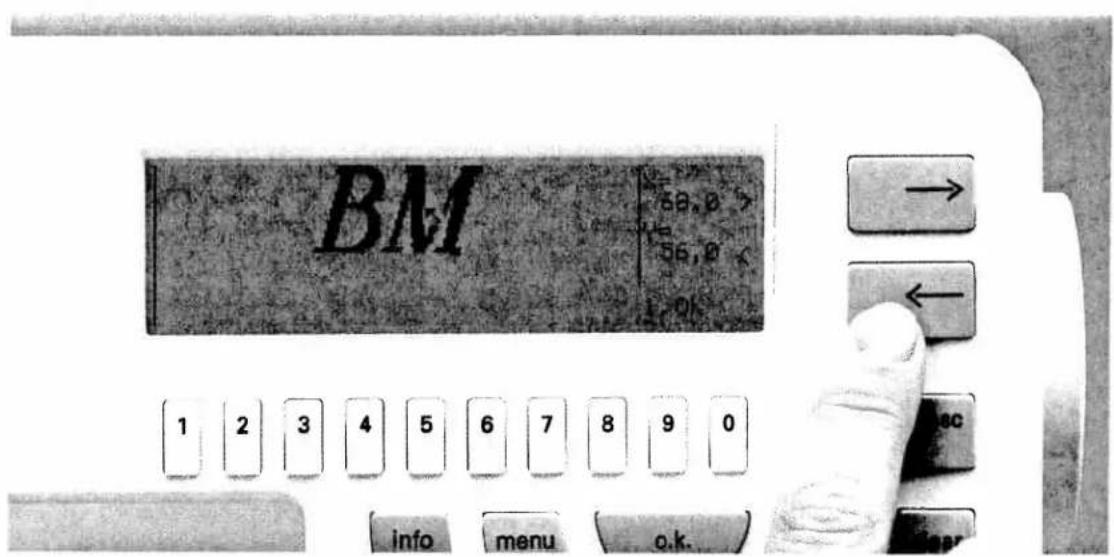
text_image
BM 58,0 > 56,0 1 2 3 4 5 6 7 8 9 0 info menu o.k.Using the two cursor keys, place the arrow on the letter you wish to move (e.g. arrow on the M).

text_image
BM → ← esc info menu o.k. 0-9 clearOnce the arrow is in position press the ok key twice.

text_image
BM → ← 1 2 3 4 5 6 7 8 9 0 esc info menu o.k. 0-9 clearAfter a short period you will see a new screen.
In the display the position of the pattern in the frame is displayed using the x and y values. Y stands for the vertical and x for t he horizontal axis. The 0 point is in the bottom left of the frame.

text_image
Close-up of a vintage computer control panel with labeled buttons and a hand pressing the button.If you now move one letter, e.g. the M (with the second cursor key) to the left, the values of the axes change.
By pressing the second cursor key again you move the letter in the direction of the arrow. You can also press and hold the key.

text_image
BM 1 2 3 4 5 6 7 8 9 0 esc Info menu 0-9 clearWith the number keys 9 and 0 underneath the symbols arrow □□ you move the selected letters up or down.

text_image
Digital display panel with numeric keypad and control buttons, showing navigation arrows and a 'ESC' buttonIf you have placed the letter where you want it press the esc key to return to the initial screen.
With the 9 key underneath the ☐ symbol you enter the sewing screen.
You can now sew the pattern sequence.

text_image
Start Stellung für den Gas 1 2 3 4 5 6 7 8 9 0 esc info menu lock 0-9 clearThe embroidery frame moves to start position. If you have fulfilled all the requirements in the display, confirm with "ok".
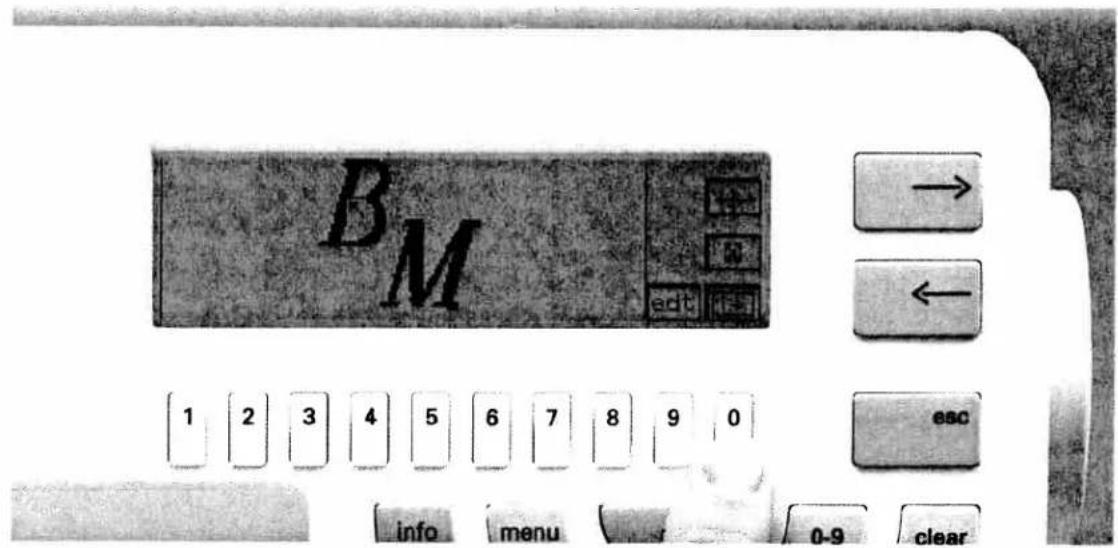
text_image
BM → ← 1 2 3 4 5 6 7 8 9 0 esc info menu 0-9 clearWith the 0 key underneath the □ symbol you can view the entire sequence letter by letter.
Attention!
You are in the sewing screen.
With the key underneath card you store your sequence on the "Creative Card".

text_image
1 2 3 4 5 6 7 8 9 0 info menu 0-9 clearTo delete a letter press "esc" to return to the previous screen and then press the key underneath edt.

text_image
Bpc → ← 1 2 3 4 5 6 7 8 9 0 BSC info menu 0-9 clearWith the 0 key underneath the □ symbol you can delete one letter or the entire sequence.
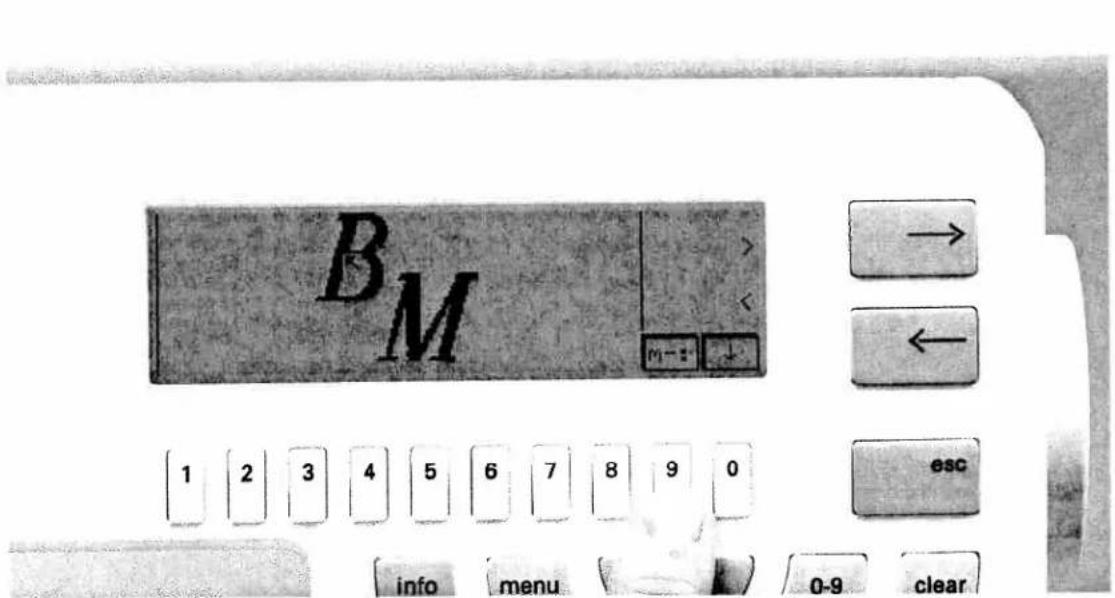
text_image
BM 1 2 3 4 5 6 7 8 9 0 esc info menu 0-9 clearWith the 9 key underneath the symbol ☐ you access a new menu.

text_image
BM 1 2 3 4 5 6 7 8 9 0 esc info menu 0-9 clearWith the 9 key underneath the symbol ☐ you delete the letter on which the arrow is placed.

text_image
B 1 2 3 4 5 6 7 8 9 0 info menu clear 0-9 clearWith the 0 key underneath the □ symbol you call up the question "Delete entire sequence?". With the "ok" key you delete the entire sequence, with the esc key you leave the sequence as it is.
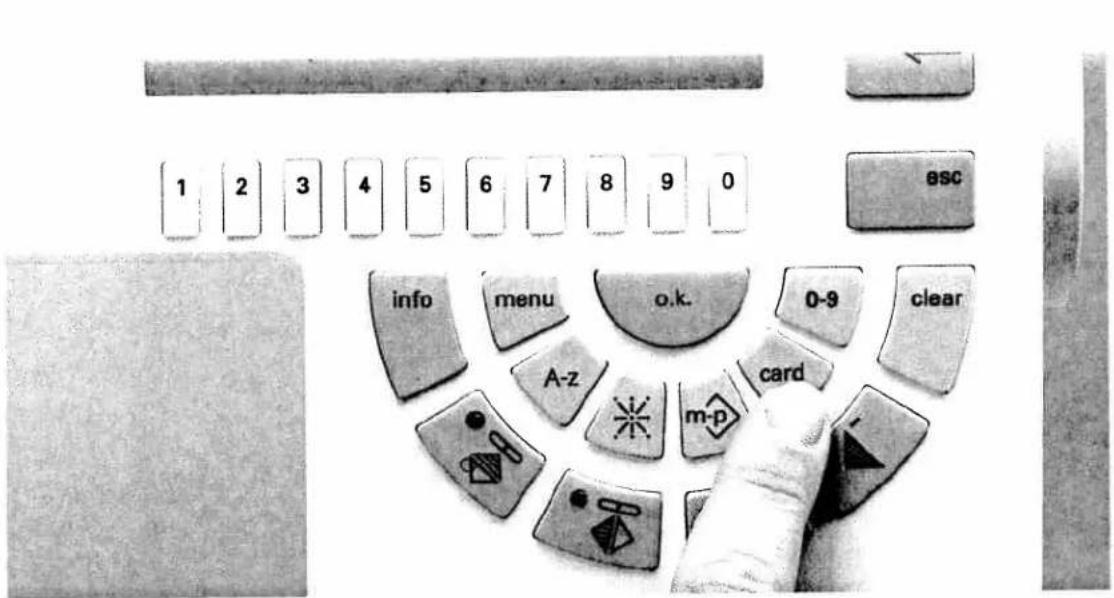
text_image
1 2 3 4 5 6 7 8 9 0 ESC info menu o.k. 0-9 clear A-z m-p cardPlacing monograms in frames
Select an empty M-memory. After confirmation with the "ok" key the message "Pattern sequence is empty" appears.
Now press the "Card" key.
By pressing key 1 you can see a summary of the embroidery patterns on pattern card 1.
Underneath the embroidery patterns there are also frame patterns.

text_image
0 my 1 2 3 4 5 6 7 8 9 0 info menu o.k. 0-9Find the frame you want by scrolling with the cursor key.

text_image
'0 any → ← 1 2 3 4 5 6 7 8 9 0 esc inf minu o.k. 0-9 clearUsing the number keys select a frame.
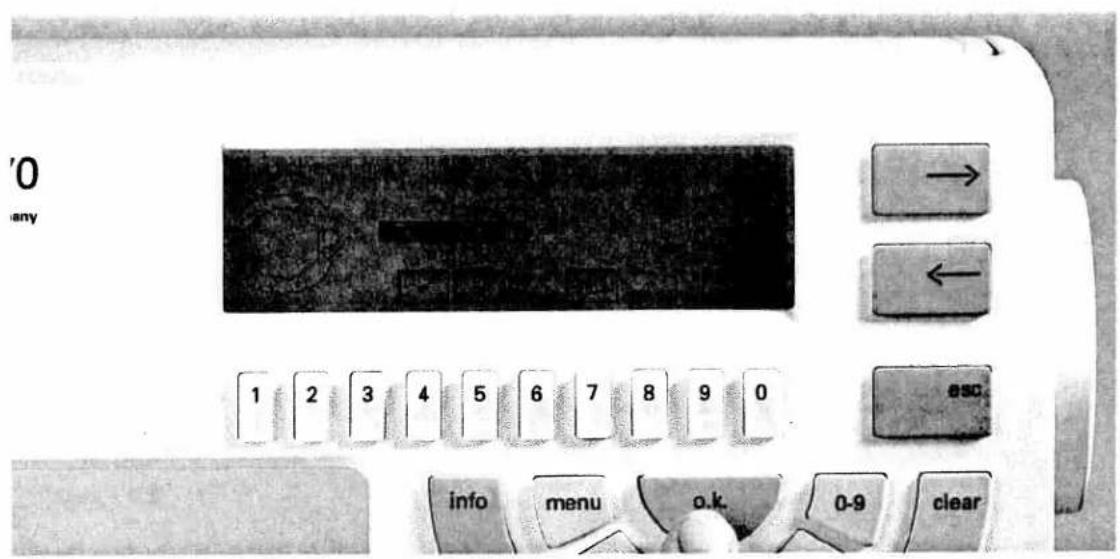
text_image
'0 any 1 2 3 4 5 6 7 8 9 0 esc info menu o.k. 0-9 clearYou can change the size of the motif with keys 4 and 5.
Save the desired pattern by pressing the "ok" key.
'0 any

text_image
1 2 3 4 5 6 7 8 9 0 info menu o.k. 0-9 clearRepeat this procedure by pressing the Card key again and then selecting key 2 for embroidery monograms.
'0 any
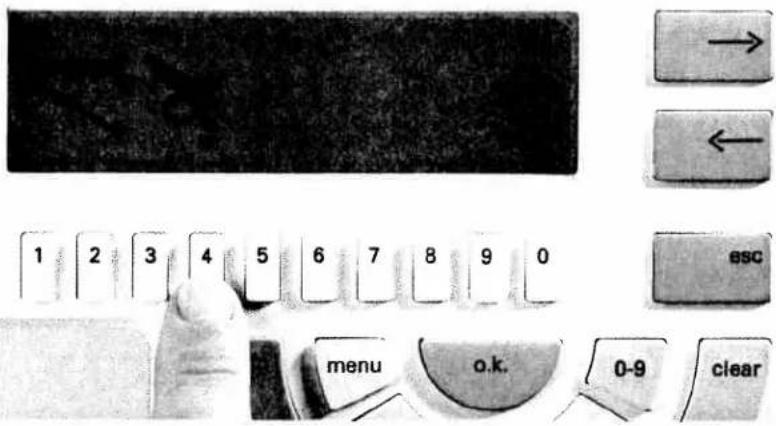
text_image
1 2 3 4 5 6 7 8 9 0 esc menu o.k. 0-9 clearThen select a monogram alphabet
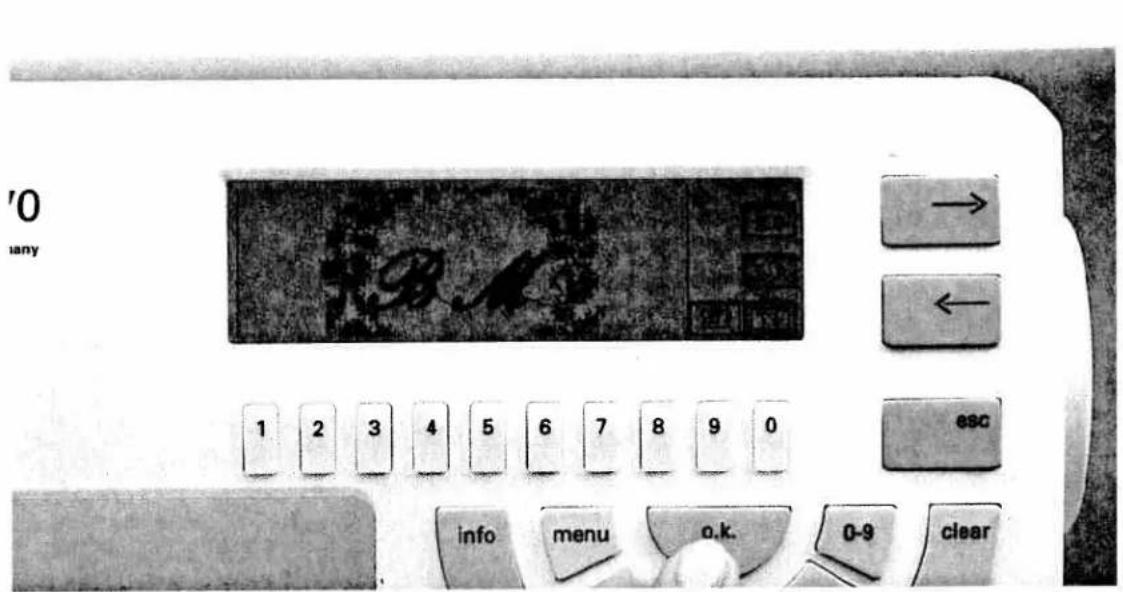
text_image
'0 any → ← 1 2 3 4 5 6 7 8 9 0 esc info menu o.k. 0-9 clearNow enter both letters with the "ok" key (e.g. BM).

text_image
'0 any 1 2 3 4 5 6 7 8 9 0 esc info menu o.k. 0-9 clearAfter pressing the m-p key the letters appear automatically in the frame. Press the key underneath the sewing machine symbol and you can sew your motif.
The description of how to move the monograms within the frame is on pages 44-47.
Creating a word sequence
When dealing with word sequences or names, please note that the size of the letters can be altered. At a letter height of 40 mm, 3 letters can be embroidered within the frame, depending on the width of the letters. The smaller the letters the more letters can be stored one after another in the sequence.
Creating longer words or names can also be done by moving the frame. On pages 86 in the chapter Tips and examples for use you will find a detailed description.
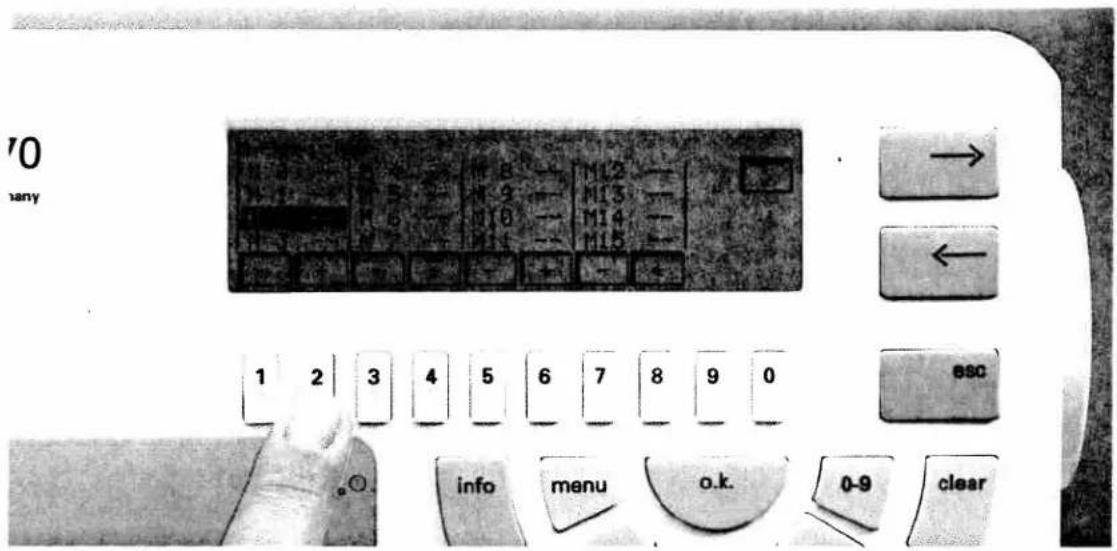
text_image
70 any 1 2 3 4 5 6 7 8 9 0 info menu o.k. 0-9 clearCreate a word sequence. Select a free M-memory. Use card 1 "creative fantasy".
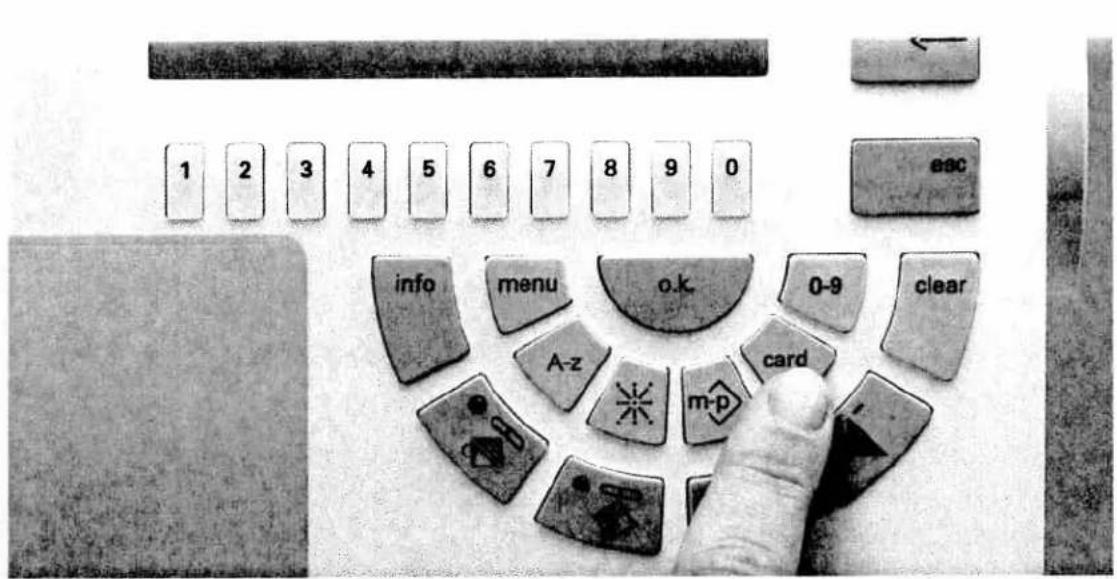
text_image
1 2 3 4 5 6 7 8 9 0 esc info menu o.k. 0-9 clear A-z m-p cardPress the Card key.
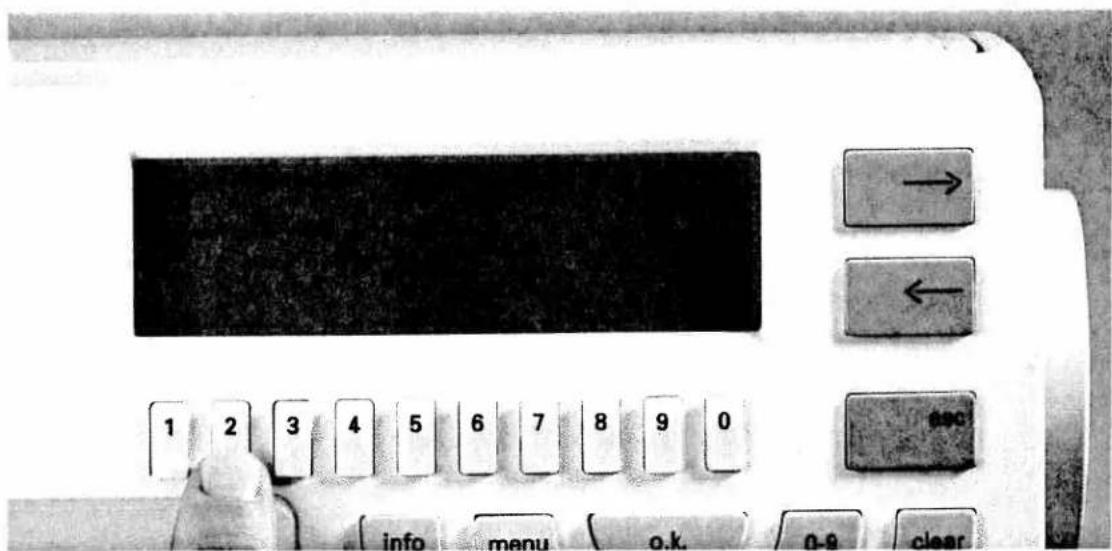
text_image
Close-up of an electronic device control panel with labeled buttons and a black screen displaying the text.Press key 2 for embroidery monograms.
PFAFF
Embroidery unit
7570
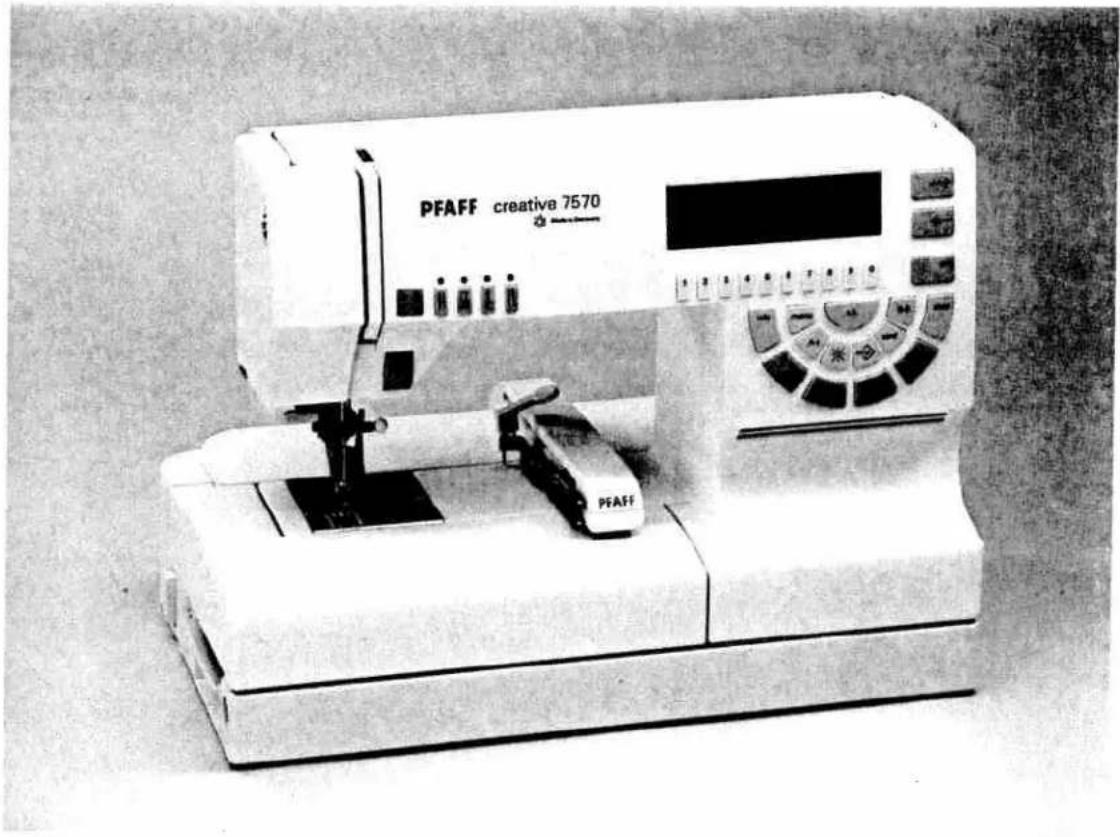
natural_image
Exterior view of a PFAFF creative 7570 laboratory instrument (no visible text or symbols on the device body)Instruction manual
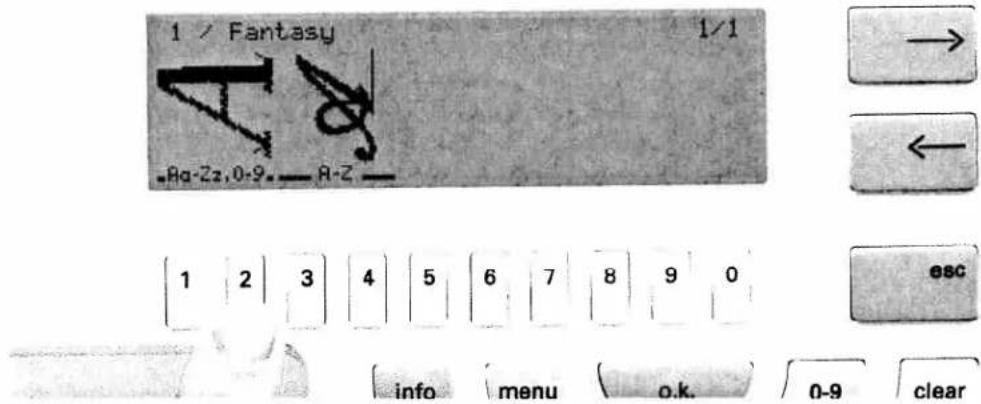
text_image
1 / Fantasy A Bq-Zz,0-9.—A-Z 1 2 3 4 5 6 7 8 9 0 esc info menu o.k. 0-9 clearNow select the block letter alphabet with the number keys.
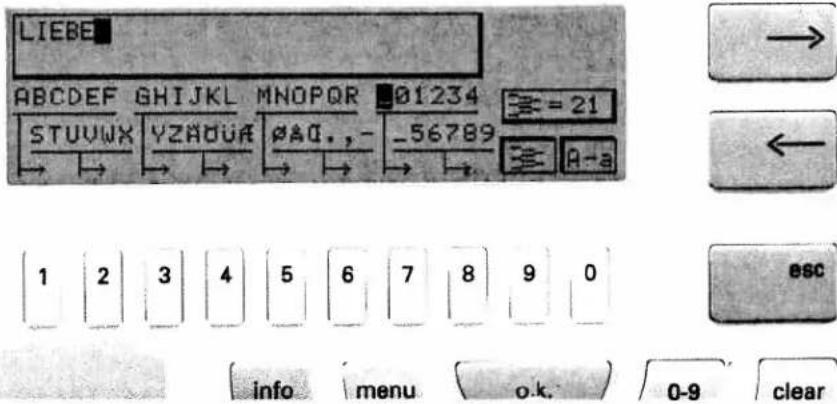
text_image
LIEBE ABCDEF GHIJKL MNOPOR 01234 = 21 STUVWX YZADUA AAG.,- -56789 A-a 1 2 3 4 5 6 7 8 9 0 esc info menu o.k. 0-9 clearNow enter the letters using the number keys. If you wish to write on 2 or 3 lines, enter a maximum of 6 letters in the first line. If the word has less than 6 letters enter empty spaces to fill the line.
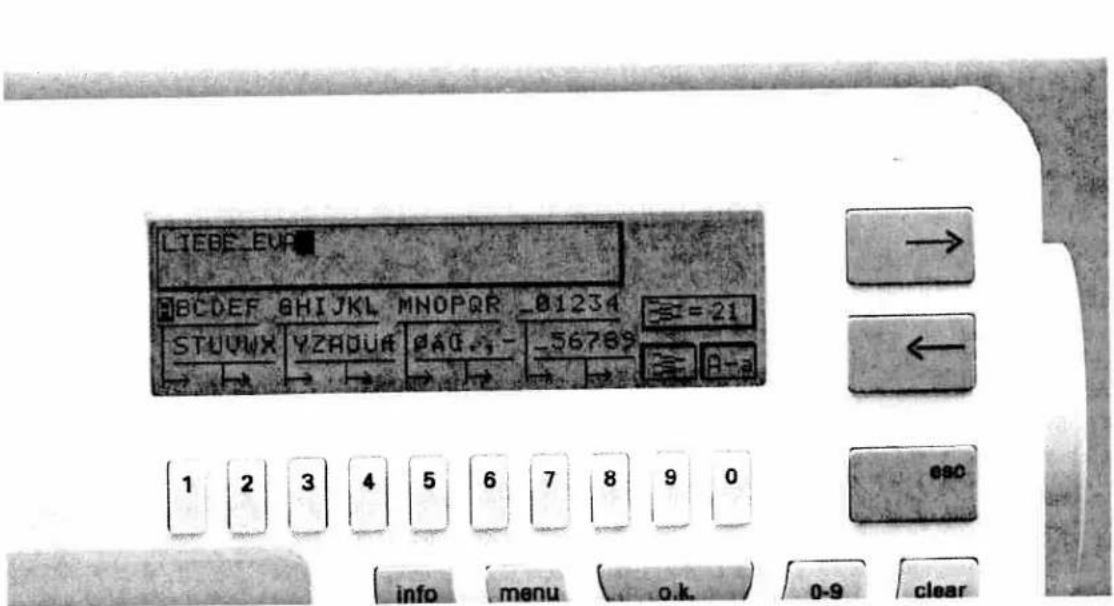
text_image
LIEBE_EVA ABCDEF 8HIJKL MNOPQR -01234 =21 STUVWX YZADUR PAD_1 -56789 B-a 1 2 3 4 5 6 7 8 9 0 info menu o.k. 0-9 clearE.G. LOVE - EVA
There should never be more than 6 letters or symbols in a row.

text_image
LIE BE 1 2 3 4 5 6 7 8 9 0 info menu o.k. 0-9 clearThe two words are now in two lines. Depending on the alphabet and the size of the letters the word sequences can become larger or smaller.
Combining motifs with word sequences

text_image
M-Speicher M 0. -- | M 4 -- | M 8 -- | M12 -- M 1. 2 | M 5 -- | M 9 -- | M13 -- M 2. 3 | M 6 -- | M18 -- | M14 -- M 3 -- | M 7 -- | M11 -- | M15 -- - + - + - + - + - → ← esc info menu o.k. 0-9 clearIf you wish to store motifs with word sequences, select a free M-memory. Use card 1 "creative fantasy".

text_image
1 2 3 4 5 6 7 8 9 0 esc info menu o.k. 0-9 clear A-z cardThen press the "Card" key.
text_image
'0 any 1 2 3 4 5 6 7 8 9 0 esc info menu o.k 0-9 clearNow press 1 for embroidery patterns.
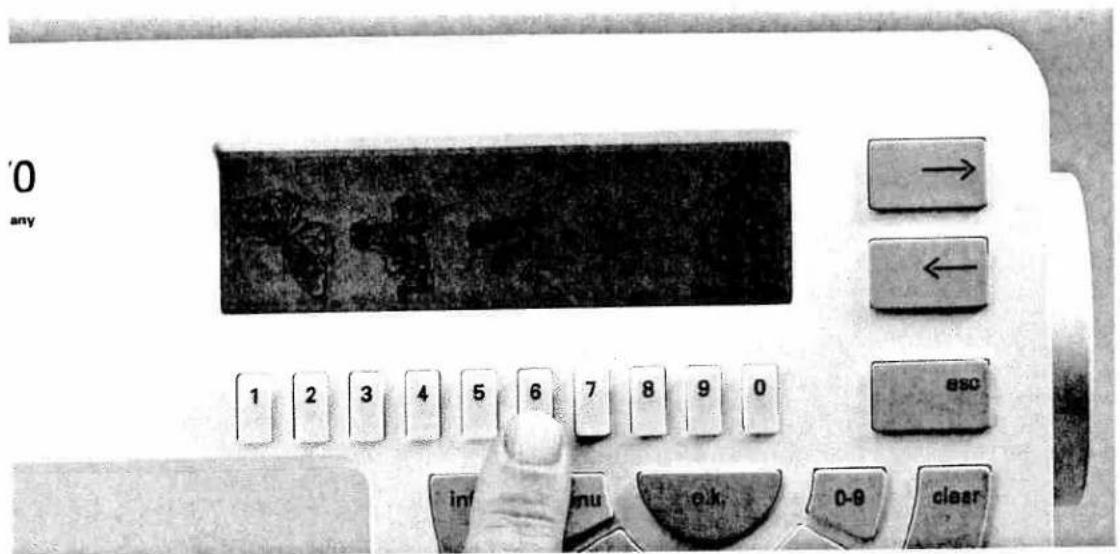
text_image
'0 any 1 2 3 4 5 6 7 8 9 0 esc inf menu o.k. 0-9 clearNow select a motif with the number keys (e.g. key no. 6).
'0 any
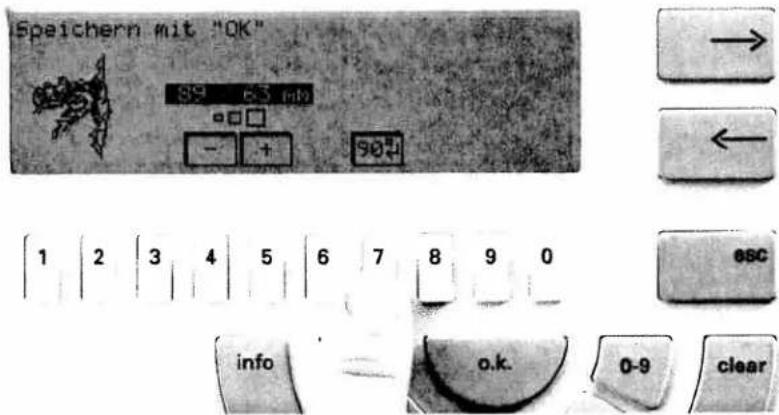
text_image
Speichern mit "OK" S9 6.3 mb - + S0 1 2 3 4 5 6 7 8 9 0 esc info o.k. 0-9 clearWith key 7 underneath the □ symbol you can rotate the motif before storing it.
They did not make the sign
'0 any
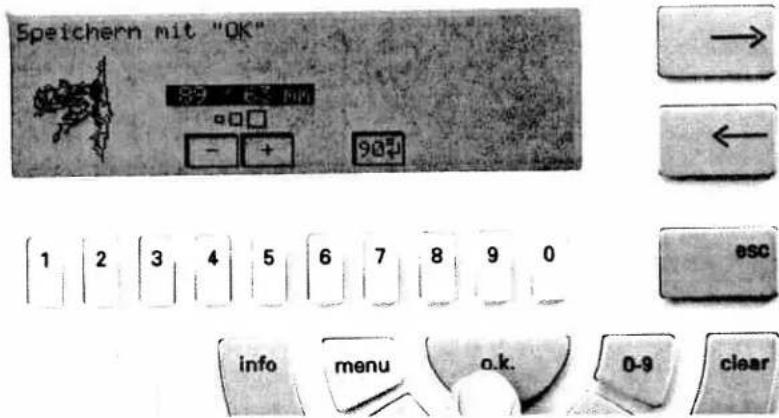
text_image
Speichern mit "OK" 89 F- 40V - + 90Ω 1 2 3 4 5 6 7 8 9 0 esc info menu o.k. 0-9 clearConfirm with the "ok" key. The motif is stored.

text_image
'0 any 1 2 3 4 5 6 7 8 9 0 esc info menu o.k. 0-9 clearTo keep a word sequence in the same memory, press the "Card" key once again. Press the 2 key for monograms. In the display you will see the 2 current monograms on card 1.
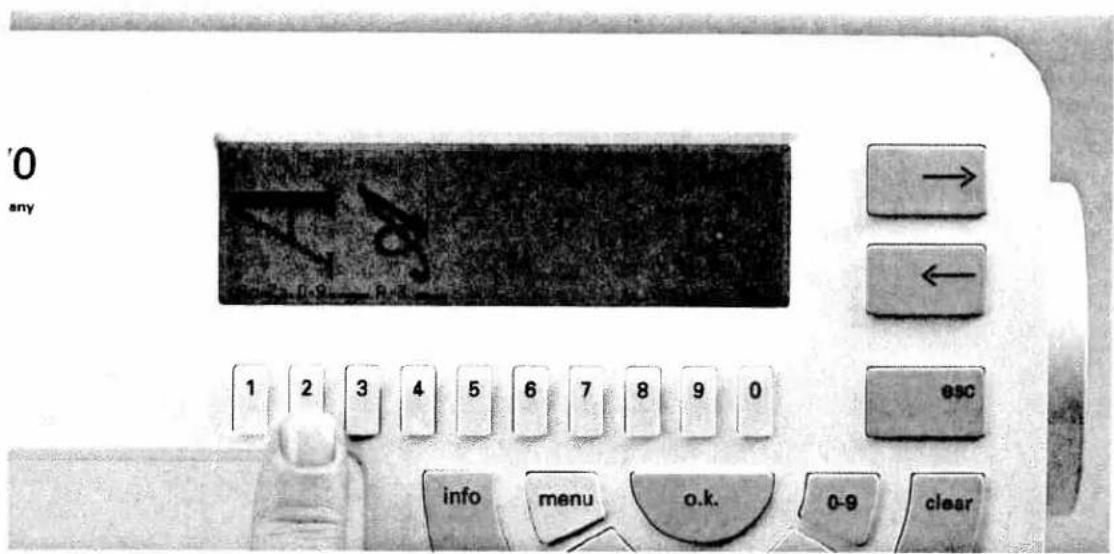
text_image
'0 any 1 2 3 4 5 6 7 8 9 0 esc info menu o.k. 0-9 clearPress key 2.
0
any

text_image
ABCDEF CHINE PROBE STUDUS MZROUR 10K 5E78


text_image
1 | 2 | 3 | 4 | 5 | 6 | 7 | 8 | 9 | 0

text_image
info menu o.k. 0-9 clearNow enter a word sequence using the number keys (e.g. DONALD). Now press the m-p key.
0
inty
text_image
DONALD

text_image
1 | 2 | 3 | 4 | 5 | 6 | 7 | 8 | 9 | 0

text_image
info menu o.k. 0-9 clearThe word sequence is laid on top of the motif.
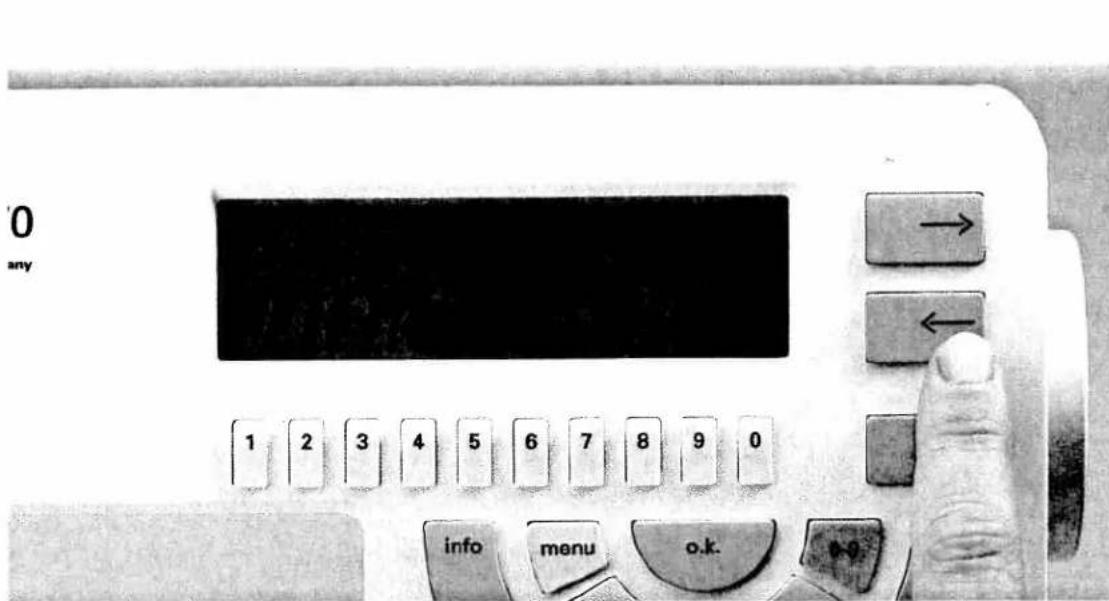
text_image
'0 any 1 2 3 4 5 6 7 8 9 0 info menu o.k. +0Press the first cursor key next to the arrows. You will see a new menu.

text_image
'0 any 1 2 3 4 5 6 7 8 9 0 info menu o.k.Using the cursor keys, move the arrow in the display to the first letter of the word (D in DONALD).
0
any

text_image
1 2 3 4 5 6 7 8 9 0 esc info menu o.k. 0-9 clearPress the "ok" key once.
0
my
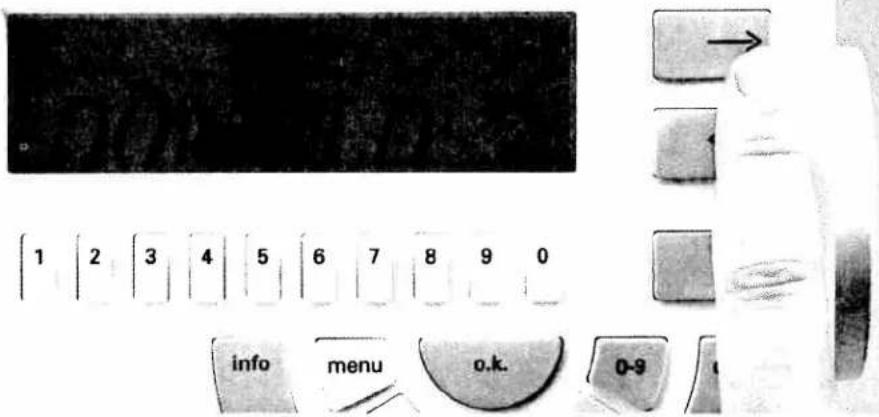
text_image
1 2 3 4 5 6 7 8 9 0 info menu o.k. 0-9Move the arrow in the display to the last letter of the word (D in DONALD).

text_image
'0 any 1 2 3 4 5 6 7 8 9 0 info menu o.k. 0-9 clearNow press the "ok" key again.
The word sequence can now be moved up or down in the display.
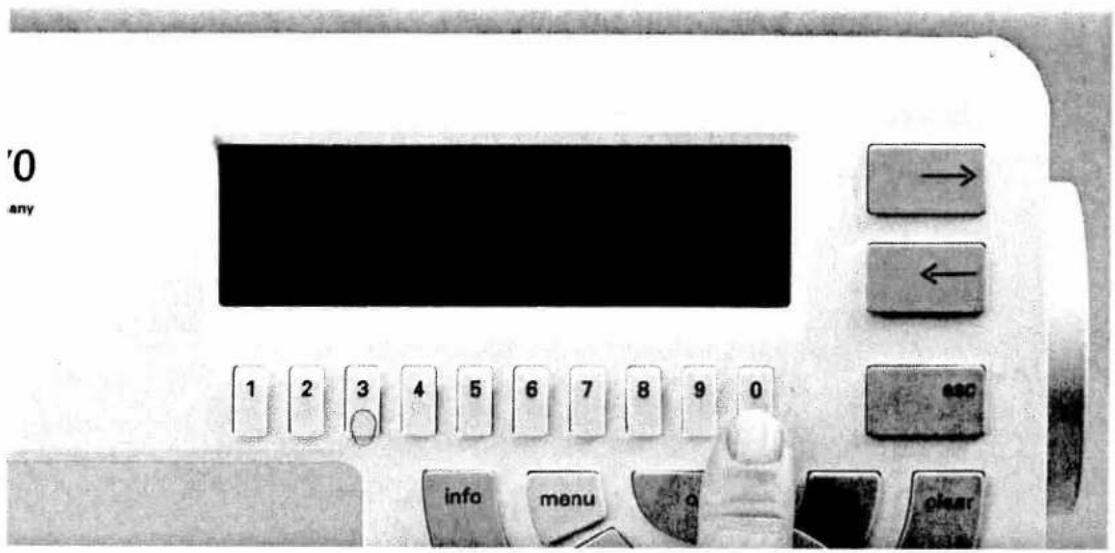
text_image
'0 any 1 2 3 4 5 6 7 8 9 0 info menu o clearNow use key 9 or 0 underneath the symbols
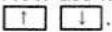
'0 any

text_image
DONALD 1 2 3 4 5 6 7 8 9 0 esc info menu 0-9 clearIf you wish to sew the pattern, press the "esc" key followed by the 9 key underneath the symbol. Once all requirements in the display have been fulfilled press the "ok" key. The sewing machine is now ready to sew.
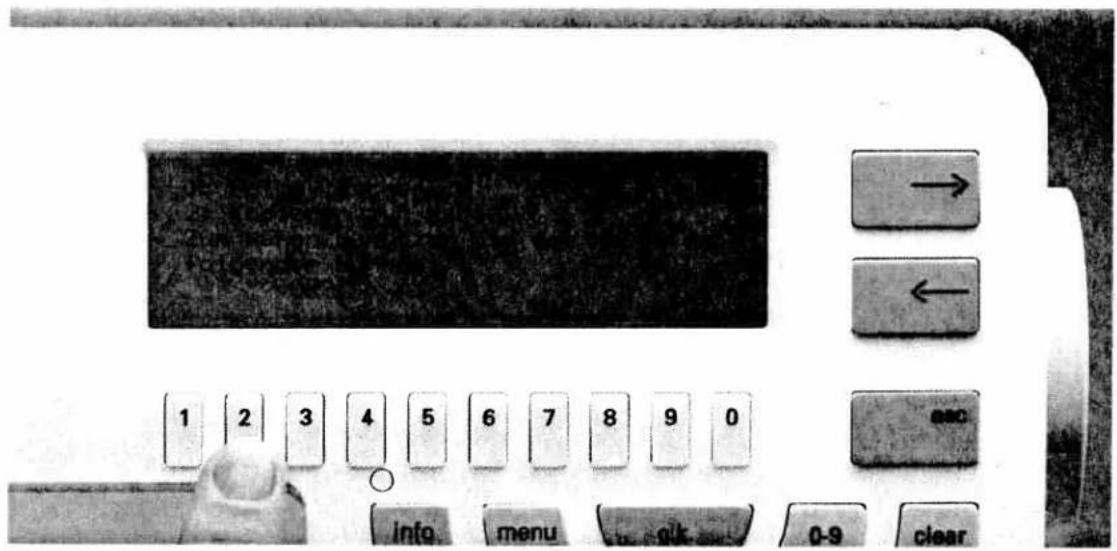
text_image
Control panel interface with labeled buttons and numeric keypad, showing navigation and function keysIf you want to store pattern sequences on the "Creative Card" in which patterns from card 1 Fantasy are used, the following message will appear if the card is not inserted in the machine:
-
Delete sequence
-
Copy onto card
or use the card with the following number: 1 ok?
Confirm with ok.
Press key 2 to copy. The following message appears:
Please use the programmable card, ok?
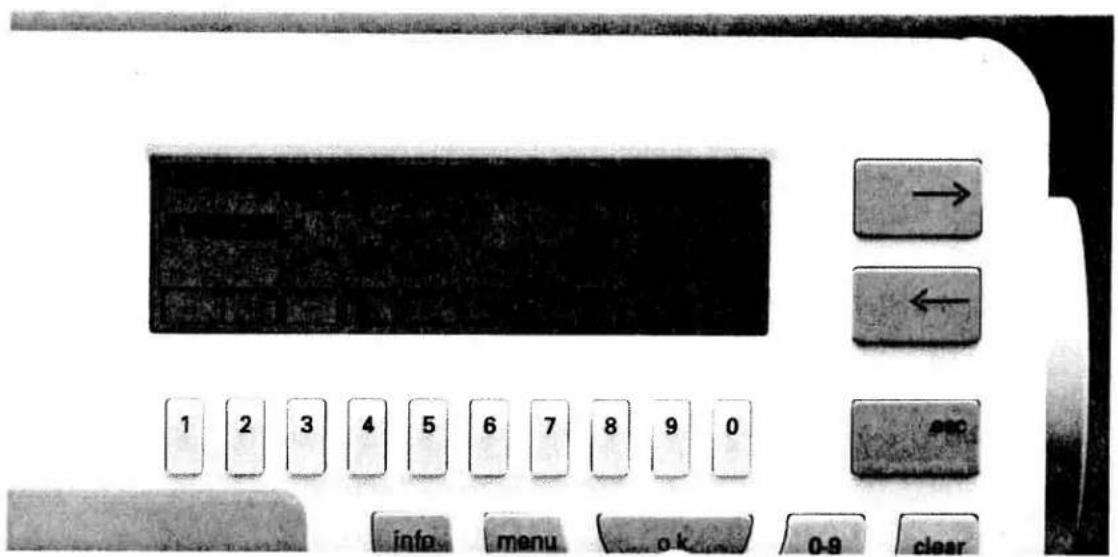
text_image
Control panel interface with labeled buttons and numeric keypad, showing navigation and function buttonsNow insert a "Creative Card". Then press "ok".
You can now see a menu with the title "M-memory on the card".
Select a free M-memory and press "ok".

text_image
M-Speicher M 0 — M 4 — M 8 — M12 — M 1 — M 5. / S M 9 — M13 — M 2. 2 M 6 — M10 — M14 — M 3 — M 7 — M11 — M15 — — + — + — + — + 1 2 3 4 5 6 7 8 9 0 esc info menu ( o.k. ) 0-9 clearAfter a short time the machine switches and you are back in the selection menu of the pattern sequence.

text_image
M-Speicher auf der farle M 0 — M 4 — M 8 — M12 — M 1. — M 5 — M 9 — M13 — M 2 — M 6 — m 8 — M14 — M 3 — M 7 — M11 — M15 — — + + + + + + + + + + + + 1 2 3 4 5 6 7 8 9 0 esc info menu ( o.k. ) 0-9 clearPress the "Card" key as a check. You can see the selection menu of the "Creative Card" with the pattern which you have just stored.
'0
any
natural_image
Solid black rectangle with no visible text, symbols, or features.

text_image
1 2 3 4 5 6 7 8 9 0

text_image
info menu a.i. 0-9 clearAnother method of storing a pattern sequence on the Creative Card is:
Insert card 1 Fantasy into the sewing machine and select the pattern sequence again. You will see the following message:
- Fit and insert the "120" frame
-
Lower feed dog
-
Insert full bobbin
- Attach embroidery foot and bring lever to embroidery position.
ok?
Once you have set all the functions press the ok key.
After a short wait the pattern sequence will be shown in the display.
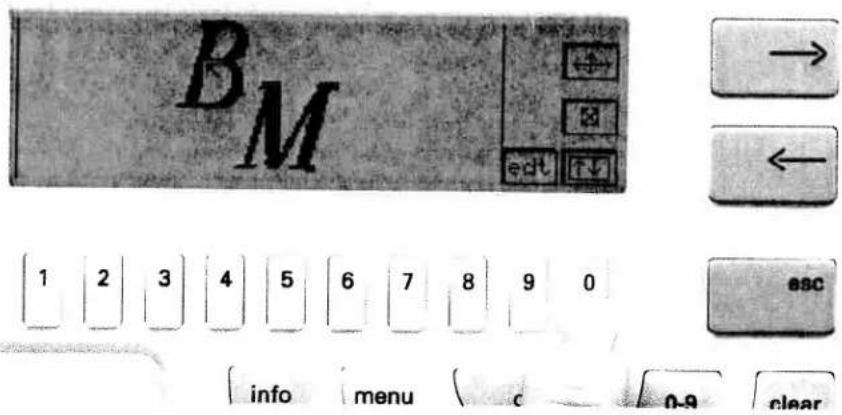
text_image
BM → ← 1 2 3 4 5 6 7 8 9 0 esc info menu c 0-9 clearIn order to be able to store the pattern on the Creative Card press the 0 key underneath the symbol. This takes you to a new menu.

text_image
BM → ← 1 2 3 4 5 6 7 8 9 0 esc info menu 0-9 clearWith the 9 key underneath the card symbol you can store the pattern sequence on the "Creative Card".
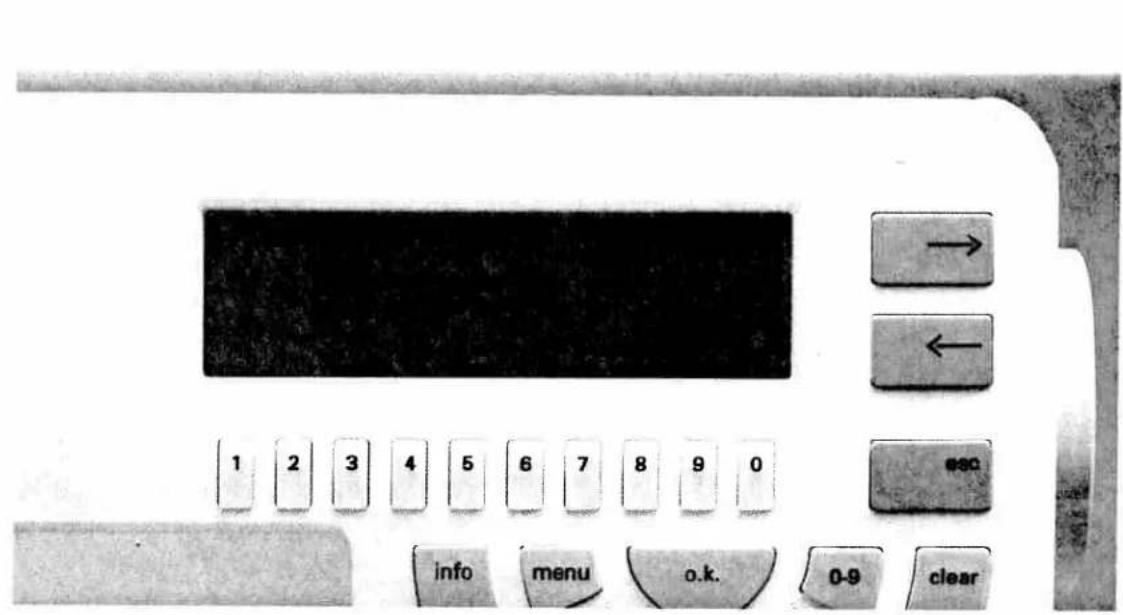
text_image
1 2 3 4 5 6 7 8 9 0 info menu o.k. 0-9 clearIf you have not inserted a Creative Card you will see the above message in the display.
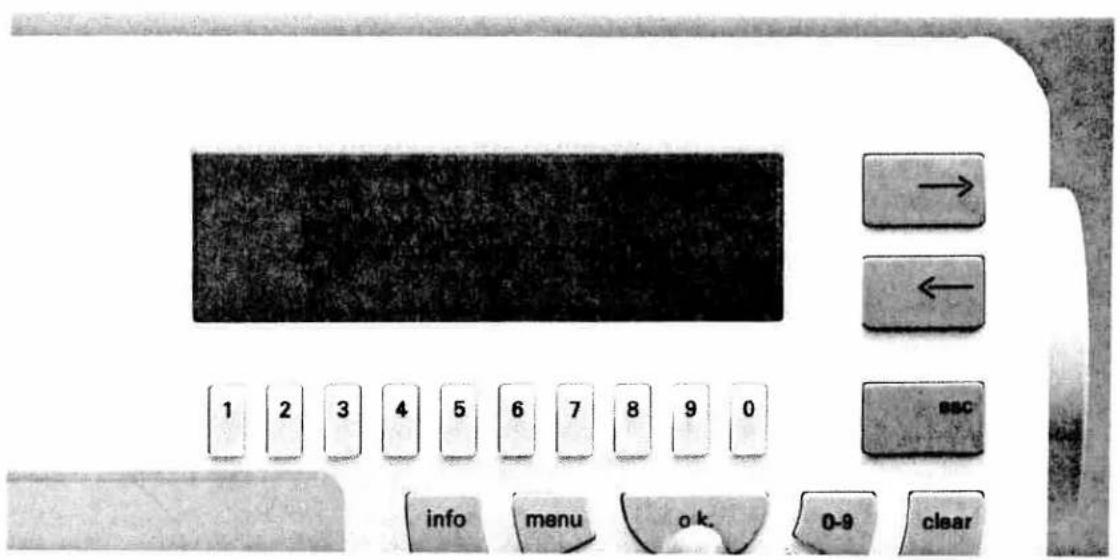
text_image
1 2 3 4 5 6 7 8 9 0 info menu o k. 0-9 clearNow insert the Creative Card and confirm with "ok".

text_image
M-Speicher auf der Karte M 0 -- M 4 -- M 8 -- M12 -- M 1. 2 M 5 -- M 9 -- M13 -- M 2 -- M 6 -- M10 -- M14 -- M 3 -- M 7 -- M11 -- M15 -- - + - + - + - + 1 2 3 4 5 6 7 8 9 0 esc info menu o.k. 0-9 clearInsert the "Creative Card" and press "ok".
Select a free M-memory and confirm with the "ok"
key. The message ok appears briefly in the display.
The motif has been stored in the memory.
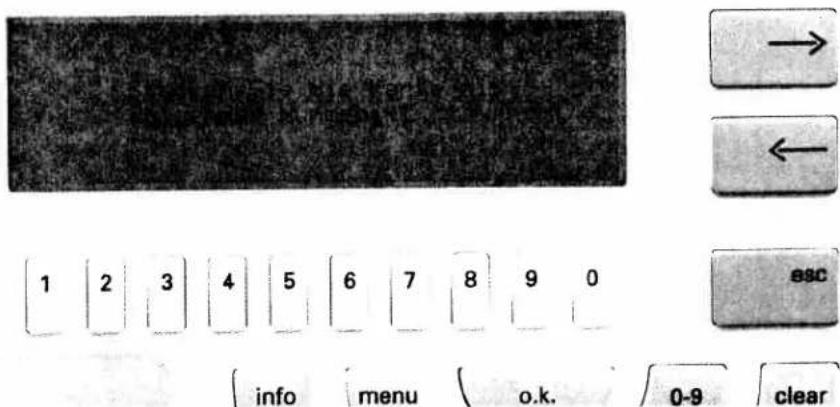
text_image
1 2 3 4 5 6 7 8 9 0 info menu o.k. 0-9 clearIn the screen you will see Insert the card with the
following number: 1 Now you can sew or leave the
menu.
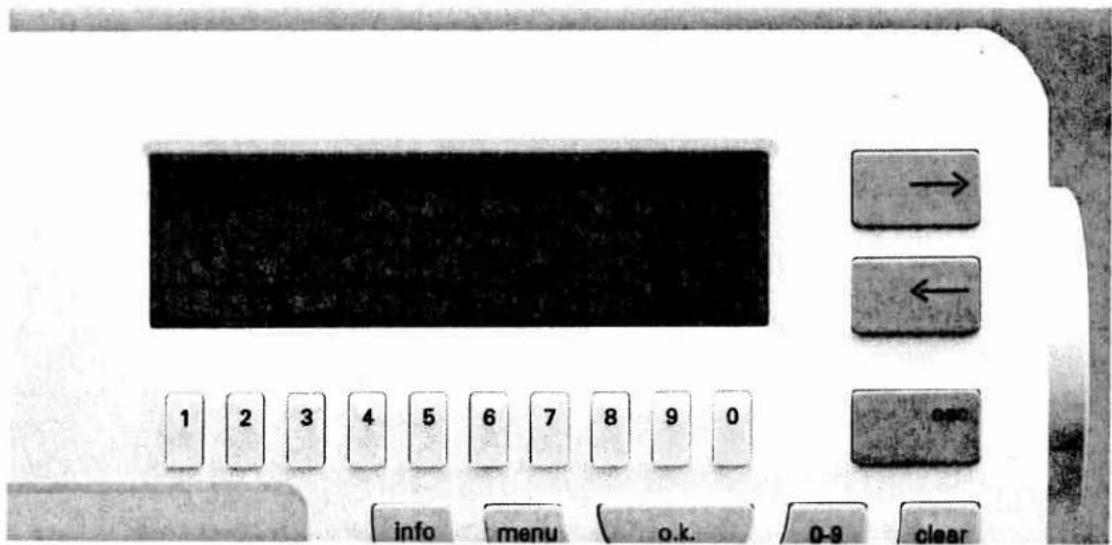
text_image
1 2 3 4 5 6 7 8 9 0 info menu o.k. 0-9 clearIf you wish to call up pattern sequences from the Creative Card, insert the card into the slot and press the card key.
In the display the M-memories of the card appear.
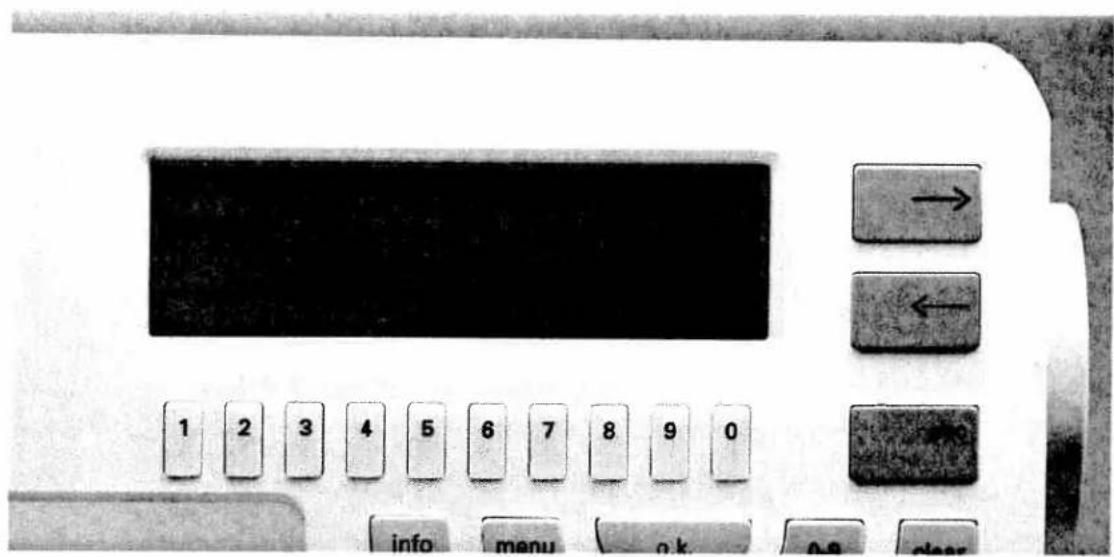
text_image
Close-up of a vintage computer control panel with labeled buttons and a display screen showing text content.Select an occupied memory with the number key beneath it. Confirm with the "ok" key.

text_image
M-Speicher M 8 -- | M 4 -- | M 8 -- | M12 -- M 1 -- | M 5. 9 | M 9 -- | M13 -- M 2. 2 | M 6 -- | M10 -- | M14 -- M 3 -- | M 7 -- | M11 -- | M15 -- - + - + - + - + + 1 2 3 4 5 6 7 8 9 0 info menu o.k. 0.9 clear → ← ESCThe M-memories of the sewing machine appear in the display. Select a free memory and confirm with "ok". The pattern sequence of the card is now transferred to the M-memory of the machine.

text_image
1 info menu o.k. 0-9 clear → ← esc 1 2 3 4 5 6 7 8 9 0To call up the M-memory press the "ok" key. The following message appears in the display:
- Delete sequence
- ...
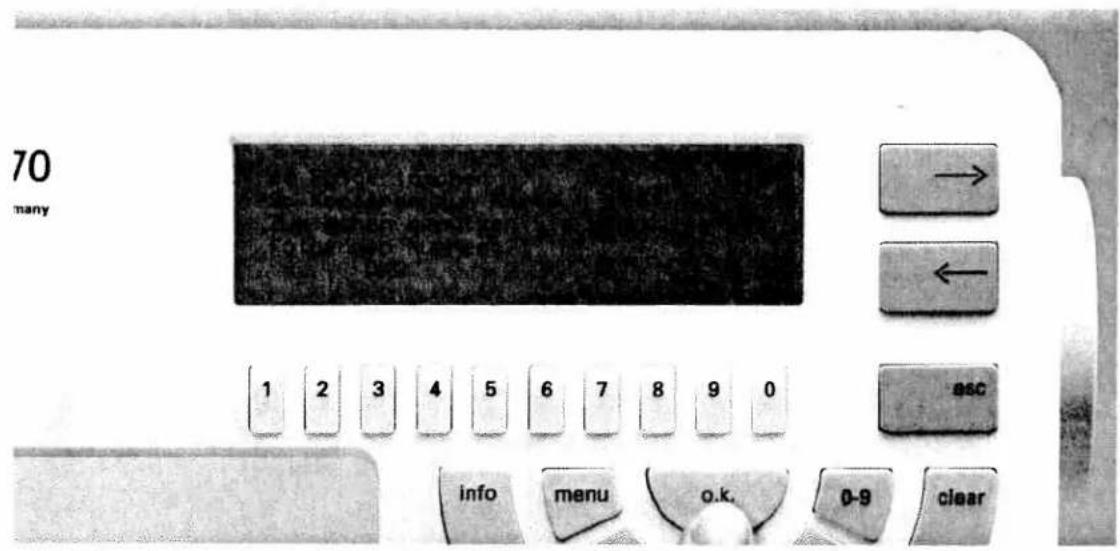
text_image
70 many 1 2 3 4 5 6 7 8 9 0 esc info menu o.k. 0-9 clearNow insert card 1 into the slot and press the "ok" key.

text_image
70 many 1 2 3 4 5 6 7 8 9 0 vec info menu o.k. 0-9 clearIn the display you will see the summary of the M-memory again. Now re-select the M-memory by pressing the "ok" key.
70
nany

The machine moves into position. The following message appears in the display:
- Fit 120 frame ...
- Lower feed dog
- ...
ok?
'0
any
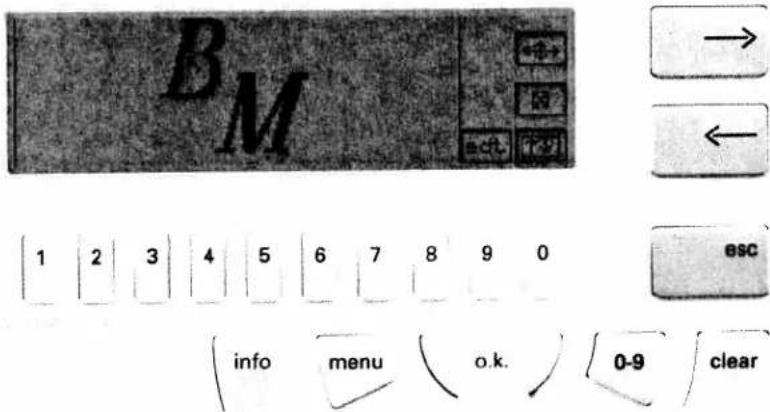
text_image
BM 1 2 3 4 5 6 7 8 9 0 info menu o.k. 0-9 clearPress the "ok" key. The pattern sequence can now be sewn.
70
nany
natural_image
Dark, low-resolution image with no discernible text, symbols, or structured content.

text_image
1 2 3 4 5 6 7 8 9 0 escIf you wish to delete a pattern sequence from the Creative Card, press the "Card" key. (The "Creative Card" must be in the machine.)
The M-memories on the card appear in the display.
'0
any

natural_image
Completely black image with no visible content or text.

text_image
1 2 3 4 5 6 7 8 9 0
If other motifs are stored on the "Creative Card" apart from the pattern sequence, a selection menu appears with the message:
Card 1001
Please select
-
Normal patter 9 mm
-
Pattern sequence
Now press the 2 key for pattern sequence.
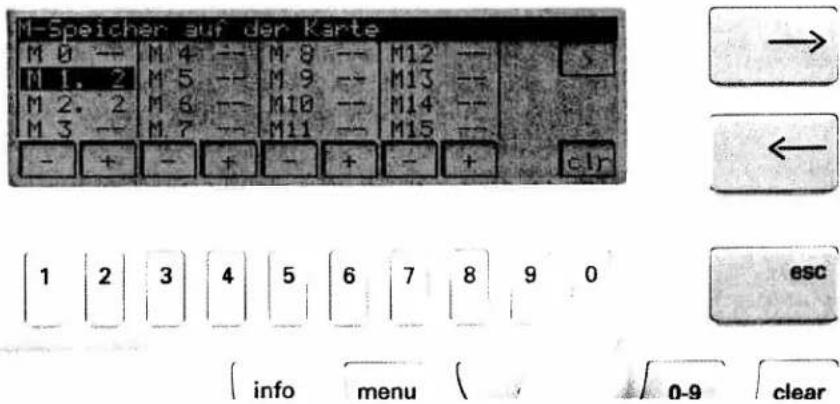
text_image
M-Speicher auf der Karte M 0 -- M 4 -- M 8 -- M12 -- M 1. 2 M 5 -- M 9 -- M13 -- M 2. 2 M 6 -- M10 -- M14 -- M 3 -- M 7 -- M11 -- M15 -- - + - + - + - + c.I.r 1 2 3 4 5 6 7 8 9 0 esc info menu 0-9 clearUsing the number keys select the memory you wish to delete. This is then given a dark background.
Press the 0 key underneath the clr symbol.
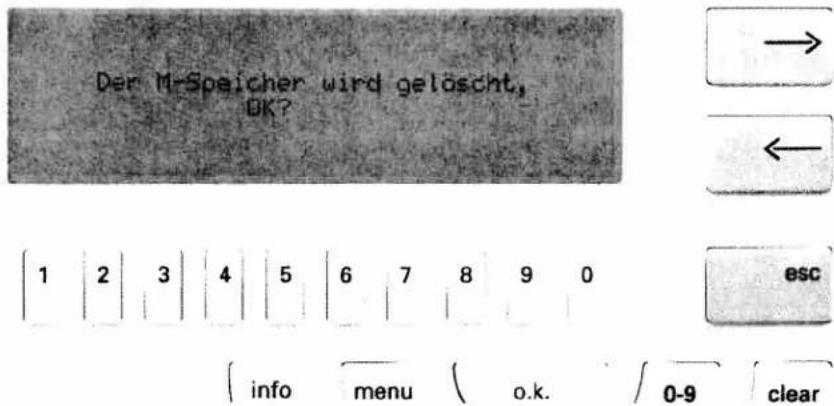
The question appears in the display:
Delete M-memory ok?

text_image
1 2 3 4 5 6 7 8 9 0 info menu o.k. 0.9 clearPress the "ok" key. After a short "ok" message in the display the sequence is deleted.
natural_image
Black-and-white portrait of a woman in vintage attire with floral patterns, standing against a dark architectural background (no text or symbols visible)Tips and examples for use
Pages 85-104
natural_image
Black-and-white photo of a vintage-style office interior with brick walls, decorative panels, and a vintage clock (no visible text or symbols)Contents
| Richelieu work | Page 86 |
| Appliqué | Page 87 |
| Embroidering thin fabrics | Page 88 |
| Embroidering frotté | Pages 89, 90 |
| Embroidering small pieces of fabric | Page 91 |
| Combining motifs to form a border | Pages 92, 93 |
| Combining motifs | Pages 94, 95 |
| Embroidering a word sequence | Pages 96, 97 |
| Maxi pattern combinations from a card | Page 98 |
| Embroidering leather | Page 99 |
| Attaching embroidered motifs | Pages 100, 101 |
| Embroidering contours | Page 102 |
natural_image
Black-and-white historical photo of a large cylindrical object with decorative patterns, surrounded by foliage and rocks (no visible text or symbols)Richelieu work
The Creative Card No. "7" is an appliqué and Richelieu card.
The appliqué motifs are marked with an A in the motif list.
If you wish to embroider a Richelieu motif these patterns can also be embroidered without Richelieu effect, i.e. the fabric pieces are not cut out of the spaces.
Select a Richelieu pattern, e.g. pattern No. 6 and embroider it in one or more colours onto your fabric. After embroidering, the segments which are surrounded by the zigzag stitch can be cut out if desired.

natural_image
Ornamental black-and-white decorative swirl pattern with no text or symbols
text_image
1 2 3 4 5 6 7 8 9 0 → ← ESC info menit ok infoAppliqué with the embroidery motifs
It is also possible to embroider appliqué with this card. Including a piece of coloured material lends profile to the pattern. Beautiful coloured effects can be achieved.
Floral motifs can be particularly attractive if you use cellular fabrics or fine organza.
Select pattern No. 1 from this card for example. Embroider the pattern. After the first segment the machine stops and the message "Insert appliqué" appears in the display accompanied by "Change thread colour 3" when embroidering in more than one colour. Cut the needle thread and lay the appliqué fabric onto the sewn pattern. You can pin the outer edges of the fabric down if you wish.

natural_image
Black-and-white decorative floral design with curved vine and leaves (no text or symbols)Important:
Do not remove the fabric from the frame. Re-thread the needle thread and continue to sew the pattern. Once the appliqué is sewn on, the machine stops again and elicits the message "Cut out appliqué". To do so you can remove the frame from the embroidery unit but not the fabric from the frame. Now cut the fabric carefully along the sewn line.
Re-insert the frame into the embroidery unit. Press the foot pedal and finish embroidering the pattern. Any fabric pieces protruding from the appliqué can be cut off subsequently.

natural_image
Black-and-white illustration of a draped garment with floral embroidery and a dark hat, no text or symbols present.Embroidering thin fabrics
If you wish to embroider on very fine and thin materials such as chiffon, organza or silk, we recommend reinforcing the material with a textile hardener from PFAFF:
The fabric must be hardened because you cannot back the material with an embroidery fleece (this would show through the thin fabric). Therefore, repeat the procedure until the fabric is strong enough.
Then fit the fabric tightly into the frame. If you think that the fabric is still too slack, fit Avalon in the frame also. The Avalon dissolves in water (available from your Pfaff dealer). Now you can select your desired pattern and embroider.
natural_image
Black-and-white photo of a tiled room interior with a person silhouette overlaying the table and wall, no visible text or symbols.Embroidering frotté
You can even embroider on fine loop fabrics such as frotté or velvet with the Creative. Both the maxi stitches and the embroidery motifs of the embroidery unit can be used for this purpose. However, we recommend using embroidery fleece and Avalon (available from your Pfaff dealer).
Embroidering with maxi stitches:
For a border with the maxi patterns of the machine or from cards A and B we recommend the following:
- Lay embroidery fleece underneath the fabric and pin it to the fabric.
- Lay Avalon on top of the fabric and pin it to the fabric also. The Avalon covers the loops of the frotté or velvet so the sewing foot glides over the fabric more easily ensuring a good neat embroidery.
- When you have finished embroidering, remove the Avalon carefully. The embroidery fleece underneath the fabric can be torn off. The rest of the Avalon will dissolve in water.
natural_image
Silhouette of a person wearing a hat and patterned garment, with no visible text or symbols.
natural_image
Close-up of a textured surface with no visible text or symbolsIf the frotté is too thick to fit into the frame, fit a piece of embroidery fleece into the frame and stick the frotté fabric onto it with a glue pen.
Embroidering with the embroidery unit
If you wish to embroider motifs on frotté or velvet with the embroidery unit, we recommend using embroidery fleece and Avalon.
Lay the Avalon on top of and the embroidery fleece underneath the frotté fabric and fit the three layers into the frame.
natural_image
Abstract grayscale image with a curved, dark shape and faint diagonal lines (no text or symbols)Now the Avalon can be pinned onto the frotté fabric. Take care, however, that the pins are close to the edge of the frame so that the machine doesn't embroider over them.
When you have finished embroidering, remove the frotté fabric from the embroidery fleece and pull the Avalon out.

natural_image
Close-up of a sewing machine needle stitching fabric (no visible text or symbols)
Embroidering small pieces of fabric
If you want to embroider on a small piece of fabric, for example a pocket or the corner of a napkin but you cannot fit all the fabric into the frame, we recommend tacking the piece of fabric onto embroidery fleece with large stitches. Now you can fit the part into the frame and embroider it. Remove the embroidery fleece when you have finished embroidering.
Embroidering small pieces of
fabri

natural_image
Vertical arrangement of five black-and-white floral patterns with stems and leaves, no text or symbols present.Combining motifs to form a border
Many motifs can be used to make a border. Cut a long strip of fabric. Draw a line down the middle of the fabric with disappearing chalk or disappearing magic marker.
Lay embroidery fleece under the fabric and fit both plies into the frame. Take care to ensure that the line you have drawn runs parallel to the embroidery frame.
Select a pattern, e.g. pattern 16 from card 1 and rotate the pattern 90^ . It is now displayed lengthwise. Embroider the pattern onto the fabric. If you wish to change the position of the fabric within the frame, you can do so before beginning to embroider with the symbols (see page 23). Embroider the pattern.

natural_image
Close-up of a sewing machine needle stitching a floral pattern on a curved surface (no text or symbols visible)Remove the fabric from the frame and measure the length of the pattern. Halve this length. This shows you where the middle of the pattern is. Now mark the middle of the fabric with a dot. This is very important because the placing and moving of a pattern in the embroidery frame is always based around the middle of the pattern. When you begin to sew the machine skips back to the pattern start automatically.
Now fit the fabric into the frame again so that the line is parallel to the frame. Now position the needle exactly over the marking in the middle of the fabric using the ▲▼◀ symbols. Using key 7 ☐, ensure that the pattern borders on the previously em broidered pattern.
Now embroider the second pattern. All further patterns are to be embroidered using the same procedure.
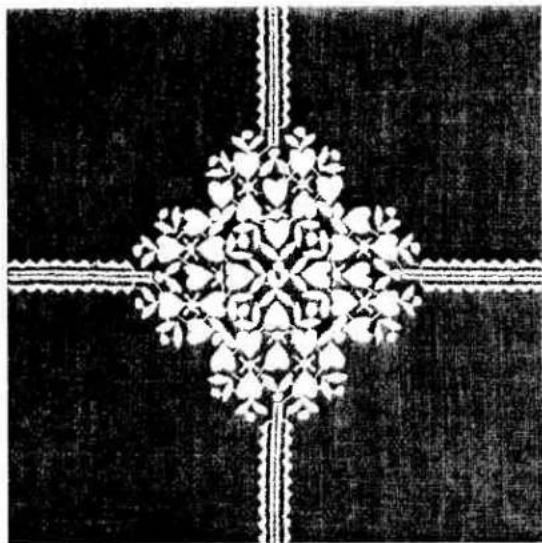
natural_image
Symmetrical black-and-white decorative pattern with symmetrical floral and geometric motifs (no text or symbols)Combining patterns to form a large motif
In this example the pattern has been embroidered four times.
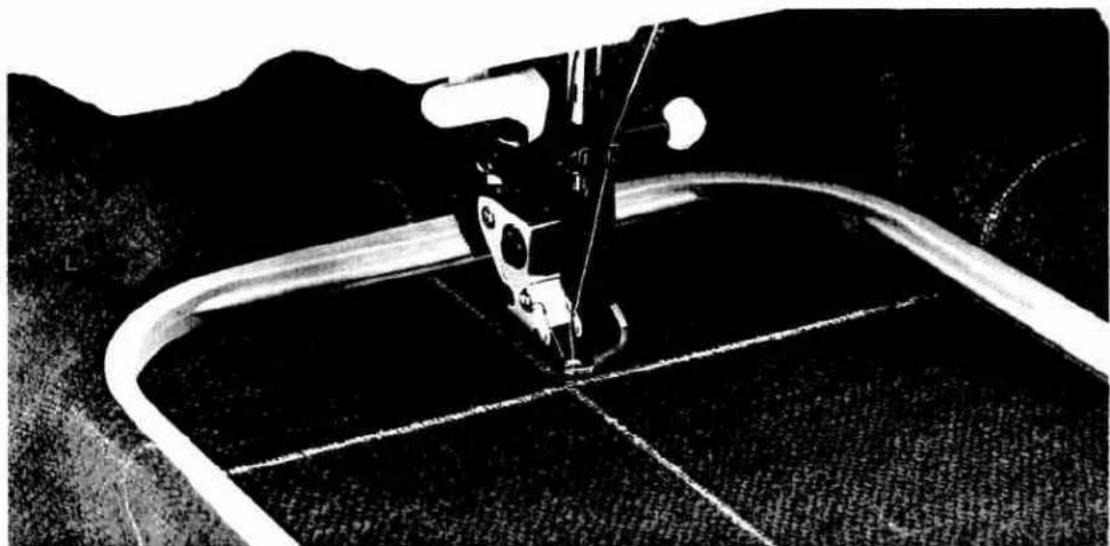
natural_image
Close-up of a sewing machine needle stitching fabric, no visible text or symbolsMark a large cross on the fabric. Select pattern No. 12 from card 2 and fit the fabric and the embroidery fleece into the frame so that the lines are parallel to the embroidery frame. The cross should be on the upper edge of the frame. Select "mono" and rotate the pattern 270°.
The length and width of the pattern is shown in the display. Halve the pattern length to find the middle of the pattern and mark it.
Position the needle over the marking in the middle of the pattern using the ▲▼◀ keys. The pattern can now be embroidered. When starting to embroider, the frame returns automatically to the beginning of the pattern.
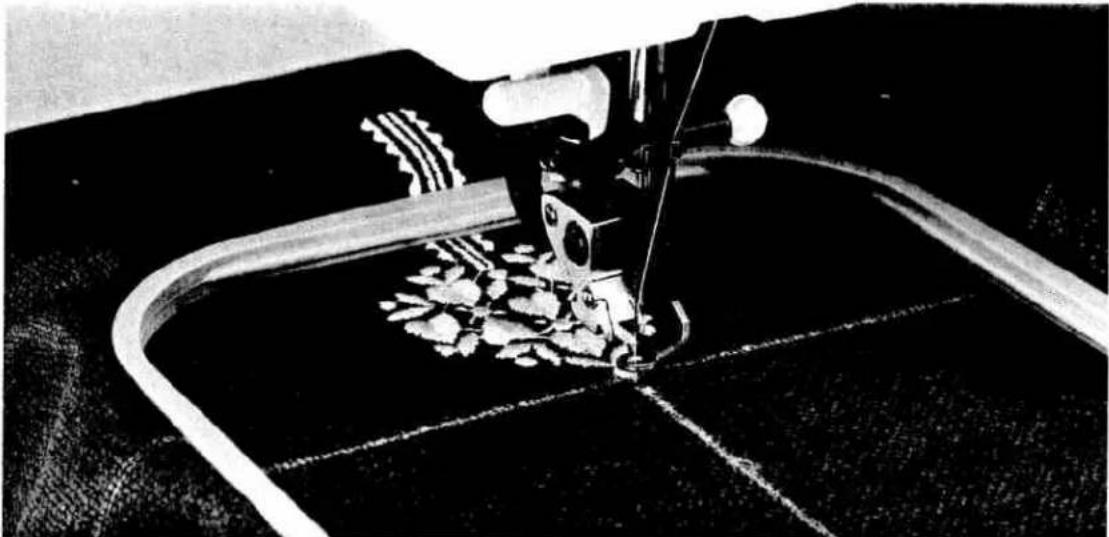
natural_image
Close-up of a sewing machine needle stitching fabric, no visible text or symbolsRemove the fabric from the frame and fit it again. Mark the middle of the pattern on the fabric and position the needle above the marking with keys ▲▼◀. Using the pattern start key you can return to the beginning of the pattern. This allows you to check if the second pattern borders on the first. Now embroider the second pattern.
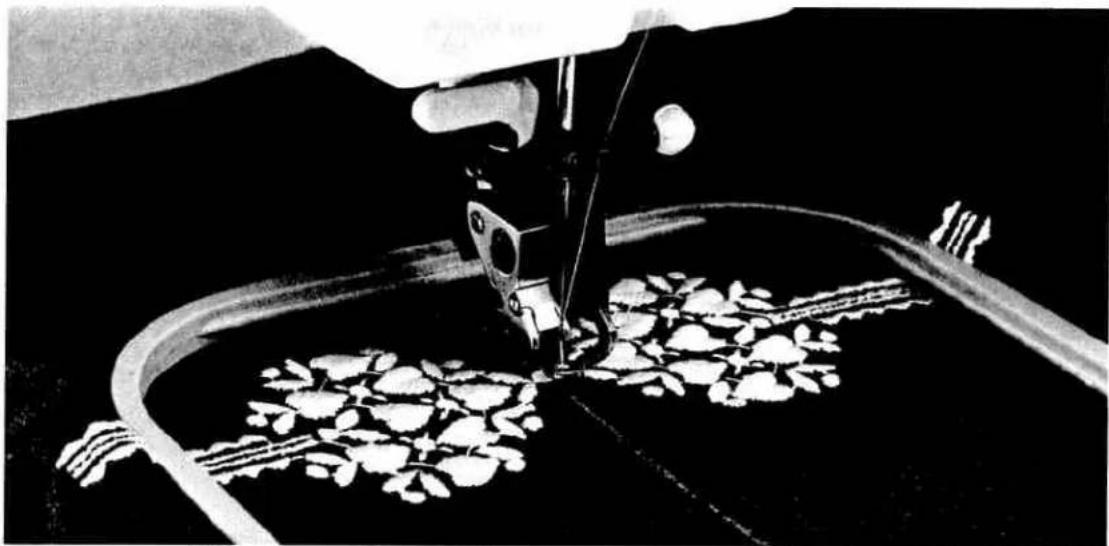
natural_image
Black-and-white illustration of a sewing machine stitching fabric into a curved pipe (no text or symbols visible)Remove the fabric from the frame again and place the pattern between the two embroidered motifs. For the fourth pattern proceed as for the previous pattern.
Tip:
Between embroidery procedures always tighten the needle screw and the sewing foot retaining screw a little.

text_image
Scanned text of a document with dense, illegible characters and symbols

text_image
1 2 3 4 5 6 7 8 9 0 info menu o.k. 0-9 clearEmbroidering a word sequence
Always use the larger frame when embroidering words. this allows you to embroider at least three letters (depending on letter size).
You can embroider in two ways:
- Connecting individual letters
- Programming word segments into the M-memory and then embroidering them (see pattern combinations instructions for use 7570 page 56 + 57)
Always embroider the desired word onto a piece of waste material first. Measure the length and size of the word. Then mark the area required for the word on the fabric, e.g. with disappearing chalk.
The disappearing chalk can be removed from the fabric after embroidering by ironing it.
You can also mark with a marker thread.
Now fit the fabric into the frame with a ply of embroidery fleece.
Take care to ensure that the marking is parallel to the embroidery frame.
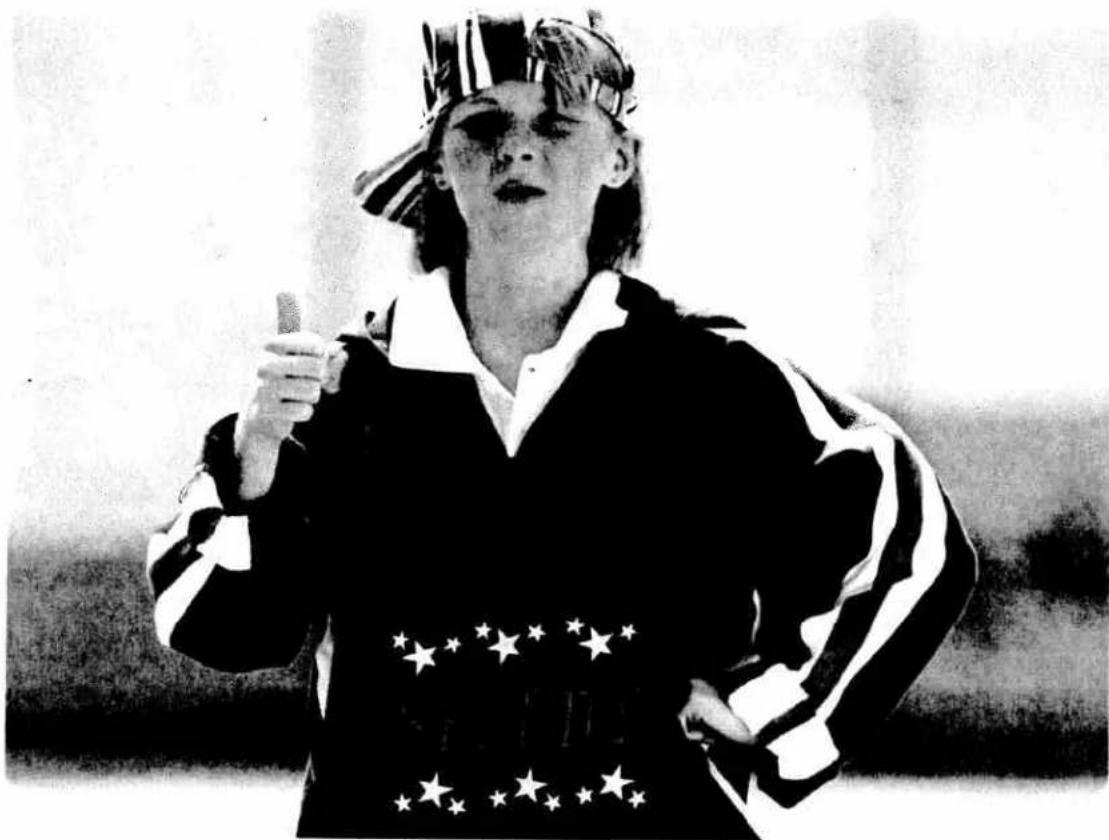
natural_image
Black-and-white photo of a person in a striped sweater with stars pattern, holding an object (no visible text or symbols)Before beginning to embroider you can go through the embroidery pattern with the ☐ key (see instruction manual page 23) and correct the position of the word or letter if necessary.
When combining word sections always ensure that the position, height and distance to the previous word segment is the same.
Now you can embroider the desired word onto your fabric without any problems.
text_image
Black-and-white photo showing a person in a kitchen with visible handwritten text on the wall and a small inset image of a person.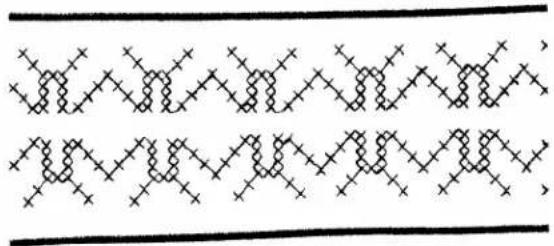
natural_image
Pure geometric pattern of interlocking zigzag lines with cross marks, no text or symbols presentMaxi pattern combinations from a card
With the maxi patterns on the maxi design cards available you can embroider combined borders easily.
Example: The cross stitch motif above can be embroidered very attractively by mirroring it once in the lengthwise axis (lengthwise mirroring 19) and once in the lateral axis (pattern mirror 17). This gives you numerous variations.
Many maxi motifs can be combined in this way.

natural_image
Silhouette of a person's face with abstract geometric patterns and no visible text or symbolsTip:
On coarse fabrics use Avalon. This facilitates the fabric feed and the maxi patterns can be embroidered more evenly and more beautifully.
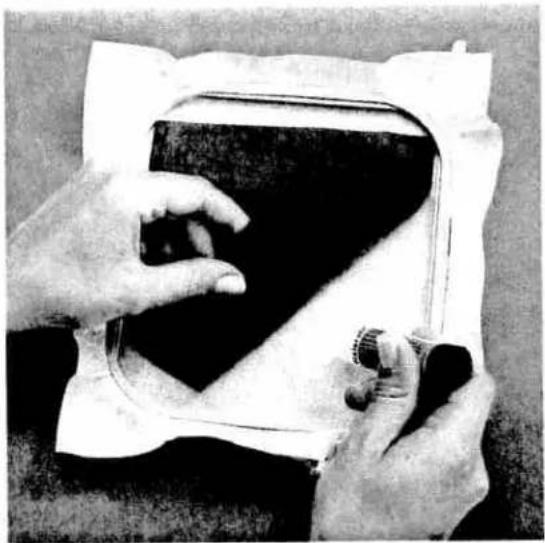
natural_image
Close-up of hands holding a small object over a dark rectangular object, possibly a device or container (no visible text or symbols)Maxi pattern combinations from a card
Attach the piece of leather which is to be embroidered onto embroidery fleece with a glue pen or textile adhesive.
Now fit the fabric with the embroidery fleece into the embroidery frame and click it into the embroidery unit.
If the leather is too thick to be fitted into the frame, only fit the fleece into the embroidery frame and lay the extra leather over the embroidery unit so that it

natural_image
Close-up of hands holding a rectangular object with a curved top frame (no visible text or symbols)does not hinder the feed of the frame control when embroidering. Using Filmoplast is another possibility (see picture above). This is a fleece which is adhesive on the top. This means that the parts to be embroidered do not have to be stuck into the embroidery frame. Instead they are stuck to the fleece. The Filmoplast is much easier to use than sticking with ordinary fleece.
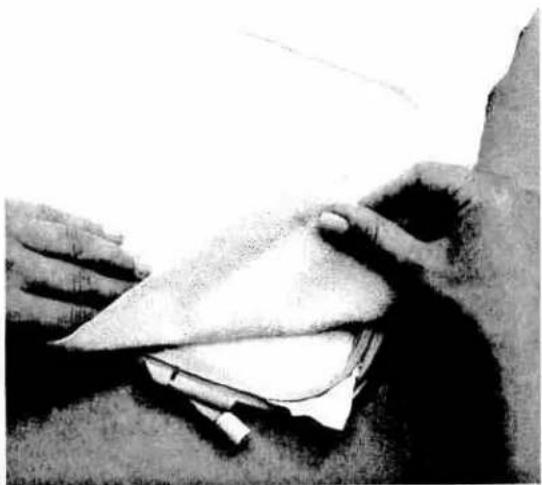
natural_image
Close-up of hands folding a piece of paper or fabric, no visible text or symbolsTake care to ensure that the leather is stuck down flat. On very thick and very stiff fabrics it is recommended to press the slow sewing key (3) before starting to sew and, where possible, to enlarge the embroidery motif to avoid the needle breaking and extra perforation holes being made in the leather.
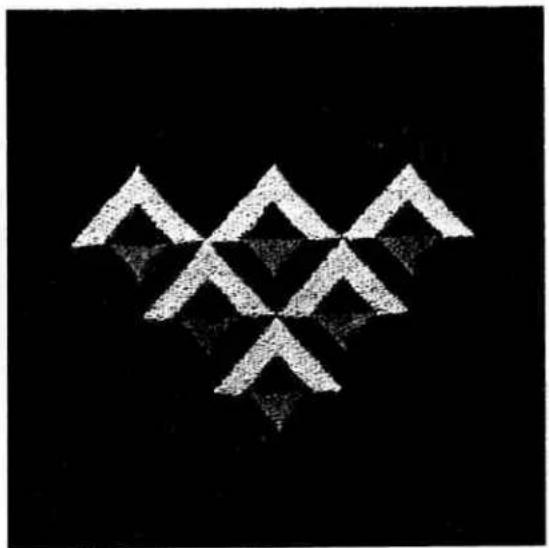
natural_image
Abstract geometric pattern composed of interlocking triangles and diamonds on a black background (no text or symbols)Tip: From time to time the sewing foot and needle retaining screws should be tightened as on thick materials the sewing foot and the needle can more easily become loose.
natural_image
Black-and-white photo of a traditional hat with embroidered patterns and decorative ornaments, no visible text or symbols.
natural_image
Black-and-white illustration of two hands holding a small teddy bear figure (no text or symbols)Sticking on embroidered motifs
On material pieces which you would like to embroider but which cannot be fitted into the embroidery frame, you can embroider the motif and then stick it onto the material. Proceed as follows:
Fit a layer of embroidery fleece and a layer of thermogauze (thermogauze on top) into the embroidery frame. Click the frame into place. Filled, closed patterns such as the teddy bear are particularly suitable. Embroider the pattern. Then remove the excess embroidery fleece.
Iron the embroidered piece until the thermogauze becomes fragile and can easily be removed. Then you can stick the embroidered piece onto the desired object with textile adhesive or with iron-on stabilizer, whereas the iron-on stabilizer gives a superior result.
Thermogauze will be available from approx. January 1996.
natural_image
Black-and-white photo of a teddy bear sitting on a dark surface, no text or symbols visibleProceed as follows:
Place the iron-on stabilizer onto the reverse side of the embroidered fabric with the paper side facing upwards. Iron the two pieces of material together.
Then remove the paper, lay the embroidered motif onto the object which is to carry the motif and iron this also.

natural_image
Abstract black-and-white sketch of a stylized animal figure (no text or symbols)
natural_image
Completely black image with no visible content, text, or symbols.PFAFF
G. M. Pfaff
Aktiengesellschaft
Subject to alteration
No. 29-629 994-93/000 · RD · 8/95 engl.