creative 1473 - Sewing machine PFAFF - Free user manual and instructions
Find the device manual for free creative 1473 PFAFF in PDF.

User questions about creative 1473 PFAFF
0 question about this device. Answer the ones you know or ask your own.
Ask a new question about this device
Download the instructions for your Sewing machine in PDF format for free! Find your manual creative 1473 - PFAFF and take your electronic device back in hand. On this page are published all the documents necessary for the use of your device. creative 1473 by PFAFF.
USER MANUAL creative 1473 PFAFF
creative 1473·1473 CD Instruction Book

natural_image
Black-and-white photo of a PFAFF sewing machine with control panel and buttons (no visible text or symbols on device body)Fold out this page
Some safety rules
a) Take care to avoid injury to your fingers by the needle during sewing.
b) Make sure you unplug the power cord whenever you have to leave the machine or want to clean it, oil it or change mechanical and accessory parts.
c) Be sure to use only a 15-watt light bulb in the sewing lamp.
d) The drive belt must never be adjusted by anyone but an authorized Pfaff agent.
Some safety rules valid for United Kingdom only
The wires in the mains lead are coloured according to the following code:
Blue: Neutral
Brown: Live
As the colours of the wires in the mains lead of this appliance may not correspond with the colour coding of the terminals in your plug, proceed as follows: the wire which is coloured blue must be connected to the terminal which is marked with the letter N or coloured black.
The wire which is coloured brown must be connected to the terminal which is marked with the letter L or coloured red.
Please note:
When a 13-ampere plug is used, a 3-ampere fuse has to be fitted.
Contents on pages 165 to 167.
More than just a sewing machine:
Your new PFAFF Creative 1473
The right machine for creative sewing, embroidery as if by hand, and textile design.
This means you have bought a quality product, one of the best sewing machines in the world. Compared with other makes it has a multitude of superb sewing features. From this vast range of features we have compiled a number of tips and ideas for you and divided them into three groups:
- Straight-stitch, zigzag and utility stitch programs and buttonhole program.
- Embroidery stitch program.
- Programming of embroidery and hand-sewn stitches, and alphabet programs.
As a creative fashion designer you will no doubt have further questions regarding sewing problems now and then. If so, simply contact your PFAFF dealer. They will be pleased to help you whenever you wish.
To make full use of the numerous features of the machine, please read this instruction book carefully.
When using this book, fold out the front and back cover pages.
We wish you great pleasure and success with your creative sewing.
text_image
Technical diagram of a sewing machine with numbered parts and labeled control panelParts of the sewing machine
1 Carrying handle
2 Folding cover
3 Hand wheel
4 Release disc
5 Keys for balance and pattern length
6 Key for program sequence and recommended sewing modes
7 Key for stitch length and pattern length
8 Stitch width keys
9 Main switch
10 Connection socket for the Creative Designer 1473 CD
11 Work support with accessory box and accessory compartment
12 Sewing foot holder with sewing foot
13 Needle holder with retaining screw
14 Bobbin thread monitor
15 "Needle down" key
16 "Sew-slow" key
17 Presser bar lifter
18 "Reverse" key
19 "Tie-off"/buttonhole key
20 Presser bar
21 Display
22 Four program selection keys
23 Program chart
24 Storing compartment
25 Bobbin winder
26 Pattern start key
27 Single pattern key
28 Pattern mirror key
29 Twin neddle key
30 Memory recall key
31 Connection socket for foot control
32 Baseplate
33 Cover, sewing hook area
34 Free arm
35 Threader
36 Sewing lamp
37 Thread trimmer
38 Threading slots
39 Needle thread tension
40 Bobbin winder thread guide
41 Take-up lever
42 Needle plate
43 Dual feed
44 Bobbin winder thread guide (swing-out)
45 Spool holder with unwinding disc
46 Second spool holder (swing-up)
47 Correction key
48 Program entry key
Utility stitch programs
| 00 | 01 | 02 | 03 | 04 | 05 | 06 | 07 | 08 | 09 | 10 | 11 | 12 | 13 | 14 |
| ↑ | ↑ | ↓ | ↓ | || | || | ↖ | ↖ | ↖ | ↖ | ↖ | ↖ | ↖ | ↖ | ↖ |
| | | → | | | → | ← | ← | ↖ | ↖ | ↖ | ↖ | ↖ | ↖ | ↖ | ↖ | ↖ |
| No. | Description | Application | Max width in mm |
| 00 | Straight stitch middle needle position | For all sewing work, plus a 6 mm fancy stitch. | - |
| 01 | Straight stitch with 19 needle positions | For all sewing work requiring special needle positions. | - |
| 02 | Straight stitch, reverse middle needle position | For sewing continuously in reverse, if you do not wish to turn the work. | - |
| 03 | Straight stitch, reverse with 19 needle positions | Same as program 02, but with special needle position. | - |
| 04 | Stretch triple straight stitch stitch length 1.5 to 4.5 mm | For very strong seams. Under any strain they stretch without tearing. | - |
| 05 | Stretch triple straight stitch stitch lenght 3 to 6 mm | They are used, for example, for inside leg seams on sports- and workwear, but also as a fancy seam. | - |
| 06 | Stem stitch, narrow | For embroidering with the embroidery programs. | - |
| 07 | Stem stitch, wide | For embroidering with the embroidery programs. | - |
| 08 | Grass stitch | For embroidering. | - |
| 09 | Basting stitch | For basting cuttings. | - |
| 10 | Zigzag stitch from middle needle position | For serging, appliquéeing, inserting lace and basting with fringe foot. | 6 |
| 11 | Zigzag stitch from right needle position | Same as program 10 (for zigzag from left needle position push pattern reverse key). | 6 |
| 12 | Purl stitch | For sewing purl seams. | 6 |
| 13 a 13 b | Stretch stitch a = 2 penetrations; b = 1 penetration | For sewing on elastic tape, darning tears and patching. Suitable for almost every fabric. | 7 |
| 14 | Shell-edging stitch | For shell-edging and ordinary edging. | 6 |
| 15 | 16 | 17 | 18 | 19 | 20 | 21 | 22 | 23 | 24 | 25 | 26 | 27 | 28 | 29 |
| - |
| No. | Description | Application | Max.width in mm |
| 15 | Fancy elastic stitch | For over-stitching elastic and woolen threads, gathering and smocking. | 6 |
| 16 | Blind stitch | For invisible hemming and shell-edging. | 6 |
| 17 | Stretch blind stitch | For invisible hemming in elastic materials (securing edges). | 6 |
| 18 | Light buttonhole | For buttonhole sewing. | 5,5 |
| 19 | Button sewing | For sewing on buttons. | 6 |
| 20 | Edge binding stitch | For serging or enhancing edges | 7,5 |
| 21 | Closed overlock stitch | For joining and serging seams with edge thread. | 7,5 |
| 22 | Tricot-patching stitch | For sewing and patching light knitteds (underwear). | 6 |
| 23 | Pullover stitch | For elastic joining and serging seams in heavy-knits and jersey. | 7 |
| 24 | Honeycomb stitch | For sewing on elastic threads, covering terry-cloth seams and fancy hem seams (shirring effect). | 7 |
| 25 | Closed overlock stitch | Joining and serging seams, ideal for jeans. | 6 |
| 26 | Closed overlock stitch | For joining and serging seams in heavy-knits and jersey. | 6 |
| 27 | Cross stitch | A high-stretch seam for sportswear. | 7 |
| 28 | Overlock stitch | For sewing and serging in one operation. | 6 |
| 29 | Fagotting stitch | For joining foundation wear. Produces a fancy hem-stitching effect. | 7 |
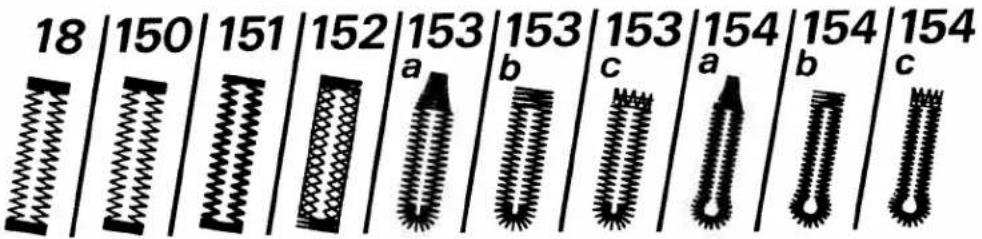
text_image
18 | 150 | 151 | 152 | 153 | 153 | 153 | 154 | 154 a b c a b c| No. | Description | Application | Max width in mm |
| 18 | Light buttonhole 7.0 to 16 mm | For sewing buttonholes in blouses, shirts and linen. | 5.5 |
| 150 | Light buttonhole 7.0 to 44 mm | For sewing buttonholes in bed linen. | 5.5 |
| 151 | Stretch buttonhole, reinforced | For buttonholes in open-weave fabrics. | 5.5 |
| 152 | Stretch buttonhole | For buttonholes in stretch fabrics (jersey, etc.) | 5.5 |
| 153 a | Round buttonhole with wedge tack | For buttonholes in trousers and casual garments. | 7.0 |
| 153 b | Round buttonhole with lengthwise tack | For outerwear buttonholes in light materials. | 7.0 |
| 153 c | Round buttonhole with crosswise tack | For outerwear buttonholes in heavier materials. | 7.0 |
| 154 a | Eyelet buttonhole with wedge tack | For buttonholes in jeans, trousers and sportswear. | 8.5 |

text_image
147 157 158 159 160 161| No. | Description | Application | Max width in mm |
| 154b | Eyelet buttonhole with lengthwise tack | For buttonholes in outerwear, costumes, coats, etc. | 8.5 |
| 154c | Eyelet buttonhole with crosswise tack | For buttonholes in heavy-duty outerwear. | 8.5 |
| 147 | Covering stitch | For joining terry cloth, jersey and inserting patches (flat seam with double edge reinforcement). | 9 |
| 157 | Bartack | For sewing bartacks on pocket openings, belt loops, hanger tabs and zipper ends. | 4.0 |
| 158 | Darning program lengthwise | For darning thin damaged areas. | 9 |
| 159 | Darning program lengthwise and crosswise | For darning holes. | 9 |
| 160 | Stretch triple-zigzag stitch | For sewing elastic tapes in sportswear and bathing wear (high-stretch seam for light knitted fabrics). | 6 |
| 161 | Stretch triple stitch elastic stitch | For sewing elastic tapes in sportswear and bathing wear (high-stretch seam for heavy knitted fabrics). | 6 |
:mbroidery stitch programs

text_image
30 | 31 | 32 | 33 | 34 | 35 | 36 | 37 | 38 | 39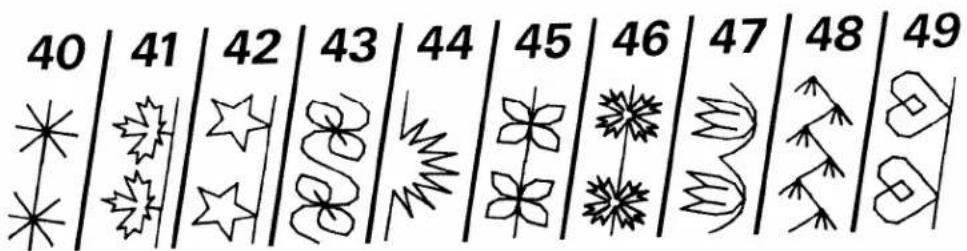
text_image
40 | 41 | 42 | 43 | 44 | 45 | 46 | 47 | 48 | 49
text_image
50 | 51 | 52 | 53 | 54 | 55 | 56 | 57 | 58 | 59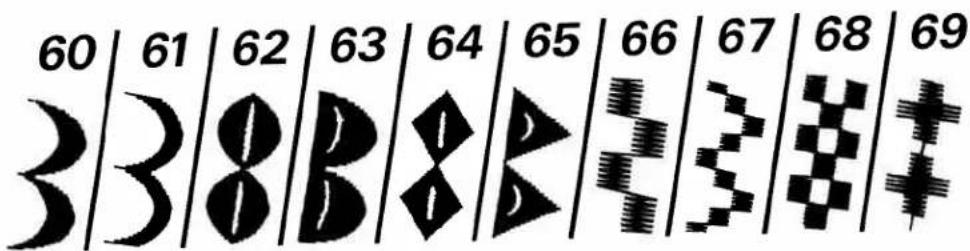
text_image
60 61 62 63 64 65 66 67 68 69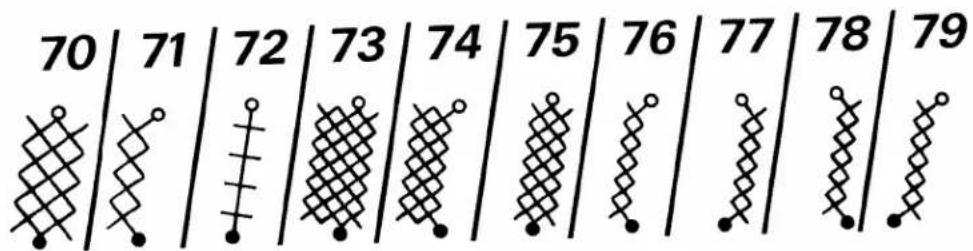
other
| Row | Value | |---|---| | 1 | 70 | | 2 | 71 | | 3 | 72 | | 4 | 73 | | 5 | 74 | | 6 | 75 | | 7 | 76 | | 8 | 77 | | 9 | 78 | | 10 | 79 |
other
| Position | Value | |---|---| | 80 | 81 | | 81 | 82 | | 82 | 83 | | 83 | 84 | | 84 | 85 | | 85 | 86 | | 86 | 87 | | 87 | 88 | | 88 | 89 | | 90 | 91 | | 91 | 92 | | 92 | 93 | | 93 | 94 | | 94 | 95 | | 95 | 96 | | 96 | 97 | | 97 | 98 | | 98 | 99 | | 100 | 101 | | 101 | 102 | | 102 | 103 | | 103 | 104 | | 104 | 105 | | 105 | 106 | | 106 | 107 | | 107 | 108 | | 108 | 109 | | 110 | 111 | | 111 | 112 | | 112 | 113 | | 113 | 114 | | 114 | 115 | | 115 | 116 | | 116 | 117 | | 117 | 118 | | 118 | 119 | | 120 | 121 | | 121 | 122 | | 122 | 123 | | 123 | 124 | | 124 | 125 | | 125 | 126 | | 126 | 127 | | 127 | 128 | | 128 | 129 | The chart displays a grid of abstract, stylized, and dot patterns (e.g., circles, squares, triangles) representing different patterns or categories. The values are explicitly labeled on the left side.
text_image
130 131 132 133 134 135 136 137 138 139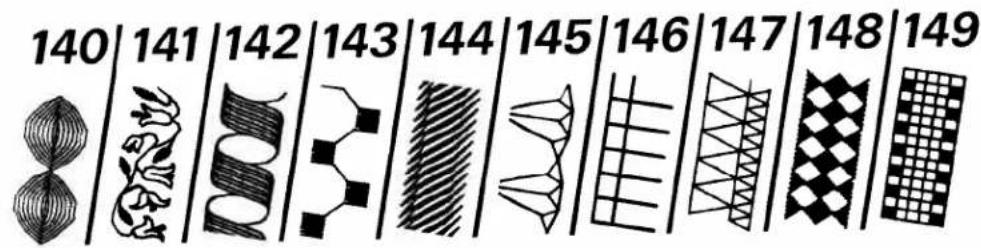
text_image
140 141 142 143 144 145 146 147 148 149
text_image
155 156 162 163 164 165 166 167 168 169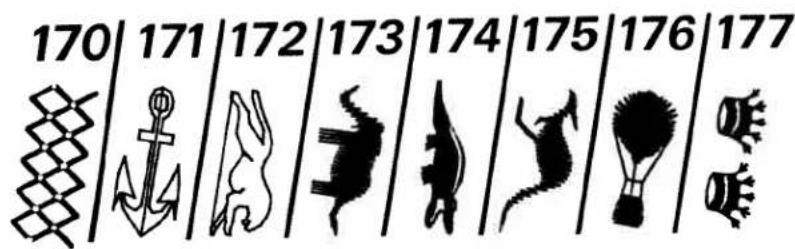
text_image
170 171 172 173 174 175 176 177
text_image
:aA |:aA |:a0 |:bA |:b0 |:cA |:c0 α |A |0 |A |0 |A |0 z |z |9 |z |9 |z |9| No. | Description | Application | Max width in mm |
| 30-6990-163171-17750-5360,61,63 | Embroidery stitch programsScalloping edge decoration | For fancy seams, ornaments, borders and embroideries. Programs 162 a, 162 b and 163 are filling-out stitches for large areas.For table linen, serviettes, bed linen, etc. | 9 |
| 70-89 | Cross stitch programs | For cross-stitch embroidery in children's wear, blouses, covers, etc. | 3-9 |
| 164-170 | Hem-stitching programs | For hem-stitching in table linen, bed linen, blouses, cloths, etc. | 6-9 |
| Alphabets with special letters for languages | For monograms and texts | ||
| aA aA_r a0 | Script letters and numerals | Upper and lower case letters, numbers and punctuation marks. | 79 |
| bA_r b0 | Block letters and numerals | Capital letters, numbers and punctuation marks. | 9 |
| cA_r c0 | Outline letters and numerals | Capital letters, numbers and punctuation marks | 9 |
natural_image
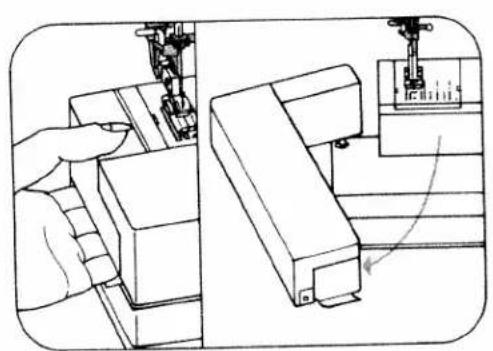
Technical line drawings of a mechanical device with top and side views (no text or symbols)Electrical connection
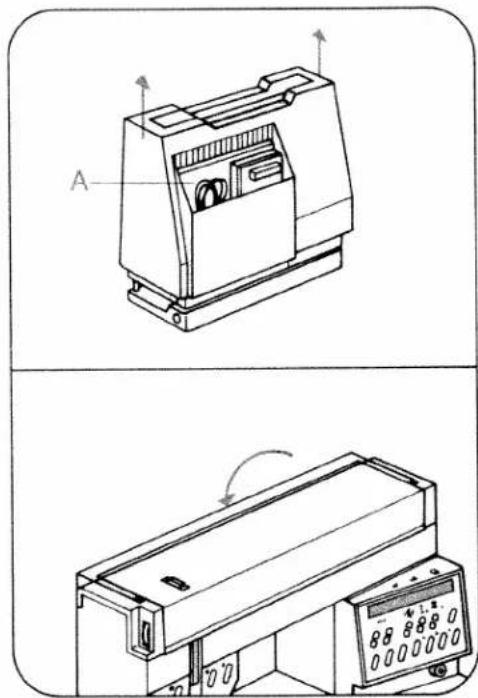
Lift off the cover and fold down the carrying handle. Compartment A is for storing the foot control, mains lead and instruction book.
natural_image
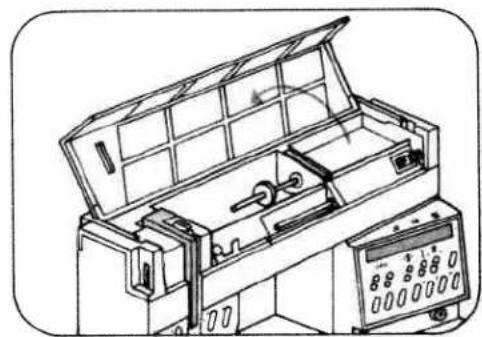
Line drawing of an open industrial machine with control panel and display (no text or symbols)Open cover 2.
natural_image
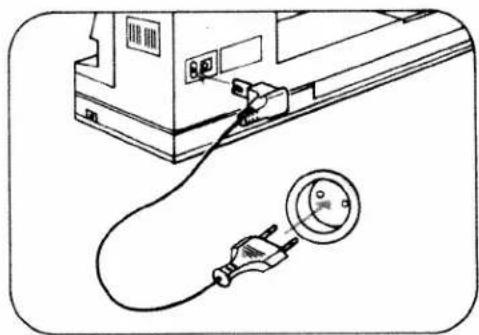
Line drawing of a cable being inserted into a device (no text or symbols present)Connect the mains lead.

natural_image
Illustration of hands using a tool to adjust or install a component, no text or symbols presentPull the power lead out of the foot control.

text_image
31Plug the foot control lead into connection socket 31 and place the foot control on the ground.
text_image
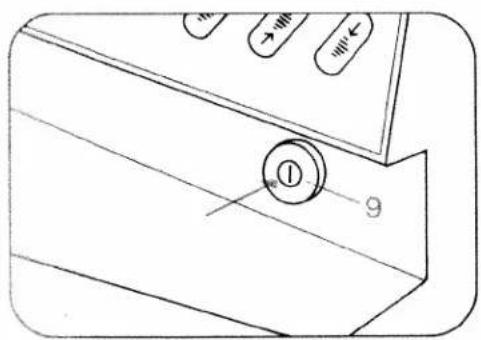
Technical diagram of a device with labeled components and numbered partsPress main switch 9, the sewing lamp then goes on.

natural_image
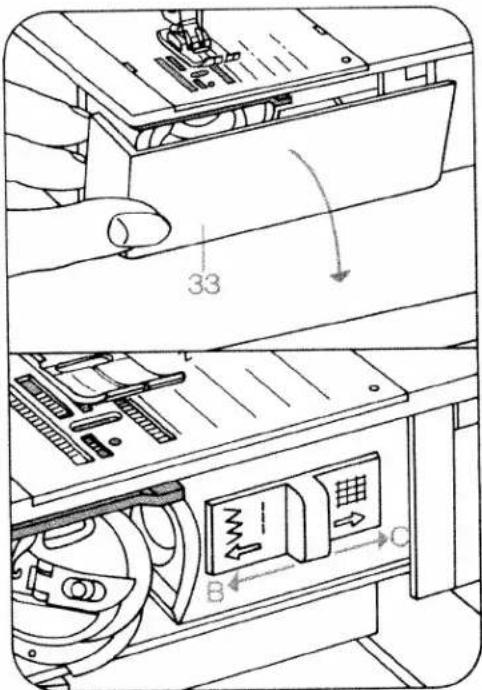
Technical line drawing of a sewing machine with hand operating the base panel (no text or symbols)Bobbin winding:
Take hold of the work support and swing it to the left.
text_image
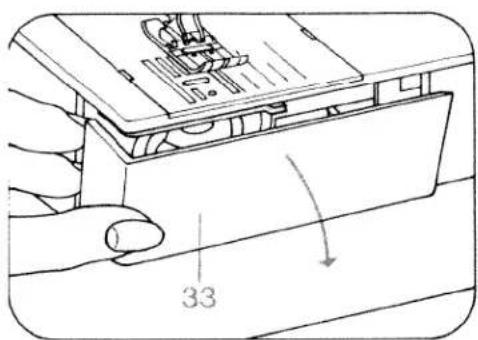
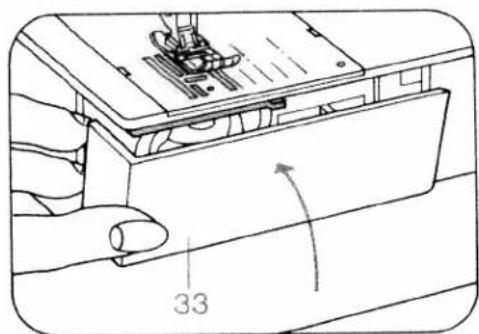
33Open free arm cover 33.

natural_image
Technical line drawing of a mechanical device with gears and housing (no text or symbols)Switch off main switch 9.
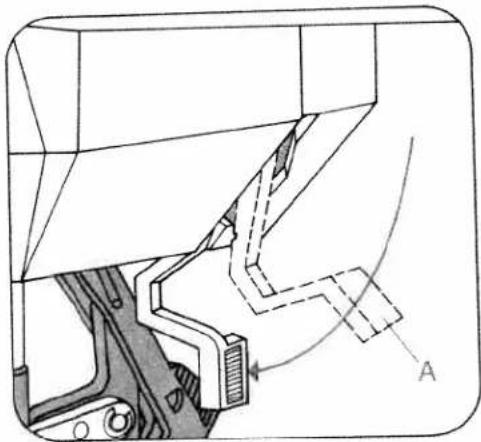
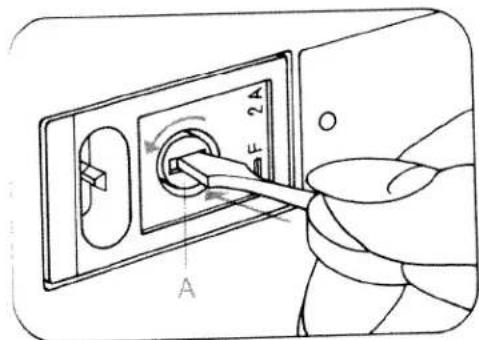
Lift latch A and pull out the bobbin case.
natural_image
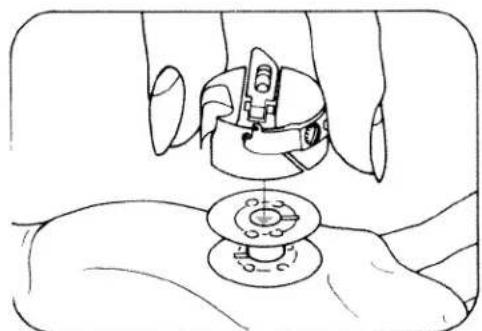
Line drawing of a hand holding a sewing machine over a circular base (no text or symbols)Release latch A and take out the bobbin.
text_image
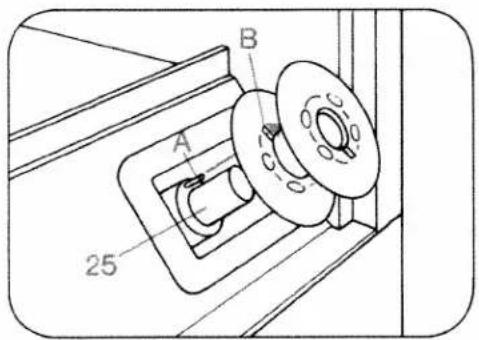
A B 25Place the bobbin on winder 25 and turn it so that pin A engages in slot B.

natural_image
Technical line drawing of a hand turning a mechanical component with a gear-like shaft (no text or symbols)Disengaging the sewing action: Hold the balance wheel and turn release disc 4 as shown by the arrow.
natural_image
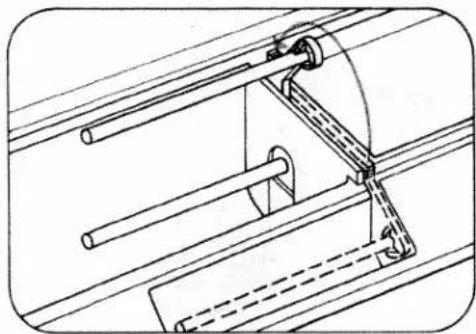
Technical line drawing of a mechanical assembly with pipes and rods (no text or symbols)Swing the second spool holder up and away from you.
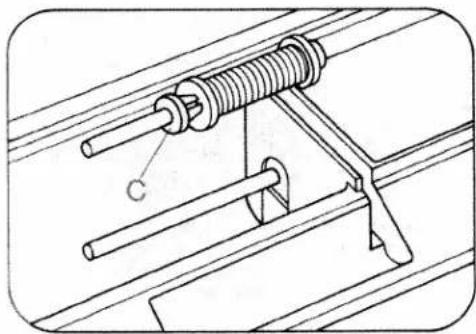
natural_image
Technical line drawing of a mechanical clamp or spring assembly with labeled component 'C' (no text or symbols beyond label)Place a spool of thread and unwinder C on the spool holder.

text_image
40 45 44 25 B A progWinding from a second spool:
Swing bobbin winder thread guide 44 to the front. Pull the thread into guide 40, into bobbin winder tension A and around finger B. Now pass the thread to bobbin winder 25 and wind it a few times clockwise around the bobbin. Press the bobbin to the right. Then turn on the main switch, press the foot control and wind the bobbin. Press the full bobbin to the left and cut the thread using thread cutter 37. Bobbins are wound in the same way from reel holder 45.
Important: If an empty M- or P-memory is selected, it is not possible to wind the bobbin. A program between 00 and 177 must be selected. If the spool has a thread slot, the slot must face to the right when the spool is placed on.
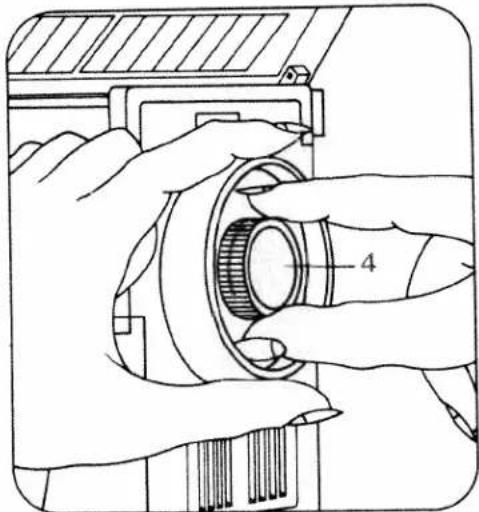
natural_image
Illustration of hands operating a mechanical component with a numbered part (4), no text or symbols present.Engaging the sewing action: hold the hand wheel firmly and turn disc 4 to the rear. Then turn the hand wheel to the front until it engages.

text_image
Technical diagram of a sewing machine with labeled parts and control panelWinding through the needle
Only with metal sewing foot! Swing bobbin winder thread guide 44 to the front.
Raise sewing foot. Switch on the dual feed. Set needle at top position. Place bobbin on bobbin winder 25. Disengage sewing action. Pull the needle thread under the sewing foot to the right and through guide 44 (into opening A and around finger B, see illustration). Wind the thread a few times clockwise around the bobbin and press it to the right. Then turn on the main switch, press the foot control and wind the bobbin. Push the full bobbin to the left, remove it and cut the thread using thread cutter 37.
Important: If an empty M- or P-memory is selected, it is not possible to wind the bobbin. A program between 00 and 177 must be selected.

natural_image
Illustration of hands operating a mechanical component with a numbered part (4), no text or symbols present.Engaging the sewing action: hold the hand wheel firmly and turn disc 4 to the rear. Then turn the hand wheel to the front until it engages.

text_image
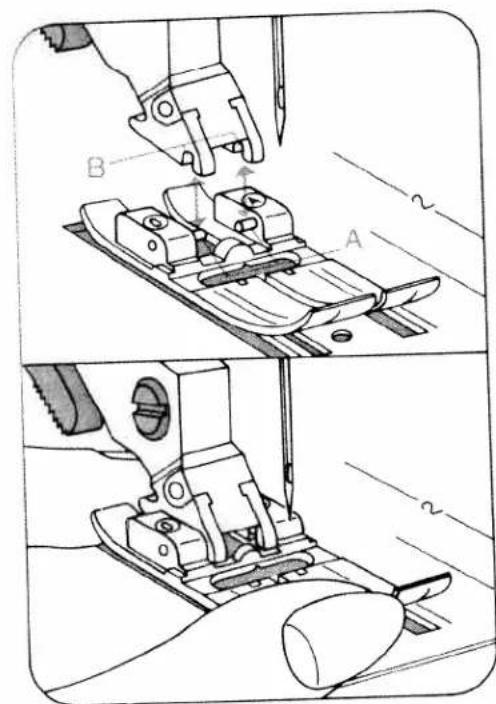
Technical diagram showing three views of a mechanical component with labeled parts A, B, and CInserting the bobbin: insert bobbin so that the thread unwinds as shown (A), pull thread through slot (B) and out of opening (C).
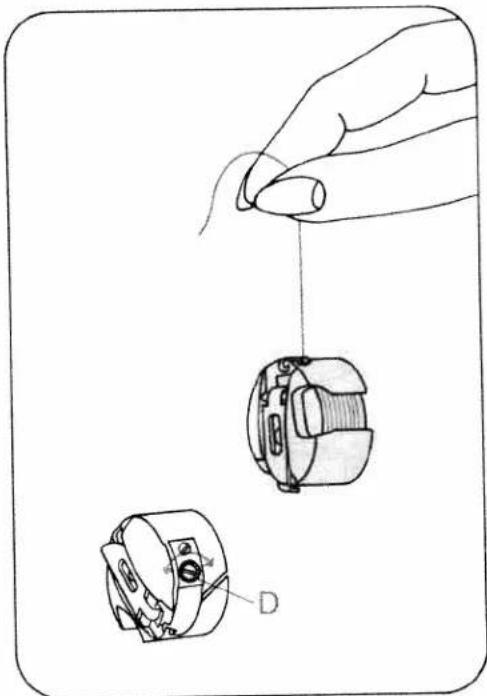
natural_image
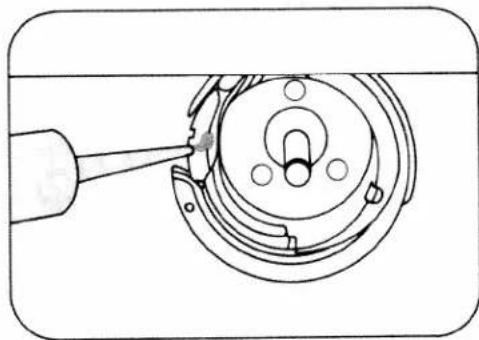
Technical line drawing showing a hand holding a small mechanical component with two views (top and side), no text or symbols present.Checking the bobbin thread tension: with a brief, sharp upward movement of your hand the bobbin must slip downwards (turn screw D to the left for weaker tension and to the right for stronger tension).
text_image
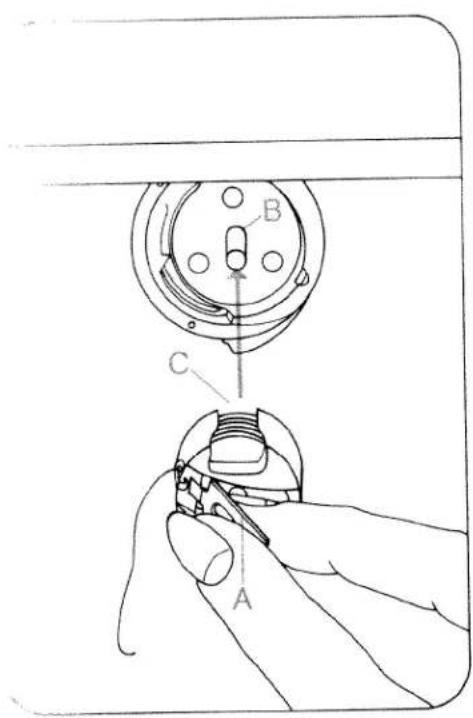
Technical diagram showing a hand operating a sewing machine with labeled parts A, B, and C for assembly or repair.Inserting the bobbin case: switch off main switch 9, lift latch A and push the bobbin case fully onto pin B. Cutout C must face upwards.
natural_image
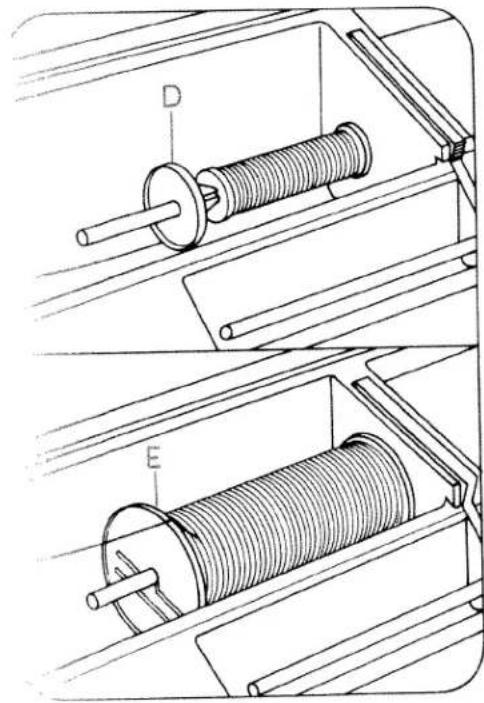
Technical line drawing of a mechanical assembly with two views (top and side), showing internal components like a coiled spring or coil, no text or symbols present.Thread reel sizes: for small spools use the small or medium unwinding disc D, for large spools use large unwinding disc E.

text_image
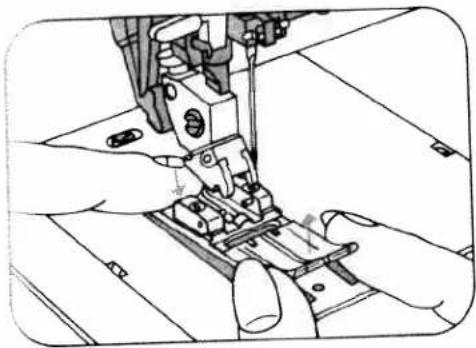
Technical diagram of a mechanical assembly with labeled components and numbered partsThreading:
Switch off main switch 9. Set needle at top position. Raise sewing foot. Pull the thread as shown by the arrow into groove A, to the left past guide C, from below into slot B, into take-up lever 41, back to slot B and into the right-hand guide on the needle holder.
text_image
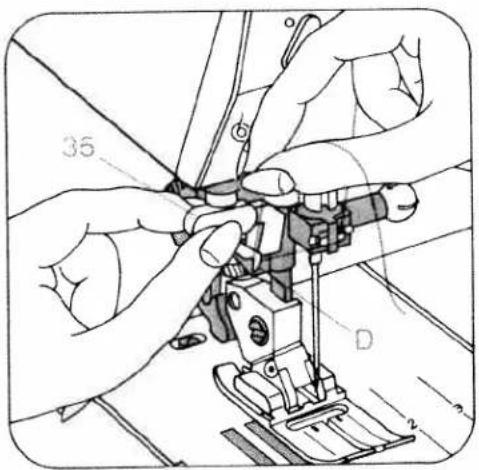
35 DPlace the needle thread behind hook D and hold it. Pull threader 35 fully downwards.

Swing threader to front against needle and hold it there.
Place thread in hook E from below.
Swing threader to rear, releasing thread at same time, and when the threader has moved upwards, pull the thread fully through the needle eye.
natural_image
Technical line drawing of a sewing machine needle stitching a metal sheet (no text or symbols)Hold the needle thread, turn hand wheel to the front and sew a stitch. Needle and take-up lever must be at top. Pull the bobbin thread up with the needle thread.

natural_image
Technical line drawing of a sewing machine needle stitching a mechanical component (no text or symbols)Place the needle- and bobbin thread under the sewing foot to the right.
text_image
33Close free arm cover 33.

natural_image
Technical line drawing of a sewing machine with no visible text or symbolsDual feed
This prevents shifting of the material plies during sewing. Raise the sewing foot before engaging or disengaging if.

natural_image
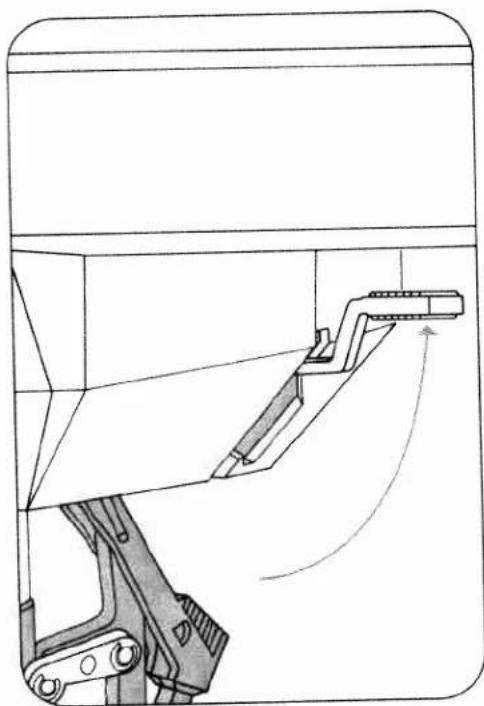
Technical line drawing of a sewing machine with no visible text or symbolsTo engage: push top feed 43 downwards to lock it in place.
To disengage: unlock top feed by pushing it lightly downwards, then pull it to the rear and allow it to move up.

text_image
Ancient Chinese stone inscription with vertical classical text, likely a stele or inscription
text_image
Scanned text of contract clauses or legal document sections
text_image
Scanned text of contract clauses
text_image
Scanned text of contract clauses with partially visible Chinese characters and a vertical line separator
text_image
Scanned text of contract clauses with partially legible characters and possible legal or regulatory content
text_image
Ancient Chinese stone inscription with vertical classical text, likely a stele or inscription
natural_image
Close-up of a sewing machine needle stitching fabric (no visible text or symbols)Exclusive built-in dual feed lets you do things even experts find difficult.
Even experts find it difficult to match patterns and plaids when sewing slippery silks and synthetics. But easy matching is automatic with Pfaff's exclusive built-in dual feed.
When two or more fabric layers are fed simultaneously through conventional sewing machines, there is always the possibility of slippage.
The exclusive Pfaff solution ist built-in dual feed, a walking foot that simultaneously feeds the fabric from above as the feed dog moves it from below. You can sew up to 12 fabric layers without fear of slippage.

natural_image
Line drawing of a sewing machine needle inserted into a garment pocket (no text or symbols)Swing work support 11 against the machine arm.
natural_image
Line drawing of a sewing machine stitching fabric (no text or symbols)Switch off main switch 9. Now place the material under the sewing foot.

natural_image
Line drawing of a hand holding a tool with a bracket, no text or symbols presentTo place extra thick materials below the presser foot, raise presser bar lifter 17 higher and hold until fabric is in correct sewing position.
natural_image
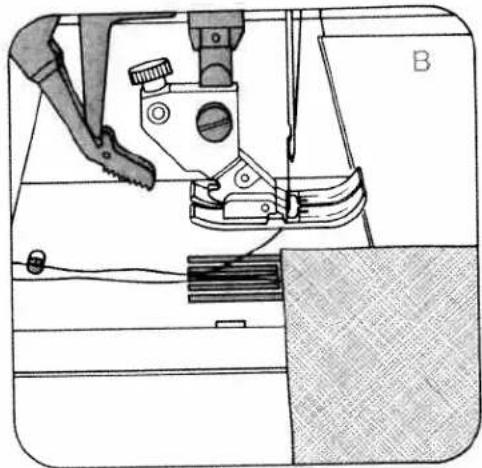
Technical diagram of a mechanical assembly with labeled component A (no text or symbols present)Switch on main switch 9, have material cover needle hole (see illustration B) and lower the sewing foot onto it by pressing presser bar lifter 17 downwards. Position A of lever 17 is for darning.
natural_image
Technical line drawing of a sewing machine with clasp and fabric (no text or symbols)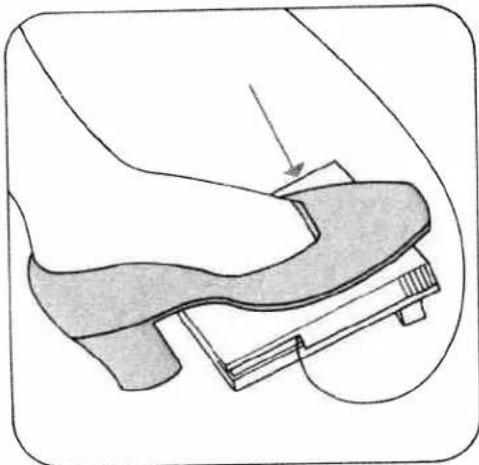
natural_image
Illustration of a hand pressing down on a foot with a curved object underneath (no text or symbols)Press the pedal. The harder you press, the faster the Creative sews.

text_image
A 5 4
natural_image
Simple line drawing of a rectangular block with a wavy internal pattern and a wavy edge, no text or symbols present.Needle thread tension 39
A = setting mark
Important!
In order to obtain good sewing results it is important to check the following:
- that the needle is in good order,
- and the needle- or bobbin thread tension is correct.
The bobbin thread tension is adjusted correctly at the works.
If on checking the bobbin thread tension (see page 16) you find it is necessary to correct it, turn the adjusting screw by small amounts only.
Checking the needle thread tension:
The normal setting is from 3 to 5. The higher the number, the tighter the thread tension. This is checked with a wide zigzag stitch (program 10). Sew a short seam. The thread interlace should lie exactly between the two material plies. Range 3 is for buttonhole sewing.
natural_image
Technical line drawing of a mechanical assembly with no visible text or symbolsRaising the presser bar lifter: When you have finished a seam the needle must be fully raised. Then raise presser bar lifter 17.

natural_image
Technical line drawing of a mechanical component with dimension label '37' (no text or symbols beyond the number)Removing the work from the machine and cutting the threads:
Remove the material to the rear and pull the threads in sewing direction into thread cutter 37 in order to cut them.
Important!
When the main switch is pressed to switch the machine on, the sewing lamp lights up.
When the machine is switched off by pressing the main switch, removing the mains plug or by power failure, the program memory in the computer is saved by a battery back-up. When the machine is switched on again, program 00 (straight stitch with needle in middle position) appears. All program combinations entered into any memory are retained automatically. If a program is entered during sewing, it will not become effective until the machine is stopped and the foot control is pressed again.
The stitch width and stitch length can be changed during sewing. For bobbin winding disengage the sewing action.
After bobbin winding engage the sewing action again. Owing to the use of electronic components this machine becomes warm during operation. This is quite normal and of no consequence.
Batteries:
When the batteries are empty, the word "battery" appears in four languages in display 21.

text_image
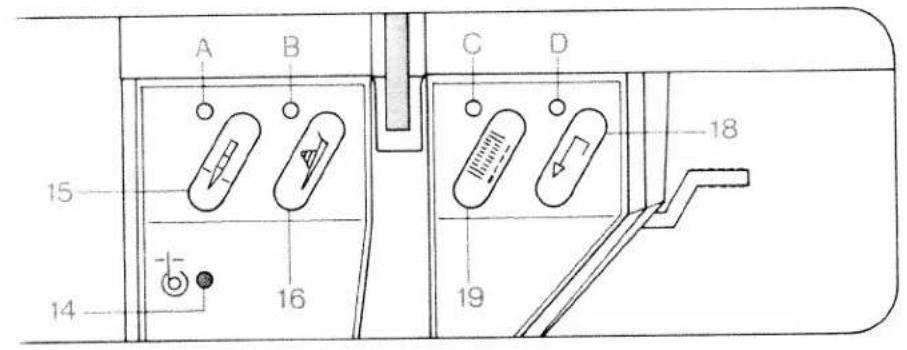
A B C D 15 14 16 19 18Electronic bobbin thread monitoring:
Bobbin thread monitor 14 flashes before bobbin thread runs out. It goes out again when the full bobbin is inserted and sewing is continued. Important: cover 33 must always be closed.
Top and bottom needle position:
When the machine stops, the needle goes up. Press key 15 for the needle down position. Display A then lights up and the needle will remain down when sewing is stopped. Press key 15 again. The indicator light goes out and the needle rises and stays at the top position.
Electronic actual speed selection:
Press key 16 for slow sewing. Display B lights up. The machine sews at half speed. Press key 16 again. The display goes out and the machine sews again at full speed.
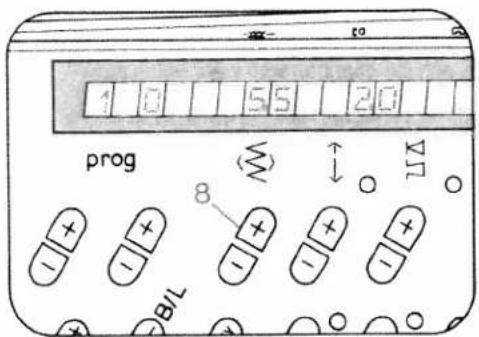
Tie-off/buttonhole. To sew: Press key
19: Indicator C lights up, the programmed seam is tied off at the beginning, then indicator light C goes out. If you push the key during sewing, the light goes on and a seam is tied off immediately, whereas a pattern is tied off at the end. The display then goes out. Buttonhole: In buttonhole programs 150, 151 and 152, key 19 is used for determining and memorizing the length. For more details please see pages 78-97.
Reverse sewing: Press key 18 before you start sewing. Indicator light D lights up and the machine sews backwards permanently. If you press the key during sewing, the light will not go on and the machine will sew backwards as long as the key is pressed.
Darning: The lengths of darning programs 158 and 159 are also determined and memorized with key 18.

text_image
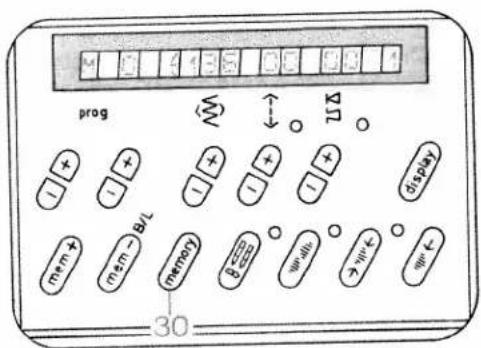
21 0 0 25 22 prog 8 7 6 47 display 5 48 mem + mem - B/L 26 27 30 29 28The controls of the Creative comput-
er:
5 Keys for balance and pattern length
6 Key for program sequence and recommended sewing modes
7 Stitch length and pattern length keys
8 Stitch width keys
21 Display
22 Four program keys
26 Pattern start key
27 Single pattern key
28 Pattern mirror key
29 Twin needle key
30 Repetition key
47 Memory correction key
48 Program entry key for memories
The computer of the Creative contains four different alphabets and three sets of numerals, punctuation marks and 178 programs. The programs are illustrated in the table with their seam types and setting numbers or symbols in the folding cover.
The optimum width and length is indicated for every program. When you push and hold key 6 the computer also makes recommendations as to the use of dual feed, needle thread tensions and sewing feet for each program.
These settings are indicated in display 21 above the keys. The programs can only be changed with keys which have an indicator above them.
The computer also contains 16 M memories for program combinations and 16 P memories for free programming. During free programming lets you design your own patterns and store them in the Creative computer.

text_image
21 22 105 3.0 3.5 1 prog W 17 + - + - + - + - + - + - + - + - + - + - + - + - + - + - + - + - + - + - + - + - + - + - + - + - + - + - + - + - + - + - + - + - + - + - + - + - + - + - + - + - + - + - + - + - + - + - + - + - + - + - + -Program selection:
When the Creative is switched on, program -00- appears in display 21. Enter the required number in program display 22 using programming keys 21. The alphabet and number symbols are selected with the left keys, while letters and numbers are selected with the right keys.
Stitch width setting:
The stitch width ranges from 0 to 9 mm.
Keys 8 have three functions:
- Selection of width for the program.
- Selection of the size of letters and numbers.
- Selection of 19 needle positions for straight stitch programs 01, 03 and 04, and 17 needle positions for program 05.
text_image
1 0 5 5 2 0 prog 8 B/L
text_image
1 2 3 <9 > > + 9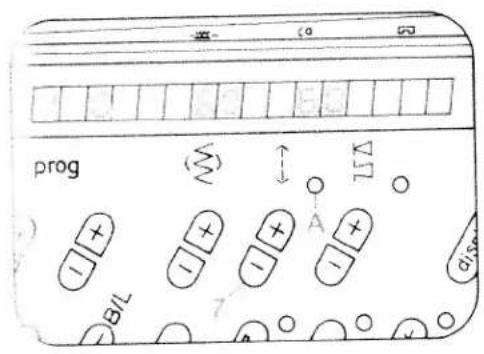
text_image
prog A B C D E F G H I J K L M N O P Q R S
text_image
1 2Stitch length and pattern length setting:
Keys 7 have two functions:
- Selection of stitch length for programs in which display A does not light up. The stitch length ranges from 0 to 6 mm. For some of the programs the stitch length is limited.
- Selection of pattern length for programs with illuminated display A. The pattern length is indicated in mm and is limited in different ways.

text_image
prog B/L 5 B ΔT B
text_image
1 2Balancing out and pattern length setting:
Keys 5 have three functions:
- Adjusting the reverse stitch length in a pattern (for balancing out, see page 32) for programs in which display B does not light up.
- Selecting the pattern length in mm while the stitch density remains the same in programs in which display B lights up. The set stitch length determines the maximum pattern length.
- Checking and altering the stitch counter in free programming.
Balance, or correction of reverse stitches
The balance control is used for correcting pattern- or program combinations which are sewn with a slight shift owing to influences by the type of material or working method used. The stitch length of the reverse stitches of a pattern is corrected from -7 to +7; the normal position is "0". The minus "-" settings shorten the reverse stitches and the patterns or programs become longer, and the plus "+" settings lengthen the reverse stitches; patterns or programs become shorter.
Examples:
- Correction of individual patterns (also in the P-memory)
Pattern too long
Prog.
159

41
Corrected by:
+3
+3
Rule: if the pattern is too long, correction has to be made by "+" (from +1 to +7).
- Correction of pattern- and program combinations
(in the M-memory)
Combination: SUREEN
Corrected by: +3: SURFEN
Rule: If the pattern or program last entered is corrected with "-" or "+" and entered, this applies to the entire program combination.

prog

text_image
mem + BTL memory display48=47
progr.:
| 99 | 43 | 136 |
| 36 | 00 | 00 |
| 00 | 00 | |
| 129 | 118 | |
| 129 |

natural_image
Decorative floral border pattern with repeating floral motifs (no text or symbols)Storing program combinations:
The creative computer contains 16 M memories, M 0 to M 15. A maximum of 484 programs can be stored in the 16 M memories.
One M memory holds up to 84 entries of programs 00 to 99 or letters and numerals, and up to 63 entries of programs 100 to 177.
Programs 00 to 177 can also be combined with letters and numbers. Storing: first select a free M memory with left key 22 M and right key 22.
The M memory is empty when no indication appears in display 21.
If no M memory from M 1 to M 15 is selected, all programs will go into memory M 0.
Afterwards press key 48 for program entry. The memory is now ready for input.
Select programs, letters, punctuation marks or numbers individually with program keys 22 and enter them in the memory by pressing key 48. The program numbers, letters, punctuation marks or numbers appear in display 21. The programs can be changed in length and width before input. If the computer will not take further inputs, this means the memory capacity is exhausted, and a memory you no longer need must be emptied.
Checking a program combination by running it through the display:
When more than 4 programs or more than 11 letters or numbers are stored, the program can be run through display 21 from right to left by pressing key 6. To stop the display press key 6 again.
Press memory key 30 to sew the programs entered from the beginning. By pressing the foot control the machine sews the combination from the beginning as well.
Cancelling a program combination:
By pressing key 47 "correct", the last program of the stored combination is cancelled. Continue pressing key 47 until the entire combination is cancelled.
If the combination consists of several M memories, each individual memory has to be selected and cancelled. The memories are then free for new combinations.
text_image
prog B/L memory 30Repeating program combinations:
Key 30 "memory/repeat" has three functions:
- Returning a program combination to the starting position.
- Repeating selected program combinations after other programs have been sewn in the meantime.
- Initiating sewing after free programming.

text_image
136 00 00 118
text_image
5 7 9 10 11 12 prog + - + - + - + - + - + - + - + - + - + - + - + - + - + - + - + - + - + - + - + - + - + - + - + - + - + - + - + - + - + - + - + - + - + - + - + - + - + - + - + - + - + - + - + - + - + - + - + - + - + - + -29
natural_image
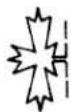
Abstract pattern of white zigzag lines on a dark textured background (no text or symbols)Twin-needle sewing:
Key 29 "twin needle" must be pressed. Indicator C lights up and the stitch width is reduced by 2 mm. Press key 29 again and both function and indicator are switched off.
Key 29 has a second function for straight stitch sewing with a round-hole needle plate and straight stitch foot (special accessories). If the machine is in program 00 and you press key 29, indicator C lights up and the computer programming function is switched off.
text_image
prog Δ11 D 28Pattern mirroring:
Press "pattern mirror key 28." Display D lights up. The selected program is sewn in reverse. Programs can also be entered mirror-imaged into a combination, as well as whole combinations can be sewn mirror-imaged by pressing key 30 first, then key 28, display and function are now switched off.

text_image
Progr. 145 57 39 37 37 37
text_image
prog BRL mem+ mem- memory 27 E display + - + - + - + - + - + - + - + - + - + - + - + - + - + -
text_image
99 93Single pattern setting:
Push "single pattern" key 27. Display E lights up. The machine sews a program or a program combination and ties off beginning and end of the seam. If the key 27 is pressed while sewing is in progress, the machine completes the program and ties off the seam.
text_image
prog + - + - + - + - + - display mem + mem - memory B B ">" << <<Setting the pattern start:
Key 26 "pattern start" has three functions:
- Push "pattern start" key 26. A pattern in progress is returned to the starting point.
- The last program in a combination appears in the display.
- Length programming in buttonhole-and darning programs is cancelled.
Recommended sewing modes:
For every program from 00 to 177, and for letters and figures the machine will indicate recommended sewing modes with regard to dual feed, needle thread tension and sewing feet.
Press key 6 and hold it. The recommendations appear in the display beneath the three symbols on the computer:

A: dual feed
engaged
KK
disengaged

B: needle thread tension

C: number of sewing foot (standard accessories)
Recommendations made in this book may differ from those in the machine display. In that case both recommendations can be used.

text_image
A B C ∞ Q R prog ← Δ displ
natural_image
Black-and-white image of a decorative book cover with ornate laurel wreath and crown motifs (no readable text or symbols)
natural_image
Technical line drawing of a sewing machine needle stitching a metal sheet (no text or symbols)Changing the needle
(System 130/705 H):
- Switch off main switch 9. Loosen screw A. Take out the needle. Push the new needle up as far as it will go (flat side facing the back). Tighten the screw.
text_image
Technical diagram showing a device's internal components with labeled parts and directional arrows indicating movement or assembly.Lowering the feed dog:
Open free arm cover 33. Push the slide control toward C (feed dog lowered) or toward B (sewing position).
natural_image
Illustration of hands operating a sewing machine needle (no text or symbols visible)Removing sewing foot: switch off main switch 9. Needle must be raised. Push the sewing foot downwards at the rear, tilting it up a little at the front at the same time. To change the buttonhole foot swing the work support to the left and push the foot down at the front.
text_image
Technical diagram showing sewing process with labeled parts A and B, including a hand operating the needle.Fitting sewing foot: lower the presser bar lifter with the foot positioned so that pins A snap into grooves B.
text_image
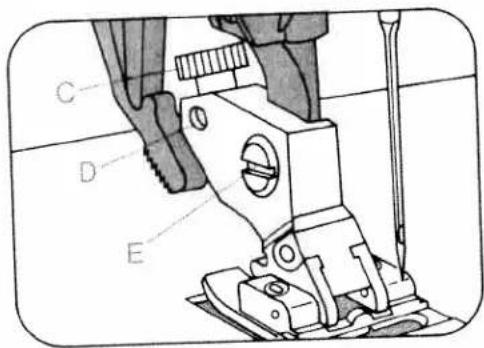
Technical diagram of a sewing machine with labeled parts C, D, and EC and D are for attaching accessories. E is the sewing foot screw.
natural_image
Technical line drawing of a sewing machine needle stitching a component (no text or symbols)Take hold of the work support and swing it out to the left.
text_image
Technical diagram of a mechanical assembly with labeled components A, B, and C, showing internal components and assembly steps.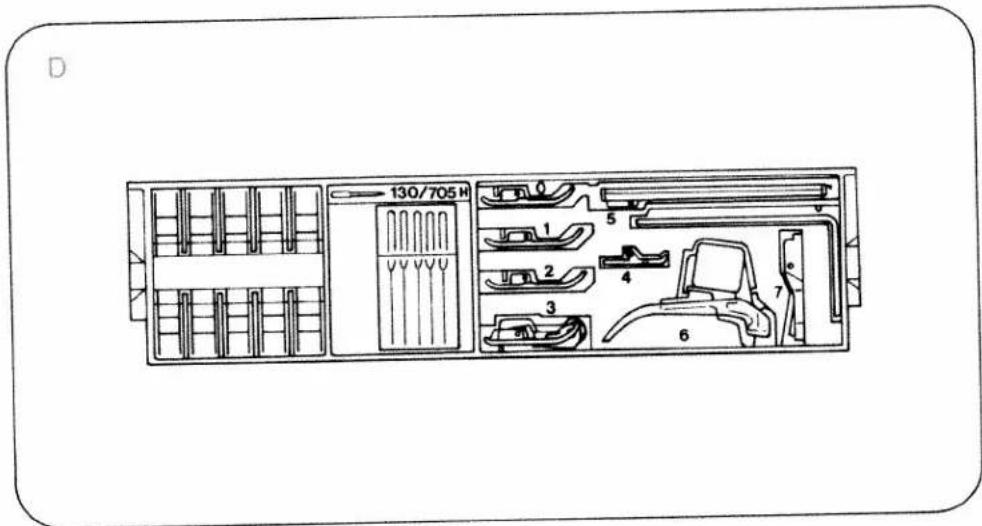
text_image
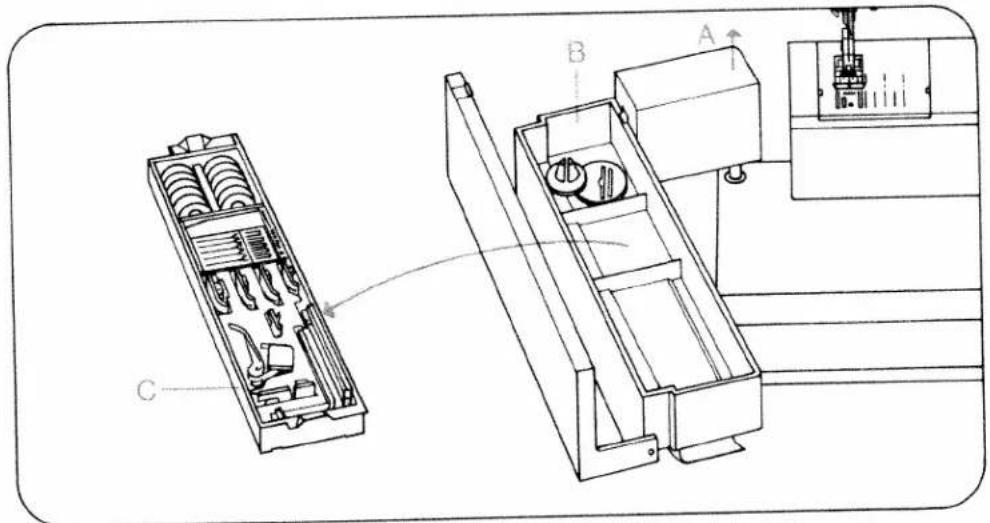
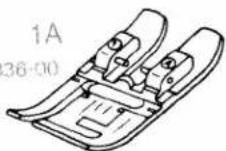
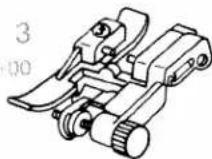
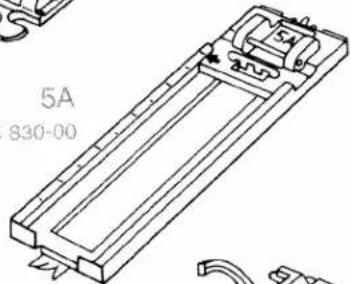
D 130/705 H 1 2 3 4 5 6 7Detachable work support and accessories:
The work support can be lifted out (A). Open its lid and take out accessory box C. Underneath the box is an accessory compartment B. Illustration D shows how to arrange sewing feet, needles and bobbins in the accessory box.
Sewing feet (normal accessories)
OA Normal sewing foot
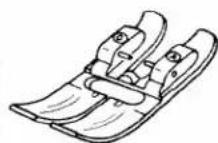
1A Fancy stitch foot for dual feed
2A Fancy stitch foot (not for dual feed)
3 Blind stitch and overlock foot
4 Zipper and edge- sewing foot
5A Buttonhole foot
6 Darning foot
7 Hemming foot
8 Edge guide
OA
98-694 828-00
98 694 836-00

2A
98 694 838-00
98-694 890-00


4
98-694 884-00
28 694 830-00
text_image
5A S30-00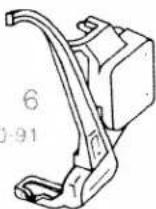
93-035 960-91

text_image
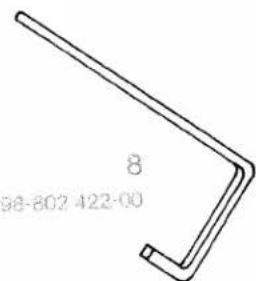
8 98-802 422-00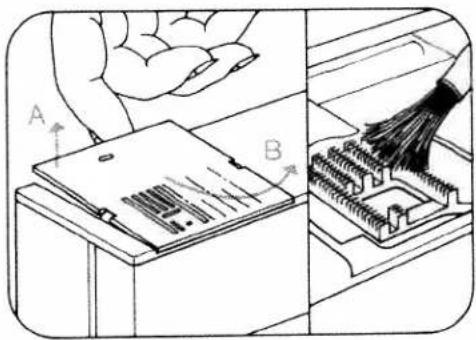
text_image
Technical diagram showing a hand operating a device with labeled parts A and B, alongside a close-up of the device's internal structure.Cleaning and oiling
- Pull out the mains plug. Tilt the needle plate up at the back (A) and remove it (B). Clean the feed dog and the parts in the sewing hook area with a soft brush. Clean the bobbin thread monitor as instructed on page 163. Apply a drop of oil in the hook raceway, as shown in the illustration, every 15 to 20 hours of operation. Other than that, the machine is maintenance-free and must not be oiled.
natural_image
Technical line drawing of a mechanical component with a tool inserted, showing internal components and alignment (no text or symbols)
natural_image
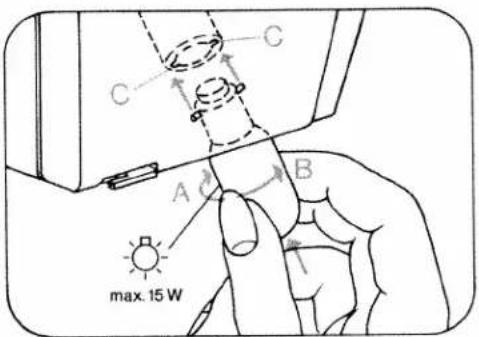
Illustration of a hand using a tool to press or install a mechanical component, with no visible text or symbols.Changing the light bulb:
- Disconnect the mains plug. Close the hinged top cover and swing up the carrying handle. Insert the edge guide into cutout D, push down the lamp housing and hold it there. Turn the light bulb towards A and take it out. Insert the new bulb so that its pins enter slots C. Push it up and turn it towards B. Pull out the edge guide. Be sure to use only a 15-watt light bulb in the sewing lamp.
text_image
C A B max. 15 W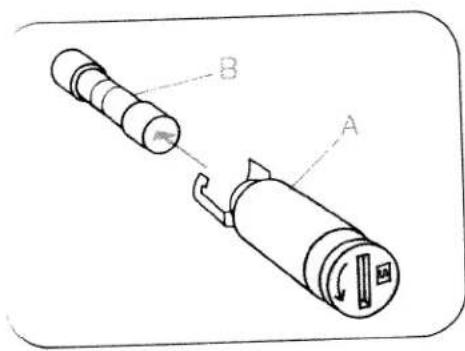
text_image
Technical diagram of a mechanical component with labeled parts A and BChanging the fuse
Disconnect the mains plug. Turn fuse holder A left by a quarter turn with a screwdriver, release it and take it out. Pull out fuse B. Insert a new fuse in the holder, replace the holder, push it in with the screwdriver, then turn it right by a quarter turn. (The fuse type is F2A.) 110-volt machines have no fuse.
text_image
F 2A A
text_image
A B BChanging the batteries:
Switch on the machine, so that the memories are not lost when the batteries are changed, and tilt the machine over backwards. A battery compartment is installed in the base. Lift cover B at the catches in recesses A and remove cover. Take out the batteries. Insert the new batteries with the plus side (+) facing upwards: Place cover B in so that hinges C engage in recesses D and press cover until it snaps in place. After changing the batteries, check the contents of the memories. Replacement batteries: 2 Mignon cells, 1.5 V, type LR 6 Only use leak-proof batteries!

text_image
Diagram of an electronic device showing labeled components including battery, diode, and capacitorsSpecial accessories
Special accessories The special accessories listed below are intended for special sewing work. They can be obtained from your dealer at an extra charge.
Please note!
Please note! Special accessories must be employed for the intended purpose only. They can only be used at stitch widths up to 6 mm.
| Accessory | Part No. | Sewing Operation | |
| Appliqué foot | 93-042 941-91 | For appliqué work | |
| Binder (remove sewing foot holder) | 98-053 484-91 | For binding edges with tape | |
| Cording foot, 5 grooves (twin needle with 1.8-2.5 mm needle gauge) | 93-042 950-91 | For cording work (needle size 80, for fine cording needle size 70) | |
| Cording foot, 7 grooves (twin needle with 1.4-1.8 mm needle gauge) | 93-042 953-91 | ||
| Cording blade (2 ea.) | 93-035 952-45 | ||
| Fringe sewing foot | 93-042 943-91 | For sewing fringes and for basting | |
| Straight-stitch foot with round needle hole | 98-694 821-00 | Important! Only for straight stitches, needle position center. For topstitching and sewing very delicate and soft fabrics (silk jersey, etc.) | |
| Needle plate with round needle hole | 98-694 827-00 | ||
| Felling foot 4.5 mm | 93-042 946-91 | For felled seams | |
| Felling foot 6.5 mm | 93-042 948-91 | ||
| Shirring foot | 93-036 998-91 | For shirring valances | |
| Single-needle cording foot | 93-036 915-91 | For single-needle cording | |
| Eyeletting plate | 93-036 977-91 | For eyeletting | |
| Hemmer, 4 mm (for dual feed) | 98-694 823-00 | For hemming edges | |
| Knit edge sewing foot | 98-042 957-91 | For sewing knitted fabrics | |
| Teflon sewing foot | 93-036 917-91 | For sewing plastic, synthetic materials and leather |

natural_image
Black-and-white illustration of a floral arrangement with a teapot, saucer, and floral patterns on a table (no text or symbols)Working with straight stitch, utility- and stretch stitch
natural_image
Illustration of a sewing machine needle stitching fabric, with hands operating the process (no text or symbols visible)1
Tips for embroidering and sewing with the Pfaff Creative 1473
● Before you begin, first try sewing on a piece of waste fabric.
- Check the stitch formation and tension.
- Secure the beginning and end of the seam by pressing "tie-off/button-hole" key 19.
- For sewing light, soft and stretch materials hold the thread ends at the beginning of sewing (Fig. 1).
- With cross seams, such as lap-felled seams, we recommend cutting out the fold and pressing the seam. This will provide a flatter cross seam.
- In the case of problem materials, you can achieve better sewing results with the left needle position.
● Exact stitching of edges is facilitated by the marking guide lines on the needle plate or by an edge guide (Fig. 2).
- If you have to interrupt work during sewing, e.g. with long fabric panels or upon change of sewing direction, select needle position "down".
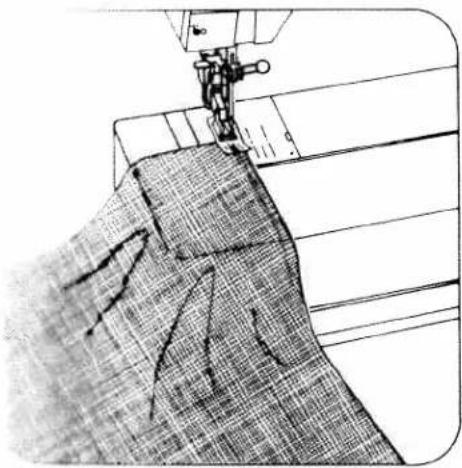
Top-stitching collar points
- Insert a thread into each collar point before beginning to sew and leave approximately 10 cm of thread hanging. When stitching the corner, you pull on the threads of the respective corner for the first stitches in sewing direction. The material feed is supported in this way and you obtain a beautifully stitched corner (Fig. 3).
natural_image
Technical line drawing of a sewing machine needle stitching fabric (no text or symbols)
natural_image
Diagram of a folded fabric or material with shaded sections and wavy texture, labeled with numbers 2 and 3 (no text or symbols on the diagram itself)
natural_image
Line drawing of a sewing machine needle stitching fabric (no text or symbols)For top-stitching edges, especially in the case of soft materials, a round-hole needle plate and a straight sewing foot with round needle hole can produce good sewing results (special accessories).
Sewing aid for thick seams
In order to ensure uniform feeding at the beginning of the seam, we recommend supporting the sewing foot with a piece of material of the same thickness (Fig. 4).
natural_image
Close-up of a textured gray surface with no visible text, symbols, or markings.
natural_image
Close-up of a textured gray surface with no visible text, symbols, or markings
natural_image
Grayscale abstract texture with a horizontal white line dividing it into two sections (no text or symbols)
natural_image
Grayscale abstract texture with a horizontal dashed line across the center (no text or symbols)
natural_image
Gray square textured surface with a horizontal seam (no text or symbols)
natural_image
Grayscale abstract texture with no discernible text, symbols, or structured elements
natural_image
Close-up of a textured gray surface with no visible text, symbols, or markings.
natural_image
Solid black rectangle with a thin white horizontal line across the center (no text or symbols)Sewing tips for different materials
Woollen fabrics: well balanced stitch length and tension.
Batiste: light needle thread tension and medium stitch length.
Velvet or silk velour: baste the seam line twice and sew in grain direction with a stitch length of 2.5 to 3 mm.
Be careful when pressing velvet! try out on a piece of waste fabric and do not press down on the iron, or use velved pressing board.
Twill/jeans: use special needles for jeans fabrics. When sewing over thick intersections it is advisable to cut away seam allowances.
Synthetic materials: do not baste such materials as plastic, foil or oilcloth (penetration holes!). Use long stitch lengths (4 to 6 mm) and the dual feed.
Pure silk: set needle thread tension a little lower. Needle must be in perfect condition (otherwise fibres are pulled). Use stitch lengths between 2 and 2.5 mm.
Knitted or crocheted materials: sew with light needle thread tension and elastic seams.
Machine-embroidery silk: to obtain effective motif embroideries set the needle thread tension lighter, i. e. lower than the buttonhole range.

text_image
Diagram showing a sewing process with scissors cutting fabric, labeled in Chinese characters for garment construction.
natural_image
Pure geometric diagram of a rectangular plate with dashed lines and corner markers (no text or symbols)asting seams
inge foot, special accessory
| prog | |||
| 10 | -3 | Fringe foot |
itch-width: 2 mm
eedle: 80
ewing thread: Machine embroidery thread
asting is a useful method of transferring seams onto the fabric.
rst mark all contours with tailoring chalk on the p material ply.
ew along the marked lines with the fringe foot. then all lines have been basted, pull the two bric plies apart to find the joining threads and at these through carefully, to avoid damage to the material.
Basting stitches
| prog | |||
| 09 | -3+ | 0A |
Feed dog: lowered
Sewing thread: normal sewing thread or basting thread
For trying on a garment, we recommend securing the parts previously with basting stitches. Place the workpiece under the sewing foot. Sew one stitch. After that, pull the material by the required stitch length to the rear. Repeat this procedure until basting is completed. In order to avoid shifting of the material plies during securing of patterned materials, insert dress pins crosswise to the basting direction. Shifting of the material plies is thus largely avoided.
Basting at 6 mm stitch length
| prog | |||
| 00 | -3 | 0A |
Stitch length: 6 mm
For this application do not lower the feed dog. Set the stitch length at 6 mm. Remove the basting thread after sewing.

text_image
prog 7 Δ Display mem+ mem- Bt memory 29 ①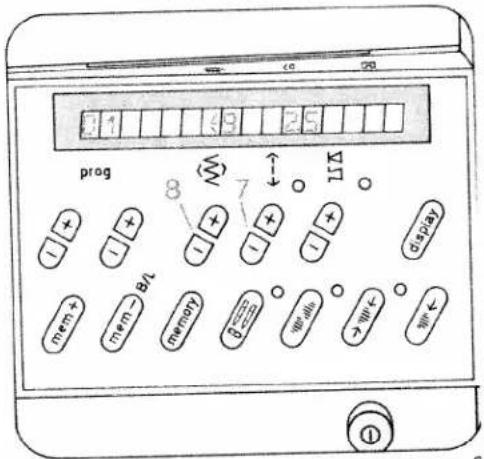
text_image
prog 8 7 L12 mem+ mem- BIT memory 8-10-10-10 widths >width< width< displayStraight stitch
| prog | |||
| 00 01 | 3-5 | OA |
Program 00 is a straight stitch with the needle in center position (Fig. 1). By pressing "twin needle" key 29 in program 00, the computer programming function is blocked. This is necessary when the straight stitch foot and the round-hole needle plate are used (special accessories).
Program 01 is a straight stitch with the needle in left position. With key 8 the needle position can be changed to 19 positions from left to right (Fig. 2). Programs 02 and 03 are straight stitch backwards. These are used for program combinations. Program 03 can be sewn in 19 needle positions. Select a longer or shorter stitch length according to the work required by pressing stitch length keys 7. Raise the sewing foot higher for heavy materials or several material plies. This makes it easier to place the work under the sewing foot. Do not forget to lower the presser bar lifter again! Certain seams are easier to sew with a different needle position (see page 53).
natural_image
Grayscale abstract texture with diagonal white stripe and textured gray background (no text or symbols)
text_image
Diagram of a device control panel with labeled buttons and indicators, including 'Display' and directional arrows.Stretch triple straight stitch
| prog | |||
| 04 05 | 3-5 | 0A |
Program 04 is stretch triple straight stitch at 1.5 mm to 4.5 mm.
Program 05: is stretch triple straight stitch at 3 to 6 mm (Fig. 4). Both programs can be sewn in different needle positions.
Elastic straight stitch seams you need (press-open seams) for all stretchable materials and especially for seams subjected to high strain, e.g. inside seams on trousers, ski- and swimwear (Fig. 3).

text_image
Diagram of a device control panel with labeled buttons and indicators, including '12' and '17' labels.Zigzag stitch
| prog | |||
| 10 11 | 3-5 | OA |
Program 10 is zigzag stitch at middle needle position.
Program 11 is zigzag stitch beginning with right needle position.
Select a stitch width from 0.5 to 6.0 mm using key 8, and the stitch length with key 7 (Fig. 1).
A stretchable seam can also be obtained with a narrow zigzag stitch. It is used especially for jersey materials (Fig. 2).
Stitch width: 1.0 mm
Stitch length: 1.5 mm

2
51
natural_image
Technical line drawings of two garment pattern pieces: front and side views (no text or symbols)Top-stitch seams
Buttonhole thread as needle thread
| prog | |||
| 00 | 5-6 | OA |
Needle: 100 or 130 H-N
Needle thread: buttonhole thread
Stitch length: longest stitch
Top-stitch seams produce nice ornamental effects. For this, selection of a suitable thread is important. To obtain particularly prominent seams, we recommend using buttonhole thread.
Buttonhole thread as bobbin thread
| prog | |||
| 00 | 6-7 | OA |
Buttonhole thread can also be wound on the bobbin and used as bobbin thread. In this case, sewing thread should be used in the needle. For this sewing job the needle thread tension must be set relatively high. For topstitching, the fabric is placed in the machine wrong side up. Select the longest stitch. For topstitching, a No. 80 needle may be used.
- For difficult top-stitch seams we recommend using the straight-stitch foot and the round-hole needle plate (special accessory).
● Before you fit these, set the needle at its middle position.
It is not possible to select a program now. To select another program press the key "twin needle" again.
50
Top-stitch seams sewn with two needle threads
| prog | |||
| 00 | 3-5 | OA |
Stitch length: 6.0 mm
Needle: 80
Thread: sewing thread
If you cannot find a suitable buttonhole thread for specific sewing work, try using two needle threads together. Place one thread to the right, and the other to the left of disc "C", (see page 102) and insert both threads in the needle eye.
Triple-fancy-stitch seams
| prog | |||
| 05 | 3-5 | 0A |
Stitch length: 6.0 mm
Needle: 80
Thread: sewing thread
- This stitch can be used without any difficulty for sewing a top-stitch seam along lapel and pocket edges or sewing an ornamental seam. For this, normal sewing thread is used.
Twin-needle top-stitch seams
| prog | |||
| 00 | 3-5 | 0A |
Needle: twin needle;
needle gauge, as desired
The twin needle can be used not only for embroidery work, but also for top-stitching. It produces particularly attractive effect along hem edges and on facings.
Fold the bottom edge, the facing or border edg over to the wrong side and baste it down. Sew of the right side of the fabric with the twin needle. Trim away the excess material on the wrong side (For threading instructions see page 102).
natural_image
Simple line drawing of a rectangular object with a zigzag line inside, no text or symbols present.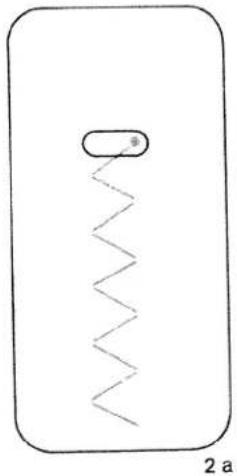
natural_image
Simple line drawing of a rectangular object with a zigzag line inside, no text or symbols present.Change of needle position with straight stitch
Through adjustment of the needle (needle position), certain sewing work can be carried out easier. For example, if you wish to stitch at a narrow margin such as on collars or when inserting zippers, you select the required needle position.
- For changing the needle position, the needle must always be in the highest position.
Left needle position
Program: 01
The left needle position is also shown by the symbol to the left of the stitch width number in the display. With key 8 + the needle position can be changed from left to right for 19 different positions.
The right needle position is shown by the symbol to the right of the stitch width number in the display (Fig. 1).
Change of needle position with zigzag stitch
● The needle must always be in the highest position.
Right needle position
e.g.
Program: 11
Stitch width: as required
Stitch length: as required
Left needle position
Program: 11
Stitch width: as required
Stitch length: as required
Key: Pattern mirror 28
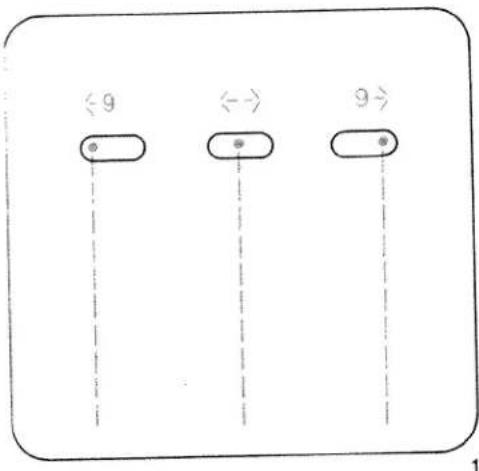
With the above-mentioned settings, the stored zigzag-program can be sewn with left or right zig-zag throw. For an intermediate needle position, stitch width key 8 is pressed repeatedly until the needle is in the required starting position (Fig. 2 + 2a).
$$ 1 4 7 3 - 1 4 7 3 C D $$
$$ P _ {A R} t B $$

natural_image
Close-up of a dark textured fabric with a vertical seam dividing it into two sections (no text or symbols visible)| a | b | ||||

natural_image
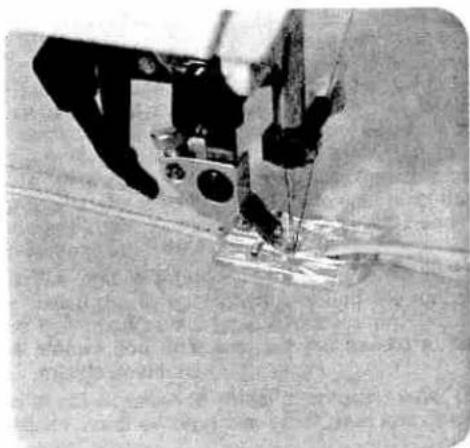
Close-up of a sewing machine needle stitching fabric (no visible text or symbols)1
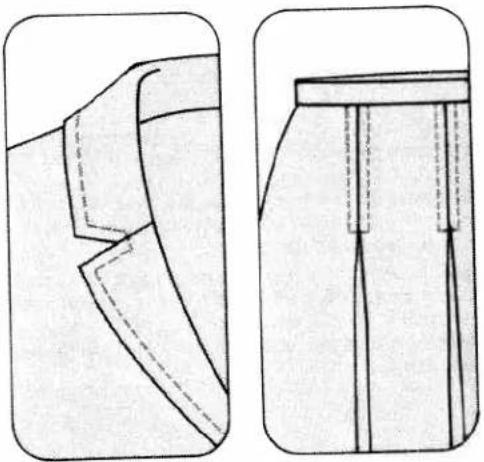
Lap-felling · Imitation lap seam sewn with the ordinary sewing foot.
| prog | |||
| 00 | 3-5 | 0A |
Place the two pieces of fabric one on top of the other with their face sides, and sew them together about one centimetre from the edge. Neaten the raw edge. Fold the seam allowance over to one side and press. Then topstitch on the face side of the fabric, using the edge of the sewing foot as a guide (Fig. 1).
Double lap seam sewn with the felling foot (special accessory)
| prog | |||
| 00 | 3-5 | Feiling foot |
natural_image
Close-up of a sewing machine needle stitching fabric (no visible text or symbols)2
If two lines of stitching are to appear on the face side of the lap-seamed fabric, the two pieces of fabric must be placed together with their reverse sides facing (Fig. 4a). If only one line of stitching is to appear on the face side of the lap-seamed fabric the two pieces of fabric must be placed together with their face sides facing (Fig. 4b).
First workstep
Place the two pieces of fabric one on top of the other with the bottom ply protruding by the width of the cutout in the felling foot. Make sure the protruding edge enters the felling foot so that it is folded and stitched down (Fig. 2).
Second workstep
Open the two pieces and insert the seam ridge in the felling foot. The ridge is folded down in the foot and stitched down along the edge. Pull both fabric plies apart lightly during sewing (Fig. 3).
● Two felling feet are available as special accessories for stitching margins of 4.5 and 6.5 mm.
54
3

natural_image
Black-and-white textured surface with three white geometric patterns and a horizontal dotted line at the bottom (no text or symbols)
natural_image
Illustration of hands operating a sewing machine on a fabric or textile surface (no text or symbols visible)
natural_image
Close-up of a sewing machine needle stitching fabric, no visible text or symbols0
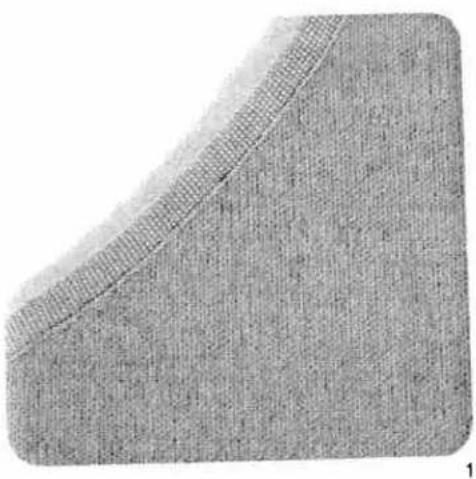
Binding edges with the hemmer
| prog | |||
| 00 | 3-5 | 7 |
Hemmer foot
Hemming secures the fabric edge against fraying and produces a neat and durable edge.
Begin by folding the fabric edge approx. 15 inch and placing the folded edge under the hemmer foot. Lower the foot and secure the hem in position with a few stitches.
Fig. 0 shows how the fabric is drawn into the hemmer foot scroll with the aid of the stitched-down threads.
Fig. 2 shows how the fabric edge is fed into the hemmer foot scroll. Hold the fabric tight as you guide it during sewing. Make sure the fabric contacts the edge of the right half of the hemmer foot as it enters the scroll.

natural_image
Black-and-white photo of a spacecraft or scientific instrument on a flat surface, no visible text or symbols2

natural_image
Close-up of a sewing machine needle stitching fabric (no visible text or symbols)3
Binding edges with the roll hemmer
| prog | |||
| 10 | 3-5 | * |
• Roll hemmer (special accessory)
Use the roll hemmer foot for hemming nylon, tri-dot and chiffon. Begin by stretching the fabric to see which way the edge curls. This is the side to which the hem must be rolled. Draw the fabric into the hemmer scroll with the aid of sewn-on threads.
Set the stitch width just wide enough that the needle stitches close to the drawn-in hem edge (Fig. 3). In this way, an attractive shell edge effect is obtained.

natural_image
Close-up of a mechanical component with no visible text or symbols
natural_image
Black-and-white photo of a rugged landscape with dense vegetation and no visible text or symbols1
2
Shirring with straight stitch
| prog | |||
| 00 | -3 | 0A |
Stitch length: 4 mm
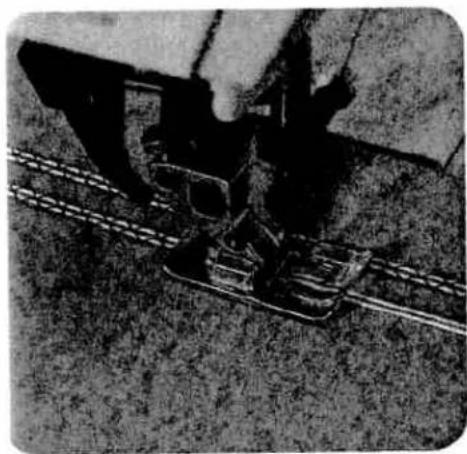
In order to obtain consistent gather with straight stitch it is imperative to insert 2 to 4 shirring threads. First mark the starting line for the shirring on the face side of the fabric. Sew the first seam straight and carefully. During sewing, pull the fabric taut a little with your hands, because with long stitches the seam will pucker easily (Fig. 1). After sewing, leave about 15 cm of thread hanging. The next two or three seams can be sewn at about sewing-foot width.
Finally take hold of all underthreads and pull them. By this means you determine the amount of gather yourself. Please do not use fine threads, in order to ensure they do not break during gathering. Do not forget to tie off the threads at the beginning and end of the seams afterwards (Fig. 2).

natural_image
Close-up of a sewing machine needle stitching fabric, no visible text or symbols1
natural_image
Black-and-white photo of a hand operating a large industrial machine on a conveyor belt (no visible text or symbols)2
natural_image
Close-up of a floral blouse with floral patterns and a small piece, resting on a textured surface (no text or symbols visible)3
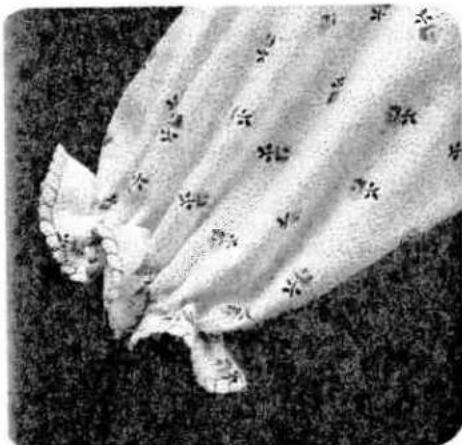
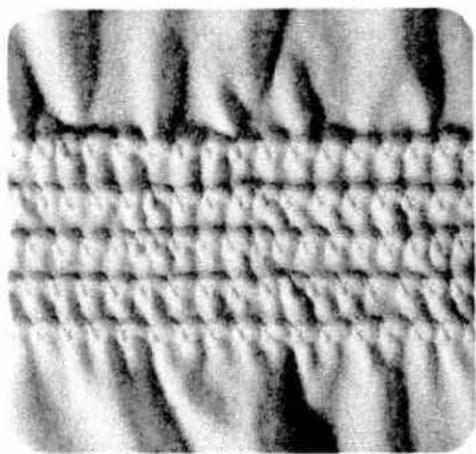
Shirring with elastic threads
| prog | |||
| 13 15 23 | 3-5 | 2A or * |
* Cording foot (special accessory)
First mark the starting line for the shirred seams on the underside of the fabric. Insert the needle at the seam beginning point and place an elastic thread around the needle. Insert the elastic thread in the groove of the sewing foot in use. Lower the presser foot and sew a number of seams at about foot width. Ensure that the elastic thread is not pierced during sewing and do not stretch it. Finally, pull the threads with your hand, and determine the amount of gather yourself. Knot the threads on the inside (see Fig. 1).
Instead of elastic thread it is also possible to use heavy cotton thread (see Fig. 2).
Pull the fabric to the required width and stitch the threads down. This provides you with a fixed shirred edge.

text_image
A B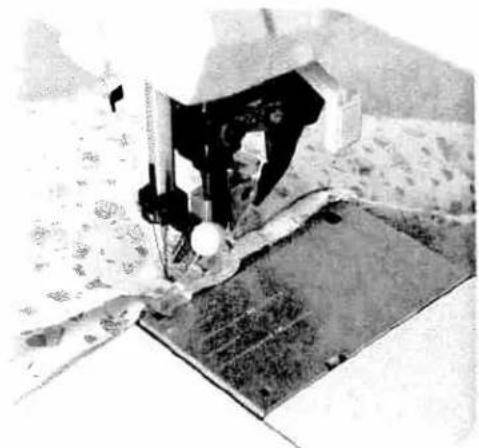
natural_image
Black-and-white photo of a sewing machine needle stitching fabric, no visible text or symbols2
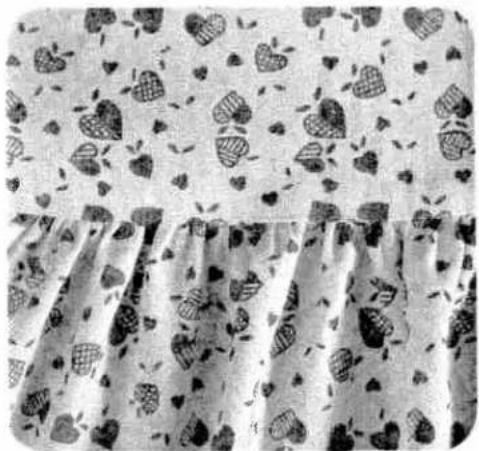
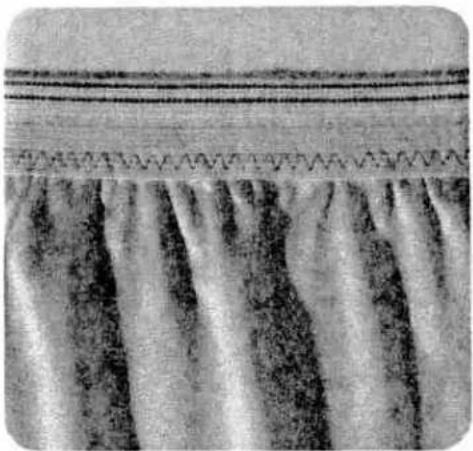
Gathering with shirring foot
(special accessory)
| prog | |||
| 00 | -3 | Shirring foot |
Stitch length: 3-4 mm
How to insert the shirring foot
Insert the shirring foot with its rear pin in groove "A" and push the shoe upwards so that front pin "B" snaps in (Fig. 2).
How to gather
Both outer fabric and the material to be shirred are sewn together with the shirring foot in one workstep. Ensure that the gathered material always goes under the foot and the smooth outer fabric in the foot cutout (Fig. 1). Lightly stretch the outer fabric during sewing; by this means you determine the degree of gathering.
How to disengage the foot:
Raise the presser bar lifter. Disengage the sewing foot. Press up and hold the presser bar lifter and remove the sewing foot to the rear.
1
natural_image
Black and white photo of a patterned fabric with heart-shaped cutouts on a light background (no text or symbols)
natural_image
Close-up of a sewing machine stitching fabric (no visible text or symbols)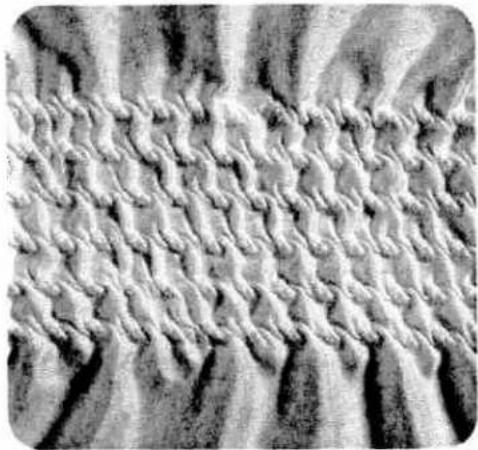
natural_image
Close-up of textured fabric with wavy patterns and no visible text or symbols1
2
nocking ith elastic thread
| prog | |||
| 00 | 3-5 | 0A |
ch length: 3 to 4 mm
bbin thread: elastic thread, (wind tension-free on bobbin)
edle thread: sewing thread
- sewing with elastic threads we recommend ying an additional bobbin case.
cause elastic threads are much thicker than an linary bobbin thread, the tension on the bobbin se has to be set looser. The greater the bobbin ead tension the greater the shirring effect. a most suitable fabrics are nylon, satin, batiste d fine-knit fabrics. The amount of gathering can determined by testing on a piece of waste ric. Sew the seams at about foot width. Tie off seams on the reverse fabric side at the begin- g and end of the seams (Fig. 1).
here are several parallel seams, the material st be stretched to its original width during ving, otherwise the shirring will turn out irregu-Do not forget to carry out a sewing test.
natural_image
Close-up of a textured fabric with parallel grooves and ridges (no text or symbols)3

natural_image
Abstract pattern of star-like shapes forming a zigzag line on textured background (no text or symbols)
natural_image
Abstract pattern of white circular shapes on a textured gray background, no text or symbols present.61 B

natural_image
Black-and-white photo of a sewing machine needle stitching fabric, no visible text or symbols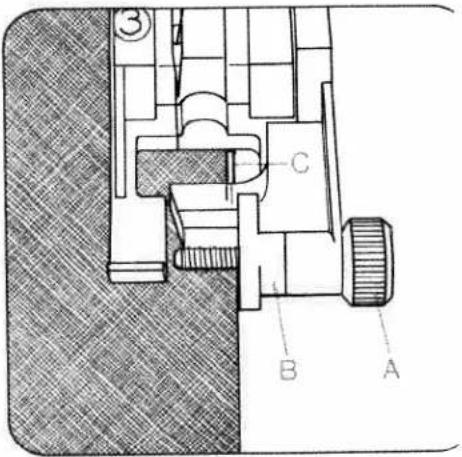
text_image
Technical diagram of a mechanical assembly with labeled parts A, B, and COvercasting raw edges with the zigzag-stitch
| prog | |||
| 10 | 3-5 | OA |
Stitch-width: as required
Sewing thread: embroidery, darning,
or sewing thread
The stored zigzag-stitch is suitable for serging of light materials. The more difficult the material, the wider the stitch width must be selected for the zigzag stitch. Ensure that the needle passes outside the outer edge during sewing. In this way the material edge is properly serged and well covered (Fig. 1).
For heavy or easily fraying materials, use:
● Program: 13, 21, or 22 (Fig. 3).
Serging with overlock foot
For materials which contract during serging us the overlock foot.
| prog | |||
| 11 | 3-5 | 3 |
Stitch-width: as required
Serge the raw edge with the required zigzag stitch. The material enters at the red marking of the sewing foot (Fig. 2).
● Preparation of the sewing foot (overlock for No. 3)
Turn screw "A" fully to the front. The red mark "I" is then on the right sewing foot side. Allow the edge of the material to be sewn to enter close against the red mark. During sewing, the three places itself over the wire "C". By this means you will receive a beautiful smooth seam (Fig. 2). For change of needle position for zigzag stitch see page 53.
natural_image
Pure black rectangle with a faint white border at the top (no text or symbols)62
3
natural_image
Close-up of a textured surface with zigzag patterns and layered texture (no text or symbols)
natural_image
Pure zigzag line pattern without any text, numbers, or symbols1
Stretch triple zigzag-stitch _ycrastitch
| prog | |||
| 160 161 | 3-5 | OA |
Veedle: 130/705 H 80 or 130/705 H SKF 80
Stitch width: as required
With the above-mentioned programs it is possible to repair elastic tapes, or join them, on underwear, bathing wear and high-stretch materials such as vycra and difficult synthetic fabrics.
Select the appropriate stitch width for the application. For this work it is recommended to use fine sewing threads (Figs. 1 and 2).
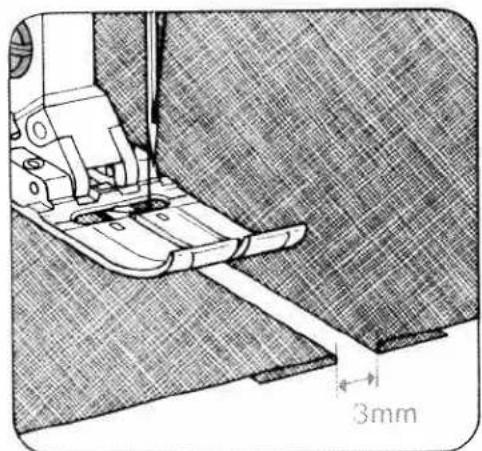
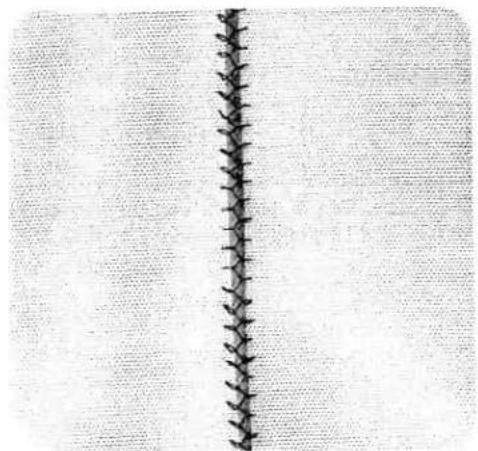
=aggotting stitch 'or corsetry
| prog | |||
| 29 | 3-5 | 0A |
Veedle: 130/705 H 80 or 130/705 H SKF 80
With faggotting stitch it is possible to sew a highly elastic seam with hem-stitching effect. Tack over the edges to be sewn and place them under the sewing foot with a clearance of 3 mm (Fig. 3). Over-stitch using program 29. The needle must penetrate the material to the right and to the left (Fig. 4).
natural_image
Technical illustration of a sewing machine needle stitching fabric, showing measurement annotation (3mm) with no readable text or symbols beyond the dimension line.3
natural_image
Close-up of a vertical seam or crack on a textured fabric background (no text or symbols)4
63
natural_image
Close-up of a textured surface with vertical striations and horizontal lines, no visible text or symbols
natural_image
Cross-sectional illustration of layered material with visible grain structure (no text or symbols)Elastic stitch (for underwear)
| prog | |||
| 13a | 3-5 | 0A |
Cut off the stretched elastic tape close to the edge. Gather the fabric to the waist size using straight stitch. Push the part prepared in this way between the elastic tape and pin it firmly. Stitch it on using elastic stitches. Finally over-stitch the closed and rounded tape elastic stitches (Fig. 1).
Elastic straps (outerwear)
| prog | |||
| 13a | 3-5 | 0A |
On skirts or trousers sew the strap onto the prepared edge with elastic stitches (Fig. 2).
Bartacks
| prog | |||
| 157 | 3-5 | 0A |
Belt loops, flies or pockets can be very easily tacked down with automatic bartacks (Fig. 3).
Change of bartack width and length
The bartacks can be changed to different widths or lengths, or only in width or length (Fig. 4 + 4b)
| prog | |||
| 157 | 3-5 | 0A |
Pattern length: as required Stitch-width: as required
In order to ensure correct feeding of protruding crosswise seams, belt-loops and similar things we recommend supporting the sewing foot with a correspondingly thick piece of material (see page 47).
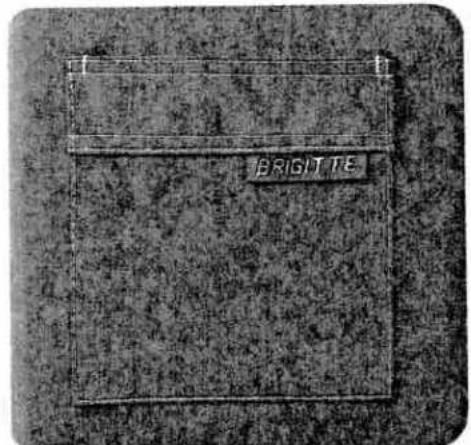
text_image
BRIGITIE3

natural_image
Dark rectangular object with faint horizontal lines and small white marks, no visible text or symbols4 a

natural_image
Dark rectangular object with three vertical white lines on a horizontal line (no text or symbols)4 b

natural_image
Close-up of a sewing machine stitching fabric (no visible text or symbols)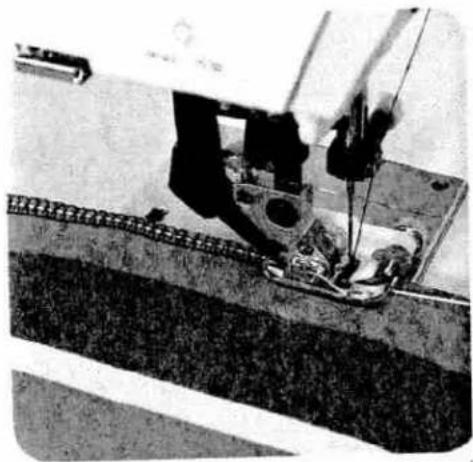
natural_image
Close-up of a sewing machine needle stitching fabric (no visible text or symbols)Closing- and serging seams
| prog | |||
| 23 28 | 3-5 | OA,3 |
Seams which are not ironed open can be sewn together and serged in one workstep. This method is fast, very durable and suitable for many different materials.
The Pfaff Creative 1473 offers a selection of different elastic closing and serging seams from which you can easily select the corresponding seam for all stretchable materials.
Closed overlock stitch or overcasting stitch
| prog | |||
| 21 25 26 | 3-5 | 0A,3 |
Material: Jersey
Especially jersey materials can be sewn together and serged in one workstep with the recommended stitches (Fig. 1).
Sleeve cuffs or knit collars can be sewn on with the above-mentioned programs in a wear-resistant manner just the same.

natural_image
Close-up of a textured fabric with a curved, layered edge against a black background (no text or symbols)Sewing neck cutouts: Measure the require width and close the stand at the correct curvature and press open the seam, fold over in lengthwise direction and pin onto neck cutout from face side. The raw edges of the knit facing are placed on the raw edge of the cutout. In one workstep, kn facing and cutout edge are sewn together (Fig. 3). In order to avoid waviness in the case of loose woven materials, insert an elastic thread. By th means, the seam keeps its original shape (Fig. 2)
natural_image
Close-up of a mechanical component with circular holes and a triangular base, resting on a textured surface (no visible text or symbols)
natural_image
Close-up of a textured, irregularly shaped object with no visible text or symbols1
Closed overlock stitch
| prog | |||
| 23 | 3-5 | * |
* Knit-edge foot (special accessory)
Veedle: 70 or 80
Fashioned knit parts can easily be sewn together with a closed overlock stitch seam. To obtain a good-looking seam we recommend inserting a lightly tensioned wool thread in it (Fig. 1).
Overlock stitch with edge-thread effect
| prog | |||
| 26 | 3-5 | 3 |
Stitch length: 3.0 mm
Place the raw edges under the sewing foot, as shown in Fig. 2. Make sure the needle stitches just beyond the fabric edge, as it descends in its right position. In this way, the edge thread is placed over the raw edge and serves as an edge protection.
For setting overlock foot No. 3 see page 62.
Overedge stitch
| prog | |||
| 147 | 3-5 | 0A |
Overedge stitch is used for joining two fabric parts at a gauge of up to 9 mm and serging them with a double edge finish (very durable).
natural_image
Close-up of a mechanical component with visible teeth and internal components (no text or symbols)2
natural_image
Close-up of a mechanical device with a curved track and components, no visible text or symbols
natural_image
Close-up of a textured, curved surface with no visible text or symbols1
Overlock stitch
| prog | |||
| 147 | 3-5 | 0A |
With the overlock stitch it is possible to make decorative hem edges. Tack over the hem or the facing to the right side and, as Fig. 1 and 2 show, overcast the open edge.
Honeycomb stitch
| prog | |||
| 24 | 3-5 | OA |
Honeycomb stitch is especially suitable as a means of securing hems on stretchable lining materials. Fold the hem double up to the hem edge and overcast with honeycomb stitch (Fig. 3).
Securing hems with the double needle
(T-shirt seam)
| prog | |||
| 00 | 2-3 | 0A |
Needle: double needle, 4 mm distance
For a 2 cm hem, turn over and baste about 2.5 cm of material. Stitch on the face side at about 2 cm width. Cut off the protruding material edge on the inside along the seam (Fig. 4).
natural_image
Close-up of a mechanical component with visible gears and shafts (no text or symbols)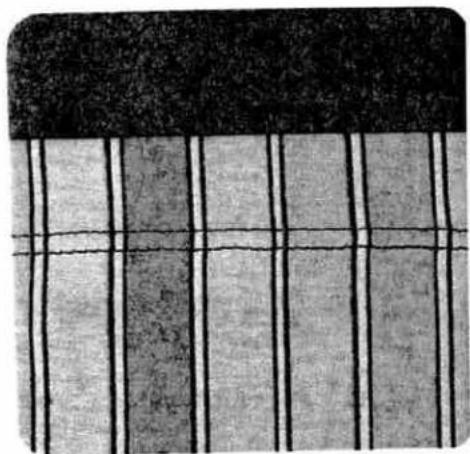
natural_image
Close-up of a textured fabric with vertical stripes and a dark top (no text or symbols)
natural_image
Close-up of a sewing machine needle stitching fabric (no visible text or symbols)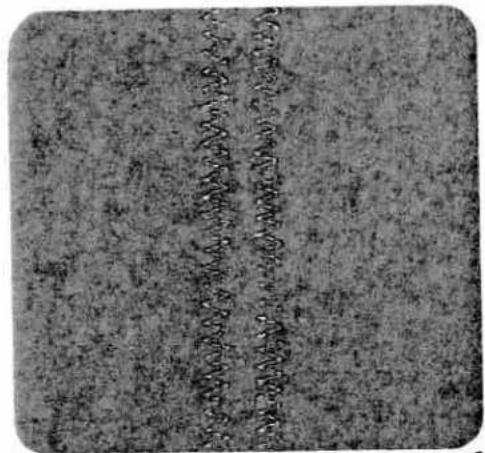
natural_image
Close-up of a textured surface with vertical seam or crack pattern (no text or symbols)elastic stitch or overlock stitch
| prog | |||
| 13a 147 | 3-5 | 0A |
)overlap the material edges by 1.5 cm and over-titch each edge with:
Program 13a
+ Stitch length 0.5 mm (Fig. 2)
r as shown by Fig. 1
Program 147
1 Stitch width 4.5 mm
1 Stitch length 3.0 mm
Over-stitch the raw edge in such a way that the arrow side runs along the raw edge, as shown in fig. 1. The second raw edge can be sewn without turning the material, by pressing:
Pattern mirroring key 28.
natural_image
Close-up of a textured fabric surface with a diagonal seam, no visible text or symbols
natural_image
Close-up of a mechanical device with attached components, possibly a sewing machine or clamp, against a textured surface (no visible text or symbols)Binding edges with non-woven tape
| prog | |||
| oo | 3-5 | OA |
Fold ready-made bias binding lengthwise and shape-press. Push the folded binding over the fabric edge and baste it in place, if required. Then sew it on with straight stitches (Fig. 1).
natural_image
Close-up of a dark horizontal band on a textured gray background, no visible text or symbols
natural_image
Close-up of a textured, elongated object with a horizontal dark band (no visible text or symbols)Edge-binding with the binder
| Sewing foot: | Binder (special accessory) | |
| Program: | 00 | |
| Stitch length: | 2.5 mm,or | (Fig. a) |
| Program: | 10 | |
| Stitch width: | 2.5 mm | |
| Stitch length: | 1.5 mm,or | (Fig. b) |
| Program: | 44 | |
| Pattern length: | 10 | (Fig. c) |
| Bias tape width: | 24 to 26 mm | |

natural_image
Close-up of a textured surface with a dark horizontal band and faint linear markings (no text or symbols)Remove sewing foot and screw on binder. Insert the bias tape in the scroll of the binder and pull it out to the rear. Set the binder in such a way that the needle enters 1 to 1.5 mm from the turned-in bias edge. Sew a number of stitches along the bias tape. Place the raw edge in the groove of the binder. During sewing, the bias tape is wrapped automatically over the material edges. Sew the bias tape on with the above mentioned program or a program of your own selection. Straight material edges are the simplest to bind (Fig. 2).

natural_image
Black hand with a smiling face on the palm, no text or symbols visible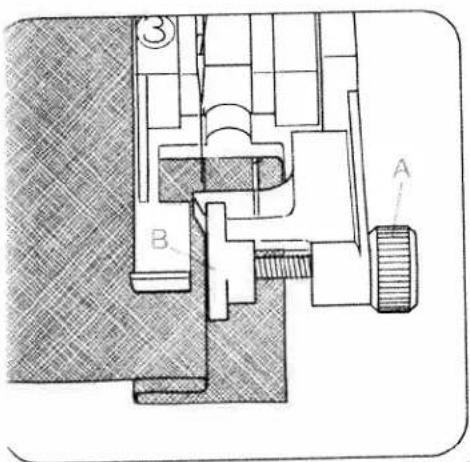
text_image
Technical diagram of a mechanical assembly with labeled components A and B, showing cross-sectional views and structural details.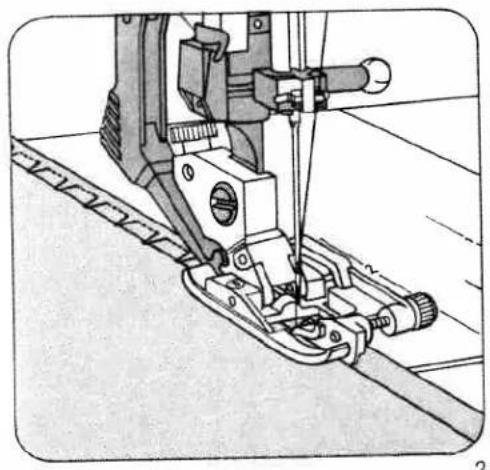
natural_image
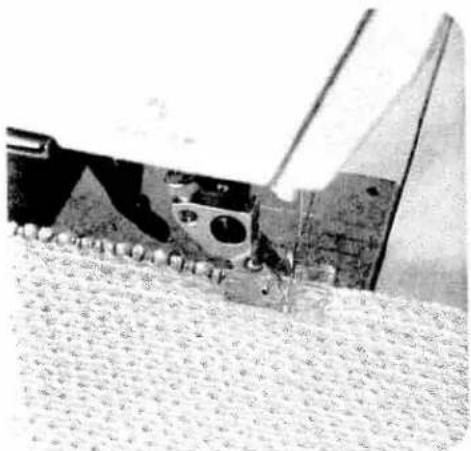
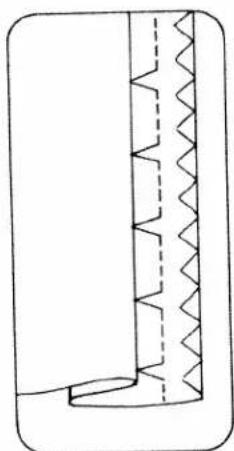
Technical line drawing of a sewing machine needle stitching fabric (no text or symbols)3lind stitch
| prog | |||
| 16 | -3+ | 3 |
Fold the previously overcast raw edge over to form a hem of the desired width and baste about 0.5 cm from the fabric edge. Place the fabric under the blindstitch foot and sew, making sure the folded fabric edge runs along edge guide "B" of the blindstitch foot (Fig. 1 + 2a).
Before you start blindstitching, adjust the needle penetration point on the folded fabric edge.
To do this, adjust the position of edge guide "B" by turning regulating screw "A" so that the needle catches only one thread in the folded edge when it makes its left stitch. Sew a trial seam on a piece of scrap material first.
Then proceed as described above (Fig. 2).
natural_image
Pure technical line drawing of a mechanical component with zigzag internal structure (no text or symbols)2 a

natural_image
Simple line drawing of a vertical pipe or channel with a wavy internal structure and a small base (no text or symbols)2b
Elastic-blind stitch
(for elastic materials)
| prog | |||
| 17 | -3+ | 3 |
This type of stitch is suitable for stretch fabrics. First fold the hem to the desired width. Adjust the needle position as described above (Fig. 2b).
- Then start hemming, following the instructions given above.
natural_image
Close-up of a textured fabric with intersecting diagonal lines (no text or symbols)
natural_image
Close-up of a textured fabric with a square frame and stitching pattern (no text or symbols)Darning with elastic stitch
| prog | |||
| 13a | 3-5 | OA |
Depending on the size of the damaged area, stitch over it with as many elastic stitch seams as are needed to cover it. Each seam should just slightly overlap the one before it (Fig. 1).
Inserting patches
| prog | |||
| 13a | 3-5 | 0A |
Stitch length: 0.5 mm
Needle position: down
The new piece of fabric is pinned on the face side and the fabric edge over-sewn with the selected stitch.
To make the patch more durable you can sew a second seam at sewing-foot width from the first. Afterwards cut away the damaged material on the inside (Fig. 2).
natural_image
Close-up of a textured surface with a vertical line and a small star-like mark at the bottom (no text or symbols)Darning torn fabrics
| prog | |||
| 13a 15 | 3-5 | 0A |
For mending tears, frayed edges and small holes, place a piece of material under the torn fabric which is larger than the damaged area. Stitch over the area at the width of the tear. The material underneath reinforces the damaged material and ensures reliable darning. Trim any protruding material on the underside close to the edge (Fig. 3).
-

text_image
Cropped image showing a vertical black text block on a textured gray background, likely from a document or label.Automatic darning
| prog | |||
| 158 159 | -3+ | 2A,5A |
Sewing thread: embroidering and darning thread The darning program 158 is mainly intended for darning damaged spots. Stitch over the damaged spot at the required length, then press the reverse" key. The length of the darning seam is now memorized in the computer. The Pfaff Creative then automatically stitches over the damaged area.
The programmed darn size can then be repeated as often as required.
n darning program 159 when key 18 is pressed, he machine will stitch over the darning area crosswise and repeat the same size continuously without further adjustment.
f the worn area is wider than the darning program, he darning program must be repeated several times until the damaged spot has been covered completely.
Depending on the fabric, the darn may turn out one-sided. If so, this can be compensated by balance key 5.
Example:
Fig. 1: Using balance key, select +1 to +3 or more, if required.
Fig. 2: Using balance key, select -1 to -3 or more, if required.
If you wish to darn a larger area we recommend to use buttonhole foot 5A. The darning program must be repeated several times until the damaged spot has been covered.
natural_image
Two abstract geometric patterns labeled 1 and 2, with no text or symbols within the shapes.Changing the darning length
If you wish to change the programmed darning length, press the "pattern start key". The darning length is cleared and a new length can be programmed.

text_image
Technical diagram of a mechanical assembly with labeled parts A and B, showing structural components and motion indicators.
text_image
Technical diagram of a sewing machine with labeled parts including needle, base, and cutting toolDarning with straight stitch
| prog | |||
| 00 | — | 2-3 | 6 |
Feed dog: lowered
Presser bar lifter: in darning position
Sewing-cotton: embroidering and
darning thread
Darning position (Fig. 1):
Lower presser bar lifter "A", at the same time pushing it back slightly until it enters notch "B" at the bottom of its slot.
Attach the darning foot (Fig. 2):
Raise the needle. Push lever "E" towards the back and hold it there. Insert the pin of the foot in hole "C" and insert the foot so that it rests against its stop. When you do so, guide fork "G" fits around the presser bar. Release clamp "E", which then moves down onto retaining screw "F". Tighten screw "D".
Draw up the bobbin thread. Hold both threads until the machine has made a few stitches. First sew a few stitches in the unworn area of the fabric. Then stitch over the damaged spot from one side to the other in serpentine fashion, placing the lines of stitching close together (Fig. 3). When the damaged spot has been covered completely, turn the work through 90^ and darn at right angles to the preceding row of stitches (see Fig. 4).
You determine the length of the darning stitches by the rate at which you move the fabric back and forth.
For mending you can place the damaged part of the fabric in an embroidery hoop.

natural_image
Technical line drawing of a sewing machine needle stitching a patterned fabric (no text or symbols)
natural_image
Pure diagram of a grid pattern with arrows, no text or symbols present
natural_image
Close-up of a sewing machine needle stitching fabric (no visible text or symbols))arning with wool
| prog | |||
| 10 13a | — | 2-3 | 6 |
eed dog: lowered
'resser bar lifter: in darning position
(see page 74)
Sewing thread: Embroidery and darning thread Draw the wool thread through the needle hole of the darning foot and into the thread guide (Fig. 1). Place the wool thread under the darning foot. Start at the top left and place the wool thread back and forth across the damaged area (Fig. 2). Then cut the wool thread and sew over the rows of wool thread with zigzag stitches or an elastic-titch seam (Fig. 3).
) Do not place the lines of stitching too close together as this would make the darn too hard.
will darning work described above is carried out on the reverse side of the fabric, so that the darn looks neater on the face side.
1
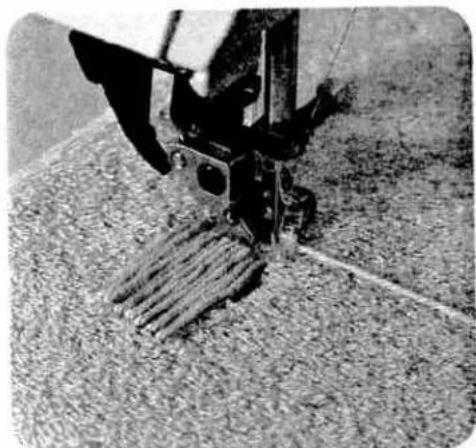
natural_image
Close-up of a mechanical device with textured surface and lever mechanism (no visible text or symbols)2

natural_image
Close-up of a sewing machine stitching fabric (no visible text or symbols)3
75

natural_image
Illustration of a spoon and plate with decorative floral border (no text or symbols)
natural_image
Repeating pattern of circular shapes with internal patterns, no text or symbols present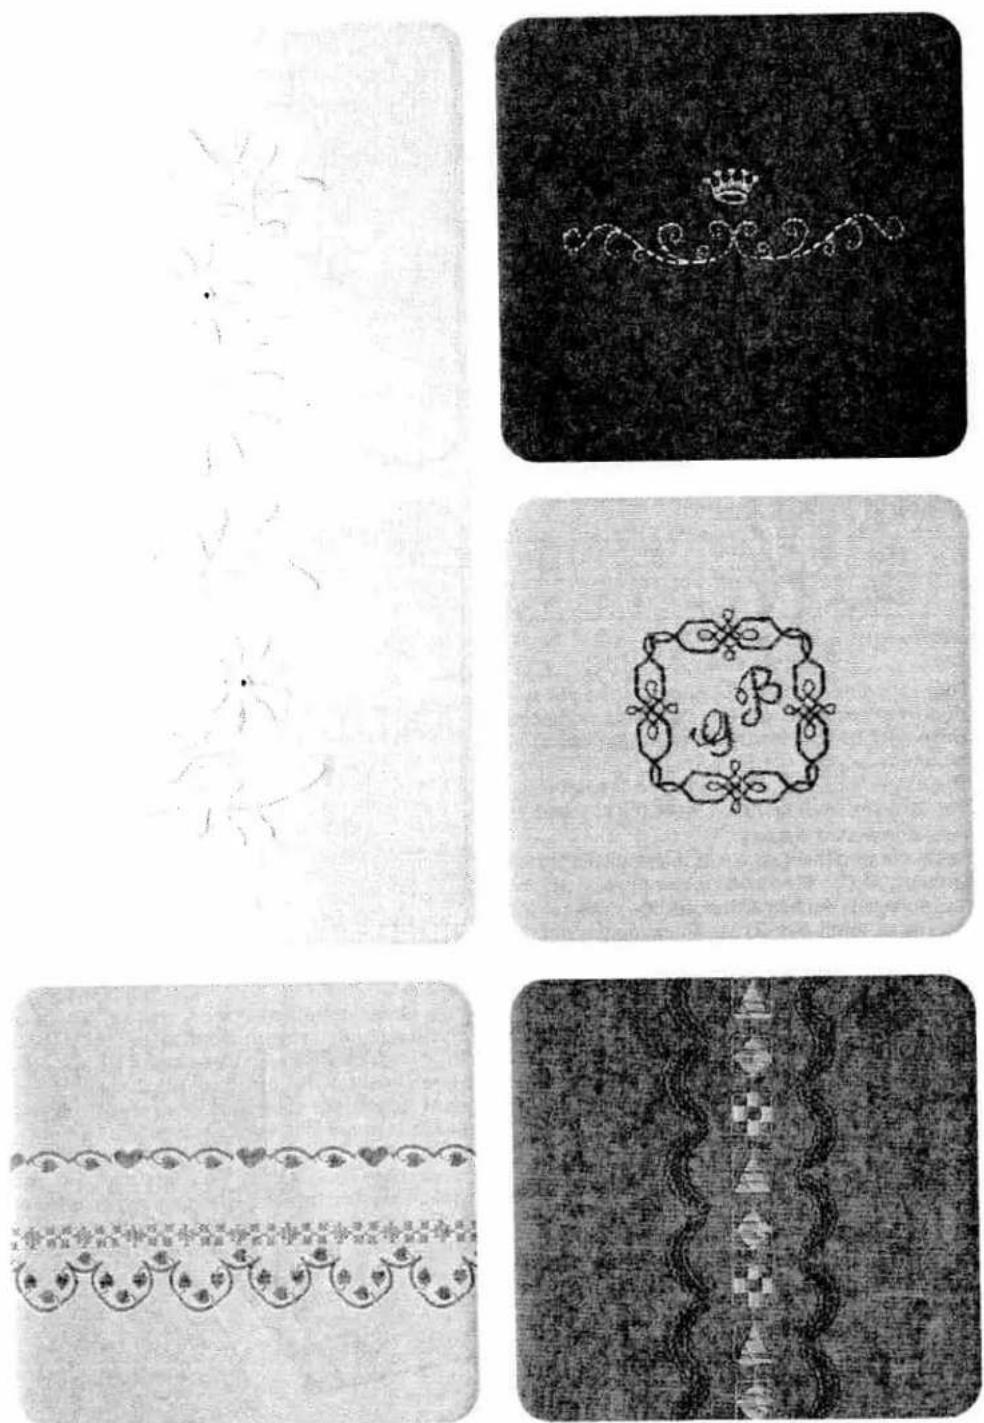

natural_image
Technical line drawing of a sewing machine component, showing two steps with no text or symbols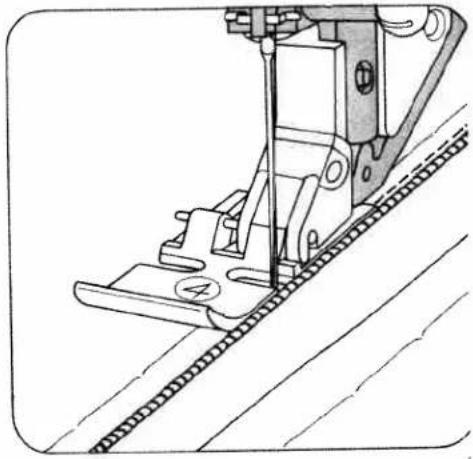
natural_image
Technical line drawing of a sewing machine needle stitching a patterned fabric (no text or symbols)Sewing in zippers
| prog | |||
| 00,01 | 3-5 | 4 |
Stitch length: 2.5–3.0 mm
Key: needle down
There are different kinds of zippers: joined or split zippers and special ones for trousers or slacks. They can be inserted concealed or open, as required.
The zipper foot can be engaged on the left or on the right, depending on the work (Figs. 1 and 2).
Fully concealed zippers
Baste the zipper in first. Snap the zipper foot in at the right (Fig. 1). Place the open zipper under the foot so that its right-hand guide edge moves along the zipper teeth (Fig. 3). By changing the needle position (see page 53) the zipper can be stitched in at a narrow depth. Sew about half the seam at the required depth, leave the needle down in the material, raise the zipper foot and close the zipper (Fig. 4). Then lower the foot again, continue stitching until you reach the end of the zipper and sew across this end.
Sew along the other side of the zipper parallel to the edge and at the same distance as the first seam. Shortly before you reach the end of the seam, leave the needle down in the material, raise the sewing foot, open the zipper (Fig. 5), lower the foot again and sew to the end of the seam.
Our sewing tip: If you lack practice, we recommend using the quilting gauge to obtain parallel seams.
If the sewing foot shoe is engaged at the right, the needle must only be varied to the right.
If the shoe is engaged at the left, the needle must only be varied to the left.
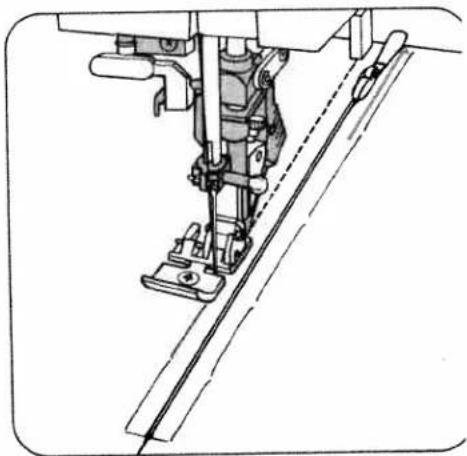
natural_image
Technical line drawing of a sewing machine needle and base (no text or symbols)
natural_image
Technical line drawing of a sewing machine needle and chain (no text or symbols)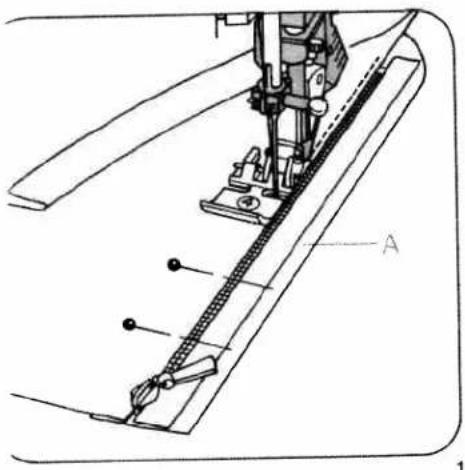
natural_image
Technical line drawing of a sewing machine needle and chain assembly (no text or symbols)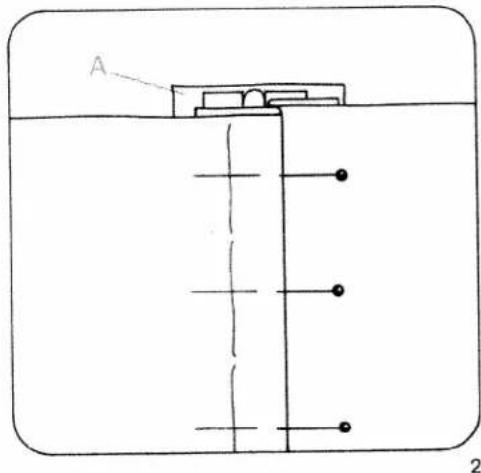
text_image
A 2ippers for ladies' slacks
| prog | |||
| 00,01 | 3-5 | 4 |
itch length: 2.5-3.0 mm
Needle down
Snap the zipper foot in at the right.
on the fly edge. Baste the closed zipper under- death the pressed right-hand fly edge so that its teeth are still visible. Pin facing strip "A" to the underside and stitch it down at the same time as you sew on the zipper. The zipper teeth move along the right-hand guide edge (Fig. 1). Shortly before you reach the end of the seam, leave the needle down in the material, raise the sewing foot and open the zipper. Then lower the foot again and sew the seam to the end. Close the zipper. old the right edge over the left and pin it in place according to the seam line. Then baste in the left upper chain (Fig. 2).
open the zipper: Attach the edge guide and adjust it so that its finger moves along the fabric edge (Fig. 3). Shortly before you reach the end of the seam, leave the needle down in the material, raise the sewing foot and close the zipper. Then lower the foot again and sew to the end of the seam. Secure the end of the zipper seam with a pick, program 157.
ur sewing tip: If a zipper jams after dry cleaning, lab candle wax or a piece of soap over its teeth. It can then be opened and closed without any effort.

natural_image
Technical line drawing of a sewing machine needle stitching fabric (no text or symbols)Note
If you wish to place your seam as close as possible to the zipper, select program 01 instead of 00 and use the various needle positions.
To sew zipper with foot to the left of zipper, we recommend right needle position 5, and with foot to the right of zipper, left needle position 5.
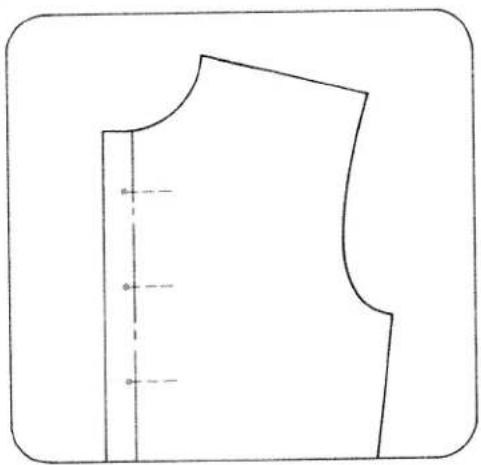
natural_image
Pure line drawing of a garment pattern piece without any text, numbers, or symbolsLinen buttonholes (fully automatic)
| prog | |||
| 18 | Δ Δ | -3+ | 5A |
Sewing thread: Embroidery and darning thread Generally buttonholes are sewn onto double material. In spite of this, a piece of paper should be placed underneath during sewing. First draw the spacings and the distance from the edge. This point always marks the beginning of sewing.
Ten buttonhole lengths are stored in the computer, from 7.0 to 16 mm.
On program selection a programmed buttonhole length of 14 mm and a buttonhole width of 4 mm appear in the display. Select the length of the buttonhole using stitch-length keys 7 (Fig. 1). The machine will automatically sew the selected buttonhole.
Before beginning the buttonhole pull the runner of the buttonhole foot fully to the front.
For the following buttonholes it is best to lift the fabric a little in order not to affect feeding. The sewing speed should always be the same.
Correcting a buttonhole
If a buttonhole does not turn out well, cancel it by pressing "pattern start" key 26 and sew it again.
Changing the buttonhole width
For every type of fabric, the corresponding buttonhole width can be determined up to 5.5 mm. For heavy materials select a wide buttonhole and for light materials a narrow one. With stitch width keys B, you determine the required buttonhole width. The length of the cut changes automatically (Fig. 5). A buttonhole width of 4 mm is stored.

text_image
1 8 40 14 3 22 prog 8 7 11 - + + - + - - + + - - - 5 display mem + mem - BIT memory 6 < 28 0 w ill > 38 < 26 26Adapting the buttonhole seam lengths with the balance keys
With "balance" keys 5 the left buttonhole sean length can be adapted to the right one. Sew a sample buttonhole first.
Example:
If the left seam is too short
(Fiq. 4a)
Select balance +1 to +3 with key, or more i required.
If the left seam is too long
(Fig. 4b)
Select balance -1 to -2 with key, or more i required.
- Sew the first buttonhole seam at the required length and
● the first bartack.
- Press balance keys 5, "+" or "-" , and adjust the second buttonhole seam length to the first one (Figs. 4a, 4b).
- Sew last bartack.
The change made in this way will be maintained for the following buttonholes.

text_image
19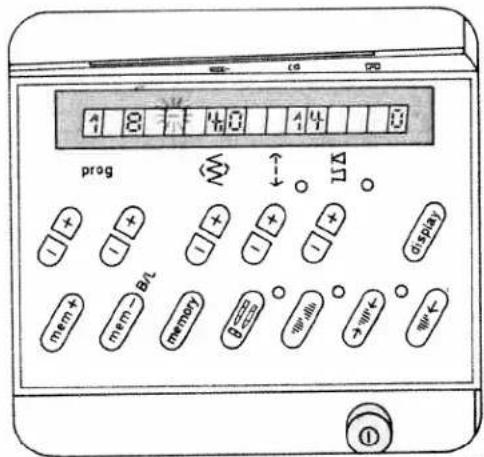
text_image
4 8 1 4 0 1 4 3 prog + - + - + - + - + - + - + - + - + - + - + - + - + - + - + - + - + - + - + - + - + - + - + - + - + - + - + - + - + - + - + - + - + - + - + - + - + - + - + - + - + - + - + - + - + - + - + - + - + - + - + -Determining the second bartack
semi-automatic)
you wish to determine the second bartack in a programmed buttonhole, press "tie-off/button-ole" key 19 (Fig. 2). A dash flashes in display 21 (Fig. 3) at the right of program 18. The machine now sews slowly just before the end of the second seam. When both seams are the same length, press key 19 again. The bartack is now sewn and ed off (Fig. 2).
his sewing sequence can also be applied for fully automatic buttonholes when the two buttonhole seams are not the same length anymore.
you wish to sew the next buttonhole fully automatically, press key 19 again. (Same sewing sequence as described on page 78). The flashing ash will then have disappeared.
ote:
you interrupt sewing at the reduced sewing speed by releasing the foot control, the machine will return to the normal speed when you start sewing again.

text_image
a + b -
natural_image
Two vertical striped rectangular shapes inside a rounded rectangle (no text or symbols)
natural_image
Close-up of a metallic screw and a circular mechanical component on a dark background (no text or symbols visible)
natural_image
Close-up of a dark circular object with a horizontal line and arrow, no visible text or symbols
text_image
1 2 3 4 5 6 7 8 9 10 22 prog 8 ↑ ↓ 11 - + + - - + - + + - - + - + + - - + - display T mem+ mem- memory 8 + - + - + - + - + - + - + - + - + - + - 26 ①
text_image
19Linen buttonholes (fully automatic)
| prog | |||
| 150 | -3+ | 5A |
Sewing thread: Embroidery and darning thread Mark the location of the buttonhole. Try out a buttonhole on a piece of waste material and choose the buttonhole size.
21 buttonhole lengths are stored in the computer, from 7,0 to 44 mm.
On program selection a programmed buttonhole length of 22 mm and a buttonhole width of 4.5 mm appear in the display.
Select the length of the buttonhole using stitch-length keys 7 (Fig. 1). The machine will automatically sew the selected buttonhole.
Before beginning the buttonhole pull the runner of the buttonhole foot fully to the front.
Changing the buttonhole width
For every type of fabric, the corresponding buttonhole width can be determined up to 5.5 mm. For heavy materials select a wide buttonhole and for light materials a narrow one. With stitch width keys 8, you determine the required buttonhole width. The length of the cut changes automatically (Fig. 5). A buttonhole width of 4.5 mm is stored.
Correcting a buttonhole
If a buttonhole does not turn out well, cancel it by pressing "pattern start" key 26 and sew it again.
Adapting the buttonhole seam lengths with the balance keys
With "balance" keys 5 the left buttonhole seam length can be adapted to the right one.
Sew a sample buttonhole first.
Example:
If the left seam is too short
(Fig. 4a)
Select balance +1 to +3 with key, or more if required.
If the left seam is too long
(Fig. 4b)
Select balance -1 to -2 with key, or more if required.
- Sew the first buttonhole seam at the required length and
● the first bartack.
- Press balance keys 5, "+" or "-" , and adjust the second buttonhole seam length to the first one (Figs. 4a, 4b).
● Sew last bartack.
The change made in this way will be maintained for the following buttonholes.
For programmable linen buttonholes see page 82.
text_image
150 45 22 0 prog ΔI + - + - + - + - + - + - + - + - + - + - + - + - + - + - + - + - + - + - + - + - + - + - + - + - + - + - + - + - + - + - + - + - + - + - + - + - + - + - + - + - + - + - + - + - + - + - + - + - + - + - + -
text_image
a + b - 43
Determining the second bartack
semi-automatic)
you wish to determine the second bartack in a rogrammed buttonhole, press "tie-off/button- ole" key 19 (Fig. 2). A dash flashes in display 21 Fig. 3) at the right of program 150. The machine ow sews slowly just before the end of the second eam. When both seams are the same length, ress key 19 again. The second bartack is now ewn and tied off.
his sewing sequence can also be applied for fully utomatic buttonholes when the two buttonhole earns are not the same length anymore.
you wish to sew the next buttonhole fully automatically, press key 19 again. (Same sewing sequence as described on page 80). The flashing ash will then have disappeared.
ote:
you interrupt sewing at the reduced sewing speed by releasing the foot control, the machine will return to the normal speed when you start sewing again.
R1

natural_image
Close-up of a circular mechanical part with a hole and a vertical rod, no visible text or symbols.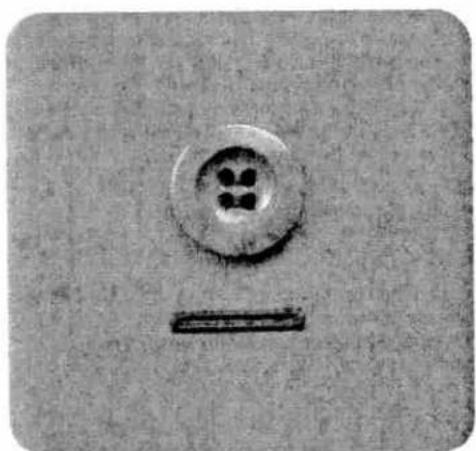
natural_image
Close-up of a circular button with four dots and a horizontal bar, no visible text or symbols.
natural_image
Two grayscale images showing a circular button with a vertical line and a square button with four dots, both without any text or symbols.
natural_image
Two grayscale images showing a circular button with a vertical line and a square button with four dots, both without any text or symbols.
text_image
450 1 45 25 3 prog 22 8 7 11 mem + mem > mem? mem will → will ← ① 26
text_image
a b c 19Linen buttonhole, prog. 150, programmable
Determining your own buttonhole length and bartack
When you press right (+) program key (22) the buttonhole symbol appears at the right side of program 150 and both segments will flash (Fig. 1).
● Before beginning the buttonhole pull the runner of the buttonhole foot fully to the front.
- Sew the first buttonhole seam at the length required (Fig. 2a).
- Press "tie-off/buttonhole" key 19 (Fig. 2). Now, only the left upper segment of the buttonhole symbol is flashing (Fig. 3). The machine then automatically sews the first bartack and the return seam (Fig. 2b). Shortly before the end of the seam the machine sews slowly, stitch by stitch, in order to draw attention to the last bartack. One zigzag stitch before the end of the first buttonhole seam.
- Press key 19 again. The second bartack is now sewn and tied off (Fig. 2c). (Both segments of the buttonhole symbol are off, Fig. 4). Now the buttonhole is stored. Without having to actuate further keys, all following buttonholes can be sewn automatically.
Adjusting the density of buttonhole seams
With stitch-length keys 7 the buttonhole seams can be set more densely or loosely.
The stored buttonhole density is 0.5 mm.
Make a sample buttonhole first.
Changing the buttonhole width
For every type of fabric, the corresponding buttonhole width can be determined up to 5.5 mm. For heavy materials select a wide buttonhole and for light materials a narrow one. With stitch width keys 8, you determine the required buttonhole width. The length of the cut changes automatically (Fig. 6). A buttonhole width of 4.5 mm is stored.
Adapting the density of the left buttonhole seam to the right one
With "balance" keys 5 the left buttonhole seam can be adapted to the right one.
- Sew the first buttonhole seam at the required length and the first bartack.
- Press "balance" keys 5, "+" or "-" , and adapt the second buttonhole seam to the first one (Fig. 5).
- Press "pattern start" key 26. Afterwards program the buttonhole as described on this page. Make a sample buttonhole before you sew buttonholes on a garment.
Note: If the buttonhole seams of the stored buttonhole do not coincide, make another correction at "balance" keys 5.
Adapting the seam lengths of stored button-holes with the balance keys, see page 80.
text_image
150 0 4.5 prog 3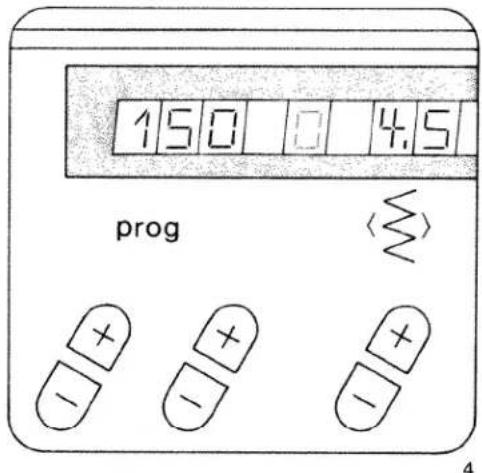
text_image
150 0 4.5 prog, adapting the buttonhole length
garment may consist of different numbers of bric plies, e.g. the buttonhole strip may consist three plies and the collar stand of six - owing to folded seam edge. In this case it is necessary program the buttonhole for varying numbers of bric plies in order to maintain the same buttonhole length as on the three-ply buttonhole strip.
ote:
or sewing buttonholes on knitted or very thin materials we recommend sewing foot No. 1 A and dual feed.
the buttonhole seams do not coincide, press e-off/buttonhole" key 19 to switch from fully automatic to semi-automatic during sewing; one segment flashes (Fig. 3) and you can determine our own second bartack.
hen key 19 is pressed again the buttonhole pro- ammed before is sewn fully automatically and e segment does not flash anymore.
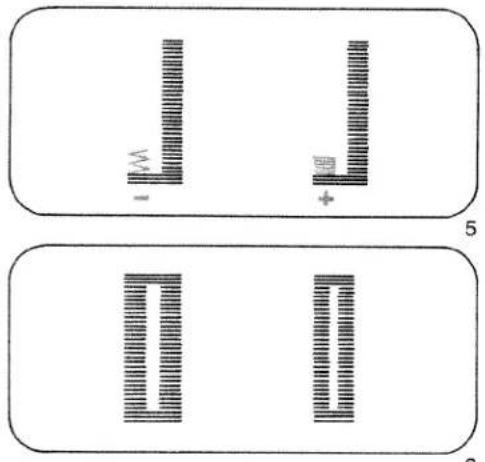
text_image
Diagram showing two rectangular panels with vertical bars and symbols, labeled with numbers 1 and 5, likely representing a scientific or technical schematic.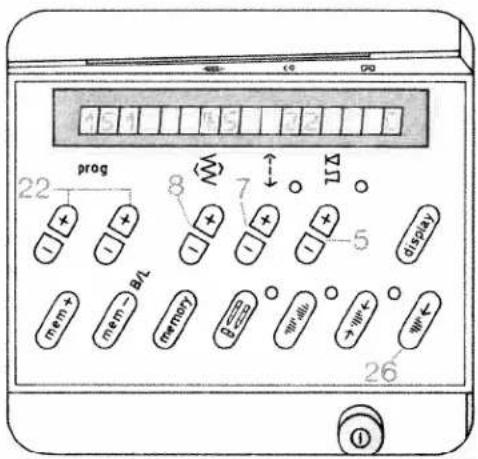
text_image
151 15 12 22 prog 8 7 Δ11 + - + - + - + - + - + - + - + - + - + - + - + - + - + - + - + - + - + - + - + - + - + - + - + - + - + - + - + - + - + - + - + - + - + - + - + - + - + - + - + - + - + - + - + - + - + - + - + - + - + - + -1
Stretch buttonhole, reinforced
| prog | |||
| 151 | Δ Δ | -3+ | 5A |
Sewing thread: embroidery and darning thread 18 buttonhole lengths are stored in the computer, from 10 to 44 mm.
On program selection, a programmed buttonhole length of 22 mm and a buttonhole width of 4.5 mm appear in the display. Select the required length of buttonhole with stitch-length keys 7 (Fig. 1). The machine automatically sews the selected buttonhole.
Before beginning the buttonhole pull the runner of the buttonhole foot fully to the front.
Correcting a buttonhole
If a buttonhole does not turn out well, cancel it with "pattern start" key 26 and sew it again.
Changing the buttonhole width
For every type of fabric the corresponding button-hole width can be determined up to 5.5 mm. For heavy fabrics select a wide buttonhole and for light fabrics a narrow one. At stitch width keys 8 you can set the required width. The length of the cut changes automatically (Fig. 5).
The stored buttonhole width is 4.5 mm.
natural_image
Two identical black wavy lines on a textured gray background, no text or symbols present.2
Adapting the buttonhole seam length with the balance keys
With "balance" keys 5 the left buttonhole seam length can be adapted to the right one. Make a sample buttonhole first.
Example:
If the left seam is too short
(Fig. 4a)
Select balance +1 to +3 with key 5, or more if required.
If the left seam is too long
(Fig. 4b)
Select balance -1 to -2 with key 5, or more if required.
- Sew the first buttonhole seam at the length required and
● the first bartack. - Press balance keys 5, "+" or "-" , and adjust the second buttonhole seam length to the first one (Figs. 4a, 4b).
- Sew last bartack.
The change made in this way will be maintained for the following buttonholes.
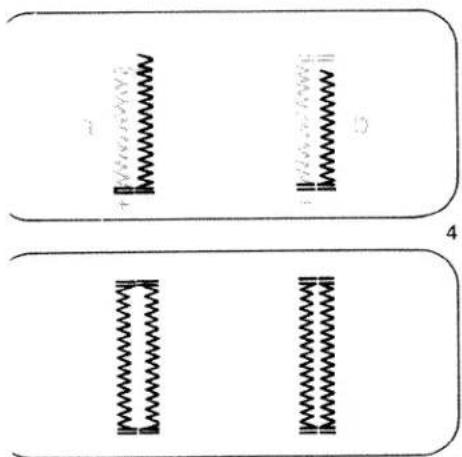
text_image
Diagram showing two labeled panels with spring-like symbols and a numbered label '4' at the bottom.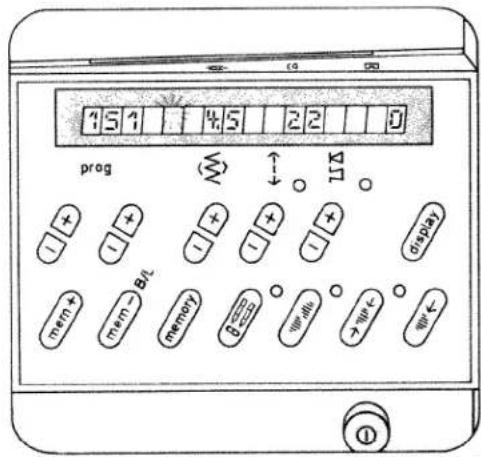
text_image
454 45 22 0 prog + - + - + - + - + - + - + - + - + - + - + - + - + - + - + - + - + - + - + - + - + - + - + - + - + - + - + - + - + - + - + - + - + - + - + - + - + - + - + - + - + - + - + - + - + - + - + - + - + - + - + -etermining the second bartack
emi-automatic)
you wish to determine the second bartack in a ogrammed buttonhole, press "tie-off/button-ole" key 19 (Fig. 7). A dash then flashes in display
(Fig. 6) at the right side of program 151. The achine now sews slowly just before the end of a second seam. When both seams are the same length, press key 19 again. The bartack is now wn and tied off (Fig. 7).
his sewing sequence can also be applied for fully automatic buttonholes when the buttonhole arms are not the same length anymore.
you wish to sew the next buttonhole fully auto- atically again, press key 19. (Sewing sequence described on page 84). The flashing dash has en disappeared.
)te:
you interrupt sewing at the reduced sewing eed by releasing the foot control, the machine ll return to the normal speed when you start wing again.
be next page for programmable stretch button-les.
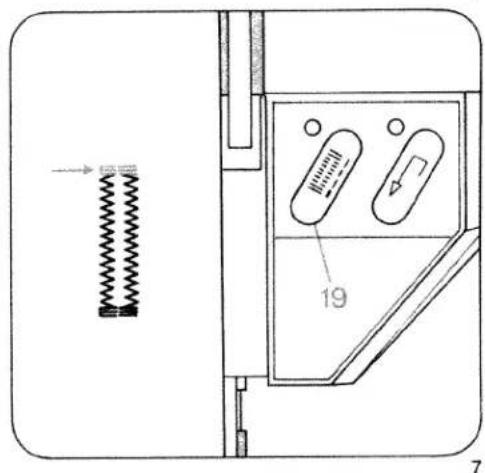
text_image
19 7
text_image
prog 22 BTL mem + mem - memory 6-0-0- 7- + - + - + - 5 displa) 26
text_image
a b c gStretch buttonhole, prog. 151 programmable
Determining your own buttonhole length and bartack
When you press right (+) program key (22) the buttonhole symbol appears at the right side of program 151 and both segments will flash (Fig. 1).
● Before beginning the buttonhole pull the runner of the buttonhole foot fully to the front.
- Sew the first buttonhole seam at the length required (Fig. 2a).
- Press "tie-off/buttonhole" key 19 (Fig. 2). Now, only the left upper segment of the buttonhole symbol is flashing (Fig. 3). The machine then automatically sews the first bartack and the return seam (Fig. 2b).
Shortly before the end of the seam the machine sews slowly stitch by stitch in order to draw attention to the last bartack. One zigzag stitch before the end of the first buttonhole seam.
- Press key 19 again. The second bartack is now sewn and tied off (Fig. 2c). (Both segments of the buttonhole symbol are off, Fig. 4).
Now the buttonhole is stored. Without having to actuate further keys, all following button-holes can be sewn automatically.
Changing the density of buttonhole seams
With stitch-length keys 7 the buttonhole seams can be set more densely or loosely.
The stored buttonhole density is 1 mm.
Make a sample buttonhole first.
Changing the buttonhole width
For every type of fabric, the corresponding buttonhole width can be determined up to 5.5 mm. For heavy materials select a wide buttonhole and for light materials a narrow one. With stitch width keys 8, you determine the required buttonhole width. The length of the cut changes automatically (Fig. 6). The stored buttonhole width is 4.5 mm.
Adapting the density of the left buttonhole seam to the right one
With "balance" keys 5 the left buttonhole seam can be adapted to the right one.
- Sew the first buttonhole seam at the required length and the first bartack.
- With "balance" keys 5, "+" or "-" adapt the second buttonhole seam to the first one (Fig. 5).
- Press "pattern start" key 26. Afterwards program the buttonhole as described on this page. Make a sample buttonhole before you sew buttonholes on a garment.
Note: If the seam lengths of the stored buttonhole do not coincide, make another correction at "balance" keys 5.
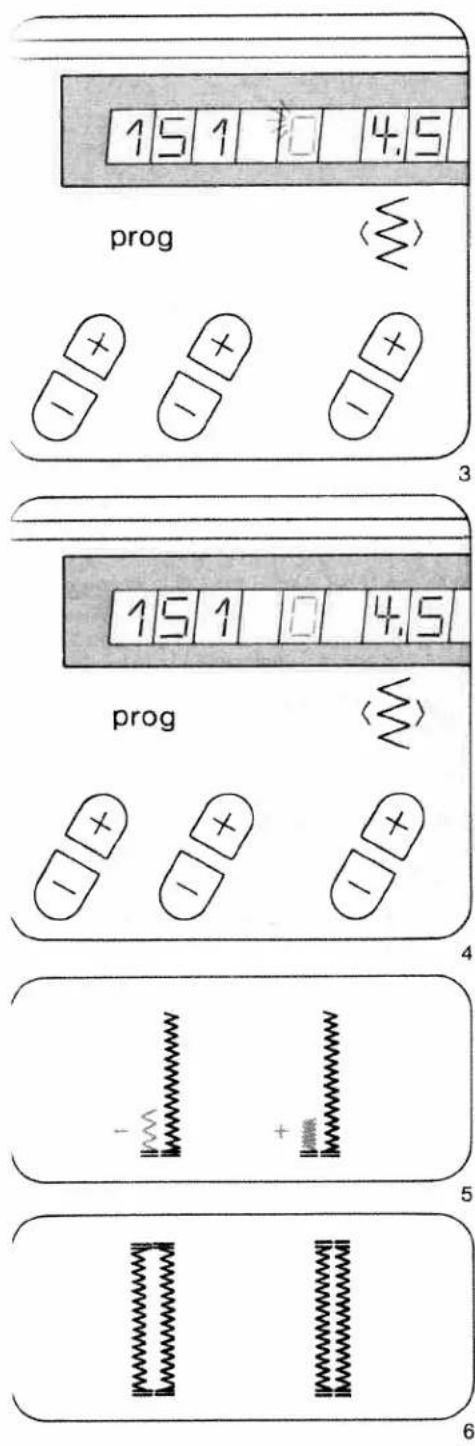
text_image
15 1 0 4.5 prog - + + - + - 15 1 0 4.5 prog - + + - + - 5 6Adapting the seam lengths of stored button-holes with the "balance" keys, see page 84.

text_image
152 50 3 7 22 prog 8 7 ↓ ΔT + - + - + - + - + - 5 display mem+ mem- BIT memory B###-# ... ... > > 26 ①
natural_image
Two black rectangular blocks with textured, patterned edges on a light gray background (no text or symbols)Stretch buttonhole (fully automatic)
| prog | |||
| 152 | Δ Δ | -3+ | 5A |
Sewing thread: embroidery and darning thread
18 buttonhole lengths are stored in the computer, from 10 to 44 mm.
On program selection, a programmed buttonhole length of 22 mm and a buttonhole width of 5 mm appear in the display. Select the required length of buttonhole with stitch-length keys 7 (Fig. 1). The machine automatically sews the selected buttonhole.
Before beginning the buttonhole pull the runner of the buttonhole foot fully to the front.
For the following buttonholes it is best to lift the fabric a little in order not to affect feeding. The sewing speed should always be the same.
Correcting a buttonhole
If a buttonhole does not turn out well, cancel it by pressing "pattern start" key 26 and sew it again.
Changing the buttonhole width
For every type of fabric, the corresponding buttonhole width can be determined up to 5.5 mm. For heavy materials select a wide buttonhole and for light materials a narrow one. With stitch width keys 8, you determine the required buttonhole width. The length of the cut changes automatically (Fig. 4). A buttonhole width of 5 mm is stored.
Adapting the buttonhole seam lengths with the balance keys
With "balance" keys 5 the left buttonhole sear length can be adapted to the right one. Sew a sample buttonhole first.
Example:
If the left seam is too short
(Fig. 3a)
Select balance +1 to +3 with key, or more required.
If the left seam is too long
(Fig. 3b)
Select balance -1 to -2 with key, or more required.
● Sew the first buttonhole seam at the length required and
● the first bartack.
- With balance keys 5, "+" or "-" , adjust the second buttonhole seam length to the first on (Figs. 3a, 3b)
● Sew last bartack.
The change made in this way will be maintained for the following buttonholes.

text_image
a + - D 3 4
text_image
152 90 22 0 prog B/L mem + mem - B/L memory 0 < img > mm ← ① 5Determining the second bartack
(semi-automatic)
If you wish to determine the second bartack in a fully automatic buttonhole, press "tie-off/button-hole" key 19 (Fig. 6). A dash flashes in display 21 (Fig. 5) at the right of program 152. The machine now sews slowly just before the end of the second seam. When both seams are the same length, press key 19 again. The bartack is now sewn and tied off (Fig. 6).
This sewing sequence can also be applied to fully automatic buttonholes when the two buttonhole seams are not the same length anymore.
If you wish to sew the next buttonhole fully automatically, press key 19 again. (Same sewing sequence as described on page 88). The flashing dash will then have disappeared.

text_image
Technical diagram of a device with labeled components and directional arrow, showing internal structure and numbered parts.Note:
If you interrupt sewing at the reduced sewing speed by releasing the foot control, the machine will return to the normal speed when you start sewing again.
For programmable stretch buttonholes see next page.
text_image
152 7 30 22 8 prog 22 8 7 15 + + - + + - + + - + + - + + - + + - + + - + + - + + mem + mem → B/L memory 0 < 0 > 5 display wir ← wir ← 26Stretch buttonhole, prog. 152, programmable
Determining your own buttonhole seam length and bartack
When you press right (+) program key (22) the buttonhole symbol appears at the right side of program 152 and both segments will flash (Fig. 1).
Before beginning the buttonhole pull the runner of the buttonhole foot fully to the front.
- Sew the first buttonhole seam at the length required (Fig. 2a).
- Press the "tie-off/buttonhole" key 19 (Fig. 2). Now, only the left upper segment of the buttonhole symbol is flashing (Fig. 3). The machine then automatically sews the first bartack and the return seam (Fig. 2b). Shortly before the end of seam the machine sews slowly, stitch by stitch, in order to draw attention to the last bartack. One zigzag stitch before the end of the first buttonhole seam press key 19 again. The second bartack is now sewn and tied off (Fig. 2c). (Both segments of the buttonhole symbol are off, Fig. 4).
- Now the buttonhole is stored. Without having to actuate further keys, all following button-holes can be sewn automatically.
Adjusting the density of buttonhole seams
With stitch-length keys 7 the buttonhole seams can be set more densely or loosely. The stored buttonhole density is 1.5 mm. Make a sample buttonhole first.

text_image
a b c O 19 2Changing the buttonhole width
For every type of fabric, the corresponding buttonhole width can be determined up to 5.5 mm. For heavy materials select a wide buttonhole and for light materials a narrow one. With stitch width keys 8, you determine the required buttonhole width. The length of the cut changes automatically (Fig. 6). A buttonhole width of 5 mm is now stored.
Adapting the density of the left buttonhole seam to the right
one
With "balance" keys 5 the left buttonhole seam can be adapted to the right one.
- Sew the first buttonhole seam at the required length and the first bartack.
- With "balance" keys 5, "+" or "-" adapt the second buttonhole seam to the first one (Fig. 5).
- Press "pattern start" key 26. Afterwards program the buttonhole as described on this page. Make a sample buttonhole before you sew buttonholes on a garment.
Note: If the buttonhole seams of the stored buttonhole do not coincide, make another correction at "balance" keys 5.
Adapting the seam lengths of stored button-holes with the balance keys, see page 88.

text_image
152 70 5.0 prog 3
text_image
152 0 5.0 prog 4dapting the buttonhole length
garment may consist of different numbers oforic plies, e.g. the buttonhole strip may consist three plies and the collar stand of six - owing to a folded seam edge. In this case it is necessary program the buttonhole for varying numbers oforic plies in order to maintain the same buttonhole length as on the three-ply buttonhole strip.
te:
or sewing buttonholes on knitted or very thin materials we recommend sewing foot No. 1 A and dual feed.
the buttonhole seams do not coincide, press e-off/buttonhole" key 19 to switch from fully tomatic to semi-automatic during sewing; one gment flashes (Fig. 3) and you can determine ur own second bartack.
hen key 19 is pressed again the buttonhole pro- ammed before is sewn fully automatically and e segment does not flash anymore.

natural_image
Diagram showing two vertical structures with different patterns, one labeled '+' and one '−', enclosed in a rounded rectangle (no text or symbols beyond labels)
natural_image
Two vertical rectangular panels with patterned borders, no text or symbols presentVarious buttonhole bartacks
Round buttonholes and eyelet buttonholes can be sewn with three different bartack designs.
| Round buttonhole with wedge tack | or | Eyelet buttonhole with wedge tack |
| Program 153 a | Program 154a | |
| This bartack design is very suitable for buttonholes in trousers and casual wear | This bartack design is very suitable for buttonholes in jeans, trousers and sportswear | |
| Round buttonhole with lengthwise tack | or | Eyelet buttonhole with lengthwise tack |
| Program 153b | Program 154b | |
| This tack design we recommend for buttonholes in outerwear in light materials | This tack design we recommend for buttonholes in outerwear, costumes, coats, etc. | |
| Round buttonhole with crosswise tack | or | Eyelet buttonhole with crosswise tack |
| Program 153c | Program 154c | |
| This reinforced tack design is very suitable for buttonholes in outerwear in harder materials | This reinforced tack design is very suitable for buttonholes in outerwear that has to withstand great wear. |

natural_image
Three ornamental circular frames with floral patterns, arranged in a loose cluster (no text or symbols)
text_image
453a 45 22 8 22 prog 8 7 ↓ ↑ ↓ mem + mem → mem + memory → Wi-Fi → Wi← Wi← 26Round buttonhole (fully automatic)
| prog | |||
| 153a, b, c | Δ Λ | -3+ | 5A |
Sewing thread: embroidery and darning thread Key: press "slow sewing"
For round buttonholes with different bartack designs please see table on page 92.
153a = buttonhole with wedge tack 153b = buttonhole with lengthwise tack 153c = buttonhole with crosswise tack
The buttonhole must be 3 mm longer than the diameter plus height of the button. The distance from the edge should be as wide as the button.
First mark the spacings and the distance from the edge, then mark the buttonhole towards the inside from this point. Sewing is always begun from the inside outwards.
19 buttonhole lengths are stored in the computer, from 7.0 to 40 mm.
On program selection a programmed buttonhole length of 22 mm and a buttonhole width of 4.5 mm appear in the display.
Select the length of the buttonhole using stitch-length keys 7 (Fig. 1). The machine will automatically sew the selected buttonhole.
Before beginning the buttonhole pull the runner of the buttonhole foot fully to the front.
Correcting a buttonhole
If a buttonhole does not turn out well, cancel it by pressing "pattern start" key 26 and sew it again.
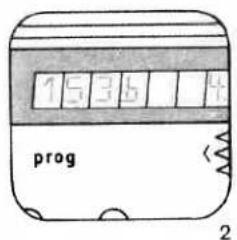
text_image
1536 prog 2
text_image
1 5 3 2 4 prog
text_image
153a 4. prog 4
natural_image
Diagram of a device with two oval components and a labeled section (19), no readable text or symbols present.Changing the buttonhole width
For every type of fabric, the corresponding buttonhole width can be determined up to 5.5 mm. For heavy materials select a wide buttonhole and for light materials a narrow one. With stitch width keys 8, you determine the required buttonhole width. The length of the cut changes automatically (Fig. 7). A buttonhole width of 4.5 mm is now stored.
Adapting the buttonhole seam lengths with the balance keys
With "balance" keys 5 the left buttonhole sean length can be adapted to the right one. Sew a sample buttonhole first.
Example: If the left seam is too short (Fig. 8d)
Select balance +1 to +3 with key, or more i required.
If the left seam is too long (Fig. 8e)
Select balance -1 to -2 with key, or more i required.

natural_image
Close-up of a dark, elongated object with serrated edges on a textured gray background (no visible text or symbols)
natural_image
Pure diagram of two spring-loaded components with starburst patterns, no text or symbols present
natural_image
Close-up of a black cylindrical object with textured surface (no visible text or symbols)
text_image
d e
natural_image
Close-up of a dark, elongated object with a textured surface (no visible text or symbols)6c
Determining the bartack
semi-automatic)
you wish to determine the bartack in a programmed buttonhole, press "tie-off/buttonhole" ey 19 (Fig. 5). A dash flashes in display 21 (Fig. 4) t the right of program 153a, b, or c. The machine ow sews slowly just before the end of the second eam. When both seams are the same length, press key 19 again. The bartack is now sewn and ed off.
you wish to sew the next buttonhole fully automatically, press key 19 again. (Same sewing sequence as described on page 94). The flashing flash will then have disappeared.
lote:
If you interrupt sewing at the reduced sewing speed by releasing the foot control, the machine will return to the normal speed when you start sewing again.
When you are working in the bartack determining node and have selected bartack design "a", you have to press the "tie-off/buttonhole" key when the second buttonhole seam has reached the second to last mark of the buttonhole foot. Observance of this always ensures correct finishing of the bartack.
Adapting the buttonhole seam lengths
A garment may consist of different numbers of fabric plies, e.g. the buttonhole strip may consist of three plies and the collar stand of six - owing to the folded seam edge. In this case it is necessary to program the buttonhole for varying numbers of fabric plies in order to maintain the same buttonhole length as on the three-ply buttonhole strip.
Note:
For sewing buttonholes on knitted or very thin materials we recommend sewing foot No. 1 A and dual feed.

text_image
22 prog 8 7 ↓ 5 display mem+ mem- B/2 memoy 0 0 0 0 0 0 0 0 0 0 0 0 0 0 0 0 0 0 0 0 0 0 0 0 0 0 0 0 0 0 0 0 0 0 0 0 0 0 0 0 0 0 0 0 0 0 0 0 26Eyelet buttonhole (fully automatic)
| prog | |||
| 154a, b, c | Δ Δ | -3+ | 5A |
Sewing thread: embroidery and darning thread Key: press "slow sewing"
Eyelet buttonholes with different tack designs: (see table on page 92).
154a = buttonhole with wedge tack
154b = buttonhole with lengthwise tack
154c = buttonhole with crosswise tack
Eyelet buttonholes are often sewn in outerwear, such as jackets, coats or casual wear. They should always be sewn with backing material underneath. In spite of this, a piece of paper should be placed underneath during sewing.
The buttonhole must be 3 mm longer than the diameter of the button, plus its height. The distance from the front edge should be equal to the buttonhole width. First mark the spacings and the distance from the edge. Mark the buttonhole length from this point to the inside. Sewing is then always begun from the inside to the outside towards the edge.
16 buttonholes are stored in the computer, from 10 to 40 mm
On program selection a programmed buttonhole length of 22 mm and a buttonhole width of 6 mm appear in the display. Select the length of the buttonhole using stitch-length keys 7 (Fig. 1). The machine will automatically sew the selected buttonhole.
Before beginning the buttonhole pull the runner of the buttonhole foot fully to the front.
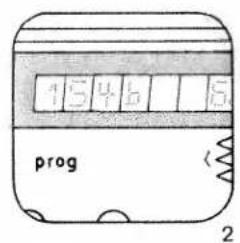
text_image
1546115 prog 2
text_image
prog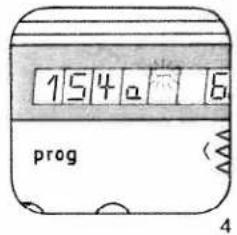
text_image
154 6 prog 4
text_image
19Correcting a buttonhole
If a buttonhole does not turn out well, cancel it by pressing "pattern start" key 26 and sew it again.
Changing the buttonhole width
For every type of fabric, the corresponding buttonhole width can be determined from 5.5 to 8.5 mm. For heavy materials select a wide buttonhole and for light materials a narrow one. With stitch width keys 8, you determine the required buttonhole width. The length of the cut changes automatically (Fig. 7).
A buttonhole width of 6 mm is now stored.
Adapting the buttonhole seam lengths with the balance keys
With "balance" keys 5 the left buttonhole seam length can be adapted to the right one. Sew a sample buttonhole first.
Example:
If the left seam is too short
(Fig. 8d)
Select balance +1 to +3 with key, or more if required.
If the left seam is too long
(Fig. 8e)
Select balance -1 to -2 with key, or more if required.

natural_image
Close-up of a black, elongated, oval-shaped object on a textured gray background (no text or symbols visible)a

natural_image
Close-up of a black, textured object resembling a stylized tool or device (no visible text or symbols)b
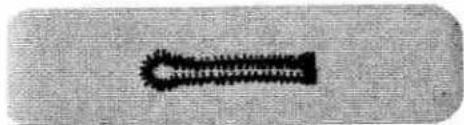
natural_image
Close-up of a textured fabric with a dark rectangular object on the left side (no visible text or symbols)6c
Determining the bartack
semi-automatic)
If you wish to determine the bartack in a programmed buttonhole, press "tie-off/buttonhole" key 19 (Fig. 5). A dash flashes in display 21 at the light side of program 154a, b, or c (Fig. 4). The machine now sews slowly just before the end of the second seam. When both seams are the same length, press key 19 again. The bartack is now sewn and tied off.
If you wish to sew the next buttonhole fully automatically, press key 19 again. (Sewing sequence is described on page 96). The flashing dash will then have disappeared.
vote:
If you interrupt sewing at the reduced sewing speed by releasing the foot control, the machine will return to the normal speed when you start sewing again.
When you are working in the bartack determining node and have selected bartack design "a", you have to press the "tie-off/buttonhole" key when he second buttonhole seam has reached the second to last mark of the buttonhole foot. Observance of this always ensures correct finishing of the bartack.

natural_image
Simple line drawing of two abstract shapes resembling stylized arrows or arrows, no text or symbols present.7
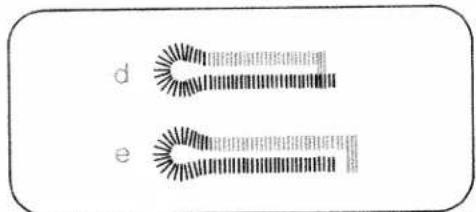
text_image
d e8
Adapting the buttonhole seam length
A garment may consist of different numbers of fabric plies, e.g. the buttonhole strip may consist of three plies and the collar stand of six - owing to the folded seam edge. In this case it is necessary to program the buttonhole for varying numbers of fabric plies in order to maintain the same buttonhole length as on the three-ply buttonhole strip.
Note:
For sewing buttonholes on knitted or very thin materials we recommend sewing foot No. 1 A and dual feed.

natural_image
Mechanical device with labeled parts A and B, showing internal components without any readable text or symbols.
natural_image
Close-up of a white knuckle-shaped object on a textured gray background (no text or symbols visible)1
Buttonhole with gimp thread
In the case of elastic materials, it is possible that the buttonholes extend. Therefore, the button-hole strip should be reinforced with interlining material. In order to retain the shape of the button-hole, use gimp thread if possible. Place the gimp thread over the back ridge "A", pull taut and jam it into front ridge "B" to the left and right (Fig. 1). (Pull runner fully to the front).
The buttonhole sequence is the same as without gimp thread. After completing the buttonhole pull on the left gimp thread (Fig. 2) until the loop is covered up by the bar. This is where the button will be located later.
On elastic materials pull the gimp threads through to the reverse side with a needle and tie them off. On normal fabrics the gimp threads can be trimmed immediately behind the last bartack.
Eyelet buttonhole with gimp thread
Suitable threads: bead yarn No. 8, or thick sewing thread
- Move runner slightly to the rear.
- Jam the gimp thread into the left of ridge "A" (Fig. 3) and pull to the front under the button hole runner.
- Place it over the front ridge "B" and jam it to the right and left (Fig. 4).
- Pull it to the rear again and jam it into the right of ridge "A" (Fig. 5).
● Place the fabric underneath the sewing foot, - pull the buttonhole runner fully to the front and lower the sewing foot.
- Before you start sewing press "slow sewing" key 16 (Fig. 6).
- Sew the first buttonhole seam.
- When the machine starts sewing slowly (at the beginning of the curve), take the gimp thread from the left of ridge "A".
- pull down the thread from ridge "B" by means of a needle and pull it to the rear until a loop appears in needle plate cutout "C" of the buttonhole runner (Fig. 7).
- Sew the curve and - when the machine has again reached its normal speed -
- pull the thread taut and finish sewing the buttonhole. To prevent the gimp threads from showing at the end of the bartack, pull them taut and cut them off.
Round buttonholes with gimp threads are sewn in exactly the same way.
Note:
The thicker the gimp thread you use, the wider the buttonhole seams must be selected to correspond with the thread.
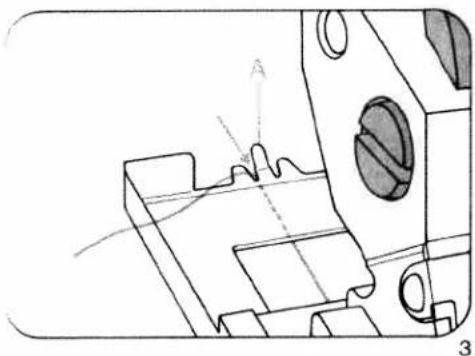
natural_image
Technical drawing of a mechanical component with no visible text or symbols
text_image
Technical diagram of a mechanical assembly with labeled component C and directional arrow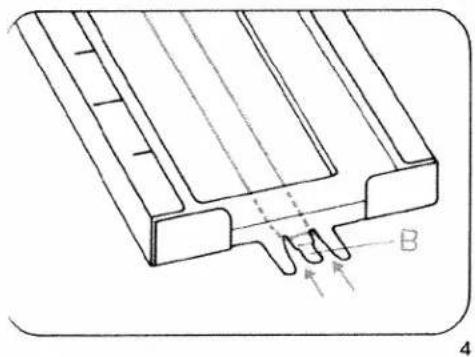
natural_image
Technical line drawing of a mechanical component with labeled points A and B (no text or symbols beyond labels)
natural_image
Close-up of a thin, elongated object against a dark textured background (no visible text or symbols)
natural_image
Technical line drawing of a mechanical component with no visible text or symbols
text_image
16 6
natural_image
Simple line drawing of a tool interacting with a striped surface (no text or symbols)
natural_image
Mechanical sewing machine needle stitching a circular base on a textured floor (no text or symbols visible)Cutting open buttonholes
When you cut open a buttonhole it is important not to damage the bartacks. To avoid this, insert the seam ripper about 1 mm away from the bartack. Now carefully cut the buttonhole open to the middle, then repeat this from the bartack at the other end (Fig. 1). If you have no punch pliers to cut the eyelet, simply cut around the curve with a pair of pointed scissors.
Sewing on buttons
| prog | |||
| 19, 11 | -2 | 2A |
Feed dog: dropped (prog 11)
Place the button on the mark made on the fabric beforehand and push the fabric with the button under the sewing foot holder or sewing foot (Fig. 2). Turn the hand wheel towards you and adjust the position of the button so that the needle stitches into its left hole. Lower the presser bar lifter. Turn the hand wheel and check to make sure the needle enters the right hole of the button. Now sew the button on.
After tieing off the needle stops in its top position.
Sewing on buttons with stems
Place a match stick or a toothpick on the butto between the two holes and sew the button on a described (Fig. 3). Afterwards remove the match stick, pull the button and fabric apart, then wra the stems with the threaded needle- and bobbi thread and knot the thread ends (Figs. 4, 5).
To ensure that flat or small buttons do not sli away during sewing we recommend using th normal sewing foot and switching off the top feed For some buttons it is necessary to change th zigzag width. Finer settings for sewing on these buttons can be made using program 11.
In this case place the button in the way that the needle in right stitch position sticks into the right hole of the button exactly.
Afterwards adjust zigzag width so that the needl sticks into the left hole of the button exactly.

natural_image
Pure vertical black line on white background, no text or symbols present
natural_image
Black-and-white photo of a woman in vintage clothing, standing indoors near a window (no visible text or symbols)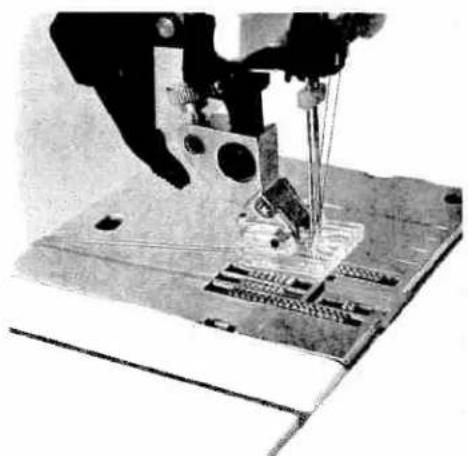
natural_image
Close-up of a sewing machine needle stitching fabric (no visible text or symbols)Cording
Cording foot + cording tongue (special accessory)
| prog | |||
| 00 | Δ Δ | -5+ | cording foot |
Needle: Double needle
Cording seams are especially popular as a decoration on underwear, dresses, blouses, etc.
Cording sewn with the cording tongue
Cording is always sewn with two needle threads. Place a spool of thread on each spool pin and secure it in position with the corresponding unwinding disc. Place one thread to the right, and the other to the left of disc "C" (Fig. 3a). Then continue threading the machine, as usual. Do not twist the two threads. Thread each thread separately through thread guides and the needle eye (Fig. 3b).
The thread tension should be adapted to every fabric type. The tighter the tension, the more prominent the cording appears. Fig. 1 shows how the cording tongue is engaged.
For thin materials, the cording foot with 7 grooves, the small cording tongue and a double needle of up to 2 mm are used.
For thicker materials, the cording foot with 5 grooves, the large cording tongue and the necessary double needle are used.
If you wish to sew several cordings beside each another, use the grooves of the cording foot (Fig. 2). For greater distances we recommend using the edge guide.

natural_image
Close-up of a sewing machine needle stitching fabric (no visible text or symbols)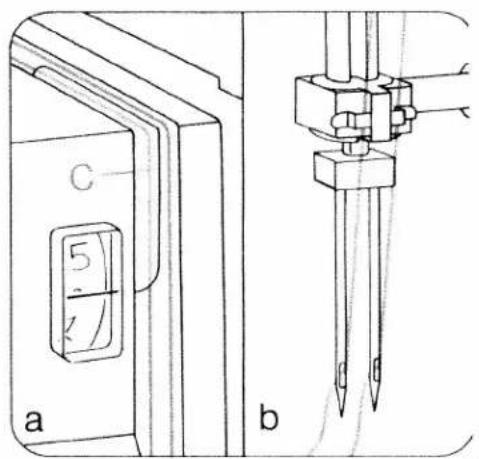
text_image
C 5 a bCording sewn with gimp thread
| prog | |||
| 00 | -5+ | cording foot |
'eedle: Double needle
lift the needle plate off and pass the gimp thread through the round hole "A". After that re-insert the needle plate. Notch "B" is the entry groove (Fig. 1). Place the roll of gimp thread in front of the machine.
lace the beginning of the gimp thread together with needle thread and bottom threads to the rear under the cording foot. Move the detachable work support against the machine. Choose a imp thread of the same colour as the outer fabric.
↓arrow pleats
| prog | |||
| 00 | 3-5 | 0A |
leedle: 130/705-H, size 80
on the first fold line and stitch at the required width. Prepare and stitch the further fold groups in the same manner (Fig. 3).
or stitching down wider pleats we recommend sing the edge guide. Adjust the edge guide to the required width. Guide the material so that fold uns along the edge guide. (See page 106).
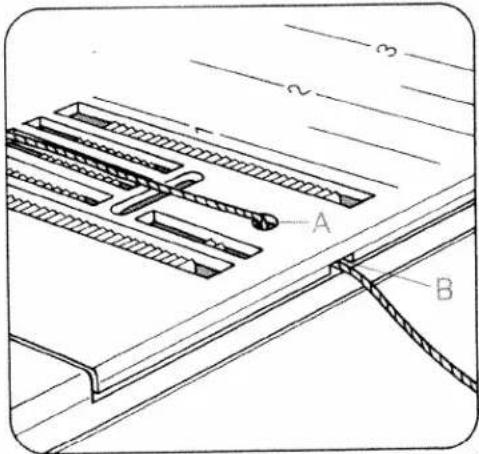
text_image
A B1
natural_image
Close-up of a textured surface with vertical striations and a dark horizontal band (no text or symbols)2
natural_image
Close-up of a textured surface with horizontal parallel lines, no visible text or symbols3
103

natural_image
Close-up of a sewing machine stitching fabric with visible stitching details (no text or symbols)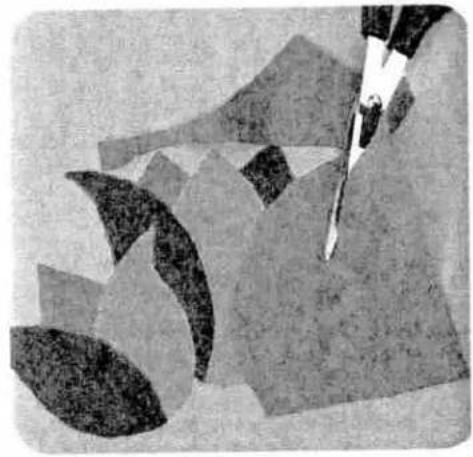
natural_image
Abstract illustration of scissors cutting paper sheets (no text or symbols)1
Appliqué work
For this, two worksteps are required.
First workstep
| prog | |||
| 10 | Δ Δ | 2-3 | 2A |
Stitch width: 0.5 mm
Stitch length: 1.0 mm
Second workstep
| prog | |||
| 10 | 2-3 | 2A |
Stitch width: 1.5 mm
Stitch length: 0.2 to 0.25 mm (for cording)
Trace the design on the reverse side of the fabric, lay the appliqué on the face side and baste it on, making sure it matches the fabric grain.
First workstep
Sew along the outline of the design on the wrong side (Fig. 1). Trim the excess material close to the contour seam (Fig. 2).
Second workstep
Sew over the raw edges of the appliqué with nar row, dense zigzag (purl) stitches (Fig. 3).
To make the edge of the appliqué more prominent, insert a filler cord in the seam.
Ready-made fabric appliqués can be applied much more easily. Before you cut out the design iron on a fusible backing. This reinforces the material, makes it easier to cut, and prevents fraying Baste on the design. Place three layers of tissue paper under the fabric and sew along the edges of the design with dense, narrow zigzag stitches. In this way, a good-looking seam is produced.
- For cording we recommend the appliqué foo (special accessory)

natural_image
Abstract black-and-white floral pattern with layered petals and a central oval shape (no text or symbols)3

natural_image
Cartoon illustration of a smiling character with curly hair and outfit, standing against a dark background (no text or symbols)105
natural_image
Line drawing of a sewing machine on a grid background (no text or symbols)
natural_image
Black-and-white illustration of a decorative pillow with floral patterns on a textured background (no text or symbols)Quilting
| prog | |||
| 00 | 3-5 | 0A,4 |
- Edge guide
Seams stitched on articles filled with cotton wool or some other soft padding have a very prominent effect. For this purpose, batting, foam plastic or flannel is placed between the top ply and a lightweight bottom ply (Fig. 3).
To keep the fabric plies and the padding in place, baste them together with rows of long basting stitches spread over the whole area.
Squares and diamonds can be sewn on the straight or on the bias of the material. On fabrics with regular patterns stitch between the patterns or around them.
The spacing between seams can be set as required by adjusting the guide accordingly.
Trace the seam line for the first seam on the fabric or guide the quilting gauge along the straight-cut fabric edge.
When you have completed the first seam move the work sideways so that the quilting gauge runs along the first seam or the traced seam line. For each subsequent seam, guide the gauge finger along the preceding line of stitching (Fig. 1).
Quilting can also be done advantageously on patterned materials.
Preparation of the material is the same as described above. Just sew around the contours and you have a very beautiful piece of embroidery (Fig. 2).

natural_image
Ancient stone carving depicting a stylized human figure (no readable text or symbols)
natural_image
Black-and-white illustration of a laurel wreath made of leaves, no text or symbols present
natural_image
Close-up of a pair of scissors cutting through a metal sheet (no text or symbols visible)
natural_image
Decorative border design with floral lace border and textured background (no text or symbols)Inserting lace
For this work, two worksteps are required
First workstep
| prog | |||
| oo | -3+ | 0A |
Second workstep
| prog | |||
| 10 | -3+ | 0A |
First workstep
The lace insert is first secured to the right material side and is sewn on at a narrow margin with straight stitch.
The material underneath the lace is opened at the middle and ironed to one side.
Second workstep
Sew over the lace edge on both sides with small, dense zigzag-stitches from the face side. Cut off the remaining material on the reverse side (Fig. 1).
Attaching lace
For this work, two worksteps are required
First workstep
| prog | |||
| 10 | -3+ | OA |
Stitch width: 5.0 mm
Stitch length: 1.5 mm
Second workstep
| prog | |||
| 00 | -3+ | OA |
Stitch length: 3.0 mm
First workstep
Serge the raw edge with zigzag stitches (Fig. 2)
Second workstep
Baste and sew the lace onto the right materia side (Fig. 3).
Secure the corners with stitches.
natural_image
Decorative corner frame with ornate lace border and floral motifs (no text or symbols)3

natural_image
Black-and-white illustration of a traditional Chinese scroll with floral and geometric patterns (no text or symbols)109
Embroidery stitch program
natural_image
Black-and-white illustration of a flowering branch with multiple blossoms and leaves (no text or symbols)Multi-colour embroidery
These multi-colour embroidery possibilities set no limits to your imagination. Carried out with great devotion to detail, colour and decorative effects, multicolour embroidery gives your clothes the stamp of your personality.
The following pages are intended as an inspiration for ornamentation of dresses, blouses and other garments with embroidery motifs made on your Pfaff Creative.
Transfer the pattern onto the face side of the fabric with tracing paper.
Always place two sheets of tissue paper under the material before you start sewing.
| prog | |||
| 06 62 65 127 | -3+ | 2A |
Sewing thread: Embroidery or darning thread Motif 1 is made up of the patterns enumerated above.
First workstep: stems
Program 06
● Change the stitch length to 2.5 mm.
- Follow the traced lines with a program 06 seam.
Second workstep: leaves
- Program 62
● Change the stitch width to 4.0 mm.
● Change the pattern length to 25. - Push the "single pattern" key.
- Needle in down position.
- Sew the leaf slightly curved, starting at the stem. Leave the needle down in the fabric, turn the fabric through 180° and sew the pattern backwards. In this way, all leaves can be sewn larger or smaller.
Third workstep: half flower
Program 65
● Stitch width: 5.0 mm.
● Pattern length: 20.
- Push the "single pattern" key.
● The tip of the pattern should contact the stem
Fourth workstep: flowers
● Program: 62
● Stitch width: 4.5 mm.
● Pattern length: 20.
● Push the "single pattern" key.
- Sew the petals, including those of the ha flower.
Fifth workstep: flower centre (dot)
● Program: 127
● Stitch width: 5.0 mm.
● Push the "single pattern" key.
● Sew the flower centres (dots).
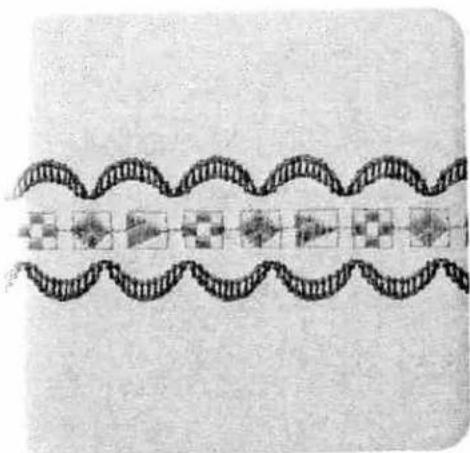
natural_image
Abstract wavy line pattern with repeating geometric motifs (no text or symbols)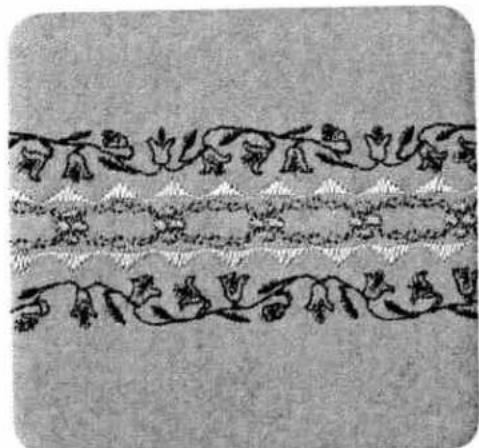
natural_image
Decorative black-and-white pattern with floral and geometric motifs (no text or symbols)1
Border 1 consists of the following programs:
Centre motif: 104
Side motif: 53
First workstep: centre motif
Select program 104.
- Sew the programmed stitch pattern.
Second workstep: side motifs
Select program 53.
- Sew the programmed stitch pattern along both sides of the centre motif. The second side motif can be sewn without turning the fabric by pushing the "pattern mirror" key.
Border 2 consists of the following programs
130 65 141
First workstep: centre motif
- Select program 130.
- Sew the programmed stitch pattern.
Second workstep:
- Select program 65 and change zigzag width to 4–5 mm.
- Sew the programmed stitch pattern along both sides of the centre motif.
Third workstep: side motifs
● Enter program 141.
- Sew the programmed stitch pattern on both sides along the previously sewn motif.
natural_image
Black-and-white sketch of a traditional East Asian-style garment with floral embroidery, placed on dark textured background (no text or symbols)
natural_image
Black-and-white sketch of a flowering branch with leaves, no text or symbols present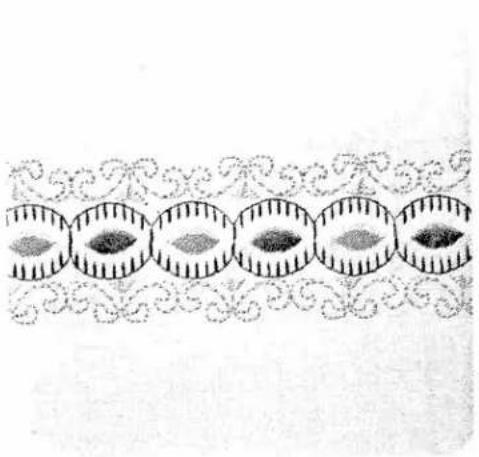
natural_image
Decorative border with repeating oval patterns and diamond eyes, no text or symbols present3

natural_image
Five black starburst patterns arranged in a row on a textured gray background (no text or symbols)4
Border 3 consists of the following
programs:
Centre motif: 39
Side motif: 92
Single motif: 62
First workstep: centre motif
- Select program 39.
- Needle in down position.
- Sew the programmed stitch pattern. Shortly before you reach the end of the seam, press the "tie-off/buttonhole" key. At the end of the pattern the needle remains down in the material. Turn the fabric through 180°.
- Sew the opposite half back in the other direction, making sure the patterns match.
Second workstep: side motifs
- Select program 92.
- Sew the programmed stitch pattern along both sides of the centre motif. The second side motif can be sewn without turning the fabric by pushing the "pattern mirror" key.
Third workstep: centre dots
- Select program 62.
● Change the stitch width to 6 mm.
● Change the pattern length to 10 mm. - Push the "single pattern" key.
- Sew the selected program (single pattern) in the centre motifs.
Heart motif (Fig. 4)
- Select program 119.
● Change stitch length to 0.25 mm. - Reduce pattern length to 9.0 mm
- Press key 27 "single pattern".
- Press key 15 "needle down"
- Sew the heart motif and, with the needle down turn the material so that the tip of the heart is exactly in line with the red mark on the left side of the sewing foot.
Repeat this process until the motif is closed.

natural_image
Black-and-white photo of a textured surface with repeating star patterns and decorative border (no text or symbols)
natural_image
Black-and-white aerial photo of a dense forest with scattered white figures (no visible text or symbols)
natural_image
Black rectangular object with a central abstract pattern resembling a stylized flower or seed pod (no text or symbols)Fancy seams in leather
| prog | |||
| Optional | -3+ | 2A |
Thread: embroidering/darning thread
Needle: 130/705 H-LR, size 80
Since leather is a pliable material, an underlay of double-folded paper or light non-woven material (e. g. vylene) should always be used. Do not set the stitches too close, because leather splits easily and cracks in leather show up on the finished work.
Flat leather seams
Overlap the raw edges by about 1/2 cm. Top-stitch both sides at a narrow margin using straight stitch. Instead of straight stitch it is also possible to use zigzag stitch or some other program to over-stitch the double seam. This method of sewing is commonly used for joining parts of different colours (e.g. patchwork).

text_image
A B1473-1473CD
PART C

natural_image
Close-up of a sewing machine needle stitching fabric, no visible text or symbols
natural_image
Three parallel rows of circular objects on a white background, no text or symbols visibleShell edging
| prog | |||
| 14 16 | Δ Λ | -5+ | 2A |
Stitch length: 1.5 mm
Key: 28 pattern mirror in program 16
Shell edging provides nice trimming, especially on sheer, soft materials. Fold over the fabric edge once along the line which is to be decorated. During sewing, the blindstitches draw in the fabric edge at regular intervals, thus producing a shell-edge effect. The stronger the needle thread tension, the more the fabric edge is indented (Fig. 2). Adding a wool thread in a different colour not only reinforces the edge, but also makes an attractive contrast trimming.
Place the material under the needle so that it protrudes far enough to allow the wide zigzag blind-stitch to pass over its edge (Fig. 1).
natural_image
Close-up of a textured surface with repeating geometric patterns and a wavy base (no text or symbols)
natural_image
Black-and-white illustration of a butterfly with visible wing venation (no text or symbols)
natural_image
Black-and-white close-up of a flower with visible petals and stamens, set against a textured background (no text or symbols)Fringe seams
Butterfly
Two worksteps are required for this:
First workstep (wings)
| prog | |||
| 10 | 2-3 | Fringe foot |
Stitch width: 1.5
Stitch length: 0.5
Fringe foot: (special accessory)
Second workstep (body)
| prog | |||
| 62 | 2-3 | 2A |
Pattern length: as required
Key: single pattern
First workstep (wings)
- First sew a fringe seam as a trial, using a piece of scrap material. During sewing, try different stitch lengths until you find the one most suitable. The wings are best sewn in circular seams, working from the outside inwards.
Second workstep (body)
- Sew the body as shown in the illustration (Fig. 1).
Suggestions: (not described)
Flower
| prog | |||
| 06 62 63 | -3+ | 2A |
Mark out the pattern of the flower on the fabric. Sew the petals, stem and leaves as shown in the illustration. Now fill in the seed capsule using a fringe seam, working spirally from the outside inwards (Fig. 2).

natural_image
Close-up of a textured surface with horizontal black and white stripes (no text or symbols)3
The image contains no legible text or symbols. According to the guidelines, non-text figures and diagrams must be ignored. Therefore, the correct OCR output is an empty string.
1

2
Hem-stitching
As the illustrations show, hem-stitching can be used in different ways, both as an edge reinforcement and as a fancy effect on table linen or clothing articles.
"Ladder" hem-stitching
| prog | |||
| 165 | Δ Δ | -3+ | 2A |
Stitch width: 2 mm
Thread: embroidering/darning thread
Needle: normal needle, size 80
In the same way as in hand hem-stitching, threads are drawn out of the fabric at the required width. Stitch the fabric edges with the program described above.
The needle must penetrate very closely to the edge where the threads were drawn. When sewing the second seam, ensure that the cross threads are always tied off parallel (Fig. 1).
Hem-stitching turned-in hem edges
| prog | |||
| 165 | Δ Δ | -3+ | 2A |
Stitch width: 2 mm
Thread: embroidering/darning thread
To hem-stitch a turned-in hem edge (Fig. 4), first draw the number of fabric threads for the required hem-stitch width. Place the hem breakline against the edge where the threads are drawn and tack it in place. Now secure the hem using the above-mentioned program.
natural_image
Close-up of a textured fabric with a dotted line above it, no visible text or symbols
natural_image
Close-up of a textured fabric or carpet with grid patterns and a dark border (no visible text or symbols)
natural_image
Close-up of a textured fabric with a horizontal dotted line and small dark dots, no visible text or symbols.lem-stitching with wing needle
| prog | |||
| 164 166 | Δ Δ | -3+ | 2A |
head: embroidering/darning thread
leedle: wing needle
or this work, four threads are drawn, five threads re left in, then a further four threads drawn. Over-ew the five threads left in the fabric using pro-ram 164 or 166 (Figs. 2 and 3).
lem-stitching as an edge finish made with the ring needle
| prog | |||
| 164 | -3+ | 0A |
'head: embroidering/darning thread 'needle: wing needle
This edge finish is used on very light and thin abrics. It is particularly well suited for valances, lounces and frills or for finishing edges. For this sewing job no threads must be drawn out of the fabric. Sew at sewing-foot width along the fabric edge, using the edge of the sewing foot as a guide. Then carefully trim the excess material along the hemstitching with a small scissors (Fig. 5).
Linen embroidery
Plain embroidery on linen is a widely known and popular ornamentation. The patterns illustrated can be made on your Pfaff Creative in a very short time by combining all kinds of stitches.
Transfer the pattern illustrated onto the face side of the fabric either by ironing it on or with the aid of tracing paper.
Always place two sheets of tissue paper under the fabric during embroidering.
| prog | |||
| 06 10 117 156 | Δ Δ | -3+ | 2A |
Thread: embroidering/darning thread
The motif in Fig. 1 is made up of the above-mentioned programs.
First workstep: scallops
- Program: 10
● Stitch width: 2.0 mm
● Stitch length: 0.3 mm - Needle in down position
● Stitch along the above-mentioned outlines.
Second workstep: stems
Program: 06
● Stitch length: 2.5 mm - Follow the above-mentioned stem lines with a program 06 seam.
Third workstep: leaves
- Program: 117
● Stitch width: 5.0 mm - Press the "single pattern" key.
- Sew the leaf motifs slightly curved, starting at the stem.
Fourth workstep: eyelets
Program: 156
- Press the "single pattern" key.
- Mark the position of the eyelet, then sew it in the middle of the scallop.

natural_image
Line drawing of a sewing machine with handle and base components (no text or symbols)
natural_image
Abstract pattern of black dots arranged in a grid on a textured gray background (no text or symbols)2
Eyelet embroidery with the eyeletting plate (special accessory)
| prog | |||
| 11 | — | 2-3 | removed |
Key: 28 pattern mirror
Feed dog: dropped
Presser bar lifter: in darning position (page 74)
Sewing thread: embroidering and darning thread
Fitting the eyeletting plate: Insert the eyeletting plate so that the catches engage in the three narrow slots and push it towards the back (Fig. 1), the middle tooth will lock it. Then push the needle plate to the front so that it snaps in.
Place the traced fabric tautly in an embroidering hoop. Cut one or two fibres in the fabric and push the fabric over the pin. The fabric must be tight against the pin all round. Draw the bobbin thread up and hold it for the first few stitches (placing presser bar lifter in darning position beforehand). Stitch around the cut with zigzag stitches, turning the hoop slowly clockwise at the same time. Finally, secure the stitches with a few straight stitches at the edge (Fig. 2).

natural_image
Microscopic view of cellular structures with labeled number 1 (no text or symbols beyond label)
text_image
4 5
natural_image
Microscopic view of cellular structures with labeled number 3 (no text or symbols beyond label)
natural_image
Microscopic view of a cellular or tissue structure with two dark circular features labeled '2' (no text or symbols beyond the number)Ring of flowers
The illustration above shows a pretty ring of flowers. For this type of embroidery it is very important to guide the embroidery hoop evenly and steadily. Here are the instructions for sewing the different motifs:
Motif 1: 2 worksteps
1st workstep:program 111 reverse pattern stitch width 2 mm 2nd workstep:program 37 stitch width 6 mm
Motif 2: 2 worksteps
1st workstep:program 111 reverse pattern stitch width 2 mm 2nd workstep:program 63 stitch width 6 mm
Motif 3: 2 worksteps
1st workstep:program 111 reverse pattern stitch width: 2 mm 2nd workstep:program 61 stitch width 6 mm
Motif 4: 3 worksteps
1st workstep:program 111 reverse pattern stitch width 2 mm 2nd workstep:program 10 stitch width 1.5 mm 3rd workstep:program 11 stitch width 2 mm
Motif 5: 2 worksteps
1st workstep:program 11 reverse pattern stitch width 2 mm 2nd workstep:program 17 stitch width 6 mm
natural_image
Black-and-white illustration of a circular arrangement of flowers and leaves on a textured background (no text or symbols)
text_image
A Newing monograms with ie embroidery foot
| prog | |||
| 10 12 62 | -3+ | 2A |
read: embroidering/darning thread
ear-lined block letters or monograms made by combining different ornamental patterns can be wn without any difficulty. Trace the monogram paper first, then transfer it to the fabric. Having one so, follow the outlines with the programmed tch pattern chosen.
- sew monograms on terry cloth, pin the paper pattern onto the fabric and sew along the traced itlines with a narrow zigzag stitch. Then sew er the contours of the monogram with the pro-ammed stitch pattern chosen.

natural_image
Abstract wavy line drawing with no text or symbols
text_image
EF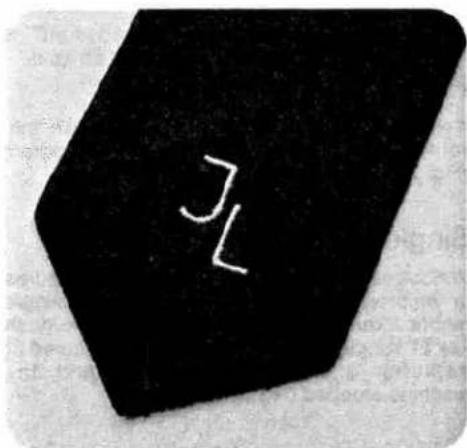
text_image
JL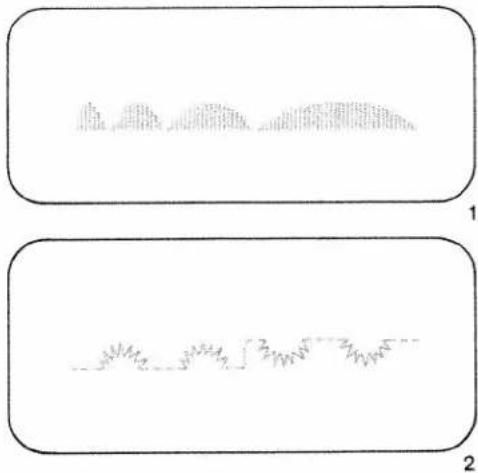
natural_image
Two rectangular panels with abstract line patterns, no text or symbols present
natural_image
Abstract white floral or leaf-like pattern on dark textured background, no text or symbols presentLengthening a pattern at the same stitch density
Fancy stitch programs can be varied in length at the same stitch density when the display at key 5+ lights up. The pattern length selector is set between 6,0 an 90 mm.
The maximum pattern length at short stitch lengths is limited (Fig. 1).
The table below shows the minimum and maximum pattern lengths according to different stitch lengths:
| Stitch length in mm | Pattern length in mm | |
| from | to | |
| 0.2 | 6.0 | 50 |
| 0.25 | 6.0 | 60 |
| 0.3 | 6.0 | 70 |
| 0.35 | 6.0 | 80 |
| 0.4 onwards | 6.0 | 90 |
Pattern mirroring
If you wish to sew a program in reverse, push "mirror key" 28 in addition to the selected program (Fig. 2).
Single patterns
Various sewing work such as monogram, figures or embroidery motifs can be sewn as single motifs. After entering the selected program, push key 27 "single pattern". The pattern is secured at beginning and end automatically and the machine stopped (Fig. 3).
Programming the computer with embroidery stitches and monograms
Compiling various programs from 00 to 177
● The Creative computer has 16 M-memories, from M 0 to M 15.
- Per one pattern sequence - M - up to 84 programs can be entered in one M-memory.
● Distributed over 16 M-memories, up to 484 programs can be stored.
- If no M-memory is pre-selected, all programs are stored in memory M 0.
- When the machine is switched off, the stored programs are maintained.
- When the capacity of the memories is used up, no further programs are accepted.
- The M-combinations no longer required can than be cancelled with the "correct" key.

text_image
prog BRL mem+ mem- memory G=0.02 + - - - - - - - - + - + - + - + - + - + - + - + - + - + - + - + - + - + - + - + - + - + - + - + - + - + - + - + - + - + - + - + - + - + - + - + - + - + - + - + - + - + - + - + - + - + - + - + - + - + - + - + - + - + - + - + - + - + - + - + - + - + - + - + -
text_image
prog 22 21 mem + mem - BL memory B-000 0 000 0 000 0 000 4.3 ①To enter the programs from 00 to 177 first select a free M-memory.
How to select an M-memory:
Fig. 1
- Select the M-memory (with the left prog key 22).
Fig. 2
- Select the number of a free M-memory (using the right button prog 22).
● The M-memory is free when the display (21) to the right of the memory number is empty. - Push key mem + 48. The memory is now ready to accept a program.
Fig. 3
- Select the programs (00 to 177) with the keys (prog 22) and enter them one after the other in the computer by pressing the key mem + 48 for program entry. The program numbers appear in display 21.
- When you have entered all program combinations, the machine is ready to sew.
Single patterns
If you wish to sew only one pattern sequence or just one pattern, press the key
- "Single pattern" 27. The machine then sews until the program is concluded, secures the stitches, and stops automatically.
Mirroring a pattern
If you wish to sew a pattern in reverse, press the following keys in addition to the selected program:
● "Pattern mirror" key 28
- "mem+" key 48
The pattern mirroring function is indicated by the symbol following the number in the computer. If you wish to mirror an entire pattern combination, press the following keys after programming:
● "memory" key 30 and
● "pattern mirror" key 28 (Fig. 4).

text_image
prog 115 21 mem+ mem- BTL memory d=0.000 will →will ← display 18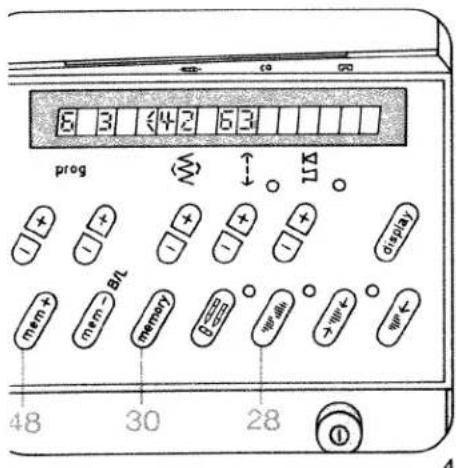
text_image
8 3 4 2 6 3 prog 15% + - + - + - + - + - + - + - + - + - + - + - + - + - + - + - + - + - + - + - + - + - + - + - + - + - + - + - + - + - + - + - + - + - + - + - + - + - + - + - + - + - + - + - + - + - + - + - + - + - + - + -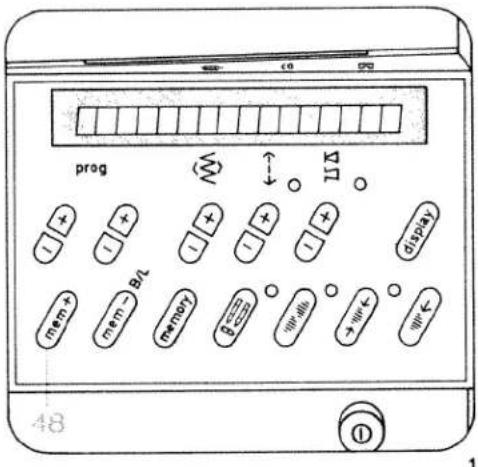
text_image
prog mem + mem → B/L mem02 15 Ω display mem ← → ← ← 48 ①
text_image
6 2 3.0 18 prog ↑↓ ↑↓ - + + - + + - + + - + + - + + - + + - + + - + + - + + - + + - + + - + + - + + - + + - + + - + + - + + - + + - + + - + + - + + - + + - + + - + + - + + - + + - + + - + + - + + - + + - + + - + + - + + - + + -mm+ - BnI mvm - BnI memory B = -2 + -2 + -2 + -2 + -2 + -2 + -2 + -2 + -2 + -2 + -2 + -2 + -2 + -2 + -2 + -2 + -2 + -2 + -2 + -2 + -2 + -2 + -2 + -2 + -2 + -2 + - + - + - + - + - + - + - + - + - + - + - + - + - + - + - + - + - + - + - + - + - + - + - + - + - + - + - + - + - + - + - + - + - + - + - + - + - + - + - + - + - + - + - + - + - + - + - + - + - + - + ~ + ~ + ~ + ~ + ~ + ~ + ~ + ~ + ~ + ~ + ~ + ~ + ~ + ~ + ~ + ~ + ~ + ~ + ~ + ~ + ~ + ~ + ~ + ~ + ~ + ~ + ~ + ~ + ~ + ~ + ~ + ~ + ~ + ~ + ~ + ~ + ~ + ~ + ~ + ~ + ~ + ~ + ~ + ~ + ~ + ~ + ~ + ~ + ~ + ~ + ~All programs and program combinations can be altered to any length or width and entered in the computer.
Changing the
stitch length
Before the last program entry for a fancy pattern the stitch length has to be determined (using key 7) (Fig. 2).
This change of stitch length also determines the length of stitches in the programs entered before (Fig. 1).
Example:
- Select a free M-memory
- Push "mem+" key 48
- Select program 41
- Push "mem+" key 48
- Select program 62
- Push "mem+" key 48
- Select program 41
- Push "mem+" key 48
- Select program 62 and change the stitch length to 0.25 (using key 7), Fig. 2.
- Push "mem+" key 48
- Now the whole program with the altered stitch length is inside the computer.
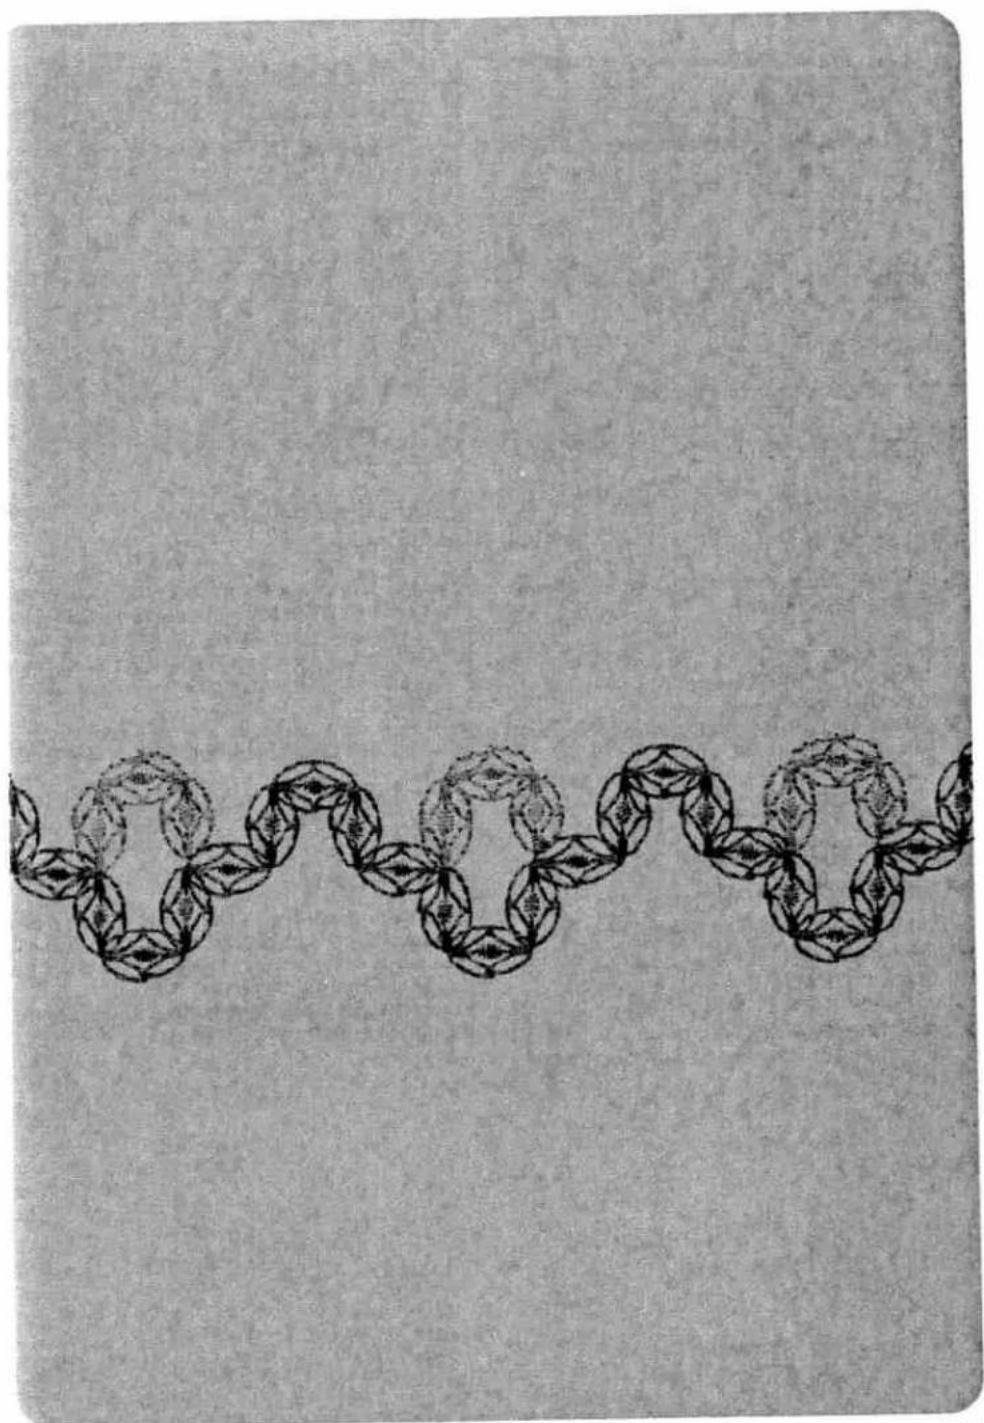
natural_image
Abstract geometric pattern composed of interlocking rings (no text or symbols)
text_image
6 2 45 035 18 prog 8 ↓ ↑Δ + - + - + - + - + - display mem → Bt mem → memory 6 7 8 9 → ← ← 48 ①Changing the stitch width
The stitch width can be changed before each program entry (using key 8).
Example: prog 62
Stitch width: 4.5 mm
- Push "mem+" key 48
The pattern is now stored with the changed data. (Fig. 1 + 1a).
Changing the pattern length at the same stitch density
The pattern length can be changed before each program entry (using key 5).
Example: prog 62 Pattern length: 25
- Push "mem+" key 48
The pattern is now stored with the changed data (Fig. 2 + 2a).

text_image
6 2 90 035 prog + - + - + - + - + - + - + - + - + - + - + - + - + - + - + - + - + - + - + - + - + - + - + - + - + - + - + - + - + - + - + - + - + - + - + - + - + - + - + - + - + - + - + - + - + - + - + - + - + - + - + -Checking the stored programs
If you wish to check the stored program and you have entered more than four patterns, twelve letters or figures push key 6 "display". The stored program runs through in display 21. You can stop the program run by pushing key 6 a second time (Fig. 3).
When sewing is started, or when memory key 30 is pressed, the display returns to the beginning again.
Correcting stored programs
If you have entered a pattern wrongly during programming, you can cancel the entries up to the mistake by using "mem - " key 47. Then enter the rest of the program again.
Programs that are no longer required are cancelled by pushing: "mem-" key.
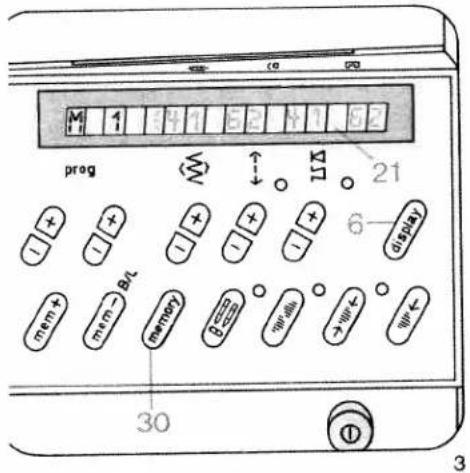
text_image
prog BCL memory 30 6 display 21 3
text_image
1a 2a
natural_image
Decorative pattern with repeating cloud-like motifs and central floral motifs (no text or symbols)1
Ornamental borders
You can give free rein to your creativity by combining various patterns. The ornamental borders illustrated on this page and described below are intended as a stimulus to your imagination.
- For sewing ornamental borders we recommend using the fancy-stitch sewing foot No. 2A.
- Place tissue paper under the fabric. This will help you to achieve better sewing results.
Border 1 consists of the following
programs:
Middle motif: 129, 156, 46, 156
Side motif: 51
First workstep, centre motif
● Before programming select a free M-memory
- Push "mem+" key 48
- Select program 129
- Push "mem+" key 48
- Select program 156
● Change stitch width to 9 mm
- Push "mem+" key 48
- Select program 46
- Push "mem+" key 48
- Select program 156
● Change stitch width to 9 mm
- Push "mem+" key 48
● Sew the stored program
Second workstep, outer motif
- Select program 51
- Sew the selected program along either side of the middle motif. The second side can be sewn without turning the fabric by simply pushing mirroring key 28.

text_image
Ancient Chinese manuscript with vertical column of inscribed text and a row of elephant figures, likely from a historical or literary manuscript.
natural_image
Black-and-white sketch of a line with silhouetted animals on grass and grassy ground (no text or symbols)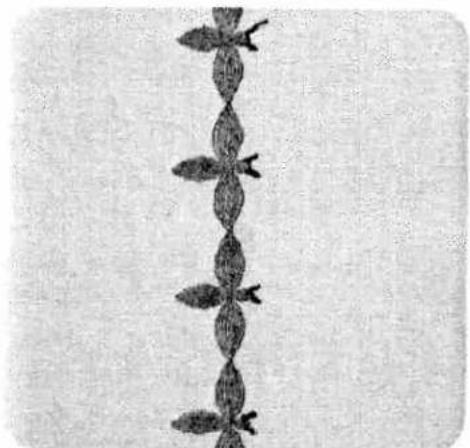
natural_image
Black-and-white illustration of a vertical chain of fish-like shapes, no text or symbols present
natural_image
Decorative floral border with scalloped edges and circular motifs (no text or symbols)Border 2 consists of the
following programs:
140, 62 and 00
2
First workstep
- Select program 140
● Sew the selected program.
Second workstep
- Select program 62
● Press single pattern key 27.
● Sew the body starting from the middle
- Finally, sew the feelers with short straight stitches, program 00.
Border 3 consists of the following programs:
60, 45, and 156
First workstep
● Before programming, select a free M-memory
- Push "mem+" key 48
- Select program 60 and change the pattern length to 20
- Push "mem+" key 48
● Push "pattern start" key 26
● Program 60, pattern length 14
- Push "mem+" key 48
- Push "pattern start" key 26
● Program 60, change pattern length to 10
- Push "mem+" key 48
- Push "pattern start" key 26
● Program 60, pattern length 14
- Push "mem+" key 48
- Push "pattern start" key 26
● Program 60, change pattern length to 20
- Push "mem+" key 48
● Push key 27 "single pattern"
● Push key 15 "needle down"
- Sew the entered program along the traced lines.
Second workstep, middle motif
- Select program 45
Sew the pattern at sewing-foot width along the fancy seam sewn before.
Third workstep, final motif
- Select program (156)
Sew the pattern along the fancy seam sewn before.
3
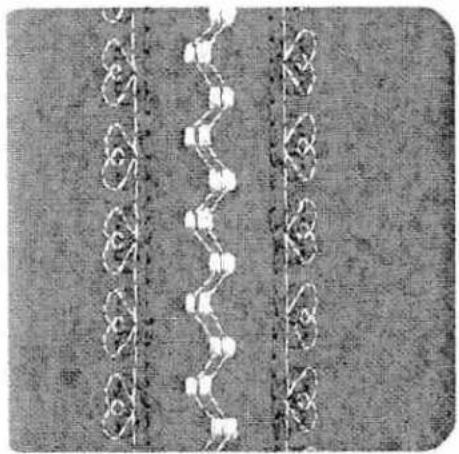
natural_image
Aerial view of a road network with multiple lanes and vehicles (no visible text or symbols)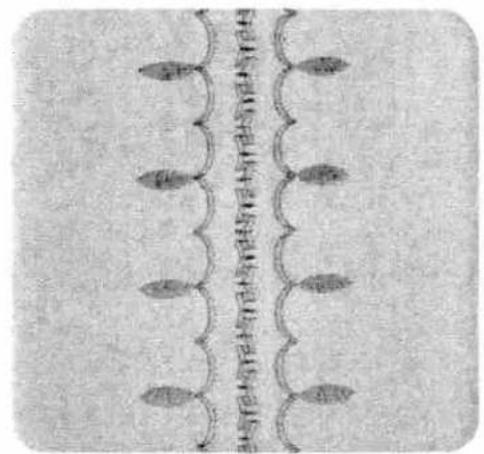
natural_image
Pure diagram of a vertical line with curved lines and leaf-like shapes, no text or symbols presentewing fancy seams with the twin needle optional
| prog | |||
| Optional | 3-5 | 2A |
needle: twin needle, 1.6 mm gauge
y: "twin needle"
ry attractive fancy patterns can be sewn with e twin needle. The illustrations above show me of the dainty patterns that can be produced th a little imagination.
ess "twin needle" key 29; this limits the stitch dth and prevents the needle from striking the edle plate.
r sewing, use two reels of thread of different lours. Place one reel on each reel pin and cure it in position with the corresponding winding disc. Place one thread to the right and other to the left of disc "C". Continue threading in the usual way, threading each needle separately. See threading instructions on page 102.
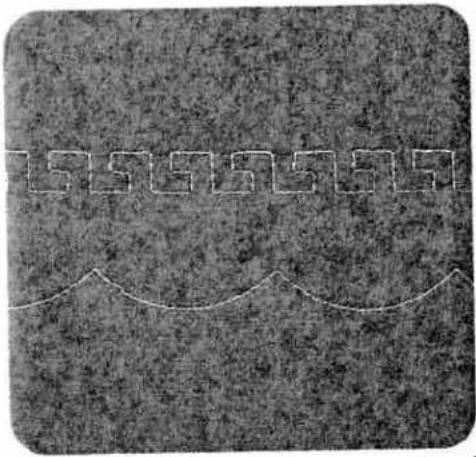
natural_image
Abstract textured surface with wavy white lines and a central geometric pattern (no text or symbols)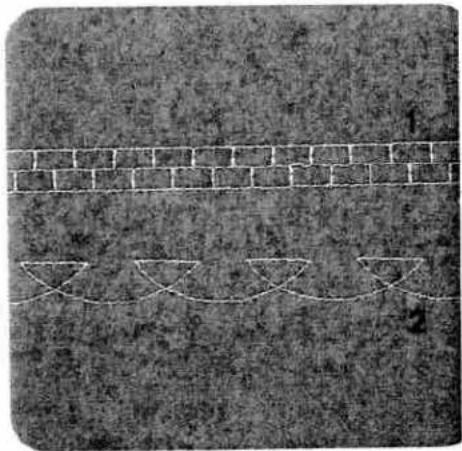
natural_image
Grainy outdoor scene with brick wall and curved line patterns (no text or symbols)1
Pattern variations made with the programmed reverse straight stitches
You will find numerous ways of expressing your creative talent by varying or rearranging the reverse straight-stitch patterns in programs 02 and 03 or the pattern combinations derived from them.
The pattern variations illustrated and explained below are intended as an inspiration.
| prog | |||
| see below | -3+ | 2A |
Stitch combination 1 consists of the following programs: 102, 02 (Fig. 2)
● Before programming, select a free M-memory
- Push "mem+" key 48
- Select the programs:
1 × 10², 2 × 02
and enter them in the computer by pressing "mem+" key 48 each time
● Sew the stored program.
Stitch combination 2 consists of the following programs: 38, 03 (Fig. 2)
- Before programming, select a free M-memory - Push "m e m+" key 48
- Select the programs:
1 × 38, 6 × 03
and enter them in the computer by pushing "mem+" key 48 each time
● Sew the stored program.
A B C D E F G H I J K L M N O P Q R S T U V W X Y Z
012 345
6789
abc defghijelm nongrustureusey
ABCDEFGHIJKLMNOPQRSTUVWXYZ
MNOPQRSTU
VWXYZ
0123456789
21
AQUAEQCE
ABCDEFGHIJKLMNOPQRSTUVWXYZ
KLMNOPQR
STUVW
XYZ
0123456789

AEOE a?
A'O'U
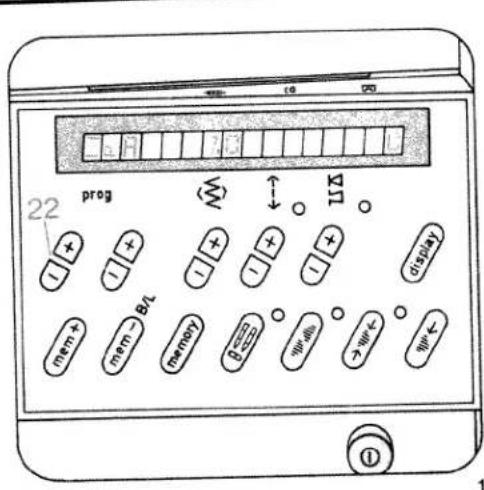
text_image
22 prog BTL mem+ mem- memory 10 10 10 10 10 10 10 10 10 10 10 10 10 10 10 10 10 10 10 10 10 10 10 10 10 10 10 10 10 10 10 10 10 10
text_image
prog 22 48 mem+ mem- BIT memory θ=0.000 Wt+0.000 Wt+1.000 Wt-1.000 display ① ②Programming letters and numbers
With the Pfaff Creative you can choose between four different types of lettering and three different number characters. For sewing monograms and texts we recommend to press "slow sewing" key 16.
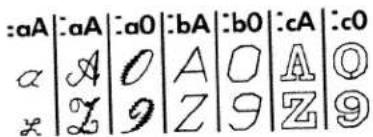
text_image
:aA |:aA |:a0 |:bA |:b0 |:cA |:c0 α |A |O |A |O |A |O ₂ |Z |9 |Z |9 |Z |9These are used for enhancing or marking linen and outerwear. It is also possible to compile texts and write them on material. 484 letters and numbers can be distributed over 16 M-memories, with a maximum of 84 in one M-memory.
| prog | |||
| 二aA二bA二cA | Δ Δ | -3+ | 2A |
Thread: embroidering thread
Hand writing sewn in capitals and small letters —gA—gA
Example: Pfaff
● Before programming select a free M-memory
- Press "mem+" key 48
- Press key 22 left - and select = a A (Fig. 1)
- Press key 22 right + and select the following letter (Fig. 2): - P and enter it in the computer by
- Pressing "mem+" key 48
- Press "prog" key 22 left - and select =aA
- Press "prog" key 22 right + and select following letters (Fig. 3): faff
- Press "mem+" key 48 to enter them in the computer each time
- Press "single pattern" key 27
● Sew the stored pattern (Fig. 4).

text_image
prog 22 15A display mem+ mem- memory 27 48 3
text_image
Daff
text_image
prog mem → BL memory ← ↓ Δ Δ display → ← ← ①
text_image
prog 11 display mem + mem → B/L memory P-100 C-C 27 + - + - + - + - + - + - + - + - + - + - + - + - + - + - + -Sewing script capital letters
二aA
Example: D F
● Before programming, select a free M-memory
- Push "mem+" key 48
- At key: "Prog." 22 (left, minus) select A (Fig. 1)
- At key: "Prog." 22 (right, plus) enter the letters (Fig. 2) aD aF
by pressing "mem+" key 48 each time
● Push "single pattern" key 27
● Sew the stored program (Fig. 3).
Sewing numbers 2a0
- Select program = a 0
Program numbers as described under letters.
When these letters and figures are sewn at the max. width of 9 mm, key 16 "slow sewing" must be pressed.
Fig. 4 shows special characters of the alphabet that can be sewn, too.

text_image
DF
text_image
AOU AEOO - - ?! a o u d a o - - ?! b é è ^~
text_image
22 prog BIL memory ΔΣ ΔΣ display mem+ mem- BIL memory ΔΣ → BIL → BIL ← ① 1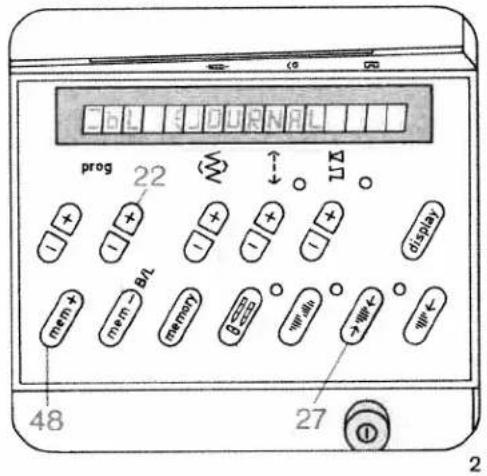
text_image
COL JOURNAL prog 22 ↑↓ 11 - + + - + + - - + - - + - - + - - + - - + - - + - - + - - + - - + - - + - - + - - + - - + - - + - - + - - + - - + - - + - - + - - + - - + - - + - - + - - + - - + - - + - - + - - + - - + - - + - - + - - + - - + - - + - mem + mem → BL memory → w all → w ← w ← 48 27 ① 2Sewing block letters 二bA
:example: J O U R N A L
Before programming, select a free M-memory
, Push "mem+" key 48
At key "Prog." 22 (left, minus) select =bA Fig.1)
At key "Prog." 22 (right, plus) enter the letters: (Fig. 2)
__J__O__U__R__N__A__L
by pressing "mem+" key 48 each time
- Push "single pattern" key 27
- Sew the stored program (Fig. 3).
Sewing numbers 二b0
Select program = b0
Program numbers as described under letters.

text_image
JOURNAL3

text_image
AIR MAIL4
141
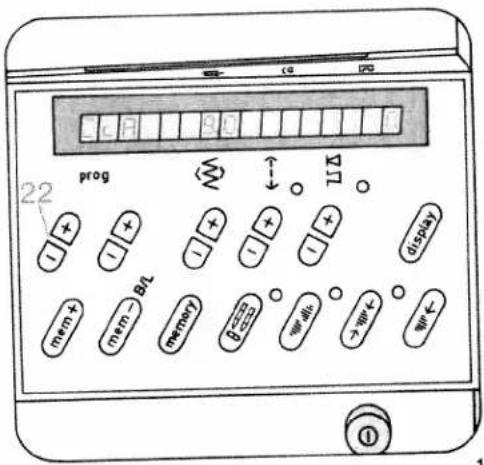
text_image
22 prog mem + mem - Ret mem + ... will > will < will <
text_image
prog 22 mem + mem - BL memory b = 00 > m = < m = < m = < m = < m = < m = < m = < m = < m = < m = < m = < m = < m = < m = < m = < m = < m = < m = < m = < m = < m = < m = < m = < m = < m = < m = < m = < m = < m = < m = < m = < m = < m = < m = < n = 48 27Outline alphabet, sewing outlined letters \_cA
Example: PARIS
● Before programming, select a free M-memory
- Push "mem+" key 48
- At key "prog." 22 (left, minus) select _cA (Fig. 1)
- At key "Prog." 22 (right, plus) enter the letters: (Fig. 2)
__P __A __R __I __S by pressing "m e m+" key 48 each time
- Push "single pattern" key 27
● Sew the stored program (Fig. 3).
Sewing numbers = c0
- Select program = c0
Program numbers as described under letters.
PARIS
BERLIN
ROM

text_image
ST
text_image
PEAEE ALL OVER THE WORLD SEWING MACHINES
text_image
22 prog mem + mem - BLT memory β = 0.0000000000000000000000000000000000000000000000000000000000000000000000000000000000000000
text_image
prog 22 48 ① ②Sewing dots
A dot can be used as a full stop or period, for example between the letters of an abbreviation. A dot can be selected together with every letter or figure in italics.
Example: H. P
● Before programming, select a free M-memory
- Push "mem+" key 48
- At key: "Prog." 22 (left, minus) select =aA (Fig. 1)
- At key: "Prog." 22 (right, plus) select -aA (Fig. 2)
- Push "mem+" key 48
Dot quick-selection
- Push "mem+" key 48 and hold it (a second "H" appears Fig. 3), and in addition
● Push the left key "Prog." (22 +)
● The second "H" is now substituted with a dot
- Select aA at the right key "Prog." (121 +)
● Push "mem+" key 48 (Fig. 4)
- Push single pattern key 27
Now your monogram is provided with a dot and can be sewn (Fig. 4).
text_image
22 prog BCL mem+ mem- memory BCL wll wll← wll← 48 ① 3
text_image
1a P H P prog 22 ↑ ↓ Δ + + - + + - + + - + + - + + - + + - + + - + + - + + - + + - + + - + + - + + - + + - + + - + + - + + - + + - + + - + + - + + - + + - + + - + + - + + - + + - + + - + + - + + - + + - + + - + + - + + - + + - + * 48 27 Ⓓ
text_image
PFAFF_KARLSRUHE
text_image
prog 22 ← 11 display mem+ mem- memory 27 481
: spacing between words
bA=cA
xample: PFAFF____KARLSRUHE spacing must always be programmed between no words.
spacing can be selected for every block capital outline letter. Three or four spacing characters re input, depending on the size of spacing required (Fig. 1).
- Spacings are programmed the same way as dot quick-selection
Sewing hyphens
xample: PFAFF-CREATIVE
Press right "prog" keys 22 until the dash is displayed in the right length (Fig. 2)
Press "mem+" key 48 (Figs. 2 and 3)
- Input the rest of the text
Press "single pattern" key 27
'ull stops, commas, spacing marks, dashes, question marks or exclamation marks
at the end of the numbers and outline letters a full top, comma, space mark and hyphen are programmed.
at the end of the alphabets in hand-writing and apitals a question mark and exclamation mark re programmed.
- Select the required program with "prog" keys 22.
Press "mem+" key 48.
text_image
PEAFF-CREATIVE3
text_image
HAPPY BIRTHDAY
text_image
ABA ABA ABA1
Sewing texts
If you wish to divide a text into several lines, select a free M-memory for each line and enter the text. After the last program entry, press the single pattern key. Insert a spacing after each word (page 145). Sewing is then begun with the first M-memory again. To divide the text, select one M-memory after the other with each part of the text. The machine will stop after each line.
Before sewing, mark the beginning of the text on the fabric.
After sewing, cut the joining threads between letters, figures and spacings (Fig. 1).
If you wish to check the text, press run-through key, display 6. The text will then run through in the computer. It can be stopped by pressing the same key again.
Letters and figures in different sizes
Letters and figures can be sewn in different sizes. The maximum character height is 9 mm.
Before the first entry of a letter or a figure, its height can be determined by means of stitch width key 8 (Fig. 2).
If you wish to sew letters and numbers in different heights, select the height just before the required change and input the program in the memory.
Correcting program entries
If you have missed out a letter or figure or entered a wrong one, you can correct the entry. Cancel the individual entries back up to the mistake using "m e m -" key 47 and correct it, then enter the rest of the text again.
Programming names with embroidery stitches
- Select a free M-memory
- Push "mem+" key 48
- Select the following programs
1×132
2×00
E V A
2×00
1 × 132
● and enter them in the computer by pressing "mem+" key 48 each time.
● Press single pattern key 27.

text_image
EVA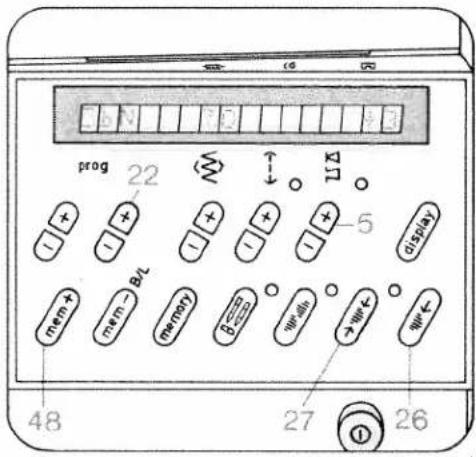
text_image
prog 22 5 display mem+ mem→B/L memory D=0.000 wall →W/K W/K 48 27 26
text_image
SURFEN2
Correcting characters with the balance key
Sometimes, letters or words may shift, depending on the fabric used. This can be corrected with the balance key (Fig. 2).
Words or texts can only be corrected together. The letter or figure last entered is corrected towards plus or minus with key 5 and entered with "mem+" key 48. The correction applies to the whole memorized program.
Example: SURFEN
- Press "pattern start" key 26
● Program "N" appears - Select + 3 on balance key 5 (Fig. 1)
- Press "mem+" key 48
the program has now been corrected with +3 (Fig. 3) - Press "single pattern" key 27.

text_image
SURFEN3
natural_image
Black-and-white photo of a tea set with saucers and a teacup on a patterned tablecloth, no visible text or symbols.
text_image
HOPOL HOTU VW XYZ
text_image
Hand-drawn sketch of a cat silhouette made from paper strips, with visible text fragments and symbols
natural_image
Close-up of a textured fabric with diagonal seam pattern and repeating diamond motifs (no text or symbols)The cross stitch has always played an important role in the history of crafts. The Pfaff Creative offers you the chance to continue this wonderful tradition with great ease. Besides the cross-stitch programs 70 to 79 the sewing computer has numerous other ready-made cross-stitch borders in store for you. The program numbers of these are 80 to 89, and they can be called whenever needed.
These beautiful motifs are also available for combination as shown on pages 158 and 159. The decorative hand-work stitches are ideal for making small presents. Cross-stitch motifs on table cloths, clothing or children's things lend them a singularly personal touch. Why not spend some of your leisure time beautifying and increasing the personal expression of your clothing? When cross-stitching, it is suggested to press key 16 "sew slowly".
natural_image
Abstract pixelated pattern with black and white blocks on a textured gray background (no text or symbols)
natural_image
Abstract geometric pattern with interlocking angular shapes on a textured gray background (no text or symbols)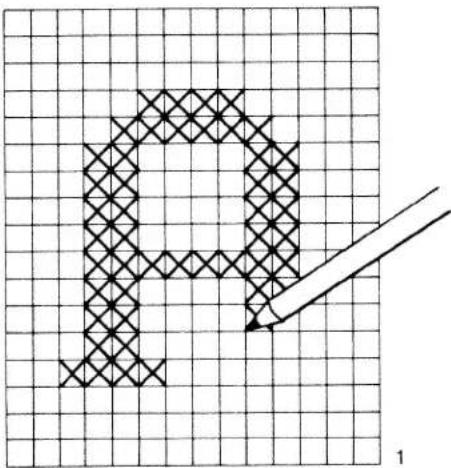
text_image
P 1Cross-stitches
| prog | |||
| 70-79 | -3+ | 2A |
If you have no cross-stitch pattern available, you can design and sew your own pattern.
● Draw the cross-stitch pattern on graph paper (see Fig. 1).
- Before beginning to sew, mark the sewing sequence by means of arrows on the drawing. As shown in the above example, indicate the sequence of numbers for every pattern sequence -M-. This is required for programming (Fig. 2).
- Now place the pattern in the direction of the arrow. The number of cross stitches is then entered for each pattern sequence in a free M-memory by pressing "mem+" key 48 each time.
- For sewing, the programmed memories are then selected one after the other, beginning with the first M-memory.
● Fancy stitching foot No. 2A has red lines on it which make cross-stitch sewing easier for you. The crosswise lines in the foot are for determining the beginning of the pattern.
- Allow the left metal edge in the window of the foot to move exactly along the line of the pattern sewn previously, in order to avoid spacings occurring between adjoining patterns.

text_image
M1 M2 M3 M2 M4 M4 2- Arrow = Sewing direction
- Point = Beginning of sewing (needle penetration)
- When sewing is begun the needle always enters in the middle of the foot. The red dot on the pattern marks each starting point.
- In order to shift individual cross stitches, 71 from left to right, press the pattern reverse key beforehand.
● The mirroring of program 71 is indicated in the computer by a dash after figure 71.
● The illustrations on this and the following pages provide some suggestions of ways to make attractive cross-stitch patterns with your Creative, instead of by hand.
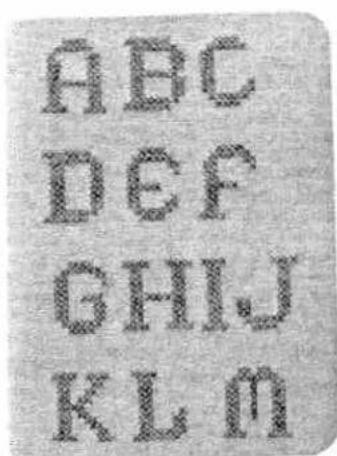
text_image
ABC DEF GHIJ KLMSuggestions: (not described)
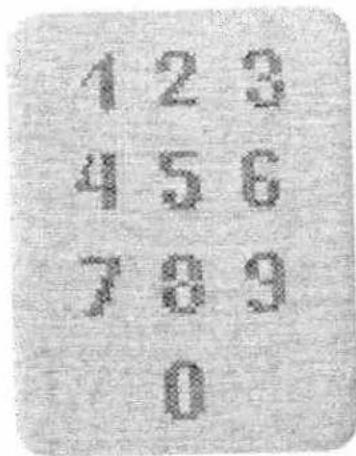
text_image
1 2 3 4 5 6 7 8 9 0or the pattern Fig. 2, for example, the following ombinations are stored:
hree worksteps are required.
irst workstep
- Select a free M-memory before program-
v1 ming
- Push "mem+" key 48
- Select the following programs:
1 x 71; "pattern mirror"
4×70 and
1 x 711 "pattern mirror"
and enter them in the computer by pressing "mem+" key 48 each time.
● Push "memory" key 30
- Select the next free M-memory
Push "mem+" key 48
M2 ● Push the pattern start key
- Select the program:
9 × 70
and enter it in the computer by pressing "mem+" key 48
- Push "memory" key 30
- Select the next free M-memory
M3 ● Push "mem+" key 48
- Select the program:
4×71
and enter it in the computer by pressing
- Push "memory" key 30
- Push the "single pattern" key
Now the cross-stitch monogramme is memorized.
Arrow = Sewing direction
- Point = Beginning of sewing (needle penetration)
Second workstep
● Mark the starting point for sewing on the fabric.
Select memory M 1 and sew through pro-
M1 gram according to pattern.
↓ Select memory M 2.
M2 Sew the program once right and once left, as shown by the pattern.
↓ Select memory M 3 and sew through pro- M3 gram according to pattern.
Third workstep
● Push the pattern start key.
- Select program 71.
● Push the single pattern key.
M4 ● Sew the individual patterns according to design.
When the programmed memories are no longer required, they can be cancelled by pressing "mem-" key.

natural_image
Pure diagram of two vertical chain-like structures with cross marks, no text or symbols present1
Cross-stitch borders
Depending on the kind of work, the illustrated borders can be sewn in plain colours or in colour combinations.
Mark the beginning line for the border on the fabric.
Border 1 consists of the programs: 70, 71, 711
First workstep
- Select a free M-memory before programming. (middle motif)
- Push "mem+" key 48
- Select the programs: 1 x 71
1 x 711, pattern mirror 28
and enter them in the computer by pressing "mem+" key each time.
- Push "memory" key 30.
- Select the next free M-memory (edge motif).
- Push "mem+" key 48.
● Push the pattern start key. - Select the programs:
1×70
3×71
and enter them in the computer by pressing "mem+" key.
- Push "memory" key.
The border is now stored in the computer.
Second workstep
Call off the programmed M-memory for each workstep and sew according to the design. When the M-memories are no longer required they can be cancelled with "mem-" key.

natural_image
Close-up of a textured surface with vertical dashed lines and a wavy white line, no text or symbols visible.2
Border 2 consists of the following programs: 70, 71, 72
First workstep: centre motif
Mark the pattern design for the centre motif in dots on the material. The distance between two points is approximately 2.5 cm and the height approximately 1.3 cm. Connect the dots with lines.
- Select the following program. 1 x 72
Sew the selected program along the pre-drawn line.
Second workstep: edge
- Select a free M-memory before programming.
- Push "mem+" key 48.
- Enter programs:
1 x 70 mirror
2×71
in the computer by pressing "mem+" key each time. Sew the stored program.
The 2nd side can be sewn without turning the material by pressing "memory" key 30 "pattern mirror" key 28.
text_image
Cropped image showing vertical Chinese text lines on a textured gray background, possibly from a document or label.3
order 3 consists of the following programs: 70, 71, 72
irst workstep: centre motif
- Select the following program. 1 x 70
- Sew the selected program.
second workstep: centre rows - Select the following program 1 x 72
- Sew the selected program at both sides along the centre motif.
hird workstep: edge - Select a free M-memory.
, Push "mem+" key 48. - Enter programs
2×70
4×71
in the computer by pressing "mem+" key each time.
- Sew the stored program at both sides.
By pressing
"memory" key 30 and "pattern mirror" key you will save yourself the trouble of turning the material. The programmed memory can be cleared again after the work is finished by pressing "mem-" key.
Suggestions: (not described)

chemical
Molecular structure diagram showing two identical macrocyclic units connected by a chain of atoms
natural_image
Abstract pattern of interlocking diamond shapes on a textured gray background (no text or symbols)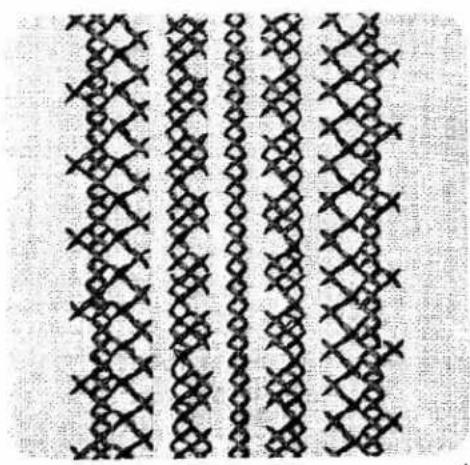
natural_image
Pattern of repeating diamond and cross motifs in black and white (no text or symbols)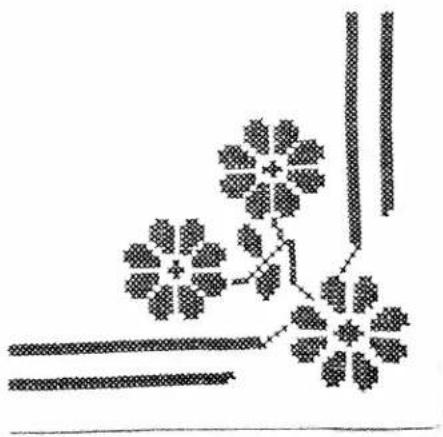
natural_image
Abstract geometric pattern with pixelated floral and line elements (no text or symbols)Border 4 consists of the following programs: 70, 71, 71i
First workstep (centre motif)
● Mark the centre-line on the material.
- Select program 71
and sew along the marked line.
Second workstep
- Select a free M-memory.
- Push "mem+" key 48.
- Enter programs
2×70
1 × 71
in the computer by pressing key "mem+" each time.
- Sew the stored program at both sides along the centre-line.
Third workstep
- Select a free M-memory.
- Push "mem+" key 48.
● Push beginning-of-pattern key - Enter programs
1×71
1 x 71i pattern mirror
in the computer by pressing "mem+" key each time.
- Sew the stored program at both sides along the previously sewn pattern.
Fourth workstep (edge)
- Select a free M-memory.
- Push "mem+" key 48.
- Enter programs
1 × 70
3×71
in the computer by pressing "mem+" key each time.
- Sew the stored program at both sides along the previously sewn pattern as shown on the drawing.
The reserved M-memories can be cleared by pressing "mem-" key after the work is finished.

chemical
Molecular structure diagram showing a central atom bonded to multiple surrounding atoms, with bonds and substituents indicated.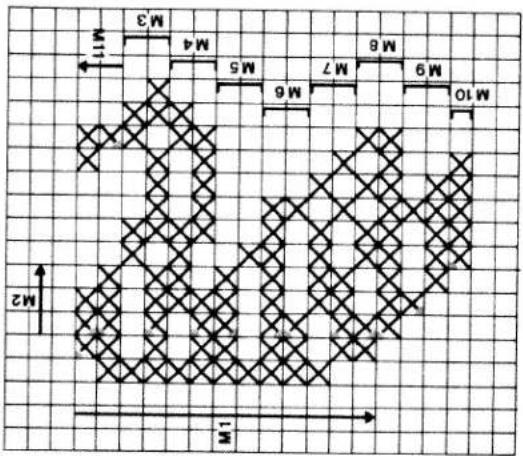
text_image
M M2 M6 M7 M8 M9 M10 M3 M4 M5 M6 M7 M8 M9 M10↓ Arrow = Sewing direction
= Sewing direction (M3 to M10)
* Dot = Beginning of seam (needle penetration)
Motifs with cross stitches
Swan
For the pattern shown above 11 free M-memories are required. As the following example shows, they are stored in sequence (for preparation see page 150).
For M-memory programs M 3 to M 10 the arrow indicating the sewing direction is replaced by symbol = sewing direction.
First workstep
- Select a free M-memory.
M1 M1 - Press "mem+" key 48
- Enter programs
1 x 711 mirror
1 × 70
1×71
1 x 70
1×71
2×70
1×71
2×70
1×71
2 x 711 mirror in the computer by pressing "mem+" key each time.
↓ ● Press "memory" key.
M2 ● Select the next free M-memory. M 2
- Press "mem+" key
- Press "pattern start" key.
- Enter programs:
2×70
1×71
in the computer by pressing "m e m +" key each time.
Press "memory" key.
M3 ● Select the next free M-memory. M 3
- Press "mem+" key.
- Press "pattern start" key
- Enter programs
3×71
1 x 711 mirror
1 × 70
3×71
1 x 711 mirror
1×70
1 × 71
in the computer by pressing "m e m +" key each time.
Press "memory" key.
M4 ● Select the next free M-memory. M 4
- Press "mem+" key.
- Press "pattern start" key.
- Enter programs
1 × 71
1×70
2 x 711 mirror
1 × 70
3×71
1 × 70
1 x 711 mirror
in the computer by pressing "m e m +" key each time.
Press "memory" key.
M5 ● Select the next free M-memory. M 5
- Press "mem+" key
- Press "pattern start" key.
- Enter programs
3 x 71 mirror
1×71
in the computer by pressing "mem+" key each time.
Press "memory" key.
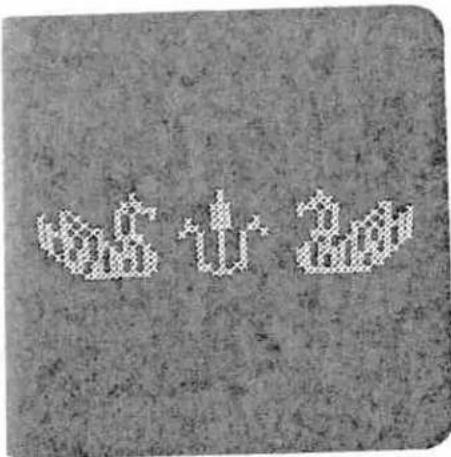
natural_image
Pixelated illustration of two stylized figures with geometric patterns, no text or symbols present16 ● Select the next free M-memory. M 6
- Push "mem+" key.
- Push "pattern start" key.
● Enter programs
1 × 70
4 x 711 mirror
1×70
in the computer by pressing "mem+"
key each time.
Push "memory" key.
√7 ● Select the next free M-memory. M 7
- Push "mem+" key.
- Push "pattern start" key.
- Enter programs
1×71
2×70
2 x 711 mirror
1×71
1 x 711 mirror
1×71
in the computer by pressing "mem+"
key each time.
Push "memory" key
M8 ● Select the next free M-memory. M 8
- Push "mem+" key
- Push "pattern start" key.
● Enter programs
1×70
2×71
2×70
1×71
1 x 70
1 x 71
1×70
in the computer by pressing "mem+" key each time.
Push "memory" key.
M9 ● Select the next free M-memory. M 9
- Push "mem+" key.
- Push "pattern start" key.
● Enter programs
1 x 711 mirror
3×71
1×70
1×71
in the computer by pressing "mem+" key each time.
Push "memory" key.
M10● Select the next free M-memory. M 10
- Push "mem+" key.
- Push "pattern start" key.
- Enter programs
5×71
in the computer by pressing "mem+"
key each time.
Push "memory" key.
M11 ● Select the next free M-memory. M 11
- Push "mem+" key.
- Push "pattern start" key.
● Enter programs
1×71
1×70
in the computer by pressing "mem+"
key each time.
□● Push "memory" key.
- Push "single pattern" key.
Now your pattern is stored.
Second workstep: sewing a pattern
- Mark the beginning point on the material. Select an M 1 memory and recall the following M-memories in sequence and sew according to pattern.
When the programmed memories are no longer required, they can be cleared with the correction key.

natural_image
Abstract pattern of repeating black dots and diamonds on a textured gray background (no text or symbols)
natural_image
Close-up of a textured fabric with a horizontal seam and dotted pattern, no visible text or symbols.
natural_image
Black-and-white patterned fabric with repeating diamond and square motifs, no text or symbols visible
natural_image
Repeating geometric pattern of eight diamond-shaped frames on a light background (no text or symbols)Needle chart
Using the adequate needle guarantees better processing of the material.
| Fabric weight: light Needle size: 60, 70, 75 | Fabric weight: medium Needle size: 80, 90 | Fabric weight: heavy Needle size: 100, 110, 120 | ||
| Needle points | ||||
| System & No. | Profile | Point & eye | Suitable for | |
| 130/705 H 70, 80 |  | Light ball point | Universal needle for fine-meshed synthetics, fine linen, chiffon, batiste, organdy, woolens, velvet, fancy seams and embroidery work. | |
| 130/705 H-SUK 70, 110 |  | Medium ball point | Coarse knitted fabrics, Lastex, double-jersey fabrics, Quiana and Simplex. | |
| 130/705 H-PS 75, 90 |  | Medium ball point | Stretch-fabric needle developed especially for Pfaff. Particularly suitable for delicate stretch and knitted fabrics. | |
| 130/705 H-SKF 70, 110 |  | Heavy ball point | Wide-meshed corsetry, Lycra, Simplex and Lastex. | |
| 130/705 H-J 90-110 |  | Acute round point | Twill, workwear, heavy linen, blue jeans and light canvas. | |
| 130/705 H-LR 70-120 |  | Narrow twist point | Leather, suede, calf and goatskin leathers. | |
| 130/705 H-PCL 80-110 |  | Narrow wedge point with left-twist groove | Imitation leathers, plastic materials, plastic sheeting and oilcloth. | |
| 130 H-N 70-110 |  | Light ball point, long eye | Seams topstitched with buttonhole silk or No. 30/3 synthetic thread. | |
| 130/705 H-WING 100 |  | Hemstitching point | Attractive hemstitching on heavily dressed materials, organdy and glass cambric. | |
| System & No. | Stitch length | Stitch width | Needle spacing | Suitable for | |
| 130/705 H-ZWI80 | 2.5 mm2.5 mm | -- | 1.6 mm2.0 mm | Medium-wide cording | |
| 130/705 H-ZWI8090100 | 2.5 mm2.5 mm3.0 mm | -- | 2.5 mm3.0 mm4.0 mm | Wide cordingExtra wide cordingExtra-wide cording | |
| Decorative designs sewn with twin needlesBefore you start sewing, turn the handwheel and check to make sure the needles stitch into the fabric properly. In this way, needle breakage can be largely prevented. | |||||
| Decorative and zigzag patterns | |||||
| 130/705 H-ZWI808080 | 0.5-1.5 mm0.5-1.5 mm0.5-1.5 mm | widenarrownarrow | 1.6 mm2.0 mm2.5 mm | OrnamentationsOrnamentationsOrnamentations | |
| Special hemstitching twin needle | |||||
| 130/705H-ZWI-Ho80100 | 2.0-3.0 mm2.0-3.0 mm | very narrowvery narrow | -- | Decorative hem-stitching effect.Heavily dressed fabrics are particularly suitable. | |
Fault finding
Cause:
Remedy:
1. Machine skips stitches
Needle not inserted correctly.
Push needle up as far as it will go, its flat shank side facing rear.
Wrong needle used.
Insert system 130/705 H needle.
Machine threaded improperly.
Check threading.
Needle too thin for thread used.
Insert thicker needle.
2. Needle thread breaks
For any of the above reasons.
See par. 1 above.
Thread tension too strong.
Regulate thread tensions.
Poor-quality or knotty thread used, or thread that has become too dry by excessive storage.
Use only good-quality thread.
3. Needle breaks
Needle not pushed up as far as it will go.
Insert new needle and push it up as far as it will go.
Needle bent.
Insert new needle.
Needle too thin or too thick.
Refer to needle table.
Needle bent and strikes needle plate because fabric is pushed or pulled.
Let machine feed the fabric. Only guide the material lightly.
Bobbin case improperly inserted.
When inserting the bobbin case, push it in as far as it will go.
4. Seam is not uniform
Tension out of adjustment.
Check upper and lower tensions.
Tread too thick, knotty or hard.
Use first-class thread only.
Bobbin thread wound unevenly.
During bobbin winding, do not hold thread in hand, but pass it through the winder tension stud.
Kinks appear on top and bottom of material.
Thread machine properly and check both tensions.
Cause:
Remedy:
5. Machine feeds irregularly or not at all
Lint has accumulated between tooth rows of feed dog.
Feed dog lowered. (Slide control is at right).
Remove needle plate and remove lint with a soft brush.
Push slide control to the left.
6. Machine runs with difficulty
Thread ends in hook raceway.
Remove thread ends and put one drop of oil into hook raceway.
7. Electronic bobbin thread monitor does not work
Thread ends and dirt have collected in the free arm cover over the sensor, in the hook raceway, in the bobbin case, behind the hook and on the second sensor to the right behind the hook.
Remove thread ends and dirt. Special care should be taken in the area round the second sensor.
8. Machine does not sew the program entered
Switch the machine off, wait about 30 seconds, then switch it on again. Again enter the desired program.
9. Machine can no longer be programmed
If you find that it is not possible to program the computer although it is not filled up, the machine must be switched off. Press key 47 "Correction B/L" after about 30 seconds, hold it down and switch the machine on again by actuating main switch 9. Release button 47. By means of this procedure the contents of both the M- and P-memory has been fully erased. Required program sequences and patterns must be entered once more.
10. The sewing lamp lights up, but the machine does not run
Fuse is defective.
Insert new fuse.
Important:
Before exchanging either sewing foot or needle, switch off master switch 9. Never run a threaded machine unless there is a piece of fabric under the sewing foot. If you have to leave the machine, even for a short while, be sure to switch off the master switch. This is particularly important when children are around.
natural_image
Black-and-white sketch of a stylized flower with five petals and two leaves, on textured background (no text or symbols)ntents
hnical section
| N | |||
| habets, numbers | 8, 9 | Needle changing | 38 |
| Needle thread tension, checking | 25 | ||
| ance and pattern length setting | 31, 32 | P | |
| ltery changing | 43 | Pattern mirroring | 35 |
| obin case, inserting | 17 | Pattern start, setting | 36 |
| obin thread tension, checking | 16 | Presser bar lifter | 23, 24 |
| obin thread, drawing up | 20 | Program combination, cancelling | 33 |
| bbin winding | 12, 13 | Program combination, checking | 33 |
| bbin winding from a second spool | 14 | Program combination, repeating | 34 |
| bbin winding through the needle | 15 | Program combination, storing | 33 |
| bbin, inserting | 16 | Program selection | 30 |
| ttonhole programs | 4 | Program table | 2-9 |
| R | |||
| eaning and oiling | 42 | Recommended sewing modes | 36 |
| eative computer keys | 29 | ||
| S | |||
| Safety notes | 37 | ||
| opping the feed dog | 38 | Sewing feet | 41 |
| al feed | 21, 22 | Sewing foot changing | 39 |
| Single pattern setting | 35 | ||
| Special accessories | 44 | ||
| Spool fitting | 17 | ||
| ectrical connection | 10, 11 | Stitch length and pattern length setting | 31 |
| ectronic controls and keys | 28 | Stitch width setting | 30 |
| abroidery stitch programs | 6-9 | ||
| T | |||
| ot control | 24 | Thread trimmer | 26 |
| se, changing | 43 | Twin-needle sewing | 34 |
| U | |||
| portant notes | 27 | Upper threading | 18, 19 |
| Utility stitch programs | 2-5 | ||
| ump bulb, changing | 42 | W | |
| Work support and accessories box | 40, 41 | ||
Index
Sewing instructions
A
| Alphabet, outline | 142 |
| Alphabets and numbers, programming | 138 |
| Appliquéing | 104 |
B
| Balance | 73, 78, 148 |
| Bartacks, width and length | 64 |
| Basting | 49 |
| Basting seams | 49 |
| Binding attachment | 70 |
| Binding edges | 68, 70 |
| Blind stitch | 71 |
| Block capitals | 141 |
| Borders, ornamental | 110, 111, 130, 132 |
Buttonholes
| Buttonholes, linen 7-16 mm | 78, 79 |
| Buttonholes, linen 7-44 mm | 80, 81 |
| Buttonholes, linen 7-16 mm(fully-automatic, semi-automatic) | 78, 79 |
| Buttonholes, linen 7-44 mm(fully-automatic, semi-automatic) | 80, 81 |
| Buttonholes, linen programmable | 82, 83 |
| Buttonholes, stretch reinforced(fully- and semi-automatic) | 84, 85 |
| Buttonholes, stretch reinforcedprogrammable | 86, 87 |
| Buttonholes, stretch(fully- and semi-automatic) | 88, 89 |
| Buttonholes, stretch programmable | 90, 91 |
| Buttonholes, bartacks | 92-97 |
| Buttonholes, round | 94, 95 |
| Buttonholes, eyelet | 96, 97 |
| Buttonholes with gimp thread | 98 |
| Buttonholes, cutting open | 100 |
| Buttons, sewing on | 100 |
C
| Combinations with reverse straight stitch | 134 |
| Cording | 102, 103 |
| Corsetry stitch | 63 |
| Covering stitch | 66 |
| Cross stitches | 149-159 |
D
| Darning tears | 72 |
| Darring, elastic stitch | 72 |
| Darning, automatic | 73 |
| Darning, straight-stitch wool | 73, 74, 75 |
| Darning, wool | 75 |
| Dot, sewing and quick selection | 144 |
E
| Elastic stitch | 64, 69 |
| Embroidery stitches and monograms, programming | 123-148 |
| Embroidery stitches, programming in M-memory | 123, 124 |
| Embroidery, eyelet- | 119, 120 |
| Embroidery, linen | 118 |
| Embroidery, multi-colour | 110 |
F
| Fagotting stitch | 63 |
| Fancy stitch | 52 |
| Fault finding | 162, 163 |
| Fringes | 115 |
G
| Gathering with elastic thread | 59 |
| Gathering with shirring foot | 60 |
| Gathering, straight stitch | 58 |
H
| Hem-stitching | 116, 117 |
| Hemmer | 56 |
| Hems, securing with twin-needle | 52, 68 |
| Honecomb stitch | 68 |
| Hyphen or dash | 145 |
| ining and serging seams | 68 |
| ce, inserting and sewing on | 108 |
| p-felling | 54 |
| ather seams | 113 |
| tters and numbers in different sizes | 146 |
| tters, italics | 138, 140 |
| cra stitch | 63 |
| memories, selecting | 124 |
| onograms | 121, 138-140 |
| ames, sewing, with embroidery stitches | 146 |
| needle position, changing, zigzag stitch | 53 |
| needle position, changing, straight stitch | 53 |
| needle table | 160, 161 |
| umbers in different heights | 146 |
| umbers, sewing | 140, 141, 142, 146 |
| verlock stitch, closed | 66, 67 |
| verlock stitch, edge | 67, 68, 69 |
| verlockstitch | 68 |
| verlockstitch with edge thread | 67 |
| atches, inserting | 72 |
| attern mirroring | 122, 124 |
| attern, single | 122, 124 |
| leats | 103 |
| rograms, checking stored | 128 |
| rograms, correction of | 128 |
| quilting | 106 |
| R | |
| Roll hemmer | 57 |
| S | |
| Serging seams | 66 |
| Serging with zigzag stitch and overlock foot | 62 |
| Sewing with twin-needle | 52 |
| Shell edging | 114 |
| Smocking with elastic threads | 61 |
| Spacing between two words | 144 |
| Spacing mark | 144 |
| Special marks | 141 |
| Stitch density | 122, 128 |
| Stitch length | 126 |
| Stitch length, changing | 126 |
| Stitch width | 128 |
| Stitch width, changing | 128 |
| Straight stitch | 50, 51, 52, 53 |
| Stretch triple straight stitch | 51 |
| Stretch triple zigzag stitch | 63 |
| Swan | 156, 157 |
| T | |
| T-shirt hems | 68 |
| Texts, sewing | 146 |
| Tips for embroidering and sewing | 46-48 |
| Top-stitching seams | 52 |
| Twin needle, fancy seams | 133 |
| Z | |
| Zigzag stitch | 51, 53 |
| Zippers, inserting | 76, 77 |
| Zippers, trousers | 77 |
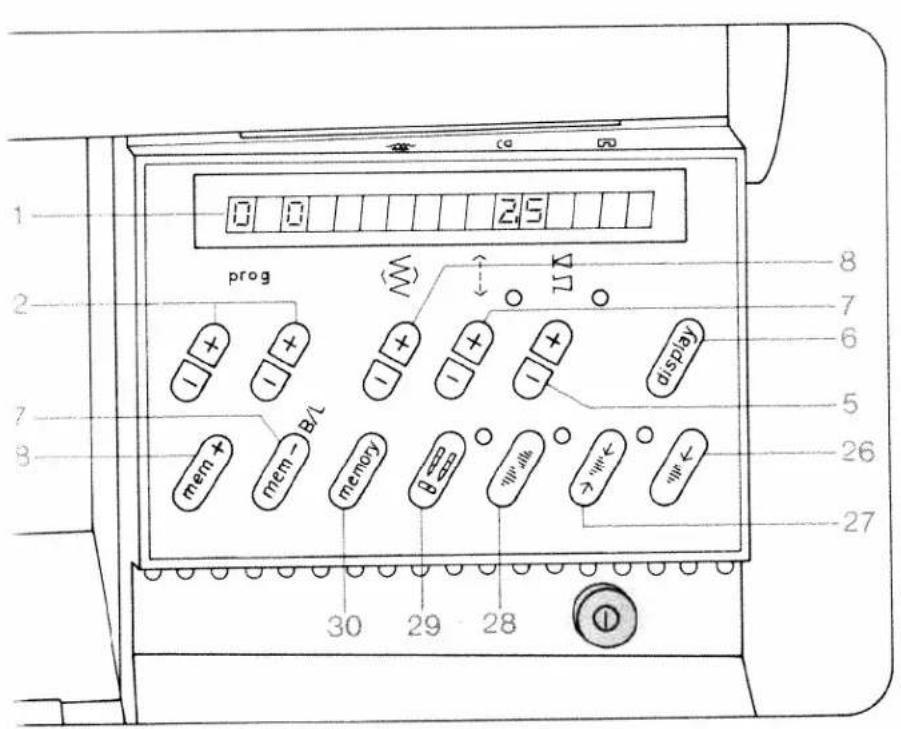
text_image
0 0 25 prog mem + mem - B/L memory b-gg > "←" 30 29 28 17 display 8 7 6 5 26 27