92 - Sewing machine PFAFF - Free user manual and instructions
Find the device manual for free 92 PFAFF in PDF.

User questions about 92 PFAFF
0 question about this device. Answer the ones you know or ask your own.
Ask a new question about this device
Download the instructions for your Sewing machine in PDF format for free! Find your manual 92 - PFAFF and take your electronic device back in hand. On this page are published all the documents necessary for the use of your device. 92 by PFAFF.
USER MANUAL 92 PFAFF
natural_image
Vintage sewing machine with needle and control panel (no visible text or symbols)INSTRUCTION BOOK
PFAFF®
Automatic 92
INSTRUCTIONS
FOREWORD
Your dream has come true.
Your are now the proud owner of a Pfaff Automatic 92, the sewing machine which will enable you to master all ordinary sewing and darning jobs that may come up in a home. In addition, your machine can sew a large number of beautiful decorative designs completely automatically.
This instruction book will help you understand the machine and give you valuable tips to make sewing more fun for you.
Even if you are an experienced seamstress, you will find this book a valuable guide to easy sewing.
Follow these simple instructions and familiarize yourself with the exclusive features of your machine. You will find sewing exciting on your easy-to-operate Pfaff 92.
If you have any sewing problems, please contact your Pfaff dealer. He will be glad to help you at any time.
G. M. PFAFF AG
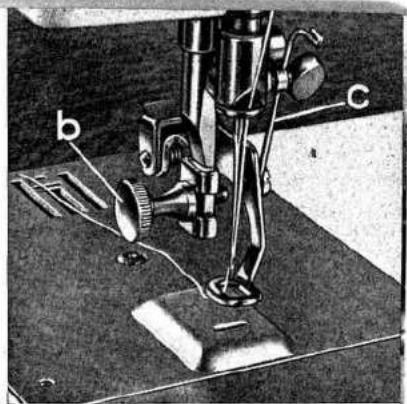
9 Balance wheel
10 Stop motion knob
11 Motor disengaging
mechanism
12 Stitch length control
13 Reverse feed control
14 Bed slide
15 Pfaff rotary sewing hook
16 Dual-purpose needle plate
17 Sewing foot thumb screw
18 Light switch
19 Needle thread tension
20 Presser bar lfter
2) Needle set screw
22 Sewing foot
Fundamentals of Machine Operation
- Whenever you have to turn the balance wheel, turn it toward you (counter-clockwise as shown by black arrow).
- Make sure stop motion knob on the balance wheel is tightened before you begin sewing.
- Never run a threaded machine unless you have fabric under the sewing foot.
- Place both threads back under the sewing foot before you put fabric into the machine.
- The machine will feed the material under the sewing foot automatically. All you have to do is guide the work.
● Always bring take-up lever to its highest position before you begin and after you have completed a seam.
Failure to observe this rule may cause the thread to slip out of the needle eye. Also, it is easier to remove the work with the take-up lever up.
DR QSO

natural_image
Close-up of a hand holding a small mechanical component with a curved arrow indicating motion (no text or symbols visible)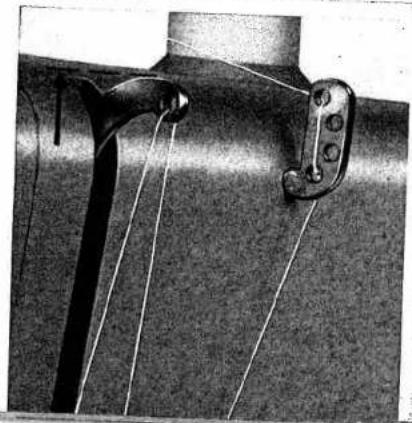
natural_image
Close-up of a mechanical component with wires and connectors (no visible text or symbols)DR 051
natural_image
Close-up of a hand holding a circular object with a curved arrow, possibly indicating rotation or motion (no text or symbols visible)DR 506
Operation of Your Sewing Machine
Engaging the Sewing Mechanism
Hold balance wheel and turn stop motion knob clockwise.
Disengaging the Sewing Mechanism
Hold balance wheel and turn stop motion knob counter-clockwise (toward you). The sewing mechanism is then disengaged for bobbin winding.
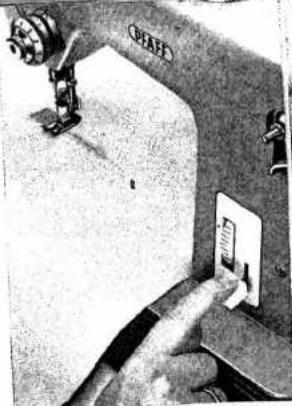
Electrical Information
Power Drive and Sewlight
Push plug 1 into receptacle 2 on back of machine, and plug 3 at other end of cord into the wall outlet. Cord 4 leads to the foot control.
Foot-driven machines
have merely a sewlight cord whose plug is pushed into the wall outlet. To switch on the sewlight, push button on face cover. Mount driving belt. Before you drop the machine, remove the belt from the stand wheel, pulling it to the right.

text_image
Labeled photo of hands using a power plug to switch and plug into an electrical socket, with numbered parts visible.4
DR 510
DR 550

natural_image
Close-up of a white spherical object with a pointed tip, attached to a dark surface with a curved line and a small black dot (no text or symbols visible)Motor Disengaging Mechanism
Power-driven machines feature a lever underneath the balance wheel which serves to swing the motor to its operative position. To do this, flick the lever down. After you have completed sewing, flick the lever to its top position in order to return the motor to the inoperative position.
With the motor swung out of engagement, all machines set up on treadle stands can be driven by foot power.
natural_image
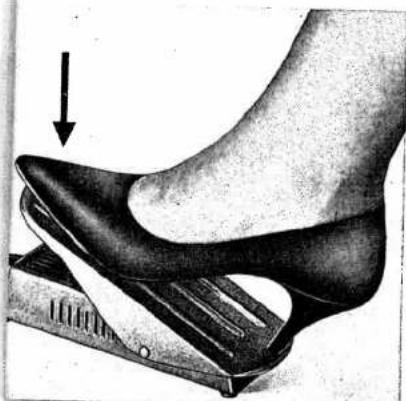
Illustration of a foot pressing down on a high-heeled shoe (no text or symbols)Foot Control
Place the foot control under the cabinet within easy reach of your foot. Rest the right foot on the control pedal and press. The harder you press, the faster the machine will run.
On some sewing cabinets, the foot control cord can be passed through the opening in the bedplate extension.
Sewing Speed
The Pfaff rotary hook enables you to sew at speeds of over 1200 stitches a minute. Such high speeds are ideal for straight stitching operations.
Wide zigzag stitches and Automatic embroidery work require a lower speed which is obtained by depressing the foot control only slightly.
R 7132
5

natural_image
Close-up of a mechanical device with labeled parts A and B, showing internal components and a tool (no readable text or symbols beyond labels)DR 489 B
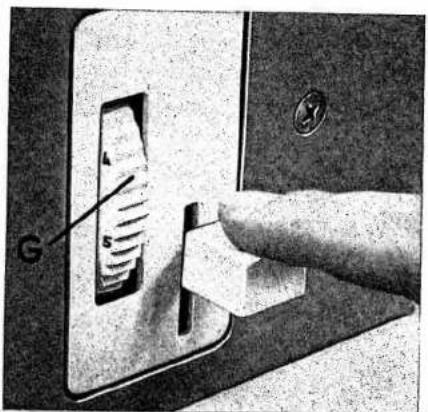
Straight Stitching
For straight-stitch sewing set:
Lever A = 0
Lever B = Center
(For straight stitching, too, a fashion disc should be inserted in the machine.)
Control G regulates the stitch length. For detailed instructions please refer to page 20. To backtrack the end of a seam, simply depress the finger-tip control.
natural_image
Close-up of a hand pressing down on a device with a finger pointing to the button (no visible text or symbols)6
DR 009
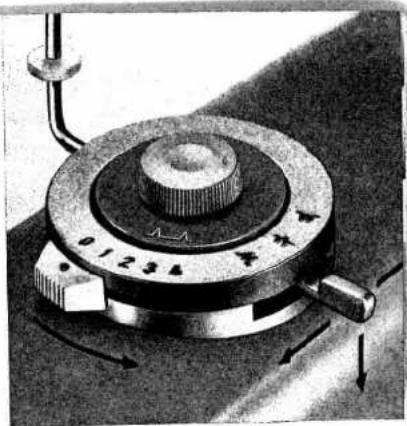
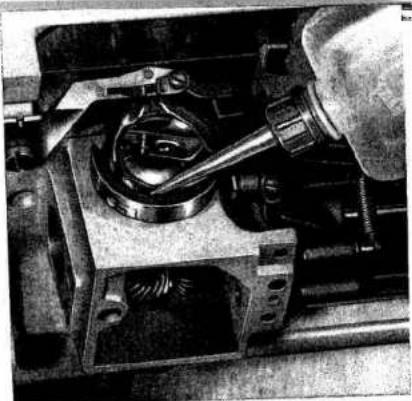
Zigzag Sewing
If you want to switch from straight (A on "0") to zigzag stitching, insert the zigzag disc, and turn lever A to desired stitch width (indicated by numbers 1 to 4).
For most sewing jobs it is best to leave zigzag disc (A) in the machine so that you can quickly change over from straight to zigzag stitching. Lever B changes the position of the needle in the needle plate slot. Thus the stitching can be moved from the center to the left or right of the slot, as desired.
DR 489 A
natural_image
Close-up of a mechanical rotary dial with no visible text or symbols on the dial face (pure technical diagram)The position of lever B (left, center, right) indicates the position of the needle in the needle plate slot.
Control G lengthens zig-zag stitches or packs them more closely together (satin stitch).
[Figure]
text_image
A B CAutomatic Fashion Discs
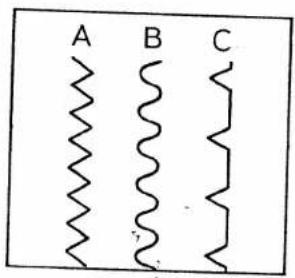
Functional Stitches
Three exchangeable fashion discs are furnished with each machine. These discs are used to make the zigzag stitch, the elastic serpentine stitch, and the blindstitch, and are marked as follows:
Disc A = zigzag stitch
Disc B = elastic serpentine stitch
Disc C = blindstitch
text_image
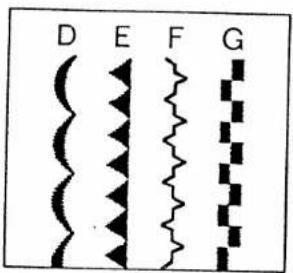
D E F GOrnamental Stitches
Fashion discs D, E, F and G serve to produce various decorative designs.
Countless pattern variations are possible by changing both the stitch length and the stitch width.
DR 544 A
text_image
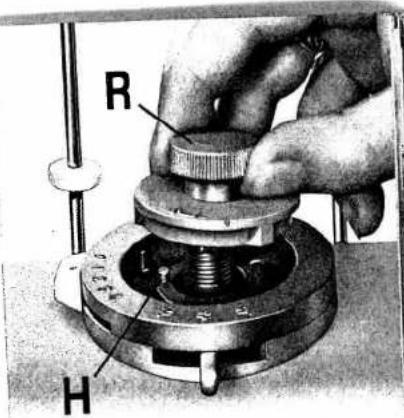
R HChanging the Fashion Discs
Always jerk stitch width lever A to "0" before you insert or remove a slot. It is not a key for the movement, then pull it up and take it out.
lease the disc in the zigzag mechanism, then point up
Push the disc onto the stud and rotate it until stud H shapes like a ball and a ball.
turning it clockwise.
- The machine for the desired stitch width and stitch length.

natural_image
Close-up of hands operating a sewing machine on a fabric cutting board (no visible text or symbols)GR 014
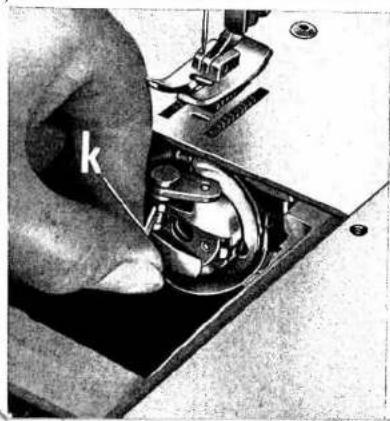
Removing the Bobbin Case
- Turn the balance wheel until the needle has risen clear of the needle hole, lift front end of bed slide and pull.
natural_image
Close-up of a hand using a sewing machine to adjust or install a component, no visible text or symbolsLift latch k with the thumb of your left hand and pull out bobbin case with bobbin. When you release the latch, the bobbin drops out.
DR 013
10
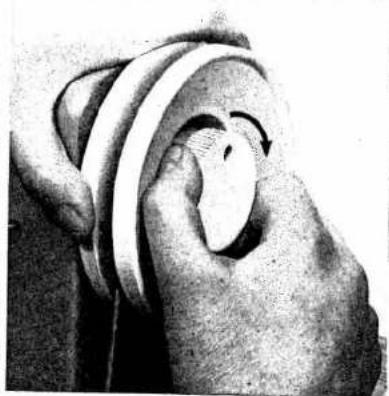
Winding the Bobbin
Disengage the sewing mechanism (see page 4) and flick presser bar lifter to highest position. Raise the spool pins to the vertical position. Place spool of thread on one of the spool pins and set bobbin on bobbin winder spindle so that the key at base of spindle enters slot in bobbin.
Threading the Machine
Pass the thread from spool 1 through both front holes of thread retainer 2 and thence to the bobbin on the bobbin winder spindle.
Since the upper thread is passed through the rear holes of the four-hole thread retainer, you can wind the bobbin from a second spool without unthreading the needle.
Before you drop the machine into the cabinet or place it in the carrying case (portable machines) the spool pins should be swung forward to the horizontal position.
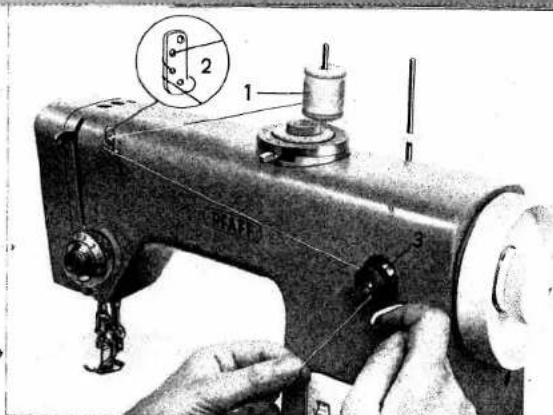
text_image
1 2 3DR 549
IVV
The quick brown fox jumps over the lazy dog.
“ ”
Inserting a Full Bobbin into the Bobbin Case
① As shown in illustration 1, hold bobbin in left hand so that the thread end falls from the top down toward you, and insert bobbin into bobbin case.
② Hold the bobbin firmly in the bobbin case and pull the thread into the case slot.
③ Pull the thread under the tension spring until it emerges from the opening at the end of the spring. Leave about three inches of thread hanging from the bobbin case.
④ Hold the case by its open latch so that the bobbin cannot fall out.
R 5857 1

natural_image
Close-up of hands holding a string tied around a small object (no text or symbols visible)R 5869 2
natural_image
Close-up of hands holding a small wire or wire with a loop, against a dark background (no text or symbols visible)R 5870 3

natural_image
Close-up of hands holding a small object, possibly a tool or device, with no visible text or symbols.R 5868 4

natural_image
Black-and-white sketch of a hand holding a spool of thread, no text or symbols visibleInserting the Bobbin Case
Raise take-up lever to its highest point and lift the latch with the thumb and forefinger of your right hand. Turn bobbin case until slot points up (see arrow). Place bobbin case on center stud s of hook.
In replacing the bobbin case, it is best to hold the loose end of thread so that it will not get jammed between bobbin case and hook. Release the latch and press against bobbin case until you hear it snap into place. An improperly inserted bobbin case will cause needle breakage.

natural_image
Black-and-white illustration of a vintage mechanical device with gears and a handle, no visible text or symbolsDR 015
| Types of Fabrics | Mercerized Cotton | Silk | Needle Size |
| Fine Fabrics such as georgette, chiffon, batiste, voile, lawn, silk. | 80 to 100 | 0 to 000 twist | 60 or 70 |
| Lightweight Fabrics such as dress silks and cottons, sheer woolens, shirling, draperies. | 70 to 80 | A & B twist | 80 |
| Medium Fabrics such as lightweight woolens, madras, muslin, brocades, heavy silks and rayon, gabardine. | 50 to 70 | B & C twist | 90 |
| Heavy Fabrics such as coating, denim, corduroy, slipcover fabrics, bed tickings, lightweight canvas. | 40 to 50 | C & D twist | 100 |
| Synthetics, Rayon, Acetate including nylon, orlon, dacron, plastics, etc. | Determined by weight of fabric 40 to 50 | Determined by thread size 60 to 80 | |
Recommended Needle and
Thread Sizes
The appearance of the finished seam is dependent on the correct relationship between needle, thread and fabric. Select the proper thread sizes and needles from this chart.
The same size threads should be used in the needle and on the bobbin. Some experienced seamstresses prefer a somewhat thinner bobbin thread. However, the bobbin thread never should be thicker than the needle thread.
For embroidery and darning work, a No. 50 thread should normally be used.
Important Facts about Needles
On Pfaff 92 sewing machines, System 130 R, flat-shank needles are used for all ordinary sewing and embroidery work. The last column in the chart on page 14 gives you the needle size required for the material in hand. Genuine Pfaff needles, System 130 R, are available from every Pfaff dealer. Bent or blunt needles should not be used.
Changing the Needle
Bring needle bar to its highest point and lower sewing foot.
Loosen needle set screw a half a turn and pull old needle out of needle clamp. Make sure that the flat side of the shank faces toward the back and long groove toward you. Insert new needle into opening of needle clamp and push it up as far as it will go. Tighten needle set screw a.

natural_image
Close-up of hands operating a sewing machine needle, showing mechanical components and fabric (no text or symbols visible)DR 028
Upper Threading
Raise the spool pins to the vertical position and place a spool of thread on one of them. Lace the thread through the two rear openings of thread retainer 2 (see illustration).
Pull thread between any two of tension discs 3, as illustrated, and jerk it far over to the right so that it slips properly into the slot and under the thread check spring. At the same time, press the thread between spool and tension against the top of the machine.
Bring take-up lever 4 as high as it will go and pass thread from right to left through the hole at its end and into slot at left of thread guide 5. Then thread needle, front to back.

text_image
DR 543 PFAI 17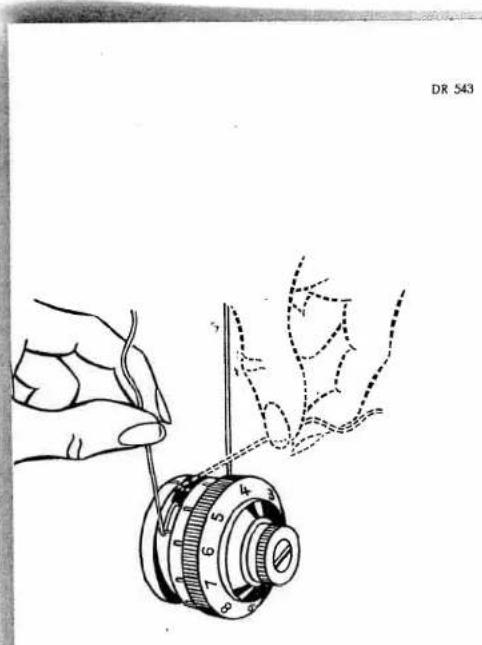
natural_image
Illustration of a hand using a tool to adjust a mechanical component (no text or symbols present)
text_image
PFAI 2 3 4 5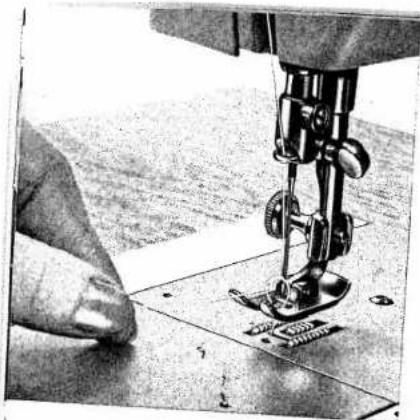
natural_image
Close-up of a sewing machine needle stitching fabric on a sewing machine (no visible text or symbols)DR 046
Drawing Up the Bobbin
Thread
Hold needle thread lightly in your left hand. Turn balance wheel toward you until the needle moves once down and up again. Lightly pull needle thread to draw-bobbin thread up through the needle hole. Place both threads back under the sewing foot.
Correct Tension Regulation
Balanced tensions are essential for sewing. If your tension is correct, you will have perfect seams as sketched below (III). Sketch I - The threads interlock on the underside of the fabric.
Cause: Upper tension too loose or lower tension too tight. Sketch II - The threads interlock on the surface of the fabric.
Cause: Upper tension too tight or lower tension too loose.
1
11
III

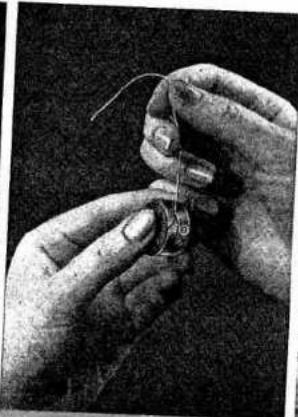
Regulating the Thread Tension
The bobbin thread tension has been set for a medium grade and need not be adjusted for all ordinary sewing operations. If a special sewing operation should require a looser or tighter tension, turn the small knurled screw on the bobbin case with the tip of your thumb as follows:
Turn it left ✕- for looser tension. Turn it right ✕- for tighter tension.
Determine whether the bobbin thread tension is set for a medium grade by holding the thread end between thumb and forefinger and letting the bobbin case hang freely. The tension should be strong enough to keep the bobbin case from being pulled down by its own weight. However, as you jerk your hand slightly, the bobbin case should gradually slide down. Do not turn the knurled screw too far to the left to keep it from falling out. Choose the lower tension slightly stronger when doing ornamental stitching to be sure you always have a neat satin stitch on the right side of the fabric.

natural_image
Close-up of a hand holding a small mechanical component, possibly a tool or device (no visible text or symbols)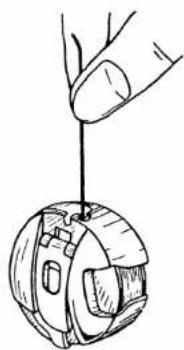
natural_image
Hand holding a small mechanical component with a connecting rod (no text or symbols visible)R 8029
DR 580

natural_image
Close-up of hands adjusting a mechanical dial with numbered parts (no visible text or symbols)▲
The upper tension is so designed that all grades of tension — loose to tight — can be covered with one complete turn of the tension dial. The numbers on the tension dial indicate different degrees of tension. The higher the number, the greater the tension. Only in very rare cases will it be necessary to reset the tension. For ordinary sewing, the upper tension should be set between 3 and 5.
Your upper tension has a third tension disc for two-needle work.
natural_image
Close-up of a finger pressing a small component on a wall socket (no visible text or symbols)DR 008
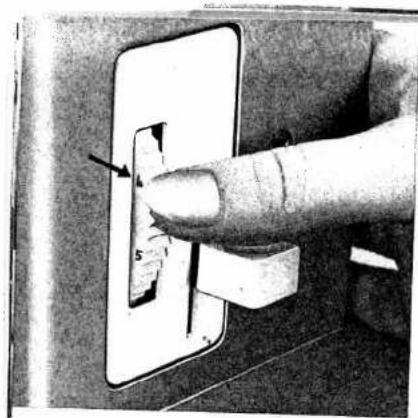
Stitch Length Regulation
The stitch length control serves to regulate the stitch length and to limit it in sewing backwards.
The numbers on the control indicate the stitch length (the higher the number, the longer the stitch). When the control is set on "0", the machine ceases feeding.
To regulate the stitch length, turn the control until the number indicating the desired stitch length is opposite the mark on the left edge of the slot. (The position of the mark is indicated by an arrow in the illustration).
Reverse Sewing
To sew in reverse, simply press the finger-tip control down. When the control is released, the machine resumes forward sewing.
This feature is ideal for backtacking the beginning or end of a seam and for darning rips.
20

text_image
Close-up of a hand pressing down on a device panel with visible text labels '4' and '5'DR 009
Changing the Sewing Foot
Lift both needle and presser bar to their highest positions and turn sewing foot thumb screw b to the left. Tilt the foot sideways and pull it down.
DR 042

natural_image
Close-up of a hand using a sewing machine to adjust or install a small mechanical component (no visible text or symbols)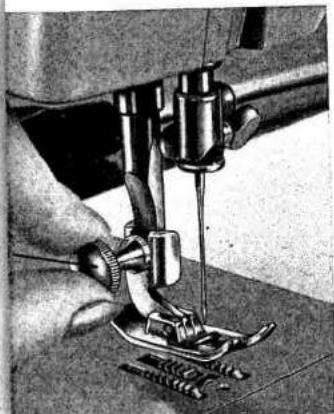
natural_image
Close-up of a sewing machine needle stitching fabric (no visible text or symbols)Reverse procedure to slip on new foot and tighten screw b securely.
DR 043
21

natural_image
Close-up of hands operating a sewing machine with a sewing machine needle and fabric (no visible text or symbols)DR 585
Preparing Your Machine for Dawning
Remove the sewing foot and the bed slide. Lift front end of needle plate and tilt out.
Turn needle plate half a turn so that raised portion is at the front (see illustration) and replace. Press down stud and replace bed slide. Thread the needle with darning wool and lower presser bar lifter. Now you can embroider and darn without presser foot, moving the work freely by hand.
22
DR 586

natural_image
Close-up of a sewing machine needle stitching fabric, with no visible text or symbols
Dawning and Embroidery Foot
Remove the sewing foot. Attach darning foot No. 93-100 154-91 from the rear. Hold spring clip c so that it is behind the needle set screw, and tighten screw b.
DR 047
natural_image
Close-up of a sewing machine needle and base with labeled parts (b, c), no visible text or symbols beyond labels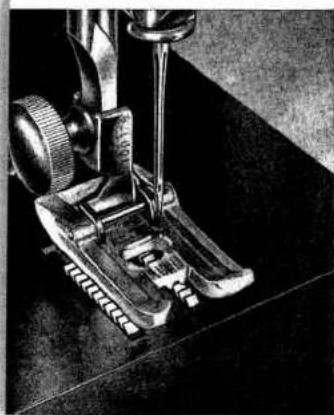
natural_image
Close-up of a sewing machine needle and base mechanism (no visible text or symbols)All-Purpose Sewing Foot
(with Clear-View Shoe)
All-purpose sewing foot No. 93-100 179-00 is attached as instructed on page 21.
The transparency of its shoe facilitates all sewing operations where it is important to watch the needle penetrate the fabric.
Special application possibilities are discussed in the second part of this book under the heading "Using Sewing Feet and Attachments".
DR 588
23
Care and Maintenance
Longevity and smooth machine performance are dependent on regular and proper cleaning and oiling.
Use Pfaff sewing machine oil only. Never lubricate machine with animal or vegetable oils.
All moving and rotating parts require regular lubrication. Begin under the bedplate. If you have a portable machine, tilt it back, loosen the large thumb screw on the underside of the machine base, and remove the base.
In replacing the machine base, tighten thumb screw lightly.

natural_image
Mechanical device with attached clamping mechanism (no visible text or symbols)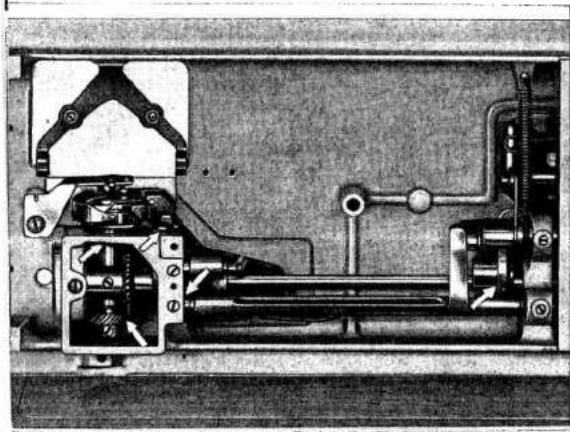
natural_image
Cross-sectional diagram of a mechanical assembly with no visible text or symbolsFrom time to time, lubricate the needle bar frame bearings in the sewing head.
For removing the face cover see page 26.
The principal oiling points are marked by arrows in the illustrations on these pages.
DR 590
24
natural_image
Close-up of a mechanical component with a circular dial and central hub (no visible text or symbols)DR 557
DR 589
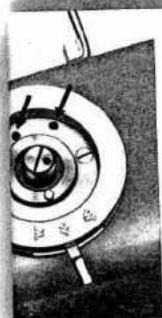
To oil the zigzag mechanism, remove the fashion disc and apply a drop of oil to the two marked oiling points (see arrows).
Do not lubricate the bobbin winder.
The raceway in the sewing hook is the most important oiling point. Put one drop of oil into the raceway each day you sew (see picture at top right).
From time to time, remove the needle plate and clean the machine feed with a soft brush. Take a toothpick and remove accumulations of packed lint. Take out the bobbin case and the bobbin and clean the vicinity of the sewing hook.
Before you begin to oil the mechanism under the bedplate and at the needle-bar end of the machine, remove the dirt and lint which has accumulated on these parts.
natural_image
Close-up mechanical assembly showing a dial and housing (no visible text or symbols)
natural_image
Close-up of a mechanical device with tools and components (no visible text or symbols)25
DR 587
natural_image
Close-up of a hand holding a mechanical component with a curved arrow indicating direction (no visible text or symbols)GR 024
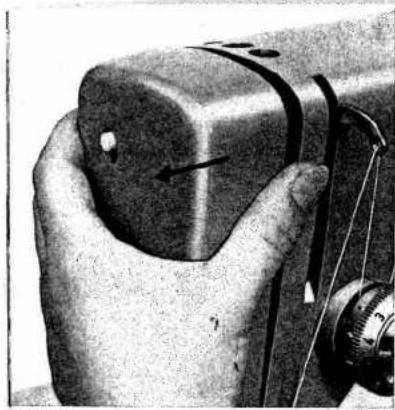
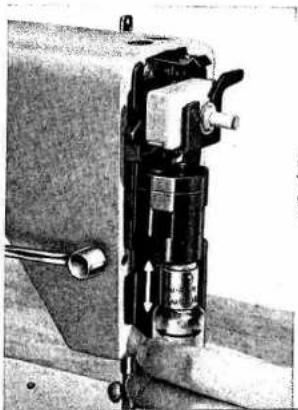
Changing the Light Bulb
The built-in 15-watt sewing light illuminates the area of stitching perfectly. To change the light bulb, remove the face cover, push the bulb into its socket, turn left, and pull out. When inserting sew light bulb, be sure to slide bulb pins into socket slots. Press bulb in and turn right.
natural_image
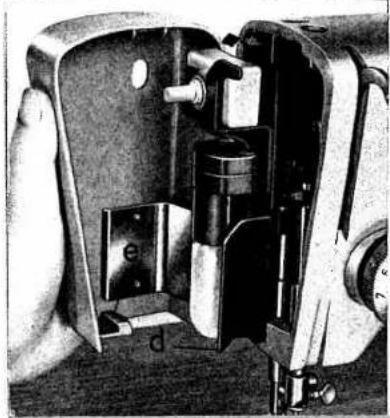
Close-up mechanical assembly showing internal components and parts (no visible text or symbols)Removing the Face Cover
To change the light bulb or oil the parts at the needle-bar end, remove the face cover by pulling it upwards.
Replacing the Face Cover
Slip tip d into slot e and push face cover up until it snaps into place.
DR 512
26
DR 505
natural_image
Mechanical assembly diagram showing a valve mechanism with no visible text or symbolsTrouble Shooting
1. Machine Skips Stitches
Cause:
Remedy:
Needle incorrectly inserted.
Push needle up as far as it will go and be sure that the long groove faces toward you, and flat side of shank away from you.
Wrong needle.
Choose the correct needle from chart on page 14. (For ordinary sewing, use System 130 R needles.)
Needle bent.
Insert new needle.
Machine threaded improperly.
Check and correct threading as instructed on pages 16 and 17.
Needle too fine or too thick for the thread.
Use correct needle and thread (see chart on page 14).
2. Needle Thread Breaks
Cause:
Remedy:
The above mentioned may cause thread breakage.
See remedies listed under 1. above.
Thread tension too tight.
Adjust tensions as instructed.
Poor, knotty or rotten thread used.
Use good quality threads only.
Hook raceway is jammed with thread or needs oiling.
Clean and oil hook raceway.
Burrs or sharp edges on needle plate slot.
Polish needle plate slot with fine emery cloth.
27
F
3. Needle Breaks
Cause:
Bent needle strikes point of sewing hook.
Needle too thin or thread too heavy.
Fabric pulls needle so it bends and strikes needle plate.
Bobbin case inserted incorrectly.
Remedy:
Replace needle at once to prevent further damage.
Use correct needle and thread sizes.
Don't force the feeding motion. Guide the material lightly.
Push bobbin case until you hear it snap into place.
4. Faulty Stitch Formation
Cause:
Improper tension.
Thread too heavy, knotty or hard.
Bobbin unevenly wound.
Pieces of thread between tension discs.
Remedy:
Adjust tensions as instructed.
Use only first-rate thread – the correct size for the needle and fabric.
Don't run thread over finger when winding the bobbin, but lead
it ground needle thread tension.
Raise presser bar lifter and remove thread.
5. Machine Feeds Improperly
Cause:
Machine does not feed because stitch length control set on "0".
Accumulations of lint packed between feed teeth.
Remedy:
Regulate stitch length, as desired.
Take off needle plate and remove lint with a stiff brush.
6. Machine Works Heavily
Cause:
Remedy:
Hook raceway lacks oil or is obstructed by pieces of thread.
Clean and oil hook raceway.
Mechanism clogged by inferior oil.
Use only Pfaff sewing machine oil - never salad oil or glycerine.
Bobbin winder working while sewing.
Stop bobbin winder.
7. Machine Fails to Sew Zigzag or Ornamental Stitch Desired
Cause:
Remedy:
Wrong fashion disc inserted or none at all.
Jerk stitch width lever to "0" and insert proper fashion disc.
For straight stitching, too, a fashion disc should be inserted in the machine (see pp. 6, 7 and 9).
8. Motor Idles
Cause:
Remedy:
Motor disengaging lever raised
Flick lever down (see page 5).
Thread Jamming
The Pfaff rotary hook will not normally jam, even if the machine should be handled improperly. If thread should happen to jam in the hook raceway, the power of the motor in most instances will be sufficient to overcome hard working of the mechanism.
If this action should not free the jammed thread, put a dop of kerosene into the hook raceway, jerk the balance wheel back, then rock it back and forth.
Using Sewing Feet and Attachments
(setting see page 6)
Zipper Insertion
Machine Setting: A = 0; B =
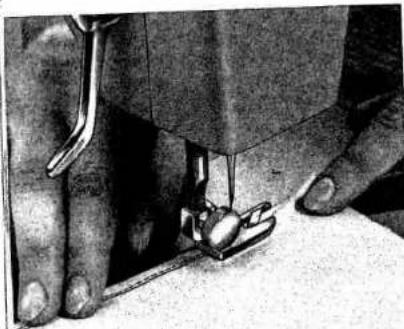
Pin or baste closed zipper on wrong side of fabric. Position of zipper depends on whether or not you want the edge of the fabric to overlap the zipper. Turn fabric to right side. Run a straight seam close to left edge of zipper, stitch across end and up the other side in one continuous operation. Use right edge of foot as a guide.

Edge Stitching
Machine Setting: A = 0 to 4; B =
Sew parallel rows of straight or zigzag stitches at various distances from the fabric edge by using adjustable seam guide No. 847 300 and the edge stitcher (without quilting gauge). The seam guide is fastened to the machine bed with the long thumb screw. For wider marginal stitching, turn edge guide half a turn and use low end as a guide. (To sew narrow parallel seams, guide fabric edge or preceding seam along right edge of sewing foot, using no edge guide.)
DR 032

natural_image
Close-up of a sewing machine needle stitching fabric, showing mechanical components and fabric layers (no text or symbols visible)
natural_image
Illustration of a sewing machine stitching fabric with a ruler and clasp (no text or symbols)DR 002
Quilting
Machine Setting: A = 0; B = Edge stitcher No. 847 600 used with the quilting gauge sews parallel rows of stitching at any distance over the entire surface of the fabric. Always guide the gauge finger along the preceding row of stitches. Attractive tea cosies, slippers, seat pads and covers can be quilted.
30
DR 003

natural_image
Close-up of a sewing machine needle stitching tiled fabric (no text or symbols visible)
natural_image
Close-up of a hand operating a sewing machine needle (no visible text or symbols)DR 048

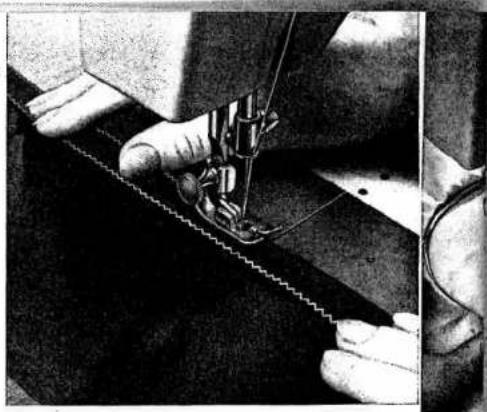
Flat Felled Seams
Machine Setting: A = 0 or 2; B =
电
Flat felled seams are used to durably join two pieces of fabric. They are made in two operations.
Flat felled seams usually are straight-stitched. Narrow zigzag stitches are used for felling on elasticized fabrics only.
First Seam
Lay pieces together with the wrong sides facing and the bottom pieces pretruding 18 inch. Feed both pieces into felling foot, as illustrated, so that the
bottom fabric is folded over edge of top piece and stitched down. Make sure that protruding seam allowance is not folded twice.

natural_image
Close-up of a sewing machine needle stitching fabric (no visible text or symbols)Second Seam
Open the two pieces, place them under the needle right side up, insert seam ridge into felling foot opening, and stitch down to the left. Make sure that
second seam is placed close to the edge but not beyond it. The felling foot has a needle slot, rather than a needle hole, to permit zigzag felling.
31
DR049

Hemming
Machine Setting: A = 0 or 2 to 3; B = ↘,
The hemmer foot is indispensable if you want to sew a uniform hem. You can hem with straight or zigzag stitches, depending on the type of fabric you are using. Clip off the corner of the fabric to facilitate insertion into the hemmer foot curl. Feed fabric so that the raw edge is in line with the left edge of the hemmer foot. If you feed less, the fabric will not be folded twice and the raw edge will show.

natural_image
Close-up of a sewing machine needle stitching fabric (no visible text or symbols)DR 508
natural_image
Close-up of hands operating a sewing machine needle (no visible text or symbols)DR 509
Avoid ugly ends by slowing down feeding. To do this, press the fabric against the needle plate on the left side of the foot before you come to the end of the hem.
32

Stitching Synthetic Materials
Curtains
Machine Setting: A = 1 to 3, depending on material; B =
Stitch Length: Minimum
Insert fashion disc A.
To finish the edge of synthetic curtain fabrics, such as Diolen, use a matching synthetic thread. If necessary, ease the upper and lower tensions somewhat.
Both these hints should be adhered to in order to avoid shrinking of both the thread and the fabric in the laundry. To butt seam the various sections of curtains, proceed as instructed on page 34.
Plastic Sheets
Machine Setting: A = 0 to 2; B =
Stitch Length: Medium
Plastic curtains, as are used in kitchens and bathrooms, are sewn with synthetic thread or cotton and a fine needle. Place a piece of tissue paper under sticky plastic sheets which can be easily removed after the sewing. To prevent plastic sheets from sticking to the sewing foot, apply a drop of oil to its sole.

Overcasting Edges
Machine Setting: A = 2 to 4; B =
Overcasting prevents frayed edges. Use a long wide zigzag stitch and sew edge with the needle taking one stitch into the fabric and the other over its edge (normal tension setting). You may overcast edges after fabric is cut and before the pieces are joined.
DR 037
natural_image
Close-up of a sewing machine needle stitching fabric, no visible text or symbols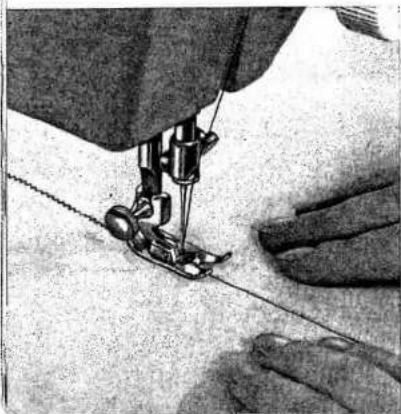
natural_image
Close-up of a sewing machine needle stitching fabric (no visible text or symbols)
Butt Seaming
Machine Setting: A = 3 or 4; B =
Two similar pieces of fabric which do not ravel easily may be butted together and joined with zigzag stitches. Worn bed sheets may be mended this way. Cut out worn center strip. Place the selvaged edges of the remaining pieces of sheet under the sewing foot so that the abutted edges are centered under the needle. Join them with close, wide zigzag stitches to obtain a neat and flat seam. Hem raw edges of sheet.
DR 045
34
natural_image
Black-and-white photo of a person operating a mechanical device (no visible text or symbols)DR 056
natural_image
Close-up of hands operating a sewing machine needle and cable (no visible text or symbols)DR 057
natural_image
Close-up of a sewing machine needle stitching fabric, with a hand inserting a card into the pocket (no visible text or symbols)DR 559
Darning
Machine setting: A = 0, B =
Prepare your machine for darning as instructed on pages 22 and 26. Pfaff dealer.
Prepare your measurement of the hoop. Hoops may be obtained from your position in the center of the hoop.
Triangular Tears
Triangular tears are best darned by placing the torn section between hoops and making close stitches across and lengthwise. Move work under the needle with both hands.
Thin Spots
Remember that "a stitch in time saves nine" and reinforce spots that have worn thin with short stitches made
lengthwise and across worn section. This job can be done without foot, too.
Small Holes
Darn small and medium-size holes by trimming ragged edges with the fabric grain. First stitch back and forth across the hole from one side to the other with the machine running at high speed. Then turn the fabric at right angles and sew back and forth
over preceding work with short stitches. Make sure the stitches are taken right into the good material.
Long Rips
may be darned with the normal sewing foot and without hoops. Set needle plate in its normal, or sewing, position and use forward-reverse feed control.

natural_image
Three-panel image showing sewing process: needle stitching, hand holding tool, and fabric swatch (no text or symbols)
Inserting Patches
Elastic Fabrics
Machine Setting: A = 4; B = ▼
Stitch Length: Medium
Insert fashion disc B (elastic serpentine stitch).
Large holes can be patched quickly. The following method may be used for jersey and other elastic fabrics. Cut patch so that its grain will match the rest of the fabric. Place the patch over the damaged area.
Sew it down with an elastic serpentine stitch of medium length.
For additional strength, stitch over corners twice. Turn over and trim close to seams.
Ordinary Fabrics
Machine Setting: A = 2; B =
Stitch Length: Minimum
Insert fashion disc A.
Patches are inserted in ordinary fabrics with short zigzag stitches. Sew over corners twice. Other than that, proceed as instructed above.
For added strength, sew around patch again, guiding the edge of the sewing foot along the first seam.

Blindstitching
Machine Setting: A = 4; B =
Stitch Length: Maximum
Insert fashion disc C.
Skirts, dresses and ladies' coats of medium and heavy-weight fabrics are hemmed with blind stitches. To do this, insert the blindstitch disc and a No. 70 needle. Use embroidery thread No. 50 or silk thread that matches the fabric. Ease upper tension somewhat.
Next, follow this procedure:
Turn fabric wrong side up. Fold finished edge of woolen fabrics once (Fig. 1), other thin fabrics twice (Fig. 2). In this latter case there is no need to finish the edge. It is best to press or baste the hem. Guide the work evenly. Set stitch width lever A so that needle takes left stitch exactly in the folded edge and right stitch up to or over the hem edge. When hem is finished, stitches will not be visible on top side.
DR 567

natural_image
Close-up of a textured fabric with a white border and dark patterned side (no text or symbols)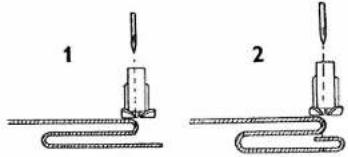
text_image
1 2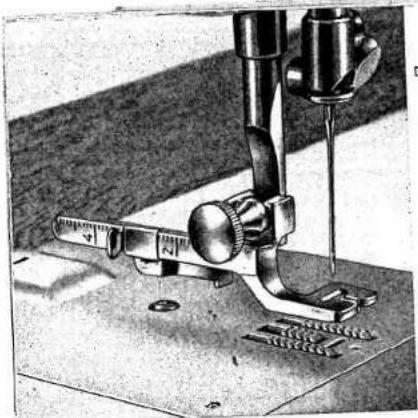
natural_image
Close-up of a sewing machine needle and screwdriver on a workbench (no visible text or symbols)DR 034
natural_image
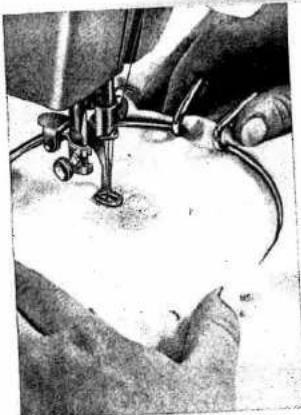
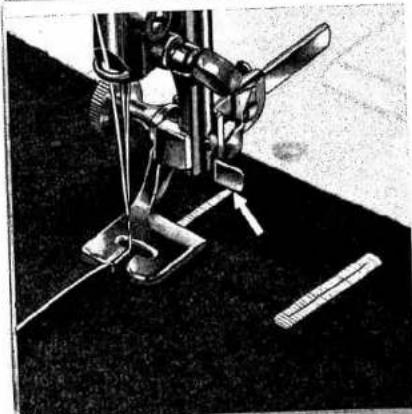
Close-up of a sewing machine needle stitching fabric (no visible text or symbols)Sewing Buttonholes
Machine Setting: A = 1 ^1/2 (first notch); B = ♦
Stitch Length: Almost 0 (for buttonhole seam)
Insert fashion disc A.
Use only No. 50 embroidery and darning thread.
Attach buttonhole foot No. 847 616 and set slide on buttonhole gauge to buttonhole length desired. The buttonhole is the right length when beginning of first seam reaches red end of slide indicator (see arrow).
When you follow the procedure on the opposite page, the barracks at each end of your buttonhole will be twice as wide as a buttonhole seam.
If you prefer more prominent buttonholes, pull a filler cord through the hole in left toe of foot. To get the correct stitch length, sew on a piece of scrap material. In making buttonholes in soft or loosely woven fabrics, it is advisable to place a piece of tissue paper under the material. To strengthen buttonholes in tricot and knit fabrics, insert a piece of firmly woven cotton material between the fabric layers.

Buttonholes may be made with the aid of the all-purpose sewing foot. Place the filler cord in the left groove of the clear-view shoe.
DR 035
38
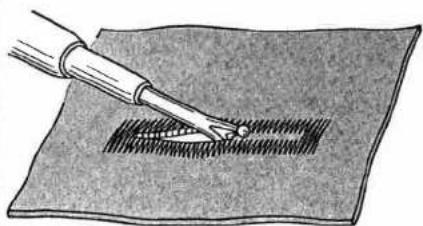
Instructions for Buttonholing
1 Sew first side over a filler cord. When beginning of seam reaches red end of slide indicator on buttonhole gauge, it is the right length. Leave needle in fabric on right side of its throw.
2 Lift foot, turn fabric around clockwise, using needle as a pivot. Lower foot, take one stitch to the left, pull filler cord taut and lay it parallel to completed line of stitching.
3 Turn dial A until it is caught in second notch (or stops at 4). Make 4 to 6 bartack stitches, slightly holding the material to reduce length of bar.
natural_image
Illustration of a pen tiping a textured surface with a hatched pattern (no text or symbols)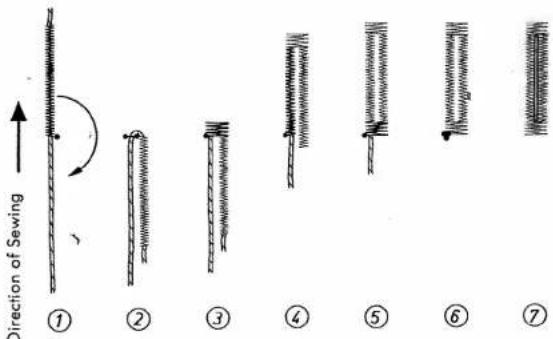
text_image
Direction of Sewing ① ② ③ ④ ⑤ ⑥ ⑦4 Change dial A to "1 ^1/2 ". Trim filler cord at end of first stitch row. Sew second row and stop about 4 to 6 stitches ( ^1/18 ) from end of first row.
5 Turn dial A to second notch position (or "4"). Make second tack, as instructed above (under 3).
6 Turn dial A to "0" and make 3 or 4 fastening stitches.
7 Trim both the sewing and filler threads. Open the buttonhole with your seam ripper. Be careful not to injure the bartacks.

natural_image
Black-and-white photo of a sewing machine needle stitching circular components on fabric (no visible text or symbols)DR 583

Button Sewing
Don't be afraid to sew on buttons or rings with your Pfaff. The needle won't break and the threads will not get loose either. Thet'lafter may happen only with ready-made clothing sewn with a chain stitch. It won't be worthwhile to take the machine out for sewing on a single button, but you will appreciate this feature when sewing lines of buttons on pillow and bed covers, on shirts or dresses, or when fastening rings on curtains etc. There your machine will come in very handy. Attach all-purpose sewing foot No. 93-100 179-00.
Hooks and eyes are sewn on with the aid of a special button sewing foot, No. 847 608, which can be obtained from your Pfaff dealer. Turn the needle plate half a turn so that the raised portion is at the front (see picture at the bottom of page 22). The raised portion of the needle plate features an elongated needle hole.
Place button under button sewing foot and align so that needle will enter left hole. Let needle stitch through hole and make one or two tying stitches. Raise needle. Turn dial A counter-clockwise, usually to 3, until needle on the right of its throw is centered over right hole. Start machine and sew as many zigzag stitches as you deem necessary to fasten button securely. Return dial A to 0 and make two or three tying stitches.
When sewing on four-hole buttons, reposition button and repeat the above process, stitching through the second pair of holes.

Attaching Lace
Machine Setting: A = 2; B =
You can attach lace edging in one simple operation. Fold the edge of the fabric about 38 " over to the wrong side, following the texture, and preferably iron it down. Place the straight edge of the lace on the fold of the fabric and sew it down with narrow zigzag stitches, taking one stitch into lace and fabric and the other into lace only. Cut off excessive cloth on the wrong side of the material close to the seam.
DR 044

natural_image
Close-up of a sewing machine needle stitching fabric (no visible text or symbols)2.1.1.1
1
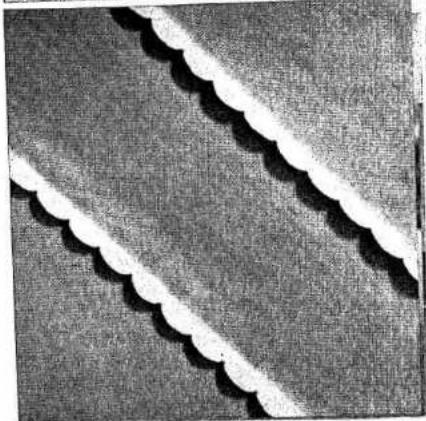
Shell-Edging Made with Blindstitch Disc
Machine Setting: A = 4; B =
Stitch Length: Medium
Insert fashion disc C, and tighten upper and lower thread tensions.
Shell edging is an effective fashion trim on blouses (particularly those made of delicate, soft fabrics). Fold fabric along desired line. Guide work so that needle takes one stitch in the fabric, and the other over its edge. (As the threads interlock outside the material, its edge is drawn back, producing the desired shell edging).
Shell edging makes a nice trimming on handkerchiefs, too.
natural_image
Close-up of two white scalloped fabric strips on a textured gray background (no text or symbols)41
DR 564
F

natural_image
Close-up of a sewing machine needle stitching a flower-like shape (no text or symbols visible)DR 033

Applique Work
Machine Setting: A = 1½ to 2; B = ◼ Insert fashion disc A.
Applique is easy and modern. Trace design on wrong side of fabric and baste a piece of contrasting material to right side. Outline design on wrong side with a narrow zigzag stitch – and the motive will appear on right side.
Applique is very effective on buster suits, pinafores, bibs, frocks, covers, wall hangings, or wherever a gay note is desired.
Fill out small, but essential sections of design with granite stitches.

natural_image
Close-up of hands cutting a flower with scissors, no visible text or symbolsTrim excess material close to the seam and sew over edges of applique with a medium-wide satin stitch. If you want to give the design a plastic effect, use buttonhole foot Nr. 847 616 or all-purpose sewing foot, flick lever B to the left and satin-stitch over a filler thread (see also page 38).
R 7167
42
R 7220

natural_image
Illustration of a girl kneeling beside a small house with a bag, no text or symbols present
natural_image
Close-up of hands using a sewing machine to create a thread-like knot (no text or symbols visible)DR 038
Monogram Embroidery
Machine Setting: A = 3 to 4; B =
Insert fashion disc A.
2
Prepare machine as for darning. Script letters are best for monogram embroidery without a sewing foot. It requires a little practice. You will soon enjoy creative embroidery once you have learned to move the material at a uniform rate. The fabric should be held laut in the hoops and the presser bar lifter lowered. Let the needle stitch into the fabric at the beginning of your design and draw bobbin thread up through the fabric. Hold both thread ends and sew over outline, moving hoops slowly and evenly. To give your monogram dimensional quality, embroider outline twice. Be sure stitches are closely spaced.

Sewing Monograms
Machine Setting: A = 2 ^1/2 to 3; B =
The procedure below is primarily used for block letters. Set needle plate so that feed dog feeds the material. Attach all-purpose sewing foot and set machine for satin stitch. Sew outlines of monogram, making sure that seams do not overlap at joints of letters.
natural_image
Close-up of a sewing machine needle stitching fabric, with no visible text or symbols43
DR 031
1
※

natural_image
Close-up of a sewing machine needle stitching fabric (no text or symbols visible)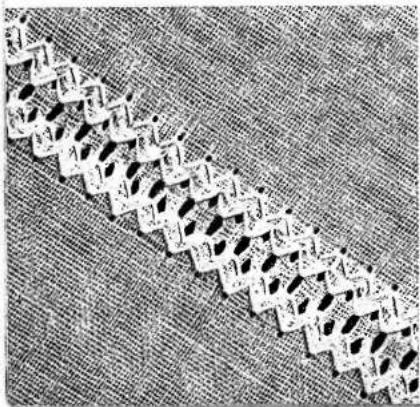
natural_image
Close-up of a patterned fabric with repeating diamond shapes and black holes, no text or symbols visible.
Straight-Stitch Hemstitching
Infert fashion disc A.
Machine'Setting: A = 0 · B =
Stitch length: Medium to maximum.
Insert twin hemstitching needle, System 130 Zwi-Ho, as instructed on page 15. Turn out needle set screw-a little further than for ordinary needles.
The thread size, threading procedure and thread tension are the same as for cording work (see page 45).
Beautiful hemstitching effects on blouses, dresses, handkerchiefs, doilies and so forth, can be obtained with Pfaff's System 130 twin needle. The harder the fabric yarn, the more pronounced the hemstitching will be. For this reason, batiste, organdy, georgette, etc. are best suited to hemstitching, while woolly fabrics are not recommended.
Procedure
Fold fabric to mark seamline or trace seamline on fabric. Sew first row. Guide fabric so that wing needle stitches along traced line. At the end of the seam, turn fabric half a turn and sew second row. Guide fabric in such a way that wing needle penetrates the needle holes it has made and enlarged previously.
Imitation hemstitching thus requires at least two operations. If desired, additional straight or curved ornamental seams may be stitched parallel to the first one. Exciting decorative effects may be obtained by using vari-colored embroidery and darning threads.
Zigzag Hemstitching
Machine Setting: A = Up to 1^1/2 ; B =
Insert fashion disc A
Same as above, except that the wing needle should penetrate the traced line only when it is on the left of its throw.
DR 001 R B427
44
Cording
Machine Setting: A = 0; B = ∅
To cord on your Pfaff 92, use a cording foot and a twin needle.
Twin needles are available for needle distances of 1.2 (3/64"), 1.6 (1/16"), 1.8, 2.0 (5/64"), 2.5 (3/32), 3.0, and 4.0 (5/32") millimeters.
Cording feet are available in three varieties, as follows:
Pin tucks are made with cording foot No. 847 680 (7 grooves, 3/64" wide each) and a 1.2-mm twin needle. For narrow cording use cording foot No. 847 675 (5 grooves, 1/16" wide each; see ill.) and a 1.6-mm twin needle. Wider cording is made with cording foot No. 847 671 (3 grooves, 5/64" wide each) and a twin needle with a needle distance of 2.0 or 2.5 millimeters.
Cording feet and twin needles, System 130, are supplied on special request and at extra cost.
Changing the Needle and the Sewing Foot
Bring take-up lever to highest point, loosen needle set screw a, and pull ordinary needle out of needle clamp. Insert twin needle into opening of needle clamp and push it up as far as it will go. Make sure that the flat side of the shank faces toward the back. Tighten needle set screw a securely.
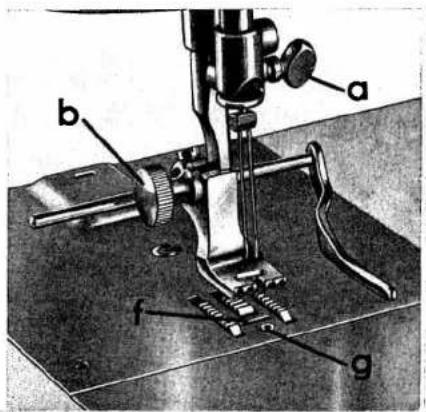
text_image
Technical diagram of a sewing machine with labeled parts (a, b, f, g)Turn sewing foot thumb screw b to the left and take out the sewing foot. Slip on cording foot and tighten screw b securely.
It is best to turn out screw b completely if you want to slip on a cording foot with the guide attached.
Thread Size
Pin tucks and narrow cording are made with a No. 50 embroidery thread, wider cording with sewing silk in the needle and on the bobbin.
Set the machine for a medium stitch length.
Upper Threading
Place a spool of thread on each of the two spool pins. Pass both thread ends through both thread returner openings 2, as illustrated on page 17. Lead one thread between the rear and center tension discs, and the other between the center and front tension discs of upper tension 3. Raise take-up lever 4 to its highest position and pass both threads through the hole at its end. Pull threads into slot 5, and thread each needle from front to back.
The bobbin thread is drawn up as instructed on page 18. To do this, hold both needle threads in your left hand.
natural_image
Close-up of a sewing machine needle stitching fabric (no visible text or symbols)Thread Tension
Slightly increase the bobbin thread tension, and increase or decrease the needle thread tension depending on the type of fabric used. If the tension has been set correctly, the bobbin thread should appear as a faint zigzag line on the other side.
Filled Cording
If you want to make cording in filmy fabrics or render your cording more prominent, Pfaff recommends that you insert a filler cord. Its thickness depends on the cording size you want.
Remove the bed slide and pass the filler cord from below through hole g located in front of the oval needle hole f (see ill, on page 45). Lay the end of the filler cord back under the cording foot (together with the needle and bobbin thread ends). Pull a filler cord forward under the bed slide and place the ball in your lap.
DR 521
46
F
Spacing between Tucks
To ensure uniform spacing between parallel tucks, place the preceding seam into one of the grooves of the foot and use it as a guide. For a larger spacing between tucks, use the adjustable guide (see ill. on page 46) which is part of every cording foot.
Various Cording Effects
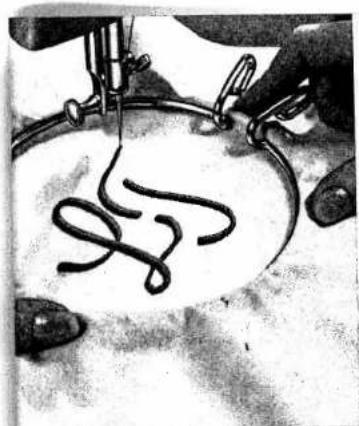
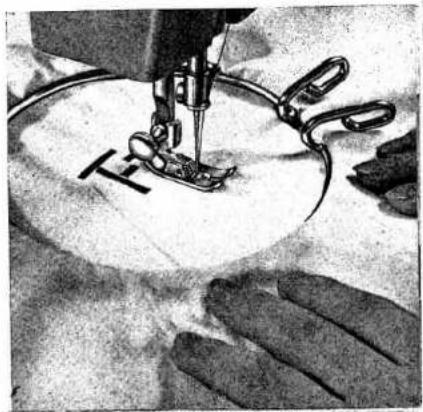
Attractive cording effects may be obtained by combining horizontal, vertical and diagonal tucks or stitching curved tucks (see ill. below). If you want to turn a corner, leave needle in fabric (up to needle eye only), lift foot, turn fabric, lower foot, and continue sewing. To stitch an acute angle, turn fabric halfway, let needle make one stitch, turn fabric all the way, and resume stitching.
DR 058
natural_image
Black-and-white sketch of a button-up shirt with collar and buttons, no text or symbols visible
natural_image
Abstract wavy pattern with no text or symbolsDR 473
natural_image
Close-up of a wavy, curved line on textured gray background (no text or symbols)DR 474

natural_image
Abstract geometric pattern with interlocking lines on textured background (no text or symbols)DR 475

natural_image
Abstract geometric pattern with layered rectangular shapes (no text or symbols)DR 058A

natural_image
Three vertical panels showing a wavy line pattern with square and circular elements, no text or symbols present.DR 554

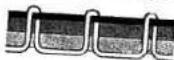
Coarse-Thread Embroidery
Machine Setting: A = 0 to 4; B = optional
Insert fashion disc A.
Buy a coarse, four-ply embroidery thread in the desired colors.
Embroidery designs made with this thread are very attractive. They have dimensional quality and closely resemble manual embroidery work.
The adjoining designs were made with the aid of the zigzag disc. To make the design illustrated in the middle, alternate straight and zigzag stitching.
Machine embroidery is made with the machine running at a moderate speed.
DR 555

Automatic Embroidery
Machine Setting: A = 2 to 4; B =
Stitch Length: Minimum
Insert fashion disc D, E, F or G, and use No. 50 embroidery thread.
Numerous pattern variations are possible by changing stitch width and stitch length. Selecting the most effective design and color combinations will challenge your imagination.
Automatic embroidery designs, too, are rendered more prominent by using coarse embroidery thread. It is advisable to increase the stitch length slightly.
Flower petals sewn with fashion disc E and coarse embroidery thread.
49

natural_image
Repeating black-and-white geometric pattern with repeating diamond shapes (no text or symbols)
text_image
Scanned text of dense Chinese characters, likely from a document or form
natural_image
Pure zigzag pattern with no text, numbers, or symbols-1
※
Two-Needle Decorative Sewing
Machine Setting: A = up to 2; B =
Insert fashion discs A to G.
Automatic embroidery designs are particularly attractive when sewn with twin needles and different color thread. The distance between both needles must not exceed 5/64 inch. (For threading the twin needles see cording instructions on page 45).
Beautiful border effects can be produced by combining zigzag, serpentine, and blind-stitch designs.
Your Pfaff can do many additional sewing jobs and turn out beautiful work. See your Pfaff dealer who will be glad to advice you on our extensive line of attachments designed to enlarge the range of possible applications of your machine. Such additional applications include granite stitching and sewing on wool thread. Interesting effects can also be obtained with the multi-stitch ruffler and the bias binder.
Contents
Foreword 1
Essential Parts of Machine 2
Fundamentals of Machine Operation ..... 3
Operation of Your Sewing Machine ..... 4
Motor Disengaging Mechanism 4
Electrical Information 5
Straight Stitching 6
Zigzag Sewing 7
Automatic Fashion Discs 8
Changing the Fashion Discs 9
Removing the Bobbin Case....10
Winding the Bobbin 11
Inserting a Full Bobbin into the Bobbin Case . . 12
Inserting the Bobbin Case . . . . . . . . . . 13
Recommended Needle and Thread Sizes . . . . 14
Important Facts about Needles ..... 15
Changing the Needle 15
Upper Threading 16
Correct Tension Regulation ..... 18
Drawing Up the Bobbin Thread 18
Regulating the Thread Tension ..... 19
Stitch Length Regulation 20
Reverse Sewing 20
Changing the Sewing Foot 21
Preparing Your Machine for Darning ..... 22
Darning and Embroidery Foot 23
All-Purpose Sewing Foot (with Clear-View Shoe) 23
Care and Maintenance 24
Changing the Light Bulb 26
Removing the Face Cover 26
Replacing the Face Cover . . . . . . . . . . . 26
Trouble Shooting 27
Zipper Insertion 30
Edge Stitching . . . . . . . . . . . . . . . . . . 30
Quilting 30
Flat Felled Seams 31
Hemming 32
Stitching Synthetic Materials 33
Overcasting Edges 34
Buff Seaming 34
Darning 35
Inserting Patches 36
Blindstitching 37
Sewing Buttonholes 38
Button Sewing 40
Attaching Lace 41
Shell-Edging Made with Blindstitch Disc . . . . 41
Applique Work 42
Monogram Embroidery 43
Sewing Monograms 43
Straight-Stitch Hemstitching 44
Zigzag Hemstitching 44
Cording 45
Coarse-Thread Embroidery 48
Automatic Embroidery 49
Two-Needle Decorative Sewing ..... 50
PFAFF®