
DO441BL - Blender DOMO - Free user manual and instructions
Find the device manual for free DO441BL DOMO in PDF.

| Brand | DOMO |
| Model | DO441BL |
| Product type | Blender |
| Power supply | 220-240 V ~ 50/60 Hz |
| Power | 600 W |
| Capacity | 1.5 L |
| Container material | Glass |
| Blade material | Stainless steel |
| Functions | Blend, crush ice, pulse function |
| Number of speeds | Variable with regulator |
| Pulse function | Yes (P position) |
| Maximum continuous use time | 3 minutes |
| Minimum rest time | 10 minutes |
| Removable parts | Measuring cup, lid, container, sealing ring, blades |
| Maintenance of container and accessories | Dishwasher safe (max 70°C) or hand wash |
| Maintenance of the motor unit | Clean with a damp cloth, do not immerse |
| Safety | Do not use empty, do not blend boiling liquids, sharp blades |
| Warranty | 2 years |
| Included accessories | Motor unit, container with lid, measuring cup, sealing ring, blades |
Frequently Asked Questions - DO441BL DOMO
User questions about DO441BL DOMO
0 question about this device. Answer the ones you know or ask your own.
Ask a new question about this device
Download the instructions for your Blender in PDF format for free! Find your manual DO441BL - DOMO and take your electronic device back in hand. On this page are published all the documents necessary for the use of your device. DO441BL by DOMO.
USER MANUAL DO441BL DOMO
natural_image
Black and white photo of a modern blender with handle and control knob (no visible text or symbols)DO441BL
PRODUCT OF LINEA 2000
GARANTIEVOORWAARDEN
CONDITIONS DE GARANTIE
This appliance has a two year warranty period. During this period the manufacturer is responsible for any failures that are the direct result of construction failure. When these failures occur the appliance will be repaired or replaced if necessary. The warranty will not be valid when the damage to the appliance is caused by wrong use, not following the instructions or repairs executed by a third party. The guarantee is issued with the original till receipt. All parts, which are subject to wear, are excluded from the warranty.
If your device breaks down within the 2-year warranty period, you can return the device together with your receipt to the shop where you purchased it.
CONDICIONES DE GARANTÍA
RECYCLAGE-INFORMATIE
natural_image
Simple line drawing of a trash bin with two crossed lines indicating no waste or discharge (no text or symbols)
RECYCLING INFORMATIONEN
natural_image
Recycling symbol composed of three chasing arrows forming a triangle (no text or labels)RECYCLING INFORMATION
This symbol on the product or on its packaging indicates that this product may not be treated as household waste. Instead it must be brought to the applicable collection point for recycling of electrical and electronic equipment. By ensuring this product is disposed of correctly, you will help prevent potential negative consequences for the environment and human health, which could otherwise be caused by inappropriate waste handling of this product. For more detailed information about recycling of this product, please contact your local city office, your household waste disposal service or the shop where you purchased the product.
The packaging is recyclable. Please treat package ecologically.

natural_image
Simple line drawing of a trash bin with crossed lines indicating no waste or discharge (no text or symbols)
natural_image
Recycling symbol composed of three chasing arrows forming a triangle (no text or labels)natural_image
Simple black line drawing of a plug with a curved cable (no text or symbols)If the supply cord is damaged, it must be replaced by the manufacturer, its service agent or a similarly qualified person in order to avoid a hazard.
natural_image
Close-up of a mechanical component with a white arrow pointing to a small feature (no visible text or symbols)natural_image
Warning symbol depicting steam rising inside a triangle (no text or numbers)
AVANT LA PREMIÈRE UTILISATION
natural_image
Close-up of a dark, textured surface with a small white arrow pointing to a feature (no visible text or symbols)UTILISATION DU MIXEUR
VOR DEM ERSTEN GEBRAUCH
This appliance may be used by children from the age of 8 and up, and also by persons with a physical or sensory limitation, as well as mentally limited persons or persons with a lack of experience and knowledge. But only on the condition that these persons have received the necessary instructions on how to use this appliance in a safe way and know the dangers that can occur by using this appliance.
Children cannot be allowed to play with the appliance. Maintenance and cleaning of the appliance may not be done by children, unless they are older than 8 years old and are under supervision. Keep the appliance out of reach of children younger than 8 years old.
This appliance is suitable to be used in a household environment and in similar surroundings such as:
- Kitchen for personnel of shops, offices or other similar professional surroundings
- Farms
- Hotel or motel rooms and other surroundings with a residential character
- Guest rooms or similar
Attention: This appliance cannot be used with an external timer or a separate remote control.
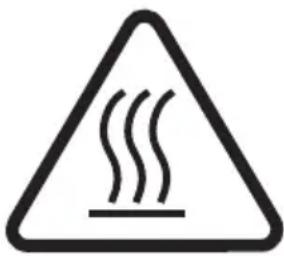
The appliance can become hot during use. Keep the power cord away from hot parts and don't cover the appliance.
- Read all instructions before use.
- Before use, check if the voltage stated on the appliance corresponds with the voltage of the power net at your home.
- Do not let the cord hang on a hot surface or on the edge of a table or counter top.
- Never use the appliance when the cord or plug is damaged, after malfunction or when the appliance itself is damaged. In that case, take the appliance to the nearest qualified service center for check-up and repair.
- Close supervision is necessary when the appliance is used near or by children.
- The use of accessories that are not recommended or sold by the manufacturer can cause fire, electrical shock or injuries.
- Unplug the appliance when it is not in use, before assembling or disassembling any parts and before cleaning the appliance. Put all buttons and knobs into the ‘off’ position and unplug the appliance by grasping the plug. Never unplug by pulling the cord.
-
Do not leave a working appliance unattended.
-
Never place this appliance near a gas stove or electrical stove or in a place where it may come into contact with a warm appliance.
- Do not use the appliance outdoors.
- Only use the appliance for its intended use.
• Always use the appliance on a steady, dry and level surface. - Avoid contact with moving parts.
- Do not put hands or utensils into the jar while mixing. This could cause serious injuries and/or serious damage to your appliance.
- Never place the blade assembly onto the blender without the jar well attached to it.
- When you want to remove the jar from the motor unit, always wait until the blades have fully stopped spinning.
• Always use the blender with the lid on. - The blades are sharp. Be very careful.
- Never use the appliance when the jar is empty. Never use boiling liquids in the blender.
PARTS
- Measuring cup
- Lid
- Jar
- Sealing ring
- Blade assembly
- Motor unit
- Speed knob with pulse function (P)

BEFORE THE FIRST USE
- Take the appliance out of the packaging
- Disassemble the different parts of the appliance and clean all removable parts according to the instructions described in the section ‘Cleaning and maintenance’.
-
Reassemble all parts when they are dry:
-
Place the jar upside down on a level surface, hold the jar by the handle and first put the sealing ring and then the blade assembly into the base of the jar. Tighten the blade assembly by turning it counterclockwise.
-
Turn over the jar so that the base is at the bottom again
-
Tighten the lid onto the jar by turning it clockwise until it clicks.
-
Place the measuring cup into the top of the lid and turn it clockwise until it is tightened.
-
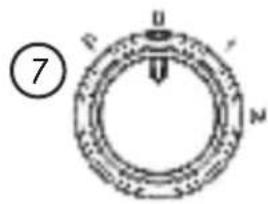
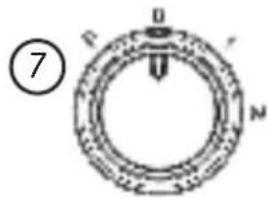
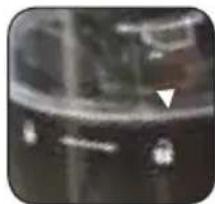
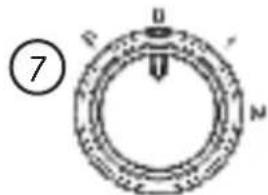
Tighten the jar back onto the motor unit by aligning the arrow on the jar with the lock on the motor unit and turning the jar clockwise.
natural_image
Close-up of a dark, textured surface with a white arrow pointing to a small bright spot (no visible text or symbols)USING THE BLENDER
- Peal the fruit or vegetables and cut them into small pieces.
- Put all foods that are to be blended into the jar. It is recommended to also always add pure water to facilitate a smooth operation of the blender. The ideal proportion of food/water is 2 to 3. The content of the jar should not exceed the maximum indication on the jar.
Caution: Never use boiling liquids or do not use the blender when the jar is empty.
- Place the lid onto the jar. Make sure that the measuring cup is well in place in the lid.
- Plug in the blender.
- Turn the speed knob to the required speed.
- For quick and accurate blending, turn the speed knob to the P position and hold for a few seconds. When you release the knob, it will automatically reset itself to the 0 position. You can do this a few times in a row, until the desired consistency has been reached.
- If you want to add ingredients while you are blending, remove the measuring cup from the lid and put the extra ingredients into the jar through this fill opening.
- When crushing ice or blending hard foods, keep 1 hand firmly onto the lid.
- Turn off the blender by setting the speed knob to 0.
- Unplug the blender after use.
Caution: For each use, the consecutive operation time should not exceed 3 minutes. Between two continuous cycles at least 10 minutes resting time should be maintained. The appliance needs to cool down to room temperature before starting the next blending cycle.
IMPORTANT TIPS
- When blending solid foods with liquids, first pour the liquids into the jar and only then add the solid foods.
- What you can not do with the blender: whipping egg whites, whipping cream, mashing potatoes, grinding meat, mixing dough, extracting the juice out of fruit and vegetables.
- Never put the following ingredients into the blender: bones, large pieces of solid, frozen foods or tough foods such as turnips.
- To crush ice, put 6 ice cubes into the jar. If you need more crushed ice, remove the measuring cup from the lid and add the ice cubes one by one through the fill opening.
CLEANING AND MAINTENANCE
- Pour some warm soapy water into the jar and turn the speed knob for a few seconds to the P position. Empty the jar.
- Unplug the blender before continuing with cleaning.
- Always clean the blender immediately after us for easy cleaning. Do not let food
dry in the jar or the blade assembly, this will make them harder to clean.
- Disassemble the removable parts. Turn the jar counterclockwise and remove it from the motor unit. Loosen the blade assembly from the bottom of the jar by turning it clockwise. Remove the blade assembly and the sealing ring. Also remove the lid from the jar and the measuring cup from the lid.
- Clean the measuring cup, the lid, the sealing ring and the jar by hand or in the dishwasher. When using the dishwasher, make sure that the temperature does not exceed 70^ .
- Clean the blades with some warm soapy water and rinse under the tap. Do not touch the blades and be extra careful. Do not immerse the blade assembly in water. Let the blade assembly dry upside down, out of reach of children.
- Wipe the motor unit clean with a damp cloth and dry thoroughly. Remove stubborn stains by scrubbing with a non-abrasive cleaner. If liquids spill onto the motor unit, unplug the blender, wipe the motor unit clean with a damp cloth and dry thoroughly.
Caution:
- Never immerse the motor unit in any liquid to avoid the risk of electrical shock.
- Do not use any rough scouring pads or cleaners on the parts or on the finish of the appliance.
PRECAUCIONES IMPORTANTES
natural_image
Warning symbol of rising steam inside a triangle (no text or numbers)natural_image
Close-up of a dark, textured surface with a small white arrow pointing to a feature (no visible text or symbols)USO DE LA LICUADORA
PŘED PRVNÍM POUŽITÍM
natural_image
Close-up of a dark, textured surface with a small white arrow pointing to a feature (no visible text or symbols)POUŽITÍ MIXÉRU


- GARANTIEVOORWAARDEN
- CONDITIONS DE GARANTIE
- CONDICIONES DE GARANTÍA
- RECYCLAGE-INFORMATIE
- RECYCLING INFORMATIONEN
- RECYCLING INFORMATION
- AVANT LA PREMIÈRE UTILISATION
- UTILISATION DU MIXEUR
- VOR DEM ERSTEN GEBRAUCH
- PARTS
- BEFORE THE FIRST USE
- USING THE BLENDER
- IMPORTANT TIPS
- CLEANING AND MAINTENANCE
- Caution:
- PRECAUCIONES IMPORTANTES
- USO DE LA LICUADORA
- PŘED PRVNÍM POUŽITÍM
- POUŽITÍ MIXÉRU
Brand : DOMO
Model : DO441BL
Category : Blender