
HB 544 - Solar bench PHILIPS - Free user manual and instructions
Find the device manual for free HB 544 PHILIPS in PDF.
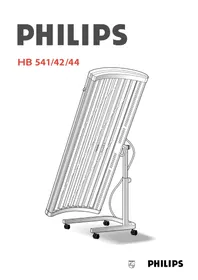


| Product Type | Sunbed |
| Brand | Philips |
| Model | HB 544 |
| Number of UVA tubes | 10 large tubes (100 W) + 4 small tubes (15 W) for face |
| Tube type | Philips UVA 100 W "Cleo Performance" (large), Philips UVA 15 W "Cleo Performance" (small) |
| Starters | 10 large starters S12 + 4 small starters S12 |
| Timer | Yes, automatic shut-off after 60 minutes maximum |
| Recommended tanning distance | 20 cm (8 inches) between body surface and lamps |
| Protective goggles included | Yes, model HB 071 (ref. 4822 690 80123) |
| Power supply | Check voltage on rating plate (not specified, usually 220-240 V) |
| Estimated total power | Approx. 1060 W (10 × 100 W + 4 × 15 W) |
| Approximate weight | Approx. 30 kg |
| Approximate dimensions | Not specified, length approx. 180 cm, width approx. 60 cm |
| Usage positions | Lying, sitting, standing (height adjustable) |
| Height adjustment | By adjustment knob, column with gas spring |
| Ventilation | Fan and ventilation slots |
| Protective plate | Yes, with removable adhesive coating |
| Maximum tanning hours per year | 28 hours (1680 minutes) for this model |
| Cleaning | Damp cloth, avoid abrasive products, alcohol, acetone |
| Spare parts | Tubes, starters, protective goggles (HB 071) |
| Repairability | Replacement of tubes and starters possible by user or a professional |
| Safety | Automatic timer, overheat shutdown, 13 A fuse (UK) or 10/16 A (other countries) |
Frequently Asked Questions - HB 544 PHILIPS
User questions about HB 544 PHILIPS
0 question about this device. Answer the ones you know or ask your own.
Ask a new question about this device
Download the instructions for your Solar bench in PDF format for free! Find your manual HB 544 - PHILIPS and take your electronic device back in hand. On this page are published all the documents necessary for the use of your device. HB 544 by PHILIPS.
USER MANUAL HB 544 PHILIPS
Keep page 3 open when reading these operating instructions.
Important
- Before connecting the appliance to the mains socket, check if the voltage indicated on the rating plate corresponds with the mains voltage in your home. Water and electricity are a dangerous combination! Therefore, do not use the appliance in wet surroundings (e.g. in the bathroom or shower, or near a swimming pool).
- If you have just been swimming or have just taken a shower, dry yourself thoroughly before using the appliance. Take care that children cannot play with the solarium. As a precaution remove the plug from the wall socket after use.
- Keep the ventilation openings in the upper casing clear of obstruction when using the solarium.
- Do not exceed the advised session times or the maximum amount of "tanning hours". (See section "UV sessions: How often? And how long?")
- Do not select a shorter operational distance than the advised 20 cm (approx. 8").
- Do not treat each part or side of the body more often than once a day. Avoid intensive skin exposure to natural sunlight on the same day as a UV session.
- If you have any symptoms of illness, if you take any medicines and/or apply cosmetics which increase skin sensitivity, you should not have a UV-session.
Special care is also necessary in cases of pronounced individual sensitivity to ultraviolet. When in doubt, please consult your doctor.
- A solarium is not to be used by people who get sunburnt without tanning when exposed to the sun, by persons suffering from sunburn, by children, or by persons who suffer (or have previously suffered) from skin cancer or who are predisposed to skin cancer.
- Consult your doctor if ulcers, moles or persistent lumps develop on the skin.
- Always wear the protective eye goggles while tanning to protect your eyes against excessive doses of ultraviolet, visible light and infrared. (Also refer to section "UV and your health".)
- Remove creams, lipstick and other cosmetics well in advance of a UV session.
- Do not use sunscreen lotions or creams.
- Do not use suntan lotions or creams.
- If your skin should feel taut after the sun tanning session, you may apply a moisturizing cream.
- Never use the solarium if the timer has become faulty.
- Colours may fade under the influence of the sun. The same effect may occur when using the appliance.
- Do not expect the appliance to yield better results than the natural sun.
The Sun
The sun is the source of energy on which all life on earth depends.
There are various kinds of solar energy: the sunlight enables us to see, we feel the warmth of the sunshine on our skin, and under the influence of the sun our skin is tanned.
These three effects are due to three specific components of the sun radiance spectrum, each of the components having their own wave lengths.
The sun radiates electro-magnetic vibrations with widely different wave lengths. The wave lengths of heat rays or "infrared" (IR) are longer than the wave lengths of visible light. And the wave lengths of "ultraviolet" (UV), which tans our skin, are shorter than these.
Science has managed to reproduce these three kinds of solar radiation: heat (e.g. Infraphil), light (lamps) and UV (solariums, sun couches etc.)
UV-A, UV-B and UV-C
Ultraviolet (UV) is subdivided into UV-A (longer wavelengths), UV-B, and UV-C (shorter wavelengths).
UV-C seldom reaches the earth as it is filtered out by the atmosphere.
UV-A and UV-B cause the tanning effect of the skin.
In fact, there are two processes that produce tanning, and they are simultaneously effective:
- "Indirect tanning". Primarily UV-B stimulates the production of a substance called "melanin", which is necessary for tanning. The effect does not show until a couple of days after the sunbath.
- "Direct tanning". The UV-A and also a part of the visible light cause quicker browning without reddening or "getting sunburnt".
The solarium
This solarium emits predominantly UV-A, and also a very small amount of UV-B.
It possesses some important features that make tanning at home comfortable and convenient.
The unique type of sun lamp used in this solarium emits light, warmth, and ultraviolet, just like the natural sun.
You can position this solarium so that using it really resembles lying in the sun: your whole body is tanned evenly, from head to toe.
For your convenience, but also to prevent unintended prolonged exposure (e.g., after falling asleep), a timer-controlled automatic switch-off operates after 60 minutes of tanning.
As it is with the natural sun, it's wise not to have too much of a good thing! (See section "UV and your health".)
UV and your health
After an excessive exposure to ultraviolet (from the natural sun or from your solarium), the skin may develop sunburn.
Beside numerous other factors, such as excessive exposure to the natural sun, improper and excessive use of your solarium will increase the risk of skin and eye disease.
The nature, intensity and duration of the radiation on one hand, and the sensitivity of the individual on the other, are decisive on the degree in which these affects can occur.
The more skin and eyes are exposed to UV, the more risk increases of diseases such as inflammation of the cornea and/or conjunctiva, damaging of the retina, cataract, premature aging of the skin and skin tumours.
Certain medicines and cosmetics increase the sensitivity to UV.
Therefore, it is of great importance
- that you follow the instructions in sections "Important" and "UV sessions: how often? And how long?";
- that you select the advised operational distance of at least 20 cm (approx. 8");
- that you do not exceed the maximum amount of tanning hours per year (Please see the section "UV sessions (...) which applies to your solarium type number!);
- that you always wear the provided goggles while tanning.
For solarium type HB 541 (8 tube lamps) only:
UV sessions: how often? And how long?
You may have one UV session per day, over a period of five to ten days. Allow at least 48 hours between the first two sessions.
After such a course, you may rest the skin for a while.
Approximately one month after a course your skin will have lost much of the tan. You might then decide to start a new course.
On the other hand, it is also possible to have one or two UV sessions per week after a course has elapsed in order to keep up the tan.
Whatever you may prefer, make sure that you do not exceed the maximum amount of tanning hours per year.
- For solarium type HB 541 (8 tube lamps) this is 33 hours (= 1980 minutes).
Example:
Imagine that you take a 10 day UV course, with a 12 minute session on the first day and 30 minutes' sessions on the nine following days.
The entire course then includes (1 x 12 minutes) + (9 x 30 minutes) = 282 minutes.
- When using solarium type HB 541 (with 8 tube lamps), you may have 7 of these courses over a year. (As 7 x 282 minutes = 1974 minutes.)
Of course, this maximum amount of tanning hours is valid for each treated part or side of the body separately.
(E.g. for the front side of your body and for the other side.)
From the table it will be seen that the first session of a course should have a duration of 12 minutes.
This is not dependent upon individual skin sensitivity.
| Duration of the UV session (for each separately treated part of 1st 2nd the body) in minutes | 3rd 4th 5th session | 6th 7th 8th session | 9th 10th session | session | session | session | session | session | session | session |
| - for persons with very sensitive skin: | 12 | 10-15 | 10-15 | 10-15 | 10-15 | 10-15 | 10-15 | 10-15 | 10-15 | 10-15 |
| - for persons with normal sensitive skin: | 12 | 30-35 | 30-35 | 30-35 | 30-35 | 30-35 | 30-35 | 30-35 | 30-35 | 30-35 |
| - for persons with less sensitive skin: | 12 | 35-40 | 35-40 | 35-40 | 35-40 | 35-40 | 35-40 | 35-40 | 35-40 | 35-40 |
- If you think that the sessions are too long for you (e.g. if the skin gets taut and tender after the session), we advise you to reduce the sessions by e.g. 5 minutes per side of the body.
- To get a beautiful all-over tan it is suggested that you turn slightly during the session so that the sides of your body are better exposed to the tanning rays.
For solarium types HB 542 and HB 544 (with 10 large tube lamps) only:
UV sessions: how often? And how long?
You may have one UV session per day, over a period of five to ten days. Allow at least 48 hours between the first two sessions.
After such a course, you may rest the skin for a while.
Approximately one month after a course your skin will have lost much of the tan. You might then decide to start a new course.
On the other hand, it is also possible to have one or two UV sessions per week after a course has elapsed in order to keep up the tan.
Whatever you may prefer, make sure that you do not exceed the maximum amount of tanning hours per year.
- For these solarium types HB 542 and HB 544 (with 10 large tube lamps) this is 28 hours (= 1680 minutes).
Example:
Imagine that you take a 10 day UV course, with a 10 minute session on the first day and 30 minutes' sessions on the nine following days.
The entire course then includes (1 x 10 minutes) + (9 x 30 minutes) = 280 minutes.
- When using solarium type HB 542 or HB 544 (with 10 large tube lamps), you may have 6 of these courses over a year. (As 6 x 280 minutes = 1680 minutes.)
Of course, this maximum amount of tanning hours is valid for each treated part or side of the body separately.
(E.g. for the front side of your body and for the other side.)
From the table it will be seen that the first session of a course should have a duration of 10 minutes.
This is not dependent upon individual skin sensitivity.
| Duration of the UV session(for each separately treated part of 1st 2nd 3rd 4th 5th 6th 7th 8th 9th 10th the body) in minutes | session | session | session | session | session | session | session | session | session | session |
| - for persons with very sensitive skin: | 10 | 10-15 | 10-15 | 10-15 | 10-15 | 10-15 | 10-15 | 10-15 | 10-15 | 10-15 |
| - for persons with normal sensitive skin: | 10 | 20-25 | 20-25 | 20-25 | 20-25 | 20-25 | 20-25 | 20-25 | 20-25 | 20-25 |
| - for persons with less sensitive skin: | 10 | 30-35 | 30-35 | 30-35 | 30-35 | 30-35 | 30-35 | 30-35 | 30-35 | 30-35 |
- If you think that the sessions are too long for you (e.g. if the skin gets taut and tender after the session), we advise you to reduce the sessions by e.g. 5 minutes per side of the body.
- To get a beautiful all-over tan it is suggested that you turn slightly during the session so that the sides of your body are better exposed to the tanning rays.
General description (fig. 1, page 3)
Tube lamps and starters
HB 541 - 8 large tube lamps (type Philips UVA 100W
"Cleo Performance") with
8 starters (type Philips S12)
HB 542 - 10 large tube lamps (type Philips UVA 100W
"Cleo Performance") with
10 starters (type Philips S12)
HB 544 - 10 large tube lamps (type Philips UVA 100W
"Cleo Performance") with
10 starters (type Philips S12) and
4 small tube lamps (type Philips UVA 15W
"Cleo Performance") for extra face tanning
performance, with
4 starters (type Philips S2)
B Timer
c Stand
(Type HB 071 / service no. 4822 690 80123)
End caps
F Rod
D Protective eye goggles (2x) G Bolts and nuts Height adjustment knob Spanner Mains cord K Castor wheels Handle M Cooling fan N Vents Protective shield P Protective plastic foil
Making the solarium ready for use


Fixing the stand
- With one person helping you, lay the solarium on a table top with the lamps facing downwards (fig. 2).
Ensure that the handle does not rest on the table.
- Fix the castor wheels to the stand (fig. 3).


- Mount the stand to the rod (fig. 4, 5).


- Lift the solarium from the table top (fig. 6).
- Remove the plastic foil from the protective shield (fig. 7).


You can be tanned either lying (fig. 8),
sitting (fig. 9), or
standing (fig. 10)
with this solarium.
To make this possible, you can adjust the height and position of the upper casing.
- During tanning, the distance between the lamps and your body should be at least 20 cm (8").
- If you intend to tan while lying, this means that the distance between the lamps and your bed, couch or mattress should be at least 40 cm (16") (fig. 11).
Height adjustment
- Rotate the height adjustment knob anti-clockwise two or three turns to release the rod (fig. 12). A gas spring stabilizes the position of the rod.
- Adjust the height of the rod by pulling or pushing the handle (fig. 13).
- Turn the height adjustment knob clockwise until tight to lock the rod (fig. 14).


How to use
- Check the distance between your body and the solarium (min. 20 cm or 8"). If necessary adjust the height and/or position of the solarium.
- Set the timer to the session time (fig. 15). (Please refer to the table in these instructions and to your own notes.)
- Do not forget to put on the eye goggles provided.
- As soon as the session time has elapsed the lamps will automatically be switched off. - If you wish to treat the other side of your body as well, you can set the timer again. (It is not necessary for the solarium to cool down first.)

Lying
- Place the solarium beside a bed or couch.
- As the stand is on wheels you can draw the solarium towards you while lying. Ensure that the lamps are positioned straight above you (fig. 8).
- You can move the stand under the bed (fig. 16).
- After use, you can push the solarium away from you to make getting up easier.
Sitting
- Place a (deck) chair and the solarium together (fig. 9).
- Bring the solarium in optimum position by turning the upper casing.
Standing
- Turn the upper casing to bring it into a vertical position. If necessary adjust the height.
- Stand in front of the solarium (fig. 10) - at least 20 cm (8") away.
Storage
The solarium takes up very little space when stored in a vertical position (fig. 17).


Cleaning
- Always unplug the solarium and let it cool down before cleaning.
- You can clean the outside of the solarium with a damp cloth. Make sure that no water runs into the appliance.
- Do not use abrasives or scourers.
- Never use liquids such as alcohol, methylated spirits, petrol or acetone to clean the protective plate as this may cause irreparable damage.
Replacing the tube lamps and/or starters
In the course of time (in normal family use after some years) the efficiency of the tube lamps will gradually decrease. If this happens, you may increase the tanning session time or have the tube lamps replaced.
- You can have the tube lamps and/or the starters replaced by authorized service personnel: they have the required skill and the original replacement parts and tools to do the job. They also have the facilities to dispose of the used tube lamps.
- If you prefer to replace the lamps yourself, proceed as follows:
- First remove the mains plug from the wall socket.


- Loosen the screws and remove the two end caps (fig. 18).
- Pull out the protective shield completely (fig. 19). After this, the lamps and starters are accessible.
- Rotate the lamps slightly to the left or to the right. When unlocked remove them from the lamp holders.
- Remove the starters by turning slightly to the left and withdrawing. (Half the amount of starters are at each end of the solarium.)
- To place new lamps and starters proceed in reverse order and direction.
- Slide the protective shield back into the profile. Do not forget to fix the end caps by means of the screws.

The tube lamps of solariums contain substances which may pollute the environment. When discarding old tube lamps, please ensure that they are separated from the normal household refuse and that they are disposed of at an officially assigned place.
For U.K. only:
Fitting a different plug
This appliance is fitted with a BS 1363 13 Amp plug. Should you need to replace the plug, connect the wires as follows:
Brown wire to the Live (L) terminal of the new plug. Blue wire to the Neutral (N) terminal of the new plug.
Always fit the same value of fuse as that originally supplied with your appliance.
Only use BS 1362 approved fuses.
As a guide only: Appliances under 700 W can have a 3 Amp fuse (red) and all others should have a 13 Amp fuse (brown).
When disposing of an old plug (particularly the moulded type which has been cut from the mains cord) always remove the fuse as the plug could be dangerous if ever inserted in a live socket.
Solarium does not operate as required?
If the solarium should not operate as required, this may be due to a defect. In this case do not hesitate to apply to your dealer or to a Philips Service Centre.
However, it is also possible that the appliance has not been installed according to the instructions or is used incorrectly. If this is the case, you will be able to solve the problem immediately.
You may check the following section before contacting your dealer or Philips Service Centre.
Problem
• Solarium does not switch on.
- The power fuse switches the mains power off when switching on or while using the solarium.
- The browning is not according to your expectations.
Possible cause
- Mains plug is not in wall socket.
- No mains power. (Please check with other appliance.)
- Timer has not been set.
- Check the fuse to which the solarium has been connected. The proper type for your solarium is a 13 A (for U.K.) or a 10 or 16 A (for other countries) normal fuse or a slow reacting automatic fuse.
- You use an extension cord which is too long, wound-up and/or does not allow the required power levels. Please apply to your dealer. In general, we advise not to use an extension cord.
- You followed a course which is not the most appropriate for your skin type.
- The operational distance is larger than indicated.
- After using for a long time the UV production of the lamps decreases. (With normal use this will not be noticeable for years.) You may compensate for this effect by selecting longer treatment times or replace the sun lamps
French
Important

Base fixing


Use

Cleaning


Use of the device

Cleaning


Use
Seated
Cleaning


HOW TO USE THE SUNBED

CLEANING


How to use it

Cleaning


- Mount the rods on the stand (fig. 4, 5).


- Lift the sunbed off the table (fig. 6).


Cleaning.
Sun


- Mount the stand to the rod (fig. 4, 5).


You can sunbathe either:
lying down (fig. 8),
sitting (fig. 9), or
standing (fig. 10)
with this solarium.


Using the solarium
Sitting
Cleaning


You can sunbathe either:
lying down, fig. 8,
sitting, fig. 9, or
standing, fig. 10
with this solarium.


Use

Cleaning
- IMPORTANT
- UV-A, UV-B AND UV-C
- THE SOLARIUM
- UV AND YOUR HEALTH
- THEREFORE, IT IS OF GREAT IMPORTANCE
- FOR SOLARIUM TYPE HB 541 (8 TUBE LAMPS) ONLY
- UV SESSIONS: HOW OFTEN? AND HOW LONG
- EXAMPLE
- GENERAL DESCRIPTION (FIG. 1, PAGE 3)
- TUBE LAMPS AND STARTERS
- B TIMER
- C STAND
- END CAPS
- F ROD
- MAKING THE SOLARIUM READY FOR USE
- FIXING THE STAND
- HEIGHT ADJUSTMENT
- HOW TO USE
- LYING
- SITTING
- STANDING
- STORAGE
- CLEANING
- REPLACING THE TUBE LAMPS AND/OR STARTERS
- FOR U.K. ONLY
- FITTING A DIFFERENT PLUG
- SOLARIUM DOES NOT OPERATE AS REQUIRED
- PROBLEM
- POSSIBLE CAUSE
- FRENCH
- BASE FIXING
- USE
- USE OF THE DEVICE
- SEATED
- HOW TO USE THE SUNBED
- HOW TO USE IT
- SUN
- USING THE SOLARIUM
Brand : PHILIPS
Model : HB 544
Category : Solar bench