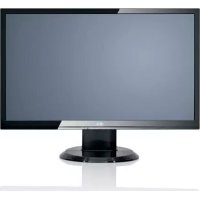
B22W-5 ECO - Monitor FUJITSU - Free user manual and instructions
Find the device manual for free B22W-5 ECO FUJITSU in PDF.

User questions about B22W-5 ECO FUJITSU
0 question about this device. Answer the ones you know or ask your own.
Ask a new question about this device
Download the instructions for your Monitor in PDF format for free! Find your manual B22W-5 ECO - FUJITSU and take your electronic device back in hand. On this page are published all the documents necessary for the use of your device. B22W-5 ECO by FUJITSU.
USER MANUAL B22W-5 ECO FUJITSU
...anytechnicalquestionsorproblems?
Pleasecontact:
- ourHotline/HelpDesk(pleaserefertotheenclosedHelpDesklistorlookupthe contactdetailsonourwebsiteat:" http://ts.fujitsu.com/support/")
•yoursalespartner
•yoursalesoffice
Thelatestinformationaboutourproducts,usefultips,updatesetc.isavailable onourwebsite:" http://ts.fujitsu.com/support/"
Copyright
© Fujitsu Technology Solutions 2009
2009/06
Published by
Fujitsu Technology Solutions GmbH
http://ts.fujitsu.com/support
All rights reserved, including intellectual property rights.
Technical data subject to modifications and delivery subject to availability. Any liability that the data and illustrations are complete, actual or correct is excluded. Designations may be trademarks and/or copyrights of the respective manufacturer, the use of which by third parties for their own purposes may infringe the rights of such owner. For further information see http://ts.fujitsu.com/terms_of_use.html
FUJITSUB22W-5ECO
OperatingManual
YourLCDscreen...1
Importantnotes 3
Gettingstarted7
Operation 13
Notesonergonomiccolouradjustment21
Troubleshooting 22
NotesregardingtheDINENISO
13406-2standard 24
Technical specification 25
VESA, DDCandDPMSareregisteredtrademarksoftheVideoElectronicsStandardsAssociation.
Copyright©FujitsuTechnologySolutionsGmbH2009
Allrightsreserved, including rightsoftranslation, reproductionbyprinting, copying orsimilarmethods, inpartorinwhole.
Offenderswillbelieablefordamages.
All rights reserved, including rights created by patent grant or registration of a utility model or design.
Subjecttoavailabilityandtechnicalmodifications.
Noliabilityforcontentorprintingerrors.
Contents
YourLCDscreen....1
Targetgroup 1
Furtherinformation 2
Notationalconventions....2
Important notes 3
Safetyinstructions 3
Powercable 4
Transportingthedevic e 4
Cleaningthedevice 4
CEmarking 5
EnergyStar 5
Disposalandrecycling 6
Getting started 7
Unpacking and checking the delivery 7
Settingupthedevice 7
Setting up an ergonomic video workstation 8
Adjustingtheheight 9
Adjustingtheinclination 9
Adjustingtherotation 9
Removingmonitorbase 10
Connecting the device 10
Connecting cables to the monitor 10
Connecting cables to the computer 12
Operation 13
Switchingth e device on and off 13
Notesonpower management 14
Changingth e monitorsettings 15.
Changingth e monitor settings with the buttons of the control panel 15
ChangingthemonitorsettingsusingtheOSDmenu 16
Noteson ergonomic colour adjustment ....
Troubleshooting 22
Notes regarding the DIN EN ISO 13406-2 standard 24
Technical specification 25
VESA-DDC-compatibleVGAinterface 26
Preset operating modes 26
Mostf requentoperatingmodes.... 26
SUBDport 27
DVI-D port 28
YourLCDscreen...
hasawholerangeofusefulfeaturesandfunctions,e.g.:
• TFTdisplay(ThinFilmTransistor; activematrix)
- minimalspacerequirementstha nkstoslimcasing
- optimumergonomic characteristics (totally distortion-free, excellent picture definition and colour purity right into the corners)
•highdegreeofbrightnessandg oodcontrast
•highresolution(1680x1050)
•presentationofupto16.7milli oncolours(inconjunctionwithanappropriatedisplayadapter)
• automaticscanningofhorizontalfrequenciesfrom30to82kHzandrefreshrates (vertical frequencies) from 56 to 76 Hz (absolutely flicker-free)
•digitalscreencontrollerwithm icroprocessorforstoring28differentdisplaymodes
•freelyadjustablecolouralignmentformatchingthescreencolourstothe coloursofvariousinputandoutputdevices
- convenientoperationviainteg ratedOSD(On-Screen-display)menu
• VESA-DDCcompatibility
•VESA-FPMPMIcompatibility(Fla Mountingdeviceforswivelarman tPanelMonitorPhysicalMountingInterface)-dwallbracket
- Plug&Playcapability
• ECOfunction
• power management for reducing power consumption when the computer is not in use
•CompliancewiththerecommendationsaccordingtoTCO5.0
• the monitor fulfills all GS ("Geprüfte Sicherheit", Certified Security) requirements.
Thisoperatingmanualcontainsim portantinformationyourequiretostartupandrunyourLCDmonitor.
Agraphicscard(displayadapter)w DVlinterfaceisrequiredtocontr suppliedtoitbythedisplayada isresponsibleforsettingthem
v ithVGAinterfaceoradigitaldisplayadapterwith oltheLCDmonitor.Themonitorprocessesthedata pter.Thedisplayadapterortheassociateddriversoftware odes(resolutionandrefreshrate).
Whenputtingthemonitorintoop erationforthefirsttime,thescreendisplayshouldbe optimallyadaptedtothedispla yadapterusedandadjustedinaccordancewithyour needs(seechapter" Changingth emonitorsettings",Page15).
Target group
You don't need to be an "expert" to perform the operations described here. However, please observe the safety information given in the operating instructions for the computer and in this manual.
Intheeventofanyproblemsoccurring,pleasecontactyoursalesoutletorourHelpDesk.
Furtherinformation
Detailsofhowyousettheresolutionandrefreshrateareprovidedinthedocumentation foryourdisplayadapterandtheassociateddriversoftware.
Forergonomicreasons, were recommend as screen resolution of 1680x1050 pixels.
Becauseofthetechnologyused(activematrix)anLCDmonitorprovidesatotally flicker-freepictureevenwitharefreshrateof60Hz.
Notationalconventions
 | Payparticularattentiontotextmarkedwiththissymbol.Failuretoobserve these warningscouldposearisktohealth,damagethedeviceorlead tolossofdata.Thwarrantywillbeinvalidatedifthedevicebecomes defective throughfailuretoobservethesewarnings. | |
 | Indicatesimportantinformationfortheproperuseofthedevice. | |
| ▶ | Indicatesanactivitythatmustbeperformed | |
| ↳ | Indicatesaresult | |
| Thisfont | indicatesdataenteredusingthekeyboardinaprogramdialogueorat the command line, e.g. your password (Name123) or a command used to startaprogram(start.exe) | |
| Thisfont | indicates information that is displayed on the screen by a program, e.g.: Installationiscomplete. | |
| Thisfont | indicates•termsandtextsusedinasoftwareinterface,e.g.:ClickonSave• names of programs or files, e.g. Windows or setup.exe. | |
| "Thisfont" | indicates•cross-referencestoanothersection,e.g."Safetyinformation"• cross-references to an external source, e.g. a web address: For more information,goto" http://ts.fujitsu.com"•NamesofCDs,DVDsandtitlesordesignationsofothermaterials,e.g.: "CD/DVDDrivers&Utilities"or"Safety"Manual | |
| Key | indicatesakeyonthekeyboard,e.g: F10 | |
| Thisfont | indicates terms and texts that are emphasised or highlighted, e.g.: Do notswitchoffthedevice | |
Importantnotes
In this chapter you will find information regarding safety which it is essential to take note of when working with your device.
Safetyinstructions
Thisdevicecomplieswiththere levantsafetyregulationsfordataprocessingequipment, includingelectronicofficema chines for use in an office environment. If you have any questions,contactyoursales outletorourHelpDesk.
•Thedisplaysurfaceofthedevi becarefulwiththedisplaysur ceissensitivetopressureandscratches. Youshouldtherefore faceinordertoavoidlastingdamage(scratches).
- If the device is brought into the installationsite from acold environment, condensation can form. Before operating the device, wait until it is absolutely dry and has reached approximately the same temperature at the installationsite.
- Wheninstallingandoperatin gthedevice,pleaseobservethenotesonenvironmental conditionsinChapter" Technical specification", Page 25 as well as the instructions in Chapter" Settingupanergon omicvideoworkstation",Page8.
• To ensure sufficient ventilation, the air inlet and outlet openings of the device must be kept clear.
- The device automatically set makesure that the local mains sits self to the correct voltage within the range from 100V to 240V. voltage is neither higher nor lower than this range.
- Ensure that the powers octon the device and themains outlet are freely accessible.
•TheON/OFFswitchdoesnotdi fullyfromthemainssupply, sconnectthemonitorfromthemainsvoltage.Todisconnect disconnectthepowerplugfromthesocket.
- Thedeviceisequippedwithapowercablethatcomplieswithsafetystandards.
•Usethesuppliedpowercableo nly.
- Laythecablesinsuchawaythattheydonotcreateahazard(dangeroftripping) and cannot be damaged. When connecting the device, observe the relevant notesinchapter" Connectingthedevice",Page10.
•Nodatatransfercablesshou ldbeconnectedordisconnectedduringathunderstorm.
- Makesurethatnoobjects(e.g.jewellerychains,paperclips,etc.)orliquidsget insidethedevice(dangerofelectricshock,shortcircuit).
•The device is not waterproof! Never immersethed device in water and protect it from spray water (rain, se awater).
- Inemergencies(e.g.damagedcasing,elementsorcables,penetrationof liquidsorforeignmatter),switchoffthedevice,disconnectthepowerplugand contactyoursalesoutletorourHelpDesk.
•Repairstothedevicemusto nlybeperformedbyqualifiedtechnicians.Unauthorisedopening andincorrectrepairmaygr eatlyendangertheuser(electricshock, firerisk).
- Only use the screen resolution settings and refresh rates specified in Chapter "Technical specification", Page 25. Otherwise you may damage the device. If you areinanydoubt,contactyoursalesoutletorourHelpDesk.
- Useascreensaverwithmovi ngimagesandactivatethepowermanagementfor yourmonitortopreventsti llimagesfrom"burningin".
- If you operate the device with the swivel armor wall bracket, it must not be turned by 180^ .
- The device may only be operated in the wide format (0° landscape mode). The button of the control panel are located at the bottom in the middle of the monitor.
- Storethismanualclosetothedevice.Ifyoupassthedeviceontothird parties,youshouldpassthismanualonwithit.
- Werecommendthatyouplaceyourdeviceonadurable,non-slipsurface.Inview of the many different finishes and varnishes used on furniture, it is possible that the feetofthedevicemaymarkthesurfacetheystandon.
- To ensure sufficient ventilation, the air supply and air outlet openings of themonitormustneverbeblocked.
Powercable
Usethesuppliedpowercableonly.
Usethefollowingguidelinesifitisnecessarytoreplacetheoriginalcableset.
• The female/male receptacles of the cord set must meet IEC60320/CEE-22 requirements.
- The cable has to be HAR-certified or VDE-certified. The mark HAR or VDEwillappearontheoutersheath.
- For devices which are mounted on a desk or table, type SVT or SJT cable sets may be used. For devices which sit on the floor, only SJT type cable sets may be used.
- Thecablesetmustbeselectedaccordingtotheratedcurrentforyourdevice.
- Ifnecessary, replace the original power cable with a regular grounded 3-core mains lead.
Transportingthedevice

Transportallpartsseparatelyintheiroriginalpackagingorinapackagingwhich protectsthemfromknocksandjolts,tothenewsite.
Donotunpackthemuntilalltransportationmanoeuvresarecompleted.
If the device is brought from a cold environment into a room where it will be used, condensation may occur. Before operating the device, wait until it is absolutely dry and has reached approximately the same temperature as the installations site.
Cleaningthe device

Switchoffthedeviceandunplugthepowerplug.
Donotcleananyinteriorpartsyourself,leavethisjobtoaservicetechnician.
Do not use any cleaning agents that contain abrasives or may corrode plastic.
Ensure that noliquidentersthedevice.
Thedisplaysurfaceofthedeviceissensitivetopressureandscratches.Clean itonlyusingasoft,slightlymoistenedcloth.
Thesurfaceofthecasingcanbecleanedwithadrycloth. Ifparticularlydirty, useacloththat hasbeenmoistenedinmilldomesticdetergentandthencarefullywrungout.
CEmarking
CE
TheshippedversionofthisdevicecomplieswiththerequirementsofEEC directives2004/108/EC"Electromagneticcompatibility"and2006/95/EC "Lowvoltagedirective".
EnergyStar

text_image
ENERGY ENERGY STARThe Fujitsu LCD colour monitor is equipped with a power managements system which reduces the power draw in OFF mode to less than 0.1 W. With this, the LCD monitor satisfies therequirements of the U.S. Environmental Protection Agency (EPA).
The EPA estimates that computerequipment uses approximately 5% of all business electricity and that this is growing rapidly. If all desktop PCs and peripherals were to enter alow-powermodewhen not in use, the overall electricity saving could amount to \$2 billion annually. Thesesavings could also prevent the emission of 20 million ton of carbondioxide into the atmosphere-equivalent to the discharge from 5 million cars.
As an Energy Star Partner, Fujitsu Technology Solutions GmbH has determined that this product meets the Energy Star guidelines for energy efficiency.
Disposalandrecycling
This device has been manufactured as far as possible from materials which can be recycled or disposed of in such a way that the environment is not damaged. The device may be taken back after use to be reused or recycled, provided that it is returned in a condition that be fits its intended use. Any components not reclaimed will be disposed of in an environmentally acceptable manner.
The device must be disposed of in accordance with local regulations for disposal of special waste. Thescreenbackgroundlightingcontainsmercury. Youmustobservetheapplicable handlinganddisposalsafetyregulationsforfluorescenttubes.
If you have any questions regarding disposal, please contact your local sales office, our Help Desk, or:
| Germany | Belgium | Switzerland |
| FujitsuTechnologySolutionsGmbHRemarketingandRecyclingD-33106Paderborn,GermanyTel.:+495251/818010Fax:+495251/818015"http://ts.fujitsu.com/wvm" | RECUPELBoulevardReyers,80B-1030BrusselsTel.:+322/7068616Fax: + 3 2 2 / 7 0 6 8 6 1E-mail:info@recupel.be"http://www.recupel.be" | SWICOSchweizerischerWirtschaftsverbandderInformations-,Kommunik ations-3ndOrganisationstechni k(SwissTradeAssociationforInformation,CommunicationsandOrganisationalTechnology).For a listof SWICODisposal sites,see:"http://www.swico.ch" |
| Asia | USA | |
| Taiwan:EnvironmentalProtectionAdministrationExecutive,Yuan,R.O.C."http://recycle.epa.gov.tw" | Fujitsu America Inc.1250E.ArquesAvenueSunnyvale,CA94085,U.S.A.Contact:BerndHenningPhoneNo.:(408)329-6737FaxNo.:(408)746-8299 |
Information on this subject is also available on the Internet at "http://ts.fujitsu.com/recycling".
Gettingstarted
Unpackingandcheckingthedelivery

Thedisplaysurfaceofthedeviceissensitivetopressureandscratches.
Alwaysholdthedevicebythecasing!
The completed device package includes:
•onemonitor
•onedatacable(D-SUB)
▶ Unpackalltheindividualparts.
▶ Checkthecontentsofthepacka geforanyvisibledamagecausedduringtransport.
▶ Check whether the delivery conforms to the details in the delivery note.
Should you discover that the delivery is not correctly. Note, notify your localsalesou if you does not correspond to the delivery tlet immediately.

Donotdiscardtheoriginalpac packaginginthefutureifyoun
kingmaterialofthedevices.Youmayneedthe eedtotransportyourdevice.
Setting up the device

To ensure sufficient ventilation, theairinletandoutletopenings of the device must be kept clear.
Settingupanergonomicvideoworkstation

flowchart
graph TD
    A["Component 1"] --> B["Component 2"]
    B --> C["Component 3"]
    C --> D["Component 4"]
    style A fill:#f9f,stroke:#333
    style B fill:#ccf,stroke:#333
    style C fill:#cfc,stroke:#333
    style D fill:#fcc,stroke:#333
▶ Donotpositionthevideoworkstation oppositeawindow(1).

natural_image
Diagram showing two configurations of a radar or surveying instrument with multiple axes and a labeled component (no text or symbols present)▶ Positionthemonitoroutsidethereach ofalightsource(1).

natural_image
Line drawing of a person sitting at a desk using a computer (no text or symbols present)▶ Positionthekeyboardwhereitis easiesttoreach(1).

text_image
1 50 cm
text_image
0 60 2 1 65 30 30 65 2▶ Positionthemonitorsothatheeyedistance tothescreen(1)isaround50cm.
▶ Positionthemonitorforoptimumviewing (1). Themonitorshouldunderno circumstancesfalloutsidethepermissible viewingspace(2).

Depending on the situation, it may be advisable to use a swivel arm or wall bracket(VESAFPMPMI), which are available from specialist dealers. For this purpose the monitor basemust beremoved before hand as described in Chapter "Removing monitor base", Page 10.
Adjustingtheheight
Theheightofth emonitorcanbeadjustedbyapproximately110mm.
▶ Graspthemonito rwithbothhandsontherightandleftedgeofthecasing andmoveitupwa rdordownward.
Adjusting the inclination
The inclination of the monitorkan be adjusted by -5° (forward) and +20° (backwards) from its vertical position.
▶ Hold the monitor with both hands on the left and right sides of the casing and move it to the desired angle.
Adjustingtherotation
▶ Graspthemonitorwithbothhandsontherightandleftedgeofthecasing andturnittothedesiredposition.
Removingmonitorbase
Beforeyoucanuseaswivelarmorawallbracket,youmustremovethemonitorbase.

Thedisplaysurfaceissusceptibletoscratching!

text_image
1 2 3 4▶ Switchoffthemonitorandpullthepower plugoutofthepowersocket.
▶ Laythemonitoronitsfaceonasoftsurface.
▶ Removethecoveranddisconnectallcables.
▶ Removethescrews(1)ontherear ofthemonitor.
→ Youcannowmountaswivelarmor awallbracketasperVESAFPMPMI with100mmholespacing.

Forinstructionsonhowtomounttheswivelarmorwallbracket,pleasesee thedocumentationfortheswivelarmorwallbracket.
Connectingthedevice

Please observe the safety information in "Important notes", Page 3.
CEconformanceandoptimumpicturequalityareguaranteedonlyif youusethedatacablessupplied.
▶ Switchoffthemonitorandthecomputer.
▶ Disconnectthepowerplugfromthecomputer.
Connectingcablestothemonitor
Thedatacablessuppliedhavetwo15-pinD-SUBconnectorsortwo24-pinDVI connectorsforconnectiontothemonitorandtothecomputer.
Information on the computer connections and interfaces is contained in the operating manual for the computer.

text_image
FUJITSU 6 6 1 2 3 4 51=Powerconnector
4=D-SUBsocket(ANALOG)
2=AUDIO-INsocket
5=Securityslotfor"KensingtonLock"
3=DVI-Dconnector(DIGITAL)
6=Holesforfixingswivelarmorwallbracket
▶ Selectthedatacablewhichissuitableforyourcomputer.

text_image
1 2 3 4▶ Connect one of the connectors of the data cable to the D-SUB socket or DVI-D socket of themonitorandsecuretheplug-inconnectionbytighteningthesafetyscrews.

Themonitorautomaticallydetectstheinputwhenonlyonesignalsourceisconnected.
▶ Insert one plug of the audio line in the AUDIO IN socket on the monitor and makesureitisproperly engaged.
Plugthepowercablesuppliedintothepowerconnectorofthemonitor.
▶ Securethecoverovertheconnections.

A lock (Kensington Lock) can be mounted in the security slot to protect the monitor fromtheft.AKensingtonLockisnotincludedwiththemonitoratdelivery.
Connectingcablestothecomputer
Information on the computer connections and interfaces is contained in the operating manual for your computer.
Connectthedatacabletothe(active)monitorportonthecomputerandsecure theplug-inconnectionbytighteningthesafetyscrews.
▶ Inserttheotherplugoftheaudiocableintheaudiooutputofthecomputer.
Plugthepowerconnectorofthemonitorintoaproperlygroundedmainsoutlet.
Plugthepowerconnectorofthecomputerintoaproperlygroundedmainsoutlet.

If your computer hastwomonitorports ("onboard" screen controller and separate graphics card), the monitor port for these separate graphics card is active as standard.
Operation
Switchingthedeviceonandoff

text_image
1 2 31=ButtonsfortheOSDmenu(On-Screen Display)
2=Powersupplyindicator
3=ON/OFFswitch

Pressthebuttonsupwardsfrombelow.
ThecolouroftheLEDindicatorchangesasfollows:
| LEDindicatorStatus | |
| blue | Monitorandcomputerareswitchedon(normalmode). |
| green | Monitorandcomputerareswitchedon(ECOmode). |
| orange | Themonitorisnotreceivingavideosignalorisswitchingtopower savingmode(indicationapprox.2seconds). |
| doesnotlightup | Themonitorisswitchedoff(orisinpowersavingmode-power consumptioninstandbyandoffmode≤ 0.1W). |
| Front | Rear |
 |  |
| 1=powerindicator | |
| 2=ON/OFFswitch |
▶ SwitchthedeviceonusingtheON/OFFswitch.

Onlyswitchonthecomputerafteryouhaveswitchedonthemonitor.
Notesonpowermanagement
If your computer is equipped with power management (power-saving mode), the monitor can fully support this function. Here the monitor does not distinguish between the individual energy-saving modes of the computer (standby mode, suspend mode and OFF mode), as it is capable of immediately switching into themodewith the highest energy-saving effect.
| Level | Operation | Powersavingmode | |
| Normal | ECO | ||
| Powersupply indicator | illuminatedblueillum | minatedgreenunlit | |
| Monitormax.brightness | ss | typ.200cd/m ^2 | unlit |
| Powerconsumption (typical) | <24W<21Wreduced | dto≤ 0.1W | |
If your computer detects activity (noinput) its sends an appropriate signal to the monitor to reduce the power consumption (energy-saving mode). The power indicator of the monitor changes colour to indicate the status change. ECO mode is the preset factory default.
Onceaninputismadeatt hecomputerthescreencontentsarerestored.

Fordetailedinformat iononhowenergy-savingmodeoperates, pleasereferto theoperatingmanualo rtechnicalmanualofthecomputer.
Changingthemonitorsettings
When putting the monitor into operation for the first time, the screen display should be optimally adapted to the display adapter used.
Changingthemonitorsettings withthebuttons ofthecontrolpanel

Thebuttonsofthecontrolpanelhavetwofunctions.WiththeOSDmenunot activated,youcanmakethefollowingsettingsdirectly:

text_image
SELECT/ MENU ▼ / ECO ▲ / INPUT EXIT / AUTO 1 2 31=ButtonsfortheOSDmenu(On-Screen Display)
3=ON/OFFswitch
2=Powersupplyindicator
Performingauto-adjustmentofthemonitor
▶ Pressthe EXIT/AUTO buttonforabout1second.
→ TheAutoProcessingmessageappears
Picturequalityandpositionaresettooptimumvaluesforyoursystem.
Selectinginputsignal(D-SUB/DVI-D)
▶ PresstheBack/ INPUT button to open the Input select setting window.
▶ Press the Forwards / ECO button or the Back / INPUT button to select the desired monitor connection (VGAorDVI).

ThissettingwindowcanalsobecalledwhentheOSDmenuislocked.
Activate/deactivateECOoperatingmode

The power consumption of the device can be decreased by reducing the brightness of the picture.
▶ Press the Forwards / ECO button to switch the ECO operating mode on or off.
→ ThemessageActionwasexecutedappears.
If the ECO operating mode is activated, the following OSD settings are changed:
Colour
6500K
temperature
Brightness
reduced
AftertheECOoperatingmodeisswitchedoff,thebrightnesspreviouslysetbytheuserisrestored.
LockingtheOSDmenu
The OSD menu can be locked to prevent accidental or unauthorised changes to the monitor settings.
▶ Pressandholdthe [SELECT/MENU] buttonforafewsecondswhileyouswitch onthemonitorwiththeON/OFFswitch.
→ TheActionwasexecutedmess ageappears.

Pleaseproceedinthesame mannertoreleasethelockedOSDmenuagain.
LockingtheON/OFFbutton
The ON/OFF switch can be locked to prevent accidental or unauthorised changestothemonitor settings.

Please proceed in the samemann to release the locked ON/OFF switch again.
ChangingthemonitorsettingsusingtheOSDmenu
With the button on the control panel, you can call up and use the integrated OSD (On-Screen Display) menu.

The OSD menu is available in various languages. The English menu names are used in the following description (default setting). You can select another language using the OSD Language function in the OSD Setup menu.

text_image
Brightness/Contrast Image adjust Audio Colour OSD Setup Advanced Information FUJITSU Brightness Contrast Black Level Auto Brightness Auto Level▶ Press the SELECT/MENU button to activate the OSD menu. → Themainmenuappears, with icons for the setting functions. The first icon, (Brightness/Contrast), is highlighted and the associated functions are visible in the right-hand menu field.

text_image
Brightness/Contrast Image adjust Audio Colour OSD Setup Advanced Information FUJITSU H-Position V-Position Clock Phase 50▶ PresstheForwards/ECObuttonor theBack/ INPUT button highlight anothericon(e.g.Imageadjust).
▶ Pressthe SELECT/MENU button to select the highlighted icon.
→ TheImageadjustsetupwindowwill bedisplayed.
▶ PresstheForwards/ECObuttonor theBack/ INPUT button highlight another function.
▶ Pressthe SELECT/MENU button to select the highlighted function.
▶ PresstheForwards/ECObuttonor theBack/ INPUT buttontohighlight anotherfunction.
▶ Pressthe EXIT/AUTO buttonto exitthefunction.
▶ PresstheForwards/ECObuttonorthe Back/ INPUT buttontohighlightanother functionorpressthe EXIT/AUTO button toreturntothemainmenu.
Allchangesarestoredautomatically.

If you wishto change othersettings, select the corresponding function from the OSD mainmenu. All possible adjustments of the mainmenu are described below.
OSDmenufunctions

TheOSDmenuforanaloguemonitoroperationisdescribedbelow. During digitaloperationsomefunctionsarenotavailable, they are not needed because of the digital transmission technology being used.
Adjustingthebrightnessandcontrast
| CalluptheBrightness/Contrastsettingwindow | |
| Brightness | Setthebrightnessofthedisp layWiththisfunctionyouchanget hebrightnessofthebackgroundlighting.YoucanseewhethertheECOoper atingmodeisactiveunderthebarfordisplayingthebrightnessset ting. |
| Contrast | SetthecontrastofthedisplayWiththisfunctionyoumodifythecontrastofbrightcolourtones. |
| Blacklevel | SetthebrightnessofthedisplayWiththisfunctionyoumodifythecontrastofdarkcolourtones. |
| Autolevel | AdjustthesignallevelWiththisfunctionyoucanautomaticallysetthecontrast.Thefunctionisexecutedwiththe SELECT/MENU button. |

If the contrast is set too high, bright surfaces can longer be distinguished from very bright surfaces. If the contrast is set too low, the maximum brightness will not be achieved.
Adjusting the picturesize and position
| CalltheImageadjustsettingwindow | |
| Phase | EliminatepicturedisturbanceWith this function you fine-tune your monitor to eliminate picture disturbance. |
| Clock | SetsynchronisationWiththisfunctionyouadjustthepicturewidthtoeliminateverticalpicture disturbances. |
| H-Position | AdjustthehorizontalpositionWiththisfunctionyoumovethepicturetotheleftortotheright. |
| V-Position | AdjusttheverticalpositionWiththisfunctionyoumovethepictureupordown. |
Adjustingthevolume
| CalltheAudiosettingwindow | |
| Volume | Setthevolumeforplaybackwiththeintegratedloudspeakers |
| Mute | Switchtheloudspeakersofforon |
Setting the colour temperature and colours
| CalltheColoursettingwindow | |
| SelectthecolourtemperatureThe"warmth"ofthescreencoloursissetusingthecolourtemperature.The colourtemperatureismeasuredinKelvin(K).YoucanchoosebetweensRGB, 6500 K, 9300 K, Native and Custom Colour.In the user-defined setting you can change the colour ratios of the basic colours(red,green,blue)asrequired. |
Adjustingthedisplayoft heOSDmenu
| CallingtheOSDSetupadjustmentwindow | |
| Language | SelectingthelanguagefortheOSDmenuWiththisfunctionyouchoosebetweenEnglish(defaultsetting),French,German,ItalianandSpanishasthelanguagefortheOSDmenu. |
| OSDHposition | SettingthehorizontalpositionoftheOSDmenuWiththisfunctionyoucanmovetheOSDmenutotheleftortotheright. |
| OSDVposition | SettingtheverticalpositionoftheOSDmenuWiththisfunctionyoucanmovetheOSDmenuupordown. |
| OSDTimeout | SettingthedisplaydurationoftheOSDmenuWiththisfunctionyoucanselectavaluefrom10to120seconds.Ifthesetimeexpireswithoutasettingbeingmade,theOSDmenuis automaticallyhidden. |
SettingfunctionsintheAdvancedmenu
| CalluptheAdvancedsettingwindow | |
| Inputselect | SelectingtheinputsignalThisfunctionallowsyoutoswitchthemonitorfromanaloguetodigitalmodeandviceversa,whentwosignalsourcesareconnected.Thisrequiresthatthegraphiccardusedsupportthisfunction. |
| DDC-CI | Activation/deactivationoftheDDC-CION=TheDDC-CIfunctionisenabled(standardsetting)Off=TheDDC-CIfunctionisdisabled |
| FactoryRecall | ActivatingthefactorysettingsWiththisfunctionallsettingsareresettothefactorysettingswithoutpromptingforconfirmation.Pressthe SELECT/MENU buttontoactivatethefunction.TheAutoProcessingmessageisdisplayed. |
Displayinginformation
| i | CalltheInformationsettingwindowWiththisfunctionthemodeldesignation,serialnumber,resolution,H/V frequency,inputsignalandpolarityofthesynchronisationsignalare displayed. |
Notesonergonomiccolouradju stment

If you select colours forthemonitor in your application programmes, take note of the information below.
The primary colours blue and red on dark background donot produce the minimum required contrast of 3:1 and are therefore not suitable for continuous text and data entry.
When using several colours for characters and background and giving the primary colours full modulation, you can obtain very suitable colour combinations (seethefollowingtable):
| Background | Characters | |||||||
| blackwhite | purpleblue | cyangreen | yellowred | |||||
| black | + | + | - | + | + | + | - | |
| white | + | + | + | - | - | - | + | |
| purple | + | + | - | - | - | - | - | |
| blue | - | + | - | + | - | + | - | |
| cyan | + | - | - | + | - | - | - | |
| green | + | - | - | + | - | - | - | |
| yellow | + | - | + | + | - | - | + | |
| red | - | + | - | - | - | - | + | |
+Colourcombination verysuitable
-Colourcombinationnotsuitablebecausecolourhuesaretooclosetogether,thincharacters are not identifiable or rigorous focusing is demanded of the human eye.
Troubleshooting
Should an error occur, first check the following points. If the distortion is still not eliminated, the monitor should, if possible, be checked on another computer.
If you are unable to solve the problem, please inform our help desk.
| Havingthisproblem?Checkthefollowingpoints: | |
| NoscreendisplayPowerindicatordoesnotlightup | ▶ CheckwhethertheON/OFFswitchonthe monitorisswitchedon.▶ Checkwhetherthepowercable onthe monitorisconnectedcorrect ly.▶ Checkwhetherthecomputerisswitchedon. |
| NoscreendisplayPowerindicatorislit | ▶ Checkwhetherthecomputerisswitchedon.▶ Checkwhetherthedatacableforthe monitoriscorrectlyattachedtothemonitor portonthecomputer.▶ Pressanykeyonthecomputerkeyboard. Thecomputermaybeinpowersaving mode.▶ Alterthebrightnessand/orcontrastuntilyou getapicture. |
| Message:NoSignal | ▶ Checkwhetherthedatacableforthe monitoriscorrectlyattachedtothemonitor portonthecomputer.▶ Checkwhetherthecomputerisswitchedon. |
| Message:Frequencyoutofrange:##kHz/##HzPleasechangethedisplaymode to1680x1050with60Hz | Theinputsignal(horizontalfrequency and refreshrate)atthedisplayedinputdoesnot correspondtothetechnicaldataforthemonitor.▶ Adjustthevideofrequencyrangeusingthe computersoftware(seedocumentationfor thecomputerordisplayadapter).▶ Setadifferentscreenre solutionusingthe computersoftware(seed ocumentationfor thecomputerordisplay adapter). |
| Picturepositionnotcor rect | Themonitorrecognisesanundefinedmode(see chapter" Technicalspecification",Page25).▶ Pressthe EXIT/AUTO buttontoperform auto-adjustmentofthescreen. |
| Pictureisshaking | ▶ Checkwhetherthedatacableforthe monitoriscorrectlyattachedtothemonitor portonthecomputer.▶ Pressthe EXIT/AUTO buttontoperform auto-adjustmentofthescreen. |
| Pictureiswronglyadjusted▶ Pressthe | SELECT/MENU buttonto activatetheFactoryRecallfunction.TheAutoProcessingmessageappears. |
| Picturedisturbances(vertical lines) | ► Pressthe EXIT/AUTO buttontoperform auto-adjustmentofthescreen. |
| Picturedisturbances(horizontallines,picture noise) | ► Pressthe EXIT/AUTO buttontoperform auto-adjustmentofthescreen. |
| Thescreenbecomesdarker | Thebackgroundlightinghasalimitedlifetime. Ifyourmonitordisplayshouldbecometoodark, thebackgroundlightingwillhavetobereplaced. ► Pleasecontactourhelpdesk. |
Notesregardingthe DINENISO13406-2standard
Permanentlyunlitorlitpixels
The standard of production techniquet today cannot guarantee an absolutely fault-free screen display. Afewisolated constant litor unlit pixels (picture elements) may be present. The maximum permitted number of pixels faults stipulated in the international standard ISO 13406-2 (Class II).
Examples:
A 20" or 22" flat-screen monitor with a resolution of 1680 x 1050 has 1680 x 1050 = 17664000pixels. Eachpixel consists of three subpixels (red, green and blue), so there are almost 5.3 millions subpixels total. In accordance with ISO 13406-2 (Class II), a maximum of 6 pixels and 9 subpixels may be defective.
| Pixel | Apixelconsistsof3subpixels,normallyred,greenandblue.Apixelis thesmallestelementthatcanbegeneratedbycompletefunctionalityof thedisplay. |
| Subpixel | Asubpixelisaseparatelyaddressableinternalstructurewithinapixelthat enhancesthepixelfunction. |
| ClusterAclustercontain | instwoormoredefectivepixelsorsubpixelsina5 x 5 pixelblock. |
Technicalspecification

Condensationisnotpermitted, neitherintheratedrangeofoperation norinthelimitrangeofoperation.
B22W-5ECO
| Dimensionsandweight | ||
| Visiblediagonals55.9cmDotpitch0.28mm | ||
| Width473.76mmlmagesizeHeight296.1mm | ||
| Maximumresolution1680x1050 | ||
| Dimensions incl. monitor base | Width511mmHeight401.5mm-511mm | |
| Depth | 212mm | |
| Weight(withoutpackaging) | approx.7.6kg | |
| Storabledisplaymodes | 25 | |
| Pixel error classesaccording toISO13406-2 | Class | II |
| Electricaldata | ||
| Video | AnalogDigital | positive, 0.7Vss, 75 ΩDVI-D / HDMI with HDCP |
| Synchronisation | Separatesync.TTL,positiveor negative | |
| Horizontal frequency | 30 kHz .... 80 kHz (multi-scanning) | |
| Refreshrate | 56Hz....76Hz | |
| Maximumpixelrate | 135MHz | |
| Powersupply | switches automatically100V–240V,50Hz–60 Hz | |
| Totalpowerconsumption (withoutaudio) | NormaloperationECO operatingmodeEnergy saving mode | <24W< 21 W< 0.1 W |
| Soundoutput | 2.0 Wleft;2.0Wright | |
Environmentalconditions
Environmentclass3K2,DINIEC721
Ratedrangeofoperation 15°C.....35°C
Humidity 20%....85%
Limitrangeofoperation 5°C.....35°C
Humidity 20%....85%
VESA-DDC-compatibleVGAinterface
YourmonitorisequippedwithaVESA-DDC-compatibleVGAinterface.VESA-DDC(Video ElectronicsStandardAssociation,DisplayDataChannel)isusedasthecommunications interfacebetweenthemonitorandthecomputer.Ifthecomputerisequippedwitha VESA-DDC-compatibleVGAinterface,itcanautomaticallyreadthedataforensuring optimumoperationfromthemonitorandselecttheappropriatesettings.
Presetoperatingmodes

Thepicturepositionands izehavebeenoptimisedatthefactoryfortheoperating modeslistedabove.Depen dingonthegraphicscardused,itmaybenecessary toadjustthedisplayposi tionorsize.Inthiscaseyoucanchangeandsavethe settings(seechapter" Changingthemonitorsettings",Page15).
Forergonomicreasons, ascreenresolutionof1680x1050pixelsisrecommended. Becauseofthetechnolo gyused(activematrix),anLCDmonitorprovidesa totallyflicker-freepi cture,evenwitharefreshrateof60Hz.
Mostfrequentoperatingmodes
| HorizontalfrequencyRefreshrateScreenresolution | ||
| 31.5kHz70Hz720x400 | ||
| 31.5kHz60Hz640x480 | ||
| 37.5kHz75Hz640x480 | ||
| 37.9kHz60Hz800x600 | ||
| 46.9kHz75Hz800x600 | ||
| 48.4kHz60Hz1024x768 | ||
| 60.0kHz75Hz1024x768 | ||
| 65.0kHz60Hz1680x1050 | ||
SUBDport

text_image
5 1 10 6 15 11| PinMeaning | |
| 1Videoinputred | |
| 2Videoinputgreen | |
| 3Videoinputblue | |
| 4 | Ground |
| 5 | Ground |
| 6Videogroundred | |
| 7 | Videogroundgreen |
| 8Videogroundblue | |
| 9 | +5V(DDC) |
| 10 | Sync.ground |
| 11 | Ground |
| 12 | DDCData |
| 13H.sync | |
| 14V.sync | |
| 15 | DDCClock |
DVI-Dport

text_image
1 9 17| PinMeaning | |
| 1 | TMDSData2- |
| 2 | TMDSData2+ |
| 3 | TMDSData2/4Shield |
| 4notconnected | |
| 5 | notconnected |
| 6 | DDCClock |
| 7 | DDCData |
| 8 | AnalogVerticalSync |
| 9 | TMDSData1- |
| 10 | TMDSData1+ |
| 11 | TMDSData1/3Shield |
| 12notconnected | |
| 13notconnected | |
| 14+5VPower | |
| 15Earth | |
| 16HotPlugDetect | |
| 17 | TMDSData0- |
| 18 | TMDSData0+ |
| 19 | TMDSData0/5Shield |
| 20notconnected | |
| 21notconnected | |
| 22 | TMDSClockShield |
| 23 | TMDSClock+ |
| 24 | TMDSClock- |