
i-Sensys MF4730 - Printer CANON - Free user manual and instructions
Find the device manual for free i-Sensys MF4730 CANON in PDF.


| Product Type | Monochrome Laser Multifunction Printer |
| Functions | Print, copy, scan |
| Print Technology | Monochrome Laser |
| Print Speed | Up to 23 pages per minute (A4) |
| Print Resolution | 600 x 600 dpi |
| Paper Sizes | A4, A5, B5, Letter, Legal, Envelopes |
| Paper Capacity | Input tray: approx. 150 sheets, multipurpose tray: 1 sheet |
| Dimensions (W x D x H) | Approx. 390 x 400 x 300 mm |
| Weight | Approx. 10 kg |
| Power Supply | 220-240 V, 50/60 Hz |
| Power Consumption | Active: ~400 W, Standby: ~5 W |
| Connectivity | USB 2.0 |
| Cartridge | Toner cartridge (standard capacity approx. 1500 pages) |
| Monthly Duty Cycle | Up to 8,000 pages |
| Noise Level | Approx. 50 dB during operation |
| Safety | Auto shut-off, sleep mode, thermal protection |
| Maintenance and Cleaning | Clean rollers and casing with a damp cloth; do not use solvents |
| Spare Parts and Repairability | Toner cartridge, maintenance kit (rollers), belt |
Frequently Asked Questions - i-Sensys MF4730 CANON
User questions about i-Sensys MF4730 CANON
0 question about this device. Answer the ones you know or ask your own.
Ask a new question about this device
Download the instructions for your Printer in PDF format for free! Find your manual i-Sensys MF4730 - CANON and take your electronic device back in hand. On this page are published all the documents necessary for the use of your device. i-Sensys MF4730 by CANON.
USER MANUAL i-Sensys MF4730 CANON

MF4890dw/MF4780w
MF4890dw/MF4870dn/MF4780w/MF4750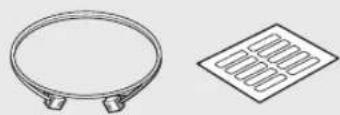
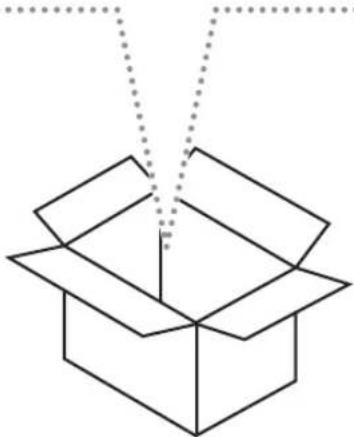
MF4890dw/MF4870dn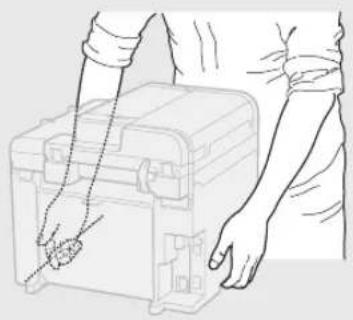
▶
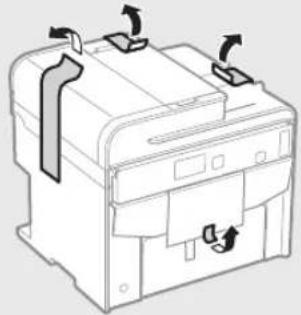
X4

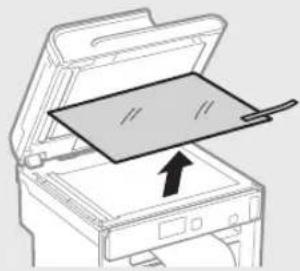
MF4780w/MF4750/MF4730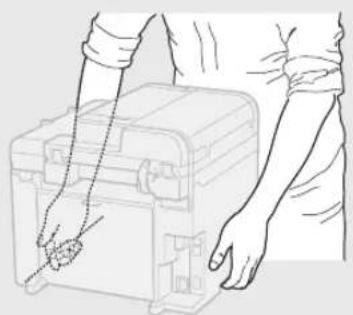
▶
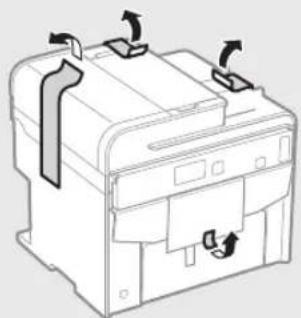
X4
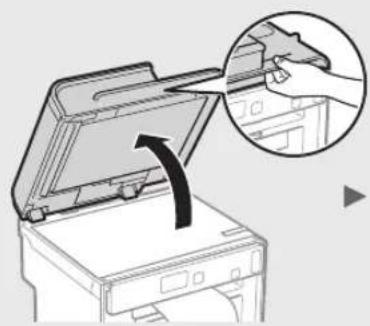
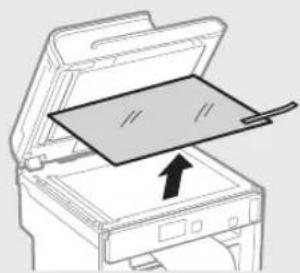
X4
![graph TD A["Printer Opening"] --> B["Add Paper to Box 1"] B --> C["Add Paper to Box 2"] C --> D["Add Paper to Box 4"] D --> E["Add Paper to Box 5"]](/content/2026/06/1237351/images/08204cd4a6e9fca12c1e2df326b37cfddec0dbea6f470b02f1eb70a04b4d8d7b.jpg)
![graph TD A["Step 1: Printer with two parts"] --> B["Step 2: Disassembly of the printer"] B --> C["Step 3: Disassembly of the printer"] C --> D["Final Step: Disassembly of the printer with two parts"]](/content/2026/06/1237351/images/088712813cf6d089143a91fbc3885099ce86503e9894827af837ee5659721ccb.jpg)

Installing the Handset (Option)![graph TD A["MF4890dw"] --> B["MF4870dn/MF4780w/MF4750"] B --> C["MF4890dw"] C --> D["MF4870dn/MF4780w/MF4750"]](/content/2026/06/1237351/images/5a7ce76d99e830bf8c35f0cedbd39815714d89868b8554fd811efae8813f0154.jpg)

About the Supplied Manuals ....10
Navigating the Menu and Text
Input Method 10
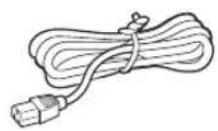
Connecting the Power Cord and Turning ON
the Power 11
Specifying the Initial Settings .....11
Choosing the Method to Connect
the Machine to the Computer 12
Connecting via a Wired LAN
(MF4890dw/MF4870dn/MF4780w Only) 12
Connecting via a USB Cable....12
Setting a Paper Size and Type 13
Specifying Initial Fax Settings
and Connecting a Telephone Cable
(MF4890dw/MF4870dn/MF4780w/MF4750 Only) .....13
Perform Useful Tasks 14
Clearing Paper Jams....15
Replacing Toner Cartridge ....16
About the Supplied Manuals
① Starter Guide (This manual):
Read this manual first. This manual describes the installation of the machine, the settings, and a caution. Be sure to read this manual before using the machine.
② Wireless LAN Setting Guide (MF4890dw/MF4780w Only):
Read this manual with Starter Guide. This manual describes Wireless LAN setup procedures and causes and countermeasures for troubles you might face during the setup. Be sure to read this manual before using the machine.
③ MF Driver Installation Guide (User Software CD-ROM):
Read this manual next. This manual describes software installation.
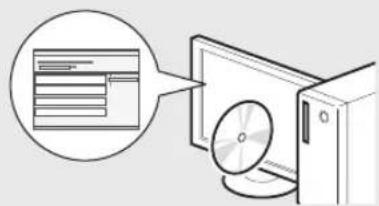
④ e-Manual (Multi-lingual User Manual CD):
Read the desired chapter to suit your needs. The e-Manual is categorized by subject to find desired information easily.

Navigating the Menu and Text Input Method
MF4890dw/MF4870dn/MF4780w/MF4750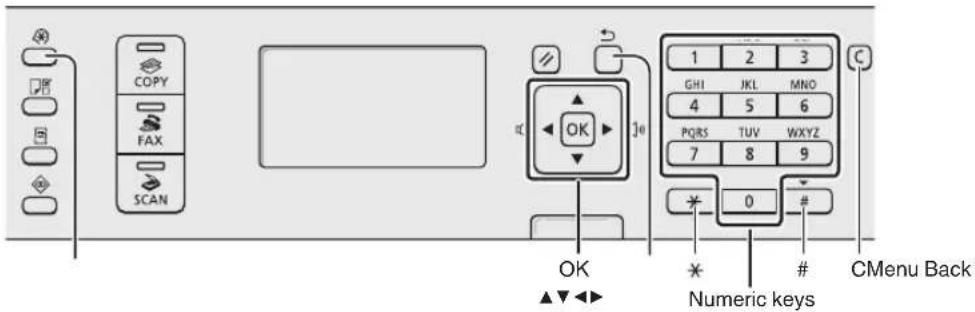
MF4730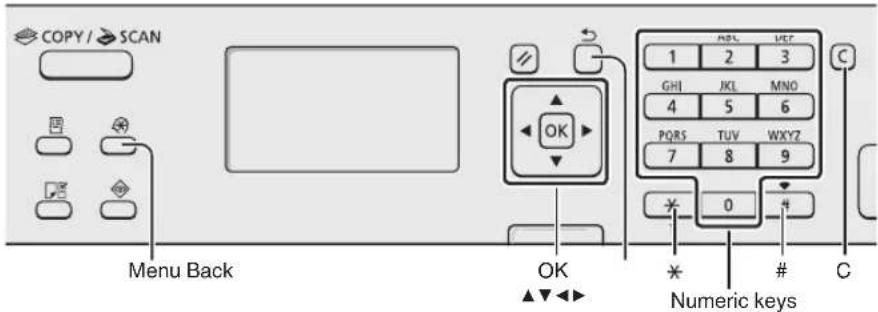
Navigating the Menu
Item selection or moving the cursor among the menu items
Select an item with [▲] or [▼]. Proceed to the next hierarchy with [OK] or [▶]. Return to the previous hierarchy with [□] (Back) or [◀].
Setting confirmation
Press [OK]. However, when appears on the display, select , and then press [OK].
Text Input Method
Changing entry mode
Press [▼] to highlight , and then press [OK]. You can also press [★] (Tone) to change the entry mode.
Entering text, symbols, and numbers
Enter with the numeric keys or [#] (SYMBOLS).
For details on the switchable mode or the available text, see the next page.
Moving the cursor (Entering a space)
Move with [◀] or [▶]. Move the cursor to the end of the text and press [▶] to enter a space.
Deleting characters
Delete with [c] (Clear). Pressing and holding [d] (Clear) key deletes all characters.
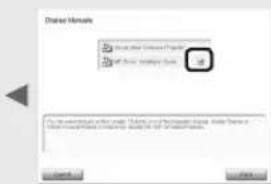
Viewing the e-Manual from the CD-ROM
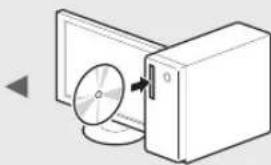
1 Insert the Multi-lingual User Manual CD in your computer.
2 Select your language.
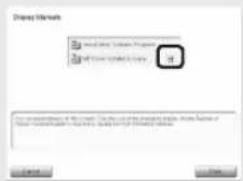
3 Click [Display Manuals].
※ Depending on the operating system you are using, a security protection message appears.
Connecting the Power Cord and Turning ON the Power
En
Entering text, symbols, and numbers
| Entry mode: | Entry mode: <12> | |
| 1 | @ .- _/ 1 | |
| 2 | ABCabc 2 | |
| 3 | DEFdef 3 | |
| 4 | GHIghi 4 | |
| 5 | JKLjkl 5 | |
| 6 | MNOmno 6 | |
| 7 | PQRSpqrs 7 | |
| 8 | TUVtuv 8 | |
| 9 | WXYZwxyz 9 | |
| 0 | (Not available) 0 | |
| # | @ ./ - _ ! ? & $ % # ( ) [ ] { } <> * + = " , : ; ' ^ ' | \ | (Not available) |
Changing entry mode
| Entry mode Available text | |
| Alphabet (capital and small letters) and symbols | |
| <12> Numbers | |
![graph LR A["Printer with OFF"] --> B["Switched to power outlet"] B --> C["Final printer with ON"]](/content/2026/06/1237351/images/203512ab0a6c7eb60d5b7c354c7ca2d684bc970fafcb99c2c20a4528eb841d08.jpg)
Do not connect the USB cable at this time. Connect it when installing software.
Specifying the Initial Settings
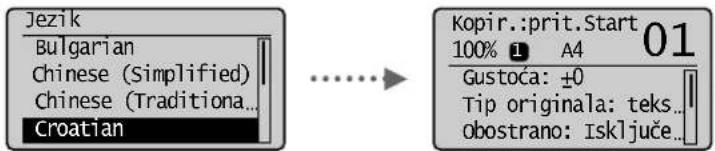
Follow the instructions on the screen, set the language and time. For details on navigating the menu and how to input the numbers, see "Navigating the Menu and Text Input Method" (P.10).
MF4890dw/MF4780w
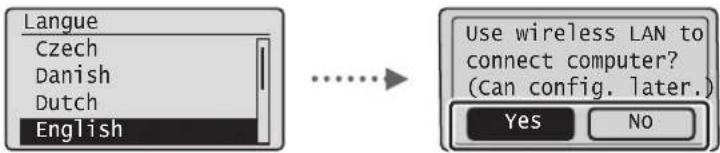
MF4870dn/MF4750/MF4730

En
Choosing the Method to Connect the Machine to the Computer
- Connecting via a Wired LAN
(MF4890dw/MF4870dn/MF4780w Only)
See "Connecting via a Wired LAN"
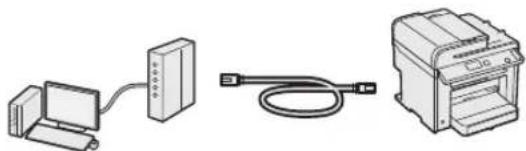
You can connect the machine to the computer through a wired router. Use the LAN cables to connect the machine to the wired router (access point).
※ Make sure that there is an available port in the router to connect the machine and the computer. ※ Have a LAN Cable of Category 5 twisted-pair cable or higher ready.
- Connecting via a USB cable
See "Connecting via a USB Cable"

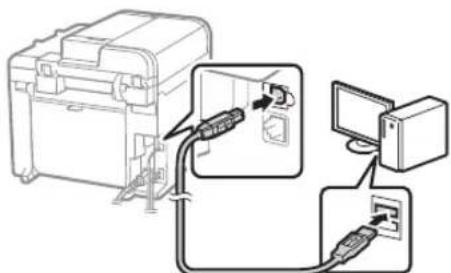
You can connect the machine to the computer using a USB cable.
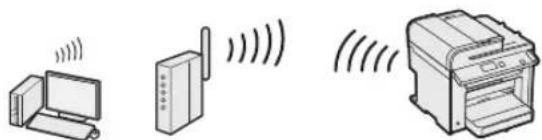
- Connection via a Wireless LAN (MF4890dw/MF4780w Only)
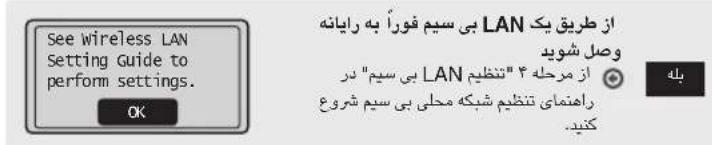
See the Wireless LAN Setting Guide.

You can connect the machine to the computer through a wireless router*. Since it is connected to wireless, no LAN cables are needed.
* A wireless router (or access point), which supports IEEE802.11b/g/n, is required.
If you do not sure whether your router is wireless or wired:
See the instruction manual provided with your network device, or contact the manufacturer.
Connecting via a Wired LAN (MF4890dw/MF4870dn/MF4780w Only)
1 Connect the LAN cable.
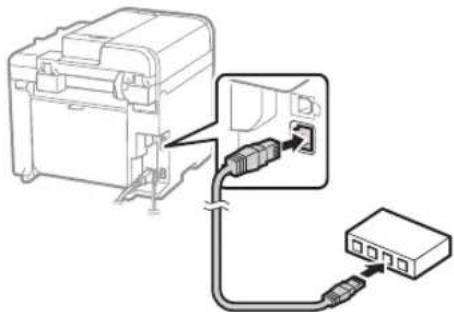
The IP address will be automatically configured in 2 minutes. If you want to set the IP address manually, see the following items.
e-Manual "Network Settings" ▶ "Basic Network Settings" ▶ "Setting the IP Address"
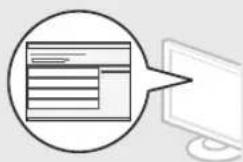
2 Install the driver and software using the User Software CD-ROM.
Proceed to "Setting a Paper Size and Type" (P.13).
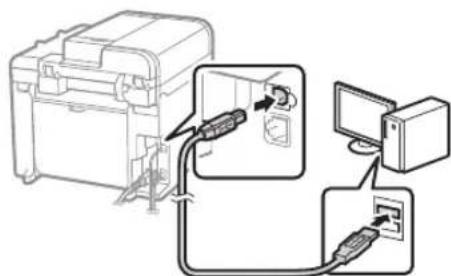
Connecting via a USB Cable
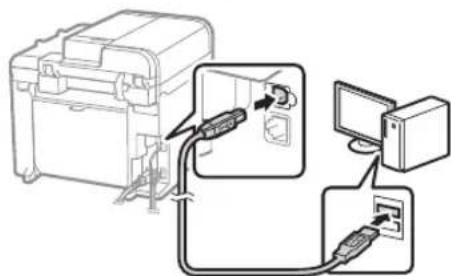
Connect the USB cable after installing the MF Drivers and the MF Toolbox.
1 Install the driver and software using the User Software CD-ROM. 2 Connect the USB cable.

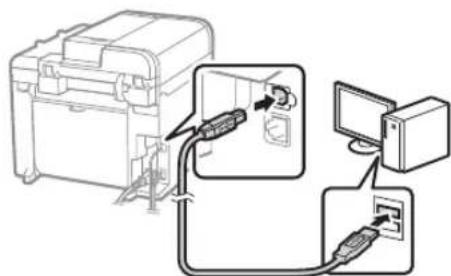
Proceed to "Setting a Paper Size and Type" (P.13).
For details on the installation procedures: See the MF Driver Installation Guide
![graph TD A["Printer"] --> B["CD-ROM Setup"] B --> C["Display Settings"] C --> D["Computer"]](/content/2026/06/1237351/images/5205167af5dd94ac14a346ce3f1811b8a4fb699fffc748b760b59833e5a6c563.jpg)
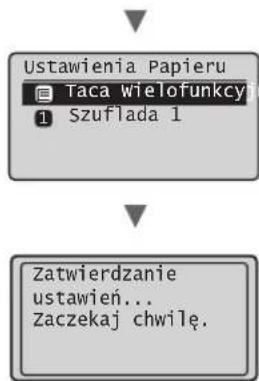
Setting a Paper Size and Type
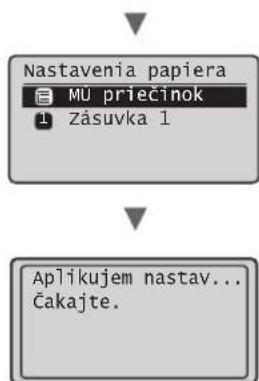
Follow the instructions on the screen, set the paper size and type.
MF4890dw/MF4870dn/MF4780w/MF4750![graph TD A["Printer Setup"] --> B["Paper Settings"] B --> C["MP Tray"] B --> D["Drawer 1"] C --> E["Applying settings wait a moment."]](/content/2026/06/1237351/images/350c2be6328246841818e0aee8fbbcf61c290782e7e6ca1865bbb18431ee7115.jpg)
Specifying Initial Fax Settings and Connecting a Telephone Cable (MF4890dw/MF4870dn/MF4780w/MF4750 Only)
1 Specify the initial fax settings.![graph TD A["Radio System"] --> B["Clock Icon"] B --> C["Button Button"] C --> D["Next Phone Line"] D --> E["Connect instructions on the next screen: Connect line to A. *Next : Press OK"] F["Perform fax setup?"] --> G["Set up Now\nSet up Later"]](/content/2026/06/1237351/images/7700ce22cf04737cf74eb0a075127dc043694a7782e7c1da7a590f0efa1017cf.jpg)
Follow the "Fax Setup Guide" to specify a fax number, a unit name, and a receive mode. For more details on the receive mode, see the e-Manual.
e-Manual "Fax" ▶ "Using the Fax Functions" ▶ "Receiving Faxes" ▶ "RX Mode"
How to use a username
When you send a document, the sender information that you registered is printed on the recipient's paper.
2 Connect a telephone cable.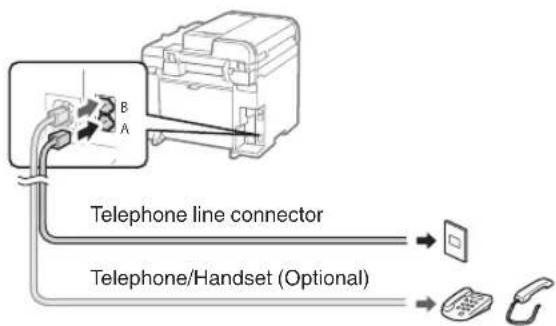
When appears on the display, connect the telephone cable by referring to the illustration.
When installing the optional handset:
For more details, see the supplied manual with the handset.
3 Exit the Fax Setup Guide, and then restart the machine.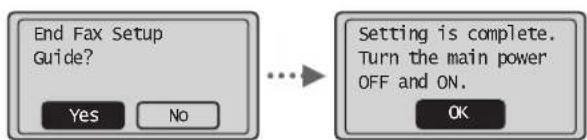
Turn OFF the machine and wait for at least 10 seconds before turning it ON again. The telephone line types are not detected automatically. See the e-Manual and set a telephone line manually.
e-Manual "Fax" ▶ "Using the Fax Functions" ▶ "Changing Fax Settings (Settings that Can Be Specified Using the [Menu] Button)" ▶ "Configuring Send Settings" ▶ "Select Line Type"
You can use various functions in this machine. Following functions are the overview of the main functions that you can use routinely.
Copy
Enlarged/Reduced Copies
You can enlarge or reduce standard size documents to copy on standard size paper or specify the copy ratio in percentage.
2-Sided Copying*
You can copy 1-sided documents on both sides of paper.
Collating
You can sort copies into sets arranged in page order.
Reduced Layout
You can reduce multiple documents to copy them onto one sheet.
2 on 1 4 on 1
![graph TD A["Input Device"] --> B["Data Processing Unit"] B --> C["Output Module"] C --> D["Storage System"]](/content/2026/06/1237351/images/26b1f36aa9f543735acbe8d65aad4f3635a433a281ccd4ce7eaf73873daba755.jpg)
Copying ID Card
You can make a copy of a 2-sided card onto one side of paper.
Fax**
Sending a Document Directly from a Computer (PC Fax)
In addition to the normal sending and receiving faxes, you can use the PC fax.
Sending
You can register fax destinations in the address book. You can specify the destinations using various methods, enabling you to send documents quickly and easily.
- Destination search
- One-touch keys
- Coded dialing
- Destination Group
- Specifying from the sending history
- Sequential broadcast
- Delayed sending
Receiving
● Receiving in the memory You can store the received documents in the memory. You can print the stored documents at any time, and if you do not need them, you can delete them.
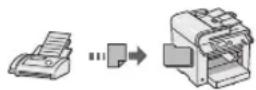
- Remote Receiving
If an external telephone is connected, you can switch to the fax receiving mode immediately by dialing the ID number for fax receiving using the dial buttons of the telephone during a phone call.
- Polling Receiving
You can retrieve pre-loaded documents from a sender's fax machine when you want to receive the fax.
Enlarged/Reduced Printing
2-Sided Printing*
Reduced Layout
You can reduce multiple documents to print them onto one sheet.
2 on 1 4 on 1
![graph TD A["Input Module"] --> B["Processing Module"] B --> C["Output Server"] style A fill:#f9f,stroke:#333 style B fill:#ccf,stroke:#333 style C fill:#cfc,stroke:#333](/content/2026/06/1237351/images/bef27ea8145d2f88db389da1735f2f5ff5ce4dea0ce715059b333c81c9a9b094.jpg)
Booklet Printing*
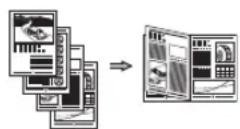
Poster Printing
Watermark Printing
Displaying a Preview before
Printing
Selecting a "Profile"
Scan
Saving the Documents Using the Operation Panel of the Machine
![graph TD A["① Documents"] --> B["② Paper"] B --> C["Data"] C --> D["③ Computer"]](/content/2026/06/1237351/images/5e7ec4d40d52a2da5842046d90b1ac2236bc94f729a36187f7519adc84dca33d.jpg)
Saving the Documents Using Operations from a Computer
- Scanning with the MF Toolbox
![graph TD A["Documents"] --> B["Data"] B --> C["Output"]](/content/2026/06/1237351/images/86c0d29e1fb44821a16211d6dbdf26165a2193569a6f27b64623c59a95268a00.jpg)
- Scanning from an Application
- Scanning with the WIA Driver***
Network Settings****
This machine comes equipped with a network interface that you can construct a network environment easily. You can print a document, use the PC fax, and use the network scan from all computers which are connected with the machine. The machine supports to increase work efficiency as a shared machine in the office.
Remote UI****
You can understand the condition of the machine from the computers on the network. You can access the machine and manage jobs or specify various settings via network.
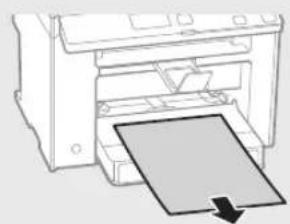
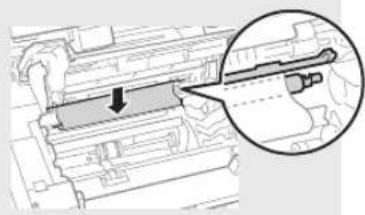
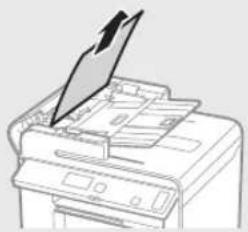
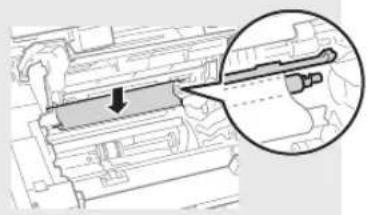
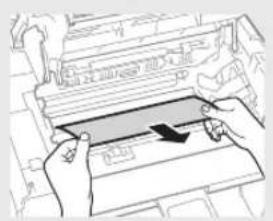
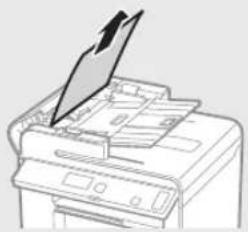
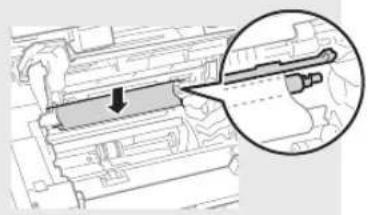
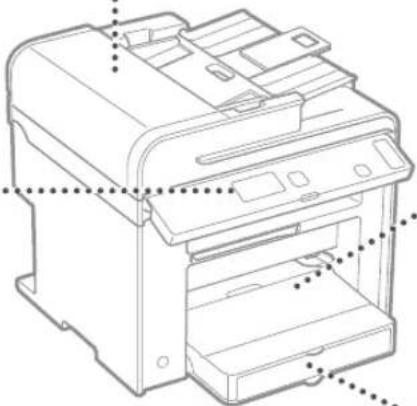
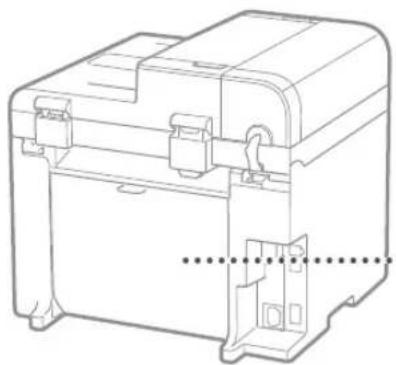
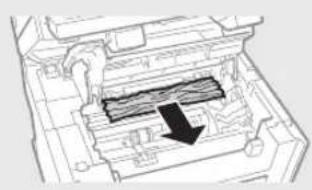
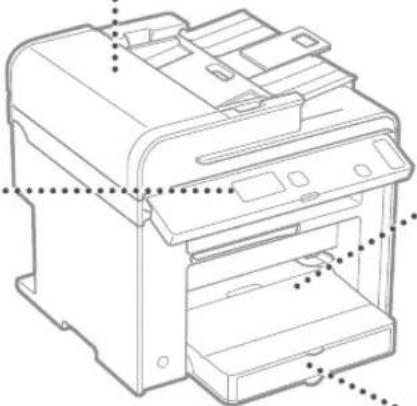
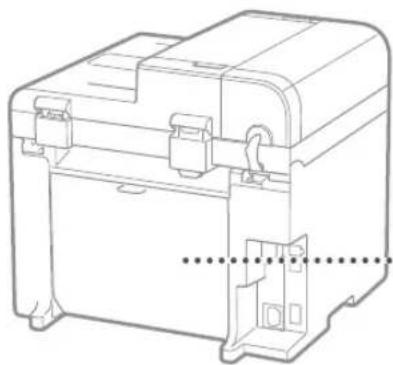
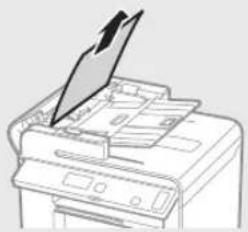
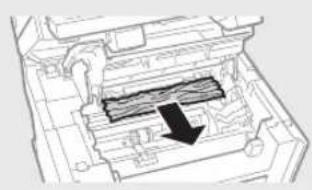
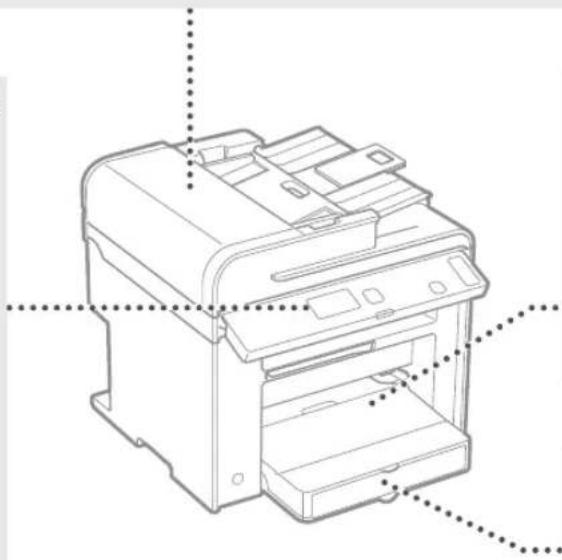
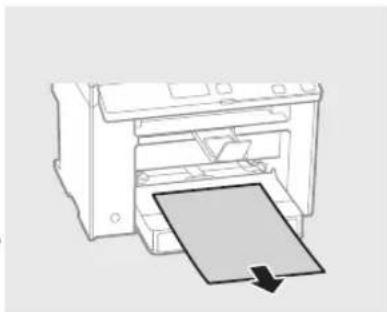
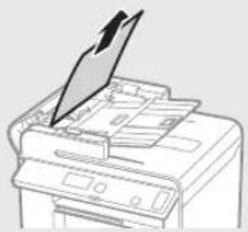
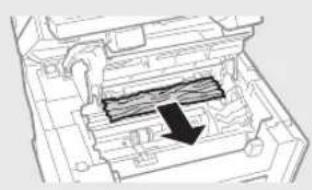
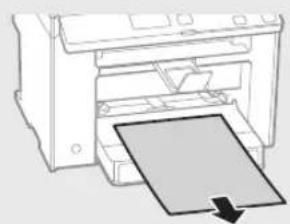
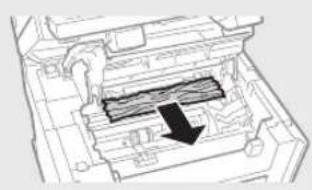
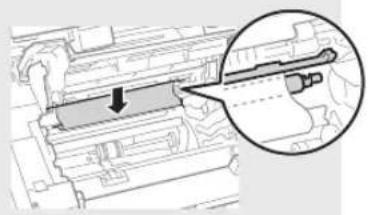
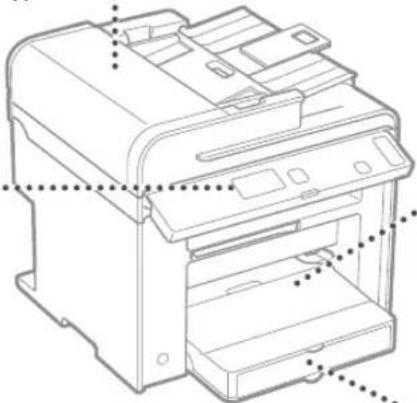
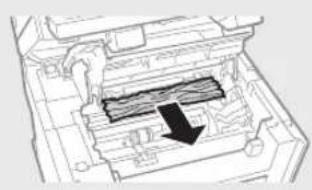
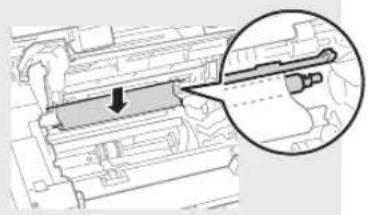
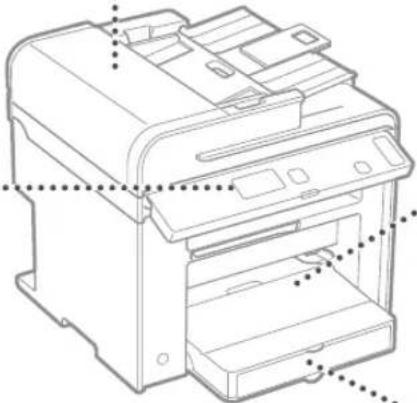
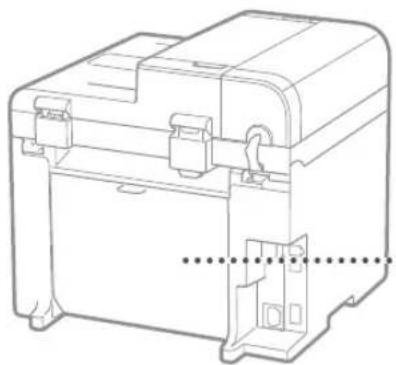
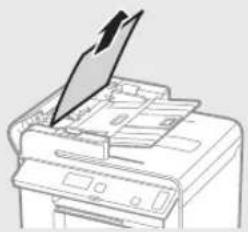
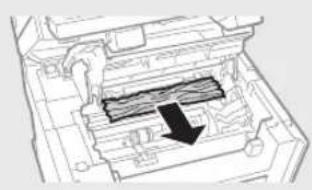
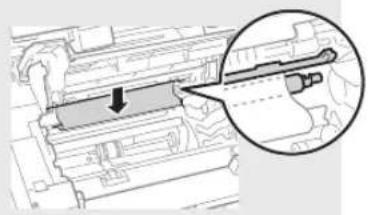
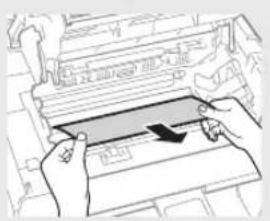
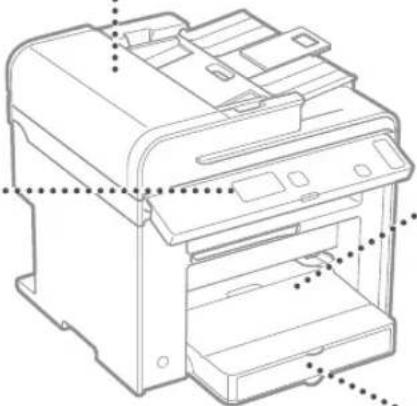
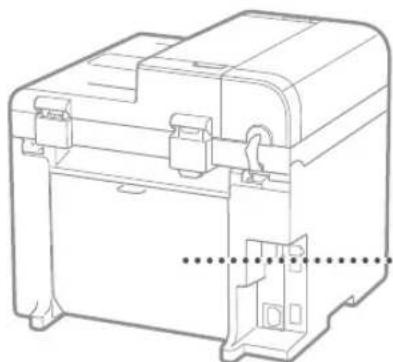
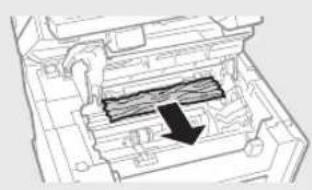
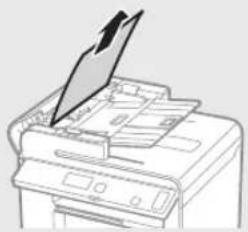
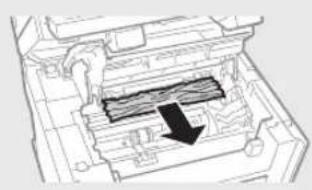
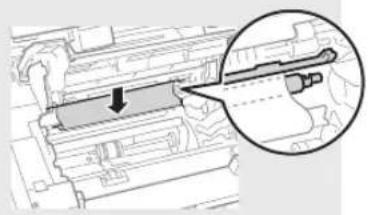
Clearing Paper Jams
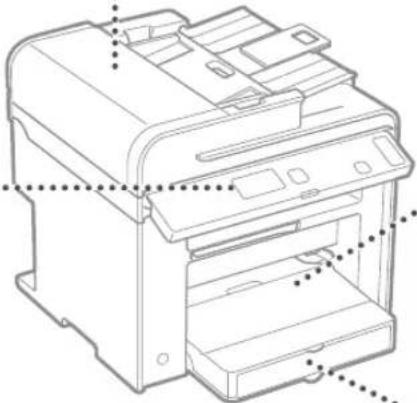
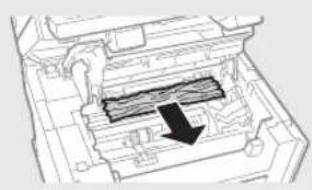
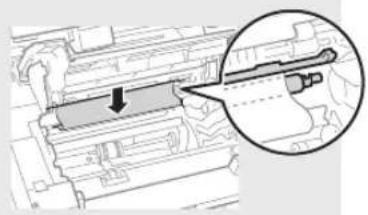
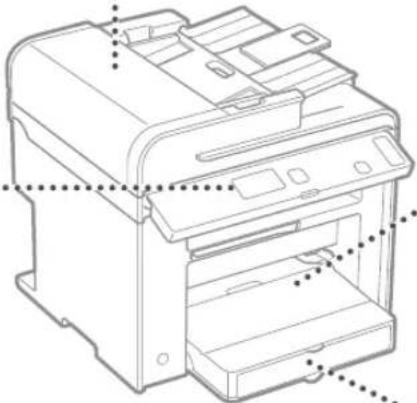
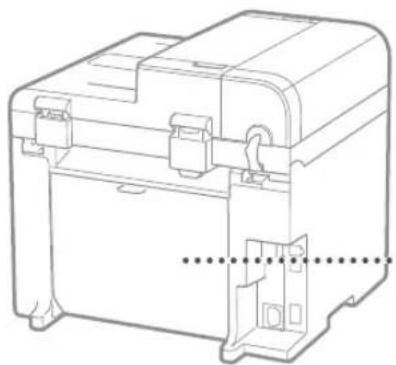
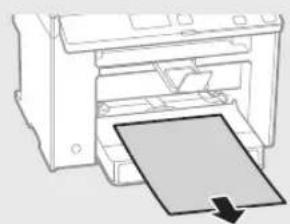
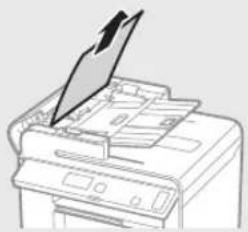
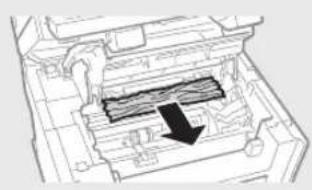
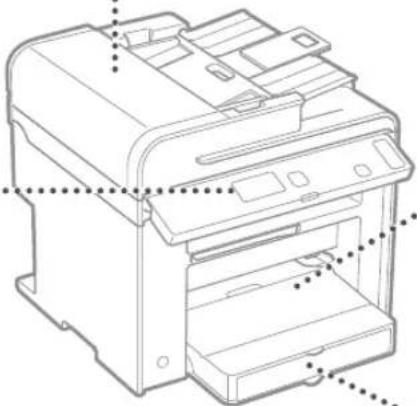
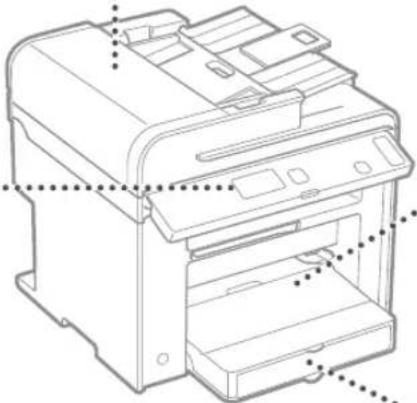
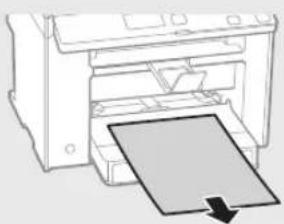
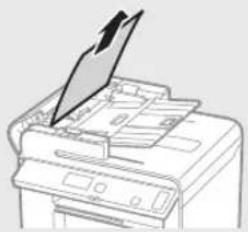
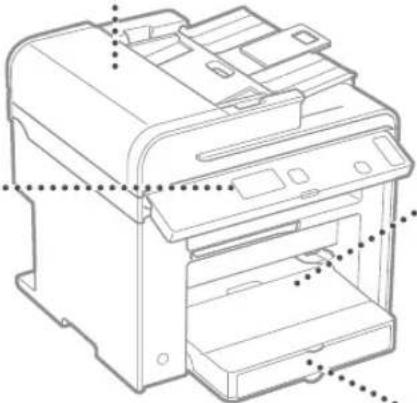
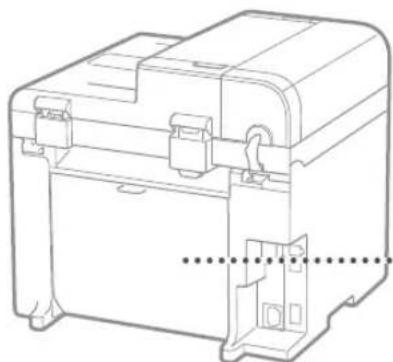
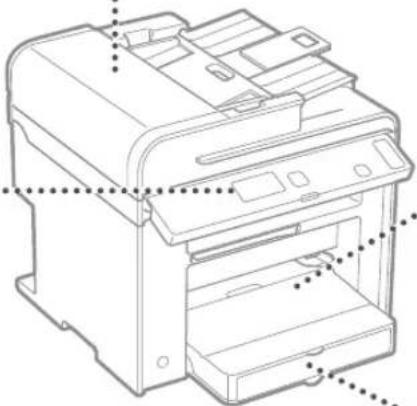
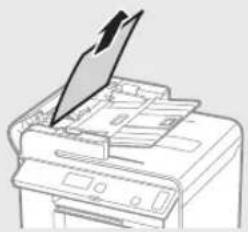
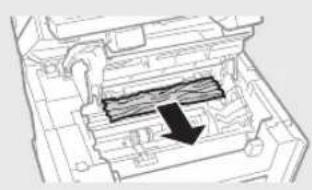
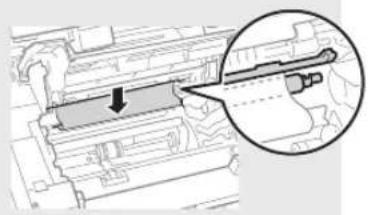
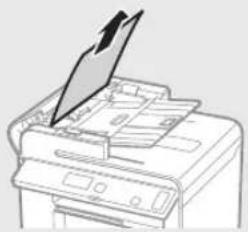
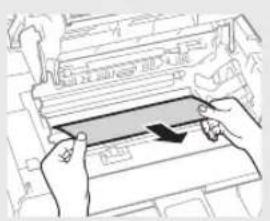
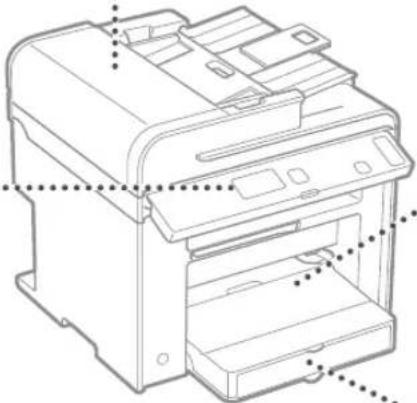
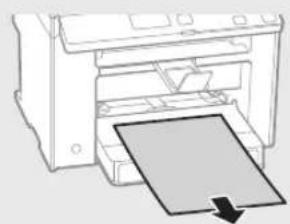
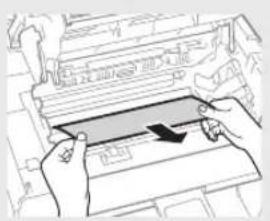
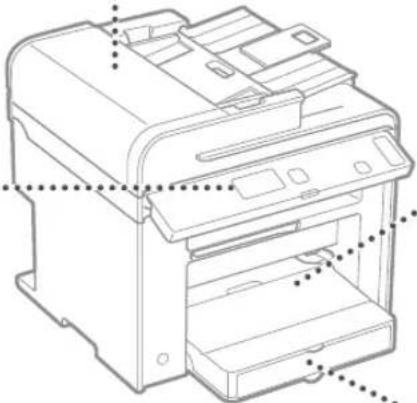
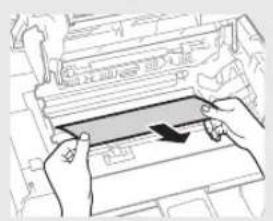
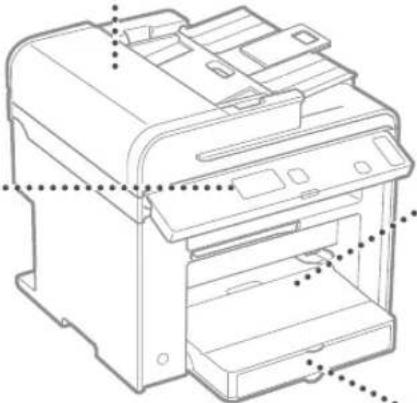
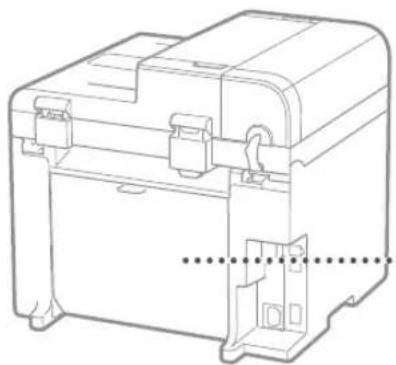
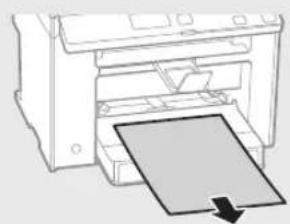
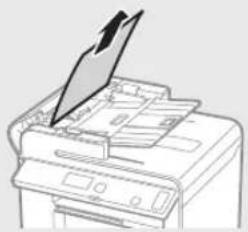
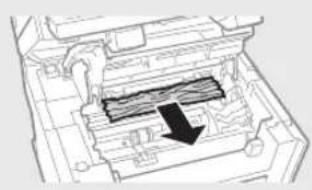
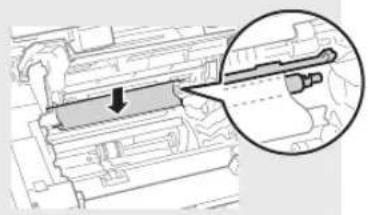
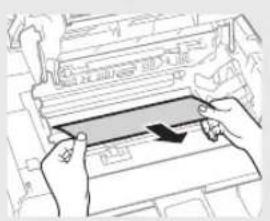
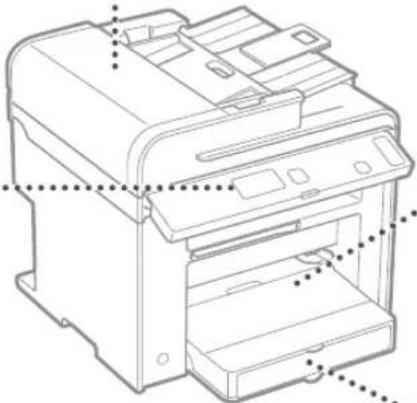
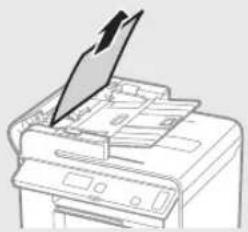
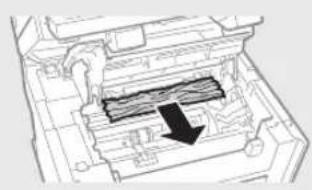
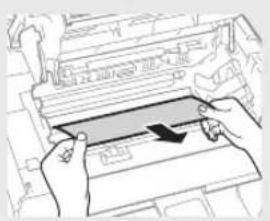
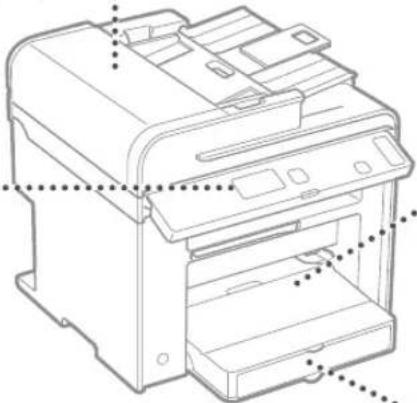
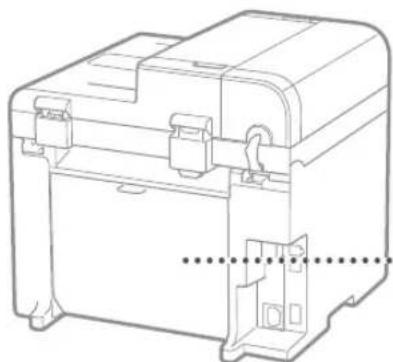
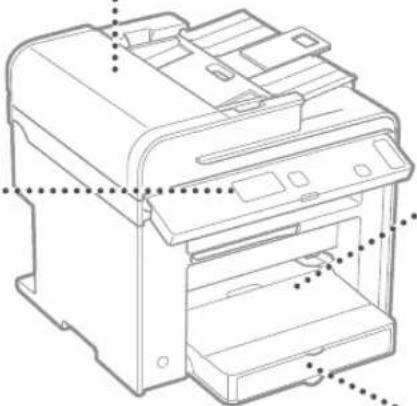
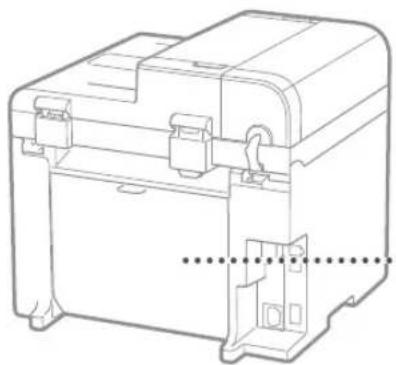
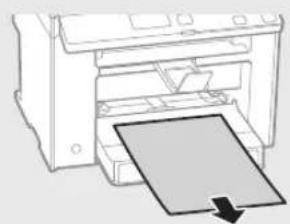
If the following screen appears, a paper jam has occurred in the feeder or inside the machine. Follow the procedure displayed on the screen to remove the jammed document or paper. This manual indicates only areas where paper jams occur. For details on each function, see the e-Manual.
84 Paper jam.
Press [▶] to display steps.
Feeder

MF4890dw
MF4870dn/MF4780w/MF4750/MF4730

Inside the machine Multi-purpose tray
Paper Cassette


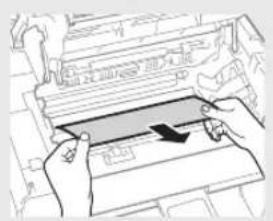


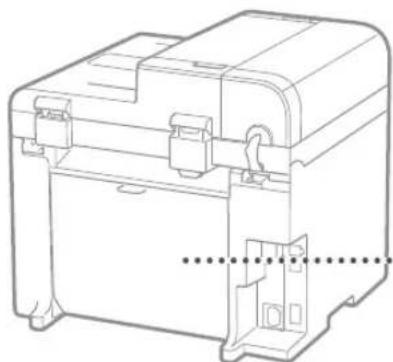
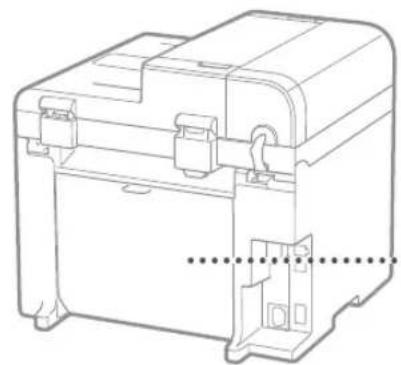
Back cover (MF4890dw/MF4870dn only)
Toner cartridges are consumables. When the toner becomes nearly empty or has run out completely in the middle of a job run, a message appears on the screen, or the following problems may occur. Take the appropriate action accordingly.
When a Message Appears When the toner becomes nearly empty in the middle of a job run, a message appears on the screen.
When a Message Appears When the toner becomes nearly empty in the middle of a job run, a message appears on the screen.
| Message | When the message is displayed on the screen | Description and Solutions |
| When the toner cartridge needs a replacement soon. | Shake the toner cartridge to evenly distribute the toner inside the cartridge.⊕ e-Manual “Before Replacing the Toner Cartridge”We recommend that the toner cartridge be replaced before printing high-volume documents.⊕ e-Manual “Replacing the Toner Cartridge” | |
| When the toner cartridge has reached the end of its life. | Shake the toner cartridge to evenly distribute the toner inside the cartridge.⊕ e-Manual “Before Replacing the Toner Cartridge”If this message does not disappear, replace the toner cartridge.⊕ e-Manual “Replacing the Toner Cartridge”If this message is displayed, the incoming fax will be stored in the memory without being printed. Also, reports may not be printed, even if they are set to be printed automatically.Ifinis set to, however, printing will be continued, but white streaks or smudges may appear on printouts.⊕ e-Manual “Printing the Report Automatically”⊕ e-Manual “Continue Print. When Toner Is Nearly Out” |
When white streaks appear on the output, or the output is partially faded:
When white streaks appear on the output or the output is partially faded, the toner cartridge has almost reached the end of its life, even if no message appears on the screen. When the print quality becomes unacceptable, see the following to fix the problem.
When White Streaks Appear on the Output or the Output Is Partially Faded
When the toner nearly runs out, white streaks appear on the output, or the output is partially faded.
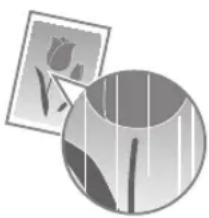

No message appears on the screen if the toner nearly runs out. Replace the toner cartridge when white streaks appear on the output, or the output is partially faded.
When this problem occurs:
Follow the steps in the procedure below before replacing the toner cartridge. The machine continues printing until the toner runs out completely.
e-Manual "Before Replacing the Toner Cartridge"
When the print quality is still unacceptable:
If the problem persists after you have followed the steps in the procedure below, replace the toner cartridge.
e-Manual "Replacing the Toner Cartridge"
Memo
En
En
Symbols Used in This Manual

WARNING
Indicates a warning concerning operations that may lead to death or injury to persons if not performed correctly. To use the machine safely, always pay attention to these warnings.

CAUTION
Indicates a caution concerning operations that may lead to injury to persons if not performed correctly. To use the machine safely, always pay attention to these cautions.
Keys and Buttons Used in This Manual
The following symbols and key names are a few examples of how keys to be pressed are expressed in this manual.
- Operation panel keys: [Key icon] + (Key name) Example: [☐] (Stop)
- Display:
- Buttons and items on the computer display: [Preferences]
Illustrations and Displays Used in This Manual
Illustrations and displays used in this manual are which of MF4890dw unless specified.

WARNING
To avoid the risk of personal injury or damage to the equipment and for legal information, read the Legal Notice and Important Safety Information in Multi-lingual User Manual CD that is included with the product.
Important Safety Instructions
Please read the "Important Safety Instructions" in this manual and in the e-Manual thoroughly before operating the machine.
As these instructions are intended to prevent injury to the user and other persons or to prevent destruction of property, always pay attention to these instructions and operational requirements.
Please note that you are responsible for all damages caused by failure to follow the directions provided herein, using the device for any purpose for which it was not intended, or repairs or alterations made by anyone other than a Canon-approved technician.
Installation

WARNING
- Do not install the machine near flammable substances such as alcohol-based products or paint thinners. If these substances come in contact with the electrical parts inside the machine, they could ignite and cause a fire or increase your risk of electric shock.
- Do not place necklaces and other metal objects or containers filled with liquid on the machine. If foreign substances come into contact with electrical parts inside the machine, this may result in a fire or electrical shock. If any of these substances falls into the machine, turn off the power to the machine immediately and contact your local Canon dealer.
- Do not use near any medical equipment. Radio waves emitted from this machine may interfere with medical equipment, which may result in serious accidents.

CAUTION
- Do not install the machine in the following locations. Doing so may result in personal injury, fire, or electrical shock.
- Unstable location – A location subject to excessive vibrations
- A location where the ventilation slots are blocked (too close to walls, bed, shaggy rug, and other similar objects)
- A damp or dusty location – A location exposed to direct sunlight or an outside place – A location subject to high temperatures – A location near open flames – A location with poor ventilation system
- Although ozone is generated from the machine during operation, it does not have any effect on the human body. However, if you intend to use the machine for long periods of time, ensure that the installation location is well ventilated.
- Do not connect unapproved cables to this machine. Doing so may result in a fire or an electric shock.
Power Supply

WARNING
- Do not use power cords other than the one provided, as this can result in a fire or electrical shock.
- Do not modify or bend the power cord and do not pull on it with great force. Do not place heavy objects on the power cord. Damaging the power cord may result in a fire or an electric shock.
- Do not plug or unplug the power plug with wet hands, as this can result in electrical shock.
- Do not use extension cords or multi-plug power strips with this machine. Doing so may result in a fire or electric shock.
- Do not bundle up or tie up the power cord in a knot, as this can result in a fire or electrical shock.
- Insert the power plug completely into the AC power outlet. Failure to do so can result in a fire or electrical shock.
- Remove the power plug completely from the power outlet during a thunder storm. Failure to do may result in a fire, electric shock, or malfunction.

CAUTION
- Use only a power supply that meets the voltage requirements listed herein. Failure to do so may result in a fire or electric shock.
- Do not obstruct the power outlet where this machine is connected, so that you can unplug the power cord easily in an emergency.
Handling

WARNING
- Do not disassemble or modify the machine. There are high-temperature and high-voltage components inside the machine which may result in a fire or electrical shock.
- Do not allow children to touch or play with the power cord and cables or internal or electrical parts. Doing so may result in serious personal injury.
- Please contact an authorized Canon dealer if the machine makes an unusual noise, emits an unusual smell, or emits smoke or excessive heat. Continued use may result in a fire or electric shock.
- Do not use flammable sprays near the machine. If flammable substances come into contact with electrical parts inside the machine, this may result in a fire or electric shock.

CAUTION
- For your safety, please unplug the power cord if the machine will not be used for a long period of time.
- Use caution when opening and closing covers to avoid injury to your hands.
- Keep hands and clothing away from the rollers in the output area. If the rollers catch your hands or clothing, this may result in personal injury.
- The inside of the machine and the output slot is very hot during and immediately after use. Avoid contact with these areas to prevent burns. Also, printed paper may be hot immediately after being output, so use caution when handling it. Failure to do so may result in burns.
Maintenance and Inspections

WARNING
- Turn off the machine and unplug the power cord from the outlet before cleaning. Failure to do so may result in a fire or an electric shock.
- Unplug the power plug from the power outlet periodically and clean the area around the base of the power plug's metal pins and the power outlet with a dry cloth to remove dust and grime. When damp, accumulated dust may cause short circuiting or fires.
- Use a damp, well wrung-out cloth to clean the machine. Dampen cleaning cloths with water only. Do not use alcohol, benzenes, paint thinners, or other flammable substances. If these substances come into contact with electrical parts inside the machine, this may result in a fire or electric shock.
- Check the power cord and plug regularly for damage. Check the machine for rust, dents, scratches, cracks, or excessive heat generation. Use of poorly-maintained equipment may result in a fire or electric shock.
Consumables

WARNING
- Do not dispose of used toner cartridges in open flames. This may cause an ignition, and result in burns or fire.
- If you accidentally spill or scatter toner, carefully wipe up the loose toner with a damp, soft cloth and avoid inhaling any toner dust. Never use a vacuum cleaner to clean up loose toner. Doing so may cause a malfunction in the vacuum cleaner or result in a dust explosion due to static discharge.

CAUTION
- Keep the toner cartridges and other consumables out of the reach of small children. If toner is ingested, consult a physician or poison control center immediately.
- Do not attempt to disassemble the toner cartridge. The toner may scatter and get into your eyes or mouth. If toner gets into your eyes or mouth, wash them immediately with cold water and consult a physician.
- If toner spills from the toner cartridge, avoid inhaling it or allowing it to come into contact with your skin. If the toner comes into contact with your skin, wash immediately with soap. If you inhale the toner or your skin becomes irritated due to contact with the toner, consult a physician or poison control center immediately.
Others

WARNING
- If you are using a cardiac pacemaker: This machine generates a low level magnetic field. If you feel any abnormalities in your body while using this machine, please move away from the machine and consult your physician immediately.
Legal Notices
En
Legal Limitations on Usage of Your Product and the Use of Images
Using your product to scan, print or otherwise reproduce certain documents, and the use of such images as scanned, printed or otherwise reproduced by your product, may be prohibited by law and may result in criminal and/or civil liability. A non-exhaustive list of these documents is set forth below. This list is intended to be a guide only. If you are uncertain about the legality of using your product to scan, print or otherwise reproduce any particular document, and/or of the use of the images scanned, printed or otherwise reproduced, you should consult in advance with your legal advisor for guidance.
- Paper Money
- Traveler's Checks
- Money Orders
- Food Stamps – Certificates of Deposit
- Passports – Postage Stamps (canceled or uncanceled)
- Immigration Papers – Identifying Badges or Insignias – Internal Revenue Stamps (canceled or uncanceled) – Selective Service or Draft Papers – Bonds or Other Certificates of Indebtedness – Checks or Drafts Issued by Governmental Agencies
- Stock Certificates – Motor Vehicle Licenses and Certificates of Title – Copyrighted Works/Works of Art without Permission of Copyright Owner
Considerable effort has been made to ensure that the manuals for this machine are free of inaccuracies and omissions. However, as we are constantly improving our products, if you need an exact specification, please contact Canon.

MF4890dw

MF4870dn/MF4780w/MF4750/MF4730

Paper Cassette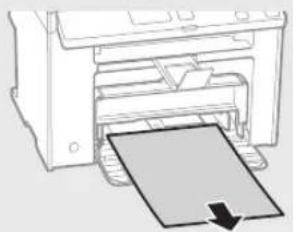
Rear Cover (MF4890dw/MF4870dn only)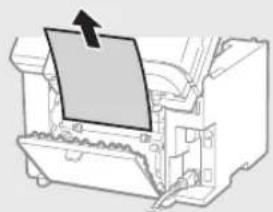

④ e-Manual (Multi-lingual User Manual CD):
MF4890dw
MF4870dn/MF4780w/MF4750/MF4730



Paper Cassette
CLASS 1 LASER PRODUCT
LASER KLASSE 1
APPAREIL À LASER DE CLASSE 1
APPARECCHIO LASER DI CLASSE 1
PRODUCTO LÁSER DE CLASE 1
APARELHO A LASER DE CLASSE 1
LUOKAN 1 LASER-TUOTE
LASERPRODUKT KLASS 1
④ Manuale in formato elettronico (Multi-lingual User Manual CD):

MF4890dw

MF4870dn/MF4780w/MF4750/MF4730


Coperchio posteriore
(solo MF4890dw/MF4870dn)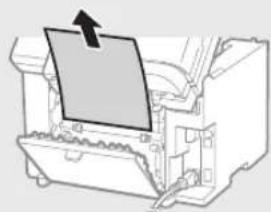

④ e-Manual (Multi-lingual User Manual CD):

MF4890dw
MF4870dn/MF4780w/MF4750/MF4730
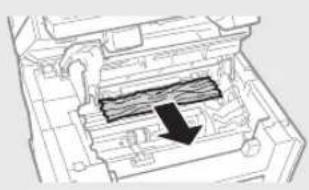
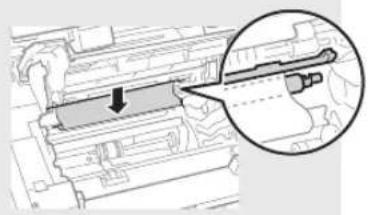

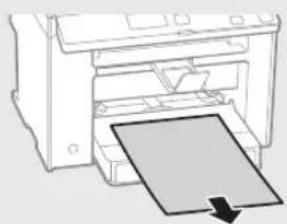
Bandeja de papel
Back cover (MF4890dw/MF4870dn only)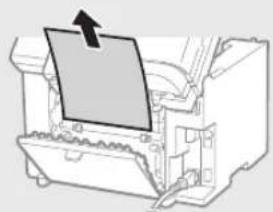

④ Electronic Manual (Multi-lingual User Manual CD):
MF4890dw
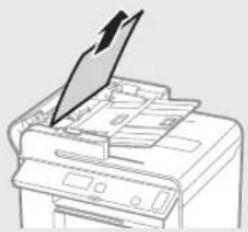
MF4870dn/MF4780w/MF4750/MF4730
Inside the machine Multipurpose tray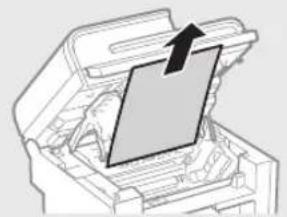
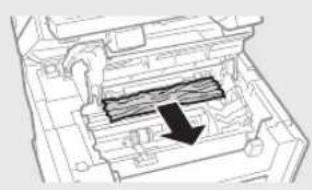


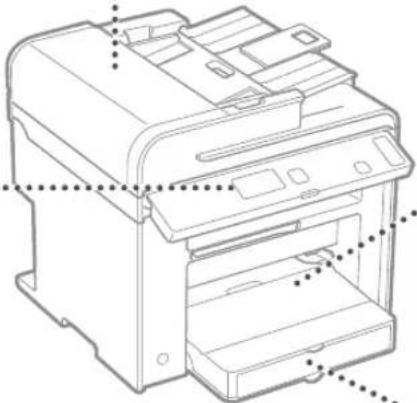

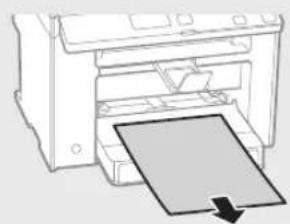
Paper drawer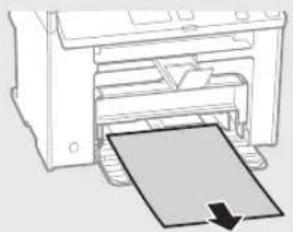
Back cover (MF4890dw/MF4870dn only)

MF4890dw
MF4870dn/MF4780w/MF4750/MF4730


Paper cassette

③ MF Driver Installation Guide (User Software CD):

MF4890dw
MF4870dn/MF4780w/MF4750/MF4730
Inside the machine Universal tray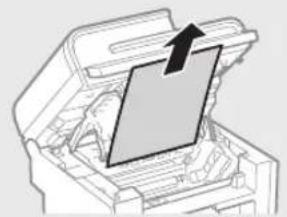
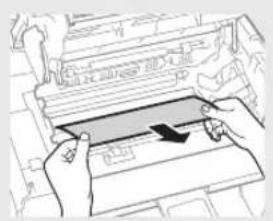


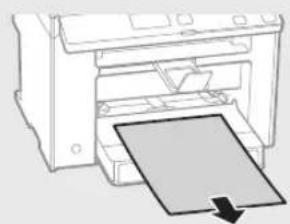
Paper cassette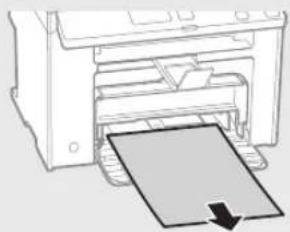
Paper feed cover (MF4890dw/MF4870dn only)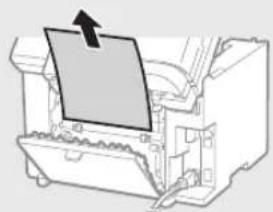

![graph TD A["Device with cable"] --> B["Switch"] B --> C["Computer with monitor"] C --> D["Power outlet"]](/content/2026/06/1237351/images/8717451823eab6ccd3db79495e8a4f12c98f193e5cd2a3073fa6f658f3a21ba0.jpg)
MF4890dw
MF4870dn/MF4780w/MF4750/MF4730


Manual feed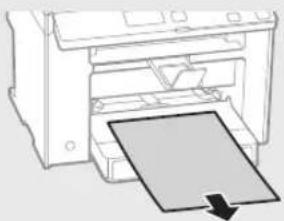
Paper cassette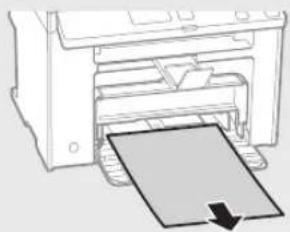
Replace toner cartridge

③ MF Driver Installation Guide (User Software CD):
Read this manual afterwards. This manual describes software installation.
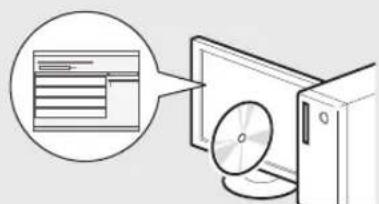
You can connect the machine to the computer via a wired router. Use LAN cables to connect the machine to the wired router (access point).
※ Make sure there is a free port on the router to connect the machine and the computer. ※ Have a Category 5 twisted pair LAN cable ready.
You can connect the machine to the computer via a USB cable.
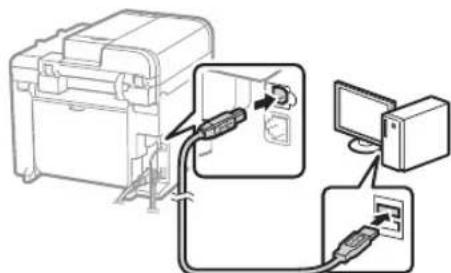
MF4890dw

MF4870dn/MF4780w/MF4750/MF4730
Inside the machine Multi-purpose tray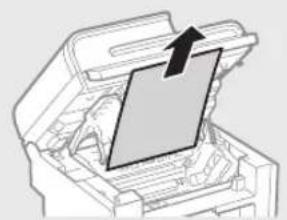


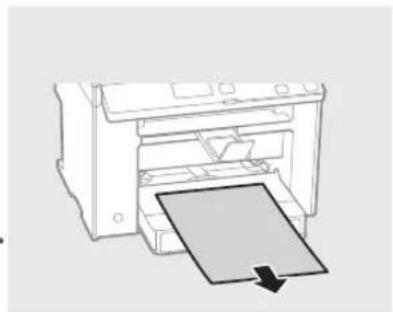
Paper cassette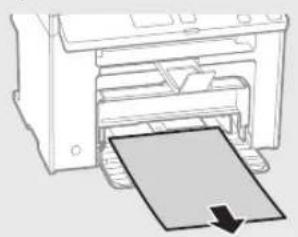
Rear cover (MF4890dw/MF4870dn only)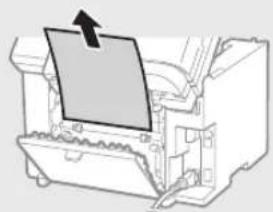
Replacing the toner cartridge

![graph TD A["Device"] -->|Cable Route| B["Computer"] B -->|Cable Route| C["Device"] C -->|Cable Route| D["Computer"]](/content/2026/06/1237351/images/d27c16de431b2c42405f7057e33f89912fb65172c1baf817cee7e974985a8933.jpg)
MF4890dw
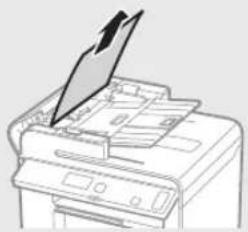
MF4870dn/MF4780w/MF4750/MF4730
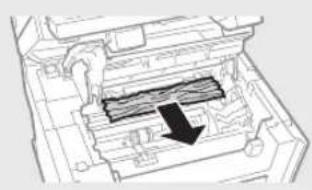

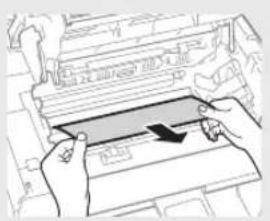

Paper cassette
Rear cover (MF4890dw/MF4870dn only)
Replacing the toner cartridge

② Wireless LAN Setup Guide (MF4890dw/MF4780w only):
③ MF Driver Installation Guide (User Software CD):
MF4890dw
MF4870dn/MF4780w/MF4750/MF4730



Paper cassette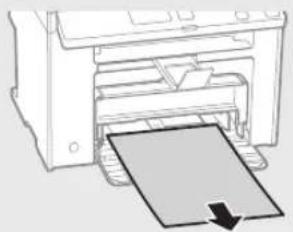
Rear cover (MF4890dw/MF4870dn only)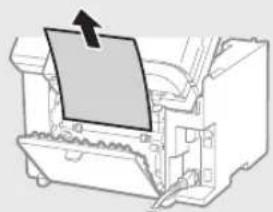

MF4890dw
MF4870dn/MF4780w/MF4750/MF4730


Paper cassette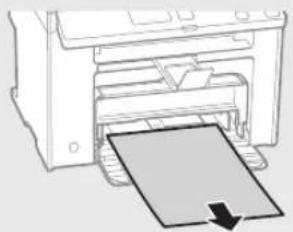

Yes
MF4890dw
MF4870dn/MF4780w/MF4750/MF4730



Paper cassette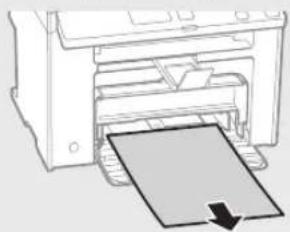


MF4890dw
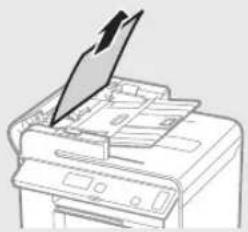
MF4870dn/MF4780w/MF4750/MF4730
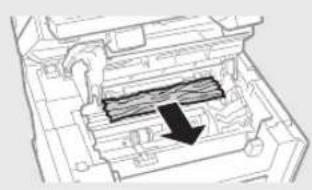
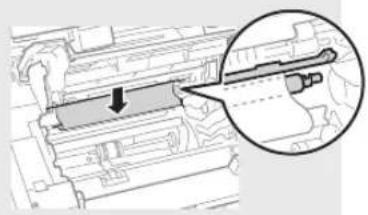


Paper cassette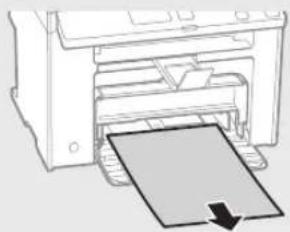
Replacing the toner cartridge

Yes
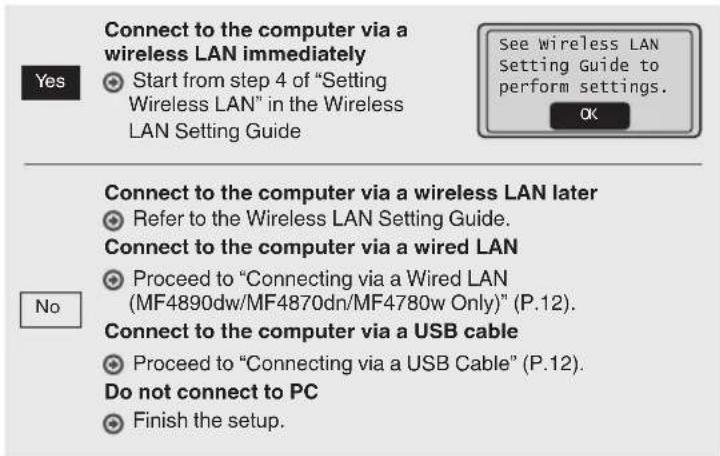
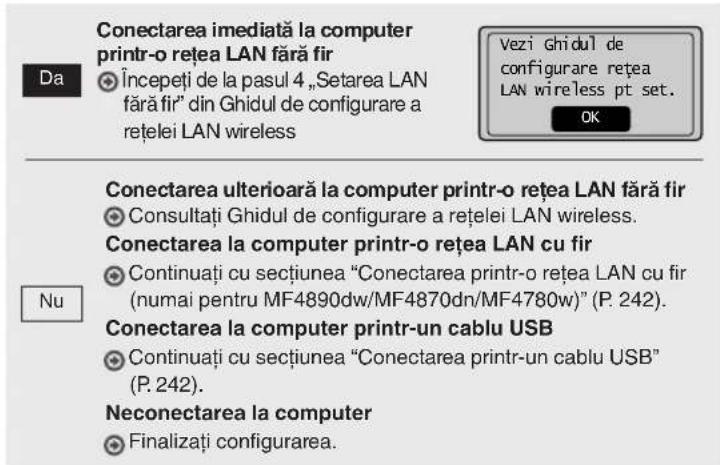
Connect to the computer using a wireless LAN immediately.
See Wireless LAN Setting Guide to perform settings.
OK
No
Connect to the computer using a wireless LAN later.
See "Wireless LAN Setup Instructions".
Connect the computer using a wired LAN
Go to "Connecting Using a Wired LAN (MF4890dw/MF4870dn/MF4780w only)" (p. 162).
Connect the computer using a USB cable
Go to "Connecting Using a USB Cable" (p. 162).
You can connect the machine to the computer using a USB cable.
- Connecting Using a Wireless LAN (MF4890dw/MF4780w only) See "Wireless LAN Setup Instructions"

MF4890dw
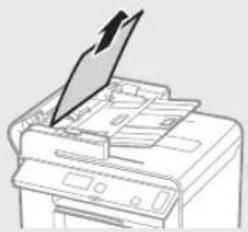
MF4870dn/MF4780w/MF4750/MF4730
Inside the machine, in the universal tray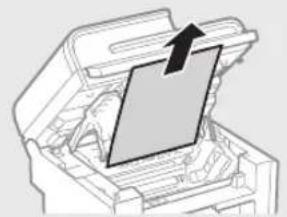
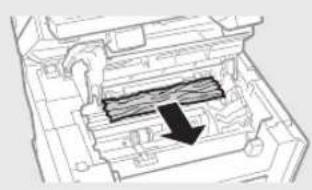

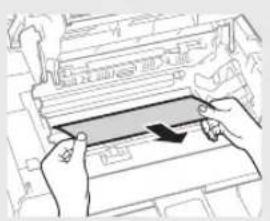

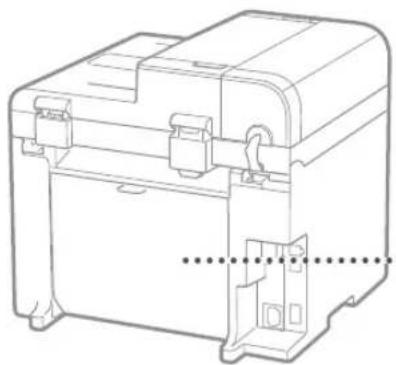
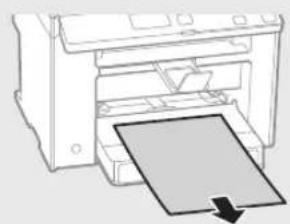
In the paper cassette
In the rear cover (MF4890dw/MF4870dn only)


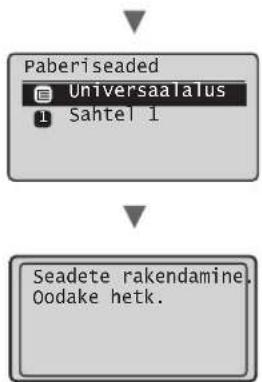
MF4890dw

MF4870dn/MF4780w/MF4750/MF4730
Inside the machine, in the universal tray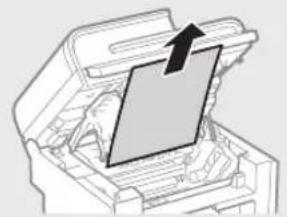
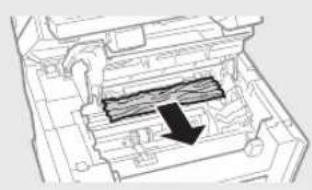

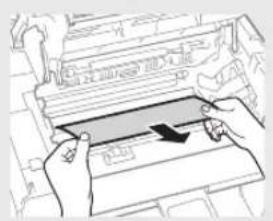


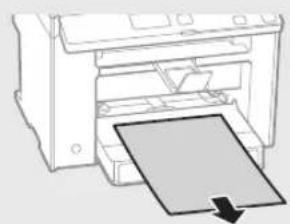
Paper cassette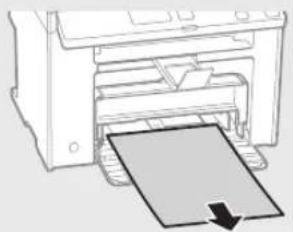
Cassette (MF4890dw/MF4870dn only)

MF4890dw

MF4870dn/MF4780w/MF4750/MF4730


Paper cassette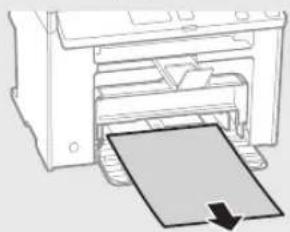


MF4890dw

MF4870dn/MF4780w/MF4750/MF4730


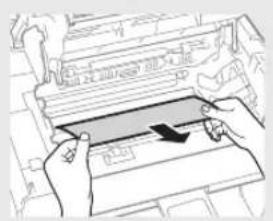
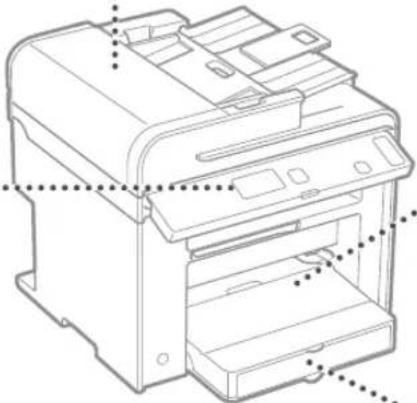
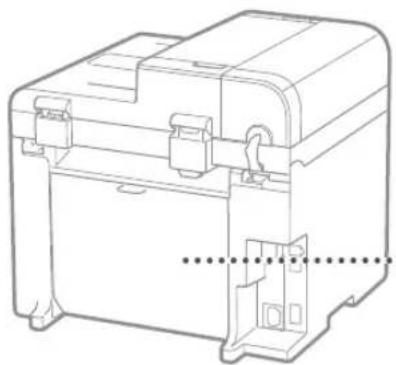
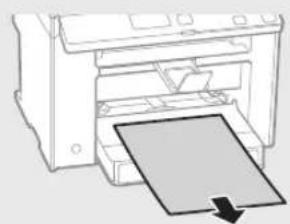
Paper tray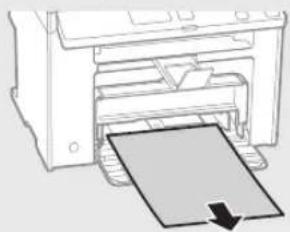


MF4890dw
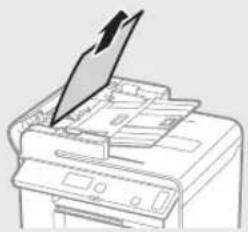
MF4870dn/MF4780w/MF4750/MF4730
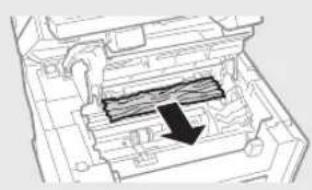

Paper tray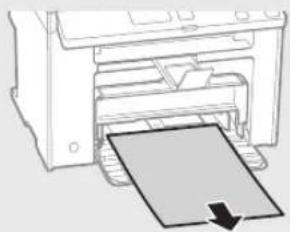

Menu navigation and text entry mode
MF4890dw/MF4870dn/MF4780w/MF4750
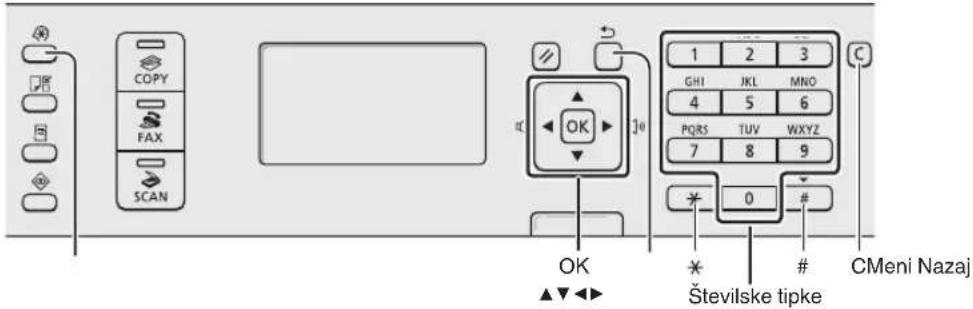
MF4730
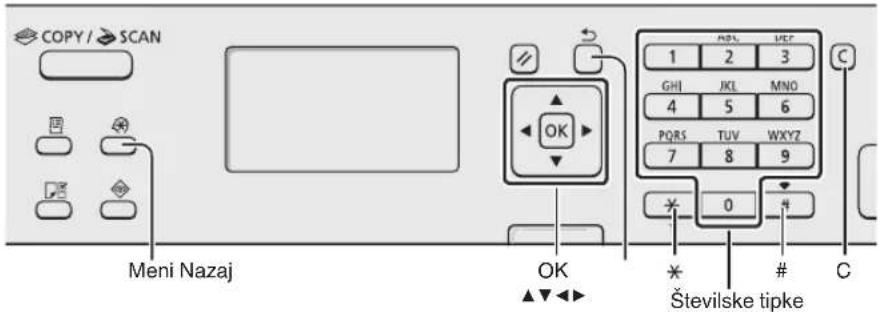
Menu navigation
Selecting an item or moving the cursor through menu items
Select an item with the [▲] or [▼] key. Use the [OK] key or [▶] to move to the next hierarchy level. Use the [□] (Back) key or [◀] to move to the previous hierarchy level.
MF4890dw
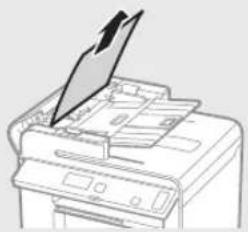
MF4870dn/MF4780w/MF4750/MF4730
Inside of the device Multi-purpose tray

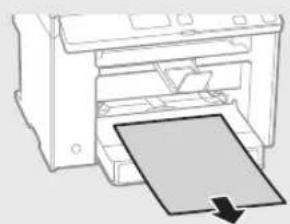
Paper cassette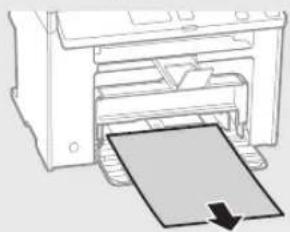
Back cover (only MF4890dw/MF4870dn)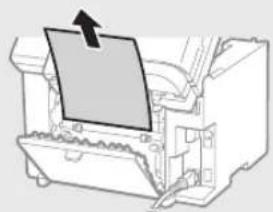
Replacing the toner cartridge

④ e-Manual (Multi-lingual User Manual CD):
Read the chapter that corresponds to your needs. To easily find the information you are looking for, the e-Manual is divided into categories by topic.
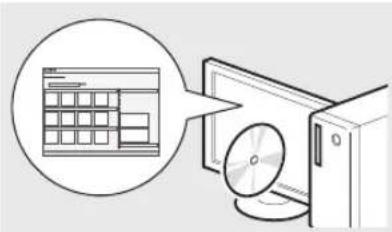
Navigating the menu and entering text
MF4890dw/MF4870dn/MF4780w/MF4750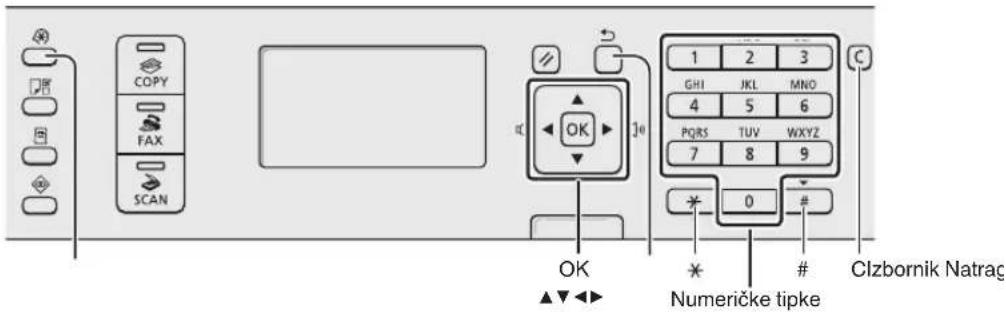
MF4730
Do not connect the USB cable at this time. Connect it when installing the software.
Setting the initial settings
Follow the on-screen instructions; set the language and time. For details on navigating the menu and entering numbers, see the chapter "Navigating the Menu and Entering Text" (p. 220).
MF4890dw/MF4780w


MF4870dn/MF4750/MF4730
The IP address will be configured automatically within 2 minutes. If you want to set the IP address manually, see the following items.
e-Manual "Network Settings" ▶ "Basic Network Settings" ▶ "Setting the IP Address"
Setting the Paper Type and Size
Follow the on-screen instructions; set the paper size and type.
MF4890dw/MF4870dn/MF4780w/MF4750
MF4730


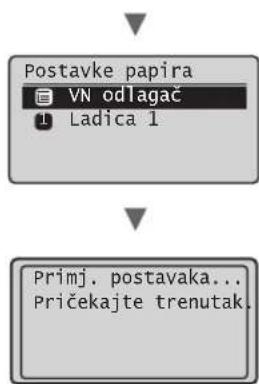
Setting the Initial Fax Settings and Connecting the Telephone Cable
(MF4890dw/MF4870dn/MF4780w/MF4750 models only)
1 Set the initial fax settings.
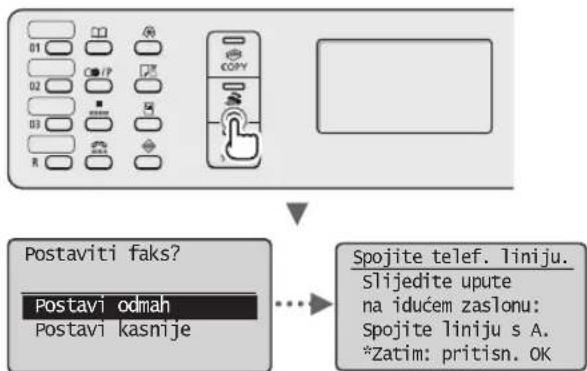
Follow the "Fax Setup Instructions" to set the fax number, unit name, and reception mode. For details on the reception mode, see the e-Manual.
MF4890dw
MF4870dn/MF4780w/MF4750/MF4730

Paper cassette
Back side (MF4890dw/MF4870dn only)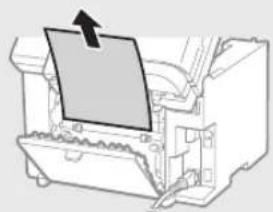
Replacing the toner cartridge

MF4890dw

MF4870dn/MF4780w/MF4750/MF4730
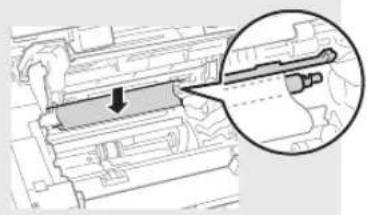
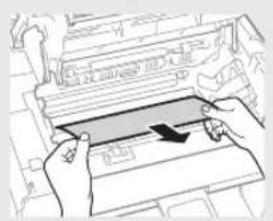

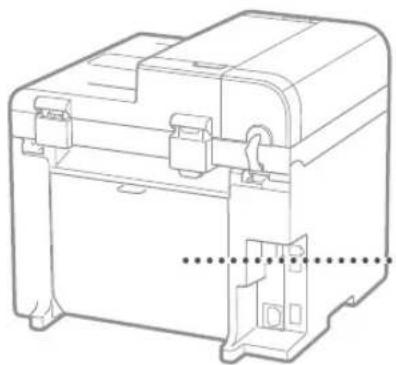
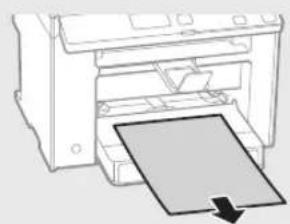
Paper cassette
Hu

④ e-Manual (Electronic Manual) (Multi-lingual User Manual CD (CD with multilingual user manual)):
MF4890dw
MF4870dn/MF4780w/MF4750/MF4730





MF4890dw
MF4870dn/MF4780w/MF4750/MF4730


Paper cassette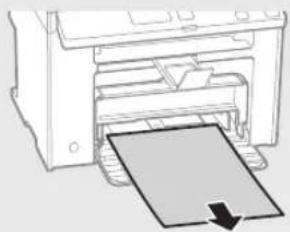

MF4890dw
MF4870dn/MF4780w/MF4750/MF4730

Paper Cassette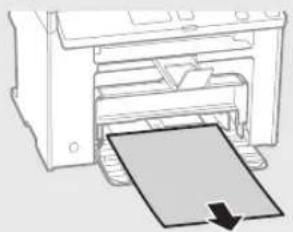
Rear cover (MF4890dw/MF4870dn only)


How to Enter Text
Changing the Input Mode

"Setting the IP Address" ▶ (Setting triangle ABC)




.
•
•
?
.
1
•
•
1
•
1
•
.
Caution
- ABOUT THE SUPPLIED MANUALS
- ① STARTER GUIDE (THIS MANUAL)
- ② WIRELESS LAN SETTING GUIDE (MF4890DW/MF4780W ONLY)
- ③ MF DRIVER INSTALLATION GUIDE (USER SOFTWARE CD-ROM)
- ④ E-MANUAL (MULTI-LINGUAL USER MANUAL CD)
- NAVIGATING THE MENU AND TEXT INPUT METHOD
- NAVIGATING THE MENU
- ITEM SELECTION OR MOVING THE CURSOR AMONG THE MENU ITEMS
- SETTING CONFIRMATION
- TEXT INPUT METHOD
- CHANGING ENTRY MODE
- ENTERING TEXT, SYMBOLS, AND NUMBERS
- MOVING THE CURSOR (ENTERING A SPACE)
- DELETING CHARACTERS
- VIEWING THE E-MANUAL FROM THE CD-ROM
- CONNECTING THE POWER CORD AND TURNING ON THE POWER
- SPECIFYING THE INITIAL SETTINGS
- EN
- CHOOSING THE METHOD TO CONNECT THE MACHINE TO THE COMPUTER
- CONNECTING VIA A WIRED LAN (MF4890DW/MF4870DN/MF4780W ONLY)
- CONNECTING VIA A USB CABLE
- SETTING A PAPER SIZE AND TYPE
- SPECIFYING INITIAL FAX SETTINGS AND CONNECTING A TELEPHONE CABLE (MF4890DW/MF4870DN/MF4780W/MF4750 ONLY)
- HOW TO USE A USERNAME
- WHEN INSTALLING THE OPTIONAL HANDSET
- COPY
- ENLARGED/REDUCED COPIES
- SIDED COPYING
- COLLATING
- REDUCED LAYOUT
- COPYING ID CARD
- FAX
- SENDING A DOCUMENT DIRECTLY FROM A COMPUTER (PC FAX)
- SENDING
- RECEIVING
- REMOTE RECEIVING
- POLLING RECEIVING
- ENLARGED/REDUCED PRINTING
- SIDED PRINTING
- BOOKLET PRINTING
- POSTER PRINTING
- WATERMARK PRINTING
- DISPLAYING A PREVIEW BEFORE
- PRINTING
- SCAN
- SAVING THE DOCUMENTS USING THE OPERATION PANEL OF THE MACHINE
- SAVING THE DOCUMENTS USING OPERATIONS FROM A COMPUTER
- NETWORK SETTINGS
- REMOTE UI
- CLEARING PAPER JAMS
- WHEN WHITE STREAKS APPEAR ON THE OUTPUT, OR THE OUTPUT IS PARTIALLY FADED
- WHEN WHITE STREAKS APPEAR ON THE OUTPUT OR THE OUTPUT IS PARTIALLY FADED
- WHEN THIS PROBLEM OCCURS
- WHEN THE PRINT QUALITY IS STILL UNACCEPTABLE
- MEMO
- SYMBOLS USED IN THIS MANUAL
- WARNING
- CAUTION
- KEYS AND BUTTONS USED IN THIS MANUAL
- ILLUSTRATIONS AND DISPLAYS USED IN THIS MANUAL
- IMPORTANT SAFETY INSTRUCTIONS
- INSTALLATION
- POWER SUPPLY
- HANDLING
- MAINTENANCE AND INSPECTIONS
- CONSUMABLES
- OTHERS
- LEGAL NOTICES
- LEGAL LIMITATIONS ON USAGE OF YOUR PRODUCT AND THE USE OF IMAGES
- ④ MANUALE IN FORMATO ELETTRONICO (MULTI-LINGUAL USER MANUAL CD)
- REPLACE TONER CARTRIDGE
- REPLACING THE TONER CARTRIDGE
- ② WIRELESS LAN SETUP GUIDE (MF4890DW/MF4780W ONLY)
- ③ MF DRIVER INSTALLATION GUIDE (USER SOFTWARE CD)
- YES
- MENU NAVIGATION AND TEXT ENTRY MODE
- MENU NAVIGATION
- SELECTING AN ITEM OR MOVING THE CURSOR THROUGH MENU ITEMS
- NAVIGATING THE MENU AND ENTERING TEXT
- SETTING THE INITIAL SETTINGS
- SETTING THE PAPER TYPE AND SIZE
- SETTING THE INITIAL FAX SETTINGS AND CONNECTING THE TELEPHONE CABLE
- ④ E-MANUAL (ELECTRONIC MANUAL) (MULTI-LINGUAL USER MANUAL CD (CD WITH MULTILINGUAL USER MANUAL))
- HOW TO ENTER TEXT
Brand : CANON
Model : i-Sensys MF4730
Category : Printer