USER MANUAL 5710 HUSQVARNA
Operating Manual Viking 5710
For you and
your new
Viking
We have prepared this booklet, to let you know
Prepared this booklet, to let you know how to operate this sewing machine and how to make best use of all its sewing possibilities.
We hope you will have many pleasant hours with your new sewing machine.
HUSQVARNA AB, SWEDEN
US Factory Subsidiary:
Viking Sewing Machine Co., Inc. 2300 Linnings, Inc.
2500 Louisiana Ave. North, Minneapolis, Minn. 55427
Minneapolis, Minn. 55427.
In countries other than the U. S. A. and the U. K., Viking sewing machines are sold under the name "Husqvarna". For practical reasons the illustrations in this manual show machines with the Husqvarna name.
Table of contents
(1)
| Fine adjustment of buttonhole sewing | 40 | Presser foot pressure | 16 |
| Foot control | 6 | Putting the machine away | 6 |
| Free-arm | 7 | Raised seams | 44 |
| Free-hand embroidery | 46 | Reinforced buttonholes | 41-42 |
| Gathering | 22, 26 | Reverse stitching | 21 |
| General hints | 20 | Seams with edges overcast together | 35 |
| Glide plate | 17 | Selecting the stitches | 21-42 |
| Hook (shuttle) | 13 | Sewing on buttons | 45 |
| Knit stitch (overlock) | 34 | Shuttle (hook) | 13 |
| Lace | 26-27 | Spool pins | 10 |
| Light and light switch | 7 | Stitch length dial | 21 |
| Lowering the feed dog | 45 | Stitch selector | 21 |
| Lower thread, bringing up | 14 | Straight stitching | 21 |
| Lower thread tension | 15 | Tacking (basting) | 22 |
| Lower thread, threading | 13 | Tensions | 15-16 |
| Maintenance hints | 49-50 | Terry cloth (towelling) | 29 |
| Mending | 30 | Thread and needle | 9 |
| Needle, changing | 9 | Thread cutter | 14 |
| Needle and thread | 9 | Threading lower thread | 13 |
| Open arm | 7 | Threading upper thread | 10 |
| Operation guide | 58-60 | Thread tension | 15, 16 |
| Overcasting | 29 | Three-step zig-zag | 28 |
| Overcasting and assembling | 37 | Top stitching | 37 |
| Overlock (elastic knit stitch) | 34 | Unpacking the machine | 6 |
| Packing and unpacking the machine | 6 | Upper thread tension | 15 |
| Plugging in the machine to the power outlet | 7 | Upper thread, threading | 10 |
| Presser bar lever | 8 | Utility stitch presser foot | 17 |
| Presser feet | 17 | Zig-zag presser foot | 17 |
| Presser foot for thin fabrics | 18 | Zig-zag stitching | 25 |
| Presser foot for thin fabrics | 18 | Zipper foot | 23 |
| Presser foot for thin fabrics | 18 | Zippers, sewing in | 22, 24 |
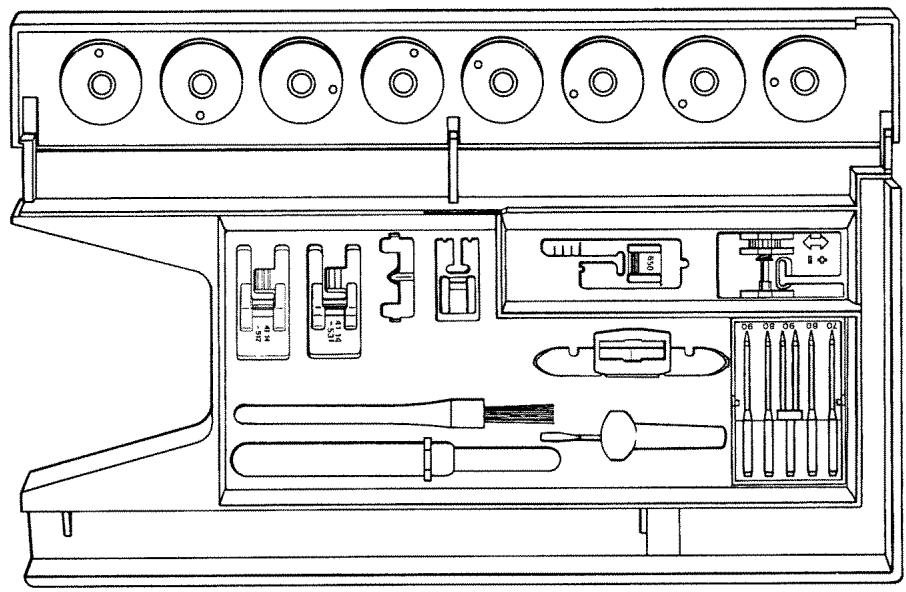
| Accessory box, contents | 50-51 |
| Appliqués | 27 |
| Basting (tacking) | 22 |
| Blind hem | 32 |
| Blind hem, elastic | 33 |
| Blindstitching | 31-33 |
| Bobbin case | 12-13 |
| Bobbin winding | 11-12 |
| Bound edges | 26 |
| Bringing up lower thread | 14 |
| Buttons, sewing on | 45 |
| Buttonhole knife | 43 |
| Buttonholes | 38-42 |
| Care of the machine | 48 |
| Changing the light bulb | 48 |
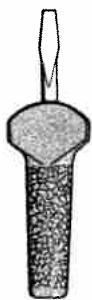
| Changing the needle | 9 |
| Changing the presser foot ankle | 19 |
| Changing the snap-on presser foot | 19 |
| Choice of needle and thread | 9 |
| Cleaning | 48 |
| Connection to wall socket | 7 |
| Contents of accessory box | 51-52 |
| Darning | 47 |
| Elastic blind hem | 33 |
| Elastic blindstitch | 33 |
| Elastic knit stitch (overlock) | 34 |
| Elastic straight stitch | 36-37 |
| Extension table | 8 |
| Extra accessories | 53-57 |
| Feed dog, cleaning | 48 |
| Feed dog, lowering | 45 |
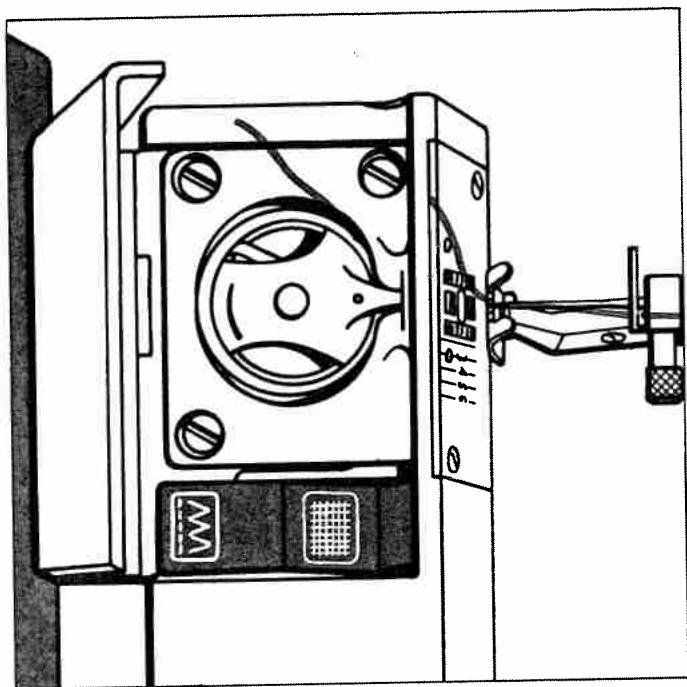
- Drop feed button
31: Bobbin winding arm 32: Bobbin winding spindle
- Needle canap screw 10. Needle
- Pressbar 18. Needle bar
- Base plate 16. Presser foot finish
- Dooon case 13. Shuttle case cover
- Feed dog 12. Bob it
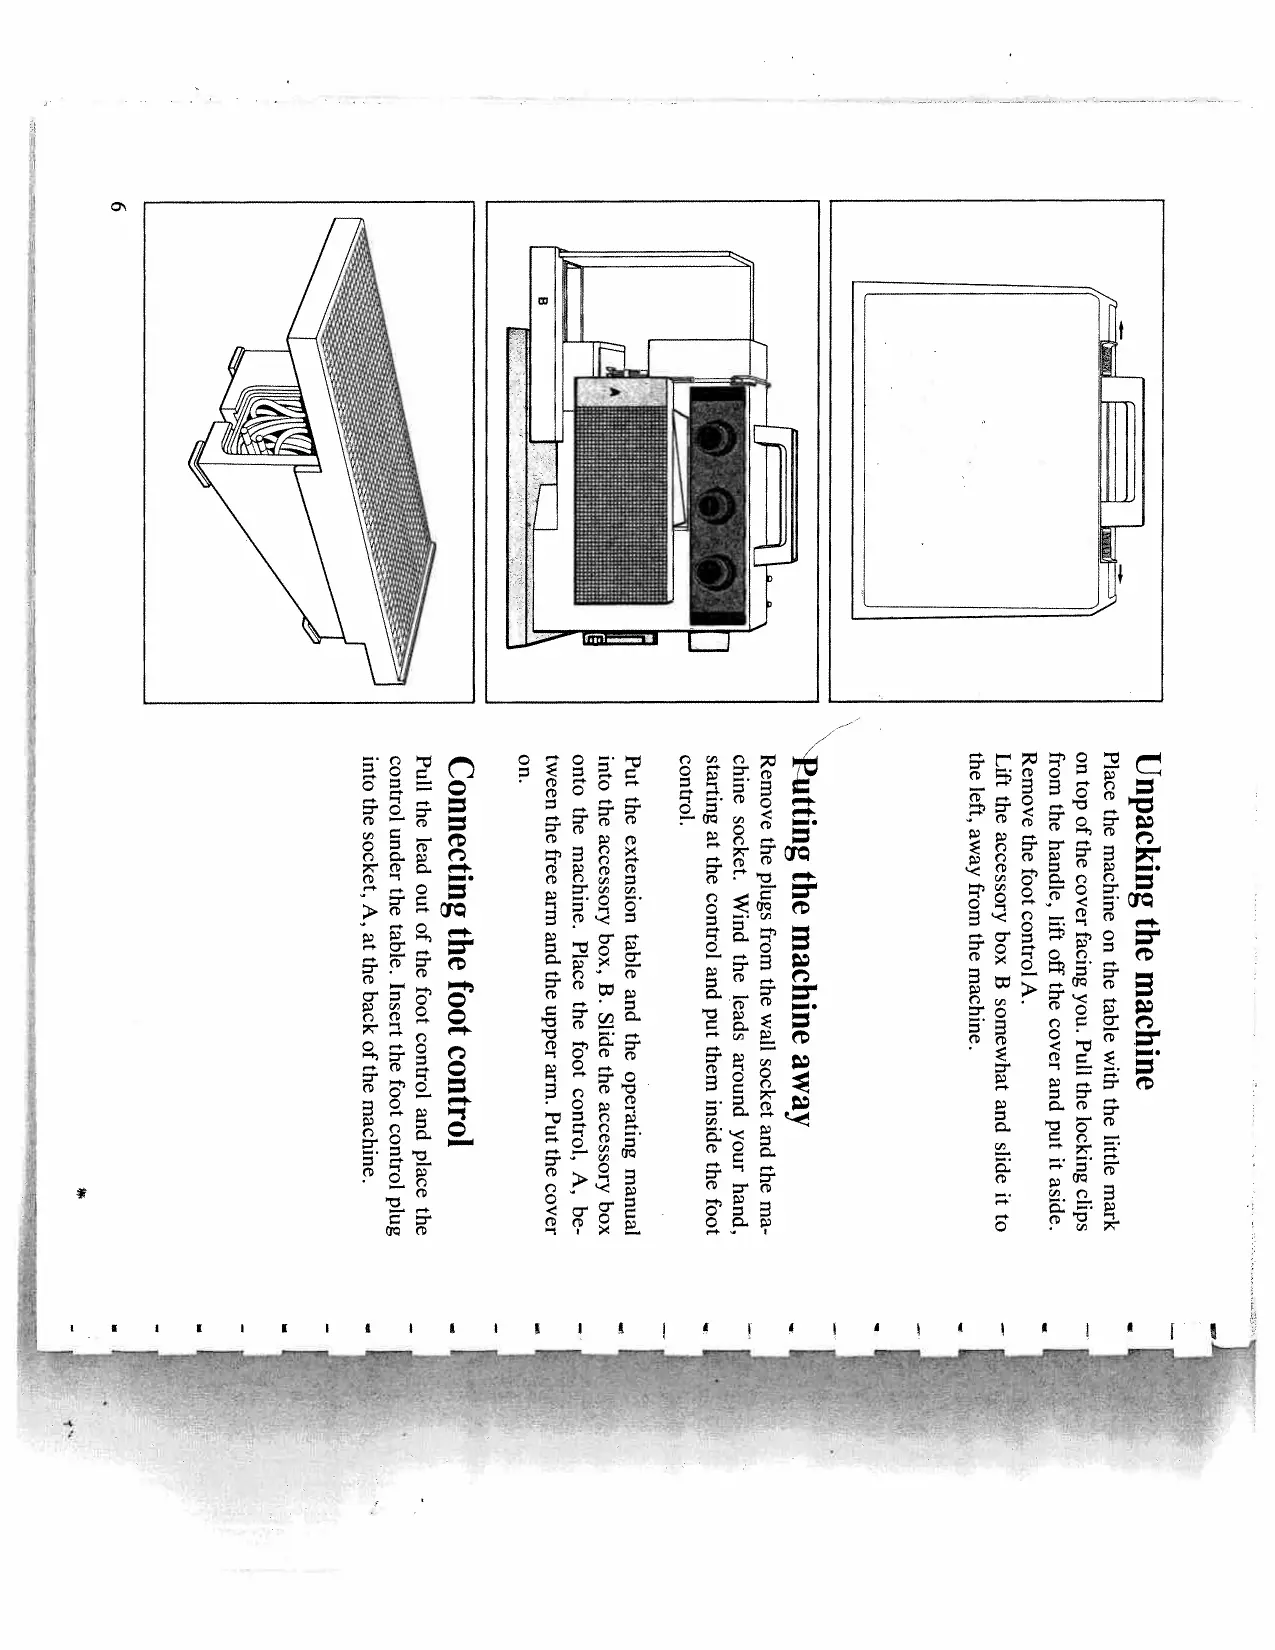
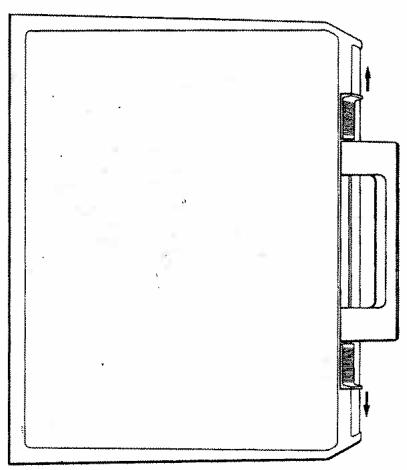
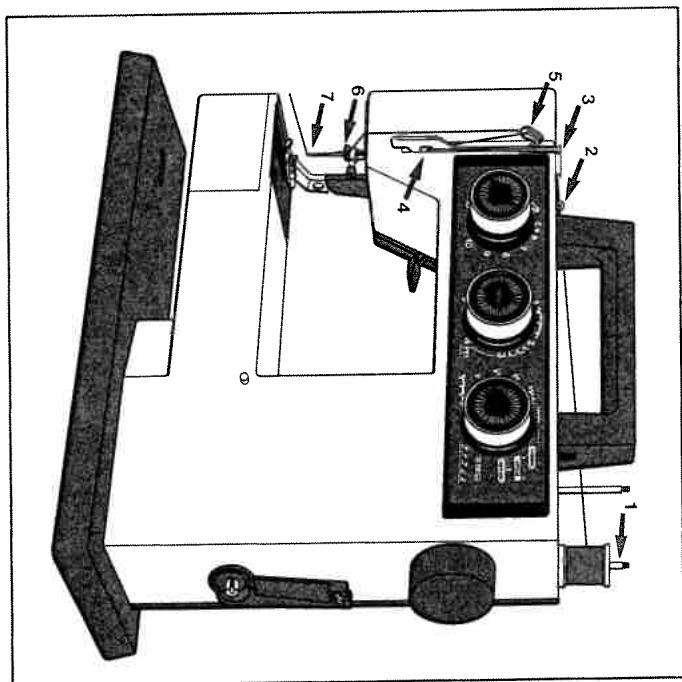
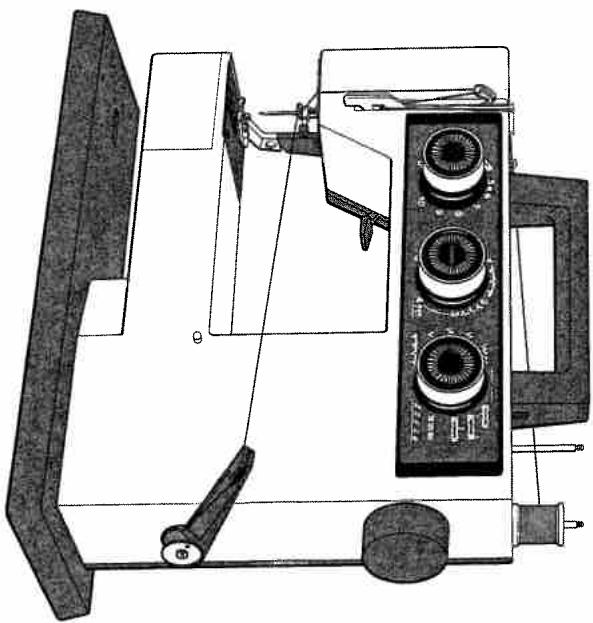
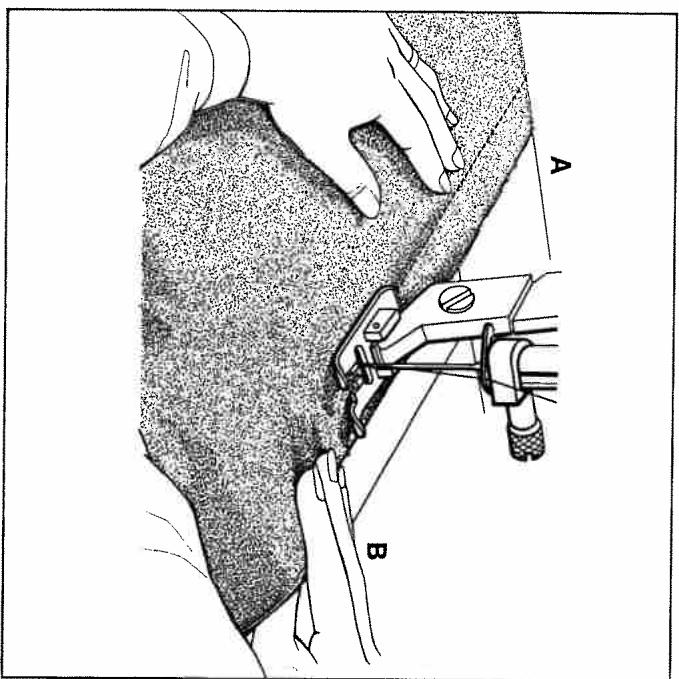
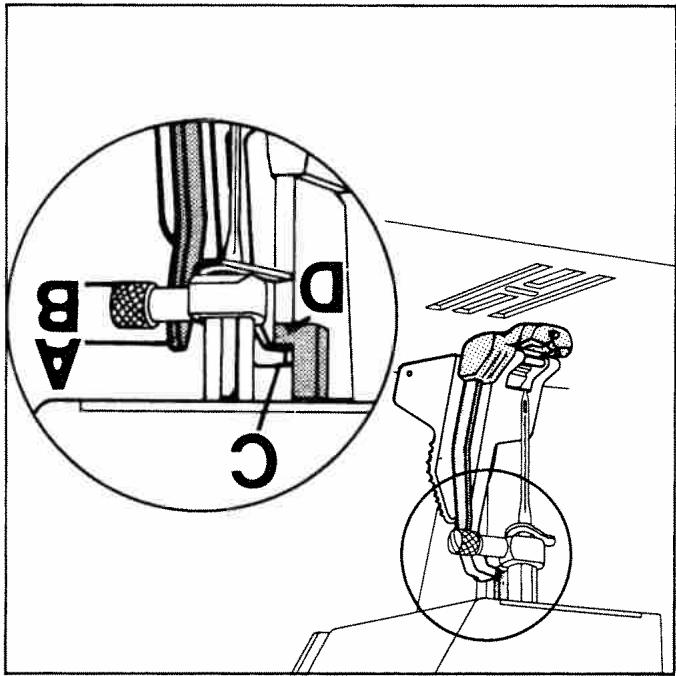
Unpacking the machine
Unpacking the machine
Pace the machine on the table with the little mark on top of the cover facing you. Pull the locking clips
from the handle, lift off the cover and put it aside.
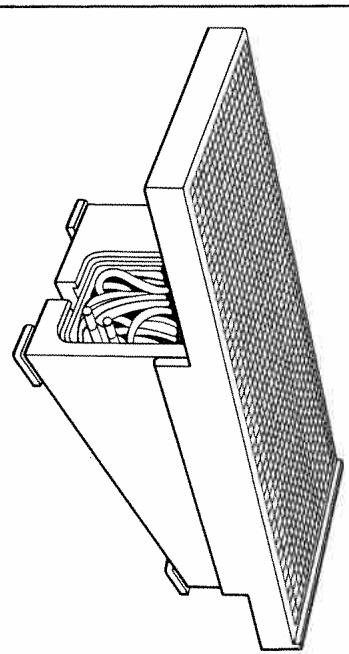
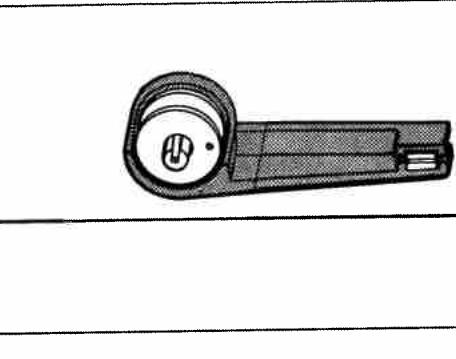
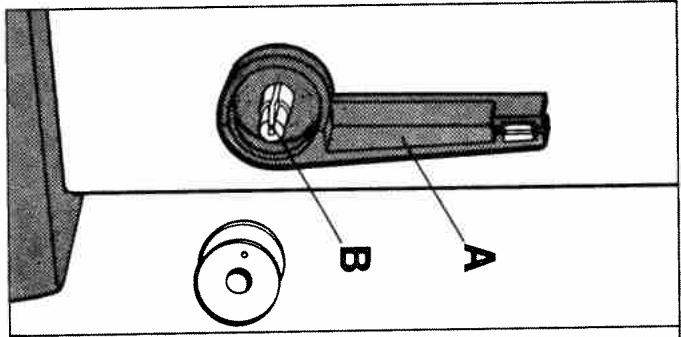
RemovethefootcontrolA.
Lift the accessory box B somewhat and slide it too
the left, away from the machine.
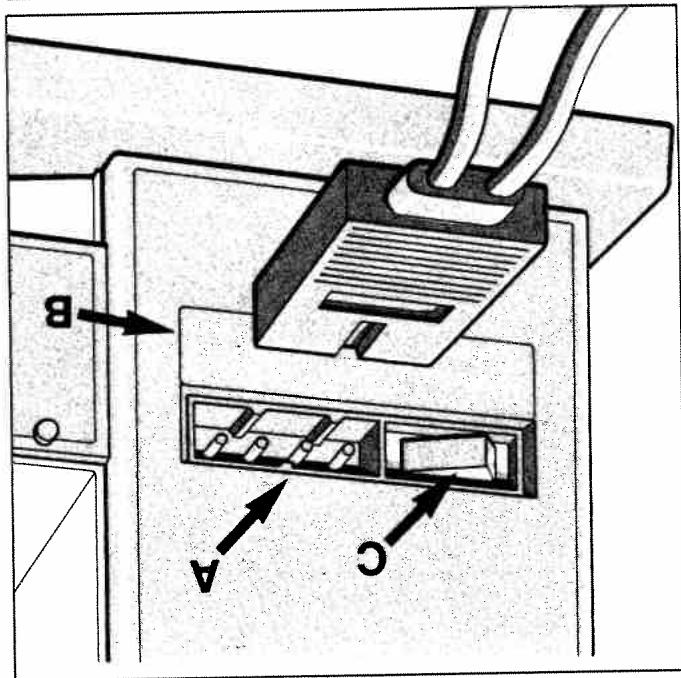
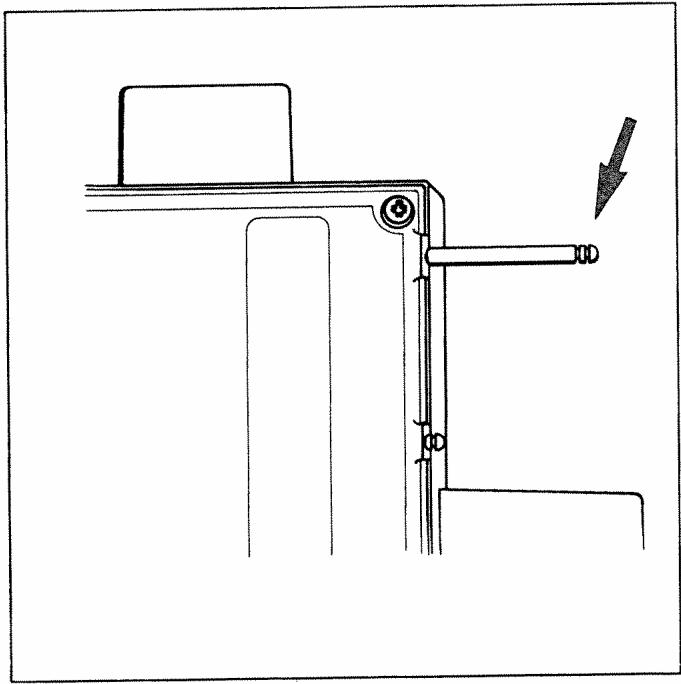
Putting the machine away

Pull the lead out of the foot control and place the
cucuunrnnnne rannnnnne nnnnne annnnnne aen annnnnne ennnnne
into the socket, A, at the back of the machine

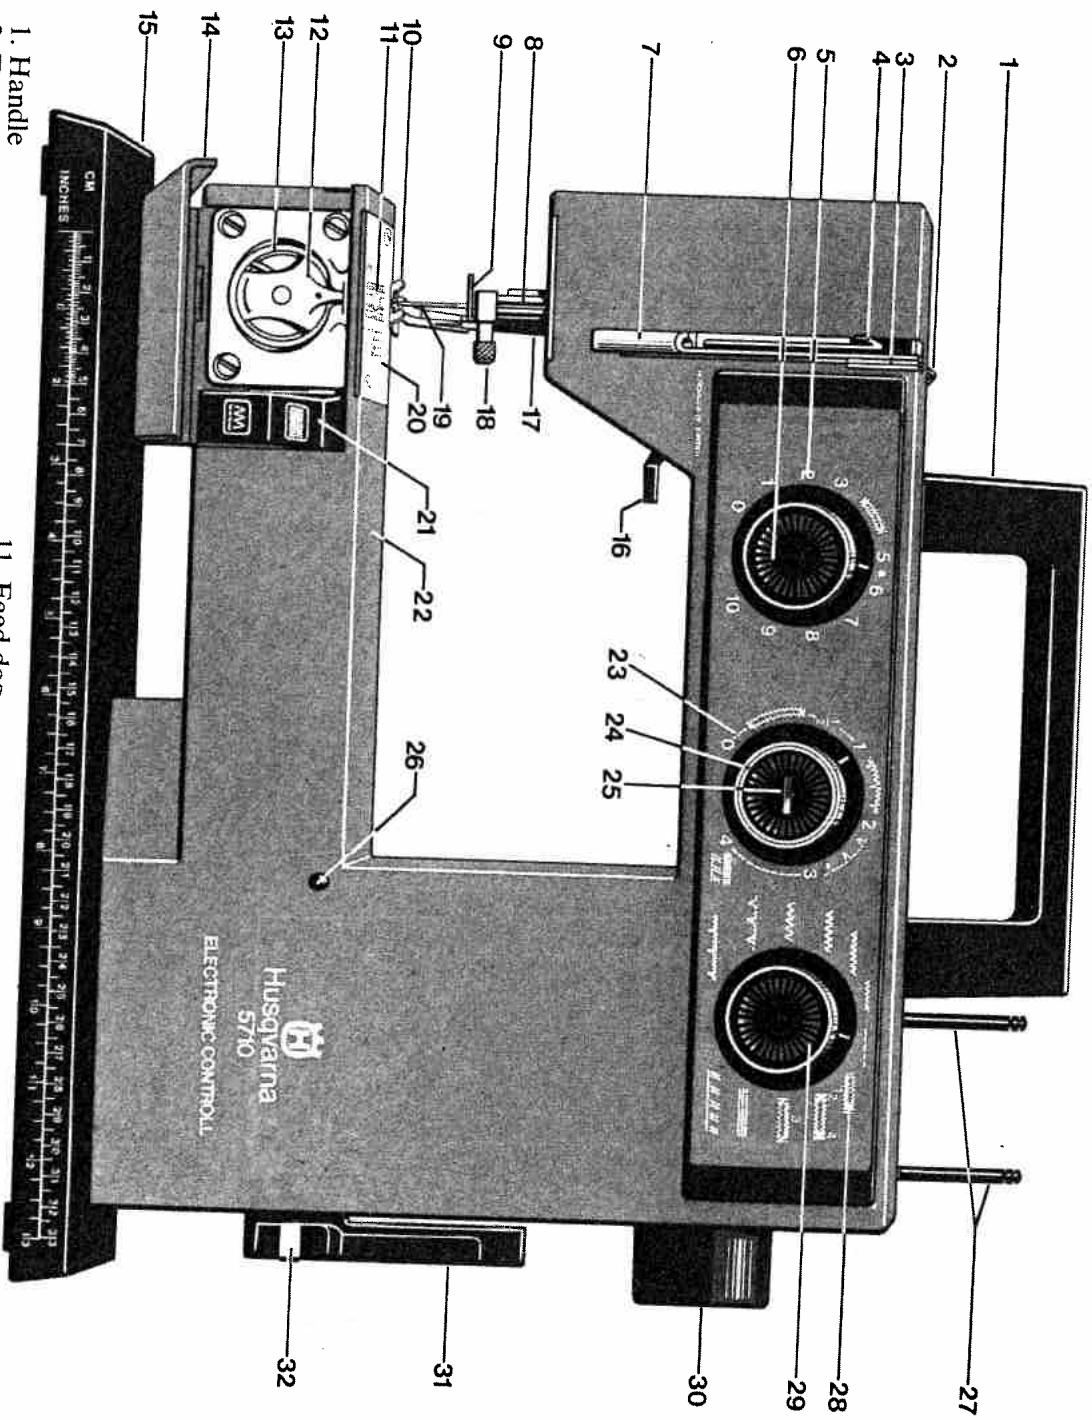
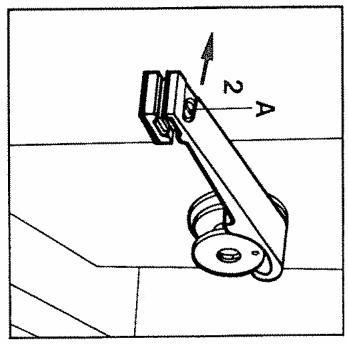
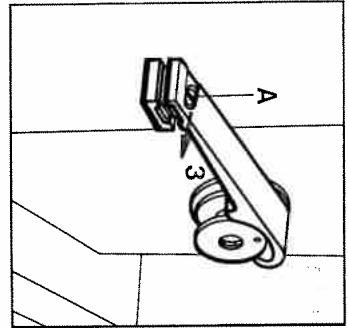
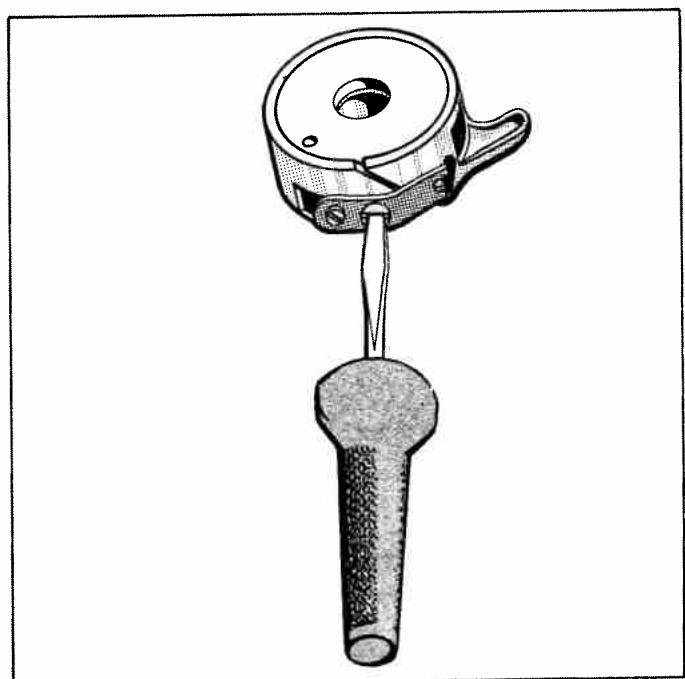
By means of the presser bar lever at the rear of the machine, the presser foot can be raised and lowered. When raising, the presser foot will remain in the raised position, but the height can be doubled by pushing the presser bar lever upwards and holding it in this position. Useful when you want to put gar-ments with thick seams etc. under the presser foot. The presser foot should be lowered during sewing.
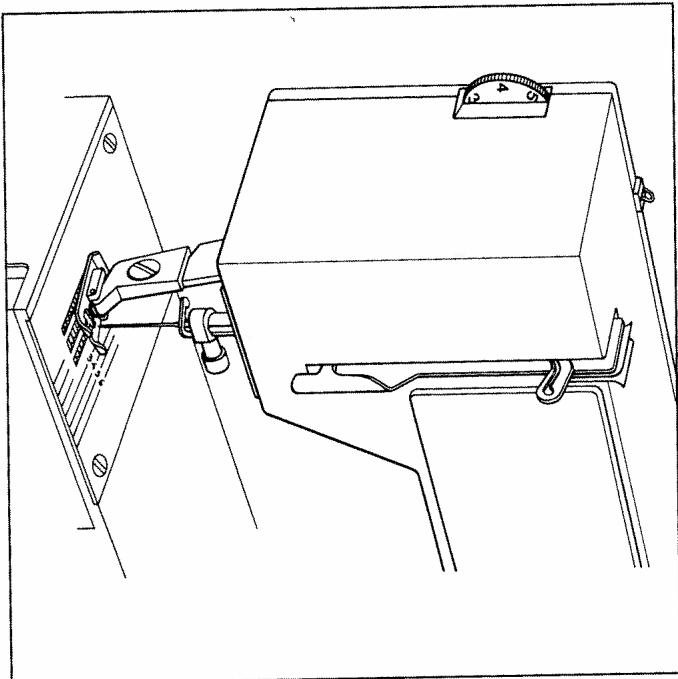
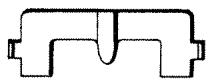
When you need a larger working surface, attach the extension table. There are two grooves underneath the extension table which should be fitted onto corresponding studs on the free arm. There is also an extra support leg which should be lowered.
Extension table
Needle and thread
Mercerized cotton thread as well as synthetic thread is used for all sorts of fabrics. A special embroidery or darning thread could be used for decorative stitching. As the name implies, it is of course also
used for embroidery and darning.
The needle system has number 705H and is adapted to a range of sizes such as jersey, etc. Use only
to modern materials, such as jersey, etc. Use only in the case of a car in this way. The machine is fitted
with needle No. 80. You will also find a number of
extra needles of various sizes in the accessory box.
With regard to the size of needle, generally No.
A 80-90 can be used for most fabrics. For a finer fabric, use a finer fabric or finer fabric or finer
thread and for sheer and tightly woven fabrics a finer, more delicate thread of woven fabric made from
The needle should be used in order to avoid damaging the
the fabric.
be used. The higher the number, the coarser the
needle. The sizes of thread and needle to be used are
is shown in the table.
Regarding special needles, see Extra accessories.
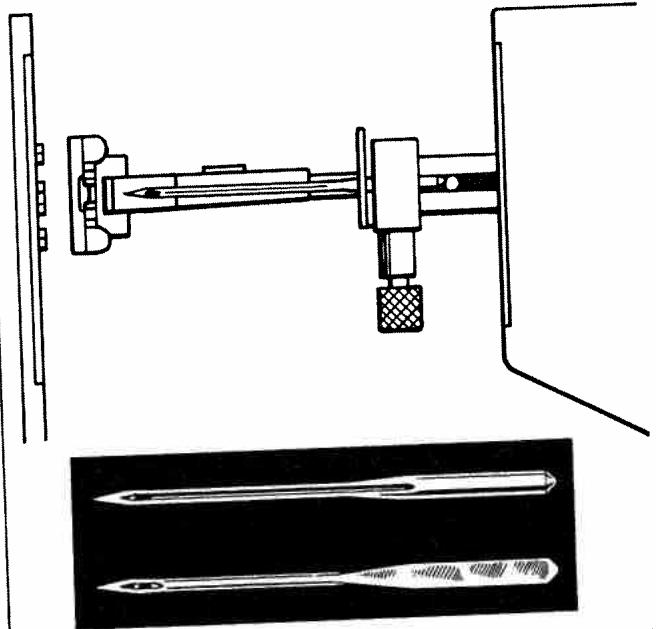
Changing the needle
Loosen the needle clamp screw and remove the needle which is to be changed. When you insert the
new needle, turn the flat side away from you and
will go. Tighten the screw so that the needle is held
firmly.
1) Synthetic threads are not generally numbered.
| Sewing thread English or USA No. | Silk thread | Synthetic thread | Embroidery thread or Darning thread | Needle Width No. |
| 60 | | | 60 | 70 |
| 50-60 | 100/3 | 1) | 40-50 | 80 |
| 40-50 | 100/3 | 1) | 30-50 | 90 |
| 40 | | | 20 | 100 |
| 30 | | | | 110 |
| 30 | | | | 120 |
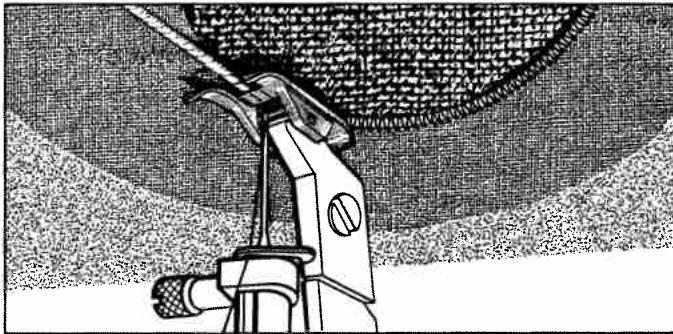
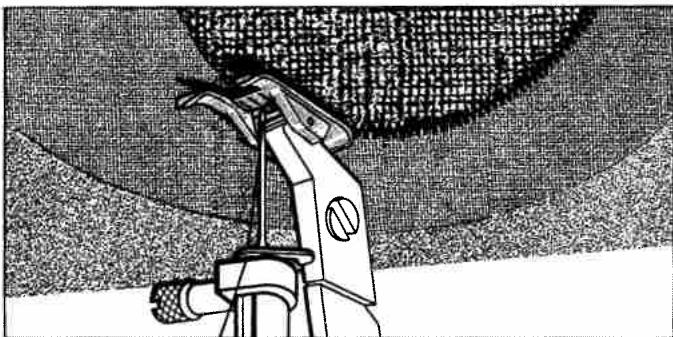
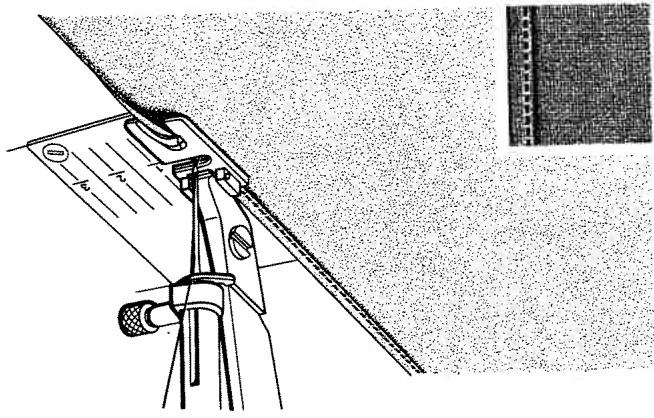
of the 'upper', arm. Then draw the thread to the front between the tension discs, 3, and down around the thread guide, 4. Now continue the threading by drawing the thread from right-to-left in the slot on the thread take-up lever, 5. Draw the thread behind the black thread guide, 6. Thread the needle, 7, from the front. Due to the white field on the presser foot clamp the needle-eye appears very clearly and in this way the threading of needle, 7, is easier.
Peeeppeeppeeppeeppeeppeeppeeppeeppeeppeeppeeppeeppeeppeeppeeppeeppeeppeeppeeppeeppeeppeeppeeppeeppeeppeeppeeppeeppeeppeeppeeppeeppeeppeeppeeppeeppeeppeeppeeppeeppeeppeeppeeppeeppeeppeeppeeppeeppeeppeeppeep
Threading the upper thread
machine
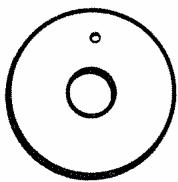
Pull out one of the spool pins at the back of the
sponnns
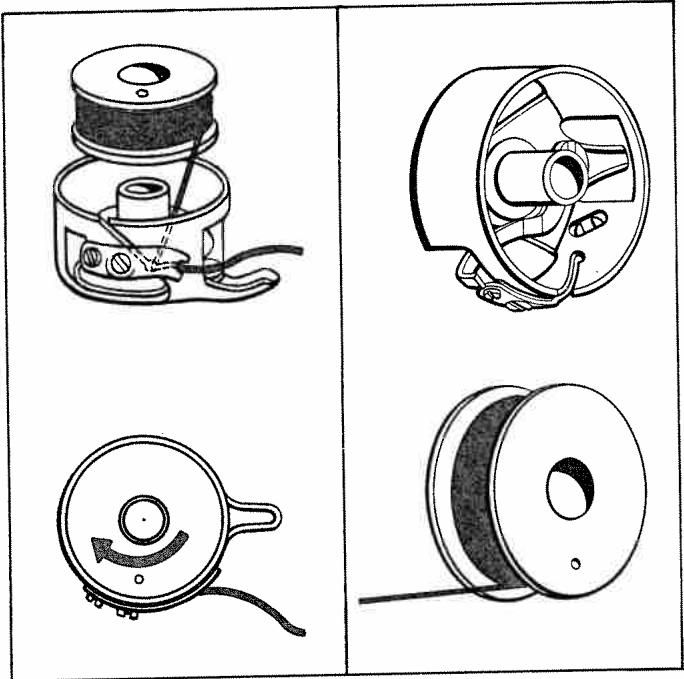
Bobbin winding
Take an empty bobbin from the accessory box. In
order to get the best possible result when bobbin
winding, use only Husqvarna-Viking transparent
bobbins, which have three grooves in the hole.
Other types of bobbins cannot be used, due to the
construction of the bobbin winding device.
On one side of the bobbin there is a marking. Turn
the bobbin with the marking outwards and slide the
bobbin onto the bobbin spindle, B.
to the upright position.
Remove the bobbin. Cut the thread. Return the arm
and incorrect bobbin winding'.
If the machine is winding unevenly, see "Correct
filled, as in fig. 1 on page 12.
starts. Stop winding before the bobbin is completely
foot control. Release the thread as soon as winding
Hold the end of the thread while you press down the
around the bobbin in an anti-clockwise direction.
bobbin winding arm. Wind the thread a few times
between the tension/guide discs in the top of the
until it stops. Draw the thread through the slot and
thread guide. Pull the spool arm, A, towards you
You can wind the bobbin directly from the black
6
winding
Correct and incorrect bobbin
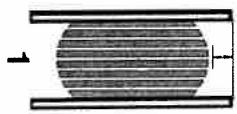
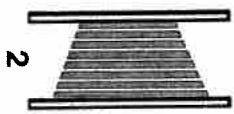
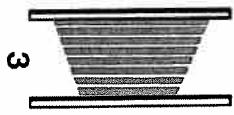
Fig. 1 shows a correctly wound bobbin.
If you notice that the bobbin is winding unevenly as in fig. 2, loosen screw A with the aid of the screwdriver, move the screw slightly to the left until the winding becomes even. Tighten the screw.
If the winding looks like fig. 3, check to see if the bobbin is properly pressed in on the spindle. If this is correct, move the screw slightly to the right until the winding becomes even. Tighten the screw.
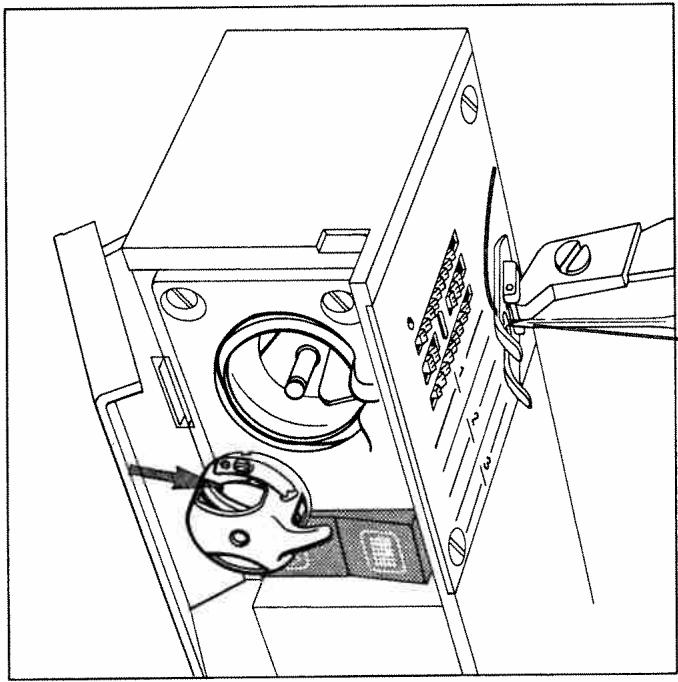
Removing the bobbin case
Open the shuttle cover. There is a small recess on
Grasp the bobbin case with the thumb and index
f finger so that the latch is depressed and draw out the bobbin case. The bobbin will remain in the case as
long as the latch is depressed. When you release the
cach, the bobbin will be released.
Threading the lower thread
When the bobbin is wound, place it beside its case with the marking upwards. The thread is then run
ning as shown in the fig. Place the bobbin in its case without turning it around.
Slide the thread into the slot on the edge of the
bobbin case.
Pull the thread in under the tension spring. Check that it holds the same direction of the arrow.
that the bobbin rotates in the direction of the arrow when the thread is pulled.
Insertion of the bobbin case
Push the bobbin case onto the spindle of the shuttle
(hook) so that the projection of the bobbin case fits
in the notch at the top of the shuttle cover. Press on
the bobbin case slightly to be sure it is latched onto
the door.
Bringing up the lower thread
Hold the threaded upper thread slack and turn the
handwheel towards you until the needle goes down
through the needle plate and then up again. When
the needle is in its highest position, pull the upper
thread and you will get a loop of the lower thread
which is easy to catch. You shouldn't pull the upper
thread too hard as this may damage the needle.
__________
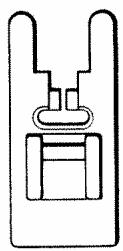
Thread cutter
the thread cutter, wh
the thread cutter , which makes it easy for you to cut
off the threads.
oeos 1001 s n nn nnnn neon nnnnne nnnnne nnnnne nnnnne nnnnne nnnnne nnnnne nnnnne nnnnne nnnnne nnnnne nnnnne nnnnne nnnnne nnnnne nnnnne nnnnne nnnnne nnnnne nnnnne nnnnne nnnnne nnnnne nnnnne nnnnne nnnnnee nnnnne nnnnne nnnnne nnnnne nnnnne nnnnne nnnnne nnnnne nnnnne nnnnne nnnnne nnnnne nnnnne nnnnne nnnnne nnnnne nnnnne nnnnne nnnnne nnnnne nnnnne nnnnne nennnne nnnnne nnnnne nnnnne nnnnne nnnnne nnnnne nnnnne nnnnne nnnnne nnnnne nannnee
peJnJOMoI JO uOIsuL
eepnne nnnnns nss s! 8nnnns sll L (B) ssnoonnnnns
sssss
peaipjoadnjo uouisua

tension
Correct and incorrect thread
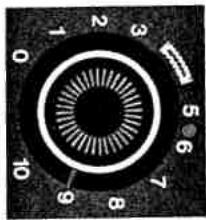
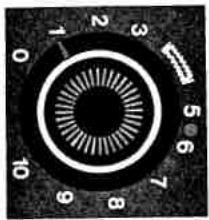
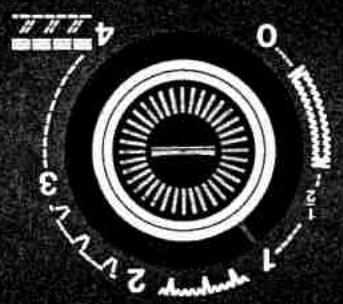
In order to get a strong seam, the thread tension should be balanced so that the threads interlock in the middle of the layers of fabric.
In order to understand more easily the importance of correct thread tension, you can try different thread
tensions by sewing on a scrap of fabric. Use the same fabric you intend to work with.
Begin by using a too loose tension, i.e. you turn the thread tension dial to 1. Look at the seam and you
When you turn the dial to the right, the opposite
When you turn the dial to the right, the opposite occurs. The upper thread lies straight and the lower
eep eep eep eep eep eep eep eep eep eep eep eep eep eep eep eep eep eep eep eep eep eep eep eep eep eep eep eep eep eep eep eep eep eep eep eep eep eep eep eep eep eep eep eep eep eep eep eep eep eep eep
in the middle of the layers of fabric.
If you want to sew zig-zag, check the thread tension
in the same way as for straight sutching.
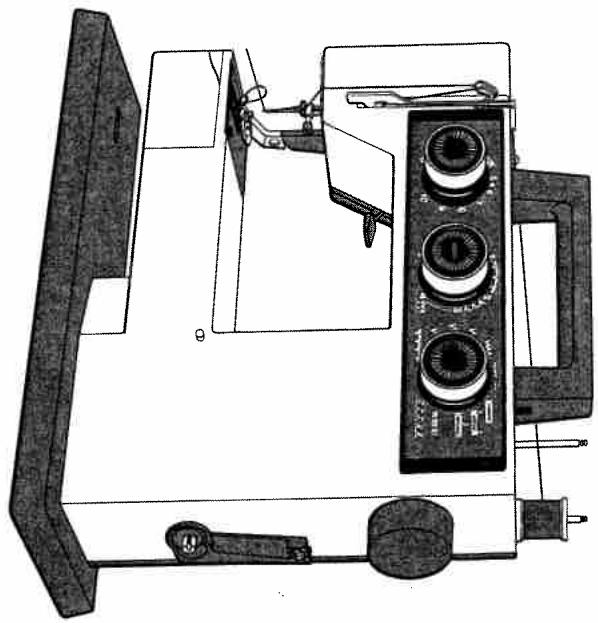
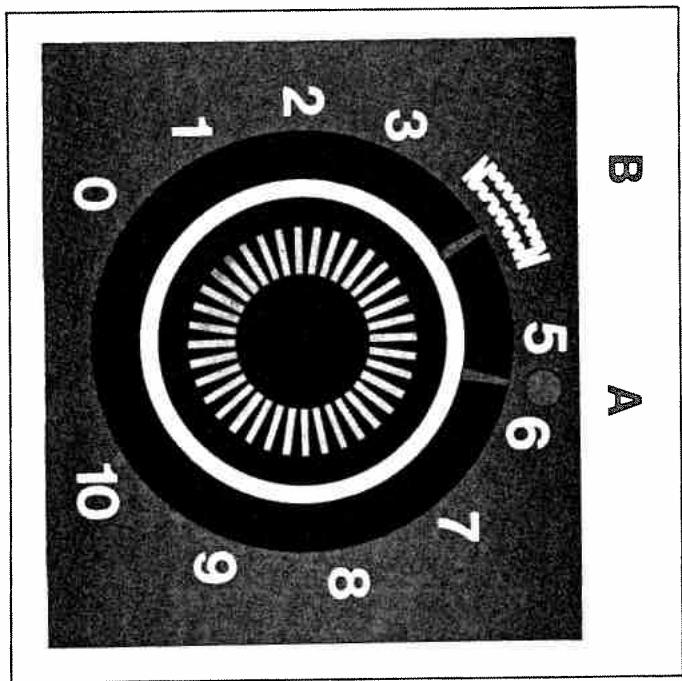
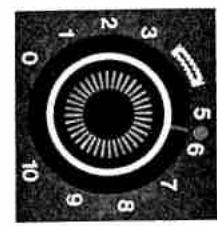
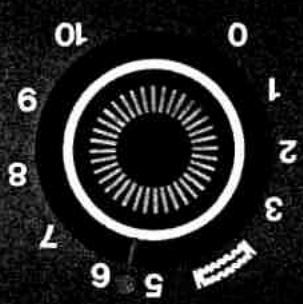
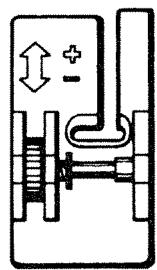
The presser foot pressure can be adjusted with the
aid of a dial located on the left side of the machine.
nnae aen eae ene ne aeene nne eae
5-6, but for some fabrics it may be better to reduce
or increase the pressure somewhat by turning the
Prrnnnne nnnnne
(19/5)
W 2 Jo oe ooe W ees e sas (sre w puey
y 3e enx 3) yonouosown (z/c)
ww Jo oe ooe W ees e noa 'spren dns
o ono aow A (swnns on saiyy) 00
Joo Jo epe Jno Ow [A] unu oqne Jn
(1/1) wU L Jo oe ooe W ees e J. 3uws uom
sepsn se pssn qnnw sainw pue sone
nnererree
sssssssssssssssssssssssssssssssssssssssssssssssssssssssssssssssssssssssssssssssssssssssssssssssssssssssssssssssssssssssssssssssssssssssssssssssssss
00j JssaJd qns Amm
suee eaeepnneeppeeppeeppeeppeeppeeppeeppeeppeeppeeppeeppeeppeeppeeppeeppeeppeeppeeppeeppeeppeeppeeppeeppeeppeeppeeppeeppeeppeeppeeppeeppe
1001 1ssed ajo
epn nnnnne eae d np no pns nanepe -es no ssed puree aonoeod no 0d
· (10 - 88 II [p])100j
esssed 8z-3z an sly (10-998 II I) aed dpe
aepn
( 9 / ) uw
e e 10-88 [I.1] 100
100j Jessd 8z-8!Z
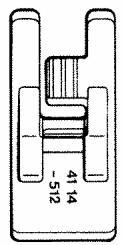
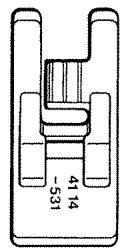
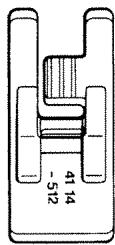
For close zig-zag stitching, the utility presser foot (41 14 512-01) is more suitable.
he presser foot is best suited for straight stitching and wide zig-zag.
eepnne eae nnnnne nee eee
and/or have a glossy surface. The underneath is designed in such a way that it secures the material
nng nynon. tricot and similar fabrics that are thin
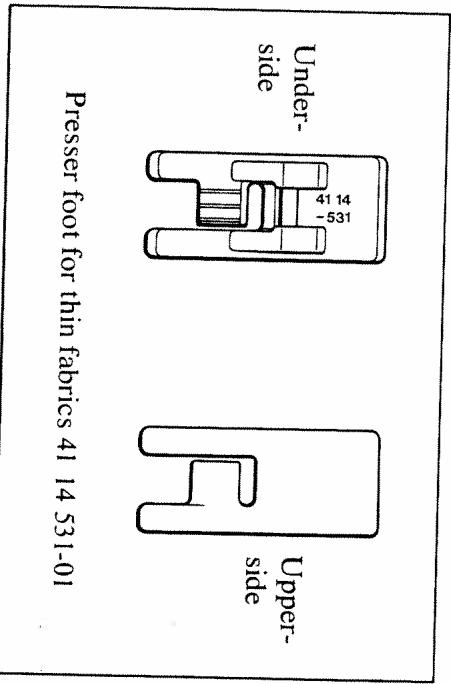
Preser foot for thin fabrics
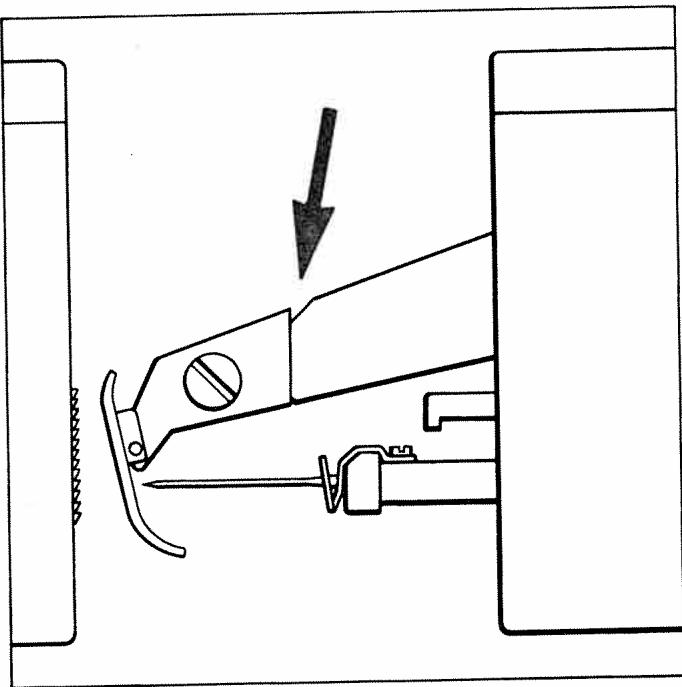
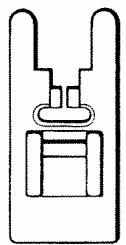
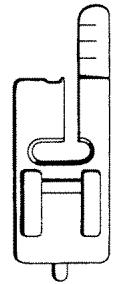
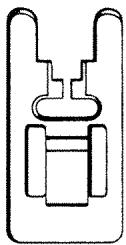
Changing the presser foot. ankle's Certain presser feet cannot be constructed as loose soles and then the ankle bracket must also be changed. Make sure that the needle is in its highest position. Then screw off the retaining screw and remove the presser foot ankle.
There is a spring at the bottom of the ankle bracket. Slide on the presser foot so that the pin fits into the space between the bracket and the spring. Then press lightly backward and downward and the pres- ser foot will snap into the correct position.
The presser feet which accompany the machine are in the form of loose soles which are held in place on the presser foot 'ankle' by a spring. If you wish to change the presser foot, turn the hand wheel toward you until the needle is in the highest position. Re- move the presser foot by drawing it toward you while pressing slightly downward.
at least 6 inches (15 cm) of thread in the needle so that it will not be drawn out of the eye of the needle when the next seam is started.
Lock the thread ends by pressing the reverse button.
making the machine sew backwards. When sewing
utility or zig-zag stitches you can lock the thread
ends by holding back the fabric or lowering the
feed-dog and sewing a few stitches.
Before you remove the fabric, the machine should
have fully completed the last stitch, with the needle
in its highest position.
When turning a corner, stop with the needle down in the fabric and raise the presser foot. This also ap- pries when stopping the machine in order to re-ar- range the work.
Start the machine gently and increase the speed gradually. Watch the presser foot to ensure that it follows an edge or a seam - don't watch the needle. The best way to hold the fabric is when you rest the left hand lightly on the fabric at A and guide it forward. With the right hand you hold the edge of the fabric at B and guide the work. Don't pull the fabric, only guide it towards the presser foot and let the machine do the feeding.
Always start a straight seam by turning the hand- wheel towards you so that the needle enters the seam line, then lower the presser foot. When sewing zig-zag and other stitches, first lower the presser foot, then lower the needle. When sewing on thin and soft fabrics, start the seam about 1/4'' from the edge of the fabric to prevent it from being pulled down into the needle hole in the throat plate. If you wish to extend the seam out to the very edge of the fabric, sew a few reverse stitches and then hold the thread behind the presser foot when sewing forward again.
General hints
10-88E 11 10003eessd8z-8iZ
psn s yonns nss onse e anenb aes
yonw o p
- 10000000000000000000000000000000000000000000000000000000000000000000
weas e
Hnnns s 2 Hnss n nn nnnn nnnn nnnn nnnn nnnn nnnn nnnn nnnn nnnn nnnn nnnn nnnn nnnn nnnn nnnn nnnn nnnn nnnn nnnn nnnn nnnn nnnn nnnn nnnn nnnn nnnn nnnn nnnn nnnn nnnn nnnn nnnn nnnn nnnn nnne
Pnne Pnne Pnne Pnne Pnne Pnne Pnne Pnne Pnne Pnne Pnne Pnne Pnne Pnne Pnne Pnne Pnne Pnne Pnne Pnne Pnne Pnne Pnne Pnne Pnne Pnne Pnne Pnne Pnne Pnne Pnne Pnne Pnne Pnne P
Ss
səpə
aunnne nnnn nn nnnn nnnn nnnn nnnn nnnn nnnn nnnn nnnn nnnn nnnn nnnn nnnn nnnn nnnn nnnn nnnn nnnn nnnn nnnn nnnn nnnn nnnn nnnn nnnn nnnn nnnn nnnn nnnn nnnn nnnn nnnn nnnn nnnn nnnn nnnee
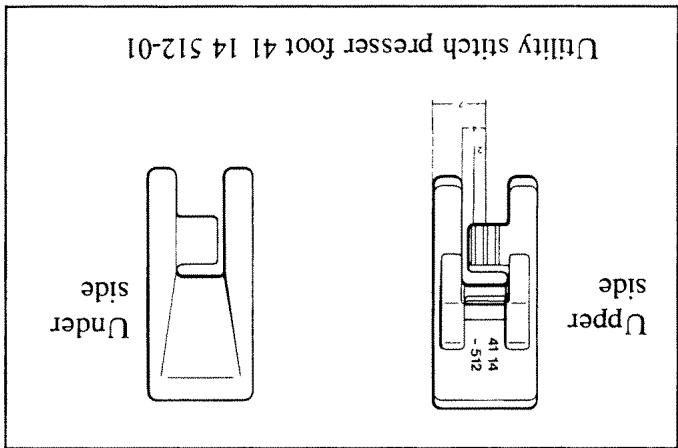
10-215 11 1008 Jssed ynnn Aynnn ene S
Bunnns nnnnne nnne nnnnne nnnnne nnnnne nnnnne nnnnne nnnnne nnnnne nnnnne nnnnne nnnnne nnnnne nnnnne nnnnne nnnnne nnnnne nnnnne nnnnne nnnnne nnnnne nnnnne nnnnne nnnnne nnnnne nnnnne nnnnne nnnnee nnnnne nnnnne nnnnne nnnnne nnnnne nnnnne nnnnne nnnnne nnnnne nnnnne nnnnne nnnnne nnnnne nnnnne nnnnne nnnnne nnnnne nnnnne nnnnne nnnnne nnnnne nnnnne nnnnne nannnee
sənbɪddv
sOeOnns nIeNs yM mS pue waeepoJ o ssees 3n on 0sOs ePis aen noosess Oq
(0 13e] 10n) s eon nns nnnn nnnn nn nnnn nnnn nnnn nnnn nnnn nnnn nnnn nnnn nnnn nnnn nnnn nnnn nnnn nnnn nnnn nnnn nnnn nnnn nnnn nnnn nnnn nnnn nnnn nnnn nnnn nnnn nnnn nnnn nnnn nnnn nnnn nnnn nnnn nnnn nnne

P P P P P P P P P P P P P P P P P P P P P P P P P P P P P P P P P P P P P P P P P P P P P P P P P P P P P P P P P P P P P P P P P P P P P P P P P P P P P P P P P P P P P P P P P P P P P P P P P P P P P
papwocae I or puea e nns unnL
VvV [oqws on oioe OSe OuS
nA spEeMOn [eHApuey
aunnnn an nnnn nn nnnnnn nn nnnnnn nn nnnnnn
8z-8z dəs-əJU
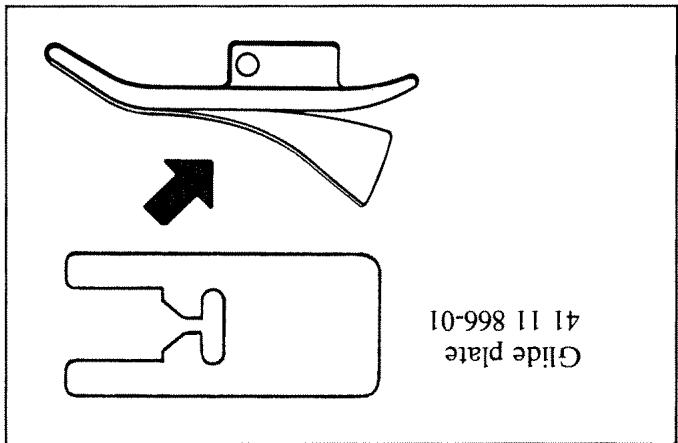
10-215 11 1000
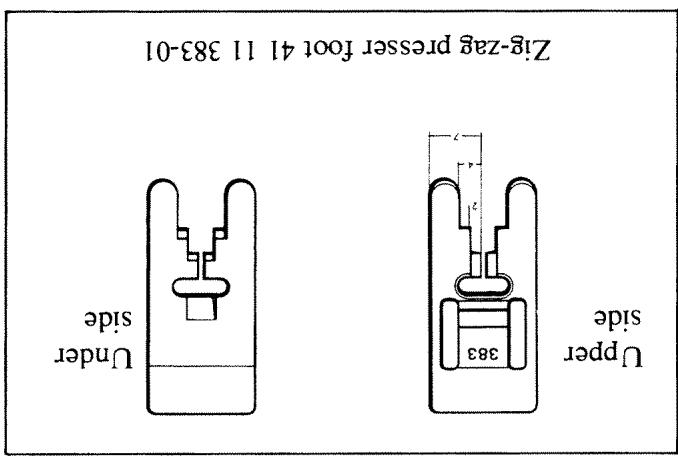
10-88 11 14003
oussnpeaJL

S
S
8z-8z dons-oe
'JqIiI iI I I JIe e ee 14,
e oI yon nnnn nnne 300000000000000000000000000000000000000000000000000000000000000000000000000000000000
sowos
Awwnnpn
Aunbnare swnpe aenrnnnne nnnnne nnne nnnnne nnnnne nnnnne nnnnne nnnnne nnnnne nnnnne nnnnne nnnnne nnnnne nnnnne nnnnne nnnnne nnnnne nnnnne nnnnne nnnnne nnnnne nnnnne nnnnne nnnnne nnnnne nnnnne nnnnne nnnnne nnnnee
UoOJ AJIaI SuaMəS
aennnnn nnnnnn
'ssrpuuusuuuusuuuusuuuusuuuuuuuuuuuuuuuuuuuuuuuuuuuuuuuuuuuuuuuuuuuuuuuuuuuuuuuuuuuuuuuuuuuuuuuuuuuuuuuuuuuuuuuuuuuuuuuuuuuuuuuuuuuuuuuuuuuuuuuuuuuuuuuuuuuuuuuuuuuuuuuuuuuuuuuuuuuuuuuuuuuuuuuuuuuuuuuuuuuuuuuuuuUU
n nn nns
Aa aaa a a a a a a a a a a a a a a a a a a a a
souoounn n on o mou smous eae d
eep
Pn Pnnn nnnn nnne nnnn nee nnnn nnnn nnnn nnnn nnnn nnnn nnnn nnnn nnnn nnnn nnnn nnnn nnnn nnnn nnnn nnnn nnnn nnnn nnnn nnnn nnnn nnnn nnnn nnnn nnnn nnnn nnnn nnnn nnnn nnnn nnnn nnnn nnnn nnnn nnnee
1/210q
-wwos oikkqepn pueonssod sas nup
E loquwAs
oepnne pue nqepn no nnoepepepepepepepepepepepepepepepepepepepepepepepepepepepepepepepepepepepepepepepepepepepepepepepepepepepepepepepepepepepepepepepepepepepepepepepepepepepepepepe pe
/2loqws oI [ep a]u
Pue 1qpe Jno no pess eepn nee nnnnne nnnnne nnnnne nnnnne nnnnne nnnnne nnnnne nnnnne nnnnne nnnnne nnnnne nnnnne nnnnne nnnnne nnnnne nnnnne nnnnne nnnnne nnnnne nnnnne nnnnne nnnnne nnnnne nnnnne nnnnne nnnnnee nnnnne nnnnne nnnnne nnnnne nnnnne nnnnne nnnnne nnnnne nnnnne nnnnne nnnnne nnnnne nnnnne nnnnne nnnnne nnnnne nnnnne nannnee
· (+) snid
spremunL:Koeisoooouno oouuunoo puru-4R · (-) snuiu
spremunL:143nooonooouno puru-4R
:AAeunns
+01 11 11 11 11 11 11 11 11 11 11 11 11 11
-01 31 11 11 11 11 11 11 11 11 11 11 11 11 11 11 11 11 11 11 11 11 11 11 11
oepnnsod qpnns nnnq AwwonNnnn 8mssesaae aen mnnn Apsnpe qne sly L .sasz-iz j os sumno oom jnojoeae de de u e onpoid wpeaes puree e e e e e e e e e e e e e e e e e e e e e e e e e e e e e e ee
Suaaonq
0
17
Jnno pss
Aannns nnnnns nnnnns nnnnns nnnnns nnnnns nnnnns nnnnns nnnnns nnnnns nnnnns nnnnns nnnnns nnnnns nnnnns nnnnns nnnnns nnnnns nnnnns nnnnns nnnnns nnnnns nnnnns nnnnns nnnnns nnnnns nannnns nnnnns nnnnns nnnnns nnnnns nnnnns nnnnns nnnnns nnnnns nnnnns nnnnns nnnnns nnnnns nnnnns nnnnns nnnnns nnnnns nnnnns nnnnns nnnnns nnnnns nnnnns nnnnns nnnnns nnnnns nennnns nnnnns nnnnns nnnnns nnnnns nnnnns nnnnns nnnnns
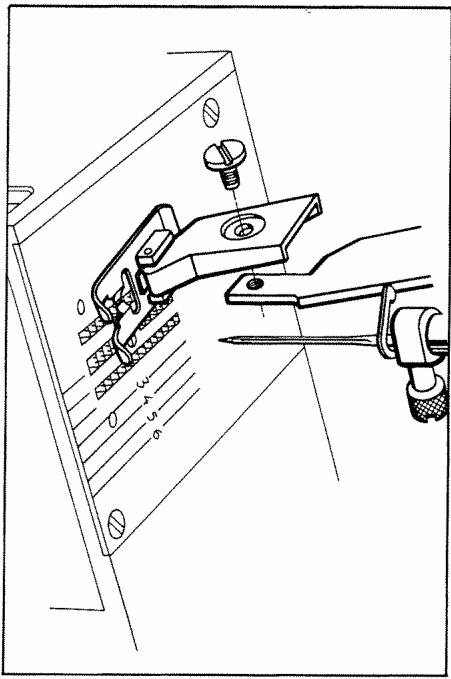
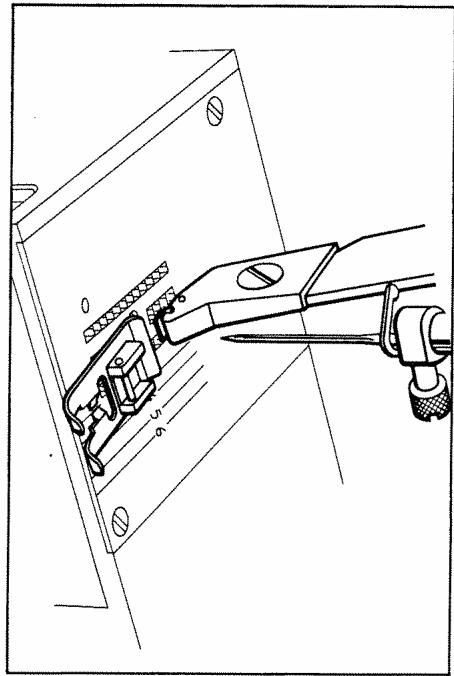
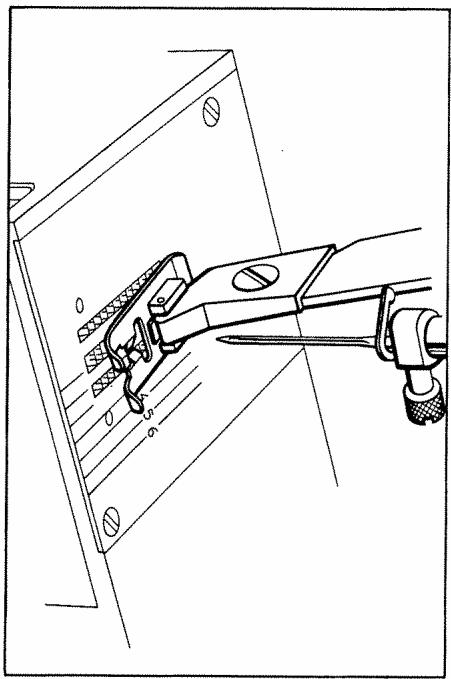
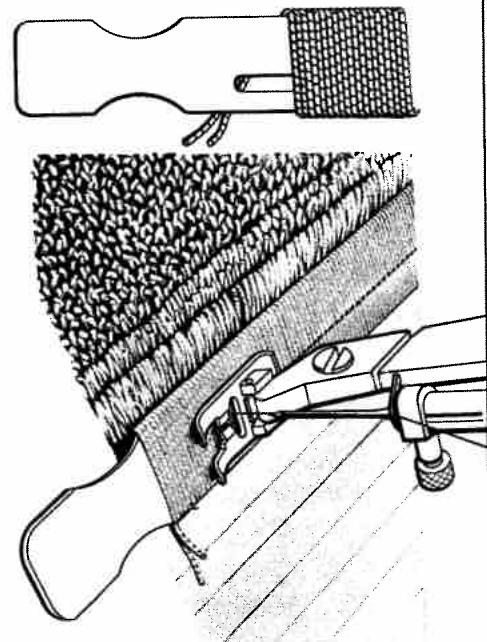
Set the machine to zig-zag. Remove the presser foot, including the 'ankle', shank, and remember to low- er the presser bar in order to tension the upper thread. Press the material against the stitch plate. Move the work slowly. The machine speed should be high so that the stitches will be close together.
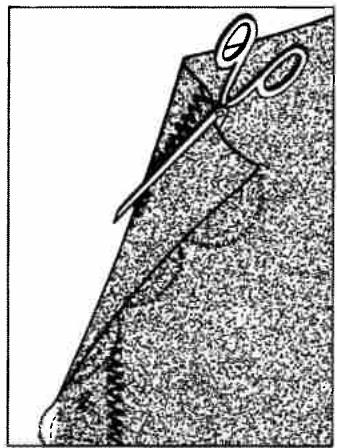
Free-hand embroidery is suitable for decorations or monograms on garments. It needs practice, how- ever. If you have a steady hand, you'll soon learn the technique. Draw the pattern on tissue paper, pin it to the fabric and sew the outline with straight stitch. Use embroidery cotton No. 50-40. Remove the paper. Stretch the fabric in a hoop.
Free-hand embroidery
00000000000000000000000000000000000000
Ae aee
eeppeeppeeppeeppeeppeeppeeppeeppeeppeeppeeppeeppeeppeeppeeppeeppeeppeeppeeppeeppeeppeeppeeppeeppeeppeeppeeppeeppeeppeeppeeppeeppeeppeeppeeppeeppeeppeeppeeppeeppeeppeeppeeppeeppeeppeeppeeppeeppeeppeeppeep
sos
()
puodscoou op qqpepepepepepepepepepepepepepepepepepepepepepepepepepepepepepepepepepepepepepepepepepepepepepepepepepepepepepepepepepepepepepepepepepepepepepepepepepepepepepepepepepepepepepepepepepepepepepepe pe
01 saeed ees Pppeepn nnnnns 1 91 eee ees S 1 6 6 6 6 6 6 6 6 6 6 6 6 6 6 6 6 6 6 6 6 6 6 6 6 6 6 6 6 6
Lower thread not brought up by the upper thread The needle is incorrectly inserted. See page 9.
Stitch length varies 1. The feed dog is choked by dust and dirt. Clean it with the straw, which is small enough to make a small convroduicer. See
Uneven thread tension This may be due to poor quality thread.
Irregular bobbin winding
1. The bobbin is not pressed in far enough. See page
- The machine is not co
winding. See page 11.
- The thread guide for bobbing
rectly adjusted. See page 12.
Fabric puckers
1. The upper thread is too tightly tensioned. See
page 16.
2. The upper and lower thread tension is too tight in
relation to the thickness of the fabric. See pages
15-16.
3. The needle is damaged. Change the needle. See
page 9.
50
Machine runs sluggishly
1. Dirt or lint has got under the throat plate. Loosen the throat plate and brush clean between the teeth of the feed dog. See page 48.
2. Dirt or lint has got into the shuttle. Take out the bobbin and bobbin case and brush clean with special brush. See page 48.
3. The wall socket voltage is too low.
10-1E5
10-686 214
06811
P 10-25 104
10-059 11 1
sssssssss
1000 1000
0000000000000000000000000000000000000000000000000
ssssssssssssssssssssssssssssssssssssssssssssssssssssssssss
Xoq Aossaoc Jo spuau
xs'suqqoB 10-104 p11p
10-998 11 14
HSOL WSAIS SsIepeauuWwSaeaepeaN 10-618 S1 O

ynsn 10-555 s1 0b

(Addn wes) aen ene oonnn 10-66510
-1e -e e 100 100 2) 9/5 sss ppepepepepepepepepepepepepepepepepepepepepepepepepepepepepepepepepepepepepepepepepepepepepepepepepepepepepepepepepepepepepepepepepepepepepepepepe pe
3 8z-8z wnpn npnns nnnnns nnnn nn nnnn nn nnnn nn nnnn nn nnnn nn nnnn nn nnnn nn nnnn nn nnnn nn nnnn nn nnnn nn nnnn nn nnnn nn nnnn nn nnnn nn nnnn nn nnnn nn nnnn nn nnnn nn nnnn nn nnnn nn nnnn nn nnnn nn nnnn nn nnnn nn nnnn

Jnne nnnnns nnnn nnnn nnnn nnnn nnnn nnnn nn nnnn nnnn nnnn nnnn nnnn nnnn nnnn nnnn nnnn nnnn nnnn nnnn nnnn nnnn nnnn nnnn nnnn nnnn nnnn nnnn nnnn nnnn nnnn nnnn nnnn nnnn nnnn nnnn nnnn nnnn nnnn nnnn nnnn nnnn nn
3 19/5 10+8E II I
ssssse 1x


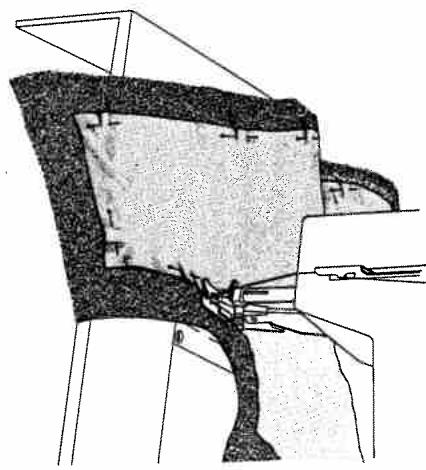
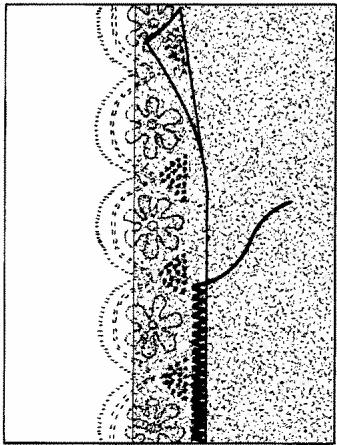
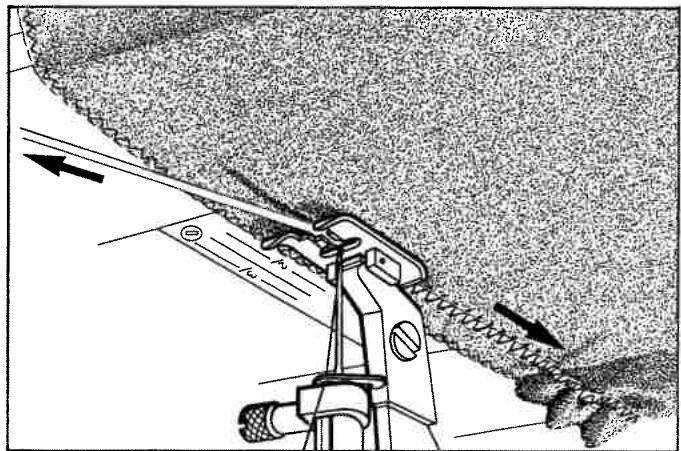
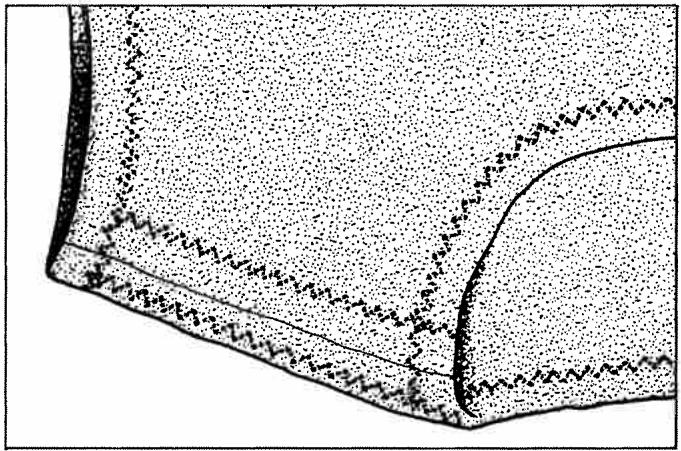
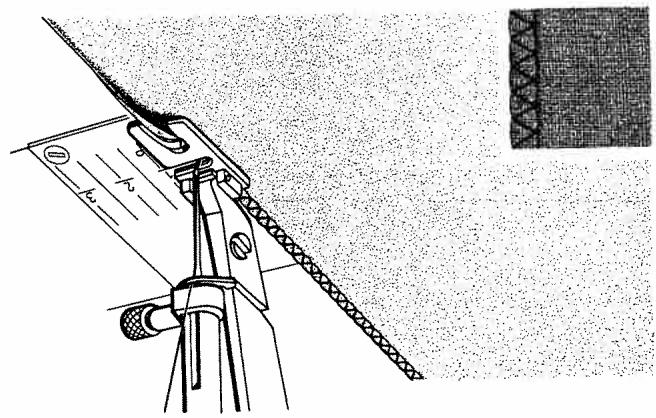
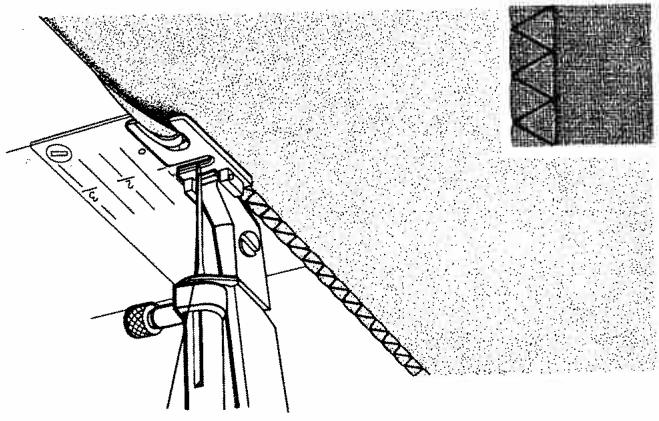
41 11 822-01. Bias binder. Can be used for 8, 10, 12 and 15mm wide folded edgings and 22 - 24~mm (^7 / 8'' - ^15 / _16'') wide unfolded edgings. Seam distance can be varied.
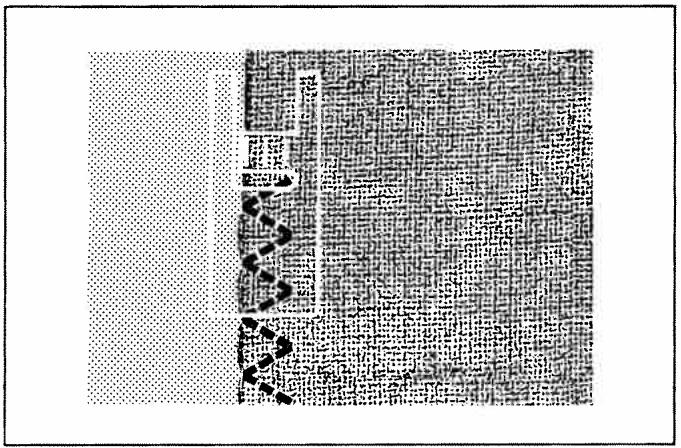
41 13 931-01. Marking stitch foot, which is used for transferring instructions from the paper pattern to the fabric. For zig-zag, stitch length 2-2.5, and loose upper thread tension.
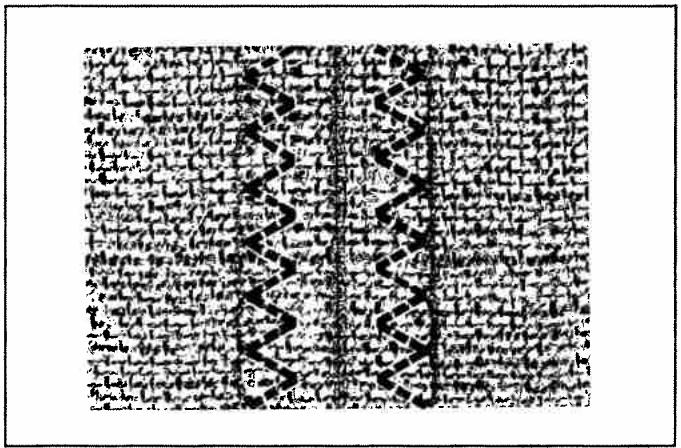
40 15 367-01. Hemstitcher. Put the fork between two layers of material, which are sewn together with straight stitching and long stitches. (Note: In parts of the U.S.A. "hemstitching" may have a different meaning.)
41 13 458-01, 1 3/16" (30 mm). 41 13 458-02, 1 25/32" (45 mm). Weaver's reed for rug sewing. Wind the yarn over the reed and sew on with straight stitch.
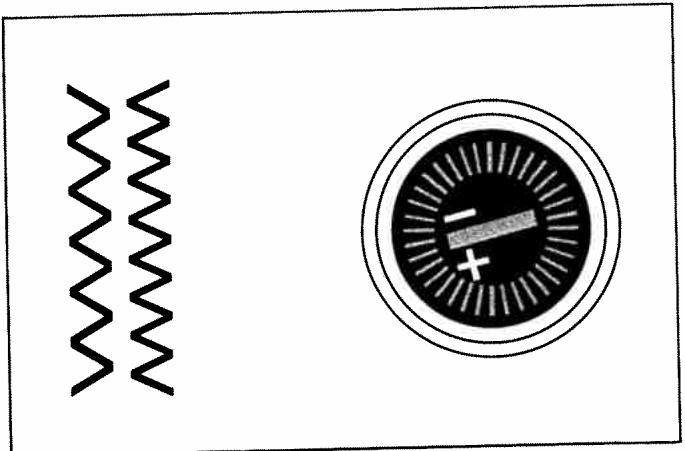
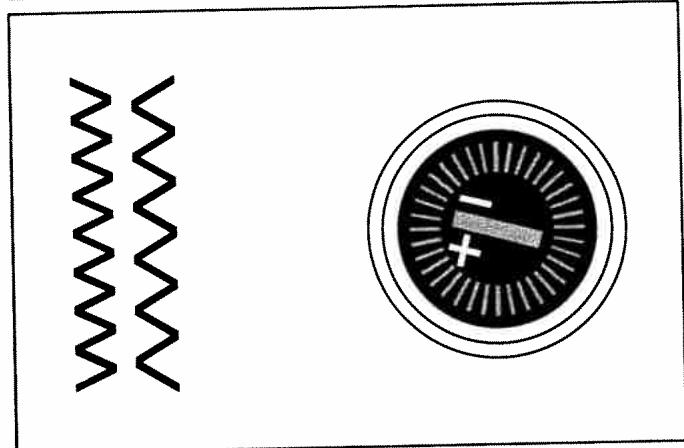
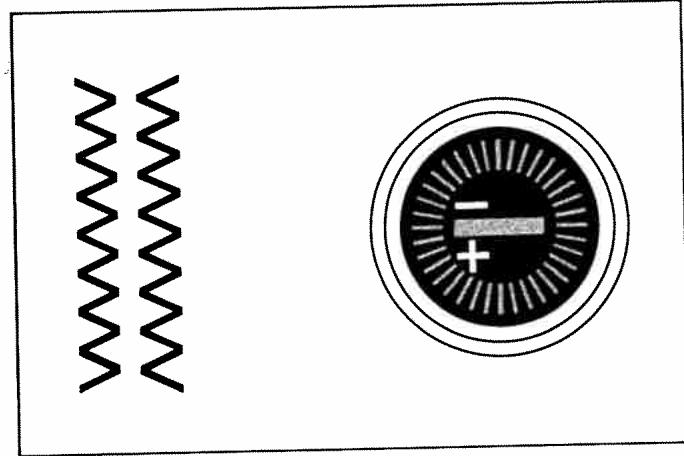
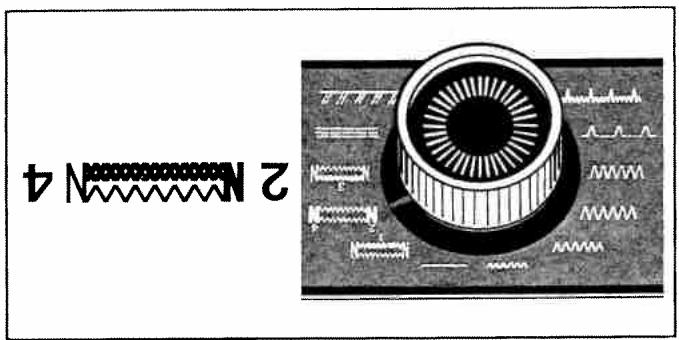
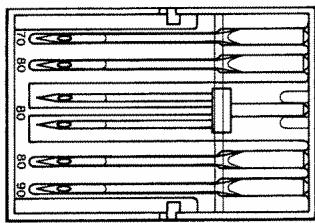
| Thread tension
Stitch length
Stitch selector
Presser foot |
| Three-step zig-zag
Overcasing in elastic, thin or
easily frayed fabrics.
Sewing in terry cloth. |
| Mending
Mending and darning in all fabric.
Mending and darning in all fabric. |
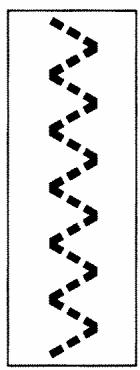
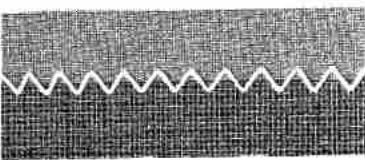
| Elastic knife stitch
Sews and finishes seams in one
operation. For stretch and non-
stretch materials, especially
fibrics that tend to fray. |
| Elastic straight stitch
Joining of elastic fabrics.
Extra strong, for example for
crotch sewing, and arm
insertion. |
| Top stitching
Decorative stitching.
Briditching hemming
Hemming in close-woven fabrics.
Finishing of edges. |
| Elastic blinditch hemming
Hemming in elastic fabrics.
Blindstitching
presser foot
41 15 331-01
41 15 331-01 |
| | | |
| 10-059 11 14
10000000000000000000000000000000000000000000000000000000000000000000000000000000000000000000000000000 | | | |
| 10-059 11 14
10000000000000000000000000000000000000000000000000000000000000000000000000000000 | | | |
| 100000000000000000000000000000000000000000000000000000000000000000000000000000000000000000000000000 | S | S | S |