EXT-CEM - Lenses Vello - Free user manual and instructions
Find the device manual for free EXT-CEM Vello in PDF.

User questions about EXT-CEM Vello
0 question about this device. Answer the ones you know or ask your own.
Ask a new question about this device
Download the instructions for your Lenses in PDF format for free! Find your manual EXT-CEM - Vello and take your electronic device back in hand. On this page are published all the documents necessary for the use of your device. EXT-CEM by Vello.
USER MANUAL EXT-CEM Vello
natural_image
Black DSLR camera with coiled lens assembly against black background (no text or symbols visible)INTRODUCTION
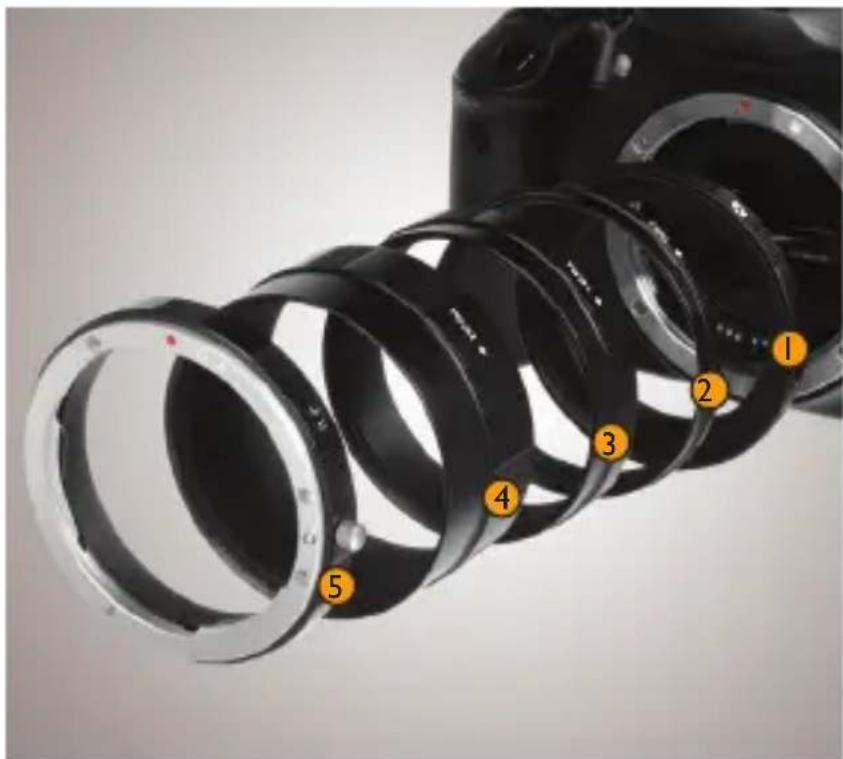
Thank you for purchasing the Vello Manual Extension Tube Set. Extension tubes provide a practical way of adding macro performance to SLR camera setups. The Vello manual extension tubes can be attached to a variety of lenses for different effects and are less expensive than dedicated macro lenses. The extension tubes can be stacked in eight combinations, allowing for greater control of the level of magnification.
* Images are for illustration purposes only.
CONTENTS
text_image
1 2 3 4 5① Camera Mount Tube
② 7mm Extension Tube
③ 14mm Extension Tube
4 28mm Extension Tube
⑤ Lens Mount Tube
MOUNTING OF THE EXTENSION TUBES
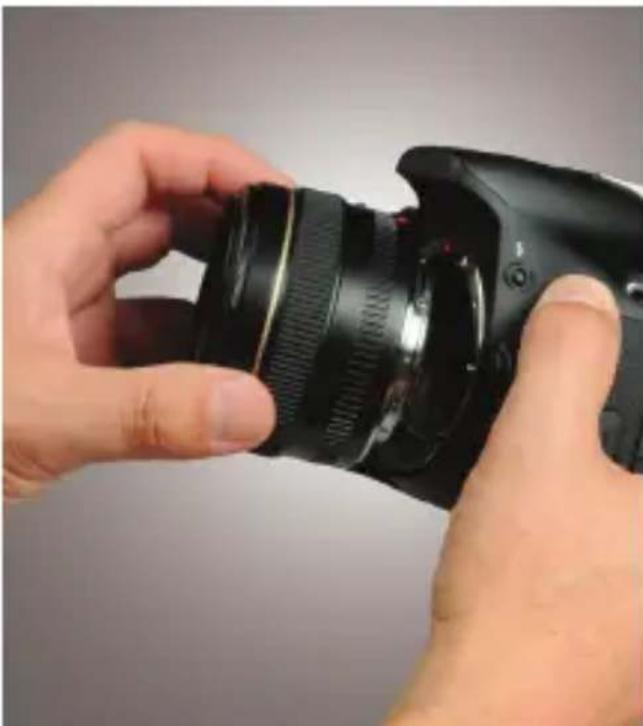
I. Remove the lens from your camera.
natural_image
Close-up of hands holding a DSLR camera lens, no visible text or symbolsMOUNTING OF THE EXTENSION TUBES
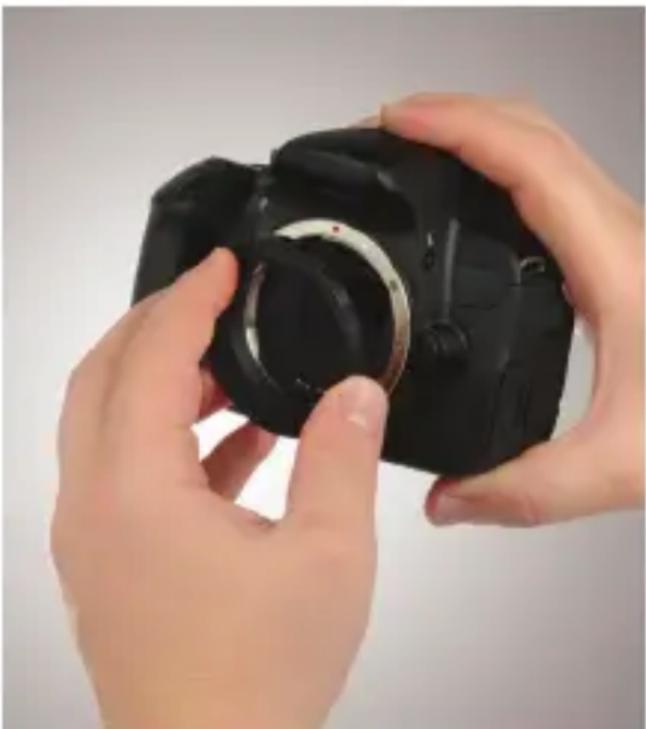
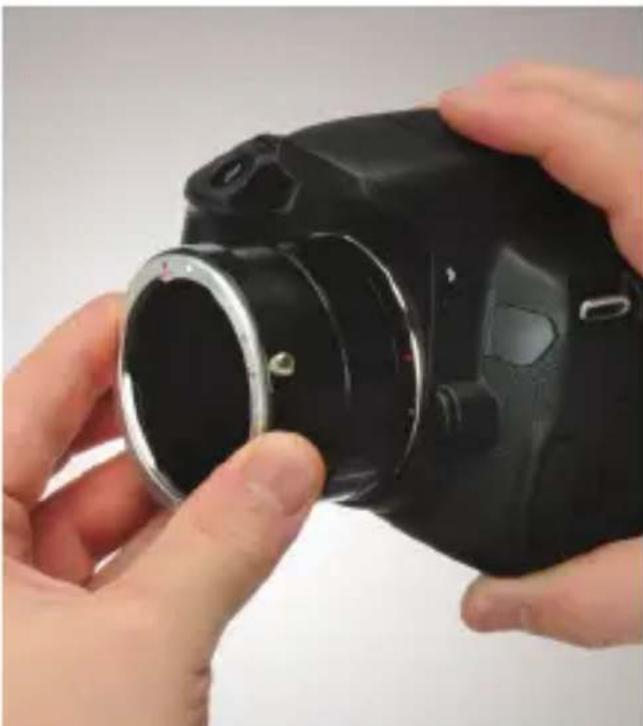
2 Align the camera mount tube to the camera's lens mount. The camera tube will mount in the same exact manner as a standard SLR lens. Make sure to line up the alignment marks on the tube and the camera's lens mount.
3. Rotate the camera mount tube in your camera's lens mount until it locks into place.
natural_image
Close-up of hands holding a black DSLR camera with a ring handle (no visible text or symbols)MOUNTING OF THE EXTENSION TUBES
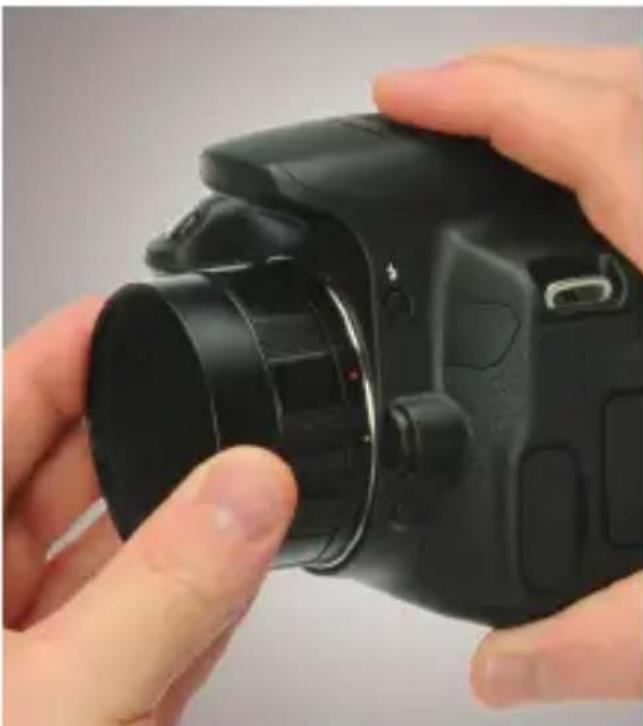
- Match up the male threaded end of the desired extension tube with the camera mount tube and rotate the extension tube clockwise until secure. Be careful not to over tighten.
natural_image
Close-up of hands holding a black DSLR camera lens, no visible text or symbolsMOUNTING OF THE EXTENSION TUBES
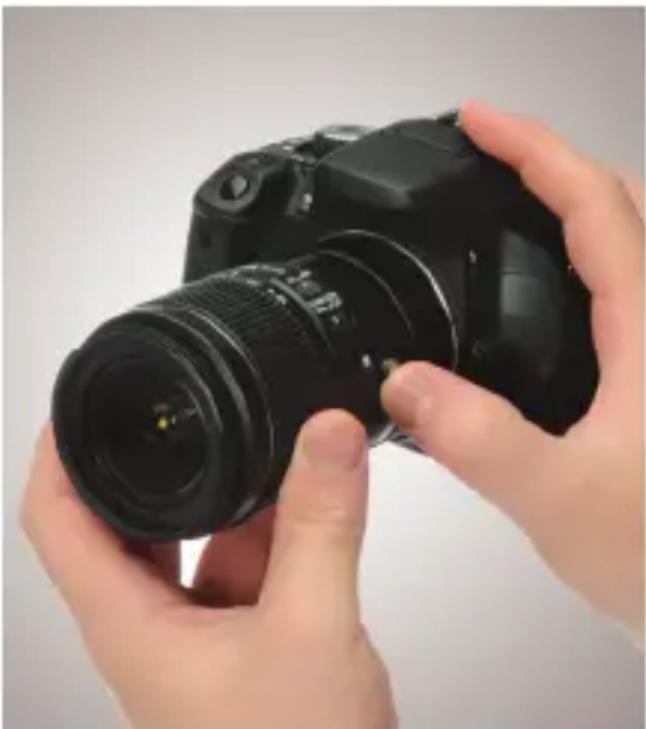
- Whatever the desired extension tube combination, the terminal piece must be the lens mount tube in order to mount your lens to the camera. Then simply mount your lens as you would normally.
natural_image
Close-up of hands holding a black DSLR camera lens (no visible text or symbols)REMOVING THE EXTENSION TUBES
I. Push the release pin towards the camera and hold it in as you rotate the lens to remove it from the extension tube assembly.
2. Press the lens release button on the camera and rotate the extension tube assembly to release it from the camera, just as you would remove a normal SLR lens.
natural_image
Close-up of hands holding a black DSLR camera with lens, no visible text or symbolsTIPS FOR USING THE VELLO EXTENSION TUBES
- As with all macro photography, images will have a very shallow depth of field. To increase depth of field, select a smaller aperture.
- Due to increased exposure times, a tripod and cable release or remote are always recommended for macro photography.
- Closer focusing can be achieved by using the larger extension tubes or by stacking the tubes.
- Make sure to set camera to manual exposure mode when using the Vello Manual Extension Tube Set.
TIPS FOR USING THE VELLO EXTENSION TUBES
- At extremely close distances, it may be difficult to focus. In such a case, use a macro focusing rail or manually set the lens to a desired focus point and then move the lens forward or back to achieve a sharp focus.
- When using extension tubes, on-camera flash may result in unsightly shadows and is therefore not recommended. For best results, off-camera flash, dedicated macro light, or other light sources are recommended.
NOTES
Limited One-Year Warranty
Vello provides a limited warranty that this product is free from defects in materials and workmanship to the original purchaser under normal use for a period of one (1) year from the original purchase date or thirty (30) days after replacement whichever occurs later. Our responsibility with respect to this limited warranty shall be limited solely to repair or replacement, at its option, of any product which fails during normal consumer use. To obtain warranty coverage during the Warranty Period, contact your place of purchase (“Seller”) to obtain a return merchandise authorization (“RMA”) number, and return to Seller the defective product along with proof of purchase and the RMA number. This warranty does not extend to damage or failure which results from misuse, neglect, accident, alteration, abuse, improper installation or maintenance. EXCEPT AS PROVIDED HEREIN, VELLO MAKES NEITHER ANY EXPRESS WARRANTIES NOR ANY IMPLIED WARRANTIES, INCLUDING BUT NOT LIMITED TO ANY IMPLIED WARRANTY OF MERCHANTABILITY OR FITNESS FOR A PARTICULAR PURPOSE. This warranty provides you with specific legal rights, and you may also have additional rights which vary from state to state.
www.vellogear.com © Copyright 2012 Gradus Group
All other trademarks are the property of their respective owners