BE1-30AG-L - Barbecue Fisher & Paykel - Free user manual and instructions
Find the device manual for free BE1-30AG-L Fisher & Paykel in PDF.

User questions about BE1-30AG-L Fisher & Paykel
0 question about this device. Answer the ones you know or ask your own.
Ask a new question about this device
Download the instructions for your Barbecue in PDF format for free! Find your manual BE1-30AG-L - Fisher & Paykel and take your electronic device back in hand. On this page are published all the documents necessary for the use of your device. BE1-30AG-L by Fisher & Paykel.
USER MANUAL BE1-30AG-L Fisher & Paykel
text_image
DCS by Fisher&PaykelOUTDOOR GRILL
BE1-30
Models
USER GUIDE
US CA
! DANGER
IF YOU SMELL GAS
- Shut off gas to the appliance.
- Extinguish any open flame.
- Open lid.
- If odor continues, keep away from the appliance and immediately call your gas supplier or your fire department.
WARNING
- Do not store or use gasoline or other flammable liquids or vapors in the vicinity of this or any other appliance.
- An LP cylinder not connected for use must not be stored in the vicinity of this or any other appliance.
CONTENTS
Introduction 3
Safety and warnings 4
Before you begin 9
Lighting instructions 10
Using the grill 12
Leak testing 14
Burner adjustment 15
Care and cleaning 17
Troubleshooting 20
Warranty and service 21
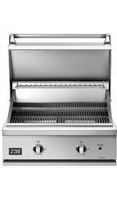
Giving you the searing heat and precise control of DCS appliances, the Series 9 All Grill gives you 525 square inches of flat top grilling space with up 50,000 BTU. Designed with flexibility in mind, the All Grill can be built-in to match the full suite of professional styled DCS Series 9 products, or mounted on a freestanding cart to create the complete outdoor kitchen for your backyard.

natural_image
Line drawing of a rectangular industrial or storage unit with internal grating and two side outlets (no text or symbols)! WARNING!
Electric Shock Hazard
Failure to follow this advice may result in electric shock or death.

- This appliance is equipped with a three-prong or four-prong grounding plug for your protection against shock hazard and should be plugged directly into a properly grounded power outlet.
- Never remove the grounding plug or use with a 2 prong adapter.
- Use only extension cords with a 3 prong grounding plug, rated for the power of the equipment, and approved for outdoor use with a W-A marking.
- Do not immerse cord or plugs in water or other liquid.
WARNING!
Fire Hazard
Failure to follow this advice may result in a fire causing death or serious injury.
- This unit is for outdoor use only. Do not operate under un protected combustible construction. Do not use in buildings, garages, sheds, breezeways, covered structures or other such enclosed areas.
- Never store a spare LP cylinder under or near this unit. Do not fill the gas tank more than 80% of its total capacity.
- Do not use aluminium foil to line drip pans, grates or radiant trays. This can interfere with combustion, air flow or trap excessive heat in the control area. The result of this can be melted dials or damaged ignition components.

WARNING!
 | Hot Surface HazardFailure to follow this advice may result in fire, burns, scalds or personal injury.Accessible parts may become hot during use.When in use, do not touch the burner, grate, or immediate surrounding area as these areas become extremely hot. Clean the with caution.Never let clothing or other flammable materials come in contact with or get too close to any grate, burner or hot surface until it has cooled.Never lean over an open unit. When lighting a burner, always pay close attention to what you are doing. Be certain you are pushing the burner dial when you attempt to light.Never operate the unit without a drip tray. Let hot grease cool before attempting to handle it. Avoid letting grease deposits collect in the drip pan.Ensure all controls are turned off and the unit is cool before using any type of aerosol cleaner on or around the product. The chemical that produces the spraying action could, in the presence of heat, ignite or cause metal to corrodeKeep any electrical supply cord and the fuel supply hose away from any heated surfaces. |
WARNING!

Excessive weight Hazard
Failure to follow this advice may result in personal injury.
- Two or more people are required to move and install this unit.
WARNING!

Explosion Hazard
Failure to follow this advice may result in injury or death
- If you smell gas, do not use the appliance.
- Do not use water on grease fires, a violent steam explosion may result. Turn all burners off, then smother fire or flame or use dry chemical or foam-type extinguisher.
- Do not heat unopened food containers such as cans – build up of pressure may cause container to burst and result in injury.
WARNING!
To reduce the risk of fire, injury to persons or damage when using the appliance, follow the important safety instructions listed below. Read all the guidance before using the appliance. Do not use an outdoor cooking gas appliance for purposes other than intended.
Servicing
- Do not repair or replace any part of the appliance unless specifically recommended in the user guide. All other servicing should be undertaken be a Fisher & Paykel trained and supported service technician or qualified person.
- Only use the product with the type of gas specified on the rating plate. To change gas type a factory conversion kit is required.
Fire Hazard
- Use only in well ventilated areas.
- Never leave the product unattended when in use.
- Always remove the cover before lighting. Do not replace cover during cooking or before appliance has cooled.
- Do not use a flame to check for gas leaks.
- Do not attempt to disconnect any gas connections while your appliance is in use or the gas supply is on.
- Never connect an unregulated gas line to the appliance.
- Have an ABC rated Fire Extinguisher accessible – never attempt to extinguish a grease fire with water or other liquids.
Storage
- When not in use, ensure the gas supply is turned off at the supply cylinder.
- Keep appliance covered when not in use
- Storage of the appliance indoors is permissible only if the cylinder is disconnected and removed from the unit.
-
Cylinders must be stored outdoors, out of reach of children and must not be stored in a building, garage, or any other enclosed area.
-
Do not store a full LP tank in direct sunlight.
- After a period of storage or non-use, the appliance should be checked for gas leaks, deterioration, proper assembly, and burner obstructions before use.
General Use
- This appliance is not intended to be installed in or on recreational vehicles, trailers or boats.
• After lighting burners, ensure they are operating correctly. - When using the appliance, be sure that all parts of the unit are firmly in place and that everything is stable.
- On cart mounted units, never move without first allowing the appliance to cool, disconnecting the cable and ensuring that the gas supply is turned off.
- Do not move the appliance during use.
- Children should not be left alone or unattended in an area where the product is being used. Never allow them to sit, stand or play on or around the unit at any time.
- Do not store items of interest to children around or below the appliance.
- Never use the appliance in a windy area.
- To put out flare-ups, adjust the controls to lower the temperature.
- Do not obstruct the flow of combustion and ventilation to the appliance.
- Spiders and insects can nest in the burners or openings and can block or restrict the burner. This can cause a flash back to the control panel which can cause a fire.
- Do not try lighting this appliance without reading the lighting instruction in the user guide.
- Do not locate, store or operate the appliance on a slope.
- This product must be installed by a licensed plumber or gas fitter when installed within the Commonwealth of Massachusetts.
- Never use a dented or rusty LP tank. Keep the ventilation openings of the cylinder enclosure free and clear from debris.
- Clean and perform general maintenance on the appliance regularly. Watch for corrosion, cracks, or insect activity. Check the regulator, hoses, burner ports, air shutter, and venturi/valve section carefully. Always turn off gas at the source prior to inspecting.
- You must inspect the unit at least once a year or immediately if the smell of gas is present in conjunction with the burner flames appearing yellow, the appliance does not reach temperature or heats unevenly or the unit makes popping noises.
- Do not smoke while leak testing and extinguish all open flames.
- When cleaning the burners centre the burner onto the orifice correctly and ensure they are level before lighting to prevent fire hazard or explosion. Refer to the user guide for detailed guidance.
- Use only a Ground Fault Interrupter (GFI) protected circuit with this outdoor cooking gas appliance.
- Unplug from the outlet when not in use and before cleaning. Allow to cool before putting on or taking off parts.
- Do not operate the appliance with a damaged cord, plug, or after the appliance malfunctions or has been damaged in any manner. Contact the manufacturer for repair.
- Do not let the cord hang over the edge of a table or touch hot surfaces.
- When connecting, first connect plug to the appliance then plug appliance into the outlet.
- Do not place the unit directly on the ground or other surface without support. This will prevent damage to the regulator/hose assembly.
Gas requirements
-
This appliance can be used with any brand of 20lb LP gas tank provided it is compatible with a proper retention device (not supplied).
• The LP gas cylinder must be: -
Designed for use with a Type 1 system only.
- Constructed and marked in accordance with the Specifications for LP gas Cylinders of the U.S. Department of Transportation (D.O.T.) or the Standard for Cylinders, Spheres and Tubes for Transportation of Dangerous Goods and Commission, CAN/CSA-B339
- Provided with a listed overfilling prevention device.
-
Provided with a cylinder connection device compatible with the connection for outdoor cooking gas appliances
-
The cylinder must be provided with a shut-off valve terminating in an LP gas supply cylinder valve outlet specified, as applicable, for connection Type 1.
- Do not change the regulator/hose assembly from that supplied with the unit or attempt to use a Type 1 equipped regulator/hose assembly with a standard 510 POL tank/valve assembly.
- Never use a cylinder with a damaged valve. The cylinder that is used must have a collar to protect the cylinder valve.
• An installer-supplied gas shut-off valve must be installed in an easily accessible location - All installer supplied parts must conform to local codes, or in the absence of local codes, with the National Electrical Code, ANSI/NFPA 70 or the Canadian Electrical Code, CSA C22.1, and the National Fuel Gas Code, ANSI Z223.1 or CSA-B149.1 Natural Gas Installation Code or CSA-B149.2 Propane Installation Code.
• In Massachusetts such shut-off valves should be approved by the Board of State Examiners or Plumbers & Gas Fitters. - All pipe sealants must be an ap proved type and resistant to the actions of LP gases. Never use pipe sealant on flare fittings.
- A dented or rusty LP tank may be hazardous and should be checked by your LP supplier.
• Always check for leaks after every LP tank change.
• Gas leak testing must be carried out by a qualified technician. - For LP units, check with a full cylinder.
- Do not use the appliance until all connections have been checked and do not leak.
-
Before each use, inspect the gas supply piping or hose prior to turning the gas ON. If there is evidence of cuts, wear, or abrasion, it must be replaced prior to use. The pressure regulator and hose assembly supplied with the unit must be used. If replacements are needed, contact customer care at www.dcsappliances.com
-
Ensure the installer has completed the final checklist in the installation guide.
- Read this guide, taking special note of the safety and warnings section.
- Remove all packaging and dispose of it responsibly. Recycle items that you can.

natural_image
Technical line drawing of a rectangular enclosure with vertical slats and internal partitions (no text or symbols)
text_image
Technical diagram showing a rectangular structure with three circular components labeled ①, ②, and ③, each with a horizontal line indicating a reference or measurement.Grill Features
① Control dials
② Dual-sided grates
③ Drip pan
Not shown: lid
Dial halos
When a dial is in use, an orange halo around that dial will illuminate. This will change from orange to white if the dial is turned to OFF but another dial remains active. If all dials are turned OFF, all halos will dim.
Multiple DCS Series 9 products may be linked together to allow for cross-product halo illumination. To allow for this functionality, an approved DCS kit is required and can be purchased separately from your local DCS dealer.
Grill layout
Each grill section consists of a burner, heat baffles, ceramic rods encased in a radiant tray, and a heat retaining grate. Each burner is rated at 25,000 Btu/hr or 26,5MJ/h.
Discoloration of the grates is normal after use.
Seasoning the grates
Season your grates before first use and then periodically to protect the grate surface from corrosion, and to stop food sticking.
① Pour two teaspoons of vegetable oil on a soft cloth and rub on both sides of the grates. Only a light coating is needed.
② Turn the dial to a medium heat setting. Some smoke may be visible during the preheating stage.
③ Turn the dial to OFF when the oil begins to smoke and allow the grill to cool.
④ Repeat as needed.
If you are using propane gas, a slight pop or flash may occur at the burner ports a few seconds after the burner has been turned OFF. This is normal for propane gas.

natural_image
Technical line drawing of a cabinet or drawer with two circular cutouts and an upper shelf (no text or symbols)Remove the cover and any cooking utensils. Ensure the drip pan is in place.

text_image
OFF SEAR HA MED LOW GRILL SEAR ②Push in and hold the selected dial for 2 seconds before turning to SEAR. Hold for 5 seconds to light the selected burner.

text_image
GRILL OFF 3If burner does not light in 5 seconds, turn dial back to OFF and wait 5 minutes before trying again. This will allow any accumulated gas to dissipate.
Manual lighting
If the burner will not light after several attempts, the burner can be manually lit. If you have attempted to light the burner with the ignition, allow 5 minutes for any accumulated gas to dissipate.

natural_image
Technical line drawing of a rectangular frame with two circular cutouts, no text or symbols presentRemove the cover and any cooking utensils. Ensure the drip pan is in place.

natural_image
Diagram of a cabinet with two circular doors and a magnified inset showing a hand holding a tray (no text or symbols)Hold a match over the hole located on the top left for burner on the left, or the right hole for the right burner.

text_image
OFF SEAM HI MED LOW GBILL OFF FLAM 3Push and turn the corresponding control dial to SEAR. If the burner does not light in 5 seconds, turn dial back to OFF and wait 5 minutes before trying again.
Using the grill

natural_image
Technical line drawing of a rectangular frame with two circular cutouts, no text or symbols presentRemove the cover and any cooking utensils. Ensure the drip pan is in place.

text_image
OFF SEAR 18 M20 LOW GRILL 5mm ECOR ②Light the grill burners following the lighting instructions and preheat.
Place food on the grill and cook to the desired level. You can adjust the heat setting during cooking if needed.
When finished
Turn control dial to OFF and shut the main gas supply. Allow the grill to cool and clean after each use.
Dual-sided grates
The dual-sided grate provides cooking options for food of varying textures. One side has a W-shaped surface that creates nice sear lines for steaks, chicken, chops and routes oil and grease away from food. The other side has a radius surface area providing more support for handling of delicate food items.
W SHAPED GRATE RADIUS GRATE
Chicken Lobster
Steaks Shrimp
Bread Scallops
Sausages Flat breads
Grilling guidelines
Grilling requires high heat for searing and browning. Most foods are cooked at the MED to HI heat setting for the entire cooking time, however, when grilling large pieces of meat or poultry, it may be necessary to turn the heat to LOW after the initial browning. Foods cooked for a long time or basted with a sugary marinade may need a lower heat setting near the end of the cooking time.
A complete gas tightness check must be performed at the installation site. Periodically check the whole system for leaks, or immediately if the smell of gas is present.
When using a LP gas cylinder ensure it is installed in a vertical position to provide the required vapor withdrawal.

text_image
GRILL OFF 1Prepare soap solution by combining one part liquid detergent and one part water. Pour into a spray bottle. Ensure all control valves are in the OFF position before turning the gas supply ON.

text_image
leak points leak points NG: ②Check all connections from the supply line or LP cylinder by applying the solution around the connection, tubing and end of the manifold. Soap bubbles will appear where a leak is present.

text_image
leak points LP:If a leak is present
Immediately turn the gas supply OFF and tighten any leaking connections. Turn gas ON, and recheck. If you cannot stop a gas leak turn the gas supply OFF and call your local gas utility or the dealer you purchased the appliance from. Only parts recommended by the manufacturer should be used on the unit, substitution can void the warranty.
Changing the LP cylinder
Ensure the main tank valve is turned off before turning the coupler counter clockwise, the inlet will then disengage. Remove the inlet from the tank valve opening. Your local LP filling station should be equipped with the proper equipment to fill your tank.
Do not attempt to remove, repair or replace the regulator/hose assembly. This must be done by qualified and licensed technician only.
Flame height adjustment
Flames should be blue and stable with no yellow tips, excessive noise or lifting (Note: LP units may have some yellow tipping). If any of these conditions exist, check the air shutter and burner ports are clear. If cleaning these does not improve performance, the air shutter can be adjusted as per the instructions below.
①

text_image
OFF RIGHT HOLDEnsure the grill is OFF and cool. To access the air shutters, remove the grate, radiant and U-burner.
②

natural_image
Technical line drawing of a mechanical assembly with cylindrical components and mounting brackets (no text or symbols)With a screw driver, loosen the lock screw on the face of the air shutter so it can be adjusted. If the flame is yellow turn the air shutter counterclockwise, if the flame is noisy and tends to lift turn the air shutter clockwise.
③

text_image
yellow tips noisy/lifting blue + stableReinstall the U-burner and light to check. If the flame is blue and stable, remove the burner, tighten the air shutter screw and replace all parts. If flame is still unstable, repeat the above steps.
Low flame adjustment
The valves on the grill feature an adjustable low setting. Due to fluctuations in gas pressure, or heating value you may want to increase or decrease gas flow in the low position. If the gas type has been converted from natural to LP or vice-versa, the low flame setting must be reviewed and adjusted.

text_image
OFF SEAR HI MED LOW GRILL OFF ECAF ①Push in and hold the selected dial for 2 seconds before turning to SEAR. Hold for 10 seconds to light the selected burner.

text_image
OFF LEAF HI MED LOW GRILL 2000 RED 41 ②Turn the control dial counterclockwise to the lowest setting.

text_image
Technical diagram showing mechanical assembly steps with numbered annotations (3 and 4) and component detailsRemove the dial.
BEZEL FRONT VIEW
Hold the valve shaft with pliers, insert a flat-tipped screwdriver into the shaft and, while viewing the burner, adjust to a minimum stable flame.
Regulator and hose replacement
The pressure regulator and hose assembly supplied with the unit must be used. If replacements are needed, contact customer care at dcsappliances.com.
Resetting the flow control
Failure to follow the steps in the order shown may cause the Flow Limiting Device to activate resulting in extremely low gas flow and irregular operation.
① All dials must be in the OFF position.
② Attach regulator hose assembly to the tank and open the LP tank valve (minimum of two full turns).
Cleaning grill grates
The grill grates must be re-seasoned after cleaning to prevent rust stains.
Full clean
- The easiest way to clean the grill is immediately after cooking is completed.
- Wear a mitt to protect your hand from the heat and steam.
- Dip a soft brass bristle brush in a mixture of 2 cups of water and 1/2 cup of vinegar and scrub the grill while still hot. The steam created will assist in the cleaning process. Any food particles loosened in the process will fall onto the ceramic rods and burn off or fall into the drip pan.
Sear clean
Turn burners on HI for 15-20 minutes to burn any remaining food particles. After turning the grill OFF, use a bristle brush to remove any remaining food particles or ash.
Ceramic rods
If grease can be seen on the rods or there are a lot of flare-ups during cooking, turn the rods over and heat on HI for 30 minutes.
304 Stainless steel
The grill is made from non-rusting and non-magnetic stainless steel. After initial use, areas of the grill may discolor from the intense heat given off by the burners, this is normal. Grease can gather on the surfaces of the stainless steel and bake on to the surface and give the appearance of rust. To remove baked on grease use an abrasive pad in conjunction with a stainless steel cleaner. Always rub in the direction of the grain.
Note: Stainless steel tends to corrode in presence of chlorides and sulfides especially in coastal areas. To ensure corrosion prevention, wash all stainless steel surfaces every three to four weeks with fresh water and stainless cleaner. Keep grill covered when not in use.
Removing the burners for cleaning

Ensure the grill is OFF and cool.
Remove the grill grates, then lift out the radiant tray.
Use a screw driver to open the bracket slot at the rear of the unit
Press the bracket down while pulling the burner back and up. This should remove the burner from the bracket at the rear and the opening in the control panel.
Angle the burner sideways to remove.
Burner cleaning
Clean the exterior of the burner with a stainless steel wire brush. Clear stubborn scale with a metal scraper. Clear any clogged ports with a straightened paper clip. Never use a wooden toothpick as it may break off and clog the port. Shake out any debris through the air shutter. Use a flashlight to inspect the burner inlet to ensure it is not blocked. If obstructions can be seen, use a metal wire to remove.
With the burner removed, remove the orifice and shine a flashlight through the opening to ensure there is no blockage. Use a needle to clear any debris. Be extremely careful not to enlarge the hole or break the needle.
Burner alignment

Ensure the air shutters are not misaligned from their original position. Lower the rear of the burner into the cutouts on the support channel at the rear of the burner box. Ensure it is level and does not rock. Light all of the burners and check that the flame is blue, stable and even (refer to page 15 for detail). Complete any adjustments prior to cooking.
If there is a problem with your grill, please check the following before contacting your local Fisher & Paykel trained and supported service technician or DCS Customer Care Centre.
| PROBLEM POSSIBLE CAUSES WHAT TO DO | ||
| The grill won't light when the ignition is pushed | There is no gas flowing to the unit. | Check gas supply and connections.Ensure no air is trapped in line. |
| There is a something blocking the air or gas flow. | Check all openings for blockages. | |
| Check that the unit is connected to a live AC power source.Check GFI outlet, reset if tripped. | ||
| Burner flame is yellow or orange in conjunction with the odor of gas. | Dirt or dust may be present in the area. | Move to a less dusty area and check for obstructions. |
| Incorrect gas supply or type. Confirm gas supply and type. | ||
| Low heat with dial in the HI position. | Fuel hose may be bent or kinked. Check hose is routed correctly. | |
| Burner may need cleaning. Follow cleaning instructions. | ||
| If using LP gas, supply may be low or empty. | Check supply, refill tank if needed. | |
| Burner power too high in the LOW position. | Low flame setting has been incorrectly set. | Refer to 'Low flame adjustment' for details. |
| Dial halos don't illuminate. | Power supply is off.GFI has tripped (Ground Fault Interrupter). | Check that the unit is connected to a live AC power source.Check GFI outlet, reset if tripped.Check power supply fuse, replace if blown. |
Before you call for service or assistance
Refer to the installation instructions and your user guide and check that:
- Your product is correctly installed.
- You are familiar with its normal operation.
- Model number (can be found on the inside, right side panel behind the drip pan handle.
- Serial number (can be found on the inside, right side panel behind the drip pan handle.
- Code (can be found on the inside, right side panel behind the drip pan handle.
- Date of installation
If after checking these points you still need assistance or parts, please refer to the Service & Warranty book for warranty details and your nearest Service Centre, Customer Care, or contact us through our website www.dcsappliances.com or email:
customer.care@dcsappliances.com
Complete and keep for safe reference:
Mode
Serial No. ____
Purchase Date ____
Purchaser
Dealer
Suburb
Town ____
Country ____
DCSAPPLIANCES.COM
© Fisher & Paykel Appliances 2019. All rights reserved.
The product specifications in this document apply to the specific products and models described at the date of issue. Under our policy of continuous product improvement, these specifications may change at any time. You should therefore check with your Dealer to ensure this document correctly describes the product currently available.
US CA
592073A 11.19