
KASMCMODBTA - Security Camera Kogan - Free user manual and instructions
Find the device manual for free KASMCMODBTA Kogan in PDF.


| Product Type | Outdoor Wireless Security Smart Camera |
| Model | KASMCMODBTA |
| Brand | Kogan |
| Resolution | 5MP |
| Power Source | Rechargeable 5200mAh lithium-ion battery |
| Charging Port | USB-C |
| Connectivity | Wi-Fi 2.4GHz only |
| Motion Detection | PIR sensor |
| Audio | Two-way audio |
| Night Vision | Yes, with spotlight (full color) |
| Local Storage | SD card up to 128GB (FAT32 format) |
| Smart Home Compatibility | Kogan SmarterHome app, Google Home, Amazon Alexa |
| Installation | Wall-mount bracket; recommended height 2.5m, angle 15-20° downward |
| Power Button | Press 3 seconds to turn on/off |
| Reset Button | Press and hold 5 seconds to reset |
| Status Light | Solid red: booting/fault; Blinking red: Wi-Fi pairing; Blinking blue: connecting; Solid blue: normal |
| Charging Indicator | Red: charging; Blue: fully charged |
| Field of View | Not specified (typical 110°-130°) |
| Water Resistance | Not specified (outdoor rated) |
Frequently Asked Questions - KASMCMODBTA Kogan
User questions about KASMCMODBTA Kogan
0 question about this device. Answer the ones you know or ask your own.
Ask a new question about this device
Download the instructions for your Security Camera in PDF format for free! Find your manual KASMCMODBTA - Kogan and take your electronic device back in hand. On this page are published all the documents necessary for the use of your device. KASMCMODBTA by Kogan.
USER MANUAL KASMCMODBTA Kogan
natural_image
Exterior view of a modern security camera mounted on a wall-mounted base (no visible text or symbols)KOGAN SMARTERHOME™ OUTDOOR WIRELESS SECURITY SMART CAMERA
(5MP, BATTERY POWERED WITH SPOTLIGHT)
KASMCMODBTA
Components 3
Overview 4
Connect to SmarterHome™ App 6
Google Home Control 11
Amazon Alexa Control 14
Installation 17
Operation 18
FAQ 20
Notes 21
COMPONENTS

natural_image
Simple line drawing of a vertical control panel with three circular buttons and a central indicator (no text or symbols)Security Camera

natural_image
Technical line drawing of a mechanical component with flanged ends and a central hub (no text or symbols)Bracket
natural_image
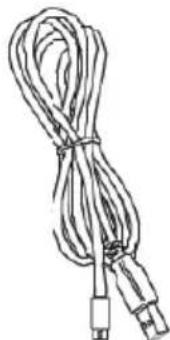
Line drawing of a coiled cable with connectors (no text or symbols)Charging Cable
natural_image
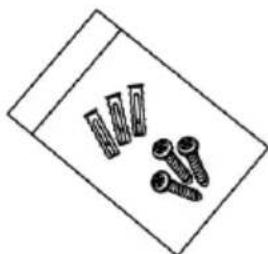
Simple line drawing of two screws and two bolts on a rectangular surface (no text or symbols)Mounting Hardware
User Guide
OVERVIEW
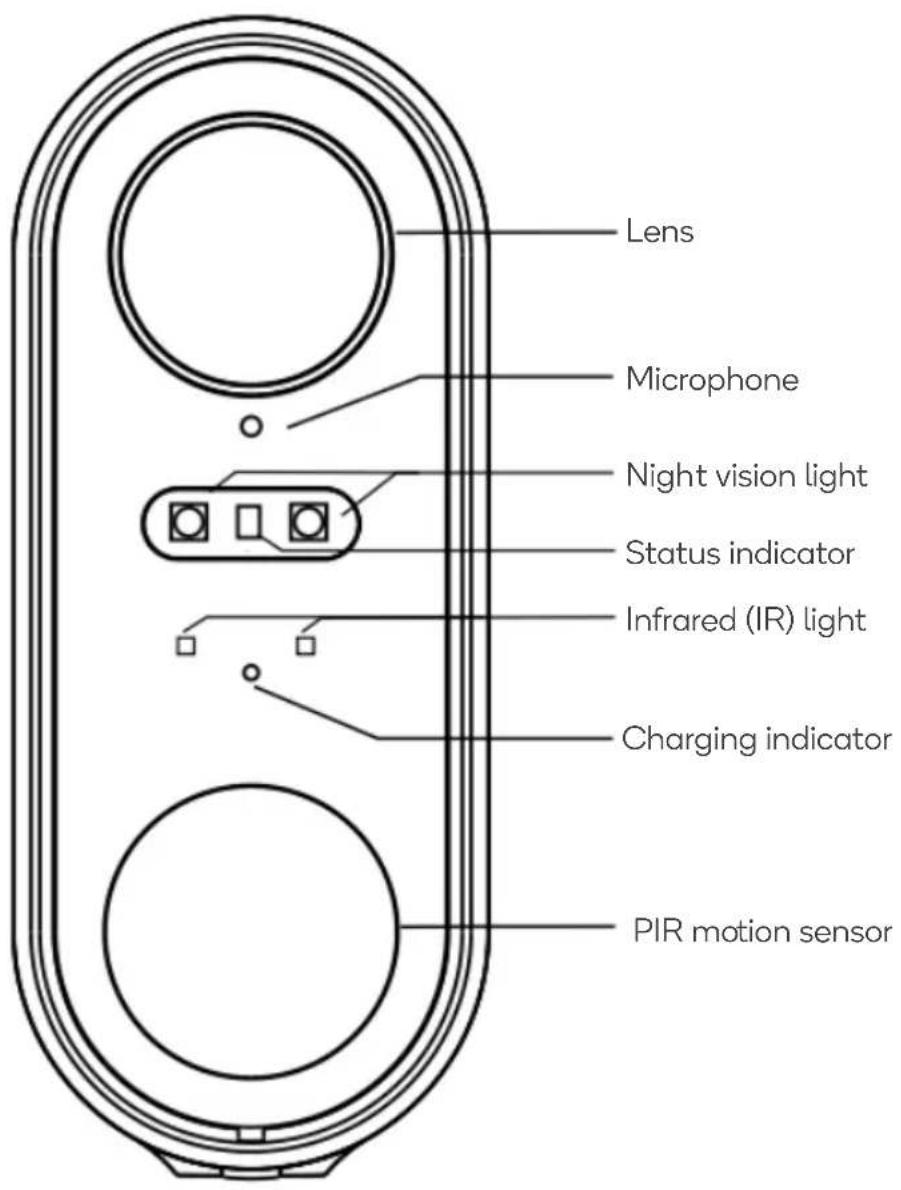

| Power input port (USB-C) | Use the supplied charging cable to connect to a power adapter (not supplied). |
| Power button | Press the button for 3 seconds to turn on/off the camera |
| Status light | Solid Red light: the camera is turning on or malfunctional |
| Blinking Red light: awaiting Wi-Fi connection (slowly blinking) connecting the Wi-Fi (quickly blinking) | |
| Blinking Blue light: currently connecting | |
| Solid Blue light: the camera runs correctly | |
| SD card slot | Support local SD card storage (Max.128G) |
| Reset | Press and hold on for 5 seconds to reset the camera |
| Charging indicator | Red light: charging |
| Blue light: full charged | |
| Battery capacity | 5200mAh (lithium-ion battery) |
CONNECT TO SMARTERHOME™ APP
Install App
Download the "Kogan SmarterHome" app from the Play Store (Android) or App Store (iOS).

Play Store (Android)
App Store (iOS)
To register:
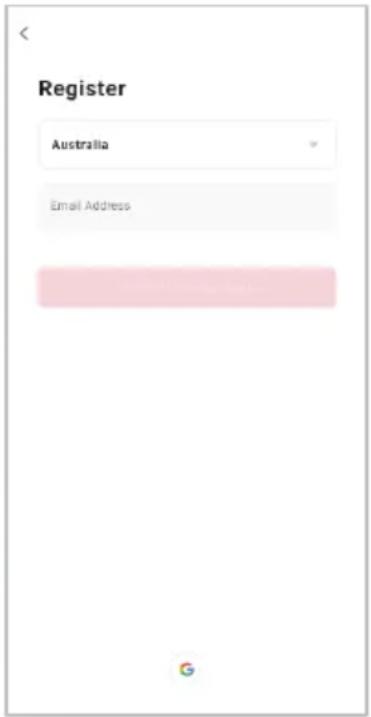
- If you already have a SmarterHome account, select 'Log In'. To register a new account, select 'Sign Up'.
- The system will automatically recognise your country. If needed, you can manually select your country from the drop-down box. Enter your email address and tap 'Get Verification Code' to continue.
- A 6-digit code will be sent to the submitted email address. Enter this code before the one-minute timer expires.
- Continue to the next page and complete your SmarterHome profile.


Set device in pairing mode
When the device is first turned on, it may automatically enter pairing mode (status indicator is blinking rapidly).
If not automatically in pairing mode when powered on, you can manually set the device in pairing mode by product specific pairing mode steps until example of indicator.
Add device through network
- Once registered, tap "Add Device" on the app's home page, or the "+" in the upper right corner, to add a new device through the network.
- Select the product type from the list of options in the app (Home Security > Camera).
- Ensure that the device is in pairing mode, with the status indicator is blinking rapidly, and tap "Next".
- Enter your Wi-Fi details. It is important that your SmarterHome™ device and the app are connected to the same Wi-Fi network during setup.
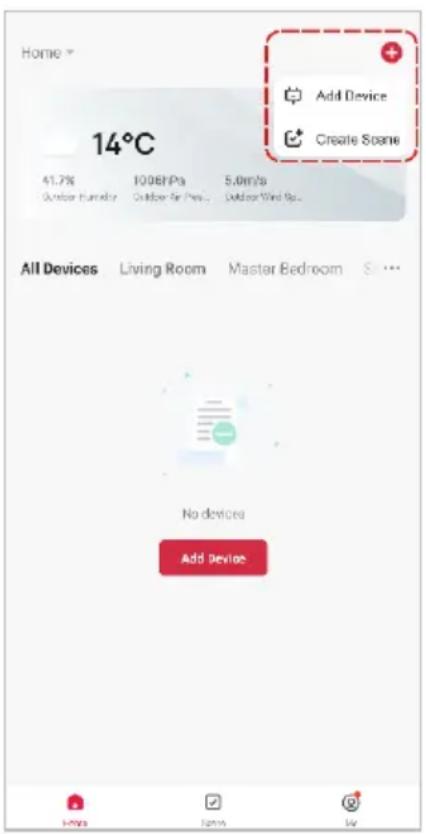


Notes:
• The device and the app have to use the same Wi-Fi network.
• The device is only compatible with 2.4Ghz networks.
• Depending on the product, Steps 3 and 4 may be in opposite order.
-
Calibrate the smart camera by holding your smartphone 15-20cm away from the camera lens until it successfully scans the QR code shown on the following screen of the setup. The device will make a prompt sound to confirm, click "I heard a prompt" to proceed to the next screen.
-
The device will commence the pairing process and connect to the app. Ensure your Wi-Fi router, mobile phone, and the SmarterHome™ device are kept close until connection is complete.
-
After successfully being added, you will have the option to rename the device and assign it to a location. It will now be listed on the app's home page. Tap the device listing to enter its control page.
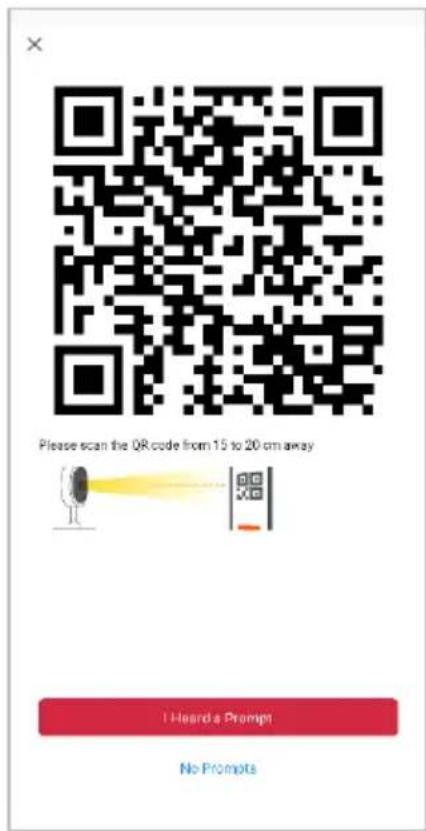

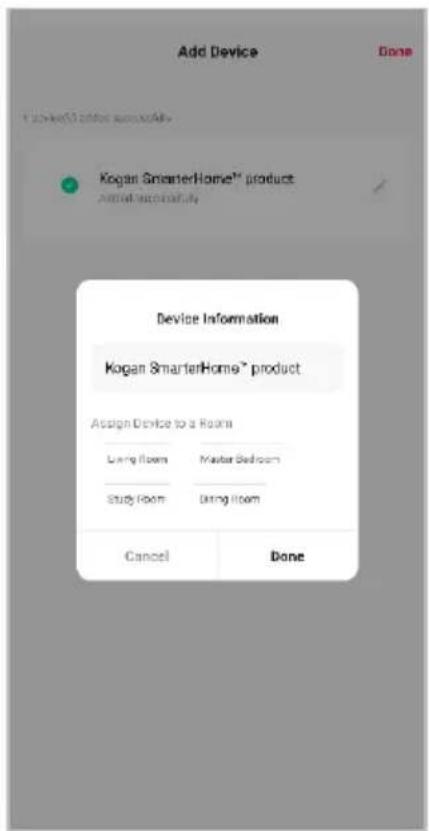
Note:
Once connected, you can select Create Scene from the “+” in the upper right corner (or from the Scene tab) to group connected SmarterHome™ products and automate their functions.
Having trouble connecting?
The prior steps detail the process for “EZ Mode” connection. If that does not work for your connection, we suggest trying it again, and if still no success, attempting the following method for AP Mode connection.
Set device in AP pairing mode
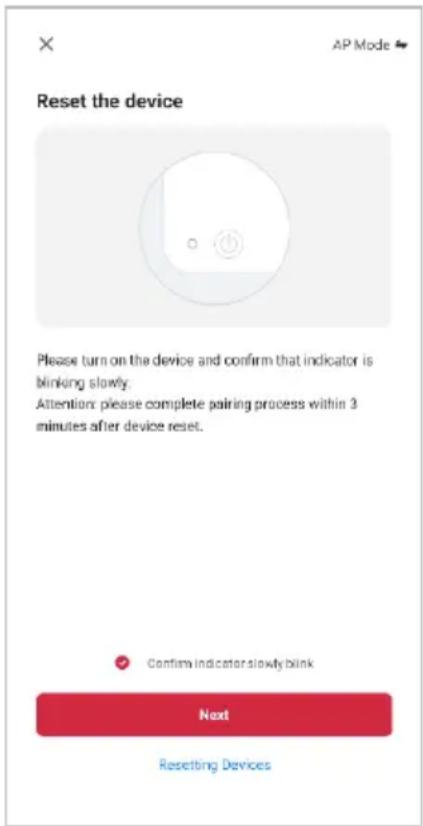
Set the device in pairing mode by pressing and holding the reset button until the status indicator is flashing slowly.
Using AP Mode to add device
- Follow the previous steps to select your product type (Home Security > Camera).
- Adjust your connection method by tapping on the mode type in the top-right corner of the screen. Select "AP Mode" for the set-up type.
- Ensure that the device is in pairing mode, with the status indicator flashing slowly, and tap "Confirm light is slowly flashing".
- Enter your Wi-Fi details. It is important that your SmarterHome™ device and the app are connected to the same Wi-Fi network during setup.
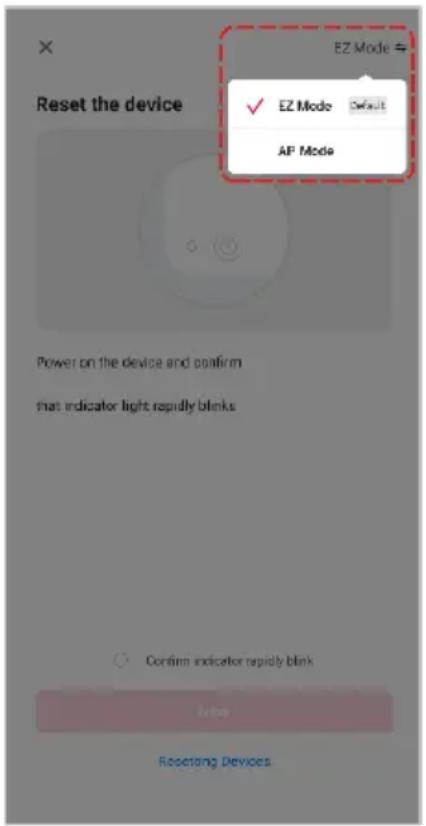

Notes:
• The device and the app have to use the same Wi-Fi network.
• The device is only compatible with 2.4Ghz networks.
• Depending on the product, Steps 3 and 4 may be in opposite order.
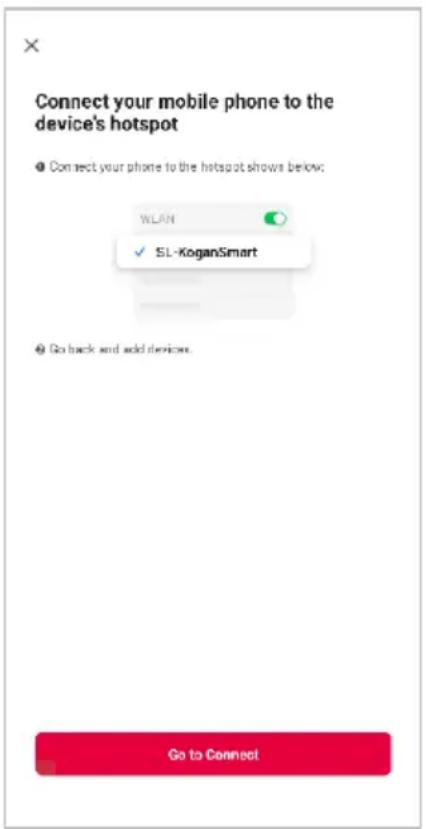
- Follow the in-app prompts to continue AP Mode connection, which will pair your mobile phone to the device's Wi-Fi hotspot to ensure a connection. This may be named "SL-KoganSmart", "SmartLife-XXXX", or another similar name.
Note:
If the Wi-Fi hotspot does not appear on your phone in the list of available networks, your device may not be set in AP Pairing Mode correctly. Try repeating the steps outlined above to ensure your device is ready for connection.
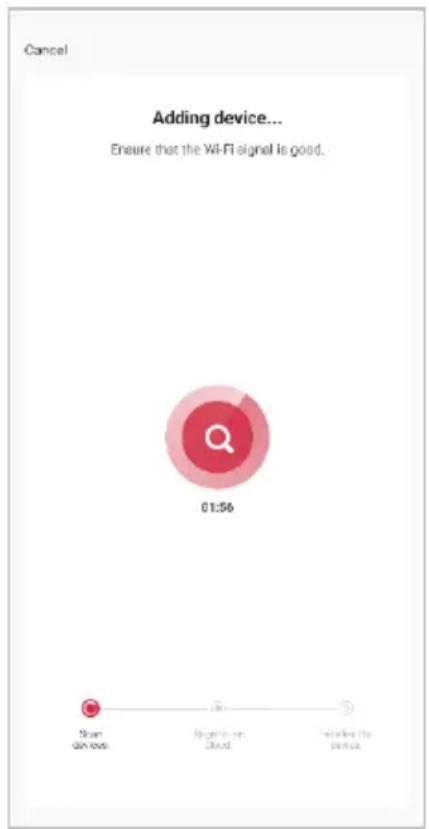
- The device will commence the pairing process and connect to the app. Ensure your Wi-Fi router, mobile phone, and the SmarterHome™ device are kept close until connection is complete.
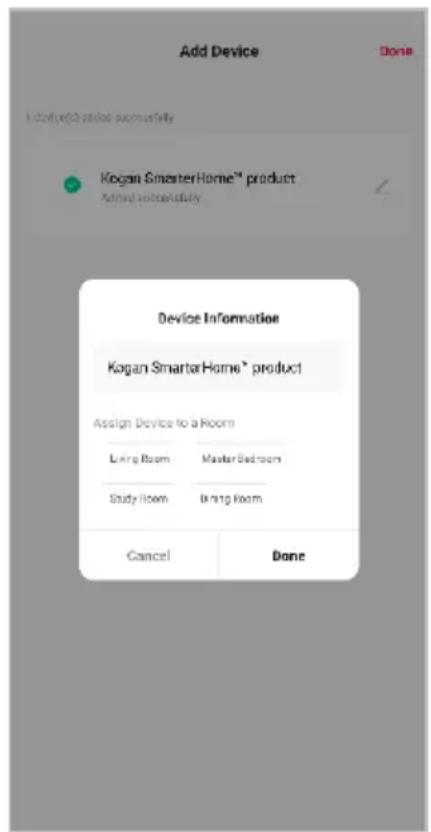
- After successfully being added, you will have the option to rename the device and assign it to a location. It will now be listed on the app's home page. Tap the device listing to enter its control page.
Note:
Once connected, you can select Create Scene from the “+” in the upper right corner (or from the Scene tab) to group connected SmarterHome™ products and automate their functions.
GOOGLE HOME CONTROL
Note:
You will need to have set up a Google Home account prior to linking your Kogan SmarterHome™ device.
Adding "SmarterHome" to the Google Home app
- From the home page of the Google Home app, select the “+” icon (top left corner, see arrow in the below screenshot) to access the ‘Add and manage’ page.
- Select 'Set up device', then select the 'Works with Google' option.

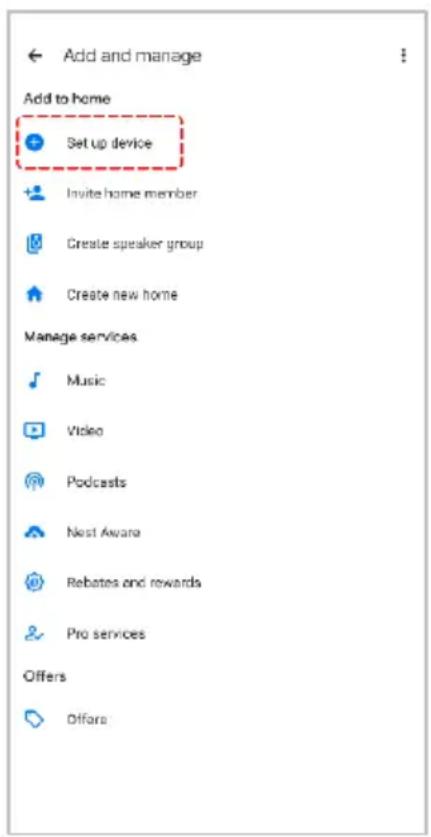
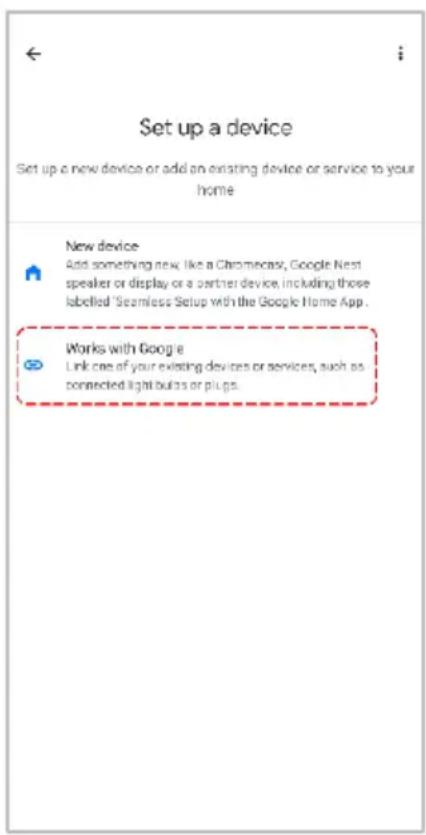
- Select the search bar and type 'Smarter Home' to locate the Kogan SmarterHome™ service.
- From here, you will be prompted to sign into your SmarterHome™ account using either your email or mobile phone number, depending on which method you used to register your account.
- Select "Kogan SmarterHome™" from the app options.
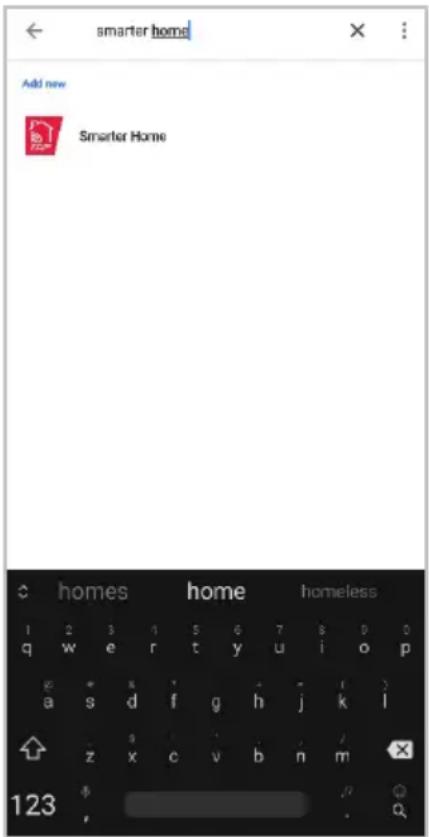
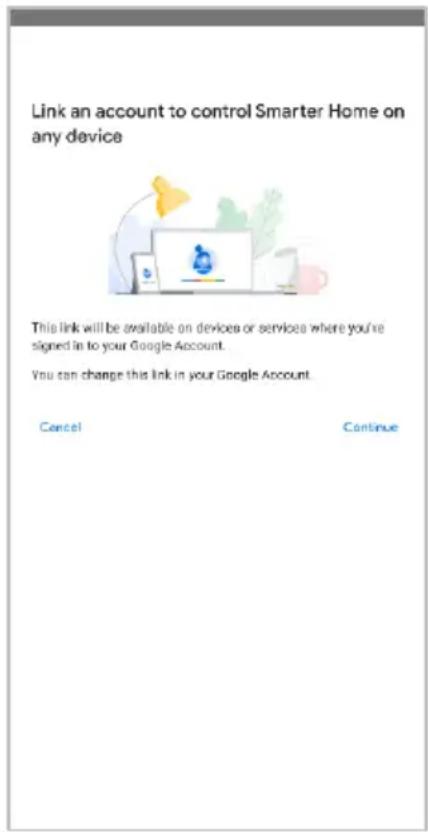

- Tap 'Authorise' to grant Google permission to access the SmarterHome™ app and your devices.
- Once connected, the app will display any compatible devices linked to your SmarterHome™ account. From here you can assign them to rooms and set up any routines. Tap on any of the devices to view a list of available commands.
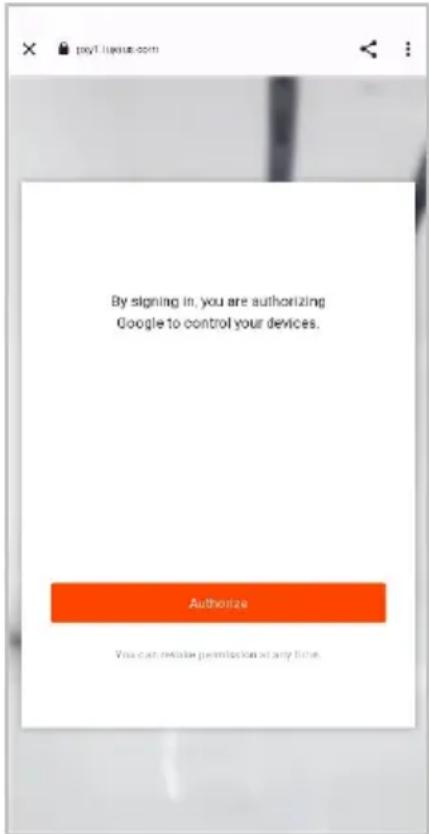

Note:
Please note that Google Home can only control the base/core functions of any compatible SmarterHome™ devices. To make full use of this product's smart functionality, please use the Kogan SmarterHome™ app.
AMAZON ALEXA CONTROL
Note:
You will need to have set up an Alexa account prior to linking your Kogan SmarterHome™ device.
Adding "SmarterHome" to the Alexa app
- From the home page of the Alexa app, select the “=” icon in the bottom-right and select “Skills & Games” from the sidebar.
- Select the search bar and type 'Smarter Home' to locate the Kogan SmarterHome™ skill.

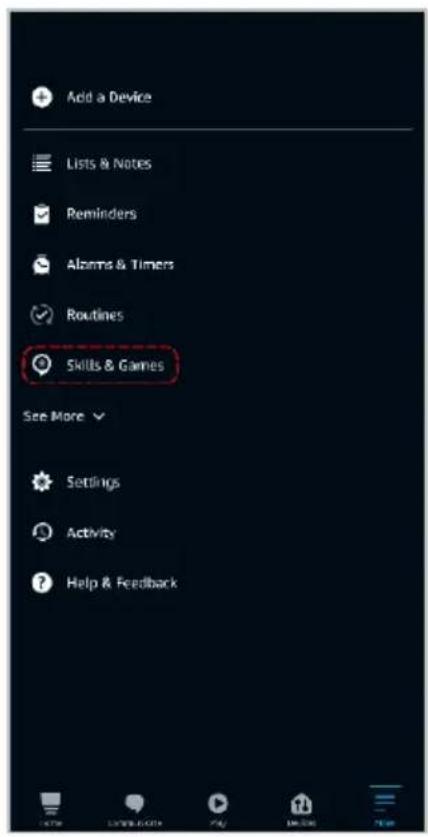

- Tap 'Enable to Use' to add the Kogan SmarterHome™ skill to Alexa.
- From here, you will be prompted to sign into your SmarterHome™ account using either your email or mobile phone number, depending on which method you used to register your account.
- Select "Kogan SmarterHome™" from the app options.

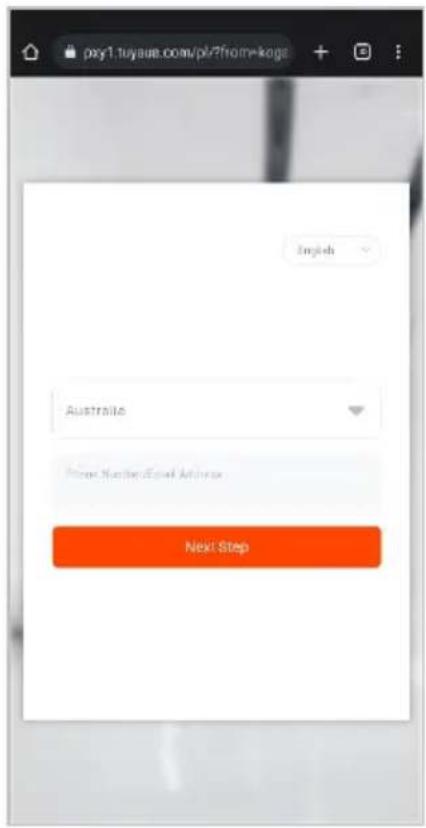

- Tap 'Authorise' to grant Alexa permission to access the SmarterHome™ app and your devices.
- Once connected, the app will perform a search and display the devices linked to your SmarterHome™ account. When your devices have successfully connected to the Alexa app, you will be able to control your Kogan SmarterHome™ devices via Alexa's voice commands.


Note:
Please note that Alexa can only control the base/core functions of any compatible SmarterHome™ devices. To make full use of this product's smart functionality, please use the Kogan SmarterHome™ app.
INSTALLATION
Notes:
The recommended installation height is 2.5m (8.2 feet) above the ground and the recommended angle is 15^ to 20^ downwards.
Bracket Installation
- Using the supplied hardware, attach the bracket to the wall. If you are unsure as to what hardware is required for your chosen surface, please consult a qualified trade professional.
- Install the camera onto the bracket and tighten the screw.
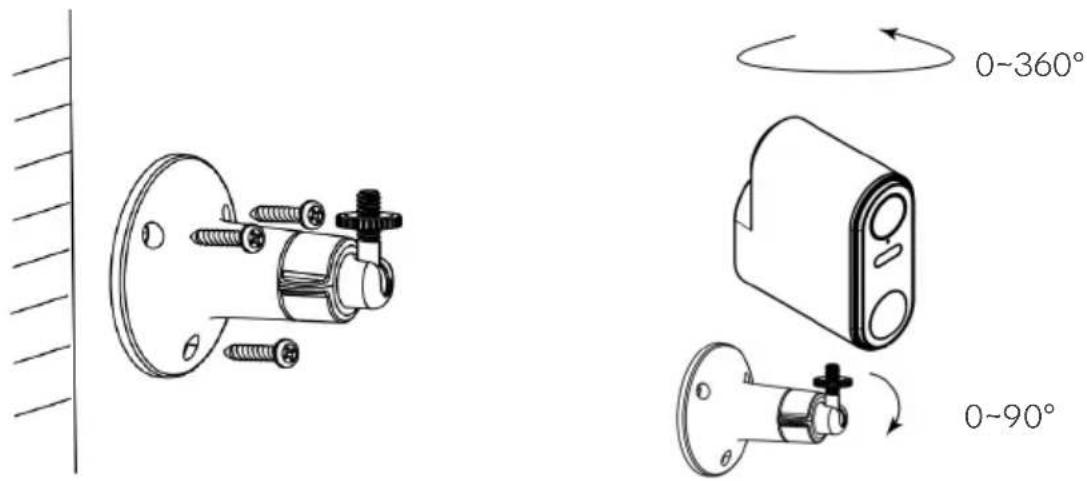

natural_image
Technical line drawing of a mechanical device with mounting flange and housing (no text or symbols)After adjusting the camera angle, lock this screw.
OPERATION
In live view interface, click " ... " to access the camera settings and additional functions.

Remote wake-up
Remote Wake-Up: The camera conserves power by entering sleep mode. Users can remotely activate the camera from the app, allowing for a quick preview when needed.
Two-way audio
You can see and hear the visitors from the camera in your SmarterHome™ app.
Full colour vision
The use of white light ensures that pictures and videos captured during motion detection are presented in vivid color, enhancing overall visibility for a more detailed and clear vision.
PIR motion detection
Built-in motion sensor detects movement, and the camera will send push notifications and app alerts.
When someone passes by, an alarm will be triggered and sent to phone.
Alerts
When the alarm is triggered at night, the camera will activate both sound and light notifications.
Low battery alarm
You can set a low-battery alarm threshold in the SmarterHome™ app. The threshold is set to a minimum of 10% and a maximum of 50%. When the battery power of the camera is lower than the set threshold, the app will send an alert.
Record
Use an SD card to keep recording for every moment.
Day & Night
Never miss a moment, even in complete darkness, with powerful night-vision technology.

natural_image
Interior view of a modern living room with sofa, coffee table, lamp, and panda-themed wall art (no visible text or symbols)
natural_image
Interior view of a modern living room with sofa, coffee table, lamp, and wall art (no visible text or symbols)Note:
The PIR motion sensor will occasionally false trigger depending on the camera's environment. This is completely normal and not an indication of improper operation or product fault.
FAQ
Q: The camera cannot be previewed properly.
A: Check that the network status is normal. Place the camera closer to the router. If this doesn't solve the issue, reset the camera and re-add it to using the SmarterHome™ app.
Q: Why is the camera still in list of devices after resetting?
A: Resetting only resets the network configuration of the camera. To remove the camera from the list of devices it must be deleted using the SmarterHome™ app.
Q: How do I connect the camera to a different router?
A: Delete the camera from the list of devices using the SmarterHome™ app. Follow the pairing steps using the new router.
Q: Why doesn't the camera recognise the SD card?
A: It is best to insert the SD card while the camera if off. Ensure the SD card used is FAT32 formatted. The SD will not be recognised if the network environment is poor.
Q: Why don't I get push notifications on my smart phone?
A: Check that the SmarterHome™ app is running on your phone and that it has been given the correct level of notification permission in your phone's system settings.
NOTES
Need more information?
We hope that this user guide has given you the assistance needed for a simple set-up.
For the most up-to-date guide for your product, as well as any additional assistance you may require, head online to help.kogan.com
kogan.com


- KOGAN SMARTERHOME™ OUTDOOR WIRELESS SECURITY SMART CAMERA
- COMPONENTS
- OVERVIEW
- CONNECT TO SMARTERHOME™ APP
- Install App
- To register:
- Set device in pairing mode
- Add device through network
- Notes:
- Note:
- Having trouble connecting?
- Set device in AP pairing mode
- Using AP Mode to add device
- GOOGLE HOME CONTROL
- Adding "SmarterHome" to the Google Home app
- AMAZON ALEXA CONTROL
- Adding "SmarterHome" to the Alexa app
- INSTALLATION
- Bracket Installation
- OPERATION
- Remote wake-up
- Two-way audio
- Full colour vision
- PIR motion detection
- Alerts
- Low battery alarm
- Record
- Day & Night
- FAQ
- NOTES
- Need more information?
Brand : Kogan
Model : KASMCMODBTA
Category : Security Camera