
KAKIDINCMPB - Camera Kogan - Free user manual and instructions
Find the device manual for free KAKIDINCMPB Kogan in PDF.

| Product Type | Kids Instant Print Camera |
| Brand | Kogan |
| Model | KAKIDINCMPB |
| Dimensions | 123 x 87.4 x 59 mm |
| Weight | 251 g |
| Battery | Built-in 7.4V 1000mAh Li-ion (non-removable) |
| Charging | USB-C, 5V/2A adapter (not included) |
| Printing Technology | Thermal (black and white) |
| Paper Size | 57 mm x 25 mm rolls (BPA-free) |
| Print Size | 48 x 65 mm |
| Photo Resolution | Max 4032 x 2880 (72 dpi) |
| Video Resolution | 1920 x 1080 |
| Memory | microSD up to 32 GB (not included) |
| Working Time | Approximately 1.7 hours video recording |
| Lenses | Front and rear (switchable) |
| Display | Yes (LCD) |
| Flash/LED Light | Rear-facing with On, Off, Always On modes |
| Filters | 35 pre-installed (Purikura) |
| Scene Modes | Auto, Sunlight, Cloudy, Tungsten, Fluorescent |
| Self-Timer | 3, 5, or 10 seconds |
| Burst Mode | 3 photos in approx. 2 seconds |
| Cyclic Recording | 3, 5, or 10 minute intervals for video |
| Auto Power Off | 3, 5, or 10 minutes or Off |
| Language Support | English, Chinese, German, French, Italian, Spanish, Japanese, Korean, Russian, Polish, Czech |
| Included Accessories | 2 paper rolls, sticker set, 5 markers, USB-C cable, lanyard |
| Safety Warning | Choking hazard; not for children under 3; adult supervision required; keep away from fire |
| Maintenance | Clean with dry cloth; disconnect charging cable before cleaning |
| Spare Parts | BPA-free 57mm x 25mm thermal paper rolls (sold separately) |
| Repairability | Battery not replaceable; contact Kogan.com for support |
Frequently Asked Questions - KAKIDINCMPB Kogan
User questions about KAKIDINCMPB Kogan
0 question about this device. Answer the ones you know or ask your own.
Ask a new question about this device
Download the instructions for your Camera in PDF format for free! Find your manual KAKIDINCMPB - Kogan and take your electronic device back in hand. On this page are published all the documents necessary for the use of your device. KAKIDINCMPB by Kogan.
USER MANUAL KAKIDINCMPB Kogan
natural_image
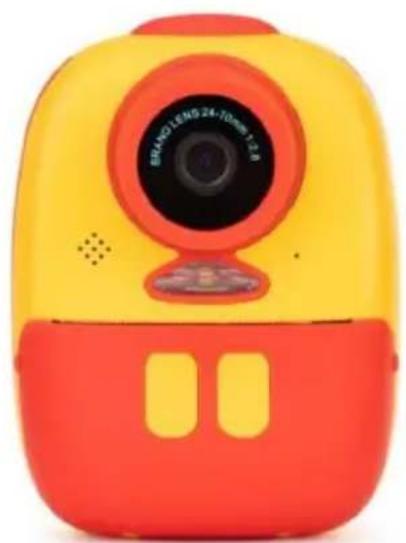
Colorful cartoon-style camera with yellow body, red front panel, and black camera lens (no text or symbols visible)KIDS INSTANT PRINT CAMERA
KAKIDINCMRA, KAKIDINCMPA, KAKIDINCMRB, KAKIDINCMPB

WARNING:
CHOKING HAZARD - Small parts.

Warning! Not for children under 3 years. Contains small parts.
Warning
- As small parts are included, it is not suitable for children below 3 years old.
- Keep away from fire sources when using.
- Children should be supervised by an adult when using this device.
- The device should only be charged by an adult or under the supervision of an adult.
- The charger is not a toy. Ensure the device is charged only with an 5V/2A USB adapter.
- Ensure the charging cable is disconnected before cleaning the camera.
Attention
- The built-in 7.4V battery cannot be removed or replaced. If it is damaged, please contact Kogan.com for support assistance.
- Please keep in mind, despite the colour images and filters, this device performs black and white thermal printing only. The photos saved to the microSD card will retain all colour.
- Due to thermal printing technology, the print-outs are not archival quality and will degrade over time. For the prints to last longer, store away from heat or direct sunlight.
Note:
- The thermal printing paper rolls supplied by Kogan.com (provided with this camera and additional rolls sold separately) are BPA-free to ensure a safe product for children. We recommend only using these BPA-free rolls.
- The camera will not turn on when the reset switch is set to 'OFF' position. When reset function is used, switch to 'OFF' and then back to 'ON'.
COMPONENTS
natural_image
Colorful children's phone with yellow and red casing, camera lens visible (no text or symbols)A Instant print camera (x1)

natural_image
Close-up of two white circular objects with black circular centers, resembling stylized buttons or gauges (no text or symbols visible)B 57mm x 25mm BPA-free print rolls (x2)

natural_image
Colorful cartoon-style icons arranged on a yellow background, including butterfly bow, wings, hearts, and stars (no text or symbols)C Sticker set (x1)

natural_image
Six colored and white marker pens arranged in a row (no text or symbols visible)D Coloured marker pens (x5)
natural_image
Coiled white cable with a small metallic connector at the top (no text or symbols visible)E USB-C charging cable (x1)

natural_image
Three white disposable clothing items with smiling face icons, arranged diagonally (no text or symbols visible)F Lanyard (x1)
G User guide (x1)
OVERVIEW
Front:

Rear:

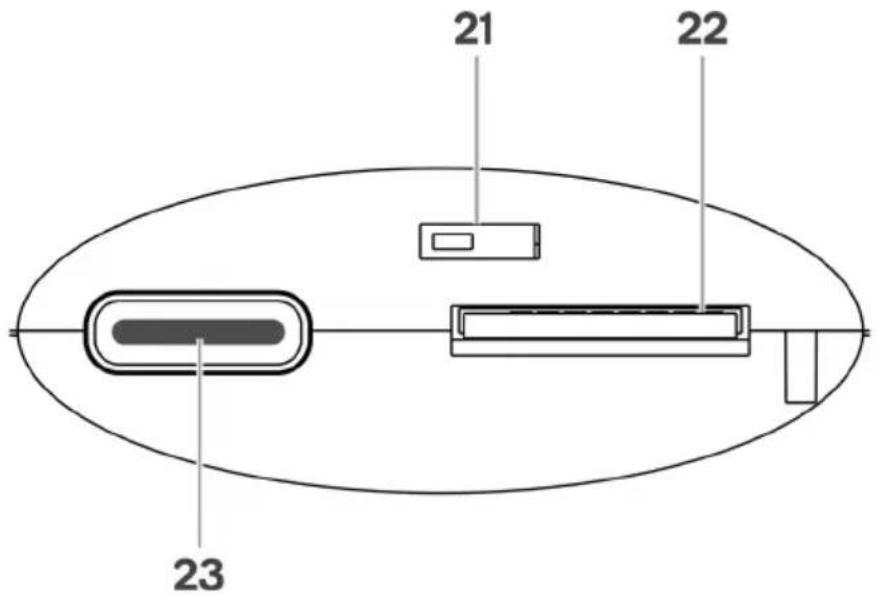
Top of camera, below safety cover:
| 1 Front lens 9 | Photo/Video switch button | 17 | Flash/Light | |
| 2 Display | 10 | OK button | 18 | Printer output slot |
| 3 Settings button | 11 | Down button | 19 | Pull tab (for paper compartment) |
| 4 Power (on/off) button | 12 | Playback button | 20 | Paper compartment |
| 5 Print button | 13 | Shutter button | 21 | Reset switch |
| 6 Front/Rear lens switch button | 14 | Rear lens | 22 | microSD card slot |
| 7 Indicator light | 15 | Speaker | 23 | Charging port (USB-C) |
| 8 Up button | 16 | Microphone | ||
Note:
The camera will not turn on when the Reset switch (21) is set to 'OFF' position. When reset function is used, switch to 'OFF' and then back to 'ON'.
GETTING STARTED
Loading the printer paper
Use the pull tab to open the paper compartment. Insert the roll of thermal printer paper (57mm x 25mm) into the paper compartment, ensuring the roll is facing the same direction as shown in the image below (rolling under then back from above).
Fit the roll so some of the paper is feeding out through the slot, then close the paper compartment and tear off the excess paper exposed on the outside.

natural_image
Technical line drawing of a digital camera with two views: one showing a cylindrical body and the other showing a rectangular lens (no text or symbols)Correct direction for thermal paper roll
Installing microSD card
The SD card slot is below the safety cover at the top of the camera. This device will not work with a card above 32GB capacity. To eject the card, push inward.
Charging the camera
Insert a USB-C cable into the charging port at the top of the camera (below safety cover), and connect the other end into a USB power adapter (5V/2A). Once power is connected, the camera will begin charging.
The indicator light is Red while charging is in progress, and will turn off when fully charged.
The camera will give a low battery prompt when further charging is required.
Powering on
Once fully charged, press the Power button once to turn the camera on. By default, it will start in Photo mode, with the rear lens.
OPERATION
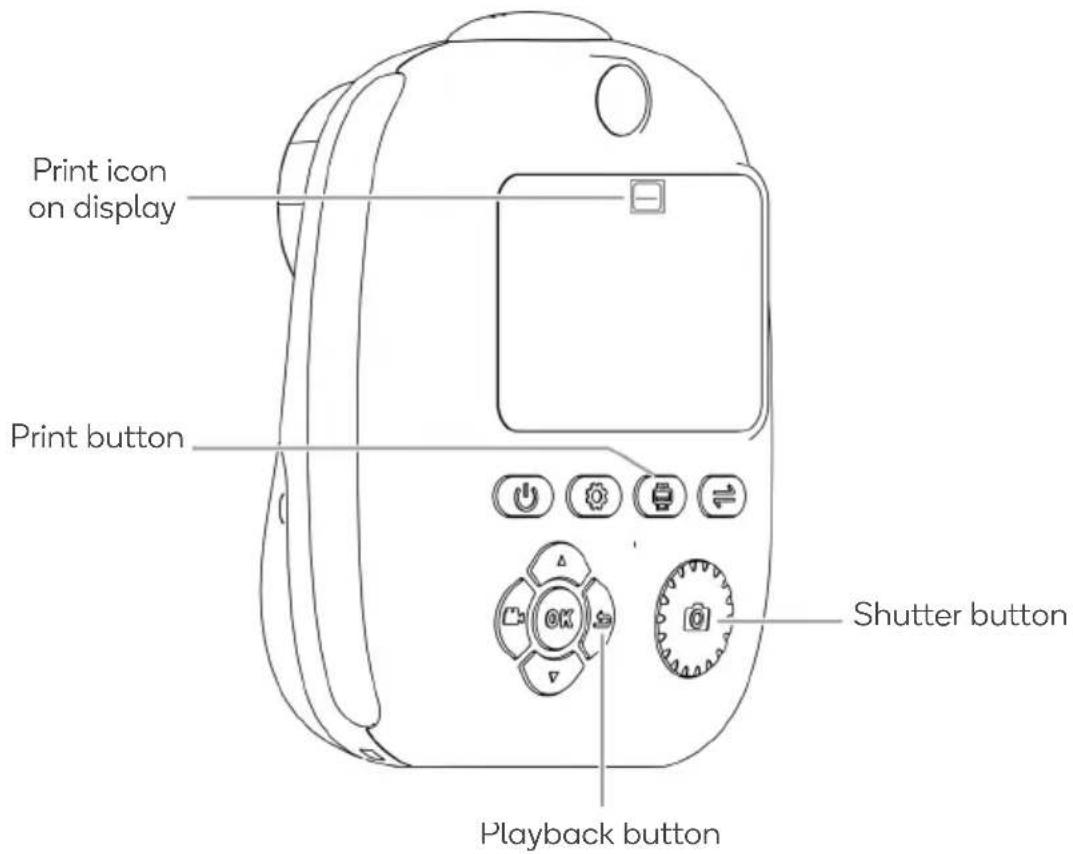
Instant printing
- Press Print button 📋 until the 'print' icon appears on the display screen.
- Press the Shutter button Ⓤ to take a photo. In this setting, the photo will immediately print out.
Note:
If you do not want every photo to print, press the Print button until the 'print' icon does not appear on the display. In this setting, photos can only be printed manually from the Playback menu.
Printing from playback menu
- Press Playback button 📋 to enter playback menu.
- Press Up/Down buttons to select previous images.
- Press Print button ⚙ to print selection.
Switching front-facing and rear-facing lens
- Press the Front/Rear lens switch button to switch the active lens.
- Press Playback button 📋 to review photos taken with the rear-facing lens.
Recording video
- Press Photo/Video switch button 📂 to enter Video mode.
- Press Front/Rear lens switch button ⇌ to switch the active lens.
- Press Shutter button 📄 to begin recording. Press Shutter button again to save the video and stop recording.
- Press Playback button 📋 to view recorded videos. Press the Shutter button 📄 to play the video in the Playback menu.
Filters
Press the Up/Down buttons to cycle through different filter options. Filters overlay a fun scene or border to your image, with different options available between front and rear cameras. To quickly return to default (no filter) option, press the Front/Rear Lens switch button twice, to swap quickly back to the current lens with no filter.
Note that while the full colour of the scenes/filters will be saved to the SD card (and exportable to other devices in this format), the printer will only print black and white.
Delete
- Press Playback button 📋 to enter playback menu. Press Up/Down buttons to select saved images or videos.
- Press Settings button 📋 to bring up the Delete option. Use the Up/Down buttons to select 'OK' or 'Cancel'.
- Press OK button ☐ while 'OK' is selected to delete the selected image or video.
Reset
If the camera becomes non-responsive or shows difficulty operating, the Reset switch acts as a manual override to turn the power completely off and then back on. Slide the Reset switch to 'OFF', then slide back to 'ON' before pressing the power button to turn the camera back on. If the switch is left set to 'OFF', it will not turn on.
SETTINGS
To access the settings menu, press the Settings button ⚙️.
Use the Up/Down buttons to navigate the different menu options, and press OK button Ⓜ to enter the selected submenu to edit the settings. Press OK button to confirm selection and exit the submenu.
To exit without saving, press the Playback button.
Print shade
Select from High, Medium or Low to adjust the depth of the print-outs. Low setting has a lighter print out, High setting is darker.
Resolution
Select between HD (high definition) or FHD (Full high definition) for the recording resolution. The higher the resolution, the more space on the memory card this will use.
Delay photo
Also known as an auto-timer or self-timer, this allows the user to set a delay between when the Shutter button is pressed and when the photo is taken. Select between 3 seconds, 5 seconds, or 10 seconds. To disable, select Off.
Three photos
Also known as burst shots, this takes and saves 3 photos within approximately 2 seconds.
Cyclic record
This setting applies to video mode only. When enabled, this allows videos to continuously record while saving as short clips. Select between 3 minute, 5 minute, or 10 minute intervals. When video is recording, the device will automatically save the current video and begin recording the next once the selected time has passed. This is ideal for recording long videos indefinitely, without needing to manually stop and save clips. It also ensures smaller, easier to manage files rather than one long clip.
Scene
Scenes will overlay a colour across the image, allowing for enhanced detail in low-light and sunny conditions. Select between Auto (default), Sunlight, Cloudy, Tungsten, or Fluorescent. Filters can be applied over scene settings.
Purikura
“Purikura” refers to the Filters, as described in the Operation section. Here they can be set manually, as a list from 1 - 35.
Photo zoom
When enabled, the rear-facing camera will be set in zoom mode, allowing items further in distance to be seen from the lens.
Date tag
When enabled, this will save the current date and time onto the photo as it is taken. Date tags cannot be added or removed from photos that have already been taken. To adjust the date and time information, refer to Time Setting option.
Beep sound
Select the volume of the buttons/functions. Choose between high volume, low volume or off (silent) options.
LED flash
Set the mode for the camera's rear-facing flash/light, selecting between Off, On, or Always On. Always On allows the light to stay on as long as the camera is powered on, even when not taking photos or video.
Time
Set the device's year/month/day/time data.
Auto Power Off
When set, the camera will automatically power down after not being used for the set time (select between 3, 5 or 10 minutes). Set to ‘Off’ to disable this, but note that the battery life will be shorter if left on.
Language settings
Select the desired menu/on-screen display language. Select from English, 简体中文,繁醴中文, Deutsch, Français, Italiano, Español, 日本語, 한국어, русски, Polski, and čeština.
Format
Format the microSD card. Warning that this will erase any data currently saved.
Reset system
Select this to reset all settings to the factory default.
TROUBLESHOOTING
| Issue Cause | Possible solution | |
| The camera will not turn on, even when fully charged. | Reset switch is engaged in the ‘OFF’ position. | Slide Reset switch on the base of the device to ‘ON’. |
| Photos and videos aren’t saving, even though I have a microSD card inserted. | The installed microSD card exceeds 32GB. | Use a smaller capacity microSD card. |
| The paper roll is getting jammed when trying to print. | The roll of thermal printer paper is not installed correctly. | Refer to the image in the Getting Started page to see correct install position. |
| The image prints out too light / too heavy. | Printing settings not refined in settings menu. | Refer to Settings > Printing Colour Setting submenu and adjust as required. |
| Poor printing quality |
SPECIFICATIONS
Net weight 251g
Charging USB Type-C, 5V/2A
Battery capacity 1000mAh
Working time 1.7h for video recording
microSD card capacity Max 32GB
Max photo dimensions 4032 x 2880
Resolution 72 dpi
Video resolution 1920 x 1080
Camera size 123 x 87.4 x 59mm
Paper roll size 57mm x 25mm
Printed image size 48 x 65mm
Printing colours Black and white
NOTES
Need more information?
We hope that this user guide has given you the assistance needed for a simple set-up.
For the most up-to-date guide for your product, as well as any additional assistance you may require, head online to help.kogan.com
kogan.com


- KIDS INSTANT PRINT CAMERA
- WARNING:
- Warning
- Attention
- Note:
- COMPONENTS
- OVERVIEW
- GETTING STARTED
- Loading the printer paper
- Installing microSD card
- Charging the camera
- Powering on
- OPERATION
- Instant printing
- Printing from playback menu
- Switching front-facing and rear-facing lens
- Recording video
- Filters
- Delete
- Reset
- SETTINGS
- Print shade
- Resolution
- Delay photo
- Three photos
- Cyclic record
- Scene
- Purikura
- Photo zoom
- Date tag
- Beep sound
- LED flash
- Time
- Auto Power Off
- Language settings
- Format
- Reset system
- TROUBLESHOOTING
- SPECIFICATIONS
- NOTES
- Need more information?
Brand : Kogan
Model : KAKIDINCMPB
Category : Camera