PD1012 - Projector VIEWSONIC - Free user manual and instructions
Find the device manual for free PD1012 VIEWSONIC in PDF.

User questions about PD1012 VIEWSONIC
0 question about this device. Answer the ones you know or ask your own.
Ask a new question about this device
Download the instructions for your Projector in PDF format for free! Find your manual PD1012 - VIEWSONIC and take your electronic device back in hand. On this page are published all the documents necessary for the use of your device. PD1012 by VIEWSONIC.
USER MANUAL PD1012 VIEWSONIC
Following information is only for EU-member states:
The mark shown to the right is in compliance with the Waste Electrical and Electronic Equipment Directive 2002/96/EC (WEEE).
The mark indicates the requirement NOT to dispose the equipment as unsorted municipal waste, but use the return and collection systems according to local law.
If the batteries, accumulators and button cells included with this equipment, display the chemical symbol Hg, Cd, or Pb, then it means that the battery has a heavy metal content of more than 0.0005% Mercury or more than, 0.002% Cadmium, or more than 0.004% Lead.

Important Safety Instructions
- DO NOT place objects on top of the device, as objects may scratch the screen.
- DO NOT expose the device to dirty or dusty environments.
- DO NOT place the device on an uneven or unstable surface.
- DO NOT insert any foreign objects into the device.
- DO NOT expose the device to strong magnetic or electrical field.
- DO NOT expose the device to direct sunlight as it can damage the LCD Screen. Keep it away from heat sources.
- DO NOT use the device in the rain.
- Please check with your Local Authority or retailer for proper disposal of electronic products.
- The device may produce some heat during normal operation or charging. To prevent discomfort or injury from heat exposure, DO NOT leave the device on your lap.
- POWER INPUT RATING: Refer to the rating label on the device. Only use accessories specified by the manufacturer.
- DO NOT use any sharp object to tap the screen.
- Clean the touch screen with a soft cloth. If needed, dampen the cloth slightly before cleaning. Never use abrasives or cleaning solutions.
- Disconnect the device from an electrical outlet and power off before cleaning the device.
- DO NOT disassemble the device. Only a certified service technician should perform repair.
- Users have to use the connection to USB interfaces with USB 2.0 version or higher.
Declaration of RoHS2 Compliance
This product has been designed and manufactured in compliance with Directive 2011/65/EU of the European Parliament and the Council on restriction of the use of certain hazardous substances in electrical and electronic equipment (RoHS2 Directive) and is deemed to comply with the maximum concentration values issued by the European Technical Adaptation Committee (TAC) as shown below:
| Substance | Proposed Maximum Concentration | Actual Concentration |
| Lead (Pb) 0.1% < 0.1% | ||
| Mercury (Hg) 0.1% < 0.1% | ||
| Cadmium (Cd) 0.01% < 0.01% | ||
| Hexavalent Chromium ( Cr^6+ ) 0.1% < 0.1% | ||
| Polybrominated biphenyls (PBB) 0.1% < 0.1% | ||
| Polybrominated diphenyl ethers (PBDE) | 0.1% < 0.1% |
Certain components of products as stated above are exempted under the Annex III of the RoHS2 Directives as noted below:
Examples of exempted components are:
- Mercury in cold cathode fluorescent lamps and external electrode fluorescent lamps (CCFL and EEFL) for special purposes not exceeding (per lamp):
(1) Short length ( ≤ 500 mm): maximum 3.5 mg per lamp.
(2) Medium length (>500 mm and ≤ 1,500 mm): maximum 5 mg per lamp.
(3) Long length (>1,500 mm): maximum 13 mg per lamp.
- Lead in glass of cathode ray tubes.
- Lead in glass of fluorescent tubes not exceeding 0.2% by weight.
- Lead as an alloying element in aluminium containing up to 0.4% lead by weight.
- Copper alloy containing up to 4% lead by weight.
- Lead in high melting temperature type solders (i.e. lead-based alloys containing 85% by weight or more lead).
- Electrical and electronic components containing lead in a glass or ceramic other than dielectric ceramic in capacitors, e.g. piezoelectronic devices, or in a glass or ceramic matrix compound.
Copyright Information
Copyright © ViewSonic Corporation, 2014. All rights reserved.
ViewSonic and the three birds logo are registered trademarks of ViewSonic Corporation.
Disclaimer: ViewSonic Corporation shall not be liable for technical or editorial errors or omissions contained herein; nor for incidental or consequential damages resulting from furnishing this material, or the performance or use of this product.
In the interest of continuing product improvement, ViewSonic Corporation reserves the right to change product specifications without notice. Information in this document may change without notice.
No part of this document may be copied, reproduced, or transmitted by any means, for any purpose without prior written permission from ViewSonic Corporation.
Product Registration
To meet your future needs, and to receive any additional product information as it becomes available, please register your product on the Internet at: www.viewsonic.com.
For Your Records
Product Name: PD1012
ViewSonic Pen Display
Model Number: VS15685
Document Number: PD1012_UG_ENG Rev. 1A 04-07-14
Serial Number:
Purchase Date:
Product disposal at end of product life
ViewSonic respects the environment and is committed to working and living green. Thank you for being part of Smarter, Greener Computing. Please visit ViewSonic website to learn more.
USA & Canada: http://www.viewsonic.com/company/green/recycle-program/
Europe: http://www.viewsoniceurope.com/uk/support/recycling-information/
Taiwan: http://recycle.epa.gov.tw/recycle/index2.aspx
Contents
Compliance Information...... i
Important Safety Instructions....ii
Declaration of RoHS2 Compliance......iii
Copyright Information iv
Product Registration......iv
- Introduction......1
1.1 Packing List....1
1.2 Product Overview....1
- Installation and Setup....3
2.1 Installing the Driver....3
2.2 Setting the display area....6
2.3 Handwriting Area Mapping 7
2.4 More Touch Function Settings....9
- Troubleshooting....11
3.1 Monitor problems.... 11
3.2 Interactive Pen Problems ...... 12
3.3 Control key Problems....12
- Product Specification....13
4.1 Monitor 13
4.2 Interactive Pen 14
- Appendix....15
5.1 Replacing a pen tip....15
Customer Support ....16
Limited Warranty ....17
1. Introduction
1.1 Packing List
After unpacking, make sure that all of the following contents are included:
- Pen Display
- Quick Start Guide
- Software CD
● Micro USB 3.0 Y-type Cable
● Mini USB 2.0 - USB Canle - Pen tip replacement tool
- Interactive Pen
- Pen tip x 3
● Warranty catd (For China only) - Pen Strap
If there is a defect or missing part, please contact your dealer.
1.2 Product Overview
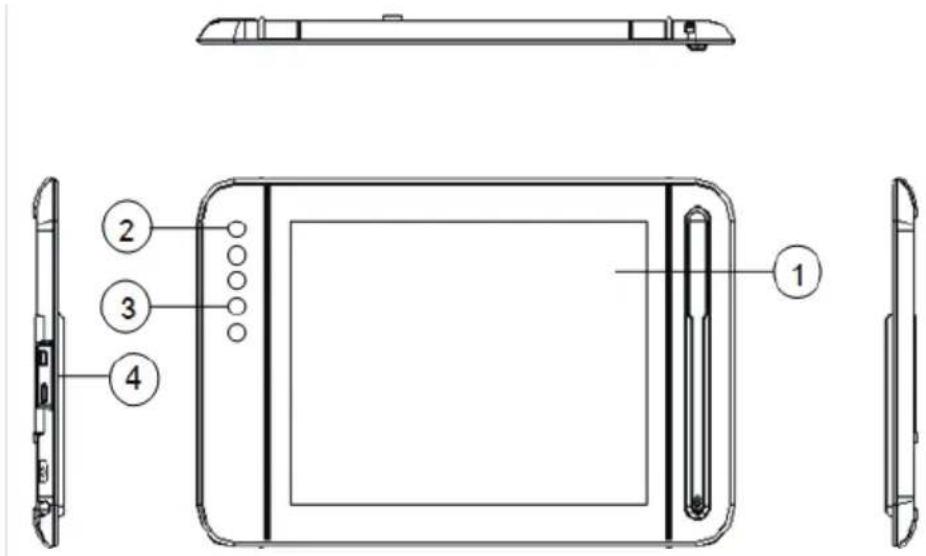
1.2.1 Front and Side View
text_image
Technical diagram of a device with labeled parts including front, side, and top views① Display and pen touch area.
② Power button and Light indicator: Red for no signal input; Blue for screen on; Blank for no power or when screen is turned off.
③ Control key buttons: 1-[Left-Shift], 2-[Left-Ctrl], 3-[Left-Alt], 4-[Space].
④ P1 Port: It is Mini-B type for signal input.
P2 Port: It is Micro-B type for power input (In addition to using the Micro 3.0 main power supply, you can also use an external power supply. Please refer to the specification page for the recommended power adapter.)
1.2.2 Rear View
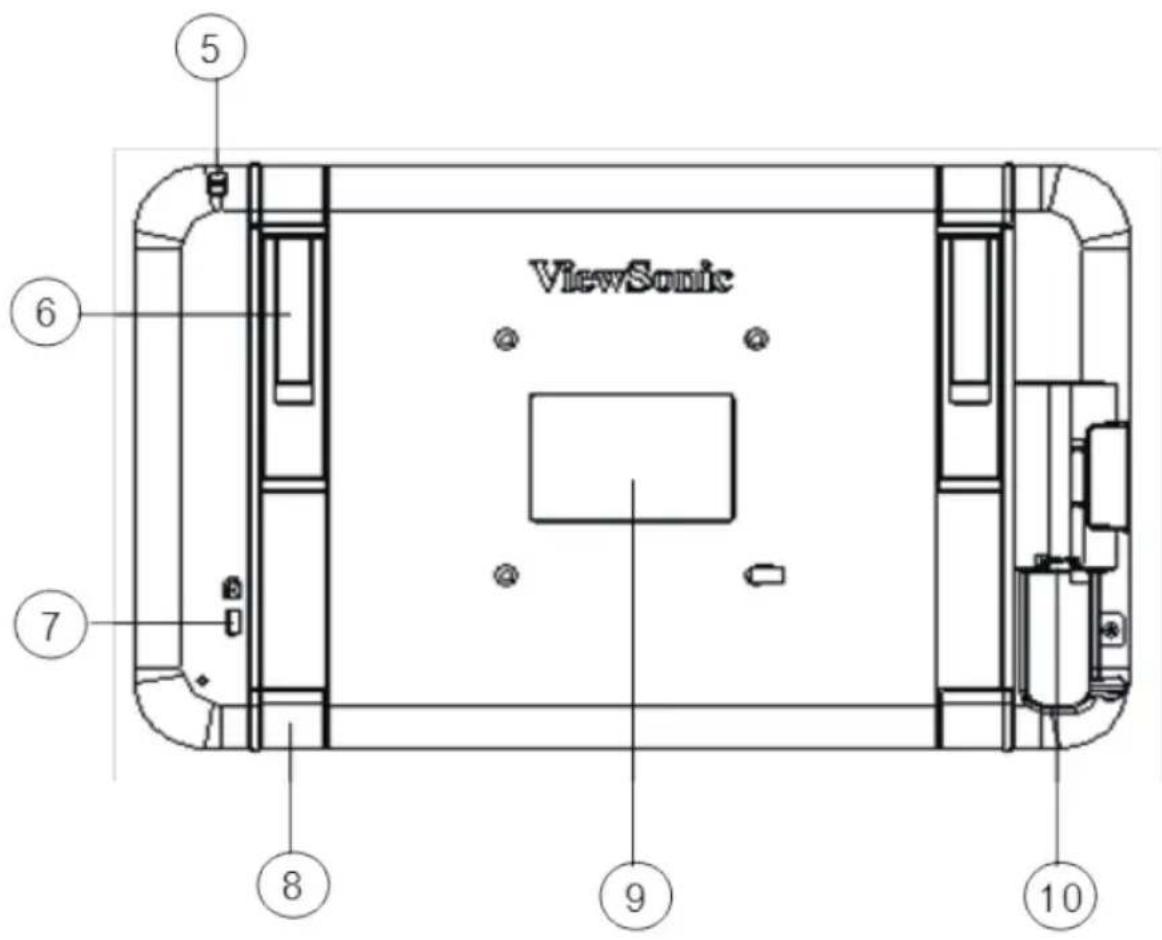
text_image
ViewSonic ⑤ ⑥ ⑦ ⑧ ⑨ ⑩⑤ Interactive pen holder strap
⑥ Stand (x2)
⑦ Kensington lock
⑧ Foot rubber (x4)
⑨ Rear label
⑩ Micro 3.0 Port: for signal input and power supply
Caution: Avoid the risk of electric shock. Do not open the housing by yourself. Please contact maintenance personnel if any problem countered.
1.2.3 Interactive Pen
The interactive pen uses electromagnetic resonance technology, and is battery free.
2. Installation and Setup
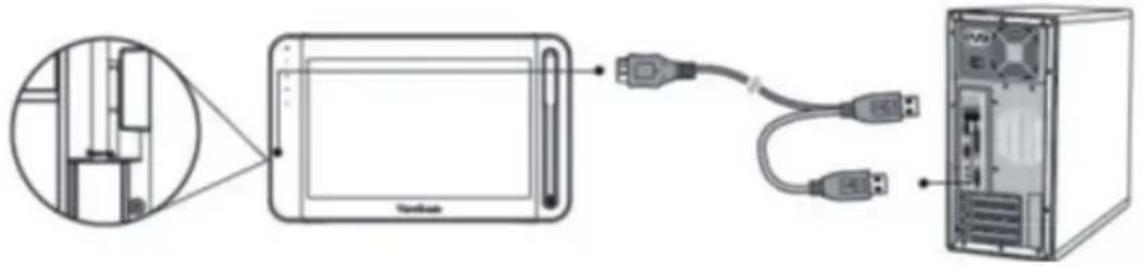
2.1 Installing the Driver
Use the included Micro USB 3.0 Y-type cable to connect the device to your desktop or notebook PC, as shown below. The screen will be off, but the red LED indicator light will turn on.
text_image
Diagram showing a device connection to a server, with an inset close-up of the device's screen and cable routing.Note: When connecting the device to a PC/NB, plug in both of the USB connectors to make sure there is sufficient power.
2.1.1 Installing DisplayLink display drivers and software
(Recommendation: When installing the DisplayLink driver, please make sure the Pen Display is connected to your PC or notebook.)
1) Open the accompanying driver and software CD, click on DisplayLink_xx.exe to start the installation on Windows (For installation on Mac OS, click Displaylink Installer-xx.dmg). After installation you may be prompted to restart your computer.

text_image
DisplayLink Core Software Preparing to install... CancelNote: The latest DisplayLink DisplayLink driver is available for free download at: http://www.displaylink.com/support/downloads.php
2.1.2 Handwriting driver installation
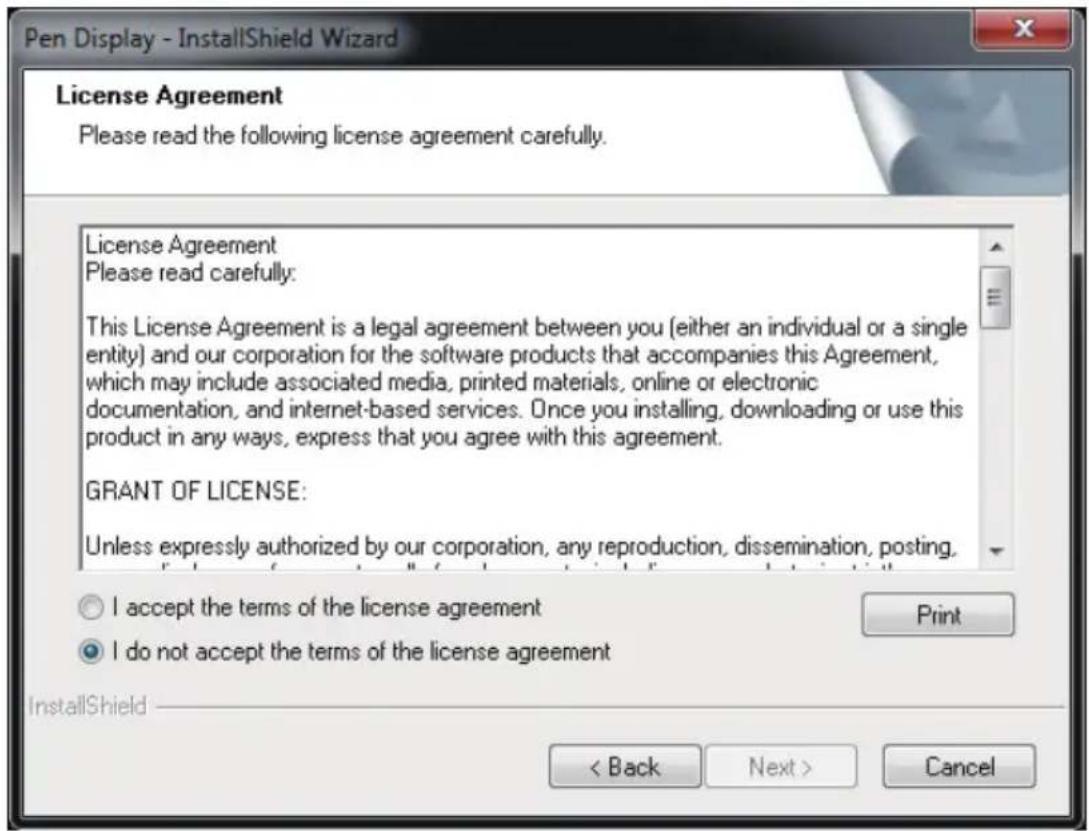
1) Open the driver CD, and click on Pen Display xxx.exe to start installation on Windows. For installation on Mac OS, click Installxxx.dmg.
text_image
Pen Display - InstallShield Wizard License Agreement Please read the following license agreement carefully. License Agreement Please read carefully: This License Agreement is a legal agreement between you (either an individual or a single entity) and our corporation for the software products that accompanies this Agreement, which may include associated media, printed materials, online or electronic documentation, and internet-based services. Once you installing, downloading or use this product in any ways, express that you agree with this agreement. GRANT OF LICENSE: Unless expressly authorized by our corporation, any reproduction, dissemination, posting. I accept the terms of the license agreement I do not accept the terms of the license agreement < Back Next > Cancel2) ClickInstall to begin the installation.
text_image
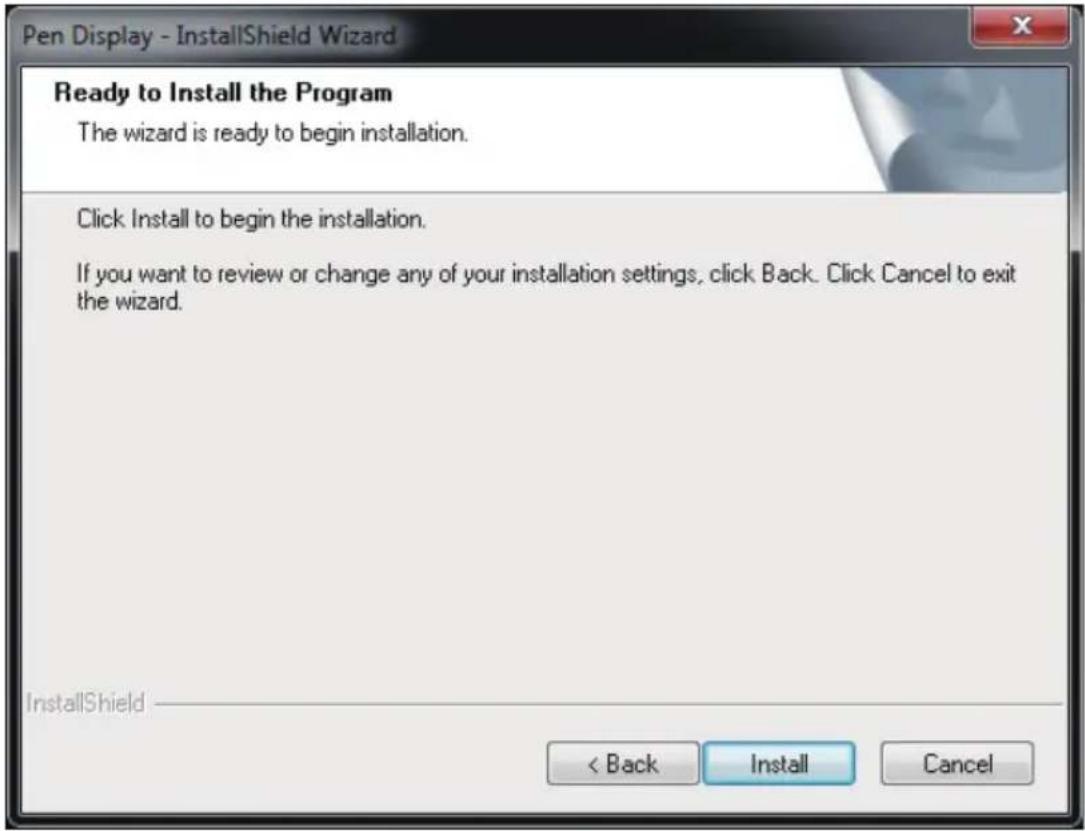
Pen Display - InstallShield Wizard Ready to Install the Program The wizard is ready to begin installation. Click Install to begin the installation. If you want to review or change any of your installation settings, click Back. Click Cancel to exit the wizard. InstallShield < Back Install Cancel3) After complete the installation, you need restart your PC.
text_image
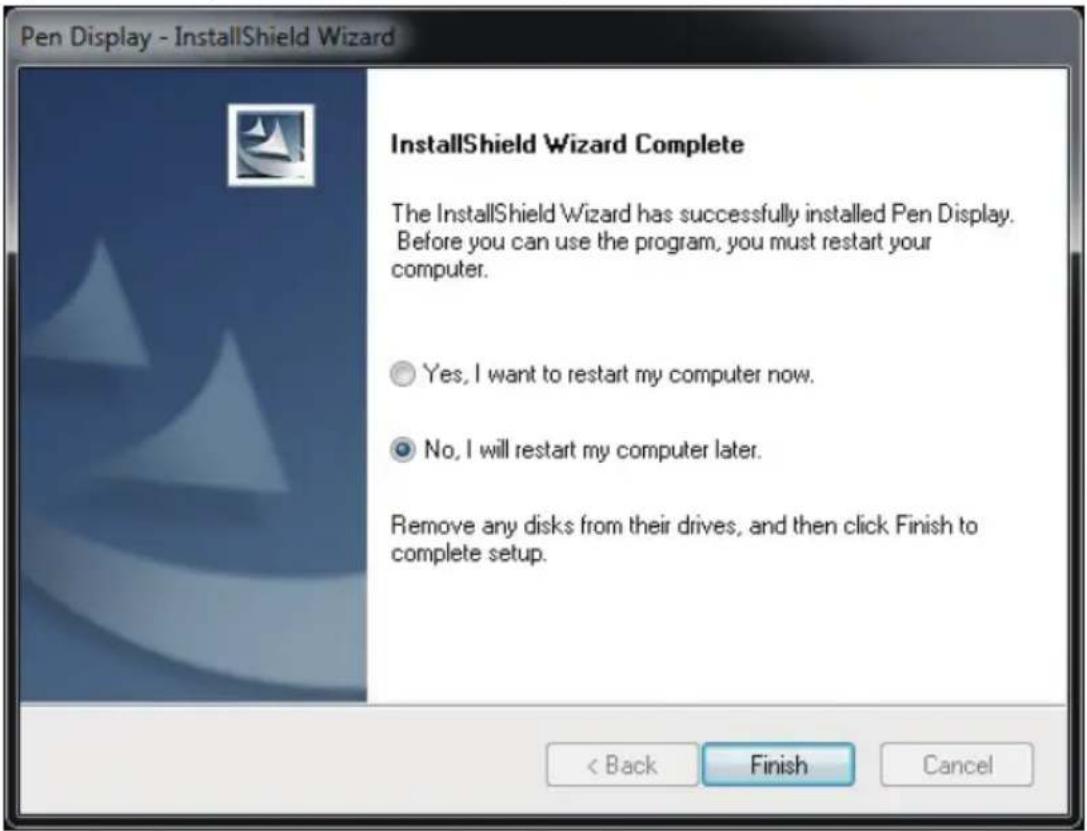
Pen Display - InstallShield Wizard InstallShield Wizard Complete The InstallShield Wizard has successfully installed Pen Display. Before you can use the program, you must restart your computer. Yes, I want to restart my computer now. No, I will restart my computer later. Remove any disks from their drives, and then click Finish to complete setup. < Back Finish Cancel2.2 Setting the display area
Setup environment for Windows 7/8
To access the setup window, click Start → Control Panel → Display → Adjust Resolution.

text_image
Control Panel > All Control Panel Items > Display > Screen Resolution Change the appearance of your displays Detect Identify Display: 2. PD1012 Resolution: 1280 x 800 (recommended) Orientation: Landscape Multiple displays: Extend these displays This is currently your main display. Advanced settings Make text and other items larger or smaller What display settings should I choose? OK Cancel Apply1) When installing your PD1012 device, you will also see additional options for configuring multiple displays.
2) There are 4 multiple display options to choose from:
a. Duplicate the display screen: in mirror display mode, the same resolution will appear on both the main and duplicate screens.
b. Extend the display: the display will be extended to the right (default setting).
c. Show desktop on screen 1: only shows the desktop on the main monitor.
d. Show desktop on screen 2: only shows the desktop on the extend monitor.
3) Select Extend these displays then press OK to exit.
2.3 Handwriting Area Mapping
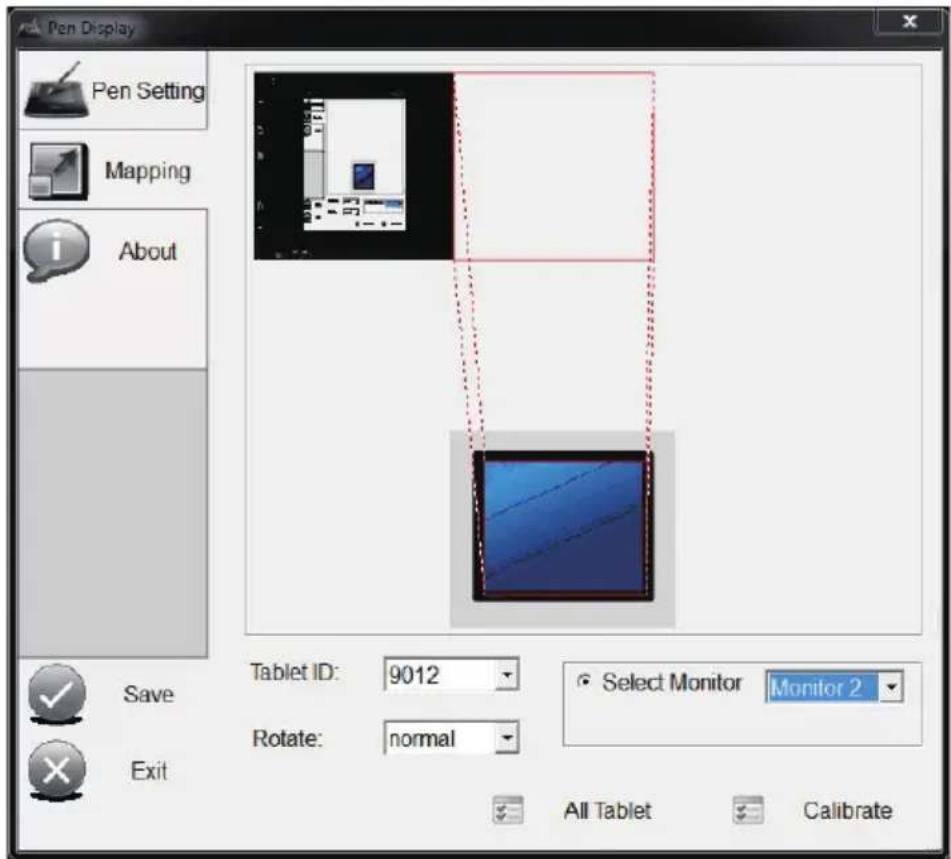
1) Press Start, select and click on Pen Display.
2) Enter Mapping and set Select Monitor as Monitor 2.
text_image
Pen Display Pen Setting Mapping About Save Exit Tablet ID: 9012 Rotate: normal Select Monitor Monitor 2 All Tablet CalibrateNote:
- The pen's accuracy has been fine-tuned during production. If needed, click Calibrate to adjust it manually.
- When the desktop computer is connected to the PD1012 and general display, manually select the appropriate rotation for monitor 2.
3) Use the pen display to draw inside the dialog box that is displayed on-screen to test and set the pressure sensitivity level. The sensitivity parameter can be adjusted by using the little wheel on the Try Here screen in Pen Setting interface.

text_image
Pen Display Pen Setting Mapping About Save Exit Profile Try Here Clean Disable Press Parameter Setting 100 Default Nib Pressure Sensitivity Right Key Double Click Key4) Click Save then Exit to complete the setting procedure.
Note: The pen supports multiple pressure levels. Select a pressure-sensitive tool from your application's tool palette: when you press the pen tip lightly, softer color or thinner lines will show. Press harder and dense color or thicker lines will appear.
2.4 More Touch Function Settings
This section covers all of the built-in touch functions for Windows 7 and 8 operating systems.
2.4.1 Pen and Touch
Click Start → Control Panel → Pen and Touch → Flicks tab.

text_image
Pen and Touch Pen Options Flicks Handwriting ✓ Use flicks to perform common actions quickly and easily ● Navigational flicks ○ Navigational flicks and editing flicks Customize... Sensitivity You can adjust how easily your flicks are recognized. A more relaxed setting may lead to accidental flicks. Relaxed Precise ✓ Display flicks icon in the notification area Practice using flicks OK Cancel Applya. Pen Options: When using the stylus on the screen, you can adjust the movement and pen button settings.
b. Flicks: You can use the pen display to quickly and easily perform brush strokes on-screen.
c. Handwriting: You can select Use Automatic Learning or Don't use automatic learning and delete all previously collected data.
2.4.2 Tablet PC Settings
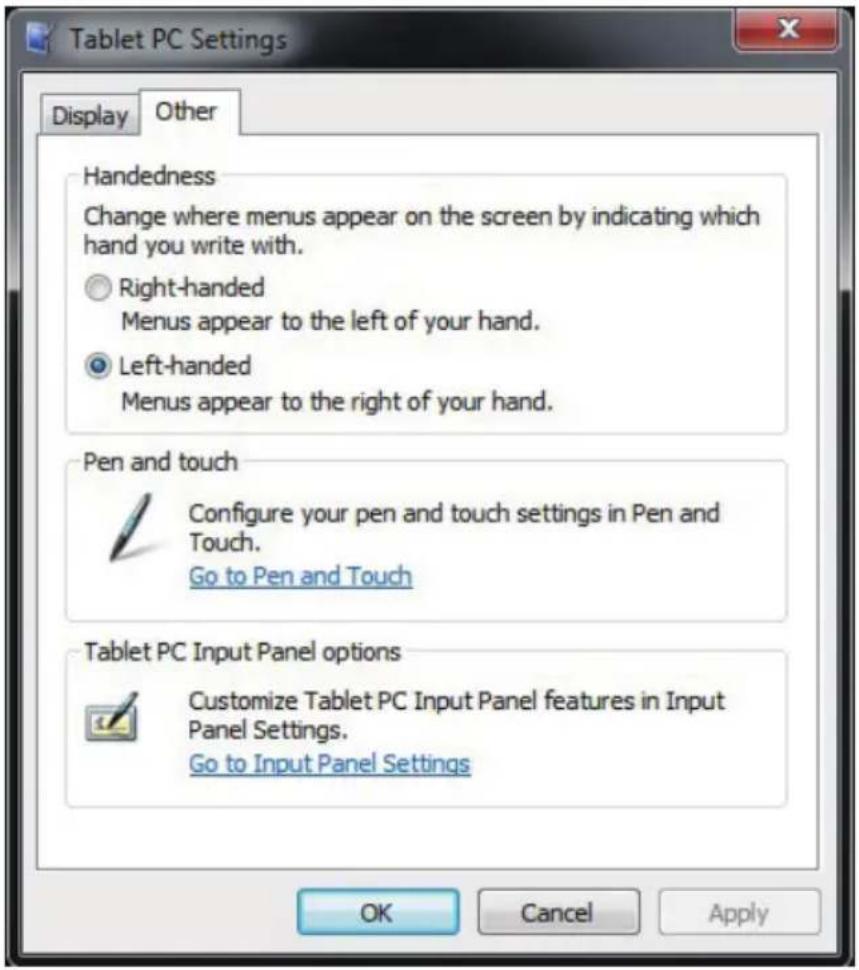
Click Start → Control Panel → Tablet PC Settings → Other tab → Go to Input Panel Settings.
text_image
Tablet PC Settings Display Other Handedness Change where menus appear on the screen by indicating which hand you write with. Right-handed Menus appear to the left of your hand. Left-handed Menus appear to the right of your hand. Pen and touch Configure your pen and touch settings in Pen and Touch. Go to Pen and Touch Tablet PC Input Panel options Customize Tablet PC Input Panel features in Input Panel Settings. Go to Input Panel Settings OK Cancel ApplyThese settings can be used to customize the following Tablet PC Input Panel features.
- Handwriting: Line width and writing spacing settings.
- Ink to text conversion: Handwriting recognition settings.
• Text completion: Auto-Complete and Predictive settings.
• Advanced: Gestures or Action settings.
3. Troubleshooting
3.1 Monitor problems
| Problems Suggested action | |
| No picture * Check USB cable should be completely connected to the computer and monitor.* Try another USB port of PC.* Check computer whether are in dormancy mode. Press keyboard or move the mouse to reactivate the system.* Press Screen power button to make sure the screen turned on.* Try adjusting the brightness.* Check that the computer is switched on.* If you use laptop PC, check that the external (RGB) output is selected.* Check that the DisplayLink Driver has been installed.* Check that there is only one graphics card inside your PC and make sure it is not SIS graphics card. | |
| Dark screen * Adjust the brightness control.* Backlight degradation after being used for a long period may cause lower screen brightness. | |
| Picture noise * Other electrical devices may cause electrical interference. | |
| Picture is fuzzy * Optimal picture quality is at native 1280 x 800 resolution. | |
| Others * Make sure your PC meets the minimum requirements and use the proper power supply. *** Check if your drivers of graphics card and USB 3.0 are up to date.* Check if you have installed any incompatible software. |
** Recommended minimum requirements for Hardware:
| CPU 1.2G above, and supports SSE2. | |
| RAM 2G above. | |
| Graphics card | Microsoft DirectX9 (Win8.1, DirectX10) above, and the driver supports WDDM. |
| Power adapter | When using P2 port for power input, please make sure using 5V/1.5A power adapter in order to meet the China MEPS I level. |
3.2 Interactive Pen Problems
| Problems Suggested action | |
| The pen is no function | * Try using mouse to double check, if mouse also no function, please restarting your computer or your application.* Try to reinstall the driver. |
| Pen tip is too short | * Check whether the pen tip is too short. If yes, replace the pen nib. |
| The cursor move incorrectly | * Eliminate interference from nearby electrical devices.* Try restarting your computer for double check.* Make sure the two-end side of USB cable is connected to PC simultaneously. |
3.3 Control key Problems
| Problems Suggested action | |
| The keys are no function | * Make sure your PC has found the device (depend on the PC settings, it usually takes about 10 sec. to identify when turn on the device.).* Try to restart your PC or turn of the screen once again. |
| The key action is incorrectly | * Make sure you don’t press the other buttons. |
Caution: Avoid the risk of electric shock. Do not open the shell by yourself. Please contact the local technical support and/or agency where you purchased the product, if you need further support.
4. Product Specification
4.1 Monitor
Display
| Type 10.1” TFT LCD, LED, Built-in interactive electromagnetic display modules Resolution 1280 x 800, 1024 x 768, 800 x 600, 640 x 480 @ 60 Hz |
Connector
| USB P1: Mini-B | type for signal input (USB2.0)P2: Micro-B type for power input (5V/1.5A (Max) power adapter is recommended);Micro3.0: Micro-B type for signal input (USB3.0) and power input |
User Controls
| Control keys Screen power, 1 [Left-Shift], 2 [Left-Ctrl], 3 [Left-Alt], 4 [Space] |
Power supply
| Input DC5V/0.9A (Micro 3.0), DC5V/1.5A (P2) | |
| Power | Tablet Monitor mode: |
| Consumption | On: 4.5W (Micro 3.0); 7.5W (P2)Standby: < 1W |
Physical
| Unit dimension | 297.36 mm x 186.91 mm x 17.02 mm |
| Unit weight Net | 0.64 kg, Gross 1.29 kg |
Environmental
| Temperature | Operating: 0°C ~ +40°C |
| Range | Storage: -20°C ~ +60°C |
| Relative | Operating: 20% ~ 80% |
| Humidity | Storage: 10% ~ 90% |
4.2 Interactive Pen
Type
| Technology methodActive area | Electromagnetic resonance methodFull screen |
Technical Specs
| Resolution 5080LPI (line per inch) |
| Tracking speed 220 PPS (points per second) |
| Pressure sensitive 2048 levels |
| Accuracy ± 0.5 mm (center), ± 2 mm (edge and corner) |
| Height readable 10 mm |
Pen
| Type Pressure-sensitive, cordless Detectable pen tilt Tilt range ± 50°User controls (switch) 1 side switchesTip Replaceable |
Note: Specification may be subject to change without prior notice.
5. Appendix
5.1 Replacing a pen tip
When the pen tip gets too short or develops a sharp edge, it can be replaced with spare tips. To replace a pen tip, follow the steps below:
1) Use a tool (such as needle-nose pliers) to pull the old tip straight out of the pen.
2) Insert a new pen tip into the stylus pen and push the tip in until it. Stops and is held firm.

natural_image
3D rendered image of a modern pen with an arrow pointing to its tip (no text or symbols visible)Customer Support
For technical support or product service, see the table below or contact your reseller.
Note : You will need the product serial number.
| Country/Region Website | T= TelephoneC = CHAT ONLINE | ||
| Australia/New Zealand | www.viewsonic.com.au | AUS= 1800 880 818NZ= 0800 008 822 | service@au.viewsonic.com |
| Canada www.viewsonic.com | T (Toll-Free)= 1-866-463-4775T (Toll)= 1-424-233-2533 | service.ca@viewsonic.com | |
| Europe | www.viewsoniceurope.com | www.viewsoniceurope.com/uk/support/call-desk/ | |
| Hong Kong www.hk.viewsonic.com T= 852 3102 2900 service@hk.viewsonic.com | |||
| India www.in.viewsonic.com T= 1800 266 0101 service@in.viewsonic.com | |||
| Korea ap.viewsonic.com/kr/ T= 080 333 2131 service@kr.viewsonic.com | |||
| Latin America (Argentina) | www.viewsonic.com/la/ | C=http://www.viewsonic.com/la/soporte/servicio-tecnico | soporte@viewsonic.com |
| Latin America (Chile) | www.viewsonic.com/la/ | C=http://www.viewsonic.com/la/soporte/servicio-tecnico | soporte@viewsonic.com |
| Latin America (Columbia) | www.viewsonic.com/la/ | C=http://www.viewsonic.com/la/soporte/servicio-tecnico | soporte@viewsonic.com |
| Latin America (Mexico) | www.viewsonic.com/la/ | C=http://www.viewsonic.com/la/soporte/servicio-tecnico | soporte@viewsonic.com |
| Nexus Hightech Solutions, Cincinnati #40 Desp. 1 Col. De los Deportes Mexico D.F.Tel: 55) 6547-6454 55)6547-6484Other places please refer to http://www.viewsonic.com/la/soporte/servicio-tecnico#mexico | |||
| Latin America (Peru) | www.viewsonic.com/la/ | C=http://www.viewsonic.com/la/soporte/servicio-tecnico | soporte@viewsonic.com |
| Macau | www.hk.viewsonic.com T= 853 2870 0303 service@hk.viewsonic.com | ||
| Middle East | ap.viewsonic.com/me/ | Contact your reseller | service@ap.viewsonic.com |
| Puerto Rico & Virgin Islands | www.viewsonic.com | T= 1-800-688-6688 (English)C = http://www.viewsonic.com/la/soporte/servicio-tecnico | service.us@viewsonic.comsoporte@viewsonic.com |
| Singapore/Malaysia/Thailand | www.viewsonic.com.sg T= 65 6461 6044 service@sg.viewsonic.com | ||
| South Africa | ap.viewsonic.com/za/ | Contact your reseller | service@ap.viewsonic.com |
| United States | www.viewsonic.com | T (Toll-Free)= 1-800-688-6688T (Toll)= 1-424-233-2530 | service.us@viewsonic.com |
Limited Warranty
VIEWSONIC® PEN DISPLAY
What the warranty covers:
ViewSonic warrants its products to be free from defects in material and workmanship, under normal use, during the warranty period. If a product proves to be defective in material or workmanship during the warranty period, ViewSonic will, at its sole option, repair or replace the product with a like product. Replacement product or parts may include remanufactured or refurbished parts or components.
How long the warranty is effective:
ViewSonic Pen Displays are warranted for 1 year for all parts and labor from the date of the first consumer purchase.
Who the warranty protects:
This warranty is valid only for the first consumer purchaser.
What the warranty does not cover:
- Any product on which the serial number has been defaced, modified or removed.
- Damage, deterioration or malfunction resulting from:
a. Accident, misuse, neglect, fire, water, lightning, or other acts of nature, unauthorized product modification, or failure to follow instructions supplied with the product.
b. Any damage of the product due to shipment.
c. Removal or installation of the product.
d. Causes external to the product, such as electrical power fluctuations or failure.
e. Use of supplies or parts not meeting ViewSonic's specifications.
f. Normal wear and tear.
g. Any other cause which does not relate to a product defect.
- Any product exhibiting a condition commonly known as "image burn-in" which results when a static image is displayed on the product for an extended period of time.
- Removal, installation, one way transportation, insurance, and set-up service charges.
How to get service:
- For information about receiving service under warranty, contact ViewSonic Customer Support (Please refer to Customer Support page). You will need to provide your product's serial number.
- To obtain warranty service, you will be required to provide (a) the original dated sales slip, (b) your name, (c) your address, (d) a description of the problem, and (e) the serial number of the product.
- Take or ship the product freight prepaid in the original container to an authorized ViewSonic service center or ViewSonic.
- For additional information or the name of the nearest ViewSonic service center, contact ViewSonic.
Limitation of implied warranties:
There are no warranties, express or implied, which extend beyond the description contained herein including the implied warranty of merchantability and fitness for a particular purpose.
4.3: ViewSonic Digitizer Warranty Page 1 of 2 DIGITIZER_LW01 Rev. 1A 10-24-12
Exclusion of damages:
ViewSonic's liability is limited to the cost of repair or replacement of the product. ViewSonic shall not be liable for:
- Damage to other property caused by any defects in the product, damages based upon inconvenience, loss of use of the product, loss of time, loss of profits, loss of business opportunity, loss of goodwill, interference with business relationships, or other commercial loss, even if advised of the possibility of such damages.
- Any other damages, whether incidental, consequential or otherwise.
- Any claim against the customer by any other party.
- Repair or attempted repair by anyone not authorized by ViewSonic.
Effect of state law:
This warranty gives you specific legal rights, and you may also have other rights which vary from state to state. Some states do not allow limitations on implied warranties and/or do not allow the exclusion of incidental or consequential damages, so the above limitations and exclusions may not apply to you.
Sales outside the U.S.A. and Canada:
For warranty information and service on ViewSonic products sold outside of the U.S.A. and Canada, contact ViewSonic or your local ViewSonic dealer.
The warranty period for this product in mainland China (Hong Kong, Macao and Taiwan Excluded) is subject to the terms and conditions of the Maintenance Guarantee Card.
For users in Europe and Russia, full details of warranty provided can be found in www.viewsoniceurope.com under Support/Warranty Information.

natural_image
Illustration of three colorful birds perched on a branch against a red background (no text or symbols)ViewSonic®