EGP-HD-0429 - Phone Excello - Free user manual and instructions
Find the device manual for free EGP-HD-0429 Excello in PDF.

User questions about EGP-HD-0429 Excello
0 question about this device. Answer the ones you know or ask your own.
Ask a new question about this device
Download the instructions for your Phone in PDF format for free! Find your manual EGP-HD-0429 - Excello and take your electronic device back in hand. On this page are published all the documents necessary for the use of your device. EGP-HD-0429 by Excello.
USER MANUAL EGP-HD-0429 Excello
EGP-HD-0360 (2 Pack + 50 ft G40 Lights)
EGP-HD-0362 (4 Pack + 100 ft G40 Lights)
natural_image
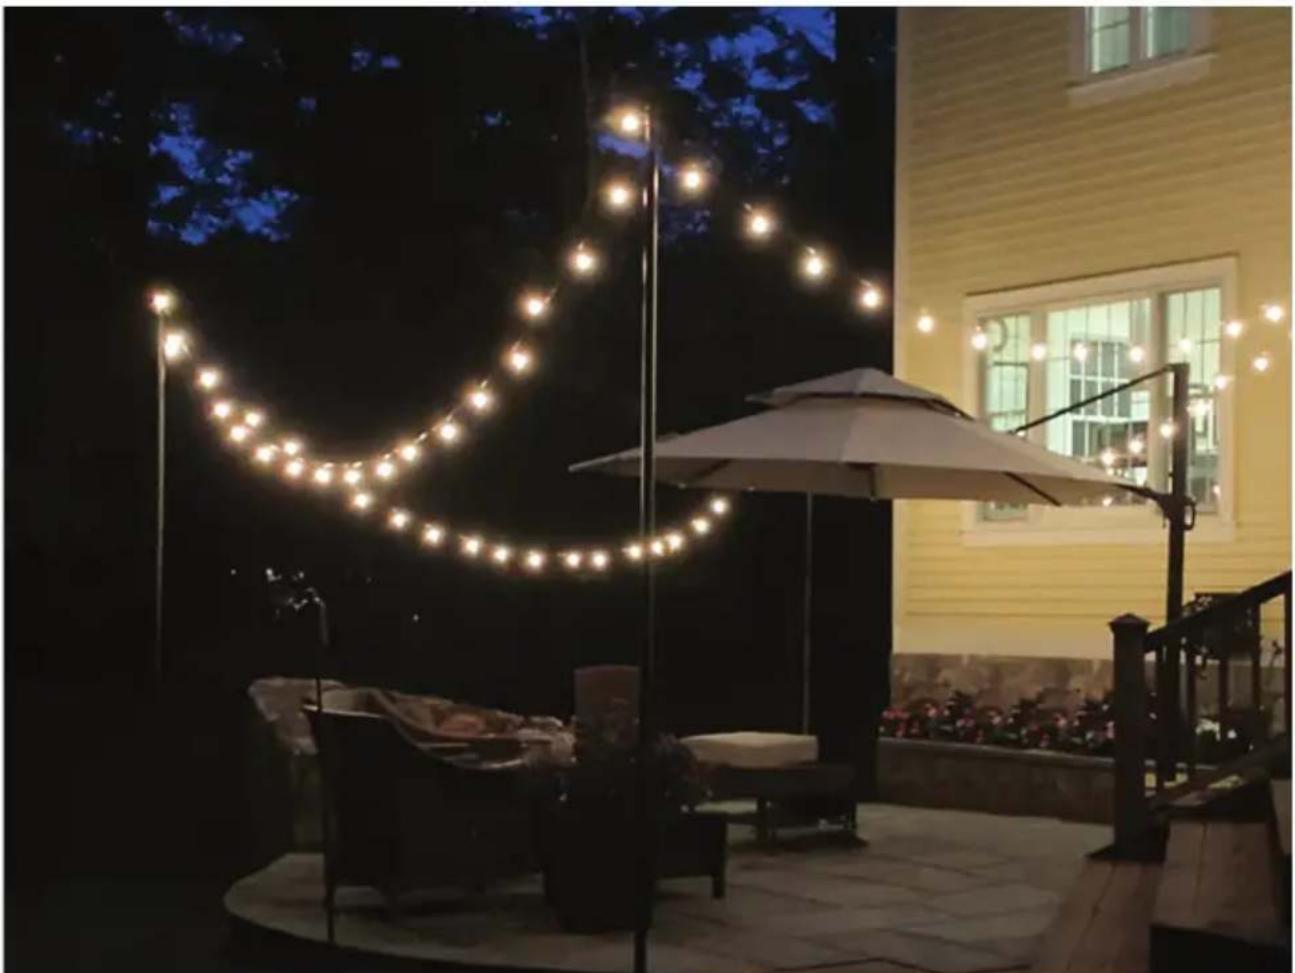
Exterior night view of a courtyard with illuminated streetlights and an umbrella, no visible text or symbolsQuestions? Call 1-877-969-2710 or email orders@excelloglobal.com
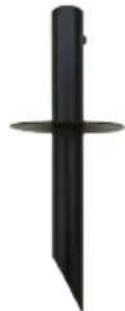
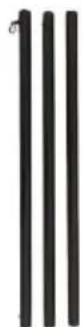
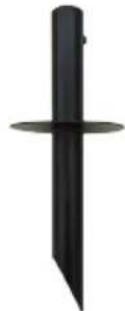
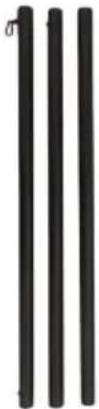
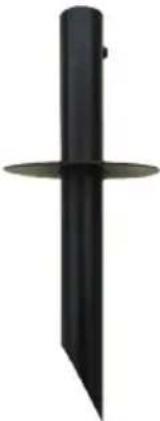
INCLUDED PARTS
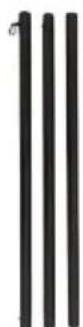
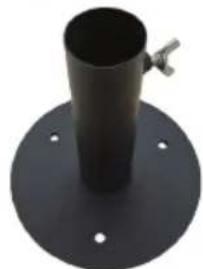
| EGP-HD-04291 10FT Poles (Lights Not Included) | |||
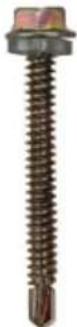
| Light Poles(3 Pieces Each) | Wood/Concrete Base Yard Stake Base Self-Tapping HexHead Screws | ||
 |  |  | 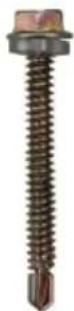 |
| x 1 x 1 x 1 x 3 | |||
EGP-HD-0359
2 10 ^FT Poles (Lights Not Included)
| Light Poles(3 Pieces Each) | Wood/Concrete Base Yard Stake Base Self-Tapping HexHead Screws | ||
 |  |  |  |
| x 2 x 2 x 2 x 6 | |||
EGP-HD-0361
4 10 ^FT Poles (Lights Not Included)
| Light Poles(3 Pieces Each) | Wood/Concrete Base Yard Stake Base Self-Tapping HexHead Screws | ||
 |  |  |  |
| x 4 x 4 x 4 x 12 | |||
THANK YOU FOR PURCHASING FROM EXCELLO GLOBAL PRODUCTS!
Missing Parts? Please Call 1-877-969-2710
Before you throw away the box, please check that you have all the parts listed below. If any are missing, please contact our customer service at the number above and we will gladly ship your replacement parts free of charge.
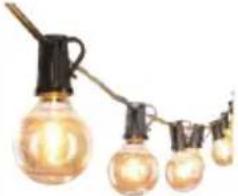
| EGP-HD-03602 10FT Poles (with 50FT String Lights) | ||||
| Light Poles(3 Pieces Each) | Wood/Concrete Base | Yard Stake Base | Self-Tapping Hex Head Screws | 50 ft G40 Globe String Lights |
 |  |  |  |  |
| x 2 x 2 x 2 x 6 x 1 | ||||
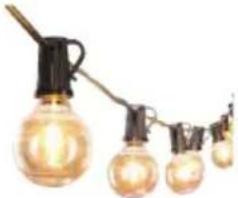
| EGP-HD-03624 10FT Poles (with 100FT String Lights) | ||||
| Light Poles(3 Pieces Each) | Wood/Concrete Base | Yard Stake Base | Self-Tapping Hex Head Screws | 50 ft G40 Globe String Lights |
 |  |  |  |  |
 | ||||
INSTALLATION INSTRUCTIONS
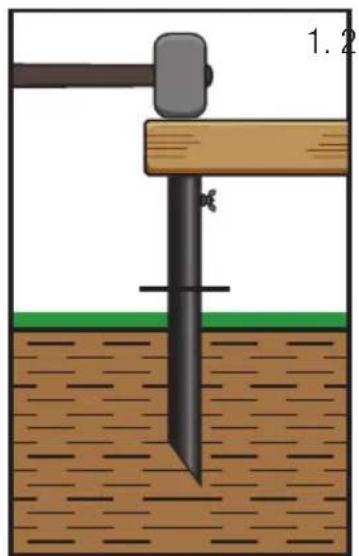
Option 1 – Installation onto Wooden Decks Using Included Lag Screws
If your deck is not solid wood, please contact the decking manufacturer before installing to ensure proper installation. Here is the contact information for some popular composite decking companies: TREX (1-800-289-8739), AZEK/TimberTech (1-877-275-2935), Fiberon (1-800-573-8841), Veranda (1-800-230-7547)
Tools Needed:
- Drill or Impact Driver
- 5/16" Hex Head Bit
• Included Self-Tapping Screws -
Marker to mark holes
-
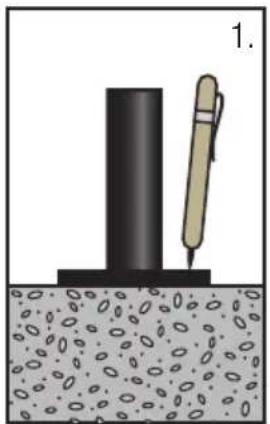
Place the Wood/Concrete Base in the desired locations.
- Using the included self-tapping screws, mount the base to the deck.
- Assemble the pole into the base.

text_image
1. 2. 3.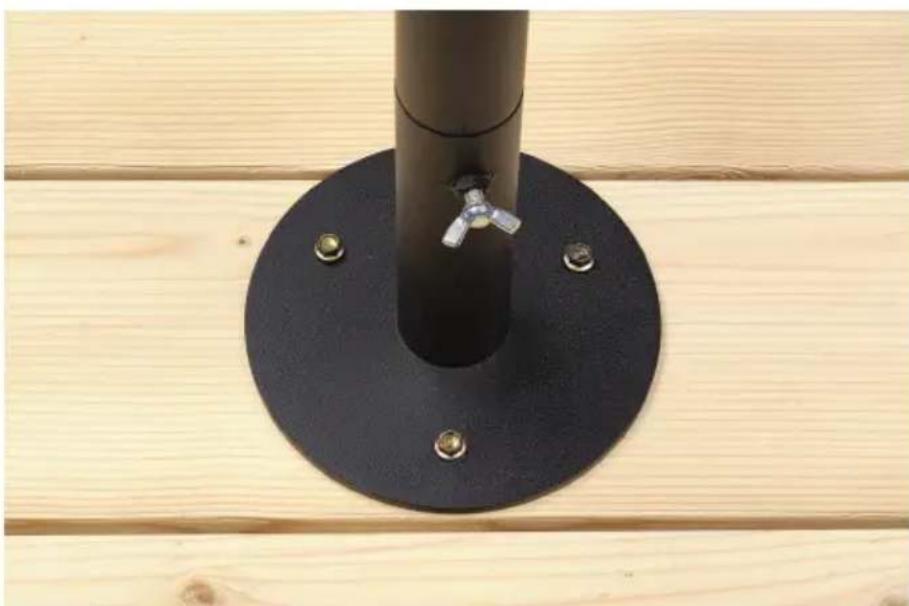
natural_image
Close-up of a black metal support structure mounted on a wooden floor, with four bolts and a valve (no text or symbols visible)Option 2 – Installation onto Concrete or Pavement

If installing onto pavement, note that hot weather may soften the asphalt causing the base to loosen or fall. Double check all fasteners regularly to ensure proper tightness.
Tools/Materials Needed:
- Drill (Hammer drill is ideal, but a regular drill will also work)
• Concrete drill bit 1/4" in size - 1/4" wedge anchors (not included – may be purchased at most home stores)
-
Marker to mark holes
• Method to clean out dust from holes (vacuum, air compressor, leaf blower) -
Using the Wood/Concrete Base as a template, mark the holes onto the concrete using a marker. ***For exact precision, holes can instead be drilled while base is in place.
- Drill holes into the concrete using a 1/4" masonry bit.
NOTE: Wedge anchors require holes to be drilled longer than the anchor itself. Refer to anchor packaging instructions to ensure minimum embedment requirements are met.
- Clean out the holes using a vacuum, compressed air, or leaf blower.
natural_image
Illustration of a pen writing on a surface with an oval object at the base (no text or symbols)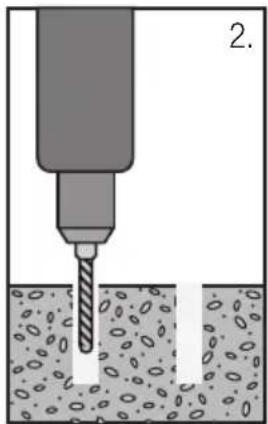
natural_image
Diagram of a drill using a tool to drive a container with liquid, labeled '2.' (no text or symbols on the diagram itself)
natural_image
Diagram showing a container with particles rising from a rod, partially submerged in liquid (no text or symbols)- Put the nut and washer onto the wedge anchor and make sure that the nut is on the last threads (this will protect the threads from damage when the wedge anchor is hammered into the hole).
- Insert the wedge anchor through the base's hole and into the hole in the concrete. This should be a very tight fit – use a hammer to drive the anchor in until the nut and washer are against the base. ***It is important that the threads go below the surface of either the base material or the base.
- Finger-tighten the nut, then using a wrench turn the nut 3 or 4 full turns until snug.
- Assemble the pole into the base.

natural_image
Diagram showing a hammer striking a cylindrical object on a surface with two bolts and embedded in a pit (no text or symbols)
natural_image
Diagram showing a wrench inserted into a bolted joint with embedded bolts, no text or symbols present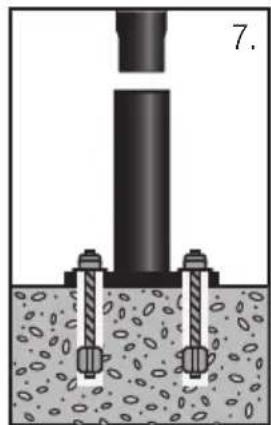
natural_image
Diagram of a mechanical assembly with a cylindrical component inserted into a granular medium, no text or symbols present.Option 3 – Installation into Ground – Reinforced with Rebar
NOTE: The suggested maximum span of lights for this installation method is 20 feet, subject to your soil conditions.
Tools Needed:
- Sacrificial piece of wood larger than the diameter of the yard stake
- Hammer (the heavier the better)
- Rebar (1/2" to 1" in diameter and at least 18" in length – the longer the better) ***Rebar not included. May be purchased at most home stores

Check for any underground pipes or wire before driving the metal stake or rebar into the ground.
- Hammer the rebar at least 12" deep (or deeper if your ground allows). This will help reinforce the ground stake even further.
- Slide the ground stake over the rebar.
- Place your sacrificial wood on top of the stake tube and hammer the stake into the ground until the flange meets the ground.
- Assemble the pole into the base.

text_image
1. 2. 3. 4.Optional Rebar

text_image
18" MinimumQuestions? Call 1-877-969-2710 or email orders@excelloglobal.com
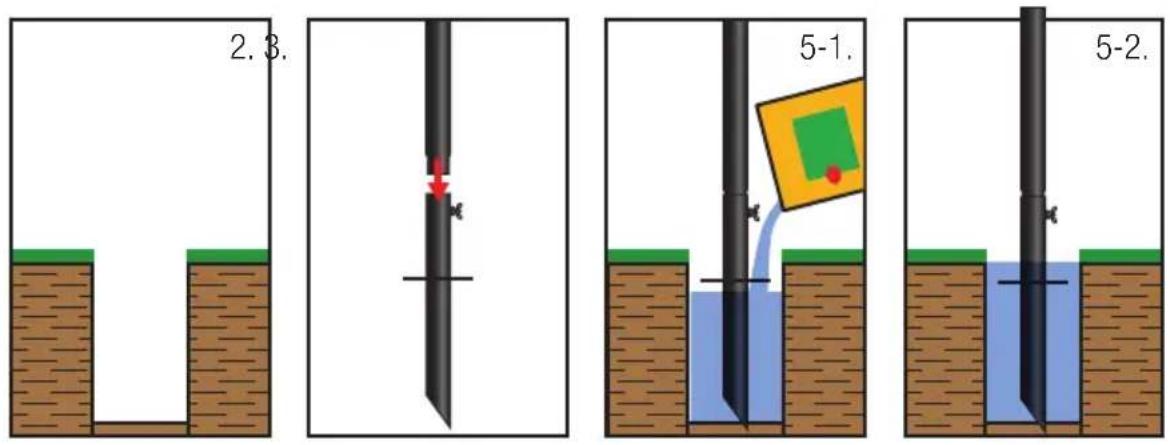
Option 4 – Installation into Ground – Reinforced with Sika® Postfix®
NOTE: Either rebar (see option 3) or Post Foam Mix is the recommended installation method for long term use in soil.
Tools Needed
- Shovel or Post Hole Digger
- Level (optional)

Check for any underground pipes or wire before digging holes.
Instructions
- Sika ^® PostFix ^® can be found at your local hardware store and is a great option for securely and semi-permanently fixing your poles into soil.
- Dig a hole 18" deep and at least 8" wide.
- Attach 1 section of pole to the yard stake base.
- Place the yard stake and pole into the hole and hold straight up.
- Following all PostFix manufacturer instructions, including safety, add the mix to the hole and wait to set.
- Assemble the remaining pole sections.
text_image
2. 3. 5-1. 5-2.Option 5 – Installation into Ground
NOTE: This option is recommended for short term applications only. For longer term solutions, it is strongly recommended to install with support rebar (Option 3) or use Sika® PostFix® Fence Post Mix (Option 4).
Tools Needed:
- Sacrificial piece of wood larger than the diameter of the yard stake
- Hammer (the heavier the better)

Check for any underground pipes or wire before driving the metal stake or rebar into the ground.
- Place your sacrificial wood on top of the stake tube and hammer the stake into the ground until the flange meets the ground.
- Assemble the pole into the base.
natural_image
Diagram of a drilling or anchor installation over soil, showing a hammer and wooden post with a measuring rod (no text or symbols)
natural_image
Diagram showing a vertical pipe inserted into a soil layer with a valve, no text or symbols present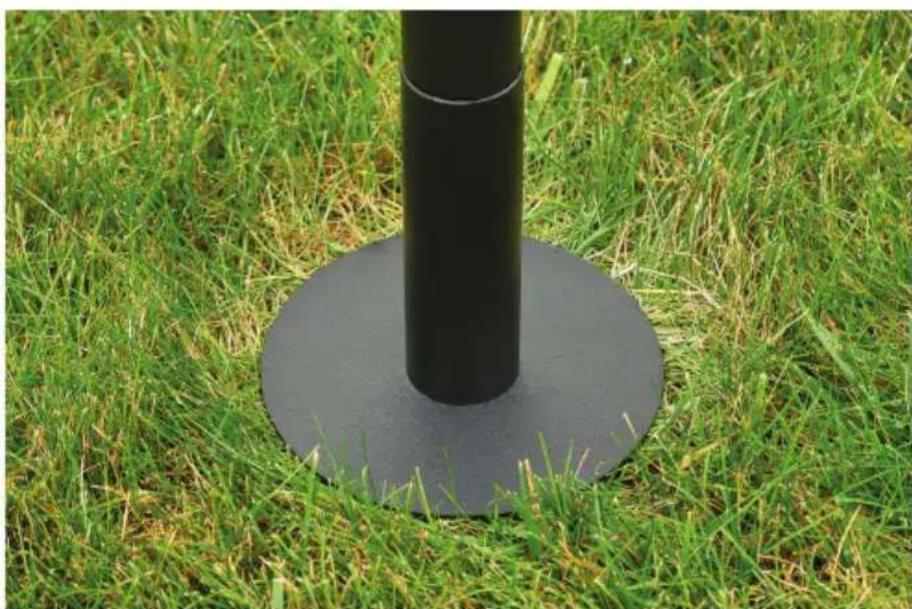
natural_image
Close-up of a black cylindrical pole mounted on a circular base, placed on grassy ground (no text or symbols visible)How do I secure the lights to the carabiner clips?
The two best ways to secure your lights are with zip ties or reusable rubber twist ties (you can find on Amazon, Home Depot or Lowe's). Excello Global Products finds the black zip ties to be the easier of the two methods, but would require cutting the tie if you ever want to relocate them.
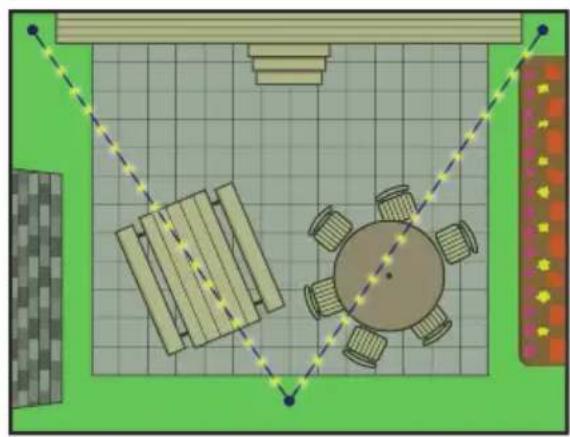
How do I determine my string light pattern?
The ideal design will start with asking yourself 3 questions:
- What area do I want to illuminate?
- Where is my power source?
- Are there structures or trees that I want to attach the lights to? ***This will help you determine where you need to place poles.
Once you have these questions answered you can begin your design:
- Start at the power source – this is often an outlet and might require running an outdoor-rated extension cord to where your lights will begin. If using your structure, be sure to have hooks installed to aid in installation.
- Decide which pattern will best illuminate the area you need. Popular designs are V, X, W, and a Fan as seen below:
natural_image
Top-down architectural layout diagram showing a table with chairs, a round table, and a dining table (no text or symbols)
natural_image
Top-down architectural layout diagram showing a central table with chairs and a round table, surrounded by green grid lines and decorative elements (no text or symbols)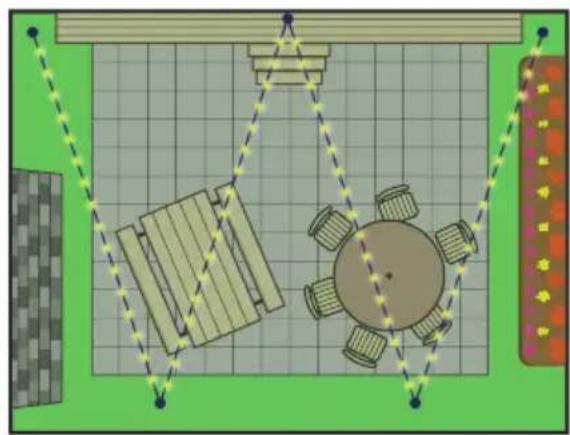
natural_image
Top-down architectural layout diagram showing a dining table with chairs and a round table, surrounded by green grid and decorative elements (no text or symbols)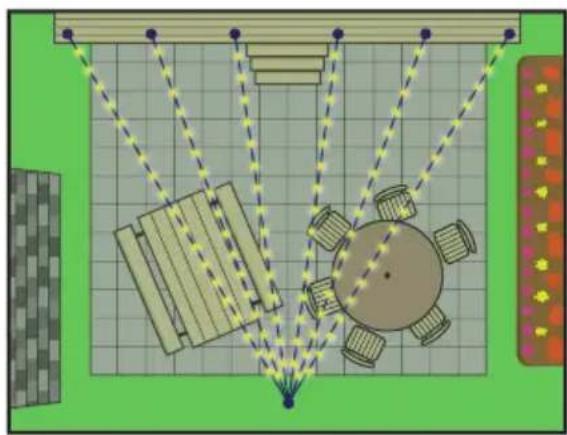
natural_image
Top-down architectural layout diagram showing furniture and lighting fixtures (no text or symbols)- Draw a rough sketch with measurements.
- Start by hanging your first patio light string with the male plug end closest to your outlet.
- If working with multiple light strings, finish hanging your first string and then connect the male end of the second string to the female end of the first string. Continue this pattern until all strings have been hung.
10 ft Bistro Light Poles
EGP-HD-0429 (1 Pack)
EGP-HD-0359 (2 Pack)
EGP-HD-0361 (4 Pack)
EGP-HD-0360 (2 Pack + 50 ft G40 Lights)
EGP-HD-0362 (4 Pack + 100 ft G40 Lights)

natural_image
Outdoor patio scene with a fire pit, wooden railing, and illuminated streetlights in a forest (no text or symbols visible)
natural_image
Five golden stars in a horizontal row, no text or symbols presentEXCELLO
GLOBAL PRODUCTS®
Questions? Call 1-877-969-2710 or email orders@excelloglobal.com