Stealthbox SB-GM-SLVCTR2/10W3v3/DG - Subwoofer JL Audio - Free user manual and instructions
Find the device manual for free Stealthbox SB-GM-SLVCTR2/10W3v3/DG JL Audio in PDF.

User questions about Stealthbox SB-GM-SLVCTR2/10W3v3/DG JL Audio
0 question about this device. Answer the ones you know or ask your own.
Ask a new question about this device
Download the instructions for your Subwoofer in PDF format for free! Find your manual Stealthbox SB-GM-SLVCTR2/10W3v3/DG - JL Audio and take your electronic device back in hand. On this page are published all the documents necessary for the use of your device. Stealthbox SB-GM-SLVCTR2/10W3v3/DG by JL Audio.
USER MANUAL Stealthbox SB-GM-SLVCTR2/10W3v3/DG JL Audio
INSTALLATION GUIDE for the
SB-GM-SLVCTR2/10W3v3
SKU# 94350 - 94353
2007 - 2013 Silverado, Sierra, Avalanche, Suburban, Tahoe, Yukon & Yukon XL with Front Row 40/20/40 Split Bench Seating
natural_image
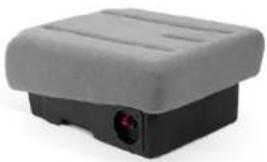
Exterior view of a gray and black electronic device with a small red button (no text or symbols visible)Thank you for choosing a JL Audio Stealthbox for your automotive sound system. With proper installation, your new vehicle specific enclosed subwoofer system will deliver years of listening pleasure.
We strongly recommend that you have your new Sleetthboff installed by your authorized It. Audio dealer. The installation professionals employed by your dealer have the necessary tools and experience to disassemble and reassemble your vehicle property. Also, keep in mind that your warranty coverage extends to 2 years if your system is installed or approved by your authorized It. Audio dealer. If you prefer to perform your own installation, please read this installation guide completely before beginning the process.
JL AUDIO.
Ahead of the Curve
SB-GM-SLVCTR2/10W3v3_N5TR_SKU#011248
! IMPORTANT
If you choose to perform the installation yourself, it is absolutely vital that the Stealthbox* be properly mounted to the vehicle according to these instructions. Failure to mount the enclosure properly presents two problems:
1) The sub-bass performance will suffer due to the movement of the enclosure caused by the force exerted by the woofer(s).
2) A loose enclosure presents a serious safety hazard in the event of a collision or sudden deceleration.
INSTALLATION DIFFICULTY:

ESTIMATED TIME: 1-2 HOURS
natural_image
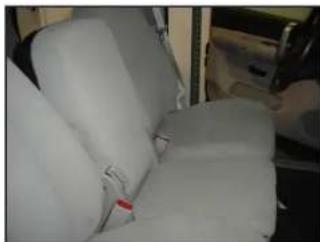
Interior view of a vehicle seatbelt with white leather seats and a red tag (no visible text or symbols)STEP 1
Remove any contents from the front seat area.
Flip the center seat back / storage bin in the up position.
natural_image
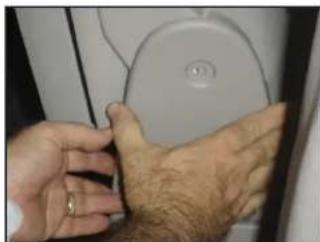
Close-up of hands adjusting a circular object with a small circle on the wall (no visible text or symbols)STEP 2
Move both front seats all the way forward.
From the passenger side of the vehicle, look to the side of the center seat back / storage bin.
Remove the black plastic push clip.
Remove the plastic trim.
natural_image
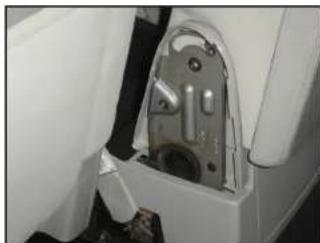
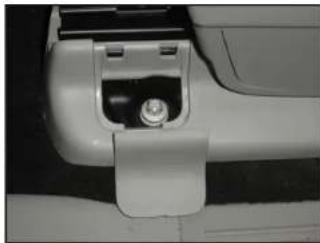
Close-up of a mechanical component with metallic parts and a circular opening (no visible text or symbols)STEP 3
From the driver's side of the vehicle, look to the side of the center seat back / storage bin.
Remove the bolt and plastic trim.
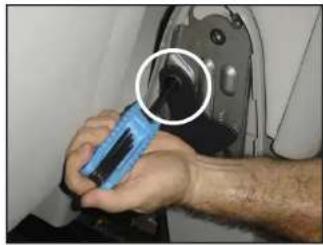
natural_image
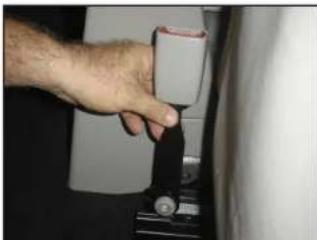
Close-up of a person using a handheld device to adjust or install a mechanical component, with a magnified inset showing a circular detail (no visible text or symbols)STEP 4
From the driver's side of the vehicle, look to the side of the center seat back / storage bin.
Use an hex key to remove the black bolt that secures the gray bracket to the center seat back / storage bin.
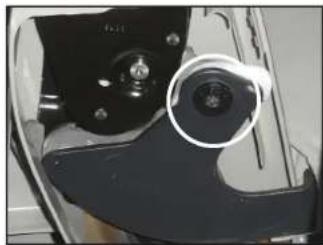
natural_image
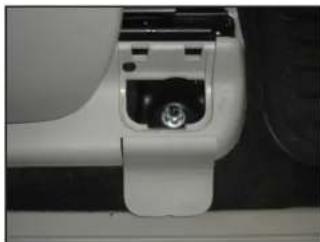
Close-up of a mechanical component with a highlighted circular detail (no visible text or symbols)STEP 5
From the passenger's side of the vehicle, look to the side of the center seat back / storage bin.
Use an hex key to remove the black bolt that secures the gray bracket to the center seat back / storage bin.
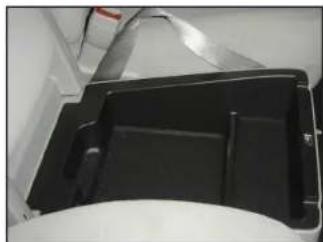
natural_image
Black plastic tray with a side panel, placed on a white surface (no visible text or symbols)STEP 6
Grab a hold of the bottom cushion and pull forward. Remove the bottom cushion from the vehicle.
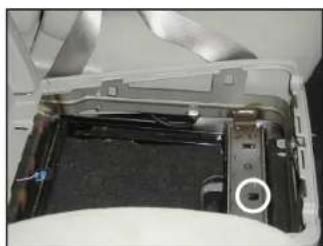
natural_image
Interior view of a device showing a black electronic component with a circled area, no visible text or symbolsSTEP 7
Remove the plastic tray from vehicle.
natural_image
Close-up of a car interior showing a white car seatbelt with a metallic knob (no visible text or symbols)STEP 8
Remove the four rear bolts that secure the seating to the floor.
natural_image
Close-up of a car headrest lever with a metallic knob (no visible text or symbols)STEP 9
Remove the four front nuts that secure the seating to the floor.

natural_image
Close-up of hands operating a black control panel with a red button, surrounded by wires and tools (no visible text or symbols)STEP 10
Run speaker wire from the amplifier location to the Stealthbox® location.

natural_image
Close-up of a person operating a mechanical device with a tool, no visible text or symbolsSTEP 11
Slice the rear of the Stealthbox ^® into the mounting area first, then drop the front of the Stealthbox ^® into place.

natural_image
Close-up of a hand operating a printer with a white cover (no visible text or symbols)STEP 12
Place the supplied lock washer and then flat washer onto the supplied bolt.
Till the seating back.
From under the center seal section, place the bolt assembly through a factory hole and into the threaded insert of the Stealthbox ^5 . This hole can be viewed in STEP 7, circled.
Secure the bolt assembly to the Stealthbox ^4 , do not over lighten.
natural_image
Close-up of a hand holding a small white object, possibly a device or tool, in a dimly lit environment (no visible text or symbols)STEP 13
We do not recommend the use of this center section to be used as a seat. You can remove the seat belt latch as an extra precaution.

natural_image
Close-up of a hand using a screwdriver to adjust or install a car seatbelt (no visible text or symbols)STEP 14
Secure the bolts and nuts that were removed in Steps 8 & 9.
Secure the plastic covers that were removed in Steps 2 & 3.

natural_image
Interior view of a modern passenger seat with gray seating and a metallic tray (no visible text or symbols)CONGRATULATIONS
You have completed the installation for this model!
Please refer to the Power Recommendation section for an amplifier recommendation and basic set-up help.
INCLUDED HARDWARE
(1) 3/8 inch 16 x 1-1/4 inch Hex Bolt
(1) 3/8 inch Lock Washer
(1) 3/8-inch Flat Washer
SPECIFICATIONS
Enclosure Type: Acoustic Suspension (sealed)
Driver Type: 10W3×3-2
Nominal Impedance: 2 onms
Continuous Power Handling: 500 Watts
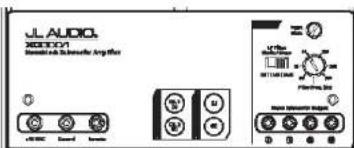
POWER RECOMMENDATION
JL Audio recommends using a high quality amplifier such as the JL Audio XD300/1v2. The diagram below shows the recommended crossover settings for the XD300/1v2 when being used to power your Stealthbox*.
text_image
JLAUDIO NORDON Standard & Subwoofer Amp filter OFFICE Sound Noise L1 L2 L3 L4 L5 L6 L7 L8 L9 L10 L11 L12 L13 L14 L15 L16 L17 L18 L19 L20 L21 L22 L23 L24 L25 L26 L27 L28 L29 L30 L31 L32 L33 L34 L35 L36 L37 L38 L39 L40 L41 L42 L43 L44 L45 L46 L47 L48 L49 L50 L51 L52 L53 L54 L55 L56 L57 L58 L59 L60 L61 L62 L63 L64 L65 L66 L67 L68 L69 L70 L71 L72 L73 L74 L75 L76 L77 L78 L79 L80 L81 L82 L83 L84 L85 L86 L87 L88 L89 L90 L91 L92 L93 L94 L95 L96 L97 L98 L99 L100The JL Audio XD300/1v2 is a very versatile audio component. Please consult the owner's manual for even more detailed information about installing and tuning this amplifier.
MID/HIGH FREQUENCY DRIVER FITMENT
A variety of JL Audio coaxial and component systems will fit in the factory speaker locations of you vehicle.
Front Speaker Size / Location: 6.5-inch / Front Doors
Fits JL Audio Models: TR650-CSI, TR650-CXI, C2-650, C2-650x.
C3-650,C5-650,C5-650x&∠R650-CSI
Rear Speaker Size / Location: 5.25-inch / Rear Door
Flts JL Audio Models: TR650-CSI, TR650-CXI, C2 650, C2 650x.
C3-650, C5-650, C5-650x & ZR650-CSI

JL AUDIO®
Ahead of the Curve
| (954) 443-1100 | www.jlaudio.com |
| All video formats are only to change in time, remove "J. Audio" and the J. Audio logo "Sauditor" and the audio based logos are regularized recommendations of J. Audio, Inc. "About of the Guide" and to prospective video contentment of J. Audio, Inc.JIA-580V 011246-10.31.2010 - limited in USA - 00785 J. Audio, Inc.For more detailed information please call us call at www.jlaudio.com. | AMERONOMBERGALMARTINOMARIA |
10369 NORTH COMMERCIAL PARKWAY · MIHAMAN, FLORIDA · 33025 · USA