
C165SS - Loudspeaker CAMBRIDGE - Free user manual and instructions
Find the device manual for free C165SS CAMBRIDGE in PDF.


| Product Type | Ceiling Speaker |
| Brand | Cambridge Audio |
| Model | C165SS |
| Speaker Configuration | 1 x 6.5" (165mm) woofer, 2 x 0.5" (13mm) tweeters |
| Impedance | 4 Ohms |
| Sensitivity | 86dB (2.83 Vrms input) |
| Frequency Response | 60Hz - 20kHz |
| Dimensions (H x Dia) | 97 x 240mm (3.8 x 9.4") |
| Weight | 1.28kg (2.8lbs) |
| Mounting Type | In-ceiling with dog-leg clamps |
| Cutout Hole Diameter | Approximately 210mm (not explicitly stated, but derived from speaker diameter) |
| Mounting Surface Thickness | 10 - 30mm (0.39 - 1.18") |
| Required Clearance Behind Ceiling | At least 93mm (3.74") |
| Recommended Speaker Cable | 16 gauge minimum |
| Grille Attachment | Magnetic, removable for painting |
| Painting | Grille and frame paintable; includes plastic mask to protect cone |
| Compliance | Low smoke/zero halogen cable may be required by local codes |
| Included Accessories | Cutting template, painting mask |
| Warranty | Register at cambridgeaudio.com for updates |
Frequently Asked Questions - C165SS CAMBRIDGE
User questions about C165SS CAMBRIDGE
0 question about this device. Answer the ones you know or ask your own.
Ask a new question about this device
Download the instructions for your Loudspeaker in PDF format for free! Find your manual C165SS - CAMBRIDGE and take your electronic device back in hand. On this page are published all the documents necessary for the use of your device. C165SS by CAMBRIDGE.
USER MANUAL C165SS CAMBRIDGE
C165SS Ceiling Speaker
Manual Generated: 15/04/2023 - 02:37
Table of Contents
C165SS Ceiling Speaker 3
Introduction 4
What's included with the C165SS? 5
Installation Instructions 6
Painting the speaker grille and frame 8
Technical specifications 9
C165SS Ceiling Speaker
Last updated: December 6, 2022 03:49. Revision #8133
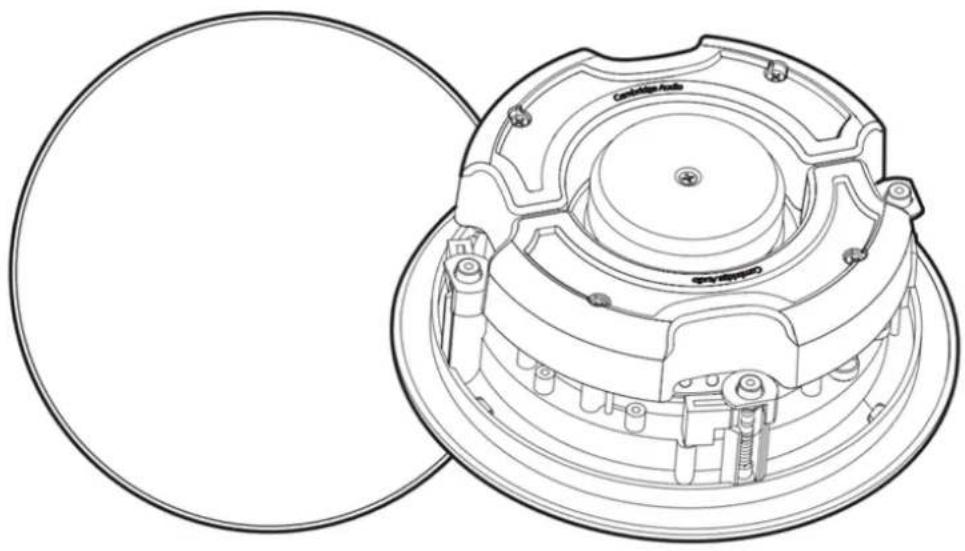
Users Manual
Introduction
Last updated: January 19, 2023 01:55. Revision #8396
This guide is designed to make installing and using this product as easy as possible. Information in this document has been carefully checked for accuracy at the time of printing; however, Cambridge Audio's policy is one of continuous improvement, therefore design and specifications are subject to change without prior notice.
This document contains proprietary information protected by copyright. All rights are reserved. No part of this manual may be reproduced by any mechanical, electronic or other means, in any form, without prior written permission of the manufacturer. All trademarks and registered trademarks are the property of their respective owners.
© Copyright Cambridge Audio Ltd.
For upcoming news on future products, software updates and exclusive offers, make sure you register your product at
http://www.cambridgeaudio.com/register
What's included with the C165SS?
Last updated: January 19, 2023 01:55. Revision #8397
- 1 x C165SS Ceiling Speaker.
Installation Instructions
Last updated: January 19, 2023 01:55. Revision #8398
- Firstly, remove the cardboard pad from inside the supplied template to mark the position for the mounting hole at the selected location.

- Before cutting ceiling speaker holes, it is suggested that the area is tested for clearance by making an L-shaped probe from strong wire (see illustration below), drilling a small hole in the target area, inserting the probe and slowly turning. Any obstructions will be immediately obvious, and the target area can be moved to a more suitable position.
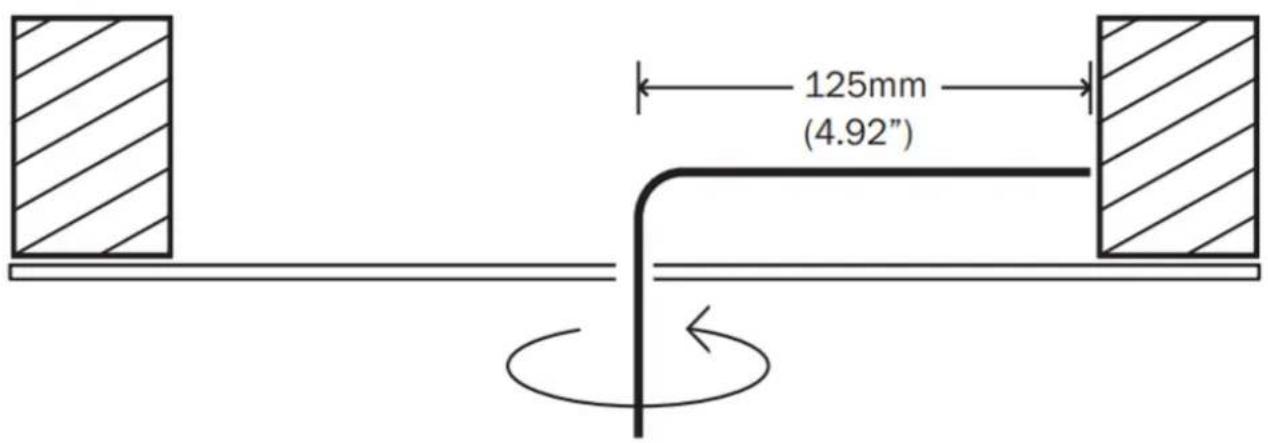
- Cut the mounting hole with a drywall, or keyhole saw. Be sure the mounting surface is between 10 and 30mm (0.39 - 1.18") thick, and that there is at least 93mm(3.74") of clearance behind the mounting surface.
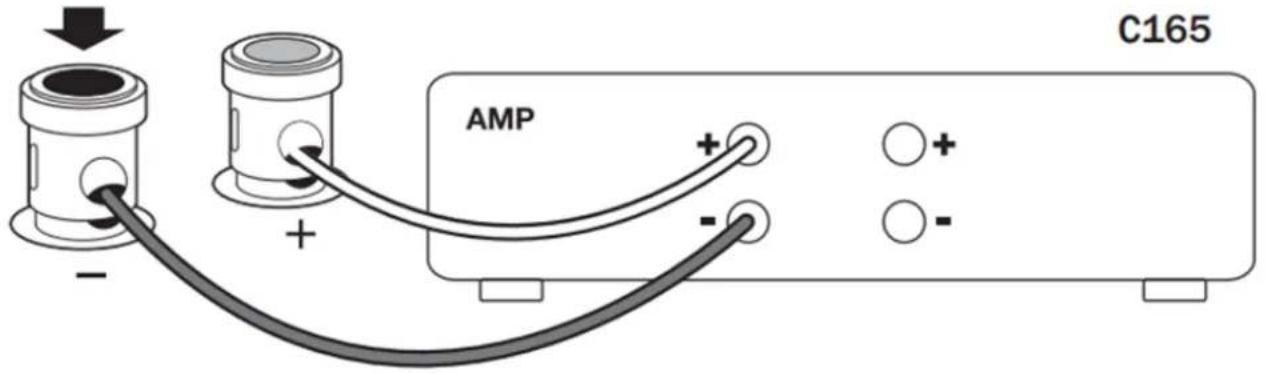
- Use 16 gauge minimum speaker cable to connect between your amplifier and your speakers. Ensure that speaker cables are routed away from any electrical cables and that any amplifiers/sources are switched off during installation.
- Use a wire stripper to strip 10mm of insulation from the end of each speaker cable and twist the strands together.
- When connecting speakers pay extra attention to polarity ensuring that red (+) terminals on your amplifier are connected to the red (+) terminals on your speakers, and that the black (-) terminals on your amplifier are connected to the black (-) terminals on your speakers.
-
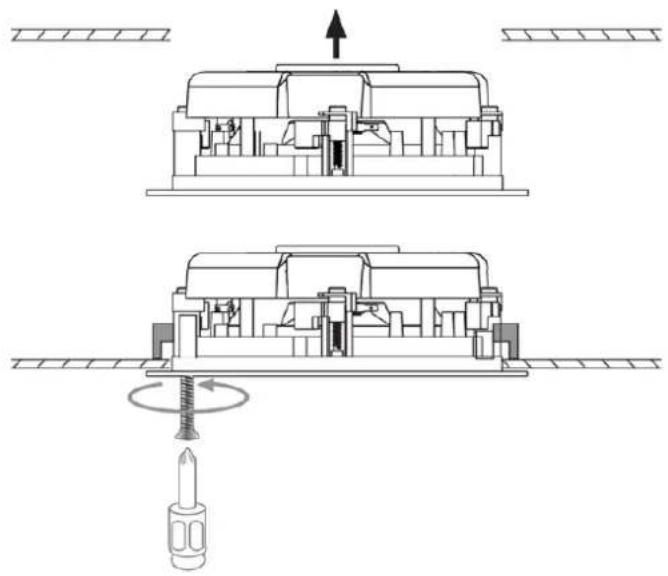
Ensure that the four fixing screws on the speaker are slackened off allowing the mounting dog-legs to move freely. Move each dog-leg foot to the LEFT into its holding slot and then line the speaker up in the mounting hole.
-
With the speaker in the mounting hole use a cross-head screwdriver to slowly turn each fixing screw clockwise, moving the dog-legs out of their slots. Tighten these screws until the dog-legs grip the ceiling.
Note: Please check with your builder/installer whether you need to install a fire hood with this product. "Low smoke/zero halogen" specification Speaker cable may also be required.
Painting the speaker grille and frame
Last updated: January 19, 2023 01:55. Revision #8399
The C165SS speaker grille is attached by a magnet, allowing it to be easily removed for painting.
- Carefully remove the grille ensuring not to damage the speaker cone.
- Paint the grille using your chosen paint.
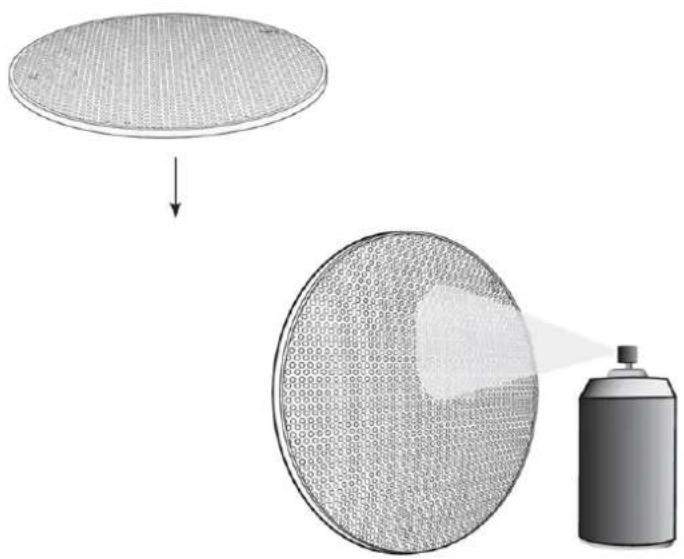
- If you wish to paint the speaker surround, please use the included clear plastic painting mask to cover the speaker cone and avoid causing damage.
Technical specifications
Last updated: January 19, 2023 01:55. Revision #8400
Sensitivity (SPL)
86dB (2.83 Vrms input)
Frequency Response
60Hz - 20kHz
Impedance
4 Ohms
Drivers
1 x 6.5" (165mm) woofer.
2 x 0.5" (13mm) tweeters.
Speaker Dimensions (H x W x D)
97 x ø 240mm (3.8 x ø 9.4")
Weight
1.28kg (2.8lbs)
Brand : CAMBRIDGE
Model : C165SS
Category : Loudspeaker