
Arepa Maker SM1719 - Sandwich maker TEFAL - Free user manual and instructions
Find the device manual for free Arepa Maker SM1719 TEFAL in PDF.


| Product Type | Arepa Maker / Sandwich Maker |
| Brand | Tefal |
| Model | SM1719 |
| Number of Arepas | 4 (four cavities) |
| Indicator Lights | Red power light, green temperature ready light |
| Non-Stick Coating | Yes, on cooking plates |
| Preheating Time | Approximately 5-10 minutes |
| Cooking Time | 5-10 minutes (for arepas) |
| Closure Latch | Yes, secures lid during cooking |
| Handle | Yes, for lid operation |
| Power Cord Length | Short (designed to reduce tripping hazard) |
| Cleaning Method | Hand wash with warm water and dish soap; not dishwasher safe |
| Materials | Plastic body, non-stick coated metal plates |
| Safety Features | Polarized plug, short cord, automatic temperature control |
| Usage | Household use only; not for commercial use |
| Accessories Included | None (user manual only) |
| Dimensions (approximate) | 30 x 25 x 12 cm (estimated) |
| Weight (approximate) | 1.5 kg (estimated) |
| Power Rating (estimated) | 750-1000 W |
Frequently Asked Questions - Arepa Maker SM1719 TEFAL
User questions about Arepa Maker SM1719 TEFAL
0 question about this device. Answer the ones you know or ask your own.
Ask a new question about this device
Download the instructions for your Sandwich maker in PDF format for free! Find your manual Arepa Maker SM1719 - TEFAL and take your electronic device back in hand. On this page are published all the documents necessary for the use of your device. Arepa Maker SM1719 by TEFAL.
USER MANUAL Arepa Maker SM1719 TEFAL
Instructions for use
When using electric appliances, basic safety precautions should always be followed, including the following:
- Read all instructions before using.
- Do not touch hot surfaces. Use handles or knobs.
- To protect against electric shock do not immerse or partially immerse cord, plugs, or appliance in water or other liquid.
- Not intended for use by children. Close supervision is necessary when any appliance is used by or near children.
- Unplug from outlet when not in use and before cleaning. Allow to cool before putting on or taking off parts, and before cleaning the appliance.
- Do not operate the appliance with a damaged cord or plug or after the appliance malfunctions, or has been damaged in any manner. Return the appliance to the nearest authorized service facility for examination, repair or adjustment.
- The use of accessory attachments not recommended by the appliance manufacturer may cause injuries.
- Do not use outdoors.
- Do not let cord hang over the edge of table or counter, or touch hot surfaces.
- Do not place on or near a hot gas or electric burner, or in a heated oven.
- Do not use the appliance for other than intended use.
- Extreme caution must be used when moving an appliance containing hot oil or other hot liquids.
- The temperature of accessible surfaces may be high when the appliance is operating.
- Check that the electrical installation is compatible with the wattage and voltage stated on the bottom of the appliance.
- If this appliance has a polarized plug (one blade is wider than the other), it is to reduce the risk of electric shock. This plug is intended to fit into a polarized outlet only one way. If the plug does not fit fully into the outlet, reverse the plug. If it still does not fit, contact a qualified electrician. Do not attempt to modify the plug in any way.
- To disconnect the appliance, turn any control to minimum position, then remove plug from the wall outlet.
- The appliance is only to be operated in the closed position.
SAVE THESE INSTRUCTIONS.
Safety instructions
- Never leave the appliance unattended when in use.
- Do not immerse the appliance, the control panel or power cord in water.
- If an accident occurs, rinse the burn immediately with cold water and call a doctor if necessary.
- To prevent the appliance from overheating, do not place it in a corner or against a wall.
- Never leave the appliance plugged in when not in use.
- Do not place the hot plate under water or on a fragile surface.
- If you have any problems, contact the authorized after-sales service center or the internet address www.t-falusa.com.
Short Cord instructions
A short power-supply cord (or detachable power-supply cord) is to be provided to reduce the risk resulting from becoming entangled in or tripping over a longer cord.
Longer detachable power-supply cords or extension cords are available and may be used if care is exercised in their use.
If a long detachable power-supply cord or extension cord is used :
1) The marked electrical rating of the cord or extension cord should be at least as great as the electrical rating of the appliance;
2) If the appliance is of the grounded type, the extension cord should be a grounding 3-wire cord; and
3) The longer cord should be arranged so that it does not drape over the countertop or table top where it can be pulled on by children or tripped over unintentionally.
THIS APPLIANCE IS INTENDED TO BE USED IN HOUSEHOLD ONLY.
EN

Thank you for buying this appliance. Read the instructions in this leaflet carefully and keep them within reach. Any commercial use, inappropriate use or failure to comply with the instructions, the manufacturer accepts no responsibility and the guarantee will not apply.
For your safety, this product conforms to all applicable standards and regulations (Electric Safety, Food Compliant Materials, Environment, ...).
Our company has an ongoing policy of research and development and may modify these products without prior notice.
This appliance is not intended to be used in the following applications, and the guarantee will not apply for :
- staff kitchen areas in shops, offices and other working environments;
- farm houses;
- by clients in hotels, motels and other residential type environments;
- bed and breakfast type environments.
Prevention of accidents at home
- This appliance is not intended for use by persons (including children) with reduced physical, sensory or mental capabilities, or lack of experience and knowledge, unless they have been given supervision or instruction concerning use of the appliance by an adult responsible for their safety. Children should be supervised to ensure that they do not play with the appliance.
- Accessible surface temperatures can be high when the appliance is operating. Never touch the hot surfaces of the appliance, always use the handles.
- Never leave the appliance plugged in when not in use.

Description
1 - Operating indicator light
2 - Temperature indicator light
3 - Handle
4 - Closure latch
5 - Plates
6 - Power cord
EN
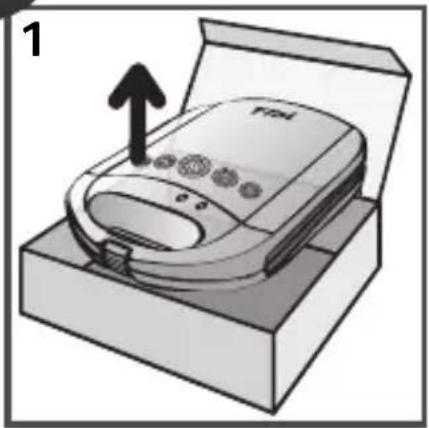
Remove all packaging materials, stickers and accessories from the inside and the outside of the appliance (1).
Never place the appliance directly on a fragile surface (glass table, tablecloth, varnished furniture, etc.) or on a soft surface such as a dish towel.
Always use the appliance on a flat, stable, heat-resistant work surface.

To prevent the appliance from overheating, do not place it in a corner or against a wall.
Open the appliance by lifting the closure latch (2).

Before using for the first time, thoroughly clean the plates with warm water and dish soap.
Wipe over the plate using a paper towel dipped in a little cooking oil (3).
Remove any surplus oil using a clean kitchen paper towel.

Close the appliance (4). Fully unwind the power cord.
Make sure that the electric power supply is compatible with the power rating and voltage indicated on the bottom of the appliance.
If an extension cord is used, take all necessary precautions to prevent anyone from tripping over it; make sure to choose one of equivalent diameter.
If the power supply cord is damaged, it must be replaced by the manufacturer or its service agent or a similarly qualified person in order to avoid a hazard.

The power supply cord should be regularly examined for signs of damage, and if the cord is damaged, the appliance must not be used.
Plug the cord into the wall socket (5).
The red indicator light will turn on (6).
On first use, there may be a slight odor and a little smoke during the first few minutes.
This appliance is not intended to be operated by means of an external timer or separate remote-control system.


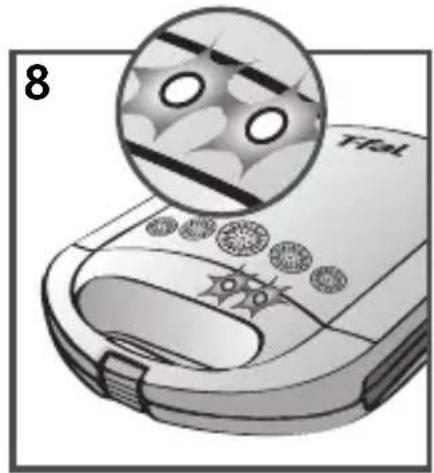
It will take around 5-10 minutes for the appliance to pre-heat (7).
As soon as the appliance is pre-heated, the green indicator light will turn on (8).
After pre-heating, the appliance is ready for use.
3 - Cooking
EN
Do not move the appliance when in use.


To preserve the non-stick properties of the coating, do not cook food in aluminium foil.
Never leave the appliance unattended when in use.
Do not place cooking ustensils on the cooking surface of the appliance.
Never cut directly on the plates.
Never run the appliance empty.
The green light will flash on and off regularly during the cooking process, to show that the temperature is maintained.
Arepa dough recipe
- Pour 2 1/2 cups of warm water into a bowl and add a teaspoon of salt or to taste.
- Slowly add 2 cups of precooked maize flour. Knead by hand.
- Cheese, seasonings or indeed a few drops of oil can be added.

Shape the dough into round balls using the palm of your hands (9).
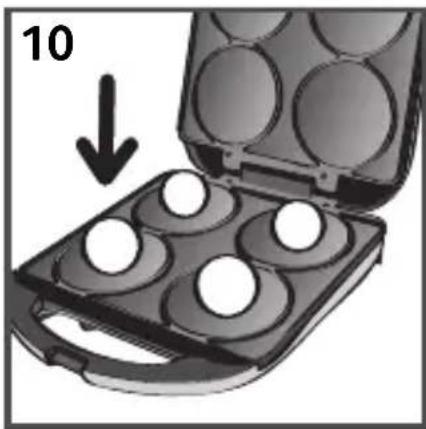
Place a dough ball in each mould and close the lid (10).
Make sure that the unit closes properly.
Four arepas can be prepared at a time.
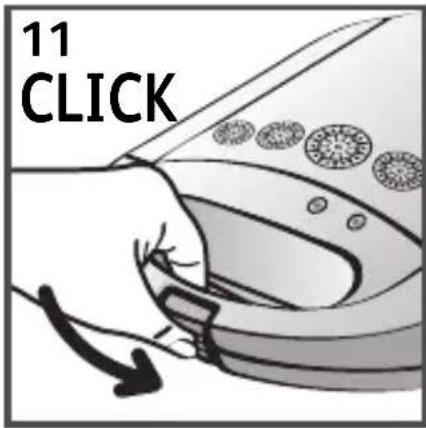
Lock the latch (11).

Allow to cook for 5 to 10 minutes (12).
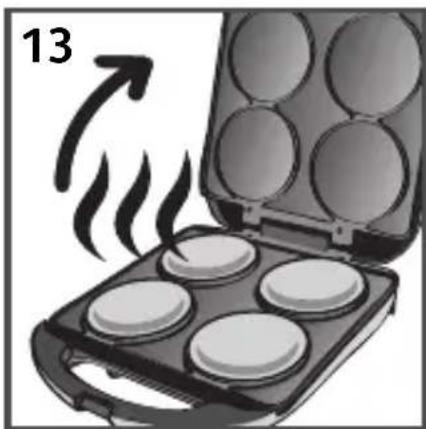
After completion of the baking process, open the appliance (13) and remove the baked items (14).

Always use a wooden or plastic spatula to avoid damaging the cooking plate.

EN
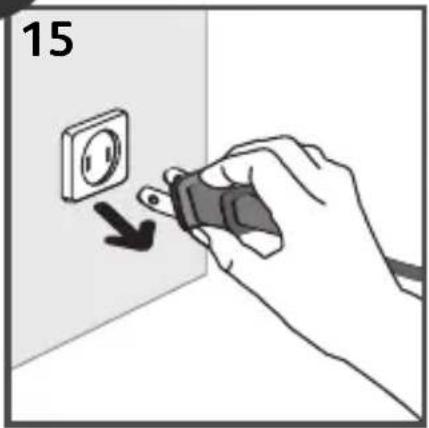
Unplug the appliance (15).

Let it cool down before moving and cleaning it (16).

Clean the plates and the body of the appliance with a sponge, hot water and dish soap (17).
Never immerse the appliance or power supply cord in water. They are not dishwasher safe (18).
Never use metal scourers or scouring powder to avoid damaging the cooking surface.

PRECAUCIONES IMPORTANTES
Always use the appliance on a flat, stable, heat-resistant work surface.

- Verter 2 1/2 copas de agua caliente into a bowl and add a teaspoon of salt or to taste.
- Slowly add 2 cups of precooked maize flour. Knead by hand.
- Cheese, seasonings or indeed a few drops of oil can be added.

Shape the dough into round balls using the palm of your hands (9).


Brand : TEFAL
Model : Arepa Maker SM1719
Category : Sandwich maker