
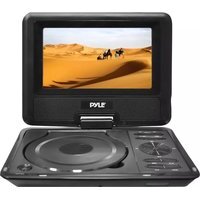
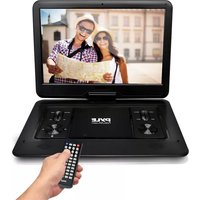
PDV905BK - Portable DVD Player Pyle - Free user manual and instructions
Find the device manual for free PDV905BK Pyle in PDF.

| Product Type | Portable DVD Player |
| Brand | Pyle |
| Model | PDV905BK |
| Display | High-Resolution Color TFT LCD |
| Disc Compatibility | DVD, SVCD, VCD, CD, CD-R/RW, JPEG, WMA, MPG, MP3, VOB, AVI, MP4 (RM/RMVB optional) |
| Supported External Storage | USB flash drive, SD/MMC card |
| Anti-Shock Protection | DVD: 3 sec; VCD/CD: 10 sec; MP3: 90 sec |
| Audio Output | 2.0V±0.2V, Speakers: 8Ω/1.5W, Headphone: 15mW |
| Frequency Response | 20Hz-20kHz |
| Signal-to-Noise Ratio | ≥50dB |
| Video Output | 1.0V±0.2Vp-p (75Ω), PAL/NTSC/AUTO/SECAM |
| Battery | Built-in polymer lithium battery, up to 2 hours playtime |
| Power Supply | AC 100-240V adapter (included), 12V car adapter (included) |
| Charging Indicator | Red (charging), Green (fully charged) |
| Remote Control | Infrared, range ≤5m, angle ≤30° |
| Copy Function | Copy CD to USB/SD card |
Frequently Asked Questions - PDV905BK Pyle
User questions about PDV905BK Pyle
0 question about this device. Answer the ones you know or ask your own.
Ask a new question about this device
Download the instructions for your Portable DVD Player in PDF format for free! Find your manual PDV905BK - Pyle and take your electronic device back in hand. On this page are published all the documents necessary for the use of your device. PDV905BK by Pyle.
USER MANUAL PDV905BK Pyle
natural_image
Pyle desktop TV with a snowman photo displayed on its screen, alongside a remote control (no visible text or symbols on the device body)PDV905BK
Portable DVD
USER MANUAL
CONTENTS
Contents 1
Notice 2
Notice and Safety Information 2
Function Introduction .... 5
Keys Function and Panel Instruction 6
Remote Control Function and Instructions 8
PANEL SETTING 12
System Setup 12
CD Transcription and Multi Media Function 15
DVD Parameter 17
NOTICE
Please read this manual carefully before using your PDV905BK Portable DVD Player and keep it for future reference.
Note: When you open, refit or demount the machine, our company will not supply after-sales service.
NOTICE AND SAFETY INFORMATION
1. User Notice
After buying the PDV905BK Portable DVD Player, please read the operations and instructions carefully. Incorrect use of the system may result in personal injury or damage to the system and components.
2. Disc
DO NOT use broken, distorted shape or mended disc, which will cause damage and will inefficiently read the disc.
3. Inspection

Check the DVD player and power adapter for any damage
4. Repair
In order to avoid electric shock, please use wide blade plug to match with wide groove connector and make sure and secure connection. All repair issue, please contact technical service center. All repair issue, please contact technical service center. Without technical service allowed, don't repair the DVD and spare parts.
 | Attention, Don't open the cover, in order to avoid the conflagration or electric shock. Please make sure to consign qualified repair personnel for repair |
 | Risk or electric shock |
 | Operations and other notices after purchasing this player |
 | Lower laser light; no harmful radiation outside of machine |
5. Earphone
Gradually raise the volume controls while using the earphone. Listening at full volume for long periods may damage the user's ears
6. Humidity
In avoid of electric shock and fire accident, please don't use the DVD player in a wet environment such as rain or bathtub or in a humid environment. Do not attempt to service this product yourself as opening or removing covers may expose you to dangerous voltage or other hazards. Refer all servicing to qualified service personnel.
7. Keep away from liquid
Ensure the DVD player and its spare parts are kept away from and liquid source. Liquid inside the DVD player can cause electronic shock.
8. Keep away from heat
Ensure the DVD player and its spare parts are kept away from heat sources such as heaters, induction cookers, and so on.
9. Thunder and Lightning
Do not use the DVD player during thunder and lightning conditions.
10. Ventilation
Ensure the DVD player is used in a ventilated environment. Do not use with it resting on a bed, sofa, or other soft surfaces as it can cause the DVD player and other parts components to be very hot and can cause fire.
11. LCD Screen
Do not drop, impact or scratch the LCD screen. Do not rest heavy items on top of the DVD player.
Note: Do not to touch the LCD screen directly should it become broken. If the liquid of LCD has touched the skin, please wash your skin with water for at least 15 minutes
12. Laser
Attention: This DVD player is equipped with a laser system. In case of requiring repair, please contact the distributor or our technical service center. Do not open the DVD.
13. Charger
Use the supplied AC charger to re-charge the battery. Ensure that it is suitable for your local environment and use a suitable travel adaptor if using overseas. Unsuitable INPUT, OUTPUT can cause damage to the DVD player, fire or electric shock. Do not use the AC adaptor or battery if they are damaged.
14. Battery and charging
1. Charging process:
Before shipping, all batteries have not enough power.
Connect either the 240V mains power adaptor (indoor use) or the 12V car adaptor (in car use) to the DC input socket on the DVD player.
The DVD player will charge by itself.
The red light will be on when the battery is charging.
When it is fully charged, the light will be green.
Note: You can play a DVD while the DVD player is charging.
Note: Please consult a qualified service technician to replace the battery if required.
- Do not put the battery into fire.
- When the DVD player is charging or playing, do not install the battery.
- Do not put the battery into water or other liquids, it will cause damage to the battery.
- Do not hit, impact or drop the battery.
- Do not open the battery and change the structure.
- If you want to have a long rest or sleep, please take the power off to prevent rechargeable cell damage or damage caused by an unexpected accident.
- Use in temperatures -41^ — 104^
FUNCTION INTRODUCTION
- High resolution color TFT LCD full screen display
2, Super electronic shock resistance (3 seconds for DVD, 10 seconds for CD/VCD and 90 seconds for MP3) - Compatible with most DVD, SVCD, VCD, CD, Mp3, MP4.
- Built -in super power polymer lithium battery for up to 2 hours continue playing
- Supports USB, SD/MMC
- Support full functions control remote, easy to operate.
- Support MP4, MP3, WMA, MPG, AVI, VOB, JPEG formats.
- Switch regulated power supply adapter ACI 00-240V
- Personalize adjustment of TFT display
- Fine ultra-thin design
- Support RM/RMVB formats (Optional)
- RMVB function / TXT Reader function is optional.
- Be sure to hold the edge of disc. Do not touch the surface of the disc.
- Please do not put tape or sticker on disk.
- Do not store discs in a place subject to direct sunlight or near heat source
- Keep and store the disc after playing.
Clean Disc
- Before play disc, use a soft clean cloth to clean the disc from the centre to the outer of the disc.
- Do not use gasoline, non-special disc cleaners or anti static spray to clean the disc.
KEYS FUNCTION AND PANEL INSTRUCTION
Keys Function Instruction
| 1 | LCD MENU | Press to access the LCD setting menu |
| 2 | VOL- | Press to decrease volume |
| 3 | VOL+ | Press to increase volume |
| 4 | SETUP | Press to access the set up menu for the DVD player |
| 5 | MODE | Press to change playback mode |
| 6 | Directional button – left. For use in menus | |
| 7 | Directional button – right. For use in menus | |
| 8 | Press to rewind in DVD playback. Press to go back a song in CD playback. | |
| 9 | Press to fast forward in DVD playback. Press to go forward a song in CD playback. | |
| 10 | Press to pause playback, press again to resume playback | |
| 11 | COPY | For use with the copy from CD disc to flash stick function |
| 12 | LCD/⏻ | Short press 'LCD/⏻' function to shutdown |
| 13 | USB/SD | When in disc playback mode, press to change from disc play mode to USB/SD mode. |
| 14 | R/L | Short press "track": left single voice/right single voice/stereo/mixed track function switching. |
| 15 | STOP | Press to stop playback |
| 16 | MENU/PBC | Short press 'PBC/menu": DVD~title/VCD~ menu functions switching |
| 17 | OPEN | Switch to open lid for DVD player |
Interfaces with lights:
| 1 | ANT | Antenna signal input |
| 2 | DC-IN | Power inputNote: when not in use, please disconnect power DC adapter and unplug the mains power plug |
| 3 | ON/OFF | OFF/ON switch to turn the player off and on |
| 4 | AV IN | External video input signal |
| 5 | AV OUT | Video out signal |
| 6 | Ω EARPHONE | Connect earphones to this jack, earphones not included |
| 7 | SD/MMC | SD/MMC Card socket |
| 8 | USB | USB socket |
| 9 | Rechargeable lights | Charging instructions:A. Red light when charging, green light when fully charged .B. Lamp blinks when charging, steady light when fully charged.C. Steady light when charging, powers off when fully charged. |
| 10 | Remote control receiving window | Remote control signal receiver |
| 11 | ON Indicator | When turning on the power, indicator lights yellow and turns red when off. |
REMOTE CONTROL FUNCTION AND INSTRUCTIONS
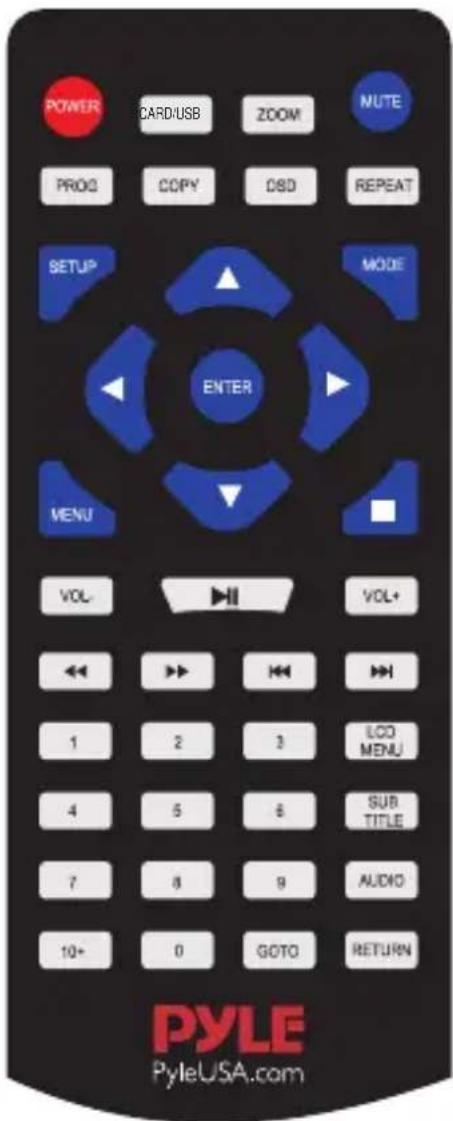
| POWER | Press this button to turn the DVD player on or off. |
| MENU | Press to access a DVD discs menu on discs which allow this function |
| LCD MENU | LCD Settings menu button. Short press to access the pop-up function |
| MODE | Press to change playback mode |
| ▲ | Directional button – up. For use in menus |
| Directional button – left. For use in menus | |
| ENTER | Press to make a selection when changing settings in menus |
| Directional button – right. For use in menus | |
| PROG | Press to program a loaded disc to play chapters and titles or tracks in a specified order. |
| Directional button – down. For use on menus | |
| MUTE | Press to mute the soundNote: No mute for AV output |
| RETURN | Exits current operation, e.g.: menu |
| Press to stop playback | |
| Press to pause playback, press again to resume playback | |
| REPEAT | In CD disc playback, press to repeat the current music track |
| Press to fast forward in DVD playback. Press to go forward a song in CD playback. | |
| Press to rewind in DVD playback. Press to go back a song in CD playback. | |
| Press to go back a chapter when playing a DVD disc which allows for this function | |
| Press to go forward a chapter when playing a DVD disc which allows for this function | |
| SUBTITLE | Press to access subtitles on discs which allow for this function |
| AUDIO | Press to switch between left/right/stereo sound playback |
| SD/USB | When in disc playback mode, press to change from disc play mode to USB/SD mode. |
| COPY | For use with the copy from CD disc to flash stick function |
| Number keys | Press during CD disc playback to jump to a particular track |
| VOL+ | Press to increase volume |
| VOL- | Press to decrease volume |
| OSD | Press when playing a disc to display disc playback info |
| SETUP | Press to access the set up menu for the DVD player |
| GO TO | Press to jump to a particular section when playing a DVD disc that allows for this function |
| ZOOM | Press during DVD playback to zoom into the picture on the screen |
Batteries in the remote control
- Remove the battery cover from the rear of the remote control.
- Add 2 x batteries to the remote as per the polarity directions in the battery compartment in the remote control.
- Put the battery cover back onto the rear of the remote control.
Note:
- Do not use re-chargeable batteries in the remote control, because they lose power at a slower rate.
- Do not mix different brands and type of batteries, do not use old and new batteries together.
- When the remote control function is not strong or control range is small, replace the batteries.
-
If the remote control will not be used for a long time, remove the batteries to avoid damage to the remote control from battery leakage or corrosion.
-
Do not use the remote control ion hot or humid conditions.
-
Do not disassemble the remote control.
-
Make sure that there are no obstacles between the remote control and the IR sensor on the DVD player that might obstruct the infra-red beam
-
The remote control must be held at an angle within 30 degrees perpendicular to the DVD Player's IR remote control sensor to function correctly. The distance between the remote control and the sensor should not exceed 5 meters.
-
Connect the DVD Player to the power supply (100-240V). Red light will show when power on and charging.
-
Switch the ON button on the machine to turn on the DVD player. Turn the switch to OFF when not in use.
2. Play / Pause
- This player will automatically play once the disc is loaded.
- Press▶ to pause
- Press ▶ once more to resume play.
3. Play back from USB/SD/MMC memory card
Press the SD/USB button to play back from USB or memory card.
1. PANEL SETTING
Press the "LCD MENU" key to enter menu setting; press the direction key UP/DOWN key to move the cursor, press the direction key to select the desired submenu function and the direction key LEFT/RIGHT key to adjust the function.
-
Brightness Adjustment: Press the direction key DOWN key and RIGHT key to choose the "Brightness" submenu, press the direction key LEFT/RIGHT key to adjust the function and set the brightness of video output.
-
Contrast Adjustment: Press the direction key DOWN key and RIGHT key to choose the "Contrast" submenu, press the direction key LEFT/RIGHT key to adjust the function and set the contrast of video output.
-
Color Adjustment: Press the direction key DOWN key and RIGHT key to choose the "Color" submenu, press the direction key LEFT/RIGHT key to adjust the function and set the color of video output.
-
TINT Adjustment: Press the direction key DOWN key and RIGHT key to choose the "Tint" submenu, press the direction key LEFT/RIGHT key to adjust the function and set the tint of video output.
-
Ratio: Press the direction key DOWN key to move the cursor and choose "Ratio", press the direction key LEFT/RIGHT key to adjust the function and set the ratio of image screen of video output as 16:9/4:3.
-
Default: Choose to restore to factory settings
1. SYSTEM SETUP
-
Power Resume: Choose the (Power Resume) option, press the direction key RIGHT and UP key to choose the desired option to set the function "ON" or "OFF"; when this device is in stop state or switched off, restart the device to resume the last video play status.
-
Screen Saver: On/Off; you may turn on/off the screen saver.
Note:
a. The play effect is related to the ratio of the video recorded; therefore, some videos may not be played in the screen size you have chosen.
b. For the 4:3 video, which ever video ratio is set, the play ratio will be 4:3.
-
Password: Initially, set this option as "Password lock" status; in such case, you cannot choose the password as per "Level" nor change the password. To set the "Level" option, press the number key to input the initial password of this device: 0000, then press the Selection key to confirm; to revise the password, you need to input the old password and then new password (the valid password shall be 4 digits).
-
Rating: When the disc with lock function, you may, according to the level of the disc and your actual demand, choose a proper age control level. The control levels are arranged from high to low; Level 1 is the lowest while Level 8 is the highest. This function is only suitable for discs with level limit system; this function can be realized only when the password function is released, remote control can be used when password function is active.
-
Default: After this option is chosen, this function setting column can restore to the initial factory settings.
2. LANGUAGE SETTING
- OSD Language: Enter OSD LANGUAGE setting, press the direction key to choose the desired "OSD LANGUAGE" option, then press the (ENTER) key to confirm. There are 8 modes available for such option. i.e. English, Chinese, German, Spanish, French, Portuguese, Italian and Russian.
Note: If the language you choose is unavailable in the DVD, then this device will automatically choose the defaulted language in such video.
-
Audio Lang: Enter AUDIO LANG setting, press the direction key to choose the desired "AUDIO LANGUAGE" option, then press the [ENTER] key to confirm. There are multiple modes available for such option, i.e. English, Chinese, German. Spanish. French, Portuguese, Italian, Russian, etc..
-
Subtitle Lang: Enter SUBTITLE LANG setting. press the direction key to choose the desired "Subtitle Language" option, then press the [ENTER] key to confirm. There are multiple modes available for such option, i.e. English, Chinese, German, Spanish, French, Portuguese, Italian, Russian, etc..
-
Menu Lang: Enter MENU LANG setting, press the direction key to choose the desired "Menu Language" option, then press the [ENTER] key to confirm. There are multiple modes available for such option, i.e. English, Chinese, German. Spanish, French, Portuguese, Italian, Russian, etc..
Note: If the language you choose is unavailable in the DVD, then this device will automatically choose the defaulted language in such disc.
3. AUDIO SETUP
- KEY: Press the UP/DOWN key to move the sliding block to adjust the audio.
4. VIDEO SETUP
-
Brightness: Press the UP/DOWN key to move the module to adjust the brightness of video output.
-
Contrast: Press the UP/DOWN key to move the module to adjust the contrast of video output.
-
Hue: Press the UP/DOWN key to move the module to adjust the hue of video output.
-
Saturation: Press the UP/DOWN key to move the module to adjust the saturation of video output.
-
Hue: Press the UP/DOWN key to move the module to adjust the sharpness of video output.
5. DIGITAL SETUP
-
OP Mode: In the output mode, choose the desired line output and RF adjustment.
-
Dynamic Range: Press the direction key DOWN key to enter the "Dynamic Range Compression" menu to eject the following "Dynamic Range Compression" functional pictures; press the direction key RIGHT key and DOWN key to adjust the "Dynamic RangeCompression" ratio.
-
Dual Mono: Choose the (Digital Setup) option, press the direction key RIGHT key to enter the submenu to eject the "Left +Right" or "Dynamic Range Compression", then press the direction key UP/DOWN key to choose Stereo/Left Right Mix and finally press the OK key to confirm.
CD/TRANSCORD/MULTIMEDIA FUNCTION
1. Copy the music/video in MP3, CD, EVD, MP4, RMVB (MP5)
When playing MP3/CD, press the (CH—COPY) key on the remote controller, the display of the device will eject the operation menu; press the UP/DOWN key to move the cursor to (TRACKS), press the direction key RIGHT key to move the cursor to the [TRK TITLE] menu, and press the [ENTER] key to choose all tracks. Press the UP/DOWN key move the blue cross cursor to the "Track" to be reproduced and press the [ENTER] key to confirm.


Press the [ENTER] key to choose the desired track, press the direction key to move the cursor left to the "Start" option and then press the "ENTER" key to start copying.
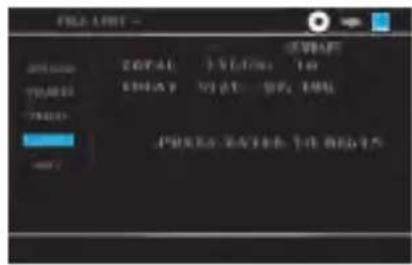

In the transcording process, do not disconnect USB or power off; otherwise the file transcorded will be lost; after the transcorded music or video is played completely, the transcording will be complete at the same time. In such case, the U disc has such track. After the operation is over, press the direction key to move the cursor to the "QUIT" option, press the "ENTER" key to exist and then unplug the USB.
Note: When EVD/MP4/MP is played, you must press the “■” key on the remote controller and then press the [COPY] key (if not so, no reaction when only the [COPY] key is pressed) to have the following interface; the device will eject the operation menu (press the direction key to move the cursor right to the icon of your desired file, such as music icon, album icon, game icon, video icon, e—book icon, and then press the UP/DOWN key to move the cursor to [TRACKS], press the direction to move the cursor right to the [TRK TITLE] menu and finally press [ENTER] key to confirm. Or press the UP/DOWN key to move the blue cross cursor to the track to be copied and press the [ENTER] key to confirm. After pressing the [ENTER] key to choose the desired track, press the direction key to move the cursor left to the "START" option and then press the [ENTER] key to start copying.

After the operation ends, press the direction key to move the cursor to the "QUIT" option and then press the "ENTER" key to exit and finally unplug the USB.
DVD PARAMETER
DVD Parts Technical Specification
| Compatible Disc | DVD, SVCD, VCD, CD, CD-R/RW, JPEG, DVD, WMA, MPG, MP3, VOB, AVI, MP4 etc(RM/RMVB is optional) |
| Supporting out device | USB/MMC/SD |
| Anti-Shock Function | DVD; 3sec.; VCD/CD; 10sec. MP3; 90sec. |
| AUDIO OUT | AUDIO; 2.0V+-0.2, Speak: 8Ω/1.5W; Output of earphone: 15mW |
| Frequency | 20HZ-20KHZ |
| Audio (s/n) Radio | ≥ 50dB |
| Range of Activity | ≥ 50dB |
| Video Output Level | 1.0V±0.2Vp-p(75Ω) |
| Video Output | PAL/NTSC/AUTO/SECAM |

natural_image
Illustration of a laptop with a red checkmark on screen, accompanied by partial text on the right side (no readable document text)VISIT US ONLINE:
Have a question?
Need service or repair?
Want to leave a comment?
PyleUSA.com/ContactUs


- PDV905BK
- Portable DVD
- USER MANUAL
- CONTENTS
- NOTICE
- NOTICE AND SAFETY INFORMATION
- User Notice
- Disc
- Inspection
- Repair
- Earphone
- Humidity
- Keep away from liquid
- Keep away from heat
- Thunder and Lightning
- Ventilation
- LCD Screen
- Laser
- Charger
- Battery and charging
- Charging process:
- FUNCTION INTRODUCTION
- Clean Disc
- KEYS FUNCTION AND PANEL INSTRUCTION
- REMOTE CONTROL FUNCTION AND INSTRUCTIONS
- Batteries in the remote control
- Note:
- Play / Pause
- Play back from USB/SD/MMC memory card
- PANEL SETTING
- SYSTEM SETUP
- LANGUAGE SETTING
- AUDIO SETUP
- VIDEO SETUP
- DIGITAL SETUP
- CD/TRANSCORD/MULTIMEDIA FUNCTION
- Copy the music/video in MP3, CD, EVD, MP4, RMVB (MP5)
- DVD PARAMETER
- VISIT US ONLINE:
Brand : Pyle
Model : PDV905BK
Category : Portable DVD Player