IP Tester - Testeur IP American DJ - Free user manual and instructions
Find the device manual for free IP Tester American DJ in PDF.

User questions about IP Tester American DJ
0 question about this device. Answer the ones you know or ask your own.
Ask a new question about this device
Download the instructions for your Testeur IP in PDF format for free! Find your manual IP Tester - American DJ and take your electronic device back in hand. On this page are published all the documents necessary for the use of your device. IP Tester by American DJ.
USER MANUAL IP Tester American DJ
ELATION® PROFESSIONAL

natural_image
Two black plastic medical or testing equipment cases with visible internal components and no text or symbols on the main objects.IP TESTER
User Manual
©2018 ELATION PROFESSIONAL all rights reserved. Information, specifications, diagrams, images, and instructions herein are subject to change without notice. Elation logo and identifying product names and numbers herein are trademarks of Elation. Copyright protection claimed includes all forms and matters of copyrightable materials and information now allowed by statutory or judicial law or hereinafter granted. Product names used in this document may be trademarks or registered trademarks of their respective companies and are hereby acknowledged. All non-Elation brands and product names are trademarks or registered trademarks of their respective companies.
ELATION PROFESSIONAL and all affiliated companies hereby disclaim any and all liabilities for property, equipment, building, and electrical damages, injuries to any persons, and direct or indirect economic loss associated with the use or reliance of any information contained within this document, and/or as a result of the improper, unsafe, insufficient, and negligent assembly, installation, rigging, and operation of this product.
ELATION PROFESSIONAL USA
6122 S. Eastern Ave. Los Angeles, CA. 90040
323-582-3322 | Fax 323-832-9142 | www.elationlighting.com | sales@elationlighting.com
ELATION PROFESSIONAL B.V.
Junostraat 2 | 6468 EW Kerkrade, The Netherlands
+31 45 546 85 66 | Fax +31 45 546 85 96 | www.elationlighting.eu | info@elationlighting.eu
ELATION PROFESSIONAL Mexico
AV Santa Ana 30 Parque Industrial Lerma, Lerma, Mexico 52000
+52 (728) 282-7070
DOCUMENT VERSION
Please check www.elationlighting.com for the latest revision/update of this guide.
| Date | Document Version | Software Version ≥ | Notes |
| 11/09/18 | 1 | 1.0.2 | Initial release. |
| 07/15/19 | 1.2 | 1.0.2 | Updated included temporary vent plug info. |
Europe Energy Saving Notice
Energy Saving Matters (EuP 2009/125/EC)
Saving electric energy is a key to help protecting the environment. Please turn off all electrical products when they are not in use. To avoid power consumption in idle mode, disconnect all electrical equipment from power when not in use. Thank you!
CONTENT
| GENERAL INFORMATION | 4 |
| LIMITED WARRANTY (USA ONLY) | 5 |
| SAFETY GUIDELINES | 6 |
| OVERVIEW | 7 |
| RECOMMENDED TOOLS | 8 |
| CONNECTIONS | 9 |
| TESTING FUNCTIONS | 11 |
| TESTING EXAMPLE: ELATION PROTEUS HYBRIDTM | 15 |
| PC SOFTWARE - INSTALLATION | 18 |
| PC SOFTWARE - OPERATION | 21 |
| UPDATING IP TESTER SOFTWARE FROM PC SOFTWARE | 29 |
| CASE DIMENSIONS | 31 |
| OPTIONAL ACCESSORIES | 31 |
GENERAL INFORMATION
INTRODUCTION
Please read and understand the instructions in this manual carefully and thoroughly before attempting to operate this device. These instructions contain important safety and use information.
UNPACKING
Every device has been thoroughly tested and has been shipped in perfect operating condition. Carefully check the shipping carton for damage that may have occurred during shipping. If the carton is damaged, carefully inspect the device for damage, and be sure all accessories necessary to install and operate the device have arrived intact. In the event damage has been found or parts are missing, please contact our customer support team for further instructions. Please do not return this device to your dealer without first contacting customer support. Please do not discard the shipping carton in the trash. Please recycle whenever possible.
BOX CONTENTS
(1) 3-5 ft Coiled Air Hose/Quick Connect Fitting
(1) M12 Treaded Brass Nozzle/Push-to-Connect Fitting
(1) M12x1.5 Hex-Socket Cap-Head A4-70 Stainless Steel Bolt/Washer
(1) 5 ft powerCON Power Cable
(1) 6 ft USB Cable
(1) 4GM (min) Micro SD Card
CUSTOMER SUPPORT
Contact ELATION Service for any product related service and support needs. Also visit forums.elationlighting.com with questions, comments or suggestions.
ELATION SERVICE USA - Monday - Friday 8:00am to 4:30pm PST 323-582-3322 | Fax 323-832-9142 | support@elationlighting.com
ELATION SERVICE EUROPE - Monday - Friday 08:30 to 17:00 CET +31 45 546 85 63 | Fax +31 45 546 85 96 | support@elationlighting.eu
REPLACEMENT PARTS please visit parts.elationlighting.com

IMPORTANT NOTICE!
THIS DEVICE MUST ONLY BE USED BY AN AUTHORIZED ELATION TRAINED SERVICE TECHNICIAN. DO NOT ATTEMPT TO USE THIS DEVICE WITHOUT BEING FULLY TRAINED ON HOW TO USE IT. ANY DAMAGES OR REPAIRS TO THIS DEVICE OR ANY ELATION AND/OR NON-ELATION LIGHTING FIXTURES CONNECTED TO THIS DEVICE RESULTING FROM IMPROPER USE, INCORRECT PRESSURE/VACUUM SETTINGS, AND/OR THE DISREGARD OF THE SAFETY AND OPERATION GUIDELINES IN THIS USER MANUAL VOIDS THE ELATION WARRANTY AND ARE NOT SUBJECT TO ANY WARRANTY CLAIMS AND/OR REPAIRS, AND MAY ALSO VOID THE WARRANTY FOR ANY NON-ELATION LIGHTING FIXTURES.
CONSULT WITH YOUR RESPECTIVE LIGHTING MANUFACTURER BEFORE USING THIS IP TESTER DEVICE ON NON-ELATION BRAND FIXTURES! IP TESTER DEVICE SETTINGS CONTAINED IN THIS MANUAL DO NOT APPLY TO NON-ELATION BRAND FIXTURES AND MAY DAMAGE YOUR FIXTURE. PLEASE CONTACT ELATION SERVICE FOR FURTHER DETAILS.
LIMITED WARRANTY (USA ONLY)
A. Elation Professional hereby warrants, to the original purchaser, Elation Professional products to be free of manufacturing defects in material and workmanship for a period of two years (730 days), and Elation Professional product rechargeable batteries to be free of manufacturing defects in material and workmanship for a period of six months (180 days), from the original date of purchase. This warranty excludes discharge lamps and all product accessories. This warranty shall be valid only if the product is purchased within the United States of America, including possessions and territories. It is the owner's responsibility to establish the date and place of purchase by acceptable evidence, at the time service is sought.
B. For warranty service, send the product only to the Elation Professional factory. All shipping charges must be pre-paid. If the requested repairs or service (including parts replacement) are within the terms of this warranty, Elation Professional will pay return shipping charges only to a designated point within the United States. If any product is sent, it must be shipped in its original package and packaging material. No accessories should be shipped with the product. If any accessories are shipped with the product, Elation Professional shall have no liability what so ever for loss and/or or damage to any such accessories, nor for the safe return thereof.
C. This warranty is void if the product serial number and/or labels are altered or removed; if the product is modified in any manner which Elation Professional concludes, after inspection, affects the reliability of the product; if the product has been repaired or serviced by anyone other than the Elation Professional factory unless prior written authorization was issued to purchaser by Elation Professional; if the product is damaged because not properly maintained as set forth in the product instructions, guidelines and/or user manual.
D. This is not a service contract, and this warranty does not include any maintenance, cleaning or periodic check-up. During the periods as specified above, Elation Professional will replace defective parts at its expense, and will absorb all expenses for warranty service and repair labor by reason of defects in material or workmanship. The sole responsibility of Elation Professional under this warranty shall be limited to the repair of the product, or replacement thereof, including parts, at the sole discretion of Elation Professional. All products covered by this warranty were manufactured after January 1, 1990, and bare identifying marks to that effect.
E. Elation Professional reserves the right to make changes in design and/or performance improvements upon its products without any obligation to include these changes in any products theretofore manufactured.
F. No warranty, whether expressed or implied, is given or made with respect to any accessory supplied with the products described above. Except to the extent prohibited by applicable law, all implied warranties made by Elation Professional in connection with this product, including warranties of merchantability or fitness, are limited in duration to the warranty periods set forth above. And no warranties, whether expressed or implied, including warranties of merchantability or fitness, shall apply to this product after said periods have expired. The consumer's and/or dealer's sole remedy shall be such repair or replacement as is expressly provided above; and under no circumstances shall Elation Professional be liable for any loss and/or damage, direct and/or consequential, arising out of the use of, and/or the inability to use, this product.
G. This warranty is the only written warranty applicable to Elation Professional products and supersedes all prior warranties and written descriptions of warranty terms and conditions heretofore published.
WARRANTY RETURNS
All returned service items whether under warranty or not, must be freight pre-paid and accompany a return authorization (R.A.) number. The R.A. number must be clearly written on the outside of the return package. A brief description of the problem as well as the R.A. number must also be written down on a piece of paper and included in the shipping container. If the unit is under warranty, you must provide a copy of your proof of purchase invoice. Items returned without a R.A. number clearly marked on the outside of the package will be refused and returned at customer's expense. You may obtain a R.A. number by contacting customer support.
SAFETY GUIDELINES
This device is a sophisticated piece of electronic equipment. To guarantee a smooth operation, it is important to follow all instructions and guidelines in this manual. ELATION PROFESSIONAL is not responsible for injury and/or damages resulting from the misuse of this device due to the disregard of the information printed in this manual. Only the original included parts and/or accessories for this device should be used. Any modifications to the device, included and/or accessories will void the original manufactures warranty and increase the risk of damage and/or personal injury.

PROTECTION CLASS 1 - IP TESTER MUST BE PROPERLY GROUNDED

THIS DEVICE MUST ONLY BE USED BY AN AUTHORIZED ELATION TRAINED SERVICE TECHNICIAN. DO NOT ATTEMPT TO USE THIS DEVICE WITHOUT BEING FULLY TRAINED ON HOW TO USE IT. ANY DAMAGES OR REPAIRS TO THIS DEVICE OR ANY ELATION AND/OR NON-ELATION LIGHTING FIXTURES CONNECTED TO THIS DEVICE RESULTING FROM IMPROPER USE, INCORRECT PRESSURE/VACUUM SETTINGS, AND/OR THE DISREGARD OF THE SAFETY AND OPERATION GUIDELINES IN THIS USER MANUAL VOIDS THE ELATION WARRANTY AND ARE NOT SUBJECT TO ANY WARRANTY CLAIMS AND/OR REPAIRS, AND MAY ALSO VOID THE WARRANTY FOR ANY NON-ELATION LIGHTING FIXTURES. DO NOT PLUG IP TESTER INTO A DIMMER PACK! KEEP FLAMMABLE MATERIALS AWAY FROM IP TESTER.

DRY LOCATIONS USE ONLY! DO NOT EXPOSE IP TESTER TO RAIN, MOISTURE, AND/OR SEVERE ENVIRONMENTS! DO NOT SPILL WATER AND/OR LIQUIDS ON OR INTO THE IP TESTER!

IP FIXTURE MUST BE POWERED OFF AND PROPERLY COOLED BEFORE TESTING. PLEASE REFER TO THE IP FIXTURE USER MANUAL FOR PROPER COOLING TIMES.

ENSURE NO DUST, WATER, OR DEBREE ENTERS THE IP FIXTURE WHEN REMOVING THE AIR RELIEF VALVES! CAREFULLY INSPECT THE AREA AROUND THE AIR RELIEF VALVE OPENINGS BEFORE REPLACING THE AIR RELIEF VALVE AFTER TESTING IS COMPLETE.
DO NOT connect an external compressor to the device.
AVOID brute force handling when transporting or operating.
DO NOT expose any part of the device to open flame or smoke. Keep device away from heat sources such as radiators, heat registers, stoves, or other appliances (including amplifiers) that produce heat.
DO NOT use device in extreme and/or severe environments.
DO NOT operate device if power cord is frayed, crimped, damaged and/or if any of the power cord connectors are damaged and do not insert into the device securely with ease. NEVER force a power cord connector into device. If the power cord or any of its connectors are damaged, replace it immediately with a new one of similar power rating.
CAUTION: Device should be operated by qualified and trained professionals ONLY.
Read user manual carefully to ensure normal operation and lifespan of the device.
ONLY use the original packaging materials and/or case to transport the IP Tester in for service.
OVERVIEW

text_image
Micro SD Slot I/O USB Port powerCON TRUE1 Cable POWER IN 100~240VAC 50/60Hz ON/OFF Switch USB Cable Air IN/OUT Vent M12 Brass Nozzle Air Hose Micro SD AIR IN/OUT IP TESTER IP TESTER® IP TESTER IP TESTER® Micro SD Micro SD IP USB ON/OFF POWER IN 100~240VAC 50/60Hz ON/OFF SwitchINCLUDED ACCESSORIES
(1) 3-5 ft Coiled Air Hose/Quick-Connect Fitting
(1) M12 Treaded Brass Nozzle/Push-to-Connect Fitting
(1) M12x1.5 Hex Socket Cap Head A4-70 Stainless Steel Bolt/Washer
(1) 5 ft powerCON TRUE1 Power Cable
(1) 6 ft USB Cable
(1) 4GM (min) Micro SD Card

text_image
IP Tester Test Personality Info PressRECOMMENDED TOOLS
Tools pictured below are required to remove and/or replace the pressure relief valves used on most IP fixtures. These are not included with the IP TESTER but can be purchased at any local hardware store.

text_image
M12x1.5 Hex Socket Cap Head A4-70 Stainless Steel Bolt/Washer (included) 6mm Hex Wrench (not included) 17mm Socket (not included) Socket Wrench (not included)CONNECTIONS

natural_image
Open black plastic case with hexagonal top and internal components (no visible text or symbols)
natural_image
Close-up of a hand holding a metallic connector with a black coiled spring attached, labeled 'Pressure / Vacuum To Fixture' (no other text or symbols visible)- Connect the air hose quick-connect fitting to the IP TESTER.

natural_image
Close-up of a metallic cylindrical component with blue wire routing through it (no text or symbols visible)Internal Hose Stop
Hose Clamping Mechanism

natural_image
Close-up of a brass mechanical connector with a close-up inset showing a 10 feet scale ruler (no text or symbols on the device itself)
natural_image
Close-up of a brass mechanical component with a ruler for scale, showing measurement markings (no text or symbols on the component itself)- Connect the air hose to the brass nozzle by fully inserting the bare end into the push-to-connect fitting, then tug gently to engage the internal clamping mechanism.
NOTE: Air hose must be inserted approximately 1-inch (2.5cm) for a proper connection.

natural_image
Close-up of a white electronic component with no visible text or symbols on its body
text_image
A/250V AC 10 5 IN RJ4- Remove main pressure relief valve from the fixture using a 17mm socket and socket wrench.

natural_image
Close-up of a black metal grate with a circular opening and screw base (no text or symbols visible)
natural_image
Close-up of a black automotive engine component with a circular vent and mounting bracket (no visible text or symbols)
natural_image
Close-up of hands adjusting a small metallic component on a black electronic device (no visible text or symbols)
natural_image
Close-up of a black and white car's front grille with checkered pattern (no visible text or symbols)- If the fixture has a second pressure relief valve, remove and replace it with an M12x1.5 Hex Socket Cap Head A4-70 Stainless Steel Bolt/Washer (included), tighten using a 6mm Hex Wrench. NOTE: Make sure the bolt has its O-ring for a proper seal.

text_image
FUSE.T12A/250V RJ45 IN RJ45 OUT
natural_image
Close-up of a mechanical device with labeled components including fuse, RJ45, and a brass connector (no readable text or symbols beyond labels)- Carefully insert the threaded end of brass nozzle into the fixture air relief valve hole and twist it until it is finger tight and slightly compresses the rubber O-ring seal.
NOTE: Make sure the brass nozzle has an O-ring for a proper seal.
It may be easier to FIRST insert and tighten the brass nozzle into the fixture relief valve hole, and then insert the bare end of the air hose into the push-to-connect fitting.
NOTE: The air hose must be inserted approximately 1-inch (2.5cm) for a proper connection, and tugged on gently to engage the internal clamping mechanism.
- Connect power cable and switch the IP TESTER ON.
NOTE: If a leak is suspected at the nozzle or nylon bolt, check the following items:
- Confirm brass nozzle is properly inserted and secure, apply an additional 14 -turn if needed.
- Confirm air hose is fully inserted approximately 1-inch (2.5cm), remove and reinsert if needed.
- Confirm the nylon bolt is properly installed and secure, apply an additional 14 -turn if needed.
Retest fixture again to verify the nozzle or nylon bolt leak no longer exists.

WARNING: DO NOT OVER TIGHTEN BRASS NOZZLE OR NYLON BOLT!
CONSULT WITH YOUR RESPECTIVE LIGHTING MANUFACTURER BEFORE USING THIS IP TESTER DEVICE ON NON-ELATION BRAND FIXTURES! IP TESTER DEVICE SETTINGS CONTAINED IN THIS MANUAL DO NOT APPLY TO NON-ELATION BRAND FIXTURES AND MAY DAMAGE YOUR FIXTURE. PLEASE CONTACT ELATION SERVICE FOR FURTHER DETAILS.
TESTING FUNCTIONS
Test
Connect the air hose to the tester and the fixture, power ON the tester and select the desired mode/function.
Use Personality mode to set fixture used in Test mode (see Personality mode)
Note: The IP Tester can work independently of a PC, and automatically saves test results in PSI or KPA format on the Micro SD card, which can then be opened and viewed using the IPTester PC software.

text_image
IP Tester Test ^ Auto ↓ MODE (ESC) CE- Select Test and

text_image
fixture model: Proteus Hybrid < start test > MODE (100%) CE- Click
← to input serial number (Choose 'fixture' in Personality')

text_image
input SN# 0000000001 MODE YESO CE- To input SN#, use ← → and ↑↓ to enter numbers. If you want to bypass this process, merely click
↓ again and the test will run automatically

text_image
input SNR 0123456789 MODE FESC CE←→ and ↑↓ to
I want to bypass this

text_image
Protou Hybrid:pressure target value:4.500psi min. value:3.700psi hold time:000sec TEST:001sec- The test results are automatically stored on SD Card

text_image
IP Tester Test Personality Info Press(Use ↑↓ to select, then ← to enter selection)

text_image
MODE / ESCPress
Auto | fixture model:Fixture A<start test>(Choose ‘fixture’ in ‘Personality’) | input SN#0000000000(Use ← → and ↑↓ to enter numbers) | target value: ##.### psi min. value: ##.###psi Hold time: ## sec TEST: ##sec |
| < back > Note that in “auto mode,” the test always performs a “pressure” test, and when this passes, it automatically performs a “vacuum” test. | |||
Manual Test | Vacuum | target value: -##.# psi | |
| min. value:-##.# psi | |||
| time hold:### s | |||
| < OFF >Test pass | < ON > | ||
| Pressure | target value: ##.# psi | ||
| min. value: ##.# psi | |||
| time hold:005 s | |||
| < OFF >Test pass | < ON > | ||
| Self-Test |  SELF-TEST MODE FOR FACTORY CALIBRATION ONLY! DO NOT CONNECT ANY LIGHTING FIXTURE TO THE DEVICE USING SELF-TEST MODE! SELF-TEST MODE FOR FACTORY CALIBRATION ONLY! DO NOT CONNECT ANY LIGHTING FIXTURE TO THE DEVICE USING SELF-TEST MODE! | ||
Personality
Select the desired fixture to be tested.

text_image
IP Tester Test Personality Info Press Enter to Confirm MODE / EBC CE- Select Personality and press

text_image
IP Tester Personality ▲ Fixture ▼ MODE /IEC CE- Select Fixture or Device, use ← → arrows to toggle through available fixtures

text_image
IP Tester Fixture- With fixture selected, press
←, and press ←, again when you see the fixture numbers to load the fixture in the "auto" test. If you don't do this, then the fixture won't load.

text_image
IP Tester Proteus Hybrid Pressure target value: 4.500 psi Hold time: 30 sec Pressure min. value: 3.700 psi Vacuum target value: -4.500 psi Hold time: 30 sec Vacuum min. value: -3.700 psi MODE / EBC CE- Press MODE/ESC to return to main mode menu. Note that to "set" a fixture, you need to enter this page again to get it into the "auto" or "manual" test mode.
The fixtures listed in the right column are sample choices; the number of fixtures available for testing is not limited to those listed on this chart.
Additional fixtures can be created and loaded to the IP Tester using the PC software.
If a fixture uploaded from the PC software doesn't show on the fixture list, select Service Setting, then Fixture, which uploads the fixture directly to the IP Tester, and allows the fixture to be selected using the Fixture in the Personality Mode.

text_image
IP Tester Test Info Personality Press(Use ↑↓ to select, then ← to enter selection)

text_image
MODE /ESCPress
Fixture

(sample of moving head fixture)
Pressure target value: 7.980 psi
Hold time: 10 sec
Pressure min. value: 6.530 psi
Vacuum target value: -7.980 psi Hold time: 10 sec
Vacuum min. value: -6.530 psi
Fixture A
Pressure target value: ##.### psi Hold time: ## sec
Pressure min. value: ##.### psi
Vacuum target value: -##.### psi Hold time: ## sec
Vacuum min. value: -##.### psi
Fixture B
Pressure target value: ##.### psi Hold time: ## sec
Pressure min. value:##.### psi
Vacuum target value: -##.### psi Hold time: ## sec
Vacuum min. value: -##.### psi
Fixture C
Pressure target value: ##.### psi Hold time: ## sec
Pressure min. value: ##.### psi
Vacuum target value: -##.### psi Hold time: ## sec
Vacuum min. value: -##.### psi
Proteus Hybrid
Pressure target value: 7.980 psi
Hold time: 10 sec
Pressure min. value: 6.530 psi
Vacuum target value: -7.980 psi Hold time: 10 sec
Vacuum min. value: -6.530 psi
| Personality (continued) | ||||
 | Unit | kPa | ||
| psi | ||||
(Use ↑↓ to select, then ↓ to enter selection)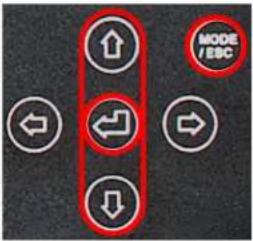 Pressto Confirm Pressto Confirm | Service Setting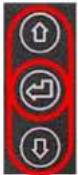 Note, that once you're in Service Setting, after entering the password, you can manually change all the settings from each fixture in "set Fixture." Also, in Service Setting, after entering the password, you have access to the "reset default" menu; which when activated, erases all fixtures except Fixture A, B, and C. You have to upload them again from the PC. Note, that once you're in Service Setting, after entering the password, you can manually change all the settings from each fixture in "set Fixture." Also, in Service Setting, after entering the password, you have access to the "reset default" menu; which when activated, erases all fixtures except Fixture A, B, and C. You have to upload them again from the PC. | Password | < 000 > Range: 000 - 255(Default password: 050) | |
| Fixture | Proteus Beam | Pressure target value: 7.980 psiHold time: 10 secPressure min. value: 6.530 psiVacuum target value: -7.980 psiHold time: 10 secVacuum min. value: -6.530 psi | ||
| Fixture A | Pressure target value: ##.### psiHold time: ## secPressure min. value: ##.### psiVacuum target value: -##.### psiHold time: ## secVacuum min. value: -##.### psi | |||
| Fixture B | Pressure target value: ##.### psiHold time: ## secPressure min. value: ##.### psiVacuum target value: -##.### psiHold time: ## secVacuum min. value: -##.### psi | |||
| Fixture C | Pressure target value: ##.### psiHold time: ## secPressure min. value: ##.### psiVacuum target value: -##.### psiHold time: ## secVacuum min. value: -##.### psi | |||
| Proteus Hybrid | Pressure target value: 7.980 psiHold time: 10 secPressure min. value: 6.530 psiVacuum target value: -7.980 psiHold time: 10 secVacuum min. value: -6.530 psi | |||
Info
View the current software version.

text_image
IP Tester Test Personality Info Press (Enter) to Confirm MODE / IBC CE- Select Info and press

text_image
IP Tester Info Software Ver MODE / EBC CE- Press

text_image
IP Tester Software Ver Ver:1.0.2 MODE / EBC CE- Press MODE/ESC to return to main mode menu

text_image
IP Tester Test Personality Info Press Enter to Confirm(Use ↑↓ to select, then ↓ to enter selection)

text_image
MODE /ESCPress
Auto

Ver: 1.0.2
TESTING EXAMPLE: ELATION PROTEUS HYBRID™

natural_image
Exterior view of a black triangular radar or optical device with a smaller case labeled 'EATON' and red arrows pointing to a component (no text or symbols on the device itself)The following sequence of instructions demonstrates a typical IP fixture test; However, specific testing instructions will vary for each IP fixture.
The ELATION PROTEUS HYBRID, which is used for this testing example, has a secondary pressure relief valve. For testing, this valve needs to be removed temporarily, and replaced with an included air/water-tight M12x1.5 Hex Socket Cap Head A4-70 Stainless Steel Bolt/Washer.
Always review the IP fixture user manual for specific instructions on accessing the pressure relief valves.

text_image
Solid user manual before use On open unit, risk of wireless stands. Power: 750W Tc=45°C, Tcr=550°C Made in P.R.C FUSE.T13A/360V AC 100-240V: 60/90Hz,750W
text_image
Load car transmission bus. The red open unit, part of electric shock. Power: 760W Tens°F: 10+150°C Made in P.R.C. PUSE T13A/98V AC 100-36V~ RUNS RUNS OUT RUNS OUT RUNS OUT- Remove the M12 hex-head pressure relief valve on the rear connection pane of the fixture.

natural_image
Hand inserting a spring into a black plastic case with a digital display (no visible text or symbols)
natural_image
Hand holding a black rubber hose attached to an open black case with a digital display (no visible text or symbols)- Connect the air hose to the IP TESTER by inserting the quick-connect fitting into the coupler.

natural_image
Close-up of hands holding a black cable with a metallic connector, no visible text or symbols
natural_image
Close-up of hands holding a black cable with a metallic connector, no visible text or symbols- Connect the air hose to the brass nozzle by fully inserting the bare end into the push-to-connect fitting, then tug gently to engage the internal clamping mechanism.
NOTE: Air hose must be inserted approximately 1-inch (2.5cm) for a proper connection.

natural_image
Close-up of a hand inserting a device into a black electronic device with buttons and ports (no visible text or symbols)
natural_image
Close-up of a black electronic device with visible internal components and wiring (no readable text or symbols)- Insert the threaded end of Pressure/Vacuum Hose Adapter into the threaded valve through hole socket, and twist it until it is finger tight and slightly compresses the rubber O-ring seal (If the pressure test fails and you suspect a slight leak at the hose adapter, an additional 1/4-turn with a wrench may be necessary to ensure a complete seal, then re-run the pressure test to verify).

natural_image
Close-up of a black dome-shaped object with a red circular hole and white connectors, mounted on a grid-patterned surface (no text or symbols visible)
natural_image
Close-up of a black automotive roof grille with a red circular badge highlighting a bolt (no text or symbols visible)- Remove the back-panel on the fixture moving head and remove the 12M pressure relief valve.

natural_image
Close-up of hands adjusting a black automotive roof-mounted sensor component (no visible text or symbols)
natural_image
Close-up of a black automotive roof grille with a headlamp and grille grilles (no visible text or symbols)- Install an M12x1.5 Hex Socket Cap Head A4-70 Stainless Steel Bolt/Washer (included), and tighten using a 6mm Hex Wrench. NOTE: Make sure the bolt has its O-ring for a proper seal.

text_image
IP Tester Start Parameters End (Ass. Color) to Before NODE PROFESSIONAL ELATION PROFESSIONAL- Select Personality (use ← → ↑ ↓ arrows to toggle through modes) and press
↘.

text_image
IP Tester Proteus Hybrid Pressure target value: 5.500 pct Hold time: 48 sec. Pressure Mio. value: 9.700 pct Rescue target value: -6.500 pct Hold time: 48 sec. Rescue Mio. value: -6.700 pct- Fixture and test parameters are displayed, press
↓ again to load the fixture.

text_image
IP Tester Test Personality Press (date) to notice ELATION PROFESSIONAL- Select Test and press

text_image
fixture model: Proteus Hybrid < start test > ELATION PROFESSIONAL- Click
↓ again will bring you first to input serial SN# (Choose 'fixture' in Personality).

text_image
input SN8 0123456789 MODE /ESC ELATION PROFESSIONAL IP TESTER CE- To enter the serial number, use ↑↓ arrows to change numbers, and use ← → arrows to move cursor, then press
↓ to begin the test. To bypass the input SN# altogether, just push ↓ again.

text_image
IP Tester Personality ▲ Fixture ▼ MODE MODER ELATION PROFESSIONAL CE- Select Fixture (use ←, → arrows to toggle through available fixtures) and press
↓.

text_image
IP Tester Text Formality from close to series ELATION CE- Press Mode/Esc to return to Mode menu.

text_image
IP Tester Test A Auto V MODE PROFESSIONAL ELATION PROFESSIONAL- Select Auto and press
↓.

text_image
input SN8 0000000001 ELATION PROFESSIONAL
text_image
Proteus Hybrid pressure target value:4.600psi min. value:3.790psi Hold time:030sec TEST:031secPC SOFTWARE - INSTALLATION
Compatible with Windows 7, 8, 8.1, and 10 and requires a minimum of 52MB free disk space.
Download and install

IPTester 1.0.2 setup
Step 1: Select Destination Location (requires at least 52MB of free disk space).

text_image
Setup - IPTester Select Destination Location Where should IPTester be installed? Setup will install IPTester into the following folder. To continue, click Next. If you would like to select a different folder, click Browse. C:\Program Files (x86)\IPTester Browse... At least 52.0 MB of free disk space is required. Next > CancelStep 2: Select Start Menu Folder, to select different folder location, click 'Browse...', and then click 'Next >' to continue.

text_image
Setup - IPTester Select Start Menu Folder Where should Setup place the program's shortcuts? Setup will create the program's shortcuts in the following Start Menu folder. To continue, click Next. If you would like to select a different folder, click Browse. IPTester Browse... Don't create a Start Menu folder < Back Next > CancelStep 3: Select Additional Tasks, select 'Create a desktop shortcut' and click 'Next >'.

text_image
Setup - IPTester Select Additional Tasks Which additional tasks should be performed? Select the additional tasks you would like Setup to perform while installing IPTester, then click Next. Additional shortcuts: ✓ Create a desktop shortcut < Back Next > CancelStep 4: 'Ready to install', click 'Install'

text_image
Setup - IPTester Ready to Install Setup is now ready to begin installing IPTester on your computer. Click Install to continue with the installation, or click Back if you want to review or change any settings. Destination location: C:\Program Files (x86)\IPTester Start Menu folder: IPTester Additional tasks: Additional shortcuts: Create a desktop shortcut < Back Install CancelStep 5: As the program finishes installing, a dialogue window will prompt you to launch the program.
Select Run SETUP.EXE, and select Launch IPTester if desired, and click Finish.
Click desktop shortcut to launch IPTester software.
PC SOFTWARE - OPERATION
Main Software Interface

text_image
IP Tester 1.0.2 Setup project Open a project blank Operation Management Update Template Filter: input fixture name and press "Enter" key 12P HEX IP 18P HEX IP 7P HEX IP 7PZ IP CUEPIX 16IP CW Profile HP IP Dyna G HO ExDMX DynaCove Ex HO DynaGrace Ex HO Linear One Ex LOOKING FOR ANY LEAK Profile IP Proteus Beam Proteus Hybrid Sxpar UV 72IP Volt WIFLY EXR HEXS IP Wifly EXR QAS IP WW Profile HP IP Share Fixture Display & Data Entry Import photo Fixture Name: less than 16 characters Unit: kPa Pressure target: 0.00 kPa Pressure min. limit(0, 60) 0.00 kPa Hold Time: 1 (sec) Vacuum target: 0.00 kPa Vacuum min. limit(-60, 0) 0.00 kPa Hold Time: 1 (sec) Save Upload CancelStep 1:
Click the 'blank' area to upload a new fixture and enter new data.
- import photo: Upload fixture photo in png. or jpg. format
- Fixture name: Enter fixture name
- Unit: Choose between kPa and psi.
- Pressure target: Enter maximum pressure value.
- Pressure min.: Enter minimum pressure value.
- Hold Time: Enter number of seconds for Pressure test.
- Vacuum target: Enter maximum vacuum value.
- Vacuum min.: Enter minimum vacuum value.
- Hold Time: Enter number of seconds for Vacuum test.

text_image
x86/IPTester/templates/Proteus Beam.png Import photo Fixture Name: Proteus Beam Unit: psi Pressure target: limit(0, 8.7) 7.98 psi Pressure min. limit(0, 8.7) 6.53 psi Hold Time: 10 (sec) Vacuum target: limit(-8.7, 0) -7.98 psi Vacuum min. limit(-8.7, 0) -6.53 psi Hold Time: 10 (sec) Save Upload CancelSave: Saves entered data and lists the fixture.
Upload: Upload the data to IP Tester.
CONFIG OK displays if upload is successfully.
Ensure IP Tester is connected to PC successfully before clicking Upload.
Delete:
Right click to delete the fixture data you want.

text_image
Delete Protues beam blankStep 2:
Select fixture you need to test. Then click Setup Project. The following image will be displayed.

line
| Time(sec) | Pressure(Pa) | | --------- | ------------ | | 0 | 20.0 | | 10 | 20.0 | | 20 | 20.0 | | 30 | 20.0 | | 40 | 20.0 | | 50 | 20.0 | | 60 | 20.0 | | 70 | 20.0 | | 80 | 20.0 | | 90 | 20.0 | | 100 | 20.0 |
Click here to return to main interface.

text_image
✓ Manual test □ Auto testManual test: Click (+) for Pressure Test, and (-) for Vacuum Test.

text_image
Manual test ✓ Auto testAuto test: performs Pressure test first, then Vacuum test.
Current pressure:
Current pressure: shows current fixture pressure.
Hold Time:
Hold time: shows hold time for either Pressure test or Vacuum test.
Step 3:
The following 5 test displays are samples of tests run in both Manual Test and Auto Test modes:
Sample Manual Test for Pressure - Pass

line
| Time(sec) | Pressure(psi) | | --------- | ------------- | | 0.0 | 1.0 | | 10.0 | 2.26253 | | 90.0 | 2.26253 |Sample Manual Test for Vacuum - Pass

line
| Time(sec) | Pressure(psi) | | --------- | ------------- | | 0.0 | -1.5 | | 5.0 | -2.5 | | 10.0 | -2.41818 | | 15.0 | -2.41818 | | 20.0 | -2.41818 | | 25.0 | -2.41818 | | 30.0 | -2.41818 | | 35.0 | -2.41818 | | 40.0 | -2.41818 | | 45.0 | -2.41818 | | 50.0 | -2.41818 | | 55.0 | -2.41818 | | 60.0 | -2.41818 | | 65.0 | -2.41818 | | 70.0 | -2.41818 | | 75.0 | -2.41818 | | 80.0 | -2.41818 | | 85.0 | -2.41818 | | 90.0 | -2.41818 |Sample Auto Test - Running

line
| Time(sec) | Pressure(psi) | | --------- | ------------- | | 0.0 | 1.0 | | 5.0 | 2.5 | | 10.0 | 2.2 | | 15.0 | 2.0 | | 20.0 | -2.0 | | 25.0 | -2.0 | | 30.0 | -2.0 | | 35.0 | -2.0 | | 40.0 | -2.0 | | 45.0 | -2.0 | | 50.0 | -2.0 | | 55.0 | -2.0 | | 60.0 | -2.0 | | 65.0 | -2.0 | | 70.0 | -2.0 | | 75.0 | -2.0 | | 80.0 | -2.0 | | 85.0 | -2.0 | | 90.0 | -2.0 |Sample Auto Test - Pass

line
| Time(sec) | Pressure(psi) | | --------- | ------------- | | 0.0 | 1.0 | | 5.0 | 2.5 | | 10.0 | 2.3 | | 15.0 | -1.0 | | 20.0 | -2.0 | | 25.0 | -2.0 | | 30.0 | -2.0 | | 35.0 | -2.0 | | 40.0 | -2.0 | | 45.0 | -2.0 | | 50.0 | -2.0 | | 55.0 | -2.0 | | 60.0 | -2.0 | | 65.0 | -2.0 | | 70.0 | -2.0 | | 75.0 | -2.0 | | 80.0 | -2.0 | | 85.0 | -2.0 | | 90.0 | -2.0 |Sample Auto Test - Fail

line
| Time(sec) | Pressure(psi) | | --------- | ------------- | | 0.0 | 1.5 | | 5.0 | 2.5 | | 10.0 | 2.3 | | 15.0 | 0.5 | | 20.0 | -1.5 | | 25.0 | -0.5 | | 30.0 | 0.0 | | 35.0 | 0.5 | | 40.0 | 1.0 | | 45.0 | 1.5 | | 50.0 | 2.0 | | 55.0 | 2.5 | | 60.0 | 3.0 | | 65.0 | 3.5 | | 70.0 | 4.0 | | 75.0 | 4.5 | | 80.0 | 5.0 | | 85.0 | 5.5 | | 90.0 | 6.0 |Step 4:
To save test results, first select your file location, name your file, then click:

Test results can be saved in two file formats: .gmv and .xlsx (see below). When saving to .xlsx format, enter the device serial number so it will correctly display in .xlsx table.

text_image
Save Project Local Disk (C:) > Program Files (x86) > IPTester > Search IPTester File name: When saving to .xlsx format, enter serial number here as file name so it will correctly display in .xlsx table. Save as type: GMV File(*.gmv) GMV File(*.gmv) Excel(*.xlsx) Browse Folders Save CancelStep 5:
To check the results that you saved in .gmv:
- The test results saved in .gmv format can be opened from your computer with the IPTester PC software. First click on 'Open a project', then navigate to the location where you saved the project file from Step 4 above, and click 'Open'.
- Depending on the unit setting (psi or kpa), the IP Tester can work independently of a PC and automatically saves test results in either a .psi or .kpa format on the Micro SD card, which can then be viewed by the IPTester PC software.

text_image
Setup project Template Filter: Input fixture name and press "Enter" key Open a project Open Project IP Tester > IP Test Files > test files in gmv format Search test files in gmv format Organize New folder Name Date modified Type Size Quick access Serial Number as file name Date IPTester File 2 KB Desktop Downloads Pictures IP Tester IPTester program OneDrive This PC 3D Objects File name: Serial Number as file name GMV File(*.gmv;*.kpa) Open CancelStep 5 (con't):
To check the results that you saved in .xlsx:
- Test results saved in .xlsx format can be opened with Microsoft Excel. Note that when saving to an .xlsx format, you should enter the serial number of the fixture in the file name box before you save it so that it will correctly display in the .xlsx table.

line
| Parameter | Value | |---------------------|-------| | PSI | 1.4 | | Pressure Target | 3.0 | | Pressure Min.: | 2.5 | | Pressure Hold Time | 10.0 | | Vacuum Target | -3.0 | | Vacuum Min.: | -2.5 | | Vacuum Hold Time | 10.0 |UPDATING IP TESTER SOFTWARE FROM PC SOFTWARE
Step 1: With the IP Tester connected to your computer via the USB cable and the PC Software open, click 'Update'.

text_image
IP Tester 1.0.2 Setup project Open a project Template Filter: Input fixture name and press "Enter" key 12P HEX IP 18P HEX IP 7P HEX IP 7PZ IP CUEPIX 16IP CW Profile HP IP Dyna G HO ExDMX DynaCove Ex HO DynaGrace Ex HO Linear One Ex LOOKING FOR ANY LEAK Profile IP Proteus Beam Proteus Hybrid Sixpar UV 72IP Volt WIFLY EXR HEX5 IP Wifly EXR QAS IP WW Profile HP IP blank UpdateStep 2: Click 'Browse' and navigate to location of
Step 3: Click on '1U01_V102.gsd' to select IP Tester software update, then click 'Open'.
“...IPTester > Program > ‘1U01_V102.gsd’, then click software update, then click ‘Open’.
'OK'.

text_image
GSD Update GSD Path: Browse Update OK
text_image
File Program Files (g86) > IPTester > program Organize > New folder IP Tester Name Date modified Type Size 1U01_V102.gsd 10/10/2019 12:52 GSD File 132 KB OneDrive This PC 3D Objects Desktop Documents Downloads Music Pictures Videos Local Disk I/Os File name: 1U01_V102.gsd (GSD File(*.gsd)) Open CancelStep 4: With the IP Tester software update path opened, click 'Update'.h]
Step 5: After 'Update' is selected, the IP Tester PC Software will update the software of the IP Tester, and displays the status of the updating process after it is completed, displaying 'Update completely!'

text_image
GSD Update GSD Path: s (x86)/IPTester/program/1U01_V102.gsd Browse Update Choose file: C:/Program Files (x86)/IPTester/program/1U01_V102.gsd OK
text_image
GSD Update GSD Path: s (x86)/IPTester/program/1U01_V102.gsd Browse Update Choose file: C:/Program Files (x86)/IPTester/program/1U01_V102.gsd Gsd file size: 134320 bytes File is uploading,please wait for a moment. Send count: 4198 Update completely!Step 6: Also, during the updating process, the IP Tester screen displays the image on the left. Once it's complete, it automatically resorts to the default Mode selection screen menu shown below right.

text_image
Software Update Online 1. Long Wait 2. Product Code Correct 3. User Code Correct 4. Software Version Correct Now Update is Pcb: 01 IC: 001 Count: 01000 Boot: U1.1.2 Data Check...
text_image
IP Tester Test Personality Info PressTo display the newly updated (current) software.

text_image
IP Tester Test Personality Info Press (Enter) to Confirm MODE T/IEBC CE- Select Info and press

text_image
IP Tester Info Software Ver MODE /ESC CE- Press
↓ again.

text_image
IP Tester Software Ver Ver:1.0.2 MODE /IEC CE- Press MODE/ESC to return to main mode menu
CASE DIMENSIONS
Weight: 15.4 lbs. (7kg)

text_image
6.5" (165.1mm) 11.0" (279.4mm) 14.25" (362mm) 12.5" (317.5mm) 16.5" (419.1mm) 5.2" (132mm) 15.25" (387.4mm)OPTIONAL ACCESSORIES
| ORDER CODE | DESCRIPTION |
| 50501990323 | 3-5 ft Coiled Air Hose/Quick Connect Fitting |
| 9900010723 | M12 Treaded Brass Nozzle/Push-to-Connect Fitting |
| IP TESTER PLUG | M12x1.5 Hex Socket Cap Head A4-70 Stainless Steel Bolt/Washer |
| NEU007 | powerCON TRUE1 Power Cable |