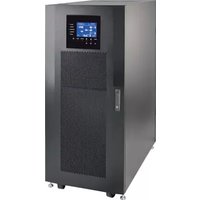
SVX30KS1P0B - UPS Tripp Lite - Free user manual and instructions
Find the device manual for free SVX30KS1P0B Tripp Lite in PDF.


| Product Type | UPS (Uninterruptible Power Supply) |
| Brand | Tripp Lite |
| Model | SVX30KS1P0B |
| Power Capacity | 30 kVA / 27 kW |
| Input Voltage | 3-Phase, 208V/220V/240V (configurable) |
| Output Voltage | 3-Phase, 208V/220V/240V (configurable) |
| Frequency | 50 / 60 Hz (auto-sensing) |
| Form Factor | Tower / Rackmount (tower kit included) |
| Battery Type | Sealed Lead-Acid (VRLA) |
| Communication Ports | USB, RS-232, RJ45 Ethernet, CONFIG port |
| Management Interfaces | Web interface, CLI (SSH), PowerAlert software |
| Dimensions (H x W x D) | 36.5 x 17.5 x 29.5 in (927 x 445 x 749 mm) |
| Weight | 350 lbs (159 kg) |
| Operating Temperature | 0°C to 40°C (32°F to 104°F) |
| Certifications | UL, cUL, FCC, NOM |
| Warranty | 3 years (parts and labor) |
| Maintenance | Periodic battery replacement; keep vents clear; firmware updates via web/CLI |
| Repairability | Modular design; hot-swappable batteries; replaceable fans and control board |
Frequently Asked Questions - SVX30KS1P0B Tripp Lite
ipv4 or ipv6 commands under the root level. After changing, run apply network to activate changes. This may cause a reboot.device , then use battery test start. For automatic periodic tests, use battery test period .snmp-server trap commands. Create an SNMP trap receiver with snmp-server host , then enable traps. Alternatively, use the action command with type snmp-trap.email , then configure SMTP with smtp commands. Finally, create an action of type email and assign the contact.device restart command. You can also schedule a restart using the schedule command with a restart action.firmware command. For network updates, specify the path to the firmware file via FTP or SCP. The system will install the update and reboot.show alert to view all alerts. Each entry shows ID, event, device, date/time, severity, and acknowledgment status. Use alert acknowledge to acknowledge.User questions about SVX30KS1P0B Tripp Lite
0 question about this device. Answer the ones you know or ask your own.
Ask a new question about this device
Download the instructions for your UPS in PDF format for free! Find your manual SVX30KS1P0B - Tripp Lite and take your electronic device back in hand. On this page are published all the documents necessary for the use of your device. SVX30KS1P0B by Tripp Lite.
USER MANUAL SVX30KS1P0B Tripp Lite
Register your product today and be automatically entered to win an ISOBAR ® surge protector in our monthly drawing!
tripplite.com/warranty




1111 W. 35th Street, Chicago, IL 60609 USA • tripplite.com/support
Copyright © 2021 Tripp Lite. All rights reserved.
Table of Contents
1. Overview 4
2. Logging In 5
3. Entering Commands 6
3.1 General CLI Commands 6
3.2 Keyboard Shortcuts 7
4. Log Navigation 8
5. CLI Commands 9
aaa 9
action 10
contact 11
count 12
delay 13
enable 13
interval 14
load 15
load-group 16
name 17
output-contact 17
show 18
snmp-set 19
target-device 20
trigger 21
alert 22
apply 25
autoprobe 25
authentication 26
community 27
description 27
enable 28
interval 29
name 29
primary 30
privacy 31
retry 32
secondary 33
security-mode 34
show 35
username 36
version 36
backup 37
clock 37
contact 39
default 39
device 43
apply 45
asset-tag 46
auto-restart 46
avr 48
battery 49
buzzer 52
bypass 53
cold-start 54
date-installed 54
db9 55
dehumidifying 56
details 57
energy 57
fault 58
id 59
input 59
last-reason 60
load 61
load-group 67
location 72
mute 72
name 73
off 74
off-mode 74
on 75
on-battery 75
output 76
power 78
ramp 79
remote 79
region 80
reset 81
restart 81
restore-hardware 82
sensor 82
set-point 92
shed 93
show 94
shutdown 95
watt-hours 96
dns 96
email 98
address 99
enable 99
name 100
show 101
test 101
Table of Contents
| event | 102 |
| acknowledge | 104 |
| enable | 105 |
| logging | 105 |
| name | 107 |
| severity | 107 |
| show | 108 |
| exit | 108 |
| firmware | 109 |
| help | 110 |
| host | 110 |
| http | 111 |
| https | 112 |
| ipv4 | 113 |
| ipv6 | 115 |
| ldap-server | 117 |
| anonymous | 118 |
| attribute | 118 |
| bind | 119 |
| domain | 120 |
| enable | 121 |
| host | 121 |
| name | 122 |
| object-class | 123 |
| port | 123 |
| priority | 124 |
| search | 125 |
| show | 126 |
| test | 126 |
| type | 127 |
| log | 128 |
| autoexport | 129 |
| export | 130 |
| interval | 131 |
| max-size | 132 |
| metrics | 133 |
| severity | 134 |
| show | 134 |
| man | 138 |
| password | 138 |
| password-policy | 139 |
| radius-server | 141 |
| accounting | 142 |
| authentication | 143 |
| enable | 144 |
| host | 145 |
| name | 145 |
| password | 146 |
| priority | 146 |
| show | 147 |
| test | 148 |
| reboot | 148 |
| restore | 149 |
| role | 149 |
| description | 150 |
| name | 151 |
| privilege | 152 |
| show | 153 |
| schedule | 154 |
| enable | 155 |
| frequency | 156 |
| load | 157 |
| load-group | 158 |
| name | 159 |
| output-contact | 160 |
| recurrence | 161 |
| restart | 162 |
| run-on | 163 |
| show | 164 |
| target-device | 165 |
| scp | 165 |
| session | 166 |
| sftp | 167 |
| show | 168 |
| sms | 169 |
| contact | 170 |
| enable | 171 |
| name | 171 |
| show | 172 |
| test | 173 |
| smtp | 174 |
| snmp | 178 |
| snmp-server | 180 |
| authentication | 181 |
| community | 182 |
| enable | 182 |
| host | 183 |
| name | 183 |
| privacy | 184 |
| security-mode | 185 |
| set | 186 |
| show | 187 |
| trap | 188 |
| username | 189 |
| snmp-user | 190 |
| authentication | 191 |
| community | 192 |
| contact | 192 |
| description | 193 |
| enable | 194 |
| filter | 195 |
| privacy | 196 |
| role | 197 |
| security-mode | 197 |
| show | 198 |
| username | 199 |
| ssh | 199 |
| syslog-server | 201 |
| enable | 202 |
| facility | 202 |
| host | 203 |
| log | 204 |
| name | 204 |
| port | 205 |
| severity | 206 |
| show | 207 |
| telnet | 207 |
| user | 209 |
| contact | 210 |
| description | 210 |
| enable | 211 |
| filter | 212 |
| fullname | 213 |
| password | 213 |
| password-age | 214 |
| role | 215 |
| show | 216 |
| timeout | 216 |
| username | 217 |
1. Overview
Beginning with firmware version 20.0.0, LX Platform devices support a full-featured Command Line Interface (CLI). Nearly all functions and controls available through the web interface are accessible via CLI. Additionally, CLI allows for the use of scripts to facilitate operation and integration with third-party systems.
The CLI can be accessed on LX Platform devices through the RJ45 network port, Micro USB port or RJ45 CONFIG port. Once connected, use a terminal emulator application – (such as PuTTY) – to access the CLI via Secure Shell (SSH) on default port 22. Enter the Host Name or IP address of the LX Platform device in the applicable field, then click "Open."

Figure 1-1: PuTTY terminal emulator
2. Logging In
In the terminal window that opens, enter the login credentials. The default login and password credentials are both localadmin. Note that the initial login to the device may require a password change. In this case, prompts will be provided for changing the password. Upon successful log in, a welcome message appears, followed by the root-level command prompt.

Figure 2-1: CLI Login
Note: PADM supports a maximum of two concurrent CLI sessions. If a third session is attempted, a warning message will appear that the session limit has been reached. The exception to this is if the third session is logging in with the default localadmin/localadmin credentials, in which case the oldest active session will be terminated.
3. Entering Commands
Commands can be entered individually by typing the command at the prompt.
console> snmp port 165
console> no snmp v1 enable
console> snmp v3 enable
PADM also supports command-chaining, whereby related commands and parameters can be sequentially added in a single line, separated by a semi-colon (;)
console> snmp port 165; no snmp v1 enable; snmp v3 enable
If using command-chaining with a nested command, end the line with "end" to exit from the nested command format. Otherwise, the prompt will remain in the nested format
console> email user1;address user1@company.com;enable;end
For quick-reference information on the usage of a command, enter the command name at the prompt. For detailed information about a command, view its manual page by entering “man” followed by the command name at the prompt.
When displayed log reports exceed one page, the bottom of the screen will display a pagination indicator. The numbers appearing in brackets are the current page number and the total number of pages. The numbers appearing in carets (<>) indicate horizontal continuation of the current page. At the cursor, enter the desired page number or a letter designating the support navigation commands: [f]irst, [p]rev, [n]ext, [l]ast, [r]efresh, [q]uit. Enter the left or right caret to display the respective horizontal continuation of the page.
[1/56], <1/2>:q
3.1 General CLI Commands
| ? Displays a list of commands. |
| help Displays a list of commands. |
| end Exits a nested command section and returns to the previous section. |
| exit Exits a nested command section and returns to the previous section. Terminates the CLI session, if entered at the root level. |
| man Displays the manual page (description) of a command. |
| no Disables, removes or deletes content. |
| show Displays command or keyword details. |
| <> Indicates a required value in place of the brackets and text within. |
| [] Indicates an optional parameter. |
| {} Indicates a required parameter; an item from the list of choices must be selected. |
| | Separates mutually exclusive choices. |
| [{}] Indicates a required choice within an optional element. |
3. Entering Commands
3.2 Keyboard Shortcuts
| Ctrl A Moves the cursor to the beginning of the command line. |
| Ctrl B / Left Arrow Moves the cursor one character to the left. |
| Ctrl C Exits from the current command and provides a new prompt. |
| Del Key Deletes the character to the right of the cursor. |
| Ctrl D Exits from CLI, if entered at the root level. Exits a nested command section. |
| Ctrl E Moves the cursor to the end of the command line. |
| Ctrl F / Right Arrow Moves the cursor one character to the right. |
| Ctrl K Deletes all characters to the right of the cursor. |
| Ctrl N / Down Arrow Shows the next command in history, for the current log session. |
| Ctrl P / Up Arrow Shows the previous command in history, for the current log session. |
| Ctrl U Deletes the whole line. |
| Backspace Key Moves the cursor back one space, deleting that character. |
| Tab Key Auto-completes the text (command) being entered. |
4. Log Navigation
When viewing the Accounting, Data or Event Log in CLI, the prompt will change to allow navigation of the log contents, displayed in the following format:
[4/25], <1/2>:
In this example, the log is currently at page 4 of 25, and on the first of two pages, horizontally. Use the following letters and characters, followed by the
| # Enter a page number to go directly to that page. |
| f Go to the first page of the log. |
| p Go to the previous page. |
| n Go to the next page. |
| l Go to the last page. |
| < Move horizontally to the left. |
| >Move horizontally to the right. |
| r Refresh the page. |
| q Quit. Return to the regular CLI command prompt. |
| ? Display the list of navigation options. |
5. CLI Commands
The following section provides a detailed description of each command and its nested commands, including syntax and examples.
All commands that follow are presented in alphabetical order.
aaa
aaa accounting
Use the aaa accounting command to modify the default setting for the Accounting Scheme. Accounting activity can be logged to the local system or to a remote server, such as RADIUS. The default Accounting Scheme is local-only. The other available choices are: "log activity to the remote server only" (remote-only), "try logging to the local system first, then the remote server, if necessary" (local first), and "try logging to the remote system first, then the local, if necessary" (remote first).
Syntax
aaa accounting {local-only | remote-only | local-first | remote-first}
Examples
The following command changes the Accounting Scheme to “try local first, then try remote”:
console> aaa accounting local-first Update complete
aaa authentication
Use the aaa authentication command to modify the default setting for the Authentication Scheme. Authentication and authorization can be performed on users entered into either the local system or a remote server, such as RADIUS or LDAP. The default Authentication Scheme is local-only. The other available choices are: "authenticate using the remote server only" (remote-only), "try authenticating using the local system first, then the remote server, if necessary" (local-first), and "try authenticating using the remote system first, then the local, if necessary" (remote-first).
Syntax
aaa authentication {local-only | remote-only | local-first | remote-first}
Examples
The following command changes the Authentication Scheme to local authentication only:
console> aaa authentication local-only Update complete
show aaa
Use the show aaa command to display the current settings for AAA.
Syntax
show aaa [accounting | authentication]
Examples
The following command displays all AAA settings:
console> show aaa
Accounting Scheme : try local-first, then try-remote if necessary
Authentication Scheme : local only
5. CLI Commands
action
action
Use the action command to create and/or manage an action entry. The action-type must be specified when creating a new action entry; action types are dependent upon the device(s) connected. Certain action types also require specifying a target device. Use the show action-types command to display a list of available action types and their target device dependence. Use the no form of this command to delete an action. To exit from the action (
Note: When creating an SNMP action, all SNMP contacts will automatically be assigned to the action. To assign individual SNMP contacts to the action, first delete all contacts using the no contact all command. See the action: contact command for details.
Syntax
action
- action-name – Specifies the action entry to be managed.
action
- action-name – Specifies the name of the action entry to be created. If spaces are required, bookend the name with quotation marks (“).
- action-type – Specifies the action type for the entry.
- device-name – Specifies the target device. Use the show action-types command to identify which action types require specifying a target device.
no action
- action-name – Specifies the action entry to be deleted. If spaces are required, bookend the name with quotation marks (“).
Examples
The following command creates an action entry titled “Load Control” with an action type of “load”, applied to target device “PDU123”:
console> action "Loads Control" load PDU123
Created Loads Control
console> action (Loads Control)>
The following command deletes entry "Cycle-Load-4":
console> no action Cycle-Load-4
Deleted Cycle-Load-4
5. CLI Commands
show action
Use the show action command to display a summary table of all action entries or the details of a specified action entry.
Syntax
show action [
- action-name – Specifies the entry for which action details are to be displayed.
Examples
The following command displays a summary table of all action entries:
| console> show action | ||||
| NAME | TYPE | STATUS | DELAY | INTERVAL |
| Default Device Shutdown | turn-off-device | enabled | 120 | 0 |
| Default Email Notification | enabled | 30 | 0 | |
| Default Reboot LX Card | reboot-web1x | enabled | 30 | 0 |
| Default SMS Notification | sms | enabled | 30 | 0 |
| Default SNMP Trap Notification | snmp-trap | disabled | 30 | 0 |
action: contact
contact
Use the contact command to assign one or more notification recipients to the action entry. Use the no form of this command to remove one or more contacts from the entry. This command applies only to action types "email", "sms", "snmp-set-oid" and "snmp-trap". Note that contacts for each of these action types are created using the corresponding commands: email, sms and snmp-user.
Syntax
contact {all |
- all – Sets all contacts as notification recipients
- contact-x – Specifies a comma-delimited list of contacts as notification recipients
no contact {all |
- all – Sets all contacts to be removed as notification recipients
- contact-x – Removes a comma-delimited list of contacts as notification recipients
Examples
The following command sets all email contacts to be recipients of entry "Send Email":
console> action (Send Email)> contact all Update complete
The following command specifies contacts "jdoe", "Mary Smith" and "bjones" as the recipients or entry "Send Email":
console> action (Send Email)> contact jdoe,"Mary Smith",bjones Update complete
The following command removes "Billy Jones" as a recipient for entry "Send Email":
console> action (Send Email)> no contact "Billy Jones"
Update complete
5. CLI Commands
show contact
Use the show contact command to display the list of recipients for a notification action entry.
Syntax
show contact
Examples
The following command displays the recipients for entry "Send Email":
console> action (Send Email)> show contact jdoe, Mary Smith, bjones
action: count
count
Use the count command to set the number of times an On Set action will execute, when a single trigger condition occurs. Actions will stop executing once the trigger condition clears. The default value for count is (1), meaning that the action will execute once when triggered. A count of zero (0) configures the action to execute indefinitely, until the trigger condition clears. Use the interval command to set the amount of time, in seconds, that must elapse between successive action executions. An interval of zero (0) configures the action to execute once, regardless of the count. This command applies only to action types "email", "sms", "snmp-set-oid" and "snmp-trap".
Syntax
count
- count – Specifies the number of times that the action will execute, when triggered (Range: 0-65535).
Examples
The following command configures entry "Send Email" to execute indefinitely until the trigger condition clears:
console> action (Send Email)> count 0
Update complete
show count
Use the show count command to display the number of times an action will execute until the trigger condition clears.
Syntax
show count
Examples
The following command displays the number of times entry "Send Email" will execute when triggered:
console> action (Send Email)> show count 5
5. CLI Commands
action: delay
delay
Use the delay command to set the time that a triggered On Set action must wait before it executes. Actions will not execute if the trigger condition clears before the delay time elapses. The default value for delay is zero (0), which will cause the action to execute immediately when triggered.
Syntax
delay
- delay – Specifies the delay time, in seconds, for the action entry.
Examples
The following command sets a delay time of 30 seconds for entry "Send Email":
console> action (Send Email)> delay 30
Update complete
show delay
Use the show delay command to display the delay time for the action entry.
Syntax
show delay
Examples
The following command displays the delay time for entry "Send Email":
console> action (Send Email)> show delay 30
action: enable
enable
Use the enable command to activate the action entry. Use the no form of this command to disable the entry. A disabled action will not execute when a trigger condition occurs.
Syntax
enable
no enable
Example
The following command disables entry "UPS Check":
console> action (UPS Check)> no enable
Update complete
5. CLI Commands
show enable
Use the show enable command to display the enabled/disabled status for the action entry.
Syntax
show enable
Examples
The following command displays the status of entry "UPS Check":
console> action (UPS Check)> show enable disabled
action: interval
interval
Use the interval command to set the amount of time, in seconds, between successive executions of a triggered On Set action. Actions will stop executing once the trigger condition clears. Use the count command to set the number of times the action will execute. This command applies only to action types "email", "sms", "snmp-set-oid" and "snmp-trap".
Syntax
interval
- interval – Specifies the interval time, in seconds, for the entry (Range: 0-65535).
Examples
The following command sets the interval time at 2 minutes for entry "Send Email":
console> action (Send Email)> interval 120
Update complete
show interval
Use the show interval command to display the interval time for the action entry.
Syntax
show interval
Examples
The following command displays the interval time, in seconds, for entry "Send Email":
console> action (Send Email)> show interval 120
5. CLI Commands
action: load
load
Use the load command to assign one or more loads to an action. Loads can be assigned as a series of numbers (i.e. "3,4,5,6"), as a range of numbers (i.e. "3-6"), or in combination (i.e. "3,5-8,10,12-15"). Note that the list of loads is additive. Use the no form of this command to remove one or more loads from the action. This command applies only to action type "load".
Syntax
load
- load-x – Specifies a comma-delimited list of loads to be assigned to the action entry.
no load [
- load-x – Specifies a comma-delimited list of loads to be removed from the action entry.
Examples
The following two commands clear the action of loads, then assign loads 1, 5, 6, 7, 8 and 12 to entry “Cycle Routers”:
console> action (Cycle Routers)> no load
Update complete
console> action (Cycle Routers)> load 1,5-8,12
Update complete
load state
Use the load state command to specify load behavior when the action is executed. This command applies only to action type "load".
Syntax
load state {cycle | off | on}
Examples
The following command configures the loads specified in entry “Cycle Routers” to cycle when triggered:
console> action (Cycle Routers)> load state cycle
Update complete
show load
Use the show load command to display the load details for the action entry. This command applies only to action type "load".
Syntax
show load [state]
Examples
The following command displays the load details for entry "Cycle Routers":
console> action (Cycle Routers)> show load
Load Action : cycle
Loads : 1,5,6,7,8,12
5. CLI Commands
action: load-group
load-group
Use the load-group command to assign one or more load groups to an action. Note that load groups are created using the device-level load-group command. Use the no form of this command to remove one or more load groups from the action. This command applies only to action type "load-group".
Syntax
load-group <group-1>[,<group-2>...<group-N>]
- group-x – Specifies a comma-delimited list of load groups to be assigned to the action.
no load-group [<group-1>[,<group-2>...<group-N>]]
- group-x – Specifies a comma-delimited list of load groups to be removed from the action.
Examples
The following two commands clear the action of load groups, then assign load groups "Routers1" and "Routers2" to entry "Cycle Router":
console> action (Cycle Router)> no load-group
Update complete
console> action (Cycle Router)> load-group Routers1,Routers2
Update complete
load-group state
Use the load-group state command to specify the load group behavior when the action is executed. This command applies only to action type "load-group".
Syntax
load-group state {cycle | off | on}
Examples
The following command configures the load groups specified in entry “Cycle Router” to cycle when triggered:
console> action (Cycle Router)> load-group state cycle
Update complete
show load-group
Use the show load-group command to display the load group details for the action entry. This command applies only to action type "load-group".
Syntax
show load-group [state]
Examples
The following command displays the load group details for entry "Cycle Router":
console> action (Cycle Router)> show load-group
Load Action : cycle
Load Groups : Routers1,Routers2
5. CLI Commands
action: name
name
Use the name command to modify the name of the action entry.
Syntax
name <new-name>
- new-name – Specifies the new name for the entry. If spaces are required, bookend the name with quotation marks (“).
Examples
The following command changes the entry's name from "Send Email" to "Email Manager":
console> action (Send Email)> name "Email Manager"
Update complete
console> action (Email Manager)>
show name
Use the show name command to display the name of the action entry.
Syntax
show name
Examples
The following command displays the name of the entry:
console> action (Email Manager)> show name
Email Manager
action: output-contact
output-contact
Use the output-contact command to specify the output contact behavior for the action entry – to either turn on or turn off, when triggered. This command is applicable only to action type "sensor" and, specifically, sensor model E2MTDO. Ensure that the specific E2MTDO is selected using the target-device command.
Syntax
output-contact
- number – Specifies the output contact number of the sensor.
Examples
The following command sets the #2 contact to turn on when triggered, for entry "Fan On":
console> action (Fan On)> output-contact 2 on Update complete
5. CLI Commands
show output-contact
Use the show output-contact command to display the output settings of the entry.
Syntax
show output-contact
Examples
The following command displays the output settings of entry "Fan Off":
console> action (Fan On) > show show output contact
Contact Number : 2
Action : on
action: show
show
Use the show command, with optional keywords, to display details about the action entry. To view all keywords applicable to the entry, enter show [Tab][Tab].
Syntax
show [keyword]
- keyword – Specifies the attribute to be displayed.
Examples
The following command displays all show keywords for entry "Email Manager":
This example should appear second, since it was mentioned second in the show definition above.
console> action (Email Manager)> show [Tab][Tab]
contact delay interval status
count help name trigger
show
The following command displays all settings for entry "Email Manager":
console> action (Email Manager)> show
Name : UPS Check
Type : battery-test
Status : enabled
Delay : 30
Interval : 0
Count : 1
Target : UPS123
5. CLI Commands
show targets
Use the show targets command to display a list of devices and sensors available for selection as targets for action entries.
Syntax
show targets
Examples
The following command displays a list of devices and sensors available for selection as targets:
console> action (Email Manager)> show targets
NAME    TYPE
-------- ----
UPS123 device
E2MTHDI sensor
E2MT-A sensor
E2MT-B sensor
action: snmp-set
snmp-set oid
Use the snmp-set oid command to specify the Object Identifier (OID) to set when an SNMP Set action is executed. This command is applicable only to action type “snmp-set oid”.
Syntax
snmp-set oid
- oid – Specifies the OID to set for the entry, in numeric notation.
Examples
The following command sets "1.3.6.1.4.1.123.4.5.6.0" as the OID for entry "Notify Server #1":
console> action (Notify Server #1)> snmp-set oid 1.3.6.1.4.1.123.4.5.6.0 Update complete
snmp-set value
Use the snmp-set value command to configure the value set to the specified OID when the action is executed. The OID type must be specified: integer or string. This command is applicable only to action type "snmp-set oid".
Syntax
snmp-set value
- value – Specifies the set value for the entry. For strings, if spaces are required, bookend the string with quotation marks (“).
Examples
The following command configures entry "Notify Server #1" with an SNMP Set integer value of 1:
console> action (Notify Server #1)> snmp-set value 1 integer Update complete
The following command configures entry "Notify Server #1" with an SNMP Set string value of "Load 1 is Off":
console> action (Notify Server #1)> snmp-set value "Load 1 is Off" string Update complete
5. CLI Commands
show snmp-set
Use the show snmp-set command to display the OID details for an SNMP Set action entry. This command is applicable only to action type “snmp-set oid”.
Syntax
show snmp-set [oid | value]
Examples
The following command displays the OID details for entry "Notify Server #1":
action: target-device
target-device
Use the target-device command to specify the device or sensor undergoing the action, as defined by the action entry. Note that changing the target device of an action entry will require re-entering all action parameters; the parameters associated with the previous target device will be erased. Use the show targets command to display a list of devices and sensors available for selection as target devices.
Syntax
target-device {
- device-name – Specifies the new target device associated with the entry.
- sensor-name – Specifies the new target sensor associated with the entry.
Examples
The following command sets "Sensor-E2MTDO" as the new target device for entry "Indicator":
console> action (Indicator)> target-device Sensor-E2MTDO Update complete
show target-device
Use the show target-device command to display the name of the device or sensor selected to undergo the action.
Syntax
show target-device
Examples
The following command displays the target device for entry "Indicator":
console> action (Indicator)> show target-device Sensor-E2MTDO
5. CLI Commands
action: trigger
trigger
Use the trigger command to assign one or more trigger conditions to the action entry. Use the no form of this command to remove one or more triggers from the entry. Use the show trigger command to display an enumerated list of all applicable trigger events. The enumeration and/or keywords are used when selecting events as triggers. Due to the variance of events by device type and model, the enumeration will not be sequential. Within the list, an asterisk (*) denotes that the event is selected as a trigger.
Syntax
trigger {on-clear | on-set} {all |
- event-x – Specifies a comma-delimited list of event names or enumerations that will act as triggers for the action entry. (see the show trigger command).
- on-clear – Configures the action entry to execute when any of the selected On Clear events occur.
- on-set – Configures the action entry to execute when any of the selected On Set events occur.
no trigger {on-clear | on-set} {all |
no trigger {
- device-name – Removes all trigger events assigned to the specified device.
- event-x – Specifies a comma-delimited list of event names or enumerations to be removed from the action entry.
- on-clear – Removes On Clear events as triggers for the action entry; if no enumerated events are specified, all On Clear events will be removed.
- on-set – Removes On Set events as triggers for the action entry; if no enumerated events are specified, all On Set events will be removed.
- sensor-name – Removes all trigger events assigned to the specified sensor.
Examples
The following command sets “Battery Low” and “Communications Lost” – enumerated as 4 and 6, respectively – as the On Set triggers for entry “Notify Server #1”:
console> action (Notify Server #1)> trigger on-set 4,6 Update complete
The following command sets “Battery Low” and “Communications Lost” – listed by name – as the On Set triggers for entry “Notify Server #1”:
console> action (Notify Server #1)> trigger on-set "Battery Low", "Communication Lost" Update complete
The following command sets “Battery Normal” and “Communications Restored” – enumerated as 4 and 6, respectively – as the On Clear triggers for entry “Notify Server #1”:
console> action (Notify Server #1)> trigger on-clear 4,6 Update complete
The following command removes all On Clear triggers for entry "Notify Server #1":
console> action (Notify Server #1)> no trigger on-clear all Update complete
5. CLI Commands
show trigger
Use the show trigger command to display an enumerated list of all applicable events. Within the list, an asterisk (*) denotes that the event is selected as a trigger.
Syntax
show trigger [
- name-pattern – a string of characters by which the displayed list of trigger events will be filtered.
Examples
The following command displays all applicable trigger events for entry "Notify Server #1":
| console> action (Notify Server #1)> show trigger | |||||
| # | EVENT | TYPE | ON SET | ON CLEAR | SOURCE |
| ---- | ---- | ---- | ---- | ---- | ---- |
| 1 | Watchdog NTP Probe Failed | autoprobe | no | no | Watchdog NTP |
| 2 | Watchdog Ping Probe Failed | autoprobe | no | no | Watchdog Ping |
| 3 | Battery Bad | device | no | no | UPS123 |
| * 4 | Battery Capacity Below Warning Level | device | yes | no | UPS123 |
| * 5 | Battery Low | device | yes | no | UPS123 |
| 38 | Contact Output 2 in Alarm | device | no | no | Sensor07 |
| * 39 | Temperature Beyond Limits | device | yes | yes | Sensor07 |
alert
alert acknowledge
Use the alert acknowledge command to acknowledge one or more alerts. Alerts can be acknowledged as a series of numbers (i.e. "3,4,5,6"), as a range of numbers (i.e. "3-6"), or in combination (i.e. "3,5-8,10,12-15").
Syntax
alert acknowledge {all |
- alert-x – Sets a comma-delimited list of record numbers to be acknowledged.
- all – Sets all alerts to be acknowledged.
Examples
The following command acknowledges all alerts:
console> alert acknowledge all
Update complete
The following command acknowledges alert log records 1, 5, 6, 7, 8 and 12:
console> alert acknowledge 1,5-8,12
Update complete
5. CLI Commands
alert export
Use the alert export command to configure and execute an on-demand alert log export. The alert log can be exported as an email to a single recipient (refer to the email command for creating email recipients). The default file format for exported alert logs is CSV; use the xml option to change the exported file format to XML.
Syntax
alert export email
- contact-name – Identifies a single email contact as the recipient of the exported alert log.
Examples
The following command exports the Alert Log in XML format to email recipient johnd:
console> alert export email johnd xml
Update complete
show alert
Use the show alert command to view the Alert Log in its entirety or filtered by record number, range of record numbers or quantity of sorted records. Use the show alert
Syntax
show alert
show alert size
show alert count [{ critical | info | warning }]
show alert [{ acknowledged | unacknowledged }] [{ cleared | uncleared }] [device
show alert [{ acknowledged | unacknowledged }] [{ cleared | uncleared }] [device
show alert [{ acknowledged | unacknowledged }] [{ cleared | uncleared }] [device
show alert [{ acknowledged | unacknowledged }] [{ cleared | uncleared }] [device
- acknowledged – Filters the log to display only entries that are acknowledged.
- cleared – Filters the log to display only entries that are cleared.
- device-name – Filters the log to display only entries associated with the specified device.
- end-num – Specifies the number of the last log record to be displayed (must be a number greater than start-num).
- end-date – Filters the log to display all entries that occurred on or before this date; use the date format set using the default date-format or default user date-format command.
continued
5. CLI Commands
- end-time – Filters the log to display all entries that occurred on or before this time; use the time format set using the default time-format or default user time-format command.
- event-name – Filters the log to display only entries associated with the specified event.
- limit – Specifies the number of log entries to be displayed.
- period – Specifies the quantity of the selected time period of entries to be displayed.
- record-num – Specifies the record number to be displayed.
- start-num – Specifies the number of the first log record to be displayed, when displaying a range of records.
- start-date – Filters the log to display all entries that occurred on or after this date; use the date format set using the default date-format or default user date-format command.
- start-time – Filters the log to display all entries that occurred on or after this time; use the time format set using the default time-format or default user time-format command.
- unacknowledged – Filters the log to display only entries that are not acknowledged.
- uncleared – Filters the log to display only entries that are not cleared.
Examples
The following command displays all active alerts:
| console> show alert | ||||||
| ID | EVENT | DEVICE | DATE/TIME | TYPE | ACKNOWLEDGED | |
| 3 | On Battery | UPS01 | 3/31/2020 | 11:15:47 AM | critical | no |
| 2 | Temperature High | Sensor 1 | 3/31/2020 | 10:33:07 AM | warning | no |
| 1 | Loads All Off | UPS01 | 3/31/2020 | 10:12:22 AM | critical | yes |
show alert count
Use the show alert count command to view the quantity of active alerts by severity.
Syntax
show alert count [critical | info | warning]
Examples
The following command displays the quantity of active alerts:
console> show alert count
Critical : 2
Warning : 1
Info : 0
The following command displays the quantity of active critical alerts.
console> show alert count critical 2
show alert size
Use the show alert size command to display the total number of alerts currently stored in the log file.
Syntax
show alert size
Examples
The following example displays the number of alerts stored:
console> show alert size 18
5. CLI Commands
apply
apply network
Use the apply network command to apply network-specific changes, which includes changes to Internet settings, DNS and network services. Applying network changes may require terminating all active user sessions. Ensure that all network changes are made prior to applying them.
Syntax
apply network
Examples
The following command applies any changes made to network settings:
console> apply network
Applying changes to network settings on the device. Note that this may cause a system reboot.
autoprobe
autoprobe
Use the autoprobe command to create and manage automatic network probe (AutoProbe) entries. The probe type must be specified when creating a new action. The available choices are "probe an NTP server" (ntp), "ping a network device" (ping) and "perform an SNMP GET" (snmp). If snmp is chosen as the probe type, the SNMP version must be specified – v1, v2 or v3. Use the no form of this command to delete the entry. When creating an entry, select an easily remembered name as a label for the entry; this name will be used in the command format autoprobe
Refer to the event command for configuring an AutoProbe entry as an action trigger. Once this has been completed, refer to the action command for assigning an action to the AutoProbe event.
Syntax
autoprobe
- probe-name – Specifies the probe entry to be managed.
autoprobe
- probe-name – Specifies the name of the probe to be created. If spaces are required, bookend the name with quotation marks (“).
no autoprobe
- probe-name – Specifies the probe entry to be deleted.
Examples
The following command creates "Probe Get" as an SNMP (version v3) GET probe entry:
console> autoprobe "Probe Get" snmp v3
Created Probe Get
console> autoprobe (Probe Get)>
The following command deletes "old probe":
console> no autoprobe "old probe"
Deleted old probe
5. CLI Commands
show autoprobe
Use the show autoprobe command to view a summary table of all AutoProbe entries or the details of a specified AutoProbe entry.
Syntax
show autoprobe [ntp | ping | snmp]
Examples
The following command displays a summary table of all AutoProbe entries:
| console> show autoprobe | |||||
| NAME | TYPE | DESCRIPTION | STATUS | PRIMARY IP | P PORT |
| ---- | ---- | ---- | ---- | ---- | ---- |
| probe ABC | ping | Monitor switch | enabled | 172.17.77.77 | 161 |
| probe 123 | ntp | NTP server | disabled | 192.168.5.100 | 162 |
| SnmpProbe | snmp | Get status | enabled | 172.17.77.88 | 163 |
autoprobe: authentication
authentication passphrase
Use the authentication passphrase command to enter an authentication passphrase for the SNMP (v3) GET AutoProbe entry. A passphrase is required if security-mode is set to either authnopriv or authpriv. Two options are available for entering the password. The first option will prompt the entry of a password followed by a password confirmation, neither of which will be echoed to the terminal. The second option allows entry of a plain text password on the command line by using the plaintext keyword.
Syntax
authentication passphrase [plaintext
- passphrase – Specifies the authentication passphrase for the SNMP GET AutoProbe entry, in plain text.
Examples
The following command sets the Authentication Passphrase to "a1b2c3" for entry "Probe Get":
console> autoprobe (Probe Get)> authentication passphrase plaintext alb2c3 Update complete
authentication protocol
Use the authentication protocol command to select an Authentication Protocol for the SNMP (v3) GET AutoProbe entry. A protocol selection is required if security-mode is set to either authnopriv or authpriv. The available options are MD5 and SHA1.
Syntax
authentication protocol {md5 | sha1}
Examples
The following command sets the Authentication Protocol to SHA1 for entry "Probe Get":
console> autoprobe (Probe Get)> authentication protocol shall Update complete
5. CLI Commands
show authentication protocol
Use the show authentication protocol command to display the selected authentication protocol for the SNMP (v3) GET AutoProbe entry.
Syntax
show authentication protocol
Examples
The following command displays the authentication protocol for entry "Probe Get":
console> autoprobe (Probe Get)> show authentication protocol shal
autoprobe: community
community
Use the community command to enter a community string for an SNMP (v1 or v2) GET AutoProbe entry. A community string must be specified prior to enabling the entry. Two options are available for entering the community string. The first option will prompt the entry of a password followed by a password confirmation, neither of which will be echoed to the terminal. The second option allows entry of a plain text community string on the command line by using the plaintext keyword.
Syntax
community [plaintext
- community-string – Specifies the community string for the entry, in plain text.
Examples
The following command sets "public" as the community string for SNMP GET probe entry "ProbeGet":
console> autoprobe (ProbeGet)> community plaintext public Update complete
autoprobe: description
description
Use the description command to optionally enter a description for the AutoProbe entry. Use the no form of this command to clear the description.
Syntax
description
no description
- description – Specifies a description for the entry. If spaces are required, bookend the description with quotation marks (“).
Examples
The following command sets "Monitor network switch" as the description for entry "probe ABC":
console> probe (probe ABC)> description "Monitor network switch"
Update complete
5. CLI Commands
show description
Use the show description command to display the description entered for the AutoProbe entry.
Syntax
show description
Examples
The following command displays the description for entry "probe ABC":
console> probe (probe ABC)> show description
Monitor network switch
autoprobe: enable
enable
Use the enable command to activate the AutoProbe entry. Use the no form of this command to disable the AutoProbe.
Syntax
enable
no enable
Example
The following command disables "probe ABC":
console> probe (probe ABC) > no enable
Update complete
show enable
Use the show enable command to display the enabled/disabled status of the AutoProbe entry.
Syntax
show enable
Examples
The following command displays the status of entry "probe ABC":
console> probe (probe ABC)> show enable enabled
5. CLI Commands
autoprobe: interval
interval
Use the interval command to set the time between successive AutoProbe tests.
Syntax
interval
- value – Specifies the period (in seconds) between successive probe tests (Range: 0-999).
Examples
The following command sets an interval time of 30 seconds between each test of entry "probe ABC":
console> probe (probe ABC)> interval 30
Update complete
show interval
Use the show interval command to display the interval entered for the AutoProbe entry.
Syntax
show interval
Examples
The following command displays the interval entered for entry "probe ABC":
console> probe (probe ABC) > show interval 30
autoprobe: name
name
Use the name command to modify the name of the AutoProbe entry.
Syntax
name
- new-name – Specifies the new name for the entry. If spaces are required, bookend the name with quotation marks (“).
Examples
The following command changes the entry's name from "probe ABC" to "probeXYZ":
console> probe (probe ABC)> name probeXYZ
Update complete
console> probe (probeXYZ)>
5. CLI Commands
show name
Use the show name command to display the name entered for the AutoProbe entry.
Syntax
show name
Examples
The following command displays the entry's name:
console> probe (probe ABC) > show name
probe ABC
autoprobe: primary
primary address
Use the primary address command to set the IP address of the primary network device that the AutoProbe entry will probe. Both IPv4 and IPv6 addresses are supported.
Syntax
primary address
- address – Specifies the primary IPv4 or IPv6 address of the entry.
Examples
The following command specifies "172.17.77.88" as the primary address of entry "SnmpProbe":
console> probe (SnmpProbe)> primary address 172.17.77.88
Update complete
primary oid
Use the primary oid command to set the SNMP OID that the AutoProbe entry will probe. This command applies only to SNMP probes.
Syntax
primary oid
- oid – Specifies the OID that the entry will use for probe tests.
Examples
The following command specifies "1.3.6.1.2.1.1.3.0" as the OID to use for entry "SnmpProbe":
console> probe (SnmpProbe)> primary oid 1.3.6.1.2.1.1.3.0
Update complete
5. CLI Commands
primary port
Use the primary port command to set the port number of the primary network device that the AutoProbe entry will probe. This command applies only to NTP and SNMP probes.
Syntax
primary port
- port-number – Specifies the primary port number that the entry will use for probe tests (Range: 1-65535).
Examples
The following command specifies "161" as the primary port for entry "SnmpProbe":
console> probe (SnmpProbe) > primary port 161
Update complete
show primary
Use the show primary command to display the primary address, OID and port settings for the AutoProbe entry.
Syntax
show primary [address | oid | port]
Examples
The following command displays the primary address, OID and port settings for entry "SnmpProbe":
console> probe (SnmpProbe)> show primary
Primary Address : 172.17.77.88
Primary Oid : 1.3.6.1.2.1.1.3.0
Primary Port : 161
autoprobe: privacy
privacy passphrase
Use the privacy passphrase command to enter a privacy passphrase for the SNMP (v3) GET AutoProbe entry. A passphrase is required if security-mode is set to authpriv. Two options are available for entering the password. The first option, which is using the command without additional parameters, will prompt the entry of a password and password confirmation, neither of which will be echoed to the terminal. The second option allows entry of a plain text password on the command line by using the plaintext keyword.
Syntax
privacy passphrase [plaintext
• passphrase – Specifies the passphrase for the entry, in plain text.
Examples
The following command sets the Privacy Passphrase to "g2h3j4" for entry "Probe Get":
console> autoprobe (Probe Get)> privacy passphrase plaintext g2h3j4 Update complete
5. CLI Commands
privacy protocol
Use the privacy protocol command to select a Privacy Protocol for the SNMP GET AutoProbe entry. A protocol selection is required if security-mode is set to authpriv. The available options are DES and AES.
Syntax
privacy protocol {des | aes}
Examples
The following command sets the Privacy Protocol to AES for entry "Probe Get"
console> autoprobe (Probe Get)> privacy protocol aes
Update complete
show privacy protocol
Use the show privacy protocol command to display the selected privacy protocol for the SNMP GET AutoProbe entry.
Syntax
show privacy protocol
Examples
The following command displays the privacy protocol for entry "Probe Get":
console> autoprobe (Probe Get)> show privacy protocol
aes
autoprobe: retry
retry
Use the retry command to set the number of consecutive AutoProbe tests that must fail before an alarm is triggered.
Syntax
retry
- retry – Specifies the number of probe tests that must fail before the entry triggers an alarm (Range: 0-999).
Examples
The following command sets the retry count to two for entry "probe ABC":
console> probe (probe ABC) > retry 2
Update complete
5. CLI Commands
show retry
Use the show retry command to display the retry value entered for the AutoProbe entry.
Syntax
show retry
Examples
The following command displays the retry value of entry "probe ABC":
console> probe (probe ABC) > show retry 2
autoprobe: secondary
secondary address
Use the secondary address command to set the IP address of the second network device that the AutoProbe entry will probe. Both IPv4 and IPv6 addresses are supported.
Syntax
secondary address
- ip-address – Specifies the IPv4 or IPv6 address of the second network device that the entry will probe.
Examples
The following command specifies "172.17.77.89" as the secondary IP address for entry "SnmpProbe":
console> probe (SnmpProbe)> secondary address 172.17.77.89
Update complete
secondary oid
Use the secondary oid command to set the secondary SNMP OID that the AutoProbe entry will probe. This command applies only to SNMP probes.
Syntax
secondary oid
- oid – Specifies the secondary OID that the entry will use for probe tests.
Examples
The following command specifies "1.3.6.1.2.1.1.3.1" as the secondary OID to use for entry "SnmpProbe":
console> probe (SnmpProbe)> secondary oid 1.3.6.1.2.1.1.3.1 Update complete
5. CLI Commands
secondary port
Use the secondary port command to set the port number of the second network device that the entry will probe. This command applies only to NTP and SNMP probes.
Syntax
secondary port
- port-number – Specifies the port number of the second network device that the entry will use for probe tests (Range: 1-65535).
Examples
The following command specifies "161" as the secondary port for entry "SnmpProbe":
console> probe (SnmpProbe) > secondary port 161
Update complete
show secondary
Use the show secondary command to display the secondary address, OID and port settings for the AutoProbe entry.
Syntax
show secondary [address | oid | port]
Examples
The following command displays the secondary address, OID and port settings for entry "SnmpProbe":
console> probe (SnmpProbe) > show secondary
Secondary Address : 172.17.77.89
Secondary Old : 1.3.6.1.2.1.1.3.0
Secondary Port : 161
autoprobe: security-mode
security-mode
Use the security-mode command to change the default Privacy setting of the SNMP (v3) GET probe entry. The default setting is “No Authentication and No Privacy” (noauthnopriv). The other available choices are: “Authentication and No Privacy” (authnopriv), “Authentication and Privacy” (authpriv).
Syntax
security-mode {noauthnopriv | authnopriv | authpriv}
Examples
The following command sets the Security Mode to “Authentication and Privacy” for entry “Probe Get”:
console> autoprobe (Probe Get)> security-mode authpriv
Update complete
5. CLI Commands
show security-mode
Use the show security-mode command to display the security mode selected for the SNMP (v3) GET probe entry.
Syntax
show security-mode
Examples
The following command displays the security mode of entry "Probe Get":
console> autoprobe (Probe Get)> show security-mode authentication and privacy
autoprobe: show
show
Use the show command, with optional keywords, to display details about the AutoProbe entry. To view all keywords applicable to the entry, enter show [Tab][Tab].
Syntax
show [keyword]
- keyword – Specifies the attribute to be displayed.
Examples
The following command displays all show keywords for entry "SnmpProbe":
console> probe (VlProbe) > show [Tab] [Tab]
description interval primary secondary type
help name retry status version
The following command displays all details for (SNMPv1) entry "V1Probe":
console> probe (SnmpProbe) > show
Name : V1Probe
Type : snmp
Description : Get device status
Status : enabled
Primary Ip : 172.17.77.88
Primary Port : 161
Secondary Ip : 172.17.77.89
Secondary Port : 161
Interval : 30
Retry : 2
Primary Oid : 1.3.6.1.2.1.1.3.0
Secondary Oid :
Version : v1
5. CLI Commands
autoprobe: username
username
Use the username command to enter or modify the username for the SNMP (v3) GET AutoProbe entry.
Syntax
username
- username – Specifies a username for the entry. Note: spaces are not allowed in SNMPv3 usernames.
Examples
The following command sets "System123" as the username for entry "Probe Get":
console> autoprobe (Probe Get)> username System123
Update complete
show username
Use the show username command to display the username entered for the SNMP GET AutoProbe entry.
Syntax
show username
Examples
The following command displays the username entered for entry "Probe Get":
console> autoprobe (Probe Get) > show username System123
autoprobe: version
version
Use the version command to modify the SNMP version of the SNMP GET probe entry. Note that switching the SNMP version from v1/v2 to v3 – or vice-versa – will require entering parameters associated with the new version. The settings for the original version will be retained, but not used. For example, switching from v2 to v3 will hide the community setting and will require setting parameters for authentication, privacy, security-mode and username.
Syntax
version {v1 | v2 | v3}
Examples
The following command changes the SNMP version of entry "Probe Get" to v2:
console> autoprobe (Probe Get)> version v2
Update complete
5. CLI Commands
show version
Use the show version command to display the SNMP version for the SNMP GET probe entry.
Syntax
show version
Examples
The following command displays the version selected for entry "Probe Get":
console> autoprobe (Probe Get)> show version v3
backup
backup
Use the backup command to back up all configuration settings and create a system-restore point. Use the restore command to restore configuration settings from the most recent backup.
Syntax
backup
Examples
The following command creates a system-restore point:
console > backup
Creating a backup...
clock
clock ntpserver
Use the clock ntpserver command to specify the address of one or two Network Time Protocol (NTP) servers. This command is only available when NTP is set as the source (using the clock source command).
Syntax
clock ntpserver
- primary-server – Specifies the IPv4 address, IPv6 address or hostname of the primary NTP server.
- secondary-server – Specifies the IPv4 address, IPv6 address or hostname of the secondary NTP server.
Example
The following command identifies both a primary and a secondary NTP server as the clock source:
console> clock ntpserver 0.pool.ntp.org 1.pool.ntp.org Update complete
5. CLI Commands
clock set
Use the clock set command to configure the system date and time. This command is applicable only if clock source is set to RTC. Note that this command may terminate all sessions as the system undergoes synchronization. Use the force option to execute the command without confirmation. If the time format being used contains a space (for example, h:mm:ss tt), ensure that the entire time period is bookended in quotes. Example: "10:11:22 PM"
Syntax
clock set
- date – Specifies the current date, in the format selected using the default date-format or default user date-format command.
- time – Specifies the current time, in the format selected using the default time-format or default user time-format command.
Example
The following command sets the time and date of the system as 1/8/2020, 3:58 PM; a confirmation will appear when entered:
console> clock set 1/8/2020 "3:58:00 PM"
Modifying system time settings may end this and other active user sessions. Type "yes" to proceed:
clock source
Use the clock source command to select one of two options as the clock source. The available choices are NTP (Network Time Protocol) and RTC (Real Time Clock). If NTP is selected as the clock source, an NTP server address must be specified (using the clock ntpserver command). Note that this command may terminate all sessions as the system undergoes synchronization. Use the force option to execute the command without confirmation.
Syntax
clock source {ntp | rtc} [force]
Example
The following command sets NTP as the clock source, without a confirmation prompt:
console> clock source ntp force
Update complete
show clock
Use the show clock command to display the current clock settings.
Syntax
show clock [ntpserver | source | timezone]
Example
The following command displays all clock settings:
console> show clock
Primary Server : 0.pool.ntp.org
Secondary Server : 1.pool.ntp.org
Source : ntp
Time Zone : America/Chicago
Current UTC Date and Time : 3/30/2020 12:45:10 PM
Current Local Date and Time : 3/30/2020 4:45:10 PM
5. CLI Commands
contact
contact
Use the contact command to modify the System Contact information. The default contact name is "localadmin@poweralert".
Syntax
contact
- contact-name – Sets the new name for the System Contact information.
Example
The following command sets the System Contact information to "John Smith: (123) 555-1234":
console> contact "John Smith: (123) 555-1234"
Update complete
show contact
Use the show contact command to display the current System Contact.
Syntax
show contact
Example
The following command displays the System Contact:
console> show contact
John Smith: (123) 555-1234
default
default date-format
Use the default date-format command to set the global date format. Note that format selections are case-sensitive and must be entered using the same capitalization as documented. Users can individually override this setting by using the default user data-format command.
Syntax
default date-format {M/d/yyyy | M/d/yy | MM/dd/yy | MM/dd/yyyy | yy/MM/dd | yyyy-MM-dd | dd-MM-yy}
Examples
The following command sets the global date format preference to "MM/dd/yyyy":
console> default date-format MM/dd/yyyy
Update complete
5. CLI Commands
default temperature-format
Use the default temperature-format command to set the global temperature format. Users can individually override this setting by using the default user temperature-format command.
Syntax
default temperature-format {celsius | fahrenheit}
Examples
The following command sets the current user's temperature format preference to Fahrenheit:
console> default temperature-format fahrenheit
Update complete
default time-format
Use the default time-format command to set the global time format. Please note the format selections are case-sensitive and must be entered using the same capitalization as documented. Users can individually override this setting by using the default user time-format command.
Syntax
default time-format {h:mm:ss tt | hh:mm:ss tt | H:mm:ss | HH:mm:ss}
- If using either the h:mm:ss tt or hh:mm:ss tt time format, use quotes when entering the time (see Examples)
Examples
The following command sets the current user's time format preference to "hh:mm:ss tt":
console> default time-format "hh:mm:ss tt"
Update complete
default timeout
Use the default timeout command to apply global timeout settings. Idle timeout sets the amount of time (in minutes) that a user's session can remain idle before the system terminates the session. Session timeout specifies the amount of time (in minutes) a user's session can remain active before the system requests the user to re-authenticate. Users can individually override these settings by using the default user timeout command.
Syntax
default timeout {idle | session}
- timeout – Sets the timeout, in minutes (Range: 1-999)
Examples
The following command sets 30 minutes as the system-wide idle timeout:
console> default timeout idle 30
Update complete
5. CLI Commands
default timezone
Use the default timezone command to set the global settings for the local time zone, with respect to Universal Time Coordinated (UTC). A list of available time zones can viewed using the show timezones command. Users can individually override this setting by using the default user timezone command.
Syntax
default timezone
- timezone – The time zone in string format.
Example
The following command sets the timezone to U.S. Central Standard Time:
console> default timezone America/Chicago
Update complete
default user date-format
Use the default user date-format command to set a preferred date format, applied exclusively to the user logged into the system. Note that format selections are case-sensitive and must be entered using the same capitalization as documented. Use the no form of this command to remove the user preference, thereby reverting to the global default date format as set by default date-format.
Syntax
default user date-format {M/d/yyyy | M/d/yy | MM/dd/yy | MM/dd/yyyy | yy/MM/dd | yyyy-MM-dd | dd-MMM-yy} no default user date-format
Examples
The following command sets the current user's date format preference to "MM/dd/yyyy":
console> default user date-format MM/dd/yyyy
Update complete
default user reset
Use the default user reset command to clear all user preferences for the user logged into the system.
Syntax
default user reset
Examples
Examples are not applicable for this command.
5. CLI Commands
default user temperature-format
Use the default user temperature-format command to set a preferred temperature format, applied exclusively to the user logged into the system. Use the no form of this command to remove the user preference, thereby reverting to the global default temperature format as set by default temperature-format.
Syntax
default user temperature-format {celsius | fahrenheit} no default user temperature-format
Examples
The following command sets the current user's temperature format preference to Fahrenheit:
console> default user temperature-format fahrenheit Update complete
default user time-format
Use the default user time-format command to set a preferred temperature format, applied exclusively to the user logged into the system. Note that format selections are case-sensitive and must be entered using the same capitalization as documented. Use the no form of this command to remove the user preference, thereby reverting to the global default time format as set by default time-format.
Syntax
default user time-format {h:mm:ss tt | hh:mm:ss tt | H:mm:ss | HH:mm:ss} no default user time-format
- If using either the h:mm:ss tt or hh:mm:ss tt time format, use quotes when entering the time (see Examples).
Examples
The following command sets the current user's time format preference to "hh:mm:ss tt":
console> default user time-format "hh:mm:ss tt"
Update complete
default user timezone
Use the default user timezone command to set a preferred timezone, applied exclusively to the user logged into the system. A list of available time zones can be viewed using the show timezones command. Use the no form of this command to remove the user preference, thereby reverting to the global default time format as set by default timezone.
Syntax
default user timezone
no default user timezone
- timezone – Sets the time zone in string format. A list of available time zones can be found in the Appendix of this document.
Examples
Examples are not applicable for this command.
5. CLI Commands
show default
Use the show default command to display default configuration settings.
Syntax
show default [date-format | temperature-format | time-format | timeout [idle | session] | timezone | user [date-format | temperature-format | time-format | timezone]]
Examples
The following command displays all default configuration settings:
console> show default
Display Date Format : MM/dd/yyyy
Display Time Format : hh:mm:ss tt
Default Temperature Format : fahrenheit
Default Timezone : America/Chicago
Global Session Timeout (Minutes) : 360
Global Idle Timeout (Minutes) : 30
The following command displays the user's default configuration settings:
console> show default user
Display Date Format : M/d/yyyy (System Default)
Display Time Format : HH:mm:ss
Default Temperature Format : celsius
Default Timezone : America/Chicago (System Default)
device
device
Use the device command to enter the device (
Note: for devices that support External Battery Packs (EBPs), on entering the device (
Syntax
device [
- device-name – Specifies the device entry to be managed.
no device
- device-name – Specifies the inactive device entry to be deleted. continued
5. CLI Commands
Examples
The following command enters the device (
console> device Device0076
Note: a new External Battery Pack configuration file is available. Use the 'battery-pack update' command to download the new version.
Retrieving details...
console> device (Device0076)>
The following command deletes the inactive device named "PDU-Rack1":
console> no device PDU-Rack1
Deleted PDU-Rack1
show device
Use the show device command to display a summary table of all devices or the details of a specified device.
Syntax
show device [
- device-name – Specifies the device for which details are to be displayed.
Examples
The following command displays a summary table of the device and peripherals connected to it:
console> show device
NAME ALERT STATUS ACTIVE TYPE MANUFACTURER MODEL SERIAL #
Device0076 warning yes UPS TRIPP LITE SMART1000RM2U 2810GY0SM12345676
Sensor0011 normal yes Sensor TRIPP LITE E2MTHDI 2357AV0AC886D0005
device:
Use keywords to assign or modify values of associated data points and attributes. Up to 6 keywords can be entered in one command, but they must be entered in the correct order. For instance, to adjust the Nominal Input Voltage, the command must be entered as “input voltage nominal” (three keywords). To view available keywords, enter [Tab][Tab] at the prompt.
Syntax
- keyword – Specifies one or more attributes that comprise a data point.
- value – Specifies the new value for the data point.
Example
The following command sets the device's Nominal Input Voltage to 220V:
console> device (Rack PDU)> input voltage nominal 220 Update complete
The following command sets the device's Fan Speed to High:
console> device (Rack PDU)> cooling fan speed high
Update complete
5. CLI Commands
[Tab]
The keyboard [Tab] key serves several functions when used in conjunction with keywords. To view available keywords, enter [Tab][Tab] at the prompt. Enter [Tab] to auto-fill partially entered attributes.
Example
Pressing the [TAB] key twice at the prompt lists the keywords available for the device or sensor:
console> device (UPS123) > [TAB] [TAB]
auto-restart end load no ramp sensor
battery exit load-group off reboot shed
buzzer help location on region show
date-installed input name output runtime threshold
show
Use the show
Syntax
show [keyword-1 [keyword-2 [keyword-3 [keyword-4 [keyword-5 [keyword-6]]]]]]
- keyword – Specifies one or more words that comprise a data point's name.
Examples
The following command displays the device's Nominal Input Voltage:
console> device (Rack UPS)> show input voltage nominal 120
The following command displays all metrics labeled as "nominal":
console> device (Rack PDU)> show nominal
NAME    TYPE    VALUE
Nominal Input Voltage (V)    Input    120
Nominal Output Voltage (V)    Output    120
device: apply
apply ramp-shed
Use the apply ramp-shed command to make effective all changes made to ramp and shed parameters (i.e. enable and delay). Upon entering the command, a confirmation message will appear; enter "yes" to proceed. Use the force option to apply the changes without confirmation.
Syntax
apply ramp-shed [force]
Examples
The following command will apply all ramp and shed parameter changes made to device "UPS123", without confirmation:
console> device (UPS123)> apply ramp-shed force
Update complete
5. CLI Commands
device: asset-tag
asset-tag
Use the asset-tag command to optionally enter an asset identifier for the device. Use the no form of this command to clear the entry.
Syntax
asset-tag
no asset-tag
- tag – Specifies an identity for the device. If spaces are required, bookend the name in quotation marks (“).
Example
The following command assigns "IT123ZZ" as the asset tag for device "PDU-Rack1":
console> device (PDU-Rack1)> asset-tag IT123ZZ
Update complete
show asset-tag
Use the show asset-tag command to display the identifier entered for the device.
Syntax
show asset-tag
Examples
The following command displays the asset tag for device "PDU-Rack1":
console> device (PDU-Rack1) > show asset-tag IT123zz
device: auto-restart
auto-restart low-voltage
Use the auto-restart low-voltage command to set whether a low-voltage event will cause the device to automatically restart.
Syntax
auto-restart low-voltage enable
no auto-restart low-voltage enable
Examples
The following command configures device "UPS-123" not to auto-restart if a low-voltage event occurs:
console> device (UPS-123)> no auto-restart low-voltage enable Update complete
5. CLI Commands
auto-restart overload
Use the auto-restart overload command to set whether an overload event will cause the device to automatically restart.
Syntax
auto-restart overload enable
no auto-restart overload enable
Examples
The following command configures device "UPS-123" to auto-restart if an overload event occurs:
console> device (UPS-123)> auto-restart overload enable Update complete
auto-restart overtemp
Use the auto-restart overtemp command to set whether an over-temperature event will cause the device to automatically restart.
Syntax
auto-restart overtemp enable
no auto-restart overtemp enable
Examples
The following command configures device "UPS-123" to auto-restart if an overtemp event occurs:
console> device (UPS-123)> auto-restart overtemp enable Update complete
auto-restart shutdown
Use the auto-restart shut-down command to set whether a shutdown event will cause the device to automatically restart.
Syntax
auto-restart shutdown enable
no auto-restart shutdown enable
Examples
The following command configures device "UPS-123" to auto-restart if a shutdown event occurs:
console> device (UPS-123)> auto-restart shutdown enable
Update complete
5. CLI Commands
auto-restart wakeup
Use the auto-restart wakeup command to set whether a wakeup event will cause the device to automatically restart.
Syntax
auto-restart wakeup enable
no auto-restart wakeup enable
Examples
The following command configures device "UPS-123" to auto-restart if a wakeup event occurs:
console> device (UPS-123)> auto-restart wakeup enable Update complete
show auto-restart
Use the show auto-restart command to display all or selected auto-restart settings.
Syntax
show auto-restart [low-voltage | overload | overtemp | shutdown | wakeup]
Examples
The following command displays all auto-restart settings for device "UPS-123":
console> device (UPS-123)> show auto-restart
NAME VALUE
----
On Delayed Wakeup disabled
On Low Voltage disabled
On Overload enabled
On Overtemp enabled
On Shutdown enabled
device: avr
avr transition count reset
Use the avr transition count reset command to reset the recorded number of recorded AVR transitions. On executing this command, a prompt will appear to confirm the action. Use the force option to execute the command without confirmation.
Syntax
avr transition count reset [force]
Example
The following command resets the recorded AVR transition count for device "UPS123", without confirmation:
console> device (UPS123)> avr transition count reset force
Update complete
5. CLI Commands
show avr
Use the show avr command to display the recorded count of AVR transitions.
Syntax
show avr
Examples
The following command displays the recorded AVR transition count for device "UPS123":
console> device (UPS123)> show avr 3
device: battery
battery age threshold
Use the battery age threshold command to configure age-related threshold parameters of the battery. This command is valid only for devices that support battery age threshold.
Syntax
battery age threshold {high-warning| high-critical}
- decimal-value – Sets the time (in years) as the age threshold for the specified severity level.
battery age threshold tolerance - tolerance – Sets the time (in years) that must be exceeded for the threshold event to trigger again
Example
The following command sets the high-warning battery age threshold as 3.25 on device "UPS123":
console> device (UPS123)> battery age threshold high-warning 3.25 Update complete
The following command sets the battery age threshold tolerance as 0.5 on device "UPS123":
console> device (UPS123)> battery age threshold tolerance 0.5 Update complete
battery date installed
Use the battery date installed command to enter a date on which the internal battery was installed.
Syntax
battery date installed
- date - Specifies the date, in the format selected using the default date-format or default user date-format command.
Example
The following command sets March 3, 2020 as the battery installation date for device "UPS123":
console> device (UPS123)> battery date installed 3/3/2020
Update complete
5. CLI Commands
battery test period
Use the battery test period command to configure auto-test of the battery (if supported by the device). Note that the available period choices will vary by UPS model.
Syntax
battery test period {disabled | monthly | quarterly | semi-annually}
Example
The following command configures auto-test of the battery every quarter on device "UPS123":
console> device (UPS123)> battery test period quarterly Update complete
battery test start
Use the battery test start command to perform an on-demand battery test (if supported by the device). On executing this command, a prompt will appear to confirm the action. Use the force option to execute the command without confirmation.
Syntax
battery test start [force]
Example
The following command initiates a battery test on device "UPS123":
console> device (UPS123)> battery test start
Are you sure? Type "yes" to proceed: yes
Execution complete
battery threshold capacity tolerance
Use the battery threshold capacity tolerance command to set the margin which must be exceeded in order to re-trigger a threshold event.
Syntax
battery threshold capacity tolerance
- integer-value - Specifies the tolerance value, as a percentage.
Example
The following command sets the battery threshold capacity tolerance at 5% for device "UPS123":
console> device (UPS123)> battery threshold capacity tolerance 5
Update complete
5. CLI Commands
battery transition count reset
Use the battery transition count reset command to clear the stored value identifying the number of times the device transitioned from utility power to battery. Use the force option to execute the command without confirmation.
Syntax
battery transition count reset [force]
Example
The following command clears the stored battery transition count on device "UPS123", with no confirmation:
console> device (UPS123)> battery transition count reset force
Execution complete
show battery
Use the show command, with optional keywords, to display details about the battery. To view all keywords applicable to the battery, enter show battery [Tab][Tab].
Syntax
show battery [Tab][Tab]
Examples
The following command displays all battery-related show keywords for device "UPS123":
console> device (UPS123)> show battery [Tab][Tab]
age    fully    rating    transition
capacity    high-critical    replacement    voltage
charge    high-warning    state
charged    installed    status
condition    low    temperature
count    low-critical    test
date    low-warning    threshold
discharged    period    tolerance
The following command displays all details about the battery associated with device "UPS123":
console> device (UPS123)> show battery
NAME    TYPE    VALUE
Battery Temperature (C)    Battery    35.0
Battery Temperature (F)    Battery    95.0
Battery Age (Years)    Battery    0.0
...Thresholds and Bounds
...High Warning    3.25
...High Critical    4.00
Battery Test    Device    Done and Passed
...Battery Test Date    3/31/2020
...Auto-Test Period    14 Days
...Initiate Battery Test
Battery Voltage (V)    Battery    27.3
5. CLI Commands
device: buzzer
buzzer setting
Use the buzzer setting command to adjust how the device's audible alert will behave when triggered. The available choices are "audible buzzer" (alarm_normally) and "muted" (stay_silent). This command applies only to devices that support audible alerts, and only if enabled via the buzzer status command.
Syntax
buzzer setting {alarm-normally | stay-silent}
Examples
The following command configures the buzzer on device "UPS-123" to be muted when triggered:
console> device (UPS-123)> buzzer setting stay-silent
Update complete
buzzer status
Use the buzzer status command to enable or disable the ability to selectively adjust the device's audible alert. This command applies only to devices that support audible alerts.
Syntax
buzzer status enable
no buzzer status enable
Examples
The following command configures the audible alarm on device "UPS-123" to be selectively adjusted:
console> device (UPS-123)> buzzer status enabled
Update complete
show buzzer
Use the show buzzer command to display all buzzer settings.
Syntax
show buzzer [setting | status]
Examples
The following command displays the buzzer settings for device "UPS-123":
console> device (UPS-123)> show buzzer
NAME    TYPE    VALUE
-------- ---- ----
Buzzer    System    Enabled
..Status    Enabled
..Setting    Alarm Normally
5. CLI Commands
device: bypass
bypass voltage
Use the bypass voltage command to set the lowest and highest acceptable input voltage for bypass operation. Expressed as a percentage, the high limit is a positive integer and the low limit is a negative integer.
Syntax
bypass voltage {high-limit | low-limit}
- integer-value - Sets the value for the specified limit.
Examples
The following command sets the lower bypass voltage limit to -14 for device "UPS-123":
console> device (UPS-123)> bypass voltage low-limit -14 Update complete
show bypass
Use the show bypass command to display all bypass values.
Syntax
show bypass [voltage | limit | line | count]
Examples
The following command displays all bypass values for device "UPS-123":
console> device (UPS-123)> show bypass
NAME    TYPE    VALUE
Bypass Limit    Bypass
..Voltage Limit
....High Limit    10
....Low Limit    -14
Hardware Configuration Device
..Bypass Line Count    0
5. CLI Commands
device: cold-start
cold-start enable
Use the cold-start enable command to activate the cold start function. Use the no form of this command to disable cold-start.
Syntax
cold-start enable
no cold-start enable
Example
The following command activates cold start for device "UPS123":
console> device (UPS123)> cold-start enable
Update complete
show cold-start
Use the show cold-start command to display the status of the cold start function.
Syntax
show cold-start
Examples
The following command displays the cold start status for device "UPS123":
console> device (UPS123)> show cold-start
NAME    TYPE    VALUE
-------- ----    ----    ----
Hardware Features  Device
..Cold Start    Enabled
device: date-installed
date-installed
Use the date-installed command to modify the date that the device was installed. The default value is the current date.
Syntax
date-installed
no date-installed
- date – Specifies the date of the installation in the format selected using the default date-format or default user date-format command.
Example
The following command sets October 16, 2020 as the installation date for device "PDU-Rack1":
console> device (PDU-Rack1)> date-installed 10/16/2020
Update complete
5. CLI Commands
show date-installed
Use the show date-installed command to display the entered installation date.
Syntax
show date-installed
Examples
The following command displays the installation date entered for device "PDU-Rack1":
console> device (PDU-Rack1)> show date-installed 10/16/2020
device: db9
db9 input
Use the db9 input command to set the input action when pins 3 and 9 of the DB9 port are shorted.
Syntax
db9 input 3-9 {shutdown(_default) | output_off | reboot | output_on | power_toggle}
Example
The following command sets Output Off as the DB9 port input action for device "UPS123":
console> device (UPS123)> db9 input 3-9 output_off Update complete
db9 output
Use the db9 output command to set the condition signaled by the UPS when pins 1 and 5 or pins 8 and 5 of the DB9 port are shorted.
Syntax
db9 output 1-5 {on_battery_(default) | on_bypass | output_on | low_battery}
db9 output 8-5 {on_battery | on_bypass | output_on | low_battery_(default)}
Example
The following command sets Output On as the condition signalled by device "UPS123" when pins 8 and 5 of the DB9 port are shorted:
console> device (UPS123)> db9 output 8-5 output_on Update complete
5. CLI Commands
show db9
Use the show db9 command to display the DB9 port settings.
Syntax
show db9 [input | output]
Examples
The following command displays all DB9 port settings for device "UPS123":
console> device (UPS123)> show db9
NAME    TYPE    VALUE
----    ----    ----
DB9 Settings    Device
..Input Action - Pins 3-9    Shutdown (default)
..Output Trigger - Pins 1-5    On Battery (default)
..Output Trigger - Pins 8-5    Low Battery (default)
device: dehumidifying
dehumidifying
Use the dehumidifying command to set the dehumidifying mode of the cooling device.
Syntax
dehumidifying mode {on | off}
Example
The following command sets the dehumidifying mode to off for device "SRCOOL123":
console> device (SRCOOL123)> dehumidifying mode off Update complete
show dehumidifying
Use the show dehumidifying command to display the dehumidifying mode of the cooling device.
Syntax
show dehumidifying
Examples
The following command displays the dehumidifying mode of device "SRCOOL123":
console> device (SRCOOL123)> show dehumidifying
NAME    TYPE    VALUE
----    ----    ----
Operating Mode    Cooling    Cooling
..Dehumidifying Mode    Off
5. CLI Commands
device: details
details
Use the details command to display a comprehensive list of the device's metrics.
Syntax
show details [
- device-name – Specifies the device for which detailed metrics are to be displayed. This option is not required if no other devices are connected.
Example
The following command displays detailed metrics for device "PDU-Rack1":
console> device (PDU-Rack1)> show details
NAME    TYPE    VALUE
----  ----  ----
Input Voltage (V)    Input    120.9
..Recorded High/Low
....Minimum (V)    118.5
...Maximum (V)    121.6
Nominal Input Voltage (V)    Input    120
High Critical    138
High Warning    132
Low Critical    102
Low Warning    108
device: energy
energy saving setting
Use the energy saving setting command to set the output load percentage trigger for automatic shutdown.
Syntax
energy saving setting
- integer-value - Sets the output load percentage that will trigger an automatic shutdown.
Example
The following command sets the energy saving setting at 15% for device "UPS123":
console> device (UPS123)> energy saving setting 15
Update complete
5. CLI Commands
show energy saving setting
Use the show energy saving setting command to display the Energy Savings setting for the device.
Syntax
show energy saving setting
Examples
The following command displays the Energy Saving setting for device "UPS123":
console> device (UPS123)> show energy saving setting
NAME    TYPE    VALUE
-------- ---- ----
Hardware Features  Device
..Energy Saving    15
device: fault
fault action
Use the fault action command to set the behavior of the UPS when a fault condition occurs. The bypass option maintains AC output (so long as input voltage is within bypass high/low limits). The standby option causes the UPS to turn off AC output in response to fault conditions.
Syntax
fault action {go_to_bypass | go_to_standby}
Examples
The following command configures device "UPS123" to maintain AC output if a fault condition occurs:
console> device (UPS123)> fault action go_to_bypass Update complete
show fault action
Use the show fault action command to display the setting of how the device will behave when a fault condition occurs.
Syntax
show fault action
Examples
The following command displays the Fault Action setting for device "UPS123":
console> device (UPS123)> show fault action
NAME    TYPE    VALUE
---- ---- ----
Hardware Features    Device
..Fault Action    Go to Bypass
5. CLI Commands
device: id
id
Use the id command to optionally set a numeric identifier for the device. Use the no form of this command to clear the entry.
Syntax
id
- id – Specifies a numerical identifier for the device (Range: 0-65535).
Example
The following command sets "98765" as the numerical identifier for device "PDU-Rack1":
console> device (PDU-Rack1)> id 98765
Update complete
show id
Use the show id command to display the identifier entered for the device.
Syntax
show id
Examples
The following command displays the numerical identifier for device "PDU-Rack1":
console> device (PDU-Rack1) > show id 98765
device: input
input
Use the input command to configure the device's input settings. Input parameters vary by device type and model; use keywords to identify applicable input parameters. Use the force option to execute the input voltage reset command without confirmation.
Syntax
input voltage reset [force]
input voltage {I1-I2 | I2-I3 | I3-I1} reset [force]
input voltage threshold {low-critical | low-warning | high-warning | high-critical}
input voltage {I1-I2 | I2-I3 | I3-I1} threshold {low-critical | low-warning | high-warning | high-critical}
input voltage threshold {high-transfer | low-transfer}
input {high-warning | low-warning} threshold voltage
input voltage threshold tolerance
- decimal-value – Specifies the numerical value for the threshold or tolerance.
continued
5. CLI Commands
Examples
The following command resets the recorded minimum and maximum voltage levels, on device "PDU-Rack1", without confirmation:
console> device (PDU-Rack1)> input voltage reset force
Execution complete
The following command sets 102 as the Low Critical input voltage threshold on device "PDU-Rack1":
console> device (PDU-Rack1)> input voltage threshold low-critical 102 Update complete
show input
Use the show input command to display the device's input metrics.
Syntax
show input [frequency | nominal | voltage]
Examples
The following command displays all input information for device "PDU-Rack1":
console> device (PDU-Rack1)> show input
NAME    TYPE    VALUE
----    ----    ----
Input Voltage (V)    Input    120.9
..Recorded High/Low
...Minimum (V)    118.5
...Maximum (V)    121.6
Nominal Input Voltage (V)    Input    120
High Critical    138
High Warning    132
Low Critical    102
Low Warning    108
device: last-reason
last-reason
Use the last-reason command to reset the recorded reason for the specified event. Upon entering the command, a prompt will appear to confirm the action. Use the force option to execute the command without confirmation.
Syntax
last-reason {ac-failure | shutdown} reset [force]
Examples
The following command resets the last recorded AC failure reason, for device "UPS123", with no confirmation:
console> device (UPS123)> last-reason ac-failure reset force
Execution complete
5. CLI Commands
device: load
load
Use the load command to enter the load (
Syntax
load
- load-num – Specifies the number of the load.
Examples
The following command enters the container for load #3 on device "PDU-Rack1":
console> device (PDU-Rack1) > load 3
console> device (PDU-Rack1) > load (3) >
show load
Use the show load command to display a summary table of all loads on the device or the details of a specified load.
Syntax
show load [
- load-num – Specifies the load for which details are to be displayed.
Examples
The following command displays a summary table of all loads on device "PDU-Rack1".
| console> device (PDU-Rack1)> show load | |||||
| # | NAME | GROUP | STATE | DESCRIPTION | CONTROLLABLE |
| --- | ---- | ---- | ---- | ---- | ---- |
| 1 | srv ps 1 | Group 1 | on | vm server power supply 1 | yes |
| 2 | srv ps 2 | Group 1 | on | vm server power supply 2 | yes |
| 3 | rtr1 ps | Group 2 | on | router 1 power supply | yes |
| 4 | rtr2 ps | Group 2 | off | router 2 power supply | yes |
device: load: cycle
cycle
Use the cycle command to turn off a specified load, and then turn it on. This command applies only to devices that support controllable loads. When the command is issued, a prompt will appear to confirm the action. Use the force option to execute the cycle without confirmation.
Syntax
cycle [force]
Examples
The following command cycles load #2 on device "PDU-Rack1", with no confirmation:
console> device (PDU-Rack1)> load (2)> cycle force
Cycling
5. CLI Commands
device: load: description
description
Use the description command to optionally enter a description for the specified load. Use the no form of this command to clear the description.
Syntax
description
no description
- description – Specifies a description for the load. If spaces are required, bookend the description with quotation marks (“).
Examples
The following command sets "vm server 1" as the description for load #2 on device "PDU-Rack1":
console> device (PDU-Rack1)> load (2)> description "vm server 1"
Update complete
show description
Use the show description command to display the description entered for the load.
Syntax
show name
Examples
The following command displays the description for load #2 on device "PDU-Rack1":
console> device (PDU-Rack1)> load (2)> show description
vm server 1
device: load: name
name
Use the name command to set or modify the name of the load.
Syntax
name
- new-name – Specifies the name of the load.
Examples
The following command changes the name of load 1 on device "PDU-Rack1" to "Rack DXS Switch":
console> device (PDU-Rack1)> load (1)> name "Rack DXS Switch"
Update complete
console> device (PDU-Rack1)> load (Rack DXS Switch)>
5. CLI Commands
show name
Use the show name command to display the name entered for the load.
Syntax
show name
Examples
The following command displays the name of the specified load on device "PDU-Rack1":
console> device (PDU-Rack1)> load (Rack DXS Switch)> show name
Rack DXS Switch
device: load: off
off
Use the off command to turn a specified load off. This command applies only to devices that support controllable loads. When the command is issued, a prompt will appear to confirm the action. Use the force option to execute the action without confirmation.
Syntax
off [force]
Examples
The following command turns off load #2 on device "PDU-Rack1", with no confirmation.
console> device (PDU-Rack1) > load (2) > off force
Turning off
device: load: on
on
Use the on command to turn a specified load on. This command applies only to devices that support controllable loads. When the command is issued, a prompt will appear to confirm the action. Use the force option to execute the action without confirmation.
Syntax
on [force]
Examples
The following command turns on load 2 on device "PDU-Rack1", with no confirmation:
console> device (PDU-Rack1)> load (2)> on force
Turning on
5. CLI Commands
device: load: ramp
ramp delay
Use the ramp delay command to set the time that the specified load must wait before it turns on. This command requires the load to be enabled for a ramp function via the ramp enable command. Note that on exiting the load (
Syntax
ramp delay
- delay-time – Specifies the ramp delay time, in seconds, for the specified load.
Examples
The following command sets the ramp delay time for load #2 to 30 seconds, on device "PDU-Rack1":
console> device (PDU-Rack1) > load (2) > ramp delay 30
Update complete
ramp enable
Use the ramp enable command to turn on a specified load when a ramp is initiated. This command applies to devices that support controllable loads. Use the no form of this command to have a load remain in its present state during a ramp. Note that on exiting the load (
Syntax
ramp enable
no ramp enable
Examples
The following command enables the ramp function for load #2 on device "PDU-Rack1":
console> device (PDU-Rack1)> load (2)> ramp enable
Update complete
show ramp
Use the show ramp command to display the ramp details for the load.
Syntax
show ramp [delay | enable]
Examples
The following command displays the ramp details for load #2 on device "PDU-Rack1":
console> device (PDU-Rack1)> load (2)> show ramp
Ramp Delay : 30
Ramp Status : enabled
5. CLI Commands
device: load: shed
shed delay
Use the shed delay command to set the time that the specified load must wait before it turns off. This command requires the load to be enabled for a shed function; see the shed enable command. Note that on exiting the load (
Syntax
shed delay
- delay-time – Specifies the shed delay time, in seconds, for the specified load.
Examples
The following command sets the shed delay time for load #2 to 30 seconds, on device "PDU-Rack1".
console> device (PDU-Rack1) > load (2) > shed delay 30
Update complete
shed enable
Use the shed enable command to turn off a load when a shed is initiated. This command applies to devices that support controllable loads. Use the no form of this command to have a load remain in its present state during a shed. Note that on exiting the load (
Syntax
shed enable
no shed enable
Examples
The following command enables the shed function for load #2 on device "PDU-Rack1":
console> device (PDU-Rack1)> load (2)> shed enable Update complete
show shed
Use the show shed command to display the shed details for the load.
Syntax
show shed [delay | enable]
Examples
The following command displays the shed details for load #2 on device "PDU-Rack1":
console> device (PDU-Rack1) > load (2) > show shed
Shed Delay : 15
Shed Status : enabled
5. CLI Commands
device: load: show
show
Use the show command, with optional keywords, to display details about the load. Note that supported settings and details will vary by device type and model. To view all keywords applicable to the load, enter show [Tab][Tab].
Syntax
show [keyword-1 [keyword-2 [keyword-3 [keyword-4 [keyword-5 [keyword-6]]]]]]
- keyword-x – Specifies the attribute(s) to be displayed. Up to 6 keywords can be used per command
Examples
The following command displays all show keywords for Load #2 on device "PDU-Rack1":
console> device (PDU123)> load (2)> show [Tab][Tab]
bank current help power state
circuit description name ramp voltage
controllable group phase shed
The following command displays all details for Load #2 on device "PDU-Rack1":
console> device (PDU-Rack1) > load (2) > show
<h1 id="2">: 2</h1>
Name : Load #2
Group : Group A
State : on
Description : Server supply A
Controllable : yes
Ramp : enabled
Delay : 30
Shed : enabled
Delay : 30
Current : 2.0A
Power : 240W
Circuit : 1
Phase : 1
Bank : 1
5. CLI Commands
device: load-group
load-group
Use the load-group command to create and manage a load group entry. Use the no form of this command to delete the entry. When creating an entry, select an easily remembered name as a label for the entry; this name will be used in the command format load-group (
Syntax
load-group
- name - Specifies the load group to be created or managed. If spaces are required, bookend the name with quotation marks (“).
no load-group
- name - Specifies the load group to be deleted.
Examples
The following command creates a load group named "Load Group 1" on device "PDU-Rack1":
console> device (PDU-Rack1)> load-group "Load Group 1"
Created Load Group 1
console> device (PDU-Rack1)> load-group (Load Group 1)>
The following command deletes the load group named "LG3" on device "PDU-Rack1":
console> device (PDU-Rack1)> no load-group LG3
Deleted LG3
device: load-group: cycle
cycle
Use the cycle command to turn a specified load group off and then on. This command applies only to devices that support controllable loads. When the command is issued, a prompt will appear to confirm the action. Use the force option to execute the action without confirmation.
Syntax
cycle [force]
Examples
The following command cycles all loads assigned to "Load Group 1" on device "PDU-Rack1", with no confirmation:
console> device (PDU-Rack1)> load-group (Load Group 1)> cycle force Cycling
5. CLI Commands
device: load-group: description
description
Use the description command to optionally enter a description for the load group entry. Use the no form of this command to clear the description.
Syntax
description
no description
- description – Specifies a description for the entry. If spaces are required, bookend the description with quotation marks (“).
Examples
The following command enters “NMS server power supplies” as the description for entry “Load Group 1” on device “PDU-Rack1”:
console> device (PDU-Rack1) load group (Load Group 1)> description "NMS server power supplies"
Update complete
show description
Use the show description command to display the description entered for the load group entry.
Syntax
show description
Examples
The following command displays the description entered for "Load Group 1" on device "PDU-Rack1":
console> device (PDU-Rack1) load group (Load Group 1)> show description NMS server power supplies
device: load-group: enable
enable
Use the enable command to activate the load group. Use the no form of this command to disable the entry. A disabled load group cannot be selected when configuring actions.
Syntax
enable
no enable
Example
The following command enables load group entry "GROUP1", associated with device "PDU123":
console> device (PDU123)> load-group (GROUP1)> enable Update complete
5. CLI Commands
show enable
Use the show enable command to display the enabled/disabled status for the load group.
Syntax
show enable
Examples
The following command displays the status of load group entry "GROUP1", associated with device "PDU123":
console> device (PDU123)> load-group (GROUP1)> show enable enabled
device: load-group: loads
loads
Use the loads command to assign loads to the load group entry. Loads can be assigned as a series of numbers (i.e. "3,4,5,6"), as a range of numbers (i.e. "3-6"), or in combination (i.e. "3,5-8,10,12-15"). Note that the list of loads is additive. Use the no form of this command to remove loads from the list.
Syntax
loads
- load-x – Specifies a comma-delimited list of loads to be added to the load group.
no loads
- load-x – Specifies a comma-delimited list of loads to be removed from the load group.
Examples
The following command assigns loads 2 through 5 and 16 through 20 to entry "Load Group 1" on device "PDU-Rack1":
console> device (PDU-Rack1)> load group (Load Group 1)> loads 2-5,16-20 Update complete
The following command removes loads 6 and 7 from load group "Servers" on device "PDUxyz":
console> device (PDUxyz)> load group (Servers)> no loads 6,7 Update complete
show loads
Use the show loads command to display the load numbers associated with the load group entry.
Syntax
show loads
Examples
The following command displays the loads associated with entry "Load Group 1" on device "PDU-Rack1":
console> device (PDU-Rack1)> load group (Load Group 1)> show loads 2,3,4,5,16,17,18,19,20
5. CLI Commands
device: load-group: name
name
Use the name command to modify the name of the load group entry.
Syntax
name <new-name>
- new-name – Specifies a new name for the entry. If spaces are required, bookend the name with quotation marks (“).
Examples
The following command changes the entry's name from "Load Group 1" to "LG1" on device "PDU-Rack1":
console> device (PDU-Rack1)> load-group (Load Group 1)> name LG1
Update complete
console> device (PDU-Rack1)> load-group (LG1)>
show name
Use the show name command to display the name entered for the load group entry.
Syntax
show name
Examples
The following command displays the load group's name:
console> device (PDU-Rack1)> load-group (LG1)> show name LG1
device: load-group: off
off
Use the off command to turn off all of the loads associated with the load group entry. This command applies only to devices that support controllable loads. When the command is issued, a prompt will appear to confirm the action. Use the force option to execute the action without confirmation.
Syntax
off [force]
Examples
The following command turns off all loads assigned to "Load Group 1" on device "PDU-Rack1", with no confirmation:
console> device (PDU-Rack1)> load-group (Load Group 1)> off force
Turning off
5. CLI Commands
device: load-group: on
on
Use the on command to turn on all of the loads associated with the load group entry. This command applies only to devices that support controllable loads. When the command is issued, a prompt will appear to confirm the action. Use the force option to execute the action without confirmation.
Syntax
on [force]
Examples
The following command turns on all loads assigned to "Load Group 1" on device "PDU-Rack1", with no confirmation:
console> device (PDU-Rack1)> load-group (Load Group 1)> on force
Turning on
device: load-group: show
show
Use the show command, with optional keywords, to display details about the load group. To view all keywords applicable to the load group, enter show [Tab][Tab].
Syntax
show [keyword-1 [keyword-2 [keyword-3 [keyword-4 [keyword-5 [keyword-6]]]]]]
- keyword-x – Specifies the attribute(s) to be displayed. Up to 6 keywords can be used per command
Examples
The following command displays all show keywords for entry "Load Group 1" on device "PDU-Rack1":
console> device (PDU-Rack1)> load-group (Load Group 1)> show [Tab][Tab]
description help loads name state status
The following command displays the settings for entry "Load Group 1" on device "PDU-Rack1":
console> device (PDU-Rack1)> load-group (Load Group 1)> show
Name : Load Group 1
Description : vm server 1
Loads : 2,3,4,5,16,17,18,19.20
Status : enabled
State : mixed
5. CLI Commands
device: location
location
Use the location command to optionally enter information related to the physical location of the device. Use the no form of this command to clear the location.
Syntax
location
no location
- location – Specifies physical location information pertaining to the device. If spaces are required, bookend the information with quotation marks (“).
Examples
The following command sets "Building 3 Room 11-W" as the location information for device "PDU-Rack1":
console> device (PDU-Rack1)> location "Building 3 Room 11-W"
Update complete
show location
Use the show location command to display the location entered for the device.
Syntax
show location
Examples
The following command displays the location information entered for device "PDU-Rack1":
console> device (PDU-Rack1)> show location
Building 3 Room 11-W
device: mute
mute buzzer
Use the mute buzzer command to turn off the device's buzzer for the current alert condition. When the condition clears, the buzzer will revert to its previous status. For example, if the buzzer is enabled and set to "Alarm Normally", it will once again sound if an alert condition occurs. When the command is issued, a prompt will appear to confirm the action. Use the force option to execute the mute without confirmation.
Syntax
mute buzzer [force]
Examples
The following command mutes the buzzer on device "UPS-123", without confirmation prompt:
console> device (UPS-123)> mute buzzer force
Execution complete
5. CLI Commands
show mute
Use the show mute command to display the status of the buzzer.
Syntax
show mute
Examples
The following command displays the buzzer's mute status for device "UPS-123":
console> device (UPS-123)> show mute
NAME    TYPE    VALUE
-------- ---- ----
Buzzer    Device    Enabled
..Mute Buzzer
device: name
name
Use the name command to modify the name of the device.
Syntax
name
- new-name – Specifies the new name of the device. Note: the device name cannot contain spaces.
Examples
The following command changes the device's name from "PDU-Rack1" to "PDU-R2":
console> device (PDU-Rack1)> name "PDU-R2"
Update complete
console> device (PDU-R2)>
show name
Use the show name command to display the name entered for the device.
Syntax
show name
Examples
The following command displays the device's name:
console> device (PDU-R2) > show name
PDU-R2
5. CLI Commands
device: off
off
Use the off command to turn off (shut down) the device. Upon entering the command, a prompt will appear to confirm the action. Use the force option to execute the shutdown without confirmation. Note that some devices do not support a shutdown-delay time; in those instances, the shutdown action will execute immediately on command entry. The unit of measure for delay time is typically seconds, but will vary by device model.
Syntax
off
- shutdown-delay – Specifies the time that the device will wait before executing the shutdown.
Examples
The following command executes an immediate (no delay) shutdown of device "PDU-Rack1", with no confirmation:
console> device (PDU-Rack1)> off 0 force
Device shutdown in process
device: off-mode
off-mode
Use the off-mode command to set the operational state of the UPS when it is turned off. When set to “bypass” the UPS will provide unregulated line power within configured bypass low / high limits.
Syntax
off-mode {standby | bypass}
Examples
The following command sets the Off Mode state to bypass for device "UPS123":
console> device (UPS123)> off-mode bypass
Update complete
show off-mode
Use the show off-mode command to display the Off Mode setting.
Syntax
show off-mode
Examples
The following command displays the Off Mode setting for device "UPS123":
console> device (UPS123)> show off-mode
NAME    TYPE    VALUE
----    ----    ----
Hardware Features  Device
..Off Mode    Bypass
5. CLI Commands
device: on
on
Use the on command to turn on the device. Upon entering the command, a prompt will appear to confirm the action. Use the force option to execute the startup without confirmation. Note that some devices do not support a startup-delay time; in those instances, the startup action will execute immediately on command entry. The unit of measure for delay time is typically seconds, but will vary by device model.
Syntax
on
- startup-delay – Specifies the time the device will wait before executing the start-up.
Examples
The following command turns on device "PDU-Rack1" two seconds after execution, with no confirmation:
console> device (PDU-Rack1)> on 2 force
Device startup in process
device: on-battery
on-battery shutdown-seconds
Use the on-battery shutdown-seconds command to set the maximum amount of battery runtime in seconds the UPS will provide during a power failure.
Syntax
on-battery shutdown-seconds
- integer-value - Sets the battery runtime the UPS will provide during a power failure.
Examples
The following command sets the timed shutdown at 60 seconds for device "UPS123":
console> device (UPS123)> on-battery shutdown-seconds 60 Update complete
on-battery shutdown-status enable
Use the on-battery shutdown-status enable command to activate timed shutdown in the event of a power failure. Use the no form of this command to disable the timed shutdown.
Syntax
on-battery shutdown-state enable
no on-battery shutdown-state enable
Examples
The following command activates the timed shutdown for device "UPS123":
console> device (UPS123)> on-battery shutdown-status enable Update complete
5. CLI Commands
show on-battery
Use the show on-battery command to display the timed shutdown state and value.
Syntax
show on-battery [shutdown-seconds | shutdown-status]
Examples
The following command displays the timed shutdown settings for device "UPS123":
console> device (UPS123)> show on-battery
NAME    TYPE    VALUE
----   ----   ----
Seconds on Battery (Seconds)    Battery    0
..Timed Shutdown Seconds    60
..Timed Shutdown Status    Enabled
device: output
output
Use the output command to display the device's output metrics and to configure output threshold settings. Output parameters vary by device; use keywords to identify applicable output parameters. When the reset command is issued, a prompt will appear to confirm the action. Use the force option to execute the reset without confirmation.
Syntax
output current reset [force]
output current {phase-1 | phase-2 | phase-3} reset [force]
output voltage rating {100 | 110 | 115 | 120 | 127 | 200 | 208 | 220 | 230 | 240}
output voltage threshold {low-critical | low-warning | high-warning | high-critical}
output current threshold {low-warning | high-warning | high critical}
output current {phase-1 | phase-2 | phase-3} threshold {low-warning | high-warning | high critical}
output load threshold high-critical
output voltage threshold tolerance
output utilization threshold tolerance
output utilization threshold high-critical
- integer-value – Specifies the numerical value for the output utilization threshold tolerance.
- decimal-value – Specifies the numerical value for the specified threshold or tolerance.
Example
The following command resets the recorded minimum and maximum current levels, on device "PDU-Rack1", without confirmation:
console> device (PDU-Rack1)> output current reset force
Execution complete
The following command sets 102 as the Low Critical output voltage threshold on device "PDU-Rack1":
console> device (PDU-Rack1)> output voltage threshold low-critical 102 Update complete
5. CLI Commands
show output
Use the show output command, with optional keywords, to display the device's output metrics. To view all keywords applicable to the entry, enter show output [Tab][Tab].
Syntax
show output [keyword]
Examples
The following command displays all show output keywords for device "PDU-Rack1":
console> device (PDU-Rack1)> show output [Tab][Tab]
count kv minimum total
current kw power utilization
energy line precision voltage
frequency low-critical rating
high-critical low-warning threshold
high-warning maximum tolerance
The following command displays all input information for device "PDU-Rack1":
console> device (PDU-Rack1)> show input
NAME    TYPE    VALUE
----    ----    ----
Nominal Output Voltage (V)    Output    120
Output Current (A)    Output    3.2
..Recorded High/Low
....Maximum (A)    118.5
...Minimum (A)    121.6
..Precision    Tenth (0.1A)
Output Frequency (Hz)    Output    59.7
Output Load (%)    Output    12
Output Power (W)    Output    384
Output Voltage (V)    Output    120
Voltage High Critical    138
Voltage High Warning    132
Voltage Low Critical    102
Voltage Low Warning    108
Current High Critical    25
Current High Warning    20
Current Low Critical    0.5
Current Low Warning    1.5
5. CLI Commands
device: power
power on-delay
Use the power on-delay command to set the time the device will wait to turn on after an auto-restart is triggered.
Syntax
power on-delay
- integer-value – Specifies the delay value, in seconds.
Example
The following command sets the auto-restart power-on delay at 15 seconds for device "PDU-Rack1":
console> device (PDU-Rack1)> power on-delay 15
Update complete
power strategy setting
Use the power strategy setting command to set the preferred mode of operation – maximum quality or maximum efficiency.
Syntax
power strategy setting {maximum_quality | maximum_efficiency}
Examples
The following command sets maximum quality as the power strategy for device "PDU-Rack1":
console> device (PDU-Rack1)> power strategy setting maximum_quality Update complete
show power
Use the show power command to display all power related settings and metrics.
Syntax
show power [on-delay | strategy setting]
Examples
The following command displays the power strategy setting for device "PDU-Rack1":
console> device (PDU-Rack1)> show power strategy setting
Maximum Quality
5. CLI Commands
device: ramp
ramp
Use the ramp command to start the ramp sequence or to stop an in-progress ramp sequence. This command applies only to devices that support controllable loads. The ramp enable and ramp delay commands allow setting these parameters on a multitude of loads; these parameters can also be set on individual loads using the load command. After setting these parameters, use the apply ramp-shed command to make the changes effective.
Syntax
ramp {start | stop}
ramp enable loads
ramp delay
Examples
The following command initiates the ramp sequence on device "PDU123":
console> device (PDU123)> ramp start
Ramp sequence starting
The following command enables ramp on loads 2, 4 and 5 for device "PDU123":
console> device (PDU123)> ramp enable loads 2,4,5
Update complete
The following command sets a ramp delay time of 3 seconds for loads 1, 3 and 6 for device "PDU123":
console> device (PDU123)> ramp delay 3 loads 1,2,6
Update complete
device: remote
remote temperature sensor setting enable
Use the remote temperature sensor setting command to set the external sensor as the source for the set-point temperature. Use the no form of this command to revert to the internal temperature sensor as the set-point source.
Syntax
remote temperature sensor setting enable
no remote temperature sensor setting enable
Example
The following command sets the external sensor as the source for the set-point temperature of device "SRCOOL123":
console> device (SRCOOL123)> remote temperature sensor setting enable Update complete
5. CLI Commands
show remote temperature sensor setting enable
Use the remote temperature sensor setting command to display the status of the external sensor as the source for the set-point temperature.
Syntax
show remote temperature sensor setting
Examples
The following command displays the remote sensor status as the set point source for device "SRCOOL123":
console> device (SRCOOL123)> show remote temperature sensor setting enabled
device: region
region
Use the region command to optionally enter information about the geographical location of the device. Use the no form of this command to clear the information.
Syntax
region
no region
- region – Specifies geographical information pertaining to the device. If spaces are required, bookend the information with quotation marks (“).
Examples
The following command sets “Chicago” as the region for device “Server 123”:
console> device (Server 123)> region Chicago Update complete
show region
Use the show region command to display the region entered for the device.
Syntax
show region
Examples
The following command displays the region information for device "Server 123":
console> device(Server 123)> show region
Chicago
5. CLI Commands
device: reset
reset battery-pack
Use the reset battery-pack command to remove all External Battery Pack entries from the battery profile and then reconfigure using only the internal battery. This command applies only to devices that support External Battery Packs. Upon entering the command, a confirmation message will appear; enter 'yes' to proceed with the reset. Use the force option to execute the reset without confirmation.
Syntax
reset battery-pack [force]
Examples
The following command resets device "UPS123" to using only the internal battery:
console> device (UPS123)> reset battery-pack
This command deletes all external batteries and re-configures using only the internal battery. Type "yes" to proceed: yes
Battery synchronization in progress...
device: restart
restart
Use the restart command to execute a power cycle of the device, i.e. turn the device off then on again. Upon entering the command, a prompt will appear to confirm the action. Use the force option to execute the startup without confirmation. The unit of measure for delay times is typically seconds, but will vary by device model. Not all device models support restart delay times.
Syntax
restart
- restart-delay – Specifies the time that the system will wait to turn on the device after it was shut down.
- shutdown-delay – Specifies the time that the system will wait to shutdown the device after the command is executed.
Examples
The following command waits 30 seconds before turning off device "PDU-Rack1", then turns it on after 60 seconds (with confirmation):
console> device (PDU-Rack1)> restart 30 60
Are you sure? Type "yes" to proceed:
5. CLI Commands
device: restore-hardware
restore-hardware
Use the restore-hardware command to revert the device to its factory default settings. This command applies only to devices that support factory default reversion. Upon entering the command, a prompt will appear to confirm the action. Use the force option to execute the command without confirmation. To revert the LX Card to factory default settings, use the restore command.
Syntax
restore-hardware [force]
Examples
The following command executes a reversion of device PDU-Rack1 to its factory default settings, with confirmation:
console> device (PDU-Rack1)> restore-hardware
This will immediately terminate all active user session(s) while the system restores device PUD-Rack1 to its factory defaults. Type "yes" to proceed:
device: sensor
sensor
Use the sensor command to enter the sensor (
Syntax
sensor [
- sensor-name – Specifies the sensor to be managed.
no sensor
- sensor-name – Specifies the inactive sensor to be deleted.
Examples
The following command enters the sensor command format for sensor "E2Temp" associated with device "PDU123":
console> device (PDU123)> sensor E2Temp
console> device (PDU123)> sensor (E2Temp)>
The following command deletes the inactive sensor named "Temp 1" associated with device "PDU123":
console> device (PDU123)> no sensor "Temp 1"
Update complete
5. CLI Commands
show sensor
Use the show sensor command to display the settings for a specific or all sensors.
Syntax
show sensor [
- sensor-name – Displays details for the specified sensor.
Examples
The following command displays the settings for all sensors associated with device "PDU123":
| console> device (PDU123)> show sensor | |||||
| NAME | ACIVE | TYPE | MANUFACTURER | MODEL | SERIAL # |
| TopCombo | yes | EnviroSense | TRIPP LITE | E2MTDO | 2631AV0AC88A3000010 |
| Temp 1 | yes | EnviroSense | TRIPP LITE | E2MTHDI | 2631AV0AC886D000014 |
| DigitalOut | yes | EnviroSense | TRIPP LITE | E2MTDO | 2631AV0AC88A3000019 |
device: sensor: asset-tag
asset-tag
Use the asset-tag command to optionally enter an asset identifier for the sensor. Use the no form of this command to clear the entry.
Syntax
asset-tag
no asset-tag
- tag – Specifies an identity for the sensor. If spaces are required, bookend the name in quotation marks (“).
Example
The following command assigns "ZQ32B" as the asset tag for sensor "E2MT1" connected to device "PDU-Rack1":
console> device (PDU-Rack1)> sensor (E2MTD1)> asset-tag ZQ32B Update complete
show asset-tag
Use the show asset-tag command to display the identifier entered for the device.
Syntax
show asset-tag
Examples
The following command displays the asset tag for sensor "E2MT1" connected to device "PDU-Rack1":
console> device (PDU-Rack1)> sensor (E2MTD1)> show asset-tag ZQ32B
5. CLI Commands
device: sensor: date-installed
date-installed
Use the date-installed command to modify the date that the device was installed. The default value is the current date.
Syntax
date-installed <date>
- date – Specifies the date of the installation in the format selected using the default date-format or default user date-format command
Example
The following command sets October 16, 2020 as the installation date for sensor "Temp1", associated with device "PDU123":
console> device (PDU123)> sensor (Temp1)> date-installed 10/16/2020 Update complete
show date-installed
Use the show date-installed command to display the entered installation date.
Syntax
show date-installed
Examples
The following command displays the installation date for sensor "Temp1", associated with device "PDU123":
console> device (PDU123)> sensor (Temp1)> show date-installed 10/16/2020
device: sensor: humidity
humidity
Use the humidity command to set the low-critical and high-critical threshold values and tolerance that define the operational bounds for humidity measurements. The tolerance defines the margin that a humidity measurement must exceed before triggering another threshold event; the sole setting applies to both the low-critical and high-critical thresholds.
Syntax
humidity threshold {low-critical | high-critical}
humidity threshold tolerance
- integer-value – Specifies the value for the threshold or tolerance.
Examples
The following command sets 44% as the low-critical humidity threshold for sensor "E2MTHDI", associated with device "PDU123":
console> device (PDU123)> sensor (E2MTHDI)> humidity threshold low-critical 44 Update complete
The following command sets 3% as the humidity threshold tolerance for sensor "E2MTHDI", associated with device "PDU123":
console> device (PDU123)> sensor (E2MTHDI)> humidity threshold tolerance 3 Update complete
5. CLI Commands
show humidity
Use the show humidity command to display a summary of humidity threshold settings.
Syntax
show humidity
Examples
The following command displays a summary of humidity threshold settings for sensor "E2MTHDI", associated with device "PDU123";
console> device (PDU123)> sensor (E2MTHDI)> show humidity
NAME    TYPE    VALUE
----    ----    ----
Hardware Configuration    Device
..Humidity Supported    Yes
Humidity (%)    Environment 18
..Thresholds and Bounds
....Low Critical    5
....High Critical    45
....Tolerance    0
device: sensor: id
id
Use the id command to optionally set a numeric identifier for the sensor. Use the no form of this command to clear the entry.
Syntax
id
- id – Specifies a numerical identifier for the sensor (Range: 0-65535).
Example
The following command sets “12345” as the numerical identifier for sensor “E2MT1” connected to device “PDU-Rack1”:
console> device (PDU-Rack1)> sensor (E2MTD1)> id 12345
Update complete
show id
Use the show id command to display the identifier entered for the sensor.
Syntax
show id
Examples
The following command displays the numerical identifier for sensor "E2MT1" connected to device "PDU-Rack1":
console> device (PDU-Rack1)> sensor (E2MTD1)> show id 12345
5. CLI Commands
device: sensor: input
input
Use the input command to configure the input contacts of an E2MTHDI sensor.
Syntax
input {contact-1 | contact-2} alarm-level {normally_open | normally_closed}
input {contact-1 | contact-2} description
- value – Specifies a description for the input contact.
no input {contact-1 | contact-2} description
- value – Clears the description for the input contact.
Example
The following command sets “normally_open” as the contact-1 alarm level for sensor “E2MTHDI-123” connected to device “PDU-Rack1”:
console> device (PDU-Rack1)> sensor (E2MTHDI-123)> input contact-1 alarm-level
normally_open
Update complete
The following command sets “Door 12-A” as the contact-2 description for sensor “E2MTHDI-123” connected to device “PDU-Rack1”:
console> device (PDU-Rack1)> sensor (E2MTHDI-123)> input contact-2 description "Door 12-A"
Update complete
show input
Use the show input command to display the settings for the input contacts of the sensor.
Syntax
show input
Examples
The following command displays the input settings for sensor "E2MTHDI-123" connected to device "PDU-Rack1":
console> device (PDU-Rack1)> sensor (E2MTHDI-123)> show input
NAME    TYPE    VALUE
----    ----    ----
Contact Input 1    Environment    Open
..Alarm Level    ----    Normally Open
..Description    ----    Contact Input #1
Contact Input 2    Environment    Open
..Alarm Level    ----    Normally Open
..Description    ----    Door 12-A
5. CLI Commands
device: sensor: location
location
Use the location command to optionally enter information related to the physical location information of the sensor. By default, this information will match the location entered on the device to which the sensor is connected. Use the no form of this command to clear the location.
Syntax
location
no location
- location – Specifies location information of the sensor. If spaces are required, bookend the information with quotation marks (“).
Examples
The following command sets "Rack5-middle" as the location information for sensor "Temp1", associated with device "PDU123":
console> device (PDU123)> sensor (Templ)> location Rack5-middle Update complete
show location
Use the show location command to display the location entered for the sensor.
Syntax
show location
Examples
The following command displays the location information entered for sensor "Temp1", associated with device "PDU123":
console> device (PDU123)> sensor (Temp1)> show location Rack5-middle
device: sensor: name
name
Use the name command to modify the name of the sensor. If spaces are required, bookend the name with quotation marks (“).
Syntax
name
- new-name – Sets the new name for the sensor.
Examples
The following command changes the sensor's name from "sensor0076" to "Temp1", associated with device "PDU123":
console> device (PDU123)> sensor (sensor0076)> name Temp1
Update complete
console> device (PDU123)> sensor (Temp1)>
5. CLI Commands
show name
Use the show name command to display the name entered for the sensor.
Syntax
show name
Examples
The following command displays the specified sensor's name:
console> device (PDU123)> sensor (Temp1)> show name Temp1
device: sensor: output
output
Use the output command to configure the output contacts of an E2MTDO sensor.
Syntax
output {contact-1 | contact-2} alarm-level {normally_open | normally_closed}
output {contact-1 | contact-2} description
- value – Specifies a description for the output contact.
no input {contact-1 | contact-2} description
- value – Clears the description for the output contact.
Example
The following command sets “normally_open” as the contact-1 alarm level for sensor “E2MTDO-456” connected to device “PDU-Rack1”:
console> device (PDU-Rack1)> sensor (E2MTDO-456)> output contact-1 alarm-level
normally_open
Update complete
The following command sets “Beacon 12-A” as the contact-2 description for sensor “E2MTDO-456” connected to device “PDU-Rack1”:
console> device (PDU-Rack1)> sensor (E2MTDO-456)> output contact-2 description "Beacon 12-A"
Update complete
output close
Use the output close command to close an output contact of an E2MTDO sensor. On executing this command, a confirmation message will appear; use the force option to close the contact without confirmation.
Syntax
output {contact-1 | contact-2} close [force]
Example
The following command closes contact-1 of sensor "E2MTDO-456" connected to device "PDU-Rack1":
console> device (PDU-Rack1)> sensor (E2MTDO-456)> output contact-1 close
Are you sure? Type "yes" to proceed:
5. CLI Commands
show output
Use the show output command to display the settings for the output contacts of the sensor.
Syntax
show output
Examples
The following command displays the output settings for sensor "E2MTDO-456" connected to device "PDU-Rack1":
console> device (PDU-Rack1)> sensor (E2MTDO-456)> show output
NAME    TYPE    VALUE
----    ----    ----
Contact Output 1    Environment    Open
..Alarm Level    Normally Open
..Description    Contact Output #1
Contact Output 2    Environment    Open
..Alarm Level    Normally Open
..Description    Beacon 12-A
Hardware Configuration   Device
..Contact Output Count    2
device: sensor: region
region
Use the region command to optionally enter a description of the geographical area where the sensor is located. By default, this information will match the region entered on the device to which the sensor is connected. Use the no form of this command to clear the information.
Syntax
region
no region
- region - Specifies geographical information pertaining to the sensor. If spaces are required, bookend the information with quotation marks (“).
Examples
The following command sets “Chicago” as the region for sensor “Temp1”, associated with device “PDU123”:
console> device (PDU123)> sensor (Temp1)> region Chicago Update complete
5. CLI Commands
show region
Use the show region command to display the region information entered for the sensor.
Syntax
show region
Examples
The following command displays the region information entered for sensor "Temp1", associated with device "PDU123":
console> device (PDU123)> sensor (Temp1)> show region Chicago
device: sensor: show
show
Use the show command, with optional keywords, to display details about the sensor. To view all keywords applicable to the sensor, enter show [Tab][Tab].
Syntax
show [keyword-1 [keyword-2 [keyword-3 [keyword-4 [keyword-5 [keyword-6]]]]]]
- keyword-x – Specifies the attribute(s) to be displayed. Up to 6 keywords can be used per command.
Examples
The following command displays all show keywords for sensor "TopCombo", associated with device "PDU123":
console> device (PDU123)> sensor (TopCombo)> show [Tab][Tab]
alarm-level description location region
asset-tag details low-critical serial-number
contact help manufacturer supported
contact-1 high-critical model temperature
contact-2 humidity name threshold
count id output tolerance
date-installed input protocol
The following command displays all details for sensor "TopCombo", associated with device "PDU123":
console> device (PDU123)> sensor (TopCombo)> show
Name : TopCombo
Active : yes
Type : EnviroSense
Manufacturer : TRUPP LITE
Model : E2MTHDI
Serial # : 2631AV0AC886D00014
Install Date : 3/2/2020
Protocol : 9300
Device ID : 0
Asset Tag :
Region :
Location :
5. CLI Commands
device: sensor: temperature
temperature
Use the temperature command to set the low-critical and high-critical threshold values and tolerance that define the operational bounds for temperature measurements. The tolerance defines the margin that a temperature measurement must exceed before triggering another threshold event; the sole setting applies to both the low-critical and high-critical thresholds.
Syntax
temperature threshold {low-critical | high-critical}
temperature threshold tolerance
- decimal-value – Specifies the value for the specified threshold or tolerance.
Examples
The following command sets 50 degrees as the low-critical temperature threshold for sensor “E2MTHDI”, associated with device “PDU123”:
console> device (PDU123)> sensor (E2MTHDI)> temperature threshold low-critical 50 Update complete
The following command sets 3 degrees as the temperature threshold tolerance for sensor “E2MTHDI”, associated with device “PDU123”:
console> device (PDU123)> sensor (E2MTHDI)> temperature threshold tolerance 3
Update complete
show temperature
Use the show temperature command to display a summary of temperature threshold settings.
Syntax
show temperature
Examples
The following command displays a summary of temperature threshold settings for sensor "E2MTHDI", associated with device "PDU123":
console> device (PDU123)> sensor (E2MTHDI)> show temperature
NAME    TYPE    VALUE
----    ----    ----
Hardware Configuration    Device
..Temperature Supported    Yes
Temperature (F)    Environment    76.7
..Thresholds and Bounds
....Low Critical    65.0
....High Critical    90.0
....Tolerance    3.0
5. CLI Commands
device: set-point
set-point
Use the set-point command to set the ambient temperature which the cooling device is to maintain.
Syntax
set-point temperature
- decimal value – the value of the desired ambient temperature.
Example
The following command sets the temperature set-point to 73 degrees (F) for device "SRCOOL123":
console> device (SRCOOL123)> set point temperature 73
Update complete
show set-point
Use the show set-point command to display the temperature set-point of the cooling device.
Syntax
show set-point
Examples
The following command displays the set-point temperature (and source) for device "SRCOOL123":
console> device (SRCOOL123)> show set-point
NAME    TYPE    VALUE
----    ----    ----
Remote Temperature Supported  Device    Disabled
Set Point Temperature (F)    73.0
5. CLI Commands
device: shed
shed
Use the shed command to start the shed sequence or to stop an in-progress shed sequence on the specified device. This command applies only to devices that support controllable loads. The shed enable and shed delay commands allow setting these parameters on a multitude of loads; these parameters can also be set on individual loads using the load command. After setting these parameters, use the apply ramp-shed command to make the changes effective.
Syntax
shed {start | stop}
shed enable loads
shed delay
Examples
The following command initiates the shed sequence on device "PDU123":
console> device (PDU123)> shed start
Shed sequence starting
The following command enables shed on loads 2, 4 and 5 for device "PDU123":
console> device (PDU123)> shed enable loads 2,4,5
Update complete
The following command sets a shed delay time of 3 seconds for loads 1, 3 and 6 for device "PDU123":
console> device (PDU123)> shed delay 3 loads 1,2,6
Update complete
5. CLI Commands
device: show
show
Use the show command, with optional keywords, to display details about the device. To view all keywords applicable to the device, enter show [Tab][Tab].
Syntax
show [keyword-1 [keyword-2 [keyword-3 [keyword-4 [keyword-5 [keyword-6]]]]]]
- keyword-x – Specifies the attribute(s) to be displayed. Up to 6 keywords can be used per command.
Examples
The following command displays all show keywords for device "Device0076":
console> device (Device0076)> show [Tab][Tab]
age    help    model    serial-number
asset-tag    high-critical    name    setting
auto-restart    high-warning    nominal shutdown
battery    id    output    status
battery-pack input overload temperature
battery-pack-models load    overtemp test
buzzer    load-group period threshold
controls    location phase tolerance
count    low-critical power utilization
current    low-voltage precision voltage
date    low-warning protocol wakeup
date-installed manufacturer region
details    maximum runtime
frequency    minimum sensor
The following command displays all properties for device "Device0076":
console> device (Device0076)> show
Retrieving details...
Name : Device0076
Alert Status : normal
Active : yes
Type : UPS
Manufacturer : TRIPP LITE
Model : SMART1000RM2U
Serial # : 2810GY0SM12345676
Install Date : 4/1/2020
Protocol : 3015
Device ID : 1
Asset Tag :
Region : Chicago
Location : HQ building
5. CLI Commands
show battery-pack-models
Use the show battery-pack-models command to display a list of all External Battery Packs with which battery-pack configuration can be executed. Asterisks (*) denote which battery packs are currently configured with the device.
Syntax
show battery-pack-models [
- name-pattern – a string of characters by which the displayed list of battery models will be filtered.
Examples
The following command displays all External Battery Packs that can be configured for device "Device0076":
console> device (Device0076)> show battery-pack-models
<h1 id="model">MODEL</h1>
---
1 BP12V81
2 BP-192v12-3U
3 BP192v18-4U
*4 BP192v5RT2U
5 BP240v10RT3U
...
device: shutdown
shutdown completion
Use the shutdown completion command to set whether the UPS will complete or cancel communicating shutdown messaging to connected systems if power is restored.
Syntax
shutdown completion {complete_if_ac_returns | cancel_if_ac_returns}
Examples
The following command sets device "UPS123" to cancel shutdown messaging if power is restored:
console> device (UPS123)> shutdown completion cancel_if_ac_returns Update complete
show shutdown completion
Use the show shutdown completion command to display shutdown completion settings for the device.
Syntax
show shutdown completion
Examples
The following command displays the shutdown completion settings for device "UPS123":
console> device (UPS123)> show shutdown completion
NAME    TYPE    VALUE
----    ----    ----
Hardware Features    Device
..Shutdown Completion Behavior    Cancel if AC Returns
5. CLI Commands
device: watt-hours
watt-hours reset
Use the watt-hours reset command to reset the recorded watt-hours per 24-hour period. Upon entering the command, a prompt will appear to confirm the action. Use the force option to execute the command without confirmation.
Syntax
watt-hours reset [force]
Examples
The following command resets the recorded watt hour value for device "UPS123", with no confirmation:
console> device (UPS123)> watt-hours reset force
Execution complete
dns
dns address
Use the dns address command to configure the Domain Name System IP address(es) to use for resolving domain names. Use the no form of this command to clear all or a specified DNS IP address. Note that changes to network parameters must be applied using the apply network command for the changes to take effect.
Syntax
dns address
dns address {secondary | tertiary}
- address – Specifies the secondary or tertiary DNS IP address
- primary – Specifies the primary DNS IP address
• secondary – Specifies the secondary DNS IP address - tertiary – Specifies the tertiary DNS IP address
no dns address [secondary | tertiary]
Example
The following command specifies the primary DNS server IP address as 192.188.5.5 and the secondary DNS server IP address as 192.188.5.6:
console> dns address 192.188.5.5 192.188.5.6
NOTE: Use the "apply network" command to complete the change. This may cause a system reboot.
The following command clears the secondary DNS server IP address:
console> no dns address secondary
NOTE: Use the "apply network" command to complete the change. This may cause a system reboot.
5. CLI Commands
dns enable
Use the dns enable command to activate the use of Domain Name System IP address(es) for resolving domain names. Use the no form of this command to disable the use of DNS. Note that changes to network parameters must be applied using the apply network command for the changes to take effect.
Syntax
dns enable
no dns address
Example
The following command activates the use of DNS server IP address(es):
console> dns enable
NOTE: Use the "apply network" command to complete the change. This may cause a system reboot.
show dns
Use the show dns command to display the current DNS settings.
Syntax
show dns [primary | secondary | tertiary | status]
Example
The following command displays all DNS settings:
console> show dns
Primary DNS : 192.188.5.5
Secondary DNS : 192.188.5.6
Tertiary DNS : 192.188.5.7
Manual DNS : disabled
5. CLI Commands
Use the email command to create and manage email notification recipients. Use the no form of the command to delete recipients. When creating an entry, select an easily remembered name as a label for the entry; this name will be used in the command format email (
Syntax
email
- name - Specifies the email entry to be created or managed. If spaces are required, bookend the name with quotation marks (“).
no email
- name - Specifies the email entry to be deleted.
Examples
The following command creates "maryd" as an email notification recipient:
console> email maryd
Created maryd
console> email (maryd)>
The following command deletes entry "maryd":
console> no email maryd
Deleted maryd
show email
Use the show email command to display a summary table of all notification recipient entries or the details of a specified email entry.
Syntax
show email [
- name – Specifies the entry for which email details are to be displayed.
Examples
The following command displays a summary table of all notification recipient entries:
console> show email
NAME EMAIL STATUS LAST TEST
Maryd mary_dove@company.com enabled Test successful 3/2/2020 17:34:56
janed jane_dove@company.com enabled Test failed 3/25/2020 18:38:00
Tom D tom_dove@company.com disabled Not tested
5. CLI Commands
email: address
address
Use the address command to set an email address for the email entry.
Syntax
address
- email-address – Specifies the email address associated with the entry.
Examples
The following command sets "mary_dove@company.com" as the email contact information for entry "maryd":
console> email (maryd)> address mary_dove@company.com
Update complete
show address
Use the show address command to display the address entered for the email entry.
Syntax
show address
Examples
The following command displays the email address for entry "maryd":
console> email (maryd)> show address
mary_dove@company.com
email: enable
enable
Use the enable command to activate the email recipient. Use the no form of this command to disable the email recipient.
Syntax
enable
no enable
Example
The following command disables entry "maryd":
console> email (maryd)> no enable
Update complete
5. CLI Commands
show enable
Use the show enable command to display the enabled/disabled status for the email recipient.
Syntax
show enable
Examples
The following command displays the status of entry "maryd":
console> email (maryd)> show enable enabled
email: name
name
Use the name command to modify the name of the email recipient entry.
Syntax
name
- new-name – Specifies the new name for the entry.
Examples
The following command changes the entry's name from "maryd" to "Mary Dove":
console> email (maryd)> name "Mary Dove"
Update complete
console> email (Mary Dove)>
show name
Use the show name command to display the name of the email recipient entry.
Syntax
show name
Examples
The following command displays the entry's name:
console> email (Mary Dove)> show name
Mary Dove
5. CLI Commands
email: show
show
Use the show command to display the details about the email recipient entry.
Syntax
show [address | name | status | test]
Example
The following command displays all details for entry "Mary Dove":
console> email (Mary Dove)> show
Name : Mary Dove
Email : mary_dove@company.com
Status : disabled
Last Test : Test failed - 3/24/2020 5:34:56 PM
email: test
test
Use the test command to perform a check of the entry's email address.
Syntax
test
Examples
The following command executes an email test for entry "maryd":
console> email (maryd)> test
Testing...complete
Test successful - 3/24/2020 5:34:56 PM
show test
Use the show test command to display the metrics of the most recent email test for the email recipient entry.
Syntax
show test
Examples
The following command displays the metrics of the last email test for entry "maryd":
console> email (maryd)> show test
Test successful - 3/24/2020 5:34:56 PM
5. CLI Commands
event
event
Use the event command to manage standard events and to create custom events. Use the no form of this command to delete a custom event. When creating a custom event, select an easily remembered name as a label for the entry; this name will be used in the command format event (
Syntax
event
- device-name – Specifies the device to which the event applies.
- event-name – Specifies the standard event entry to be managed, or, specifies the name of a custom event to be created.
- sensor-name – Specifies the sensor to which the event applies.
no event
- event-name – Specifies the custom event entry to be deleted. Standard events cannot be deleted.
Examples
The following command creates a custom event named "Event ABC":
console> event "Event ABC"
Created Event ABC
console> event (Event ABC)>
5. CLI Commands
show event
Use the show event command to display a summary table of all events or the details of a specified event entry. Note that the list of events will vary by device type and model.
Syntax
show event [
- event-name – Specifies the entry for which event details are to be displayed.
Examples
The following command displays a summary table of all events supported by the device (a basic UPS, in this example):
| console> show event | |||||
| NAME | SEVERITY | STATUS | SOURCE | AUTO-ACK | |
| Contact Input 1 In Alarm | critical | enabled | Sensor1 | enabled | |
| Contact Input 2 In Alarm | critical | enabled | Sensor1 | enabled | |
| Communications Lost | information | disabled | Sensor1 | disabled | |
| Humidity Beyond Limits | critical | enabled | Sensor1 | enabled | |
| Temperature Beyond Limits | critical | enabled | Sensor1 | enabled | |
| Battery Age Above Threshold | information | enabled | UPS123 | enabled | |
| Battery Low | critical | enabled | UPS123 | disabled | |
| Communications Lost | critical | enabled | UPS123 | enabled | |
| Event ABC | warning | enabled | UPS123 | disabled | |
| Load 01 Off | warning | enabled | UPS123 | enabled | |
| Load 02 Off | warning | enabled | UPS123 | enabled | |
| Load Level Above Threshold | warning | enabled | UPS123 | enabled | |
| Loads Not All On | warning | enabled | UPS123 | enabled | |
| NTP Watchdog NTP Probe Failed | warning | enabled | UPS123 | enabled | |
| On Battery | critical | enabled | UPS123 | enabled | |
| Output Off | warning | enabled | UPS123 | enabled | |
| Overload | critical | enabled | UPS123 | disabled | |
| Ping Watchdog Ping Probe Failed | warning | enabled | UPS123 | enabled | |
| Self Test Failed | warning | enabled | UPS123 | enabled | |
| Temperature High | critical | enabled | UPS123 | disabled | |
The following command displays the settings for event "Communications Lost":
| console> show event "Communications Lost" | |||||
| NAME | SEVERITY | STATUS | SOURCE | AUTO-ACK | LOGGING |
| Communications Lost | information | disabled | Sensor1 | disabled | disabled |
| Communications Lost | critical | enabled | UPS123 | enabled | disabled |
5. CLI Commands
event: acknowledge
acknowledge enable
Use the acknowledge enable command to automatically acknowledge all alerts raised by the specified event entry. Use the no form of this command to disable auto-acknowledge for the entry.
Syntax
acknowledge enable
no acknowledge enable
Example
The following command enables automatic acknowledgement for event "On Battery":
console> event (On Battery)> acknowledge enable Update complete
show acknowledge
Use the show acknowledge command to display the enabled/disabled status for auto-acknowledge of the event entry.
Syntax
show acknowledge
Examples
The following command displays the automatic acknowledgement status for entry "On Battery":
console> event (On Battery)> show acknowledge
enabled
5. CLI Commands
event: enable
enable
Use the enable command to activate the event. Use the no form of this command to disable the event. Disabled events will not generate alerts or be logged (upon occurring), nor can they be selected when creating or executing actions. By default, all events (standard and custom) are enabled.
Syntax
enable
no enable
Example
The following command disables event "Loads Not All On":
console> event (Loads Not All On)> no enable Update complete
show enable
Use the show enable command to display the enabled/disabled status of the event.
Syntax
show enable
Examples
The following command displays the status of entry "Loads Not All On":
console> event (Loads Not All On) > show enable disabled
event: logging
logging enable
Use the logging enable command to record all occurrences of the event entry in the Event Log. Use the no form of this command to disable event logging for the entry. This command is valid only if the event is enabled.
Syntax
logging enable
no logging enable
Example
The following command disables event logging for entry "Load Level Above Threshold":
console> event (Load Level Above Threshold)> no logging enable Update complete
5. CLI Commands
show logging
Use the show logging command to display the event logging enabled/disabled status for the event entry.
Syntax
show logging
Examples
The following command displays the event logging status for entry “Load Level Above Threshold”:
console> event (Load Level Above Threshold)> show logging disabled
5. CLI Commands
event: name
name
Use the name command to modify the name of the event. This command applies only to custom events.
Syntax
name
- new-name – Specifies a new name for the custom event. If spaces are required, bookend the name with quotation marks (“).
Examples
The following command changes the name of custom event "Event ABC" to "Event 123":
console> event (Event ABC)> name "Event 123"
Update complete
console> event (Event 123)>
show name
Use the show name command to display the name of the event.
Syntax
show name
Examples
The following command displays the name of (standard) event "On Battery":
console> event (On Battery)> show name
On Battery
event: severity
severity
Use the severity command to change the severity level of the event. By default, all custom events are assigned a severity of "warning".
Syntax
severity {critical | info | warning}
- critical – Sets the event's severity level as “critical”.
- info – Sets the event's severity level as "info".
- warning – Sets the event's severity level as "warning".
Example
The following command sets the severity level as “critical” for entry “Load 01 Off”:
console> event (Load 01 Off)> severity critical
Update complete
5. CLI Commands
show severity
Use the show severity command to display the severity level of the event.
Syntax
show severity
Examples
The following command displays the severity level for entry "Load 01 Off":
console> event (Load 01 Off)> show severity critical
event: show
show
Use the show command, with optional keywords, to display all configuration settings for the event. To view all keywords applicable to the event, enter show [Tab][Tab].
Syntax
show [keyword]
- keyword – Specifies the attribute to be displayed.
Examples
The following command displays all show keywords for event "On Battery":
console> event (On Battery)> show [Tab][Tab]
acknowledge help logging name severity status
The following command displays all settings for custom event entry "Event ABC":
console> event (Event ABC) > show
Name : Event ABC
Severity : warning
Status : enabled
Source : device123
Auto-Ack : enabled
Logging : enabled
exit
exit
Use the exit command at the root level of the command line interface to log out and terminate the session. This command can also be used to exit a nested command format (e.g. action (
Syntax
exit
Examples
Examples are not applicable for this command.
5. CLI Commands
firmware
Upon logging into CLI, the system automatically checks for the availability of a new (LX card) firmware version. If an update is available, a message will appear identifying the new firmware version.
Example
Welcome to PowerAlert Device Manager CLI v20.0.0.5678
A new firmware version is available: v20.0.0.9999
Use the 'firmware update' command to download the latest version console>
firmware check
Use the firmware check command to verify availability of a new firmware version. A message will appear with the results of the check and a prompt for downloading a new version, if available. Use the force option to automatically download the new firmware file, if available.
Syntax
firmware check [force]
Examples
The following command checks for availability latest firmware version available:
console> firmware check
Current firmware version : v20.0.0.2345
Staged firmware version : v20.0.0.2346
Firmware is currently staged for upgrade. Enter 'firmware update' to upgrade
If a new firmware version is not available, a message stating so will appear when the command is entered:
console> firmware check force
The LX Card is running the latest firmware update, v20.0.0.1871
firmware update
Use the firmware update command to execute update of the staged firmware file. A firmware file becomes staged either by scp/sftp upload or when uploaded using the firmware check command. Note that downgrades to previous firmware versions are possible using the scp/sftp method. When the command is issued, a prompt will appear to confirm the action. Use the force option to execute the update without confirmation. All active user sessions are terminated during the update process, including the session that initiated the process. Updating the firmware version cannot be canceled once started.
Syntax
firmware update [force]
Examples
The following command updates the device to the latest firmware version available:
console> firmware update
This will immediately terminate any active user session(s) while the system installs the updated firmware to v20.0.0.2346 and reboots.
Are you sure? Type "yes" to proceed:
Update process started. Terminating sessions
Farewell localadmin
Quitting shell
continued
5. CLI Commands
If a new firmware version is not available, a message stating so will appear when the command is entered:
console> firmware update
Latest firmware version is already installed (installed version is 20.0.0.9999)
If a new firmware version is not available, a message stating so will appear when the command is entered:
console> firmware update
No firmware has been staged via website download or scp/sftp upload.
help
help
Use the help command to display a list of available commands and a brief description of each. Use the man command to obtain a more detailed description of a command.
Syntax
help
Examples
Examples are not applicable for this command.
host
host name
Use the host name command to modify the name by which the system will appear on the network. Note that the system has predefined hostname by default.
Syntax
host name
- hostname – Specifies the name by which the system will appear on the network.
Example
The following command changes the hostname to PDUroom2:
console> host name PDUroom2
Update complete
show host
Use the show host command to display the current hostname.
Syntax
show host
Example
The following command displays the current hostname:
console> show host
PDUroom2
5. CLI Commands
http
http enable
Use the http enable command to enable the HTTP service. Use the no form of this command to disable the HTTP service. Note that changes to network parameters must be applied using the apply network command for the changes to take effect. The HTTP service is enabled by default.
Syntax
http enable
no http enable
Examples
The following command disables the HTTP service:
console> no http enable
Update complete
NOTE: Use the "apply network" command to complete the change. This may cause a system reboot.
http port
Use the http port command to set the port number to use for the HTTP service. The default port number for the HTTP service is 8080.
Syntax
http port
- port-number - Specifies the port to use for the HTTP service (Range: 1-65535).
Examples
The following command changes the port to use for the HTTP service to 8077:
console> http port 8077
Update complete
NOTE: Use the "apply network" command to complete the change. This may cause a system reboot.
http redirect enable
Use the http redirect enable command to redirect all HTTP traffic to HTTPS. Use the no form of this command to disable the redirect. HTTP redirect is disabled, by default.
Syntax
http redirect enable
no http redirect enable
Examples
The following command enables HTTP redirect:
console> http redirect enable
Update complete
NOTE: Use the "apply network" command to complete the change. This may cause a system reboot.
5. CLI Commands
show http
Use the show http command to display the current settings for the HTTP service.
Syntax
show http [status | port | redirect]
Examples
The following command displays all HTTP service information:
console> show http
HTTP Status : enabled
HTTP Port : 8077
HTTP Redirect : disabled
https
https enable
Use the https enable command to enable the HTTPS service. Use the no form of this command to disable the HTTPS service. Note that changes to network parameters must be applied using the apply network command for the changes to take effect. The HTTPS service is enabled by default.
Syntax
https enable
no https enable
Examples
The following command disables the HTTPS service:
console> no https enable
Update complete
NOTE: Use the "apply network" command to complete the change. This may cause a system reboot.
https port
Use the https port command to set the port number to use for the HTTPS service. The default port number for the HTTPS service is 4040.
Syntax
https port
- port-number – Specifies the port to use for the HTTPS service (Range: 1-65535).
Examples
The following command changes the port to use for the HTTPS service to 4033:
console> https port 4033
Update complete
NOTE: Use the "apply network" command to complete the change. This may cause a system reboot.
5. CLI Commands
show https
Use the show https command to display the current settings for the HTTPS service.
Syntax
show https [status | port]
Examples
The following command displays all HTTPS service information:
console> show https
HTTPS Status : disabled
HTTPS Port : 4033
ipv4
ipv4 enable
Use the ipv4 enable command to enable the IPv4 service. Use the no form of this command to disable the service. Note that changes to network parameters must be applied using the apply network command for the changes to take effect. The IPv4 service is enabled by default. To check current network settings, use the show network command.
Syntax
ipv4 enable
no ipv4 enable
Examples
The following command enables the IPv4 service:
console> ipv4 enable
Update complete
NOTE: Use the "apply network" command to complete the change. This may cause a system reboot.
ipv4 address
Use the ipv4 address command to configure the IPv4 settings. The default setting for IPv4 address is DHCP.
Syntax
ipv4 address dhcp
ipv4 address
{ |- gateway-address – Specifies the IPv4 address for the gateway.
- ipv4-address – Specifies the static IPv4 address to assign to the system.
- mask - Specifies the subnet mask IP address.
- prefix-length – Specifies the number of bits comprising the IPv4 address prefix (Range: 1-30). The value must be preceded by a forward slash character (/).
continued
5. CLI Commands
Examples
The following command configures IPv4 for DHCP:
console> ipv4 address dhcp
Update complete
NOTE: Use the "apply network" command to complete the change. This may cause a system reboot.
The following command configures IPv4 for a static address of 192.168.10.33, a subnet mask of 255.255.255.0 and a gateway of 10.0.0.1:
console> ipv4 address 192.168.10.33 255.255.255.0 gateway 10.0.0.1
Update complete

NOTE: Use the "apply network" command to complete the change. This may cause a system reboot.
The following command configures IPv4 for a static address of 192.168.10.33 and a prefix length of 24:
console> ipv4 address 192.168.10.33/24
Update complete
NOTE: Use the "apply network" command to complete the change. This may cause a system reboot.
ipv4 gateway
Use the ipv4 gateway command to set the IPv4 gateway address.
Syntax
ipv4 gateway < gateway -address>
- gateway -address - Specifies the IPv4 address for the gateway.
Examples
The following command sets 192.168.10.1 as the IPv4 gateway:
console> ipv4 gateway 192.168.10.1
Update complete
NOTE: Use the "apply network" command to complete the change. This may cause a system reboot.
show ipv4
Use the show ipv4 command to display the current settings for the IPv4 service.
Syntax
show ipv4 [status | address | gateway]
Examples
The following command displays all IPv4 service information:
console> show ipv4
IPV4 Status : enabled
IPV4 Address : 192.168.10.33
IPV4 Subnet : 255.255.255.0
IPV4 Gateway : 10.0.0.1
5. CLI Commands
ipv6
ipv6 enable
Use the ipv6 enable command to enable the IPv6 service. Use the no form of this command to disable the IPv6 service. Note that changes to network parameters must be applied using the apply network command for the changes to take effect. The IPv6 service is enabled by default. To check current network settings, use the show network command.
Syntax
ipv6 enable
no ipv6 enable
Examples
The following command enables the IPv6 service:
console> ipv6 enable
Update complete
NOTE: Use the "apply network" command to complete the change. This may cause a system reboot.
ipv6 address
Use the ipv6 address command to configure the IPv6 settings. The default setting for IPv6 address is DHCP.
Syntax
ipv6 address dhcp
ipv6 address < ipv6-address /prefix-length> [gateway
- gateway-address – Specifies the IPv6 address for the gateway.
- ipv6-address – Specifies the static IPv6 address to assign to the network interface.
- prefix-length – Specifies the number of bits constituting the prefix.
Examples
The following command configures IPv6 for DHCP:
console> ipv6 address dhcp Update complete
NOTE: Use the "apply network" command to complete the change. This may cause a system reboot.
The following command configures IPv6 for a static address prefix of 2018::567, a prefix length of 64 and a gateway address of fe80::7e9a:54ff:fee2:380:
console> ipv6 address 2018::567/64 gateway fe80::7e9a:54ff:fee2:380 Update complete
NOTE: Use the "apply network" command to complete the change. This may cause a system reboot.
5. CLI Commands
ipv6 gateway
Use the ipv6 gateway command to set the IPv6 address for the gateway.
Syntax
ipv6 gateway
- gateway-address – Specifies the IPv6 address for the gateway.
Examples
The following command sets fe80::7e9a:54ff:fee2:380 as the IPv6 address for the gateway:
console> ipv6 gateway fe80::7e9a:54ff:fee2:380
Update complete
NOTE: Use the "apply network" command to complete the change. This may cause a system reboot.
show ipv6
Use the show ipv6 command to display the current settings for the IPv6 service.
Syntax
show ipv6 [status | address | gateway]
Examples
The following command displays all IPv6 service information:
console> show ipv6
IPV6 Status : enabled
IPV6 Address : 2018:aa9:0:1234::567/64
IPV6 Gateway : fe80::7e9a:54ff:fee2:380
5. CLI Commands
Idap-server
Idap-server
Use the Idap-server command to create and/or manage a Lightweight Directory Access Protocol (LDAP) server entry. Use the no form of this command to delete an entry. When creating an entry, select an easily remembered name as a label for the entry; this name will be used in the command format Idap-server (
Syntax
ldap-server
- server-name – Specifies the LDAP server entry to be created or managed. If spaces are required, bookend the name with quotation marks (“).
- server-name – Specifies the LDAP server entry to be deleted.
no ldap-server <server-name>
Examples
The following command creates "LDAPsrvr1" as an LDAP server entry:
console> Idap-server LDAPsrvr1
Created LDAPsrvr1
console> Idap-server (LDAPsrvr1)>
The following command deletes LDAP Server entry "Server 123":
console> no ldap-server "Server 123"
Deleted Server 123
show Idap-server
Use the show ldap-server command to display a summary table of all LDAP server entries or the details of a specified entry.
Syntax
show ldap-server [
- server-name – Specifies the entry for which LDAP server details are to be displayed.
Examples
The following command displays a summary table of all LDAP server entries:
console> show ldap-server
| NAME | STATUS | HOST | PORT | PRIORITY | ANONYMOUS |
| LDAPsrvrv2 | enabled | localhost | 22 | 1 | enabled |
| LDAPsrvrv4 | enabled | 172.17.59.35 | 23 | 2 | disabled |
5. CLI Commands
Idap-server: anonymous
anonymous enable
Use the anonymous enable command to enable anonymous bind for the LDAP server entry. Use the no form of this command to disable anonymous bind. If anonymous bind is disabled, a bind domain name and password must be specified. Anonymous bind is enabled by default.
Syntax
anonymous enable
no anonymous enable
Example
The following command disables anonymous bind for entry "LDAPsrvr1":
console> ldap-server (LDAPsrvr1)> no anonymous enable Update complete
show anonymous
Use the show anonymous command to display the anonymous bind status for the LDAP server entry.
Syntax
show anonymous
Examples
The following command displays the anonymous bind status for entry "LDAPsrvr1":
console> ldap-server (LDAPsrvr1)> show anonymous disabled
ldap-server: attribute
attribute
Use the attribute command to optionally enter a login name attribute for the LDAP server entry. Use the no form of this command to clear the attribute string.
Syntax
attribute
- attribute – Specifies the attribute to be associated with the login name. If spaces are required, bookend the attribute with quotation marks (“).
no attribute
Examples
The following command adds attribute "vetted" to LDAP server entry "SRV-LDAP":
console> ldap-server (SRV-LDAP)> attribute vetted
Update complete
5. CLI Commands
show attribute
Use the show attribute command to display the login name attribute for the LDAP server entry.
Syntax
show attribute
Examples
The following command displays the attribute entered for LDAP server entry "SRV-LDAP":
console> ldap-server (SRV-LDAP) > show attribute vetted
ldap-server: bind
bind dn
Use the bind dn command to set the distinguished name (user, location and domain) for the LDAP server entry. This command is required if anonymous is disabled.
Syntax
bind dn
- dn – Sets the distinguished name for the entry.
Examples
The following command sets the distinguished name for accessing entry "LDAPsrvr1":
console> ldap-server (LDAPsrvrl)> bind dn "CN=Users, DC=example, DC=com"
Update complete
bind password
Use the bind password command to enter a password for the entry. This command is required if anonymous is disabled. Two options are available for entering the password. The first option will prompt entry of the password and password confirmation, neither of which will be echoed to the terminal. The second option allows entry of a plain text password on the command line by using the plaintext keyword.
Syntax
bind password
bind password plaintext
- password – Sets the password for the entry, in plain text.
Examples
The following command sets "q8w9e0" as the password for entry "LDAPsrvr1":
console> ldap-server (LDAPsrvr1)> bind password plaintext q8w9e0 Update complete
5. CLI Commands
show bind
Use the show bind command to display the distinguished name for the LDAP server entry.
Syntax
show bind
Examples
The following command displays the distinguished name details for entry "LDAPsrvr1":
console> ldap-server (LDAPsrvr1)> show bind
CN=Users, DC=example, DC=com
Idap-server: domain
domain
Use the domain command to optionally enter a domain name for the LDAP server entry. This command applies only if active-directory is selected as the LDAP server type. Use the no form of this command to clear the domain name.
Syntax
domain
- domain – Specifies the domain name for the LDAP server entry. If spaces are required, bookend the name with quotation marks (“).
no domain
Examples
The following command sets the domain name for entry "LDAPsrvr1" as DMN123:
console> ldap-server (LDAPsrvvr1)> domain DMN123
Update complete
show domain
Use the show domain command to display the domain name entered for the LDAP server entry.
Syntax
show domain
Examples
The following command displays the domain name for entry "LDAPsrvr1":
console> ldap-server (LDAPsrvr1)> show domain DMN123
5. CLI Commands
Idap-server: enable
enable
Use the enable command to activate the LDAP server entry. Use the no form of this command to disable the entry. Note: an entry cannot be enabled until it is configured using the following commands: host, password, type, anonymous.
Syntax
enable
no enable
Example
The following command disables entry "Server ABC":
console> ldap-server (Server ABC) > no enable Update complete
show enable
Use the show enable command to display the enabled/disabled status of the LDAP server entry.
Syntax
show enable
Examples
The following command displays the status of entry "Server ABC":
console> ldap-server (Server ABC) > show enable disabled
Idap-server: host
host
Use the host command to set the IP address or host name of the LDAP server entry. Both IPv4 and IPv6 addresses are supported.
Syntax
host {
- ip-address – Identifies the IPv4 or IPv6 address of the entry.
- host-name – Identifies the host name of the entry.
Examples
The following command sets 172.17.60.66 as the IPv4 address of entry "LDAPsrvr1":
console> ldap-server (LDAPsrvr1)> host 172.17.60.66
Update complete
5. CLI Commands
show host
Use the show host command to display the host name or IP address of the LDAP server entry.
Syntax
show host
Examples
The following command displays the IP address of entry "LDAPsrvr1":
console> ldap-server (LDAPsrvr1)> show host 172.17.60.66
Idap-server: name
name
Use the name command to modify the name of the LDAP server entry.
Syntax
name
- new-name – Identifies the new name for the entry.
Examples
The following command changes the entry's name from "Server ABC" to "Server XYZ":
console> ldap-server (Server ABC)> name "Server XYZ"
Update complete
console> ldap-server (Server XYZ)>
show name
Use the show name command to display the name entered for the LDAP server entry.
Syntax
show name
Examples
The following command displays the entry's name:
console> ldap-server (Server XYZ) > show name
Server XYZ
5. CLI Commands
ldap-server: object-class
object-class
Use the object-class command to limit a user search to a specific class of objects for the LDAP server entry. Use the no form of this command to clear the search string.
Syntax
object-class
- object-class – Sets the object class to search. If spaces are required in the search string, bookend the search string with quotation marks (“).
no object-class
Examples
The following command sets "adminPerson" as the object class for entry "LDAPsrvr1":
console> ldap-server (LDAPsrvr1)> object-class adminPerson Update complete
show object-class
Use the show object-class command to display the object class for the LDAP server entry.
Syntax
show object-class
Examples
The following command displays the object class for entry "LDAPsrvr1":
console> ldap-server (LDAPsrvr1)> show object-class adminPerson
Idap-server: port
port
Use the port command to specify the port number of the LDAP server entry for authentication requests. The default authentication port is 389.
Syntax
port
- port-number – Specifies the entry's port number for authentication requests (Range: 1-65535).
Examples
The following command specifies 400 as the LDAP server port for entry "LDAPsrvr1":
console> ldap-server (LDAPsrvr1)> port 400
Update complete
5. CLI Commands
show port
Use the show port command to display the port number for the LDAP server entry.
Syntax
show port
Examples
The following command displays the port number for entry "LDAPsrvr1":
console> ldap-server (LDAPsrvr1)> show port 400
Idap-server: priority
priority
Use the priority command to set a priority for the LDAP server entry. In the case where multiple entries exist, the priority determines which servers are used first. For the priority value, enter an integer from 1 to 99. Lower numbers have higher priority.
Syntax
priority
- priority – Sets the priority of the entry (Range: 1-99).
Examples
The following command sets 1 (one) as the priority level for entry "LDAPsnvr1":
console> ldap-server (LDAPsrvrl)> priority 1
Update complete
show priority
Use the show priority command to display the priority of the LDAP server entry.
Syntax
show priority
Examples
The following command displays the priority for entry "LDAPsrvr1":
console> ldap-server (LDAPsrvr1)> show priority 1
5. CLI Commands
Idap-server: search
search base
Use the search base command to optionally designate the starting point for the search in the external LDAP directory tree to search. Use the no form of this command to clear the search string.
Syntax
search base
- search-base – Sets the directory tree to search.
no search base
Examples
The following command sets "sub-tree" as the LDAP directory on "LDAPsrvr1" to search:
console> ldap-server (LDAPsrvr1)> search base dc=tripplite,dc=com Update complete
search filter
Use the search filter command to optionally refine the list of LDAP users to search. Use the no form of this command to clear the filter string.
Syntax
search filter
- search-filter – Sets the filter to apply when searching the LDAP directory tree.
no search filter
Examples
Examples are not applicable for this command
show search
Use the show search command to display the search details for the LDAP server.
Syntax
show search [base | filter]
- base – Displays search details related to the specified directory tree.
- filter – Displays search details as determined by the specified filter.
Examples
The following command displays the search base for entry "LDAPsrvr1":
console> ldap-server (LDAPsrvr1)> show search base
Directory Tree to Search : dc=tripplite,dc=com
Filter To Apply When Searching :
5. CLI Commands
Idap-server: show
show
Use the show command, with optional keywords, to display details about the LDAP server entry. To view all keywords applicable to the entry, enter show [Tab][Tab].
Syntax
show [keyword]
- keyword – Specifies the attribute to be displayed.
Examples
The following command displays all show keywords for entry "LDAPsrvr1":
console> ldap-server (LDAPsrvrl)> show [Tab][Tab]
anonymous help object-class search type
attribute host port status
bind name priority test
The following command displays all details for entry "LDAPsrvr1":
console> ldap-server (LDAPsrvrl)> show
Name : LDAPsrvrl
Status : enabled
Host : localhost
Port : 389
Priority : 1
Type : active-directory
Server Search Base DN :
Login Name Attribute :
User Entry Object Class :
User Search Subfilter :
Active Directory Domain : testdomain
Anonymous Bind : disabled
Bind DN : testname
Last Test : Not tested
Idap-server: test
test
Use the test command to test authenticated communications to the specified LDAP server. On executing this command, prompts will appear for entering the access credentials of the specified LDAP server.
Syntax
test
Examples
The following command executes a communication test of entry "LDAPsrvr1":
console> ldap-server (LDAPsrvr1)> test
Username: Admin123
Password:
Testing...completed
Test successful - 3/24/2020 12:34:56 PM
5. CLI Commands
show test
Use the show test command to display the metrics of the last communications test for the LDAP Server entry
Syntax
show test
Examples
The following command displays the metrics of the last test of entry "LDAPsrvr1":
console> ldap-server (LDAPsrvr1)> show test
Test successful - 3/24/2020 12:34:56 PM
Idap-server: type
type
Use the type command to set the LDAP server type for the entry. The supported choices are: OpenLDAP (openldap) and MS Active Directory (active-directory).
Syntax
type {openldap | active-directory}
- active-directory – Sets the entry's LDAP server type as MS Active Directory.
- openldap – Sets the entry's LDAP server type as OpenLDAP.
Examples
The following command sets MS Active Directory as the LDAP server type for entry "LDAPsrvr1":
console> ldap-server (LDAPsrvr1)> type active-directory Update complete
show type
Use the show type command to display the LDAP server type of the LDAP server entry.
Syntax
show type
Examples
The following command displays the LDAP server type for entry "LDAPsrvr1":
console> ldap-server (LDAPsrvrl)> show type active-directory
5. CLI Commands
log
log
Use the log command to enter the log
Syntax
log {accounting | application | data | event}
Examples
The following command enters the command format for the Event Log:
console> log event
console> log (event)>
show log
Use the show log command to display the settings for all logs or a specified log.
Syntax
show log [accounting | application | data | event]
Examples
The following command displays the settings for all logs:
| console> show log | ||||
| LOG TYPE | AUTO-EXPORT | RECIPIENTS | FORMAT | MAX SIZE |
| accounting | enabled | johnd, joed, moed | xml | 10000 |
| application | disabled | moed | ||
| data | enabled | all contacts | csv | |
| event | enabled | moed, joed | xml | 10000 |
5. CLI Commands
log: autoexport
autoexport email
Use the autoexport email command to assign one or more email recipients of automatically-exported logs. Use the no form of this command to remove a recipient from the list of automatically-exported log recipients. Email recipients are created and configured using the email command. This command applies to all log types (Accounting, Application, Data, Event).
Syntax
autoexport email {all |
- all – Specifies all enabled email contacts as recipients of the auto-exported log.
- contact-x – Sets a comma-delimited list of contacts as email recipients of the auto-exported log.
no autoexport email {all |
- all – Specifies all enabled email contacts to be removed as recipients of the auto-exported log.
- contact-x – Sets a comma-delimited list of contacts to be removed as email recipients of the auto-exported log.
Examples
The following command configures auto-export of the Accounting Log to all email recipients:
console> log (accounting)> autoexport email all Update complete
The following command removes email recipients “moed” and “joed” from the list of Data Log auto-export recipients:
console> log(data)> no autoexport email moed,joed Update complete
autoexport enable
Use the autoexport enable command to enable the automatic export of the log. Use the no form of this command to disable the automatic exporting of the log. This command will automatically export the log under the following conditions:
- Accounting and Event Log – upon reaching the maximum log size, as configured using the size command.
- Application Log – upon reaching the maximum log size.
- Data Log – once or twice daily, depending on the quantity of logged variables and log interval.
For the Accounting Log and Event Log, auto-export will remove the older half of the displayed entries. Auto-export will not affect the displayed Data Log; entries will be purged on a First In First Out basis. The Application Log will be cleared of all entries upon being auto-exported.
Syntax
autoexport enable
no autoexport enable
Examples
The following command enables automatic export of the Event Log:
console> log (event)> autoexport enable
Update complete
5. CLI Commands
autoexport format
Use the log autoexport format command to configure the file format of the automatically exported log file. This command applies only to the Accounting Log and the Event Log. By default, the format is set to CSV; use the xml option to change the file format to XML.
Syntax
autoexport format {csv | xml}
Examples
The following command sets CSV as the file format for automatically-exported Event Logs:
console> log (event)> autoexport format csv
Update complete
show autoexport
Use the show autoexport command to display all auto-export settings.
Syntax
show autoexport [email | enable | format]
Examples
The following command displays all autoexport settings for the Accounting Log:
console> log (accounting)> show autoexport
Auto-export Status : enabled
Auto-export Format : xml
Auto-export Recipients : all contacts
log: export
export
Use the export command to configure and execute an on-demand export of the log. The log can be exported to a single email recipient [refer to the email command for creating email recipients]. This command applies to all log types. For Accounting Log and Event Log exports, the default file format is CSV; use the xml option to change the file format to XML.
Syntax
export email
- contact-name – Identifies a single email contact as the recipient of the exported log.
Examples
The following command exports the Accounting Log in XML format to email recipient "johnd":
console> log (accounting)> export email johnd xml
5. CLI Commands
export rollup
Use the export rollup command to configure and execute an on-demand export of the Data Rollup Log. The log can be exported in csv format to a single email recipient [refer to the email command for creating email recipients]. The Data Rollup Log cannot be purged (cleared) upon being exported. This command applies only to the Data Log.
Syntax
export rollup email
- contact-name – Identifies the email recipient of the exported Data Rollup Log.
Examples
The following command exports the Data Rollup Log to email recipient "johnd":
console> log (data)> export rollup email johnd
Update complete
log: interval
interval
Use the interval command to specify how often metrics are recorded in the Data Log. This command applies only to the Data Log.
Syntax
interval
- value – Specifies the amount of time, in seconds, between successive recordings of data (Range: 5-600).
Examples
The following command configures the system to record metrics in the Data Log every 30 seconds:
console> log (data)> interval 30
Update complete
show interval
Use the show interval command to display how often metrics are recorded in the Data Log. This command applies only to the Data Log.
Syntax
show interval
Examples
The following command displays the recording interval for the Data Log:
console> log (data)> show interval
60
5. CLI Commands
log: max-size
max-size
Use the max-size command to set the maximum number of entries to be stored in the log. This value is used as the trigger for automatic export of a log, if enabled using the autoexport command. This command applies only to the Accounting Log and the Event Log.
Syntax
max-size
- maxsize – Sets the maximum number of entries to be stored in the log (Range 1000 - 10000).
Examples
The following command sets the maximum size of the Accounting Log at 5,000 entries:
console> log (accounting)> max-size 5000 Update complete
show max-size
Use the show max-size command to display the maximum number of entries to be stored in the log. This command applies only to the Accounting Log and the Event Log.
Syntax
show max-size
Examples
The following command displays all settings for the Accounting Logs:
console> log (accounting)> show max-size 5000
5. CLI Commands
log: metrics
metrics
Use the metrics command to specify one or more data metrics to be recorded in the Data Log and the Data Rollup Log. By default, all metrics are recorded. Use the no form of this command to remove one or more metrics from being recorded. This command applies only to the Data Log.
Syntax
metrics {all | {<metric-id1> | <metric-keyword1>}[,{<metric-id2> | <metric-keyword2>}...{<metric-idN> | <metric-keywordN>}]
no metrics {<metric-id1> | <metric-keyword1>}[,<metric-id2> | <metric-keyword2>]...{<metric-idN> | <metric-keywordN>}]
- all – Sets all data metrics to be recorded in the Data Log.
- metric-x – Identifies a comma-delimited list of enumerated metrics and/or keywords to be recorded in the Data Log (refer to the show metrics command).
Examples
The following command sets all metrics to be recorded in the Data Log:
console> log (data)> metrics all
Update complete
The following command sets the Data Log to record Input Voltage, Input Current, Input Power and Input Frequency, enumerated as 11, 12, 14 and 16, respectively:
console> log (data)> metrics 11,12,14,16
Update complete
show metrics
Use the show metrics command to display an enumerated list of all applicable metrics and keywords associated with those metrics. The enumeration and/or keywords are used when selecting metrics to be recorded, as well as for filtering displayed data. Due to the variance of metrics by device type and model, the enumeration will not be sequential. Within the list, an asterisk (*) denotes that the metric is selected for logging.
Syntax
show metrics [device
show metrics [sensor
show metrics [group {battery | environment | input | output}]
- device-name – Displays an enumerated list of metrics and associated keywords for the specified device.
- sensor-name – Displays an enumerated list of metrics and associated keywords for the specified sensor.
Examples
The following command displays the available metrics for the device and all peripherals connected to it:
| console> log (data)> show metrics | |||||
| # | NAME | DEVICE | GROUP | KEYWORD (s) | |
| * | 1 | Input Frequency | Device0068 | input | frequency-input |
| * | 2 | Input Voltage | Device0068 | input | voltage-input |
| * | 3 | Output Current | Device0068 | output | output-current |
* Current recorded metrics
5. CLI Commands
log: severity
severity
Use the severity command to set the lowest severity level of items to be recorded in the log. This command applies only to the Application Log.
Syntax
severity {emergency | alert | critical | error | warning | notice | info | debug | trace}
Examples
The following command sets the Application Log to record items with a severity level of "warning" and higher:
console> log (application)> severity warning
show severity
Use the show severity command to display the selected severity level for Application Log. This command applies only to the Application Log.
Syntax
show severity
Examples
The following command displays the selected severity level for the Application Log:
console> log (application)> show severity warning
log: show
show
Use the show command to display current settings for the log. Note that the severity keyword applies only to the Application Log. The max-size keyword applies only to the Accounting Log and Event Log. The interval, metrics and rollup keywords apply only to the Data Log.
Syntax
show [autoexport | interval | max-size | metrics | report | rollup | severity | size]
Examples
The following command displays all settings for the Accounting Log:
console> log (accounting)> show
Auto-export Status : enabled
Auto-export Format : xml
Auto-export Recipients : all contacts
Max Size : 10000
5. CLI Commands
show report
Use the show report command to view the Accounting, Data or Event Log in its entirety or by specified subset, described below:
Accounting Log and Event Log
Use the show report ...
Use the show report ... from
Use the show report ... sort ... limit
Use the show report last
Data Log
Use the show report command to view the Data Log. Use the show report columns
Syntax
show report
show report [description
show report [description
show report [description
show report [description
show report [description
show report [description
show report [description
show report [description
show report [columns {
continued
5. CLI Commands
show report [columns {
- description – Filters the Accounting or Event Log to display only records containing a description that begins with the specified text.
- device-name – Filters the Event Log to display only records associated with the specified device.
- end-date – Filters the log to display all records that occurred on or before the specified date; use the date format set using the default date-format or default user date-format command.
- end-num – Specifies the number of the last Accounting or Event Log record to be displayed (must be a number greater than start-num).
- end-time – Filters the log to display all records that occurred on or before the specified time; use the time format set using the default time-format or default user time-format command. If using either the h:mm:ss tt or hh:mm:ss tt time format, use quotes when entering the time (see Examples).
- metric-x – Filters the Data Log to display only data columns specified via a comma-delimited list of enumerated metrics and/or keywords (see the show log metrics command).
- origin – Filters the Accounting Log to display only records containing an origin that begins with the specified text.
- period – Specifies the quantity of the selected time period of log entries to be displayed.
- qty – Specifies the quantity of Accounting or Event Log records to be displayed, beginning with the most recent record.
- record-num – Specifies the record number of the Accounting or Event Log to be displayed.
- sensor-name – Filters the Data Log to display only records associated with the specified sensor.
- severity – Filters the Event Log to display only records with the specified severity level.
- start-date – Filters the log to display all records that occurred on or after the specified date; use the date format set using the default date-format or default user date-format command.
- start-num – Specifies the number of the first Accounting or Event Log record to be displayed, when displaying a range of records.
- start-time – Filters the log to display all records that occurred on or after this time; use the time format set using the default time-format or default user time-format command. If using either the h:mm:ss tt or hh:mm:ss tt time format, use quotes when entering the time (see Examples).
- username – Filters the Accounting Log to display only records associated with the specified user name.
- verbose – Displays extended details for a single Event Log record.
Examples
The following command displays the five (5) most recent Accounting Log records pertaining to user "John D":
console> log (accounting)> show report user "John D" 5
The following command displays record # 353 of the Accounting Log:
console> log (accounting)> show report 353
The following command displays Accounting Log records starting January 1, 2020 at 12:00 AM through January 30, 2020 at 12:00 PM, sorted by date in ascending order:
console> log (accounting)> show report start-date 1/1/2020 start-time "12:00:00 AM" end-date 1/31/2020 end-time "12:00:00 PM" sort date asc
The following command displays Accounting Log records - within range #500 through #1100 - having a description starting with "login", sorted by origin in descending order:
console> log (accounting)> show report description login from 500 to 1100 sort origin desc
continued
5. CLI Commands
The following command displays only the temperature and humidity records (enumerated 117 and 119, respectively) for "Sensor Rack 2A":
console> log (data) show report sensor "Sensor Rack 2A" columns 117,119
The following command displays only the last 3 days of Data Log records:
console> log (data)> show report last 3 day
The following command displays all Data Log records from May 1, 2020 9:00 AM to May 31, 2020, 5:00 PM:
console> log (data)> show report start-date 5/1/2020 start-time "9:00:00 AM" end-date 5/31/2020 end-time "5:00:00 PM"
The following command displays only Event Log records with a severity level of “critical”:
console> log (event)> show report severity critical
The following command displays only Event Log records - within record range #1000 through #6000 - pertaining to device "SensorABC", sorted by severity in descending order:
console> log (event)> show report device Sensor ABC from 1000 to 60000 sort severity desc
The following command displays - within the last 600 records - records having description beginning with “on”, sorted by date in ascending order:
console> log (event)> show report description on limit 600 sort date asc
show rollup report
Use the show rollup report command to view the Data Rollup Log. This command applies only to the Data Log.
Syntax
show rollup report [{columns {
- device-name – Filters the log to display only records associated with the specified device.
- metric-x – Filters the log to display only data columns specified via a comma-delimited list of enumerated metrics (see the show log metrics command).
- sensor-name – Filters the log to display only records associated with the specified sensor.
Examples
The following command displays only the Output Current and Output Power records (enumerated as 60 and 65, respectively) in the Data Rollup Log:
console> log (data)> show rollup report columns 60,65
The following command displays only the metrics associated with "Sensor 123" in the Data Rollup Log:
console> log (data)> show rollup report sensor "Sensor 123"
5. CLI Commands
show size
Use the show size command to display the number of records currently stored in the log. This command does not apply to the Application Log.
Syntax
show size
Examples
The following command displays the number of records in the Accounting Log:
console> log (accounting) > show size 2112
man
man
Use the man command to display a detailed description of a specified command, including usage syntax and examples.
Syntax
man
- command – Identifies the command for which detailed usage information is to be displayed.
Examples
The following command provides detailed documentation about the host command:
console > man host
password
password
Use the password command to change the login password for the currently logged-in user. Two options are available for entering the password. The first option will prompt the entry of a password followed by a password confirmation, neither of which will be echoed to the terminal. The second option allows entry of a plain text password on the command line by using the plaintext keyword. To change the password for a different user, an Administrator should use either the user or snmp-user command.
Syntax
password
password plaintext
- current-password – Specifies the existing password, in plain text.
- new-password – Specifies the new password, in plain text.
Examples
The following command changes the password from "localadmin" to "j5k6l7":
console> password plaintext localadmin j5k617 Update complete
5. CLI Commands
password-policy
password-policy age enable
Use the password-policy age enable command to enable login password age requirements. Use the no form of this command to disable login password age requirements. By default, this setting is disabled.
Syntax
password-policy age enable
no password-policy age enable
Examples
The following command enables login password age requirements:
console> password-policy age enable
Update complete
password-policy age maximum
Use the password-policy age maximum command to specify the number of days a login password can be used before it must be changed; password-policy age must be enabled for this setting to be in force.
Syntax
password-policy age maximum
- max-age – Specifies the maximum number of days a password can be used (Range: 1-999).
Examples
The following command sets the maximum login password age to 30 days:
console> password-policy age maximum 30
Update complete
password-policy age minimum
Use the password-policy age minimum command to specify the number of days that, upon being changed, a login password must be active before it can be changed again; password-policy age must be enabled for this setting to be in force. A value of zero allows users to immediately change their passwords. This value must be less than the maximum password age.
Syntax
password-policy age minimum
- min-age – Specifies the minimum number of days a password must remain active before it can be changed (Range: 0-999).
Examples
The following command sets the minimum login password age to 2 days:
console> password-policy age minimum 2
Update complete
5. CLI Commands
password-policy min-length
Use the password-policy min-length command to specify the minimum number of characters that a login password must contain.
Syntax
password-policy min-length
- length – Specifies the minimum number of characters required in the password.
Examples
The following command sets the minimum login password length to 6 characters:
console> password-policy min-length 6
Update complete
password-policy syntax
Use the password-policy syntax command to specify one or more optional character requirements for a login password. The available options are “must contain at least one numeric character” (numeric), “must contain at least one special character” (special) and “must contain at least one uppercase character” (uppercase). Use a comma (“,”) between options (no spaces) when specifying multiple options. For each option, a minimum of one such character must be used in the password. For example, if uppercase is specified, then at least one capital letter must be used in the password. Use the no form of this command to remove all syntax requirements.
Syntax
password-policy syntax {numeric | special | uppercase}
no password-policy syntax
Examples
The following command sets the requirement for login passwords to contain at least one numeric character and at least one uppercase character:
console> password-policy syntax numeric, uppercase Update complete
show password-policy
Use the show password-policy command to display current settings for login password requirements.
Syntax
show password-policy [min-length]
show password-policy [age [status | minimum | maximum]]
show password-policy [syntax [numeric | special | uppercase]]
Examples
The following command displays all login password policy parameters:
console> show password-policy
Status : enabled
Minimum Password Age : 2
Maximum Password Age : 30
Min Required Length : 6
Must Contain At Least One Special Character : disabled
Must Contain At Least One Uppercase Character : enabled
Must Contain At Least One Numeric Character : enabled
5. CLI Commands
radius-server
radius-server
Use the radius-server command to create and/or manage a RADIUS server entry. Use the no form of this command to delete the entry. When creating an entry, select an easily remembered name as a label for the entry; this name will be used in the command format radius-server (
Syntax
radius-server
- server-name – Specifies the RADIUS server entry to be created or managed. If spaces are required, bookend the name with quotation marks (“).
no radius-server
- server-name – Specifies the RADIUS server entry to be deleted.
Examples
The following command creates "RADsrvr1" as a RADIUS server entry:
console> radius-server RADsrvrl
Created RADsrvrl
console> radius-server (RADsrvrl)>
The following command deletes entry "Server XYZ":
console> no radius-server "Server XYZ"
Deleted Server XYZ
show radius-server
Use the show radius-server command to display a summary table of all RADIUS server entries or the details of a specified RADIUS server entry.
Syntax
show radius-server [
- server-name - Specifies the entry for which RADIUS server details are to be displayed.
Examples
The following command displays a summary table of all RADIUS server entries:
| console> show radius-server | ||||||
| NAME | ACCT | PORT | AUTH | PORT | PROTOCOL | HOST |
| RADsrvr1 | enabled | 1812 | enabled | 1813 | chap | 192.168.1.0 |
| RADsrvr2 | disabled | 1814 | enabled | 1815 | pap | 192.168.1.2 |
5. CLI Commands
radius-server: accounting
accounting enable
Use the accounting enable command to activate the RADIUS server entry as an accounting server. Use the no form of this command to disable the entry.
Syntax
accounting enable
no accounting enable
Examples
The following command enables entry "RADsrvr1" as an accounting server:
console> radius-server (RADsrvr1)> accounting enable Update complete
accounting port
Use the accounting port command to specify the RADIUS server's port number to use for accounting requests. The default accounting port is 1813.
Syntax
accounting port
- port-number – Specifies the entry port to use for accounting (Range: 1-65535).
Examples
The following command sets 1813 as the accounting port to use for entry "RADsrvr1":
console> radius-server (RADsrvrl)> accounting port 1813 Update complete
show accounting
Use the show accounting command to display the accounting details for the RADIUS server entry.
Syntax
show accounting [port | status]
Examples
The following command displays the accounting details for entry "RADsrvr1":
console> radius-server (RADsrvr1)> show accounting
Acct : enabled
Port : 1813
5. CLI Commands
radius-server: authentication
authentication enable
Use the authentication enable command to designate the RADIUS server entry as an authentication server. Use the no form of this command to disable the entry as an authentication server.
Syntax
authentication enable
no authentication enable
Examples
The following command designates entry "RADsrvr1" as an authentication server:
console> radius-server (RADsrvr1)> authentication enable
Update complete
authentication port
Use the authentication port command to specify the RADIUS server entry's port number to use for authentication requests. The default RADIUS authentication port is 1812.
Syntax
authentication port
- port-number – Specifies the port to use for authentication (Range: 1-65535).
Example
The following command specifies 1812 as the RADIUS server port for entry "RADsrvr1":
console> radius-server (RADsrvrl)> authentication port 1812 Update complete
authentication protocol
Use the authentication protocol command to set the Authentication Protocol type for the RADIUS server entry. The available options are: Password Authentication Protocol (pap), Challenge-Handshake Authentication Protocol (chap) and Microsoft Challenge-Handshake Authentication Protocol (ms-chap).
Syntax
authentication protocol {pap | chap | ms-chap}
Examples
The following command sets CHAP as the Authentication Protocol type for entry "RADsrvr1":
console> radius-server (RADsrvr1)> authentication protocol chap
Update complete
5. CLI Commands
show authentication
Use the show authentication command to display the authentication details for the RADIUS server.
Syntax
show authentication [port | protocol | status]
Examples
The following command displays the authentication details for entry "RADsrvr1":
console> radius-server (RADsrvr1)> show authentication
Auth : enabled
Port : 1812
Protocol : chap
radius-server: enable
enable
Use the enable command to activate the RADIUS server entry. Use the no form of this command to disable the entry. Note: an entry cannot be enabled until it is configured using the following commands: host, port, accounting, authentication.
Syntax
enable
no enable
Example
The following command disables entry "Server ABC":
console> radius-server (Server ABC)> no enable Update complete
show enable
Use the show enable command to display the enabled/disabled status of the RADIUS server entry.
Syntax
show enable
Examples
The following command displays the status of entry "Server ABC":
console> radius-server (Server ABC)> show enable enabled
5. CLI Commands
radius-server: host
host
Use the host command to set the IP address or host name of the RADIUS server entry. Both IPv4 and IPv6 addresses are supported.
Syntax
host {<ip-address> | <host-name>}
- ip-address – Specifies the IPv4 or IPv6 address of the entry.
- host-name – Specifies the host name of the entry.
Examples
The following command sets 172.17.60.67 as the IPv4 address of entry "Server ABC":
console> radius-server (Server ABC)> host 172.17.60.67
Update complete
show host
Use the show host command to display the host name of the RADIUS server entry.
Syntax
show host
Examples
The following command displays the host name of entry "Server ABC":
console> radius-server (Server ABC)> show host 172.17.60.66
radius-server: name
name
Use the name command to modify the name of the RADIUS server entry.
Syntax
name
- new-name – Specifies the new name for the entry.
Examples
The following command changes the entry's name from "Server ABC" to "Server XYZ":
console> radius-server (Server ABC)> name "Server XYZ"
Update complete
console> radius-server (Server XYZ)>
5. CLI Commands
show name
Use the show name command to display the name entered for the RADIUS server entry.
Syntax
show name
Examples
The following command displays the entry's name:
console> radius-server (Server XYZ)> show name
Server XYZ
radius-server: password
password
Use the password command to enter a password for the RADIUS-server entry. Two options are available for entering the password. The first option will prompt the entry of a password followed by a password confirmation, neither of which will be echoed to the terminal. The second option allows entry of a plain text password on the command line by using the plaintext keyword.
Syntax
password
password plaintext
- password – Specifies the password for the entry, in plain text.
Examples
The following command sets "v3b4n5" as the password for entry "RADsrvr1":
console> radius-server (RADsrvr1)> password plaintext v3b4n5 Update complete
radius-server: priority
priority
Use the priority command to set a priority for the RADIUS-server entry. In the case where multiple entries exist, the priority determines which servers are used first. For the priority value, enter an integer from 1 to 99. Lower numbers have higher priority.
Syntax
priority
- priority – Specifies the priority level of the entry (Range: 1-99).
Examples
The following command sets 1 (one) as the priority level for entry "RADIUSsrvr1":
console> radius-server (RADIUSsrvr1) > priority 1
Update complete
5. CLI Commands
show priority
Use the show priority command to display the priority of the RADIUS-server entry.
Syntax
show priority
Examples
The following command displays the priority for entry "RADIUSsrvr1":
console> radius-server (RADIUSsrvrl)> show priority 1
radius-server: show
show
Use the show command, with optional keywords, to display details about the RADIUS server entry. To view all keywords applicable to the sensor, enter show [Tab][Tab].
Syntax
show [keyword]
- keyword – Specifies the attribute to be displayed.
Examples
The following command displays all show keywords for entry "Server 123":
console> radius-server (Server 123)> show [Tab][Tab]
accounting help name status
authentication host priority test
The following command displays all details for entry "Server 123":
console> radius-server (Server 123)> show
Name : Server 123
Accounting Status : enabled
Accounting Port : 1813
Authentication Status : enabled
Authentication Port : 1812
Protocol : pap
Host : localhost
Priority : 1
Status : enabled
Last Test : Not tested
5. CLI Commands
radius-server: test
test
Use the test command to test authenticated communications to the RADIUS server entry. On executing this command, prompts will appear for entering the access credentials for the entry.
Syntax
test
Examples
The following command executes a communication test of entry "RADIUSsrvr1":
console> radius-server (RADIUSsrvr1)> test
Username: Admin123
Password:
Testing...complete
Successful - 3/24/2020 4:34:56 PM
show test
Use the show test command to display the metrics of the last communications test of the RADIUS Server entry.
Syntax
show test
Examples
The following command displays the last test metrics of entry "RADIUSsrvr1":
console> radius-server (RADIUSsrvrl) > show test
Successful - 3/24/2020 4:34:56 PM
reboot
reboot
Use the reboot command to gracefully shut down and then power up the device's network interface, i.e. the "LX Card". When the command is issued, a prompt will appear to confirm the action. Use the force option to execute the restore without confirmation. This operation does not power cycle the device itself nor any outlet on the device. Note: rebooting the LX Card will terminate all active sessions.
Syntax
reboot [force]
Examples
The following command executes a reboot of the device's network interface, with confirmation prompt:
console> reboot
This will gracefully shut down and then power up the device's network interface. This operation will not power cycle the device itself or any outlet on the device.
NOTE: a reboot will terminate all active sessions
Are you sure? Type "yes" to proceed:
5. CLI Commands
restore
restore
Use the restore command to apply configuration settings from either the most recent backup or from factory defaults. When restoring factory default settings, use the keep-network option to exclude network settings, i.e. prevent the currently saved network setting from being overwritten. A restore is irreversible. When the command is issued, a prompt will appear to confirm the action. Use the force option to execute the restore without confirmation.
Syntax
restore [factory-defaults [keep-network]] [force]
Examples
The following command restores the device's previous configuration (stored using the 'backup' command):
console> restore
A restore is irreversible. Are you sure you want to proceed with the restore? Type "yes" to proceed.
The following command restores the device to factory defaults (including network settings), without a confirmation prompt:
console> restore factory-defaults force
Restore in progress...
role
role
Use the role command to create a customized user role. Use the no form of the command to delete the role. When creating an entry, select an easily remembered name as a label for the entry; this name will be used in the command format role (
Syntax
role
- name – Specifies the role entry to be created or managed. If spaces are required, bookend the name with quotation marks (“).
no role
- name – Specifies the role entry to be deleted.
Examples
The following command creates "Manager 2" as a role:
console> role "Manager 2"
Created Manager 2
console> role (Manager 2)>
The following command deletes role "contractor":
console> no role contractor
Deleted contractor
5. CLI Commands
show role
Use the show role command to display a list of available roles - including default and customized user roles - or the details of a specified role entry.
Syntax
show role [
- name – Specifies the entry for which role details are to be displayed.
Examples
The following command displays a list of available roles, which includes two custom-created roles:
console> show role
NAME DESCRIPTION
Administrator
Manager
Monitor
Guest
supervisor-day
supervisor-night
role: description
role description
Use the role description command to optionally enter a description of the role entry. Use the no form of this command to clear the description.
Syntax
description
no description
- description – Specifies a description for the entry. If spaces are required in the description, bookend the description with quotation marks (“).
Examples
The following command adds the description "second shift" for entry "Manager 2":
console> role (Manager 2)> description "second shift"
Update complete
show description
Use the show description command to display the description of the role entry.
Syntax
show description
Examples
The following command displays the description of entry "Manager 2":
console> role (Manager 2)> show description second shift
5. CLI Commands
role: name
name
Use the name command to modify the name of the role entry.
Syntax
name
- new-name – Specifies the new name of the entry. If spaces are required in the description, bookend the description with quotation marks (“).
Examples
The following command renames entry "Manager 2" to "IT Manager 2":
console> role (Manager 2)> name "IT Manager 2"
Update complete
console> role (IT Manager 2)>
show name
Use the show name command to display the name entered for the entry.
Syntax
show name
Examples
The following command displays the entry's name:
console> role (IT Manager 2)> show name
IT Manager 2
5. CLI Commands
role: privilege
privilege
Use the privilege command to assign one or more privileges to a role. The list of assigned privileges is additive. Use the no form of this command to delete the privileges entry. To view an enumerated list of all privileges, use the show privileges command; privileges that are already assigned to the role are denoted with an asterisk (*). Note that certain privileges may require specifying resources such as load numbers or load group numbers; the default value for these resources is all. Specifying one or more resources overwrites the default/previous value.
Syntax
privilege {<privilege-id1> | <privilege-name1>}[,{<privilege-id2> | <privilege-name2>}...{<privilege-idN> | <privilege-nameN>}]}
privilege <privilege> {all | <resource-1>[,<resource-2>...<resource-N>]}
- privilege – Specifies a privilege, either by name or number, to be assigned to the role.
- privilege-idx – Specifies the privileges to be assigned to the role, via a comma-delimited, enumerated list.
- privilege-namex – Specifies the privileges, by name, to be assigned to the role.
- resource-x – Specifies resources related to a privilege, if required.
no privilege {<privilege-id1> | <privilege-name1>}[,{<privilege-id2> | <privilege-name2>}...{<privilege-idN> | <privilege-nameN>}]}
- privilege-idx – Specifies the privileges to be removed from the role, via a comma-delimited, enumerated list.
- privilege-namex – Specifies the privileges, by name, to be removed from the role.
Examples
The following command assigns the privilege of modifying the clock settings, enumerated as 25, for role "Manager 2":
console> role (Manager 2)> privilege 25
Update complete
The following command removes the privilege of changing load group settings, enumerated as 42, on device RackPDU, for role "Shift 2":
console> role (Shift 2)> no privilege RackPDU 42 Update complete
The following command assigns switch load control privileges of loads 1, 2 and 4-12, for role "Manager 2":
console> role (Manager 2)> privilege switch-loads 1,2,4-12 Update complete
5. CLI Commands
show privileges
Use the show privileges command to display a list of all available privileges. Privileges already assigned to the device are denoted with an asterisk (*).
Syntax
show privileges [
- name-pattern – a string of characters by which the displayed list of privileges will be filtered.
Examples
The following command displays all privileges available to role “Manager 2”. Asterisks denote which privileges are assigned to “Manager 2”:
console> role (Manager 2)> show privileges
<h1 id="name-resources">NAME RESOURCE(S)</h1>
*1 acknowledge-alarms
2 administrator
3 backup-restore
*4 change-action-settings
5 change-advanced-device-details
...
*46 view-schedules
47 view-sessions
*Assigned privileges
role: show
show
Use the show command to display all settings for the specified role.
Syntax
show [description | name | privileges]
Examples
The following command displays all settings for role "Manager 2":
console> role (Manager 2)> show
Name : Manager 2
Description : second shift
<h1 id="privilege-resources">PRIVILEGE RESOURCES</h1>
1 acknowledge_alarms
4 change-action-settings
6 change-alert-contact-settings
8 change-event-settings
9 change-load-group-settings
11 change-load-settings all
...
45 view-loads all
43 view-load-groups
44 view-load-ramp-shed
45 view-schedules
5. CLI Commands
schedule
schedule
Use the schedule command to create and/or manage a scheduled action entry. The schedule-type must be specified when creating a new scheduled action entry; schedule types are dependent upon the device(s) connected. Certain schedule types also require specifying a target device. Use the show schedule-types command to display a list of available action types and their target device dependence. Use the no form of this command to delete an entry. When creating an entry, select an easily remembered name as a label for the entry; this name will be used in the command format schedule (
When configuring a schedule, be sure to enter all parameters specific to the selected action-type. Prior to enabling the entry, you must set a start-date, frequency and recurrence.
Note: scheduled actions will NOT account for time shifts caused by Daylight Savings Time; the actions will continue to execute at the configured time.
Syntax
schedule
- schedule-name – Specifies the schedule action entry to be managed.
schedule
- device-name – Specifies the device (or sensor) undergoing the scheduled action.
- schedule-name – Specifies the name of the schedule to be created. If spaces are required, bookend the name with quotation marks (“).
- schedule-type – Specifies the type of scheduled action.
no schedule
- schedule-name – Specifies the scheduled action entry to be deleted.
Examples
The following command creates “Daily Shutdown” as a scheduled action entry for device “UPS123”:
console> schedule "Daily Shutdown" turn-off-device UPS123
Created Daily Shutdown
console> schedule (Daily Shutdown)>
The following command deletes entry "Weekend Shutdown":
console> no schedule "Weekend Shutdown"
Deleted Weekend Shutdown
5. CLI Commands
show schedule
Use the show schedule command to display a summary table of all schedules or the details of a specified schedule entry.
Syntax
show schedule [
- schedule-name – Specifies the entry for which schedule details are to be displayed.
Examples
The following command displays a summary table of all scheduled action entries:
| console> show schedule | |||
| NAME | TASK | STATUS | NEXT SCHEDULED |
| Servers off | load(s) | enabled | 2020/03/24 11:00:00 PM |
| Reboot All | reboot device | enabled | 2020/04/01 6:30:00 PM |
schedule: enable
enable
Use the enable command to activate the scheduled action entry. Use the no form of this command to disable the entry.
Syntax
enable
no enable
Example
The following command enables entry "Daily Shutdown":
console> schedule (Daily Shutdown)> enable Update complete
show enable
Use the show enable command to display the enabled/disabled status of the scheduled action entry.
Syntax
show enable
Examples
The following command displays the status of entry "Daily Shutdown":
console> schedule (Daily Shutdown)> show enable enabled
5. CLI Commands
schedule: frequency
frequency
Use the frequency command to configure when the action entry will be executed.
Syntax
Frequency once
frequency daily
- days – Specifies the number of days between successive executions of the scheduled action entry. For example, a value of one (1) sets the schedule to run every day; a value of two (2) will run every other day, and so on.
frequency weekly
- weeks – Specifies the number of weeks between successive executions of the scheduled action entry. For example, a value of one (1) sets the schedule to run every week; a value of two (2) will run every other week, and so on.
- weekday-x – Specifies the days of the week - sun, mon, tue, wed, thu, fri, sat - that the scheduled action entry is to be executed. Use a comma (“,”) between selections without any spaces when specifying multiple days (e.g. “mon,tue,fri”).
frequency monthly
- day – Specifies the numeric day of the month – 1 to 31 – on which a scheduled action entry is to be executed.
- months – Specifies the number of months between successive executions of the scheduled action entry. For example, a value of one (1) sets the schedule to run every month; a value of two (2) will run every other month, and so on.
frequency monthly {first | second | third | fourth | last}
- {occurrence} – Sets the occurrence of the month that the scheduled action entry is to be executed. Use a comma (“,”) between selections without any spaces when specifying multiple occurrences (e.g. “first,third”).
- weekday-x – Specifies the days of the week - sun, mon, tue, wed, thu, fri, sat - that the scheduled action entry is to be executed. Use a comma (“,”) between selections without any spaces when specifying multiple days (e.g. “mon,tue,fri”).
- months – Specifies the number of months between successive executions of the scheduled action. For example, a value of one (1) sets the schedule to run every month; a value of two (2) will run every other month, and so on.
frequency yearly [,...]
- day – Specifies the numeric day of the month – 1 to 31 – on which a scheduled action entry is to be executed.
- month-x – Specifies which months – jan, feb, mar, apr, may, jun, jul, aug, sep, oct, nov, dec – the scheduled action entry is to be executed. Use a comma (“,”) between selections without any spaces when specifying multiple months (e.g., “jan, apr, jul, oct”).
frequency yearly {first | second | third | fourth | last}
- {occurrence} – Sets the occurrence of the month that the scheduled action entry is to be executed. Use a comma (“,”) between selections without any spaces when specifying multiple occurrences (e.g. “first,third”).
- weekday-x – Specifies the days of the week – sun, mon, tue, wed, thu, fri, sat – that the scheduled action entry is to be executed. Use a comma (“,”) between selections without any spaces when specifying multiple days (e.g. “mon,tue,fri”).
- month-x – Specifies which months – jan, feb, mar, apr, may, jun, jul, aug, sep, oct, nov, dec – the scheduled action entry is to be executed. Use a comma (“,”) between selections without any spaces when specifying multiple months (e.g., “jan, apr, jul, oct”).
continued
5. CLI Commands
Examples
The following command sets entry “Weekend Shutdown” to be executed every week, on Sundays:
console> schedule (Weekend Shutdown)> frequency weekly sun Update complete
The following command sets entry “Bi-monthly Reset” to be executed every two months, on the first and third Saturday of the month:
console> schedule (Bi-monthly Reset)> frequency monthly first, third sat 2 Update complete
show frequency
Use the show frequency command to display the frequency settings of the scheduled action entry.
Syntax
show frequency
Examples
The following command displays the frequency settings of entry "Bi-monthly Reset":
console> schedule (Bi-monthly Reset)> show frequency Every 2 month(s) on the first and third Saturday
schedule: load
load
Use the load command to assign one or more loads to a scheduled action. Loads can be assigned as a series of numbers (i.e. "3,4,5,6"), as a range of numbers (i.e. "3-6"), or in combination (i.e. "3,5-8,10,12-15"). Note that the list of loads is additive. Use the no form of this command to remove one or more loads from the scheduled action. This command applies only to action type "load".
Syntax
load
- load-x – Specifies a comma-delimited list of loads to be added to the scheduled action entry.
no load
- load-x – Specifies a comma-delimited list of loads to be removed from the scheduled action entry.
Examples
The following command assigns loads 1, 5, 6, 7, 8 and 12 to entry "Daily Off":
console> schedule (Daily Off) > load 1,5-8,12
Update complete
5. CLI Commands
load state
Use the load state command to specify load behavior – turn on, turn off or cycle – when the scheduled action is executed. This command applies only to action type “load”.
Syntax
load state {cycle | off | on}
Examples
The following command configures the loads specified in entry "Daily Off" to turn off when triggered:
console> schedule (Daily Off) > load state off
Update complete
show load
Use the show load command to display the load details for the scheduled action entry. This command applies only to action type "load".
Syntax
show load [state]
Examples
The following command displays the load details for entry "Daily Off":
console> schedule (Daily Off)> show load
Load(s) : 1,5,6,7,8,12
Load State : off
schedule: load-group
load-group
Use the load-group command to assign one or more load groups to a scheduled action. Note that load groups are created using the device-level load-group command. Use the no form of this command to remove one or more load groups from the scheduled action. This command applies only to action type "load-group".
Syntax
load-group
- group-x – Specifies a comma-delimited list of load groups to be added to the scheduled action.
no load-group
- group-x – Specifies a comma-delimited list of load groups to be removed from the scheduled action.
Examples
The following command assigns load groups "Routers1" and "Routers2" to entry "Weekly Cycle":
console> schedule (Weekly Cycle)> load-group Routers1,Routers2 Update complete
5. CLI Commands
load-group state
Use the load-group state command to specify the load group behavior – turn on, turn off or cycle – when the scheduled action is executed. This command applies only to action type “load-group”.
Syntax
load-group state {cycle | off | on}
Examples
The following command configures the load groups specified in entry “Weekly Cycle” to cycle when triggered:
console> schedule (Weekly Cycle)> load-group state cycle
Update complete
show load-group
Use the show load-group command to display the load group details for the scheduled action entry. This command applies only to action type "load-group".
Syntax
show load-group [state]
- state – Displays the behavior of the load group(s), when triggered.
Examples
The following command displays the load group details for entry "Weekly Cycle":
console> schedule (Weekly Cycle)> show load-group
Load Group(s) : Routers1,Routers2
Load Group State : cycle
schedule: name
name
Use the name command to modify the name of the scheduled action entry.
Syntax
name
- name – Specifies the new name for the scheduled action entry.
Examples
The following command changes the entry name from “Daily Shutdown” to “Weekend Shutdown”:
console> schedule (Daily Shutdown)> name "Weekend Shutdown"
Update complete
console> schedule (Weekend Shutdown)>
5. CLI Commands
show name
Use the show name command to display the name of the scheduled action entry.
Syntax
show name
Examples
The following command displays the name of entry "Daily Shutdown":
console> schedule (Daily Shutdown)> show name Daily Shutdown
schedule: output-contact
output-contact
Use the output-contact command to specify the output contact behavior – to open or close – when triggered by the scheduled action entry. This command is applicable only to action type “sensor” and, specifically, sensor model E2MTDO. Ensure that the specific E2MTDO is selected using the target-device command.
Syntax
output-contact
- number – Specifies the output contact number of the sensor.
Examples
The following command sets the #2 contact to open when triggered, for scheduled action "Noon Fan Off":
console> schedule (Noon Fan Off) > output-contact 2 open
Update complete
show output-contact
Use the show output-contact command to display the output settings of the scheduled action entry.
Syntax
show output-contact
Examples
The following command displays the output settings of scheduled action "Noon Fan Off":
console> schedule (Noon Fan Off) > show output contact
Contact Number: 2
Action: Open
5. CLI Commands
schedule: recurrence
recurrence
Use the recurrence command to configure how often a scheduled action entry is to be executed.
Syntax
recurrence forever
recurrence count
- count – Specifies the number of times that the entry is to be executed (Range: 0-99).
recurrence until
- date – Specifies the entry's ending date, in the format selected using the default date-format or default user date-format command.
- time – Specifies the entry's ending time, in the format selected using the default time-format or default user time-format command. If using either the h:mm:ss tt or hh:mm:ss tt time format, use quotes when entering the time (see Examples).
Examples
The following command sets entry "Weekend Shutdown" to be executed twelve (12) times:
console> schedule (Weekend Shutdown)> recurrence count 12
Update complete
The following command sets entry "Weekend Shutdown" to be executed until 12/1/2020 12:34:56 PM:
console> schedule (Weekend Shutdown)> recurrence until 12/1/2020 "12:34:56 PM"
Update complete
show recurrence
Use the show recurrence command to display the recurrence settings of the scheduled action entry.
Syntax
show recurrence
Examples
The following command displays the recurrence of entry “Weekend Shutdown”:
console> schedule (Weekend Shutdown)> show recurrence until 12/1/2020 12:34:56 PM
5. CLI Commands
schedule: restart
restart
Use the restart command to set the restart delay time for the scheduled action entry. The restart delay sets the time that must elapse (after shutdown completes) before the device turns on. The default value is zero (0), which will cause the immediate restart of the device after shutdown. The unit of measure for delay times is typically seconds, but will vary by device model. Not all device models support restart delay times. This command applies only to action type “restart-device”.
Syntax
restart
- delay – Specifies the restart delay time, in seconds, for the “restart-device” scheduled action entry (Range: 0-65535).
Examples
The following command sets a restart delay of 60 seconds for scheduled action entry "WeeklyRestart":
console> schedule (WeeklyRestart) > restart 60
Update complete
show restart
Use the show restart command to display the restart delay time for the scheduled action entry. This command applies only to action type “restart-device”.
Syntax
show restart
Examples
The following command displays the restart delay time for scheduled action entry "WeeklyRestart":
console> schedule (WeeklyRestart)> show restart 60
5. CLI Commands
schedule: run-on
run-on
Use the run-on command to set the starting date of the scheduled action entry. Note that if using either the h:mm:ss tt or hh:mm:ss tt time format, use quotes when entering the time (see Examples). New scheduled action entries cannot have a run-on time sooner than 10 minutes after the current PADM UTC time. Doing so will automatically add 10 minutes to the desired run-on time. This issue may also arise if changes to PADM date and time settings are made after new schedule entries are created. For instance, if the PADM time is set back by one hour, the run-on time of the newly created schedule will automatically change to the current time plus 10 minutes.
Syntax
run-on
- date – Specifies the entry's starting date, in the format selected using the default date-format or default user date-format command.
- time – Specifies the entry's starting time, in the format selected using the default time-format or default user time-format command.
Examples
The following command sets a start date and time of 6/1/2020 2:34:56 PM for entry "Weekend Shutdown":
console> schedule (Weekend Shutdown)> run-ons 6/1/2020 "2:34:56 PM"
Update complete
show run-on
Use the show run-on command to display the start date and time of the scheduled action entry.
Syntax
show run-on
Examples
The following command displays the start date of entry "Weekend Shutdown":
console> schedule (Weekend Shutdown)> show run-on 6/1/2020 2:34:56 PM
5. CLI Commands
schedule: show
show
Use the show command, with optional keywords, to display details about the scheduled action entry. To view all keywords applicable to the entry, enter show [Tab][Tab].
Syntax
show [keyword]
- keyword – Specifies the attribute to be displayed.
Examples
The following command displays all show keywords for entry “Weekend Shutdown”:
console> schedule (Weekend Shutdown)> show [Tab][Tab]
frequency name recurrence status
help next-date run-on target-device
The following command displays all schedule settings for entry "Weekend Shutdown":
console> schedule (Weekend Shutdown)> show
Name : Weekend Shutdown
Task : turn-off-device
Status : enabled
Next Scheduled : 2/22/2020 3:42:00 PM
Last Ran :
Frequency : monthly, first and third Saturday, every 2 month(s)
Recurrence : until 12/1/2020 6:00:00 PM
Target Device : device123
show targets
Use the show targets command to display a list of devices and sensors available for selection as targets for action entries.
Syntax
show targets
Examples
The following command displays a list of devices and sensors available for selection as targets:
console> schedule (Weekend Shutdown)> show targets
NAME TYPE
-------- ----
UPS123 device
E2MTHDI sensor
E2MT-A sensor
E2MT-B sensor
5. CLI Commands
schedule: target-device
target-device
Use the target-device command to specify the device or sensor undergoing the action, as defined by the scheduled action entry. Note that changing the target device of a scheduled action entry will require re-entering all action parameters; the parameters associated with the previous target device will be erased. Use the show targets command to display a list of devices and sensors available for selection as target devices.
Syntax
target-device {<device-name> | <sensor-name>}
- device-name – Specifies the new target device associated with the entry.
- sensor-name – Specifies the new target sensor associated with the entry.
Examples
The following command sets "Sensor-E2MTDO" as the new target device for scheduled action entry "IndicateHour":
console> schedule (IndicateHour)> target-device Sensor-E2MTDO Update complete
show target-device
Use the show target-device command to display the device or sensor undergoing the scheduled action.
Syntax
show target-device
Examples
The following command displays the target device for scheduled action entry "IndicateHour":
console> schedule (IndicateHour)> show target-device Sensor-E2MTDO
scp
scp enable
Use the scp enable command to enable Secure Copy (SCP) service. Use the no form of this command to disable the SCP service. The SCP service can only be enabled if the SSH service is enabled (see ssh command). By default, both SSH and SCP are enabled. Note that SCP is tied to SFTP; enabling or disabling SCP will automatically enable or disable SFTP, respectively.
Syntax
scp enable
no scp enable
Examples
The following command disables SCP service:
console> no scp enable
Update complete
Note: Use the "apply network" command to complete the change. This may cause a system reboot.
5. CLI Commands
show scp
Use the show scp command to display the status of the SCP service.
Syntax
show scp [status]
Examples
The following command displays all SCP service information:
console> show scp enabled
session
no session
Use the no session command to forcibly end one or more active sessions, i.e., users logged into the device interface. Given that a user may be active in more than one session, sessions are terminated by specifying the session number. Use the show session command to view a list of active sessions, arranged by session number.
Syntax
no session
- session-x – Specifies a comma-delimited list of session numbers to be terminated.
Examples
The following command terminates session #5:
console> no session 5
Session(s) terminated
The following command terminates session #3 and session #8:
console> no session 3,8
Session(s) terminated
5. CLI Commands
show session
Use the show session command to view a list of active sessions, i.e. users logged into the device.
Syntax
show session
show session location
show session name
show session type {console | web}
show session username
- location – Specifies the location for which all active sessions are to be displayed.
- name – Specifies the full name for which all active sessions are to be displayed.
- session-# – Specifies the session number for which information is to be displayed.
- username – Specifies the user name for which all active sessions are to be displayed.
Examples
The following command displays all active sessions:
| console> show session | ||||||
| ID | USER NAME | NAME | TYPE | LOCATION | LOGGED ON | |
| 1 | ITadmin1 | John Doe | console | 10.2.22.1 | 3/24/2020 | 11:32:22 AM |
| 2 | localmgr1 | Jane Doe | web | 10.2.24.63 | 3/24/2020 | 1:55:12 PM |
| 3 | localmgr2 | Moe Doe | web | 10.2.24.66 | 3/23/2020 | 4:05:47 AM |
| 4 | localmgr2 | Moe Doe | web | 10.2.24.77 | 3/22/2020 | 4:21:32 AM |
| 5 | contractor15 - | console | 192.168.1.1 | 3/21/2020 | 3:55:13 PM | |
sftp
sftp enable
Use the sftp enable command to enable SSH File Transfer Protocol (SFTP) service. Use the no form of this command to disable the SFTP service. The SFTP service can only be enabled if the SSH service is enabled; by default, both SSH and SFTP are enabled. Note that SFTP service is also tied to SCP service; enabling or disabling SFTP will automatically enable or disable SCP, respectively.
Syntax
sftp enable
no sftp enable
Examples
The following command disables SFTP service:
console> no sftp enable
Update complete
Note: Use the "apply network" command to complete the change. This may cause a system reboot.
5. CLI Commands
show sftp
Use the show sftp command to display the current status of the SFTP service.
Syntax
show sftp [status]
Examples
The following command displays all SFTP service information:
console> show sftp enabled
show
show
Use the show command to display all available commands. Use the show command with optional keywords to display details about a specified command. To view a summary list of all keywords, enter show [Tab][Tab].
Syntax
show [keyword]
- keyword – Specifies the command for which details are to be displayed.
Examples
The following command displays all root level show keywords:
console> show [Tab][Tab]
aaa dns log sms uptime
about email network smtp user
action event password-policy snmp
action-types help radius-server snmp-server
alert host role snmp-user
autoprobe http schedule ssh
clock https schedule-types support
contact ipv4 scp syslog-server
default ipv6 session telnet
device ldap-server sftp timezones
The following command displays a list of time zones:
console> show timezones
Africa/Abidjan
Africa/Accra
Africa/Algiers
...
5. CLI Commands
sms
sms
Use the sms command to create and manage Short Message Service (SMS) notification recipients. Use the no form of this command to delete recipients. When creating an entry, select an easily remembered name as a label for the entry; this name will be used in the command format sms (
Syntax
sms
- name – Specifies the sms recipient entry to be created or managed. If spaces are required, bookend the name with quotation marks (“).
no sms
- name – Specifies the sms recipient entry to be deleted.
Examples
The following command creates "johnd" as an SMS notification recipient:
console> sms johnd
Created johnd
console> sms (johnd)>
The following command deletes entry "johnd":
console> no sms johnd
Deleted johnd
show sms
Use the show sms command to display a summary table of SMS recipients or the details of a specified SMS entry.
Syntax
show sms [
- name – Specifies the SMS entry for which details are to be displayed.
Examples
The following command displays a summary table of all SMS recipients:
| console> show sms | |||
| NAME | CONTACT | STATUS | LAST TEST |
| johnd | 1-800-123-4567 | enabled | Not tested |
| janed | 1-800-123-4568 | enabled | Test successful - 3/24/2020 17:34:45 |
| tomd | tomd@text.com | disabled | Test failed - 3/23/2020 11:22:33 |
5. CLI Commands
sms: contact
contact
Use the contact command to specify the contact information for the entry – either a phone number associated with a supported carrier or an SMS (email) address associated with an unsupported carrier. Use the show carriers command to display a list of supported carriers.
Syntax
contact
contact
- carrier – Specifies the carrier associated with the entry, in abbreviated form.
- email-address – Specifies the SMS email address associated with the entry.
- phone-number – Specifies the phone number associated with the entry.
Examples
The following command sets AT&T phone number 888-555-1234 as the SMS contact information for entry "maryd":
console> sms (maryd)> contact at&t 888-555-1234
Update complete
The following command sets "8005551234@txt.othercarrier.net" as the SMS contact information for entry "maryd":
console> sms (maryd)> contact 8005551234@txt.othercarrier.net Update complete
show contact
Use the show contact command to display the contact information for the SMS entry.
Syntax
show contact
Examples
The following command displays the contact information for entry "maryd":
console> sms (maryd)> show contact
att: 888-555-1234
5. CLI Commands
sms: enable
enable
Use the enable command to activate the SMS entry. Use the no form of this command to disable the SMS entry.
Syntax
enable
no enable
Example
The following command disables entry "maryd":
console> sms (maryd)> no enable
Update complete
show enable
Use the show enable command to display the enabled/disabled status of the SMS recipient entry.
Syntax
show enable
Examples
The following command shows the status of entry "maryd":
console> sms (maryd) > show enable
disabled
sms: name
name
Use the name command to modify the name of the SMS recipient entry.
Syntax
name
- new-name – Specifies the new name for the SMS entry.
Examples
The following command changes the entry's name from "maryd" to "Mary Dove":
console> sms (maryd)> name "Mary Dove"
console> sms (Mary Dove)>
5. CLI Commands
show name
Use the show name command to display the name of the SMS recipient entry.
Syntax
show name
Examples
The following command displays the entry's name:
console> sms (Mary Dove)> show name
Mary Dove
sms: show
show
Use the show command to display the details about the SMS recipient entry.
Syntax
show [contact | name | status | test]
Examples
The following command displays all settings for entry "maryd":
console> sms (maryd)> show
Name : maryd
Phone : 888-888-8888
Status : enabled
Last Test : Not tested
5. CLI Commands
show carriers
Use the show carriers command to display a list of supported carriers.
Syntax
show carriers
Examples
The following command displays a list of supported carriers:
console> sms (maryd)> show carriers
alltel
att
boost_mobile
c_spire
consumer_cellular
cricket
custom
google_fi
metro_pcs
page_plus
republic_wireless
sprint
ting
tmobile
tracfone
us_cellular
verizon
virgin_mobile
xfinity_mobile
sms: test
test
Use the test command to send a test SMS message to the SMS recipient entry.
Syntax
test
Examples
The following command sends a test SMS message to entry "maryd":
console> sms (maryd)> test
Testing...completed
Successful - 1/1/2020 7:34:45 PM
5. CLI Commands
show test
Use the show test command to display the metrics of the last test message sent to the SMS recipient.
Syntax
show test
Examples
The following command displays the metrics of the last test SMS message for entry "maryd":
console(maryd)> show test
Successful - 1/1/2020 7:34:45 PM
smtp
smtp authentication enable
Use the smtp authentication enable command to optionally enable SMTP authentication. Note that an SMTP user name, password and security type must be entered before SMTP authentication can be enabled. Use the no form of this command to disable SMTP authentication. Use the apply network command to complete SMTP configuration.
Syntax
smtp authentication enable
no smtp authentication enable
Examples
The following command enables SMTP authentication:
console> smtp authentication enable
Update complete
NOTE: Use the "apply network" command to complete the change. This may cause a system reboot.
5. CLI Commands
smtp email
Use the smtp email command to configure settings related to notification email messages. Use the from sub-command to specify the email address of the entity sending the email notifications. Use the subject sub-command to modify the subject line (title) of the email message; the default subject line is "PowerAlert Notification". Use the language sub-command to select the language of the email notifications; the default selection is English. Note that this setting is independent of the language selection for the user interface of PowerAlert Device Manager.
Syntax
smtp email from
- address – Specifies the email address of the entity sending the email.
smtp email language {english}
smtp email subject


- Table of Contents
- Overview 4
- Logging In 5
- Entering Commands 6
- Log Navigation 8
- CLI Commands 9
- Overview
- Logging In
- Entering Commands
- General CLI Commands
- Log Navigation
- CLI Commands
- aaa
- aaa accounting
- Syntax
- Examples
- aaa authentication
- show aaa
- action
- show action
- action: contact
- contact
- show contact
- action: count
- count
- show count
- action: delay
- delay
- show delay
- action: enable
- enable
- Example
- show enable
- action: interval
- interval
- show interval
- action: load
- load
- load state
- show load
- action: load-group
- load-group
- load-group state
- show load-group
- action: name
- name
- show name
- action: output-contact
- output-contact
- show output-contact
- action: show
- show
- show targets
- action: snmp-set
- snmp-set oid
- snmp-set value
- show snmp-set
- action: target-device
- target-device
- show target-device
- action: trigger
- trigger
- show trigger
- alert
- alert acknowledge
- alert export
- show alert
- show alert count
- show alert size
- apply
- apply network
- autoprobe
- show autoprobe
- autoprobe: authentication
- authentication passphrase
- authentication protocol
- show authentication protocol
- autoprobe: community
- community
- autoprobe: description
- description
- no description
- show description
- autoprobe: enable
- autoprobe: interval
- autoprobe: name
- autoprobe: primary
- primary address
- primary oid
- primary port
- show primary
- autoprobe: privacy
- privacy passphrase
- privacy protocol
- show privacy protocol
- autoprobe: retry
- retry
- show retry
- autoprobe: secondary
- secondary address
- secondary oid
- secondary port
- show secondary
- autoprobe: security-mode
- security-mode
- show security-mode
- autoprobe: show
- autoprobe: username
- username
- show username
- autoprobe: version
- version
- show version
- backup
- clock
- clock ntpserver
- clock set
- clock source
- show clock
- default
- default date-format
- default temperature-format
- default time-format
- default timeout
- default timezone
- default user date-format
- default user reset
- default user temperature-format
- default user time-format
- default user timezone
- show default
- device
- show device
- device:
- [Tab]
- device: apply
- apply ramp-shed
- device: asset-tag
- asset-tag
- no asset-tag
- show asset-tag
- device: auto-restart
- auto-restart low-voltage
- auto-restart overload
- auto-restart overtemp
- auto-restart shutdown
- auto-restart wakeup
- show auto-restart
- device: avr
- avr transition count reset
- show avr
- device: battery
- battery age threshold
- battery date installed
- battery test period
- battery test start
- battery threshold capacity tolerance
- battery transition count reset
- show battery
- device: buzzer
- buzzer setting
- buzzer status
- show buzzer
- device: bypass
- bypass voltage
- show bypass
- device: cold-start
- cold-start enable
- show cold-start
- device: date-installed
- date-installed
- show date-installed
- device: db9
- db9 input
- db9 output
- show db9
- device: dehumidifying
- dehumidifying
- show dehumidifying
- device: details
- details
- device: energy
- energy saving setting
- show energy saving setting
- device: fault
- fault action
- show fault action
- device: id
- id
- show id
- device: input
- input
- show input
- device: last-reason
- last-reason
- device: load
- device: load: cycle
- cycle
- device: load: description
- device: load: name
- device: load: off
- off
- device: load: on
- on
- device: load: ramp
- ramp delay
- ramp enable
- show ramp
- device: load: shed
- shed delay
- shed enable
- show shed
- device: load: show
- device: load-group
- device: load-group: cycle
- device: load-group: description
- device: load-group: enable
- device: load-group: loads
- loads
- show loads
- device: load-group: name
- device: load-group: off
- device: load-group: on
- device: load-group: show
- device: location
- location
- no location
- show location
- device: mute
- mute buzzer
- show mute
- device: name
- device: off
- device: off-mode
- off-mode
- show off-mode
- device: on
- device: on-battery
- on-battery shutdown-seconds
- on-battery shutdown-status enable
- show on-battery
- device: output
- output
- show output
- device: power
- power on-delay
- power strategy setting
- show power
- device: ramp
- ramp
- device: remote
- remote temperature sensor setting enable
- show remote temperature sensor setting enable
- device: region
- region
- show region
- device: reset
- reset battery-pack
- device: restart
- restart
- device: restore-hardware
- restore-hardware
- device: sensor
- sensor
- show sensor
- device: sensor: asset-tag
- device: sensor: date-installed
- device: sensor: humidity
- humidity
- show humidity
- device: sensor: id
- device: sensor: input
- device: sensor: location
- device: sensor: name
- device: sensor: output
- output close
- device: sensor: region
- no region
- device: sensor: show
- device: sensor: temperature
- temperature
- show temperature
- device: set-point
- set-point
- show set-point
- device: shed
- shed
- device: show
- show battery-pack-models
- device: shutdown
- shutdown completion
- show shutdown completion
- device: watt-hours
- watt-hours reset
- dns
- dns address
- dns enable
- show dns
- show email
- email: address
- address
- show address
- email: enable
- email: name
- email: show
- email: test
- test
- show test
- event
- show event
- event: acknowledge
- acknowledge enable
- show acknowledge
- event: enable
- event: logging
- logging enable
- show logging
- event: name
- event: severity
- severity
- show severity
- event: show
- exit
- firmware
- firmware check
- firmware update
- help
- host
- host name
- show host
- http
- http enable
- http port
- http redirect enable
- show http
- https
- https enable
- https port
- show https
- ipv4
- ipv4 enable
- ipv4 address
- ipv4 gateway
- show ipv4
- ipv6
- ipv6 enable
- ipv6 address
- ipv6 gateway
- show ipv6
- Idap-server
- show Idap-server
- Idap-server: anonymous
- anonymous enable
- show anonymous
- ldap-server: attribute
- attribute
- no attribute
- show attribute
- ldap-server: bind
- bind dn
- bind password
- show bind
- Idap-server: domain
- domain
- show domain
- Idap-server: enable
- Idap-server: host
- Idap-server: name
- ldap-server: object-class
- object-class
- show object-class
- Idap-server: port
- port
- show port
- Idap-server: priority
- priority
- show priority
- Idap-server: search
- search base
- search filter
- show search
- Idap-server: show
- Idap-server: test
- Idap-server: type
- type
- show type
- log
- show log
- log: autoexport
- autoexport email
- autoexport enable
- autoexport format
- show autoexport
- log: export
- export
- export rollup
- log: interval
- log: max-size
- max-size
- show max-size
- log: metrics
- metrics
- show metrics
- log: severity
- log: show
- show report
- Accounting Log and Event Log
- Data Log
- show rollup report
- show size
- man
- password
- password-policy
- password-policy age enable
- password-policy age maximum
- password-policy age minimum
- password-policy min-length
- password-policy syntax
- show password-policy
- radius-server
- show radius-server
- radius-server: accounting
- accounting enable
- accounting port
- show accounting
- radius-server: authentication
- authentication enable
- authentication port
- show authentication
- radius-server: enable
- radius-server: host
- radius-server: name
- radius-server: password
- radius-server: priority
- radius-server: show
- radius-server: test
- reboot
- restore
- role
- show role
- role: description
- role description
- role: name
- role: privilege
- privilege
- show privileges
- role: show
- schedule
- show schedule
- schedule: enable
- schedule: frequency
- frequency
- Frequency once
- frequency daily
- frequency monthly
- frequency yearly [,...]
- show frequency
- schedule: load
- schedule: load-group
- schedule: name
- schedule: output-contact
- schedule: recurrence
- recurrence
- show recurrence
- schedule: restart
- show restart
- schedule: run-on
- run-on
- show run-on
- schedule: show
- schedule: target-device
- scp
- scp enable
- show scp
- session
- no session
- show session
- show session username
- sftp
- sftp enable
- show sftp
- sms
- show sms
- sms: contact
- sms: enable
- sms: name
- sms: show
- show carriers
- sms: test
- smtp
- smtp authentication enable
- smtp email
Brand : Tripp Lite
Model : SVX30KS1P0B
Category : UPS